SPM99 Manual - Wellcome Trust Centre for Neuroimaging
SPM99 Manual - Wellcome Trust Centre for Neuroimaging
SPM99 Manual - Wellcome Trust Centre for Neuroimaging

Create successful ePaper yourself
Turn your PDF publications into a flip-book with our unique Google optimized e-Paper software.
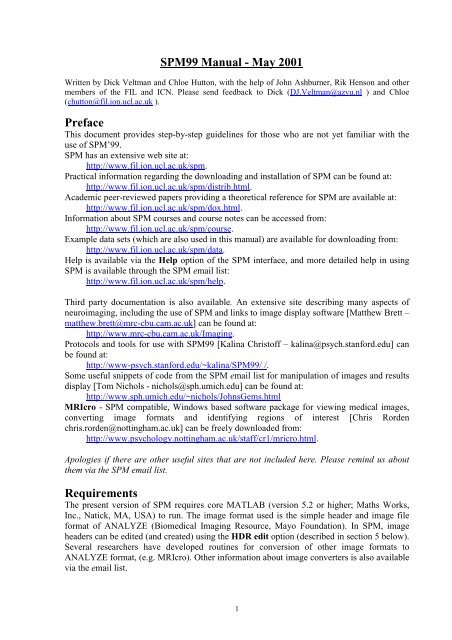
<strong>SPM99</strong> <strong>Manual</strong> - May 2001<br />
Written by Dick Veltman and Chloe Hutton, with the help of John Ashburner, Rik Henson and other<br />
members of the FIL and ICN. Please send feedback to Dick (DJ.Veltman@azvu.nl ) and Chloe<br />
(chutton@fil.ion.ucl.ac.uk ).<br />
Preface<br />
This document provides step-by-step guidelines <strong>for</strong> those who are not yet familiar with the<br />
use of SPM’99.<br />
SPM has an extensive web site at:<br />
http://www.fil.ion.ucl.ac.uk/spm.<br />
Practical in<strong>for</strong>mation regarding the downloading and installation of SPM can be found at:<br />
http://www.fil.ion.ucl.ac.uk/spm/distrib.html.<br />
Academic peer-reviewed papers providing a theoretical reference <strong>for</strong> SPM are available at:<br />
http://www.fil.ion.ucl.ac.uk/spm/dox.html.<br />
In<strong>for</strong>mation about SPM courses and course notes can be accessed from:<br />
http://www.fil.ion.ucl.ac.uk/spm/course.<br />
Example data sets (which are also used in this manual) are available <strong>for</strong> downloading from:<br />
http://www.fil.ion.ucl.ac.uk/spm/data.<br />
Help is available via the Help option of the SPM interface, and more detailed help in using<br />
SPM is available through the SPM email list:<br />
http://www.fil.ion.ucl.ac.uk/spm/help.<br />
Third party documentation is also available. An extensive site describing many aspects of<br />
neuroimaging, including the use of SPM and links to image display software [Matthew Brett –<br />
matthew.brett@mrc-cbu.cam.ac.uk] can be found at:<br />
http://www.mrc-cbu.cam.ac.uk/Imaging.<br />
Protocols and tools <strong>for</strong> use with <strong>SPM99</strong> [Kalina Christoff – kalina@psych.stan<strong>for</strong>d.edu] can<br />
be found at:<br />
http://www-psych.stan<strong>for</strong>d.edu/~kalina/<strong>SPM99</strong>/ /.<br />
Some useful snippets of code from the SPM email list <strong>for</strong> manipulation of images and results<br />
display [Tom Nichols - nichols@sph.umich.edu] can be found at:<br />
http://www.sph.umich.edu/~nichols/JohnsGems.html<br />
MRIcro - SPM compatible, Windows based software package <strong>for</strong> viewing medical images,<br />
converting image <strong>for</strong>mats and identifying regions of interest [Chris Rorden<br />
chris.rorden@nottingham.ac.uk] can be freely downloaded from:<br />
http://www.psychology.nottingham.ac.uk/staff/cr1/mricro.html.<br />
Apologies if there are other useful sites that are not included here. Please remind us about<br />
them via the SPM email list.<br />
Requirements<br />
The present version of SPM requires core MATLAB (version 5.2 or higher; Maths Works,<br />
Inc., Natick, MA, USA) to run. The image <strong>for</strong>mat used is the simple header and image file<br />
<strong>for</strong>mat of ANALYZE (Biomedical Imaging Resource, Mayo Foundation). In SPM, image<br />
headers can be edited (and created) using the HDR edit option (described in section 5 below).<br />
Several researchers have developed routines <strong>for</strong> conversion of other image <strong>for</strong>mats to<br />
ANALYZE <strong>for</strong>mat, (e.g. MRIcro). Other in<strong>for</strong>mation about image converters is also available<br />
via the email list.<br />
1
Contents<br />
Preface<br />
1. Getting started 2<br />
2. Spatial pre-processing 5<br />
2.1 Realignment 5<br />
2.2 Coregistration 10<br />
2.3 Slice timing 14<br />
2.4 Normalisation 16<br />
2.5 Smooth 23<br />
2.6 Segment 24<br />
3. Model specification and parameter estimation 26<br />
3.1 PET/SPECT models 26<br />
3.2 fMRI models 35<br />
3.2.1 Specification of a model – first step 35<br />
3.2.2 Specification of a model – second step 41<br />
3.3 Customisations <strong>for</strong> PET/SPECT and fMRI statistics 45<br />
3.4 Basic models 46<br />
4. Results assessment 51<br />
4.1 Example 1: single-subject fMRI block design (plotting and overlays) 51<br />
4.2 Example 2: multi-subject PET design (volume of interest, masking<br />
and conjunction analyses). 59<br />
4.3 Example 3: single-subject event-related fMRI design 70<br />
5. Miscellaneous functions and Utilities 81<br />
5.1 Display 81<br />
5.2 CheckReg 82<br />
5.3 Render 82<br />
5.4 PET/fMRI 84<br />
5.5 Toolboxes 84<br />
5.6 Means 84<br />
5.7 ImCalc 85<br />
5.8 HDR edit 85<br />
5.9 Help 85<br />
5.10 Utils 85<br />
5.11 Defaults 86<br />
5.12 Quit 86<br />
2
1. Getting started<br />
For start-up from Matlab, type spm.<br />
Select from:<br />
PET and SPECT (or enter spm pet)<br />
Studies are considered as a series of independent scans<br />
fMRI (or enter spm fmri)<br />
Studies are considered as a temporally correlated time-series<br />
N.B.<br />
• The interface and usage <strong>for</strong> the above models of operation are similar. Differences<br />
between these components are indicated where applicable.<br />
About SPM<br />
SPM’99 in<strong>for</strong>mation<br />
SPMweb<br />
Link to the SPM-pages of the <strong>Wellcome</strong> Dept of Cognitive Neurology website<br />
(http://www.fil.ion.ucl.ac.uk/spm)<br />
Quit<br />
Exits SPM, closes windows and clears workspace variables<br />
N.B.<br />
• The directory from which SPM is started becomes the SPM working directory, to which a<br />
graphical output file spm99.ps (postscript file containing displays) and the results of<br />
statistical analyses are written.<br />
• The spm99.ps file is appended when written to. SPM signals the risk of overwriting<br />
previous statistical results.<br />
3
The SPM graphical user interface<br />
The SPM graphical user interface (shown above) is divided into three panels: the upper <strong>for</strong><br />
spatial pre-processing of data, the middle <strong>for</strong> model specification/estimation and statistical<br />
inference, and the lower <strong>for</strong> general utilities (shown above <strong>for</strong> fMRI).<br />
Spatial pre-processing functions are:<br />
Realign: realignment of functional time-series<br />
Coregister: Coregistration of same modality and multi-modality image volumes<br />
Slice timing: Adjustment <strong>for</strong> timing differences in multi-slice image acquisition (fMRI)<br />
Normalize: Spatial normalisation of image volumes to a template<br />
Smooth: Convolution of image volume with a Gaussian kernel<br />
Segment: Segmentation of MRI volume(s) into CSF, grey and white matter<br />
Model specification & parameter estimation:<br />
fMRI and PET/SPECT models: set-up of modality-specific models<br />
Basic models: basic statistical models <strong>for</strong> independent data<br />
Explore design: review a previously specified model<br />
Estimate: estimation of a previously specified model and configuration<br />
Statistical inference:<br />
Results: analysis and display of regional effects<br />
The lower panel includes miscellaneous and general utility functions.<br />
4
2. Spatial pre-processing<br />
2.1 Realignment (spm_realign_ui.m)<br />
Realignment of an image time-series of the same modality.<br />
Specify:<br />
Specify (<strong>for</strong> fMRI only):<br />
Select scans:<br />
Clicking the *.img will select those images, clicking the preceding number (in white) will<br />
show individual scans. SPM displays the total number of selected scans (lower part of<br />
window).<br />
Other options:<br />
- Filter disables filter<br />
- All selects all images shown<br />
- Edit allows editing of image file names<br />
- Keybd allows command line input of image file names<br />
- Reset will undo selection<br />
- Done completes selection.<br />
Specify:<br />
Coregister only: determines parameters used to realign to the first image in the selected<br />
series. For multiple sessions, the first scan of each session is realigned to the first scan of the<br />
first session; then the images within each session are realigned to the first scan of the session.<br />
Saves the trans<strong>for</strong>m parameters <strong>for</strong> each filename.img in filename.mat. Realignment<br />
5
parameters are saved <strong>for</strong> each session as realignment_params_*.txt, which can be used as a<br />
set of 6 covariates to regress out movement-related activations.<br />
N.B.<br />
• The first image = the first selected image. This need not be the first acquired in time.<br />
• For each realignment, the current *.mat files are used and updated.<br />
• All output images are written to the same directory as the input images. The mean*.img is<br />
written to the directory containing the images <strong>for</strong> the first session.<br />
• In PET, realignment is in two steps: all images are realigned to the first and a mean image<br />
is computed to which all images are realigned in a second pass.<br />
Reslice only: reslices and saves images using the trans<strong>for</strong>ms specified by *.mat files.<br />
Trans<strong>for</strong>ms filename.img using filename.mat and saves as rfilename.img.<br />
*Coregister & Reslice (*=default): above steps combined. Saves trans<strong>for</strong>m parameters <strong>for</strong><br />
filename.img in filename.mat. Reslices and saves images as rfilename.img.<br />
Specify:<br />
Trilinear interpolation: uses trilinear interpolation to resample images.<br />
Sinc interpolation (default): uses a truncated (kernel is 9x9x9 voxels) sinc interpolation.<br />
Slower than trilinear but more accurate; recommended <strong>for</strong> fMRI time-series.<br />
Fourier space interpolation: added option also found in other packages (AIR). Per<strong>for</strong>ms<br />
rigid body rotations as shears in Fourier space (Eddy et al. 1996, MRM 36, 923-931). For<br />
isotropic voxels only.<br />
Specify:<br />
All images (1-n): reslices all images including the first which is untrans<strong>for</strong>med (i.e., SPM<br />
duplicates the first and saves it as rfirstimage).<br />
Images 2-n: reslices all images except the first (useful when the first image has a different<br />
modality).<br />
All images + Mean Image (default): reslices all images and creates a mean of all resliced<br />
images, which is saved as meanfilename.img.<br />
Mean Image only: creates mean image only.<br />
6
N.B.<br />
• Because each reslicing slightly degrades the images, this may be postponed until the<br />
normalisation step. It is useful, however, to create a mean image to determine parameters<br />
from at the normalisation stage (2.4) or to coregister to a structural MR (2.3). Select<br />
Coregister & Reslice, Trilinear or Sinc interpolation (trilinear is probably sufficient and<br />
much faster) and Mean Image Only. The other images will have only their *.mat files<br />
updated.<br />
• If the ORIGIN coordinates in the image headers need adjustment, this should be done<br />
prior to realignment (because SPM will ignore the ORIGIN coordinates in the header once<br />
a *.mat file is created). Select the Display option (lower panel), select an image, and place<br />
the crosshair at the anterior commissure. Select HDRedit, select ‘set Origin’, and copy &<br />
paste the coordinates (in voxels) from the Graphics window. Apply to all time-series<br />
images (see 5 <strong>for</strong> discussion of utilities).<br />
Specify (<strong>for</strong> fMRI only):<br />
This removes interpolation errors arising from reslicing of the data by doing a regularised fit<br />
<strong>for</strong> motion-related variance and removes estimated variance from resliced images. However,<br />
if there is any motion-related variance that is correlated with the task, this option may remove<br />
variance of interest (i.e. true positives).<br />
Output from spm_realign:<br />
Display (shown here <strong>for</strong> a 12-scan PET study): spm_realign displays realignment parameters<br />
in graphic <strong>for</strong>m. This display is written to the spm99.ps file in the working directory. This file<br />
can be viewed using a postscript reader package such as ghostview or pageview.<br />
7
Files: the realigned images r*.img, r*.hdr, and the updated .mat files are written to the input<br />
file directory. The mean*.img and mean*.hdr are written to the input file directory <strong>for</strong> the<br />
first session. Realignment parameters are saved as realignment_params_*.txt to the input<br />
file directory <strong>for</strong> each session.<br />
Customisations <strong>for</strong> realignment (optional):<br />
N.B.<br />
• Changes in default settings are valid only during one session. After quitting and restarting<br />
SPM, these adjustments need to be renewed.<br />
From the ‘Defaults’ options (lower panel), select ‘Realignment’:<br />
Specify:<br />
- allow separate coregistration and reslicing (default)<br />
- always combine coregistration and reslicing<br />
Specify:<br />
- always create all images & mean image<br />
- full options (default, see above)<br />
Specify:<br />
- always adjust <strong>for</strong> interpolation errors<br />
- never adjust <strong>for</strong> interpolation errors (e.g., when realignment parameters are used as<br />
covariates)<br />
- optional adjust (default)<br />
8
Specify:<br />
- always mask images (=default): to avoid movement-related artefactual variance at the<br />
edge of the FOV<br />
- optional mask<br />
Specify:<br />
which refers to the density of voxel sampling <strong>for</strong> computation of realignment parameters. The<br />
quality improves with higher density, which is also more time-consuming.<br />
9
2.2 Coregistration (spm_coreg_ui.m)<br />
Between and within modality image coregistration.<br />
Specify:<br />
Specify:<br />
Coregister only: determines parameters used to coregister to one image to another. This<br />
option saves the trans<strong>for</strong>m parameters filename.img in filename.mat.<br />
Reslice only: reslices and saves images using the trans<strong>for</strong>ms specified by the *.mat files.<br />
Trans<strong>for</strong>ms filename.img using filename.mat and saves as rfilename.img.<br />
*Coregister & Reslice (*=default): above steps combined. Saves trans<strong>for</strong>m parameters <strong>for</strong><br />
filename.img in filename.mat. Reslices and saves images as rfilename.img.<br />
FOR ‘Coregister only’ AND ‘Coregister & Reslice’:<br />
Specify:<br />
Specify:<br />
10
Select:<br />
Select:<br />
Select (or press ‘Done’):<br />
The TARGET image is the image to which the OBJECT image is realigned. OTHER images<br />
(if any) are trans<strong>for</strong>med in the same way as the OBJECT image.<br />
For example, to realign a structural T1-MRI to a fMRI time-series:<br />
- TARGET : mean EPI<br />
- OBJECT : T1<br />
- OTHER : -<br />
To realign a sequence of PET-images to a structural T1-MRI:<br />
- TARGET: T1<br />
- OBJECT: mean PET<br />
- OTHER: PET1.img, PET2.img,….<br />
N.B.<br />
• If the target and object images have different modalities, an image segmentation (see 2.6)<br />
is per<strong>for</strong>med to partition target and object into CSF, white and grey matter. These<br />
partitions are then used in the coregistration.<br />
FOR ‘Reslice Only’:<br />
Select:<br />
The space of this image (i.e. the space defined by the .mat file associated with this image) will<br />
be used to reslice the object image.<br />
Select:<br />
This image is the object image that will be resliced in the space of the previously selected<br />
image. The image will be resliced at the voxel size and origin of the previously selected image<br />
and will have the same space defined by the corresponding .mat file.<br />
Output from spm_coregister:<br />
11
Display: spm_coregister displays the coregistered images with the contours of the OBJECT<br />
image overlaid on both sets of images. This display is written to the spm99.ps file in the<br />
working directory. If OBJECT and TARGET image have different modalities, a segmentation<br />
is also carried out <strong>for</strong> both images. This is displayed as in spm_segment (see 2.6) and written<br />
to the spm99.ps file.<br />
12
Files: the coregistered images rfilename.img and rfilename.hdr are written to the same<br />
directory as the input images if ‘reslice’ is specified. The current rfilename.mat files are<br />
updated.<br />
Customisations <strong>for</strong> coregistration (optional):<br />
N.B.<br />
• Changes in default settings are valid only during one session. After quitting and restarting<br />
SPM, these adjustments need to be renewed.<br />
From the ‘Defaults’ options (lower panel), select ‘coregistration’:<br />
Specify:<br />
- use default registration<br />
- use mutual in<strong>for</strong>mation registration (advisable when default between-modality<br />
coregistration doesn’t work due to e.g. poor grey/white contrast, so that the segmentation<br />
step fails)<br />
Specify (<strong>for</strong> default between-modality coregistration only):<br />
- do all three coregistration steps (i.e., (1) 6-parameter (rigid body) normalisation of object<br />
and target image to a template of its own modality, (2) segmentation of object and target<br />
image, (3) coregistering the segmented images using the results of (1) as a starting point;<br />
=default)<br />
- do first coreg step only (6-parameter normalisation of object and target image, each to a<br />
template of its own modality), e.g. when coregistering two images with poor grey/white<br />
contrast such as a PET transmission scan and a CT-scan, or as a first step prior to mutual<br />
in<strong>for</strong>mation registration<br />
13
2.3 Slice timing (spm_slice_timing.m)<br />
Correction <strong>for</strong> differences in slice acquisition time.<br />
This is only <strong>for</strong> fMRI. Corrects <strong>for</strong> differences in acquisition time between slices during<br />
sequential imaging (as in echo-planar imaging). It is especially relevant <strong>for</strong> event-related<br />
designs. This routine per<strong>for</strong>ms a phase shift, resulting in each time series having the values<br />
that would have been obtained had the slice been acquired at (<strong>for</strong> example) the beginning of<br />
each TR.<br />
N.B.<br />
• This step can be per<strong>for</strong>med either be<strong>for</strong>e or after realignment (but be<strong>for</strong>e normalisation).<br />
Both procedures have potential disadvantages:<br />
- slice time correction be<strong>for</strong>e realignment may interpolate signals from different brain<br />
regions if there is significant head movement (which may be particularly problematic<br />
near the edge of the brain, where large signal differences occur across nearby voxels);<br />
- slice time correction after realignment however may shift voxels to adjacent slices<br />
(and hence different time points).<br />
• The latter problem is especially relevant <strong>for</strong> interleaved acquisitions, where the time<br />
difference between adjacent slices may be ½ TR. It is there<strong>for</strong>e recommended to per<strong>for</strong>m<br />
slice time correction first <strong>for</strong> interleaved sequences.<br />
• The latter problem is less relevant to sequential (ascending/descending) acquisitions,<br />
where the time difference between adjacent slices is small, and so realignment may be<br />
better first <strong>for</strong> ascending/descending sequences, to allow <strong>for</strong> movement effects.<br />
Specify:<br />
Select:<br />
Specify:<br />
ascending (first slice = bottom; e.g. 1 2 3 ………..68)<br />
descending (first slice = top; e.g. 68 67 66 ……..1)<br />
interleaved (first slice = top; e.g. 68 66 64 ……2 67 65 63….1)<br />
user specified (e.g., other interleaved sequences; SPM will prompt <strong>for</strong> a vector specifying<br />
slice acquisition order, where the slices are numbered in Analyze <strong>for</strong>mat)<br />
14
Specify:<br />
SPM will suggest the middle slice (in space) as the default (in the example above: slice 34).<br />
This is particularly useful <strong>for</strong> ascending/descending sequences because the phase shift<br />
interpolation tends to become less accurate with increasing shifts, and slices further away<br />
from the middle slice tend to be of less interest. When the regions of interest do lie in extreme<br />
(top or bottom) slices however, the reference slice may be chosen to correspond to these<br />
regions, so that interpolation artefacts are minimised (the signal in the reference slice itself is<br />
unchanged by the interpolation).<br />
N.B.<br />
• For fMRI analyses, SPM divides each TR into a number of time bins (by default this<br />
number=16). SPM by default then uses the first time bin as the reference or sampled bin.<br />
This bin provides the values from which the covariates are constructed.<br />
• When the first slice in time is NOT used as the reference slice during slice-timing<br />
correction, the default sampled bin (=1) must be adjusted prior to statistical analysis.<br />
• For example, if the middle slice was chosen as the reference slice <strong>for</strong> slice timing<br />
correction, the middle time bin must be set to the sampled time bin. If the number of time<br />
bins =16 <strong>for</strong> example, the sampled time bin should =8.<br />
• To change these settings, select Defaults, select ‘Statistics – fMRI’, set ‘Sampled bin’ to<br />
8. This change must be made be<strong>for</strong>e creating the design matrix.<br />
Specify:<br />
Specify:<br />
TR is defined as the time between the first slice of one scan and the first slice of the next scan;<br />
TA is the time between the first and the last slice within one scan. Without an interscan time<br />
delay, TA=TR-(TR/N), where N= number of slices (= default). When there is an interscan<br />
delay, TA must be adjusted.<br />
N.B.<br />
• In this example, TR>4sec. Although slice timing correction is potentially more important<br />
<strong>for</strong> long TRs, interpolation also becomes less accurate. It is there<strong>for</strong>e advised to omit slice<br />
time correction <strong>for</strong> TR>3sec and model timing differences by including temporal<br />
derivatives as an additional regressor, or using a phase-invariant Fourier set (see 3.1).<br />
Output from spm_slice_timing:<br />
Files: afilename.hdr, afilename.img and afilename.mat files are written to the input file<br />
directory.<br />
15
2.4 Normalisation (spm_sn3d.m)<br />
Three-dimensional spatial normalisation of PET, SPECT and (f)MRI images to a standard<br />
space.<br />
Normalisation consists of two steps: first the determination of an optimum 12-parameter<br />
(translations, rotations, zooms & shears) affine trans<strong>for</strong>mation (from an image to a template),<br />
followed by a nonlinear estimation of de<strong>for</strong>mations. These parameters can be used to reslice<br />
other images coregistered to the image from which the parameters were determined.<br />
Select:<br />
Determine parameters only: determines parameters (linear and nonlinear) used to normalise<br />
image to a template. Saves normalisation parameters in filename_sn3d.mat.<br />
Write normalised only: reslices and saves images using normalisation parameters specified<br />
by the selected sn3d.mat file. Applies parameters to filename.img (*.hdr, *.mat) and saves<br />
as nfilename.img (n*.hdr, n*.mat).<br />
Determine parameters and write normalised (=default): the above steps combined. Saves<br />
normalisation parameters <strong>for</strong> filename.img in filename_sn3d.mat. Saves normalised images<br />
as nfilename.img (n*.hdr, n*.mat).<br />
N.B.<br />
• All output images, headers and *.mat files as well as the *_sn3d.mat file are written to the<br />
input directory.<br />
• To assure optimal normalisation, image and template should be in a similar starting<br />
position. This can be tested with the Check Reg option in the lower panel. Use the Display<br />
option to reposition the image (see section 5).<br />
Specify:<br />
Select:<br />
<strong>for</strong> example, a coregistered T1 structural image or a mean functional (PET or EPI) image.<br />
Select:<br />
Select:<br />
16
The selected template image which should be the same modality (and have very similar<br />
contrast) as the image from which the parameters are to be determined.<br />
N.B.<br />
• The space of the template images in SPM is based upon the Talairach system, but does<br />
not make assumptions about brain symmetry, and includes the cerebellum.<br />
• The stereotactic space is based on 152 brains from the Montréal Neurological Institute,<br />
and will eventually be replaced in due course by a 450-brain version <strong>for</strong> the entire ICBM<br />
consortium ().<br />
• The 152 subject average brain was chosen rather than the MNI305 official standard brain<br />
because from the 152 subjects T2- and PD-weighted images were also available, allowing<br />
much more flexibility in the range of different MR contrasts that can be spatially<br />
normalized to the same stereotaxic space. See spm_templates.man <strong>for</strong> details.<br />
• A combination of templates may be used when the image to determine parameters from is<br />
different (e.g., intensity with a new MRI sequence) from the templates provided by SPM.<br />
For other purposes, e.g. normalising PET-ligand scans, creating a user-specified template<br />
should be considered.<br />
Specify:<br />
Nearest neighbour: fast but not very accurate and there<strong>for</strong>e not usually recommended.<br />
Bilinear (=default): recommended <strong>for</strong> fMRI images which have been resliced at the<br />
realignment stage, and PET.<br />
Sinc interpolation: uses a modified sinc interpolation (9x9x9 voxels kernel); slowest,<br />
recommended <strong>for</strong> fMRI data which have not been resliced at the realignment stage.<br />
Output from spm_sn3d:<br />
17
Display: spm_sn3d displays the normalised image and the template. The display is written to<br />
the spm99.ps file in the working directory.<br />
Files: the normalisation parameters filename_sn3d.mat are written to the same directory as<br />
the input image(s). The normalised images nfilename.img (n*.hdr, n*.mat) are written to the<br />
input directory if ‘write normalised’ is specified.<br />
18
Customisations <strong>for</strong> normalisation (optional):<br />
N.B.<br />
• Changes in default settings are valid only during one session. After quitting and restarting<br />
SPM, these adjustments need to be renewed.<br />
From the ‘Defaults’ options (lower panel), select ‘Spatial Normalisation’:<br />
Specify:<br />
- Defaults <strong>for</strong> Parameter Estimation (first step)<br />
- Defaults <strong>for</strong> Writing Normalised (second step)<br />
For changing Parameter Estimation defaults, specify:<br />
- Neurological Convention (R=R): SPM assumes that the images are in neurological<br />
convention (as used by SPM) so the starting estimates won’t include a L-R flip (0 0 0 0 0<br />
0 1 1 1 0 0 0)<br />
- Radiological Convention (L=R; default): SPM assumes that the images are in radiological<br />
convention so the starting estimates will include a L-R flip (0 0 0 0 0 0 -1 1 1 0 0 0)<br />
- Custom Starting Estimates:<br />
enter these in the following order:<br />
x translation (mm)<br />
y translation (mm)<br />
z translation (mm)<br />
x rotation ‘pitch’ (radians)<br />
y rotation ‘roll’ (radians)<br />
z rotation ‘yaw’ (radians)<br />
x scaling<br />
y scaling<br />
z scaling<br />
x shear<br />
y shear<br />
z shear<br />
19
N.B.<br />
• As an alternative to customising starting estimates, prior to normalisation the images may<br />
be repositioned using the Display option (see above).<br />
Specify:<br />
- Allow customised (options <strong>for</strong> # nonlinear basis functions and iterations, type of<br />
regularisation, and masking)<br />
- Disallow customised normalisation (=default; standard options <strong>for</strong> # nonlinear basis<br />
functions and iterations, type of regularisation, and masking)<br />
If customised is selected, specify:<br />
The default is 7x8x7 functions. A large number of functions will improve the quality of the<br />
normalisation provided the images do not contain gross lesions and/or have different contrasts<br />
compared to the template. More functions will be computationally slower, however.<br />
Specify:<br />
The default is 12 iterations. Again, the more iterations the better the result, but memory<br />
demands will similarly increase.<br />
20
Specify:<br />
Regularisation involves stabilising the estimation of the de<strong>for</strong>mations by penalising large<br />
de<strong>for</strong>mations. Heavy regularisation basically means that more weight is applied to the penalty<br />
term. There<strong>for</strong>e, if the spatial normalisation introduces excessive warping that is clearly<br />
wrong, more regularisation is needed. Conversely, if the images do not get warped enough to<br />
match the template, the amount of regularisation needs to be decreased. The default is<br />
medium regularisation.<br />
Specify:<br />
Masks template brain (1 1 1 1 .. <strong>for</strong> voxels within the brain, 0 0 0 0 .. <strong>for</strong> voxels outside the<br />
brain) in order to per<strong>for</strong>m normalisation based on the shape of the brain instead of the skull.<br />
Not necessary when normalising a mean EPI image to the EPI template, in which case<br />
unmasked normalisation may give better results.<br />
Specify:<br />
Similarly using 1 1 1 1 .. <strong>for</strong> voxels within the brain, 0 0 0 0 .. <strong>for</strong> voxels outside the brain. An<br />
object brain mask might be used e.g. to prevent an abnormal region (lesion) influencing the<br />
normalisation.<br />
For changing Writing Normalised defaults, specify:<br />
In mm distances (x y z) from the anterior commissure. When choosing ‘Runtime option’,<br />
SPM will prompt <strong>for</strong> bounding box dimensions during specification of the normalisation.<br />
21
Specify:<br />
In mm (x y z):<br />
- 1 1 1<br />
- 1.5 1.5 1.5<br />
- 2 2 2 (=default; may lead to oversampling of the data; the advantage is that the data will<br />
require less smoothing to meet the assumptions of Gaussian field theory, disadvantage is<br />
that resulting *.img files will use more disk space)<br />
- 3 3 3<br />
- 4 4 4<br />
- 1 1 2 (e.g., <strong>for</strong> structural MRI’s with 1mm interslice gap)<br />
- 2 2 4 (e.g., <strong>for</strong> EPI images with 2mm in-plane resolution and 2mm interslice gap)<br />
- Customise<br />
- Runtime option (i.e., SPM will prompt <strong>for</strong> voxel sizes during specification of the<br />
normalisation)<br />
22
2.5 Smooth (spm_smooth.m)<br />
Three-dimensional convolution of an image with a Gaussian kernel.<br />
Specify:<br />
Gaussian filter width. This can be a scalar (<strong>for</strong> isotropic voxels) or a vector of length 3 (sx sy<br />
sz) <strong>for</strong> anisotropic voxels. Suggested is 2-3 times the voxel size.<br />
Select:<br />
N.B.<br />
Spatial smoothing has three important objectives:<br />
• it increases signal to noise ratio<br />
• it conditions the data so that they con<strong>for</strong>m more closely to a Gaussian field model. This is<br />
important if Gaussian field theory is used to make statistical inferences about regionally<br />
specific effects (i.e., assign p-values)<br />
• it ensures that effects between different subjects are assessed on a reasonable spatial scale<br />
with respect to functional anatomy.<br />
See also Matthew Brett's basic tutorial on smoothing at:<br />
http://www.mrc-cbu.cam.ac.uk/Imaging/smoothing.html<br />
Output from spm_smooth:<br />
Images are saved as sfilename.img (s*.hdr, s*.mat) in the same directory as the input files.<br />
23
2.6 Segment (spm_segment.m)<br />
Segments MRI-image(s) into grey and white matter, CSF, and other.<br />
Specify:<br />
Select:<br />
if more than one, they should be coregistered.<br />
Specify:<br />
If not, specify:<br />
to match with a template which will be used <strong>for</strong> affine normalisation of the image(s). This is<br />
required <strong>for</strong> probabilistic segmentation.<br />
Specify:<br />
this option attempts to model intensity inhomogeneities using smooth basis functions.<br />
If inhomogeneity correction is to be applied, specify:<br />
Inhomogeneity-corrected images may be saved as corr_filename.img <strong>for</strong> inspection.<br />
Output from spm_segment.m:<br />
24
Display: spm_segment displays the segmentation results. This display is written to the<br />
spm.ps file in the working directory. N vox is the proportion of voxels belonging to each<br />
class, worked out from a subregion of the volume that encloses the brain.<br />
Files: the segmented images are written as filename_seg1.img, filename_seg2.img, and<br />
filename_seg3.img <strong>for</strong> grey and white matter, and CSF. These images are saved to the input<br />
directory.<br />
25
3. Model specification & parameter estimation<br />
This section deals with the specification of a model to analyse imaging data, and subsequent<br />
parameter estimation. Statistical inference is per<strong>for</strong>med using the Results option (see 4). SPM<br />
distinguishes three classes of models:<br />
- For modality-specific, independent data (PET/SPECT models; 3.1).<br />
- For modality-specific, serially correlated data (fMRI models, 3.2).<br />
- Basic models <strong>for</strong> independent data, which include random effects (RFX) analyses (3.3).<br />
3.1 PET/SPECT models (spm_spm_ui.m)<br />
SPM offers a number of PET/SPECT prototype models, which limits the number of necessary<br />
specifications <strong>for</strong> easy use.<br />
N.B.<br />
• All data entered in the model need to be in the same position (i.e., coregistered), and have<br />
identical dimensions and voxel sizes.<br />
- Single-subject, conditions & covariates: e.g. analysis of an individual subject, 12 scans<br />
(ARARARARARAR), with habituation (time) as a covariate. See example 1 below<br />
- Single-subject, covariates only: e.g., analysis of an individual subject, 12 scans during<br />
which a task is per<strong>for</strong>med, with covariate = task score (this example is discussed in<br />
Matthew Brett’s tutorial on SPM statistics; see http://www.mrccbu.cam.ac.uk/Imaging/spmstats.html<br />
)<br />
26
- Multi-subject, conditions & covariates: e.g., a study with 10 subjects, each per<strong>for</strong>ming a<br />
task with three levels of difficulty, with reaction time as a covariate (i.e, a condition x<br />
covariate interaction)<br />
- Multi-subject, condition x subject interaction & covariates: conditions are modelled<br />
separately <strong>for</strong> each subject, which allows assessment of condition x subject interactions.<br />
See example 2 below<br />
- Multi-subject, covariates only: e.g., a study with 6 spider phobic patients shown slides<br />
of spiders during each of 12 scans, with anxiety ratings as a covariate<br />
- Multi-group: conditions & covariates: e.g., a factorial design with two groups of<br />
subjects both per<strong>for</strong>ming an ARARARARARAR experiment. This design allows<br />
assessment of main effects (task vs. rest) <strong>for</strong> each group separately and both groups<br />
combined, as well as task x group interaction effects<br />
- Multi-group, covariates only: e.g., the ‘Multi-subject, covariates only’ spider study with<br />
a group of non-phobic controls added<br />
- Population main effect: 2 conditions, 1 scan/condition (= modality-adjusted paired t-<br />
test), e.g., a PET or SPECT study using a dopaminergic ligand in subjects with<br />
Parkinson’s disease scanned both pre- and post-therapy<br />
- Dodgy population main effect: > 2 conditions, 1 scan/condition; ‘dodgy’ because<br />
sphericity assumptions are likely to be violated (see example 1 below)<br />
- Compare-populations: 1 condition, 1 scan/condition (=modality-adjusted two-sample t-<br />
test), e.g., a PET or SPECT ligand study comparing patients to normal controls<br />
- Compare-populations (AnCova): 1 condition, 1 scan/condition, with nuisance<br />
variable(s) added, e.g. the preceding study with age entered as a possible confound<br />
- The Full Monty: ‘asks you everything’; an amalgam of ‘Multi-subject, cond x subj<br />
interaction & covariates’ and ‘Multi-group’ options<br />
Example 1: single-subject: conditions & covariates<br />
Select:<br />
Specify a vector whose length equals the number of scans, e.g. 1 2 1 2 1 2 1 2 1 2 1 2:<br />
Specify:<br />
If a covariate is modelled, specify a vector whose length also equals the number of scans:<br />
Specify (e.g., time):<br />
Specify:<br />
‘none’ will model the covariate (=time) as one parameter (time x session) or column in the<br />
design matrix (see below); ‘with condition’ as two (time x cond1 and time x cond2).<br />
27
Specify:<br />
Centring a covariate ensures that main effects of the interacting factor are not affected by the<br />
covariate, there<strong>for</strong>e SPM suggests centring on the overall mean. If ‘interaction by condition’<br />
had been specified, the default becomes ‘centring around condition means’.<br />
Specify:<br />
(=0 in this example; otherwise, specification of nuisance variables is similar to covariates).<br />
Specify:<br />
Scan to scan differences in global flow can be:<br />
- modelled as a nuisance variable (AnCova),<br />
- adjusted <strong>for</strong> by scaling the voxel values <strong>for</strong> each scan to the mean (proportional scaling)<br />
- ignored.<br />
AnCova is advised <strong>for</strong> multi-subject studies unless differences in global flow are large (e.g.,<br />
due to variability in injected tracer dose). Because AnCova also uses one degree of freedom<br />
<strong>for</strong> each subject/group, proportional scaling may be preferable <strong>for</strong> single-subject studies.<br />
If proportional scaling is selected, specify:<br />
the default of which scales the global flow to a physiologically realistic value of 50 ml/dl/min.<br />
Specify:<br />
to ensure that only grey-matter voxels are included in the analysis, by masking out from all<br />
scans voxels that fail to reach the specified threshold.<br />
If ‘proportional’ is selected, specify:<br />
the default being 80% of the mean global value. If thresholding is to be omitted, specify ‘-<br />
Inf’.<br />
Specify:<br />
28
The default is a two-step process in which first the overall mean is computed, after which<br />
voxels which do not reach a threshold of overall mean/8 (i.e., those which are extra-cranial)<br />
get masked out, followed by a second computation of the mean of the remaining voxels.<br />
Specify:<br />
Sphericity assumes equal variance and independency of measures across replications,<br />
condition types, and/or subjects. If this assumption is not met, without a correction statistical<br />
inference might produce biased (i.e., inflated) results. If a correction is to be applied, SPM<br />
will prompt to specify violations.<br />
Output from PET/SPECT models (spm_spm_ui) <strong>for</strong> example 1:<br />
29
Display: SPM displays a design matrix having columns <strong>for</strong> each parameter (in this example,<br />
two conditions, one covariate, and one constant (block)) and a row <strong>for</strong> each scan. The greyand-white<br />
bar below the design matrix signals that the matrix is rank deficient (columns 1,2<br />
and 4 are linearly dependent) which limits selection of meaningful contrasts (parameter<br />
weights) <strong>for</strong> condition effects to those which sum up to zero (see 4).<br />
File: the design matrix will be saved as SPMcfg.mat in the working directory.<br />
Specify:<br />
to begin parameter estimation now or at a later stage. If ‘later’, select ‘Estimate’ (middle<br />
panel) and select the appropriate SPMcfg.mat file.<br />
Example 2: Multi-subject, cond x subj interaction & covariates.<br />
Consider a study in which five subjects per<strong>for</strong>m an attention task with two stimulus types<br />
alternated with rest (ABRABRABRABR, suitably randomised across subjects) where<br />
individual differences in arousal (measured as skin conductance (GSR)) may interact with<br />
per<strong>for</strong>mance.<br />
Specify (5):<br />
Select:<br />
Specify (<strong>for</strong> each subject) a vector whose length equals the number of scans, e.g. A B R R A<br />
B B R A A R B:<br />
Specify (1):<br />
Specify a vector whose length equals the total number of scans:<br />
Specify (GSR):<br />
Specify (with subject):<br />
30
‘none’ will model the covariate (=GSR) as one parameter (GSR x session) or column in the<br />
design matrix (see below); ‘with condition’ as three (GSR x cond1-3) and ‘with subject ’ as<br />
five (GSR x subj1-5).<br />
Specify:<br />
Centring a covariate ensures that main effects of the interacting factor are not affected by the<br />
covariate, there<strong>for</strong>e SPM here suggests centring on subject means.<br />
Specify (0):<br />
Select:<br />
Scan to scan differences in global flow can be:<br />
- modelled as a nuisance variable (AnCova),<br />
- adjusted <strong>for</strong> by scaling the voxel values <strong>for</strong> each scan to the mean (proportional scaling)<br />
- ignored.<br />
AnCova is advised <strong>for</strong> multi-subject studies unless differences in global flow are large (e.g.,<br />
due to variability in injected tracer dose). Because AnCova also uses one degree of freedom<br />
<strong>for</strong> each subject/group, proportional scaling may be preferable <strong>for</strong> single-subject studies.<br />
If AnCova is selected, specify:<br />
the default corrects <strong>for</strong> subject to subject differences in mean global flow (within-subject<br />
differences were modelled during the previous step).<br />
Specify (50):<br />
the default of which scales the global flow to a physiologically realistic value of 50 ml/dl/min.<br />
As in example 1, specify:<br />
to ensure that only grey-matter voxels are included in the analysis, by masking out voxels<br />
which fail to reach the specified threshold.<br />
31
If ‘proportional’ is selected, specify:<br />
the default being 80% of the mean global value. If thresholding is to be omitted, specify ‘-<br />
Inf’.<br />
Specify:<br />
the default is a two-step process in which first the overall mean is computed, after which<br />
voxels which do not reach a threshold of overall mean/8 (i.e. extracranial voxels) get masked<br />
out, followed by a second computation of the mean of the remaining voxels.<br />
Specify:<br />
Sphericity assumes equal variance and independency of measures across replications,<br />
condition types, and/or subjects. If this assumption is not met, without a correction statistical<br />
inference might produce unrealistic (i.e., inflated) results. If a correction is to be applied, SPM<br />
will prompt to specify violations.<br />
Output from PET/SPECT models (spm_spm_ui) <strong>for</strong> example 2:<br />
32
Display: SPM displays a design matrix having columns <strong>for</strong> each parameter (in this example,<br />
fifteen conditions (three conditions, modelled separately <strong>for</strong> each subject), one covariate<br />
(GSR <strong>for</strong> each subject), five constants (block) and five nuisance variables (GBF)), and a row<br />
<strong>for</strong> each scan. The grey-and-white bar below the design matrix signals that the matrix is rank<br />
deficient (columns 1-15 and 21-25 are linearly dependent) which limits selection of<br />
meaningful contrasts (parameter weights) <strong>for</strong> condition effects to those which sum up to zero<br />
(see 4).<br />
File: the design matrix will be saved as SPMcfg.mat in the working directory.<br />
As in example 1, specify:<br />
33
to begin parameter estimation now or at a later stage. If ‘later’, select ‘Estimate’ (middle<br />
panel) and select the appropriate SPMcfg.mat file.<br />
N.B.<br />
• Model estimation may also be launched via the ‘Explore design’ option. SPM will then<br />
prompt you to select a SPMcfg.mat file <strong>for</strong> inspection.<br />
• Clicking ‘Design’ (lower left window) will activate a pull-down menu which allows<br />
selection of displays <strong>for</strong> the design matrix, details of design orthogonality (surfable),<br />
selected scans and specified conditions, and covariates. It does not provide options to edit<br />
the model.<br />
Output from PET/SPECT parameter estimation (spm_spm.m):<br />
- beta_0001.img/hdr, beta_0002.img/hdr, beta_0003.img/hdr, ….. : images containing<br />
parameter estimates <strong>for</strong> each column in the design matrix<br />
- mask.hdr/img : mask image consisting of 0’s and 1’s indicating which voxels within the<br />
image volume are to be assessed<br />
- ResMS.hdr/img : image of estimated residual variance<br />
- RPV.hdr/img : image of estimated resels per voxel<br />
- SPM.mat file : contains details of design matrix, analysed images, search volume,<br />
smoothness estimates and results files.<br />
- xCon.mat file : contains default F-contrast (so-called ‘effects of interest’) which are used<br />
<strong>for</strong> selecting ‘interesting’ voxels at which to save raw data <strong>for</strong> future plotting<br />
- Y.mad file : contains (in compressed <strong>for</strong>m) the raw (unsmoothed) data at voxels with an<br />
F-statistic higher than the default. Each column corresponds to one voxel, each row to an<br />
input image<br />
- Yidx.mat file : contains a 1 x N vector of column indices used in the Y.mad file (where N<br />
= number of available voxels)<br />
34
3.2 fMRI models (spm_fmri_spm_ui.m)<br />
3.2.1 Specification of a model – first step:<br />
Select ‘specify a model’:<br />
As with PET/SPECT, SPM’99 allows separate model specification & inspection, and<br />
parameter estimation, <strong>for</strong> fMRI designs. However, fMRI model building is more flexible, the<br />
main distinction being between epoch- and event-related designs.<br />
N.B.<br />
• Whereas model specification & parameter estimation occurs in two stages <strong>for</strong><br />
PET/SPECT studies, <strong>for</strong> fMRI there are three:<br />
(i) specification of conditions, timings, user-specified covariates, and regressor types<br />
(e.g. boxcar),<br />
(ii) selecting scans, modelling nuisance variables and other confounds, i.e. lowfrequency<br />
drifts and temporal autocorrelation,<br />
(iii) parameter estimation. This permits the use of a single design matrix (i.e., the first<br />
step) <strong>for</strong> different data sets (sessions/subjects) acquired with the same paradigm, and<br />
also <strong>for</strong> designing an experiment (stochastic designs, see below). In SPM, the first<br />
step is termed ‘specify a model’, the second and third ‘estimate a specified model’.<br />
• In the ‘specify and estimate a model’ option, the order of the prompts is slightly different;<br />
moreover, SPM does not display graphs of the specified regressor(s) and design<br />
orthogonality (these can be displayed using the ‘review a specified model’ option and<br />
selecting the appropriate SPM_fMRIDesMtx.mat file).<br />
Specify:<br />
N.B.<br />
• As with PET/SPECT, all data entered in the model need to be in the same position (i.e.,<br />
coregistered), and have identical dimensions and voxel sizes.<br />
• In addition, the TR must be identical.<br />
Specify:<br />
Here SPM does not distinguish between sessions and subjects: e.g., <strong>for</strong> a design with 4<br />
subjects each having two sessions of 96 scans, enter 96 96 96 96 96 96 96 96.<br />
When more than one session is entered, specify:<br />
35
If ‘no’, SPM will prompt <strong>for</strong> the number (and names) of conditions / trials <strong>for</strong> each session. If<br />
‘yes’, specify:<br />
If ‘no’ (as will be usually the case, i.e. when replications are randomised across sessions),<br />
SPM will prompt <strong>for</strong> onset times/trial lengths <strong>for</strong> each session.<br />
Specify:<br />
<strong>for</strong> all sessions combined when conditions are replicated, or otherwise <strong>for</strong> each session<br />
separately.<br />
Specify:<br />
<strong>for</strong> each condition.<br />
Specify:<br />
This option allows building an (event-related) experiment rather than analysing one. If ‘yes’,<br />
SPM will prompt to specify:<br />
(i) Whether to include a null event,<br />
(ii) Whether there is a fixed time delay between consecutive events of the same type<br />
(SOA, see below),<br />
(iii) The relative frequency of event types (e.g., 1/1),<br />
(iv) Whether this frequency should be stationary or modulated across the experiment.<br />
The resulting design matrix can be used <strong>for</strong> both conducting and analysing an experiment.<br />
Otherwise, select ‘no’.<br />
Specify:<br />
if ‘fixed’, specify:<br />
SOA = stimulus onset asynchrony = time (in scans) between the onset of two consecutive<br />
appearances of the same condition/trial type. This must be entered <strong>for</strong> each trial/condition.<br />
Specify:<br />
<strong>for</strong> each trial/condition. For example, if the1 st trial occurs at the beginning of the first scan,<br />
enter 0, if it occurs halfway through the 3 rd scan, enter 2.5.<br />
If SOA = ‘variable’, specify:<br />
again <strong>for</strong> each trial/condition. Enter the onset in scans <strong>for</strong> each occurrence of the trial. The<br />
length of this vector should equal the number of times the trial occurs (replications).<br />
36
Next, specify:<br />
and if yes, specify trial durations <strong>for</strong> each replication:<br />
Again, the length of this vector should equal the number of trials (4 in this example).<br />
N.B.<br />
• SOA = stimulus onset asynchrony = time (in scans) between the onset of two consecutive<br />
appearances of the same condition/trial type. As an example, consider a time series of 96<br />
scans with conditions A, B, and R, each block lasting 8 scans; if the scanning order is<br />
ABRABRABRABR, SOA = fixed (24 scans), onset time = 0/8/16 <strong>for</strong> A/B/R. If the<br />
scanning order is randomised to ABRRBABARRAB, SOA = variable, vector of onsets =<br />
0 40 56 80/8 32 48 88/16 24 64 72 <strong>for</strong> A/B/R.<br />
• If block lengths within a condition are different, it should be analysed as an event-related<br />
design (see below). Alternatively, it can be specified as an epoch design with separate<br />
conditions <strong>for</strong> each block length. For example, consider a simple ARAR… study in which<br />
condition A alternately lasts 7 or 8 scans; this can be modelled as A1RA2R… where A1 =<br />
7-scan activation blocks, and A2 = 8-scan activation blocks.<br />
• In these examples, a resting condition is included <strong>for</strong> clarity. A resting condition<br />
(baseline) need not be explicitly modelled in SPM, however.<br />
Specify:<br />
This option allows modelling changes over replications of conditions/trials across session.<br />
If ‘time’ or ‘other’, select:<br />
to model linear, exponential, or polynomial changes. (When choosing ‘polynomial’, SPM will<br />
prompt <strong>for</strong> the order of the polynomial, the default being 2 generating a polynomial with<br />
linear + squared components).<br />
Next, specify condition or trial numbers in which a parametric term should be included (e.g.<br />
<strong>for</strong> 2 trials, select 1, 2 or both):<br />
If ‘other’, SPM will also prompt <strong>for</strong> a vector whose length is equal to the number of<br />
replications (e.g., 10):<br />
For two or more condition/trial types, specify:<br />
For each condition, trials should be either events or epochs. If mixed, SPM prompts to specify<br />
‘events’ or ‘epochs’ <strong>for</strong> each condition separately. If there is only one condition, SPM will<br />
also prompt to specify ‘events’ or ‘epochs’.<br />
37
For an epoch design, select:<br />
i.e., a function or set of functions which, convolved with the timings specified earlier,<br />
provides the most adequate modelling of the data. Basis functions are more flexible than fixed<br />
response models but their components usually cannot be interpreted in a physiologically<br />
meaningful way; there<strong>for</strong>e multivariate or F-contrasts are required <strong>for</strong> statistical inference<br />
(see 4). A discrete cosine set may be useful when a steady-state response does not occur;<br />
SPM will prompt <strong>for</strong> the number of functions (default = 2). Similarly, mean & exponential<br />
decay may be chosen when the response decreases over time within an epoch (as opposed to<br />
across replications, see above).<br />
Next, select:<br />
Convolving with the canonical hemodynamic response function (hrf) will add a delayed<br />
onset, early peak, and late undershoot to the model.<br />
Select:<br />
if yes, the partial derivative of e.g. the boxcar function with respect to time is added as an<br />
additional regressor, which will enable modelling of slight onset differences.<br />
Finally, specify <strong>for</strong> each condition modelled as epochs:<br />
For an event-related design, select:<br />
- hrf (alone): canonical hemodynamic response function; based on empirical (visual<br />
stimulation) data; consists of two gamma functions (one positive, one negative) shifted 2s<br />
apart.<br />
- hrf (with time derivative): hrf with partial derivative <strong>for</strong> time added; allows modelling of<br />
slight (ca. 1s) onset differences.<br />
- hrf (with time and dispersion derivatives): hrf with partial derivatives <strong>for</strong> time and<br />
dispersion added; allows modelling of slight onset differences in onset time and response<br />
width.<br />
- basis functions (Fourier set): uses a set of sines/cosines to model responses. The default<br />
window length is 32s (at which time the canonical hrf has returned to baseline), the<br />
38
default number of functions is 4, resulting in 9 basis functions: sines/cosines with<br />
frequency 1/32, 2/32, 3/32 and 4/32 Hz, and a constant. The number of functions should<br />
be chosen with regard to the TR, as it is doubtful whether one should include components<br />
higher than the Nyquist frequency (i.e., 1/(2TR) Hz).<br />
- basis functions (Fourier set with Hanning): similar to the previous option but with an<br />
amplitude modulation (Hanning filter) added so that all functions start and end at zero.<br />
- basis functions (Gamma functions): uses three gamma functions (which are<br />
asymmetrical) with different onset-to-peak times and orthogonalised with respect to each<br />
other.<br />
- basis functions (Gamma functions with derivatives): similar to the previous option but<br />
with temporal derivatives <strong>for</strong> each function added.<br />
- basis functions (Finite Impulse Response): uses a set of ‘mini-boxcars’ to model peristimulus<br />
time. The default bin size (= ‘boxcar length’) is 2s, the default number of bins is<br />
8, giving 9 functions (1 constant).<br />
N.B.<br />
• As with epoch designs, basis functions are more flexible (no prior assumptions regarding<br />
the shape of the response, especially the Fourier and FIR sets) but their components<br />
cannot be interpreted in a physiologically meaningful way and there<strong>for</strong>e usually need F-<br />
contrasts <strong>for</strong> inference.<br />
• When T-contrasts are required (e.g., <strong>for</strong> a second-level analysis, see 3.3 and 4), hrf with or<br />
without time and dispersion derivatives should be chosen.<br />
For both epoch and event-related designs, specify:<br />
This option allows modelling (regressing out) of non-linearities due to the interaction of<br />
successive trials of the same type (<strong>for</strong> example, repetition suppression (priming)). Use also<br />
when the time between successive events is 2s or less.<br />
Specify:<br />
to model any other covariates (i.e., other than modulation across replications (e.g., time) or<br />
within a block (=mean and exponential decay, see above)). SPM will prompt <strong>for</strong> a vector<br />
whose length equals the number of scans (e.g., 64):<br />
39
Output from fMRI model specification (spm_fmri_spm_ui.m) – first step:<br />
Display: shown <strong>for</strong> an event-related design, 112 scans, one event type, modelled using a<br />
canonical hrf with time and dispersion derivatives. There are six panels:<br />
40
- upper left: shows the columns in the design matrix, one <strong>for</strong> each regressor, one constant<br />
(block). This matrix is surfable: R-clicking will show parameter names, L-clicking will<br />
show design matrix values <strong>for</strong> each scan<br />
- upper middle: shows the ‘columns’ of the previous graph (except <strong>for</strong> the constant) after a<br />
90° rotation, giving a ‘bar graph’ showing positive (light grey –white) and negative (dark<br />
grey – black) values across session <strong>for</strong> regressor(s) used<br />
- upper right: graph of design orthogonality: white = orthogonal, black = collinear, grey =<br />
between orthogonal and collinear. This matrix is also sourball: L-clicking will give the<br />
value of the cosine of the angle between two parameters (0 = orthogonal, 1 = collinear)<br />
- middle left: shows a more detailed graph of each regressor across session (cf. upper<br />
middle panel)<br />
- middle right: shows a Fourier (frequency domain) trans<strong>for</strong>m of each regressor<br />
- lower: shows a graph of each regressor relative to peri-stimulus sampling (time bins)<br />
N.B.<br />
• As shown in this example, the regressors are not completely orthogonal due to the limited<br />
number of sampling points (orthogonality there<strong>for</strong>e varies with TR length).<br />
File: the output of fMRI model specification at this point is saved as<br />
SPM_fMRIDesMtx.mat in the working directory.<br />
N.B.<br />
• SPM displays only the first trial/session. To review the model <strong>for</strong> subsequent<br />
trials/sessions, select ‘review a model’ from ‘fMRI models’, select the<br />
SPM_fMRIDesMtx.mat file, and click ‘Explore fMRI design’ (lower left window),<br />
which will activate a pull-down menu.<br />
3.2.2 Specification of a model – second step:<br />
To complete specification and proceed to estimating your model, select estimate a specified<br />
model from ‘fMRI models’:<br />
Select:<br />
Select scans (<strong>for</strong> each session/subject):<br />
Specify:<br />
which provides the option of scaling global activity within a session (scaling across<br />
sessions/subjects occurs implicitly). This may remove e.g. scanner drifts within a session; on<br />
the other hand, large activations may be scaled down as well.<br />
41
Specify:<br />
Select specify if low-frequency confounds are to be removed.<br />
:<br />
The default suggested by SPM <strong>for</strong> epoch designs is two times the experimental cycle, e.g., <strong>for</strong><br />
an ARAR…. design with A=8 scans and R=6, the default cut-off is 2(8+6)*TR. For eventrelated<br />
designs, the default is two times the longest interval between two appearances of the<br />
most frequently occurring event. For both epoch- and event-related designs the lower<br />
threshold is 32sec, the upper threshold is 512sec.<br />
Specify:<br />
If there were no correction <strong>for</strong> temporal autocorrelation in fMRI data, statistical inference<br />
would produce inflated results (the actual number of degrees of freedom is lower than the<br />
number of observations (scans)). <strong>SPM99</strong> gives two options to deal with this problem:<br />
(i) Replacing the unknown autocorrelations by an imposed autocorrelation structure, by<br />
smoothing the data with a temporal filter that will attenuate high frequency<br />
components, hence a ‘low-pass filter’. The shape of this filter can be either Gaussian<br />
or hrf. Differences between these two are slight but hrf may provide a better<br />
sensitivity <strong>for</strong> event-related data modelled using a hrf-basis function;<br />
(ii) Attempting to regress out the unknown autocorrelations (AR(1)-model, see below).<br />
If Gaussian, specify filter width (default = 4sec):<br />
A large (wide) filter implies that attenuation will occur at lower frequencies (or, put<br />
differently, that high frequencies will be suppressed more) than with a small filter. The tradeoff<br />
is that a large filter may remove interesting data while a small filter will not be adequate to<br />
impose a new (known) autocorrelation structure on the data.<br />
Specify:<br />
AR(1) = auto-regression (1) = modelling serial correlations by regressing out the variance<br />
explained by the previous observation (scan).<br />
N.B.<br />
• Either temporal smoothing or AR(1) should be chosen, not both.<br />
• It is unclear whether the AR(1) option provides adequate correction <strong>for</strong> serial correlations<br />
and hence biased statistics. More extensive autoregression models (AR(n)) are more<br />
flexible than low-pass filtering but are computationally demanding.<br />
• Serial correlations affect only statistical inference at the first level. Correction may<br />
there<strong>for</strong>e be omitted when one is only interested in a second-level (random effects)<br />
analysis.<br />
42
Finally, specify:<br />
i.e., default F-contrasts <strong>for</strong> each trial type will be computed.<br />
Output from fMRI model specification (spm_fmri_spm_ui.m) – 2nd step:<br />
43
Display: the design matrix shown at this point is simply the left upper panel of the previous<br />
graph, with the file names of the scans added, and with other details of the configuration listed<br />
underneath.<br />
Output: the configuration <strong>for</strong> the design matrix is saved as SPMcgf.mat in the working<br />
directory.<br />
N.B.<br />
• The design matrix is also shown when the ‘specify and estimate a model’ option has been<br />
chosen.<br />
As with PET/SPECT models, SPM provides the option to begin parameter estimation now or<br />
at a later stage:<br />
If ‘later’, select ‘Estimate’ (middle panel) and select the appropriate SPMcfg.mat file.<br />
N.B.<br />
• Model estimation may also be launched via the ‘Explore design’ option. SPM will prompt<br />
you to select a SPMDesMtx.mat or a SPMcfg.mat file <strong>for</strong> inspection.<br />
• Clicking ‘Design’ (lower left window) will activate a pull-down menu that allows<br />
selection of displays <strong>for</strong> the design matrix <strong>for</strong> each session, details of design orthogonality<br />
(surfable), and model estimation (when the SPMcfg.mat file was selected).<br />
Output from fMRI parameter estimation (spm_spm.m):<br />
- beta_0001.img/hdr, beta_0002.img/hdr, beta_0003.img/hdr, ….. : images containing<br />
parameter estimates <strong>for</strong> each column in the design matrix<br />
- mask.hdr/img : mask image consisting of 0’s and 1’s indicating which voxels within the<br />
image volume are to be assessed<br />
- ResMS.hdr/img : image of estimated residual variance<br />
- RPV.hdr/img : image of estimated resels per voxel<br />
- SPM.mat: contains details of design matrix, analysed images, search volume, smoothness<br />
estimates and results files.<br />
- xCon.mat: contains default F-contrast (so-called ‘effects of interest’) which are used <strong>for</strong><br />
selecting ‘interesting’ voxels at which to save raw data <strong>for</strong> future plotting<br />
- Y.mad: contains (in compressed <strong>for</strong>m) the raw (unsmoothed) data at voxels with an F-<br />
statistic higher than the default. Each column corresponds to one voxel, each row to an<br />
input image<br />
- Yidx.mat: contains a 1 x N vector of column indices used in the Y.mad file (where N =<br />
number of available voxels)<br />
44
3.3 Customisations <strong>for</strong> PET/SPECT and fMRI statistics<br />
Select PET or fMRI statistics from the lower panel:<br />
Defaults <strong>for</strong> model specification and parameter estimation are few to allow maximal<br />
flexibility.<br />
For both PET and fMRI, specify:<br />
<strong>for</strong> the default ‘effects of interest’-F-test. The default value <strong>for</strong> PET is p
3.4 Basic models (spm.spm_ui.m)<br />
These are basic models <strong>for</strong> simple statistics, usually at a second level to extend the sphere of<br />
inference (random effects (RFX) analysis). Because SPM considers only a single component<br />
of variance (the residual error of variance), all analyses involving repeated measures within<br />
subjects are to be considered fixed-effects analyses, so that inferences are only valid <strong>for</strong> the<br />
sample under study. To allow inferences valid <strong>for</strong> the population from which the sample was<br />
drawn, a two-stage analysis is required, to account <strong>for</strong> first or intrasubject and second or<br />
between-subject levels of variance. During the first step, scan to scan variance (intrasubject) is<br />
modelled <strong>for</strong> each subject separately, resulting in a summary measure or ‘scan’. These<br />
summary scans (usually t-contrast images (con*.img), containing weighted parameter<br />
estimates; see 4) are then fed into a second, between-subjects level analysis, using the ‘Basic<br />
models’ option.<br />
N.B.<br />
• For second-level analyses, first-level individual subject models should be the same (i.e. it<br />
should be a balanced design).<br />
• To compute contrast images <strong>for</strong> a second-level analysis, either a single-subject OR a<br />
subject-separable multi-subject model should be chosen <strong>for</strong> the first level analysis, i.e. <strong>for</strong><br />
PET ‘Multi-subject, cond x subj interaction & covariates’ (single-group design) or ‘Full<br />
Monty’ (multi-group design).<br />
• For fMRI, each subject should be specified as one session, or contrasts should be specified<br />
over sessions. For example, if 10 subjects did two sessions each, this can be analysed as a<br />
20-session experiment, with individual contrast images specified by 1 1 0 0 0 …., 0 0 1 1<br />
0 ….., and so <strong>for</strong>th.<br />
• The ‘Basic models’ option may also be used to analyse ‘raw’ (first-level) data. For this<br />
purpose SPM provides options <strong>for</strong> global normalisation, grand mean scaling and<br />
thresholding / implicit masking similar to those discussed <strong>for</strong> PET/SPECT models. For<br />
second-level analyses, however, it is not necessary to use these options at this stage<br />
because global normalisation etc. has been specified as part of the first level analysis.<br />
Select:<br />
- One sample t-test: tests the null hypothesis that the mean of one group of observations is<br />
identical to zero. For example, a second level analysis of activation-rest contrast images<br />
from a multi-subject experiment.<br />
- Two sample t-test: tests the null hypothesis that the mean of one group of observations is<br />
identical to the mean of a second group of observations. For example, a second level<br />
analysis of activation-rest contrast images from a two-group (e.g., patients and controls)<br />
experiment.<br />
46
- Paired t-test: tests the null hypothesis that the mean difference between a group of paired<br />
observations is zero. For example, a second level analysis of activation-rest contrast<br />
images from a multi-subject experiment with two separate sessions (e.g., pre- and posttherapy).<br />
- One way Anova: tests the null hypothesis that the means of two or more groups of<br />
observations are identical. For example, a second level analysis of activation-rest contrast<br />
images from a three-group (e.g., patients A, patients B, and controls) experiment.<br />
- Simple regression (correlation): tests the null hypothesis that the slope of a fitted (using<br />
a least squares solution) regression line describing the relation between a predictor and an<br />
outcome variable is zero. For example, a multi-subject PET-ligand study with age as a<br />
potential confound.<br />
- Multiple regression: regression with two or more predictors and one outcome variable.<br />
Tests the null hypothesis that the slope of the regression line <strong>for</strong> each predictor variable is<br />
zero. For example, a multi-subject PET-ligand study with age AND weight as potential<br />
confounds.<br />
N.B.<br />
• Designs in which one or more factors represent repeated measures (e.g. from the same<br />
subject) with more than two levels (e.g. a one-way Anova on three observations from the<br />
same group) are not strictly valid. This is because SPM (currently) assumes that the data<br />
are “spherical”, which is rarely true in such models. RFX analyses are there<strong>for</strong>e normally<br />
restricted to one- or two-sample t-tests.<br />
• Designs with one measurement of a potential confound per subject (age, weight, education<br />
level, etc.) may also be analysed using the PET/SPECT models: ‘single subject, covariates<br />
only’ option, treating each subject as a scan.<br />
- AnCova: analysis of covariance: regression with two or more groups of observations and<br />
one predictor. Tests the null hypothesis that the distance between parallel regression lines<br />
is zero AND the null hypothesis that the means of two or more groups of observations are<br />
identical, with the effects of the predictor (confound) removed. For example, a second<br />
level analysis of activation-rest contrast images from a two-group (e.g., patients and<br />
controls) experiment, with IQ as a potential confound. See example below<br />
Example: AnCova (two groups, one covariate)<br />
Specify (e.g. 2):<br />
Select (<strong>for</strong> both groups):<br />
Specify a vector whose length equals the total number of scans:<br />
Specify (e.g., IQ):<br />
47
Select:<br />
- scaling of all images to overall grand mean: use only <strong>for</strong> first-level analyses.<br />
- no grand mean scaling (= default): <strong>for</strong> second-level analyses (as in this example).<br />
Select (none):<br />
Select (no):<br />
Thresholding and implicit masking (i.e., ignoring zeros. SPM will automatically disregard<br />
zero values indicated by NaN (Not a Number)) should only be per<strong>for</strong>med at the first level.<br />
Select (no):<br />
This option is primarily <strong>for</strong> analysing raw data; usually, images will be masked at the<br />
normalisation stage (2.4).<br />
Select (omit):<br />
Again, this option is <strong>for</strong> first-level analyses only.<br />
48
Output from Basic models (spm_spm_ui):<br />
Display: SPM displays a design matrix having columns <strong>for</strong> each parameter (in this example,<br />
two groups, one constant (block), and one covariate (IQ in this example), and a row <strong>for</strong> each<br />
scan (subject). Again, the grey-and-white bar below the design matrix signals that the matrix<br />
is rank deficient (columns 1-3 are linearly dependent) which limits selection of meaningful<br />
contrasts (parameter weights) <strong>for</strong> group effects to those which sum up to zero (see 4).<br />
File: the configuration <strong>for</strong> the design matrix will be saved as SPMcfg.mat in the working<br />
directory.<br />
Finally, specify:<br />
49
to begin parameter estimation now or at a later stage. If ‘later’, select ‘Estimate’ (middle<br />
panel) and select the appropriate SPMcfg.mat file.<br />
N.B.<br />
• Model estimation may also be launched via the ‘Explore design’ option. SPM will<br />
prompt you to select a SPMcfg.mat file <strong>for</strong> inspection.<br />
• Clicking ‘Design’ (lower left window) will activate a pull-down menu which allows<br />
selection of displays <strong>for</strong> the design matrix, details of design orthogonality (surfable),<br />
selected scans and specified conditions, and covariates. It does not provide options to edit<br />
the model.<br />
Output from Basic models parameter estimation (spm_spm.m):<br />
- beta_0001.img/hdr, ... : images containing parameter estimates <strong>for</strong> each column in the<br />
design matrix.<br />
- mask.hdr/img : mask image consisting of 0’s and 1’s indicating which voxels within the<br />
image volume are to be assessed.<br />
- ResMS.hdr/img : image of estimated residual variance.<br />
- RPV.hdr/img : image of estimated resels per voxel.<br />
- SPM.mat: contains details of design matrix, analysed images, search volume, smoothness<br />
estimates and results files.<br />
- xCon.mat: contains default F-contrast (‘all effects‘ or ‘effects of interest’) which is used<br />
<strong>for</strong> selecting voxels at which to save raw data <strong>for</strong> future plotting.<br />
- Y.mad: contains (in compressed <strong>for</strong>m) the raw (unsmoothed) data at voxels with an F-<br />
statistic higher than the default. Each column corresponds to one voxel, each row to an<br />
input image.<br />
- Yidx.mat: contains a 1 x N vector of column indices used in the Y.mad file (where N =<br />
number of available voxels).<br />
50
4. Results assessment (spm_results_ui.m)<br />
This section deals with the interactive exploration and characterisation of the results of a<br />
statistical analysis. For this purpose, three data sets will be discussed, which can be found at<br />
http://www.fil.ion.ucl.ac.uk/spm/data. These examples are (i) a single-subject epoch (block)<br />
fMRI study, (ii) a multi-subject PET study, (iii) a single-subject event-related fMRI study.<br />
4.1 Example 1: single-subject fMRI block design (plotting and overlays)<br />
This is a single-subject auditory activation study, with alternating 6-scan blocks of rest and<br />
binaural stimulation (speech). Details of model specification and parameter estimation can be<br />
found in the README_analysis.txt.<br />
After completing model estimation (this is shown in the lower left SPM and Matlab<br />
windows), press ‘Results’.<br />
Select:<br />
This will invoke the Contrast Manager:<br />
The contrast manager displays the design matrix (surfable) in the right panel and lists<br />
specified contrasts in the left panel. Either ‘t-contrast’ or ‘F-contrast’ can be selected. One F-<br />
contrast is predefined (‘effects of interest’).<br />
To examine statistical results <strong>for</strong> condition effects, select ‘Define new contrast’:<br />
51
Main effects <strong>for</strong> the active condition (i.e., a one-sided t-test) can be specified (in this example)<br />
as ‘1’ (active > rest) and ‘-1’ (rest > active). SPM will accept correct contrasts only. Accepted<br />
contrasts are displayed at the bottom of the contrast manager window in green, incorrect ones<br />
are displayed in red. To view a contrast, select the contrast name (e.g., active>rest) and press<br />
‘Done’:<br />
Specify (no):<br />
Masking implies selecting voxels specified by other contrasts. If ‘yes’, SPM will prompt <strong>for</strong><br />
(one or more) masking contrasts, the significance level of the mask (default p = 0.05<br />
uncorrected), and will ask whether an inclusive or exclusive mask should be used. Exclusive<br />
will remove all voxels which reach the default level of significance in the masking contrast,<br />
inclusive will remove all voxels which do not reach the default level of significance in the<br />
masking contrast. Masking does not affect p-values of the ‘target’ contrast, it only includes or<br />
excludes voxels.<br />
52
Select (enter a title):<br />
Specify (yes):<br />
Select a height/amplitude threshold to examine results that are either corrected <strong>for</strong> multiple<br />
comparisons (‘yes’), or uncorrected (‘no’) at a voxel-level.<br />
Specify:<br />
For corrected comparisons, the SPM default is p=0.05, <strong>for</strong> uncorrected comparisons, p=0.001.<br />
Specify:<br />
Select the number of voxels to restrict the minimum cluster size. 0 will include single voxel<br />
clusters (‘spike’ activations).<br />
Output from Contrast Manager:<br />
Files: images containing weighted parameter estimates are saved as con_0002.hdr/img,<br />
con_0003.hdr/img, …etc. in the working directory. Images of T-statistics are saved as<br />
spmT_0002.hdr/img, spmT_0003.hdr/img.. etc., also in the working directory.<br />
Display: in the Graphics window, SPM displays<br />
(i) a maximum intensity projection (MIP) on a glass brain in three orthogonal planes.<br />
The MIP is surfable: R-clicking in the MIP will activate a pulldown menu, L-clicking<br />
on the red cursor will allow it to be dragged to a new position.<br />
(ii) the design matrix (showing the selected contrast). The design matrix is also surfable:<br />
R-clicking will show parameter names, L-clicking will show design matrix values <strong>for</strong><br />
each scan.<br />
In the SPM Interactive window (lower left panel) a button box appears with various options<br />
<strong>for</strong> displaying statistical results (p-values panel) and creating plots/overlays (visualisation<br />
53
panel). Clicking ‘Design’ (upper left) will activate a pulldown menu as in the ‘Explore<br />
design’ option.<br />
To get a summary of local maxima, press ‘volume’:<br />
This will list all clusters above the chosen level of significance as well as separate (>8mm<br />
apart) maxima within a cluster, with details of significance thresholds and search volume<br />
underneath. The columns show, from right to left:<br />
- x, y, z (mm): coordinates in Talairach space <strong>for</strong> each maximum<br />
- voxel-level: the chance (p) of finding (under the null hypothesis) a voxel with this or a<br />
greater height (T- or Z-statistic), corrected / uncorrected <strong>for</strong> search volume<br />
- cluster-level: the chance (p) of finding a cluster with this or a greater size (k e ), corrected /<br />
uncorrected <strong>for</strong> search volume<br />
- set-level: the chance (p) of finding this or a greater number of clusters (c) in the search<br />
volume<br />
54
N.B.<br />
• The table is surfable: clicking a row of cluster coordinates will move the pointer in the<br />
MIP to that cluster, clicking other numbers will display the exact value in the Matlab<br />
window (e.g. 0.000 = 6.1971e-07).<br />
• To inspect a specific cluster (e.g., in this example data set, the R auditory cortex), either<br />
move the cursor in the MIP (by L-clicking & dragging the cursor, or R-clicking the MIP<br />
background which will activate a pulldown menu).<br />
• Alternatively, click the cluster coordinates in the volume table, or type the coordinates in<br />
the lower left windows of the SPM Interactive window.<br />
Select ‘cluster’:<br />
This will show coordinates and voxel-level statistics <strong>for</strong> local maxima (>4mm apart) in the<br />
selected cluster. This table is also surfable.<br />
To plot effect size and/or signal time course from a voxel, e.g. <strong>for</strong> the cluster maximum, move<br />
the cursor to (60 –20 8). Next, press ‘plot’:<br />
- Contrast of parameter estimates: SPM will prompt <strong>for</strong> a specific contrast (e.g.,<br />
active>rest). The plot will show effect size and error bars (in %).<br />
- Fitted and adjusted response: Plots adjusted data and fitted response across<br />
session/subject. SPM will prompt <strong>for</strong> a specific contrast and provides the option to choose<br />
different ordinates (‘an explanatory variable’, ‘scan or time’, or ‘user specified’). If ‘scan<br />
or time’, the plot will show adjusted BOLD data (in %, blue dashed line) and the<br />
regressor(s) used (red solid line):<br />
55
- Event/epoch-related responses: Plots adjusted data and fitted response across peristimulus<br />
time. SPM provides four options:<br />
fitted response: simple plot of mean (i.e., averaged over session) regressor(s) across PST<br />
fitted response and PSTH (peri-stimulus time histogram): plots mean regressor(s) and<br />
mean signal +/- SE <strong>for</strong> each time bin.<br />
fitted response +/- standard error: plots mean regressor(s) +/- SE<br />
fitted response and adjusted data: plots regressor(s) and individual data (note that in<br />
this example the data are shown in columns due to the fixed TR/ISI relationship)<br />
56
N.B.<br />
• The values <strong>for</strong> the fitted response across session/subject <strong>for</strong> the selected plot can be<br />
displayed and accessed in the Matlab window by typing ‘Y’. Typing ‘y’ will display the<br />
adjusted data.<br />
• ‘Adjusted’ data = adjusted <strong>for</strong> confounds (e.g., global flow) and high- and low pass<br />
filtering.<br />
For anatomical visualisation of a cluster (in this example, R auditory cortex), press ‘overlays’<br />
which will activate a pulldown menu. There are three options:<br />
- slices: overlay on three adjacent (2mm) transaxial slices. SPM will prompt <strong>for</strong> an image<br />
<strong>for</strong> rendering (a canonical image (see spm_template.man) or an individual T1/mean EPI<br />
image <strong>for</strong> single-subject analyses)<br />
57
- sections: overlay on three intersecting (sagittal, coronal, transaxial) slices. These<br />
renderings are surfable: clicking the images will move the crosshair<br />
- render: overlay on a volume rendered brain, with options <strong>for</strong> using a smoothed brain, and<br />
old (left) and new (right) style rendering.<br />
Renderings can be saved as filename.img and filename.hdr in the working directory by using<br />
the write filtered option.<br />
Other options (in the results controls panel):<br />
- clear: clears lower subpanel of Graphics window<br />
- exit: exits the results section<br />
- : launches spm_results_ui help<br />
58
4.2 Example 2: Multi-subject PET study (volume of interest, masking and conjunction<br />
analyses)<br />
This is a PET word generation study with five subjects, each having 12 scans, with alternating<br />
conditions of word shadowing (baseline) and word generation (active), randomised across<br />
subjects (see the README.txt). Although this data set can be analysed in several ways, it is<br />
suggested to select a subject-separable model (Multi-subj: cond x subj interaction &<br />
covariates, see 3.1). Specify: # covariates = 0, # nuisance variables = 0, GloNorm: AnCova by<br />
subject.<br />
After completing model estimation (this is shown in the lower left SPM and Matlab<br />
windows), press ‘Results’.<br />
Select:<br />
This will invoke the Contrast Manager:<br />
To examine condition effects e.g. <strong>for</strong> subject 2, select ‘Define new contrast’. Specify e.g.<br />
‘active>rest_subj2’ (name) and ‘0 0 -1 1’ (contrast), and press ‘submit’:<br />
59
As shown, SPM will interpret ‘0 0 –1 1’ as ‘0 0 –1 1 0 0 0 0 0 0’. Condition effects <strong>for</strong> each<br />
subject may be assessed as in the previous fMRI example.<br />
To examine group effects, define e.g. ‘active>rest_allsubj’ as ‘-1 1 -1 1 -1 1 -1 1 -1 1’ and<br />
select it (press ‘Done’):<br />
Specify (no):<br />
Masking implies selecting voxels specified by other contrasts. If ‘yes’, SPM will prompt <strong>for</strong><br />
(one or more) masking contrasts, the significance level of the mask (default p = 0.05<br />
uncorrected), and will ask whether an inclusive or exclusive mask should be used. Exclusive<br />
will remove all voxels which reach the default level of significance in the masking contrast,<br />
inclusive will remove all voxels which do not reach the default level of significance in the<br />
masking contrast. Masking does not affect p-values of the ‘target’ contrast.<br />
60
Specify (yes):<br />
Select a height/amplitude threshold to examine results that are either corrected <strong>for</strong> multiple<br />
comparisons (‘yes’), or uncorrected (‘no’) at a voxel-level.<br />
Specify:<br />
For corrected comparisons, the SPM default is p=0.05, <strong>for</strong> uncorrected comparisons, p=0.001.<br />
Specify:<br />
Select the number of voxels to restrict the minimum cluster size. 0 will include single voxel<br />
clusters (‘spike’ activations).<br />
Output from Contrast Manager:<br />
Files: images containing weighted parameter estimates are saved as con_0002.hdr/img,<br />
con_0003.hdr/img, …etc. in the working directory. Images of T-statistics are saved as<br />
spmT_0002.hdr/img, spmT_0003.hdr/img etc., also in the working directory.<br />
Display: in the Graphics window, SPM displays<br />
(i)<br />
(ii)<br />
a maximum intensity projection (MIP) on a glass brain in three orthogonal planes.<br />
The MIP is surfable: R-clicking in the MIP will activate a pulldown menu, L-clicking<br />
on the red cursor will allow it to be dragged to a new position.<br />
the design matrix (showing the selected contrast). The design matrix is also surfable:<br />
R-clicking will show parameter names, L-clicking will show design matrix values <strong>for</strong><br />
each scan.<br />
In the SPM Interactive window (lower left panel) a button box appears with various options<br />
<strong>for</strong> displaying statistical results (p-values panel) and creating plots/overlays (visualisation<br />
panel). Clicking ‘Design’ (upper left) will activate a pulldown menu as in the ‘Explore<br />
design’ option.<br />
61
To get a summary of local maxima, press ‘volume’:<br />
As in the previous example, this will list all clusters above the chosen level of significance as<br />
well as separate (>8mm apart) maxima within a cluster, with details of significance thresholds<br />
and search volume underneath. The columns show, from right to left:<br />
- x, y, z (mm): coordinates in Talairach space <strong>for</strong> each maximum<br />
- voxel-level: the chance (p) of finding (under the null hypothesis) a voxel with this or a<br />
greater height (T- or Z-statistic), corrected / uncorrected <strong>for</strong> search volume<br />
- cluster-level: the chance (p) of finding a cluster with this or a greater size (k e ), corrected /<br />
uncorrected <strong>for</strong> search volume<br />
- set-level: the chance (p) of finding this or a greater number of clusters (c) in the search<br />
volume<br />
62
N.B.<br />
• The table is surfable: clicking a row of cluster coordinates will move the pointer in the<br />
MIP to that cluster, clicking other numbers will display the exact value in the Matlab<br />
window (e.g. 0.000 = 6.1971e-07).<br />
• To inspect a specific cluster (e.g., in this example data set, the L prefrontal cortex), either<br />
move the cursor in the MIP (by L-clicking & dragging the cursor, or R-clicking the MIP<br />
background which will activate a pulldown menu).<br />
• Alternatively, click the cluster coordinates in the volume table, or type the coordinates in<br />
the lower left windows of the SPM Interactive window.<br />
Select ‘cluster’:<br />
This will show coordinates and voxel-level statistics <strong>for</strong> local maxima (>4mm apart) in the<br />
selected cluster. The table is also surfable.<br />
Both in the ‘volume’ and ‘cluster’ options, p-values are corrected <strong>for</strong> the entire search<br />
volume. If one has an a priori anatomical hypothesis (obviously, in the present example, that<br />
Broca’s area will be activated during this word generation task) one may use the small<br />
volume correction option (see also Matthew Brett’s tutorial at http://www.mrccbu.cam.ac.uk/Imaging/vol_corr.html).<br />
Select ‘S.V.C.’ (left lower panel), and select a suitable<br />
region, e.g., a 30mm sphere with its centre at –44 16 0. Note that the region should be defined<br />
using prior knowledge (e.g., a mask image derived from previous imaging data).<br />
63
N.B.<br />
• As is shown, only corrected p-values change (become smaller) when SVC is used.<br />
To extract a time course <strong>for</strong> data in this region of interest (spm.regions.m), select V.O.I.<br />
(Volume Of Interest) and select (‘don’t adjust’):<br />
Specify (e.g., Broca):<br />
Specify (accept default):<br />
64
Output from spm.regions.m:<br />
Display:<br />
SPM displays a graph of the first eigenvariate of the data in or centered around the chosen<br />
voxel (or the nearest suprathreshold voxel saved in the Y.mad file), and lists the eigenvariate<br />
values (Y) in the Matlab window. If temporal filtering has been specified (fMRI), then the<br />
data is temporally filtered. Adjustment is with respect to the null space of a selected contrast,<br />
or can be omitted.<br />
File: Y and VOI details (xY) are saved as VOI_regionname.mat in the working directory.<br />
In this example, group effects are calculated averaged across subjects, there<strong>for</strong>e individual<br />
data may bias group results. To assess condition effects common to all subjects, one should<br />
either mask (inclusively) the ‘all_subj’ contrast with the individual contrasts, or per<strong>for</strong>m a<br />
conjunction analysis.<br />
To assess the masked contrast, press ‘Results’, select the appropriate ‘SPM.mat’ file, and<br />
select the ‘all_subj’ contrast.<br />
Next, press ‘yes’:<br />
Select all individual contrasts (by pressing [control] while selecting):<br />
65
Specify threshold (select default):<br />
Select (inclusive):<br />
Specify (accept default):<br />
Specify (yes):<br />
Specify (accept default):<br />
Specify (accept default):<br />
When the MIP appears, press ‘volume’:<br />
66
The output shows all voxels which are (a) significant at p < 0.05 corrected across all subjects<br />
and (b) significant at p < 0.05 uncorrected <strong>for</strong> each subject individually.<br />
To per<strong>for</strong>m a conjunction across subjects, press ‘Results’, and select all individual contrasts<br />
(press ‘Control’):<br />
67
N.B.<br />
• Sometimes (e.g., if global confounds are used) the contrasts of parameter estimates are not<br />
exactly orthogonal (even if the contrast weight vectors are).<br />
• SPM checks whether the contrasts are orthogonal and if not makes them so (relative to the<br />
first contrast specified).<br />
Next, press ‘no’:<br />
Specify (accept):<br />
Specify (yes):<br />
Specify (accept default):<br />
The p-value (corrected or uncorrected) refers to the threshold of the conjunction; SPM will<br />
compute corresponding thresholds <strong>for</strong> individual contrasts (<strong>for</strong> uncorrected thresholds, the<br />
individual threshold will be p 1/n , where p = individual threshold and n = number of contrasts<br />
in the conjunction).<br />
N.B.<br />
• In <strong>SPM99</strong>b, uncorrected p-values were applied by SPM to individual contrasts, so that the<br />
threshold of the conjunction was p n .<br />
• Height, and not extent, is used to specify thresholding because the distributional<br />
approximations <strong>for</strong> the spatial extent of a conjunction SPM are not known (at present), so<br />
that inference based on spatial extent is precluded.<br />
When the MIP appears, press ‘volume’:<br />
68
Although the MIP’s of the masked group contrast and the conjunction are similar, <strong>for</strong> the<br />
conjunction an intersection SPM or ‘minimum T-field’ is computed. Conjunctions in <strong>SPM99</strong><br />
represent the intersection of several SPMs. This intersection is the same as thresholding a<br />
map of the minimum T-values (if the smallest T-value is above the specified threshold then all<br />
the T-values associated with the component SPMs are above threshold).<br />
Conjunction SPMs are very useful <strong>for</strong> testing multiple hypotheses (each component<br />
hypothesis being specified by a contrast). In this example, the set of hypotheses tested jointly<br />
is that the first subject did not activate, the second subject did not activate and so on. In<br />
regions that survive a conjunction analysis the null hypothesis is rejected jointly <strong>for</strong> all<br />
subjects. This can be thought of as enabling an inference that subject 1 activated AND<br />
subject 2 activated AND subject 3... etc.<br />
Gaussian field theory results are available <strong>for</strong> SPMs of minimum T- (or F-) statistics and<br />
there<strong>for</strong>e corrected p-values can be computed. Note that the minimum T-values do not have<br />
the usual Student’s T-distribution and small minimum T-values can be very significant.<br />
69
4.3 Example 3: single-subject fMRI event-related design<br />
As a third and more sophisticated example, consider the data from a repetition priming<br />
experiment per<strong>for</strong>med using event-related fMRI. Again, details regarding the data set can be<br />
found in the README.txt. Briefly, this is a 2x2 factorial study where famous and nonfamous<br />
faces were presented twice (while the subject was asked to make fame judgements)<br />
against a checkerboard baseline. There are thus four event-types of interest, (first and second<br />
presentations of famous and non-famous faces, ordered in the design matrix N1-N2-F1-F2),<br />
each modelled with a canonical HRF and its temporal derivative. Also included are two eventtypes<br />
of no interest – the (rare) errors made by this subject on the fame-judgement task - and<br />
the subject’s realignment parameters, to regress out residual movement-related variance. The<br />
latter can be achieved by loading the realignment_*.txt file (output from the realignment<br />
stage) as a matrix into the Matlab workspace and entering the matrix name in the SPM input<br />
box (rather than specifying 6 vectors of length 351 in this example). Preprocessing of the data<br />
includes slice timing correction having the middle slice (12) as the reference slice. There<strong>for</strong>e,<br />
prior to specifying the model, in the fMRI statistics defaults, the sampled bin should be equal<br />
to half the number of bins. For example, enter number of bins = 24 (the number of slices) and<br />
the sampled bin=12, using the Defaults button. In addition, stimulus onset times have been<br />
specified as a cell array variable, allowing different vector (row) lengths <strong>for</strong> separate trials.<br />
In addition to analysing the data in the above “categorical” design, an alternative “parametric”<br />
design is illustrated in which repetition is viewed as a continuum. In this case, the response to<br />
each presentation of famous and non-famous faces is modulated by the time interval (lag)<br />
since the previous presentation of that face (<strong>for</strong> first presentations, this lag is infinite).<br />
To assess the results <strong>for</strong> the categorical (factorial) analysis, specify and estimate the model<br />
(alternatively download the CatStats files). Next, press ‘Results’ and select the appropriate<br />
SPM.mat file. This will again invoke the contrast manager:<br />
To assess the main effects of viewing faces vs. baseline, select ‘Define new contrast’ and type<br />
‘Canonical HRF: Faces > Baseline’ (name) and ‘1 0 1 0 1 0 1 0’ (contrast), and press ‘Done’.<br />
70
Specify (no):<br />
Specify (accept default):<br />
After computation of the contrast, specify (yes):<br />
Specify (accept default):<br />
Specify (accept default):<br />
When the MIP appears, press ‘volume’:<br />
The table lists all areas where the mean of the parameter estimates <strong>for</strong> the canonical hrf of the<br />
four conditions is significantly greater than baseline (zero). To assess both the hrf and its<br />
temporal derivative, an F-contrast is required. Press ‘Results’, select the SPM.mat file, and<br />
press ‘F-contrast’ (radio button). Next, select ‘Define new contrast’, specify ‘hrf + temp deriv:<br />
Faces vs. Baseline’ (name) and enter<br />
‘1 0 1 0 1 0 1 0<br />
0 1 0 1 0 1 0 1 ‘ (contrast) and press ‘Done’:<br />
71
Select the new contrast, specify ‘mask with other images‘ (no), specify ‘name of<br />
comparison’ (accept default), specify ‘corrected height threshold’ (yes), specify ‘corrected p<br />
value’ (accept default). Again, when the MIP appears, press ‘volume’:<br />
72
Although the MIP of this F-contrast looks similar to the previous t-contrast, note that the<br />
present contrast shows the areas <strong>for</strong> which the mean of the parameter estimates <strong>for</strong> the<br />
canonical hrf OR its temporal derivative <strong>for</strong> the four conditions are different from zero<br />
(baseline). In other words, the F-contrast is two-sided, and tests two t-contrasts<br />
simultaneously. Also note that an F- (or t-) contrast such as 1 1 1 1 1 1 1 1, which tests<br />
whether the mean of the canonical hrf AND its temporal derivative <strong>for</strong> all conditions are<br />
different from (larger than) zero is not sensible. This is because the canonical hrf and its<br />
temporal derivative may cancel each other out while being significant in their own right.<br />
Finally, note that single F-contrasts can be regarded as t-contrasts^2, so that the F-contrasts 1<br />
0 -1 0 1 0 –1 0 and –1 0 1 0 –1 0 1 0 are equivalent.<br />
The relative contributions of the canonical hrf and its temporal derivative at a given voxel<br />
may also be assessed using F-contrasts to estimate a reduced model, removing all confounds.<br />
Press ‘Results’, select the SPM.mat file, press ‘F-contrast’ in the contrast manager, and select<br />
‘Define new contrast’. Specify ‘Effects of Real Interest’ (name) and type ‘9:19’ in the small<br />
window labelled ‘columns <strong>for</strong> reduced design’. This will remove columns 9 to 19 (i.e., hrf<br />
and temporal derivative <strong>for</strong> events representing error judgements and nuisance covariates)<br />
from the design.<br />
Submit and select the new contrast, specify ‘mask with other images‘ (no), specify ‘name of<br />
comparison’ (accept default), specify ‘corrected height threshold’ (yes), specify ‘corrected p<br />
value’ (accept default). Again, when the MIP appears, press ‘volume’:<br />
73
Move the cursor to e.g. the anterior right fusi<strong>for</strong>m blob (the R fusi<strong>for</strong>m face area) by clicking<br />
the second set of coordinates in the cluster (45 –48 –27) and press ‘plot’. Select ‘Contrast of<br />
parameter estimates’ and select ‘Effects of real interest’:<br />
74
Columns 1,3,5,7 are the canonical hrfs <strong>for</strong> N1 (non-famous faces, first presentation), N2 (nonfamous<br />
faces, second presentation), F1 (famous faces, 1 st presentation) and F2 (famous faces,<br />
2 nd presentation), whereas columns 2,4,6,8 are the temporal derivatives. Note that the<br />
amplitude of the canonical hrfs is large compared to the temporal derivatives, suggesting that,<br />
<strong>for</strong> this region at least, the timing of the model is adequate. Also note the repetition x stimulus<br />
type interaction (the decrease from N1 to N2 is smaller than <strong>for</strong> F1 to F2).<br />
To assess further the effects of stimulus repetition, press ‘Results’, select the SPM.mat file,<br />
and press ‘F-contrast’. Specify e.g. ‘hrf + temp deriv: 1 vs. 2’ (name) and<br />
‘1 0 –1 0 1 0 –1 0<br />
0 1 0 –1 0 1 0 –1’ (contrast). Submit and select the contrast. Specify ‘mask with another<br />
contrast’ (yes), select the ‘Canonical HRF: Faces > Baseline’ t-contrast, specify ‘threshold <strong>for</strong><br />
mask’ (accept default of p=0.05 uncorrected), specify ‘nature of mask’ (inclusive), specify<br />
‘title <strong>for</strong> comparison’ (accept default), specify ‘corrected height threshold’ (no), specify<br />
threshold (0.001).<br />
Again, when the MIP appears, press ‘volume’:<br />
75
The MIP shows all clusters where the difference between the parameter estimates <strong>for</strong> first and<br />
second presentations <strong>for</strong> the canonical hrf OR its temporal derivative is significantly different<br />
from zero AND the canonical hrf <strong>for</strong> all four conditions is significantly larger than zero. Note<br />
that although the mask does not alter the threshold <strong>for</strong> the target contrast, the combined<br />
probability <strong>for</strong> a voxel to appear in the masked contrast is in the order of 0.05 x 0.001<br />
uncorrected due to the orthogonality of the contrasts.<br />
To plot repetition suppression effects <strong>for</strong> the R fusi<strong>for</strong>m region, select the third cluster from<br />
the top (by clicking 48 60 –15; slightly more posterior to that identified above) and press<br />
‘plot’.<br />
Select ‘event/epoch-related responses’:<br />
Specify ‘1:4’:<br />
Select ‘fitted response’:<br />
To adjust the scale of the x-axis (time), press ‘attrib’ from the plot controls panel:<br />
76
Select Xlim, and change the default (-4 32) to ‘0 10’:<br />
Note the signal decrease between first and second presentations of both famous and nonfamous<br />
faces:<br />
Other options from the plot controls panel:<br />
- hold: allows overlaying of plots<br />
- grid: toggles between grid on/off<br />
- Box: toggles between axes/box<br />
- text: allows editing of title and/or axis labels.<br />
To assess movement-related activation, press ‘Results’, select the SPM.mat file, and select ‘Fcontrast’<br />
in the Contrast Manager. Specify e.g. ‘Movement-related activation’ (name) and<br />
either<br />
‘0 0 0 0 0 0 0 0 0 0 0 0 1<br />
0 0 0 0 0 0 0 0 0 0 0 0 0 1<br />
0 0 0 0 0 0 0 0 0 0 0 0 0 0 1<br />
0 0 0 0 0 0 0 0 0 0 0 0 0 0 0 1<br />
0 0 0 0 0 0 0 0 0 0 0 0 0 0 0 0 1<br />
0 0 0 0 0 0 0 0 0 0 0 0 0 0 0 0 0 1’<br />
in the ‘contrasts weights matrix’ window, or ‘1:12 19’ in the ‘columns <strong>for</strong> reduced design’<br />
window.<br />
77
Submit and select the contrast, specify ‘mask with other contrasts’ (no), ‘title <strong>for</strong><br />
comparison’ (accept default), ‘corrected height threshold’ (yes), and ‘corrected p-value’<br />
(accept default). When the MIP appears, press ‘volume’:<br />
78
The table displays all clusters where signal changes correlated with any of the six movement<br />
parameters are significantly different from zero. Note the large edge effects, which, however,<br />
are not apparent in the fusi<strong>for</strong>m regions.<br />
Finally, consider the effects of the interval between first and second presentations of famous<br />
and non-famous faces. For this purpose, an alternative statistical model needs to be estimated,<br />
with four trial types. (1) First and second presentation of a non-famous face (N1 and N2<br />
collapsed). (2) First and second presentation of a famous face (F1 and F2 collapsed). (3)<br />
Errors in judging non-famous faces. (4) Errors in judging famous faces. These are modelled<br />
with the canonical hrf alone, with two parametric (exponential) modulations added <strong>for</strong> second<br />
presentations of non-famous and famous faces. See the README.txt <strong>for</strong> details of design<br />
specification.<br />
After completion of model estimation, press ‘Results’ and select the SPM.mat file. When the<br />
Contrast Manager appears, define an F-contrast ‘Effect of Lag (on canonical N+F)’ (name)<br />
and ‘0 1 0 1’, and a t-contrast ‘Canonical: Faces>Baseline’ (name) and ‘1 0 1 0’. Select the F-<br />
contrast, specify ‘mask with other contrasts’ (yes), select ‘Canonical: Faces>Baseline’,<br />
specify ‘uncorrected mask p-value’ (accept default), ‘nature of mask (inclusive), ‘title <strong>for</strong><br />
comparison’ (accept default), ‘corrected height threshold’ (no), and ‘corrected p-value’<br />
(accept default). When the MIP appears, press ‘volume’:<br />
The table displays all clusters where the exponential change in activation between first and<br />
second presentations <strong>for</strong> famous OR non-famous faces <strong>for</strong> the canonical hrf is significantly<br />
different from zero AND the canonical hrf <strong>for</strong> the first two conditions is significantly larger<br />
than zero (baseline). To plot these parametric effects, select the R fusi<strong>for</strong>m region (45 –60 –<br />
18, similar to the region identified in the previous categorical analysis <strong>for</strong> repetition effects),<br />
79
and press ‘plot’. Select ‘Plots of parametric responses’ and select ‘F’ (or ‘N’). Note that the<br />
‘attrib’ option does not allow adjustment of the scale of the Z-axis; there<strong>for</strong>e, to change the<br />
scale <strong>for</strong> all axes, type e.g. ‘figure (1), axis ([0 30 0 100 0 1])’ in the Matlab window.<br />
Note that these repetition effects are transient (decrease with increasing intervals between first<br />
and second presentations), especially <strong>for</strong> famous faces.<br />
80
5. Miscellaneous functions and utilities<br />
This section describes miscellaneous functions and utilities that are included with SPM.<br />
5.1 Display: Interactive orthogonal display of selected image.<br />
81
Display utilities:<br />
Bottom left panel:<br />
- Image intensity at crosshair position. Translation, rotation and scaling parameters can be<br />
entered to reorient images. Image is displayed with new orientation values.<br />
- Reorient images… - overwrites the image .mat file with the new trans<strong>for</strong>mation as<br />
specified by the orientation values entered above.<br />
- Reset - overwrites the .mat file to contain an estimate of the space of the image.<br />
Bottom right panel: contains in<strong>for</strong>mation about image, its size and space.<br />
- Full volume/160x160x160mm/…etc: displays full image volume or a selected subvolume.<br />
- World Space / Voxel Space: World space – displays image in the space of its .mat file.<br />
Voxel space – displays image in voxel space, i.e. without using .mat file.<br />
- AutoWindow / <strong>Manual</strong> Window: Auto Window – scales image between minimum and<br />
maximum values. <strong>Manual</strong> Window – manually select values to scale image intensity<br />
values.<br />
- Hide Crosshairs – toggles crosshair display on and off.<br />
- NN interp / bilinear interp / sinc interp – interpolation used <strong>for</strong> displayed image.<br />
- Add/Remove blobs – can add up to 6 sets of blobs from previously executed statistics on<br />
displayed image.<br />
5.2 Check Reg(istration)<br />
This allows >1 and
-<br />
New style overlay<br />
Old style overlay<br />
- Xtract Brain – this requires that a segmentation has been per<strong>for</strong>med and that grey and<br />
white matter segmented images are available (see segmentation, 2.6). Options are:<br />
- Save Extracted Brain – extracted brain is saved as a binary mask image (i.e. 1s<br />
identifying the brain and 0s elsewhere) with the name brain_filename.img, hdr, .mat.<br />
Use display to visualise results (as in figure below).<br />
- Save Rendering – rendered brain is displayed (as in figure below) and results are saved as<br />
render_filename.mat. This file can be selected to display blobs on a rendered surface<br />
(e.g. see x).<br />
- Save Extracted Surface – brain surface is saved as surf_filename.mat. The resulting<br />
brain surface can be displayed (as in figure below) and rotated. Type help spm_xbrain at<br />
the matlab prompt <strong>for</strong> code to manipulate the surface.<br />
83
Extracted brain Rendered brain Brain surface<br />
5.4 fMRI/PET<br />
Option to toggle between the PET and the fMRI mode.<br />
5.5. Toolboxes<br />
This option provides access to SPM toolboxes installed in the toolbox subdirectory of the<br />
SPM installation directory. A sub-directory must exist under the SPM toolbox directory<br />
named after the toolbox. There must be an M-file in this sub-directory whose name ends with<br />
the toolbox directory name. E.g. a toolbox <strong>for</strong> De<strong>for</strong>mations would contain an M-file called<br />
‘spm_De<strong>for</strong>mations.m’ in a subdirectory called De<strong>for</strong>mations under the SPM toolbox<br />
directory.<br />
5.6 Means...<br />
Options:<br />
- Mean: creates a mean image from selected images and writes result to mean.img in<br />
current working directory. Selected images must have same dimensions, voxel sizes and<br />
orientations.<br />
- AdjMean: creates a mean image from selected images after adjusting <strong>for</strong> conditions and<br />
confounds using the general linear model. The user selects a design, scaling/normalisation<br />
and adjustment options in a similar way to doing SPM-PET (section 3.1). The adjusted<br />
means created with this step were previously used <strong>for</strong> PET RFX analyses. See section x<br />
<strong>for</strong> updated RFX analysis.<br />
- adjMean/fMRI - creates a mean image from selected images after adjusting <strong>for</strong><br />
conditions and confounds using the general linear model. The user specifies the design,<br />
the required global normalisation and high-pass filtering. An adjusted mean is created <strong>for</strong><br />
each condition specified in a single session fMRI epoch-related study. The adjusted means<br />
created with this step were previously used <strong>for</strong> fMRI RFX analyses. See section x <strong>for</strong><br />
updated RFX analysis.<br />
84
5.7 ImCalc<br />
ImCalc allows basic algebraic calculations to be per<strong>for</strong>med on selected images and the result<br />
written as an image. The user must specify the expression to be evaluated in standard matlab<br />
<strong>for</strong>m with the selected images referred to in order as i1, i2, i3 …etc. Logical, relational and<br />
trigonometric operators can be used as well as basic arithmetic operators. For in<strong>for</strong>mation on<br />
using these operators in matlab, type ‘help arith’, ‘help relop’, ‘help slash’ and ‘help elfun’<br />
at the matlab prompt. The user must enter a name <strong>for</strong> the resulting output image. This will be<br />
written to the current working directory.<br />
5.8 HDR edit<br />
HDR edit allows an image header to be edited and applied to selected images. It also allows<br />
the creation of image headers. Editing options are:<br />
Set options <strong>for</strong> editing, then select APPLY to images. A new header file will be written <strong>for</strong><br />
selected images. This utility is especially useful <strong>for</strong> adjusting the origin of one or more images<br />
to provide a better starting point <strong>for</strong> coregistration with an image where the origin is very<br />
different.<br />
5.9 Help<br />
This provides a graphical user interface <strong>for</strong> the help files associated with all buttons in the<br />
SPM menu window.<br />
5.10 Utils…<br />
Options:<br />
- CD – change present working directory<br />
- PWD – report present working directory<br />
- delete – file deletion utility<br />
- Show SPM – pops up figures associated with this SPM session. This is very useful when<br />
running >1 SPM at a time<br />
- Run mFile – run selected Matlab M-file in workspace<br />
- SPMweb – opens http://www.fil.ion.ucl.ac.uk/spm in web browser<br />
85
5.11 Defaults<br />
This option allows current defaults to be edited. New default settings are reset to SPM<br />
defaults when a new SPM session is started.<br />
Printing Options – allows a variety of different printing options to be selected.<br />
Miscellaneous Defaults:<br />
- Log to file - allows user to specify a file in which to log all SPM-user dialogue.<br />
- Command Line Input – allows user to select GUI or command line input mode.<br />
- Grid Value – allows user to select intensity <strong>for</strong> any overlaid grids (e.g. on the MIPS display, slices overlay).<br />
The grid is brightest <strong>for</strong> a value of 1 and disappears <strong>for</strong> a value of 0.<br />
Header Defaults –PET/FMRI – these values are used as the defaults <strong>for</strong> the HDR edit<br />
utility.<br />
The defaults <strong>for</strong> Realignment, Coregistration, Spatial Normalisation, Statistics –PET/<br />
FMRI were discussed in each of the relevant sections.<br />
Reset All – this reloads the SPM startup defaults from spm_defaults.m.<br />
5.12 Quit<br />
This exits SPM and clears the workspace.<br />
86