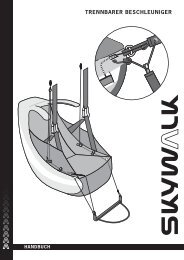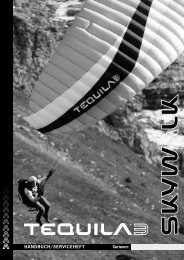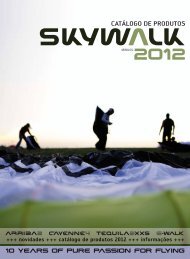
mescal 2_e - Skywalk
mescal 2_e - Skywalk
mescal 2_e - Skywalk

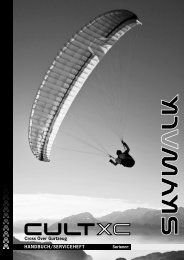
Create successful ePaper yourself
Turn your PDF publications into a flip-book with our unique Google optimized e-Paper software.
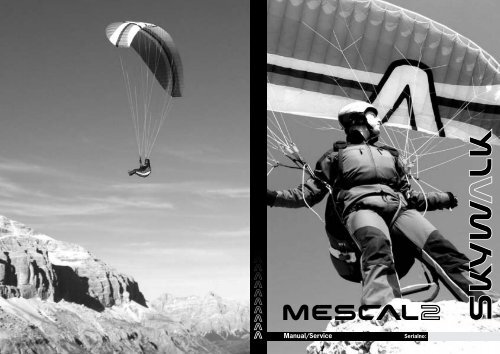
Manual/Service<br />
39
Content<br />
Introduction page 41<br />
Description page 42<br />
Line system page 43<br />
Technical data page 45<br />
Acceleration System page 46<br />
Harness page 47<br />
Introduction<br />
Congratulations and thank you for your decision for a skywalk glider! We can assure<br />
you that this decision will be honored with plenty of joy in flying.<br />
To ensure that you feel at home on your new glider, we recommend you thoroughly<br />
read the Owners Manual/Operating Instructions. This way you will get to know your<br />
skywalk MESCAL 2 quickly and easily.<br />
The following instructions will help to maintain your skywalk MESCAL 2 in excellent<br />
condition, to use it safely and have fun with it for a very long time.<br />
If you have any questions, remarks or suggestions for improvement,<br />
please don’t hesitate to contact us by fax, e-mail or phone.<br />
The skywalk-team will be happy to help anytime.<br />
Your skywalk-team<br />
Flight Techniques and Characteristics page 48<br />
Descent Techniques page 56<br />
Extreme Flight Manoeuvres page 59<br />
Materials page 63<br />
Maintenance page 66<br />
2-Year-Check / Certification page 67<br />
Conclusion page 68<br />
Line Plans page 69<br />
Test Protocols page 70<br />
Risers page 74<br />
40 41
Description<br />
The MESCAL was a true innovation. It was the worldwide first paraglider implementing<br />
JET FLAP Technology. The JET FLAP Technology made its way consequently in the<br />
passed years and following the philosophy it is only natural that the MESCAL 2 contains<br />
the re-developed JET FLAP Technology.<br />
Beside highest climbing performance the JET FLAPs offer low speed for landing and<br />
a great safety potential. A lot of work in testflying and state of the art CAD Software<br />
made it possible to launch a product which will for sure again set standards.<br />
MESCAL 2 2 is a wing for training as well as intermediate. It combines safety and performance<br />
at highest level and guarantees long and relaxing flights.<br />
Thanks to new developments in profile the wing remains stable and steerable, weak<br />
thermals can be transformated into height effectively because of excellent low speed<br />
attributes.<br />
Practically only every second cell is suspended, this saves linemeters. It reduces drag<br />
which improves performance at the same time. Every cell contains diagonal- and compressionbands<br />
for an optimum load distribution.<br />
Compression bands in the cells are responsible for an equal load distribution.<br />
An intricate distribution of tension inside and along the canopy increases the<br />
stability further and eliminates unwanted deformations.<br />
The outside wing was designed to carry less load in order to achieve an even<br />
and predictable feel in turns.<br />
Large cross-ports in the ribs create an effective inflation of all cells without reducing<br />
the profiles shape.<br />
Velcro bands are attached to the outer wings to make it easier to empty the sand<br />
from the glider.<br />
Linesystem<br />
Thanks to extensive tests the lines of the MESCAL 2 show high stability and at the<br />
same time small diameter.<br />
The control of the lines as well as the effective use of the accelerator was an issue for<br />
us.<br />
All our reflections and calculations were done under the premise of safety. That’s why<br />
we use the TECNORA TSL material of LIROS for the mainlines and the LIROS New<br />
Dyneema for the brakes and the toplines.<br />
The skywalk MESCAL 2 has 3 A-, 3 B- and 1 stabiliser line, 3 C- as well as D-main lines.<br />
Secondary lines: Top lines (top of the line system under the canopy), intermediate lines<br />
(they unite 2 or 4 top lines) and main lines. These unite 2 or 4 intermediate lines and<br />
lead to the carabiner at the riser (maillon rapide which connects the main lines with the<br />
riser).<br />
The stabiliser lines connect to the top stabiliser lines with the carabiner.<br />
The brake lines are none carrying and lead from the back of the canopy (=trailing<br />
edge) over the main brake line through the pulley on the D-riser to the brake handle.<br />
There is a mark on the main brake line indicating the position of the handle attachment.<br />
This adjustment mustn’t be altered in order to provide enough brake feedback for landing<br />
and in extreme flight situations yet enough slack not to continuously brake the glider<br />
in normal flight.<br />
For better identification, the A-lines and the A-risers are coloured red and the Stabiliser<br />
is coloured pink. The B-lines, main brake lines and the brake lines are coloured yellow<br />
and all the other lines are blue.<br />
The line maillons are triangular and have a rubber grommet to prevent the looped<br />
lines from slipping.<br />
42 43
The skywalk MESCAL 2 uses 5 risers on each side. The 2 inner main lines are attached<br />
to the front A-riser. The outer A-main line attaches to the second A-riser.<br />
The B-main lines lead to the B-riser.<br />
The C-main lines lead to the C-riser.<br />
The D-main lines and the stabiliser lead to the D-riser.<br />
For line arrangements, look under line plans, page 74.<br />
IMPORTANT SAFETY WARNING:<br />
Flying a paraglider require maximum caution at all times.<br />
Be aware that flying your paraglider is at your own risk. As<br />
a pilot you have to guarantee the flying capability of your<br />
paraglider before every single flight.<br />
Don’t use your skywalk MESCAL 2 :<br />
> Outside the certified take-off weight.<br />
> With any engine, except if you have a license from the BHPA / USHPGA<br />
> In rainy, snowy and extremely turbulent weather conditions or high winds.<br />
> In fog or clouds.<br />
> With insufficient experience or training.<br />
> Every pilot is responsible for their own safety and will have to ensure that their aircraft<br />
(paraglider) has been checked and serviced for its airworthiness before flying.<br />
> You can only fly your skywalk MESCAL 2 with a valid flying license and in accordance<br />
with local rules and regulations.<br />
> During its production your skywalk MESCAL 2 has passed thorough quality controlchecks.<br />
More spot checks were performed before its despatch.<br />
Technical Data<br />
Typ XS S M L XL<br />
Number of cells 39 39 39 39 39<br />
Area [qm] 23,18 26,08 28,4 30,4 32,13<br />
Wingspan [m] 10,55 11,19 11,68 12,09 12,42<br />
Aspect ratio 4,8 4,8 4,8 4,8 4,8<br />
Area projected [qm] 20 22,5 24,50 26,25 27,72<br />
Wingspan projected [m] 8,4 8,91 9,30 9,64 9,89<br />
Aspect ratio projected 3,53 3,53 3,53 3,53 3,53<br />
linelength [cm] 639 668 697 721 741<br />
Line diameter [mm] 1/1,2/1,8 1/1,2/1,8 1/1,2/1,8 1/1,2/1,8 1/1,2/1,8<br />
Cord max. [cm] 271 287 300 310 330<br />
Cord min. [cm] 59 62 65 67 69<br />
Canopy Weight [kg] 5,2 5,6 6,1 6,5 6,9<br />
Take off weight* [kg] 55-80 75-95 90-110 105-125 115-140<br />
Pilot + 17 kg equipment<br />
This paraglider meets the demands of the regulations of german hanggliding assciation,<br />
DHV and the CEN at the time of distribution.<br />
Further details of the construction and the measurements are described in the DHVtype<br />
sheet, which is part of this manual. The measurements of the line elements are listed<br />
in the type sheet or in the lineplans. They are measured with 5 kg weight.<br />
The DHV measures from the line carabiner to the bottom sail.<br />
CAUTION:<br />
THE TYPE SHEET IS PRINTED ONTO THE INSIDE OF THE STABILO. DATE AND<br />
NAME OF THE PILOT OF THE FIRST FLIGHT HAVE TO BE ENTERED!<br />
44 45
Acceleration System<br />
The skywalk MESCAL 2 can be equipped with an enclosed foot operated<br />
Acceleration-System.<br />
CAUTION:<br />
THE DHV RATING OF SOME GLIDER SIZES CAN CHANGE DURING THE USE OF<br />
THE ACCELERATION SYSTEM IN FLIGHT. TO DETERMINE WHICH SIZES ARE<br />
AFFECTED PLEASE CHECK THE TYPE SHEET.<br />
Harness<br />
The skywalk MESCAL 2 is licensed for all certified harnesses of the GH type<br />
(harnesses without solid cross-bracing).<br />
Be aware that the level of suspension changes the relative braking distance.<br />
CAUTION:<br />
FULLY CROSS-BRACED HARNESSES EFFECT THE HANDLING DRASTICALLY<br />
AND DO NOT LEAD TO HIGHER SAFETY!<br />
The acceleration-system effects the A-, B- and C-risers. Originally, all the risers<br />
have the same lengths: 50,5 cm over all.<br />
By using the acceleration-system, the A-riser are shortened 14 cm , the B-riser 11 cm<br />
and the C-riser a maximum of 5,5 cm. The D-riser stays at its original length.<br />
This way the perfect shape of the canopy is maintained even during the<br />
accelerated flight.<br />
Length for XS and S size in the drawing on page 74.<br />
Installing the accelerator equipment:<br />
Most commonly used harnesses have pulleys for the acceleration-system already<br />
attached. The acceleration line runs from the front through the pulleys at the harness<br />
to the top. They are tied to the ”Brummel-hooks” at the right length.<br />
With the right adjustment of the acceleration lines, the foot-bar can be reached easily<br />
with angled legs during flight. By straightening the legs, the whole acceleration range<br />
can be used.<br />
Prior to flying, the connection hooks of the footoperated<br />
accelerator and the<br />
acceleration-system have to be connected to<br />
each other (Brummel-hooks). Check that<br />
the acceleration line runs freely.<br />
46<br />
Function:<br />
By using the foot-operated accelerator the pilot<br />
reduces the force via a pulleysystem by half and<br />
shortens the A-, B- and C- risers.<br />
47
Flight Techniques and Characteristics<br />
Preflight check and maintenance<br />
It is important to check all paragliding equipment thoroughly before every flight to see<br />
if it has any defects. Also check the paraglider after long flights and after long storage.<br />
Check thoroughly:<br />
> All seams of the harness, of the risers and of the reserve bridle.<br />
> That all connecting parts, maillons and carabiners are closed.<br />
> The brake-line knots on both sides and follow the brake-line to the top.<br />
> All the other lines from riser to canopy.<br />
> All the line attachment points at the canopy.<br />
> If the top or bottom of the wing are damaged or perished.<br />
> The ribs and crossports from inside.<br />
Do not tAke-off IF YOU DETECT ANY DEFECTS, EVEN IF THEY ARE MINOR!<br />
If you find any damage or excessive wear and tear please get in touch with your flying<br />
school.<br />
Laying out the glider:<br />
If you use your paraglider for the first time we recommend that you practise some inflations<br />
and try some simple flights at a training site. This way you are able to get used to<br />
your skywalk MESCAL 2 .<br />
Lay out the canopy so that the leading edge is slightly arched. The middle of the canopy<br />
should form the deepest point of the paraglider. This way the A-lines are tensioned<br />
first in the middle whilst inflating. The paraglider inflates evenly which ensures a stable<br />
and straight take off.<br />
Separate A, B, C, D-lines and risers and put in order. Make sure that the brake lines run<br />
freely through the pulleys to the trailing edge of the paraglider. All lines have to run freely<br />
without any knots and twists from the risers to the canopy. During flight, tied or<br />
crossed over lines can often not be released or untangled! The brake-lines are lying directly<br />
on the ground, so please pay attention that they can’t ensnarl during launch.<br />
There shouldn’t be any lines beneath the canopy during take-off. Line-overs can have<br />
fatal consequences!<br />
Take-off<br />
The skywalk MESCAL 2 is very easy to launch.<br />
Hold the two A-risers and the brake handles in your hands.<br />
For a better identification, the A-lines and covers at the A-risers are coloured red.<br />
The brake lines are coloured yellow and the brake handles are black.<br />
Hold your arms slightly sideways and backwards like an extension of the A-risers.<br />
Before launching check the laid out glider. Further check the wind direction and the airspace!<br />
Pull rapidly and the canopy of the skywalk MESCAL 2 will launch and rise above your<br />
head. The canopy will inflate fast and reliable. Keep the paraglider straight above<br />
your head and run forward. Slow down a little as soon as the upward pull decreases.<br />
You can open any collapsed cells by pumping the affected side.<br />
Changes of directions that are necessary can be carried out now.<br />
Look and feel that the wing is properly inflated.<br />
Don’t make your final decision to accelerate or to take-off until you are<br />
absolutely sure that the wing is properly and evenly inflated.<br />
Otherwise, stop the take-off procedure immediately!<br />
During reverse launches and in strong winds, it is possible that the paraglider surges<br />
forward and inflates faster than intended. You can counteract this by running towards<br />
the glider.<br />
We recommend to practice this demanding launch technique on a flat slope!<br />
If you reverse launch it is advisable to only use the inside A-risers.<br />
48 49
This way the paraglider inflates a little slower and in strong winds you don’t have to<br />
deal with the full pressure at once.<br />
In the general aviation it is standard to use checklists before you take-off.<br />
We would like to help you with some pictograms on the A-riser not to forget anything<br />
while you make your take-off check:<br />
1: Checklist Pilot:<br />
Legstrap buckles, Chute/Harness main Biner, harness, helmet.<br />
2: Checklist Wing lines/Harness:<br />
lines free, brake lines free and not twisted, Harness correctly attached.<br />
3: Checklist Parawing:<br />
Wing stretched out and free, leading edge air ducts open, pilot standing in<br />
the middle.<br />
4: Wind Check:<br />
How strong Which direction<br />
5: Airspace Check:<br />
My take-off should not hinder any other pilots start or airspace.<br />
This is of great importance, especially during take-off and landing.<br />
Of course, the Jet-Flaps are no reason for uncontrolled braking, but the slow flight characteristics<br />
of the MESCAL 2 profit immensely.<br />
You don’t need any special knowledge to have control of the flap system, the use of a<br />
Jet-Flap paraglider is the same as a conventional glider.<br />
Turning:<br />
The skywalk MESCAL 2 is very manoeuvrable and reacts to steering inputs directly and<br />
without delays. Simple weight shift enables you to fly very wide turns with minimal altitude<br />
loss.<br />
Combined steering technique: Weight shifting and pulling of the inside brake line<br />
allow extra tight turns.<br />
During turning you can control the speed, the curve radius and banking by additional<br />
use of the outer brake. Counter braking or releasing the brake lines can change<br />
these parameters most effectively.<br />
CAUTION:<br />
PULLING THE BRAKE LINES TOO FAR AND TOO FAST CAN CAUSE A FULL<br />
STALL!<br />
MESCAL 2 also is equipped with the innovative JET FLAP Technology<br />
Air is conducted from the bottom sail (pressure area) to the top sail (low-pressure<br />
area) and is blown out there with higher speed. The connection is established through<br />
jet shaped channels, which are located in the rear section of the wing.<br />
When increasing the angle-of-attack the danger of airflow interruption and subsequent<br />
stalling is minimized.<br />
Results: the constant airflow even at great angles-of-attack delays the stall, the flyable<br />
minimum speed is lowered and the pilot has a higher incidence range.<br />
You will recognise a flat spin through high steering pressure and a slight backwards<br />
folding of the outer wing section. If this happens you have to release the inside brake<br />
immediately.<br />
Emergency Steering:<br />
In case one or both brake lines break you are able to steer and land the<br />
skywalk MESCAL 2 with the aid of the D-risers.<br />
Active Flying:<br />
Active flying means flying in harmony with your paraglider.<br />
50 51
Anticipate the behaviour of your skywalk MESCAL 2 in flight, especially in turbulent and<br />
thermal conditions and react accordingly. In calm air necessary corrections will be minimal,<br />
but turbulence demands permanent attention and the use of brakes and weight<br />
shifting with the harness.<br />
Good pilots have instinctive reactions. It is important that you always have direct contact<br />
to the canopy by slight pressure on the brakes in order to feel the stored energy<br />
of the glider. This way you will recognise a loss of pressure in your canopy and subsequent<br />
collapse early and are able to react in time.<br />
MESCAL 2 2 is featured with a profile that mitigates turbulences. This provides high resistance<br />
against collapses, however it can happen without a pilots reaction.<br />
Examples:<br />
When flying into strong thermals, you have to release the brakes. When flying into<br />
falling airstream, pull the brakes. This way you can avoid extensive changes of the<br />
angle of attack.<br />
In turbulent air, you feel the release in pressure on parts of the glider through the feedback<br />
from your brakes. You can balance this by quickly pulling the brake a little more<br />
until the pressure returns. Always apply brakes softly and progressively.<br />
Don’t slow down your glider too fast as this can increase the danger of stalling!<br />
By active flying you can avoid almost all deformations of the glider in advance.<br />
Accelerated Flying:<br />
To use the acceleration-system you will need to use a little effort. This can affect the<br />
sitting position in the harness. Therefore we recommend an upright position in the harness.<br />
Adjust the harness before your first attempt of accelerated flight. We remind you<br />
to only fly in wind conditions that don’t require constant use of the acceleration-system.<br />
To reach the maximum speed press the acceleration-system firmly until both pulleys<br />
on the A-risers touch each other.<br />
As soon as you apply the acceleration-system the angle of attack will be reduced,<br />
the speed increases, but the paraglider becomes less stable and can collapse more<br />
easily. Therefore always use the acceleration-system with adequate height above<br />
the ground, obstacles and other aircraft.<br />
AvoID FLYIng with too short brake lines.<br />
Accelerated collapses are normally more impulsive and demand fast reactions.<br />
NEVER ACCELERATE IN TURBULENT AIR!<br />
NEVER ACCELERATE NEAR THE GROUND<br />
NEVER LET GO OF THE BRAKE HANDLES!<br />
In case the glider collapses you will have to release the acceleration-system immediately<br />
to stabilise and reopen your paraglider.<br />
Landing:<br />
The skywalk MESCAL 2 can be landed easily.<br />
Make your final approach against the wind and let the glider slow down at its own rate.<br />
Further reduce the speed by applying the brakes lightly and evenly.<br />
At about 1m above the ground you increase the angle of attack by slowing down more<br />
and eventually completely flare out the glider. When you have reached the minimal<br />
speed apply full brake.<br />
In strong head winds, slow down carefully. When you have reached the ground safely,<br />
stall the glider warily.<br />
Avoid turning sharply before your final approach. This increases the danger of pendulum<br />
effect!<br />
Towing:<br />
The skywalk MESCAL 2 is very suitable for towing.<br />
Make sure you climb from the ground at a flat angle.<br />
52 53
The pilot must have a valid towing license.<br />
The used tow winch has to be authorised.<br />
The winch operator must have a towing license, which includes paragliding.<br />
When towing always steer sensitively, do not brake too much because the glider already<br />
flies at an increased angle of attack.<br />
Motorised flight:<br />
You can inform yourself about the current status of certification of motorised flight<br />
at your dealer, national distributor or directly through us.<br />
At this time (January 2007) we don’t have a license.<br />
should be pressed out of the glider and not through the material (this can increase<br />
the porosity of your glider).<br />
> Now attach the compression band around the packed wing, at right angles to the<br />
cell openings, then slide the glider into the light nylon bag. This helps to protect the<br />
cloth from being damaged by sharp edges or zippers from your harness.<br />
> Open the backpack and place your glider on the inside edge. The soft wing on your<br />
back will make transportation much more comfortable.<br />
Place the harness with the seat board facing up on top of your glider and close<br />
the zippers.<br />
Put the rest of your equipment (helmet, overall, instruments etc.) under the hood<br />
of your backpack.<br />
Carefully packing your paraglider will increase the longevity<br />
of your glider.<br />
> Empty the glider from all debris such as leaves, twigs, grass, sand etc.<br />
> Sort out your lines and spread them evenly on the glider.<br />
> Make sure the glider is dry when storing it for a longer period of time.<br />
> Fold the glider starting in the middle and working your way to the outside always folding<br />
2 cells, so that the leading edge is folded cleanly.<br />
> Fold the cells, starting from the second cell from the middle, so that the reinforced<br />
edges of the cell openings are on top of each other.<br />
> Do the same at the lower long-edge of the glider.<br />
> This folding method is best done together with a friend, but you should be able to<br />
do the same on your own after some practice.<br />
> Then press the air out of the folded glider starting at the bottom and working your<br />
way to the top.<br />
> Fold the whole row once toward the middle.<br />
> Do exactly the same on the other side. Then fold one half onto the other half and<br />
make sure the leading edge are folded cleanly.<br />
> Start wrapping up the glider from its lower end. The wraps should be approx. 1ft.<br />
wide.<br />
> The leading edge can be folded inwards once, but is not necessary. The left over air<br />
54<br />
55
Descent Techniques<br />
The MESCAL 2 manual is not a textbook for learning how to paraglide.<br />
According to the local rules and regulations, instruction and training must be carried<br />
out in licensed schools. The following information enables you to get the most<br />
out of your skywalk MESCAL 2 .<br />
Spiral dive:<br />
You can initiate the spiral dive by carefully increasing the pull on one of the brakes<br />
and simultaneously shifting your weight to the inside of the turn. If the glider doesn’t<br />
bank up and the sink rate doesn’t increase, then try again. Don’t just apply more and<br />
more brake without sensitivity.<br />
The skywalk MESCAL 2 enters the spiral dive with a high bank angle and makes a fast<br />
steep turn. The banking and sinking can be controlled by dosed pulling resp. loosening<br />
the inner brakeline. Smooth braking of the outer wingtip avoids collapsing and also<br />
speed can be controlled better in hard spirals. The spiral is the most effective tool in<br />
loosing height. This is advantage and disadvantage at the same time, the pilot needs to<br />
be able to handle the resulting high sinkrates.<br />
CAUTION:<br />
THE HIGH SINK RATE CAUSES HIGH PHYSICAL STRAIN DUE TO THE<br />
INCREASING CENTRIFUGAL FORCES AND MAY CAUSE BLACKOUTS!<br />
Tensing the stomach muscles during the spiral dive can be helpful. At the first signs<br />
of dizziness or feeling faint exit the spiral dive immediately.<br />
Because of the extreme loss of altitude experienced during a spiral dive always ensure<br />
you have enough height above ground.<br />
To avoid a strong surge when exiting the spiral dive you have to release the inside<br />
brake while applying the outer brake slightly.<br />
on turning under unfavourable circumstances (e.g. unintended asymmetry of the cross<br />
brace harness) you will have to actively finish the spiral dive. In this case shift your<br />
weight to the outside of the turn and simultaneously apply more outside brake.<br />
Applying both brakes will also take the paraglider out of the spiral dive but the glider<br />
can front tuck and you should dampen the exit with the brakes.<br />
Remember: Compared to regular flight manoeuvres the steering forces in a<br />
spiral dive are a lot higher<br />
B-line stall:<br />
The B-lines are pulled down symmetrically (20cm).<br />
Keep the brake handles in the respective hands.<br />
The airflow on top of the profile largely detaches and the paraglider descends without<br />
flying forward. By pulling the B-lines stronger the canopy surface decreases and the<br />
descent increases.<br />
You can exit the stall by quick and symmetric release of the B-lines. The paraglider<br />
will pitch forward and pick up speed.<br />
At no time you may use the brakes in this case!<br />
You must exit the B-line stall immediately if the canopy starts to form a forward facing<br />
semi-circle. If the wing doesn’t reopen you may speed up the opening process by<br />
gently braking.<br />
Big ears:<br />
In contrast to the spiral dive and B-line stall, Big Ears result in an increase of forward<br />
speed in relation to the gliders sink rate.<br />
Big Ears is used to avoid or exit dangerous areas in a horizontal direction.<br />
The skywalk MESCAL 2 has no tendency for locking into a spiral dive. In case it keeps<br />
56 57
Examples<br />
> In strong winds or below a thundercloud at low altitude it is possible that neither<br />
B-line stall or spiral dive will help. Big Ears are the easy way out.<br />
> If the pilot is stuck in strong lift and needs to look for sink it is advisable to exit the<br />
lift band with the use of Big Ears.<br />
> To fold the outer wingtip you only need to pull the outer A-lines symetrically. In doing<br />
so it make sense to grap the lines as far up as possible for folding maximum area.<br />
MESCAL 2 owns a separate crossline for optimising the folded area. It is not necessary<br />
for the pilot to follow anything special because of the crossline, just enjoy the<br />
effect.<br />
The skywalk MESCAL 2 will enter now a stable sink flight.<br />
The brake handles remain in your hands together with the outer A-risers.<br />
Braking and weight shift enables you to steer your paraglider.<br />
In order to increase the sink and forward speed you can optimise this manoeuvre<br />
by using the acceleration-system. The risk of canopy destabilisation in turbulent air<br />
is clearly reduced when using Big Ears.<br />
To exit Big Ears release the A-lines. The canopy will unfold automatically.<br />
You may brake a little to support the unfolding. It is advisable to pump out one side<br />
at a time to reduce the risk of detaching airflow.<br />
CAUTION:<br />
ALL DESCENT TECHNIQUES SHOULD BE TRAINED IN CALM AIR AND WITH<br />
SUFFICIENT ALTITUDE BEFORE USING THEM IN EMERGENCY SITUATIONS<br />
AND IN TURBULENT AIR.<br />
Any extreme flight manoeuvre and descent technique demands:<br />
> Training, either with an instructor in a paragliding school or during a security<br />
training course.<br />
> Double-checking that before entering a manoeuvre you have sufficient altitude and<br />
clear air space below.<br />
> Permanent visual contact with the canopy.<br />
Extreme Flight Manoeuvres<br />
Asymetric tuck:<br />
In strong turbulence, the canopy may collapse. The skywalk MESCAL 2 will re-open automatically<br />
even after bigger collapses within a turn of 180º.<br />
The turning towards the collapsed wing section can be minimised by braking on the remaining<br />
open side of the canopy.<br />
In case of a big collapse you will have to use small brake movements in order to avoid<br />
a stall.<br />
In case the canopy still doesn’t recover you can accelerate the opening process by<br />
pumping the brake on the tucked side.<br />
Cravat/Line over:<br />
This type of instability never occurred during any of our test flights with the skywalk<br />
MESCAL 2 . Still, in extremely turbulent air or during exceptional piloting errors it is<br />
possible that the folded wing section might get tangled in the lines.<br />
The pilot may then stabilise the paraglider by careful counter-braking.<br />
Without immediate intervention of the pilot a cravated paraglider will turn into<br />
a strong spiral dive.<br />
There are several possibilities to untangle the paraglider:<br />
> Pumping on the folded side.<br />
> Pulling the stabilo-lines (tip-lines).<br />
> In case none of these manoeuvres have any success you can try to unfold<br />
> the paraglider by performing a Full Stall. Only experienced pilots, with a lot of flight<br />
experience should attempt this manoeuvre.<br />
> Make sure you have enough altitude to recover the Full Stall in time.<br />
58 59
CAUTION:<br />
IF NONE OF THESE MANOEUVRES ARE SUCCESSFUL OR THE PILOT FEELS<br />
OVERWHELMED BY THE SITUATION THE RESERVE PARAcHUTE SHOULD BE<br />
DEPLOYED IMMEDIATELY!<br />
Front tuck:<br />
The paraglider can be front tucked by a strong pull on the A-risers or when<br />
encountering strong sink.<br />
The leading edge will fold forward along the whole length of the wing.<br />
Light braking will reduce the forward surge and will help to speed up the opening<br />
of the canopy.<br />
The skywalk MESCAL 2 will normally recover from a Front Tuck automatically<br />
and without pilot input.<br />
The parachutal stall:<br />
The paraglider has no forward speed and a much increased descent rate.<br />
The Parachutal Stall may follow a too passively released B-line Stall.<br />
Porous canopy fabric (excessive UV-degradation) or frequent, strong towing<br />
(stretched A-lines) results in an increased risk of a Parachutal Stall.<br />
The pilot can recover from the Parachutal Stall by slightly pushing the A-risers<br />
forward at the mallions or by using the accelerator.<br />
The skywalk MESCAL 2 usually exits the Parachutal Stall automatically.<br />
CAUTION:<br />
AS SOON AS YOU APPLY THE BRAKES DURING A PARACHUTAL STALL<br />
THE PARAGLIDER WILL IMMEDIATELY ENTER A FULL STALL. IF STILL IN A<br />
PARACHUTAL STALL CLOSE TO THE GROUND DO NOT ATTEMPT TO RECOVER<br />
BUT STRAIGHTEN UP YOUR POSITION IN THE HARNESS AND PREPARE FOR A<br />
PARACHUTE LANDING ROLL.<br />
Full stall:<br />
In order to Full Stall your paraglider take a wrap on both brake handles and pull<br />
strongly and symmetrically until the airflow breaks away from the canopy.<br />
The canopy will drop backwards. Despite this violent reaction keep the brakes<br />
fully depressed until the canopy stabilises above your head.<br />
In a Full Stall the skywalk MESCAL 2 flies backwards but doesn’t always form<br />
a forward facing semi-circle.<br />
This semi-circle can be achieved by a slower entry into the Full Stall.<br />
In order to exit a Full Stall the pilot will have to release the brakes slowly and<br />
symmetrically. (Recovery time >= 1 sec). The glider opens and surges forward<br />
to pick up speed. Brake gently to dampen the forward surge of the skywalk MESCAL 2<br />
and to counteract a possible Front Tuck.<br />
CAUTION:<br />
IN CASE THE FULL STALL IS RELEASED TOO EARLY, TOO FAST OR WITH THE<br />
WRONG TECHNIQUE THE CANOPY MAY SHOOT FORWARDS A VERY LONG<br />
WAY!<br />
Negative spins:<br />
A paraglider spins backwards if the airflow disconnects over one half of the wing<br />
caused by the inside wing turning in the opposite direction of flight.<br />
60 61
There are two reasons for the Negative Spin:<br />
> One brake is pulled too far and too hard (e.g. when entering a spiral dive)<br />
> One brake is pulled too hard when flying slow (e.g. in thermal flying).<br />
The skywalk MESCAL 2 usually re-enters normal flight immediately after the brake<br />
is released without any great loss of height.<br />
Simply release the excessively induced brake until the airflow re-connects to the<br />
inside wing.<br />
After a long lasting spin it is possible that when releasing the brake the canopy<br />
might shoot forward and collapse.<br />
Cross-braced harnesses that are too narrow increase the tendency to spin<br />
on most paragliders.<br />
Wingover:<br />
Alternating left/right turns lead to an increased banking of the canopy.<br />
The load on the outside wing tip to a minimum (the tip starts to feel light).<br />
Further turns and higher banking is not recommended at this stage as the canopy<br />
might collapse on the inside wing section.<br />
CAUTION:<br />
Materials<br />
The skywalk MESCAL 2 is manufactured out of highest-grade materials.<br />
skywalk has chosen the best possible combination of materials regarding durability,<br />
performance and longevity. We know that durability is a deciding factor for the<br />
customer’s satisfaction.<br />
Wing and Ribs:<br />
Top Sail Porcher Marine Nylon 6.6<br />
Bottom Sail Porcher Marine Nylon 6.6<br />
Ribs<br />
Porcher Marine Nylon 6.6 and TSF SC54Nylon<br />
Leading edge reinforcements Dacron<br />
Attachment point reinforcements Dacron<br />
Lines:<br />
LIROS have been the world’s leading producer of paragliding lines for quite some time.<br />
We chose the TSL lines because of their little stretch and the high length constance.<br />
Top- and Brake-lines DSL 70 and PPSL 120<br />
A-, B- and C-Main-lines TSL280 and NTSL 160<br />
D- and Stabilo main-lines NTSL 160<br />
Main-Brake-lines<br />
DFLP200/32<br />
Risers:<br />
The risers are manufactured from 25 mm Polyester webbing by Gueth and Wolf.<br />
Stretch values, strength and stability of this material is amongst the leading positions<br />
of all webbing products currently on the market.<br />
FULL STALL, NEGATIVE SPIN AND WINGOVERS (ABOVE 90°) ARE ILLEGAL<br />
ACROBATIC FLIGHT MANOEUVRES AND ARE NOT PERMITTED IN REGULAR<br />
AIR TRAFFIC. WRONG OR EXCESSIVE STEERING IN THESE SITUATIONS MAY<br />
HAVE FATAL CONSEQUENCES INDEPENDENT OF THE TYPE OF PARAGLIDER<br />
USED!<br />
62 63
Maintenance<br />
With proper maintenance, your skywalk MESCAL 2 will be in an airworthy condition for<br />
several years. A well looked after paraglider lasts a lot longer than one which is packed<br />
in its bag without care after use.<br />
Always remember: Your life depends on your paraglider!<br />
Storage:<br />
Store your paraglider in a dry location, protected from light and away from chemicals!<br />
Damp is a natural enemy for any paraglider. Therefore always make sure your paragliding<br />
equipment is dry before packing it away. Dry if necessary in a heated room.<br />
Cleaning:<br />
Rubbing and cleaning leads to faster deterioration of your paraglider.<br />
The PU-coated canopy fabric of the skywalk MESCAL2 protects it well from pollution.<br />
If you still think that your paraglider needs to be cleaned, then use a soft and wet<br />
towel or sponge. Don’t use any soap or detergents. Never use inflammable products.<br />
Repair:<br />
All repairs must be carried out by the manufacturer or by an authorised skywalk-Service-Centre.<br />
Amateur repairs can cause more harm than good.<br />
Wear:<br />
The skywalk MESCAL 2 mainly consists of Nylon fabric that loses strength and shows<br />
an increase in porosity under the influence of UV-radiation. Only unfold the paraglider<br />
shortly before starting and pack away immediately after landing to avoid any<br />
unnecessary sun exposure.<br />
Every visual damage of a line, even if it is only the line coating, requires a replacement.<br />
Only acquire new lines from the manufacturer or from an authorised skywalk-Service-<br />
Centre. Your flying school or your dealer will assist you to change a defect line.<br />
Check the correct length of the line before replacing it. Compare with its counterpart<br />
on the opposite side of your glider.<br />
After the exchange a line-check will be necessary. The best way to this is by<br />
unfolding the glider on the ground!<br />
General informations:<br />
> When unfolding the paraglider insure that neither the canopy nor the lines become<br />
too dirty as dirt particles in the fibres can damage the material and lines.<br />
> If the lines get tangled on the ground they may be over-stretched or break during<br />
take-off.<br />
> Do not step on the lines and/or canopy.<br />
> Make sure that no sand, stones or snow get inside the canopy as the extra weight<br />
collected in the trailing edge may slow down or even stall the glider.<br />
> Sharp edges damage the canopy.<br />
> Uncontrolled inflation attempts in strong winds may result in the glider impacting<br />
into the ground at high speed. This can cause rips, damage on lines and/or fabric.<br />
> Make sure not to land your canopy leading edge first as this may cause permanent<br />
damage to this area of your paraglider.<br />
> After landings in trees or on water you should check the length of the lines.<br />
> After contact with salt water thoroughly rinse the equipment with fresh water!<br />
Line-Repairs:<br />
The lines of the skywalk MESCAL 2 consist of a Dyneema-core and a Polyester-cover.<br />
Avoid heavy loads on single lines, as excessive stretch may be irreversible.<br />
Repeated folding or kinking of lines at the same spot reduces their strength even if<br />
it’s just a little.<br />
64 65
2-Year-Check / Certification<br />
According to DHV regulations your glider will have to undergo a maintenance<br />
check after 24 months.<br />
According to these regulations the Two-Year-Check has to be carried out<br />
by the manufacturer, its representative or by the owner himself.<br />
The check will have to be confirmed by a DHV-stamp. Missing this deadline or<br />
if the check is carried out by an unauthorised company will lead to immediate loss<br />
of your skywalk MESCAL 2 DHV-certificate and all warranty and liability claims.<br />
We recommend not to do this check yourself. Without the proper instruments and<br />
specific knowledge the check will be insufficient. The airworthiness of your glider<br />
can’t be guaranteed.<br />
Changes to the paraglider:<br />
Your skywalk MESCAL 2 is manufactured within the regulated parameters of tolerance.<br />
These parameters are very narrow and mustn’t be altered under any circumstance.<br />
Certification<br />
The last thing on our to do list is the certification.<br />
Creating five sizes in DHV class 1, in trim speed and accelerated, that was our obligation,<br />
here you are the result.<br />
These classifications depend on the ability of the pilot of that category.<br />
The many certification tests are the last hurdle in the development of a skywalk paraglider.<br />
The certifying test flights will only take place when the test-team is completely happy<br />
with the glider in question.<br />
We remark that the certification results will differ during flight in thermic or turbulent air.<br />
The certification solely informs about a paragliders performance in provoked extremeflight-manoeuvres<br />
during stable air conditions.<br />
These provoked extreme-flight-manoeuvres during the certification process should thus<br />
not be overrated.<br />
Only this way the optimum balance between performance, handling and safety<br />
can be guaranteed!<br />
UNAUTHORISED CHANGES CAUSE AN IMMEDIATE EXPIRATION OF THE<br />
OPERATING LICENSE! ANY LIABILITY CLAIM TOWARDS THE MANUFACTURER<br />
AND ITS DEALERS IS EXCLUDED!<br />
66<br />
67
Conclusion<br />
Paragliding is a fascinating sport. With the MESCAL 2 you own a product<br />
which is at the top of actual development<br />
This glider will provide you with plenty of fun over many years, as long as you treat<br />
and maintain it in a responsible way. Respect for the requirements and potential hazards<br />
of our sport are essential for save and successful flying.<br />
Even the safest paraglider may crash due to a pilot error or meteorological miscalculations.<br />
Remember that aviation sports are potentially hazardous and that you are responsible<br />
for your own safety.<br />
In the interest of our sport we advise you to fly cautiously and in accordance with air<br />
law and local rules and regulations.<br />
Line Plan<br />
The displayed line plan of the skywalk MESCAL 2 is only for demonstration purposes of<br />
the line configuration. Plans for other sizes can be aquired via flight schools, importers<br />
or directly from skywalk.<br />
PILOTS FLY AT THEIR OWN RISK!<br />
Your skywalk Team<br />
GmbH & Co. KG<br />
Bahnhofstraße 110<br />
83224 GRASSAU Fon: +49 (0) 8641 - 69 48 40 www.skywalk.info<br />
68 GERMANY Fax: +49 (0) 8641 - 69 48 11 info@skywalk.info<br />
69
TESTPROTOCOL<br />
test Protocol<br />
Customer, Name:<br />
Adress:<br />
Phone:<br />
Date:<br />
examinations of the lines:<br />
Firmness of main lines: daN<br />
visual check of trimming: + –<br />
Glider:<br />
Size: Serial number:<br />
Gütesiegelnr. Date of last check:<br />
Date of first flight: Year of construction:<br />
Checkflight necessary<br />
Gütesiegel plaque<br />
+ –<br />
+ –<br />
Accomplished checking: Results: [ +/– ] Description of failure Suggested repairs<br />
Identification:<br />
visual check of canopy:<br />
Upper surface:<br />
Lower surface:<br />
Profiles:<br />
Line flares:<br />
Leading edge:<br />
Trailing edge:<br />
Crossports:<br />
+<br />
+<br />
+<br />
+<br />
+<br />
+<br />
+<br />
+<br />
–<br />
–<br />
–<br />
–<br />
–<br />
–<br />
–<br />
–<br />
Identification plate<br />
+ –<br />
Condition: New<br />
Very good condition<br />
Good condition<br />
Well used<br />
Heavily used, but within gütesiegel standards, frequent checks required<br />
visual check of lines:<br />
Seams:<br />
Abrasion spots:<br />
Core withdrawals:<br />
+ –<br />
+ –<br />
+ –<br />
Repairs made<br />
No longer airworthy, outside of the limit values.<br />
vis. check of connectionparts:<br />
Suspension line screw locks:<br />
Risers:<br />
+ –<br />
+ –<br />
Lenght measurement:<br />
Risers:<br />
Lines:<br />
+ –<br />
+ –<br />
Signature of tester: Date:<br />
examinations of the canopy:<br />
Firmness of canopy:<br />
Porosity:<br />
+ –<br />
+ –<br />
70 71
TESTPROTOCOL<br />
test Protocol<br />
Customer, Name:<br />
Adress:<br />
Phone:<br />
Date:<br />
examinations of the lines:<br />
Firmness of main lines: daN<br />
visual check of trimming: + –<br />
Glider:<br />
Size: Serial number:<br />
Gütesiegelnr. Date of last check:<br />
Date of first flight: Year of construction:<br />
Checkflight necessary<br />
Gütesiegel plaque<br />
+ –<br />
+ –<br />
Accomplished checking: Results: [ +/– ] Description of failure Suggested repairs<br />
Identification:<br />
visual check of canopy:<br />
Upper surface:<br />
Lower surface:<br />
Profiles:<br />
Line flares:<br />
Leading edge:<br />
Trailing edge:<br />
Crossports:<br />
+<br />
+<br />
+<br />
+<br />
+<br />
+<br />
+<br />
+<br />
–<br />
–<br />
–<br />
–<br />
–<br />
–<br />
–<br />
–<br />
Identification plate<br />
+ –<br />
Condition: New<br />
Very good condition<br />
Good condition<br />
Well used<br />
Heavily used, but within gütesiegel standards, frequent checks required<br />
visual check of lines:<br />
Seams:<br />
Abrasion spots:<br />
Core withdrawals:<br />
+ –<br />
+ –<br />
+ –<br />
Repairs made<br />
No longer airworthy, outside of the limit values.<br />
vis. check of connectionparts:<br />
Suspension line screw locks:<br />
Risers:<br />
+ –<br />
+ –<br />
Lenght measurement:<br />
Risers:<br />
Lines:<br />
+ –<br />
+ –<br />
Signature of tester: Date:<br />
examinations of the canopy:<br />
Firmness of canopy:<br />
+ –<br />
Porosity:<br />
+ –<br />
72 73
Risers<br />
74 75