Warm air heater manual
Warm air heater manual
Warm air heater manual

You also want an ePaper? Increase the reach of your titles
YUMPU automatically turns print PDFs into web optimized ePapers that Google loves.
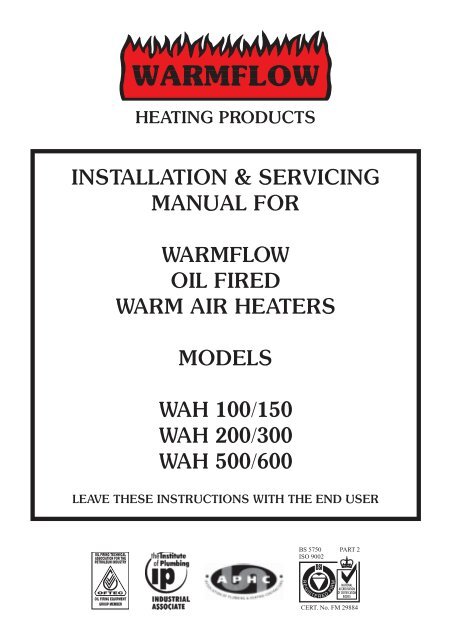
HEATING PRODUCTS<br />
INSTALLATION & SERVICING<br />
MANUAL FOR<br />
WARMFLOW<br />
OIL FIRED<br />
WARM AIR HEATERS<br />
MODELS<br />
WAH 100/150<br />
WAH 200/300<br />
WAH 500/600<br />
LEAVE THESE INSTRUCTIONS WITH THE END USER<br />
OIL FIRING TECHNICAL<br />
ASSOCIATION FOR THE<br />
PETROLEUM INDUSTRY<br />
BS 5750 PART 2<br />
ISO 9002<br />
BSI<br />
OIL FIRING EQUIPMENT<br />
GROUP MEMBER<br />
R E G<br />
F<br />
I S T E R E D<br />
IR M<br />
NATIONAL<br />
ACCREDITATION<br />
OF CERTIFICATION<br />
BODIES<br />
CERT. No. FM 29884
ISSUE 2<br />
APR ’99<br />
ENGINEERING CO. LTD.<br />
COMMISSIONING<br />
*THIS APPLIANCE MUST<br />
BE COMMISSIONED<br />
Refer to the commissioning details at rear of this handbook.<br />
SERVICING<br />
To ensure continued reliable operation and<br />
fuel economy it is recommended that the<br />
<strong>heater</strong> is serviced annually.<br />
<strong>Warm</strong>flow Engineering Service division<br />
provides an excellent back-up service,<br />
operating a team of Oftec trained engineers<br />
who can meet all the servicing,<br />
commissioning and breakdown<br />
requirements for your appliance.<br />
Simply telephone<br />
TEL: (028) 92620852<br />
FAX: (028) 92620869<br />
E-MAIL: service@warmflow.co.uk<br />
*Failure to commission the <strong>heater</strong> may invalidate warranty
Contents<br />
Page<br />
1.0 Introduction 2<br />
1.1 General Requirements 2<br />
1.2 Installation 2<br />
2.0 User Instructions 3<br />
2.1 Controls 3<br />
2.2 Components 4<br />
3.0 General Data 7<br />
3.1 Technical Data 7<br />
3.2 Dimensions 8<br />
3.3 Installation Clearances 9<br />
3.4 Air Supply 9<br />
3.5 Ductwork 10<br />
3.6 Filters 10<br />
3.7 Electrical Supply 11<br />
4.0 Oil Supply 18<br />
4.1 One Pipe Systems 18<br />
4.2 Two Pipe Systems 19<br />
5.0 Flues 20<br />
6.0 Burners 21<br />
6.1 Components 21<br />
6.2 Oil Supply 22<br />
6.3 Air Damper Adjustment 23<br />
6.4 Electrode Setting 23<br />
6.5 Burner Start Up Cycle 23<br />
7.0 Fault Finding 24<br />
8.0 Burner Spares 25<br />
Page 1
1.0 Introduction<br />
All <strong>Warm</strong>flow oil fired warm <strong>air</strong> <strong>heater</strong>s are suitable for space heating of industrial and<br />
commercial premises. The <strong>heater</strong>s are automatic in operation and are designed for<br />
free-standing operation, supplied as standard for free blowing via the <strong>air</strong> discharge<br />
hoods or for connection to a ductwork distribution system. (Contact <strong>Warm</strong>flow for<br />
details).<br />
The <strong>heater</strong>s are indirect fired with the products of combustion being carried via the<br />
flue to atmosphere.<br />
<strong>Warm</strong>flow warm <strong>air</strong> <strong>heater</strong>s are designed to burn 28 second redwood No1 (Kerosene<br />
class C2) fuel or with some adjustment 35 second redwood No1 (gas oil class D).<br />
On the 500/600 WAH only gas oil may be used.<br />
The construction of the <strong>heater</strong>s provides a framework of exceptional strength and<br />
pleasing design, while the integral base pallet guarantees safe stable handling.<br />
All the external panels are of a double skin construction, which insures low surface<br />
temperatures. The panels are all easily removable for complete access to any part of<br />
the <strong>heater</strong> while the front panel has been split to allow for easy access to the combustion<br />
chamber door.<br />
As standard the burner, <strong>heater</strong> and controls are covered by the manufacturers parts<br />
and labour warranty valid for 12 months (from the <strong>heater</strong> date stamp). However this<br />
warranty will be invalidated if the <strong>heater</strong> is improperly installed or commissioned.<br />
1.1 General Requirements<br />
The installation of the <strong>air</strong> <strong>heater</strong> must be in accordance with the following regulations:<br />
BS 5410: Parts 1 & 2: 1977: Code of practice for oil firing.<br />
Current fire regulations.<br />
Current building regulations.<br />
Current IEE wiring regulations.<br />
1.2 Installation<br />
The <strong>heater</strong>s must be placed on a level non-porous, non-combustible surface which is<br />
capable of supporting the weight of the <strong>heater</strong>. The <strong>heater</strong>s must be stable or rigidly<br />
fixed in order to prevent vibration in the appliance, which can lead to the premature<br />
failure of the <strong>heater</strong> components.<br />
Page 2
2.0 User Instructions<br />
2.1 Controls<br />
The main user controls are the 2 rocker switches on the left hand side of the control panel.<br />
The three position rocker switch at the top is marked ‘Fan Only’, ‘Off’ and ‘Heating On’.<br />
At the ‘Fan Only’ position the <strong>heater</strong> provides summer time ventilation by delivering<br />
<strong>air</strong> at the ambient temperature with the burner switched off.<br />
At the ‘Off’ position the <strong>heater</strong> will not operate.<br />
When the switch is positioned at ‘Heating On’ the <strong>heater</strong> will fire and deliver warm <strong>air</strong><br />
automatically controlled by the fan stat and the room thermostat.<br />
The sequence of firing will be as follows. The burner will go through its ignition cycle<br />
and fire. When the combustion chamber has been sufficiently heated the fan stat will<br />
automatically start the main <strong>air</strong> fan and discharge warm <strong>air</strong> through the swivel hoods<br />
or ducting.<br />
When the <strong>heater</strong> is shutdown either via the room stat or any other controls the burner<br />
will stop firing although the main <strong>air</strong> fan will continue to operate until the combustion<br />
chamber has been properly cooled down. At which point the fan stat will shut the main<br />
<strong>air</strong> fan down.<br />
Because of residual heat within the combustion chamber the fan stat may re-start the<br />
main <strong>air</strong> fan until sufficient cooling of the combustion chamber has taken place.<br />
When the burner is firing the indicator lamp on the panel will be illuminated.<br />
The 2 position rocker switch is marked ‘Automatic’ and ‘Manual’.<br />
At the ‘Automatic’, position the <strong>heater</strong> will be operated automatically via the time<br />
clock.<br />
When positioned at ‘Manual’ the end user controls the time of operation.<br />
NOTE: WHEN FIRING OR WHEN HOT, THE HEATER MUST NEVER BE SWITCHED<br />
OFF AT THE MAINS SUPPLY.<br />
This is to allow proper cooling of the combustion chamber thus preventing tripping out<br />
on the high limit stat and heat damage to the combustion chamber.<br />
If the high limit fan stat should trip out wait until the combustion chamber has cooled<br />
sufficiently before pressing the red reset button on the fan stat. If the high limit continues<br />
to trip, switch the <strong>heater</strong> to ‘off’ and contact the <strong>Warm</strong>flow Service Department.<br />
If the fan motor draws more current than the set limit the overload relay can be reset<br />
by pressing the red button in the control panel.<br />
If the relay continues to trip contact the <strong>Warm</strong>flow Service Department.<br />
Page 3
2.2 Components<br />
2.2.1 Heater<br />
Heat Exchanger<br />
Air Discharge<br />
Hoods<br />
Fan Stat<br />
Combustion<br />
Chamber Door<br />
Burner<br />
Fan<br />
Air Inlet Grills<br />
Fan Motor<br />
Base Pallet<br />
Control Panel<br />
Page 4
2.2.2 Fan Stat (Cover Removed)<br />
High Limit Stat Setting Peg (100°C)<br />
Fan on Setting Peg (40°C)<br />
Fan Off Setting Peg (20°C)<br />
Fan Override Button (White)<br />
Keep Pulled Out<br />
High Limit Reset Button (Red)<br />
2.2.3 Air Heater Control Panel<br />
Burner Cable<br />
Overload Relay<br />
Reset Button (Red)<br />
Contactor<br />
Clock<br />
3 Position<br />
Rocket Switch<br />
Burner on<br />
Lamp<br />
2 Position<br />
Rocker Switch<br />
5 Amp Fuse<br />
Room Stat<br />
5 Pin Mains In Plug<br />
Page 5
2.2.4 Time Clock<br />
Indictor Arrow<br />
Each <strong>heater</strong> is supplied as standard with<br />
a 7-day analogue clock.<br />
Timing Segments<br />
Selector Switch<br />
To set the day of the week and the time<br />
turn the minute hand in a clockwise<br />
direction until the correct day and time is<br />
opposite the indicator arrow.<br />
The required on/off switching time is set<br />
by pushing the timing segments to the<br />
outer rim of the clock. The minimum time<br />
period for each segment is 2 hours.<br />
Before operating the <strong>heater</strong> ensure that<br />
the selector switch is in its mid position.<br />
2.2.5 Room Stat<br />
A room thermostat is mounted on the main<br />
control panel and controls the operation<br />
of the burner. If the <strong>heater</strong> is not installed<br />
in the area being heated or it has been<br />
fitted with a separate fresh <strong>air</strong> intake then<br />
an additional remote room thermostat<br />
must be fitted.<br />
Page 6
3.0 General Data<br />
3.1 Technical Data<br />
WAH MODEL 100/150 200/300 500/600<br />
Output Range kW 29.3-44.0 58.6-88.0 146.5-175.8<br />
Nominal Heat kW 52.4 102.3 206.9<br />
Input (max) Btu 178,800 349,000 705,900<br />
Nominal Heat kW 44.0 88.0 175.8<br />
Output (max) Btu 150,000 300,000 600,000<br />
Nominal combustion efficiency gross % 84 86 85<br />
Burner Riello RDB 2 G10 G20s<br />
Head LD3 A G10 G20s<br />
Flue Dia mm 127 152 203<br />
Flue Dia in 5 6 8<br />
Exit Flue Gas Mass Flow<br />
Kg/h<br />
Co2 % 11.0 11.0 11.0<br />
Smoke Bacarach 0-1 0-1 0-1 0-1<br />
NFGT °C 225 185 195<br />
Nozzle<br />
Danfoss or Delevan<br />
(Kerosine) 1.25 x 60°S 2.5 x 60°S —<br />
Pump Bar 10 9 —<br />
Pressure psi 145 130 —<br />
Nozzle<br />
Danfoss or Delevan<br />
(Gas Oil) 1.0 x 60°S 2.0 x 60°S 4.0 x 60°S<br />
Pump Bar 13 12.5 13.0<br />
Pressure psi 190 180 190<br />
Approx Fuel L/h 5.2 10.1 20.4<br />
Flow Rate Gal/h 1.14 2.22 4.49<br />
Fan Motor kW 0.37 1.1 2.2<br />
Motor Speed rpm 1,440 1,440 1,440<br />
Running Current Amps 1.8 4.8 5.6<br />
Electrical Supply at 50hz Volts 230 ± 6% 1PH 230 ± 6% 1PH 400 ± 6% 1PH<br />
Fuse Rating (per phase) Amps 5 8 16<br />
Temp Rise °C 40 42 40<br />
Inlet Air Flow @ 15 C CFM 1,590 2,755 7,355<br />
M 3 /h 2,700 4,680 12,500<br />
No of Discharge Hoods 2 2 4<br />
Fan Speed (Nominal) rpm 650 900 925<br />
Weight (including burner) Kg 195 360 680<br />
Page 7
3.2 Dimensions<br />
MODEL 100/150 200/300 500/600<br />
A 1625 1860 2145<br />
B 615 790 1020<br />
C 950 1090 1445<br />
D 1410 1640 1895<br />
E 285 375 375<br />
F 285 380 380<br />
G 280 380 380<br />
H 202 260 290<br />
I 342 400 430<br />
J 900 1095 1190<br />
K 127 152 203<br />
Page 8
3.3 Installation Clearances<br />
The space in which the <strong>heater</strong> is to be fitted must have the following minimum<br />
dimensions:<br />
600mm<br />
600mm<br />
1000mm<br />
A x B<br />
ACCESS<br />
DOOR<br />
A - Width<br />
B - Height<br />
Refer to<br />
Section 3.2<br />
600mm<br />
Note: Any combustible material adjacent to the <strong>air</strong> <strong>heater</strong> and the flue system must be<br />
so placed or shielded as to ensure that its temperature does not exceed 65°C (150°F).<br />
In addition to the dimensions mentioned above the following minimum clearances<br />
must be available at the front of the <strong>heater</strong> to enable it to be serviced.<br />
Heater Model<br />
Clearance<br />
100 & 150 760mm<br />
200 & 300 1000mm<br />
500 & 600 1000mm<br />
Note: To give additional access to the fan stat when installed in a confined space the<br />
left and right side panels are interchangeable.<br />
3.4 Air Supply<br />
In all cases there must be provision for an adequate supply of <strong>air</strong> for both combustion<br />
and general ventilation.<br />
(a) Where <strong>heater</strong> is sited within area to be heated<br />
So far as any ventilation requirements are concerned, the installer should take note of<br />
any mandatory requirements for the provision of permanent <strong>air</strong> vents direct to outside.<br />
Any such <strong>air</strong> vents should have negligible resistance and must not be sited in any<br />
position where it is likely to become easily blocked or flooded nor in a position where<br />
it is possible for the ingress of toxic or flammable vapour. However, if the <strong>heater</strong> is<br />
sited within a building with an <strong>air</strong> infiltration rate of less than 0.5 per hour or where the<br />
Page 9
uilding volume is less than 2.2m 3 per kW of <strong>heater</strong> input, then ventilation should be<br />
provided in accordance with our table of recommended minimum sizes.<br />
(b) Where <strong>heater</strong> is supplied within a plant room or confined area<br />
Where the <strong>heater</strong> is sited within a plant room or other confined area, then provision<br />
must be made for the positive connection of either return <strong>air</strong> with high/low level<br />
ventilation in accordance with BS 6230 or if return <strong>air</strong> is through a louver arrangement<br />
then the return <strong>air</strong> louver must be of adequate size so as not to starve the main <strong>air</strong><br />
distribution fan of <strong>air</strong>. Under no circumstances must the burner be left to operate within<br />
an area of negative pressure without a combustion <strong>air</strong> duct.<br />
It is recommended that for applications such as these that you contact our Technical<br />
Department.<br />
(c)<br />
The <strong>heater</strong> should not be operated within a toxic, corrosive or flammable<br />
atmosphere<br />
The basic minimum effective area requirement of the <strong>air</strong> (not return <strong>air</strong> louvres) including<br />
<strong>air</strong> for combustion is as follows.<br />
Heater Model<br />
Min <strong>air</strong> vent area per <strong>heater</strong> (free area)<br />
3.5 Ductwork<br />
100/150 2300 CM 2<br />
200/300 3000 CM 2<br />
500/600 6500 CM 2<br />
All <strong>heater</strong>s are supplied for free standing and free blowing operation and are not suitable<br />
for connection to a ducted system unless the necessary drive modifications have been<br />
made. <strong>Warm</strong>flow can make the necessary drive modifications in the factory to suit a<br />
range of ductwork resistances (i.e. 0.5", 1.0", 1.5" and 2.0" wg).<br />
<strong>Warm</strong>flow cannot guarantee the correct fan/drive configuration unless we have either<br />
designed the ductwork system or were supplied with a set of as installed drawings for<br />
the existing ductwork. Prior to installation all existing ductwork and distribution grilles<br />
must be thoroughly cleaned to ensure there is no additional resistance within the<br />
system.<br />
As an additional safeguard against overheating <strong>Warm</strong>flow would recommend the<br />
installation of a thermostat within the ductwork to control the operation of the burner.<br />
The thermostat should be installed as close to the <strong>heater</strong> as possible. (Consult our<br />
technical department for details).<br />
3.6 Filters<br />
Before fitting any inlet or outlet filters, insure that the resistances are maintained or the<br />
correct modifications to belts, pulleys and motor have been made. (Contact <strong>Warm</strong>flow<br />
for details and advice).<br />
Page 10
3.7 Electrical Supply<br />
Wiring external to the <strong>air</strong> <strong>heater</strong> must be installed in accordance with IEE Wiring<br />
Regulations and any local regulations which apply.<br />
Models 100 to 300 are supplied for 240 volts, 50Hz, single phase, neutral and earth.<br />
Models 500 to 600 are supplied for 400 volts, 50Hz, 3 phase, neutral and earth.<br />
The method of connection to the mains electricity supply must facilitate complete<br />
electrical isolation of the <strong>air</strong> <strong>heater</strong> by an isolator having a contact separation of at<br />
least 3mm in all poles and the supply should serve only the <strong>air</strong> <strong>heater</strong>. The method of<br />
connection should be provided adjacent to the <strong>air</strong> <strong>heater</strong> in a readily accessible position.<br />
The minimum recommended cable size for the mains supply is 2.5mm 2 .<br />
All external wiring must be enclosed within approved conduit. Conduit from isolator<br />
switch must run so as not to interfere with the removal of the service panels of the <strong>air</strong><br />
<strong>heater</strong>.<br />
Whether a single <strong>heater</strong> or a number of <strong>heater</strong>s are to be wired as part of a single<br />
installation an isolator must be provided to each <strong>heater</strong> so that each <strong>heater</strong> can be<br />
separately disconnected. The isolator switch should be located in a readily accessible<br />
position. Each <strong>heater</strong> should be independently fused.<br />
The interwiring of controls from one <strong>heater</strong> to another <strong>heater</strong> is not permitted.<br />
3.7.1 R40 Burner Control Box G10 & G20S<br />
BLACK<br />
SOLENOID<br />
COIL<br />
CAPACITOR<br />
MOTOR<br />
M<br />
~<br />
BROWN<br />
BLUE<br />
BLACK<br />
BLUE<br />
50V<br />
WHITE<br />
BROWN<br />
1 2 3 4 5 6 7 8 9<br />
N<br />
L<br />
BLUE<br />
REMOTE LOCK-OUT IF REQUIRED<br />
FAN HOUSING<br />
BROWN<br />
GREEN/YELLOW<br />
Page 11
3.7.2 RDB Burner Control Box<br />
Lock Out<br />
Live<br />
Neutral<br />
Earth<br />
CONTROL BOX<br />
535SE/LD<br />
Fan<br />
Housing<br />
M<br />
Photoresistance<br />
Oil Valve<br />
Black<br />
White<br />
Blue<br />
Motor<br />
M<br />
Capacitor<br />
3.7.3 Fitting External Room Thermostat<br />
MAIN THERMINAL BLOCK<br />
9<br />
8<br />
7<br />
6<br />
5 4 3 2 1<br />
REMOVE<br />
LOOP ‘A’<br />
ROOM THERMOSTAT<br />
3.7.4 Fitting a Frost Thermostat<br />
The frost thermostat must be located in the coldest part of the building but where is<br />
can respond to rise in temperature as a result of switching on the <strong>heater</strong>. A frost<br />
thermostat should not be fitted on an outside wall.<br />
The frost thermostat can be connected as per the room thermostat.<br />
Page 12
3.7.5 Mains Plug<br />
By inserting a small screwdriver into the slots as shown, the retaining clips can be<br />
prised open so allowing the cover to be hinged up revealing the wiring connections.<br />
Before closing, ensure the cable clamp has properly been fitted.<br />
3.7.6 Motor Wiring<br />
Single Phase<br />
3 Phase<br />
Page 13
3.7.7 Wiring Diagram for Single Phase Control Panel<br />
Page 14
3.7.8 Wiring Schematic for Single Phase Control Panel<br />
Page 15
3.7.9 Wiring Diagram for Three Phase Control Panel<br />
Note: If the fan (and motor) are turning<br />
the wrong direction, simply swap over the<br />
brown and black wire on the motor plug.<br />
Page 16
3.7.10 Wiring Schematic for Three Phase Control Panel<br />
Page 17
4.0 Oil Supply<br />
1. Oil Tank<br />
Steel tanks constructed to BS 799 Part 5 1987 should be painted on the outside only<br />
and mounted on piers to prevent corrosion. Plastic oil tanks are also available and can<br />
be suitable for installation at ground level. However, oil should never be stored in<br />
translucent plastic containers.<br />
2. The pipe from the oil tank to the burner should be run in copper, steel or aluminium<br />
pipework. Galvanised pipe and fittings should not be used. The pipework should<br />
terminate close to the boiler and be fitted with an isolating valve and filter. It is also<br />
recommended that a remote sensing fire valve should be fitted to the oil line preferably<br />
before the oil line enters the building. (I.E. BS 5410)<br />
The fire valve sensor can be connected to <strong>heater</strong> casing above the burner by attaching<br />
a retaining clip.<br />
Depending on the position of the tank a two pipe system may be required. One and<br />
two pipe oil systems are shown below. As an alternative to a two pipe system a Tigerloop<br />
or other approved de-aerator may be used.<br />
4.1 One Pipe System<br />
FIRE VALVE<br />
SENSOR<br />
MAX OIL LEVEL 4 metres ABOVE BURNER<br />
FIRE VALVE<br />
FILTER<br />
SHUT OFF<br />
VALVE<br />
FILTER MAY BE<br />
POSITIONED<br />
OUTSIDE<br />
STEEL TANK SHOWN<br />
PLASTIC TANK ALSO SUITABLE<br />
Total Maximum Pipe Length (m)<br />
Head H (m)<br />
I.D.<br />
8 mm<br />
I.D.<br />
10 mm<br />
0.5<br />
10<br />
20<br />
1<br />
20<br />
40<br />
1.5<br />
40<br />
80<br />
2<br />
60<br />
100<br />
Note: The ‘head’ of oil refers to<br />
the distance the outlet from the<br />
oil tank is above the oil pump.<br />
Page 18
4.2 Two Pipe Systems<br />
FILTER MAY BE<br />
POSITIONED<br />
OUTSIDE<br />
SAW CUT INSIDE<br />
TANK TO PREVENT<br />
SYPHON<br />
FILTER<br />
FIRE VALVE<br />
NON RETURN<br />
VALVE<br />
RETURN LINE<br />
NO FILTERS OR VALVES<br />
STEEL TANK SHOWN<br />
PLASTIC TANK ALSO SUITABLE<br />
Total Maximum Pipe Length (m)<br />
Lift H (m)<br />
I.D.<br />
8 mm<br />
I.D.<br />
10 mm<br />
0.5<br />
35<br />
100<br />
0.5<br />
30<br />
100<br />
1<br />
25<br />
100<br />
1.5<br />
20<br />
90<br />
2<br />
15<br />
70<br />
3<br />
8<br />
30<br />
3.5<br />
6<br />
20<br />
DE AERATOR MAY<br />
BE ABOVE OR<br />
BELOW BURNER<br />
MAY BE POSITIONED<br />
OUTSIDE<br />
FIRE VALVE<br />
STEEL TANK SHOWN<br />
PLASTIC TANK ALSO SUITABLE<br />
Must be upright<br />
‘T’ TAP FOR DRAIN<br />
FILTER<br />
SHUT OFF VALVE<br />
For maximum pipe length and lift contact de-aerator manufacturer.<br />
Page 19
5.0 Flues<br />
The flue should be designed in<br />
accordance with the local bye-laws<br />
and the Clean Air Act. Draught<br />
stabilisers are not recommended.<br />
Sharp bends or horizontal runs<br />
should be avoided and the flue<br />
should terminate 2 feet (600 mm)<br />
above the ridge of the dwelling.<br />
Terminals which restrict the<br />
discharge or allow ingress of water<br />
should be avoided.<br />
It is recommended that when<br />
connecting to an existing masonry<br />
chimney a flexible stainless steel liner<br />
of the correct diameter should be<br />
used. The annular space must be<br />
sealed top and bottom and filled with<br />
insulation.<br />
Materials used for the flue system<br />
should be mechanically robust,<br />
resistant in internal and external<br />
corrosion, non-combustible and<br />
durable under the conditions to which<br />
they are likely to be subjected.<br />
Prevention of condensation within the<br />
flue should be an important factor in<br />
the design of the flue system. In order to minimise condensation the use of double<br />
walled flue pipe or insulation is recommended.<br />
Where condensation in the flue is unavoidable, provision should be made for<br />
condensate to flow freely to a point at which it can be released, preferably into a gully.<br />
The condensate pipe from the flue to the disposal point should be of non-corrodible<br />
material of not less than 22mm (in) size.<br />
Facilities should be made for disconnecting the flue pipe from the <strong>air</strong> <strong>heater</strong> for<br />
inspection and servicing purposes. Bends with removeable covers should be fitted for<br />
inspection and cleaning purposes where considered appropriate.<br />
The flue system should ensure safe and efficient operation of the <strong>air</strong> <strong>heater</strong> to which it<br />
is attached, protect the combustion process from wind effects and disperse the products<br />
of combustion to the external <strong>air</strong>.<br />
The flue should terminate in a freely exposed position and must be so situated as to<br />
prevent the products of combustion entering any opening in a building in such<br />
concentration as to be prejudicial to health or a nuisance.<br />
Page 20
6.0 Burners<br />
6.1.1 RDB Burner<br />
The burner is fitted with the correct nozzle and the pressure set. All that is further<br />
required before commissioning, is to connect the oil and electricity supply.<br />
1. Pump 5. Air damper adjustment screw<br />
2. Control box 6. Air tube connection (B/F)<br />
3. Reset button with lock-out lamp 7. Pump pressure adjustment screw<br />
4. Flange with insulating gasket 8. Pressure gauge port<br />
6.1.2 G10 Burners<br />
1. Return line 6. Screw fixing <strong>air</strong>-damper<br />
2. Suction line 7. Hydraulic jack with <strong>air</strong>-damper<br />
3. Gauge connection 8. Lock-out lamp and reset button<br />
4. Pump pressure regulator 9. Flange with insulating shield<br />
5. Vacuum gauge connection 10. Combustion head adjustment screw<br />
Page 21
6.1.3 G20S Burner<br />
1. Return line 6. Hydraulic jack with <strong>air</strong>-damper<br />
2. Suction line 7. Combustion head adjustment screw<br />
3. Gauge connection 8. Lock-out lamp and reset button<br />
4. Pump pressure regulator 9. Flange with insulating shield<br />
5. Suction gauge connection 10. Start delaying device<br />
6.2 Oil Supply<br />
The burner is supplied for use with a one pipe system. For use on a two pipe system,<br />
it is necessary to remove the return port plug and fit a small by-pass plug as shown.<br />
1. Suction port<br />
2. To nozzle<br />
3. Pressure gauge port/<strong>air</strong> bleed<br />
4. Pump pressure adjustment<br />
5. Vacuum port<br />
6. To hydraulic ram<br />
7. Return port<br />
8. By-pass plug<br />
Page 22
6.3 Air Damper Adjustment<br />
The setting is purely indicative.<br />
Each installation however, has its own unpredictable working conditions: actual nozzle<br />
output; positive or negative pressure in the combustion chamber, the need of excess<br />
<strong>air</strong>, etc.<br />
All these conditions may require a different <strong>air</strong>-damper setting, which should be checked<br />
and set during commissioning.<br />
6.4 Electrode Setting<br />
Attention<br />
Before working at the<br />
electrodes ensure that<br />
the power supply is<br />
switched off.<br />
Before assembling or removing the nozzle,<br />
loosen the screw (A) and move the electrodes<br />
away from the nozzle.<br />
6.5 Burner Start-up Cycle<br />
Thermostat<br />
Motor<br />
Ignition transformer<br />
Valve<br />
Flame<br />
Lock-out lamp<br />
Normal<br />
Lock-out due to failure to light<br />
~ 12s<br />
~ 12s<br />
~ 5s<br />
Page 23
7.0 Fault Finding<br />
Switch on electricity supply<br />
Set rocker switches to<br />
heating on and <strong>manual</strong><br />
Does the fan run<br />
N<br />
Y<br />
Is white button on the<br />
fan stat pulled out<br />
N<br />
Pull out button<br />
Y<br />
Check fan stat<br />
Check contactor<br />
Check wiring<br />
Does burner fire<br />
N<br />
Y<br />
Is burner motor running<br />
continuously without ignition<br />
N<br />
Y<br />
Is burner lock out light on<br />
N<br />
Check photocell solenoid<br />
coil and control box<br />
Check oil pump, motor, control<br />
box solenoid coil photocell<br />
and oil supply check wiring<br />
Is amber lamp on the<br />
control panel lit<br />
N<br />
Y<br />
Y<br />
Is there power to the burner Check motor and control box<br />
N<br />
Check wiring<br />
Is there continuity across<br />
the room stat<br />
Y<br />
Is there continuity across<br />
the overload relay<br />
Y<br />
Check 5 amp fuse, wiring<br />
and rocker switches<br />
N<br />
N<br />
Check operation of<br />
stat check wiring<br />
Check relay, press reset<br />
button, check wiring<br />
Does the fan start after a<br />
few minutes interval<br />
Y<br />
N<br />
Does contactor operate<br />
N<br />
Check wiring, check<br />
contactor and overload<br />
relay press reset button<br />
Y<br />
Check wiring to motor<br />
check motor<br />
Is the <strong>heater</strong><br />
running normally<br />
Y<br />
N<br />
Does the high limit on<br />
the fan stat trip<br />
N<br />
Y<br />
Has ducting been<br />
fitted to the <strong>heater</strong><br />
Y<br />
N<br />
Check nozzle combustion<br />
<strong>air</strong> supply fan stat, fan<br />
speed and supply voltage<br />
Fit the correct motor<br />
and pulleys<br />
Does fan overload trip<br />
N<br />
Y<br />
Check motor current<br />
Check overload relay<br />
Check supply cable<br />
Check motor wiring<br />
Check for correct motor and<br />
pulleys and supply voltage<br />
Check for vibration<br />
and <strong>heater</strong> sizing<br />
Does room stat<br />
cut off burner<br />
Y<br />
Switch to automatic<br />
N<br />
Check wiring<br />
Check room stat<br />
Y=YES<br />
Does clock switch the<br />
burner on and off<br />
Y<br />
N<br />
Check clock<br />
Check wiring<br />
N= NO<br />
When the burner is<br />
switched off does the fan<br />
continue to run for a few<br />
minutes before switching off<br />
N<br />
Check fan stat<br />
Check wiring<br />
Y<br />
Heater is working normally<br />
Page 24
8.0 Burner Spares<br />
Riello RDB Burner<br />
NO CODE 3748757 DESCRIPTION<br />
1 3005787 • Gasket<br />
2 3006384 • Flange<br />
3 3008769 • Cup-shaped Head<br />
4 3007513 • Electrode Assembly<br />
5 3006552 • Electrode Bracket<br />
6 3008642 • Nozzle Holder<br />
7 3008643 • Collar<br />
8 3008794 • High Voltage Lead<br />
9 3008647 • Air Damper Assembly<br />
10 3008645 • Fan<br />
11 3008646 • PE Cell<br />
12 3007479 • Capacitor 4µF<br />
13 3007582 • Needle Valve<br />
14 3008651 • Regulator<br />
15 3000439 • Pump Seal<br />
NO CODE 3748757 DESCRIPTION<br />
16 3008654 • Pump<br />
17 3007162 • ‘O’ Ring<br />
18 3008653 • Filter ‘O’ Ring<br />
19 3003602 • Connector<br />
20 3005720 • Flexible<br />
21 3008644 • Tube<br />
22 3008876 • Pressure Gauge<br />
23 3000443 • Joint<br />
24 3008648 • Coil<br />
25 3008650 • Motor<br />
26 3008649 • Protection<br />
27 3008652 • Control Box 535 RSE/LD<br />
28 3008877 • Lead Coil<br />
29 3008879 • Cover<br />
30 3008878 • Kit Seal<br />
Page 25
Riello 40 – G10<br />
NO CODE DESCRIPTION<br />
1 3000879 Air Shutter Assembly<br />
2 3006913 Tube<br />
3 3005788 Fan<br />
4 3005798 Condenser<br />
5 3007355 Motor<br />
6 3007077 Washer<br />
7 3007450 Pump<br />
8 3002279 Coil<br />
9 3006553 Cover<br />
10 3007028 ‘O’ Ring<br />
11 3007162 ‘O’ Ring<br />
12 3005719 Filter<br />
13 3006925 Valve Stem<br />
14 3007029 ‘O’ Ring<br />
15 3007156 ‘O’ Ring<br />
16 3000439 Pump Seal<br />
17 3005789 Tube<br />
18 3000443 Joint<br />
NO CODE DESCRIPTION<br />
19 3006557 Access Plate<br />
20 3005791 Collar<br />
21 3005764 Nozzle Holder<br />
22 3002278 Control Box Base<br />
23 3001156 Control Box<br />
24 3002297 Igniter<br />
25 3002280 Photocell<br />
26 3005792 Head<br />
27 3006392 Disc with Ring Pressed<br />
28 3005795 Flange Gasket<br />
29 3005796 Flange<br />
30 3000640 Hinge<br />
31 3005790 Electrode<br />
32 3006552 Electrode Clamp<br />
33 3009068 Connector<br />
34 3005720 Flexible Pipe<br />
35 3006911 Hydraulic Ram<br />
Page 26
Riello 40 – G20S<br />
NO CODE DESCRIPTION<br />
1 3005799 Fan<br />
2 3007156 ‘O’ Ring<br />
3 3007028 ‘O’ Ring<br />
4 3005801 Washer<br />
5 3005800 Tube<br />
6 3005802 Condenser<br />
7 3007077 Washer<br />
8 3005771 Pivot<br />
9 3005803 Washer<br />
10 3005804 Pivot<br />
11 3007079 Washer<br />
12 3005805 Connector<br />
13 3007162 ‘O’ Ring<br />
14 3005719 Filter<br />
15 3006925 Valve<br />
16 3007029 ‘O’ Ring<br />
17 3002297 Igniter<br />
18 3006553 Cover<br />
19 3000439 Pump Seal<br />
20 3005808 Tube<br />
21 3006500 Retarder<br />
22 3002279 Coil<br />
23 3006924 Pump<br />
NO CODE DESCRIPTION<br />
24 3000443 Joint<br />
25 3005720 Flexible Pipe<br />
26 3005820 Motor<br />
27 3006558 Access Plate<br />
28 3001156 Control Box<br />
29 3002280 Photocell<br />
30 3002278 Control Box Base<br />
31 3005809 Tube<br />
32 3005810 Collar<br />
33 3005764 Nozzle Holder<br />
34 3006264 Ring<br />
35 3005813 Flange Gasket<br />
36 3005814 Flange<br />
37 3000640 Hinge Assembly<br />
38 3006265 Head<br />
39 3005816 Electrodes<br />
40 3006552 Clamp<br />
41 3009068 Connector<br />
42 3006499 Hydraulic<br />
43 3006501 Tube<br />
44 3000645 Air Shutter<br />
45 3007161 ‘O’ Ring<br />
46 3007165 Valve Piston ‘O’<br />
Page 27
Notes<br />
Page 28
COMMISSIONING DETAILS<br />
To ensure the reliable and efficient operation of your <strong>heater</strong> it is necessary to have this<br />
appliance properly commissioned by a suitably qualified commissioning engineer. The page<br />
below is to be completed by the commissioning engineer and the <strong>manual</strong> retained by the<br />
end user.<br />
Users Name: ....................................................................................................................................<br />
Address of Installation: .....................................................................................................................<br />
..........................................................................................................................................................<br />
.................................................................... Postcode: ....................................................................<br />
Tel No (Home): ....................................................... (Daytime): .......................................................<br />
Heater Date Code: ...........................................................................................................................<br />
Installation Date: ..............................................................................................................................<br />
Heater Serial No: ..............................................................................................................................<br />
Commissioned by: ............................................................................................................................<br />
OFTEC No: ......................................................................................................................................<br />
Address: ...........................................................................................................................................<br />
.................................................................... Postcode: ....................................................................<br />
Pump Pressure: ...............................................................................................................................<br />
Co2 %: .............................................................................................................................................<br />
FGT°C: ............................................................ Smoke No: ............................................................<br />
Motor Current: .............................. Cold: .............................. Amps Hot: .............................. Amps<br />
Date Commissioned: ........................................................................................................................<br />
It is the responsibility of the installer to ensure that the <strong>heater</strong> is properly commissioned<br />
(Ref BS 5410 Parts 1 & 2)<br />
Failure to have this appliance commissioned may invalidate the warranty.
HEATING PRODUCTS<br />
Lisburn Manchester Dublin<br />
Lissue Industrial Estate, Moira Road, 144 Bradford Road, Balbriggan Industrial Estate,<br />
Lisburn, Co Antrim, N Ireland, BT28 2RF Manchester, M40 7AS Dublin<br />
Tel: (02892) 621515 Fax: (02892) 621199 Tel: (0161) 205 4202 Tel: (01) 841 6158<br />
E-mail: sales@warmflow.co.uk Fax: (0161) 205 4818 Fax: (01) 841 6614<br />
FOR PARTS, SERVICE &<br />
WARRANTY CONTACT<br />
TEL: (028) 92621515<br />
FAX: (01846) 621199<br />
E-MAIL: service@warmflow.co.uk<br />
TEL: (DUBLIN) 8416158<br />
FAX: (DUBLIN) 8416614<br />
TEL: (0161) 205 4202<br />
FAX: (0161) 205 4818<br />
N IRELAND<br />
REP OF IRELAND<br />
ENGLAND,<br />
SCOTLAND & WALES<br />
FOR TECHNICAL ASSISTANCE<br />
CONTACT WARMFLOW ON<br />
TEL: (028) 92621515<br />
E-MAIL: technical@warmflow.co.uk<br />
This <strong>manual</strong> is accurate at the date of printing but will be superseded and should be disregarded if specifications and/<br />
or appearances are changed in the interests of continued product improvement.<br />
Code 987