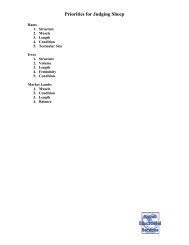
Pig Hair Clipping Guide - The Judging Connection .com
Pig Hair Clipping Guide - The Judging Connection .com
Pig Hair Clipping Guide - The Judging Connection .com

You also want an ePaper? Increase the reach of your titles
YUMPU automatically turns print PDFs into web optimized ePapers that Google loves.
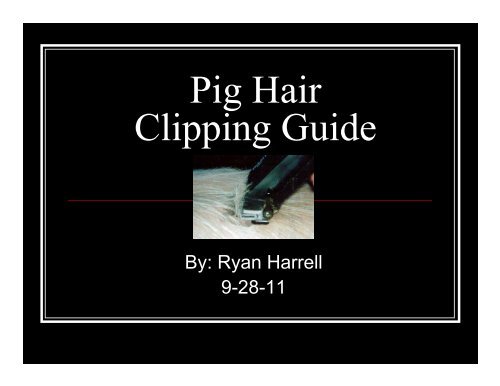
<strong>Pig</strong> <strong>Hair</strong><br />
<strong>Clipping</strong> <strong>Guide</strong><br />
By: Ryan Harrell<br />
9-28-11
Why Clip <strong>Pig</strong>s?<br />
� People clip pigs to:<br />
� Make them look<br />
fresher<br />
� Make them appear<br />
cleaner and remove<br />
stains<br />
� Show muscle<br />
definition.
When <strong>Clipping</strong> <strong>Pig</strong>s<br />
� When clipping pigs<br />
remember to be:<br />
� Patient<br />
� Stay calm<br />
It may take a few times<br />
(days) in order to<br />
ac<strong>com</strong>plish the task.
When To Clip<br />
� Depending on your method of clipping:<br />
� You can clip right before the show.<br />
� Clip 15-30 days before the show and let the hair<br />
grow out.<br />
� Keep in mind a pig might get bug or fly bites after<br />
clipping them.
Methods to Hold the <strong>Pig</strong> Still<br />
� Clip while feeding the<br />
pig.<br />
� Clip the pig when it is<br />
resting.<br />
� Snare the pig.
Equipment Used<br />
� A Pair of Clippers<br />
� Sharp Blades<br />
� Clipper Guards<br />
� Extension Cord<br />
� Brush<br />
� Scissors
Pattern <strong>Clipping</strong><br />
� Blue is with NO<br />
Guard.<br />
� Yellow is with a ½ inch<br />
Guard.<br />
� Green is with a ¾ inch<br />
Guard.<br />
� Goal: Blend the hair<br />
so it appears normal.
Wash Your <strong>Pig</strong><br />
� <strong>Clipping</strong> works best<br />
when the pig is clean.<br />
� <strong>The</strong>y shouldn’t have<br />
manure or mud stuck<br />
to the hair.<br />
� Try not to clip the hair<br />
damp.
<strong>Clipping</strong> Ears<br />
� With NO Guard:<br />
� Remove all excess hair<br />
inside the ear.<br />
� Trim around the ears<br />
and clean out the ear<br />
notches.<br />
� Remove hair on the<br />
backside of the ear.<br />
� Remove the ear hair<br />
back to the pigs neck.
<strong>Clipping</strong> the Head<br />
� Using NO Guard Trim:<br />
� <strong>Hair</strong> on the cheeks.<br />
� <strong>Hair</strong> under the Jowl.<br />
� <strong>Hair</strong> on the forehead.<br />
� <strong>Hair</strong> up to the level<br />
between the ears.<br />
� <strong>Hair</strong> around the Lips.<br />
� <strong>Hair</strong> around the nose.
<strong>Clipping</strong> the Underline<br />
� Using NO Guard:<br />
� Removing hair from the<br />
underline will show the<br />
gilts teat quality and<br />
spacing better.
<strong>Clipping</strong> the Sheath<br />
� Using NO Guard:<br />
� Trimming the excess<br />
sheath hair on a barrow<br />
will make him look<br />
trimmer in the belly.<br />
� Trim the underline hair<br />
as well.
<strong>Clipping</strong> the Legs<br />
� Using NO Guard<br />
� Remove excess hair on<br />
the back of the front and<br />
rear legs.<br />
� You can remove the hair<br />
from the front side of the<br />
legs if it is stained.
<strong>Clipping</strong> the Legs<br />
� Remove the leg hair up<br />
to the stifle and elbow<br />
pocket.
Blocking Out <strong>The</strong> Legs<br />
� Blocking the legs<br />
leaves the hair on the<br />
legs.<br />
� This appears the pig<br />
has more bone.<br />
� Usually blocking trims<br />
a small amount of hair<br />
off the back of the<br />
legs.
<strong>Clipping</strong> the Rump<br />
� With NO Guard<br />
� Trim the base of the<br />
ham and connect it to<br />
the leg lines you<br />
created.<br />
� Trim the line right up to<br />
the anus and tail.<br />
� Follow the Ham Muscle<br />
Lines.<br />
� Do this on Both Sides!
<strong>Clipping</strong> the Rump<br />
� Using a ½ inch guard<br />
� Trim the <strong>Hair</strong> on the<br />
Side on the Ham.<br />
� Do this on Both Sides!
Trimming the Tail<br />
� Using Scissors:<br />
� Trim excess hairs on the<br />
tail.<br />
� Keep some hairs at the<br />
end of the tail.<br />
� Remove the stained<br />
hair.<br />
� Trim off hairs sticking up<br />
or against the rest of the<br />
hairs.
<strong>Clipping</strong> the Belly and Sides<br />
� Using a ½ inch Guard<br />
� Trim the hair on the<br />
sides.<br />
� Trim the belly hair<br />
connecting it to the<br />
underline line you<br />
created.<br />
� Trim the neck hair and<br />
connect it to the<br />
forehead and jowl lines.
<strong>Clipping</strong> <strong>The</strong> Top<br />
� Using a ¾ inch or ½<br />
inch Guard:<br />
� Trim the hair on the top<br />
of the pig.<br />
� You can trim closer on<br />
the groove top and tail<br />
head dimple.
When Finished <strong>Clipping</strong><br />
� You may want to brush off the excess hair.<br />
� Wash and oil the pigs skin.<br />
� Spray with fly spray.<br />
� Keep the pig clean till the show.
Know the Rules<br />
� DO NOT SHAVE THE PIG BALD!<br />
� <strong>The</strong> packer needs some hair on the pig so<br />
it can be removed during harvest /<br />
processing.<br />
� Follow Your Shows <strong>Clipping</strong> Rules.
Do Not Over Stress Your <strong>Pig</strong><br />
� Take Breaks<br />
� Do Not Over Stress<br />
Your <strong>Pig</strong>.<br />
� It Could Die with the<br />
Stress Gene!
Common Mistakes<br />
� Not <strong>Clipping</strong> the Face<br />
� Not <strong>Clipping</strong> the Ear<br />
� Not finishing the whole<br />
clipping project.<br />
� Shaving the <strong>Pig</strong> Bald.<br />
<strong>Hair</strong> on the Face �
<strong>Pig</strong> <strong>Hair</strong> Products<br />
� <strong>Pig</strong> hair is used<br />
to make:<br />
� paint brushes<br />
� cosmetic<br />
brushes.
Successful <strong>Clipping</strong> Takes Practice,<br />
Patients and Time.