Owner Manual - AVR 158 (English EU) - Harman Kardon
Owner Manual - AVR 158 (English EU) - Harman Kardon
Owner Manual - AVR 158 (English EU) - Harman Kardon

You also want an ePaper? Increase the reach of your titles
YUMPU automatically turns print PDFs into web optimized ePapers that Google loves.
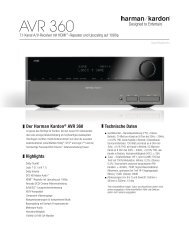
<strong>AVR</strong> <strong>158</strong><br />
Program the Remote to Control Your Source Devices and TV<br />
In addition to using the remote to control the AVr itself and the AM/FM radio, you can<br />
program the remote to control up to eight additional audio/video source devices plus<br />
your tV.<br />
once you have programmed the remote, you can switch the remote’s control mode to<br />
access the functions for a particular source device by pressing the remote’s Source<br />
Selector button for that device. to control the AVr, press the remote’s AVr button.<br />
before you begin programming the remote, review the connections you filled in on the<br />
Input connections and Source buttons table on page 13. the Source Selector buttons<br />
are assigned to the components that you listed in the table’s “Source device connected”<br />
column.<br />
1. turn on the source device you want to program the remote to control.<br />
2. look up the code numbers for the device in tables A11 – A17 in the Appendix. write<br />
all the applicable code numbers in a convenient place.<br />
3. press and hold the Source Selector button for that source device until the program<br />
Indicator led on the remote starts to flash, then release it. (this procedure places the<br />
remote in the programming mode.)<br />
note: If you’re programming one of the four hdMI source buttons, after pressing the<br />
hdMI button you must also press the Source Selector button for the type of device that<br />
will be controlled:<br />
• press dVd to control a dVd player.<br />
• press VId1 to control a Vcr, dVr or harman kardon digital media centre.<br />
• press VId2 to control a cable or satellite set-top box.<br />
4. Aim the remote at the source device and use the remote’s number buttons to enter a<br />
code number from Step 2, above.<br />
a) If the device turns off, press the Source Selector button again to save its code. the<br />
Source Selector button will flash, and the remote will exit the programming mode.<br />
b) If the device does not turn off, enter another code number.<br />
c) If you run out of code numbers for a device, you can search through all of the codes<br />
in the remote’s library for devices of its type by pressing the up or down button<br />
repeatedly until the device turns off. when it does, press the Source Selector button<br />
to save the code.<br />
5. check that other functions control the device correctly. Sometimes manufacturers<br />
use the same power code for several models, while other function codes vary. repeat<br />
this process until you’ve programmed a satisfactory code set that operates most of<br />
the device’s functions.<br />
6. If you searched through the remote’s code library to find the code, you can find<br />
out which code number you have programmed by pressing and holding the Source<br />
Selector button to re-enter the programming Mode. then press the remote’s ok<br />
button, and the program Indicator led will flash in the code sequence. one flash<br />
represents “1,” two flashes represent “2,” and so forth. A series of quick flashes<br />
represents “0.” record the code number programmed for each device in table A7 in<br />
the Appendix.<br />
repeat Steps 3 – 6 for each source device you want to control with the AVr remote.<br />
In general, the label for each button on the remote describes the button’s function when<br />
used to control the AVr. however, the button may perform a very different function when<br />
used to control another device. refer to the remote control Function list, table A10 in<br />
the Appendix, for each button’s functions with the various product types.<br />
You can also program the remote to perform Macros (preprogrammed code sequences<br />
that execute many code commands with a single button press) and “punch-through”<br />
programming (allowing the remote to operate a device’s channel or transport controls<br />
when the remote is in another device’s mode). See Advanced remote control<br />
programming, on page 22, for instructions on these functions.<br />
16<br />
Set Up the <strong>AVR</strong><br />
Turn On the <strong>AVR</strong><br />
Set Up the Remote Control, continued,<br />
and Set Up the <strong>AVR</strong><br />
1. Set the rear-panel Main power switch to “on.” (the front-panel power indicator will<br />
glow amber.)<br />
2. press the front-panel power button.<br />
Main power<br />
Switch<br />
power<br />
button<br />
unless you will not be using the AVr for an extended period of time, leave the Main<br />
power switch set to “on.” when the Main power switch is turned off, any settings you<br />
have programmed will be preserved for up to four weeks.<br />
IMPORTANT NOTE: If the PROTECT message ever appears in the Message<br />
display, turn off the <strong>AVR</strong> and unplug it. Check all speaker wires for a short<br />
circuit (“+” and “–” wires touching). If none is found, bring the unit to an<br />
authorised <strong>Harman</strong> <strong>Kardon</strong> service centre for inspection and repair before<br />
using it again.<br />
Using the On-Screen Menu System<br />
Although it’s possible to configure the AVr using only the remote and the front-panel<br />
Message display, it is easier to use the on-screen menu system.<br />
to access the menu system, press the oSd button on the remote. the Master menu will<br />
appear.<br />
** MASTER MENU **<br />
INPUT SETUP<br />
SURROUND SELECT<br />
SPEAKER SETUP<br />
SYSTEM SETUP<br />
the Master menu consists of four submenus: Input Setup, Surround Mode, Speaker<br />
Setup and System Setup.<br />
use the up/down/left/right buttons on the remote to navigate the menu system, and<br />
press the ok button to select a menu or setting line, or to enter a new setting.<br />
the current menu, setting line or setting will appear in the front-panel Message display,<br />
as well as on screen.<br />
to return to the previous menu, navigate to the “back to Master Menu” line and press the<br />
ok button. to exit the menu system, press the oSd button.<br />
Most users should follow the instructions in this Set up the AVr section to configure<br />
a basic home theatre system. You may return to these menus at any time to make<br />
additional adjustments, such as those described in the Advanced Functions section, on<br />
pages 20 through 23.<br />
before you begin initial setup, all loudspeakers, a video display and all source devices<br />
should be connected to the AVr. You should be able to turn on the AVr and view the<br />
Master menu when you press the oSd button. If necessary, reread the Making<br />
connections section and the beginning of this section before continuing.