KXTS3282W - Operating Manuals for Panasonic Products - Panasonic
KXTS3282W - Operating Manuals for Panasonic Products - Panasonic
KXTS3282W - Operating Manuals for Panasonic Products - Panasonic

You also want an ePaper? Increase the reach of your titles
YUMPU automatically turns print PDFs into web optimized ePapers that Google loves.
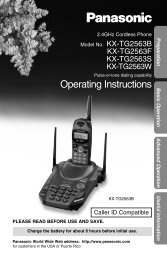
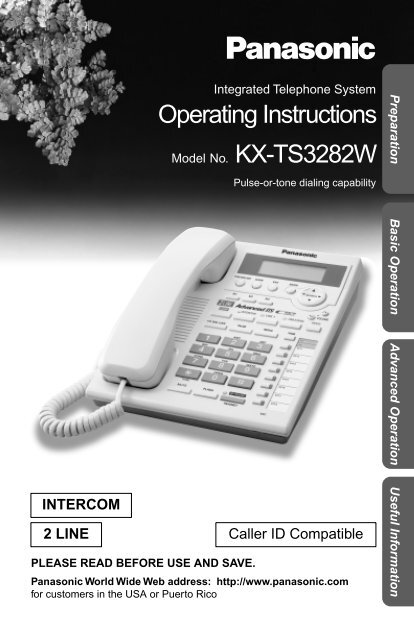
Integrated Telephone System<br />
<strong>Operating</strong> Instructions<br />
Model No. KX-TS3282W<br />
Preparation<br />
Pulse-or-tone dialing capability<br />
INTERCOM<br />
2 LINE Caller ID Compatible<br />
PLEASE READ BEFORE USE AND SAVE.<br />
<strong>Panasonic</strong> World Wide Web address: http://www.panasonic.com<br />
<strong>for</strong> customers in the USA or Puerto Rico<br />
Basic Operation Advanced Operation Useful In<strong>for</strong>mation
Be<strong>for</strong>e Initial Use<br />
Thank you <strong>for</strong> purchasing your new <strong>Panasonic</strong> integrated<br />
telephone.<br />
Please read IMPORTANT SAFETY INSTRUCTIONS on page<br />
67 be<strong>for</strong>e use. Read and understand all instructions.<br />
Caller ID and Call Waiting Service, where available, are telephone<br />
company services. After subscribing to Caller ID, this phone will display<br />
a caller’s name and phone number. Call Waiting Caller ID, which<br />
displays a second caller’s name and phone number while the user is on<br />
the phone line with the first caller, requires a subscription to both Caller<br />
ID with Name and Call Waiting Service.<br />
Attach your purchase receipt here.<br />
For your future reference<br />
Serial No.<br />
(found on the bottom of the unit)<br />
Date of purchase<br />
Name and address of dealer<br />
2
Accessories (included) For extra orders, call 1-800-332-5368.<br />
AC Adaptor (p. 10)<br />
AA (R6, UM-3) Batteries (p. 9)<br />
Order No. KX-TCA1-G<br />
one<br />
Handset (p. 10)<br />
Order No. PQJXC0402Z<br />
three<br />
Handset Cord (p. 10)<br />
Order No. PQJA212M<br />
one<br />
4-Wire Telephone Line Cord<br />
with Green Plugs<br />
(p. 11-13)<br />
Order No. PQJA10088Z<br />
one<br />
2-Wire Telephone Line Cord<br />
with Transparent Plugs (p. 13, 14)<br />
Order No. PQJA10075Z<br />
one<br />
one<br />
For assistance, please call: 1-800-211-PANA(7262)<br />
3
Contents<br />
Preparation<br />
Location of Controls . . . . . . . . . . . . . . . . . . . . . . . . . . . . . . . . . . . . . . . . 6<br />
Display . . . . . . . . . . . . . . . . . . . . . . . . . . . . . . . . . . . . . . . . . . . . . . . . . . . 8<br />
Installation . . . . . . . . . . . . . . . . . . . . . . . . . . . . . . . . . . . . . . . . . . . . . . . . 9<br />
Installing the Batteries . . . . . . . . . . . . . . . . . . . . . . . . . . . . . . . . . . . . . . . 9<br />
Connecting the Handset and AC Adaptor . . . . . . . . . . . . . . . . . . . . . . . 10<br />
Connecting Telephone Line Cords . . . . . . . . . . . . . . . . . . . . . . . . . . . . 11<br />
Connecting a Communication Device . . . . . . . . . . . . . . . . . . . . . . . . . . 14<br />
Programmable Settings. . . . . . . . . . . . . . . . . . . . . . . . . . . . . . . . . . . . . 15<br />
Time and Date . . . . . . . . . . . . . . . . . . . . . . . . . . . . . . . . . . . . . . . . . . . . 15<br />
Assigning the Extension Number. . . . . . . . . . . . . . . . . . . . . . . . . . . . . . 17<br />
Programming Summary . . . . . . . . . . . . . . . . . . . . . . . . . . . . . . . . . . . . . 19<br />
Dialing Mode . . . . . . . . . . . . . . . . . . . . . . . . . . . . . . . . . . . . . . . . . . . . . 20<br />
LCD Contrast . . . . . . . . . . . . . . . . . . . . . . . . . . . . . . . . . . . . . . . . . . . . . 21<br />
Ringer Volume . . . . . . . . . . . . . . . . . . . . . . . . . . . . . . . . . . . . . . . . . . . . 22<br />
Ringer Pattern . . . . . . . . . . . . . . . . . . . . . . . . . . . . . . . . . . . . . . . . . . . . 23<br />
Basic Operation<br />
Making Calls . . . . . . . . . . . . . . . . . . . . . . . . . . . . . . . . . . . . . . . . . . . . . . 25<br />
Answering Calls . . . . . . . . . . . . . . . . . . . . . . . . . . . . . . . . . . . . . . . . . . . 28<br />
Caller ID Service. . . . . . . . . . . . . . . . . . . . . . . . . . . . . . . . . . . . . . . . . . . 29<br />
Using the Caller List . . . . . . . . . . . . . . . . . . . . . . . . . . . . . . . . . . . . . . . 30<br />
Viewing the Caller List . . . . . . . . . . . . . . . . . . . . . . . . . . . . . . . . . . . . . . 30<br />
Calling Back from the Caller List . . . . . . . . . . . . . . . . . . . . . . . . . . . . . . 32<br />
Editing the Caller’s Phone Number . . . . . . . . . . . . . . . . . . . . . . . . . . . . 33<br />
The Caller ID Number Auto Edit Feature . . . . . . . . . . . . . . . . . . . . . . . . 34<br />
Storing Caller List In<strong>for</strong>mation in the Directory or<br />
in the One-Touch Dialer Memory. . . . . . . . . . . . . . . . . . . . . . . . . . . . . 36<br />
Erasing Caller List In<strong>for</strong>mation. . . . . . . . . . . . . . . . . . . . . . . . . . . . . . . . 37<br />
Advanced Operation<br />
Directory . . . . . . . . . . . . . . . . . . . . . . . . . . . . . . . . . . . . . . . . . . . . . . . . . 38<br />
Storing Names and Numbers. . . . . . . . . . . . . . . . . . . . . . . . . . . . . . . . . 38<br />
Finding Stored Items . . . . . . . . . . . . . . . . . . . . . . . . . . . . . . . . . . . . . . . 40<br />
Dialing . . . . . . . . . . . . . . . . . . . . . . . . . . . . . . . . . . . . . . . . . . . . . . . . . . 41<br />
4
Editing. . . . . . . . . . . . . . . . . . . . . . . . . . . . . . . . . . . . . . . . . . . . . . . . . . . 42<br />
Erasing . . . . . . . . . . . . . . . . . . . . . . . . . . . . . . . . . . . . . . . . . . . . . . . . . . 43<br />
One-Touch Dialer . . . . . . . . . . . . . . . . . . . . . . . . . . . . . . . . . . . . . . . . . . 44<br />
Storing Names and Numbers . . . . . . . . . . . . . . . . . . . . . . . . . . . . . . . . . 44<br />
Dialing a Stored Number . . . . . . . . . . . . . . . . . . . . . . . . . . . . . . . . . . . . 45<br />
Intercom . . . . . . . . . . . . . . . . . . . . . . . . . . . . . . . . . . . . . . . . . . . . . . . . . 46<br />
Paging a Designated Extension . . . . . . . . . . . . . . . . . . . . . . . . . . . . . . . 46<br />
Paging All Extensions. . . . . . . . . . . . . . . . . . . . . . . . . . . . . . . . . . . . . . . 48<br />
Transferring an External Call to Another Extension . . . . . . . . . . . . . . . . 48<br />
Room Monitor Feature . . . . . . . . . . . . . . . . . . . . . . . . . . . . . . . . . . . . . . 49<br />
Making/Answering Another Call During a Conversation . . . . . . . . . . 50<br />
Conference . . . . . . . . . . . . . . . . . . . . . . . . . . . . . . . . . . . . . . . . . . . . . . . 51<br />
Special Features . . . . . . . . . . . . . . . . . . . . . . . . . . . . . . . . . . . . . . . . . . . 52<br />
How to Use the PAUSE Button (For PBX Line/Long Distance Calls). . . 52<br />
Muting Your Conversation . . . . . . . . . . . . . . . . . . . . . . . . . . . . . . . . . . . 52<br />
For Call Waiting Service Users. . . . . . . . . . . . . . . . . . . . . . . . . . . . . . . . 52<br />
Temporary Tone Dialing (For Rotary or Pulse Service Users) . . . . . . . . 53<br />
FLASH Button. . . . . . . . . . . . . . . . . . . . . . . . . . . . . . . . . . . . . . . . . . . . . 53<br />
Incoming Call Tone. . . . . . . . . . . . . . . . . . . . . . . . . . . . . . . . . . . . . . . . . 54<br />
Line Selection. . . . . . . . . . . . . . . . . . . . . . . . . . . . . . . . . . . . . . . . . . . . . 55<br />
Setting the Password . . . . . . . . . . . . . . . . . . . . . . . . . . . . . . . . . . . . . . . 56<br />
Dial Lock. . . . . . . . . . . . . . . . . . . . . . . . . . . . . . . . . . . . . . . . . . . . . . . . . 57<br />
Call Restriction . . . . . . . . . . . . . . . . . . . . . . . . . . . . . . . . . . . . . . . . . . . . 58<br />
Call Privacy Feature . . . . . . . . . . . . . . . . . . . . . . . . . . . . . . . . . . . . . . . . 60<br />
Useful In<strong>for</strong>mation<br />
Optional Headset . . . . . . . . . . . . . . . . . . . . . . . . . . . . . . . . . . . . . . . . . . 61<br />
Connecting the Optional Headset to the Unit . . . . . . . . . . . . . . . . . . . . . 61<br />
Wall Mounting . . . . . . . . . . . . . . . . . . . . . . . . . . . . . . . . . . . . . . . . . . . . . 62<br />
Troubleshooting . . . . . . . . . . . . . . . . . . . . . . . . . . . . . . . . . . . . . . . . . . . 64<br />
Important Safety Instructions . . . . . . . . . . . . . . . . . . . . . . . . . . . . . . . . 67<br />
FCC and Other In<strong>for</strong>mation . . . . . . . . . . . . . . . . . . . . . . . . . . . . . . . . . . 69<br />
Index . . . . . . . . . . . . . . . . . . . . . . . . . . . . . . . . . . . . . . . . . . . . . . . . . . . . 71<br />
Warranty . . . . . . . . . . . . . . . . . . . . . . . . . . . . . . . . . . . . . . . . . . . . . . . . . 73<br />
Specifications . . . . . . . . . . . . . . . . . . . . . . . . . . . . . . . . . . . . . . . . . . . . . 75<br />
Preparation<br />
Basic Operation Advanced Operation Useful In<strong>for</strong>mation<br />
For assistance, please call: 1-800-211-PANA(7262)<br />
5
Location of Controls<br />
[FUNCTION/EDIT] Button<br />
(p. 19, 33)<br />
One-Touch Auto Dial Buttons<br />
[M1], [M2], [M3] (p. 44)<br />
Headset Jack (p. 61)<br />
[CLEAR] Button (p. 37, 43)<br />
[EXIT] Button (p. 19, 30, 40)<br />
[ENTER] Button (p. 15, 17)<br />
Navigator Key<br />
([▼], [▲], [ ], [ ])<br />
(p. 15, 19, 30, 40)<br />
Display (p. 8)<br />
▼<br />
▼<br />
VOLUME [ ], [ ] Buttons<br />
(p. 26)<br />
[CONF] (Conference) Button (p. 51)<br />
[HOLD] Button (p. 27, 48)<br />
[INTERCOM] Button and<br />
Indicator (p. 46, 47)<br />
[LINE 1] Button and Indicator (p. 25, 27)<br />
[LINE 2/DATA] Button and<br />
Indicator (p. 25, 27)<br />
How to use the Navigator key<br />
This key has four active areas that are indicated by arrows.<br />
• Pressing the up and down arrows allows you to enter the<br />
Caller List and scroll through the Caller List, the directory list<br />
and the function menu.<br />
• Pressing the right and left arrows allows you to enter the<br />
directory list and move the cursor when entering items.<br />
• The right arrow is used to select your menu choices.<br />
Throughout these <strong>Operating</strong> Instructions, the navigator key is indicated by<br />
the arrows [ ], [ ], [ ] or [ ].<br />
▼<br />
▼<br />
6
[PAUSE] Button (p. 52)<br />
[DIAL LOCK] Button (p. 57)<br />
[R] (TONE) Button (p. 53)<br />
[REDIAL] Button (p. 26)<br />
[PAGE] Button (p. 48)<br />
Preparation<br />
[MUTE] Button (p. 52)<br />
[FLASH] Button (p. 53)<br />
Extension Buttons and Indicators<br />
(p. 18, 46)<br />
MIC (Microphone) (p. 25, 28)<br />
[SP-PHONE (Speakerphone)/HEADSET]<br />
Button and Indicator (p. 25, 28, 61)<br />
For assistance, please call: 1-800-211-PANA(7262)<br />
7
Display<br />
1234567890123456<br />
ABCDEFGHIJKLMNOP<br />
abcdefghijklmnop<br />
(This display shows all of the possible<br />
configurations.)<br />
12:34AM 5/21[1]<br />
10 new calls<br />
12:00 1.1 [1]<br />
When the handset is on the cradle, the AC<br />
adaptor is connected and the SP-PHONE/<br />
HEADSET indicator light is off, the display<br />
shows the current time and date, the extension<br />
number, and the number of new calls if you<br />
subscribed to a Caller ID service (p. 29).<br />
If “ ” flashes on the display, the clock needs<br />
adjusting (p. 15, 16).<br />
12:34AM 5/21[1]<br />
01-06-35<br />
SMITH,JACK 1<br />
1-222-333-4444<br />
11:20AM 1/10 x3<br />
During a conversation, the display shows the<br />
length of the call (ex. 1 hour, 6 minutes and<br />
35 seconds).<br />
This is a display from the Caller List. The<br />
display shows:<br />
— the caller’s name,<br />
— the called line,<br />
— the caller’s number,<br />
— the time and date of the last call<br />
(ex. Jan. 10, 11:20 AM), and<br />
— the number of times called (ex. 3 times).<br />
P<br />
F<br />
: The dial lock mode is set (p. 57).<br />
: [MUTE] was pressed during a conversation (p. 52).<br />
: Displays when storing or viewing the directory items (p. 38, 40).<br />
: Displays while viewing the redial list (p. 26).<br />
: The battery power is low or the batteries have not been installed.<br />
To replace or install the batteries, see page 9.<br />
: [PAUSE] was pressed while dialing or storing phone numbers.<br />
: [FLASH] was pressed while storing phone numbers.<br />
8
Installation<br />
Installing the Batteries<br />
Install the three included batteries in the battery compartment. They work<br />
as emergency power during a power failure. The unit will work as a<br />
standard telephone, so that you can make or answer external calls with the<br />
handset. (You cannot use the intercom.)<br />
2<br />
1<br />
1. Press down the cover in the<br />
direction of the arrow and remove<br />
it.<br />
2. Install the batteries in proper order<br />
as shown, matching the correct<br />
polarity.<br />
3. Close the battery cover.<br />
Preparation<br />
• Please refer to page 68 <strong>for</strong> correct battery usage.<br />
• You can also install three “AA” size Alkaline (LR6) batteries.<br />
• The battery operating time may depend on usage conditions and ambient<br />
temperature.<br />
• The battery operating time during a power failure is about three weeks <strong>for</strong> the<br />
three included “AA” size Manganese (R6, UM-3) batteries. The battery operating<br />
time will be longer <strong>for</strong> three “AA” size Alkaline (LR6) batteries.<br />
• During a power failure the batteries will retain the clock memory (p. 15) and the<br />
redial memory (p. 26). If you do not install the batteries, the data in memory will be<br />
lost during a power failure.<br />
Battery replacement<br />
If “ ” flashes, the battery power is low. Replace all of the batteries with<br />
new ones.<br />
Disconnect the telephone line cord(s) be<strong>for</strong>e opening the battery cover.<br />
• You do not need to disconnect the AC adaptor, otherwise the clock memory<br />
and the redial memory will be lost. If “ ” flashes on the display, adjust the<br />
clock (p. 15, 16).<br />
• Please refer to page 68 <strong>for</strong> correct battery usage.<br />
For assistance, please call: 1-800-211-PANA(7262)<br />
9
Installation<br />
Connecting the Handset and AC Adaptor<br />
Handset<br />
Handset Cord<br />
Power Outlet<br />
(AC 120 V, 60 Hz)<br />
Power Outlet<br />
(AC 120V, 60Hz)<br />
Handset Cord<br />
Remove the wall mounting adaptor (see page<br />
62, step 2), then fasten the AC adaptor cord to<br />
prevent it from being disconnected. Attach the<br />
wall mounting adaptor again.<br />
AC Adaptor<br />
After completing all the<br />
connections (p. 10-14),<br />
plug the AC AC adaptor Adaptorinto<br />
the power outlet.<br />
LINE2/DATA<br />
LINE1/2<br />
Hook<br />
10<br />
• USE ONLY WITH <strong>Panasonic</strong> AC ADAPTOR KX-TCA1 (Order No. KX-TCA1-G).<br />
• Use only a <strong>Panasonic</strong> Handset <strong>for</strong> the KX-TS3282W.<br />
• The AC adaptor must remain connected at all times. (It is normal <strong>for</strong> the adaptor to<br />
feel warm during use.)<br />
• After you connect the AC adaptor;<br />
—the display shows “Set clock” (p. 15) <strong>for</strong> 60 seconds, and<br />
—all of the extension indicators flash until you assign the extension number of<br />
your unit (p. 17). Even if you do not use the intercom, assign the number.<br />
Otherwise all of the extension indicators will continue flashing.<br />
If you plug the AC adaptor into the power outlet without installing batteries, “ ”<br />
flashes. After you install the batteries (p. 9), “ ” disappears.<br />
During a power failure, the batteries serve as the power source (p. 9). The unit<br />
will work as a standard telephone. You can make or answer an external call with<br />
the handset. (You cannot use the intercom.)
Connecting Telephone Line Cords<br />
A maximum of eight KX-TS3282Ws can be connected in parallel. You can<br />
also connect KX-T3281W.<br />
To use the intercom, you must connect the telephone line cord to the<br />
LINE1/2 telephone jack of the unit.<br />
To connect the units to individual two-line telephone jacks<br />
Preparation<br />
Parallel Connected<br />
Two-Line Telephone Jacks (RJ14C)<br />
To another KX-TS3282W<br />
or KX-T3281W<br />
LINE2/DATA<br />
LINE1/2<br />
4-Wire Telephone Line<br />
Cord with GREEN Plugs<br />
GREEN Plug<br />
Parallel connected two-line telephone jacks<br />
• You can connect up to 8 stations (KX-TS3282W and/or KX-T3281W).<br />
• If another model telephone is connected to the KX-TS3282W except <strong>for</strong><br />
KX-T3281W, the line indicators of this unit will not function <strong>for</strong> that telephone.<br />
DSL Internet connection and KX-TS3282W Intercom work at similar<br />
frequencies. Please contact <strong>Panasonic</strong> at 1-800-211-PANA(7262) <strong>for</strong><br />
special wiring configurations.<br />
For assistance, please call: 1-800-211-PANA(7262)<br />
11
Installation<br />
• If you re-connect the telephone line cord(s), confirm that all of the extension<br />
indicators light with the AC adaptor connected, then connect the telephone line<br />
cord(s). If all of the extension indicators do not flash, the extension number has<br />
been assigned to this unit and the number might be used <strong>for</strong> another unit on the<br />
same line. Erase the previously assigned number (p. 17), then connect the<br />
telephone line cord(s). Re-assign the number to the unit (p. 17).<br />
To connect the units to a two-line telephone jack<br />
If you provide only one two-line telephone jack <strong>for</strong> the units, continue to<br />
wire them using optional <strong>Panasonic</strong> T-adaptors KX-J66. To order, call the<br />
accessories telephone number on page 3.<br />
T-Adaptor<br />
(KX-J66)<br />
T-Adaptor<br />
(KX-J66)<br />
4-Wire Telephone<br />
Line Cord with<br />
GREEN Plugs<br />
LINE2/DATA LINE1/2 LINE2/DATA LINE1/2<br />
LINE 1<br />
LINE 2<br />
Two-Line<br />
Telephone Jack<br />
(RJ14C)<br />
GREEN<br />
Plug<br />
GREEN<br />
Plug<br />
4-Wire Telephone Line Cord<br />
with GREEN Plugs<br />
GREEN<br />
Plug<br />
GREEN<br />
Plug<br />
To another KX-TS3282W<br />
or KX-T3281W<br />
4-Wire Telephone<br />
Line Cord with<br />
GREEN Plugs<br />
DSL Internet connection and KX-TS3282W Intercom work at similar<br />
frequencies. Please contact <strong>Panasonic</strong> at 1-800-211-PANA(7262) <strong>for</strong><br />
special wiring configurations.<br />
12
To connect the units to two single-line telephone jacks<br />
If you provide only two single-line telephone jacks <strong>for</strong> the units, continue to<br />
wire them using optional <strong>Panasonic</strong> T-adaptors KX-J66. To order, call the<br />
accessories telephone number on page 3.<br />
Preparation<br />
4-Wire Telephone<br />
Line Cord with<br />
GREEN Plugs<br />
T-Adaptor<br />
(KX-J66)<br />
LINE 2<br />
T-Adaptor<br />
(KX-J66)<br />
LINE2/DATA LINE1/2 LINE2/DATA LINE1/2<br />
Single-Line<br />
Telephone<br />
Jacks (RJ11C)<br />
LINE 1<br />
2-Wire Telephone<br />
Line Cord with<br />
TRANSPARENT<br />
Plugs<br />
GREEN<br />
Plug<br />
TRANS-<br />
PARENT<br />
Plug<br />
GREEN<br />
Plug<br />
4-Wire Telephone Line Cord<br />
with GREEN Plugs<br />
GREEN<br />
Plug<br />
4-Wire Telephone<br />
Line Cord with<br />
GREEN Plugs<br />
GREEN<br />
Plug<br />
To another<br />
KX-TS3282W<br />
or KX-T3281W<br />
• If you do not connect other extensions, you do not need to use a T-adaptor.<br />
Connect a 2-wire telephone line cord to the LINE1/2 telephone jack of the unit<br />
directly.<br />
DSL Internet connection and KX-TS3282W Intercom work at similar<br />
frequencies. Please contact <strong>Panasonic</strong> at 1-800-211-PANA(7262) <strong>for</strong><br />
special wiring configurations.<br />
For assistance, please call: 1-800-211-PANA(7262)<br />
13
Installation<br />
Connecting a Communication Device<br />
After connecting the telephone line cord to a two-line telephone jack, you<br />
can connect a communication device (computer, modem, fax, answering<br />
machine, etc.) through this unit using the LINE2/DATA jack.<br />
• Computer<br />
• Modem<br />
• Fax<br />
• Answering Machine<br />
2-Wire Telephone<br />
Line Cord with<br />
TRANSPARENT<br />
Plugs<br />
LINE2/DATA<br />
LINE1/2<br />
TRANSPARENT<br />
Plug<br />
GREEN<br />
Plug<br />
4-Wire Telephone<br />
Line Cord with<br />
GREEN Plugs<br />
Two-Line<br />
Telephone Jack<br />
(RJ14C)<br />
• If the communication device is in use, use LINE 1 to make or answer other calls.<br />
Otherwise the communication device may not operate properly.<br />
14
Programmable Settings<br />
Time and Date<br />
You can select 12-hour clock (AM/PM) or 24-hour clock by programming.<br />
Make sure that the handset is on the cradle, the AC adaptor is connected<br />
and the SP-PHONE/HEADSET indicator light is off.<br />
After the AC adaptor is connected, the display<br />
will show “Set clock” <strong>for</strong> 60 seconds.<br />
• If the display exits the set clock menu, press<br />
[FUNCTION/EDIT], then scroll to “Set clock” by<br />
pressing [ ] or [ ].<br />
-<br />
1<br />
2<br />
3<br />
Press [ ] or [ENTER] (Yes key).<br />
(1) Enter the time (hour and minute) Ex. Time: 09:30<br />
using [ ], [ ] and [ ].<br />
09:30AM 01/01<br />
• You can scroll to the desired hour/<br />
2002<br />
ENTER=Save<br />
minute by pressing [ ] or [ ].<br />
To move <strong>for</strong>ward, press [ ]. To move<br />
backward, press [ ].<br />
• For 12-hour clock, enter “0100” to “1259”.<br />
For 24-hour clock, enter “0000” to “2359”.<br />
• If you entered “00” or between “13” and “23”<br />
<strong>for</strong> the hour, enter the minute and press<br />
[ ], then go to step 3.<br />
• You can also enter the time using the<br />
dialing buttons ([0] to [9]).<br />
(2) For 12-hour clock, select “AM” or 09:30PM 01/01<br />
“PM” by pressing [ ] or [ ], and<br />
2002<br />
press [ ].<br />
ENTER=Save<br />
For 24-hour clock, if the hour is<br />
between 1 and 12, erase “AM” or<br />
“PM” by pressing [ ] or [ ], and press [ ].<br />
▼<br />
• You can also select “AM” or “PM” or<br />
erase it by pressing [ ].<br />
Enter the month and day using [ ], [ ]<br />
and [ ].<br />
▼<br />
▼<br />
Set clock<br />
ENTER=Yes<br />
• You can scroll to the desired month/day<br />
ENTER=Save<br />
by pressing [ ] or [ ]. To move <strong>for</strong>ward,<br />
press [ ]. To move backward, press [ ].<br />
• You can also enter the month/day using the dialing buttons ([0] to [9]).<br />
▼<br />
▼<br />
▼<br />
▼<br />
▼<br />
▼<br />
▼<br />
12:00AM 01/01 2002<br />
ENTER=Save<br />
▼<br />
▼<br />
▼<br />
▼<br />
▼<br />
▼<br />
▼<br />
Ex. Dec. 27<br />
09:30PM 12/27 2002<br />
▼<br />
▼<br />
Preparation<br />
For assistance, please call: 1-800-211-PANA(7262)<br />
(Continued )<br />
15
4<br />
5<br />
Programmable Settings<br />
Enter the year using [ ] and [ ].<br />
• You can select the year between 2000<br />
and 2099.<br />
• You can also select the year entering the<br />
last 2-digits using the dialing buttons ([0]<br />
to [9]).<br />
09:30PM 12/27 2002<br />
ENTER=Save<br />
Press [ENTER] (Save key).<br />
Extension#<br />
• A beep sounds.<br />
12345678 Erase<br />
ENTER=Save<br />
• The clock starts working.<br />
• If 3 beeps are heard, the setting is not<br />
correct. Start again from step 2.<br />
• The display will go to the extension<br />
number assigning menu as shown on the<br />
right if you had started programming<br />
within 60 seconds after plugging in the<br />
AC adaptor. The menu will remain <strong>for</strong> 60<br />
seconds. To assign a number, see page<br />
17, from step 4.<br />
• You can exit the programming mode any time by pressing [EXIT].<br />
▼<br />
▼<br />
▼<br />
▼<br />
If a power failure occurs, the adjusted time/date will be retained by installing the<br />
batteries (p. 9). Readjust if “ ” flashing on the display.<br />
To adjust the time and date<br />
1. Press [FUNCTION/EDIT].<br />
2. Scroll to “Set clock” by pressing [ ] or<br />
[ ], and press [ ].<br />
▼<br />
▼<br />
Caller ID edit<br />
Set clock<br />
Assign EXT#<br />
3. Adjust the time and date, using [ ], [ ], [ ]<br />
or [ ].<br />
▼<br />
4. Press [ENTER] (Save key).<br />
▼<br />
For Caller ID service users (p. 29)<br />
• The Caller ID in<strong>for</strong>mation will reset the clock after the first ring if the adjusted<br />
time is incorrect.<br />
• If the clock has not previously been set, the Caller ID in<strong>for</strong>mation will not adjust<br />
the clock.<br />
• The Caller ID in<strong>for</strong>mation will automatically adjust the clock <strong>for</strong> daylight saving<br />
time.<br />
16
Assigning the Extension Number<br />
Assign the extension number to the unit to use the intercom feature.<br />
Make sure that the unit has been connected to other units (KX-TS3282W<br />
and/or KX-T3281W) in parallel (p. 11-13) be<strong>for</strong>e programming.<br />
Make sure that the handset is on the cradle, the AC adaptor is<br />
connected and the SP-PHONE/HEADSET indicator light is off.<br />
1<br />
2<br />
3<br />
4<br />
5<br />
Press [FUNCTION/EDIT].<br />
Scroll to “Assign EXT#” by pressing [ ]<br />
or [ ].<br />
Press [ ].<br />
▼<br />
• The numbers (1 to 8) that have already<br />
been assigned to other units are not<br />
displayed.<br />
Press [ ] or [ ] to move the cursor to<br />
select the extension number (1 to 8).<br />
▼<br />
▼<br />
Press [ENTER] (Save key).<br />
• A beep sounds.<br />
–––––––––––––––<br />
Save M1,M2,M3<br />
Save directory<br />
1<br />
• The extension number ([1] to [8]) is shown on the<br />
right.<br />
• You can exit the programming mode any time by pressing [EXIT].<br />
• To change the extension number, start from step 1. The previous memory will be<br />
erased.<br />
• To exchange the extension numbers between two units, erase each number (see<br />
below), then re-assign the number to each unit.<br />
▼<br />
▼<br />
Set clock<br />
Assign EXT#<br />
–––––––––––––––<br />
Extension#<br />
12345678 Erase<br />
ENTER=Save<br />
▼<br />
▼<br />
Ex. Extension number 1<br />
Extension#<br />
Preparation<br />
After you connect the AC adaptor (p. 10), all of the extension indicators flash<br />
until you assign the extension number of your unit. Even if you do not use the<br />
intercom, assign the number. Otherwise all of the extension indicators will<br />
continue flashing.<br />
To erase the extension number<br />
Repeat steps 1 to 3, and select “Erase” by pressing [<br />
(Save key).<br />
•“Extension# Not assign ” is displayed.<br />
• All extension indicators flash until you assign a number to the unit.<br />
▼<br />
]. Press [ENTER]<br />
For assistance, please call: 1-800-211-PANA(7262)<br />
17
Programmable Settings<br />
What the extension indicators mean<br />
Off<br />
On<br />
The extension is not in use.<br />
The extension is in use.<br />
Memory card<br />
Remove the memory card and use it as a name index <strong>for</strong> extensions.<br />
Cover<br />
Memory Card<br />
18
Programming Summary<br />
You can program the following functions from the menu. After pressing<br />
[FUNCTION/EDIT], the main menu will be displayed first. If the main menu<br />
item has the sub-menu, it will be displayed. See the corresponding pages<br />
<strong>for</strong> function details.<br />
Make sure that the handset is on the cradle, the AC adaptor is connected<br />
and the SP-PHONE/HEADSET indicator light is off.<br />
Preparation<br />
Press [FUNCTION/EDIT].<br />
<br />
–––––––––––––––<br />
Save M1,M2,M3 . . . . . p. 44<br />
Save directory . . . . p. 38<br />
LCD contrast . . . . . . p. 21<br />
Ringer setting<br />
▼<br />
• Scroll to a desired item by pressing<br />
[ ] or [ ], and press [ ].<br />
<br />
–––––––––––––––<br />
Ringer volume . . . . . p. 22<br />
Ringer pattern . . . . p. 23<br />
Incoming call . . . . . p. 54<br />
–––––––––––––––<br />
▼<br />
▼<br />
Change password . . . p. 56<br />
Dial setting<br />
Line setting<br />
Caller ID edit . . . . p. 35<br />
Set clock. . . . . . . . . . p. 15<br />
Assign EXT# . . . . . . . p. 17<br />
–––––––––––––––<br />
–––––––––––––––<br />
Set dial mode . . . . . p. 20<br />
Set flash time . . . . p. 53<br />
Call restrict . . . . . p. 58<br />
–––––––––––––––<br />
–––––––––––––––<br />
Line selection . . . . p. 55<br />
Call barge in . . . . . p. 60<br />
–––––––––––––––<br />
During programming<br />
• To select a desired function item, scroll through the menu by pressing [ ] or [ ].<br />
Then press [ ] to go to the next step.<br />
•“–––––––––––––––” indicates the beginning or end of the function menu.<br />
• You can exit the programming mode any time by pressing [EXIT].<br />
• If you do not press any buttons <strong>for</strong> 60 seconds, the unit will exit the programming<br />
mode.<br />
▼<br />
▼<br />
▼<br />
For assistance, please call: 1-800-211-PANA(7262)<br />
19
Programmable Settings<br />
Dialing Mode<br />
If you have touch tone service, set to Tone. If rotary or pulse service is<br />
used, set to Pulse. Your phone comes from the factory set to Tone.<br />
Make sure that the handset is on the cradle, the AC adaptor is connected<br />
and the SP-PHONE/HEADSET indicator light is off.<br />
1<br />
Press [FUNCTION/EDIT].<br />
▼<br />
–––––––––––––––<br />
Save M1,M2,M3<br />
Save directory<br />
2<br />
3<br />
4<br />
5<br />
6<br />
Scroll to “Dial setting” by pressing<br />
[ ] or [ ].<br />
Press [ ].<br />
▼<br />
Press [ ] at “Set dial mode”.<br />
▼<br />
• The current setting is displayed.<br />
Select “Pulse” or “Tone” by pressing<br />
[ ] or [ ].<br />
Press [ENTER] (Save key).<br />
• A beep sounds.<br />
• To exit the programming mode, press<br />
[EXIT].<br />
▼<br />
▼<br />
Change password<br />
Dial setting<br />
Line setting<br />
–––––––––––––––<br />
Set dial mode<br />
Set flash time<br />
Dial mode :Tone<br />
ENTER=Save<br />
• You can exit the programming mode any time by pressing [EXIT].<br />
20
LCD Contrast<br />
You can select the LCD contrast level from 1 to 4 by programming. To make<br />
the display clearer, set to high level. Your phone comes from the factory set<br />
to 3.<br />
Make sure that the handset is on the cradle, the AC adaptor is connected<br />
and the SP-PHONE/HEADSET indicator light is off.<br />
1<br />
Press [FUNCTION/EDIT].<br />
▼<br />
–––––––––––––––<br />
Save M1,M2,M3<br />
Save directory<br />
Preparation<br />
2<br />
3<br />
4<br />
5<br />
Scroll to “LCD contrast” by pressing<br />
[ ] or [ ].<br />
Press [ ].<br />
▼<br />
• The current setting is displayed.<br />
•“■ ■” shows one level.<br />
Select the desired LCD contrast by<br />
pressing [ ] or [ ].<br />
• Each time you press [ ] or [ ], the LCD<br />
contrast will change.<br />
Press [ENTER] (Save key).<br />
• A beep sounds.<br />
• To exit the programming mode, press<br />
[EXIT].<br />
▼<br />
Save directory<br />
LCD contrast<br />
Ringer setting<br />
Ex. Level 3<br />
LCD contrast<br />
Low ■ ■ ■ ■ ■ ■ High<br />
ENTER=Save<br />
• You can exit the programming mode any time by pressing [EXIT].<br />
For assistance, please call: 1-800-211-PANA(7262)<br />
21
22<br />
Programmable Settings<br />
Ringer Volume<br />
You can select the ringer volume <strong>for</strong> each external line and the intercom<br />
line individually. Set to HIGH, LOW, or OFF. If set to OFF <strong>for</strong> Line 1 and/or<br />
Line 2, the unit will not ring <strong>for</strong> the line(s). If the ringer <strong>for</strong> the intercom line<br />
is OFF, the unit will not ring <strong>for</strong> intercom calls. Your phone comes from the<br />
factory set to HIGH.<br />
Make sure that the handset is on the cradle, the AC adaptor is connected<br />
and the SP-PHONE/HEADSET indicator light is off.<br />
1<br />
2<br />
3<br />
4<br />
5<br />
6<br />
Press [FUNCTION/EDIT].<br />
Scroll to “Ringer setting” by<br />
pressing [ ] or [ ].<br />
Press [ ].<br />
Press [ ] at “Ringer volume”.<br />
Select each ringer volume:<br />
(1) Select “L1”, “L2” or<br />
“Intercom” by pressing [<br />
] or<br />
[ ].<br />
(2) Select the desired volume by<br />
pressing [ ] or [ ].<br />
▼<br />
▼<br />
▼<br />
• Each time you press [ ] or [ ],<br />
the volume will change and ring.<br />
• To turn the ringer OFF, press<br />
[ ] repeatedly until “Ringer<br />
off” is displayed.<br />
Press [ENTER] (Save key).<br />
• A beep sounds.<br />
• To exit the programming mode, press<br />
[EXIT].<br />
To turn the ringer ON:<br />
Repeat steps 1 to 4, and select “L1”, “L2” or “Intercom”.<br />
Press [ ], and press [ENTER] (Save key).<br />
▼<br />
• The ringer will sound at the LOW level <strong>for</strong> the line.<br />
▼<br />
▼<br />
▼<br />
–––––––––––––––<br />
Save M1,M2,M3<br />
Save directory<br />
LCD contrast<br />
Ringer setting<br />
Change password<br />
–––––––––––––––<br />
Ringer volume<br />
Ringer pattern<br />
Ex. Line 1 is selected.<br />
Ringer volume<br />
HIGH L1 L2 Intercom<br />
Low ■ ■ ■ ■ ■ ■ High<br />
LOW<br />
OFF<br />
Ringer volume<br />
L1 L2 Intercom<br />
Low ■ ■ ■ High<br />
Ringer volume<br />
L1 L2 Intercom<br />
Ringer off
• You can exit the programming mode any time by pressing [EXIT].<br />
• If set to OFF, “Ringer off” with the line(s) (“ 1 ”, “ 2 ” and/or “INT”) is(are)<br />
displayed while the unit is not in use (standby mode).<br />
• You can also change each ringer volume while the unit is just ringing <strong>for</strong> the<br />
external/intercom line, by pressing VOLUME [ ] or [ ]. To turn the ringer OFF,<br />
press and hold VOLUME [ ].<br />
• You can change the ringer tone <strong>for</strong> Line 1, Line 2 and Intercom individually<br />
(see below).<br />
Ringer Pattern<br />
<<br />
><br />
<<br />
You can select one of eight ringer tones <strong>for</strong> Line 1, Line 2 and Intercom<br />
individually. For Intercom you can select another ringer pattern (Voice<br />
mode, Auto Answer mode or Room Monitor mode), instead of the ringer<br />
tone.<br />
Line 1 is preset to “1”, Line 2 is preset to “2” and Intercom is preset to “3”.<br />
Preparation<br />
Ringer pattern<br />
Ringer tone (1 to 8)<br />
Voice mode<br />
(<strong>for</strong> Intercom only)<br />
Auto Answer mode<br />
(<strong>for</strong> Intercom only)<br />
Room Monitor mode<br />
(<strong>for</strong> Intercom only)<br />
How the unit works when a call is being received.<br />
The unit rings with the selected ringer tone.<br />
Two short beeps sound, then you are paged with<br />
the caller’s voice instead of the bell. To answer<br />
the page, press [SP-PHONE/HEADSET] or lift<br />
the handset.<br />
Two short beeps sound, then the speakerphone<br />
turns on automatically, in response to the page.<br />
Without pressing any button, 2-way intercom<br />
with the paging party is established.<br />
Selecting the Room Monitor mode allows<br />
another extension user to monitor through your<br />
unit. Another extension can call your unit to<br />
monitor a room through it (p. 49). Your unit will<br />
not ring and the SP-PHONE/HEADSET<br />
indicator will light. If you want to prevent your<br />
unit from being monitored by other extensions,<br />
do not select this mode.<br />
• When a paging extension pages all extensions, this ringer pattern setting is not<br />
applicable (p. 48).<br />
(Continued )<br />
For assistance, please call: 1-800-211-PANA(7262)<br />
23
Programmable Settings<br />
Make sure that the handset is on the cradle, the AC adaptor is connected<br />
and the SP-PHONE/HEADSET indicator light is off.<br />
1<br />
Press [FUNCTION/EDIT].<br />
▼<br />
–––––––––––––––<br />
Save M1,M2,M3<br />
Save directory<br />
2<br />
3<br />
4<br />
5<br />
6<br />
7<br />
Scroll to “Ringer setting” by<br />
pressing [ ] or [ ].<br />
Press [ ].<br />
▼<br />
Scroll to “Ringer pattern” by<br />
pressing [ ] or [ ].<br />
Press [ ].<br />
▼<br />
• The current settings are displayed.<br />
Select the desired ringer tone (1 to 8) by<br />
pressing [ ] or [ ] <strong>for</strong> each line.<br />
For Intercom you can select the ringer<br />
tone (1 to 8), “Voice”, “Auto Ans.”<br />
(Auto Answer) or “RoomMntr” (Room<br />
Monitor).<br />
To move to another line, press [ ] or [ ].<br />
• Each time you press [ ] or [ ], the ringer<br />
tone will change and ring. If the ringer<br />
volume has been set to OFF <strong>for</strong> the line,<br />
the unit will not ring (p. 22).<br />
Press [ENTER] (Save key).<br />
▼<br />
• A beep sounds.<br />
• To exit the programming mode, press<br />
[EXIT].<br />
▼<br />
▼<br />
▼<br />
▼<br />
LCD contrast<br />
Ringer setting<br />
Change password<br />
–––––––––––––––<br />
Ringer volume<br />
Ringer pattern<br />
Ringer volume<br />
Ringer pattern<br />
Incoming call<br />
Ringer pattern<br />
L1 L2 Intercom<br />
1 2 3<br />
Ringer pattern<br />
L1 L2 Intercom<br />
1 2 Auto Ans.<br />
• You can exit the programming mode any time by pressing [EXIT].<br />
24
Making Calls<br />
The unit will automatically select a free line when you lift the handset to<br />
make a call. (To change the line selection, see page 55.) To hang up, place<br />
the handset on the cradle.<br />
[LINE 1] and Indicator<br />
[LINE 2/DATA] and Indicator<br />
VOLUME [<br />
], [V]<br />
Using the speakerphone<br />
1<br />
2<br />
3<br />
4<br />
Press [SP-PHONE/HEADSET].<br />
• The SP-PHONE/HEADSET indicator<br />
lights.<br />
• A free line is automatically selected and<br />
the line indicator lights.<br />
Dial a phone number.<br />
• The dialed number is displayed.<br />
• After a few seconds, the display will show<br />
the length of the call.<br />
• If you misdial, press [SP-PHONE/<br />
HEADSET] and start again from step 1.<br />
When the other party answers, talk into<br />
the MIC (microphone).<br />
To hang up, press<br />
[SP-PHONE/HEADSET].<br />
MIC<br />
[HOLD]<br />
[SP-PHONE/HEADSET] and Indicator<br />
12:34PM 11/24[1]<br />
00-00-00<br />
12:34PM 11/24[1]<br />
1234567890<br />
12:34PM 11/24[1]<br />
00-00-12<br />
12:35PM 11/24[1]<br />
00-01-10<br />
• The SP-PHONE/HEADSET and the line<br />
indicator lights go out.<br />
• The length of the call will remain on the<br />
display <strong>for</strong> a few seconds.<br />
• In step 1, you can select a line by pressing a line button whose indicator is not lit,<br />
instead of pressing [SP-PHONE/HEADSET].<br />
For assistance, please call: 1-800-211-PANA(7262)<br />
25<br />
Basic Operation
Making Calls<br />
26<br />
During speakerphone operation<br />
For best per<strong>for</strong>mance, please note the following:<br />
• Talk alternately with the other party in a quiet room.<br />
• If the other party has difficulty hearing you, press VOLUME [ ] to decrease the<br />
speaker volume.<br />
• You can switch to the handset by lifting it up. To switch back to the<br />
speakerphone, press [SP-PHONE/HEADSET]. You can place the handset on<br />
the cradle.<br />
To adjust the handset volume (4 levels) or the speaker<br />
volume (8 levels) while talking<br />
To increase, press VOLUME [ ]. To decrease, press VOLUME [ ].<br />
><br />
• The display shows the volume level <strong>for</strong> a few seconds.<br />
To redial the last number dialed<br />
Lift the handset or press [SP-PHONE/HEADSET] or a line button, and<br />
press [REDIAL].<br />
To redial using the redial list (Memory Redial)<br />
The last 10 phone numbers dialed are stored in the redial list.<br />
1. Press [REDIAL].<br />
234-5678<br />
• The last dialed number and “ ” are<br />
displayed.<br />
• When the number dialed has been stored in<br />
the directory or One-Touch Dialer, the name<br />
is also displayed.<br />
2. Scroll to the desired number by pressing [ ] or [ ].<br />
• You can also scroll down through the list by pressing [REDIAL].<br />
• When you scroll to the most recent item, two short beeps sound.<br />
• To exit the list, press [EXIT].<br />
3. Lift the handset or press [SP-PHONE/HEADSET] or a line button.<br />
• To erase an item, repeat steps 1 and 2, and press [CLEAR].<br />
• If “No items stored ” is displayed, the list is empty.<br />
<<br />
Ex. Handset volume level: 2 Ex. Speaker volume level: 3<br />
Loud<br />
Loud<br />
Low ■ ■ ■ ■ High Low ■ ■ ■ High<br />
“■ ■” shows one level. “■” shows one level.<br />
To put a call on hold<br />
Press [HOLD] during a conversation.<br />
• The line indicator light flashes.<br />
• If using the handset, you can place it on the<br />
cradle.<br />
• To transfer the call to another extension, see<br />
page 48.<br />
Hold<br />
Press EXT1~EXT8<br />
to transfer<br />
To release the hold<br />
Press the line button.<br />
• The other extension users can release the hold by pressing the line button.<br />
• If a phone other than KX-TS3282W or KX-TS3281W is connected on the same<br />
line, you can also release the hold by lifting the handset.<br />
What the line indicators (LINE 1 and LINE 2) mean<br />
Off<br />
On<br />
Flashing twice every 2 seconds<br />
Flashing<br />
Flashing quickly<br />
The line is free.<br />
You are using the line.<br />
Another extension is using the line.<br />
You place the call on hold.<br />
A call is being received.<br />
Basic Operation<br />
For assistance, please call: 1-800-211-PANA(7262)<br />
27
Answering Calls<br />
When a call is being received, the unit rings and the called line indicator<br />
flashes quickly. “Incoming call” and the line are displayed. You can<br />
answer a call by simply lifting the handset. (To change the line selection,<br />
see page 55.)<br />
If you subscribe to a Caller ID service, the calling party’s in<strong>for</strong>mation will be<br />
displayed after the first ring (p. 29). In order to view the Caller ID<br />
in<strong>for</strong>mation, please wait until the second ring to answer a call.<br />
Using the speakerphone<br />
1<br />
2<br />
3<br />
Press [SP-PHONE/HEADSET].<br />
• The SP-PHONE/HEADSET indicator lights.<br />
• The line indicator stops flashing and remains lit.<br />
Talk into the MIC (microphone).<br />
To hang up, press [SP-PHONE/HEADSET].<br />
• The SP-PHONE/HEADSET indicator and the line indicator lights go out.<br />
Line Buttons and Indicators<br />
MIC<br />
[SP-PHONE/HEADSET] and Indicator<br />
• You can answer a call by pressing the called line button, instead of pressing<br />
[SP-PHONE/HEADSET].<br />
• To transfer the call to another extension, see page 48.<br />
• When the ringer volume <strong>for</strong> a selected line is set to OFF (p. 22), the unit will not<br />
ring when that line is called.<br />
28
Caller ID Service<br />
This unit is compatible with a Caller ID service offered by your telephone<br />
company. If you subscribe to a Caller ID service, the calling party’s<br />
in<strong>for</strong>mation will be displayed after the first ring.<br />
The unit can record in<strong>for</strong>mation of up to 50 different callers <strong>for</strong> both lines<br />
combined, including the time and date received, the called line, and the<br />
number of times called, in the Caller List. The Caller List in<strong>for</strong>mation is<br />
sorted from the most recent to the oldest call. When the 51st call is<br />
received, the oldest call is deleted.<br />
Using the list, you can automatically call back a caller. You can store the<br />
callers’ names and numbers from the Caller List into the directory or the<br />
One-Touch Dialer memory.<br />
If you subscribe to both Caller ID and Call Waiting services, when a second<br />
call is received on the same line while talking, the new caller’s name and<br />
phone number will be displayed (p. 52).<br />
How caller in<strong>for</strong>mation is displayed when a call is<br />
received<br />
The display shows the caller’s name, phone<br />
number and the called line after the first ring.<br />
• After you answer the call, the display will<br />
show the length of the call.<br />
ROBINSON,TINA<br />
1-000-222-3333<br />
---- Line1 -----<br />
Basic Operation<br />
• If both lines receive calls at the same time, each caller’s in<strong>for</strong>mation will be<br />
displayed alternately.<br />
• Caller in<strong>for</strong>mation will not be displayed in the following cases:<br />
—If the caller dialed from an area which does not provide a Caller ID service, the<br />
display will show “Out of area”.<br />
—If the caller has requested not to display his/her in<strong>for</strong>mation, the display will<br />
show “Private caller”.<br />
—If a long distance call is identified, and the caller’s name and/or number cannot<br />
be received, the display will show “Long distance”.<br />
• The name display service may not be available in some areas. For further<br />
in<strong>for</strong>mation, please contact your telephone company.<br />
• If your unit is connected to a PBX which does not support Caller ID services, you<br />
cannot access those services.<br />
For assistance, please call: 1-800-211-PANA(7262)<br />
29
Using the Caller List<br />
If you have received new calls, the number of<br />
new calls will be displayed as shown on the<br />
right, while the unit is not in use (standby<br />
mode).<br />
Ex. Received 10 new calls<br />
12:34AM 5/21[1]<br />
10 new calls<br />
Viewing the Caller List<br />
Make sure that the handset is on the cradle, the AC adaptor is<br />
connected and the SP-PHONE/HEADSET indicator light is off.<br />
To check who has called, follow the steps below.<br />
1<br />
2<br />
3<br />
Press [ ] or [ ] to enter the Caller List.<br />
• For example, the display on the right will<br />
show.<br />
• You can go to the directory list by<br />
pressing [ ] (p. 40).<br />
▼<br />
To search from the most recent call,<br />
press [ ].<br />
• To search from the oldest call, press [ ].<br />
• To scroll between callers, press [ ] or<br />
[ ].<br />
To exit the Caller List, press [EXIT].<br />
Caller list<br />
10 new calls<br />
=Directory<br />
• If “No items stored” is displayed, the Caller List is empty.<br />
• If more than one call is received from the same caller, the time and date of the<br />
most recent call will be recorded.<br />
• If you do not press any buttons <strong>for</strong> 60 seconds, the unit will exit the Caller List.<br />
▼<br />
30
Ex. When you search from the most recent call:<br />
Press [ ] or [ ] to enter the Caller List.<br />
Caller list<br />
2 new calls<br />
=Directory<br />
▼<br />
Press [ ].<br />
SMITH,JACK<br />
1-222-333-4444<br />
11:50AM 11/24<br />
Press [ ].<br />
BROWN,NANCY 2<br />
222-3333<br />
10:50AM 11/23 X4<br />
Press [ ].<br />
TURNER,CINDY<br />
1-234-456-7890<br />
10:00AM 11/22 √<br />
1<br />
1<br />
• If there is no name in<strong>for</strong>mation <strong>for</strong> a<br />
caller, the display will only show the<br />
phone number.<br />
To return to the previous caller,<br />
press [ ].<br />
To exit the Caller List, press [EXIT].<br />
Basic Operation<br />
Press [ ].<br />
Caller list<br />
0 new call<br />
=Directory<br />
▼<br />
Press [ ].<br />
Display meaning:<br />
X2–X9: The number of times the same caller called (up to 9). After<br />
checking, “X2” to “X9” will be replaced with “√”.<br />
√: You have checked this caller in<strong>for</strong>mation, answered the call or<br />
called back the caller.<br />
1, 2:<br />
Indication of which line the caller in<strong>for</strong>mation was received<br />
For assistance, please call: 1-800-211-PANA(7262)<br />
31
Using the Caller List<br />
Calling Back from the Caller List<br />
1<br />
Press [ ] or [ ] to enter the Caller List.<br />
Caller list<br />
3 new calls<br />
=Directory<br />
▼<br />
2<br />
3<br />
Scroll to the desired caller by pressing<br />
[ ] or [ ].<br />
• To exit the Caller List, press [EXIT].<br />
Lift the handset or press<br />
[SP-PHONE/HEADSET] or a line button.<br />
• The displayed phone number is dialed<br />
automatically.<br />
• After a few seconds, the display will show<br />
the length of the call.<br />
TURNER,CYNDY 1<br />
1-234-456-7890<br />
10:50AM 11/23 X4<br />
12:34PM 11/25 [1]<br />
1234567890<br />
12:34PM 11/25 [1]<br />
00-00-09<br />
• In some cases, you may have to edit the number be<strong>for</strong>e dialing (p. 33–35).<br />
(Ex. You may have to delete “1” and the area code.)<br />
• If a phone number is not displayed in the caller in<strong>for</strong>mation, you cannot call back<br />
that caller.<br />
• If the line selection is “Auto” (p. 55), the indicated line will be selected by lifting the<br />
handset off the cradle or pressing [SP-PHONE/HEADSET], in step 3. If the<br />
indicated line is already being used, select the other line by pressing the line<br />
button.<br />
32
Editing the Caller’s Phone Number<br />
You can edit a phone number into one of 3 patterns [see below (a), (b) and<br />
(c) on this page] to call back or store it into the directory or the One-Touch<br />
Dialer memory (p. 36).<br />
The Caller ID Number Auto Edit Feature (p. 34, 35)<br />
This feature will allow the unit to edit a Caller ID number into one of 3<br />
patterns you desired <strong>for</strong> you automatically in the Caller List. For details<br />
and activation please see pages 34 and 35.<br />
1<br />
2<br />
3<br />
4<br />
Press [ ] or [ ] to enter the<br />
Caller List.<br />
Scroll to the desired caller by<br />
pressing [ ] or [ ].<br />
Press [FUNCTION/EDIT] to<br />
select a pattern.<br />
• Each time you press<br />
[FUNCTION/EDIT], the number is<br />
rearranged into one of 3 patterns.<br />
(a) Phone no. (7 digit pattern)<br />
(b) Area code – Phone no.<br />
(10 digit pattern)<br />
(c) 1– Area code – Phone no.<br />
(11 digit pattern)<br />
• The order in which patterns (a)–(c)<br />
are displayed depends on how the<br />
telephone number is displayed in<br />
step 2.<br />
Caller list<br />
3 new calls<br />
=Directory<br />
After editing, you can continue with calling back or storing<br />
procedures.<br />
To call back, lift the handset or press [SP-PHONE/HEADSET] or a<br />
line button (p. 32).<br />
To store the number in the directory or One-Touch Dialer memory,<br />
press [ENTER]. Then follow the instructions on the display (see page<br />
36, from step 4).<br />
(a)<br />
(b)<br />
(c)<br />
▼<br />
PARKER,FRED 1<br />
1-234-321-5555<br />
10:50AM 11/23 X4<br />
321-5555<br />
ENTER=Save<br />
234-321-5555<br />
ENTER=Save<br />
1-234-321-5555<br />
ENTER=Save<br />
Basic Operation<br />
For assistance, please call: 1-800-211-PANA(7262)<br />
33
Using the Caller List<br />
The Caller ID Number Auto Edit Feature<br />
There are 3 patterns of phone number [(a), (b), and (c), p. 33]. This feature<br />
allows your phone to automatically edit an in-coming Caller ID number into<br />
one pattern you preferred, and display the Caller ID number with that<br />
pattern automatically.<br />
After this feature is activated, Caller ID numbers coming from considered<br />
area codes (201, <strong>for</strong> example), from which the Caller ID numbers have<br />
been chosen to follow the desired pattern (7 digit pattern, <strong>for</strong> example), will<br />
be automatically edited from other patterns (11 digit pattern, <strong>for</strong> example)<br />
into the same pattern you have previously selected (which is 7 digit pattern,<br />
in the example).<br />
Up to 4 area codes are allowed <strong>for</strong> this feature <strong>for</strong> pattern (a), (b) and (c)<br />
(p. 33).<br />
To activate this feature, you must (1) set this feature to on, and (2) make an<br />
out-going call from Caller List (p. 33) with a number which has one of 3<br />
patterns that you have edited with considered area code, and that you<br />
prefer to be followed by future Caller ID numbers, so that in the future all<br />
the Caller ID numbers coming from the same area code will be displayed in<br />
the same pattern.<br />
The Caller ID number Auto Edit feature is preset to ON at factory.<br />
• If you fail to reach your destination when making the call, the phone number you<br />
dialed might have an incorrect pattern, please edit the phone number with another<br />
pattern (p. 33).<br />
For example, if you move to another area, you may need to turn this feature<br />
to OFF to erase previously edited area codes. Then, if still needed, you<br />
may activate this feature again.<br />
34
Make sure that the handset is on the cradle, the AC adaptor is connected<br />
and the SP-PHONE/HEADSET indicator light is off.<br />
1<br />
Press [FUNCTION/EDIT].<br />
▼<br />
–––––––––––––––<br />
Save M1,M2,M3<br />
Save directory<br />
2<br />
Scroll to “Caller ID edit” by pressing<br />
[ ] or [ ].<br />
▼<br />
Line setting<br />
Caller ID edit<br />
Set clock<br />
3<br />
4<br />
5<br />
Press [ ].<br />
▼<br />
• The current setting is displayed.<br />
Select “On” or “Off” by pressing [ ] or<br />
[ ].<br />
Press [ENTER] (Save key).<br />
• A beep sounds.<br />
• To exit the programming mode, press<br />
[EXIT].<br />
Auto edit<br />
:On<br />
ENTER=Save<br />
Basic Operation<br />
• You can exit the programming mode any time by pressing [EXIT].<br />
• When the feature is set to OFF, the unit will still be able to display Caller ID, like<br />
regular Caller ID telephone, but the in-coming Caller ID number will not be edited<br />
by pattern and by area codes.<br />
For assistance, please call: 1-800-211-PANA(7262)<br />
35
36<br />
Using the Caller List<br />
Storing Caller List In<strong>for</strong>mation in the Directory<br />
or in the One-Touch Dialer Memory<br />
You can store names and numbers that are in the Caller List to the<br />
directory or the one-touch auto dial buttons ([M1], [M2] and [M3]).<br />
Make sure that the handset is on the cradle, the AC adaptor is connected<br />
and the SP-PHONE/HEADSET indicator light is off.<br />
1<br />
2<br />
3<br />
4<br />
5<br />
6<br />
Press [ ] or [ ] to enter the Caller List.<br />
Scroll to the caller you want to store by<br />
pressing [ ] or [ ].<br />
• If the number requires editing, see<br />
page 33.<br />
Press [ENTER] twice.<br />
If required, edit the name using the<br />
dialing buttons ([0] to [9]), up to 15<br />
characters (p. 39).<br />
• To move the cursor, press [ ] or [ ].<br />
• To erase a character, press [CLEAR].<br />
• If you do not need to edit the name, press [ ]<br />
(Next key) and go to step 6.<br />
Press [ ] (Next key).<br />
▼<br />
To store the item in the directory,<br />
press [ENTER].<br />
To store the item in one of the one-touch<br />
auto dial buttons, press [M1], [M2] or [M3].<br />
TURNER,CYNDY 1<br />
1-234-456-7890<br />
10:50AM 11/23 X4<br />
TURNER,CYNDY 1<br />
1-234-456-7890<br />
ENTER=Save<br />
Enter name<br />
TURNER,CYNDY =Next<br />
• A beep sounds.<br />
• To continue storing other items, repeat from step 2.<br />
• To exit the Caller List, press [EXIT].<br />
• You can exit the programming mode any time by pressing [EXIT].<br />
• If 3 beeps are heard in step 6, the directory has already been full. Press [EXIT]. To<br />
erase other stored items from the directory, see page 43.<br />
• You cannot store caller in<strong>for</strong>mation if a phone number is not displayed. 3 beeps<br />
will be heard in step 3.<br />
• When using the Dial Lock (p. 57) or Call Restriction feature (p. 58), you cannot store an<br />
item in the one-touch auto dial buttons ([M1] to [M3]). 3 beeps will be heard in step 6.<br />
▼<br />
▼<br />
▼<br />
Enter name<br />
CINDY TURNER =Next<br />
▼<br />
▼<br />
Save to memory<br />
M1,M2,M3 or<br />
ENTER=Directory<br />
CINDY TURNER<br />
1-234-456-7890
Erasing Caller List In<strong>for</strong>mation<br />
After checking the Caller List, you can erase some or all of the entries.<br />
Make sure that the handset is on the cradle, the AC adaptor is connected<br />
and the SP-PHONE/HEADSET indicator light is off.<br />
To erase a specific caller from the Caller List<br />
1<br />
Press [ ] or [ ] to enter the Caller List.<br />
Caller list<br />
10 new calls<br />
=Directory<br />
▼<br />
2<br />
3<br />
Scroll to the caller you want to erase<br />
from the Caller List by pressing [ ] or<br />
[ ].<br />
Press [CLEAR].<br />
• A beep sounds and the in<strong>for</strong>mation is<br />
erased.<br />
• To erase other items, repeat from step 2.<br />
• To exit the Caller List, press [EXIT].<br />
REAGAN,TOM<br />
1-888-777-6666<br />
12:20AM 2/12<br />
Clear<br />
1<br />
Basic Operation<br />
To erase all entries in the Caller List<br />
Be<strong>for</strong>e erasing all entries, make sure that “0 new call” is displayed at<br />
step 1.<br />
1<br />
Press [ ] or [ ] to enter the Caller List.<br />
Caller list<br />
0 new call<br />
=Directory<br />
▼<br />
2<br />
3<br />
4<br />
Press [CLEAR].<br />
Scroll to “All clear” by pressing [ ] or<br />
[ ].<br />
Press [ENTER] (Yes key) or [CLEAR].<br />
• A beep sounds and all entries are erased.<br />
▼<br />
▼<br />
Exit<br />
All clear<br />
ENTER=Yes<br />
Exit<br />
All clear<br />
ENTER=Yes<br />
All clear<br />
For assistance, please call: 1-800-211-PANA(7262)<br />
37
38<br />
Directory<br />
You can store up to 50 names and phone numbers in the directory. All<br />
directory items are sorted by the first word in alphabetical order. Using the<br />
directory, you can make a call by selecting a name on the display.<br />
Make sure that the handset is on the cradle, the AC adaptor is connected<br />
and the SP-PHONE/HEADSET indicator light is off.<br />
Storing Names and Numbers<br />
1<br />
2<br />
3<br />
4<br />
5<br />
6<br />
7<br />
Press [FUNCTION/EDIT].<br />
Scroll to “Save directory” by<br />
pressing [ ] or [ ].<br />
Press [ ].<br />
▼<br />
• The display shows the number of stored<br />
items then “Enter name”.<br />
Enter a name, up to 15 characters with<br />
the dialing buttons ([0] to [9]) (p. 39).<br />
• To move the cursor, press [ ] or [ ].<br />
• If a name is not required, press [ ]<br />
(Next key) and go to step 5.<br />
Press [ ] (Next key).<br />
▼<br />
Enter a phone number up to 22 digits.<br />
• Each time you press [CLEAR], a digit is<br />
erased. To erase all of the digits, press<br />
and hold [CLEAR].<br />
Press [ ] (Next key).<br />
• If you want to change the name or<br />
number, press [ ] to reach the desired<br />
display and change it.<br />
Press [ENTER] (Save key).<br />
Save M1,M2,M3<br />
Save directory<br />
LCD contrast<br />
• A beep sounds.<br />
• To continue storing other items, repeat from step 2. To exit the<br />
programming mode, press [EXIT].<br />
• You can exit the programming mode any time by pressing [EXIT].<br />
• If a pause is required <strong>for</strong> dialing, press [PAUSE] where needed. If required, you<br />
can also insert [FLASH] in a phone number. Pressing [PAUSE] or [FLASH]<br />
counts as one digit (p. 52, 53).<br />
• If the display shows “Directory full ” in step 2, press [EXIT]. To erase other<br />
stored items from the directory, see page 43.<br />
▼<br />
▼<br />
Directory=<br />
10 items<br />
Enter name<br />
▼<br />
▼<br />
=Next<br />
Enter name<br />
Tom Jones =Next<br />
▼<br />
▼<br />
Enter phone no.<br />
0987654321<br />
▼<br />
▼<br />
=Next<br />
Tom Jones<br />
098-765-4321<br />
ENTER=Save
Selecting characters to enter names<br />
The dialing buttons ([0] to [9]) can be used to enter letters and symbols.<br />
Pressing each button selects a character as shown below.<br />
Number of times key is pressed<br />
Keys 1 2 3 4 5 6 7 8 9 10 11<br />
[1] # & ’ ( ) , – . / 1<br />
[2] a b c A B C 2<br />
[3] d e f D E F 3<br />
[4] g h i G H I 4<br />
[5] j k l J K L 5<br />
[6] m n o M N O 6<br />
[7] p q r s P Q R S 7<br />
[8] t u v T U V 8<br />
[9] w x y z W X Y Z 9<br />
[0] 0 Space<br />
[ ] Moves the cursor to the left.<br />
▼ ▲<br />
[ ]<br />
If you make a mistake while entering a name:<br />
Use [ ] or [ ] to move the cursor to the incorrect character, press<br />
[CLEAR] to delete and enter the correct character. Each time you press<br />
[CLEAR], a character is erased.<br />
To erase all characters, press and hold [CLEAR].<br />
For example, to enter “Tom Jones”:<br />
1<br />
2<br />
3<br />
4<br />
5<br />
▼<br />
Moves the cursor to the right. (To enter another character using the<br />
same number key, move the cursor to the next space.)<br />
▼<br />
Press [8] four times.<br />
Press [6] three times, then press [ ].<br />
Press [6] once, then press [ ] twice.<br />
Press [5] four times, press [6] three times,<br />
then press [ ].<br />
▼<br />
▼<br />
▼<br />
Press [6] twice, press [3] twice, then press<br />
[7] four times.<br />
For assistance, please call: 1-800-211-PANA(7262)<br />
T<br />
To<br />
Tom<br />
Tom Jo<br />
Tom Jones<br />
39<br />
Advanced Operation
Directory<br />
Finding Stored Items<br />
Make sure that the handset is on the cradle, the AC adaptor is connected<br />
and the SP-PHONE/HEADSET indicator light is off.<br />
1<br />
2<br />
Press [ ] or [ ] to enter the directory<br />
list.<br />
• You can go to the Caller List by pressing<br />
[ ] (p. 30).<br />
▼<br />
Scroll to the desired item by<br />
pressing [ ] or [ ].<br />
• All directory items are stored in the<br />
order shown on the right.<br />
To search <strong>for</strong> a name by initial:<br />
(1) Press the dialing button <strong>for</strong><br />
the first letter of the desired<br />
name until any name with the<br />
same initial is displayed (see<br />
the Index table below).<br />
Ex. To find “Frank”, press [3]<br />
repeatedly until the first item<br />
under “F” is displayed.<br />
(2) Press [ ] repeatedly until the<br />
name is displayed.<br />
• You can exit the directory list any time by pressing [EXIT].<br />
• If “No items stored” is displayed in step 1, the directory is empty. To exit the<br />
directory list, press [EXIT].<br />
• If you do not press any buttons <strong>for</strong> 60 seconds, the unit will exit the directory list.<br />
Index table<br />
▼<br />
▼<br />
Keys Index Keys Index<br />
[1] Space, Other symbols, 1 [6] M, N, O, 6<br />
[2] A, B, C, 2 [7] P, Q, R, S, 7<br />
[3] D, E, F, 3 [8] T, U, V, 8<br />
[4] G, H, I, 4 [9] W, X, Y, Z, 9<br />
[5] J, K, L, 5 [0] 0<br />
Directory list<br />
=Caller list<br />
▼<br />
Press [ ]. Press [ ].<br />
Alphabet letter<br />
Symbol (excluding # and )<br />
Number<br />
# and<br />
Telephone number<br />
(When no name is stored)<br />
40
Dialing<br />
1<br />
Press [ ] or [ ] to enter the directory<br />
list.<br />
▼<br />
▼<br />
Directory list<br />
=Caller list<br />
▼<br />
2<br />
3<br />
4<br />
Scroll to the desired item that you want to<br />
dial by pressing [ ] or [ ].<br />
• To search <strong>for</strong> the item by initial, see<br />
page 40.<br />
• To exit the directory list, press [EXIT].<br />
Lift the handset or press<br />
[SP-PHONE/HEADSET] or a line button.<br />
• The number is dialed automatically.<br />
To hang up, place the handset on the<br />
cradle or press<br />
[SP-PHONE/HEADSET].<br />
Frank<br />
456-7890<br />
• You can also dial the stored number as follows:<br />
1.Lift the handset or press [SP-PHONE/HEADSET]<br />
or a line button.<br />
2.Find the desired item (follow steps 1 and 2<br />
above).<br />
3.Press [ENTER] (Send key).<br />
•The number is dialed automatically.<br />
Frank<br />
456-7890<br />
ENTER=Send<br />
Advanced Operation<br />
For assistance, please call: 1-800-211-PANA(7262)<br />
41
42<br />
Directory<br />
Editing<br />
Make sure that the handset is on the cradle, the AC adaptor is connected<br />
and the SP-PHONE/HEADSET indicator light is off.<br />
1<br />
2<br />
3<br />
4<br />
5<br />
6<br />
7<br />
8<br />
Press [ ] or [ ] to enter the directory list.<br />
▼<br />
▼<br />
Scroll to the directory item you want to<br />
change by pressing [ ] or [ ].<br />
• To search <strong>for</strong> the item by initial, see<br />
page 40.<br />
Press [FUNCTION/EDIT].<br />
Edit the name using the dialing buttons<br />
([0] to [9]), up to 15 characters (p. 39).<br />
• To move the cursor, press [ ] or [ ].<br />
• If you do not need to change the name,<br />
press [ ] (Next key) and go to step 6.<br />
Press [ ] (Next key).<br />
Add a number to the current number.<br />
• Each time you press [CLEAR], a digit is<br />
erased. To erase all of the digits, press<br />
and hold [CLEAR].<br />
• To move the cursor, press [ ] or [ ].<br />
• If you do not need to change the number,<br />
press [ ] (Next key) and go to step 8.<br />
Press [ ] (Next key).<br />
• If you want to change the name or<br />
number, press [ ] to reach the desired<br />
display and change it.<br />
Press [ENTER] (Save key).<br />
• A beep sounds.<br />
• To continue editing other items, repeat<br />
from step 2.<br />
• You can exit the edit mode any time by pressing [EXIT].<br />
▼<br />
▼<br />
▼<br />
▼<br />
Jane<br />
456-7890<br />
Enter name<br />
Jane<br />
=Next<br />
▼<br />
▼<br />
Enter name<br />
Jane Walker =Next<br />
4567890<br />
▼<br />
▼<br />
=Next<br />
12344567890<br />
=Next<br />
▼<br />
▼<br />
Jane Walker<br />
1-234-456-7890<br />
ENTER=Save
Erasing<br />
Make sure that the handset is on the cradle, the AC adaptor is connected<br />
and the SP-PHONE/HEADSET indicator light is off.<br />
1<br />
2<br />
3<br />
Press [ ] or [ ] to enter the directory list.<br />
▼<br />
Scroll to the directory item that you<br />
want to erase by pressing [ ] or [ ].<br />
• To search <strong>for</strong> the item by initial, see<br />
page 40.<br />
Press [CLEAR].<br />
• To stop erasing, press [<br />
▼<br />
] (No key).<br />
Clear<br />
=No ENTER=Yes<br />
▼<br />
4<br />
Press [ENTER] (Yes key) or [CLEAR].<br />
• A beep sounds and the item is erased.<br />
• To erase other items, repeat from step 2.<br />
• To exit the directory list, press [EXIT].<br />
Clear<br />
Advanced Operation<br />
For assistance, please call: 1-800-211-PANA(7262)<br />
43
One-Touch Dialer<br />
Storing Names and Numbers<br />
You can store up to 3 names and phone numbers in the one-touch auto dial<br />
buttons.<br />
Do not press any one-touch auto dial buttons be<strong>for</strong>e storing to prevent<br />
misoperation.<br />
Make sure that the handset is on the cradle, the AC adaptor is connected<br />
and the SP-PHONE/HEADSET indicator light is off.<br />
1<br />
2<br />
3<br />
4<br />
Press [FUNCTION/EDIT].<br />
Press [ ] at “Save M1,M2,M3”.<br />
▼<br />
Enter a name, up to 15 characters with<br />
the dialing buttons ([0] to [9]) (p. 39).<br />
• To move the cursor, press [ ] or [ ].<br />
• If a name is not required, press [ ]<br />
(Next key) and go to step 5.<br />
Press [ ] (Next key).<br />
▼<br />
▼<br />
▼<br />
–––––––––––––––<br />
Save M1,M2,M3<br />
Save directory<br />
Enter name<br />
▼<br />
▼<br />
=Next<br />
Enter name<br />
John White =Next<br />
▼<br />
▼<br />
Enter phone no.<br />
5<br />
6<br />
7<br />
Enter a phone number up to 22 digits.<br />
• Each time you press [CLEAR], a digit is<br />
erased. To erase all of the digits, press<br />
and hold [CLEAR].<br />
Press [ ] (Next key).<br />
• If you want to change the name or<br />
number, press [ ] to reach the desired<br />
display and change it.<br />
Press one of the one-touch auto dial<br />
buttons ([M1], [M2] or [M3]).<br />
• A beep sounds.<br />
• To continue storing an item to another onetouch<br />
auto dial button, repeat from step 2.<br />
• To exit the programming mode, press<br />
[EXIT].<br />
2345678901<br />
▼<br />
▼<br />
=Next<br />
John White<br />
234-567-8901<br />
M1,M2,M3=Save<br />
John White<br />
234-567-8901<br />
44
• When using the Dial Lock (p. 57) or Call Restriction feature (p. 58), you cannot<br />
store an item in a one-touch auto dial button ([M1] to [M3]). 3 beeps will be heard<br />
in step 2.<br />
• You can exit the programming mode any time by pressing [EXIT].<br />
• If a pause is required <strong>for</strong> dialing, press [PAUSE] where needed. If required, you<br />
can also insert [FLASH] in a phone number. Pressing [PAUSE] or [FLASH]<br />
counts as one digit (p. 52, 53).<br />
To erase a stored number<br />
1<br />
2<br />
3<br />
Press the one-touch auto dial button<br />
([M1], [M2] or [M3]) you want to erase.<br />
• The stored item is displayed with the<br />
button number (#1 to #3).<br />
Press [CLEAR].<br />
• To stop erasing, press [ ] (No key).<br />
▼<br />
Press [ENTER] (Yes key) or [CLEAR].<br />
• A beep sounds, “Clear” is displayed and<br />
the in<strong>for</strong>mation is erased.<br />
• “Empty” is displayed.<br />
John White<br />
234-567-8901<br />
#1<br />
Clear<br />
=No ENTER=Yes<br />
▼<br />
Dialing a Stored Number<br />
1<br />
2<br />
OR<br />
1<br />
2<br />
Lift the handset or press [SP-PHONE/HEADSET] or a line button.<br />
Press the desired one-touch auto dial button ([M1], [M2] or [M3]).<br />
• The stored number is displayed and dialed.<br />
Press the desired one-touch auto dial button ([M1], [M2] or [M3]).<br />
• The stored number is displayed.<br />
Lift the handset or press [SP-PHONE/HEADSET] or a line button.<br />
• You can dial numbers stored in the one-touch auto dial buttons ([M1], [M2] and<br />
[M3]) even if the Dial Lock (p. 57) or Call Restriction feature (p. 58) is on.<br />
Advanced Operation<br />
For assistance, please call: 1-800-211-PANA(7262)<br />
45
46<br />
Intercom<br />
A 2-way intercom can be set up between two extensions.<br />
Make sure that each extension has been assigned the number ([1] to [8])<br />
(p. 17) and is connected to the LINE1/2 telephone jack of the unit (p. 11-13).<br />
Paging a Designated Extension<br />
1<br />
2<br />
3<br />
4<br />
Press [INTERCOM].<br />
• The INTERCOM indicator lights.<br />
• The SP-PHONE/HEADSET indicator<br />
lights and the speakerphone turns on.<br />
• To switch from the speakerphone to the<br />
handset, lift it off the cradle.<br />
Press an extension button ([EXT1] to<br />
[EXT8]).<br />
• A long beep is heard if the ringer pattern of<br />
the paged extension is a ringer tone (p. 23).*<br />
After the paged extension answers, talk<br />
into the MIC (microphone) or handset.<br />
• The display shows the length of the call.<br />
Intercom<br />
Press EXT1~EXT8<br />
or PAGE<br />
Ex. Calling EXT. 2<br />
Intercom<br />
Calling [2]<br />
Ex. Intercom with EXT. 2<br />
Intercom [1]-[2]<br />
00-00-00<br />
To end the intercom, press [SP-PHONE/HEADSET] or place the<br />
handset on the cradle.<br />
• The INTERCOM and SP-PHONE/HEADSET indicator lights go out.<br />
* If 2 short beeps are heard in step 2, the ringer pattern of the paged extension is<br />
the Voice mode, the Auto Answer mode or the Room Monitor mode. Speak into<br />
the MIC or handset to page the extension <strong>for</strong> the Voice or Auto Answer mode.<br />
• If the destination extension is the Auto Answer or Room Monitor mode, “Calling”<br />
with the extension number will not be displayed on your unit.<br />
During an intercom call:<br />
• To adjust the handset or speaker volume, press VOLUME [ ] or [ ] (p. 26).<br />
• If the other extensions are busy with intercom or page, you will hear a busy tone<br />
and “Busy” will be displayed when you press [INTERCOM]. Wait until the<br />
INTERCOM indicator light goes out.<br />
• You can place the intercom call on hold by pressing [HOLD]. To release the<br />
hold, press [INTERCOM].<br />
• If an incoming call is being received, you will hear two tones (incoming call<br />
tone, p. 54) and the line indicator will flash quickly. To answer the call, press the<br />
called line button.<br />
• You can switch from the speakerphone to the handset by lifting it off the cradle.<br />
To switch back to the speakerphone, press [SP-PHONE/HEADSET]. You can<br />
place the handset on the cradle.<br />
><br />
To answer a page<br />
The INTERCOM indicator light flashes quickly (<strong>for</strong> the Ringer tone or Voice<br />
mode) and the paging extension is displayed. Depending on the ringer<br />
pattern setting (p. 23), your unit will function as follows:<br />
Ringer tone (1 to 8):<br />
Voice mode:<br />
Auto Answer mode:<br />
The selected tone rings.<br />
The paging party’s voice is heard through the<br />
speaker after 2 short beeps.<br />
After 2 short beeps, the speakerphone turns on<br />
automatically. You can then talk with the caller.<br />
Lift the handset off the cradle or press<br />
[SP-PHONE/HEADSET] or [INTERCOM] to<br />
answer the page.<br />
OR<br />
If your unit is set to the Auto Answer mode, just<br />
speak into the MIC.<br />
Ex. EXT. 2 calling<br />
Intercom<br />
Call from[2]<br />
• If the ringer volume is set to OFF <strong>for</strong> Intercom, your unit will not ring.<br />
• If the ringer pattern of your unit is the Voice, Auto Answer or Room Monitor mode,<br />
the unit will not ring.<br />
To answer an intercom call directed to another extension<br />
If the paged extension user is not available, you can answer the page with<br />
your extension.<br />
Press [INTERCOM], and press [PAGE].<br />
• If the paged extension is in the Auto Answer mode or the Room Monitor mode,<br />
you cannot answer that page.<br />
What the INTERCOM indicator means<br />
Off<br />
On<br />
Intercom is free.<br />
You are using the intercom.<br />
Advanced Operation<br />
Flashing twice<br />
every 2 seconds<br />
Flashing<br />
Flashing quickly<br />
Other extension(s) is(are) using the intercom.<br />
You place the intercom call on hold.<br />
An intercom call is being received.<br />
For assistance, please call: 1-800-211-PANA(7262)<br />
47
48<br />
Intercom<br />
Paging All Extensions<br />
1<br />
2<br />
3<br />
Press [INTERCOM].<br />
• The INTERCOM indicator lights.<br />
• The SP-PHONE/HEADSET indicator<br />
lights and the speakerphone turns on.<br />
Press [PAGE], and after 2 short beeps<br />
announce the page using the MIC or the<br />
handset.<br />
• The other extensions will hear your<br />
paging voice through the speaker after 2<br />
short beeps.<br />
After one of the paged extension<br />
answers, talk into the MIC or the<br />
handset.<br />
• You can only talk with an extension who answers first.<br />
Transferring an External Call to Another<br />
Extension<br />
You can transfer an external call to another extension.<br />
1<br />
2<br />
3<br />
4<br />
Press [HOLD] to place the call on hold.<br />
• The line indicator light flashes.<br />
Press an extension button ([EXT1] to<br />
[EXT8]) to page.<br />
• If the paged extension does not answer,<br />
press the relevant line button.<br />
If required, wait <strong>for</strong> the paged extension<br />
to answer, and you can announce the<br />
transfer. If not required, go to step 4.<br />
To complete the transfer, place the<br />
handset on the cradle or press<br />
[SP-PHONE/HEADSET] to hang up.<br />
Intercom<br />
Press EXT1~EXT8<br />
or PAGE<br />
Intercom<br />
Paging<br />
[ALL]<br />
Hold<br />
Press EXT1~EXT8<br />
to transfer<br />
Ex. Calling EXT. 2<br />
Intercom<br />
Calling [2]<br />
• Any extensions can take a transferred call by pressing the relevant line button.<br />
• To page all extensions, in step 2, press [INTERCOM] then [PAGE]. Speak into the<br />
MIC or handset. After one of the extensions answers, hang up to complete the transfer.
Room Monitor Feature<br />
This feature allows you to monitor a room through an extension using the<br />
intercom feature. For example you can monitor a baby from different areas<br />
of the house. You can call the destination extension, to monitor the room.<br />
Turn the Room Monitor mode ON with the destination extension<br />
(p. 23, 24).<br />
Make sure that the destination unit must not be used and the handset is<br />
on the cradle and the AC adaptor is connected.<br />
1<br />
2<br />
3<br />
Press [INTERCOM].<br />
• The INTERCOM indicator lights.<br />
• The SP-PHONE/HEADSET indicator<br />
lights and the speakerphone turns on.<br />
Press an extension button ([EXT1] to<br />
[EXT8]).<br />
• The destination extension does not ring<br />
and the SP-PHONE/HEADSET indicator<br />
lights.<br />
• Your unit starts to monitor the room<br />
through the extension.<br />
• To monitor from the handset, lift it off the<br />
cradle. To switch back to the speaker,<br />
press [SP-PHONE/HEADSET].<br />
To end monitoring, press<br />
[SP-PHONE/HEADSET] or place the<br />
handset on the cradle.<br />
Intercom<br />
Press EXT1~EXT8<br />
or PAGE<br />
Monitoring EXT. display<br />
Ex. EXT. 1 monitors EXT. 2<br />
Intercom [1]-[2]<br />
00-00-00<br />
Monitored EXT. display<br />
Ex. Monitored by EXT. 1<br />
Intercom<br />
Call from [1]<br />
• The monitored extension user can stop being monitored by pressing<br />
[SP-PHONE/HEADSET].<br />
Advanced Operation<br />
For assistance, please call: 1-800-211-PANA(7262)<br />
49
Making/Answering Another Call<br />
During a Conversation<br />
50<br />
You can handle two external calls, or an external call and an intercom call<br />
simultaneously.<br />
Making/answering another external call during a<br />
conversation<br />
If you hear two tones during a conversation and another line indicator light<br />
flashes quickly, an incoming call is being received. You can answer the<br />
second call while holding the first call. If you subscribe to a Caller ID<br />
service, the second caller’s in<strong>for</strong>mation will be displayed when a call is<br />
being received on the other line (p. 29).<br />
You can delete the two tones (incoming call tone). See page 54.<br />
Ex. If you are using LINE1<br />
1<br />
2<br />
3<br />
Press [HOLD] to put the first call (LINE 1) on hold.<br />
• The LINE 1 indicator light flashes.<br />
Press the other line button ([LINE 2/DATA]) to make or answer a<br />
second call.<br />
• The LINE 2 indicator lights.<br />
To return to the first call (LINE 1), press the line button <strong>for</strong> the first<br />
call ([LINE 1]).<br />
• The second call is terminated.<br />
• To hold the second call in step 3, press [HOLD] be<strong>for</strong>e pressing the line button <strong>for</strong><br />
the first call.<br />
Making an intercom call during a conversation<br />
1<br />
2<br />
3<br />
4<br />
Press [HOLD] to put the external call on<br />
hold.<br />
• The line indicator light flashes.<br />
Press an extension button ([EXT1] to<br />
[EXT8]).<br />
• To page all extensions, press<br />
[INTERCOM] then [PAGE].<br />
After the paged extension answers, talk into the MIC or handset.<br />
To return to the external call, press the line button.<br />
Hold<br />
Press EXT1~EXT8<br />
to transfer<br />
• The line indicator stops flashing and remains lit. The intercom call is<br />
terminated.<br />
• To hold the intercom call in step 4, press [HOLD] then the line button.
Conference<br />
Conference with two external calls<br />
While having a conversation on one line, you can make or answer a second<br />
call on the other line and then combine the calls to make a conference call.<br />
1<br />
2<br />
3<br />
During a call, press [HOLD] to put the<br />
first call on hold.<br />
Press the other line button to make or<br />
answer a second call.<br />
When the second call is connected,<br />
press [CONF] to make a conference call.<br />
• To hang up both lines, place the<br />
handset on the cradle or press<br />
[SP-PHONE/HEADSET].<br />
• To hang up only one line, press the line<br />
button <strong>for</strong> the party with which you want to<br />
continue talking.<br />
• To put both lines on hold, press<br />
[HOLD]. To talk with only one caller, press<br />
the relevant line button. To resume both<br />
lines press [CONF].<br />
• You cannot call another extension to make a conference call.<br />
Conference with an external call and an internal call<br />
While you are talking with an outside caller, you can call another extension<br />
to make a conference call.<br />
1<br />
2<br />
3<br />
During a call, press [HOLD].<br />
• The call is put on hold.<br />
To page another extension, press an<br />
extension button ([EXT1] to [EXT8]).<br />
When the paged party answers, press<br />
[CONF] on your unit to make a<br />
conference call.<br />
• To hang up both the external and<br />
internal calls, place the handset on the<br />
cradle or press [SP-PHONE/HEADSET].<br />
• To hang up only the intercom call,<br />
press the line button.<br />
• To hang up only the external call,<br />
press [INTERCOM].<br />
Conference<br />
00-00-00<br />
Conference<br />
00-00-00<br />
Advanced Operation<br />
• You can place the conference call on hold in step 3. Press [HOLD]. To resume the<br />
conference call, press [CONF] on your unit.<br />
For assistance, please call: 1-800-211-PANA(7262)<br />
51
Special Features<br />
How to Use the PAUSE Button<br />
(For PBX Line/Long Distance Calls)<br />
We recommend you press [PAUSE] if a pause is required <strong>for</strong> dialing with a<br />
PBX or to make a long distance call.<br />
Ex. Line access number [9] (PBX)<br />
[9] [PAUSE]<br />
Phone number<br />
• Pressing [PAUSE] once creates a 3.5 second pause.<br />
This prevents misdialing when you redial or dial a stored number.<br />
• Pressing [PAUSE] more than once increases the length of the pause between<br />
numbers.<br />
Muting Your Conversation<br />
Press [MUTE] while talking.<br />
• “ ” and “[Mute]” are displayed.<br />
• The other party cannot hear you but you can hear<br />
them.<br />
• To release the mute, press [MUTE] again.<br />
• When you switch between the handset and<br />
speaker, the mute will be released.<br />
12:34AM 5/21[1]<br />
00-01-30 [Mute]<br />
52<br />
For Call Waiting Service Users<br />
If another call is received on the same line while talking, you will hear a callwaiting<br />
tone. Press [FLASH] to answer the second call.<br />
• The first call is put on hold.<br />
• To return to the first caller, press [FLASH] again.<br />
• The call waiting service cannot be used when:<br />
— the first call on the same line is put on hold,<br />
— you are having a conference call on both lines (p. 51),<br />
— another extension is joining your conversation, or<br />
— a parallel connected telephone other than KX-TS3282W or KX-T3281W is in<br />
use.<br />
• If this function does not operate properly, consult your telephone company <strong>for</strong><br />
details.<br />
Call Waiting Caller ID Feature<br />
Call Waiting Caller ID Feature allows the unit to<br />
display the second caller’s in<strong>for</strong>mation. After<br />
you hear a call-waiting tone while talking, the<br />
display will show the caller’s name, the phone<br />
number, the called line and “Waiting”.<br />
BROWN,NANCY<br />
1-555-666-7777<br />
-- L1 Waiting --<br />
• Please contact your telephone company <strong>for</strong> details and availability in your area.
Temporary Tone Dialing (For Rotary or Pulse Service Users)<br />
Press [R] (TONE) be<strong>for</strong>e entering access numbers which require tone<br />
dialing.<br />
• The dialing mode changes to tone. You can enter numbers to access an answering service,<br />
electronic banking service, etc. When you hang up, the mode will return to pulse.<br />
FLASH Button<br />
Pressing [FLASH] allows you to use special features of your host PBX<br />
such as transferring an extension call or accessing special telephone<br />
services (optional) such as call waiting.<br />
• Pressing [FLASH] causes to disable the Temporary Tone Dialing mode or the mute (p. 52).<br />
Selecting the flash time<br />
The flash time depends on your telephone exchange or host PBX. You can<br />
select the following flash times: “80, 90, 100, 110, 200, 250, 300, 400, 600,<br />
700 ms (milliseconds)”. Your phone comes from the factory set to “600 ms”.<br />
Make sure that the handset is on the cradle, the AC adaptor is connected<br />
and the SP-PHONE/HEADSET indicator light is off.<br />
1<br />
2<br />
3<br />
4<br />
5<br />
6<br />
Press [FUNCTION/EDIT].<br />
Scroll to “Dial setting” by pressing<br />
[ ] or [ ], and press [ ].<br />
Scroll to “Set flash time” by pressing<br />
[ ] or [ ].<br />
Press [ ].<br />
▼<br />
• The current settings are displayed.<br />
Select the desired time by pressing [ ]<br />
or [ ] <strong>for</strong> each line.<br />
To move to the other line, press [ ] or [ ].<br />
Press [ENTER].<br />
▼<br />
▼<br />
▼<br />
• A beep sounds.<br />
• To exit the programming mode, press [EXIT].<br />
▼<br />
▼<br />
▼<br />
–––––––––––––––<br />
Save M1,M2,M3<br />
Save directory<br />
Change password<br />
Dial setting<br />
Line setting<br />
Set dial mode<br />
Set flash time<br />
Call restrict<br />
Flash time<br />
Line1 Line2<br />
600ms 600ms<br />
Advanced Operation<br />
• You can exit the programming mode any time by pressing [EXIT].<br />
• If the unit is connected via a PBX, PBX functions (transferring a call etc.) might not<br />
work correctly. Consult your PBX supplier <strong>for</strong> the correct setting.<br />
For assistance, please call: 1-800-211-PANA(7262)<br />
53
Special Features<br />
Incoming Call Tone<br />
During a conversation, you can be in<strong>for</strong>med if another call arrives on<br />
another line (Line 1 or 2 or Intercom line). If you set to ON, this incoming<br />
call tone will be heard <strong>for</strong> as long as the external or internal line rings. To<br />
delete the incoming call tone, set to OFF. To set the incoming call tone to<br />
sound twice, set to “2”. Your phone comes from the factory set to “2”.<br />
Make sure that the handset is on the cradle, the AC adaptor is connected<br />
and the SP-PHONE/HEADSET indicator light is off.<br />
1<br />
2<br />
3<br />
4<br />
5<br />
6<br />
Press [FUNCTION/EDIT].<br />
Scroll to “Ringer setting” by<br />
pressing [ ] or [ ].<br />
Press [ ].<br />
▼<br />
Scroll to “Incoming call” by pressing<br />
[ ] or [ ].<br />
Press [ ].<br />
▼<br />
• The current setting is displayed.<br />
Select “On”, “Off” or “2” by pressing<br />
[ ] or [ ].<br />
▼<br />
▼<br />
▼<br />
▼<br />
–––––––––––––––<br />
Save M1,M2,M3<br />
Save directory<br />
LCD contrast<br />
Ringer setting<br />
Change password<br />
–––––––––––––––<br />
Ringer volume<br />
Ringer pattern<br />
Ringer pattern<br />
Incoming call<br />
–––––––––––––––<br />
Incoming call<br />
tone:2<br />
ENTER=Save<br />
7<br />
Press [ENTER] (Save key).<br />
• A beep sounds.<br />
• To exit the programming mode, press<br />
[EXIT].<br />
• You can exit the programming mode any time by pressing [EXIT].<br />
54
Line Selection<br />
The unit will automatically select a free external line when you make a call<br />
by lifting the handset or pressing [SP-PHONE/HEADSET]. The unit will<br />
also select the in-coming called line when you answer the in-coming call.<br />
You can change the line selection. There are four options as following:<br />
Line 1: Line 1 will be selected.<br />
Line 2: Line 2 will be selected.<br />
Intercom: Intercom line will be selected.<br />
Auto (factory preset): A free external line will be selected (Line1 has<br />
priority) when making a call by lifting the handset or pressing [SP-PHONE/<br />
HEADSET]. However, when you call back from the Caller List (p. 32), the<br />
line that is indicated will be selected. You can also select any line by<br />
pressing a line button. When a call is being received, the called line is<br />
selected when you lift the handset or press [SP-PHONE/HEADSET].<br />
Make sure that the handset is on the cradle, the AC adaptor is connected<br />
and the SP-PHONE/HEADSET indicator light is off.<br />
1<br />
2<br />
3<br />
4<br />
5<br />
6<br />
Press [FUNCTION/EDIT].<br />
Scroll to “Line setting” by pressing<br />
[ ] or [ ].<br />
Press [ ].<br />
▼<br />
Press [ ] at “Line selection”.<br />
▼<br />
• The current setting is displayed.<br />
Select the desired line selection,<br />
“Line1”, “Line2”, “Intercom” or<br />
“Auto” by pressing [ ] or [ ].<br />
Press [ENTER] (Save key).<br />
• A beep sounds.<br />
• To exit the programming mode, press<br />
[EXIT].<br />
▼<br />
▼<br />
▼<br />
–––––––––––––––<br />
Save M1,M2,M3<br />
Save directory<br />
Dial setting<br />
Line setting<br />
Caller ID edit<br />
–––––––––––––––<br />
Line selection<br />
Call barge in<br />
Line selection<br />
:Auto<br />
ENTER=Save<br />
Advanced Operation<br />
• You can exit the programming mode any time by pressing [EXIT].<br />
For assistance, please call: 1-800-211-PANA(7262)<br />
55
Special Features<br />
Setting the Password<br />
You can change the password <strong>for</strong> the dial lock (p. 57) and call restriction<br />
(p. 58).<br />
The factory preset password is “1111”.<br />
To set the password<br />
Make sure that the handset is on the cradle, the AC adaptor is connected<br />
and the SP-PHONE/HEADSET indicator light is off.<br />
1<br />
2<br />
3<br />
4<br />
5<br />
6<br />
7<br />
Press [FUNCTION/EDIT].<br />
Scroll to “Change password” by<br />
pressing [ ] or [ ].<br />
Press [ ].<br />
▼<br />
Enter the current password.<br />
• The factory preset is “1111”.<br />
Press [ ] (Next key).<br />
• If 3 beeps are heard, you entered a wrong<br />
password. Enter the correct one.<br />
Enter a new password using a 4-digit<br />
number. (Ex. “1234” is entered.)<br />
Press [ENTER] (Save key).<br />
• A beep sounds.<br />
• To exit the programming mode, press<br />
[EXIT].<br />
• You can exit the programming mode any time by pressing [EXIT].<br />
–––––––––––––––<br />
Save M1,M2,M3<br />
Save directory<br />
Once you have set a PIN code, you cannot confirm it. If you <strong>for</strong>get your PIN<br />
code, please call: 1-800-211-PANA(7262).<br />
▼<br />
▼<br />
Ringer setting<br />
Change password<br />
Dial setting<br />
Current password<br />
:––––<br />
=Next<br />
Current password<br />
:oooo<br />
=Next<br />
Enter password<br />
:––––<br />
ENTER=Save<br />
Enter password<br />
:1234<br />
ENTER=Save<br />
56
Dial Lock<br />
Except <strong>for</strong> the numbers stored in the one-touch auto dial buttons (p. 44),<br />
you can prevent others from making a call to any number. Only incoming<br />
calls are accepted until the dial lock is canceled.<br />
Be<strong>for</strong>e using this feature, we recommend storing emergency numbers in the<br />
memory of one-touch auto dial buttons (p. 44). Even if the dialing buttons are<br />
locked, the numbers stored in these buttons can be dialed.<br />
To set the dial lock<br />
1<br />
Press [DIAL LOCK].<br />
• “ ” flashes on the display.<br />
Enter password<br />
:----<br />
ENTER=Save<br />
2<br />
3<br />
Enter the password (p. 56).<br />
Press [ENTER] (Save key).<br />
• A beep sounds and “ ” stops flashing<br />
and remains on the display.<br />
• If 3 beeps are heard, you entered a wrong<br />
password. Enter the correct one.<br />
• You can exit the programming mode any time by pressing [EXIT].<br />
Enter password<br />
:oooo<br />
ENTER=Save<br />
“ ” is displayed when the mode is on.<br />
If the dial buttons are pressed after lifting the handset or pressing<br />
[SP-PHONE/HEADSET] or a line button, “DIAL LOCKED” will be displayed <strong>for</strong> a<br />
few seconds.<br />
• While the dialing buttons are locked, you cannot store phone numbers in the<br />
memory of one-touch auto dial buttons.<br />
Advanced Operation<br />
To cancel the dial lock<br />
Repeat steps 1 to 3 above.<br />
• “ ” will disappear on the display.<br />
For assistance, please call: 1-800-211-PANA(7262)<br />
57
Special Features<br />
Call Restriction<br />
You can prevent the unit from dialing phone numbers beginning with<br />
specified digit(s) (1 digit or 2 digits). Except <strong>for</strong> the numbers stored in the<br />
memory of one-touch auto dial buttons (p. 44), phone numbers with the<br />
restricted leading digits cannot be dialed out.<br />
Be<strong>for</strong>e using this feature, we recommend storing emergency numbers in the<br />
memory of one-touch auto dial buttons (p. 44). Even if the phone numbers are<br />
restricted, the numbers stored in these buttons can be dialed.<br />
To set the call restriction<br />
Make sure that the handset is on the cradle, the AC adaptor is connected<br />
and the SP-PHONE/HEADSET indicator light is off.<br />
1<br />
2<br />
3<br />
4<br />
5<br />
Press [FUNCTION/EDIT].<br />
Scroll to “Dial setting” by pressing<br />
[ ] or [ ].<br />
Press [ ].<br />
▼<br />
Scroll to “Call restrict” by pressing<br />
[ ] or [ ].<br />
Press [ ].<br />
▼<br />
▼<br />
▼<br />
▼<br />
▼<br />
–––––––––––––––<br />
Save M1,M2,M3<br />
Save directory<br />
Change password<br />
Dial setting<br />
Line setting<br />
–––––––––––––––<br />
Set dial mode<br />
Set flash time<br />
Set flash time<br />
Call restrict<br />
–––––––––––––––<br />
Restrict no.<br />
:--<br />
ENTER=Save<br />
If you changed the password from<br />
“1111” (factory preset) to another<br />
one, “Enter password” is displayed.<br />
Enter the password (p. 56), and press<br />
[ ] (Next key).<br />
• If 3 beeps are heard, you entered a wrong<br />
password. Enter the correct one.<br />
Enter password<br />
:----<br />
=Next<br />
Enter password<br />
:oooo<br />
=Next<br />
58
6<br />
7<br />
Enter the first number(s) (1 digit or 2<br />
digits) you want to restrict ([0] to [9]).<br />
• If you enter a wrong number, press<br />
[CLEAR] and enter the correct one.<br />
Press [ENTER] (Save key).<br />
Ex. “9” is entered.<br />
Restrict no.<br />
:-9<br />
ENTER=Save<br />
• A beep sounds.<br />
• To exit the programming mode, press<br />
[EXIT].<br />
• You can exit the programming mode any time by pressing [EXIT].<br />
• While you restrict phone numbers beginning with specified digit(s), you cannot<br />
store phone numbers in the memory of one-touch auto dial buttons.<br />
When dialing a phone number with the restricted leading digit(s), “CALL<br />
RESTRICTED” is displayed.<br />
To cancel the call restriction<br />
Repeat steps 1 to 5 on page 58. Then press [CLEAR] to clear the<br />
restricted digits, and press [ENTER] (Save key).<br />
Advanced Operation<br />
For assistance, please call: 1-800-211-PANA(7262)<br />
59
60<br />
Special Features<br />
Call Privacy Feature<br />
The Call Privacy feature allows you to prevent other extensions from joining<br />
your conversation with an outside party. If you allow other extensions to join<br />
your conversation (Call Barge In feature), select “Accept”.<br />
Your phone comes from the factory set to “Reject”.<br />
Make sure that the handset is on the cradle, the AC adaptor is connected<br />
and the SP-PHONE/HEADSET indicator light is off.<br />
1<br />
2<br />
3<br />
4<br />
5<br />
6<br />
7<br />
Press [FUNCTION/EDIT].<br />
Scroll to “Line setting” by pressing<br />
[ ] or [ ].<br />
Press [ ].<br />
▼<br />
Scroll to “Call barge in” by pressing<br />
[ ] or [ ].<br />
Press [ ].<br />
▼<br />
• The current setting is displayed.<br />
Select “Accept” or “Reject” by<br />
pressing [ ] or [ ].<br />
Press [ENTER] (Save key).<br />
• A beep sounds.<br />
• To exit the programming mode, press<br />
[EXIT].<br />
• You can exit the programming mode any time by pressing [EXIT].<br />
–––––––––––––––<br />
Save M1,M2,M3<br />
Save directory<br />
To join a conversation (Call Barge In)<br />
If your unit is set to “Accept”, other extensions can join your conversation<br />
with an outside party. The other extension users can press the relevant line<br />
button to join you.<br />
• The intercom feature may not work when more than three extensions join another<br />
extension’s conversation.<br />
• You cannot join a conversation between the other extensions and an outside party<br />
unless all conversing extensions are set to “Accept”. When you tried to join the<br />
conversation, “Busy” is displayed.<br />
▼<br />
▼<br />
▼<br />
▼<br />
Dial setting<br />
Line setting<br />
Caller ID edit<br />
–––––––––––––––<br />
Line selection<br />
Call barge in<br />
Line selection<br />
Call barge in<br />
–––––––––––––––<br />
Call barge in<br />
:Reject<br />
ENTER=Save
Optional Headset<br />
Plugging an optional headset into the unit allows a hands-free phone<br />
conversation. Please use only a <strong>Panasonic</strong> KX-TCA60, KX-TCA86,<br />
KX-TCA88, KX-TCA91 or KX-TCA92 headset. To order, call the<br />
accessories telephone number on page 3.<br />
Connecting the Optional Headset to the Unit<br />
Connect the optional headset to the headset jack as shown below.<br />
Fasten the headset<br />
cord to prevent it from<br />
being disconnected.<br />
Headset Jack<br />
Hook<br />
• The illustration of the headset is KX-TCA88.<br />
If you want to have a normal conversation, disconnect the headset.<br />
Making/Answering Calls<br />
1<br />
2<br />
Press [SP-PHONE/HEADSET] to make or answer a call.<br />
• If you misdial when making a call, press [SP-PHONE/HEADSET] twice<br />
and dial again.<br />
• You can press the line button, instead of pressing [SP-PHONE/HEADSET].<br />
To hang up, press [SP-PHONE/HEADSET].<br />
To adjust the headset receiver volume (4 levels):<br />
While using the headset, press VOLUME [ ] or [ ].<br />
•“■ ■” shows one level.<br />
><br />
<<br />
• During a conversation using the headset, you cannot switch the call to the<br />
handset by lifting it off the cradle.<br />
• If you disconnect the optional headset during a conversation with the handset on<br />
the cradle, the call will be switched to the speakerphone.<br />
• During a conversation using the speakerphone, you can switch the call to the<br />
headset by connecting the headset.<br />
For assistance, please call: 1-800-211-PANA(7262)<br />
61<br />
Useful In<strong>for</strong>mation
Wall Mounting<br />
This unit can be mounted on a wall phone<br />
plate.<br />
1<br />
Pull down the handset hook until it<br />
locks, so the tab holds the handset.<br />
2<br />
Press the tabs in the<br />
direction of the<br />
arrows (#), then<br />
remove the wall<br />
mounting adaptor<br />
($).<br />
1 1<br />
2<br />
3<br />
Connect the AC<br />
adaptor. Tuck the<br />
telephone line cord<br />
inside the wall<br />
mounting adaptor,<br />
then push it in the<br />
direction of the arrows<br />
(# and $).<br />
• The word “UP” should<br />
face upward.<br />
To Power<br />
Outlet<br />
2<br />
1<br />
62
4<br />
Connect the telephone line cord.<br />
Mount the unit, then slide down.<br />
To temporarily set the handset down<br />
during a conversation, place it as shown<br />
here.<br />
Useful In<strong>for</strong>mation<br />
For assistance, please call: 1-800-211-PANA(7262)<br />
63
Troubleshooting<br />
Problem<br />
The unit does not<br />
work.<br />
The unit does not<br />
ring.<br />
You cannot dial.<br />
The line indicators do<br />
not work properly.<br />
The other party<br />
suddenly cannot hear<br />
your voice during a<br />
conversation.<br />
You cannot program<br />
function items.<br />
Cause and Remedy<br />
• Check the settings (p. 9–14).<br />
• Unplug the AC adaptor and remove the<br />
batteries to reset. Plug in and re-install the<br />
batteries, and try again.<br />
• Other communication devices connected on<br />
the same line may be interfering with your<br />
unit.<br />
• Telephone line noise may be interfering with<br />
your unit. Consult your telephone company.<br />
• The ringer volume is set to OFF <strong>for</strong> the line.<br />
Set to HIGH or LOW (p. 22).<br />
• Check whether the dialing mode selection is<br />
correct (p. 20).<br />
• Dial lock mode is set. To cancel the mode,<br />
see page 57.<br />
• The dialed number is restricted. To cancel,<br />
see page 59.<br />
• Check the settings (p. 9-14).<br />
• [MUTE] may have been pressed during the<br />
conversation. If “ ” and “[Mute]” are<br />
displayed, press [MUTE].<br />
• Programming is not possible when the<br />
handset is off the cradle, the SP-PHONE/<br />
HEADSET indicator lights, or when searching<br />
the Caller List or the directory list.<br />
• Do not pause <strong>for</strong> over 60 seconds while<br />
programming.<br />
64
Problem<br />
You cannot store a<br />
name and phone<br />
number in memory.<br />
While programming or<br />
searching, the unit<br />
starts to ring and<br />
stops the program/<br />
search.<br />
Cause and Remedy<br />
• Programming is not possible when the<br />
handset is off the cradle or the SP-PHONE/<br />
HEADSET indicator lights.<br />
• Do not pause <strong>for</strong> over 60 seconds while storing.<br />
• Do not enter a phone number more than<br />
22 digits long.<br />
• When using the Dial Lock (p. 57) or Call<br />
Restriction feature (p. 58), you cannot store a<br />
phone number in the one-touch auto dial<br />
buttons ([M1] to [M3]).<br />
• If “Directory full” is displayed, erase<br />
other stored items from the directory (p. 43).<br />
• To answer the call, lift the handset or press<br />
[SP-PHONE/HEADSET]. Start again from<br />
the beginning after hanging up.<br />
The unit does not<br />
display the caller’s<br />
name and/or phone<br />
number.<br />
The display exits the<br />
Caller List.<br />
You cannot redial by<br />
pressing [REDIAL].<br />
• You need to subscribe to a Caller ID service.<br />
• Other telephone equipment may be<br />
interfering with your phone. Disconnect it and<br />
try again.<br />
• Other electrical appliances connected to the<br />
same outlet may be interfering with the Caller<br />
ID in<strong>for</strong>mation.<br />
• Telephone line noise may be interfering with<br />
the Caller ID in<strong>for</strong>mation. Consult your<br />
telephone company.<br />
• The caller requested not to send his/her<br />
in<strong>for</strong>mation. See page 29.<br />
• If a call is being transferred to you, the caller<br />
in<strong>for</strong>mation will not be displayed.<br />
• Do not pause <strong>for</strong> over 60 seconds while<br />
searching.<br />
• If the last number dialed was more than<br />
32 digits long, the number will not be redialed<br />
correctly.<br />
Useful In<strong>for</strong>mation<br />
For assistance, please call: 1-800-211-PANA(7262)<br />
65
Troubleshooting<br />
Problem<br />
When you press<br />
[INTERCOM], a busy<br />
tone sounds and you<br />
cannot page another<br />
extension.<br />
You cannot call a<br />
designated extension.<br />
The intercom does<br />
not work.<br />
You cannot have a<br />
conversation using an<br />
optional headset.<br />
During a power<br />
failure, you cannot<br />
make or answer a<br />
call.<br />
If you cannot solve<br />
your problem<br />
Cause and Remedy<br />
• The intercom line is being used. Wait until the<br />
INTERCOM indicator light goes out.<br />
• The called extension may have been set to<br />
the room monitor mode. To talk to the<br />
extension, select another ringer pattern on<br />
that extension (p. 23, 24).<br />
• DSL Internet connection and KX-TS3282W<br />
Intercom work at similar frequencies. Please<br />
contact <strong>Panasonic</strong> at 1-800-211-PANA(7262)<br />
<strong>for</strong> special wiring configurations.<br />
• Make sure that the headset is connected<br />
properly (p. 61).<br />
• During a power failure, you cannot use the<br />
headset.<br />
• If you have mixed fresh and discharged<br />
batteries, you may not be able to make or<br />
answer a call during a power failure. Replace<br />
all of the batteries with new ones.<br />
• Call our customer call center at<br />
1-800-211-PANA(7262).<br />
• <strong>Panasonic</strong>’s e-mail address <strong>for</strong> customer<br />
inquiries:<br />
consumerproducts@panasonic.com<br />
<strong>for</strong> customers in the USA or Puerto Rico<br />
ONLY<br />
66
Important Safety Instructions<br />
When using this unit, basic safety precautions should always be followed to<br />
reduce the risk of fire, electric shock, or personal injury.<br />
11. Read and understand all instructions.<br />
12. Follow all warnings and instructions marked on this unit.<br />
13. Unplug this unit from AC outlets be<strong>for</strong>e cleaning. Do not use liquid or<br />
aerosol cleaners. Use a damp cloth <strong>for</strong> cleaning.<br />
14. Do not use this unit near water, <strong>for</strong> example, near a bathtub, washbowl,<br />
kitchen sink, or the like.<br />
15. Place this unit securely on a stable surface. Serious damage and/or<br />
injury may result if the unit falls.<br />
16. Do not cover slots and openings on the unit. They are provided <strong>for</strong><br />
ventilation and protection against overheating. Never place the unit<br />
near radiators, or in a place where proper ventilation is not provided.<br />
17. Use only the power source marked on the unit. If you are not sure of<br />
the type of power supplied to your home, consult your dealer or local<br />
power company.<br />
18. Do not place objects on the power cord. Install the unit where no one<br />
can step or trip on the cord.<br />
19. Do not overload wall outlets and extension cords. This can result in the<br />
risk of fire or electric shock.<br />
10. Never push any objects through slots in this unit. This may result in the<br />
risk of fire or electric shock. Never spill any liquid on the unit.<br />
11. To reduce the risk of electric shock, do not disassemble this unit. Take<br />
the unit to an authorized servicenter when service is required. Opening<br />
or removing covers may expose you to dangerous voltages or other<br />
risks. Incorrect reassembly can cause electric shock when the unit is<br />
subsequently used.<br />
12. Unplug this unit from the wall outlet and refer servicing to an authorized<br />
servicenter when the following conditions occur:<br />
A. When the power supply cord or plug is damaged or frayed.<br />
B. If liquid has been spilled into the unit.<br />
C. If the unit has been exposed to rain or water.<br />
D. If the unit does not work normally by following the operating<br />
instructions. Adjust only controls covered by the operating<br />
instructions. Improper adjustment may require extensive work by an<br />
authorized servicenter.<br />
E. If the unit has been dropped or physically damaged.<br />
F. If the unit exhibits a distinct change in per<strong>for</strong>mance.<br />
13. During thunderstorms, avoid using telephones except cordless types.<br />
There may be a remote risk of an electric shock from lightning.<br />
14. Do not use this unit to report a gas leak, when in the vicinity of the leak.<br />
SAVE THESE INSTRUCTIONS<br />
For assistance, please call: 1-800-211-PANA(7262)<br />
67<br />
Useful In<strong>for</strong>mation
68<br />
Important Safety Instructions<br />
WARNING:<br />
TO PREVENT FIRE OR SHOCK HAZARD, DO NOT EXPOSE THIS<br />
PRODUCT TO RAIN OR ANY TYPE OF MOISTURE.<br />
• The AC adaptor is used as the main disconnect device, ensure that the<br />
AC outlet is located/installed near the unit and is easily accessible.<br />
CAUTION:<br />
To reduce the risk of fire or injury to persons, read and follow these<br />
instructions.<br />
11. Use only the battery(ies) specified.<br />
12. Do not dispose of the battery(ies) in a fire. It (they) may explode. Check<br />
with local waste management codes <strong>for</strong> special disposal instructions.<br />
13. Do not open or mutilate the battery(ies). Released electrolyte is<br />
corrosive and may cause burns or injury to the eyes or skin. The<br />
electrolyte may be toxic if swallowed.<br />
14. Exercise care in handling the battery(ies) in order not to short the<br />
battery(ies) to conductive materials such as rings, bracelets, and keys.<br />
The battery(ies) and/or conductor may overheat and cause burns.<br />
15. Do not recharge the battery(ies) provided with or identified <strong>for</strong> use with<br />
this product. The battery(ies) may leak corrosive electrolyte or explode.<br />
16. Do not attempt to rejuvenate the battery(ies) provided with or identified<br />
<strong>for</strong> use with this product by heating. Sudden release of battery<br />
electrolyte may occur causing burns or irritation to the eyes or skin.<br />
17. Replace all batteries at the same time. Mixing fresh and discharged<br />
batteries could increase internal cell pressure and rupture the<br />
discharged batteries. (Applies to products employing more than one<br />
separately replaceable primary battery.)<br />
18. When installing batteries observe the proper polarity or direction.<br />
Incorrect installation can cause charging, and may result in leakage or<br />
explosion. (Applies to products employing more than one separately<br />
replaceable primary battery.)<br />
19. Remove the battery(ies) from this product if the product will not be used<br />
<strong>for</strong> a long period of time (several months or more). During this time the<br />
battery(ies) could leak in the product.<br />
10. Discard the “dead” battery(ies) as soon as possible. The “dead”<br />
battery(ies) may leak in the product.<br />
11. Do not store this product, or the battery(ies) provided with or identified<br />
<strong>for</strong> use with this product, in high temperature areas. Batteries that are<br />
stored in a freezer or refrigerator <strong>for</strong> the purpose of extending shelf life<br />
should be protected from condensation during storage and defrosting.<br />
Batteries should be stabilized at room temperature prior to use after<br />
cold storage.
FCC and Other In<strong>for</strong>mation<br />
This equipment complies with Part 68 of the FCC rules and the requirements<br />
adopted by the ACTA. On the bottom of this equipment is a label that contains,<br />
among other in<strong>for</strong>mation, a product identifier in the <strong>for</strong>mat US:ACJ-----.<br />
If requested, this number must be provided to the telephone company.<br />
Registration No. .....................................................(found on the bottom of the unit)<br />
Ringer Equivalence No. (REN) ...........................................................................0.2B<br />
A plug and jack used to connect this equipment to the premises wiring and<br />
telephone network must comply with the applicable FCC Part 68 rules and<br />
requirements adopted by the ACTA. A compliant telephone cord and modular plug<br />
is provided with this product. It is designed to be connected to a compatible<br />
modular jack that is also compliant.<br />
The REN is used to determine the number of devices that may be connected to a<br />
telephone line. Excessive RENs on a telephone line may result in the devices not<br />
ringing in response to an incoming call. In most but not all areas, the sum of RENs<br />
should not exceed five (5.0). To be certain of the number of devices that may be<br />
connected to a line, as determined by the total RENs, contact the local telephone<br />
company. For products approved after July 23, 2001, the REN <strong>for</strong> this product is<br />
part of the product identifier that has the <strong>for</strong>mat US:AAAEQ##TXXXX. The digits<br />
represented by ## are the REN without a decimal point (e.g., 03 is a REN of 0.3).<br />
If this equipment causes harm to the telephone network, the telephone company<br />
will notify you in advance that temporary discontinuance of service may be<br />
required. But if advance notice isn’t practical, the telephone company will notify the<br />
customer as soon as possible. Also, you will be advised of your right to file a<br />
complaint with the FCC if you believe it is necessary.<br />
The telephone company may make changes in its facilities, equipment, operations<br />
or procedures that could affect the operation of the equipment. If this happens the<br />
telephone company will provide advance notice in order <strong>for</strong> you to make necessary<br />
modifications to maintain uninterrupted service.<br />
If trouble is experienced with this equipment, <strong>for</strong> repair or warranty in<strong>for</strong>mation,<br />
please contact a Factory Servicenter or other Authorized Servicer. If the equipment<br />
is causing harm to the telephone network, the telephone company may request that<br />
you disconnect the equipment until the problem is resolved.<br />
Connection to party line service is subject to state tariffs. Contact the state public<br />
utility commission, public service commission or corporation commission <strong>for</strong><br />
in<strong>for</strong>mation.<br />
If your home has specially wired alarm equipment connected to the telephone line,<br />
ensure the installation of this equipment does not disable your alarm equipment. If<br />
you have questions about what will disable alarm equipment, consult your<br />
telephone company or a qualified installer.<br />
Useful In<strong>for</strong>mation<br />
For assistance, please call: 1-800-211-PANA(7262)<br />
69
FCC and Other In<strong>for</strong>mation<br />
WHEN PROGRAMMING EMERGENCY NUMBERS AND(OR) MAKING TEST<br />
CALLS TO EMERGENCY NUMBERS:<br />
1) Remain on the line and briefly explain to the dispatcher the reason <strong>for</strong> the call.<br />
2) Per<strong>for</strong>m such activities in the off-peak hours, such as early morning or late<br />
evenings.<br />
This device complies with Part 15 of the FCC Rules. Operation is subject to the<br />
following two conditions: (1) This device may not cause harmful interference, and<br />
(2) this device must accept any interference received, including interference that<br />
may cause undesired operation.<br />
CAUTION:<br />
Any changes or modifications not expressly approved by the party responsible <strong>for</strong><br />
compliance could void the user’s authority to operate this device.<br />
Note:<br />
This equipment has been tested and found to comply with the limits <strong>for</strong> a Class B<br />
digital device, pursuant to Part 15 of the FCC Rules. These limits are designed to<br />
provide reasonable protection against harmful interference in a residential<br />
installation. This equipment generates, uses, and can radiate radio frequency<br />
energy and, if not installed and used in accordance with the instructions, may cause<br />
harmful interference to radio communications. However, there is no guarantee that<br />
interference will not occur in a particular installation. If this equipment does cause<br />
harmful interference to radio or television reception, which can be determined by<br />
turning the equipment off and on, the user is encouraged to try to correct the<br />
interference by one or more of the following measures:<br />
— Reorient or relocate the receiving antenna.<br />
— Increase the separation between the equipment and receiver.<br />
— Connect the equipment into an outlet on a circuit different from that to which the<br />
receiver is connected.<br />
— Consult the dealer or an experienced radio/TV technician <strong>for</strong> help.<br />
This equipment is hearing aid compatible as defined by the FCC in 47 CFR Section<br />
68.316.<br />
• Environment — do not place the unit in a room where the temperature is less<br />
than 5°C (41°F) or greater than 40°C (104°F). Allow 10 cm (4") clearance around<br />
the unit <strong>for</strong> proper ventilation. Avoid excessive smoke, dust, mechanical vibration,<br />
shock, or direct sunlight.<br />
• Routine care — wipe the unit with a soft cloth. Do not use benzine, thinner, or any<br />
abrasive powder. When you leave the unit unused <strong>for</strong> a long period of time, unplug<br />
the AC adaptor from the outlet.<br />
• If there is any trouble — disconnect the unit from the telephone line and connect<br />
a known working phone. If the known working phone operates properly, have your<br />
unit repaired by a Factory Servicenter or other Authorized Servicer. If the known<br />
working phone does not operate properly, consult your telephone company.<br />
70
Index<br />
A<br />
Accessories ............................... 3<br />
Answering Calls ....................... 28<br />
Assigning the extension number<br />
.............................................. 17<br />
Auto Answer mode............. 23, 47<br />
B<br />
Battery installation ..................... 9<br />
Battery replacement .................. 9<br />
C<br />
Call Barge In............................ 60<br />
Call on hold.................. 27, 46, 50<br />
Call Privacy.............................. 60<br />
Call Restriction ........................ 58<br />
Call Waiting Caller ID............... 52<br />
Call Waiting Tone ..................... 52<br />
Caller ID Number Auto Edit<br />
feature.............................. 33-35<br />
Caller ID service .......... 16, 28, 29<br />
Caller List, editing .................... 33<br />
Caller List, erasing................... 37<br />
Caller List, storing.................... 36<br />
Caller List, viewing................... 30<br />
Calling Back from the Caller<br />
List ........................................ 32<br />
Conference call........................ 51<br />
D<br />
Data Port.................................. 14<br />
DIAL LOCK.............................. 57<br />
Dialing Mode............................ 20<br />
Directory .................................. 38<br />
Directory, dialing ...................... 41<br />
Directory, editing ...................... 42<br />
Directory, erasing..................... 43<br />
Directory, names and symbols<br />
.............................................. 39<br />
Directory, searching ................. 40<br />
Directory, storing...................... 38<br />
Display ....................................... 8<br />
E<br />
Extension buttons.....................46<br />
Extension indicators .................18<br />
F<br />
FCC and Other In<strong>for</strong>mation......69<br />
FLASH Button ..........................53<br />
Flash time.................................53<br />
Function Menu .........................19<br />
H<br />
Headset, optional .....................61<br />
I<br />
Incoming Call Tone...................54<br />
Installation, AC adaptor............10<br />
Installation, Telephone Line Cord<br />
.........................................11-14<br />
Intercom call........................46-48<br />
Intercom paging ..................46-48<br />
L<br />
LCD contrast ............................21<br />
LINE Buttons ............................25<br />
LINE indicators.........................27<br />
Line Selection...........................55<br />
Location of controls ................6, 7<br />
M<br />
Making Calls.............................25<br />
Memory card ............................18<br />
Microphone ........................25, 28<br />
MUTE .......................................52<br />
N<br />
Navigator key .............................6<br />
O<br />
One-touch auto dial buttons .....44<br />
One-Touch Dialer .....................44<br />
P<br />
Page all ....................................48<br />
Password..................................56<br />
PAUSE......................................52<br />
Power failure...................9, 10, 16<br />
Privacy Feature ........................60<br />
Pulse service............................53<br />
Useful In<strong>for</strong>mation<br />
For assistance, please call: 1-800-211-PANA(7262)<br />
71
Index<br />
R<br />
Redial .......................................26<br />
Redial list..................................26<br />
Ringer Off.................................22<br />
Ringer pattern ..........................23<br />
Ringer tone...............................23<br />
Ringer Volume..........................22<br />
Room Monitor.....................23, 49<br />
Rotary service, Tone dialing .....53<br />
S<br />
Safety Instructions....................67<br />
Shipping product <strong>for</strong> service<br />
................................ Back cover<br />
Specifications ...........................75<br />
SP-PHONE ..............................25<br />
T<br />
Time and date ..........................15<br />
Transferring a call .....................48<br />
Troubleshooting...................64-66<br />
V<br />
Voice mode.........................23, 47<br />
Volume control....................26, 61<br />
W<br />
Wall Mounting...........................62<br />
Warranty...................................73<br />
72
PANASONIC CONSUMER<br />
ELECTRONICS COMPANY, DIVISION<br />
OF MATSUSHITA ELECTRIC<br />
CORPORATION OF AMERICA<br />
One <strong>Panasonic</strong> Way<br />
Secaucus, New Jersey 07094<br />
PANASONIC SALES COMPANY,<br />
DIVISION OF MATSUSHITA<br />
ELECTRIC OF PUERTO RICO, INC.,<br />
Ave. 65 de Infanteria, Km. 9.5<br />
San Gabriel Industrial Park<br />
Carolina, Puerto Rico 00985<br />
<strong>Panasonic</strong> Telephone <strong>Products</strong><br />
Limited Warranty<br />
Limited Warranty Coverage<br />
If your product does not work properly because of a defect in materials or workmanship,<br />
<strong>Panasonic</strong> Consumer Electronics Company or <strong>Panasonic</strong> Sales Company (collectively<br />
referred to as “the warrantor”) will, <strong>for</strong> the length of the period indicated on the chart below,<br />
which starts with the date of original purchase (“warranty period”), at its option either (a)<br />
repair your product with new or refurbished parts, or (b) replace it with a new or a<br />
refurbished product. The decision to repair or replace will be made by the warrantor.<br />
Parts<br />
One (1) Year<br />
Labor<br />
One (1) Year<br />
During the “Labor” warranty period there will be no charge <strong>for</strong> labor. During the “Parts”<br />
warranty period, there will be no charge <strong>for</strong> parts. You must mail-in your product during the<br />
warranty period. This Limited Warranty excludes both parts and labor <strong>for</strong> batteries,<br />
antennas, and cosmetic parts (cabinet). This warranty only applies to products purchased<br />
and serviced in the United States or Puerto Rico. This warranty is extended only to the<br />
original purchaser of a new product which was not sold “as is”.<br />
Mail-In Service<br />
For assistance in the continental U.S.A. in obtaining repairs please ship the product to:<br />
<strong>Panasonic</strong> Services Company<br />
Customer Servicenter<br />
Suite B<br />
4900 George McVay Drive<br />
McAllen, TX 78503<br />
For assistance in Puerto Rico call <strong>Panasonic</strong> Sales Company (787)-750-4300 or fax (787)-<br />
768-2910.<br />
When shipping the unit carefully pack and send it prepaid, adequately insured and<br />
preferably in the original carton. Include a letter detailing the complaint and provide a day<br />
time phone number where you can be reached.<br />
IF REPAIR IS NEEDED DURING THE WARRANTY PERIOD THE PURCHASER WILL BE<br />
REQUIRED TO FURNISH A SALES RECEIPT/PROOF OF PURCHASE INDICATING<br />
DATE OF PURCHASE, AMOUNT PAID AND PLACE OF PURCHASE. CUSTOMER WILL<br />
BE CHARGED FOR THE REPAIR OF ANY UNIT RECEIVED WITHOUT SUCH PROOF<br />
OF PURCHASE.<br />
Limited Warranty Limits And Exclusions<br />
This warranty ONLY COVERS failures due to defects in materials or workmanship, and<br />
DOES NOT COVER normal wear and tear or cosmetic damage. The warranty ALSO DOES<br />
NOT COVER damages which occurred in shipment, or failures which are caused by<br />
products not supplied by the warrantor, or failures which result from accidents, misuse,<br />
abuse, neglect, mishandling, misapplication, alteration, faulty installation, set-up<br />
adjustments, misadjustment of consumer controls, improper maintenance, power line surge,<br />
lightning damage, modification, introduction of sand, humidity or liquids, commercial use<br />
such as hotel, office, restaurant, or other business or rental use of the product, or service by<br />
anyone other than a Factory Servicenter or other Authorized Servicer, or damage that is<br />
attributable to acts of God.<br />
73
THERE ARE NO EXPRESS WARRANTIES EXCEPT AS LISTED UNDER “LIMITED<br />
WARRANTY COVERAGE”. THE WARRANTOR IS NOT LIABLE FOR INCIDENTAL OR<br />
CONSEQUENTIAL DAMAGES RESULTING FROM THE USE OF THIS PRODUCT, OR<br />
ARISING OUT OF ANY BREACH OF THIS WARRANTY. (As examples, this excludes<br />
damages <strong>for</strong> lost time, lost calls or messages, cost of having someone remove or re-install<br />
an installed unit if applicable, travel to and from the servicer. The items listed are not<br />
exclusive, but are <strong>for</strong> illustration only.) ALL EXPRESS AND IMPLIED WARRANTIES,<br />
INCLUDING THE WARRANTY OF MERCHANTABILITY, ARE LIMITED TO THE PERIOD<br />
OF THE LIMITED WARRANTY.<br />
Some states do not allow the exclusion or limitation of incidental or consequential damages,<br />
or limitations on how long an implied warranty lasts, so the exclusions may not apply to you.<br />
This warranty gives you specific legal rights and you may also have other rights which vary<br />
from state to state. If a problem with this product develops during or after the warranty<br />
period, you may contact your dealer or Servicenter. If the problem is not handled to your<br />
satisfaction, then write to the warrantor’s Consumer Affairs Department at the addresses<br />
listed <strong>for</strong> the warrantor.<br />
PARTS AND SERVICE, WHICH ARE NOT COVERED BY THIS LIMITED WARRANTY,<br />
ARE YOUR RESPONSIBILITY.<br />
Customer Services Directory<br />
For Product In<strong>for</strong>mation, <strong>Operating</strong> Assistance, Literature Request,<br />
Dealer Locations, and all Customer Service inquiries please contact:<br />
1-800-211-PANA (7262), Monday-Friday 9 am-9 pm; Saturday-<br />
Sunday 9 am-7 pm, EST.<br />
or send e-mail :<br />
consumerproducts@panasonic.com<br />
For hearing or speech impaired TTY users, TTY : 1-877-833-8855<br />
Web Site: http://www.panasonic.com<br />
You can purchase parts, accessories or locate your<br />
nearest servicenter by visiting our Web Site.<br />
Accessory Purchases:<br />
1-800-332-5368 (Customer Orders Only)<br />
For hearing or speech impaired TTY users, TTY : 1-866-605-1277<br />
<strong>Panasonic</strong> Services Company 20421 84th Avenue South, Kent, WA 98032<br />
(6 am to 5 pm Monday - Friday; 6 am to 10:30 am Saturday; PST)<br />
(Visa, MasterCard, Discover Card, American Express, Check)<br />
Service in Puerto Rico<br />
Matsushita Electric of Puerto Rico, Inc. <strong>Panasonic</strong> Sales Company/<br />
Factory Servicenter:<br />
Ave. 65 de Infantería, Km. 9.5, San Gabriel Industrial Park,<br />
Carolina, Puerto Rico 00985<br />
Phone (787)750-4300 Fax (787)768-2910<br />
74
Specifications<br />
Power Supply:<br />
AC adaptor (120 V AC, 60 Hz)<br />
Three “AA” size Manganese (R6, UM-3)<br />
batteries (<strong>for</strong> a power failure, p. 9)<br />
Power Consumption: Standby: Approx. 1 W<br />
Maximum: Approx. 1.5 W<br />
Dimensions (H x W x D):<br />
Mass (Weight):<br />
Dialing Mode:<br />
<strong>Operating</strong> Environment:<br />
Approx. 96 mm x 186 mm x 231 mm<br />
(3 25 / 32 " x 7 5 / 16 " x 9 1 / 16 ")<br />
Approx. 890 g (1.94 lb.)<br />
Tone (DTMF)/Pulse<br />
5 ˚C–40 ˚C (41 ˚F–104 ˚F)<br />
Specifications are subject to change without notice.<br />
Useful In<strong>for</strong>mation<br />
For assistance, please call: 1-800-211-PANA(7262)<br />
75
For product service<br />
• Call 1-800-211-PANA(7262) <strong>for</strong> the location of an authorized servicenter.<br />
• <strong>Panasonic</strong>’s e-mail address <strong>for</strong> customer inquiries:<br />
consumerproducts@panasonic.com<br />
<strong>for</strong> customers in the USA or Puerto Rico ONLY<br />
When you ship the product<br />
• Carefully pack your unit, preferably in the original carton.<br />
• Attach a letter, detailing the symptom, to the outside of the carton.<br />
Symptom<br />
• Send the unit to an authorized servicenter, prepaid and adequately insured.<br />
• Do not send your unit to the <strong>Panasonic</strong> Consumer Electronics Company<br />
listed below or to executive or regional sales offices. These locations do<br />
not repair consumer products.<br />
If you need assistance with the set-up or operation,<br />
please call 1-800-211-PANA(7262)<br />
<strong>Panasonic</strong> Consumer Electronics Company,<br />
Division of Matsushita Electric Corporation of America<br />
One <strong>Panasonic</strong> Way, Secaucus, New Jersey 07094<br />
<strong>Panasonic</strong> Sales Company,<br />
Division of Matsushita Electric of Puerto Rico, Inc.<br />
Ave. 65 de Infantería, Km. 9.5, San Gabriel Industrial Park<br />
Carolina, Puerto Rico 00985<br />
PQQX13437YA-BM S0902-1092