Nera F33 - GMPCS Personal Communications Inc.
Nera F33 - GMPCS Personal Communications Inc.
Nera F33 - GMPCS Personal Communications Inc.
Create successful ePaper yourself
Turn your PDF publications into a flip-book with our unique Google optimized e-Paper software.
Back to Start Page<br />
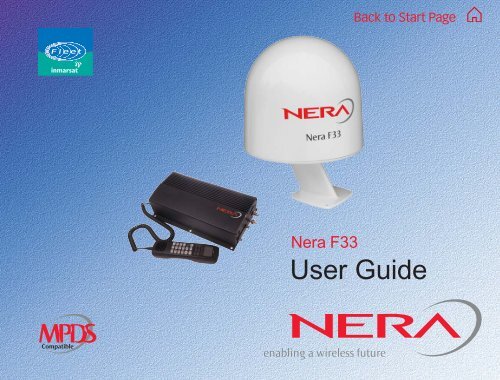
<strong>Nera</strong> <strong>F33</strong><br />
User Guide
USER GUIDE<br />
OPERATION FROM PC ............................5<br />
Starting up ......................................................... 5<br />
Phone book ....................................................... 7<br />
- capacity ........................................................... 7<br />
- abbreviated dialing .......................................... 7<br />
- adding or editing entries .................................. 7<br />
- saving entries to/from PC ................................ 8<br />
Traffic Log .......................................................... 9<br />
Traffic log settings ............................................ 10<br />
Traffic log printout viewer -<br />
normal calls (Cct) .............................................11<br />
Traffic log output to serial printer ...................... 12<br />
CONFIGURATION FROM PC .................13<br />
Menu functions ................................................ 13<br />
Function reference list ..................................... 14<br />
Access level .................................................... 15<br />
- changing the PIN code .................................. 15<br />
- functions requiring owner level ...................... 16<br />
- shifting to owner level .................................... 16<br />
- changing owner level password .................... 16<br />
Selecting default Net service provider ............. 17<br />
Phone setup .................................................... 19<br />
- setting call duration limit ................................ 19<br />
- setting date and time ..................................... 19<br />
- message indication........................................ 20<br />
Advanced functions ......................................... 21<br />
Access control ................................................. 22<br />
- restricted dialing ............................................ 22<br />
<strong>Nera</strong> <strong>F33</strong><br />
CONTENTS<br />
- checking the dialing setup ............................. 22<br />
- restricted dialing setup .................................. 23<br />
- access code .................................................. 24<br />
- restricted SIM usage ..................................... 25<br />
- setting SIM restrictions .................................. 25<br />
Configuration menu ......................................... 26<br />
- ISDN protocol configuration ........................... 26<br />
- charge tone setup.......................................... 27<br />
- net service providers ..................................... 28<br />
- spot beam report method .............................. 29<br />
- set diagnostics .............................................. 29<br />
Information available ....................................... 30<br />
- miscellaneous version Id information ............. 30<br />
- network status information............................. 30<br />
Customize menu.............................................. 31<br />
- paid functions ................................................ 31<br />
- phone name setup ......................................... 31<br />
Routing of incoming calls ................................. 32<br />
- routing of incoming calls (examples) ............. 33<br />
MSN configuration ........................................... 34<br />
- <strong>Nera</strong> ISDN Handset....................................... 35<br />
- ISDN port ...................................................... 37<br />
- RS-232 port ................................................... 38<br />
- USB port........................................................ 39<br />
Saving and reloading configurations ................ 40<br />
Print handling setup ......................................... 42<br />
Mobile Packet Data Service ............................. 43<br />
SYSTEM DESCRIPTION ........................44<br />
3
USER GUIDE<br />
OPERATION FROM PC<br />
Starting up<br />
• Switch ON <strong>Nera</strong> <strong>F33</strong>,<br />
For location of the ON/OFF switch, see "Switching<br />
ON" in Getting Started.<br />
• Turn ON the PC and click<br />
Start>Programs>vtLite Mobile.<br />
Note! VtLite can only be used on one PC at a time.<br />
1<br />
1 The satellite search program is initialized.<br />
See also "Satellite search" in Getting Started.<br />
2<br />
2 <strong>Nera</strong> <strong>F33</strong> starts searching for last known satellite/elevation<br />
(Ocean Region) as default.<br />
3 When receiving a satellite signal, a signal strength<br />
bar will appear in the search window.<br />
The longer the signal bar or higher the signal<br />
strength indicator value, the better the signal quality.<br />
The maximum marker indicates the highest signal<br />
strength achieved during the current search.<br />
Note! It is recommended that the signal strength<br />
reading (S/N=Signal/Noise ratio) should be at least<br />
500, typically 540. The antenna will automatically<br />
3<br />
<strong>Nera</strong> <strong>F33</strong><br />
5
OPERATION FROM PC CONT’D<br />
USER GUIDE<br />
fine-tune to the best signal and accept it.<br />
Clicking Seek starts the search again.<br />
If required, select a specific satellite by clicking New.<br />
See also "Selecting default Net provider" in<br />
Getting Started.<br />
4<br />
4 The equipment is ready for use when the<br />
Main window appears.<br />
To make a connection, see "Making a call" in<br />
Getting Started.<br />
S/N=Signal/Noise ratio<br />
6<br />
<strong>Nera</strong> <strong>F33</strong>
USER MANUAL GUIDE<br />
Phone book<br />
Adding and editing entries can also be done from the<br />
handset, see OPERATION FROM HANDSET in<br />
Getting Started.<br />
Phone book capacity<br />
MCU SIM card<br />
(Data vary with card type)<br />
Phone numbers: 100 entries 100 entries<br />
Number length: 19 digits 19 digits<br />
Name length: 29 characters 12 characters<br />
Entry numbers: 0 - 99 100 and up<br />
The SIM card entries and "MCU" entries merge when<br />
the card is inserted. The list is sorted by name.<br />
1<br />
2<br />
OPERATION FROM PC CONT’D<br />
Abbreviated dialing (prefix 23)<br />
1 Clicking Book opens the Phone book.<br />
2 Scroll through list œ/‘ to wanted entry.<br />
Example: dialing 2 3 1 5 on the analogue telephone<br />
or ISDN keypad fetches and sends the telephone<br />
number stored under short number entry 15.<br />
Adding or editing entries<br />
3 Clicking New (window 2) opens the window used<br />
to add an entry to the book.<br />
Use Del to modify. Save stores the new entry.<br />
<strong>Nera</strong> <strong>F33</strong><br />
3<br />
7
OPERATION FROM PC CONT’D<br />
USER GUIDE<br />
4 Clicking Edit (window 2 on previous page) opens<br />
the window allowing changes to be made in the<br />
Phone book.<br />
Use Del to modify. Remov erases the entry.<br />
Note! The book is also used with the restriction “Dial<br />
from book only”, see "Restricted dialing setup".<br />
Netwk = Net provider<br />
Another Net provider may be selected when dialing<br />
this number from the phone book. If no selection, the<br />
system uses the default one.<br />
Terrestrial network<br />
It is possible to change Terrestrial network on the<br />
selected Net provider (00 is most common).Call your<br />
Net provider for more information.<br />
4<br />
5<br />
Saving entries to/from PC<br />
(owner level only, see "Shifting to owner level")<br />
5 Click File to save phone book, or replace the<br />
stored one.<br />
8<br />
<strong>Nera</strong> <strong>F33</strong>
USER MANUAL GUIDE<br />
Traffic Log<br />
This function logs all outgoing and incoming calls<br />
both with and without SIM card inserted. <strong>Inc</strong>oming<br />
calls may be logged as well.<br />
Up to 100 calls can be logged:<br />
Circuit switched calls (Cct) including:<br />
• speech<br />
• fax<br />
• data<br />
Packet switched data calls (Mpds) including:<br />
• Mobile Packet Data Service calls<br />
The <strong>Nera</strong> <strong>F33</strong> owner may set the log output mode as<br />
follows, (see "Traffic log settings"):<br />
• paused<br />
• cleared (stops logging and clears the log)<br />
• enabled<br />
1<br />
2<br />
3<br />
OPERATION FROM PC CONT’D<br />
Traffic log readout<br />
1 Clicking Log opens the Traffic log window.<br />
2 The Traffic log window shows whether the logging<br />
is enabled, whether incoming calls are logged, and<br />
the total number of unprinted calls (MPDS and Cct<br />
calls).<br />
Circuit switched calls:<br />
Clicking Cct displays the list of calls.<br />
3 Scroll œ/‘ to wanted call record and press ’ to<br />
display details of the selected call.<br />
<strong>Nera</strong> <strong>F33</strong><br />
4<br />
* Calls not yet printed<br />
# Tagged for printout<br />
4 The call details include data such as dialed<br />
number, start of the call, duration, service and<br />
terminal Id.<br />
Quit reverts to main window.<br />
9
OPERATION FROM PC CONT’D<br />
Traffic log settings<br />
(owner level only, see "Shifting to owner level")<br />
1 In the Main window, clicking Log opens the Traffic<br />
log window, which displays the current log mode,<br />
number of unprinted calls, and whether logging of<br />
incoming calls is enabled/disabled.<br />
• Click Edit or ’ to open Logging mode window:<br />
• Paused: any logging is off.<br />
• Cleared: all log entries are deleted (incoming and outgoing).<br />
• Enabled: outgoing logging is on.<br />
• Automatic printing to RS-232 A: output to local printer<br />
• Automatic printing to RS-232 B: output to local printer<br />
Scroll œ/‘ to wanted mode, and click or press ç<br />
to select.<br />
• Scroll down ‘ to Log incoming calls and click<br />
Edit or ’ to enable or disable logging of incoming calls.<br />
Press ç to select.<br />
Circuit switched calls:<br />
2 Clicking Cct in the Traffic log window (1) opens<br />
the list of all call records except MPDS calls.<br />
Print outputs all unprinted calls (marked with a star):<br />
• Clicking Tag* marks all calls with a hash, which<br />
adds the records to the printout file.<br />
• Clicking Tag marks the selected call with a hash,<br />
which adds the record to the printout file.<br />
• Clicking Tag again untags a selected record.<br />
3 Pressing ’ at a record when in window (2)<br />
displays detailed call data.<br />
10<br />
1<br />
2<br />
3<br />
Not printed<br />
USER GUIDE<br />
Hours:minutes:seconds<br />
<strong>Nera</strong> <strong>F33</strong>
USER MANUAL GUIDE<br />
OPERATION FROM PC CONT’D<br />
Traffic log printout viewer - normal calls (Cct)<br />
The viewer lists tagged call records.<br />
Records that have been printed out previously are<br />
Click to save<br />
record file<br />
Click to delete<br />
record file<br />
Click for<br />
printout<br />
Subscriber<br />
number<br />
Type of<br />
service<br />
Start date<br />
and time<br />
marked with a hash.<br />
The record file can be printed out or saved to disk.<br />
For default setup, see "PRINT HANDLING SETUP".<br />
Call duration<br />
in minutes<br />
and seconds<br />
Terminal<br />
Id<br />
MSN<br />
number<br />
Net<br />
service<br />
provider<br />
User name if<br />
access code<br />
is activated<br />
Ref. no.<br />
#: record printed<br />
previously.<br />
"No hash" when<br />
printed first time.<br />
Number of<br />
records<br />
<strong>Nera</strong> <strong>F33</strong><br />
Duration in seconds<br />
per service<br />
Accumulated time in minutes<br />
and 1/100 of a minute<br />
11
OPERATION FROM PC CONT’D<br />
Traffic log output to serial printer<br />
When connected, traffic log<br />
details are automatically output<br />
as indicated below.<br />
One line is printed out after<br />
each call.<br />
USER GUIDE<br />
For setting up, see Serial printer settings in Getting<br />
Started.<br />
Select logging mode in vtLite Mobile Traffic log to:<br />
Automatic printing to RS232A or RS232B,<br />
see Traffic log settings earlier in this manual.<br />
Reference<br />
number<br />
Subscriber<br />
number<br />
Type of<br />
service<br />
Start date<br />
and time<br />
Call duration in<br />
minutes and<br />
seconds<br />
MSN<br />
number<br />
Net service<br />
provider<br />
User name<br />
if access<br />
code is<br />
activated<br />
018 004766779010 Speech 030508 08:33 0:53 20 004Tel captain<br />
019 004766779010 Speech 030508 08:35 1:04 20 004Tel captain<br />
020 004791381198 Speech 030508 08:38 0:12 20 004Tel<br />
021 004766779016 Speech 030508 08:40 0:24 20 004Tel captain<br />
022 004766779016 9k6fax 030508 08:45 0:56 40 004Tel<br />
023 004766779016 9k6fax 030508 08:55 2:06 40 004Tel<br />
024 004766779016 9k6fax 030508 09:05 0:56 40 004Tel<br />
025 004766779070 9k6dat 030508 10:40 10:50 60 004Tel<br />
026 004766779070 9k6dat 030508 11:50 0:58 60 004Tel<br />
12<br />
<strong>Nera</strong> <strong>F33</strong>
USER GUIDE<br />
Menu functions<br />
Point at icons and double-click the mouse to open menus and functions.<br />
CONFIGURATION FROM PC<br />
Only appears in OWNER level.<br />
Only appears in<br />
OWNER level<br />
Only appears when<br />
Diagnostics is ON<br />
Only appears in OWNER level.<br />
<strong>Nera</strong> <strong>F33</strong><br />
13
CONFIGURATION FROM PC CONT’D<br />
USER GUIDE<br />
Function reference list<br />
Reference number for direct selection. Click menu in main window and then key in the number.<br />
Ref. Function Features<br />
1 Set default Net provider Allows changing Net service provider (and terrestrial network).<br />
See "Selecting default Net service provider".<br />
2 Set access level Allows shifting between user level and owner level, changing PIN code and<br />
owner password. See "Access level".<br />
4 Phone setup menu<br />
42 Call duration guard Sets maximum call duration for 64 kbps calls.<br />
44 Set time zone Sets MCU Time Zone (UTC and date are set automatically).<br />
47 Message indication Switches indication of received fax and data cals on/off.<br />
9 Advanced functions menu<br />
91 Access control menu See "Advanced functions".<br />
911 Restrict dial Only allows calls from Phone Book. List of barred numbers may be established.<br />
912 Access code Sets personal codes for using the satellite terminal.<br />
913 Restrict SIM usage Only allows calls with specific card, no card or any card.<br />
93 Software update prep Prepares MCU for software update.<br />
94 Alarms and messages See information on CD<br />
97 Configuration menu<br />
971 ISDN configuration Chooses between ISDN protocols.<br />
972 Net service providers Changing Net service provider data.<br />
974 Set diagnostics Allows additional system information to be displayed<br />
977 Rx L-Band setup Not in use<br />
978 Charge tone Setup and enabling/disabling charge tone.<br />
979 Spot beam report method Sending spot ID or position<br />
98 Information available See "Advanced functions".<br />
982 Misc.version Id information Displays a series of version information windows and FWD ID.<br />
983 Transceiver status Displays max/min voltages and temperatures in RF unit.<br />
984 EIRP table Carrier status (not in use)<br />
989 Network status information Displays various network status information.<br />
99 Customization menu See "Advanced functions".<br />
991 Paid functions Installs additional functions, if any.<br />
992 Phone name setup Allows altering the factory and phone name.<br />
14<br />
<strong>Nera</strong> <strong>F33</strong>
USER MANUAL GUIDE<br />
CONFIGURATION FROM PC CONT’D<br />
Access level<br />
The <strong>Nera</strong> <strong>F33</strong> user program (vtLite Mobile) is accessible<br />
from two levels:<br />
• USER LEVEL<br />
• OWNER LEVEL – accessed by owner level password.<br />
Warning! To prevent misuse, passwords other than<br />
default must be entered before putting the <strong>Nera</strong> <strong>F33</strong><br />
in operation.<br />
Activating/changing user PIN code<br />
1 Double-click the Set access level icon on the<br />
Function menu.<br />
2 Click Edit to enter/modify the PIN code.<br />
3 Key in:<br />
• Old PIN code (default: 1234)<br />
• New PIN code (4 - 10 digits possible)<br />
• Retype to confirm<br />
Click Ok for each entry and to store the new code.<br />
Note! Clicking Ok without entering any numbers for<br />
New PIN and Retype new PIN disables the PIN code.<br />
NB! The Old PIN code must be entered to reactivate<br />
the previous PIN code.<br />
1<br />
2<br />
3<br />
If the PIN is accidentally lost, it is possible to reset the<br />
user’s password to default (1234) by logging in as owner:<br />
"* + owner’s password"<br />
(Resetting is not possible on the SIM card.)<br />
<strong>Nera</strong> <strong>F33</strong><br />
15
CONFIGURATION FROM PC CONT’D<br />
USER GUIDE<br />
Functions requiring owner level<br />
Programming of the functions below requires that the<br />
user access is set to OWNER LEVEL:<br />
• Traffic log settings/printouts<br />
• Modifying password<br />
• Net Service provider names<br />
• Restricted dial<br />
• Restricted SIM usage<br />
• ISDN configuration (except data/time element)<br />
• Access code<br />
• Paid functions<br />
• Phone name setup<br />
• Spot beam report method<br />
Shifting to owner level<br />
1 Click Owner in Set access level window.<br />
2 Key in the password.<br />
Note! The default password is: 1 2 3 4 5 6 7 8 9 0<br />
Clicking Ok activates the Owner level.<br />
1<br />
2<br />
Changing owner level password<br />
3 Open the Set access level window again, and<br />
click Edit to modify the owner password. Key in:<br />
• Current password<br />
• New password (10 – 12 digits)<br />
• Retype to confirm<br />
Click Ok for each entry and to store new password.<br />
To revert to User level, open the "Set access level"<br />
window and click User.<br />
16<br />
3<br />
<strong>Nera</strong> <strong>F33</strong>
USER MANUAL GUIDE<br />
CONFIGURATION FROM PC CONT’D<br />
Selecting default Net service<br />
provider<br />
The default Inmarsat Net service provider for a<br />
satellite (Ocean Region) is automatically used if<br />
the user does not select another one when making<br />
a call.<br />
Make sure that you choose the Net service provider<br />
who commissioned the equipment. You will<br />
othervise be barred or charged additional rate.<br />
In this menu default Net service provider can be<br />
preprogrammed for the current Ocean Region.<br />
When using SIM card, selection is automatically<br />
restricted to one of the allowed Net service providers<br />
and does not need to be programmed!<br />
1<br />
2<br />
Procedure:<br />
1 On the Function menu, double-click the Set<br />
default Net provider icon to display the current<br />
selections.<br />
3<br />
2 Scroll up/down to change satellite: œ/‘.<br />
3 Clicking Selct or pressing Ð opens the window<br />
promting you to confirm the choice of satellite with<br />
the current default Net service provider.<br />
To change default Net service provider for a satellite<br />
region, see next page.<br />
<strong>Nera</strong> <strong>F33</strong><br />
17
CONFIGURATION FROM PC CONT’D<br />
USER GUIDE<br />
4 Clicking Edit or pressing Ð at the satellite region<br />
selected in step 2, displays the list of available Net<br />
service providers.<br />
4<br />
5 Scroll to required Net provider: œ/‘, and<br />
press ç to enter chosen Net as default.<br />
Save stores the selected Net provider for this satellite<br />
(Ocean Region).<br />
6 Click Yes sets Net service provider for all satellites<br />
(Ocean Regions).<br />
5<br />
6<br />
18<br />
<strong>Nera</strong> <strong>F33</strong>
USER MANUAL GUIDE<br />
CONFIGURATION FROM PC CONT’D<br />
Phone setup<br />
This phone setup menu includes the functions:<br />
• Limitation of call duration.<br />
• Setting date and time.<br />
• Indication of received calls, see next page.<br />
Double-click the Phone setup menu icon in the<br />
Function menu to access the above functions:<br />
Call duration limit<br />
The call duration guard prevents accidental transmission<br />
of prolonged 9.6 kbps data calls.<br />
The timer sets the point at which the call is automatically<br />
cleared:<br />
1 Double-click the Call duration guard icon<br />
2 Click Edit to set the timer.<br />
3 Scroll œ/‘ to select the required limit (either<br />
“Stay connected” or in steps between 15 minutes<br />
and 12 hours), and click Selct to store the setting.<br />
Setting time zone<br />
The function sets the time displayed in the window:<br />
1 Double-click Set time zone to change zone.<br />
4 Clicking Edit opens the list.<br />
5 Scroll œ/‘ to select the required zone.<br />
Click Selct to store the selected zone.<br />
1<br />
2<br />
3<br />
4<br />
5<br />
<strong>Nera</strong> <strong>F33</strong><br />
19
CONFIGURATION FROM PC CONT’D<br />
USER GUIDE<br />
Message indication<br />
When the Message Indication function is set On, a<br />
received data and/or fax call is signalled in all <strong>Nera</strong><br />
Display Handsets:<br />
1<br />
The ringing stops when pressing<br />
call is finished.<br />
, or when the<br />
Data call:<br />
F2M = Fixed-to-Mobile<br />
F2M data call<br />
Press ESC. . . . . .<br />
2<br />
Fax call:<br />
F2M fax call<br />
Press ESC. . . . . .<br />
When the call is<br />
finished, the display<br />
reverts to idle.<br />
Telenor IOR<br />
Ready for call<br />
Setup:<br />
1 Double-click the Message Indication icon in the<br />
Phone setup menu.<br />
2 Select Fax or Data and Enable or Disable<br />
indication of received messages, as required.<br />
Press Save to store the settings.<br />
20<br />
<strong>Nera</strong> <strong>F33</strong>
USER MANUAL GUIDE<br />
Advanced<br />
functions<br />
*<br />
Some Advanced<br />
functions are accessible<br />
from OWNER LEVEL<br />
only.<br />
The OWNER LEVEL is<br />
protected by password.<br />
For shifting to owner<br />
level and assignment of<br />
password,<br />
see "Access level".<br />
*<br />
CONFIGURATION FROM PC CONT’D<br />
*<br />
**<br />
**<br />
Other Advanced<br />
functions are accessible<br />
when Diagnostics is<br />
turned ON.<br />
<strong>Nera</strong> <strong>F33</strong><br />
The Advanced functions include the following menus:<br />
• Access control: Restrict dial<br />
Access code<br />
Restrict SIM usage<br />
• Software update: Prepare software upgrade<br />
• Configuration: ISDN configuration<br />
Net service provider names<br />
Set diagnostics<br />
Spot Beam Report Method<br />
• Information available: Misc. version Id information<br />
Network status information<br />
(when diagnostics is ON, see "Set diagnostics")<br />
• Customize:<br />
Paid functions<br />
Phone name setup (owner level)<br />
21
CONFIGURATION FROM PC CONT’D<br />
Access control<br />
Restricted dialing<br />
The restricted dialing function allows the owner to<br />
establish a Barred list of subscriber numbers that<br />
cannot be called; or set <strong>Nera</strong> <strong>F33</strong> for dialing from<br />
Phone Book only. The restricted dialing modes<br />
prevent misuse of <strong>Nera</strong> <strong>F33</strong>:<br />
• Barred list, which may contain up to 10 phone<br />
numbers or part of numbers that can not be<br />
called. E.g. the entry "0087" in the barred list<br />
prevents all mobile-to-mobile calls.<br />
• Dial from Book only, which restricts calls to the<br />
numbers in <strong>Nera</strong> <strong>F33</strong> Phone Book. It is still possible<br />
to append: an entry with number field "0047" means<br />
that it is possible to dial all Norwegian numbers.<br />
When a SIM card is inserted, the SIM entries will<br />
not be merged with the "phone" entries.<br />
The function is active for non-SIM operation and for<br />
one specific SIM card, see "Restricted SIM usage".<br />
• No restrictions (default).<br />
Only one mode can be active at one time, as selected<br />
by the owner, see next page.<br />
Checking the dialing setup<br />
Via the Function menu > Advanced functions<br />
menu, double-clicking the Restrict dial icon on the<br />
Access control menu shows the active mode:<br />
• Barred list<br />
• Dial from Book only<br />
• No restrictions<br />
22<br />
Exit Menu<br />
1. Access<br />
control<br />
USER GUIDE<br />
4. Alarms and<br />
messages<br />
8. Information 9. Customize<br />
Exit available Menu 1. Restricted 2. Access<br />
dial code<br />
6. Satellite<br />
setup<br />
3. Restrict SIM<br />
usage<br />
7.<br />
Configuration<br />
Alternative<br />
modes<br />
<strong>Nera</strong> <strong>F33</strong>
USER MANUAL GUIDE<br />
CONFIGURATION FROM PC CONT’D<br />
Restricted dialing setup<br />
(owner level only)<br />
"Barred list" and phone book are established as<br />
follows:<br />
1<br />
1 Open the Restricted dial window as shown on the<br />
previous page.<br />
2 The Restricted dialing window shows which list is<br />
currently active.<br />
Edit allows selection of restriction mode.<br />
Scroll up/down to select:<br />
(Selct enters the chosen mode)<br />
2<br />
3 Clicking List displays the blocked phone numbers.<br />
The List key only appears when Current mode is<br />
Barred list.<br />
4 Clicking Edit allows the barred number to be<br />
modified:<br />
The field is empty when clicking New to add a<br />
phone number to the list.<br />
Remove deletes number.<br />
Save stores the changes.<br />
5 When the restriction mode "Dial from Book only" is<br />
active, clicking Book allows data to be entered.<br />
3<br />
4<br />
5<br />
Warning! Remember to revert to user level<br />
<strong>Nera</strong> <strong>F33</strong><br />
23
CONFIGURATION FROM PC CONT’D<br />
USER GUIDE<br />
Access code (owner level only)<br />
Access code can be activated for 4.8 speech only.<br />
When the access code function has been activated,<br />
the user is always prompted for a 1 - 8 digit personal<br />
code when making a call.<br />
All telephones are activated.To release a telephone for<br />
use without access code, see MSN configuration.<br />
Entering the personal code allows the subscriber<br />
number to be dialed, e.g.:<br />
1<br />
<strong>Nera</strong> ISDN Handset:<br />
Telenor IOR<br />
Code<br />
* Dial #<br />
24<br />
0 0 4 abc 7pqrs<br />
Analogue telephone:<br />
1<br />
2 3<br />
4<br />
6mno 7pqrs 2 abc 4 abc 4 abc 7pqrs 0 0<br />
0 0 4 7 6 7 2 4 4 7 0 0<br />
Setup:<br />
1 Double-click the Access code icon in the Access<br />
control menu.<br />
2 Pressing New opens the Access code entry<br />
window, allowing a name associated with the<br />
particular code to be entered.<br />
3 Pressing Ok allows entering the personal code.<br />
Pressing Ok again prompts you to confirm the entry.<br />
4 When pressing the Access code icon the next<br />
time (1), the window displays a list of the names<br />
associated with the programmed access codes.<br />
2<br />
3<br />
4<br />
<strong>Nera</strong> <strong>F33</strong>
USER MANUAL GUIDE<br />
CONFIGURATION FROM PC CONT’D<br />
Restricted SIM usage<br />
Allowed SIM<br />
<strong>Nera</strong> <strong>F33</strong> can be set to operate from:<br />
• Lock SIM, locked to one specific SIM card.<br />
Any other SIM user will be rejected.<br />
• No SIM card. All SIM users will be rejected.<br />
• Any SIM card.<br />
1<br />
Setting SIM restrictions<br />
(owner level only)<br />
1 Double-click the Restrict SIM usage icon.<br />
2 The SIM restrictions window shows an example<br />
with the setting Allowed SIM: No SIM.<br />
Click Any (default) to set <strong>Nera</strong> <strong>F33</strong> for operation<br />
from a specific card only.<br />
Lock SIM:<br />
3 Click Lock and insert the actual SIM card.<br />
<strong>Nera</strong> <strong>F33</strong> can now be operated with that specific<br />
card only.<br />
2<br />
3<br />
4<br />
4 When retracting the card, the Id of the SIM provider<br />
is displayed.<br />
Ok stores the settings.<br />
<strong>Nera</strong> <strong>F33</strong><br />
25
CONFIGURATION FROM PC CONT’D<br />
Configuration menu<br />
ISDN protocol configuration<br />
1 Open the Configuration menu via the Function<br />
menu > Advanced functions menu.<br />
2 Double-clicking the ISDN configuration displays<br />
the ISDN configurations implemented in <strong>Nera</strong> <strong>F33</strong>.<br />
Switch to owner level to edit the entries:<br />
• Protocol<br />
Select Euro ISDN for connection of equipment<br />
conforming to the European ISDN standard.<br />
Select NI-1 protocol for equipment conforming to<br />
the NI-1 standard (National ISDN-1).<br />
• Date/time element<br />
When enabled, date and time is sent to the connected<br />
Terminal Equipment during call establishment. Some<br />
ISDN devices do not survive this message. The date<br />
and time transmission may then be disabled.<br />
• Layer 2 Activation<br />
The layer 2 connection is deactivated after some<br />
idle time as default. Some ISDN devices interpret<br />
this as an alarm situation. Layer 2 dectivation can<br />
then be disabled. When the ISDN protocol is set to<br />
NI-1, this option is on as default.<br />
• Default service<br />
Some ISDN devices can not signal their own MSN<br />
number. Such a phone will be not able to use the<br />
64 kbps service since all "unknown" speech devices<br />
are required to use the 4.8 speech service. The<br />
user can set <strong>Nera</strong> <strong>F33</strong> to map all "unknown" devices<br />
to 4.8 speech (AMBE) service.<br />
NB! Remember to revert to user level.<br />
26<br />
1<br />
2<br />
Exit Menu<br />
9. Customize<br />
1. Access<br />
control<br />
Exit Menu 1. ISDN<br />
configuration<br />
8. Charge tone<br />
9. Spot Beam<br />
Report Method<br />
3. Software<br />
update prep.<br />
USER GUIDE<br />
2. Net service<br />
providers<br />
4. Alarms and<br />
messages<br />
4. Set<br />
diagnostics<br />
7. Configuration<br />
7. Rx L-Band<br />
Setup<br />
<strong>Nera</strong> <strong>F33</strong>
USER MANUAL GUIDE<br />
Charge tone setup (owner level only)<br />
When the charge tone function has been enabled, a<br />
single frequency tone or DTMF is transmitted once<br />
the call has been established. The tone informs an<br />
external debiting system, e.g. a pay phone connected<br />
to the MCU that charging can start.<br />
Procedure:<br />
1 Double-click the charge tone icon via the<br />
Function menu > Advanced functions menu ><br />
Configuration menu.<br />
2 The Charge tone window appears. The example<br />
indicates that a single 2400 Hz with a duration of<br />
1000 ms will be emitted.<br />
The window provides buttons for enabling/disabling<br />
the charge tone function.<br />
3 Clicking Setup allows selecting a single charge<br />
tone or DTMF.<br />
4 Clicking Edit allows selection between Single<br />
tone and DTMF tone emission.<br />
5 Clicking Selct with the Single tone activated<br />
allows entering the required tone frequency.<br />
6 Clicking Selct with the DTMF tone activated<br />
allows entering the DTMF key and duration.<br />
Valid settings:<br />
Frequency: 400 - 3400 Hz<br />
Duration: 10 - 5000 ms<br />
DTMF key: 0 - 15<br />
<strong>Nera</strong> <strong>F33</strong><br />
1<br />
2<br />
3<br />
4<br />
5<br />
6<br />
CONFIGURATION FROM PC CONT’D<br />
Exit Menu 1. ISDN<br />
configuration<br />
8. Charge<br />
tone<br />
9. Spot Beam<br />
Report Method<br />
2. Net service<br />
providers<br />
4. Set<br />
diagnostics<br />
7. Rx L-Band<br />
Setup<br />
27
CONFIGURATION FROM PC CONT’D<br />
USER GUIDE<br />
Net service providers (owner level only)<br />
Adding, editing, or removing entries in the list of Net<br />
service providers:<br />
1<br />
1 Via the Function menu > Advanced functions<br />
menu, double-clicking the Net service providers<br />
icon in the Configuration menu displays the list of<br />
Net service providers including their station codes.<br />
Exit Menu<br />
8. Charge<br />
tone<br />
1. ISDN<br />
configuration<br />
9. Spot Beam<br />
Report Method<br />
2. Net service<br />
providers<br />
4. Set<br />
diagnostics<br />
7. Rx L-Band<br />
Setup<br />
2 Scroll to required Net service provider, œ/‘.<br />
Clicking Ok returns you to the Configuration window.<br />
Remov deletes entry. Clicking Edit opens the<br />
window allowing the station code and provider name<br />
to be modified (window 3).<br />
4 Clicking New (window 2) opens the window allowing<br />
station code and provider name to be added.<br />
Use Del to modify. Save stores the changes.<br />
2<br />
3<br />
NB! Remember to revert to user level.<br />
4<br />
28<br />
<strong>Nera</strong> <strong>F33</strong>
USER MANUAL GUIDE<br />
CONFIGURATION FROM PC CONT’D<br />
Spot beam report method<br />
1 Double-click the Spot beam report method icon<br />
via the Function menu > Advanced functions<br />
menu > Configuration menu.<br />
2 Two selections are provided:<br />
• Do not transmit my position<br />
• May send position (default)<br />
May be changed in owner level only<br />
1<br />
2<br />
Set diagnostics<br />
Additional system information is displayed when<br />
diagnostics is turned On.<br />
See also MENU FUNCTIONS.<br />
1 Double-click Set diagnostics.<br />
3 Click On or Off as required.<br />
4 Shows idle window with Diagnostics On.<br />
When pointing at the time indication a popup<br />
window shows the year and date.<br />
3<br />
4<br />
<strong>Nera</strong> <strong>F33</strong><br />
29
CONFIGURATION FROM PC CONT’D<br />
USER GUIDE<br />
Information available<br />
Miscellaneous version Id information<br />
The Information available function displays the<br />
terminal forward Id and system versions.<br />
1<br />
1 Via the Function menu > Advanced functions<br />
menu, double-clicking the Miscellanous version Id<br />
information icon in the Information available<br />
menu displays the available data (window 2).<br />
2 With Diagnostics On, pressing ‘ opens a series<br />
of version information windows.<br />
Exit Menu<br />
2. Misc.<br />
version I...<br />
9. Network<br />
status inf...<br />
2<br />
Network status information<br />
(owner level only)<br />
This function displays various network status<br />
information.<br />
3<br />
3 Double-click the Network status information icon<br />
in the Information available menu for readout.<br />
NB! Remember to revert to user level.<br />
30<br />
<strong>Nera</strong> <strong>F33</strong>
USER MANUAL GUIDE<br />
CONFIGURATION FROM PC CONT’D<br />
Customize menu<br />
(owner level only)<br />
1 Open the Customization menu via the Function<br />
menu > Advanced functions menu.<br />
Paid functions<br />
2 A paid function is activated by entering an<br />
"Opening key" provided when purchasing the<br />
function.<br />
Double-clicking the Paid functions icon in the<br />
Customization menu displays the list of available<br />
functions.<br />
Clicking New opens the Open new paid functions<br />
menu. Enter the "Opening key" and click Ok.<br />
1<br />
2<br />
Phone name setup<br />
3 Double-clicking the Phone name setup icon in the<br />
Customization menu displays the Phone name, i.e.<br />
<strong>Nera</strong> <strong>F33</strong>. To change, key in uppercase/lowercase<br />
letters as required.<br />
Use Del to modify.<br />
Save stores the changes<br />
3<br />
NB! Remember to revert to user level.<br />
<strong>Nera</strong> <strong>F33</strong><br />
31
CONFIGURATION FROM PC CONT’D<br />
USER GUIDE<br />
Routing of incoming calls<br />
When applying for IMN numbers, a Terminal Id<br />
(OID/DID) is received from the Net service provider.<br />
All devices connected to <strong>Nera</strong> <strong>F33</strong> can make outgoing<br />
calls. For incoming calls it must be assured that<br />
the Terminal Ids and MSN numbers configured are<br />
as commissioned.<br />
To make an incoming call reach a particular device,<br />
an MSN number and the Terminal Id “connected” to<br />
the IMN number must be programmed into the Main<br />
Communication Unit (MCU). See later in this manual.<br />
The table below lists valid MSN numbers for the<br />
available services.<br />
VALID TERMINAL IDs AND MSN NUMBERS<br />
ISDN PORTS ISDN / RS-232 / USB PORTS 9.6FAX VIA TA<br />
4.8kbps speech<br />
9.6kbps data<br />
9.6kbps fax<br />
Term.Id MSN<br />
Term.Id MSN<br />
Term.Id MSN<br />
01* 20*<br />
21* 60*<br />
11* 40<br />
02* 21*<br />
22* 61*<br />
12 41<br />
03* 22*<br />
23* 62*<br />
13 42<br />
04 23<br />
24 63<br />
05 24<br />
25 64<br />
06 25<br />
26 65<br />
07 26<br />
27 66<br />
08 27<br />
28 67<br />
09 28<br />
29 68<br />
01/20: - first <strong>Nera</strong> ISDN Handset<br />
03/22 - first <strong>Nera</strong> ISDN Handset<br />
02/21 - analogue phone on TA<br />
21/60, preset for RS-232A port<br />
22/61, preset for RS-232B port<br />
23/62, preset for USB port<br />
Numbers to be programmed into ISDN devices:<br />
In ISDN device:<br />
MSN number<br />
In Main Communication Unit:<br />
MSN number<br />
and Terminal Id<br />
(the Terminal Id is paired<br />
with a specific IMN number)<br />
For an easy start, some Terminal Ids and MSN<br />
numbers have been preprogrammed into the MCU<br />
(marked with a star in the table).<br />
Note! A Term.Id already entered is not accepted.<br />
11/40: - fax on TA<br />
32<br />
* Preprogrammed<br />
<strong>Nera</strong> <strong>F33</strong>
DIAL 0+INTL<br />
TEL.NO.+<br />
FUNC ALPHA ENTER<br />
SHIFT MORE/<br />
ESC<br />
1 ABC<br />
4 JKL<br />
7 STU<br />
DATA<br />
ØÅ.<br />
HELP<br />
ON/O F<br />
DEL<br />
2 DEF<br />
PLAY<br />
5 MNO<br />
8 VWX<br />
TAX<br />
0 ÄÖÜ<br />
ON<br />
SHIFT BAT<br />
ALPHA<br />
LES<br />
P T<br />
LIST<br />
LIST<br />
3 GHI<br />
6 PQR<br />
9 LIGHT<br />
YZÆ<br />
SPC<br />
USER MANUAL GUIDE<br />
Routing of incoming calls (examples)<br />
The table below illustrates the use of appropriate<br />
Terminal Ids for the various services combined with<br />
examples incoming IMN numbers.<br />
* Preprogrammed, see table on previous page.<br />
CONFIGURATION FROM PC CONT’D<br />
Note! If the Net service provider does not specify<br />
which Terminal Id should be used with the various<br />
IMN numbers, select Term. Id no.1 for the first<br />
4.8 kbps telephone, then no. 2 for the second phone.<br />
Use the same principle for the other type services. It<br />
is advisable to note down the selections.<br />
Name Service MCU ports<br />
Provided by ISP:<br />
Term.Id IMN (examples)<br />
Bridge MSN20* 4.8kbps speech 01* 762420510<br />
<strong>Nera</strong> TA MSN21* 4.8kbps speech 02* 762420511<br />
Bridge MSN22* 4.8kbps speech 03* 762420512<br />
<strong>Nera</strong> TA MSN40* 9.6kbps fax 11 * 762420513<br />
ISDN<br />
TA - TEL1<br />
ISDN<br />
TA - TEL2<br />
Data MSN60* 9.6 kbps data 21* 762420514<br />
Data MSN 61* 9.6 kbpsdata 22* 762420515<br />
Data MSN62* 9.6kbps data 23* 762420516<br />
* Preprogrammed<br />
RS-232 A<br />
RS-232 B<br />
USB<br />
<strong>Nera</strong> <strong>F33</strong><br />
33
CONFIGURATION FROM PC CONT’D<br />
USER GUIDE<br />
MSN configuration<br />
You are prompted to enter the owner level password<br />
(default: 1234567890). For security, the password<br />
should be changed before or after configuration of a<br />
device. See ACCESS LEVEL > Changing owner<br />
level password.<br />
Click to open Device Manager for configuration<br />
of ISDN/analogue/RS-232/RS-422/USB > > > > > ><br />
34<br />
<strong>Nera</strong> <strong>F33</strong>
USER MANUAL GUIDE<br />
<strong>Nera</strong> ISDN Handset<br />
• <strong>Nera</strong> ISDN Handsets will automatically be<br />
configured with Handset MSNs in the Device<br />
Manager.<br />
• The first <strong>Nera</strong> ISDN Handset connected will be given<br />
MSN20 & MSN22.<br />
• The next <strong>Nera</strong> ISDN Handset will be the next<br />
available MSN.<br />
• The MSNs can be controlled independently, e.g. if<br />
two handsets are given the same MSN, they will<br />
CONFIGURATION FROM PC CONT’D<br />
both respond to an incoming call to that MSN.<br />
• To verify selected MSN of a handset, check in the<br />
Device Manager or press the "R"-button on the<br />
Handset.<br />
Open the device manager, see previous page.<br />
Right-clicking a Dedicated Handset and then clicking<br />
Handset Configuration starts the Handset Setup<br />
Wizard.<br />
Enter Name/Location of the installed Handset, as<br />
required.<br />
Require Access Code must be<br />
unchecked to allow this Handset to be<br />
used without entering a code.<br />
<strong>Nera</strong> <strong>F33</strong><br />
35
CONFIGURATION FROM PC CONT’D<br />
Deleting an ISDN Handset<br />
Unplug the <strong>Nera</strong> ISDN Handset to be deleted and<br />
rightclick the same in the Dedicated Handset list.<br />
Clicking Test Handset removes its data, leaving the<br />
Terminal Id and MSN number vacant for another<br />
Display Handset.<br />
USER GUIDE<br />
If necessary, click refresh: and repeat clicking<br />
Test Handset. The Main Communication Unit will<br />
remember the handset connection data. All handsets<br />
are given a unique name.<br />
Note! A triangle symbol ! in the Device Manager<br />
appears when a Display Handset is missing.<br />
36<br />
<strong>Nera</strong> <strong>F33</strong>
USER MANUAL GUIDE<br />
CONFIGURATION FROM PC CONT’D<br />
ISDN port<br />
Open device manager and right-click to open ISDN Setup Wizard.<br />
Select the required service:<br />
• 4.8 kbps standard speech service<br />
• 9.6 kbps fax service<br />
Click to continue.<br />
The system selects the Next<br />
available Terminal Id. Check with<br />
Terminal Id received<br />
from Net provider.<br />
Key in MSN number<br />
if not using the<br />
recommended one.<br />
<strong>Nera</strong> <strong>F33</strong><br />
Echo Cancellation is performed<br />
automatically for all voice calls. Uncheck<br />
if problems with echo cancellation.<br />
Require Access Code is checked when<br />
used for 4.8 speech and 64 kbps speech.<br />
Apply charge tone is used when<br />
connecting pay phone.<br />
Click to enter<br />
number.<br />
37
CONFIGURATION FROM PC CONT’D<br />
USER GUIDE<br />
RS-232 port<br />
Open device manager and right-click to open setup editor.<br />
Click to open Serial Port Setup.<br />
Key in MSN number if not using<br />
the recommended one.<br />
Click Proceed to enter number.<br />
38<br />
<strong>Nera</strong> <strong>F33</strong>
USER MANUAL GUIDE<br />
CONFIGURATION FROM PC CONT’D<br />
USB port<br />
Open device manager and right-click to open setup editor.<br />
Click to open<br />
Serial Port<br />
Setup.<br />
Key in MSN number<br />
if not using the<br />
recommended one.<br />
Click Proceed to<br />
enter number.<br />
<strong>Nera</strong> <strong>F33</strong><br />
39
CONFIGURATION FROM PC CONT’D<br />
USER GUIDE<br />
Saving and reloading<br />
configurations<br />
The <strong>Nera</strong> <strong>F33</strong> configuration settings may be stored<br />
on the PC harddisk, e.g. prior to replacing software.<br />
Procedure:<br />
1 Open the Device Manager window as indicated<br />
2 Clicking Devices >Save config to a file<br />
automatically stores the data in a "Config.cgf" file in<br />
the vtLite directory c:/program files/vtLite Mobile.<br />
3 After installing the software, the settings may be<br />
transferred back to <strong>Nera</strong> <strong>F33</strong> by pressing Load.<br />
4 Clicking Restore Factory Defaults loads default<br />
<strong>Nera</strong> <strong>F33</strong> configurations.<br />
Printout/storing a configuration summary:<br />
5 Clicking Print Summary opens the Printout<br />
Viewer (see next page) which lists the settings of the<br />
end user equipment, and allows filing and/or printout.<br />
Note!<br />
Save config to a file only saves the Device<br />
Manager settings.<br />
Settings such as Net provider / Access codes / ISDN<br />
protocol are not saved.<br />
Phone book data and traffic log must be saved in the<br />
Book and Log menus.<br />
40<br />
<strong>Nera</strong> <strong>F33</strong>
USER MANUAL GUIDE<br />
CONFIGURATION FROM PC CONT’D<br />
Configuration printout viewer<br />
The list is sorted by Terminal Id<br />
Print to local printer<br />
Save to disk<br />
Terminal Id and<br />
MSN number<br />
Type of service<br />
Individual device<br />
settings<br />
Name/location,<br />
if entered<br />
<strong>Nera</strong> <strong>F33</strong><br />
41
CONFIGURATION FROM PC CONT’D<br />
Print handling setup<br />
The Printout from modem window is used for<br />
setting of default output of Traffic log, Modem configuration<br />
etc.<br />
USER GUIDE<br />
Clicking Configure > Print handling opens the<br />
Printout from modem window. The following settings<br />
are selectable:<br />
Default print action:<br />
Normally, choose Print to screen which causes the file<br />
to be output via the Printout viewer. For an example,<br />
see "TRAFFIC LOG > Printout viewer".<br />
For direct printout, choose Print to default windows<br />
printer.<br />
Print to screen settings:<br />
Determines the output of records via the Printout viewer.<br />
Normally, use Concatenate print jobs which “chains”<br />
the jobs to be printed or saved to file.<br />
The alternative choice clears the screen after each<br />
printout.<br />
Printer settings:<br />
For hardcopy printout, make sure that the appropriate<br />
printer and font are selected.<br />
42<br />
<strong>Nera</strong> <strong>F33</strong>
USER MANUAL GUIDE<br />
Mobile Packet Data Service<br />
The MPDS service can be efficient for applications<br />
such as:<br />
• E-mail<br />
• Internet/intranet<br />
• Navigational updates<br />
• Vessel telemetry transmission<br />
• Database queries<br />
• E-commerce<br />
CONFIGURATION FROM PC CONT’D<br />
The user only pays for the amount of data sent over<br />
the network, and not for the time connected.<br />
Ports supporting MPDS:<br />
• RS232A<br />
• RS232B / RS422<br />
• USB<br />
No configuration is needed!<br />
Dial number **94# to set up an MPDS call.<br />
See the MPDS application on the <strong>Nera</strong> <strong>F33</strong> CD.<br />
<strong>Nera</strong> <strong>F33</strong><br />
43
R<br />
P<br />
–<br />
R<br />
5 4 3 2 1<br />
5 4 3 2 1<br />
9 8 7 6<br />
9 8 7 6<br />
TX+<br />
TX-<br />
RX+<br />
RX-<br />
NMEA-<br />
NMEA+<br />
TX-<br />
TX+<br />
RX-<br />
RX+<br />
ISDN<br />
ISDN<br />
ISDN<br />
RS-4 2<br />
8<br />
8 1<br />
SYSTEM DESCRIPTION<br />
USER GUIDE<br />
Inmarsat GAN system/Fleet33<br />
The Inmarsat Global Area Network service (GAN)<br />
provides 4.8 kbps voice communications service and<br />
9.6 kbps data transmission to and from mobile/fixed<br />
subscribers anywhere within the worldwide coverage<br />
of the Inmarsat 3 spot Beam system, see Satellite<br />
Coverage Map in Getting Started.<br />
The benefit of the INMARSAT system<br />
is its high capacity, and the rapid and<br />
reliable connection between the land<br />
based (fixed) users and the Mobile<br />
Earth Stations (MESs).<br />
Each satellite region is under the<br />
control of a Network Coordinating<br />
Station (NCS), which controls and<br />
monitors the traffic between the<br />
MESs and the LESs.<br />
7 8 9<br />
4 5 6<br />
1 2 3<br />
S 0 #<br />
TELEPHONE<br />
NETWORKS<br />
DATA<br />
NETWORKS<br />
LES<br />
NCS<br />
NCS: Network Coordinating Station,<br />
one in each Ocean Region (supervises<br />
all messages and signals sent in<br />
the Inmarsat system).<br />
LES:<br />
Land Earth Station w/Net<br />
service providers (interconnects fixed<br />
telecommunication networks with the<br />
Inmarsat system.<br />
MES:<br />
Mobile Earth Station<br />
(<strong>Nera</strong> <strong>F33</strong>, a user terminal for the<br />
Inmarsat system).<br />
44 <strong>Nera</strong> <strong>F33</strong><br />
ON<br />
48V DC<br />
SYNC<br />
ALARM<br />
RS-232 A RS-232 B USB<br />
MES<br />
Overview of the Inmarsat GAN system.
USER MANUAL GUIDE<br />
System satellites<br />
The satellites are positioned in a geostationary orbit<br />
above the equator at approximately 35700 km<br />
altitude.<br />
See figure.<br />
In geostationary orbit, each satellite moves at the<br />
same rate as the earth, and so remains in the same<br />
relative position to the earth.<br />
The satellites provide 99% landmass coverage.<br />
<strong>Nera</strong> <strong>F33</strong> can communicate via the four satellite<br />
Ocean Regions:<br />
AOR-W Atlantic Ocean West Region<br />
AOR-E Atlantic Ocean East Region<br />
IOR Indian Ocean Region<br />
POR Pacific Ocean Region<br />
For coverage area of the satellites for <strong>Nera</strong> <strong>F33</strong>, see<br />
Satellite Coverage Map in Getting Started.<br />
Transmission frequencies<br />
The Inmarsat terminals operate in the following<br />
frequency bands:<br />
MES transmission frequencies:<br />
1626.5 MHz - 1646.5 MHz<br />
MES receiving frequencies:<br />
1530.0 MHz - 1559.0 MHz<br />
<strong>Nera</strong> <strong>F33</strong><br />
54°W<br />
SYSTEM DESCRIPTION CONT’D<br />
35700 km<br />
Atlantic Ocean Region (West)<br />
15.5°W<br />
178°E<br />
Pacific Ocean Region<br />
12000 km<br />
EQUATOR<br />
EARTH<br />
Atlantic Ocean Region (East)<br />
Indian Ocean Region<br />
Satellite positions.<br />
A large number of channels are available (20 kHz<br />
channel separation), offering 4.8 kbps voice communication,<br />
as well as 9.6 kbps fax or 9.6 kbps data<br />
communication.<br />
Duplex communication uses two channel frequencies,<br />
one in each direction.<br />
The LESs provide interface to the international<br />
networks for telephony and data: PSTN (Public<br />
Switched Telephone Networks) and PSDN (Packet<br />
Switched Data Networks).<br />
64.5°E<br />
45
SYSTEM DESCRIPTION CONT’D<br />
Antenna search pattern<br />
Azimuth sweep<br />
A 360° rotation of the antenna in azimuth at a fixed<br />
elevation angle.<br />
Hemispheric search<br />
A hemispheric search is constituted by azimuth<br />
sweeps at elevation angles 5°, 25°, 45°, 65° and 85°.<br />
The antenna searches on the NCS Common TDM<br />
channel frequency (NCSC), initiated by the <strong>Nera</strong> <strong>F33</strong><br />
Main Communication Unit (MCU).<br />
When finding the satellite signal, it completes the<br />
hemispheric search and moves to the position where<br />
the strongest signal was detected.<br />
The Antenna reports back to the MCU for verification<br />
of valid NCSC.<br />
If no valid signal is detected, no further automatic<br />
action occurs until the MCU initiates a new search.<br />
A search request from the MCU may contain channel<br />
frequency and an order to make a full 360° search at<br />
a specific elevation, calculated from map and GPS<br />
information. If no satellite is found, a hemispheric<br />
search will be performed.<br />
360° AZIMUTH SWEEP<br />
USER GUIDE<br />
85°<br />
65°<br />
45°<br />
25°<br />
HEMISPHERIC SEARCH<br />
ELEVATION ANGLES<br />
5°<br />
Tracking<br />
At the end of a search, <strong>Nera</strong> <strong>F33</strong> performs a finetuning<br />
of the antenna position around the strongest<br />
detected signal. The fine-tuning is obtained by a<br />
squinting function based on satlite signal quality.<br />
Note! <strong>Nera</strong> <strong>F33</strong> remembers the last used Ocean<br />
Region when when switching the terminal off/on.<br />
46 <strong>Nera</strong> <strong>F33</strong>
4 ghi<br />
7 pqrs<br />
DEL<br />
1 3 def<br />
2 abc<br />
5 jkl<br />
8 tuv<br />
0<br />
ISDN<br />
Telenor IOR<br />
Ready for ca l<br />
OK<br />
6 mno<br />
9 wyz<br />
<strong>Nera</strong> ISDN<br />
<strong>Nera</strong> ISDN<br />
4 ghi<br />
7 pqrs<br />
DEL<br />
1 3 def<br />
2 abc<br />
5 jkl<br />
8 tuv<br />
0<br />
ISDN<br />
Telenor IOR<br />
Ready for ca l<br />
OK<br />
6 mno<br />
9 wyz<br />
USER MANUAL GUIDE<br />
Communication services<br />
<strong>Nera</strong> <strong>F33</strong> provides the following interfaces & services:<br />
• ISDN connectors:<br />
- 4.8 kbps speech<br />
- 9.6 kbps fax via Terminal Adapter<br />
• RS-232/RS422:<br />
- 9.6 kbps data service<br />
- MPDS<br />
• USB<br />
- 9.6 kbps data service<br />
- MPDS<br />
Requires PC with MS Windows 98<br />
Second Edition, or Apple OS 9.03 (or later).<br />
The <strong>Nera</strong> <strong>F33</strong> MCU has following ports<br />
(see figure):<br />
• ISDN ports for connection of ISDN<br />
telephones or <strong>Nera</strong> Terminal Adapter;<br />
a total of 8 devices.<br />
• RS-232/RS422 and USB ports for<br />
connection of data equipment.<br />
SYSTEM DESCRIPTION CONT’D<br />
Control interface<br />
The RS-232 or USB port allows connection of a PC<br />
for configuration of <strong>Nera</strong> <strong>F33</strong>.<br />
A PC program (vtLite Mobile) that provides the<br />
software to operate and configure <strong>Nera</strong> <strong>F33</strong> terminal<br />
is supplied on the enclosed CD (requires at least<br />
Windows 98).<br />
MCU - Main Communication Unit<br />
ON<br />
48V DC<br />
SYNC<br />
ALARM<br />
RS-232 A RS-232 B USB<br />
5 4 3 2 1<br />
9 8 7 6<br />
5 4 3 2 1<br />
9 8 7 6<br />
ISDN wall<br />
sockets<br />
ISDN<br />
NMEA-<br />
NMEA+<br />
TX-<br />
TX+<br />
RX-<br />
RX+<br />
TX+<br />
TX-<br />
RX+<br />
RX-<br />
RS-422<br />
ISDN<br />
1 8<br />
8 1<br />
ISDN<br />
Terminal<br />
Adapter<br />
Internal communication<br />
Equipment connected to the various<br />
interfaces may communicate with<br />
each other via an internal MSN<br />
(Mobile Subscriber Number)<br />
assigned to each unit.<br />
<strong>Nera</strong> <strong>F33</strong><br />
PC<br />
Serial printer<br />
PC<br />
<strong>Nera</strong> ISDN<br />
Handset<br />
<strong>Nera</strong> <strong>F33</strong> ports.<br />
DECT<br />
phone<br />
TEL1 POWER TEL2<br />
Analogue<br />
telephone<br />
Analogue<br />
telefax (G3)<br />
<strong>Nera</strong> ISDN<br />
Handset<br />
47
4 ghi<br />
7 pqrs<br />
OK<br />
DEL<br />
1 3 def<br />
2 abc<br />
5 jkl<br />
8 tuv<br />
0<br />
ISDN<br />
Telenor IOR<br />
Ready for ca l<br />
6 mno<br />
9 wyz<br />
ON<br />
48V DC<br />
SYNC<br />
ALARM<br />
RS-232 A RS-232 B USB<br />
5 4 3 2 1<br />
9 8 7 6<br />
5 4 3 2 1<br />
9 8 7 6<br />
TX+<br />
TX-<br />
RX+<br />
RX-<br />
NMEA-<br />
NMEA+<br />
ISDN<br />
ISDN<br />
TX-<br />
TX+<br />
RX-<br />
RX+<br />
RS-4 2<br />
1 8<br />
8 1<br />
ISDN<br />
SYSTEM DESCRIPTION CONT’D<br />
USER GUIDE<br />
<strong>Nera</strong> <strong>F33</strong><br />
Land<br />
Earth<br />
Station,<br />
LES<br />
Telefax Gr.3,<br />
9.6 kbps fax<br />
TEL1 POWER TEL2<br />
Examples of connections:<br />
<strong>Nera</strong> ISDN Telephone (s)<br />
Via serial port:<br />
data communication/internet<br />
Via Terminal Adapter:<br />
- analogue telephone(s)<br />
- telefax Gr.3<br />
Path established by<br />
the <strong>Nera</strong> <strong>F33</strong><br />
terminal via satellite<br />
Public<br />
Switched<br />
Telephone<br />
Network,<br />
PSTN<br />
Analogue telephone:<br />
- 4.8 kbps speech<br />
PC/modem:<br />
- 9.6 kbps<br />
data service<br />
Communication path.<br />
48 <strong>Nera</strong> <strong>F33</strong>
USER MANUAL GUIDE<br />
Net service provider<br />
The Net service provider issues your user licence<br />
and IMN (Inmarsat Mobile Number) phone numbers.<br />
It is also responsible for the billing of calls (charges).<br />
The <strong>Nera</strong> <strong>F33</strong> may respond to individual IMN numbers,<br />
giving the possibility to transfer a call directly to<br />
each device attached to it.<br />
Note! TermlD is a term that includes both Originating<br />
Identity (OlD) and Destination Identity (DID).<br />
The DID is used from LES to MES to identify the<br />
service, whereas OlD is used from MES to LES to<br />
identify the service.TermlD is used in this manual<br />
because the DID and OlD have the same value.<br />
SYSTEM DESCRIPTION CONT’D<br />
Calls from Mobiles<br />
See figure.<br />
To make an outgoing call, you use a standard international<br />
telephone number with the 00 prefix. The<br />
MES automatically includes information to identify<br />
itself and the particular device that originates.<br />
System signalling<br />
The LES uses the identifying information of the<br />
attached device for billing purposes.<br />
The MES transmits the dialing information on a<br />
channel specially assigned by the NCS to the LES.<br />
LES routes the call over the public telecommunications<br />
networks to the intended destination. When the<br />
called party responds, the call proceeds.<br />
Call announcement from mobile to fixed:<br />
The MES uses the Return Identity (RTNID) to communicate<br />
with the LES. It uses the TermlD to identify<br />
its IMN number and the service in use.<br />
The attached equipment dials the number and<br />
transmits its MSN number to the MES. The MES<br />
routes the MSN to a TermlD.<br />
LES checks that the RTNID is commissioned before<br />
connecting the call to the fixed net.<br />
<strong>Nera</strong> <strong>F33</strong><br />
49
4 ghi<br />
7 pqrs<br />
OK<br />
DEL<br />
1 3 def<br />
2 abc<br />
5 jkl<br />
8 tuv<br />
0<br />
ISDN<br />
Telenor IOR<br />
Ready for ca l<br />
6 mno<br />
9 wyz<br />
TEL1 POWER TEL2<br />
ON<br />
48V DC<br />
SYNC<br />
ALARM<br />
RS-232 A RS-232 B USB<br />
5 4 3 2 1<br />
9 8 7 6<br />
5 4 3 2 1<br />
9 8 7 6<br />
TX+<br />
TX-<br />
RX+<br />
RX-<br />
NMEA-<br />
NMEA+<br />
TX-<br />
TX+<br />
RX-<br />
RX+<br />
ISDN<br />
ISDN<br />
ISDN<br />
RS-4 2<br />
8<br />
8 1<br />
Re<br />
P<br />
–<br />
R<br />
SYSTEM DESCRIPTION CONT’D<br />
USER GUIDE<br />
Calls from Mobiles<br />
Call announcement<br />
LES 2<br />
ABCDEF<br />
Term Id 01<br />
Fixed net<br />
number<br />
004767244700<br />
Return ID<br />
67244700<br />
PSTN<br />
7 8 9<br />
4 5 6<br />
00 47 67 24 47 00<br />
LES<br />
1 2 3<br />
S 0 #<br />
MSN Service<br />
Term.Id<br />
20 4.8kbps speech 01<br />
40 9.6kbps fax 11<br />
60 9.6kbps data 21<br />
Example of MES Translation Table<br />
When the MES originates a call it starts<br />
by sending a request to the LES.<br />
This initial request for service contains<br />
the MES Return ID and type of service.<br />
<strong>Nera</strong> <strong>F33</strong> incorporates a configuration<br />
table that contains Terminal Id for every<br />
device connected and type of service.<br />
Forward/return ID Term Id Service<br />
123456/ABCDEF<br />
123456/ABCDEF<br />
123456/ABCDEF<br />
01<br />
11<br />
21<br />
4.8kbps speech<br />
9.6kbps fax<br />
9.6kbps data<br />
LES Translation Table<br />
IMN<br />
761234567<br />
761234568<br />
761234569<br />
50 <strong>Nera</strong> <strong>F33</strong>
USER MANUAL GUIDE<br />
Calls to Mobiles<br />
See figure.<br />
The <strong>Nera</strong> <strong>F33</strong> terminal receives incoming calls via<br />
the IMN phone numbers. IMN numbers are assigned<br />
to the following ports by the user:<br />
• ISDN ports<br />
• RS-232 serial data ports<br />
• RS-422 serial data port<br />
• USB serial data port<br />
Calls are made as ordinary international (Satellite)<br />
calls by dialing the international prefix (normally 00)<br />
followed by 870 and the IMN number, e.g.:<br />
00 870 762420510.<br />
The common Ocean Region access no. 870 connects<br />
the call to the dialed <strong>Nera</strong> <strong>F33</strong> regardless of<br />
the Ocean Region the user currently communicates<br />
through.<br />
If the Net service provider does not support access<br />
no. 870, call the Ocean Region directly:<br />
871 – AOR-E (Atlantic Ocean Region East)<br />
872 – POR (Pacific Ocean Region)<br />
873 – IOR (Indian Ocean Region)<br />
874 – AOR-W (Atlantic Ocean Region West)<br />
SYSTEM DESCRIPTION CONT’D<br />
Call announcement from fixed to mobile:<br />
The LES uses the MES’s Forward Identity (FWID) to<br />
communicate with the MES, and the Terminal Identity<br />
(TermlD) to identify the IMN number and the service<br />
in use.<br />
The FWID together with the TermlD replaces the<br />
need of the IMN number to be transmitted through<br />
the Inmarsat system in order to identify the MES and<br />
the specific equipment attached to it. This means<br />
that LES routes an IMN number received from the<br />
fixed net to the specific FWID and TermlD identifying<br />
the MES.<br />
The MES identifies the FWID and the TermID and<br />
routes it to a Mobile Subscriber Number (MSN)<br />
which is programmed in the attached equipment.<br />
<strong>Nera</strong> provides a table to identify which TermlD is<br />
routed to an MSN.<br />
<strong>Nera</strong> <strong>F33</strong><br />
51
4 ghi<br />
7 pqrs<br />
OK<br />
DEL<br />
1 3 def<br />
2 abc<br />
5 jkl<br />
8 tuv<br />
0<br />
ISDN<br />
Telenor IOR<br />
Ready for ca l<br />
6 mno<br />
9 wyz<br />
TEL1 POWER TEL2<br />
ON<br />
48V DC<br />
SYNC<br />
ALARM<br />
RS-232 A RS-232 B USB<br />
5 4 3 2 1<br />
5 4 3 2 1<br />
9 8 7 6<br />
9 8 7 6<br />
TX+<br />
TX-<br />
RX+<br />
RX-<br />
NMEA-<br />
NMEA+<br />
TX-<br />
TX+<br />
RX-<br />
RX+<br />
ISDN<br />
ISDN<br />
ISDN<br />
RS-4 2<br />
8<br />
8 1<br />
P 4 5 6<br />
9 8 7 Re<br />
–<br />
R<br />
SYSTEM DESCRIPTION CONT’D<br />
USER GUIDE<br />
Calls to Mobiles<br />
Call announcement<br />
LES 2<br />
Fwd ID<br />
Term ID 01<br />
123456<br />
00 870 761234567<br />
MSN <strong>Inc</strong>oming call route Term.Id<br />
20 4.8kbps speech 01<br />
40 9.6kbps fax 11<br />
60 9.6kbps data 21<br />
Example of MES Translation Table<br />
When requested to call a specific IMN, LES<br />
translates the IMN to a Terminal Id.<br />
The request is then sent to the MES which<br />
translates the Terminal Id to an MSN number.<br />
To "connect" a Terminal Id to a physical line, <strong>Nera</strong><br />
<strong>F33</strong> incorporates a translation table. This table<br />
can contain up to 100 Id translations, and each<br />
Terminal Id in use is programmed with type of call<br />
and destination.<br />
A call is not allowed to be routed to a device that<br />
is configured to another type than the Terminal Id<br />
specifies. A telephone Terminal Id can only be<br />
routed to a phone type device. A telefax Terminal<br />
Id can only be routed to a fax device.<br />
LES=2<br />
Forward/return ID Term Id Service<br />
123456/ABCDEF<br />
123456/ABCDEF<br />
123456/ABCDEF<br />
01<br />
11<br />
21<br />
4.8kbps speech<br />
9.6 kbps fax<br />
9.6kbps data<br />
LES Translation Table<br />
IMN<br />
761234567<br />
761234568<br />
761234569<br />
1 2 3<br />
S 0 #<br />
52 <strong>Nera</strong> <strong>F33</strong>
Back to Start Page<br />
<strong>Nera</strong> ASA<br />
<strong>Nera</strong> SatCom AS<br />
Bergerveien 12, PO Box 91<br />
N-1375 Billingstad, Norway<br />
Tel: +47 67 24 47 00<br />
Fax: +47 67 24 46 21<br />
www.neraworld.com


