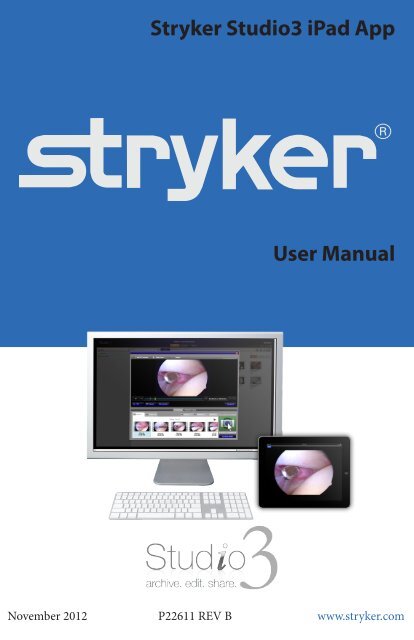
Stryker Studio3 iPad App User Manual
Stryker Studio3 iPad App User Manual
Stryker Studio3 iPad App User Manual
- No tags were found...

Create successful ePaper yourself
Turn your PDF publications into a flip-book with our unique Google optimized e-Paper software.
<strong>Stryker</strong> <strong>Studio3</strong> <strong>iPad</strong> <strong>App</strong><br />
<strong>User</strong> <strong>Manual</strong><br />
November 2012 P22611 REV B www.stryker.com
<strong>Stryker</strong> <strong>Studio3</strong> <strong>iPad</strong> <strong>App</strong><br />
<strong>User</strong> <strong>Manual</strong><br />
This manual contains confidential information that shall not be<br />
disclosed or duplicated for any reason other than to use and maintain<br />
the STRYKER STUDIO3 IPAD APP. This restriction does not<br />
limit the right to use information contained in this manual if it is<br />
obtained from another source without restriction. The information<br />
subject to this restriction is contained in all pages of this manual.<br />
© November 2012 <strong>Stryker</strong> Communications. All Rights Reserved.<br />
Information in this document is subject to change without notice.<br />
<strong>Stryker</strong> and <strong>Stryker</strong> logo are registered trademarks of <strong>Stryker</strong>.<br />
Endosuite ® OR and iSuite ® are registered trademarks of <strong>Stryker</strong>.<br />
All Rights Reserved<br />
<strong>Stryker</strong> <strong>Studio3</strong> <strong>iPad</strong> <strong>App</strong> <strong>User</strong> <strong>Manual</strong><br />
P22611A Rev B
S<br />
Contents<br />
1. Indications for Use...................................................................................3<br />
1.1 System Requirements.......................................................... 3<br />
2. General Warnings and Cautions...............................................................4<br />
2.1 Warnings............................................................................. 4<br />
2.2 Notes.................................................................................. 4<br />
2.3 Product Symbol Definition.................................................... 4<br />
3. Installing the <strong>Studio3</strong> <strong>App</strong>.......................................................................5<br />
4. Setting up the <strong>App</strong>..................................................................................6<br />
4.1 Connecting to a Server......................................................... 6<br />
4.2 Cache Settings..................................................................... 8<br />
4.3 Profile Image....................................................................... 9<br />
4.4 Setting a Passcode............................................................... 9<br />
4.5 Creating Notes................................................................... 10<br />
4.5.1 Creating a New Note.......................................... 11<br />
4.5.2 Editing an Existing Note..................................... 12<br />
5. Navigating <strong>Studio3</strong> and My Studio........................................................13<br />
5.1 Home Page Overview......................................................... 13<br />
5.2 Sorting Studies by Date...................................................... 14<br />
5.3 Searching for a Case........................................................... 14<br />
5.4 Viewing a Case................................................................... 14<br />
5.4.1 Viewing Images................................................. 16<br />
5.4.2 Viewing Videos.................................................. 16<br />
5.5 Downloading Cases from <strong>Studio3</strong>........................................ 17<br />
1
S<br />
5.5.1 Checking Download Status................................. 18<br />
5.6 Emailing Case Images......................................................... 19<br />
6. Troubleshooting....................................................................................22<br />
7. Maintenance.........................................................................................23<br />
8. <strong>Stryker</strong> Limited Warranty......................................................................24<br />
9. Contact Information..............................................................................25<br />
2
S<br />
1. Indications for Use<br />
The intended use of <strong>Studio3</strong> is to provide for the storage of surgical<br />
videos, images and related documents and allow physicians the<br />
capability to search and retrieve these assets for viewing. The <strong>Studio3</strong><br />
product is indicated for use with the <strong>Stryker</strong> Endoscopy SDC<br />
(<strong>Stryker</strong> Digital Capture) product line. The users of the <strong>Studio3</strong><br />
product are surgeons who would like to access stored videos or images<br />
that were previously recorded. The intended life of <strong>Studio3</strong> is<br />
three years in duration. There is no technical limitation that dictates<br />
the product life for <strong>Studio3</strong> but rather it is dictated by the need to<br />
enhance functionality or implement technology improvements.<br />
1.1 System Requirements<br />
• The <strong>iPad</strong> device must have version iOS 5.0.1 or higher.<br />
• <strong>Studio3</strong> must be version 1.2 or higher.<br />
3
S<br />
2. General Warnings and Cautions<br />
Please read this manual and follow its instructions carefully. The<br />
words WARNING and Note carry special meanings and should be<br />
carefully reviewed:<br />
WARNING<br />
The personal safety of the patient or<br />
user may be involved. Disregarding this<br />
information could result in injury to the<br />
patient.<br />
Note<br />
Special information to make maintenance<br />
easier or important information more clear.<br />
To avoid potential serious injury to the patient, the user must adhere<br />
to the following warnings.<br />
2.1 Warnings<br />
1. Read this manual thoroughly, and be familiar with its contents<br />
prior to using this software.<br />
2. Be qualified medical personnel, having complete knowledge<br />
of the use of this software.<br />
2.2 Notes<br />
1. Video being streamed is not HD quality.<br />
2.3 Product Symbol Definition<br />
Indicates the device is intended as a<br />
digital storage device.<br />
4
S<br />
3. Installing the <strong>Studio3</strong> <strong>App</strong><br />
To install the <strong>Studio3</strong> <strong>iPad</strong> <strong>App</strong>, download it from the iTunes store,<br />
and install as you would any other <strong>App</strong>.<br />
5
S<br />
4. Setting up the <strong>App</strong><br />
4.1 Connecting to a Server<br />
To connect to a server, follow the steps below:<br />
1. Press the Settings icon in the upper right corner of the<br />
screen.<br />
2. From the Settings menu, press the Connections button.<br />
3. Press the New Connection button.<br />
4. Enter the following information in the Add Connection<br />
popup dialog box:<br />
6
S<br />
• Display Name - The name associated with the server.<br />
• Server - The IP address of the server.<br />
• <strong>User</strong> Name - The <strong>User</strong> Name of the user associated with<br />
the connection being created.<br />
• Password - A password for the server connection<br />
• Remember Password - To have the password for the<br />
connection automatically remembered, slide the button<br />
to the On position.<br />
• To save the settings, press the Save button. To cancel the<br />
new connection, press the Connections button or anywhere<br />
outside of the Connection window.<br />
5. To return to the Settings menu, press the Settings button in<br />
the upper left corner of the dialog box. To close out of Settings,<br />
touch anywhere on the screen.<br />
6. To connect to a server, press and hold the <strong>Studio3</strong> button.<br />
7
S<br />
7. Select a server from the dialog box that appears.<br />
Note<br />
If a server has been previously selected, <strong>Studio3</strong><br />
will automatically connect to it each time<br />
the application is opened.<br />
4.2 Cache Settings<br />
Cases downloaded from <strong>Studio3</strong> to an individual <strong>iPad</strong> will be<br />
stored in a cache. The amount of space set aside on the <strong>iPad</strong> can be<br />
adjusted using the Cache setting.<br />
To change the cache settings, follow the steps below:<br />
1. Press the Settings icon in the upper right corner of the<br />
screen.<br />
2. Press the Cache Settings button.<br />
3. The Cache Settings popup dialog box will display how much<br />
space is currently being used for cases stored on the <strong>iPad</strong> and<br />
the amount of space that is being allocated for case storage.<br />
4. Use the slider to add or reduce the amount allocated space.<br />
5. Press the Save button.<br />
6. To return to the Settings menu, press the Settings button in<br />
the upper left corner of the dialog box. To close out of Settings,<br />
touch anywhere on the screen.<br />
8
S<br />
4.3 Profile Image<br />
To add or change a profile image, follow the steps below:<br />
1. Press the Settings icon in the upper right corner of the<br />
screen.<br />
2. Press the Profile Image button.<br />
3. Press the Choose button and navigate to the desired picture<br />
on the <strong>iPad</strong>. The image will then be set.<br />
4. To return to the Settings menu, press the Settings button in<br />
the upper left corner of the dialog box. To close out of Settings,<br />
touch anywhere on the screen.<br />
4.4 Setting a Passcode<br />
<strong>Studio3</strong> provides the ability to set a passcode that is required upon<br />
launching the application.<br />
To set or change a passcode, follow the steps below:<br />
1. Press the Settings icon in the upper right corner of the<br />
screen.<br />
2. Press the Passcode button.<br />
3. Press the Turn Passocode On button. If a passcode is already<br />
set, and you wish to change it, press the Change Passcode<br />
button.<br />
9
S<br />
4. Enter a 4-digit passcode in the Enter Passcode dialog box.<br />
5. Press the Enter or Cancel button when done.<br />
6. To return to the Settings menu, press the Settings button in<br />
the upper left corner of the dialog box. To close out of Settings,<br />
touch anywhere on the screen.<br />
4.5 Creating Notes<br />
General notes can be created as templates placed in the body of an<br />
email when emailing a case from the application (see Section 5.6).<br />
Note<br />
Notes are limited to 300 characters.<br />
10
S<br />
4.5.1 Creating a New Note<br />
To create a note, follow the steps below:<br />
1. Press the Settings icon in the upper right corner of the<br />
screen.<br />
2. Press the Notes button.<br />
3. Press the New Note button.<br />
4. In the New Note dialog box that appears, enter a display<br />
name for the note.<br />
5. Enter a description.<br />
6. Press the Save button.<br />
11
S<br />
4.5.2 Editing an Existing Note<br />
To edit a note, follow the steps below:<br />
1. Press the Settings icon in the upper right corner of the<br />
screen.<br />
2. Press the Notes button.<br />
3. Select the note to be modified.<br />
4. Modify the current information and press Save.<br />
To delete a note, press the Delete button.<br />
12
S<br />
5. Navigating <strong>Studio3</strong> and My Studio<br />
5.1 Home Page Overview<br />
The interface for both the My Studio and <strong>Studio3</strong> desktops are the<br />
same with only a few minor differences. The <strong>Studio3</strong> home page<br />
will appear similar to the following figure.<br />
All of the features on the home page are described in greater detail<br />
in the sections that follow.<br />
1<br />
2<br />
3<br />
4<br />
6 5<br />
1 Search Term Box<br />
2 Date Range Filter Buttons<br />
13
S<br />
3 Settings Button<br />
4 Asset Finder<br />
5 Studio 3 Button<br />
6 My Studio Button<br />
5.2 Sorting Studies by Date<br />
Cases can be filtered by specifying a date range anywhere from<br />
the current date, past 7 days, or past 30 days using the Date Range<br />
Filter buttons. You can view all cases, regardless of date by selecting<br />
the All filter button.<br />
The application will automatically open to show cases that are new<br />
as of the current date (i.e., today).<br />
To sort the studies, press the desired date range or All button.<br />
5.3 Searching for a Case<br />
A basic search can be performed using one general search criteria,<br />
such as a patient’s first or last name or procedure type.<br />
To perform a basic search, enter your criteria into the Search Term<br />
box and press the Search button. The cases appearing in the Asset<br />
Finder will be reduced to those matching any part of the search<br />
criteria. A date range filter may also be applied.<br />
To clear the search criteria, click on the “X” button located within<br />
the search box, and then refresh the page.<br />
5.4 Viewing a Case<br />
To view a case, press the thumbnail image. This will open the case<br />
in the Viewer.<br />
14
S<br />
1<br />
2<br />
3<br />
4<br />
5<br />
6<br />
7<br />
8<br />
1 Back to Home Page Button<br />
2 Case Information<br />
3 Email/Download Case Button<br />
4 Case Viewer Window<br />
5 Image Navigation Buttons<br />
6 Case Navigation Buttons<br />
7 Case Thumbnails<br />
8 Indicates Thumbnail is a Video<br />
The Viewer automatically opens to show thumbnails for all images<br />
and videos.<br />
15
S<br />
5.4.1 Viewing Images<br />
To view a specific image, press on the thumbnail. Images will appear<br />
in the Viewer.<br />
To navigate between images, either press the respective thumbnail,<br />
or use the Image Navigation buttons located directly beneath the<br />
viewing window.<br />
Note<br />
The Image Navigation buttons will only be<br />
available if there are two ore more images.<br />
To view the images only in the case, press the Images button.<br />
5.4.2 Viewing Videos<br />
To view a video, press on the thumbnail. Videos will expand to fullscreen<br />
mode and automatically begin playing.<br />
To access the playback options, touch anywhere on the screen during<br />
video playback.<br />
1 2<br />
3<br />
4<br />
5<br />
16
S<br />
1 Done Button<br />
2 Video Scroll Bar<br />
3 Full Screen Button<br />
4 Previous/Next Chapter Buttons<br />
5 Volume Scroll Bar<br />
To exit viewing a video during playback, press the Done button.<br />
Use the Video Scroll bar along the top of the screen to manually<br />
navigate to anywhere in the video.<br />
Videos automatically begin playing in landscape mode. To reduce<br />
the size of the video, press the Full Screen button. To return to full<br />
screen, press the button again.<br />
To pause the video, press the Pause button. To resume playing the<br />
video, press the Play button.<br />
Press the Previous/Next Chapter buttons to skip to the beginning of<br />
a previous or next chapter.<br />
Note<br />
This feature only works if there is more than<br />
one chapter in the video. If there is only one<br />
chapter, the Previous Chapter button will take<br />
you to the beginning of the current video.<br />
Use the volume scroll bar to control the volume of the video.<br />
5.5 Downloading Cases from <strong>Studio3</strong><br />
Cases can be downloaded from the <strong>Studio3</strong> server and stored to an<br />
individual <strong>iPad</strong>. This allows them to be accessed easier and when<br />
there is no connection to a server.<br />
Note<br />
This option is only available from <strong>Studio3</strong> to<br />
My Studio.<br />
To download a case, perform the following steps:<br />
1. Open the respective case in the Viewer.<br />
2. Press the Email/Download Case button.<br />
17
S<br />
3. Select either the Download or Download All option.<br />
4. To download specific case items, skip to the next step. To<br />
download an entire case, press the Download All button.<br />
5. Select the thumbnails to download. A selected item will be<br />
indicated by a green check mark in the upper left hand corner<br />
of the thumbnail.<br />
1<br />
2<br />
3<br />
1 Cancel Download Button<br />
2 Download Button<br />
3 Selected Item Confirmation<br />
6. Once all of the desired items have been selected, press the<br />
Download button. The case will be sent to the My Studio<br />
desktop.<br />
Note<br />
Cases downloaded from the <strong>Studio3</strong> server<br />
will still be sorted by the date of the case in<br />
My Studio, rather than the date of the download.<br />
5.5.1 Checking Download Status<br />
When a case is being downloaded, the status can be checked by doing<br />
the following:<br />
1. Press the Settings icon in the upper right corner of the<br />
screen.<br />
18
S<br />
2. Press the Downloads button. The status of any current<br />
downloads will appear in the dialog box.<br />
Note<br />
If there is nothing currently being downloaded,<br />
this dialog box will display “No Active<br />
Downloads.”<br />
To cancel the download, press the red “X” button.<br />
Once a case has been downloaded, it will appear in My Studio.<br />
5.6 Emailing Case Images<br />
Images from a can be emailed from both <strong>Studio3</strong> and My Studio<br />
and will use the email account associated with the <strong>iPad</strong>.<br />
Note<br />
Videos and reports cannot be emailed.<br />
To email a case, perform the following steps:<br />
1. Open the respective case in the Viewer.<br />
2. Press the Email/Download Case button.<br />
3. Press the Email button.<br />
4. Select the thumbnails to email. A selected item will be indicated<br />
by a green check mark in the upper left hand corner of<br />
the thumbnail.<br />
19
S<br />
1<br />
2<br />
3<br />
5. Once all of the desired items have been selected, press the<br />
Email button.<br />
6. A dialog box will open. To include patient information,<br />
ensure the slider is set to the ON position. To anonymize the<br />
case, set the slider to the OFF position.<br />
7. If desired, select a pre-created note (see Section 4.5).<br />
8. Press the Email button. A new message will be created using<br />
the email account associated with the <strong>iPad</strong>.<br />
20
S<br />
9. Enter the email information to the recipients and a subject. If<br />
a note was selected in Step 7, it will appear in the body of the<br />
email, along with the selected images.<br />
10. Once all information has been entered, press the Send button.<br />
21
S<br />
6. Troubleshooting<br />
Error<br />
End-<strong>User</strong>s are unable to share<br />
a case with external users via<br />
email address.<br />
The email option is not working.<br />
Receiving error message “Media<br />
not connected” or “Error<br />
saving data.”<br />
Videos are not transferring to<br />
the <strong>iPad</strong>.<br />
Videos are missing from a<br />
saved case.<br />
Receiving error message for<br />
insufficient memory.<br />
Solution<br />
The SMTP server settings<br />
may be configured incorrectly,<br />
or they may not be an SMTP<br />
server configured in the Administration<br />
settings. Check the<br />
SMTP settings and configure<br />
correctly.<br />
Make sure there is an account<br />
set up in the mail application,<br />
as the email operation uses the<br />
default email account.<br />
Disconnect and reconnect the<br />
device. Retry the operation<br />
after approximately 5 seconds.<br />
Make sure the video format is<br />
set to MPEG4 (AVC) on the<br />
SDC3.<br />
Check and adjust the Cache<br />
settings to allocate more space.<br />
Otherwise, removed old files to<br />
free up space.<br />
22
S<br />
7. Maintenance<br />
Make sure that the device has version iOS 5.0.1 or greater, and the<br />
SDC3 is version 1.2 or greater.<br />
The user should use the Cache Settings page to check how much<br />
space is allotted to the <strong>App</strong> and how much is being used.<br />
23
S<br />
8. <strong>Stryker</strong> Limited Warranty<br />
<strong>Stryker</strong> warrants that the Software will operate in substantial<br />
conformance with its then-current Documentation for a period of<br />
ninety (90) days after the Software is installed by <strong>Stryker</strong>. <strong>Stryker</strong><br />
agrees to correct or replace, at no charge, any nonconformity of<br />
which it receives notice during the warranty period.<br />
24
S<br />
9. Contact Information<br />
Contact <strong>Stryker</strong> Customer Service with questions or concerns.<br />
<strong>Stryker</strong> Communications<br />
1410 Lakeside Parkway #100<br />
Flower, Mound, TX 75028<br />
Toll Free: (866) 841-5663<br />
1-972-410-7100<br />
For international service locations, refer to the <strong>Stryker</strong> website at<br />
the following URL:<br />
www.stryker.com.<br />
25
S<br />
<strong>Stryker</strong> Communications<br />
1410 Lakeside Parkway #100,<br />
Flower Mound, TX 75028<br />
Tel: 866-841-5663<br />
www.stryker.com<br />
26