Series 04 Ku-Band TVRO Antenna
Series 04 Ku-Band TVRO Antenna
Series 04 Ku-Band TVRO Antenna

Create successful ePaper yourself
Turn your PDF publications into a flip-book with our unique Google optimized e-Paper software.
<strong>Series</strong> <strong>04</strong> <strong>Ku</strong>-<strong>Band</strong> <strong>TVRO</strong> <strong>Antenna</strong><br />
Troubleshooting and Maintenance<br />
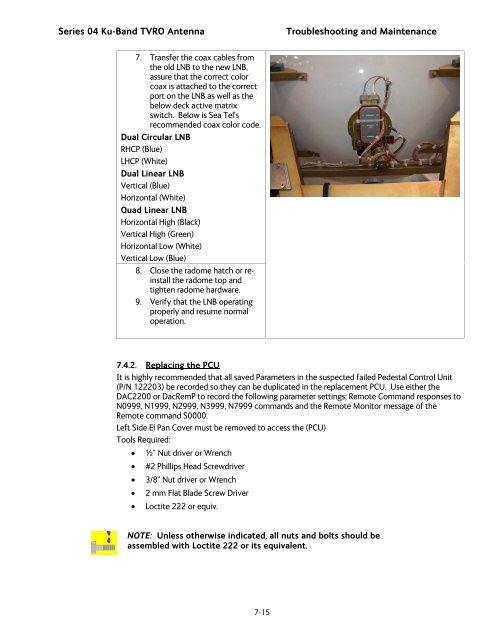
7. Transfer the coax cables from<br />
the old LNB to the new LNB,<br />
assure that the correct color<br />
coax is attached to the correct<br />
port on the LNB as well as the<br />
below deck active matrix<br />
switch. Below is Sea Tel’s<br />
recommended coax color code.<br />
Dual Circular LNB<br />
RHCP (Blue)<br />
LHCP (White)<br />
Dual Linear LNB<br />
Vertical (Blue)<br />
Horizontal (White)<br />
Quad Linear LNB<br />
Horizontal High (Black)<br />
Vertical High (Green)<br />
Horizontal Low (White)<br />
Vertical Low (Blue)<br />
8. Close the radome hatch or reinstall<br />
the radome top and<br />
tighten radome hardware.<br />
9. Verify that the LNB operating<br />
properly and resume normal<br />
operation.<br />
7.4.2. Replacing the PCU<br />
It is highly recommended that all saved Parameters in the suspected failed Pedestal Control Unit<br />
(P/N 122203) be recorded so they can be duplicated in the replacement PCU. Use either the<br />
DAC2200 or DacRemP to record the following parameter settings; Remote Command responses to<br />
N0999, N1999, N2999, N3999, N7999 commands and the Remote Monitor message of the<br />
Remote command S0000.<br />
Left Side El Pan Cover must be removed to access the (PCU)<br />
Tools Required:<br />
• ½” Nut driver or Wrench<br />
• #2 Phillips Head Screwdriver<br />
• 3/8” Nut driver or Wrench<br />
• 2 mm Flat Blade Screw Driver<br />
• Loctite 222 or equiv.<br />
NOTE: Unless otherwise indicated, all nuts and bolts should be<br />
assembled with Loctite 222 or its equivalent.<br />
7-15
![NC1147 (pdf 1.47 mb) Nitrogen Concentrator [OBIGGS] - Cobham plc](https://img.yumpu.com/51124104/1/190x245/nc1147-pdf-147-mb-nitrogen-concentrator-obiggs-cobham-plc.jpg?quality=85)