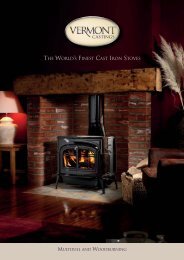
View - Stoves Online
View - Stoves Online
View - Stoves Online

You also want an ePaper? Increase the reach of your titles
YUMPU automatically turns print PDFs into web optimized ePapers that Google loves.
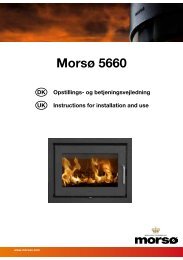
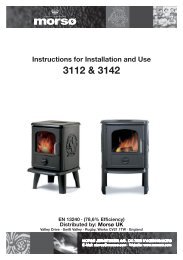
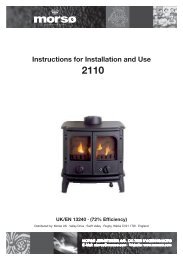
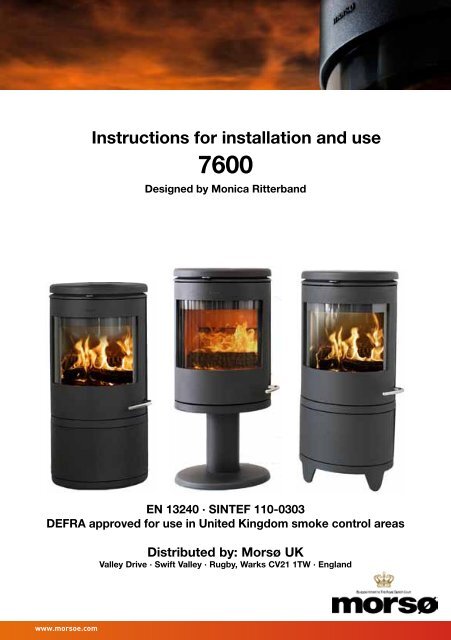
Instructions for installation and use<br />
7600<br />
Designed by Monica Ritterband<br />
EN 13240 · SINTEF 110-0303<br />
DEFRA approved for use in United Kingdom smoke control areas<br />
Distributed by: Morsø UK<br />
Valley Drive · Swift Valley · Rugby, Warks CV21 1TW · England<br />
www.morsoe.com
Enjoy your new Morsø stove!<br />
Morsø, the biggest stove company in the Danish<br />
market, has been making wood-burning stoves of<br />
the highest quality since 1853. Just follow the instructions<br />
below, and we are certain that you will<br />
be able to use and enjoy your new stove for many<br />
years to come.<br />
1.0 Installing your Morsø stove 3<br />
1.1 Unpacking the stove 3<br />
1.2 Installing the stove 3<br />
1.3 Chimney sweep 3<br />
1.4 Location of the stove/distance requirements 3<br />
1.5 The chimney 4<br />
1.6 Pipe connections 5<br />
1.7 Connecting to a brick chimney 6<br />
1.8 Connecting to a steel chimney 6<br />
1.9 Draught 7<br />
2.0 Firing/using the stove 8<br />
2.1 Lighting instructions and fuelling intervals 9<br />
3.0 Routine stove maintenance 12<br />
3.1 External maintenance 12<br />
3.2 Internal maintenance 12<br />
3.3 Cleaning the stove 13<br />
4.0 HETAS amendments 16<br />
Additional accessories<br />
We offer a comprehensive line of chimney, floor plate and accessory products that can facilitate<br />
the daily operation and maintenance of your Morsø stove.<br />
Likewise, for this stove we have developed a range of accessories designed by Monica Ritterband.<br />
Cast iron<br />
Cast iron is a live material. There are no two ovens that are identical. This is partly due to the<br />
tolerances of the casting process, partly because the ovens are a work of craftsmanship.<br />
2
1.0 Installing your Morsø stove<br />
1.1 Unpacking the stove<br />
The Morsø 7600 stoves weigh between 130 and 160 kg. In order to avoid damage when unpacking<br />
and assembling the stove, we recommend that this job be undertaken by 2 people.<br />
Remove the top cover, which is lying loose, before lifting the combustion chamber off the<br />
wooden pallet. Place the stove carefully in position, centrally on the base plate.<br />
1.2 Installing the stove<br />
National and local regulations regarding the installation of wood-burning stoves must be observed,<br />
as must local regulations regarding chimney connections and chimney installation.<br />
You may want to ask your chimney sweep for advice. However, it is you, your technical adviser<br />
or workman, who is responsible for compliance with the applicable national and local<br />
regulations.<br />
1.3 Chimney sweep<br />
As stated, it may be wise to consult your local chimney sweep before installing the stove.<br />
In any event, the chimney sweep must be notified once the wood-burning stove has been<br />
installed. The chimney sweep will inspect the installation, and reach an agreement with you<br />
regarding sweeping intervals. If your chimney has not been used for some time, it should be<br />
inspected for cracks, bird nests, etc., before it is used.<br />
1.4 Location of the stove/distance requirements<br />
Distance requirements apply only if the stove is placed near flammable materials. Your new<br />
stove can be positioned as specified on the authorisation sign on the back of the stove if the<br />
walls are made of flammable material.<br />
Minimum distances from flammable material:<br />
Type of stove Behind the stove (A) To the sides of the stove (B) To furniture<br />
Morsø 7600<br />
uninsulated flue pipe 150 mm 500 mm 1200 mm<br />
A<br />
45°<br />
A<br />
A<br />
B<br />
3
We recommend that the stove be installed at least 10 - 15 cm from masonry, in order to allow<br />
heat to circulate and to facilitate the cleaning of the inside and outside of the stove. A layer of<br />
wallpaper on a brick wall is normally viewed as non-flammable material.<br />
The floor<br />
If the stove is installed on a flammable floor, national and local regulations must be observed<br />
with regard to the size of the non-flammable underlying surface that must cover the floor beneath<br />
the stove. The underlying surface must naturally be able to bear the weight of the stove<br />
and, if applicable, the steel chimney.<br />
Distance to furniture<br />
The minimum clearance to combustible materials in front of the stove is 1200 mm. The minimum<br />
distance to combustible materials must be observed; furthermore, it should be considered<br />
whether furniture and other items will dry out if placed near the stove.<br />
A wood-burning stove gets hot when it is fired. Caution must therefore be observed, particularly<br />
with regard to children touching the stove.<br />
1.5 The chimney<br />
If local regulations permit, the stove may be connected to a chimney already serving another<br />
fireplace (such as an oil-burning stove or another wood-burning stove). Attention should be<br />
paid to any requirements concerning the location of flue pipes if two or more fireplaces are<br />
connected to the same chimney.<br />
The wood-burning stove must never be connected to a chimney to which a gas-burning stove<br />
is already connected.<br />
An efficient, modern stove places great demands on the chimney, so you should get the<br />
chimney sweep to evaluate chimney.<br />
The aperture of the chimney must comply with national and local regulations. In general, the<br />
aperture area should measure at least 175 cm2 (150 mm diameter) for wood-burning stoves.<br />
An overly large chimney aperture will mean that too much energy will be required to heat<br />
the chimney sufficiently to achieve an acceptable draught in the chimney. If you have a brick<br />
chimney with a large aperture, we recommend that you install an insulating chimney liner of<br />
the proper diameter. This will increase the draught, and improve the fuel economy.<br />
There are no requirements with respect to specific chimney heights, but a chimney must be<br />
tall enough to provide a good draught, and to ensure that the smoke does not cause any<br />
problems. As a general rule, there will be a satisfactory draught if the chimney extends 4 metres<br />
above the stove and at least 80 cm above the spine of the roof. If the chimney is located<br />
along the side of the house, the top of the chimney should never be lower than the spine of<br />
the roof or the highest point on the roof. Please note that there are often national and local<br />
regulations concerning the location of chimneys in houses with thatched roofs. Please see<br />
section 1.9 on Draught.<br />
The chimney and the flue pipe must be fitted with cleaning doors, which must be at least the<br />
same size as the chimney’s aperture area.<br />
The chimney must be accessible for external inspection, and it must be possible to access<br />
the cleaning doors and the chimney if it is to be cleaned from the top (e.g. steel chimneys).<br />
4
1.6 Connecting the flue pipe<br />
Lift the upper cast iron top plate off the stove.<br />
Note: the round cast iron cover plate in the top plate must remain mounted if the stove is<br />
being installed with the flue pipe to the rear, but unscrewed from the upper top plate if the<br />
flue pipe is being installed pointing upwards.<br />
Mounting the flue collar pointing upwards<br />
From the factory, the stove is prepared for installation with the included flue collar (1) pointing<br />
upwards with included ball stop and screws. The ball stop, which prevents the chimney<br />
sweep from damaging the stove’s baffle plates while sweeping, is the 178 mm long rod that<br />
is provided.<br />
Mounting the flue collar to the rear<br />
If the stove is being installed with the flue pipe to the rear, the round plate fixed with two<br />
screws on the back of the stove is dismounted. The iron piece on the inside convection back<br />
panel is knocked out with light, firm taps with a hammer next to the small ”bridges” holding<br />
the piece.<br />
The cast iron cover is removed from the back panel by turning it anticlockwise and mounted<br />
on the inside top plate by pressing it down and turning it clockwise. The lid can act as a<br />
cleaning cover, and facilitate access for the annual cleaning of the stove. The flue collar is<br />
centred and screwed onto the back of the stove with the clamps and screws provided. The<br />
ball stop is not used when installing the flue collar to the rear.<br />
The location of the baffles<br />
The baffles (2) and (3), which are made<br />
from vermiculite, are mounted at the factory.<br />
Make sure that the baffles are correctly<br />
assembled before lighting the stove<br />
(please see the sketch.)<br />
5
1.7 Connecting to a brick chimney<br />
Brick a flue bushing securely into the wall, and insert the flue pipe into it. The pipe must not<br />
extend into the actual chimney opening, but only to the inside of the chimney aperture. The<br />
joints between the stove/pipe and pipe/wall bushing must be sealed with the glass tape provided.<br />
It is not normally necessary to seal between any pipe joints.<br />
If the flue pipe transitions from horizontal to vertical, it is a good idea to install it with a gentle<br />
bend so as to avoid any loss of draught.<br />
The flue pipe must be dimensioned in accordance with national and local regulations. Morsø<br />
recommends, however, that flue pipes be made of 2 mm sheet steel, as this will extend the<br />
service life.<br />
1.8 Connecting to a steel chimney<br />
If your installation involves routing the chimney straight up through the ceiling, it must comply<br />
with national and local regulations concerning the distance of the chimney from flammable<br />
ceiling material. The chimney must be sealed at the smoke outlet using the glass tape provided.<br />
It is important to install the chimney with a roof support, so that the stove does not bear<br />
the weight of the chimney. (See the chimney manufacturer’s instructions). Heavy weights on<br />
the stove’s top plate may cause it to crack. The Morsø warranty does not cover the top plate<br />
if the chimney is installed without a roof support.<br />
If a chimney fire should occur as a result of incorrect operation of the stove or prolonged use<br />
of wet fuel, close the vents completely and contact the fire brigade.<br />
Be aware of the following:<br />
Discuss the cleaning options with your chimney sweep.<br />
If there is insufficient draught in the chimney, it may be a good idea to install<br />
the flue pipe straight up, so as to minimise smoke migration in the actual combustion<br />
chamber.<br />
Avoid having any more bends than necessary, and limit the length of the flue<br />
pipe so as not to reduce the draught.<br />
Fresh air supply<br />
A wood-burning stove requires air for combustion. As a result, firing a woodburning<br />
stove will help to create a healthy climate in your house. If the house<br />
is very tightly sealed, and particularly if there is a cooker hood or ventilation<br />
system in the house, it may be necessary to install an air grate in the room in<br />
which the wood-burning stove is installed. Otherwise there may not be enough<br />
draught in the chimney, which may result in the stove not being able to burn<br />
properly, and smoke may come out of the stove when the fire door is opened.<br />
If it is necessary to install air grates, they must be positioned so that they cannot<br />
be obstructed.<br />
6
1.9 Draught<br />
If smoke comes out of the stove when the fire door is opened, it will be due to the poor<br />
draught in the chimney. This type of stove requires at least 12 PA of chimney draught to<br />
achieve satisfactory combustion, and to prevent smoke from escaping. Smoke may, however,<br />
escape in any event, if the stove door is opened during very vigorous burning, so this should<br />
be avoided.<br />
The flue gas temperature at the rated output is 282°C relative to 20°C.<br />
If in doubt, you may want to get your chimney sweep to measure the draught in the chimney.<br />
Draught<br />
The draught in the chimney is the result of the difference between the high<br />
temperature in the chimney and the cooler temperature outside. Other factors<br />
that determine whether enough negative pressure can be produced to create a<br />
draught include the length and insulation of the chimney, and wind and weather<br />
conditions.<br />
The draught will be reduced when:<br />
- The temperature difference is too low, e.g. in connection with a poorly insulated<br />
chimney. If the chimney is cold, it may help to light (burn up) a rolled-up newspaper<br />
in the chimney’s cleaning door.<br />
- The outside temperature is too high, for example during the summer.<br />
- There is no wind.<br />
- The chimney is not tall enough, with the result that it sits in the lee of the roof<br />
surface or tall trees. These conditions are also associated with the greatest risk<br />
of smoke coming back down the chimney.<br />
- Air is entering the chimney in undesired places, e.g. through cracked joints or<br />
leaks in the cleaning door or the flue pipe.<br />
- Unsealed, unused fireplaces are connected to the chimney.<br />
- The flue pipe and chimney are clogged up with soot, due to inadequate cleaning.<br />
- The house is too tightly sealed (please see the section on Fresh air supply).<br />
- Too little air is getting in.<br />
A good draught is achieved when:<br />
- There is a big difference between the temperature in the chimney and outside<br />
during firing, i.e. when the need for heating is greatest.<br />
- The weather is clear and there is a good wind.<br />
- The chimney is of the proper height, i.e. at least 4 metres above the stove, and<br />
clear of the spine of the roof.<br />
7
2.0 Firing/using the stove<br />
Your stove is constructed with air inlets in two places.<br />
Pre-heated, fast-moving combustion air is added to the fire above the glass window, and is<br />
regulated using the handle above the door. The combustion air is let in when the handle is<br />
pushed to the right, and shut off when the handle is pushed to the left.<br />
Another air inlet provides a constant, pre-heated air supply which cannot be adjusted, and<br />
which comes into the combustion chamber just above the fire. This helps to burn off the last<br />
few gasses emitted by the wood whilst it is being heated up.<br />
The stove’s rated heat output is 6,2 kW. Your new Morsø stove is EN-tested for firing with<br />
wood, and is suitable for intermittent use.<br />
N.B!<br />
Wood is a material that contains a great deal of gas (approximately 75 %). The gases<br />
are released when the wood is lit and heated up. For this reason, it is important that<br />
the gases are ignited quickly after stoking. If the wood just lies smouldering, especially<br />
after re-stoking, a lot of smoke is created, which, in the worst case, may cause<br />
an explosive ignition of the gasses, resulting in damage to the stove.<br />
In order to ignite the gases that are released from the wood, and to keep clear, lasting<br />
flames during the combustion process, it is important to let in the required quantity<br />
of oxygen (air supply) at all times. The setting of the air supply, the method of ignition<br />
and the lighting intervals depend on the draught in the chimney, the wind and<br />
weather, the amount of heat required, the fuel, etc. This means that it may take some<br />
time before you get to know the correct functioning of the stove under any given circumstances.<br />
Although you can fire your Morsø stove with almost all kinds of wood, you should not<br />
fire with wet wood, or unseasoned wood. Wood ought to be stored under a roof for at<br />
least 1 year, and preferably 2 years, with free access to wind. Wood should be chopped<br />
as soon as possible after felling if it is to dry quickly. The wood can be used once<br />
the moisture content is less than 20%. During the EN test, all stoves are tested with<br />
wood with a moisture content of (16 ± 4)%.<br />
Never use driftwood, as it usually has a high salt content, which damages both the stove<br />
and the chimney. Impregnated and painted wood and chipboard emit poisonous<br />
smoke and fumes, so they should not be used as fuel either.<br />
Please note that liquid fuel may not be used in the stove.<br />
Pieces of wood with a diameter greater than 10 cm should always be chopped.<br />
The pieces of wood should be short enough to be able to lie flat over the layer of embers,<br />
with air at both ends.<br />
The maximum length of fuel in the stove is 30 cm.<br />
The maximum quantity of fuel is 2 kg/hour (max. 2 pieces of wood each time you restoke).<br />
The first few times you light the stove, the fire should be moderate, so that the heatresistant<br />
paint can harden before firing more vigorously. During the hardening phase,<br />
the paint may develop obnoxious smoke and smell the first time it is lit, which is very<br />
normal. Make sure that the room is well ventilated during this period.<br />
8
2.1 Lighting and fuelling intervals<br />
A lot of air is needed when lighting the stove. If you are starting with a cold stove, the door<br />
should be left ajar for the first few minutes, and the combustion air supply opened to maximum.<br />
Always keep approximately 1 cm of ash in the bottom of the combustion chamber. This<br />
will have an insulating effect, and ensures good combustion.<br />
1. A layer of embers will form rapidly if the stove is lit with 2 -<br />
4 fuel tablets or 7 - 10 rolled up sheets of newspaper underneath<br />
1-2 kg of dry kindling.<br />
2. Open the air supply as much as possible. This is done using<br />
the handle above the door.<br />
3. After the paper/solid alcohol tablets have caught fire, leave<br />
the fire door ajar about 5 - 10 cm, so that the chimney<br />
draws well.<br />
4. When you can see that the chimney is hot enough to draw<br />
(after 5 - 10 minutes), close the door. If all the necessary<br />
conditions are met, a thick layer of embers will have been<br />
formed in the combustion chamber after another 15 - 20<br />
minutes, and there will be a high temperature in the combustion<br />
chamber, which is necessary in order to be able<br />
to continue the combustion.<br />
9
5. If the condition in step 4 is met, place max. 2 pieces of<br />
wood with a total weight of 1.5-2 kg and a length of 25-<br />
30 cm over the embers in a single layer, with a distance of<br />
approximately 1 cm.<br />
6. Open the air supply to maximum, and close the door.<br />
The fresh wood will be lit within 2-3 minutes.<br />
If it does not light, open the door slightly to allow in enough<br />
air to ignite the wood.<br />
Close the door again once the wood has caught.<br />
7. Reduce the amount of combustion air to the desired position,<br />
and the optimal combustion will continue. Make sure<br />
that there is always enough air (oxygen) to maintain clear,<br />
lasting flames when, and after, reducing the amount of<br />
combustion air.<br />
During the official test, the stoking interval was 70-80 minutes.<br />
8. Once the fire has been reduced to a thick layer of embers,<br />
a new portion of wood can be added by repeating steps 5<br />
& 7.<br />
10
The stove door must be opened gently the first 2 - 3 centimetres, then you should wait until<br />
the pressure has equalised before opening the door all the way. This technique will prevent<br />
smoke from getting out, particularly when there is a poor draught.<br />
The stove door should never be opened when the stove is being fired vigorously.<br />
Once the wood has burned out, it becomes glowing charcoal. If a good layer of embers has<br />
already formed on top of a sufficient layer of ash, the stove can keep warm for a very long<br />
time, not least due to the favourable qualities of the cast iron.<br />
We would strongly recommend that you do not leave your stove alit at night. It<br />
harms the environment, and constitutes very poor use of the wood, as the gases<br />
in the wood do not ignite at the low temperature, but settle as soot (unburned<br />
gases) in the chimney and stove. Extreme conditions, such as poor draught<br />
in the chimney, large quantities of wood or wet wood, may, in the worst-case<br />
scenario, cause an explosive ignition.<br />
When firing in the summer period, when there is minimal need for heat, the<br />
combustion will be poor. The stove provides too much heat, so the combustion<br />
should be reduced. But always remember to make sure that there are lasting<br />
flames until the wood becomes charcoal. If you want a weaker fire, stoke up<br />
using less wood.<br />
If you fire the stove using wet wood, a lot of the fuel’s thermal energy will be<br />
spent forcing the water out of the wood, without releasing any heat to the stove.<br />
This incomplete combustion results in a layer of soot being left in the stove,<br />
pipe and chimney.<br />
Comparison between firing with wood and oil<br />
Type of wood (moisture content 20%)<br />
No. of cubic metres per 1000 l oil<br />
Oak 7.0<br />
Beech 7.0<br />
Ash 7.2<br />
Sycamore 7.5<br />
Birch 8.0<br />
Elm 8.9<br />
Common spruce 10.4<br />
Silver fir 10.9<br />
11
3.0 Routine stove maintenance<br />
3.1 External maintenance<br />
The cast surface of the stove is painted with heat-resistant Senotherm paint. It is best maintained<br />
by simply vacuuming it with a soft brush attachment or wiping it down with a dry, dustfree<br />
cloth.<br />
If the stove is used too vigorously, the painted surface may assume a greyish tinge over time,<br />
but the stove can easily be freshened up with Morsø spray paint, which is available from your<br />
local retailer.<br />
Morsø stoves are painted in Morsø charcoal. The paint is available either as a spray or in tins.<br />
3.2 Internal maintenance<br />
Glass window<br />
If the stove is used correctly, very little or no soot will be deposited on the ceramic glass<br />
window. If soot does form on the glass as the stove is being lit, it will burn away once normal<br />
combustion begins in the stove. If the glass window becomes thoroughly covered in soot due<br />
to incorrect operation, the soot can be easily removed using Morsø Glass Cleaner. The glass<br />
must be cold when you clean it. Avoid stoking the stove with pieces of wood that are so long<br />
that they press against the glass window when the door is closed.<br />
Only use Morsø Glass Cleaner.v<br />
Reasons for sooty glass window:<br />
- The fuel is too wet<br />
- The pieces of fuel are too big/uncut wood<br />
- The combustion temperature is too low<br />
- There is not enough air<br />
Ceramic glass replacement<br />
Ceramic glass cannot be recycled because it has a higher melting point that ordinary glass.<br />
If ceramic glass is mixed with ordinary glass, the raw material is spoiled, and the reclaiming<br />
process may be halted. Take care that the ovenproof glass does not end up among ordinary<br />
recycled waste. That will be a great benefit to the environment.<br />
Note: Should be handed in to a recycling station as ceramic glass.<br />
Internal cast-iron parts and/or wearing parts<br />
The baffles and other components that come in direct contact with the fire and glowing fuel<br />
are all wearing parts. As a result, they will be particularly susceptible to burn-through. When<br />
used correctly, these parts will last for many years, but overly vigorous use will naturally accelerate<br />
the burn-through. Such parts are all easily replaced.<br />
If the baffles are damaged and are not replaced in time, the top plate will be exposed to such<br />
high temperatures that it may be damaged as well.<br />
Please note that no unauthorised alterations of the design may be undertaken, and that<br />
any parts that are replaced must be replaced with original Morsø parts.<br />
12<br />
Reasons for overly rapid wear of internal parts<br />
- Stove fired too vigorously<br />
Use of very dry wood (wood from old furniture)<br />
- Too much soot on top of the baffles (please see the section on Cleaning)<br />
- Too much ash in the ash pan (please see the section on Ash)
Gaskets<br />
The gaskets in the door will wear out over time, and should be replaced as required in order<br />
to prevent runaway combustion. Use the original Morsø gasket kit.<br />
NOTE: Normal wearing parts are not covered by Morsø’s extended warranty.<br />
A selection of maintenance products (spare parts, glass cleaner, paint, gasket kit, etc.) is<br />
available from your Morsø dealer.<br />
3.3 Cleaning the stove<br />
A layer of ash and soot will form as a result of the draught in the chimney and after sweeping,<br />
particularly on the top of the upper baffle. This ash will have an insulating effect, which may<br />
speed up the burn-through of the baffles.<br />
During normal cleaning, the baffles can be removed from the stove. Once the baffles have<br />
been taken out, you can access the flue chamber above the baffles and clean it.<br />
Clean the baffles before reassembling them, and make sure that they are correctly assembled.<br />
Nowadays the chimney sweep must remove the soot in the stove, in addition to sweeping the<br />
chimney and cleaning the flue pipe.<br />
The number of annual sweepings/cleanings of the stove should be determined in consultation<br />
with your chimney sweep.<br />
1. Raise the bottom baffle slightly, and hold it in that position.<br />
This loosens the braick panels in the side.<br />
2. Tilt one of the side brick panels and remove it.<br />
13
6. Make sure that the baffles and bricks are correctly reassembled before lighting the stove after<br />
cleaning.<br />
Ash<br />
As noted above, there should be a layer of approximately 1 cm insulating ash in the bottom<br />
of the combustion chamber in order to achieve a high combustion temperature. If the layer of<br />
ash is too thick, it can be brushed down into the ash pan.<br />
Empty the ash pan before it gets completely full, so that the ash does not insulate around the<br />
grate, and thereby speed up the burn-through.<br />
In most cases, the ash will need to be taken away by the waste disposal company. Because<br />
embers may be concealed in the ash pan for several days, it may be necessary to store the<br />
ash in a container made of non-flammable material before pouring it into a rubbish bag.<br />
Ash from a wood-burning stove will not be of any benefit to your garden as fertiliser. If you<br />
have burned colour brochures, or painted or treated wood, etc., in the stove, the resulting ash<br />
must not be poured onto soil, as it may contain heavy metals.<br />
Spare parts for the 7600<br />
Description<br />
Product no.<br />
Cast grate 34761200<br />
Upper baffle 71761700<br />
Bottom baffle 79760500<br />
Glass window 79760100<br />
Right side brick panel 79760300<br />
Left side brick panel 79760400<br />
Rear brick 79760200<br />
14
3. Tilt the other side brick panel and remove it.<br />
4. Once the side brick and the rear brick panels have been<br />
removed, lower the bottom baffle and lift it out.<br />
5. Lift the upper baffle out of its holder and tilt it out.<br />
15
4.0 HETAS amendments<br />
Health and safety precautions<br />
Special care must be taken when installing the stove such that the requirements of the Health<br />
and Safety at Work Act are met.<br />
Handling<br />
Adequate facilities must be available for loading, unloading and site handling.<br />
Fire Cement<br />
Some types of fire cement are caustic and should not be allowed to come into contact with<br />
the skin. In case of contact wash immediately with plenty of water.<br />
Asbestos<br />
This stove contains no asbestos. If there is a possibility of disturbing any asbestos in the<br />
course of installation then please seek specialist guidance and use appropriate protective<br />
equipment.<br />
Metal Parts<br />
When installing or servicing this stove care should be taken to avoid the possibility of personal<br />
injury.<br />
Note of references to the current UK regulations<br />
In all cases the installation must comply with current Building Regulations, Local Authority<br />
Byelaws and other specifications or regulations as they affect the installation of the stove.<br />
It should be noted that the Building Regulations requirements may be met by adopting the<br />
relevant recommendations given in British Standards BS 8303, BS EN 15287-1:2007 as an<br />
alternative means to achieve an equivalent level of performance to that obtained following the<br />
guidance given in Approved Document J.<br />
Please note that it is a legal requirement under England and Wales Building Regulations that<br />
the installation of the stove is either carried out under Local Authority Building Control approval<br />
or is installed by a Competent Person registered with a Government approved Competent<br />
Persons Scheme. HETAS Ltd operate such a Scheme and a listing of their Registered Competent<br />
Persons can be found on their website at www.hetas.co.uk.<br />
This stove must not be installed into a chimney that serves any other heating appliance.<br />
More detailed advice about existing chimney usage<br />
NOTE: A chimney height of not less than 4.5 metres measured vertically from the outlet of the<br />
stove to the top of the chimney should be satisfactory. Alternatively the calculation procedure<br />
given in EN 13384-1 may be used as the basis for deciding whether a particular chimney design<br />
will provide sufficient draught.<br />
The outlet from the chimney should be above the roof of the building in accordance with the<br />
provisions of Building Regulations Approved Document J.<br />
If installation is into an existing chimney then it must be sound and have no cracks or other<br />
faults which might allow fumes into the house. Older properties, especially, may have chimney<br />
faults or the cross section may be too large i.e. more than 230 mm x 230 mm. Remedial<br />
action should be taken, if required, seeking expert advice, if necessary. If it is found neces-<br />
16
sary to line the chimney then a flue liner suitable for solid fuel must be used in accordance<br />
with Building Regulations Approved Document J.<br />
Any existing chimney must be clear of obstruction and have been swept clean immediately<br />
before installation of the stove. If the stove is fitted in place of an open fire then the chimney<br />
should be swept one month after installation to clear any soot falls which may have occurred<br />
due to the difference in combustion between the stove and the open fire.<br />
If there is no existing chimney then any new system must be to the designation described<br />
above and in accordance with Building Regulations Approved Document J.<br />
A single wall metal fluepipe is suitable for connecting the stove to the chimney but is not<br />
suitable for use as the complete chimney. The chimney and connecting fluepipe must have a<br />
minimum diameter of 150 mm and its dimension should be not less than the size of the outlet<br />
socket of the stove.<br />
Any bend in the chimney or connecting fluepipe should not exceed 45°. 90° bends should<br />
not be used.<br />
Combustible material should not be located where the heat dissipating through the walls of<br />
fireplaces or flues could ignite it. Therefore when installing the stove in the presence of combustible<br />
materials due account must be taken of the guidance on the separation of combustible<br />
material given in Building Regulations Approved Document J and also in these stove<br />
instructions.<br />
If it is found that there is excessive draught in the chimney then a draught stabiliser should<br />
be fitted. Fitting of a draught stabiliser will affect the requirement for the permanent air supply<br />
into the room in which the stove is fitted in accordance with Approved Document J (see also<br />
combustion air supply).<br />
Commissioning and handover<br />
Ensure all parts are fitted in accordance with the instructions.<br />
On completion of the installation allow a suitable period of time for any fire cement and mortar<br />
to dry out, before lighting the stove. Once the stove is under fire check all seals for soundness<br />
and check that the flue is functioning correctly and that all products of combustion are<br />
vented safely to atmosphere via the chimney terminal.<br />
On completion of the installation and commissioning ensure that the operating instructions<br />
for the stove are left with the customer. Ensure to advise the customer on the correct use of<br />
the appliance and warn them to use only the recommended fuel for the stove.<br />
Advise the user what to do should smoke or fumes be emitted from the stove. The customer<br />
should be warned to use a fireguard to BS 8423:2002 (Replaces BS 6539) in the presence of<br />
children, aged and/or infirm persons.<br />
Warning note on fume emission<br />
Properly installed, operated and maintained this appliance will not emit fumes into the dwelling.<br />
Occasional fumes from de-ashing and re-fuelling may occur. However, persistent fume<br />
emission is potentially dangerous and must not be tolerated. If fume emission does persist,<br />
the following immediate actions should be taken:-<br />
17
a) Open doors and windows to ventilate room.<br />
b) Let the fire out or eject and safely dispose of fuel from the appliance.<br />
c) Check for flue or chimney blockage, and clean if required.<br />
Do not attempt to relight the fire until the cause of the fume emission has been identified and<br />
corrected. If necessary seek expert advice.<br />
Extractor fan<br />
There must not be an extractor fan fitted in the same room as the stove as this can cause the<br />
stove to emit smoke and fumes into the room.<br />
Permanent air vent<br />
The stove requires a permanent and adequate air supply in order for it to operate safely and<br />
efficiently.<br />
In accordance with current Building Regulations the installer may have fitted a permanent air<br />
supply vent into the room in which the stove is installed to provide combustion air. This air<br />
vent should not under any circumstances be shut off or sealed.<br />
Chimney cleaning<br />
The chimney should be swept at least twice a year. It is important that the flue connection<br />
and chimney are swept prior to lighting up after a prolonged shutdown period.<br />
If the stove is fitted in place of an open fire then the chimney will require sweeping after a<br />
month of continuous operation. This is a precaution to ensure that any “softer” deposits left<br />
from the open fire usage have not been loosened by the higher flue temperatures generated<br />
by the closed stove.<br />
Periods of Prolonged Non-Use<br />
If the stove is to be left unused for a prolonged period of time then it should be given<br />
a thorough clean to remove ash and unburned fuel residues. To enable a good flow of air<br />
through the appliance to reduce condensation and subsequent damage, leave the air controls<br />
fully open.<br />
Use of fireguard<br />
When using the stove in situations where children, aged and/or infirm persons are present a<br />
fireguard must be used to prevent accidental contact with the stove. The fireguard should be<br />
manufactured in accordance with BS 8423:2002 (Replaces BS 6539).<br />
Use of operating tools<br />
Always use the operating tools provided when handling parts likely to be hot when the stove<br />
is in use.<br />
Aerosol sprays<br />
Do not use an aerosol spray on or near the stove when it is alight.<br />
18
www.morsoe.com<br />
Morsø Jernstøberi A/S - 20.10.2010 - 72762200