
Create successful ePaper yourself
Turn your PDF publications into a flip-book with our unique Google optimized e-Paper software.
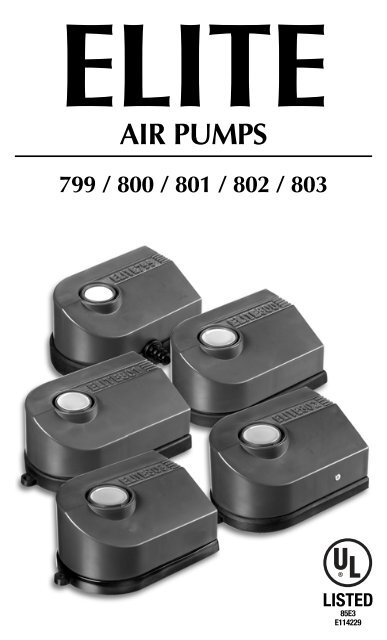
ELITE<br />
AIR PUMPS<br />
799 / 800 / 801 / 802 / 803<br />
LISTED<br />
85E3<br />
E114229
CONGRATULATIONS<br />
On your purchase of an ELITE air pump. So that you may<br />
enjoy your new air pump to the fullest, please take a few<br />
moments to read this instruction booklet to become familiar<br />
with the installation and operation procedures. Be certain to<br />
read the SAFETY INSTRUCTIONS before using your air pump.<br />
IMPORTANT SAFETY<br />
INSTRUCTIONS<br />
WARNING: To guard against injury, basic safety precautions<br />
should be observed, including the following.<br />
1. For the complete enjoyment, use and understanding of this product<br />
READ AND FOLLOW ALL<br />
SAFETY INSTRUCTIONS<br />
and all important notices on the appliance before using.<br />
Failure to do so may result in damage to the unit.<br />
2. Danger – To avoid possible electrical shock, special care<br />
should be taken since water is employed in the use of<br />
aquarium equipment. For each of the following situations,<br />
do not attempt repairs yourself; return the appliance to the<br />
manufacturer for service or discard the appliance.<br />
A. DO NOT immerse in water. If the appliance falls into the<br />
water, DON’T reach for it! First unplug it and then retrieve it.<br />
If electrical components of the appliance get wet, unplug the<br />
appliance immediately. (Non-immersible equipment only)<br />
B. Carefully examine the appliance after installation. It should not<br />
be plugged in if there is water on parts not intended to be wet.<br />
C. Do not operate any appliance if it has a damaged cord or plug,<br />
or if it is malfunctioning or if it is dropped or damaged in any<br />
manner. The power cord of this appliance cannot be replaced:<br />
if the cord is damaged, the appliance should be discarded.<br />
Never cut the cord.<br />
D. To avoid the possibility of the appliance plug or receptacle<br />
getting wet, position aquarium stand and tank to one side of a
Check<br />
Valve<br />
Drip-Loop<br />
wall mounted receptacle to prevent<br />
water from dripping onto the receptacle<br />
or plug. The “drip-loop” (see illustration)<br />
should be arranged by the user for each<br />
cord connecting an aquarium appliance<br />
to a receptacle. A “drip-loop” is that part<br />
of the cord below the level of the<br />
receptacle, or the connector if an<br />
extension cord is used, to prevent water<br />
travelling along the cord and coming in<br />
contact with the receptacle. If the plug or<br />
receptacle does get wet, DON’T unplug<br />
the cord. Disconnect the fuse or circuit<br />
breaker that supplies power to the<br />
appliance, then unplug and examine for presence of water in<br />
the receptacle.<br />
3. Close supervision is necessary when an appliance is used by<br />
or near children.<br />
4. To avoid injury, do not contact moving parts or hot parts<br />
such as heaters, reflectors, lamp bulbs, and the like.<br />
5. Always unplug an appliance from an outlet when not in use,<br />
before putting on or taking off parts, and before cleaning.<br />
Never yank cord to pull plug from outlet. Grasp the plug and<br />
pull to disconnect.<br />
6. Do not use an appliance for other than intended use. The<br />
use of attachments not recommended or sold by the<br />
appliance manufacturer may cause an unsafe condition.<br />
7. Do not install or store the appliance where it will be<br />
exposed to weather or to temperatures below freezing.<br />
8. Make sure an appliance mounted on a tank is securely<br />
installed before operating it.<br />
9. Read and observe all the important notices on the<br />
appliance.<br />
10. If an extension cord is necessary, a cord with a proper<br />
rating should be used. A cord rated for less amperes or<br />
watts than the appliance rating may overheat. Care should<br />
be taken to arrange the cord so that it will not be tripped<br />
over or pulled.<br />
SAVE THESE INSTRUCTIONS
INSTALLATION:<br />
The air pump should be installed by following either of the two<br />
recommended methods:<br />
1. Place the air pump on a surface lower than the water level<br />
of the aquarium. To avoid damage from accidentally spilled<br />
water, do not place the air pump directly below the aquarium.<br />
Important: It is recommended to<br />
always use a Check Valve (sold<br />
separately) in the air line between<br />
the air pump and the aquarium.<br />
Check Valve<br />
The Check Valve will help prevent<br />
water from siphoning out of the<br />
aquarium through the air hose and<br />
into the pump in the event of a<br />
power failure, or when removing<br />
filters and other air-driven<br />
Drip-Loop<br />
accessories from the aquarium.<br />
2. Place the air pump on a surface higher than the water level,<br />
such as a shelf. The surface should<br />
be at least 12 inches (30 cm) higher<br />
than the water level of the<br />
aquarium, but not be positioned<br />
directly above the aquarium. The<br />
Drip-Loop<br />
Check<br />
Valve<br />
surface should have a raised edge to<br />
prevent the air pump from sliding<br />
off. Use a Check Valve (sold<br />
separately) in the air line between<br />
the air pump and the aquarium to<br />
prevent back-siphoning.<br />
Once the air pump has been installed, do the following:<br />
1. Attach one end of the air line tubing (sold separately) to the air<br />
outlet(s) on air pump.<br />
2. Attach the other end of the air line tubing to filter(s), airstone(s),<br />
ornament(s) or any other air-driven aquarium accessory.<br />
Ensure that the airline tubing has no restrictions or kinks.<br />
3. Plug air pump into outlet. Be sure to allow for a “drip loop”<br />
(see illustration).
INSTALLATION TIPS:<br />
• The pump should be placed in a location which is dry and<br />
relatively free from dust . Do not place the air pump on<br />
carpet, as fibers might collect on the pump and clog freeflowing<br />
air from entering pump. This will reduce the air<br />
output and the service life of the pump.<br />
• <strong>Air</strong> control valves with multiple outlets may also be used to<br />
power additional apparatus in the aquarium. When using<br />
multiple air valves, it is recommended to have one more<br />
outlet than required by the accessories; this will be used to<br />
bleed overproduction of air due to back pressure build up.<br />
For more information about back pressure see (BACK<br />
PRESSURE).<br />
• <strong>Air</strong> <strong>Pumps</strong> can be used to operate a variety of aquarium<br />
accessories such as air stones, corner filters, under gravel<br />
filters, and ornaments. Follow installation instructions for<br />
your particular aquarium accessory product.<br />
CAUTION:<br />
Care must be taken during installation to ensure that water<br />
cannot siphon out of the aquarium through the air hose and<br />
damage the air pump. To prevent back-siphoning when<br />
removing filter(s), air stone(s), ornament(s) or any other airdriven<br />
aquarium accessory from the aquarium, do the<br />
following:<br />
1. Install a Check Valve<br />
2. Leave the pump running while you disconnect the tubing<br />
from the pump. Disconnect tubing and tape this end of the<br />
tubing to the very top frame of your aquarium.<br />
3. Filter(s), air stone(s) and other air-driven ornaments can now<br />
be safely removed from your aquarium.<br />
AIR FLOW ADJUSTMENT<br />
In order to achieve correct airflow, a balance between the<br />
valve setting and the pump output is necessary. The ideal<br />
setting is obtained by minimum back pressure or nonrestriction<br />
of flow of air. Never physically restrict the output of the pump.<br />
Restriction causes damage to the diaphragm. (SEE BACK<br />
PRESSURE). Adjust air valve output as required.
To regulate air volume using an air control valve with multiple<br />
outlets, it is recommended to have the last valve available to release<br />
excess air pressure build up (see BACK PRESSURE). In regulating<br />
the air pressure, it is best to work from the valve farthest from the<br />
input of the air valve. Remember to have the last valve completely<br />
closed so as not to lose any air pressure. Proceed to make<br />
adjustments on the remaining valves. Once the adjustments are<br />
complete slowly open the last valve to the point where no loss of air<br />
output is noticed from the items controlled by the other valves. To<br />
achieve and maintain an equal balance of air pressure to the<br />
accessories in the aquarium, further adjustments of the air valve<br />
may be required depending on the items powered by the air pump.<br />
Note: If the first valve on the air control assembly is fully<br />
opened, air volume to the remaining outlets will be reduced.<br />
To alleviate excess air pressure or overproduction of air, it is<br />
recommended to open the last valve every 2 weeks, or when<br />
required. In doing this, you will increase the life of the pump<br />
and diaphragms by preventing premature wear.<br />
BACK PRESSURE<br />
Back pressure is the buildup of pressure on the diaphragm due
to restricted air flow. This occurs when excess air is produced<br />
by the air pump, or when the air channels are inadvertantly<br />
blocked. Back pressure over time resulting from clogged air<br />
stones or other air system blockages and restrictions will cause<br />
the diaphragm to expand or rupture. An expanded diaphragm<br />
leads to a loss of air volume while a rupture results in the total<br />
loss of air.<br />
MAINTENANCE<br />
(EXTERNAL APPEARANCE)<br />
Remove dust and grime with a soft, damp cloth. Do not<br />
immerse pump in water.<br />
AIR STONE, AIR LINE, AND<br />
ORNAMENT MAINTENANCE<br />
This pump requires no regular internal maintenance during its<br />
life. The rest of the air system should be periodically checked<br />
and cleaned.<br />
• <strong>Air</strong> lines should be carefully inspected whenever standard<br />
aquarium maintenance is performed. Adjust, or if required,<br />
replace all sections which are pinched, kinked, or otherwise<br />
damaged.<br />
• All attached air-driven aquarium ornaments should be regularly<br />
maintained. Algae growths should be removed from moving parts<br />
and kept as clean as possible. Internal air tubes should be cleaned.<br />
• <strong>Air</strong> stones should be kept clean and free of debris or algae<br />
build-up. The ideal situation is to replace them every month,<br />
alternating with an extra set which has been dried over that<br />
period and cleaned before being placed in the aquarium.<br />
Two complete sets of air stones alternately changed each<br />
month will extend the life of the air stones and help keep<br />
back pressure to a minimum.<br />
Clogged airstones and air-driven aquarium ornaments will lead<br />
to low air pressure output and also reduce the life of the<br />
diaphragms.
TROUBLESHOOTING TIPS<br />
If the air pump fails to produce air, check the following:<br />
1. Ensure that the air pump is plugged in.<br />
2. Ensure that there are no blockages in the air hose assembly<br />
and that all valves allow air passage. If no air is produced<br />
by the accessories in the aquarium, remove the airline from<br />
the pump and ensure that air is being produced.<br />
3. If the air pump produces no output, the most common<br />
problem encountered with any air pump is a ripped or<br />
weakened diaphragm. Inspect the diaphragm for tears or<br />
rips. Any opening in the diaphragm will make it impossible<br />
for the pump to produce air for aeration purposes. Always<br />
inspect the diaphragm first before replacing other parts in<br />
the pump.<br />
REMOVING THE PUMP<br />
Whenever the air pump must be shut off and removed from the<br />
aeration system, always take off the air line before the pump is<br />
unplugged. This will prevent water from siphoning back into<br />
the pump. If the air line cannot be removed before unplugging<br />
the power cord, raise the pump above the water level.
REPLACEMENT PARTS<br />
Repair kits for all wearable parts are available for all ELITE,<br />
MAXIMA, MAXIMA-R, and OPTIMA <strong>Air</strong> <strong>Pumps</strong>. These can be<br />
easily obtained at your local aquarium and pet supply store.<br />
Failure of the electric coil, or any other electrical part requires<br />
proper service, and should be returned to the manufacturer for<br />
repairs or replacement (see warranty for full details).<br />
Art. #A-18030: <strong>Elite</strong> 799 Repair Kit<br />
Art. #A-18080: <strong>Elite</strong> 800/801/802 Repair Kit<br />
Art. #A-18190: <strong>Elite</strong> 803 Repair Kit<br />
Art. #A-18285: Maxima/Maxima-R Repair Module<br />
Art. #A-18330: Maxima/Maxima-R/Optima Repair Kit<br />
Art. #A-18335: Optima Repair Module
ACCESSORIES<br />
<strong>Elite</strong> Check Valve<br />
Art. #A-1165<br />
Prevents damage to air pump from backsiphoning<br />
in the event of electrical power failure<br />
or when removing air-driven ornaments and<br />
accessories from aquarium.<br />
<strong>Elite</strong> <strong>Air</strong> Control Valves<br />
Customize your aquarium set-up with<br />
<strong>Elite</strong> <strong>Air</strong> Control Valves.<br />
Art. #A-1178:<br />
<strong>Elite</strong> 2-way <strong>Air</strong> Control Valve<br />
Art. #A-1179:<br />
<strong>Elite</strong> 3-way <strong>Air</strong> Control Valve<br />
Art. #A-1180:<br />
<strong>Elite</strong> 4-way <strong>Air</strong> Control Valve<br />
Art. #A-1181:<br />
<strong>Elite</strong> 5-way <strong>Air</strong> Control Valve<br />
<strong>Elite</strong> Flex-<strong>Air</strong> Tubing<br />
Soft, pliable tubing that will not harden. Remains kink-resistant<br />
for long periods. For filters, pumps, valves, air-driven<br />
aquarium ornaments and accessories.<br />
Art. #A-1123: <strong>Elite</strong> Flex-<strong>Air</strong> Tubing<br />
3 M (10 ft)<br />
Art. #A-1124: <strong>Elite</strong> Flex-<strong>Air</strong> Tubing<br />
6 M (20 ft)
QUESTIONS?<br />
If you have a problem, or have questions about the operation of this<br />
product, please let us try to help you before you return the product to<br />
your dealer.<br />
Most problems can be handled promptly with a toll-free phone call.<br />
Or if you prefer, you can contact us on our web site at<br />
www.hagen.com<br />
When you call (or write), please have all relevant information, such<br />
as model number and/or part numbers available, as well as the nature<br />
of the problem.<br />
CALL US ON OUR TOLL FREE NUMBER: 1-800-724-2436<br />
Between 8:30 a.m. and 4:00 p.m. Eastern Time. Ask for Consumer<br />
Service.<br />
FOR AUTHORIZED GUARANTEE CONSUMER SERVICE: Return unit<br />
with dated receipt plus $5.00 for shipping and handling to: <strong>Rolf</strong> C.<br />
<strong>Hagen</strong> (U.S.A.) Corp., Consumer Repair, 50 Hampden Road,<br />
Mansfield, MA. 02048<br />
WARRANTY<br />
ELITE <strong>Air</strong> <strong>Pumps</strong> are guaranteed against defects in material or<br />
workmanship under normal aquarium usage and service for as long<br />
as you own your pump. We offer a Lifetime Limited Warranty on<br />
all non-rubber parts which means that the pump will be repaired or<br />
replaced at the manufacturer’s discretion, free of charge, when the<br />
complete pump is returned with proof of purchase and postage<br />
paid. Please include $5.00 to cover shipping and handling. This<br />
warranty does not apply to any pump which has been subjected to<br />
misuse, negligence, or tampering. No liability is assumed with<br />
respect to loss or damage to livestock or personal property<br />
irrespective of the cause thereof.<br />
Distributed by:<br />
U.S.A.: <strong>Rolf</strong> C. <strong>Hagen</strong> (U.S.A.) Corp., Mansfield, MA. 02048<br />
Printed in China USA-UL
WARRANTY REGISTRATION CARD<br />
Return to validate your guarantee.<br />
Or, if you prefer, you may register on our web site at www.hagen.com<br />
Name:<br />
Address:<br />
City: State:<br />
Zip Code: Telephone:<br />
Date Purchased:<br />
Store:<br />
City: State:<br />
Was this a gift? YES NO<br />
Is this your first aquarium? YES NO<br />
Size of Aquarium:<br />
Type(s) of Fish:<br />
ELITE 799<br />
(A-799)<br />
ELITE 800<br />
(A-800)<br />
ELITE 801<br />
(A-801)<br />
ELITE 802<br />
(A-802)<br />
ELITE 803<br />
(A-803)<br />
MAXIMA<br />
(A-805)<br />
MAXIMA-R<br />
(A-806)<br />
OPTIMA<br />
(A-807)