2012 MasterCraft Owners Manual
2012 MasterCraft Owners Manual
2012 MasterCraft Owners Manual

Create successful ePaper yourself
Turn your PDF publications into a flip-book with our unique Google optimized e-Paper software.
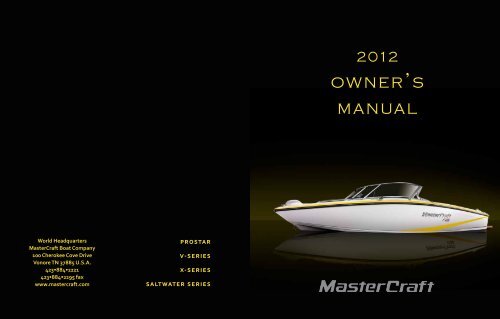
<strong>2012</strong><br />
owner’s<br />
manual<br />
World Headquarters<br />
<strong>MasterCraft</strong> Boat Company<br />
100 Cherokee Cove Drive<br />
Vonore TN 37885 U.S.A.<br />
423•884•2221<br />
423•884•2295 fax<br />
www.mastercraft.com<br />
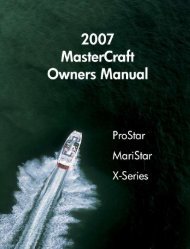
prostar<br />
v-series<br />
x-series<br />
saltwater series
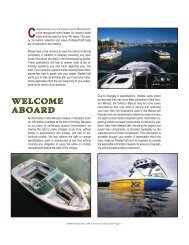
Congratulations on your boating choice!<br />
<strong>MasterCraft</strong> is the recognized world leader<br />
for inboard boats today and has been for<br />
over forty (40) years. The quality, innovation,<br />
selection and value of <strong>MasterCraft</strong> boats are<br />
unmatched in the industry.<br />
Please take a few minutes to read this Owner’s<br />
<strong>Manual</strong> completely in addition to carefully<br />
reviewing any additional information<br />
provided in the accompanying packet. These<br />
publications will help to answer most of the<br />
remaining questions you may have regarding<br />
the new boat. If you have any additional<br />
questions after reading these items publications,<br />
please feel free to speak with your dealer.<br />
<strong>MasterCraft</strong> wants you to feel comfortable<br />
with your boat (and trailer, where applicable)<br />
from the very beginning of your experience as<br />
an owner of our products.<br />
All information in this Owner’s <strong>Manual</strong> is<br />
based on the latest product information<br />
available at the time of printing. Because of<br />
our policy of continuous product improvement,<br />
we reserve the right to make changes<br />
at any time, without notice, in specifications<br />
and models, and also to discontinue models.<br />
We also reserve the right to change specifications,<br />
parts or accessories at any time<br />
without incurring any obligation to equip<br />
the same on models manufactured before<br />
the date of the change. <strong>MasterCraft</strong> recommends<br />
checking www.mastercraft.com periodically,<br />
specifically the Knowledge Center,<br />
for updates and additional information.<br />
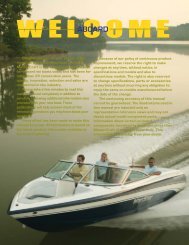
Welcome<br />
Aboard!<br />
Due to changes in specifications, models,<br />
parts and/or accessories that may occur after<br />
publication of this Owner’s <strong>Manual</strong>, the Owner’s<br />
<strong>Manual</strong> may not cover every circumstance<br />
that may arise in owning and operating a boat.<br />
Also, the illustrations used in this Owner’s<br />
<strong>Manual</strong> are intended only as representative<br />
reference views and may not depict actual<br />
model component parts. Information regarding<br />
certain on-board components furnished<br />
by suppliers other than <strong>MasterCraft</strong>, including<br />
the engine and power train components,<br />
is provided separately by the manufacturers of<br />
those components. This information is available<br />
through your dealer. A reasonable effort<br />
has been made by <strong>MasterCraft</strong> and its suppliers<br />
to provide the applicable information required<br />
to ensure a long-lasting and enjoyable<br />
boating experience.
Throughout this manual the terms “Danger,” “Warning,” and “Caution” appear, alerting the boat owner and/<br />
or operator to dangerous or potentially dangerous situations that may arise. Those terms have the following<br />
respective meanings whenever they appear herein:<br />
This is the safety alert symbol. It is used to alert you to potential personal injury hazards.<br />
Obey all safety messages that follow this symbol to avoid possible injury or death.<br />
DANGER indicates an imminently hazardous situation which, if not avoided, will result<br />
in death or serious injury.<br />
WARNING indicates a potentially hazardous situation which, if not avoided, could<br />
result in death or serious injury.<br />
CAUTION indicates a potentially hazardous situation which, if not avoided, may result<br />
in minor or moderate injury.<br />
CAUTION used without the safety alert symbol indicates a potentially hazardous<br />
situation which, if not avoided, may result in property damage.<br />
Failure to adhere to and comply with the safety dangers, warnings and cautions that<br />
appear in this manual can lead to serious illness, injury or even death and/or damage to your boat or the<br />
property of others. Beyond these warnings, boaters have a personal responsibility to utilize a common sense<br />
approach to the boating experience, including keeping individuals off or near the swim platform and the<br />
stern area of the boat during the engine operation. Personal flotation devices (“PFDs”) save lives and ensure<br />
positive experiences. <strong>MasterCraft</strong> offers many proactive approaches to the boating experience, but the<br />
consumer is ultimately responsible for the positive and safe involvement in boating.<br />
Be sure to review the Boating Safety section of this manual, which immediately follows this section.<br />
Because of the importance of these dangers, warnings and cautions, they are reprinted here, along with<br />
the pages on which you will find them. Please note that the safety information statements presented below<br />
are categorized for information purposes only, and are not presented in any particular order of importance.<br />
Each of the statements referenced below and in the other sections of this manual provide you with important<br />
safety-related information and must be read and followed to avoid injury or damage, as applicable. We<br />
strongly encourage you to cross-reference and read the dangers, warnings and cautions within the context<br />
in which they are presented by reading and reviewing those sections.<br />
Failure to comply with safety-related information and instructions<br />
may result in serious injury or death to you and/or others. Always<br />
use common sense when operating the boat or participating in any<br />
activities associated with the boat, including, but not limited to, periods<br />
of time when the boat engine is shut down and the boat is not<br />
in operation. (Page 1-7)<br />
Following the activation of the automatic fire suppression system<br />
or a hand-held fire extinguisher, a careful determination should be<br />
made as to whether the boat can safely be operated. If there is any<br />
doubt or concern whatsoever, the boat should be towed to shore<br />
and/or dock for service by an authorized <strong>MasterCraft</strong> dealer prior to<br />
operating again. Failure to follow these instructions could result in<br />
death or serious injury/illness. (Pages 1-4)<br />
Opening an engine compartment when there is indication of a fire<br />
inside can cause the fire to flare up and/or spread, which may result<br />
in extensive damage or even sinking of the boat and/or serious injury<br />
or death to people on board. (Page 1-4)<br />
Gasoline is highly flammable and its vapors may ignite, resulting in<br />
fire or explosion. Be sure to keep all sparks and flames away from the<br />
area while inspecting the boat’s fuel system. (Page 4-13)<br />
Gasoline is explosive. If a gasoline odor is present or gasoline is visually<br />
observed in the bilge area during inspection, DO NOT START<br />
YOUR ENGINE! Remove the ignition key from the ignition switch and<br />
call an authorized <strong>MasterCraft</strong> dealer for service. (Pages 3-2, 4-19)<br />
Gasoline is extremely flammable and highly explosive under certain<br />
conditions. Always stop the engine and never smoke or allow open<br />
flames or sparks within fifty (50) feet of the fueling area when fueling.<br />
(Page 3-2)<br />
Before starting the engine, open the engine compartment and check<br />
for gasoline fumes, fuel and oil leaks or the presence of fuel or oil in<br />
the bilge. (Page 3-6)<br />
Take care not to spill gasoline. If gasoline is spilled accidentally, wipe<br />
up all traces of it with dry rags immediately and dispose of properly<br />
on shore. (Page 3-2)<br />
To prevent a possible explosion, operate the blower for at least four<br />
(4) minutes before starting the engine and always when at idle or<br />
slow-running speed. Explosive gasoline and/or battery fumes may be<br />
present in the engine compartment. Failure to do so may result in<br />
serious injury or death! (Pages 3-6)<br />
<strong>MasterCraft</strong> <strong>2012</strong> <strong>Owners</strong> <strong>Manual</strong> • Page ii
Carbon monoxide is a colorless, tasteless, odorless and poisonous gas<br />
that accumulates rapidly and can cause serious injury or death. Exposure<br />
to carbon monoxide can be fatal in a matter of minutes. Exposure<br />
to even low concentrations of carbon monoxide must not be ignored<br />
because the effects of exposure to carbon monoxide can build up and<br />
be just as lethal as high concentrations. Carbon monoxide from exhaust<br />
pipes of inboard or outboard engines may build up inside and<br />
outside the boat in areas near exhaust vents, particularly during slowspeed<br />
operations. STAY AWAY from these exhaust vent areas, which<br />
are located at the stern of the boat, and DO NOT swim or engage in<br />
any watersports or other activities in or near the stern area of the boat,<br />
including, without limitation, the swim platform and the rear sun deck,<br />
when the engine is in operation. Under no circumstances should the<br />
owner and/or operator allow persons to hold onto the swim platform<br />
while the engine is operating and the boat is in motion. These activities<br />
(sometimes known as “teak surfing” or “platform dragging,” where<br />
the participant holds onto the swim platform and is pulled through the<br />
water, and/or “body surfs” immediately behind the boat) are extremely<br />
dangerous, highly likely to result in death or serious bodily injury,<br />
and are a misuse of this product. (Pages 1-12, 2-65, 2-73)<br />
The safety switch lanyard must be attached to the operator whenever<br />
the engine is running. Failure to do so may result in death or<br />
serious injury! (Page 2-31)<br />
Never override or modify the engine emergency safety shut-off<br />
switch in any way. (Page 1-7)<br />
Do not tow more than two (2) persons at one time on a tow tower.<br />
The tow tower approved for use on your boat should be used only for<br />
water skis, wakeboards or recreational towables, and not for parasailing,<br />
kite flying or towing other boats. Do not add any attachments<br />
that are not approved for use on your <strong>MasterCraft</strong> boat. Do not climb<br />
on, sit on, stand on, jump off of or dive off of the tower. Never allow<br />
passengers to sit behind the tow rope attachment point. Never allow<br />
loose tow rope ends to dangle. Always be certain that all bolts are in<br />
place and tight before and during use. When the tower is up, watch<br />
for low obstacles such as tree limbs, bridges or power lines. (Page 1-7)<br />
Information regarding the maximum number of people and/or additional<br />
weight to the boat is included in the Guide to Individual Models<br />
section of this <strong>Manual</strong>. It is the boat operator’s responsibility to ensure<br />
that the boat is never overloaded. Too much additional weight<br />
may cause the boat to overturn or sink, which can result in serious<br />
bodily injury or death. (Page 3-8)<br />
Boat operators should never attempt to duplicate operational skills<br />
of professional drivers. When such maneuvers fail, it can result in serious<br />
injury or death. (Page 3-9)<br />
Failure to comply with the requirement of operating the blower for at<br />
least four (4) minutes before starting the engine may result in serious<br />
injury or death to you and/or others. (Page 1-7)<br />
Carbon monoxide is emitted from the engine’s exhaust system. Never<br />
run the engine without proper ventilation. Do not run the engine in<br />
a confined space or where fumes may be trapped. Do not run the engine<br />
when the boat is stationary in calm wind conditions. (Page 2-35)<br />
Carbon monoxide is emitted from the engine’s exhaust system. Never<br />
run the engine without proper ventilation. Do not run the engine in<br />
a confined space or where fumes may be trapped. (Pages 2-71, 2-74)<br />
Following the activation of the automatic fire suppression system<br />
or a hand-held fire extinguisher, a careful determination should be<br />
made as to whether the boat can safely be operated. If there is any<br />
doubt or concern whatsoever, the boat should be towed to shore<br />
and/or dock for service by an authorized <strong>MasterCraft</strong> dealer prior<br />
to operating again. Failure to follow these instructions could result<br />
in death or serious injury/illness. (Page 2-70)<br />
DO NOT launch or operate the boat if any problem is found during<br />
the Safety Check. A problem could lead to an accident during the<br />
outing, resulting in death or serious injury. Any and all problems<br />
should receive attention immediately. See your authorized Master-<br />
Craft dealer’s service department for assistance. (Page 3-4)<br />
Battery electrolyte fluid is dangerous. It contains sulfuric acid, which<br />
is poisonous, corrosive and caustic. If electrolyte fluid is spilled or<br />
placed on any part of the human body, immediately flush the area<br />
with large amounts of clean water and immediately seek medical attention.<br />
(Page 4-13)<br />
When charging, batteries generate small amounts of dangerous hydrogen<br />
gas. This gas is highly explosive. Keep all sparks, flames and smoking<br />
well away from the area. Failure to follow instructions when charging a<br />
battery may cause an electrical charge or even an explosion of the battery,<br />
which could result in death or serious injury. (Pages 2-33, 4-13, 4-14)<br />
The engine box serves as a machinery guard. The engine must be<br />
OFF whenever the box is open. Clothing or body parts can get caught<br />
in moving parts, causing death or serious injury. Keep away from<br />
moving parts! (Pages 2-67, 4-13, 4-14, 4-15, 4-16)<br />
Adding additional ballast to a <strong>MasterCraft</strong> boat is not recommended,<br />
and can result in impaired visibility, diminished handling characteristics<br />
and instability when operating your boat, and may result in potential<br />
structural and/or engine damage to the boat, which damage will<br />
not be covered by your warranty. (Page 3-8)<br />
Use of improper parts may cause component or engine failure. Such<br />
failure may result in death or serious injury! (Page 4-3)<br />
All boats have weight limits. Failure to adhere to the posted limits can<br />
cause operation instability and/or the boat to sink. This may result in<br />
serious injury or death, as well as significant damage to the boat, which<br />
will not be covered by warranty. (Pages 1-12, 2-63)<br />
If the Plug ’n Play bags are removed from the boat, the plumbing<br />
plugs must be reinstalled in the boat to prevent unwanted and potentially<br />
dangerous intrusive of water into the boat. This water can<br />
result in the boat sinking, which can result in serious injury or death!<br />
(Page 2-64)<br />
<strong>MasterCraft</strong> <strong>2012</strong> <strong>Owners</strong> <strong>Manual</strong> • Page iii
When boats are in motion, operators and passengers should always<br />
be seated on upholstered designated occupant seating. No other areas<br />
should be used during operation, including, but not limited to,<br />
the gunwales, towers, sun pads, engine boxes, or any area that is not<br />
clearly intended for seating while the boat is underway. People can<br />
become dislodged from locations that are not actual seating, which<br />
could result in injury during boat motion. (Page 2-73)<br />
While operating attitude adjustment plates use caution. Improper<br />
use of plates can cause accidents, which may result in serious injury<br />
or death. While the boat is underway do not move one plate up or<br />
down significantly as this may cause listing. While at higher speeds<br />
do not over-trim, as this will cause the bow to lower quickly, resulting<br />
in a reduction of speed and may cause the boat to veer. When in following<br />
seas or when running an inlet, the plates should be fully retracted.<br />
This will allow for optimal performance. ELECTRO-MECHANICAL<br />
ACTUATORS PROVIDE AN INSTANT RESPONSE. WHEN MAKING<br />
ADJUSTMENTS, USE SHORT MOMENTARY TAPS OF THE SWITCH.<br />
(Page 2-62)<br />
ELECTROMECHANICAL ACTUATORS PROVIDE AN INSTANT RE-<br />
SPONSE. WHEN MAKING ADJUSTMENTS, USE SHORT MOMENTARY<br />
TAPS OF THE SWITCH. (Page 2-64)<br />
All boats have weight limits. Failure to adhere to the posted limits can<br />
cause operation instability and/or the boat to sink. This may result in serious<br />
injury or death, as well as significant damage to the boat, which will<br />
not be covered by warranty. When the Plug ’n Play ballast<br />
bags are filled, THE ADDITIONAL WEIGHT OF THE BAGS<br />
AND WATER MUST BE SUBTRACTED FROM the maximum<br />
WEIGHT capacity of the boat , WITH THE REMAINDER left<br />
for passengers and gear! (Page 2-63)<br />
Improperly stored anchors and/or anchor line that has been improperly<br />
re-wound, may create a hazardous situation. People on-board<br />
can trip on improperly stored materials, which can result in injury.<br />
Improperly stored materials can also move too freely during boat<br />
operation and make contact with individuals, again causing injury.<br />
Properly store all anchor and lines whether the boat is in operation or<br />
not, unless the anchor and line are in use. (Page 2-69)<br />
The platform must be raised and locked into position for use of the<br />
platform while boating. No one should be allowed on the platform<br />
until the platform is securely locked in place and the engine is OFF.<br />
Failure to do so may result in serious injury or death! (Page 2-65)<br />
<strong>MasterCraft</strong> has determined that for the tower utilized on the current<br />
models, the total weight of all accessories mounted on the<br />
tower should never exceed 85 pounds, regardless of whether the accessories<br />
are <strong>MasterCraft</strong>-approved and supplied or have come from<br />
an aftermarket supplier. Exceeding this restriction can result in tower<br />
failure, which could result in serious injury or death to the boat operator<br />
and/or passengers. (Page 2-66)<br />
Engaging the engine synchronization functionality requires practice<br />
to master. Because the boat will be in gear and will move during the<br />
process, even after mastering the maneuver boat operators should<br />
synchronize engines only on bodies of water of sufficient size to accomplish<br />
the maneuver without making contact with other vessels<br />
or with inanimate objects, which could cause serious bodily injury or<br />
significant damage to the boat. (Page 2-34)<br />
Ski/wakeboard rope should never be attached to anything but approved<br />
pylons and towers as it may otherwise break free or cause<br />
other items to break under duress. People onboard, as well as skiers<br />
and/or wakeboarders could be injured. Also, operators and passengers<br />
should always pay attention to the rope when the boat is underway<br />
as rope can snap back into the boat, which could result in injury.<br />
(Page -2-64)<br />
Completely filling the fuel tank prior to storage and then sealing the<br />
fuel tank vent does not allow room for necessary expansion. This can<br />
result, in extreme conditions, in fuel tank rupture. Such release of<br />
fuel into the boat and potentially into the storage area could result in<br />
substantial damage to the boat and contact with any spark (such as<br />
a flame-producing pilot light in a heater) could also result in property<br />
damage and serious injury or death. (Page 4-20)<br />
Be sure all fasteners used are approved and rated for marine use.<br />
Most fasteners used on <strong>MasterCraft</strong> boats are stainless steel or specially<br />
coated to resist corrosion. (Page 4-3)<br />
All replaced fuel components must meet United States Coast Guard<br />
(“USCG”) and American Boat & Yacht Council, Inc. (“ABYC”) standards,<br />
and must be Underwriter’s Laboratory (“UL”)-approved. Inferior<br />
quality components pose a serious safety threat to you and others,<br />
and the use of inferior components may result in serious injury or<br />
death. Resulting damage may void the warranty. (Page 4-19)<br />
Do not continue to run the engine if the oil pressure is low. If you do,<br />
the engine may become so hot that it, or surrounding components,<br />
could catch fire. You or others could be burned and the boat seriously<br />
damaged. Check your oil level and add an appropriate amount of approved<br />
motor oil before operating again or have your boat serviced<br />
by your local authorized dealer’s service department. Note that damage<br />
to your engine from inappropriate oil levels can be costly to repair.<br />
Such damage is not covered by your warranty. (Page 2-34)<br />
Some engine parts become very hot during operation. This inspection<br />
must be completed while the engine is cool to prevent burns to<br />
your skin. Perform this task before starting the boat.<br />
(Pages 4-13, 4-17)<br />
Towers should never have a total aggregate weight of accessories exceeding<br />
85 lbs. (U.S.) total. Excessive weight can cause tower failure<br />
and the collapse of a tower or the disconnection of the tower from<br />
the deck, which could result in serious bodily injury or damage to the<br />
boat that is not covered by warranty. (Page 1-7)<br />
Prior to operation of the boat, verify that the mirror hardware is secure.<br />
Failure to do so may result in the mirror detaching from the<br />
windshield extrusion. The mirror could hit the operator or a passenger,<br />
resulting in injury. (Page 2-63)<br />
<strong>MasterCraft</strong> <strong>2012</strong> <strong>Owners</strong> <strong>Manual</strong> • Page iv
Convertible seat backs should always be in the forward-facing position<br />
when the boat is underway. Anyone seated facing aft could<br />
become dislodged when the boat is underway, which could result in<br />
sliding off the seating and making contact with the transom or swim<br />
platform. Jump seats should be secured against the deck with a lock<br />
pin accessible under the observer seat to avoid dislodging passengers<br />
while the boat is underway. Convertible seat backing should always<br />
be secured prior to use. Care should be taken to avoid pinching fingers<br />
or other skin when sliding the backing. (Page 2-73)<br />
Always ensure that there are no people nor objects in the way when<br />
raising and lowering the tower. Individuals and their limbs may be<br />
subject to injury if caught in the path of the tower, as well as potential<br />
damage to the boat, which is not covered under warranty. (Page 2-65)<br />
When boating, avoid using the windshield as an aid for balance or getting<br />
out of a seat. This causes undue stress to the window frame and<br />
could damage it, which may not be covered under warranty. (Page 3-4)<br />
To ensure proper break-in and lubrication, boat owners should not<br />
remove the factory break-in oil until after the initial ten (10) hours of<br />
operation. At that time, an oil change should be performed on the<br />
Indmar engines by an authorized <strong>MasterCraft</strong> service technician at<br />
an authorized <strong>MasterCraft</strong> dealer. (Page 3-5)<br />
DO NOT use the ski pylon or any portion of any tower for lifting. They<br />
are NOT designed to be used as a central lifting point. Also, DO NOT<br />
use the stern ski tow as a lifting ring. The deck may be damaged. See<br />
the Storage Cradle sub-section of this section. Also never lift a boat<br />
with water in the bilge or containing a water-filled device such as a<br />
ballast system or sack. The extra stress will put an excessive load on<br />
the hull and lifting equipment that may seriously damage the boat.<br />
Such damage may not be covered by the warranty. (Page 4-2)<br />
Continued operation after the warning light has illuminated may<br />
cause severe engine damage. This will void your warranty. (Page 3-7)<br />
Lifting slings must never contact shafts, struts or hardware protruding<br />
from the hull. Damage may result that would void the warranty.<br />
(Page 4-2)<br />
When the boat is out of the water, it is important to support the hull<br />
correctly to avoid any hull damage. Such damage may void the warranty.<br />
(Page 4-2)<br />
Crossing cables or jumper cables may result in damage to the electrical<br />
components due to incorrect battery connections. Such damages<br />
may not be covered by your warranty. (Page 4-14)<br />
Attention must be paid to any leakage occurring in the propeller shaft<br />
log area. Water intrusion into the transmission, which can happen if<br />
excessive leakage is occurring may cause serious damage. Such damage<br />
may not be covered by the warranty. (Page 4-15)<br />
Engines should always be operated within engine manufacturer<br />
guidelines. Failure to do so may cause significant damage to the engine<br />
and drive train and is not covered under warranty! (Page 3-10)<br />
Continuing to operate the boat while the temperature is above normal<br />
operating parameters may cause serious damage to your engine.<br />
Damage to your engine resulting from operating the engine in<br />
an overheated condition can be costly to repair. Such damage is not<br />
covered by your warranty! (Page 2-36)<br />
Exposure to salt water will cause corrosion leading to significant<br />
damage to stainless steel and chrome parts. Failure to thoroughly<br />
rinse salt water from all hardware, and to apply protective oil after<br />
each exposure to salt water, will accelerate the corrosion of hardware<br />
and will void your warranty. (Page 4-3)<br />
The platform must be raised and locked into position for transportation<br />
of the boat, as well as use of the platform while boating. Leaving<br />
the platform down may result in damage to the boat transom during<br />
transport that will not be covered by the warranty! (Page 2-65)<br />
Fuel systems on all boats MUST be properly prepared for storage periods<br />
exceeding two (2) weeks, as outlined in this Owner’s <strong>Manual</strong>.<br />
Failure to do so will void the warranty. (Page 4-21)<br />
Because of the complexity of preparing a boat for proper winter storage,<br />
as well as the possibility of extreme damage to the drive train<br />
if a preparation error was made during winterization, <strong>MasterCraft</strong><br />
recommends scheduling an appointment with an authorized Master-<br />
Craft dealer’s service department to permit a technician to perform<br />
all winterization procedures. (Page 4-20)<br />
Add-on equipment may adversely affect the alternator output or<br />
overload the electrical system. Such damage may not be covered by<br />
the warranty. (Page 4-13)<br />
Failure to follow the engine oil recommendations listed in the engine<br />
manual can cause additional engine wear and increase the possibility<br />
of engine component failure. Damage to the engine due to incorrect<br />
oil usage can be costly to repair, and is not covered by the warranty!<br />
(Page 3-5)<br />
Allowing the fuel level in the fuel tank to fall below one-quarter of a tank<br />
full may affect the reliability of the fuel pump or result in damage to the<br />
fuel pump, which is not covered under warranty. (Pages 2-35, 3-2)<br />
Damage to the engine by use of low-quality gasoline or gasoline with<br />
an octane rating below the minimum level listed will void the warranty<br />
on the boat. (Page 3-3)<br />
Extended storage with fuel in the system can affect the fuel’s stability<br />
and may require system inspection and fuel filter replacement when<br />
the unit is placed back into service. (Page 3-3)<br />
<strong>MasterCraft</strong> <strong>2012</strong> <strong>Owners</strong> <strong>Manual</strong> • Page v
<strong>MasterCraft</strong> <strong>2012</strong> <strong>Owners</strong> <strong>Manual</strong> • Page vi
Welcome Aboard............................................................................. i<br />
Dangers, Warnings and Cautions.....................................................ii<br />
Safety Knowledge<br />
Boating Safety.......................................................................... 1-2<br />
General Precautions................................................................. 1-2<br />
Safety Equipment.....................................................................1-3<br />
Required Equipment.................................................................1-3<br />
Fire Extinguishers....................................................................1-3<br />
Fire Suppression & Extinguishing (All V-Drives)........................1-3<br />
Fire Suppression & Extinguishing (Others).............................. 1-4<br />
Fire Port.................................................................................. 1-4<br />
Personal Flotation Devices (PFDs)........................................... 1-4<br />
PFD Accessibility.....................................................................1-5<br />
Sound Producing Devices........................................................1-5<br />
Visual Distress Signals..............................................................1-5<br />
Registration, Numbering and<br />
Documentation..................................................................... 1-6<br />
Operator’s License................................................................... 1-6<br />
Recommended Equipment....................................................... 1-6<br />
Safety Afloat.............................................................................1-7<br />
Skiing and Wakeboarding Safety...............................................1-7<br />
Warning Plates and Labels....................................................... 1-8<br />
Operator’s Responsibilities....................................................... 1-8<br />
Float Plan................................................................................. 1-8<br />
Nautical Charts......................................................................... 1-9<br />
Weather................................................................................... 1-9<br />
Staying Afloat.........................................................................1-10<br />
Cold Water Survival.................................................................1-10<br />
Hypothermia...........................................................................1-10<br />
Immersion Suits......................................................................1-10<br />
Inflatable Life Rafts.................................................................1-10<br />
Anchoring............................................................................... 1-11<br />
Communications..................................................................... 1-11<br />
Law Enforcement.................................................................... 1-11<br />
Common Sense Approach.........................................................1-12<br />
Rules of the Open Water..........................................................1-14<br />
Steering and Sailing Rules/Sound Signals................................1-14<br />
Rules When Encountering Vessels............................................1-14<br />
Meeting..................................................................................1-14<br />
Crossing..................................................................................1-14<br />
Overtaking..............................................................................1-15<br />
Other Special Situations..........................................................1-15<br />
Sailing Vessel Right-of-Way.....................................................1-15<br />
Fishing Vessel Right-of-Way....................................................1-15<br />
The General Prudential Rule....................................................1-15<br />
Reading Buoys and Other Markings.........................................1-15<br />
Guide to Individual Models........................................................ 2-1<br />
ProStar 190................................................................................ 2-2<br />
ProStar 197, X-7......................................................................... 2-4<br />
ProStar 214, X-14....................................................................... 2-6<br />
ProStar 214, X-14 V-Drive........................................................... 2-8<br />
X-1 ................................................................................. 2-10<br />
200V, X-2 ................................................................................ 2-12<br />
215V, X-15............................................................................... 2-14<br />
225V, X-25............................................................................... 2-16<br />
235V, X-35............................................................................... 2-18<br />
245V, X-45............................................................................... 2-20<br />
255V, X-55............................................................................... 2-22<br />
X-Star ................................................................................ 2-24<br />
280V, X-80.............................................................................. 2-26<br />
Measurements........................................................................ 2-28<br />
<strong>MasterCraft</strong> <strong>2012</strong> <strong>Owners</strong> <strong>Manual</strong> • Page vii<br />
Table<br />
of<br />
Contents<br />
Electronic Instrumentation...................................................... 2-29<br />
Controls Common to Most Models........................................... 2-30<br />
Introduction........................................................................... 2-30<br />
<strong>Manual</strong> and Automatic Bilge Pump Switch............................. 2-30<br />
Blower Switch........................................................................ 2-30<br />
Circuit Breakers...................................................................... 2-30<br />
Dual Battery Operation Switch................................................2-31<br />
Engine Emergency Safety Stop Switch....................................2-31<br />
Horn. ..................................................................................2-31<br />
Ignition Key Slot..................................................................... 2-32<br />
Ignition START-STOP............................................................. 2-32<br />
GPS and Chartplotter............................................................. 2-32<br />
Navigation/Anchor Lights Switch........................................... 2-32<br />
Performance Controls..............................................................2-33<br />
Battery Charger.......................................................................2-33<br />
Cruise Control Gauge...............................................................2-33<br />
Engine Oil Pressure Gauge..................................................... 2-34<br />
Engine Synchronizing Switch................................................. 2-34<br />
Fuel Gauge..............................................................................2-35<br />
Low Voltage Battery Alarm......................................................2-35<br />
Other Alarms...........................................................................2-35<br />
Shift Throttle Control..............................................................2-35<br />
Speedometer......................................................................... 2-36<br />
Tachometer............................................................................ 2-36<br />
Temperature Gauge................................................................ 2-36<br />
Voltmeter............................................................................... 2-36<br />
Video Display Gauges...............................................................2-37<br />
ProStar 190, ProStar 197, X-7, X-1............................................2-37<br />
X-Star ................................................................................. 2-46<br />
200V, X-2, 215V, X-15, 225V, X-25, 235V, X-35,<br />
245V, X-45, 255V, X-55, ProStar 214, X-14,<br />
ProStar 214V, X-14V, 280, X-80............................................. 2-54<br />
Sport Enhancement Controls.................................................. 2-62<br />
Attitude Adjustment or Trim Tab Switch................................. 2-62<br />
Ballast Empty/Fill Switches.................................................... 2-63<br />
Mirrors ................................................................................. 2-63<br />
Plug ‘n Play............................................................................ 2-63<br />
Ski/Wakeboard Rope.............................................................. 2-64<br />
Surf Tab Switch....................................................................... 2-64<br />
Swim/Boarding Platforms...................................................... 2-65<br />
Towers ................................................................................. 2-66<br />
Convenience Controls...............................................................2-67<br />
12-Volt Receptacle..................................................................2-67<br />
Aft Light Switch......................................................................2-67
AM/FM Stereo, CD Player, Remote Control,<br />
iPod and MP3 Player Connections..........................................2-67<br />
Courtesy Lights Switch............................................................2-67<br />
Display Selector Switch...........................................................2-67<br />
Engine Hatch Switch...............................................................2-67<br />
Heater Switch........................................................................ 2-68<br />
Instrument Panel Backlighting Switch.................................... 2-68<br />
Refrigerator Switch................................................................ 2-68<br />
Seat Heat Switches................................................................ 2-68<br />
Shower and/or Slick Boot Switch............................................ 2-68<br />
Sink Switch............................................................................ 2-68<br />
Tower Lights Switch............................................................... 2-68<br />
Underwater Lights Switch...................................................... 2-68<br />
Wash Down Switch................................................................. 2-68<br />
Comfort and Convenience....................................................... 2-69<br />
Anchor ................................................................................. 2-69<br />
Canvas Covers........................................................................ 2-69<br />
Coolers ................................................................................. 2-69<br />
Fire Suppression and Extinguishing.........................................2-70<br />
Head. ..................................................................................2-70<br />
Heater ..................................................................................2-71<br />
Ladder ..................................................................................2-71<br />
Lighting..................................................................................2-72<br />
Refrigeration...........................................................................2-72<br />
Seat Heaters...........................................................................2-73<br />
Seating ..................................................................................2-73<br />
Shower or Wash Down............................................................2-74<br />
Tables ..................................................................................2-74<br />
Preparation................................................................................3-1<br />
Using Care When Fueling........................................................... 3-2<br />
ILMORMARINE Engines........................................................... 3-2<br />
What Type of Gasoline To Use................................................... 3-2<br />
Using Oxygenated Fuels or Fuels with Alcohol...........................3-3<br />
When the Boat Is Not Used for a While......................................3-3<br />
Fuels Outside the U.S. and Canada............................................3-3<br />
Safety Checks and Services....................................................... 3-4<br />
Before Each Operation............................................................. 3-4<br />
During Operation..................................................................... 3-4<br />
After Operation........................................................................ 3-4<br />
Using Lifting Slings................................................................... 4-2<br />
Storage Cradle......................................................................... 4-2<br />
Corrosion Prevention................................................................. 4-3<br />
Galvanic Corrosion................................................................... 4-3<br />
Salt Water Corrosion................................................................ 4-3<br />
Marine Growth......................................................................... 4-3<br />
Stainless Steel and Chrome...................................................... 4-3<br />
Cleaning the Boat...................................................................... 4-4<br />
Hull ................................................................................... 4-4<br />
Carpet ................................................................................... 4-4<br />
Teak Wood............................................................................... 4-4<br />
Fiberglass Swim Platform......................................................... 4-5<br />
Windshield............................................................................... 4-5<br />
Canvas Covers.......................................................................... 4-6<br />
Enclosed Head......................................................................... 4-7<br />
Slick Boot................................................................................. 4-7<br />
Upholstery............................................................................... 4-8<br />
Additional Upholstery Cleaning Information............................. 4-8<br />
Recommended Products.......................................................... 4-8<br />
Non-Recommended Products.................................................. 4-8<br />
<strong>MasterCraft</strong> Boat Care Products............................................... 4-9<br />
All Purpose Cleaner.................................................................. 4-9<br />
Boat Cleaner & Polish............................................................... 4-9<br />
Vinyl Dressing.......................................................................... 4-9<br />
Glass Cleaner............................................................................ 4-9<br />
Bilge Cleaner............................................................................ 4-9<br />
Hull Cleaner.............................................................................. 4-9<br />
Spray Wax.............................................................................. 4-10<br />
Boat Wash & Wax................................................................... 4-10<br />
Microfiber Detailing Cloths..................................................... 4-10<br />
Cleaning & Detailing Kit......................................................... 4-10<br />
<strong>MasterCraft</strong> Maintenance Service...........................................4-11<br />
Frequency and Scheduled Maintenance..................................4-11<br />
New Boat Break-In..................................................................4-11<br />
Before Each Use......................................................................4-11<br />
After Each Use.........................................................................4-11<br />
Quarterly (Every 50 Hours)......................................................4-11<br />
Annually (Every 100 Hours)......................................................4-11<br />
New Boat Break-In.................................................................... 3-5<br />
First Hours of Operation........................................................... 3-5<br />
After Break-In........................................................................... 3-5<br />
Starting and Basic Operation.................................................... 3-6<br />
Before Starting......................................................................... 3-6<br />
Starting the Engine.................................................................. 3-6<br />
Shifting Gears............................................................................3-7<br />
Underway.................................................................................3-7<br />
Stopping...................................................................................3-7<br />
Operational Hints...................................................................... 3-8<br />
Loading ................................................................................... 3-8<br />
Emergencies............................................................................ 3-8<br />
Courtesy................................................................................... 3-8<br />
First Time Operation................................................................ 3-9<br />
Basic Maneuvering................................................................... 3-9<br />
High Speed Operation.............................................................. 3-9<br />
Unusual Operating Conditions.................................................. 3-9<br />
Docking and Tie-Up.................................................................. 3-9<br />
Care and Maintenance............................................................... 4-1<br />
Lifting the Boat......................................................................... 4-2<br />
Using Lifting Eyes..................................................................... 4-2<br />
<strong>MasterCraft</strong> <strong>2012</strong> <strong>Owners</strong> <strong>Manual</strong> • Page viii<br />
Scheduled Maintenance.......................................................... 4-12<br />
Before Each Use (Prior to Starting the Engine).......................... 4-12<br />
Inspect Seacock Strainer....................................................... 4-12<br />
Inspect Battery Connections & Hold-Downs.......................... 4-12<br />
Inspect Throttle & Shift Cables...............................................4-13<br />
Inspect Fuel System for Leaks................................................4-13<br />
Inspect Exhaust System for Leaks......................................... 4-14<br />
Before Each Use (After Starting the Engine)<br />
Check Battery is Fully Charged............................................... 4-14<br />
Inspect the Propeller Shaft Log..............................................4-15<br />
Inspect Fuel System for Leaks................................................4-15<br />
Inspect Exhaust System for Leaks......................................... 4-16<br />
After Each Use........................................................................ 4-16<br />
General Cleaning and Storage............................................... 4-16<br />
Inspections........................................................................... 4-16<br />
Quarterly (Every 50 Hours)...................................................... 4-16<br />
Check Safety Equipment....................................................... 4-16<br />
Annually (Every 100 Hours).......................................................4-17<br />
Annual Maintenance..............................................................4-17<br />
Check Engine Mounts............................................................4-17<br />
Check Propeller Shaft Coupling Alignment.............................4-17<br />
Inspect Exhaust Flaps for Damage........................................ 4-18<br />
Lubricate Steering System.................................................... 4-18<br />
Lubricate Shift & Throttle System......................................... 4-18
Check Ballast Pump Impeller................................................. 4-18<br />
Inspect Complete Fuel System for Leakage........................... 4-19<br />
Fire Extinguisher and Suppression Units............................... 4-19<br />
Other Maintenance............................................................... 4-19<br />
Storage and Winterization...................................................... 4-20<br />
General Preparation............................................................... 4-20<br />
Fuel System Treatment.......................................................... 4-20<br />
General Power Package Preparation...................................... 4-21<br />
Other Winterization Preparations........................................... 4-21<br />
Ballast System Preparations................................................... 4-22<br />
Re-Activating the Boat After Storage..................................... 4-22<br />
Propeller Maintenance.............................................................4-23<br />
Checking/Repairing Propellers.................................................4-23<br />
Changing Propellers................................................................4-23<br />
Guide to Troubleshooting........................................................ 4-24<br />
Warranty ....................................................................................5-1<br />
Limited Warranty Statement.................................................... 5-2<br />
Warranty Registration and Transfer......................................... 5-6<br />
Service Log..................................................................................5-7<br />
Index ................................................................................... 5-8<br />
<strong>MasterCraft</strong> <strong>2012</strong> <strong>Owners</strong> <strong>Manual</strong> • Page ix
<strong>MasterCraft</strong> <strong>2012</strong> <strong>Owners</strong> <strong>Manual</strong> • Page x
Safety Knowledge
Safety<br />
Your safety, as well as the safety of others with<br />
and around you, is a direct result of how you operate<br />
and maintain your boat. You—and anyone who will<br />
be operating this boat—should read and seek to fully<br />
comprehend this Owner’s <strong>Manual</strong>, and any additional<br />
information provided by component manufacturers<br />
and suppliers. Make sure that you understand all<br />
of the controls and operating instructions before attempting<br />
to operate the boat. Improper operation is<br />
extremely dangerous!<br />
The basic safety rules are outlined in this section of<br />
the Owner’s <strong>Manual</strong>. Additional precautions throughout<br />
the <strong>Manual</strong> are noted by the following symbols:<br />
This is the safety alert symbol. It is used to alert<br />
you to potential personal injury hazards. Obey all<br />
safety messages that follow this symbol to avoid<br />
possible injury or death.<br />
DANGER indicates an imminently hazardous situation<br />
which, if not avoided, will result in death or<br />
serious injury.<br />
WARNING indicates a potentially hazardous situation<br />
which, if not avoided, could result in death or<br />
serious injury.<br />
General Precautions<br />
Be certain that all operators of your boat are aware of the safety information within<br />
this Owner’s <strong>Manual</strong> and that they use it to conform to boat safety principles.<br />
Boating safety starts with a thorough understanding of boat operations. In addition<br />
to careful review of this Owner’s <strong>Manual</strong>, you should also be aware that many sources of<br />
helpful information are available. <strong>MasterCraft</strong> urges you to pursue additional training prior<br />
to the independent operation of your boat. However, training at any time from recognized<br />
boating and/or safety organizations is beneficial.<br />
The following is a listing of a few agencies and organizations that offer safety training<br />
and/or information:<br />
American Red Cross, National HQ<br />
8111 Gatehouse Road, 6th Floor<br />
Falls Church VA 22042<br />
(202) 737-8300<br />
www.redcross.org<br />
CAUTION indicates a potentially hazardous situation<br />
which, if not avoided, may result in minor or<br />
moderate injury.<br />
CAUTION used without the safety alert symbol indicates<br />
a potentially hazardous situation which, if not<br />
avoided, may result in property damage.<br />
The precautions listed in this Owner’s <strong>Manual</strong><br />
and on the boat are not all-inclusive. If a procedure,<br />
method, tool or part is not specifically recommended<br />
by <strong>MasterCraft</strong>, using it may place you and others in<br />
an unsafe situation; in addition, you may render your<br />
warranty void. Remember: Always use common sense<br />
when operating, servicing or repairing the boat!<br />
Observing the safety recommendations found in<br />
this Owner’s <strong>Manual</strong> is critical to keeping your boating<br />
experience as safe as possible during routine operation.<br />
Your failure to do so may result in severe personal<br />
injury or death to you and/or others. Use caution and<br />
common sense when operating your boat. Do not ever<br />
take unnecessary chances!<br />
<strong>MasterCraft</strong> <strong>2012</strong> <strong>Owners</strong> <strong>Manual</strong> • Safety Knowledge • Page 1-2<br />
U.S. A. Water Ski Association<br />
1251 Holy Cow Road<br />
Polk City FL 33868<br />
(863) 324-4341<br />
www.usawaterski.org<br />
Boat <strong>Owners</strong> Association of the United States<br />
880 South Pickett Street<br />
Alexandria VA 22304<br />
(703) 823-9550<br />
www.boatus.com<br />
National Safe Boating Council<br />
2550 M Street NW, Suite 425<br />
Washington DC 20037<br />
(202) 296-4588<br />
www.safeboatingcouncil.org<br />
U.S. Coast Guard Auxiliary<br />
2100 Second Street SW<br />
Washington DC 20593-001<br />
(202) 267-1001<br />
www.uscg.mil
Safety Equipment<br />
Federal law requires certain safety equipment to be on-board your boat at all times. Responsible boaters carry additional equipment in case of<br />
emergency. It is your responsibility to check with the local boating authorities for any additional requirements and/or equipment over and above the<br />
federal requirements.<br />
Required Equipment<br />
Your <strong>MasterCraft</strong> boat has been equipped at the factory with most<br />
of the federally required safety equipment for inland waters (Class II,<br />
26-foot-to-40-foot watercraft). This equipment includes:<br />
• ABYC-approved (American Boat & Yacht Club) marine mufflers with<br />
water injection;<br />
• USCG-approved (United States Coast Guard) marine flame arrestor;<br />
• USCG-approved engine box ventilation with sparkless power blower;<br />
• ABYC-approved electric horn sound-warning device;<br />
• USCG-approved inland lighting.<br />
Fire Extinguishers<br />
In all V-drives, the engine compartment is equipped with an automatic<br />
fire suppression system with a manual override that uses a clean<br />
agent canister, which is housed in the engine compartment and is integrated<br />
with the fire suppression system. The direct drive models are<br />
equipped with a fire port, into which the contents of a clean-agent canister<br />
can be released into the engine compartment.<br />
Except as set forth below, you are also required by law to have on board<br />
one (1) five-pound, dry chemical fire extinguisher rated for Type A, B and C<br />
fires. The law requires that for all boats more than 26 feet in length, which<br />
includes the 280V and X-80 models, you must have on board two (2) fivepound,<br />
dry chemical fire extinguishers. The dry chemical fire extinguisher is<br />
standard equipment, which is automatically included in your boat from the<br />
factory. Replacement units can be ordered from <strong>MasterCraft</strong>.<br />
If any of the fire suppression system canisters on board your boat are<br />
discharged (whether a canister in an automatic system or a portable fire<br />
extinguisher), then they must be replaced. If the automatic fire suppression<br />
system has been discharged on a V-drive model, that information<br />
will be indicated through the video display screen at the helm. If the clean<br />
agent canister associated with the automatic fire suppression system or<br />
the clean agent canister used in connection with a fire port has been discharged,<br />
then you must contact your authorized <strong>MasterCraft</strong> dealer to obtain<br />
a replacement for the clean agent type of canister. If the dry chemical<br />
fire extinguisher has been discharged, then you may purchase a replacement<br />
five-pound dry chemical fire extinguisher that is rated for Type A, B<br />
and C fires from an authorized <strong>MasterCraft</strong> dealer or from another source.<br />
Fire extinguishers require periodic maintenance. Monthly, each fire extinguisher<br />
on your boat should be examined to be sure that the seals and<br />
tamper indicators are not broken or missing. The pressure gauges or indicators,<br />
if applicable, should read in the operable range. There should be no<br />
obvious physical damage, rust, corrosion, leakage or clogged nozzles. Additionally,<br />
if the extinguisher has not been used, it should be weighed annually<br />
to assure that the minimum weight as stated on the label still exists. Any fire<br />
extinguisher that has been partially emptied must be replaced or taken to a<br />
qualified fire extinguisher servicing company for recharging.<br />
In an automatic/manual system, ensure the pin inserted to protect the<br />
system during transit from the factory has been pulled to activate the system.<br />
This is part of dealer preparation, but it is the responsibility of the boat<br />
owner to ensure that the system is functional.<br />
Fire Suppression and Extinguishing (All V-Drives)<br />
Automatic Fire Suppression<br />
All <strong>MasterCraft</strong> V-drives are equipped with an automatic fire suppression system. The automatic<br />
system operates from sensors in the engine room and will automatically release a cleanagent,<br />
gaseous chemical that does not leave residue behind. In boats sold domestically, this is<br />
the FE-241 system; internationally, it is the FM-200 system.<br />
It is also possible to activate the system manually on the FE-241 system only. Pull the pin<br />
shown in the photo left with the red tag , and then pull the red fire handle to set the system<br />
in operation.<br />
In case of an engine compartment fire, shut down the engine and blowers before manual<br />
discharge, or immediately following the automatic discharge. Boats are equipped with a discharge<br />
indication light at the instrument panel or on the video display gauge at the helm.<br />
After the suppression system has been used, the fire extinguisher canister will be empty.<br />
The boat owner/operator should have the canister replaced as soon as practicable.<br />
V-drive boats have also been specified to carry a hand-held 2.5 lb. monoammonium phosphate<br />
expellant (dry chemical) unit, which is rated Class A (trash, wood and paper), Class B (UL<br />
Approved) and Class C (energized electrical equipment). These units should be used in situations<br />
other than engine compartment fires.<br />
All V-drives are specified for one (1) dry chemical, hand-held extinguisher. This is in addition to<br />
the suppression system in the engine compartment.<br />
Hand-held units should be replaced or recharged as soon as possible after use. Chemical<br />
discharge should be cleaned from all surfaces as soon as possible and prior to running the boat<br />
again, unless operation is necessary to return to shore.<br />
The boat should never be operated following a fire until after a determination has been<br />
made whether operation may result in another fire. If any danger of an additional fire exists,<br />
the boat should be towed to shore or dock rather than running the engine(s).<br />
<strong>MasterCraft</strong> <strong>2012</strong> <strong>Owners</strong> <strong>Manual</strong> • Safety Knowledge • Page 1-3
Consumers who choose to purchase fire control equipment from resources other than <strong>MasterCraft</strong><br />
must follow the instructions and requirements as listed within the engine compartment regarding suitability<br />
for the compartment volume. These standards are established by the ABYC.<br />
Following the activation of the automatic fire suppression system or a hand-held fire extinguisher,<br />
a careful determination should be made as to whether the boat can safely be operated.<br />
If there is any doubt or concern whatsoever, the boat should be towed to shore and/or<br />
dock for service by an authorized <strong>MasterCraft</strong> dealer prior to operating again. Failure to<br />
follow these instructions could result in death or serious injury/illness.<br />
Fire Suppression and Extinguishing (ProStar 190,<br />
ProStar 197, X-7, ProStar 214 direct drive and<br />
X-14 direct drive)<br />
These models are specified for two (2) fire extinguishers,<br />
both to be held in the void beneath the observer’s<br />
seat. One unit is a hand-held 2.5 lb. monoammonium<br />
phosphate expellant (dry chemical) unit, which shall be<br />
rated Class A (trash, wood and paper), Class B (UL Approved)<br />
and Class C (energized electrical equipment).<br />
These units should be used in fighting all on-board fires<br />
other than engine compartment fires.<br />
Hand-held units should be replaced or recharged as<br />
soon as possible after use, or after 12 years from date<br />
of manufacture. Any chemical discharge should be<br />
cleaned from all surfaces as soon as possible and prior<br />
to running the boat again, unless operation is necessary<br />
to return to shore.<br />
The other specified unit is a hand-held fire suppression<br />
unit FM-200 (international boats) or FE-241<br />
(domestic boats). The difference is that in domestic<br />
V-drive models the unit is not mounted in the engine<br />
compartment, and it must be manually operated (red<br />
bottle shown below).<br />
In the event of any evidence of a fire within the engine<br />
compartment, DO NOT OPEN THE ENGINE COM-<br />
PARTMENT (BOX).<br />
Opening an engine compartment when there is indication<br />
of a fire inside can cause the fire to flare up<br />
and/or spread, which may result in extensive damage<br />
or even sinking of the boat and/or serious injury or<br />
death to people<br />
on board.<br />
Shut down the<br />
engine and blowers.<br />
Continuously<br />
discharge the entire<br />
contents of<br />
the FE-241 fire<br />
suppression unit<br />
through the fire<br />
port immediately.<br />
Top: FE-241;<br />
Bottom: FM200<br />
Fire Port<br />
On these models, the engine compartment is equipped with a fire port on<br />
the side of the engine box. In the event of a fire, insert the nozzle of the fire extinguisher<br />
through the fire port pull the safety pin and press the handle to release the<br />
clean-agent, gaseous chemicals inside the engine box.<br />
The boat owner/operator should have the fire extinguisher canister replaced<br />
as soon as practicable.<br />
The boat should never be operated following a fire until after a determination<br />
has been made whether operation may result in another fire. If any danger of an<br />
additional fire exists, the boat should be towed to shore or dock rather than running<br />
the engine(s).<br />
Following the activation of the automatic fire suppression system<br />
or a hand-held fire extinguisher, a careful determination should be<br />
made as to whether the boat can safely be operated. If there is any<br />
doubt or concern whatsoever, the boat should be towed to shore<br />
and/or dock for service by an authorized <strong>MasterCraft</strong> dealer prior<br />
to operating again. Failure to follow these instructions could result<br />
in death or serious injury/illness.<br />
Personal Flotation Devices (PFDs)<br />
Federal law also requires at least one wearable Type I, II, III or Type V Personal<br />
Flotation Device (“PFD”), for each person on-board or being towed on water skis,<br />
wakeboards or other recreational equipment. A Type V PFD provides performance<br />
of either a Type I, II or III PFD (as marked on its label) and must be used according<br />
to the label requirements. In addition, one throwable Type IV PFD must also be on<br />
board. As the owner, obtaining the appropriate PFDs is your responsibility and<br />
determining whether people on-board , including those who are underage, are<br />
required to wear PFDs when underway. Your <strong>MasterCraft</strong> dealer can, and will be<br />
happy to, assist you with your purchase of appropriate PFDs.<br />
Note: Requirements for coastal waters and inland waters differ. Check with the<br />
local boating authorities for more information.<br />
<strong>MasterCraft</strong> <strong>2012</strong> <strong>Owners</strong> <strong>Manual</strong> • Safety Knowledge • Page 1-4
PFD Accessibility<br />
• Wearable PFDs must be readily accessible in the boat.<br />
• It should be possible to put on the PFDs within a reasonable amount of<br />
time in case of emergency.<br />
• PFDs should never be stowed in plastic bags, in locked or closed compartments<br />
or have other gear stowed on top of them.<br />
• The U.S. Coast Guard, as well as <strong>MasterCraft</strong>, recommends the wearing<br />
of PFDs at all times when the vessel is underway, even though it is not a<br />
requirement. The best PFD is the one that is worn–that is, the one that<br />
can save your life.<br />
• Inflatable PFDs must have a full cylinder and all status indicators on the<br />
inflator must be green, or the device is NOT serviceable, and is NOT considered<br />
a usable PFD for anyone on-board the vessel.<br />
• Coast Guard-approved inflatable PFDs are authorized for use on recreational<br />
boats by persons at least 16 years of age.<br />
• Some states require children to wear PFDs at all times. Check with your<br />
state boating safety officials for details. Be certain to equip children with<br />
a PFD that is appropriate for the size of the child. The label will indicate<br />
the weight limits for use.<br />
Sound Producing Devices<br />
The navigation rules require<br />
sound signals to be made under certain<br />
circumstances. Meeting, crossing<br />
and overtaking situations, which will<br />
be described in some detail shortly,<br />
are examples of when sound signals<br />
are required. Recreational vessels are<br />
also required to sound signals during<br />
periods of reduced visibility. Your <strong>MasterCraft</strong><br />
boat is equipped with a horn,<br />
but you may also purchase aftermarket devices in case of potential<br />
electrical disconnect or failure.<br />
Note: The requirement to carry a bell on board no longer applies to<br />
vessels operating on International Waters.<br />
Visual Distress Signals<br />
All vessels used on coastal<br />
waters, the Great Lakes, territorial<br />
seas and those waters connected<br />
directly to them up to a<br />
point where a body of water is<br />
less than two miles wide, must<br />
be equipped with U.S.C.G.-approved visual distress signals. Vessels<br />
owned in the United States but operating on the high seas must be<br />
equipped with U.S.C.G.-approved visual distress signals.<br />
Pyrotechnic visual distress signals must be Coast Guard-approved,<br />
in serviceable condition and readily accessible. This means<br />
that:<br />
• They are marked with an expiration date. Expired signals may be<br />
carried as extra equipment, but cannot be counted toward meeting<br />
the visual distress signal requirement, since they may be unreliable.<br />
• If pyrotechnic devices are selected, a minimum of three are required.<br />
That is, three signals for day use and three signals for night.<br />
Some pyrotechnic signals meet both day and night use requirements.<br />
• Pyrotechnic devices should be stored in a cool, dry location, if<br />
possible. A watertight container painted red or orange and prominently<br />
marked “Distress Signals” or “Flares” is recommended.<br />
U.S.C.G.-approved pyrotechnic visual distress signals and associated<br />
devices include pyrotechnic red flairs, hand-held or aerial; pyrotechnic<br />
orange smoke, hand-held or floating, or launchers for aerial<br />
red meteors or parachute flares.<br />
Non-pyrotechnic devices may be allowed. These include an orange<br />
distress flag (day signal only) or an electric distress light (which<br />
is acceptable for night use). Use of these devices must still meet Coast<br />
Guard requirements, information for which is available online and<br />
from the Coast Guard.<br />
Under Inland Navigation Rules, a high intensity white light flashing<br />
at regular intervals from 50-70 times per minute is considered a<br />
distress signal. Such devices do NOT count toward meeting the visual<br />
distress signal requirement, however. Regulations prohibit display of<br />
visual distress signals on the water under any circumstances except<br />
when assistance is required to prevent immediate or potential danger<br />
to persons on board a vessel.<br />
All distress signals have distinct advantages. No single device is<br />
ideal under all conditions or suitable for all purposes. Pyrotechnics are<br />
universally recognized as excellent distress signals. However, there<br />
is potential for injury and property damage if not properly handled.<br />
These devices produce a very hot flame and the residue can cause<br />
burns and ignite flammable materials.<br />
Pistol launched and hand-held parachute flares and meteors have<br />
many characteristics of a firearm and must be handled with caution. In<br />
some states they are considered a firearm and prohibited from use.<br />
Check with local authorities regarding the best visual distress signal<br />
for use in the area in which you will be boating.<br />
<strong>MasterCraft</strong> <strong>2012</strong> <strong>Owners</strong> <strong>Manual</strong> • Safety Knowledge • Page 1-5
Registration, Numbering and Documentation<br />
Although it might not be immediately obvious as to how this relates to boating safety, in fact it can be critical in emergencies. All undocumented<br />
vessels equipped with propulsion machinery must be registered in the state of principal use. A certificate of number will be issued upon registering<br />
the vehicle. These numbers must be displayed on your vessel. The owner/operator of the vessel must carry a valid certificate of number whenever<br />
the vessel is in use. When moving to a new state of principal use, the certificate is valid for 60 days. Check with your state boating authority for registration<br />
requirements.<br />
Numbers must be painted or permanently attached to each side of the forward half of the vessel.<br />
The validation stickers must be affixed within six inches of the registration number. With the exception<br />
of the vessel fee decal, no other letters or numbers may be displayed nearby. Lettering must<br />
be in plain, vertical block characters of not less than three (3) inches in height. Spaces or hyphens<br />
between letter and number groupings must be equal to the width of a letter other than “i” or a<br />
number other than “1.”<br />
The owner of a vessel must notify the agency which issued the certificate of number within fifteen (15)<br />
days if the vessel is transferred, destroyed, abandoned, lost, stolen or recovered, or if the certificate of<br />
number is lost, destroyed or the owner’s address changed. If the certificate of number becomes invalid for<br />
any reason, it must be surrendered in the manner prescribed to the issuing authority within 15 days.<br />
Recommended Equipment<br />
The responsible boat owner will avoid potential problems on an outing by having additional<br />
equipment on board. Normally, the decision regarding the appropriate equipment to take on<br />
individual outings is dependent upon the body of water and the length of the trip. We suggest the<br />
following equipment as a minimum (your <strong>MasterCraft</strong> dealer can also assist you with additional<br />
recommendations):<br />
Operator’s<br />
License<br />
Some states are implementing operator’s<br />
license requirements. These requirements<br />
vary widely. Whether operating a<br />
boat locally or in a remote location, operators<br />
should verify with state and local<br />
authorities regarding whether a license<br />
or training is required. This should be<br />
checked at least annually.<br />
• An anchor with at least 75 feet of line (in saltwater operation, particularly);<br />
• A manual bailing device for removing water;<br />
• A combination oar/boat hook;<br />
• A day-and-night visual distress signal;<br />
• A first aid kit and manual;<br />
• An airway breathing tube;<br />
• A waterproof flashlight;<br />
• A non-electric horn or whistle;<br />
• A set of local navigational charts;<br />
• Mooring lines and fenders;<br />
• Extra engine oil;<br />
• A tool kit; and<br />
• A portable, battery-operated AM/FM radio or weather radio/scanner.<br />
<strong>MasterCraft</strong> <strong>2012</strong> <strong>Owners</strong> <strong>Manual</strong> • Safety Knowledge • Page 1-6
Safety Afloat<br />
The cause of many boating accidents is often the operator’s<br />
failure to follow basic safety rules or written precautions. Many accidents<br />
can be avoided if the operator is completely familiar with the<br />
boat, its operation and can recognize potentially hazardous situations<br />
before an accident occurs.<br />
Failure to comply with safety-related information and instructions<br />
may result in serious injury or death to you and/<br />
or others. Always use common sense when operating the<br />
boat or participating in any activities associated with the<br />
boat, including, but not limited to, periods of time when the<br />
boat engine is shut down and the boat is not in operation.<br />
• Improper operation of the boat is extremely dangerous! Operators<br />
must read and understand all operating manuals supplied<br />
with the boat, before operation.<br />
• On-board equipment must always conform to the governing federal,<br />
state and local regulations.<br />
• Always attach the engine emergency safety shut-off lanyard to<br />
a part of your clothing (such as a belt loop) when operating the<br />
boat.<br />
Never override or modify the engine emergency safety shutoff<br />
switch in any way.<br />
• Never operate the boat while under the influence of alcohol or<br />
drugs.<br />
• All persons must be seated in a designated occupant seating<br />
area while the boat is in motion. Never stand or allow passengers<br />
to stand in the boat or sit on the motor box or tower (where<br />
equipped), or any location other than occupant seating while<br />
underway. You or others may be thrown within or from the boat,<br />
which could result in serious injury or death. Never allow occupants<br />
to use sun pads or transom seating while the engine is running.<br />
• Prior to starting the engine, you must open the engine box and<br />
check the engine compartment and bilge for gasoline and oil vapors.<br />
You must also operate the blower for at least four (4) minutes.<br />
Failure to do so may result in fire and/or an explosion.<br />
Failure to comply with the requirement of operating the<br />
blower for at least four (4) minutes before starting the engine<br />
may result in serious injury or death to you and/or<br />
others.<br />
• Never remove or modify any components of the fuel system.<br />
Removal or modification of any component of the fuel system<br />
may cause a hazardous situation and will void the warranty.<br />
The modern <strong>MasterCraft</strong> fuel delivery lines are pressurized<br />
and attempting to loosen or remove them may result<br />
in the uncontrolled release of fuel, which can be environmentally<br />
hazardous, and may potentially cause injury.<br />
• Never allow any type of spark or open flame on board. It may result<br />
in fire or explosion.<br />
Skiing and Wakeboarding Safety<br />
Skiers and wakeboarders are obligated to be as aware of the fundamental<br />
safety rules as operators. If you are new to water sports, you should<br />
seek certified training before starting. You may find it especially helpful to<br />
join a local water-sports club, if available, and the U.S.W.S.A. (United States<br />
Water Skiing Association).<br />
• Always remember that the majority of water-skiing and wakeboarding<br />
injuries are the result of impacts with other objects, so always look<br />
where you are going and be aware of what is going on around you.<br />
• Never put your arm, head or any other part of your body through the<br />
handle/bridle of the ski or wakeboarding line, nor wrap the line around<br />
any part of the body at any time.<br />
• Never ski or wakeboard at night.<br />
• Never ski or wakeboard directly in front of other boats.<br />
• When adding accessories to the tower, ensure that the total aggregate<br />
weight of the accessories does not exceed 85 lbs. (U.S.).<br />
Exceeding the limit may result in structural failure of the tower.<br />
<strong>MasterCraft</strong> strongly encourages the use of <strong>MasterCraft</strong> towers and<br />
accessories only as they have been tested and determined to meet<br />
product requirements, including weight.<br />
Towers should never have a total aggregate weight of accessories<br />
exceeding 85 lbs. (U.S.) total. Excessive weight can cause<br />
tower failure and the collapse of a tower or the disconnection<br />
of the tower from the deck, which could result in serious bodily<br />
injury or damage to the boat that is not covered by warranty.<br />
• Never attempt to fold a manually powered tower without assistance.<br />
Folding a manually powered tower requires at least two (2) people.<br />
(The ZFT towers are not included in this group.)<br />
• Never jump from a boat that is moving at any speed, nor enter or exit<br />
the water when the engine is running (ON). (See the Common Sense<br />
Approach section of this Owner’s <strong>Manual</strong> for additional information regarding<br />
carbon monoxide peril.)<br />
• Never climb, sit or stand on a tower. The tower is intended for towing<br />
only as noted.<br />
• Make sure that everyone knows and uses approved skiing/wakeboarding<br />
hand signals and adheres to common skiing, wakeboarding and<br />
boating courtesy.<br />
• Never ride on the ski platform or hold on to the ski platform while in<br />
the water during engine operation, including at idle. Carbon monoxide<br />
fumes are expelled from the lower transom areas of your boat and can<br />
cause death or serious illness.<br />
• The above mandates are not all-inclusive. It is the boater’s responsibility<br />
to operate the boat in a safe fashion and become familiar with any<br />
and all rules and regulations governing boat operation.<br />
Do not tow more than two (2) persons at one time on a tow<br />
tower. The tow tower approved for use on your boat should be<br />
used only for water skis, wakeboards or recreational towables,<br />
and not for parasailing, kite flying or towing other boats. Do<br />
not add any attachments that are not approved for use on your<br />
<strong>MasterCraft</strong> boat. Do not climb on, sit on, stand on, jump off<br />
of or dive off of the tower. Never allow passengers to sit behind<br />
the tow rope attachment point. Never allow loose tow rope ends<br />
to dangle. Always be certain that all bolts are in place and tight<br />
before and during use. When the tower is up, watch for low<br />
obstacles such as tree limbs, bridges or power lines.<br />
<strong>MasterCraft</strong> <strong>2012</strong> <strong>Owners</strong> <strong>Manual</strong> • Safety Knowledge • Page 1-7
Warning Plates and Labels<br />
Read and note ALL warning plates and labels from<br />
bow to stern, including those that are installed inside the<br />
engine compartment, lockers and under seating. YOU<br />
MUST READ AND ADHERE TO ALL CAUTIONS AND<br />
WARNINGS IN AND ON YOUR BOAT!<br />
Operator’s Responsibilities<br />
• Ensure the boat is in top operating condition and there are no hazards that impede your moving about the boat.<br />
• Ensure the bilge is clean prior to starting.<br />
• File a float plan, as described below, with a relative or friend.<br />
• Have a complete knowledge of the operation and handling characteristics of your boat.<br />
• Ensure that the boat is not loaded above the maximum capacity and that the load is properly distributed.<br />
• Have familiarity with your starting location and your goal, and the waterways between.<br />
• Maintain a safe speed at all times to avoid collisions.<br />
• Keep an eye out for changing weather conditions and respond accordingly.<br />
• Know and practice the navigational rules. Know and obey all federal and state regulations and operate the boat<br />
properly around all waterway markers.<br />
• Maintain a clear, unobstructed view at all times, especially forward. Scan the water and avoid tunnel vision. Many<br />
boating collisions are caused by inattention.<br />
Float Plan<br />
A “float plan” is a written record indicating the planned destination and approximate length of time for the outing.<br />
Sample forms are available at the Coast Guard’s website. One should be completed and left with a relative or friend prior<br />
to each trip. In case of an emergency or failure to return within a reasonable period of time, pertinent information will be<br />
available to assist local marine police or the Coast Guard in determining whether a search should be performed. Be sure<br />
to notify the float plan holder upon return.<br />
<strong>MasterCraft</strong> <strong>2012</strong> <strong>Owners</strong> <strong>Manual</strong> • Safety Knowledge • Page 1-8
Nautical Charts<br />
Nautical charts are especially important to boaters planning<br />
trips, particularly on open waters. These charts show<br />
the nature and shape of the coast, depths of water, general<br />
configuration and character of the bottom. Other markings<br />
on the nautical charts include prominent landmarks, port<br />
facilities, aids to navigation, and marine hazards. Changes<br />
brought about by people and nature require that nautical<br />
charts be constantly maintained and updated to aid safe<br />
navigation.<br />
National Ocean Service (NOS) charts may be purchased<br />
either directly by mail from the NOS Distribution Branch or<br />
through an authorized agent. There are more than 1,700 nautical<br />
chart agents who sell them.<br />
FAA/National Aeronautical Charting Office<br />
Distribution Division, AVN-530<br />
6303 Ivy Lane, Suite 400<br />
Greenbelt, MD 20770<br />
Telephone: (301) 436-8301<br />
Email: 9-AMC-chartsales@faa.gov<br />
Website: http://naco.faa.gov/<br />
Weather<br />
Never leave the dock without first checking the local weather forecast. Weather information is available from television,<br />
radio, local newspaper, online or from a weather channel on a VHF radio.<br />
At certain times of the year, weather can change rapidly and boaters should always keep an eye out for weather conditions.<br />
While boating, pay attention to the following:<br />
• Weather changes generally come from the west.<br />
• Watch for cloud build-up, especially rapid, vertically rising clouds.<br />
• Sudden drop in temperature.<br />
• Sudden change in wind direction and/or speed.<br />
• On-board barometers should be checked every two-to-three hours. A rising barometer indicates fair weather and<br />
a rise in wind velocity; a falling barometer indicates stormy or rainy weather.<br />
What to do in severe weather:<br />
• Reduce speed, keeping enough power to maintain headway.<br />
• Put on PFDs.<br />
• Turn on running lights.<br />
• Head for the nearest shore that is safe to approach, if possible.<br />
• Head bow of boat into waves at about a 45-degree angle.<br />
• Keep bilges free of water.<br />
• Seat passengers on bottom of the boat, near the centerline.<br />
• If the engine fails, tie a sea anchor on a line from the boat to keep the boat headed into the waves. A bucket will<br />
work as a sea anchor in an emergency.<br />
• Anchor the boat, if necessary.<br />
<strong>MasterCraft</strong> <strong>2012</strong> <strong>Owners</strong> <strong>Manual</strong> • Safety Knowledge • Page 1-9
Staying Afloat<br />
It is commonly believed that someone dressed<br />
in heavy clothing or waders will experience considerably<br />
more difficulty staying afloat if they fall overboard.<br />
This is not true. Air trapped in clothing provides<br />
flotation and bending the knees will trap air in<br />
waders. To stay afloat:<br />
• Remain calm. Do not thrash about or try to<br />
remove clothing or footwear. This leads to exhaustion<br />
and increases the loss of air that may<br />
keep you afloat.<br />
• Keep your PFD on.<br />
• Keep your knees bent.<br />
• Float on your back and paddle slowly to safety.<br />
Cold Water Survival<br />
Sudden immersion in cold water can induce rapid,<br />
uncontrolled breathing, cardiac arrest and other<br />
physical body conditions, which can lead to drowning.<br />
Always wearing a PFD will help survival in rapid<br />
immersion situations.<br />
In other situations when entry into cold water is<br />
necessary:<br />
• Wear a PFD.<br />
• Button all clothing.<br />
• Cover your head if possible and enter the water<br />
slowly.<br />
• Keep your head out of the water if at all possible.<br />
• Assume the Heat Escape Lessening Posture<br />
(HELP) position as taught within a Coast Guardtaught<br />
safety course.<br />
Hypothermia<br />
Immersion in water speeds the loss of body heat and can lead to hypothermia. This is<br />
the abnormal lowering of internal body temperature. If a boat capsizes it will likely float<br />
on or just below the surface.<br />
To reduce the effects of hypothermia, get in or on the boat. Try to get as much of<br />
your body out of the water as possible. If you can’t get in the boat, a PFD will enable you<br />
to keep your head out of the water. This is very important because about 50 percent of<br />
body heat loss is from the head.<br />
It may be possible to revive a drowning victim who has been under water for some<br />
time and shows no sign of life. Cases document instances where victims have been resuscitated<br />
after extended periods. Start CPR immediately and get the victim to a hospital as<br />
quickly as possible.<br />
Immersion Suits<br />
Immersion suits will delay the effects of hypothermia in cold water and are available<br />
through many retailers who specialize in sales of marine products. The suits should be<br />
stored and maintained according to the manufacturer’s instructions.<br />
Inflatable Life Rafts<br />
An inflatable life raft can provide a survival platform for an extended period of<br />
time. Be sure the life raft is large enough for everyone on board when the boat operates<br />
off-shore. It should have the appropriate emergency equipment pack and should<br />
be professionally serviced periodically, according to the manufacturer’s instructions.<br />
Coast Guard-approved life rafts must meet a number of stringent material and performance<br />
standards.<br />
<strong>MasterCraft</strong> <strong>2012</strong> <strong>Owners</strong> <strong>Manual</strong> • Safety Knowledge • Page 1-10
Anchoring<br />
Anchoring is done for two principal reasons: first, to stop for fishing, swimming, lunch or an overnight stay, and secondly, to keep a boat from<br />
running aground in bad weather or as a result of engine failure.<br />
When preparing to anchor, bring the bow of the vessel into the wind or current. Place the engine in neutral. When the boat comes to a<br />
stop, slowly lower the anchor. Do not throw the anchor over as it will tend to foul the anchor or tangle line. When the anchor line has been let<br />
out, back down on the anchor with the engine in idle reverse to help set the anchor. After it is firmly set, use reference points (landmarks) in<br />
relation to the boat to be sure that the boat is not drifting. Check the points frequently.<br />
Communications<br />
The following applies to salt water boating:<br />
When boating off-shore, carry communications gear such as a<br />
marine VHF-FM and/or HF transceiver(s), appropriate to the operating<br />
area. Cellular phone coverage is available in many coastal areas.<br />
However, cellular phones should NOT be considered a substitute for<br />
VHF-FM marine band radios for emergency purposes.<br />
In distress situations, press the VHF transmit button and clearly<br />
say: MAYDAY, MAYDAY, MAYDAY. Follow this with the vessel name<br />
and/or description, the location, nature of emergency and number of<br />
people on-board. Then release the transmit button and wait for 10 seconds.<br />
If there is no response, repeat the MAYDAY call.<br />
Satellite EPIRBs (406 MHz) are designed to quickly and reliably<br />
alert rescue forces, indicate an accurate distress position, and guide<br />
rescue units to the distress scene, even when all other communications<br />
fail.<br />
When activated, the satellite EPIRB transmits a distress signal<br />
with a beacon-unique identifying code. The system detects the signal,<br />
calculates an accurate distress position, checks the unique identifying<br />
code against the EPIRB registration database (vessel and point<br />
of contact information supplied by the owner) and routes the distress<br />
alert with registration information to the responsible U.S. Coast Guard<br />
(or International) Rescue Coordination Center (RCC). 406MHz EPIRBs<br />
with GPS (internal or attached) also provide an immediate GPS position<br />
in the information passed to the RCC.<br />
Geostationary satellites make detection almost immediate. If<br />
the EPIRB does not have the ability to provide a GPS position, the<br />
process to determine a position takes about an hour on average and<br />
almost always less than two hours. Satellite EPIRBs also include a<br />
homing beacon and strobe to help rescue forces quickly locate the<br />
distress scene.<br />
Satellite beacons have significant coverage, alerting timeliness,<br />
position accuracy, and signaling advantages over other types<br />
of EPIRBs (121.5 MHz). Before purchasing or using something other<br />
than the 406 MHz EPIRB, be sure to understand the capabilities<br />
and limitations.<br />
Further information and a complete listing of VHF channels<br />
and frequencies is available at: www.navcen.uscg.gov.<br />
Law Enforcement<br />
A vessel underway, when hailed by a Coast Guard<br />
vessel is required to heave to, or maneuver in such<br />
a manner that permits a boarding officer to come<br />
aboard.<br />
Other federal, state and local law enforcement officials<br />
may board and examine a vessel. The Coast Guard<br />
may impose a civil penalty up to $1,000 for failure to<br />
comply with equipment requirements; report a boating<br />
accident; or comply with other federal regulations.<br />
Failure to comply with the Inland Navigation Rules Act<br />
of 1980 can result in a civil penalty up to $5,000. Details<br />
of the Act are available online or through the U.S. Coast<br />
Guard and the Coast Guard Auxiliary.<br />
Improper use of a radio-telephone is a criminal offense.<br />
The use of obscene, indecent or profane language<br />
during radio communications is punishable by a $10,000<br />
fine, imprisonment for two years or both. Other penalties<br />
exist for misuse of a radio, such as improper use of<br />
Channel 16 VHF-FM. Channel 16 is a calling and distress<br />
channel. It is not to be used for conversation or radio<br />
checks. Such communications should be conducted on<br />
an authorized channel.<br />
Note that there are stringent requirements regarding,<br />
pollution, discharge of oil, discharge of garbage<br />
and the operation and discharge from sanitation devices.<br />
It is the boat owner’s and operator’s responsibility<br />
to determine what the laws and regulations are and to<br />
ensure that those laws and regulations are respected<br />
and enforced.<br />
Details are available through the Coast Guard.<br />
<strong>MasterCraft</strong> <strong>2012</strong> <strong>Owners</strong> <strong>Manual</strong> • Safety Knowledge • Page 1-11
This Owner’s <strong>Manual</strong> has been developed to help ensure an enjoyable experience as you<br />
boat, wakeboard and ski with a fabulous <strong>MasterCraft</strong> boat. As stated earlier, this information is<br />
not all-inclusive. There are many factors to consider and additional information that you need to<br />
research before undertaking any boating activity.<br />
In addition to reading this Owner’s <strong>Manual</strong> or other related material, and familiarizing<br />
yourself with the proper operation of the <strong>MasterCraft</strong> boat, you should also always use common<br />
sense when boating. For example, when anchoring the boat, you MUST turn OFF the<br />
engine. In most models, exhaust fumes containing carbon monoxide are emitted from the<br />
exhaust flap area of the transom immediately below the swim platform. No one should ever<br />
be on the swim platform or transom while the engine is operating. This includes while using<br />
the shower option in those models where the engine must run in order to create hot water.<br />
In those instances, showering must never be done on the swim platform or transom as the<br />
carbon monoxide fumes are toxic.<br />
Carbon monoxide is a colorless, tasteless, odorless and poisonous gas that accumulates<br />
rapidly and can cause serious injury or death. Exposure to carbon monoxide<br />
can be fatal in a matter of minutes. Exposure to even low concentrations of<br />
carbon monoxide must not be ignored because the effects of exposure to carbon<br />
monoxide can build up and be just as lethal as high concentrations. Carbon monoxide<br />
from exhaust pipes of inboard or outboard engines may build up inside<br />
and outside the boat in areas near exhaust vents, particularly during slow-speed<br />
operations. STAY AWAY from these exhaust vent areas, which are located at<br />
the stern of the boat, and DO NOT swim or engage in any watersports or other<br />
activities in or near the stern area of the boat, including, without limitation, the<br />
swim platform and the rear sun deck, when the engine is in operation. Under<br />
no circumstances should the owner and/or operator allow persons to hold onto<br />
the swim platform while the engine is operating and the boat is in motion. These<br />
activities (sometimes known as “teak surfing” or “platform dragging,” where the<br />
participant holds onto the swim platform and is pulled through the water, and/<br />
or “body surfs” immediately behind the boat) are extremely dangerous, highly<br />
likely to result in death or serious bodily injury, and are a misuse of this product.<br />
Common<br />
Sense<br />
Approach<br />
All boats have weight limits. Failure to adhere<br />
to the posted limits can cause operation<br />
instability and/or the boat to sink. This may<br />
result in serious injury or death, as well as<br />
significant damage to the boat, which will not<br />
be covered by warranty.<br />
Overloading a boat may cause it to become unstable<br />
and may potentially result in the boat’s flotation<br />
system becoming overwhelmed. Too much<br />
weight can sink any boat! Within this <strong>Manual</strong> and<br />
on a label mounted in each boat is the weight and<br />
maximum occupant limit for that specific model.<br />
Bear in mind that total weight limits include additional<br />
water ballast, gear brought onto the boat,<br />
additional options and all people. Equally critical is<br />
how weight is distributed throughout the boat. If too<br />
much weight is placed in one area it can have serious<br />
impact on maintaining control. Items and people<br />
can also shift positions during operation, potentially<br />
causing a dangerous situation.<br />
<strong>MasterCraft</strong> <strong>2012</strong> <strong>Owners</strong> <strong>Manual</strong> • Safety Knowledge • Page 1-12
Care should also be taken to<br />
avoid interfering with the boat<br />
operator’s line of sight when<br />
the boat is underway. This applies<br />
particularly to individuals<br />
riding in the bow. It is possible<br />
to quite unintentionally obscure<br />
the driver’s view. Even momentary<br />
interference can result in the<br />
driver’s inability to respond to a<br />
situation that requires avoidance<br />
of another vessel or submerged<br />
or partially-submerged objects.<br />
Everyone on board should always<br />
pay attention to other vessels,<br />
people and objects located<br />
in close proximity to the boat,<br />
activities taking place in or near<br />
the water, and should always be<br />
supportive of the boat operator.<br />
<strong>MasterCraft</strong> strongly encourages<br />
individuals to wear Personal<br />
Flotation Devices (PFDs). In many<br />
states, it is a legal requirement<br />
for children to wear them at<br />
all times while on board. Nonswimmers<br />
and swimmers of<br />
limited ability of any age should<br />
never be without a PFD while on<br />
a boat.<br />
Avoid any activity that may result in damage to the boat, thereby<br />
voiding the warranty. Some things, such as avoiding stationary objects,<br />
are obvious. However, even less obvious activities can cause<br />
damage to a boat, no matter how well-built. For example, while a<br />
beach or shoreline may seem soft while walking on it, running a boat<br />
up onto shore may result in significant scratches in the fiberglass finish.<br />
The causes of many kinds of damage are usually quite obvious to<br />
trained service personnel.<br />
<strong>MasterCraft</strong> cannot anticipate every type of activity or neglect<br />
that could result in damage to the boat or that may cause illness,<br />
injury or even death to boaters. The operator, owner and/or all persons<br />
on board are responsible for using common sense and a careful<br />
thought process to ensure that every measure has been taken to<br />
keep boating enjoyable for many years to come. A <strong>MasterCraft</strong> boat<br />
can be the source of countless hours of family fun, as well as building<br />
friendships. But the boating experience remains safe only if YOU use<br />
your head before, during and after your boating activity.<br />
As you anticipate many good times ahead with the <strong>MasterCraft</strong><br />
boat, be sure that, first and foremost, you are well-prepared to be<br />
responsible.<br />
<strong>MasterCraft</strong> <strong>2012</strong> <strong>Owners</strong> <strong>Manual</strong> • Safety Knowledge • Page 1-13
Rules of the<br />
Open Water<br />
Just as there are rules that apply when driving a vehicle on the street, there are waterway<br />
rules that apply when you are driving a boat on the water. These rules are used internationally,<br />
and they are enforced by the United States Coast Guard and local agencies. You should be<br />
aware of these rules and follow them whenever you encounter another vessel on the water.<br />
In various geographic locations, certain rules prevail that may be unique to the locale. Each state<br />
also has laws and boating limitations that may be applicable only within their boundaries. It is the<br />
operator’s responsibility to seek out this information and become familiar with all safety-related information,<br />
laws and rules governing boating operation.<br />
The rules presented in this Owner’s <strong>Manual</strong> are condensed and have been provided for<br />
convenience only. Consult your local U.S. Coast Guard Auxiliary (USCGA), Department of Motor<br />
Vehicles (DMV) or Department of Natural Resources (DNR) for a complete set of rules governing<br />
the waters in which you will be using your boat. If you plan to travel—even for a short<br />
trip—you would be well-served to contact the regional USCGA, DMV or DNR in the area where<br />
you will be boating. Often, basic information is available through websites sponsored and prepared<br />
by these organizations and governing bodies.<br />
Steering and Sailing Rules/Sound Signals<br />
Any time two (2) vessels on the water meet one another, one vessel has the right-of-way. It is called the<br />
stand-on vessel. The vessel that does not have the right-of-way is called the give-way or burdened vessel.<br />
These rules determine which vessel has the right of way, and accordingly, what each vessel should do.<br />
The vessel with the right-of-way has the duty to continue its course and speed, except to avoid an immediate<br />
collision. When you maintain your direction and speed, the other vessel will be able to determine<br />
how best to avoid you.<br />
The vessel that does not have the right of way has the duty to take positive and timely action to stay out of<br />
the way of the stand-on vessel. Normally, the give-way vessel should not cross in front of the stand-on vessel,<br />
but should slow down or change direction briefly and pass behind the other vessel. You should always move in<br />
such a way that the stand-on operator can see what you are doing if you are operating the give-way vessel.<br />
Rules When<br />
Encountering<br />
Vessels<br />
There are three (3) main situations<br />
in which you may encounter<br />
other vessels, and you must<br />
avoid a collision. These are:<br />
• Meeting (you are approaching<br />
another vessel head-on).<br />
• Crossing (you are traveling<br />
across the other vessel’s<br />
path).<br />
• Overtaking (you are passing<br />
or being passed by another<br />
vessel).<br />
Meeting<br />
If you are meeting another vessel head-on, and<br />
you are close enough to run the risk of collision, neither<br />
of you has the right-of-way. Both of you should<br />
alter course to avoid an accident. You should keep the<br />
other vessel on your port (left) side. (This rule doesn’t<br />
apply if both of you can clear each other by continuing<br />
your set course and speed.)<br />
Crossing<br />
When two (2) power-driven vessels are crossing<br />
each other’s path close enough to run the risk of collision,<br />
the vessel that views the crossing vessel to the<br />
starboard (right) side must give way.<br />
If the other vessel is to the port (left) side, you<br />
are the stand-on vessel, and provided the other vessel<br />
gives you the right-of-way, maintain your course and<br />
direction.<br />
<strong>MasterCraft</strong> <strong>2012</strong> <strong>Owners</strong> <strong>Manual</strong> • Safety Knowledge • Page 1-14
Overtaking<br />
If you are passing another vessel, you<br />
are the give-way vessel. This means that<br />
the other vessel is expected to maintain<br />
its course and speed. You must stay out of<br />
its way as you clear it, altering course and<br />
speed as necessary.<br />
Conversely, if you are being passed by<br />
another vessel, you are the stand-on vessel,<br />
and you should maintain your speed<br />
and direction so that the vessel can be<br />
steered around you.<br />
Other Special Situations<br />
There are additional rules to remember when operating your<br />
boat around other vessels, such as:<br />
• When navigating in narrow channels, you should keep to the<br />
right when it is safe and practical to do so.<br />
• When preparing to go around a bend that may obstruct your<br />
view of other water vessels, you should sound a prolonged blast<br />
on the horn or with a whistle for four (4) to six (6) seconds. Even<br />
if no reply is heard, you should still proceed around the bend<br />
with caution.<br />
Sailing Vessel Right-of-Way<br />
Sailing vessels should normally be given the right-of-way. The exceptions to this are:<br />
• When the sailing vessel is overtaking the power-driven vessel, the power-driven vessel has the right-of-way.<br />
• Sailing vessels should keep clear of any fishing vessel.<br />
• In a narrow channel, a sailing vessel should not hamper the safe passage of a power-driven vessel that can navigate<br />
only in such a channel.<br />
Fishing Vessel Right-of-Way<br />
Under international rules, all vessels that are fishing with nets, lines or trawls are considered to be fishing vessels;<br />
however, boats with trolling lines are not considered fishing vessels.<br />
Fishing vessels have the right of way, regardless of position, but these vessels cannot impede the passage of other<br />
vessels in narrow channels.<br />
The General Prudential Rule<br />
This rule is called Rule 2 in the International Rules and says, “In obeying and<br />
construing these rules due regard shall be had to all dangers of navigation and<br />
collision, and to any special circumstances, which may render a departure from<br />
the above rules necessary in order to avoid immediate danger.”<br />
Reading Buoys and Other Markings<br />
The waters of the United States are marked for safe navigation by the lateral<br />
system of buoyage. The markers and buoys you encounter will have an arrangement<br />
of shapes, colors, numbers and lights to show which side of the buoy<br />
a boater should pass when navigating in a particular direction.<br />
The markings on these buoys are oriented from the perspective of being<br />
entered from a seaward direction while the boater is going toward the port. Red<br />
buoys are passed on the starboard (right) side when proceeding from open water<br />
into port, and green buoys are passed on the port (left) side. When navigating out<br />
of port, your position to the buoys should be reversed: red buoys to port (left) and<br />
green buoys to starboard (right).<br />
Many bodies of water are entirely within the boundaries of a single state. The<br />
Uniform State Waterway Marking Systems have been devised for these waters.<br />
This system uses buoys and signs with distinctive shapes and colors to show regulatory<br />
or advisory information. These markers are white with black letters and orange<br />
borders. The information signifies speed zones, restricted areas, danger areas and<br />
general information.<br />
Remember: Markings may vary by geographic location. Always consult appropriate<br />
boating authorities before boating in unfamiliar waters.<br />
<strong>MasterCraft</strong> <strong>2012</strong> <strong>Owners</strong> <strong>Manual</strong> • Safety Knowledge • Page 1-15
<strong>MasterCraft</strong> <strong>2012</strong> <strong>Owners</strong> <strong>Manual</strong> • Safety Knowledge • Page 1-16
Guide to Individual Models
ProStar 190<br />
<strong>MasterCraft</strong> <strong>2012</strong> <strong>Owners</strong> <strong>Manual</strong> • Guide to Individual Models • Page 2-2
Storage space is located:<br />
Under observer’s seat (including into bow)<br />
Under aft seating<br />
Under aft sun pad<br />
Bow light<br />
Bow cleat<br />
Stereo CD Player<br />
(inside glove box,<br />
where equipped)<br />
Sirius Satellite Radio<br />
(where equipped)<br />
Glove box<br />
Battery<br />
(located in void<br />
beneath observer seat)<br />
MTS Ballast System<br />
(where equipped,<br />
beneath observer seat)<br />
Amp (where equipped,<br />
beneath observer seat)<br />
iPod interface<br />
(where equipped)<br />
Built-in cooler<br />
Bilge thru-hull outlet<br />
Bow cleat<br />
(where equipped)<br />
Adjustable mirror<br />
Circuit breaker panel<br />
(on kick panel<br />
beneath instrument panel)<br />
Instrument panel<br />
(details elsewhere in this section)<br />
Subwoofer (where equipped)<br />
Steering wheel<br />
Shift-throttle control<br />
Engine compartment<br />
Ski pylon<br />
Center drain plug<br />
(inside engine compartment)<br />
Fire port<br />
Fuel tank filler<br />
Stern cleat<br />
(where equipped)<br />
Ballast vent<br />
Swim platform<br />
Engine exhaust<br />
(two below swim platform)<br />
Transom rail with tow eye<br />
(where equipped)<br />
Transom drain plug<br />
(center beneath swim platform)<br />
Boats may also be equipped with towers, which may<br />
include stereo speakers, lights and/or tower-mounted mirror.<br />
Rear Ballast System fill<br />
(where equipped)<br />
Stern light receptacle<br />
(if equipped with tower,<br />
the light will be in<br />
center aft of tower)<br />
Stern cleat<br />
Ballast thru-hull vent<br />
Shower wand & switch/<br />
Slick Boot wand & switch<br />
(where equipped, inside<br />
storage compartment)<br />
Underwater lights<br />
(two where equipped<br />
under swim platform)<br />
Transom stereo remote<br />
(where equipped)<br />
Under-platform ladder<br />
(where equipped)<br />
<strong>MasterCraft</strong> <strong>2012</strong> <strong>Owners</strong> <strong>Manual</strong> • Guide to Individual Models • Page 2-3
ProStar 197<br />
X-7<br />
<strong>MasterCraft</strong> <strong>2012</strong> <strong>Owners</strong> <strong>Manual</strong> • Guide to Individual Models • Page 2-4
Storage space is located:<br />
Under observer’s seat<br />
Under bow seating<br />
Under aft seating<br />
Under aft sun pad<br />
Bow filler cushion<br />
(where equipped)<br />
Folding walk-thru seat<br />
Bow light<br />
Bow cleat<br />
Stereo CD Player<br />
(inside glove box,<br />
where equipped)<br />
Sirius Satellite Radio<br />
(where equipped)<br />
Glove box<br />
Battery<br />
(located in void<br />
beneath observer seat)<br />
MTS Ballast System<br />
(where equipped,<br />
beneath observer seat)<br />
Hand-held fire extinguishers<br />
(beneath observer seat)<br />
Built-in cooler<br />
Bilge thru-hull outlet<br />
Adjustable mirror<br />
Bow cleat<br />
Circuit breaker panel<br />
(on kick panel<br />
beneath instrument panel)<br />
Instrument panel<br />
(details elsewhere in this section)<br />
Subwoofer (where equipped)<br />
Steering wheel<br />
Shift-throttle control<br />
Engine compartment<br />
Amp (where equipped,<br />
beneath observer seat)<br />
iPod interface<br />
(where equipped)<br />
Ski pylon<br />
Center drain plug<br />
(inside engine compartment)<br />
Fire port<br />
Ballast vent<br />
Fuel tank filler<br />
Stern cleat<br />
(where equipped)<br />
Swim platform<br />
Engine exhaust<br />
(two below swim platform)<br />
Transom rail with tow eye<br />
(where equipped)<br />
Transom drain plug<br />
(center beneath swim platform)<br />
Boats may also be equipped with towers, which may<br />
include stereo speakers, lights and/or tower-mounted mirror.<br />
Rear Ballast System fill<br />
(where equipped)<br />
Stern light receptacle<br />
(if equipped with tower,<br />
the light will be in<br />
center aft of tower)<br />
Stern cleat<br />
Ballast thru-hull vent<br />
Shower wand & switch/<br />
Slick Boot wand & switch<br />
(where equipped, inside<br />
storage compartment)<br />
Underwater lights<br />
(two where equipped<br />
under swim platform)<br />
Transom stereo remote<br />
(where equipped)<br />
Under-platform ladder<br />
(where equipped)<br />
<strong>MasterCraft</strong> <strong>2012</strong> <strong>Owners</strong> <strong>Manual</strong> • Guide to Individual Models • Page 2-5
ProStar 214<br />
X-14<br />
<strong>MasterCraft</strong> <strong>2012</strong> <strong>Owners</strong> <strong>Manual</strong> • Guide to Individual Models • Page 2-6
Storage space is located:<br />
Under observer’s seat<br />
Under bow seating<br />
Under aft seating<br />
Under aft sun pad<br />
Bow light<br />
Bow filler cushion<br />
(where equipped)<br />
Bow cleat<br />
Stereo CD Player<br />
(inside glove box,<br />
where equipped)<br />
Sirius Satellite Radio<br />
(where equipped)<br />
Glove box<br />
Battery<br />
(located in void<br />
beneath observer seat)<br />
MTS Ballast System<br />
(where equipped,<br />
beneath observer seat)<br />
Hand-held fire extinguishers<br />
(beneath observer seat)<br />
Amp (where equipped,<br />
beneath observer seat)<br />
iPod interface<br />
(where equipped)<br />
Ski pylon<br />
Center drain plug<br />
(inside engine compartment)<br />
Fire port<br />
Ballast thru-hull vent<br />
Stern cleat<br />
Fuel tank filler<br />
Swim platform<br />
Engine exhaust<br />
Transom rail with tow eye<br />
Bilge thru-hull outlet<br />
Ballast thru-hull vent<br />
Bow cleat<br />
Adjustable mirror<br />
Circuit breaker panel<br />
(on kick panel<br />
beneath instrument panel)<br />
Instrument panel<br />
(details elsewhere<br />
in this section)<br />
Steering wheel<br />
Shift/throttle control<br />
Subwoofer<br />
(where equipped)<br />
Engine compartment<br />
Ballast thru-hull vent<br />
Stern cleat<br />
Fuel tank filler<br />
Stern light receptacle<br />
(if equipped with tower,<br />
the light will be in center<br />
aft of tower)<br />
Underwater lights<br />
(two where equipped<br />
under swim platform)<br />
Transom stereo remote<br />
(where equipped)<br />
Shower wand & switch/<br />
Slick Boot wand & switch<br />
(where equipped,<br />
inside storage compartment)<br />
Under-platform ladder<br />
(where equipped)<br />
Transom drain plug<br />
(center beneath swim platform)<br />
Boats may also be equipped with towers, which may<br />
include stereo speakers, lights and/or tower-mounted mirror.<br />
<strong>MasterCraft</strong> <strong>2012</strong> <strong>Owners</strong> <strong>Manual</strong> • Guide to Individual Models • Page 2-7
ProStar 214V<br />
X-14V<br />
<strong>MasterCraft</strong> <strong>2012</strong> <strong>Owners</strong> <strong>Manual</strong> • Guide to Individual Models • Page 2-8
Storage space is located:<br />
Under observer’s seat<br />
Under bow seating<br />
Under aft seating<br />
Under port side seating<br />
Bilge thru-hull outlet<br />
Ballast thru-hull vent<br />
Bow cleat<br />
Bow light<br />
Bow filler cushion<br />
(where equipped)<br />
Bow cleat<br />
Stereo CD Player<br />
(inside glove box,<br />
where equipped)<br />
Sirius Satellite Radio<br />
(where equipped)<br />
Glove box<br />
Battery<br />
(located in void<br />
beneath observer seat)<br />
MTS Ballast System<br />
(where equipped,<br />
beneath observer seat)<br />
Hand-held fire extinguishers<br />
(beneath observer seat)<br />
Amp (where equipped,<br />
beneath observer seat)<br />
iPod interface<br />
(where equipped)<br />
Convertible jump seat<br />
(where equipped) or<br />
walk-thru seat<br />
(where equipped)<br />
Center drain plug<br />
(under inspection plate)<br />
Ski pylon<br />
Ballast thru-hull vent<br />
Fuel tank filler<br />
Stern cleat<br />
Swim platform<br />
Engine exhaust<br />
(under swim platform)<br />
Transom rail with tow eye<br />
Transom drain plug<br />
(center beneath swim platform)<br />
Boats may also be equipped with towers, which may<br />
include stereo speakers, lights and/or tower-mounted mirror.<br />
<strong>MasterCraft</strong> <strong>2012</strong> <strong>Owners</strong> <strong>Manual</strong> • Guide to Individual Models • Page 2-9<br />
Adjustable mirror<br />
Circuit breaker panel<br />
(on kick panel<br />
beneath instrument panel)<br />
Instrument panel<br />
(details elsewhere<br />
in this section)<br />
Steering wheel<br />
Shift/throttle control<br />
Fire suppression unit<br />
manual override<br />
Subwoofer<br />
(where equipped)<br />
Cooler<br />
(located under seat)<br />
Engine compartment<br />
Ballast thru-hull pump-out<br />
Fuel tank filler<br />
Automatic fire extinguisher<br />
Stern cleat<br />
Shower wand & switch/<br />
Slick Boot wand & switch<br />
(where equipped,<br />
inside storage compartment)<br />
Stern light receptacle<br />
(if equipped with tower,<br />
the light will be in center<br />
aft of tower)<br />
Blower exhaust<br />
(top of deck near transom)<br />
Aft ski pylon<br />
Underwater lights<br />
(two where equipped<br />
under swim platform)<br />
Transom stereo remote<br />
(where equipped)<br />
Under-platform ladder<br />
(where equipped)
<strong>MasterCraft</strong><br />
X-1<br />
<strong>MasterCraft</strong> <strong>2012</strong> <strong>Owners</strong> <strong>Manual</strong> • Guide to Individual Models • Page 2-10
Storage space is located:<br />
Under observer’s seat<br />
Under bow seating<br />
Under aft seating<br />
Under aft sun pad<br />
Bilge thru-hull outlet<br />
Ballast thru-hull vent<br />
Bow cleat<br />
Bow light<br />
Bow filler cushion<br />
(where equipped)<br />
Bow cleat<br />
Ballast thru-hull<br />
pump-out<br />
Stereo CD Player<br />
(inside glove box,<br />
where equipped)<br />
Sirius Satellite Radio<br />
(where equipped)<br />
Glove box<br />
Battery<br />
(located in void<br />
beneath observer seat)<br />
Ballast System tank<br />
(where equipped,<br />
beneath observer seat)<br />
Hand-held fire extinguishers<br />
(beneath observer seat)<br />
Amp (where equipped,<br />
beneath observer seat)<br />
iPod interface<br />
(where equipped)<br />
Center drain plug<br />
(under inspection plate)<br />
Ballast thru-hull vent<br />
Ballast system<br />
(under sun pad)<br />
Stern cleat<br />
Swim platform<br />
Transom rail with tow eye<br />
Transom drain plug<br />
(center beneath swim platform)<br />
Adjustable mirror<br />
Circuit breaker panel<br />
(on kick panel<br />
beneath instrument panel)<br />
Instrument panel<br />
(details elsewhere<br />
in this section)<br />
Subwoofer<br />
Fire suppression unit<br />
manual override<br />
Steering wheel<br />
Shift/throttle control<br />
Ski pylon<br />
Fuel tank filler<br />
Automatic fire extinguisher<br />
Engine compartment<br />
Ballast system<br />
(under sun pad)<br />
Ballast thru-hull vent<br />
Stern cleat<br />
Shower wand & switch/<br />
Slick Boot wand & switch<br />
(where equipped,<br />
inside storage compartment)<br />
Stern light receptacle<br />
(if equipped with tower,<br />
the light will be in center<br />
aft of tower)<br />
Engine exhaust<br />
(two beneath<br />
swim platform)<br />
Underwater lights<br />
(two where equipped<br />
under swim platform)<br />
Transom stereo remote<br />
(where equipped)<br />
Boats are also be equipped with towers, which may<br />
include stereo speakers, lights and/or tower-mounted mirror.<br />
Under-platform ladder<br />
(where equipped)<br />
<strong>MasterCraft</strong> <strong>2012</strong> <strong>Owners</strong> <strong>Manual</strong> • Guide to Individual Models • Page 2-11
200V<br />
X-2<br />
<strong>MasterCraft</strong> <strong>2012</strong> <strong>Owners</strong> <strong>Manual</strong> • Guide to Individual Models • Page 2-12
Storage space is located:<br />
Under observer’s seat<br />
Under bow seating<br />
Under aft and wrap-around seating<br />
Under port and starboard sun pads<br />
Bow cleat<br />
Bow filler cushion<br />
(where equipped)<br />
Stereo CD Player<br />
(inside glove box,<br />
where equipped)<br />
Sirius Satellite Radio<br />
(where equipped)<br />
Glove box<br />
Nav/anchor light<br />
Walk-thru seat<br />
(where equipped)<br />
Batteries (including<br />
ON-OFF switch)<br />
Amp (where equipped)<br />
Hand-held fire extinguisher<br />
(beneath observer seat)<br />
Heated observer seat<br />
(where equipped)<br />
Center drain plug<br />
(under inspection plate)<br />
Cooler (under seat)<br />
Cockpit table mount<br />
(where equipped)<br />
Ski pylon<br />
Fuel tank filler<br />
Stern cleat<br />
Ballast thru-hull vent<br />
Surf tabs<br />
(on both sides,<br />
where equipped)<br />
Engine exhaust<br />
Transom rail with tow eye<br />
Transom drain plug<br />
Attitude adjustment plate<br />
Boats may also be equipped with towers, which may<br />
include stereo speakers, lights and/or tower-mounted mirror.<br />
Bow cleat<br />
Ballast tank (beneath floorboard)<br />
Bilge thru-hull outlet<br />
Ballast thru-hull vent<br />
Adjustable mirror<br />
Circuit breaker panel<br />
(on kick panel<br />
beneath<br />
instrument panel)<br />
Instrument panel<br />
(details elsewhere<br />
in this section)<br />
Nav/anchor light<br />
Armrest stereo remote<br />
Steering wheel<br />
Shift/throttle control<br />
Heated seat<br />
(where equipped)<br />
Fire suppression unit<br />
manual override<br />
Subwoofer<br />
Automatic fire extinguisher<br />
Engine compartment<br />
Stern cleat<br />
Bilge thru-hull vent<br />
Shower wand & switch/<br />
Slick Boot wand & switch<br />
(where equipped,<br />
inside compartment)<br />
Nav/anchor light<br />
(if equipped with tower,<br />
the light will be in<br />
center aft of tower)<br />
Underwater lights<br />
(two where equipped)<br />
Transom stereo remote<br />
Under-platform ladder<br />
(where equipped)<br />
<strong>MasterCraft</strong> <strong>2012</strong> <strong>Owners</strong> <strong>Manual</strong> • Guide to Individual Models • Page 2-13
215V<br />
X-15<br />
<strong>MasterCraft</strong> <strong>2012</strong> <strong>Owners</strong> <strong>Manual</strong> • Guide to Individual Models • Page 2-14
Bow light<br />
Bow cleat<br />
Bow filler cushion<br />
(where equipped)<br />
iPod interface<br />
(where equipped)<br />
Stereo CD Player<br />
(inside glove box<br />
where equipped)<br />
Sirius Satellite Radio<br />
(where equipped)<br />
Glove box<br />
Walk-thru seat<br />
(where equipped)<br />
Amp (where equipped)<br />
Hand-held fire extinguisher<br />
(beneath observer seat)<br />
Heated observer seat<br />
(where equipped)<br />
Center drain plug<br />
(under inspection plate)<br />
Cockpit table mount<br />
(where equipped)<br />
Batteries (including<br />
ON-OFF switch)<br />
Ski pylon<br />
Storage space is located:<br />
Under observer’s seat<br />
Under bow seating<br />
Under aft and wrap-around seating<br />
Under port and starboard sun pads<br />
Fuel tank filler<br />
Ballast thru-hull vent<br />
Stern cleat<br />
Engine compartment<br />
exhaust<br />
Surf tabs<br />
(one on each side<br />
below transom)<br />
Transom rail with tow eye<br />
Ballast tank below floor board<br />
Bow cleat<br />
Horn<br />
Bilge thru-hull outlet<br />
Ballast thru-hull vent<br />
Adjustable mirror<br />
Circuit breaker panel<br />
(on kick panel beneath<br />
instrument panel)<br />
Instrument panel<br />
(details elsewhere<br />
in this section)<br />
Steering wheel<br />
Armrest stereo remote<br />
Shift/throttle control<br />
Fire suppression unit<br />
manual override<br />
Heated seat<br />
(where equipped)<br />
Subwoofer<br />
(where equipped)<br />
Cooler (under seat)<br />
Fuel tank filler<br />
Bilge thru-hull vent<br />
Stern cleat<br />
Automatic fire extinguisher<br />
Engine compartment<br />
exhaust<br />
Engine compartment<br />
Shower wand & switch<br />
(where equipped,<br />
inside compartment)<br />
Stern light receptacle<br />
(if equipped with tower,<br />
the light will be in<br />
center aft of tower)<br />
Underwater lights<br />
(two where equipped)<br />
Transom drain plug<br />
Under-platform ladder<br />
(where equipped)<br />
Boats may also be equipped with towers, which may<br />
include stereo speakers, lights and/or tower-mounted mirror.<br />
<strong>MasterCraft</strong> <strong>2012</strong> <strong>Owners</strong> <strong>Manual</strong> • Guide to Individual Models • Page 2-15<br />
Transom stereo remote<br />
(where equipped)<br />
Wake adjustment plate<br />
(where equipped)
225V<br />
X-25<br />
<strong>MasterCraft</strong> <strong>2012</strong> <strong>Owners</strong> <strong>Manual</strong> • Guide to Individual Models • Page 2-16
Bow cleat<br />
Bow filler cushion<br />
(where equipped)<br />
Glove box<br />
Stereo CD Player<br />
(inside glove box,<br />
where equipped)<br />
Sirius Satellite Radio<br />
(where equipped)<br />
Navigation light<br />
Walk-thru seat<br />
(where equipped)<br />
Batteries (under<br />
observer seat)<br />
Hand-held fire extinguisher<br />
(beneath observer seat)<br />
Lifting observer seat<br />
Heated observer seat<br />
(where equipped)<br />
Anchor light<br />
Ballast-thru-hull vent<br />
Batteries ON-OFF switch<br />
(under aft rear port seat)<br />
Fuel tank fill<br />
(standard dual filler)<br />
Engine compartment<br />
Walk-over engine hatch<br />
with removable cushion<br />
Stern cleat<br />
Storage space is located:<br />
Under observer’s seat<br />
Under bow seating<br />
Under aft and wrap-around seating<br />
Under port and starboard sun pads<br />
Shower wand/Slick Boot<br />
wand (where equipped,<br />
inside compartment)<br />
Flip-up back rest for transom<br />
seats (for use while not underway)<br />
Underwater lights<br />
(two, where equipped, under<br />
swim platform)<br />
Engine exhaust<br />
Nav/anchor light (if equipped with<br />
tower, the light will be center aft of<br />
tower)<br />
Transom drain plug<br />
(center, beneath swim platform)<br />
Under-platform ladder<br />
(where equipped)<br />
Boats may also be equipped with towers, which may<br />
include stereo speakers, lights and/or tower-mounted mirror.<br />
Anchor locker<br />
Ballast tank<br />
(located beneath floorboard)<br />
Bow cleat<br />
Horn<br />
Bilge thru-hull outlet<br />
Ballast thru-hull vent<br />
Folding armrest in bow backs<br />
Lifting bow backs<br />
Adjustable mirror<br />
Navigation light<br />
Circuit breaker panel<br />
(on kick panel<br />
beneath instrument panel)<br />
Instrument panel<br />
(details elsewhere<br />
in this section)<br />
Steering wheel<br />
Shift-throttle control<br />
Heated seat<br />
(where equipped)<br />
Center drain plug (under inspection plate)<br />
Fire suppression unit<br />
manual override<br />
Removable seat back<br />
for aft-facing seating<br />
(aft of helm)<br />
Subwoofer<br />
(where equipped)<br />
Cooler<br />
(under seat)<br />
Stainless steel hatch<br />
stay-over cooler<br />
Cockpit table mount<br />
(where equipped)<br />
Ballast thru-hull air vent<br />
Fuel tank filler<br />
Bilge thru-hull<br />
Flip-down cupholder<br />
for center aft seats<br />
Ski pylon<br />
Stern cleat<br />
Wake adjustment plate (under swim<br />
platform, where equipped, two)<br />
Engine exhaust<br />
Swim platform<br />
Transom stereo remote<br />
(where equipped)<br />
Shower switch<br />
Automatic fire extinguisher<br />
<strong>MasterCraft</strong> <strong>2012</strong> <strong>Owners</strong> <strong>Manual</strong> • Guide to Individual Models • Page 2-17
235V<br />
X-35<br />
<strong>MasterCraft</strong> <strong>2012</strong> <strong>Owners</strong> <strong>Manual</strong> • Guide to Individual Models • Page 2-18
Bow cleat<br />
Bow filler cushion<br />
(where equipped)<br />
Stereo CD Player<br />
(inside glove box,<br />
where equipped)<br />
Sirius Satellite Radio<br />
(where equipped)<br />
Amp (where equipped)<br />
iPod interface<br />
(where equipped)<br />
Glove box<br />
Navigation/anchor light<br />
Convertible observer’s seat<br />
Subwoofer<br />
(where equipped)<br />
Hand-held fire extinguisher<br />
(beneath observer seat)<br />
Center drain plug<br />
(under inspection plate)<br />
Cooler (under seat)<br />
Batteries (including<br />
ON-OFF switch)<br />
Ski pylon<br />
Fuel tank filler<br />
Freshwater tank<br />
(in locker, where equipped)<br />
Engine compartment exhaust<br />
(two, on top of port and<br />
starboard deck near transom)<br />
Stern cleat<br />
Surf tabs<br />
(located under swim platform,<br />
where equipped)<br />
Underwater lights<br />
(four, where equipped,<br />
under swim platform)<br />
Transom rail with tow eye<br />
Transom drain plug<br />
(center beneath swim platform)<br />
Storage space is located:<br />
Under observer’s seat<br />
Under bow seating<br />
Under aft and wrap-around seating<br />
Bow cleat<br />
Anchor<br />
Ladder<br />
(where equipped)<br />
Ballast tank<br />
(beneath floorboard)<br />
Adjustable mirror<br />
Nav/anchor light<br />
Circuit breaker panel<br />
(on kick panel<br />
beneath instrument panel)<br />
Instrument panel<br />
(details elsewhere<br />
in this section)<br />
Fire suppression unit<br />
manual override<br />
Steering wheel<br />
Shift/throttle control<br />
Armrest stereo remote<br />
Heated seat<br />
(where equipped)<br />
Upright refrigerator<br />
(under sink,<br />
where equipped)<br />
Sink and shower<br />
(where equipped)<br />
Fuel tank filler<br />
Automatic fire extinguisher<br />
Engine compartment<br />
Engine compartment exhaust<br />
(two, on top of port and<br />
starboard near transom)<br />
Stern cleat<br />
Stern light receptacle<br />
(if equipped with tower,<br />
the light will be in<br />
center aft of tower)<br />
Under-platform ladder<br />
(where equipped)<br />
Wake adjustment plate<br />
(where equipped)<br />
Boats may also be equipped with towers, which may<br />
include stereo speakers, lights and/or tower-mounted mirror.<br />
<strong>MasterCraft</strong> <strong>2012</strong> <strong>Owners</strong> <strong>Manual</strong> • Guide to Individual Models • Page 2-19<br />
Shower wand & switch/<br />
Slick Boot wand & switch<br />
(where equipped,<br />
inside compartment)
245V<br />
X-45<br />
<strong>MasterCraft</strong> <strong>2012</strong> <strong>Owners</strong> <strong>Manual</strong> • Guide to Individual Models • Page 2-20
Bow cleat<br />
Bow filler cushion<br />
(where equipped)<br />
Stereo CD Player<br />
(inside glove box,<br />
where equipped)<br />
Sirius Satellite Radio<br />
(where equipped)<br />
Glove box<br />
Nav/anchor light<br />
iPod interface<br />
(where equipped)<br />
Amp (where equipped)<br />
Hand-held fire extinguisher<br />
(beneath observer seat)<br />
Heated observer seat<br />
(where equipped)<br />
Midship cleat<br />
Walk-thru seat<br />
(where equipped)<br />
Center drain plug (under inspection plate)<br />
Cooler (under seat)<br />
Cockpit table mount<br />
(where equipped)<br />
Batteries (including<br />
ON-OFF switch)<br />
Fuel tank filler<br />
Ballast thru-hull vent<br />
Ski pylon<br />
Storage space is located:<br />
Under observer’s seat<br />
Under bow seating<br />
Under aft and wrap-around seating<br />
Under port and starboard sun pads<br />
Bow cleat<br />
Anchor<br />
Ladder<br />
(where equipped)<br />
Ballast tank<br />
(beneath floorboard)<br />
Bilge thru-hull outlet<br />
Ballast thru-hull vent<br />
Adjustable mirror<br />
Horn<br />
Circuit breaker panel<br />
(on kick panel beneath<br />
instrument panel)<br />
Nav/anchor light<br />
Instrument panel<br />
(details elsewhere<br />
in this section)<br />
Fire suppression unit<br />
manual override<br />
Midship cleat<br />
Steering wheel<br />
Shift/throttle control<br />
Armrest stereo remote<br />
Heated seat<br />
(where equipped)<br />
Subwoofer<br />
Automatic fire extinguisher<br />
Fuel tank filler<br />
Bilge thru-hull vent<br />
Stern cleat<br />
Engine compartment<br />
exhaust (two, on top<br />
of port and starboard<br />
deck near transom)<br />
Surf tabs<br />
(under swim platform,<br />
where equipped)<br />
Sun deck filler cushion<br />
Transom rail with tow eye<br />
Transom drain plug<br />
(center beneath swim platform)<br />
Under-platform ladder<br />
(where equipped)<br />
Underwater lights<br />
(two where equipped)<br />
Boats may also be equipped with towers, which may<br />
include stereo speakers, lights and/or tower-mounted mirror.<br />
<strong>MasterCraft</strong> <strong>2012</strong> <strong>Owners</strong> <strong>Manual</strong> • Guide to Individual Models • Page 2-21<br />
Engine compartment<br />
exhaust (two, on top of<br />
port and starboard<br />
deck near transom)<br />
Stern cleat<br />
Engine compartment<br />
Shower wand & switch/<br />
Slick Boot wand & switch<br />
(where equipped,<br />
inside compartment)<br />
Stern light receptacle<br />
(if equipped with tower,<br />
the light will be in<br />
center aft of tower)<br />
Transom stereo remote<br />
(where equipped)
255V<br />
X-55<br />
<strong>MasterCraft</strong> <strong>2012</strong> <strong>Owners</strong> <strong>Manual</strong> • Guide to Individual Models • Page 2-22
Storage space is located:<br />
Under observer’s seat<br />
Under bow seating<br />
Under aft and wrap-around seating<br />
Under port and starboard sun pads<br />
Anchor<br />
Ladder<br />
(where equipped)<br />
Bow cleat<br />
Bow cleat<br />
Bow filler cushion<br />
(where equipped)<br />
Amp (where equipped)<br />
Head<br />
Hand-held fire extinguisher<br />
(inside head)<br />
iPod interface<br />
(inside head,<br />
where equipped)<br />
Nav/anchor light<br />
Stereo CD Player<br />
(where equipped)<br />
Sirius Satellite Radio<br />
(where equipped)<br />
Glove box<br />
Midship cleat<br />
Center drain plug<br />
(access plate under<br />
carpet mat)<br />
Convertible observer seat<br />
Subwoofer<br />
Batteries (including<br />
ON-OFF switch)<br />
Washdown connection<br />
Cooler (under seat)<br />
Fuel tank filler<br />
Ski pylon<br />
Blower exhaust<br />
(two, on top of port<br />
and starboard deck<br />
near transom)<br />
Stern cleat<br />
Freshwater tank fill<br />
Wake adjustment plate<br />
(under swim platform,<br />
where equipped)<br />
Swim platform<br />
Transom rail with tow eye<br />
Transom drain plug<br />
(center beneath swim platform)<br />
Under-platform ladder<br />
(where equipped)<br />
Boats may also be equipped with towers, which may<br />
include stereo speakers, lights and/or tower-mounted mirror.<br />
<strong>MasterCraft</strong> <strong>2012</strong> <strong>Owners</strong> <strong>Manual</strong> • Guide to Individual Models • Page 2-23<br />
Horn<br />
Ballast tank<br />
(beneath floorboard)<br />
Amp (standard equipment)<br />
Holding tank pump-out<br />
Adjustable mirror<br />
Nav/anchor light<br />
Circuit breaker panel<br />
(on kick panel beneath<br />
instrument panel)<br />
Instrument panel<br />
(details elsewhere<br />
in this section)<br />
Fire suppression unit<br />
manual override<br />
Steering wheel<br />
Midship cleat<br />
Shift/throttle control<br />
Armrest stereo remote<br />
Heated seat<br />
(where equipped)<br />
Sink and shower<br />
(where equipped)<br />
Upright refrigerator<br />
(under sink, where<br />
equipped)<br />
Fuel tank filler<br />
Engine compartment<br />
Stern cleat<br />
Freshwater flush port<br />
(where equipped)<br />
Automatic fire extinguisher<br />
Stern light receptacle<br />
(if equipped with tower,<br />
light will be in center<br />
aft of tower)<br />
Underwater lights<br />
(two, where equipped,<br />
under swim platform)
<strong>MasterCraft</strong> <strong>2012</strong> <strong>Owners</strong> <strong>Manual</strong> • Guide to Individual Models • Page 2-24<br />
X-Star
Storage space is located:<br />
Under observer’s seat<br />
Under bow seating<br />
Under aft and wrap-around seating<br />
Under port and starboard sun pads<br />
Bow cleat<br />
Anchor<br />
Ladder<br />
Bow cleat<br />
Bow filler cushion<br />
(where equipped)<br />
Fuel tank filler<br />
Stereo CD Player<br />
(inside glove box,<br />
where equipped)<br />
Sirius Satellite Radio<br />
(where equipped)<br />
iPod interface<br />
(where equipped)<br />
Glove box<br />
Nav/anchor light<br />
Ballast thru-hull vent<br />
Amp (where equipped)<br />
iPod interface<br />
(where equipped)<br />
Flip-up back rest<br />
Midship cleat<br />
Hand-held fire extinguisher<br />
(amp wall)<br />
Center drain plug<br />
(Under seat,<br />
remove waste basket)<br />
Cockpit table mount<br />
(where equipped)<br />
Batteries (including<br />
ON-OFF switch)<br />
Stern cleat<br />
Transom rail with tow eye<br />
Transom drain plug<br />
(center beneath<br />
swim platform)<br />
Under-platform ladder<br />
(where equipped)<br />
Engine exhaust<br />
Boats are also be equipped with towers, which may<br />
include stereo speakers, lights and/or tower-mounted mirror.<br />
Ballast tank<br />
(beneath floorboard)<br />
Bilge thru-hull outlet<br />
Ballast thru-hull vent<br />
Fuel tank filler<br />
Adjustable mirror<br />
Circuit breaker panel<br />
(on kick panel<br />
behind access panel)<br />
Instrument panel<br />
(details elsewhere<br />
in this section)<br />
Nav/anchor light<br />
Steering wheel<br />
Armrest stereo remote<br />
Shift/throttle control<br />
Fire suppression unit<br />
manual override<br />
Midship cleat<br />
Heated seat<br />
(where equipped)<br />
Subwoofer<br />
Nav/anchor light<br />
Bilge thru-hull pump-out<br />
Engine compartment<br />
Automatic fire extinguisher<br />
Stern cleat<br />
Shower wand & switch/<br />
Slick Boot wand & switch<br />
(where equipped,<br />
inside compartment)<br />
Underwater lights<br />
(two, where equipped<br />
under swim platform)<br />
Transom stereo remote<br />
(where equipped)<br />
<strong>MasterCraft</strong> <strong>2012</strong> <strong>Owners</strong> <strong>Manual</strong> • Guide to Individual Models • Page 2-25
280<br />
X-80<br />
<strong>MasterCraft</strong> <strong>2012</strong> <strong>Owners</strong> <strong>Manual</strong> • Guide to Individual Models • Page 2-26
Bow cleat<br />
Bow filler cushion<br />
(where equipped)<br />
Amp (where equipped)<br />
Stereo CD Player<br />
(where equipped)<br />
Sirius Satellite Radio<br />
(where equipped)<br />
iPod interface<br />
(inside head,<br />
where equipped)<br />
Head<br />
Hand-held<br />
fire extinguishers<br />
(inside head)<br />
Nav/anchor light<br />
Midship cleat<br />
Center drain plug<br />
(access plate<br />
under carpet mat)<br />
Fuel tank filler<br />
Convertible observer seat<br />
Subwoofer<br />
Cockpit table mount<br />
(where equipped)<br />
Batteries (including<br />
ON-OFF switch)<br />
Thru-hull pump-out<br />
Holding tank pump-out<br />
(where equipped)<br />
Stern light receptacle<br />
Stern cleat<br />
Freshwater tank fill<br />
Dual trim tabs<br />
(under swim platform)<br />
Engine exhaust<br />
(two under<br />
swim platform)<br />
Sun deck fill cushion<br />
Engine compartment<br />
Ski pylon<br />
Storage space is located:<br />
Under observer’s seat<br />
Under bow seating<br />
Under aft and wrap-around seating<br />
Under port and starboard sun pads<br />
Anchor<br />
Ladder<br />
(where equipped)<br />
Bow cleat<br />
Ballast tank<br />
(beneath floorboard)<br />
Adjustable mirror<br />
Circuit break panel<br />
(on kick panel<br />
beneath instrument panel)<br />
Nav/anchor light<br />
Instrument panel<br />
(details elsewhere<br />
in this section)<br />
Fire suppression unit<br />
manual override<br />
Midship cleat<br />
Steering wheel<br />
Fuel tank filler<br />
Armrest stereo remote<br />
Shift/throttle control<br />
Thru-hull pump-out<br />
Heated seat<br />
(where equipped)<br />
Freshwater tank, sink<br />
and shower<br />
(where equipped)<br />
Entertainment unit<br />
(under sink,<br />
where equipped)<br />
Refrigerator drawer<br />
(under seating,<br />
where equipped)<br />
Bilge thru-hull outlet<br />
Stern cleat<br />
Automatic fire extinguisher<br />
Swim platform<br />
Transom drain plug<br />
(center beneath<br />
swim platform)<br />
Under-platform ladder<br />
(where equipped)<br />
Boats may also be equipped with towers, which may<br />
include stereo speakers, lights and/or tower-mounted mirror.<br />
<strong>MasterCraft</strong> <strong>2012</strong> <strong>Owners</strong> <strong>Manual</strong> • Guide to Individual Models • Page 2-27<br />
Shower wand & switch(where<br />
equipped)<br />
Underwater lights<br />
(two, where equipped<br />
under swim platform)
Measurements<br />
Overloading a boat may cause it to become unstable and may potentially<br />
result in the boat’s flotation system becoming overwhelmed.<br />
Too much weight can sink any boat! Within this <strong>Manual</strong> and on a label<br />
mounted in each boat, except in the 280 and X-80 models, is the weight<br />
and maximum occupant limit for that specific model. Bear in mind<br />
that total weight limits include additional water ballast, gear brought<br />
onto the boat, additional options and all people. Equally critical is how<br />
weight is distributed throughout the boat. If too much weight is placed<br />
in one area it can have serious impact on maintaining control. Items<br />
and people can also shift positions during operation, potentially causing<br />
a dangerous situation.<br />
235V, X-25<br />
Length of Boat.................................23’5”<br />
Width Amidship................................ 102”<br />
Boat Weight.................... 4,650-4,900 lbs.<br />
Length of Boat w/Platform................25’3”<br />
Towing Length................................ 25’8”<br />
Fuel Capacity............................ 60 gallons<br />
Total Weight Capacity .16 people or 2,400 lbs.<br />
ProStar 190<br />
Length of Boat................................ 19’8”<br />
Width Amidship..................................91”<br />
Boat Weight.............................. 2,620 lbs.<br />
Length of Boat w/Platform............... 21’6”<br />
Towing Length................................... 22”<br />
Towing Width................................... 100”<br />
Fuel Capacity............................ 28 gallons<br />
Total Weight Capacity .7 people or 1,087 lbs.<br />
ProStar 197, X-7<br />
Length of Boat................................ 19’8”<br />
Width Amidship..................................91”<br />
Boat Weight.....................2,800-3,070 lbs.<br />
Length of Boat w/Platform............... 21’6”<br />
Towing Length....................................22’<br />
Towing Width................................... 100”<br />
Fuel Capacity............................ 28 gallons<br />
Total Weight Capacity .7 people or 1,087 lbs.<br />
ProStar 214, X-14<br />
Length of Boat................................ 21’4”<br />
Width Amidship..................................96”<br />
Boat Weight..................... 3,100-3,300 lbs.<br />
Length of Boat w/Platform............... 23’8”<br />
Towing Length................................ 24’4”<br />
Towing Width................................... 100”<br />
Fuel Capacity............................ 40 gallons<br />
Total Weight Capacity .11 people or 1,525 lbs.<br />
ProStar 214V, X-14V<br />
Length of Boat................................ 21’4”<br />
Width Amidship..................................96”<br />
Boat Weight........................3,400 lbs. est.<br />
Length of Boat w/Platform............... 23’8”<br />
Towing Length................................ 24’4”<br />
Towing Width................................... 100”<br />
Fuel Capacity............................ 34 gallons<br />
Total Weight Capacity .11 people or 1,450 lbs.<br />
X-1<br />
Length of Boat................................ 20’7”<br />
Width Amidship..................................90”<br />
Boat Weight.............................. 3,200 lbs.<br />
Length of Boat w/Platform............... 22’6”<br />
Towing Length................................ 22’3”<br />
Towing Width.....................................96”<br />
Fuel Capacity............................ 33 gallons<br />
Total Weight Capacity .11 people or 1,615 lbs.<br />
200V, X-2<br />
Length of Boat....................................20’<br />
Width Amidship..................................96”<br />
Boat Weight..................... 3,350-3,500 lbs.<br />
Length of Boat w/Platform............... 22’1”<br />
Towing Length................................ 22’9”<br />
Towing Width................................... 100”<br />
Fuel Capacity............................ 45 gallons<br />
Total Weight Capacity .11 people or 1,609 lbs.<br />
215V, X-15<br />
Length of Boat................................ 21’8”<br />
Width Amidship................................ 100”<br />
Boat Weight..................... 3,425-3,575 lbs.<br />
Length of Boat w/Platform............... 23’9”<br />
Towing Length................................ 24’1”<br />
Fuel Capacity............................ 45 gallons<br />
Total Weight Capacity .14 people or 2,325 lbs.<br />
225V, X-25<br />
Length of Boat................................ 21’6”<br />
Width Amidship................................ 102”<br />
Boat Weight..................... 4,150-4,370 lbs.<br />
Length of Boat w/Platform.......... 23’7-1/2”<br />
Towing Length......................... 26’10-1/2”<br />
Towing Width... 102” (without guide poles)<br />
Fuel Capacity............................ 53 gallons<br />
Total Weight Capacity .16 people or 2,440 lbs.<br />
245V, X-45<br />
Length of Boat................................ 24’2”<br />
Width Amidship................................ 102”<br />
Boat Weight.....................4,730-4,950 lbs.<br />
Length of Boat w/Platform............... 26’4”<br />
Towing Length................................ 26’1”<br />
Towing Width................................... 100”<br />
Fuel Capacity............................ 85 gallons<br />
Total Weight Capacity .18 people or 2,928 lbs.<br />
255V, X-55<br />
Length of Boat.................................25’5”<br />
Width Amidship................................ 102”<br />
Boat Weight.....................4,850-5,000 lbs.<br />
Length of Boat w/Platform............... 27’8”<br />
Towing Length................................ 31’2”<br />
Fuel Capacity............................ 90 gallons<br />
Total Weight Capacity .18 people or 3,000 lbs.<br />
X-Star<br />
Length of Boat................................ 24’0”<br />
Width Amidship................................ 101”<br />
Boat Weight..............................4,900 lbs.<br />
Length of Boat w/Platform.................. 26’<br />
Towing Length................................... 29’<br />
Towing Width................................... 101”<br />
Fuel Capacity............................ 74 gallons<br />
Total Weight Capacity .14 people or 1,970 lbs.<br />
280, X-80<br />
Length of Boat.................................. 28’3”<br />
Width Amidship................................ 114”<br />
Boat Weight...............6,200 lbs./6,420 lbs.<br />
Length of Boat w/Platform............... 28’3”<br />
Towing Width................................... 114”<br />
Fuel Capacity.......................... 100 gallons<br />
Total Weight Capacity..............................<br />
......... Yacht certified; no capacity rating<br />
<strong>MasterCraft</strong> <strong>2012</strong> <strong>Owners</strong> <strong>Manual</strong> • Guide to Individual Models • Page 2-28
Electronic Instrumentation
Introduction<br />
Proper control of <strong>MasterCraft</strong> boats extends<br />
beyond the steering wheel. Each boat is equipped<br />
with multiple gauges that provide information to<br />
guide the operator in maintaining control. There<br />
are also a variety of switches and buttons within<br />
the boat that control various functions from comfort<br />
to watersports enhancement to safety-related<br />
features. It is important for the boat owner<br />
and/or operator to become familiar with all gauges<br />
and switches in the boat, the functionality of<br />
each, and how to respond to alarms and warnings<br />
that the instrument panel may provide.<br />
In the Guide to Individual Models section of<br />
this Owner’s <strong>Manual</strong> is a listing of the locations<br />
of gauges and switches for the various model<br />
instrument panels. Operators should match up<br />
these listings with the actual panel. However,<br />
<strong>MasterCraft</strong> was undertaking a significant re-design<br />
of the instrument panels and some gauges<br />
and switches may be located in positions other<br />
than those identified in the listing. Prior to boating,<br />
owners and operators should also review<br />
and understand the following section regarding<br />
the boat’s electrical components and operations<br />
through the battery or batteries, as well as the<br />
circuit breaker system. A thorough understanding<br />
of these systems is critical to avoiding potential issues<br />
that may arise during an outing. <strong>MasterCraft</strong><br />
strongly recommends reviewing all instrumentation<br />
with your authorized <strong>MasterCraft</strong> dealer<br />
prior to operating the boat for the first time,<br />
and consulting with the dealer at any time an<br />
operator is uncertain about instrumentation locations<br />
or operations!<br />
The following is an explanation of the functionality<br />
of the gauges and switches that are listed<br />
for the various models.<br />
Variations in Gauges and Switches<br />
Please note that not every gauge or switch explained<br />
in this Owner’s <strong>Manual</strong> is found on every<br />
model. Some equipment is optional and not every<br />
option is available on all models of <strong>MasterCraft</strong><br />
boats.<br />
Also, <strong>MasterCraft</strong> utilizes a variety of gauge<br />
and switch styles from the gauges or switches<br />
pictured in this <strong>Owners</strong> <strong>Manual</strong>. These differences<br />
between the various styles of gauges and<br />
switches are not in functionality. If a boat is<br />
equipped with a gauge or switch that is labeled<br />
as described above, it will operate in the same<br />
fashion as the description even if its appearance<br />
is different, as the appearance changes periodically.<br />
If the owner and/or operators are uncertain<br />
about a gauge’s or switch’s purpose, do not operate<br />
the boat until consulting with an authorized<br />
<strong>MasterCraft</strong> dealer. Some gauges monitor information<br />
that is critical to safe and long-term use of<br />
the boat. Some switches can affect maneuverability,<br />
as well as operations that impact long-term<br />
use of the boat.<br />
Controls Common<br />
to Most Models<br />
<strong>Manual</strong> and Automatic<br />
Bilge Pump Switch<br />
(All Models)<br />
The bilge pumps on all V-drive models will be in the automatic<br />
mode when the ignition key is turned ON. Some<br />
models may have two (2) switches, one for the forward<br />
bilge and one for the aft. In these instances, the switches<br />
will be marked. The manual and automatic bilge discharge<br />
system is never completely off. When in the automatic (default)<br />
position, a sensor alerts the system to discharge water<br />
from the bilge area. Boat operators are advised to leave the switch in the automatic position,<br />
unless there appears to be excess water in the bilge. In that event, the bilge pump can<br />
be manually activated by turning the bilge pump switch to the manual ON position. Return<br />
the switch to the automatic position when finished emptying the bilge. Leaving the switch in<br />
manual mode can result in damage to the pump and may not be covered by warranty!<br />
Blower Switch<br />
(All Models)<br />
A two-position switch activates the engine box ventilation<br />
blower. Push the top half of the switch to turn the blower<br />
ON.<br />
Note: The blower must operate for a minimum of four (4)<br />
minutes before starting the engine at any time. The blower<br />
must also be operated during idle and slow-speed running,<br />
but is not necessary during cruising speed.<br />
To prevent a possible explosion, operate the blower<br />
for at least four (4) minutes before starting the engine and always when at idle or<br />
slow-running speed. Explosive gasoline and/or battery fumes may be present in<br />
the engine compartment. Failure to operate the blower as instructed may cause<br />
improper ventilation of the boat engine and bilge areas, and fuel vapors can accumulate<br />
in this area, causing a fire or explosion which may result in serious injury<br />
or death!<br />
Circuit Breakers<br />
(All Models)<br />
All major boat circuits are protected from shorting and overload by re-settable circuit breakers.<br />
If a problem develops with one of the following circuits, switch OFF the circuit and wait<br />
for approximately one (1) minute. Then fully push the appropriate breaker button and switch<br />
ON the circuit. If the circuit continues to trip, there is a problem somewhere that must be<br />
attended to immediately. See your authorized <strong>MasterCraft</strong> service department to resolve<br />
this matter.<br />
<strong>MasterCraft</strong> <strong>2012</strong> <strong>Owners</strong> <strong>Manual</strong> • Guide to Individual Models • Page 2-30
The location of the main circuit<br />
breaker board is under the dash panel.<br />
In some models, there is an additional<br />
breaker panel to assist with the accessory<br />
load, and where equipped is located<br />
near the battery box. There may<br />
also be a waterproof fuse for the stereo<br />
amplifier, where equipped. If the boat’s<br />
accessories are malfunctioning, check<br />
and then re-set breakers as necessary.<br />
The engines are also equipped with<br />
breaker systems. The main 35A circuit<br />
breaker protects the engine electrical<br />
system and components from overload.<br />
If the engine will not turn over with the<br />
battery switch in the ON position, locate<br />
the red breaker re-set button (labeled “35”) in the engine. There will be an audible<br />
click. Try again to start the engine. If the breaker trips again, the engine requires attention.<br />
Immediately take your boat to your authorized <strong>MasterCraft</strong> service department.<br />
In addition to the 35A circuit breaker, the engines are equipped with additional component<br />
overload protection, including a 15A ATO fuse for the fuel pump, a 15A ATO fuse<br />
for the injectors and a 15A ATO fuse for the ECM unit.<br />
If you suspect that any of these fuses may not be operating as designed, you should<br />
take your boat to your authorized <strong>MasterCraft</strong> service department for inspection and<br />
repair.<br />
If during maintenance or inspection it becomes necessary to remove or re-position<br />
any of the engine’s wiring or wire harness(es) verify that the wiring has been returned<br />
to its original position and that all harnesses are routed correctly before attempting to<br />
use the boat again. If a wiring clip or retainer breaks, replace it immediately. Wiring is<br />
specifically routed to eliminate problems related to engine heat and spray or immersion<br />
in liquids. Electrical problems may result if wiring is moved from its original position!<br />
Dual Battery Operation Switch<br />
(All V Models and Similar X Series, X-Star)<br />
All equipped models except 280 and X-80: For normal operation the battery switch should<br />
be placed in the ON position. This allows the engine and all accessories to receive power.<br />
The engine will recharge both batteries with the switch ON. For transportation and storage,<br />
the battery switch should be placed in the OFF position to allow both batteries to<br />
be isolated from all circuits.<br />
Note: The switch knob may be removed when it is in the OFF position. This is a security<br />
feature.<br />
If the engine will not start because the battery is discharged, the engine may be<br />
started from the house battery by placing the switch in the COMBINE BATTERIES position.<br />
After the engine is started, the switch should be returned to the ON position and<br />
NOT allowed to remain in the COMBINE Batteries mode.<br />
MariStar 280 and X-80: For normal operation the port and starboard<br />
battery switches should be placed in the ON position. The COMBINE<br />
BATTERIES switch should remain OFF. The engine and all accessories<br />
will receive power.<br />
Note: The port battery is a dedicated start battery for the port engine<br />
and the starboard battery provides starting current of the starboard<br />
engine while also providing power for accessory circuits. For<br />
transportation and storage, all battery switches should be placed in<br />
the OFF position to isolate both batteries from all circuits.<br />
NOTE: The switch knob may be removed when it is in the OFF position.<br />
This is a security feature.<br />
If either battery becomes discharged, start the engine with the remaining<br />
charged battery and THEN set the COMBINE BATTERIES<br />
switch to ON. The remaining engine may then be started. Return<br />
the COMBINE BATTERIES switch to OFF. The COMBINE BATTERIES<br />
switch should NOT be left ON.<br />
Engine Emergency<br />
Safety Stop Switch<br />
(All Models)<br />
The engine emergency safety stop switch, which<br />
is attached to the lanyard, is an ignition cut-off switch<br />
designed to stop the engine in the event the operator is<br />
thrown or moves too far away from the helm.<br />
The lanyard is equipped with a hook on one end that<br />
should be attached to your clothing or PFD, and the opposite<br />
end has a slide that fits over the ignition switch.<br />
Be sure that the slide is firmly attached to the ignition<br />
switch before starting.<br />
The ignition switch is located near the throttle control<br />
box, the armrest or on the instrument panel. If the<br />
slide is left off or is loose, the engine will crank but will<br />
not start. Operators should NEVER attempt to override<br />
this safety system!<br />
The safety switch lanyard must be attached to<br />
the operator whenever the engine is running.<br />
Failure to do so may result in death or serious<br />
injury!<br />
Horn<br />
(All Models)<br />
The horn is sounded<br />
by means of a button<br />
on the instrument panel.<br />
Pressing the button<br />
emits a loud and recognizable<br />
noise.<br />
<strong>MasterCraft</strong> <strong>2012</strong> <strong>Owners</strong> <strong>Manual</strong> • Guide to Individual Models • Page 2-31
Ignition Key Slot<br />
(ProStar 190, ProStar 197, X-7, X-1)<br />
<strong>MasterCraft</strong> boats come equipped<br />
with an ignition key, which must be inserted<br />
in the ignition key slot and used<br />
to activate the boat’s electrical system.<br />
This, in turn, will allow the boat to be<br />
started and operated.<br />
The key will be in one of four (4) positions:<br />
• OFF<br />
• Accessory (including running the<br />
stereo without the engine running)<br />
• ON (engine is running)<br />
• Start (turn the key to engage the<br />
engine starter, then release to allow<br />
the key to automatically return to<br />
the ON position)<br />
Never start the engine without having<br />
first run the blower for at least four<br />
(4) minutes.<br />
Never leave the ignition switch in<br />
the ON position without the engine<br />
running, as this will cause the battery to<br />
discharge.<br />
Ignition START-STOP<br />
(All Models except Prostars 190, 197, X-7 and X-1)<br />
All models so equipped will have a removable ignition<br />
key. Its purpose is for safety and security. The<br />
key should be inserted prior to starting an outing, and<br />
removed at the conclusion. This is intended to prevent<br />
theft or unapproved use of the boat.<br />
The process for starting the boat is:<br />
• Insert the key and turn. This turns ON the electrical<br />
system and prompts the battery(ies) to provide power.<br />
• Turn the blower ON and allow it to run for at least<br />
four (4) minutes before starting the engine.<br />
• Momentarily press the ENGINE START-STOP button<br />
immediately above the key.<br />
• Momentarily press the ENGINE START-STOP button<br />
to turn OFF the engine. NOTE: This button only affects<br />
the engine. The electrical system will continue to<br />
operate as long as the key is turned. If the key is left<br />
turned on after the outing, it will eventually run down<br />
the battery(ies) and the engine and all systems will not<br />
start as a result.<br />
• At the conclusion of the outing, turn the key off<br />
and remove from the key slot. Doing so will ensure<br />
that you have turned OFF the electrical system, and<br />
prevent others from starting or running the boat.<br />
GPS and<br />
Chartplotter<br />
All GPS and chartplotter<br />
systems come with extensive<br />
instruction manuals. Please<br />
refer to these manuals or the<br />
manufacturer’s website for details<br />
and guidance.<br />
Navigation/Anchor<br />
Lights Switch<br />
(All Models)<br />
A three-position switch serves to activate exterior lighting. Turning the switch<br />
in the up position will activate bow and stern lights, the middle position is OFF,<br />
and the down position is for stern-only lighting.<br />
<strong>MasterCraft</strong> <strong>2012</strong> <strong>Owners</strong> <strong>Manual</strong> • Guide to Individual Models • Page 2-32
This section discusses the performance controls. On some models,<br />
information is provided via traditional gauges and switches. On many<br />
models, however, this information (as well as some convenience and<br />
support data described elsewhere in this owner’s manual) is given<br />
through a video display gauge. Several different video display gauges<br />
are mounted in the boats, depending on the model. Descriptions of<br />
the functionality of those gauges follows in the next section. Please<br />
note that some refinement of these gauges was in progress at press<br />
time. Therefore, the gauge in your boat may have some minor variances<br />
to what is described in this manual. <strong>MasterCraft</strong> strongly encourages<br />
you to review ALL instrumentation with your authorized<br />
<strong>MasterCraft</strong> dealer prior to operating the boat for the first time, and<br />
at any time during ownership of the boat if you are uncertain as to<br />
proper and applicable functionality.<br />
Performance<br />
Controls<br />
Battery Charger<br />
(Where Equipped)<br />
As a convenience, a battery charger is offered as an option. The charger is<br />
designed to recharge the batteries and also to extend the battery’s life in applications<br />
where it is stored for long periods of time. These are three-stage electronic<br />
chargers, completely automatic, lightweight, and silent. Unlike most automotive<br />
chargers, this charger will not boil off the electrolytes in properly installed and<br />
maintained batteries. The red and green LED lights, which are mounted on the<br />
charger face, indicate when the unit is recharging and maintaining the batteries.<br />
Before charging a battery, do not operate the charger if the cables or an<br />
LED is damaged. Be sure that all accessories are OFF. If the battery or batteries<br />
must be removed from the product, always remove the grounded terminal<br />
from the battery first. Be sure that the area around the battery is well ventilated<br />
while the battery is being charged. Also ensure that the battery terminals<br />
are free of corrosion. (See the Scheduled Maintenance section of this Owner’s<br />
<strong>Manual</strong> for additional battery information.)<br />
If the battery charger ever appears to be malfunctioning, see your authorized<br />
<strong>MasterCraft</strong> dealer for assistance.<br />
When charging, batteries generate small amounts of dangerous hydrogen<br />
gas. This gas is highly explosive. Keep all sparks, flames and<br />
smoking well away from the area. Failure to follow instructions when<br />
charging a battery may cause an electrical charge or even an explosion<br />
of the battery, which could result in death or serious injury.<br />
Cruise Control Gauge<br />
(Where Equipped)<br />
Boats equipped with cruise control systems come with short manuals that describe how to operate and<br />
maintain the cruise control system. Refer to the appropriate manual prior to operation of the system.<br />
Boats featuring the “simple” cruise system function the same as an automobile with an ON/OFF switch<br />
and +/- to increase or decrease speed. For boats equipped with dual engines, see also the Engine Synchronizing<br />
Switch instructions of this section. The engine synchronizing switch must be ON for the cruise<br />
to work on dual-engine boats. Also review the operating instructions from the cruise control provider.<br />
<strong>MasterCraft</strong> <strong>2012</strong> <strong>Owners</strong> <strong>Manual</strong> • Guide to Individual Models • Page 2-33
Engine Oil<br />
Pressure Gauge<br />
(All Models)<br />
The engine oil pressure gauge indicates<br />
the pressure of the lubricating oil inside<br />
the engine. The average pressure ranges<br />
are between six (6) pounds per square inch<br />
(PSI) at 1000 RPM to 40 PSI or more at<br />
cruise-range speeds. A reading of pressure<br />
below 5 PSI at 1000 RPM may be caused<br />
by a low oil level or other potentially serious problems<br />
that result in low oil pressure. If you experience<br />
low oil pressure, stop your engine immediately and<br />
check your oil level before operating again.<br />
Do not continue to run the engine if the oil<br />
pressure is low. If you do, the engine may become<br />
so hot that it, or surrounding components,<br />
could catch fire. You or others could<br />
be burned and the boat seriously damaged.<br />
Check your oil level and add an appropriate<br />
amount of approved motor oil before operating<br />
again or have your boat serviced by your<br />
local authorized dealer’s service department.<br />
Note that damage to your engine from inappropriate<br />
oil levels can be costly to repair.<br />
Such damage is not covered by your warranty.<br />
Port engine throttle<br />
Starboard engine throttle<br />
Engine Synchronizing Switch<br />
(MariStar 280 and X-80)<br />
This two-position switch allows the engines to operate in synchronization. Do not engage<br />
the switch unless the engines are running (for safety’s sake)! Prior to engaging<br />
the synchronizing switch, ensure that you are in a large body of water. Avoid a tight<br />
cove or narrow river, and docks, dams or other objects that may protrude into the body<br />
of water. Be certain that there is a minimum of other vessels or traffic as you will need<br />
room to perform this procedure.<br />
Engaging the engine synchronization functionality requires practice to master.<br />
Because the boat will be in gear and will move during the process, even after<br />
mastering the maneuver boat operators should synchronize engines only on<br />
bodies of water of sufficient size to accomplish the maneuver without making<br />
contact with other vessels or with inanimate objects, which could cause serious<br />
bodily injury or significant damage to the boat.<br />
The port engine will have an RPM blip after the Sync switch is activated and<br />
the throttle is moved to wide-open throttle on the MariStar 280 or X-80. If the<br />
engine actually accelerates to wide-open throttle, then the Sync function did not<br />
take control of the port engine. In this instance, reduce the speed and return to<br />
Step 1.<br />
The engines can be run at different levels of throttle BUT NOT WHEN UTILIZING<br />
THE Sync FUNCTION!<br />
NOTE: DO NOT engage the Engine Synchronizing Switch when loading or<br />
unloading the boat from a trailer OR when docking. These maneuvers require a<br />
sensitive touch.<br />
The MariStar 280 is equipped with a four-lever control. (See image.)<br />
Port engine shifter<br />
Starboard engine shifter<br />
Step 1:<br />
Step 2:<br />
Step 3:<br />
Start both engines. While at idle and in neutral (shifter not moved),<br />
press up on the Sync switch to turn the synchronization function<br />
ON.<br />
Push the port throttle to wide-open throttle. There will be a slight<br />
rise in RPMs to the engine (but the boat should not move forward<br />
as the shifting and throttle response are controlled with separate<br />
levers). With the Sync switch ON, however, the engine will very<br />
quickly return to idle.<br />
Using the starboard throttle, run the boat up to the desired speed.<br />
At this point, the system will begin functioning with both engines in<br />
sync. The starboard throttle will control the speed for both engines as<br />
long as the sync switch is ON.<br />
MariStar 280, X-80<br />
Note: Before disengaging the sync functionality, move ALL levers back<br />
to idle, beginning with the starboard throttle and shifter, and then the port<br />
throttle and shifter. When the boat returns to idle, the engine synchronizing<br />
switch can be turned off. Failure to follow this procedure may result<br />
in erratic handling of the boat, which may be beyond the boat operator’s<br />
ability to handle.<br />
<strong>MasterCraft</strong> <strong>2012</strong> <strong>Owners</strong> <strong>Manual</strong> • Guide to Individual Models • Page 2-34
Fuel Gauge<br />
(All Models)<br />
Fuel gauge readings are only approximate. This gauge is activated<br />
with the ignition switch. The rocking motion of the boat<br />
during normal operation will cause the fuel gauge to fluctuate.<br />
For a more accurate reading, make sure that the boat is level<br />
and there is little or no motion present.<br />
<strong>MasterCraft</strong> recommends that operators do not run the<br />
boat below a quarter of a tank, except as necessary to return to<br />
shore, and not until the boat has been operated enough times<br />
to develop an understanding of how the fuel gauge readings<br />
relate to the visual inspection of fuel left in the tank. Extending<br />
fuel usage beyond the known capability of the boat may<br />
cause the boat to run out of fuel and may leave you stranded<br />
off-shore.<br />
Although it may be possible to see fuel in the bottom of<br />
the fuel tank, you still may not be able to operate the boat.<br />
The fuel pick-up system was designed to avoid introducing the<br />
small amount of water and debris that unavoidably accumulate<br />
in the bottom of the tank. Rather than relying on visual<br />
inspection, you should pay attention to the fuel gauge.<br />
Further, it is not recommended to allow the fuel to fall<br />
below one-quarter of a tank full at any time as it may result<br />
in damage to the fueling system. (See the Fueling section of<br />
this Owner’s <strong>Manual</strong>.)<br />
Allowing the fuel level in the fuel tank to fall below<br />
one-quarter of a tank full may affect the reliability of<br />
the fuel pump or result in damage to the fuel pump,<br />
which is not covered under warranty.<br />
Low Voltage Battery Alarm<br />
(All Models)<br />
In the event that the stereo has been functioning when the<br />
boat is not ON and running, the voltage drain on the battery<br />
(or batteries) may result in difficulties with re-starting the boat.<br />
It may also cause intermittent erroneous or fluctuating gauge<br />
readings. When the voltage level reaches 10.5 volts or below,<br />
the system will shut off the stereo and sound the alarm. Generally,<br />
the appropriate action is to leave the stereo OFF, as well<br />
as disengaging any other peripheral electrical components,<br />
and keying ON the engine. Running the engine at a moderate<br />
rate for several minutes without the additional drain of stereo<br />
and unnecessary electrical equipment will allow the alternator<br />
to recharge the battery or batteries, unless the battery(ies)<br />
have been used to the extent of their life span.<br />
Other Alarms<br />
(All Models)<br />
Sensors check the oil pressure, engine and transmission<br />
temperatures. If the system detects readings<br />
outside the acceptable range, the system shuts off<br />
the stereo and sounds the alarm for a period of one<br />
(1) minute. This signals the need to return to shore as<br />
soon as possible and seek assistance from your authorized<br />
<strong>MasterCraft</strong> dealer’s service department to diagnose<br />
and, if necessary, repair the problem.<br />
Hydraulic Steering System<br />
Some models offer a hydraulic steering system as an option. At any time, if<br />
the steering is sluggish, difficult, or shows any signs of not working smoothly<br />
and properly, the boat should immediately be taken to an authorized Master-<br />
Craft dealer for attention. The hydraulic steering system is not accessible to the<br />
consumer for repair or maintenance, all of which should be done by an authorized<br />
<strong>MasterCraft</strong> dealer.<br />
Shift/Throttle Control<br />
(All Models)<br />
With the exception of the MariStar 280 and X-80, a one-hand, single-lever<br />
control operates as both a gear shifter and a throttle. The lever automatically<br />
locks in the neutral position (straight up and down) for safety. The lever can be<br />
moved from neutral only by raising the lifter under the ball knob. Shifting is accomplished<br />
by moving the lever forward or backward. Center (straight up) is neutral.<br />
Moving the lever forward engages the running gear; moving it back from<br />
center puts the drive train into reverse.<br />
Never attempt to shift without the engine running!<br />
During regular warm-up of the engine, it is possible to temporarily increase the<br />
engine RPMs without moving the boat. To accomplish this, push in the button located<br />
at the bottom of the shift/throttle lever with one hand and pull up the “umbrella”<br />
(aluminum surround below the top of the knob). Move the lever to desired<br />
position and then simultaneously release the button and umbrella. The engine will<br />
run with increased RPMs and can be increased or decreased by moving the lever.<br />
Returning the handle to the neutral position (as shown in illustration above) will<br />
bring the system back to neutral and reduce the engine RPMs to pre-set levels.<br />
This function should be done sparingly. Over-revving the engine for any extended<br />
period can cause undue wear and tear on the engine. Avoid advancing to<br />
wide-open-throttle and holding the RPMs at that level.<br />
In the MariStar 280 and X-80 the boat is equipped with a four-lever control.<br />
The port side lever closest to the driver is the port engine shifter, which allows<br />
the boat to move forward when shifted forward, and backward when shifted aft.<br />
The next lever is the starboard engine shifter and performs the same function. If<br />
both engines are running and the boat is moving, the shifters should be shifted<br />
280, X-80 Other models<br />
Carbon monoxide is emitted from the engine’s exhaust<br />
system. Never run the engine without proper ventilation.<br />
Do not run the engine in a confined space or where<br />
fumes may be trapped. Do not run the engine when the<br />
boat is stationary in calm wind conditions.<br />
<strong>MasterCraft</strong> <strong>2012</strong> <strong>Owners</strong> <strong>Manual</strong> • Guide to Individual Models • Page 2-35
together and in the same direction. Doing otherwise can damage the system.<br />
The next middle lever is the port engine throttle, which allows the boat to feed fuel into the engine and operate in motion. Pushing forward on<br />
it will signal the system that fuel should be sent to the port engine. The engines can be run at different levels of throttle.<br />
This system allows greater maneuverability in docking, as well as when the boat is in operation. However, it requires more practice and<br />
skill in order to avoid potential damage to the boat. See Engine Synchronizing Switch in this section of the Owner’s <strong>Manual</strong> for more<br />
details.<br />
During regular warm-up of the engine, it is possible to temporarily increase the engine RPMs without moving the boat. To accomplish this, set<br />
the shifter to neutral and adjust the throttle as desired. The engine will run with increased RPMs and can be increased or decreased by moving the<br />
lever. Return the throttle to idle before shifting to Forward or Reverse.<br />
This function should be done sparingly. Over-revving the engine for any extended period can cause undue wear and tear on the engine. Avoid<br />
advancing to wide-open-throttle and holding the RPMs at that level.<br />
Speedometer<br />
(All Models)<br />
The speedometer indicates<br />
the forward speed of the boat in<br />
miles per hour (unless the boat<br />
is equipped with a speedometer<br />
that measures kilometers per hour,<br />
which is available in the optional<br />
European package.)<br />
To calibrate the speedometer, you need an accurately<br />
measured course of 850 feet and a certified<br />
stopwatch, which is accurate to within one-hundredths<br />
(.01) of a second. (This can be done with GPS, when<br />
equipped.) To calibrate to A.W.S.A. official tournament<br />
rules:<br />
• Approach the course at 36 miles per hour (MPH)<br />
as indicated on the speedometer. Hold the speed<br />
steady and have an observer check the course time<br />
with a stopwatch.<br />
• If the course time is between 15.88 and 16.28 seconds,<br />
no adjustments are necessary.<br />
• If the course time is not within that tolerance range,<br />
press up or down on the calibration rocker switch to<br />
adjust the speedometer’s speed interpretation.<br />
Tachometer<br />
(All Models)<br />
On boats not equipped with a multi-function gauge,<br />
a separate tachometer gauge is found. The tachometer<br />
indicates the<br />
engine speed in<br />
crankshaft revolutions<br />
per minute<br />
(RPM).<br />
Temperature<br />
Gauge<br />
(All Models)<br />
The temperature gauge indicates the<br />
water temperature inside the engine’s<br />
cooling system as measured in degrees<br />
Fahrenheit. The normal operating temperature<br />
will range from 140 degrees<br />
Fahrenheit to 190 degrees Fahrenheit.<br />
Engines with electronic fuel injection also have a control circuit inside the engine control<br />
module that will cause the engine to run at reduced speeds if the module senses<br />
that the engine is running too hot. If you notice that your speed has reduced during<br />
normal operation, but you have not manually slowed the throttle, monitor your temperature<br />
gauge. If the gauge indicates excessive temperatures during operation, slow<br />
down immediately and turn off the engine. This indicates an engine problem that<br />
needs to be checked by the dealer!<br />
Continuing to operate the boat while the temperature is above normal operating<br />
parameters may cause serious damage to your engine. Damage to your<br />
engine resulting from operating the engine in an overheated condition can be<br />
costly to repair. Such damage is not covered by your warranty!<br />
Voltmeter<br />
(All Models)<br />
The voltmeter registers the electrical activity<br />
necessary to operate your boat. If the battery (or<br />
batteries, in boat models requiring two [2]) is low<br />
or non-functional, or if various electrical items on<br />
the boat, such as stereo equipment, are draining<br />
the battery(ies) and impacting the boat’s ability<br />
to function properly, the voltmeter will likely<br />
be the first gauge to indicate that you have an<br />
electrical problem. The voltmeter cannot tell you<br />
which battery is draining on boats with two (2)<br />
batteries, but rather functions as a general alarm<br />
to alert boaters regarding potential issues. On<br />
boats equipped with two (2) batteries, the alarm<br />
indicates severe drain on the engine starting battery. To determine which battery is the<br />
engine starting battery, read the markings on the battery cables.<br />
<strong>MasterCraft</strong> <strong>2012</strong> <strong>Owners</strong> <strong>Manual</strong> • Guide to Individual Models • Page 2-36
This section discusses the video display gauges. On some models,<br />
information is provided via traditional gauges and switches. On many<br />
models, however, this information (as well as some convenience and<br />
support data described elsewhere in this owner’s manual) is given<br />
through a video display gauge. Several different video display gauges<br />
are mounted in the boats, depending on the model. General description<br />
of the functionality of the performance controls appeared in the<br />
previous section. Please note that some refinement of these gauges<br />
was in progress at press time. Therefore, the gauge in your boat may<br />
have some minor variances to what is described in this manual. <strong>MasterCraft</strong><br />
strongly encourages you to review ALL instrumentation with<br />
your authorized <strong>MasterCraft</strong> dealer prior to operating the boat for the<br />
first time, and at any time during ownership of the boat if you are uncertain<br />
as to proper and applicable functionality.<br />
Video<br />
Display<br />
Gauges<br />
The video display gauges are programmed to perform multiple scans, read-outs and readings for the operator. Because they are more<br />
complex than a single-action gauge, it is important for the boat operator to carefully review the functionality prior to first-time operation. The<br />
display information can be critical to safe and enjoyable operation of the boat!<br />
The basic display sequence is:<br />
ProStar 190, ProStar 197, X-7, X-1<br />
(Standard)<br />
This video display in this gauge is the alpha-numeric data provided in lower half of the gauge,<br />
through which the boat operator can toggle for performance and convenience information. Navigating<br />
the LCD displays is simple and intuitive. The various screens may be accessed in a sequential order by<br />
repeatedly pressing the external display button UP/DOWN to scroll through the available screens in a<br />
continuous loop. Note that the depth, air temperature and water temperature screens are hidden<br />
when no sensor is connected.<br />
Depth<br />
Water (Lake) Temperature<br />
Speed<br />
Ambient (Air Temperature<br />
Hours<br />
RPM<br />
Additional Functionality:<br />
Setting the Shallow Alarm<br />
• The Shallow Alarm Default is<br />
set to OFF (0.0 ft/m).<br />
• Scroll to the Depth display.<br />
• Hold the external display<br />
button down for three (3)<br />
seconds, or until the alarm set<br />
<strong>MasterCraft</strong> <strong>2012</strong> <strong>Owners</strong> <strong>Manual</strong> • Guide to Individual Models • Page 2-37
point is displayed and flashing, which indicates that the system has<br />
entered the set point adjustment mode.<br />
• Adjust the set point by pressing and/or holding the external display<br />
button UP/DOWN until the desired set point is displayed.<br />
• If no changes have been made within three (3) seconds, the system<br />
will save the set point and return to normal operation.<br />
Calibration Procedure<br />
• Scroll to the Speed display.<br />
• Hold the external display button<br />
down for three (3) seconds.<br />
The system will enter<br />
the speedometer calibration<br />
mode as indicated by the flashing<br />
display.<br />
• Press and/or hold the external display button UP/DOWN to adjust<br />
the displayed value until it agrees with the speedometer.<br />
• If no changes have been made within three (3) seconds, the system<br />
will return to normal operation.<br />
Procedure for Changing Units<br />
• Scroll to the engine Hourmeter<br />
display.<br />
• Hold the external display<br />
button for three (3) seconds.<br />
The display will indicate the<br />
units selected as: “ENG” for English units or “MET” for Metric units.<br />
• Pressing the external display button UP/DOWN will toggle the display<br />
between English and Metric.<br />
• If no changes have been made within three (3) seconds, the system<br />
will return to normal operations.<br />
(Anytime Metric Units are selected, the “METRIC” icon will be illuminated.)<br />
Diagnostic Procedure<br />
• Scroll to the Tachometer display.<br />
• Hold the external display button<br />
down for three (3) seconds,<br />
the system will enter<br />
the diagnostic mode. All the segments in the speedometer LCD illuminate.<br />
The buzzer activates for one (1) second as the test begins.<br />
The pointer in each gauge performs the following exercise: Reset<br />
for two (2) seconds; moves to mid-scale for one (1) second; moves<br />
to full-scale for one (1) second. This cycle is repeated twice. Then<br />
the display returns to normal operation.<br />
Easy Cruise<br />
• Enable the Easy Cruise by switching the Cruise button on the dash.<br />
• After the button is turned ON, a Speed icon appears in the upper<br />
right of the LCD.<br />
• An “S” (Set Point) appears at the far left of the LCD.<br />
• The current set point appears on the lower right of the LCD.<br />
• The set point can be adjusted by toggling the UP/DOWN buttons<br />
on the dash.<br />
• Drive the boat to the set point. The set point will flash if more throttle<br />
is required.<br />
SET POINT<br />
INDICATOR<br />
CRUISE “ON” ICON<br />
SET POINT VALUE<br />
(will flash if more throttle is needed)<br />
280, X-80<br />
(Standard)<br />
Switch Pad<br />
Screen Navigation<br />
Use the LEFT and RIGHT arrow buttons to scroll through the main screens.<br />
<strong>MasterCraft</strong> <strong>2012</strong> <strong>Owners</strong> <strong>Manual</strong> • Guide to Individual Models • Page 2-38
Use the UP and DOWN arrow buttons to navigate to the secondary screens from the main screens.<br />
Quicklist Screen<br />
The Quicklist screen displays the current rider’s settings on the left side of the screen and a list of Quicklist Actions on the right. The active portion<br />
of the screen is highlighted with a large red frame. Arrow UP or DOWN to highlight any action in the list with a solid red box and press ENTER<br />
to select that action.<br />
The ADD and EDIT actions are very similar. ADD creates a new rider in the LIST and EDIT allows changes to be made to an existing rider in the<br />
LIST.<br />
To ADD a new rider, arrow down to ADD and press ENTER to activate the ADD mode. The large red frame will move to the left side of the<br />
screen and a blank rider profile is active. Arrow UP or DOWN to move the smaller red highlight box over the rider setting you wish to change and<br />
press ENTER to activate the item. The large red frame will move to the active right side of the screen. Use the PLUS and MINUS buttons to change<br />
the value of the item, then press ENTER to complete the change and bounce back to the left side of the screen. Repeat the process as needed for<br />
each item you wish to edit.<br />
To EDIT an existing rider, you must first select that rider from the list if not already active. Arrow DOWN to highlight LIST and press ENTER. Arrow UP<br />
or DOWN to the desired rider and press ENTER. This rider is now active. Arrow UP to highlight EDIT and press ENTER to activate the EDIT mode. Change<br />
the rider’s settings just as you did when adding a new rider. All changes are automatically saved to the rider’s profile.<br />
EDIT<br />
RIDER NAME can be up to 14<br />
characters. If the name is less<br />
than 14, keep pushing ENTER<br />
until the highlight box bounces<br />
back to the left side of the screen.<br />
<strong>MasterCraft</strong> <strong>2012</strong> <strong>Owners</strong> <strong>Manual</strong> • Guide to Individual Models • Page 2-39
ADD<br />
IMPORT will take any exported files off the USB Flash Drive into the<br />
system. This function will overwrite any riders with the same name.<br />
SAVE CURRENT will create a rider that uses all the current boat settings.<br />
The boat settings can be ballast levels, trim settings, and speed<br />
settings. The rider name may be edited if desired.<br />
RESET TO DEFAULT will erase the RIDER LIST and replace it with the<br />
factory defaults.<br />
DELETE will remove the displayed rider.<br />
TRIM & BALLAST SCREEN<br />
The Trim and Ballast screen displays tab position and ballast tank<br />
levels. The information is Plug ’n Play; therefore, if a tank or trim sensor<br />
is not present, the date will be automatically removed.<br />
EXPORT will save the current rider to the USB Flash Drive.<br />
DIGITAL DATA SCREEN<br />
LIST will show all current riders that have been created in the system.<br />
<strong>MasterCraft</strong> <strong>2012</strong> <strong>Owners</strong> <strong>Manual</strong> • Guide to Individual Models • Page 2-40
RADIO SCREEN<br />
In this mode, the function of the Switch Pad button is illustrated<br />
on the big screen. The radio screen allows you to control the radio the<br />
same way the Clarion remote does. Press the ENTER button to enter<br />
the control mode. The display will turn green, indicating that the<br />
Switch Pad is now controlling the radio. If no buttons are pressed for<br />
five (5) seconds, the control returns to normal operation.<br />
The Digital Data Screen displays seven different parameters. You can<br />
choose what is displayed except for the main depth chart. To make<br />
changes, press ENTER and a highlight box will appear. Use any arrow<br />
key to move the highlight box to one of the four (4) parameters in the<br />
main screen area. Press ENTER over the highlighted item and a list of<br />
choices appears. Arrow DOWN to what you would like to display and<br />
press ENTER. After a few seconds the highlight box will disappear.<br />
PERFECT PASS SCREEN<br />
Use the CRUISE button to turn Perfect Pass ON and OFF. Use the<br />
“+”, “-“ and the ENTER buttons to navigate through the Perfect Pass<br />
screens. The DOWN arrow will bring up the Rider List.<br />
SET-UP SCREENS<br />
RESET FACTORY SETTINGS<br />
Returns all settings to the original<br />
factory settings. Use the ENTER<br />
button to activate the reset mode.<br />
Press the HOME button to exit.<br />
ZERO-OFF SCREEN<br />
Use the CRUISE button to turn ZeroOff ON and OFF. Use the “+”<br />
and “-“ buttons to change the Set Point of ZeroOff. The DOWN arrow<br />
brings up the Rider List.<br />
BRIGHTNESS CONTROL<br />
Achieved by adjusting the light<br />
levels for both DAY and NIGHT.<br />
The system will activate the NIGHT<br />
lighting when the navigation lights<br />
are on. Use the ENTER button to<br />
select the DAY and NIGHT slide<br />
bars. The up and down buttons<br />
control the adjustment. Press the<br />
HOME button to exit.<br />
<strong>MasterCraft</strong> <strong>2012</strong> <strong>Owners</strong> <strong>Manual</strong> • Guide to Individual Models • Page 2-41
ADJUST FUEL ALARM<br />
Also adjusted in the SETUP<br />
MENU. Use the ENTER button to<br />
activate the FUEL ALARM edit<br />
screen. Press the HOME button to<br />
exit.<br />
SPEEDOMETER CALIBRATION<br />
Press the ENTER button, then<br />
use the UP and DOWN buttons to<br />
change the speed. This must be<br />
done while using a GPS or radar gun<br />
as a reference. Press the HOME button<br />
to exit.<br />
ADJUST SHALLOW ALARM<br />
Also adjusted in the SETUP<br />
MENU. Use the ENTER button<br />
to activate the Depth Alarm Edit<br />
Screen. Use the UP and DOWN arrows<br />
to set the desired depth. Press<br />
the HOME button to exit.<br />
SET UNITS [English or Metric]<br />
To enter the Unit Selection<br />
Screen, press the ENTER button.<br />
Use the UP and DOWN buttons to<br />
highlight English or Metric. Press<br />
the ENTER button again to select.<br />
Press the HOME button to exit.<br />
UPDATE VIPER<br />
The BIG software may be upgraded<br />
by copying the new software<br />
to a USB Flash Drive and inserting<br />
it into the USB port located at the<br />
helm. The file on the flash drive must<br />
be named: Viper.App.mem. Press<br />
the ENTER button to activate the<br />
update or turn the ignition OFF and<br />
then ON. When the install is complete,<br />
the BIG will reset and automatically<br />
resume normal operation.<br />
Be sure to remove the flash drive to<br />
avoid an update on the next ignition<br />
cycle.<br />
OIL CHANGE SERVICE RESET<br />
The boat will prompt you when<br />
the recommended oil change interval<br />
has occurred. This screen will allow<br />
you to reset the interval counter.<br />
Press the ENTER button to reset<br />
the alarm.<br />
<strong>MasterCraft</strong> <strong>2012</strong> <strong>Owners</strong> <strong>Manual</strong> • Guide to Individual Models • Page 2-42
DEALER SERVICE RESET<br />
The dealer has to reset the<br />
DEALER SERVICE REQUIRED<br />
alarm in this screen.<br />
GAUGE DIAGNOSTICS<br />
Will put the system into an automatic<br />
gauge sweep test mode. Press<br />
the ENTER button to activate. Press<br />
the HOME button to exit.<br />
DEALER INFO PAGE<br />
Will display either the factory<br />
contact information or the dealer<br />
contact information.<br />
ACTIVE ENGINE FAULTS<br />
This is a tool used to determine<br />
what faults are currently active in<br />
the engine ECM. They will disappear<br />
when no longer active.<br />
VIPER DIAGNOSTICS<br />
A tool for the technician to use<br />
in testing the system. Press the<br />
HOME button to exit.<br />
INACTIVE ENGINE FAULTS<br />
<strong>MasterCraft</strong> <strong>2012</strong> <strong>Owners</strong> <strong>Manual</strong> • Guide to Individual Models • Page 2-43
BALLAST CONFIGURATION<br />
This is used to set the fill and<br />
empty times for the Jabsco ballast<br />
pumps. They can be adjusted by<br />
pressing the ENTER button and using<br />
the UP and DOWN buttons.<br />
FEATURE UNLOCK<br />
There are two ways to unlock a<br />
new feature. In both cases, you will<br />
need to go to the Medallion website<br />
[www.medallioinis.com] to retrieve<br />
the unlock code.<br />
HOME MENU [Enable or Disable]<br />
Step 1:<br />
Step 2:<br />
Step 3:<br />
Step 4:<br />
Get the SERIAL NUMBER<br />
from your system by going<br />
to either ABOUT VIPER or<br />
FEATURE ENABLE in the<br />
setup screens.<br />
If using the IMPORT in<br />
setup, copy the file to a<br />
USB Flash Drive and press<br />
the IMPORT button to read<br />
the file from the USB Flash<br />
Drive.<br />
If using the FEATURE EN-<br />
ABLE SETUP, you will need<br />
to select the feature to be<br />
unlocked.<br />
Enter the unlock code to<br />
enable the feature.<br />
ABOUT VIPER<br />
Gives you the current software<br />
revision on the boat.<br />
ALARMS AND WARNINGS<br />
Engine Temp is a warning received from the engine ECM. See additional<br />
information under Temperature Gauge in the Instruments and<br />
Gauges section of this Owner’s <strong>Manual</strong>.<br />
Low Battery will appear when the battery falls to 10.5 volts.<br />
<strong>MasterCraft</strong> <strong>2012</strong> <strong>Owners</strong> <strong>Manual</strong> • Guide to Individual Models • Page 2-44
Oil Level is a warning received from the engine ECM. See Engine<br />
Oil Pressure Gauge in the Instruments and Gauges section of this<br />
Owner’s <strong>Manual</strong>.<br />
Low Fuel is an alarm that will appear when the level reaches the<br />
limit that has been chosen in the SETUP screen. See Using Care When<br />
Fueling section of this Owner’s <strong>Manual</strong>. Pay particular attention to recommended<br />
fuel levels; specifically, avoid allowing the setting to go below<br />
one-quarter of a tank.<br />
Service Required is a warning received from the ECM. Contact<br />
an authorized <strong>MasterCraft</strong> dealer immediately.<br />
Oil Pressure is a warning received from the engine ECM. See Engine<br />
Oil Pressure Gauge in the Instruments and Gauges section of this<br />
Owner’s <strong>Manual</strong>.<br />
Loss of CAN is a warning that will occur when the data from the<br />
engine ECM is interrupted. Contact an authorized <strong>MasterCraft</strong> dealer<br />
immediately.<br />
Shallow Depth is an alarm that will appear when the level reaches<br />
the limit that has been chosen in the SETUP screen.<br />
Dealer Service Needed requires a dealer to reset. Contact an<br />
authorized <strong>MasterCraft</strong> dealer as soon as practicable.<br />
Check Engine is a warning received from the engine ECM. Refer<br />
to information in the Instruments and Gauges section of this Owner’s<br />
<strong>Manual</strong> and contact an authorized <strong>MasterCraft</strong> dealer.<br />
Oil Change Needed is a warning that will appear after the first 10<br />
hours of operation. It will reappear every 50 hours after that to serve as<br />
a reminder to change the oil. The warning is reset in the SETUP screen.<br />
Fire Extinguisher Discharged is a warning that will appear when<br />
the fire extinguisher is discharged. This icon replaces the fire extinguisher<br />
panel light on boats equipped with this feature.<br />
<strong>MasterCraft</strong> <strong>2012</strong> <strong>Owners</strong> <strong>Manual</strong> • Guide to Individual Models • Page 2-45
X-Star<br />
(Standard)<br />
The instrumentation system for the X-Star features three displays<br />
that are multi-functional tools providing GPS tracking, multimedia<br />
display, cruise control and skier profiles. It also enables equipment<br />
operators to view many different engine, ballast, transmission<br />
parameters and service codes. Included are three displays: Two are<br />
linked and some changes made on either are displayed on both. The<br />
third is independent and displays engine and transmission parameters<br />
and service codes.<br />
Menu Key<br />
When the Menu key is pressed once, the “On Screen Menu” is<br />
displayed on both the Center Display and the Touchscreen. When<br />
the Menu key is pressed and held, the Main Menu is displayed and provides<br />
access to the settings menu through a selection of soft keys.<br />
Soft Key Commands<br />
Soft key commands provide additional features and navigation<br />
shortcuts. Depending on the current screen displayed, they may appear<br />
as icons or a vertical control bar.<br />
Port Display<br />
Touchscreen<br />
Center Display<br />
Note: General maintenance is not required. However, a soft<br />
cloth can be used for cleaning the units. Window cleaner or alcohol<br />
can also be used to clean the glass portion of the display. DO NOT<br />
use harsh or abrasive cleaners on the units.<br />
Basic Navigation Features<br />
All features are easily accessed through the Quick Access Keys,<br />
menus and soft key commands. Some navigation and data are linked<br />
between two of the units.<br />
Touchscreen<br />
The Touchscreen can be accessed through the Quick Access Keys<br />
on the left and right of the display screen or operated through the<br />
touch screen. Although most of the functionality is available through<br />
touching the screen, not everything can be accessed in that manner.<br />
For example, Menu items displayed on the screen are only accessible<br />
through the Quick Access Keys.<br />
Independent Port Display<br />
The independent Port Display displays the gauges associated<br />
with the engine in both the gauge view and the digital view. It also<br />
displays the video.<br />
Quick Access Keys<br />
The following displays can be accessed via the Quick Access Keys:<br />
gauges, digital gauges and video.<br />
The following can be accessed through the touch screen:<br />
• Setting up and viewing skier profiles.<br />
• Controlling the lights.<br />
• Setting and selecting the cruise control.<br />
• Controlling the boat heaters.<br />
• Setting the trim tabs.<br />
• Controlling the video and radio.<br />
Note: Touch points are defined by words or graphics<br />
that are outlined by a bezel look. See example right.<br />
Quick Access Keys<br />
The following controls are accessed through the Quick Access<br />
Keys: Lights, Climate Control, Video Control, Stereo Control, Cruise<br />
control, Skier Profiles, Ballasts, and Trim Tabs.<br />
Touch Screen Navigation<br />
Controller<br />
Description<br />
UP or Increase: touch this to increase the value<br />
displayed. Note: Depending on which screen is<br />
displayed, the icon can also represent moving<br />
the highlight up.<br />
The following controls are accessed via the Quick Access Keys:<br />
Cruise, Skier Profiles, Stereo, GPS, Home, Cruise ON/OFF, scroll UP<br />
and scroll DOWN.<br />
<strong>MasterCraft</strong> <strong>2012</strong> <strong>Owners</strong> <strong>Manual</strong> • Guide to Individual Models • Page 2-46
Controller<br />
Description<br />
DOWN or Decrease: touch this to decrease<br />
the value displayed. Note: Depending on<br />
which screen is displayed, the icon can also<br />
represent moving the highlight down.<br />
Previous: Touch to go to the previous screen.<br />
Next: Touch to advance to the next screen.<br />
Exit: Touch to exit without saving.<br />
Bread Crumb Trail: Touch the dots to move<br />
between screens.<br />
New Rider Profile<br />
A new rider profile can be set up using the Touchscreen.<br />
To create a new profile, press Profile on the Touchscreen.<br />
For a new rider, touch NEW.<br />
Touch SAVE to save the rider and settings you created. The composite<br />
profile can be displayed on the Center Display.<br />
Touch SELECT to see the rider profile. The Touchscreen<br />
displays the cruise settings, while the Center Display<br />
displays a composite of all the settings.<br />
Touch MODIFY to modify the settings for the<br />
current rider. Follow the steps for setting up new profiles<br />
and touch SAVE when finished.<br />
(If SAVE is not touched, input will be lost when you leave this function<br />
and move to others in the menu.)<br />
Center Display Screen<br />
Type a name for the new profile using the touch keypad and then<br />
touch DONE.<br />
Touch<br />
to move the Speed settings.<br />
Quick Access Keys<br />
This section describes the features available through the Quick<br />
Access keys located to the left and right sides of the display.<br />
Main Menu<br />
The Main Menu screen for viewing engine statistics can<br />
be accessed by pressing and holding the Quick Access key.<br />
Touch to move the Ballast screen or to go back to the Name<br />
screen.<br />
The ballasts are set by touching a ballast indicator and sliding your<br />
finger to the desired setting. While the ballast fill indicator is red, the<br />
ballasts are not full. When they are full the ballast fill indicator turns<br />
green. Touch to move to the Tabs screen or to move to<br />
the previous ballast screen.<br />
Pressing the keys next to the Soft Key menu opens the associated<br />
settings screen.<br />
<strong>MasterCraft</strong> <strong>2012</strong> <strong>Owners</strong> <strong>Manual</strong> • Guide to Individual Models • Page 2-47
GPS Display–Soft Key Commands<br />
CRUISE ON/OFF initiates cruise control or turns cruise<br />
off. While cruise is engaged the following soft keys are<br />
available:<br />
INC increase speed while in cruise mode.<br />
DEC decreases speed while in cruise mode.<br />
CRUISE ON/OFF turns cruise mode off.<br />
After the settings are updated, press ENTER. The settings are<br />
saved whether or not the following screen is displayed.<br />
ZOOM IN–ZOOM OUT feature allows the operator to zoom<br />
in for more detail or zoom out for a larger view of the area<br />
map.<br />
TRACK INFO shows the current route and any waypoints<br />
that have been set. A green arrow indicates the current<br />
position while the red square indicates the initial point<br />
of trackings.<br />
User Settings Display–Soft key Commands<br />
PREVIOUS/NEXT provides the ability to navigate through the settings<br />
displayed on the screen.<br />
UP/INCREASE allows changing of the values within the settings.<br />
DOWN/DECREASE decreases the value in the setting.<br />
ENTER creates a new user profile from the current cruise settings.<br />
GPS Display<br />
The GPS Display screen can be accessed by pressing . The GPS<br />
feature displays map data, latitude and longitude coordinates, time<br />
and speed. Additional Soft Key Commands are accessed by pressing<br />
.<br />
Soft Key Commands for Track Info<br />
SAVE TRACK displays a confirmation message before saving the current<br />
track information.<br />
DELETE TRACK displays a confirmation message before deleting the<br />
current track information.<br />
WPT places a marker or “waypoint” on the map to mark a favorite<br />
location after displaying the following confirmation message.<br />
CURRENT POSITION is used to return to the current boat/satellite<br />
position after having moved the cursor to another location.<br />
GPS LAT/LONG displays the latitude, longitude, course and speed.<br />
NORTH UP determines how the orientation of the map is displayed.<br />
Either conventional “North Up,” or according to the current course<br />
heading, “Course Up.”<br />
EXIT TRACK INFO removes the Track Info soft keys and displays GPS<br />
soft keys.<br />
UP-LEFT-RIGHT-DOWN facilitates navigation of the GPS map by<br />
moving the cross hairs accordingly.<br />
<strong>MasterCraft</strong> <strong>2012</strong> <strong>Owners</strong> <strong>Manual</strong> • Guide to Individual Models • Page 2-48
Stereo Display<br />
The Stereo display can be accessed by pressing the Quick Access<br />
Key. This feature provides universal control to the Clarion stereo,<br />
mimicking all the controls of a standard remote control. This includes<br />
iPod and Thumb Drive music.<br />
Rider Profiles<br />
The Rider Profiles screen can be accessed by pressing the Quick<br />
Access Key on either the Center Display or the Touchscreen. This<br />
feature displays rider/user profiles for cruise controls based on user<br />
preferences for speed, ballast, and smart plate settings. Up to 16 rider/user<br />
profiles can be defined and stored. This information can also<br />
be loaded via a USB connection.<br />
Stereo Display–Soft Key Commands<br />
VOLUME UP-VOLUME DOWN controls the<br />
volume.<br />
PREV TRACK-NEXT TRACK plays the previous<br />
or next track of the current CD playing.<br />
PLAY/PAUSE toggles between Play and Pause modes<br />
when a CD is playing.<br />
SCAN to find stations.<br />
MODE (SOURCE) choose between iPod, USB and stereo.<br />
MUTE mutes the volume on the stereo.<br />
Profiles Screen–Soft Key Commands<br />
PROFILES provides utilities for adding new users and editing<br />
or deleting existing users.<br />
NOTE: Soft key commands are touch commands on the<br />
Touchscreen. (See image immediately above.)<br />
UP-DOWN when positioned in the Name field moves from user to<br />
user already in the system.<br />
NEW provides an interface to add new user information, which was<br />
explained earlier.<br />
SELECT provides the current rider/user profile and displays some<br />
information on the Touchscreen, as well as a compilation of all user<br />
information on the Center Display.<br />
MODIFY selects and edits the existing user name information.<br />
DELETE USER deletes the selected user name, after a confirmation<br />
warning. A button will be displayed to the right of NEW.<br />
POWER ON/OFF.<br />
Modify Current User<br />
A user profile can be modified, using the Touchscreen.<br />
Touch MODIFY to change an existing profile.<br />
Touch the name to display the keyboard. Backspace through the<br />
existing name and type a new name for the profile, using the touch<br />
keypad, concluding by touching DONE.<br />
<strong>MasterCraft</strong> <strong>2012</strong> <strong>Owners</strong> <strong>Manual</strong> • Guide to Individual Models • Page 2-49
Touch SAVE to save the rider and settings created. The composite<br />
profile can be displayed on the Center Display. If SAVE is not touched,<br />
all changes will be lost when moving to another screen.<br />
Menu Options<br />
Touch to move to the Speed settings or to go back to the<br />
Name screen.<br />
. The follow-<br />
The MENU is displayed by pressing and holding<br />
ing features are available:<br />
Touch<br />
to move to the Ballast screen.<br />
• GPS Utilities contains options to set up tracking and position,<br />
chart and time and waypoint manager. It also displays satellite<br />
status.<br />
• Cruise settings display.<br />
• User Settings allows the operator to customize the display options<br />
for ambient light and brightness, set U.S. or metric units,<br />
specify the Home screen and screen set-up status.<br />
• Engine Diagnostics displays a list of engine fault codes and descriptions.<br />
On some engines, corrective action will be shown.<br />
• Utilities allows configuration of the unit, including wire configuration,<br />
plug address, fault conversion, CAN data and fault codes.<br />
This also displays software version information at the top of the<br />
page.<br />
• System<br />
• Ballast<br />
User Settings<br />
User Settings provides options to specify viewing preferences.<br />
Pressing PREV and NEXT navigates through the options, and UP and<br />
DOWN scrolls through the selections for each option.<br />
The ballasts are modified by touching the ballast you want to set<br />
and sliding your finger to the desired setting. While the ballast fill indicator<br />
is red, the ballast are not full. When they are full, the ballast fill indicator<br />
turns green. Touch to move to the Tabs screen or<br />
to return to the previous screen.<br />
Soft Key Commands for User Settings include:<br />
PREV-NEXT moves from setting to setting and field to field.<br />
<strong>MasterCraft</strong> <strong>2012</strong> <strong>Owners</strong> <strong>Manual</strong> • Guide to Individual Models • Page 2-50
+Up/Increase or -Down/Decrease increases or decreases values within<br />
a field.<br />
ENTER saves the current values and exists.<br />
Auto Backlight<br />
This setting enables and disables the auto backlight feature. If enabled<br />
and the navigation light is turned on, the displays will reduce the<br />
screen brightness.<br />
Brightness<br />
The brightness control is accessed by using the UP and DOWN soft<br />
keys to change the settings in five percent (5%) increments until the<br />
desired brightness is achieved.<br />
Minimum Depth<br />
A minimum depth can be selected (measured from the bottom of<br />
hull) to give an alarm if the vessel comes into a minimum depth situation.<br />
Choosing “zero” turns this option OFF.<br />
Audio Intensity<br />
The Audio Intensity feature allows the operator to set values to automatically<br />
increase or decrease the audio volume, according to what<br />
speed the boat is travelling.<br />
Engine Diagnostics<br />
When choosing this selection, the display will query the engine(s)<br />
ECU, as illustrated and provide feedback on any diagnostic codes that<br />
have been activated and stored in the ECU for service needs.<br />
• Count is the number of times the event has been flagged.<br />
• Description provides the most common SPNs and FMIs that have<br />
text for the description stored in the display. If there is no text,<br />
then this SPN and FMI must be defined by referring to the engine<br />
manufacturer or the SAE J1939 standard. NOTE: This field is only<br />
used with certain brands and models of engines.<br />
• Correction is the suggested action for correction.<br />
Fault Code Pop-ups<br />
A fault condition will trigger a pop-up dialog box on the screen<br />
describing the nature of the fault.<br />
How to Hide/Show Faults<br />
To hide the fault code pop-up being displayed on the screen, press<br />
the soft key next to the “Hide” icon. The pop-up will disappear. However,<br />
the “Warning” or “Stop” icon will remain on the screen to indicate<br />
there is still a fault. Pressing “Hide” does not clear the fault. It<br />
only hides the pop-up message.<br />
When a fault code has been hidden, a “Show” icon will remain in<br />
the bottom right corner. When this soft key is pressed, the fault code<br />
will again be displayed.<br />
Scrolling Through Multiple Messages<br />
The title bar of the fault code pop-up may indicate multiple messages,<br />
as in “Diagnostic Message 1 of 3.” Press to scroll through the<br />
different messages.<br />
Utilities<br />
The Utilities menu provides tools to configure wiring and communication<br />
settings and Default Settings for adjusting the ballasts and<br />
smart plate.<br />
Soft Key Commands located through Utilities include:<br />
UP-DOWN changes the value of the current field.<br />
Soft Key Commands for Engine Diagnostics include:<br />
GET FAULTS is the query to the engine(s) ECU for feedback on diagnostic<br />
codes that have been activated and stored in the ECU for service<br />
needs.<br />
UP-DOWN navigates through the fault list.<br />
The following is a list of field definitions contained on the EN-<br />
GINE DIAGNOSTICS screen:<br />
• Source identifies the component having the fault: engine 1,2 or<br />
auxiliary.<br />
• Status indicates whether the fault has been corrected.<br />
• SPN “Suspect Parameter Number” fault code. If not translated<br />
into text by the display, see the engine manufacturer’s information<br />
for the definition of the SPN number.<br />
PREV-NEXT moves from field to field.<br />
RESTORE DEFAULTS loads the factory defaults after display a confirmation<br />
warning.<br />
SAVE/EXIT saves the current values and exits.<br />
System Settings<br />
The System Settings screen displays the current software version<br />
loaded in the unit. It is typically only accessed when the unit is first<br />
installed in order to configure the unit. You can set individual settings<br />
for the available options, or choose to select RESTORE DEFAULTS for<br />
the factory settings.<br />
• FMI “Failure Mode Indicator” fault code. The FMI is defined by SAE<br />
J1939. If not translated into text see the SAE standard or the engine<br />
manufacturer’s information.<br />
<strong>MasterCraft</strong> <strong>2012</strong> <strong>Owners</strong> <strong>Manual</strong> • Guide to Individual Models • Page 2-51
Default Settings<br />
This screen provides various fields for adjusting the values for ballast<br />
and the smart plate. The Smart plate Crossover point also defines<br />
the threshold for setting the automatic audio volume control.<br />
Chart and Time Setup<br />
This menu option allows the operator to set up viewing options for<br />
the GPS Display.<br />
GPS Utilities<br />
When using a GPS device, GPS Utilities will allow the operator to<br />
configure and monitor satellite tracking data.<br />
Chart Setup Parameters. Use the CHECK/UNCHECK soft key to select<br />
the information to be displayed on the GPS screen.<br />
Time Setup Parameters<br />
Time Setup Parameters is used to select the correct time zone and<br />
clock mode for either 12-hour or 24-hour time formats. It is also possible<br />
to enable DST (Daylight Savings time) by using the CHECK/UN-<br />
CHECK soft key to select the box.<br />
Waypoint Manager<br />
Waypoints allow the operator to mark specific locations by latitude<br />
and longitude. After the waypoints are established, the Waypoint<br />
Manger allows the operator to associate an icon with them for identification.<br />
Use the DELETE key to delete a single waypoint, or DELETE<br />
ALL to remove all of them at once.<br />
Satellite Status<br />
This feature displays a graphic indicating the satellites currently<br />
visible in orbit and the signal strength of each satellite.<br />
Depth and Position Setup<br />
This feature allows the operator to define the amount of detail to<br />
display for longitude and latitude information on the GPS map and<br />
depth display.<br />
Waypoint List displays a list of the waypoints that have been set. Use<br />
the UP and DOWN keys to highlight the desired waypoint.<br />
Waypoint Icon allows the operator to assign one of four different<br />
icons to any of the waypoints listed.<br />
Lat/Lon displays the latitude and longitude values for the currently<br />
highlighted waypoint on the list.<br />
<strong>MasterCraft</strong> <strong>2012</strong> <strong>Owners</strong> <strong>Manual</strong> • Guide to Individual Models • Page 2-52
Track Manager<br />
It is possible to set up multiple tracks for displaying on the GPS<br />
map. The Track Manager allows the operator to select tracks to<br />
“show” on the map or “hide” a map not currently in use. Operators<br />
can DELETE one track or “Delete All Tracks” at once.<br />
General Troubleshooting Guide<br />
IF...the display appears to not work or doesn’t come ON...<br />
...the display could be in SLEEP mode. Touch a key on the keypad<br />
to activate the display.<br />
...check for loose connections at the battery and display unit.<br />
...check for reversed polarity on the power connections.<br />
...verify that the battery has a minimum voltage of 6 volts.<br />
IF...the display resets or goes OFF when starting the engine...<br />
...check that the display supply wires are connected properly<br />
to the battery.<br />
...verify that the battery is charged properly.<br />
...check the battery for efficient starter current.<br />
IF...the display has no backlight...<br />
...contact your authorized <strong>MasterCraft</strong> dealer for assistance.<br />
IF...the display has no keypad backlight...<br />
...contact your authorized <strong>MasterCraft</strong> dealer for assistance.<br />
<strong>MasterCraft</strong> <strong>2012</strong> <strong>Owners</strong> <strong>Manual</strong> • Guide to Individual Models • Page 2-53
HOME SCREEN<br />
200V, X-2, 215V, X-15, 225V,<br />
X-25, 235V, X-35, 245V, X-45,<br />
255V, X-55, ProStar 214,<br />
X-14, ProStar 214V, X-14V,<br />
(Optional)<br />
USING THE OPTIONAL COLOR TOUCH DISPLAY<br />
The controls and displays on the touch screen change dynamically<br />
depending on the task you are performing.<br />
Navigating the main screens from the HOME screen<br />
• From the HOME Screen tap any screen icon to go to that screen.<br />
Controller<br />
Description<br />
Touch this to go to the CRUISE screen.<br />
Touch this to go to the QUICK LIST screen.<br />
Touch this to go to the ANALOG GAUGE screen.<br />
Touch to go to the DIGITAL GAUGE screen.<br />
• Press the HOME button, located in the information bar along the<br />
bottom of any main screen, to return to the HOME Screen.<br />
Navigating the main screens using the scroll buttons<br />
• Frequently used screens are arranged in a continuous loop and<br />
may be accessed by using the scroll right and scroll left buttons<br />
located in the information bar along the bottom of each main<br />
screen.<br />
Touch to go to the MEDIA screen.<br />
Touch to go to the TRIM BALLAST screen.<br />
Touch to go to the SETUP screen.<br />
Activity-based screen jumps<br />
When certain events occur, the display anticipates the need to<br />
view related data and automatically jumps to the appropriate screen.<br />
• Actuating any of the trim or ballast switches in the boat results in<br />
the display jumping to the TRIM/BALLAST screen.<br />
• Pressing the boat’s cruise button results in a jump to the CRUISE<br />
screen.<br />
Touch to go to the NAV screen.<br />
Scrolls left or right or return to HOME<br />
screen.<br />
<strong>MasterCraft</strong> <strong>2012</strong> <strong>Owners</strong> <strong>Manual</strong> • Guide to Individual Models • Page 2-54
MEDIA SCREEN<br />
ADDITIONAL MEDIA SCREEN CONTROLS<br />
Controller<br />
Description<br />
Touch to display video from DVD, where equipped.<br />
Touch to display video from the Tower Camera,<br />
where equipped.<br />
Controller Mode Response<br />
CD/MP3 or Starts playback from the<br />
USB/iPod Mode beginning of the current track.<br />
Radio/SAT Mode<br />
CD/MP3 or<br />
USB/iPod Mode<br />
Tunes in a lower frequency<br />
station.<br />
Starts playback from the<br />
beginning of the next track.<br />
Touch to go to the HOME screen.<br />
Radio/SAT Mode<br />
Tunes in a higher frequency<br />
station.<br />
Touch to scroll left to the CRUISE screen.<br />
Radio/SAT Mode<br />
Scrolls to next preset station.<br />
MP3 or USB Mode Selects folders.<br />
Touch to scroll right to the TRIM/BALLAST screen.<br />
Touch to increase the audio volume.<br />
Touch to decrease the audio volume.<br />
Touch and the sound is muted or play is paused.<br />
Press again to cancel.<br />
Each time the Source icon is pressed, the mode<br />
switches in the following order:<br />
Radio<br />
Satellite<br />
CD MP3<br />
USB/iPod<br />
CD Changer<br />
AUX<br />
Each time the button is pressed the band switches<br />
in the following order:<br />
Radio: FM1, FM2, FM3, AM, FM1<br />
Confirming your selection.<br />
Each time the button is pressed the Automatic<br />
Volume Control feature is toggled from<br />
ON to OFF or OFF to ON.<br />
<strong>MasterCraft</strong> <strong>2012</strong> <strong>Owners</strong> <strong>Manual</strong> • Guide to Individual Models • Page 2-55
DIGITAL GAUGE SCREEN (Normal View)<br />
In each quadrant of the screen is a measurement: upper left is the<br />
remaining fuel in approximate percentage; the upper right is the ambient<br />
air temperature (Fahrenheit is default setting); the lower left is<br />
the water temperature (Fahrenheit is default setting); and the lower<br />
right is the water depth (in feet is default setting).<br />
Touch the quadrant to be edited and a pull-down menu will appear.<br />
These are settings and functions that can be substituted by<br />
touching the name on the screen.<br />
If no display is pressed within five (5) seconds, the edit controls will<br />
disappear and the screen will return to the settings as they were.<br />
Controller<br />
Description<br />
Touch to scroll up the list.<br />
Touch to scroll down the list.<br />
Displays<br />
Controller<br />
Description<br />
Displays the approximate percentage of fuel left<br />
in the tank.<br />
Displays the ambient air temperature in<br />
Fahrenheit (default).<br />
Displays the ambient water temperature in<br />
Fahrenheit (default).<br />
Displays the depth of the water in feet (default).<br />
Displays a histogram of the water depth.<br />
Description<br />
Touch to go to the HOME screen.<br />
TRIM & BALLAST SCREEN<br />
Touch to select an item in the list, update the<br />
GAUGE screen data block and close the<br />
edit screen.<br />
Touch to scroll left to the TRIM-BALLAST screen.<br />
Touch to scroll right to the CRUISE screen.<br />
DIGITAL GAUGE SCREEN (With Edit Controls Displayed)<br />
Displays<br />
Description<br />
Reports roll data.<br />
Displays the roll in animation.<br />
Displays the total weight of the water in the<br />
ballast tanks, where equipped.<br />
Displays the trim tab positions in animation,<br />
where equipped.<br />
<strong>MasterCraft</strong> <strong>2012</strong> <strong>Owners</strong> <strong>Manual</strong> • Guide to Individual Models • Page 2-56
CRUISE ON SCREEN (Illustrated in Speed Mode)<br />
Displays the ballast tank levels in animation.<br />
Displays the pitch of the boat in degrees.<br />
Touch to go to the HOME screen.<br />
Touch to scroll left to the MEDIA screen.<br />
Touch to scroll right to the DIGITAL GAUGE<br />
screen.<br />
NOTE: The trim tabs and ballast tanks are Plug ‘n Play tabs. Any other<br />
tabs or tanks are not displayed.<br />
Controller<br />
Description<br />
Touch to increase the speed set point.<br />
CRUISE OFF SCREEN<br />
Touch to decrease the speed set point.<br />
Touch to turn Cruise off and goes to the CRUISE<br />
OFF screen.<br />
The left button goes to the next screen on the left.<br />
The right button goes to the next screen on the<br />
right. The HOME button goes to the HOME screen.<br />
CRUISE ON SCREEN (Illustrated in RPM Mode)<br />
Controller<br />
Description<br />
Touch to turn on Cruise in speed mode.<br />
Touch to go to the QUICK LIST screen.<br />
Touch to turn on Cruise in RPM mode.<br />
Controller<br />
Description<br />
Touch to increase the RPM set point.<br />
Touch to decrease the RPM point.<br />
The left button goes to the next screen on the left.<br />
The right button goes to the next screen on the<br />
right. The HOME button goes to the HOME screen.<br />
Touch to turn Cruise off and goes to the CRUISE<br />
OFF screen.<br />
<strong>MasterCraft</strong> <strong>2012</strong> <strong>Owners</strong> <strong>Manual</strong> • Guide to Individual Models • Page 2-57
The left button goes to the next screen on the left.<br />
The right button goes to the next screen on the<br />
right. The HOME button goes to the HOME screen.<br />
Touch to go to the DELETE RIDER screen.<br />
QUICK LIST SCREEN<br />
EDIT RIDER SCREEN<br />
Controller<br />
Description<br />
Controller<br />
Description<br />
Touch to scroll up through list of available riders.<br />
Touch to scroll down through list of available riders.<br />
Touch to scroll right or left to select the rider setting<br />
to be edited. The selected setting is highlighted in<br />
yellow.<br />
Touch to activate the selected (hi-lighted) rider<br />
profile.<br />
Touch to increase or decrease the selected rider<br />
setting.<br />
Touch to exit without changing any rider settings<br />
and go to the QUICK LIST screen.<br />
Touch to exit without activating a new rider, and<br />
go to the CRUISE screen.<br />
Touch to go to the RIDER EDIT screen.<br />
Touch to save changes to the rider’s settings<br />
and return to the QUICK LIST screen.<br />
Touch to go to the USB IMPORT screen.<br />
Touch to add a new rider to the list and go to<br />
the name edit screen.<br />
Touch to go to the USB EXPORT screen.<br />
Touch to save the current settings to the<br />
selected rider.<br />
<strong>MasterCraft</strong> <strong>2012</strong> <strong>Owners</strong> <strong>Manual</strong> • Guide to Individual Models • Page 2-58
DELETE RIDER SCREEN<br />
Touch to import rider data.<br />
Touch to exit without importing.<br />
Controller<br />
Description<br />
Touch to scroll through the list of available riders.<br />
NOTE: The preferred settings for each rider may be shared from<br />
boat to boat by using the USB export and import features. Rider data<br />
is stored and shared in a Text File Format with the following file name:<br />
riders.txt. The file must be located in a <strong>MasterCraft</strong> folder located in the<br />
root of the USB flash drive.<br />
Importing new rider data for an existing rider name will over-write<br />
the original data stored in the video display gauge for that rider.<br />
Create customized rider data at mastercraft.com/bigscreen/.<br />
RIDER EXPORT DATA<br />
Touch to delete the selected (highlighted) rider<br />
and all associated settings from the QUICK LIST.<br />
Touch to exit without deleting the rider<br />
information and go to the QUICK LIST Screen.<br />
RIDER IMPORT MODE<br />
Controller<br />
Description<br />
Touch to scroll UP or DOWN.<br />
Touch to send the selected rider data to the USB<br />
flash drive.<br />
Controller<br />
Description<br />
Touch to exit without exporting.<br />
Touch to scroll UP or DOWN.<br />
NOTE: The preferred setting for each rider may be shared by using<br />
the USB export and import feature. Rider data is stored and shared in a<br />
Text File Format with the following file name: riders.txt.<br />
<strong>MasterCraft</strong> <strong>2012</strong> <strong>Owners</strong> <strong>Manual</strong> • Guide to Individual Models • Page 2-59
DELETE RIDER INFORMATION<br />
NOTE: When the Cruise Control is OFF, the data block in the INFOR-<br />
MATION BAR displays the boat’s actual speed. When the Cruise Control<br />
is ON, the cruise icon is displayed in the center of the INFORMATION<br />
BAR. When the Cruise Control is ON, the data block in the INFORMA-<br />
TION BAR displays the set speed and the font color changes to green.<br />
Also, pressing the speed data block causes the pop-up speed controls to<br />
appear superimposed on the current screen. If no controls are pressed,<br />
the pop-up controls are hidden.<br />
The cruise control information is provided earlier in this section.<br />
VIEWING VIDEO INPUTS<br />
Controller<br />
Description<br />
Touch to scroll UP or DOWN.<br />
Touch to delete all information at this setting.<br />
Touch to exit without exporting.<br />
The video screens are accessed by touching the DVD & Tower Camera<br />
icons on the MEDIA screen.<br />
Controller<br />
Description<br />
Touch to display Video Input-1, then to DVD.<br />
INFORMATION BAR (with Cruise OFF)<br />
Touch to display Video Input-2, then to tower camera.<br />
INFORMATION BAR (with Cruise ON)<br />
Video screens initially display the video input channel.<br />
Controller<br />
Description<br />
Touch to go to the HOME screen.<br />
Touch to scroll left.<br />
Touch to scroll right.<br />
Pressing the data block brings up pop-up<br />
controls to allow the set speed to be increased<br />
or decreased.<br />
<strong>MasterCraft</strong> <strong>2012</strong> <strong>Owners</strong> <strong>Manual</strong> • Guide to Individual Models • Page 2-60
After a brief delay, the full-screen video content is displayed:<br />
Boats with this video display gauge will have the following gauges<br />
mounted in the instrument panel. Brief descriptions of the functions are<br />
included here. For more in-depth description of the functionality, see<br />
the Performance Controls section of this Owner’s <strong>Manual</strong>.<br />
Touch any spot on the screen to bring up user controls along the<br />
bottom of the video screen:<br />
Speedometer<br />
(Larger numbers are miles per hour; smaller interior numbers are kilometers<br />
per hour.)<br />
Controller<br />
Description<br />
Touch to display the MEDIA screen.<br />
In Clip mode: Touching TAG initiates a recording<br />
or inserts a video tag. In Loop mode: Touching<br />
TAG saves the current video loop.<br />
Touch to stop recording.<br />
Tachometer<br />
(Measurement is in revolutions per minute.)<br />
If no icons are touched, the video reverts to the full-screen video.<br />
Please note that some refinement of these<br />
gauges was in progress at press time. Therefore,<br />
the video display gauge in your boat may have<br />
some minor variances to what is described in this<br />
manual. <strong>MasterCraft</strong> strongly encourages you to<br />
review ALL instrumentation with your authorized<br />
<strong>MasterCraft</strong> dealer prior to operating the boat for<br />
the first time, and at any time during ownership<br />
of the boat if you are uncertain as to proper and<br />
applicable functionality.<br />
Multiple Readings<br />
Interior ring: Fuel reading. E is empty, F is full. Top arm provides reading.<br />
Lower left quadrant: Engine oil pressure in pounds per square inch.<br />
Lower right quadrant: Engine temperature in Fahrenheit (default).<br />
<strong>MasterCraft</strong> <strong>2012</strong> <strong>Owners</strong> <strong>Manual</strong> • Guide to Individual Models • Page 2-61
Attitude Adjustment<br />
or Trim Tab Switch<br />
(All V-Series, including X-Series)<br />
<strong>MasterCraft</strong> utilizes Lenco attitude adjustment<br />
plate kits on several models. Dual plate kits are<br />
available on the 280 and X-80 models; a single plate<br />
kit is used on the 200, X-2, 215, X-15, 235, X-35,<br />
245 and X-45, 255 and X-55. On the dual attitude<br />
adjustment plate system, the plates operate independently<br />
of each other to provide optimal performance<br />
by redirecting water flow near the transom<br />
of the boat. These plates have been designed to<br />
improve the overall attitude of a boat. If used properly, the plates will<br />
improve the ride, reduce drag, increase speed and improve the fuel<br />
efficiency of the boat.<br />
The operation of the attitude adjustment plates is basic. The<br />
plane or planes are mounted with the actuator(s) on the transom<br />
of the boat. When the plate(s) is/are lowered, the water flow is redirected,<br />
creating an upward force at the stern of the boat. When the<br />
stern rises, the bow will lower.<br />
Since these actuators are electromechanical, they provide an immediate<br />
response at the touch of the switch. The switch adjustments<br />
are based on the position of the bow. On the dual attitude adjustment<br />
plate system, the right side of the switch controls the starboard plate<br />
and the left side of the switch controls the port plate. On the single<br />
plate system, there is only one switch control.<br />
The system is set up this way to minimize the guesswork while underway.<br />
Press DOWN to lower the bow. Press LEFT to roll the boat<br />
to the left, and RIGHT to roll the boat to the right.<br />
Since our models have different weights, lengths, speed and performance,<br />
it will take some practice for the operator to understand how<br />
your boat reacts with the attitude adjustment plates installed. The<br />
plates will allow your boat to get on plane faster and continue planing<br />
at lower speeds. This will improve visibility and the overall safety of<br />
your boat. When making adjustments with the attitude adjustment<br />
plates, use short momentary taps of the switch. Continued practice<br />
will help you become familiar with how the plates perform.<br />
Special Conditions<br />
Head Sea: Lower both plates by tapping slightly BOW DOWN<br />
on both sides of a dual system, BOW DOWN on a single system.<br />
This will bring the bow down while maintaining speed. This also allows<br />
the hull of the boat to absorb the impact of the waves. This adjustment<br />
will result in a more efficient and smoother ride. Changes<br />
should be made in small increments to ensure maintaining control<br />
of the boat.<br />
Following Sea: Make sure the plates are fully retracted by<br />
pressing BOW UP on both sides of a dual system, and BOW UP on a<br />
single system. This will bring the plate(s) up to a fully retracted position,<br />
decreasing lift in the stern and allowing the bow to rise. If the<br />
plate(s) is/are deployed, the bow may dig.<br />
Windy Chop: To raise the windward side of the boat on dual systems,<br />
press BOW UP on that side. If this is not sufficient press BOW<br />
DOWN on the leeward side of the boat. Do not over-trim when attempting<br />
this. This will allow the windward side of the boat to rise<br />
and will minimize spray.<br />
Shallow Water/Hole Shot: Lower both plates completely on a<br />
dual system by pressing BOW DOWN on both sides (the single plate<br />
on a single system). This provides lift in the stern of the boat and will<br />
keep the bow down. As you throttle up and speed increases, raise<br />
Sport<br />
Enhancement<br />
Controls<br />
the tab(s) by pressing BOW UP on both sides of a dual system, and BOW UP<br />
on the single system.<br />
Uneven Load: When equipped with a dual system, if one side of the boat<br />
is higher than the other while running, press BOW DOWN on the switch on<br />
that side. This will lower the tab on the listing side (low side) to bring the<br />
boat level.<br />
Porpoising: To stop porpoising, press BOW DOWN on both sides of a<br />
dual plate system, BOW DOWN on a single system. The plate(s) needs only<br />
to be deployed slightly to correct this adverse situation.<br />
While operating attitude adjustment plates use caution. Improper<br />
use of plates can cause accidents, which may result in serious injury<br />
or death. While the boat is underway do not move one plate<br />
up or down significantly as this may cause listing. While at higher<br />
speeds do not over-trim, as this will cause the bow to lower quickly,<br />
resulting in a reduction of speed and may cause the boat to veer.<br />
When in following seas or when running an inlet, the plates should be<br />
fully retracted. This will allow for optimal performance. ELECTROME-<br />
CHANICAL ACTUATORS PROVIDE AN INSTANT RESPONSE.<br />
WHEN MAKING ADJUSTMENTS, USE SHORT MOMENTARY<br />
TAPS OF THE SWITCH.<br />
<strong>MasterCraft</strong> <strong>2012</strong> <strong>Owners</strong> <strong>Manual</strong> • Guide to Individual Models • Page 2-62
Ballast Empty/<br />
Fill Switches<br />
(On Ballast-equipped Models Only)<br />
On boat models equipped with a ballast<br />
system, a separate three-position<br />
switch will allow for the filling or emptying<br />
of the ballast tanks and/or bags. Be<br />
aware that the engine must operate at<br />
1500 RPM during the fill and empty processes.<br />
Check engine specifications for<br />
related engine idle speed, which may be<br />
too low for the empty/fill operation to be<br />
properly accomplished. Failure to increase<br />
engine RPM to the required level may result<br />
in malfunction or permanent damage<br />
to the ballast pumps that force the water<br />
through the system. Such damage is not<br />
covered under your warranty. The ballast<br />
controls vary in location by model, and the<br />
operator should determine exact location<br />
prior to use. The three-position switches are clearly marked; FILL, OFF<br />
(in center), and EMPTY.<br />
An LED light is in the tip of each switch. At the conclusion of the FILL<br />
process, the light will blink six times in succession, pause for two-tothree<br />
seconds, and then blink an additional six times. This signals that<br />
the FILL process is complete. If the system senses any potential problems,<br />
the LED lights may blink from one to five times (each signifies individual<br />
issues). If this occurs, see an authorized <strong>MasterCraft</strong> dealer for<br />
analysis and correction. Do not attempt to correct the issue on your own<br />
or continue to FILL the ballast as it may result in damage to the system.<br />
Mirrors<br />
Whether utilizing the standard mirror or the optional Extreme mirror,<br />
just as you would in a car, you should always check that the mirror<br />
is properly located to view behind the boat while it is underway. Also<br />
be sure that it is securely attached to the windshield extrusion. Under<br />
normal operation, there is a certain amount of vibration and over time<br />
this can cause brackets and hardware to work loose.<br />
Prior to operation of the boat, verify that the mirror<br />
hardware is secure. Failure to do so may result in the<br />
mirror detaching from the windshield extrusion. The<br />
mirror could hit the operator or a passenger, resulting<br />
in injury.<br />
Plug ’n Play<br />
The Plug ’n Play ballast system gives consumers the ability to mix<br />
and match ballast loads as an option on V-Series boats. If ordered as<br />
an option, the plumbing for the Plug ’n Play will come from the factory<br />
ready to install bags forward and aft. <strong>MasterCraft</strong> strongly recommends<br />
using only the Plug ’n Play bags from Fly High as they have been customized<br />
to fit neatly in storage areas. The rear bags take into consideration<br />
such factors as bulkhead dimensions and the raw water strainer location<br />
of each specific model. The forward bags are built to the dimensions of<br />
the storage area under the seats and around obstructions such as stereo<br />
amplifiers and wiring. Note that the bags are intended to be left inside<br />
the storage compartments even when not filled with water. The bags,<br />
particularly if they are wet, should not be left in contact with upholstery<br />
anywhere in the boat.<br />
The most important consideration in developing these additional ballast<br />
bags was to work within the maximum capacity of each Master-<br />
Craft model in which they are equipped. When the Plug ’n Play<br />
ballast bags are filled, THE ADDITIONAL WEIGHT OF THE<br />
BAGS AND WATER MUST BE SUBTRACTED FROM the maximum<br />
WEIGHT capacity of the boat , WITH THE REMAINDER<br />
left for passengers and gear! It is always the operator’s<br />
responsibility to ensure the weight of their specific <strong>MasterCraft</strong> boat,<br />
persons aboard, ballast and gasoline weight, and all gear are within<br />
Coast Guard limits.<br />
An objective in engineering this system was for the secondary ballast bags<br />
to fill and empty with the existing ballast pumps at the flip of a switch. In order<br />
to accomplish this, the auto-fill-and-empty system that is equipped on all<br />
boats without the Plug ’n Play option is bypassed. Although you can use the<br />
BIG’s Ballast screen to see if the tanks are full (or listen for the overflow), there<br />
are no sending units in ballast bags, so no bag level readout is available on the<br />
BIG. The operator should open the front and rear storage areas where the<br />
bags are located to watch the actual bags themselves to see when they<br />
are full. To reiterate, there is NO Auto Shut-off feature for Plug ’n Play.<br />
All boats have weight limits. Failure to adhere to the posted limits<br />
can cause operation instability and/or the boat to sink. This may<br />
result in serious injury or death, as well as significant damage to<br />
the boat, which will not be covered by warranty. When the<br />
Plug ’n Play ballast bags are filled, THE ADDI-<br />
TIONAL WEIGHT OF THE BAGS AND WATER MUST BE<br />
SUBTRACTED FROM the maximum WEIGHT capacity<br />
of the boat , WITH THE REMAINDER left for<br />
passengers and gear!<br />
<strong>MasterCraft</strong> <strong>2012</strong> <strong>Owners</strong> <strong>Manual</strong> • Guide to Individual Models • Page 2-63
Here are a few additional things to know<br />
about Plug ’n Play:<br />
1. To install the bags, you will need to remove<br />
the plugs that will come with all the plumbing.<br />
<strong>MasterCraft</strong> recommends you keep track of<br />
these plugs and place them back in the plumbing<br />
when and if the bags are removed. Without<br />
the plugs or bags in place, water will make its<br />
way into the boat through these lines.<br />
If the Plug ’n Play bags are removed<br />
from the boat, the plumbing plugs must<br />
be reinstalled in the boat to prevent unwanted<br />
and potentially dangerous intrusive<br />
of water into the boat. This water<br />
can result in the boat sinking, which<br />
can result in serious injury or death!<br />
2. Once the bags are installed, you are ready<br />
to go. In order to fill the ballast bags, after<br />
the hard tanks are filled find the Plug ’n Play<br />
switches and simply move the switch to the<br />
right so the indicator light turns from green<br />
light (tanks) to a red light (bags). This activates<br />
the electronic valve that switches water<br />
flow from the hard tanks to the bags. Once<br />
red, the bags are ready to fill by selecting the<br />
appropriate ballast switch. Please note that<br />
the Plug ’n Play switches control the forward<br />
and aft systems separately. Pressing and holding<br />
the Up button will cause the center tab to<br />
retract and then the surf tabs will retract.<br />
Ski/Wakeboard Rope<br />
<strong>MasterCraft</strong> boats are equipped with ski pylons<br />
as standard equipment, and may also offer<br />
other optional pylons and towers intended to be<br />
used to attach rope for skiing and wakeboarding.<br />
Note that tow ropes should never be attached to<br />
anything but the approved pylon or tower. Care<br />
should also be taken by all on board to pay attention<br />
to the tow rope as it can snap back and<br />
hit people on-board when a skier or wakeboarder<br />
lets go of it. Usually, rope simply skips along the<br />
water surface behind the boat, but it can become<br />
airborne, especially if it was taut prior to release.<br />
Ski/wakeboard rope should never be<br />
attached to anything but approved<br />
pylons and towers as it may otherwise<br />
break free or cause other items to<br />
break under duress. People onboard,<br />
as well as skiers and/or wakeboarders<br />
could be injured. Also, operators and<br />
passengers should always pay attention<br />
to the rope when the boat is underway<br />
as rope can snap back into the<br />
boat, which could result in injury.<br />
Surf Tab Switch<br />
(All V-Series, including X-Series)<br />
On boats equipped with a surf tab switch, it will be located on the armrest. Shown is a trim tab (upper switch)<br />
with a surf tab switch (lower switch). (See the Attitude Adjustment or Trim Tab Switch explanation elsewhere in this<br />
section for information on how to utilize that functionality.) The surf tab switch is pressed LEFT to list the boat to port<br />
(or left), raising the right (starboard) side of the<br />
boat. Press RIGHT to list the boat to right (starboard)<br />
and lift the left (port) side of the boat.<br />
This information will also appear in the Video Display<br />
Gauge, as equipped.<br />
Note: On the 200V, X-2, 215V, X-15, 225V, and X25 models, surf tabs are limited<br />
to fifty percent (50%) maximum extension when the boat speed exceeds<br />
twenty miles per hour (20 mph) or thirty-two kilometers per hour (32 kph). Because<br />
the surf tab causes the boat to list to port or starboard side, it is important<br />
for operators to be aware of how it impacts handling.<br />
Maneuvering a boat with the surf tabs extended requires practice to master.<br />
Initial times running with the surf tabs extended should be done at low speed with<br />
plenty of room. This is critical to learning how the surf tabs affect control and maneuverability.<br />
ELECTROMECHANICAL ACTUATORS PROVIDE AN INSTANT RESPONSE. WHEN MAKING ADJUSTMENTS, USE SHORT<br />
MOMENTARY TAPS OF THE SWITCH.<br />
<strong>MasterCraft</strong> <strong>2012</strong> <strong>Owners</strong> <strong>Manual</strong> • Guide to Individual Models • Page 2-64
Swim/Boarding Platforms<br />
One of the most attractive aspects of all <strong>MasterCraft</strong> boats are the swim<br />
platforms attached to the transom of the boats. Whether teak or fiberglass<br />
with inlays, the swim platforms are a source of enjoyment.<br />
<strong>MasterCraft</strong> reminds consumers to review the Common Sense Approach<br />
section of this Owner’s <strong>Manual</strong>, and pay particular attention to avoiding “teak<br />
surfing” or “platform dragging,” which expose the participant to excess carbon<br />
monoxide; and to the information regarding use of the optional shower<br />
while standing or sitting on the swim platform.<br />
Carbon monoxide is a colorless, tasteless, odorless and poisonous<br />
gas that accumulates rapidly and can cause serious injury<br />
or death. Exposure to carbon monoxide can be fatal in a matter<br />
of minutes. Exposure to even low concentrations of carbon<br />
monoxide must not be ignored because the effects of exposure to<br />
carbon monoxide can build up and be just as lethal as high concentrations.<br />
Carbon monoxide from exhaust pipes of inboard or<br />
outboard engines may build up inside and outside the boat in<br />
areas near exhaust vents, particularly during slow-speed operations.<br />
STAY AWAY from these exhaust vent areas, which are<br />
located at the stern of the boat, and DO NOT swim or engage in<br />
any watersports or other activities in or near the stern area of<br />
the boat, including, without limitation, the swim platform and<br />
the rear sun deck, when the engine is in operation. Under no<br />
circumstances should the owner and/or operator allow persons<br />
to hold onto the swim platform while the engine is operating<br />
and the boat is in motion. These activities (sometimes known as<br />
“teak surfing” or “platform dragging,” where the participant<br />
holds onto the swim platform and is pulled through the water,<br />
and/or “body surfs” immediately behind the boat) are extremely<br />
dangerous, highly likely to result in death or serious bodily injury,<br />
and are a misuse of this product.<br />
Some platforms feature a bracket, which allows the platform to fold<br />
down, reducing the amount of room required for storage. Note that the<br />
platforms themselves are fairly heavy, and releasing the bracket may result<br />
in the platform falling down and striking the transom with excessive force.<br />
Please provide support to the platform at the time of releasing the bracket,<br />
and slowly lower the platform into place for towing or storage.<br />
Many models are equipped with a swim platform that may be folded down.<br />
To determine whether the boat is so equipped, look beneath the platform and<br />
see if the bracket with pin appears as in the photo. If so, the swim platform can<br />
be folded. To do so properly, follow these instructions:<br />
Folding Down the Platform<br />
Remove the safety hinge pins in each swim platform bracket.<br />
Begin by lifting the platform about four (4) inches upward while easing<br />
the platform away from the boat transom. This will allow the platform to<br />
move freely on the hinge.<br />
NOTE: Ensure there is no tightness while the swim platform is being<br />
folded. There should be no binding during this action.<br />
Securing the Platform<br />
Step 1: Lift the platform to approximately 20 degrees angle from<br />
the boat.<br />
Step 2:<br />
Step 3:<br />
Step 4:<br />
Lightly push the platform (do not shove nor jam) toward<br />
the transom to allow the platform to set in place.<br />
Verify that the platform is in the locked position and will<br />
not fall down. Failure to verify that the platform is locked<br />
may result in the platform falling while someone is on it<br />
and could result in injury.<br />
Insert one (1) safety hinge pin into each platform bracket<br />
as shown in the top photo.<br />
The platform must be raised and locked into position for transportation<br />
of the boat, as well as use of the platform while boating.<br />
Leaving the platform down may result in damage to the<br />
boat transom during transport that will not be covered by the<br />
warranty!<br />
The platform must be raised and locked into position for<br />
use of the platform while boating. No one should be allowed<br />
on the platform until the platform is securely locked<br />
in place and the engine is OFF. Failure to do so may result<br />
in serious injury or death!<br />
<strong>MasterCraft</strong> <strong>2012</strong> <strong>Owners</strong> <strong>Manual</strong> • Guide to Individual Models • Page 2-65
Towers<br />
Many <strong>MasterCraft</strong> models are now equipped with a tower,<br />
whether as part of a standard package or as an optional<br />
addition. Again, <strong>MasterCraft</strong> strongly encourages the occupants<br />
of the boat to review the Common Sense Approach and<br />
the Boating Safety sections of this Owner’s <strong>Manual</strong> prior to<br />
use of the boat and the tower component.<br />
Occupants of the boat should never stand, sit or jump from<br />
the tower. Nothing but <strong>MasterCraft</strong>-approved towing should<br />
be attempted. (See Boating Safety section of this Owner’s<br />
<strong>Manual</strong>.)<br />
Boat owners are strongly urged to purchase tower accessories<br />
only through an authorized <strong>MasterCraft</strong> dealer. Master-<br />
Craft has carefully determined the maximum amount of accessories<br />
and total weight that the tower can safely hold. Ignoring<br />
this information could result in injury to the boat operator and/<br />
or passengers.<br />
<strong>MasterCraft</strong> has determined that for the tower<br />
utilized on the current models, the total weight of<br />
all accessories mounted on the tower should never<br />
exceed 85 pounds, regardless of whether the accessories<br />
are <strong>MasterCraft</strong>-approved and supplied or<br />
have come from an aftermarket supplier. Exceeding<br />
this restriction can result in tower failure, which<br />
could result in serious injury or death to the boat operator<br />
and/or passengers.<br />
Many boats are equipped with the ZFT5P tower. To properly<br />
operate the tower, follow these instructions:<br />
1. Always start the tower in the lowest position.<br />
2. Press the switch UP momentarily to move the tower to mid-point. The tower<br />
will advance slowly to the position. After the tower reaches this position,<br />
the control box will go into stand-by mode.<br />
NOTE: Whenever raising or lowering the tower, pay attention to the surroundings.<br />
Ensure that people and objects are never in the way. Failure to do<br />
so could result in injury or damage that is not covered under warranty.<br />
Always ensure that there are no people nor objects in the way when<br />
raising and lowering the tower. Individuals and their limbs may be subject<br />
to injury if caught in the path of the tower, as well as potential damage<br />
to the boat, which is not covered under warranty.<br />
3. From mid-point, the tower may be raised or lowered. By pressing the<br />
switch UP momentarily, it will move to the top position. By pressing the<br />
switch DOWN momentarily, it will move to the lowest position. After the<br />
tower reaches the top or lowest position, the control box will go into standby<br />
mode.<br />
4. At any time, the tower can also be stopped by pressing the UP or DOWN<br />
switch momentarily. The tower will remember the position and you may<br />
start it UP or DOWN again by momentarily pressing the switch.<br />
5. If at any time the tower stops in an unusual position, pressing the DOWN<br />
switch momentarily will bring the tower to the lowest position and reset<br />
the control box. Normal operations will then resume.<br />
In some instances, depending upon where the tower has stopped, it may<br />
be necessary to press the DOWN switch a second time to reset the control box<br />
and the tower at the lowest position.<br />
NOTE: The tower will not move when the engine is at 800 RPM or higher.<br />
Towing, wakeboarding and other allowable activities involving the tower<br />
should be undertaken with the tower FULL UP or at mid-point positions. The<br />
mid-point setting also allows the boat to run with the tower and optional Bimini<br />
tops in a lower, more aerodynamic position. For stability and to avoid<br />
damage to the Bimini, it should be stowed prior to towing the boat on a trailer.<br />
<strong>MasterCraft</strong> <strong>2012</strong> <strong>Owners</strong> <strong>Manual</strong> • Guide to Individual Models • Page 2-66
12-Volt Receptacle<br />
(All Models; Some May Have Multiple Receptacles)<br />
<strong>MasterCraft</strong> boats have one (1) or more 12-volt receptacles.<br />
Examine your boat to determine whether there are additional<br />
outlets. Prior to plugging any accessory into a 12-volt receptacle,<br />
ensure that the device is designed for use when connected<br />
to a 12-volt receptacle and will not be damaged by the connection<br />
to the receptacle.<br />
Aft Light Switch<br />
(Models Equipped with Optional Tower<br />
Lights)<br />
The location of the aft light switch<br />
(where equipped) will vary by model<br />
and should be located by the operator.<br />
In some instances, there may be two (2)<br />
switches. In all instances, the lights operate<br />
by using two-position switches,<br />
one position for ON and the other for OFF.<br />
AM/FM Stereo, CD Player,<br />
Remote Control, iPod and<br />
MP3 Player Connections<br />
(Stereo Standard Installation on X-Series; Optional on All Other<br />
Models; Remote Control on Armrest, iPod and MP3 Player Connections<br />
with Stereo Installation)<br />
Boats may be equipped with a range of entertainment opportunities<br />
from radios and CD players to connections for personal devices.<br />
ALL radio and CD players will be located within the glovebox of<br />
the boat. Remotes may be in the armrest or on the transom.<br />
The iPod interface option features a cable located inside the<br />
glovebox that allows the unit to simply be plugged in and run off the<br />
boat’s electrical system. An optional plug-in location for MP3 players<br />
is available. Be aware that all such devices are a drain on the boat’s<br />
battery and electrical system. Care should be taken to avoid excessive<br />
usage of such devices and by responding to any alarms that sound so<br />
that the boat’s battery(ies) does not become fully discharged.<br />
Another option is a wireless stereo remote that will float if accidentally<br />
dropped overboard. The remote can also double as a key fob<br />
for a limited number of keys.<br />
The stereo and components<br />
come with a separate manual<br />
explaining operation of the<br />
devices. Please review and become<br />
familiar with the equipment.<br />
Convenience<br />
Controls<br />
Courtesy Lights Switch<br />
(All Models)<br />
This switch is a two-position switch that activates the courtesy lights<br />
within the boat. Turning the switch upwards<br />
will turn the lights ON, and turning<br />
it downwards will turn the lights OFF.<br />
Note that on boats equipped with<br />
the optional underwater lights (transom<br />
below the water line), this same switch<br />
operates those lights. Also note that the<br />
underwater lights should never be operated<br />
unless the boat is in the water. Even though these are L.E.D. lights,<br />
they generate some heat and require the cooling effect of the water to<br />
avoid premature burn-out of the bulb.<br />
Display Selector Switch<br />
(ProStar 190, ProStar 197, X-7)<br />
On the models equipped with the Multi-Function gauge, this<br />
switch allows the operator to toggle between functions.<br />
Engine Hatch Switch<br />
(280/X-80)<br />
Where equipped, an engine hatch cover<br />
switch allows the cover to open and close<br />
electronically. The three-position switch<br />
is pressed up to open and down to close<br />
the hatch.<br />
The engine box serves as a machinery guard. The engine must be<br />
OFF whenever the box is open. Clothing or body parts can get<br />
caught in moving parts, causing death or serious injury. Keep<br />
away from moving parts!<br />
<strong>MasterCraft</strong> <strong>2012</strong> <strong>Owners</strong> <strong>Manual</strong> • Guide to Individual Models • Page 2-67
Heater Switch<br />
(Optional Installation for All Models)<br />
Among the accessory options available for your boat<br />
is a heater function. The heater’s three-position switch<br />
is turned up for ON (LOW), or turned down for ON<br />
(HIGH). The center position is OFF. Warmed air from<br />
an electrically powered heater box will be blown from<br />
vents within the boat deck.<br />
Instrument Panel<br />
Gauge Backlighting Switch<br />
(All models equipped with the Video Display Gauge System)<br />
A three-position switch allows the operator to change the instrument<br />
panel backlighting for the gauges. Pressing the top of<br />
the switch will cause the lights to brighten, and pressing down<br />
will dim the lights.<br />
Refrigerator Switch<br />
(280, X-80 )<br />
This switch will run the refrigerator when turned ON. The refrigerator<br />
runs off the boat’s electrical and battery system.<br />
Therefore, care should be given to ensure that the battery is not<br />
drained to such an extent that the voltmeter alarm sounds.<br />
Seat Heat Switches<br />
(Optional All Models for Driver’s Seat; Certain Models<br />
for Observer’s Seat)<br />
A two-position switch allows heat to be turned ON for the<br />
driver’s seat. In some models, an optional observer seat<br />
heat switch is available and will be found on the deck below<br />
the observer seat cushion. Note that this switch will<br />
operate only when the ignition is in the ON position.<br />
Shower and/or Slick Boot Switch<br />
(Optional Installations on Most Models)<br />
A single three-position switch mounted in an aft position storage<br />
area controls the optional shower and optional Slick Boot<br />
functions. The switch is marked for each. Turn the switch toward<br />
the Shower marking to turn ON the shower. Return to center for<br />
OFF. Turn to the other direction to turn ON the Slick Boot. Return<br />
to center for OFF. These instructions work whether the boat<br />
is equipped with one (1) or both of the options, but will not be<br />
found in boats that are not equipped with either option.<br />
Sink Switch<br />
(280 and X-80)<br />
On the face plate panel adjacent to the sink is a two-position<br />
switch. Turning the switch ON allows water to run through the<br />
faucet into the sink. The water comes from a freshwater tank that<br />
requires manual refilling when the water has run out. Be sure to<br />
turn OFF the switch after running water, and especially when the<br />
freshwater tank has run dry.<br />
Tower Lights Switch<br />
(Optional Installation for All Models)<br />
The location of the tower lights switch (where equipped)<br />
varies by model and should be located by the operator.<br />
In some instances, there<br />
may be two (2) switches.<br />
In all instances, the<br />
lights operate by using<br />
two-position switches,<br />
one position for ON and<br />
the other for OFF.<br />
Underwater Lights<br />
Switch<br />
(All Models)<br />
This switch is a two-position switch that activates the<br />
courtesy lights within the boat as well as the underwater<br />
lights (where equipped), simultaneously. Turning the<br />
switch upwards will turn the lights ON, and turning it<br />
downwards will turn the lights OFF.<br />
Also note that the underwater lights should never<br />
be operated unless the boat is in the water. Even though<br />
these are L.E.D. lights, they<br />
generate some heat and require<br />
the cooling effect of<br />
the water to avoid premature<br />
burn-out of the bulb.<br />
Wash Down Switch<br />
(Optional Installation for all V Series, X-Star, including<br />
Saltwater Series)<br />
A water tank option within available models can<br />
provide a fresh-water wash of the boat interior. The tank<br />
will be eight (8) or twentyfive<br />
(25) gallons capacity, depending<br />
on the boat model.<br />
The two-position switch is<br />
pressed up for ON and down<br />
for OFF.<br />
<strong>MasterCraft</strong> <strong>2012</strong> <strong>Owners</strong> <strong>Manual</strong> • Guide to Individual Models • Page 2-68
Comfort and<br />
Convenience<br />
<strong>MasterCraft</strong> offers significant standard and optional items to make the boating experience<br />
more enjoyable. Some of these items come with their own instructions and information from<br />
the original manufacturer. In those instances, such as with the stereo equipment, the manual<br />
is included with the boat. In other instances, some general information is provided in this section.<br />
If, at any time, you are uncertain about the use or care of anything on the boat, never hesitate<br />
to contact your authorized <strong>MasterCraft</strong> dealer for additional information and guidance.<br />
Anchor<br />
Some models are equipped with<br />
anchors, and there will be a designated<br />
storage area or stowage location on the<br />
boat. Check with your dealer if you are<br />
uncertain about this area as it is important<br />
to keep the anchor stowed when it<br />
is not in use.<br />
Canvas Covers<br />
One of the most popular options for <strong>MasterCraft</strong> boats are the<br />
variety of canvas covers available. Speak with an authorized <strong>MasterCraft</strong><br />
dealer for details about what is available for each model.<br />
<strong>MasterCraft</strong> strongly recommends having an authorized Master-<br />
Craft dealer perform the installation as snap installation can cause<br />
“crazing” (unwanted spider-web-like lines in the gel coat) if the installation<br />
is not done correctly.<br />
On-going care of the canvas is required to keep the material in<br />
good condition for the life of the boat. See Cleaning the Boat section<br />
of this Owner’s <strong>Manual</strong> for more information.<br />
Note that towing with unapproved covers on the boat may result<br />
in damage to the gel coat. <strong>MasterCraft</strong> recommends the use of<br />
our towable cover only for towing. Other canvas and covers have<br />
been developed and are available only through authorized Master-<br />
Craft dealers for a variety of uses.<br />
Improperly stored anchors and/or anchor line that has been improperly<br />
re-wound, may create a hazardous situation. People onboard<br />
can trip on improperly stored materials, which can result<br />
in injury. Improperly stored materials can also move too freely<br />
during boat operation and make contact with individuals, again<br />
causing injury. Properly store all anchor and lines whether the<br />
boat is in operation or not, unless the anchor and line are in use.<br />
The anchor has been provided to assist boaters in remaining in a<br />
chosen location. Note that use of the anchor system will not guarantee<br />
a properly anchored boat or that the boat will remain in<br />
a stationary position. Environmental, bottom conditions, current<br />
and tidal conditions must be taken into consideration when anchoring<br />
the boat. Only properly trained operators should set the<br />
anchor for this system. Establishing a secure anchorage requires<br />
practice. Damage to your boat may result due to improper anchoring<br />
techniques.<br />
Coolers<br />
On many models, a removable cooler is included, particularly on<br />
models that do not have cold plates or a refrigerator. As with any<br />
similar Igloo-type cooler, routine cleaning with warm soapy water<br />
is advised after each use. Check also whether anything from inside<br />
the cooler has been spilled or in some manner ended up in the storage<br />
area in which the cooler is kept. This should be cleaned up immediately<br />
to avoid mold, mildew, stains or other damage that is not<br />
covered under warranty.<br />
Food items or anything that can create an odor should not be<br />
left in the cooler. Neither should anything that can leak be left in<br />
these units as they could potentially damage the cooler, and this<br />
type of damage is not covered under warranty.<br />
<strong>MasterCraft</strong> <strong>2012</strong> <strong>Owners</strong> <strong>Manual</strong> • Guide to Individual Models • Page 2-69
Head<br />
The following general information is provided for installed<br />
heads. See specific information provided by the manufacturer.<br />
Preparing the head for use:<br />
Step 1: With the seat lid closed, pull the flush handle to open<br />
the slide valve. Then push to close. This relieves air<br />
pressure that may be created in the lower holding<br />
tank due to changes in temperature or altitude.<br />
Fire Suppression and Extinguishing<br />
All <strong>MasterCraft</strong> V-drives are equipped with an automatic fire suppression system.<br />
The automatic system operates from sensors in the engine room and will automatically<br />
release a clean-agent, gaseous chemical that does not leave residue<br />
behind. In boats sold domestically, this is the FE-241 system; internationally, it is<br />
the FM-200 system.<br />
It is also possible to activate the system manually on the FE-241 system only.<br />
Pull the pin with the red tag , and then pull the red fire handle to set the system<br />
in operation.<br />
In case of an engine compartment fire, shut down the engine and blowers before<br />
manual discharge, or immediately following the automatic discharge. Boats<br />
are equipped with a discharge indication light at the instrument panel or on the<br />
video display gauge at the helm.<br />
After the suppression system has been used, the fire extinguisher canister<br />
will be empty. The boat owner/operator should have the canister replaced as<br />
soon as practicable.<br />
V-drive boats have also been specified to carry a hand-held 2.5 lb. monoammonium<br />
phosphate expellant (dry chemical) unit, which is rated Class A (trash, wood and<br />
paper), Class B (UL Approved) and Class C (energized electrical equipment). These<br />
units should be used in situations other than engine compartment fires.<br />
All V-drives are specified for one (1) dry chemical, hand-held extinguisher. This is<br />
in addition to the suppression system in the engine compartment.<br />
Hand-held units should be replaced or recharged as soon as possible after use.<br />
Chemical discharge should be cleaned from all surfaces as soon as possible and<br />
prior to running the boat again, unless operation is necessary to return to shore.<br />
The boat should never be operated following a fire until after a determination<br />
has been made whether operation may result in another fire. If any danger<br />
of an additional fire exists, the boat should be towed to shore or dock rather than<br />
running the engine(s).<br />
Consumers who choose to purchase fire control equipment from resources<br />
other than <strong>MasterCraft</strong> must follow the instructions and requirements as listed<br />
within the engine compartment regarding suitability for the compartment volume.<br />
These standards are established by the ABYC.<br />
Step 2:<br />
Step 3:<br />
Step 4:<br />
Step 5:<br />
Remove the water cap and fill the upper tank until<br />
it reaches about 1 inch (25 mm) below the opening.<br />
Replace the cap.<br />
Pull the flush handle to open slide valve.<br />
Pour deodorant directly into the lower tank, then<br />
close the slide valve. Do NOT pour deodorant into<br />
the bowl with the slide valve closed.<br />
Stroke the air pump about 15 times or until air emits<br />
through the relief valve on the water cap. Do not<br />
over-pressurize the upper tank by covering the relief<br />
valve. Do not let the upper tank pressurize when<br />
it is disconnected from the lower tank.<br />
Following the activation of the automatic fire suppression system<br />
or a hand-held fire extinguisher, a careful determination should be<br />
made as to whether the boat can safely be operated. If there is any<br />
doubt or concern whatsoever, the boat should be towed to shore and/<br />
or dock for service by an authorized <strong>MasterCraft</strong> dealer prior to<br />
operating again. Failure to follow these instructions could result in<br />
death or serious injury/illness.<br />
<strong>MasterCraft</strong> <strong>2012</strong> <strong>Owners</strong> <strong>Manual</strong> • Guide to Individual Models • Page 2-70
In using the toilet:<br />
Step 1: Before each use, with the seat lid closed, pull the flush handle<br />
to open the slide valve, then push to close. This relieves air<br />
pressure that may be created in the lower holding tank due<br />
to changes in temperature or altitude.<br />
Step 2:<br />
Step 3:<br />
Pull the flush handle to release waste in the lower tank.<br />
Push the flush button to rinse the bowl. Push the flush handle<br />
to close the slide valve.<br />
To empty the holding tank:<br />
Step 1: When the tank level indicator shows “FULL,” or at the end of<br />
an outing, empty the lower tank.<br />
Step 2:<br />
Step 3:<br />
Step 4:<br />
Pull up on the rear latch to separate the upper tank from the<br />
lower tank. Carry the lower tank to an authorized waste disposal<br />
area or a normal toilet. (DO NOT DISPOSE WASTE<br />
IN ANY LOCATION, INCLUDING NAVIGABLE BODIES OF<br />
WATER, WHERE SUCH DISPOSAL IS ILLEGAL OR CRE-<br />
ATES AN ENVIRONMENTAL HAZARD.)<br />
Rotate the discharge spout away from the tank and open the<br />
vent on top of the holding tank. Empty the tank.<br />
If water is available, rinse the lower tank before reassembling<br />
the portable toilet.<br />
The head is supplied with in-depth instructions, which will be found<br />
in the head and should be removed and read prior to the first use of<br />
the system. Store the instructions with this Owner’s <strong>Manual</strong> and other<br />
important material regarding the boat.<br />
Use only rapid-dissolve toilet paper with these head systems, and<br />
only deodorant specially formulated for this type of head system. See<br />
instructions for details. In the event that anything from the head’s bowl<br />
or holding tank escapes, it should be cleaned as soon as practicable.<br />
Failure to clean any spillage may result in unpleasant odors, mildew,<br />
mold and damage to the deck or other areas of the boat. This is not<br />
covered under warranty.<br />
See the Storage & Winterization section of this Owner’s <strong>Manual</strong> for important<br />
information regarding the preparation of the head for storage.<br />
Ladders<br />
Some models are equipped with ladders, which may be located at the<br />
bow or under the swim platform aft. All ladders have stowable position<br />
and operational position. Be sure to stow ladders prior to operation of the<br />
boat. Undue pressure from the water while underway could potentially<br />
damage the ladder. When opening or closing the ladder, be careful not to<br />
pinch fingers or other skin as all ladders have some kind of catch to hold<br />
them in position and provide protection for people as they board.<br />
Heater<br />
All <strong>MasterCraft</strong> models offer a heater option. The heater’s threeposition<br />
switch is turned up for ON (LOW), or turned down for ON<br />
(HIGH). The center position is OFF. Warmed air from an electrically<br />
powered heater box will be blown from vents within the boat deck. In<br />
regular use, the heater should not require any routine maintenance.<br />
However, it is advisable to avoid placing items in front of the vents,<br />
particularly when the heater is in use. The heated air coming out could<br />
cause damage.<br />
Never run the heater in a confined space, such as a garage or shop.<br />
Fumes from the engine can have deadly consequences. See also the<br />
Common Sense Approach section of this Owner’s <strong>Manual</strong> regarding carbon<br />
monoxide danger.<br />
Carbon monoxide is emitted from the engine’s exhaust system.<br />
Never run the engine without proper ventilation. Do<br />
not run the engine in a confined space or where fumes may<br />
be trapped.<br />
<strong>MasterCraft</strong> <strong>2012</strong> <strong>Owners</strong> <strong>Manual</strong> • Guide to Individual Models • Page 2-71
Lighting<br />
Some models may be equipped with incandescent<br />
bulbs in the head, storage areas or in<br />
some instances in the forward and aft-facing<br />
lights. These lights are replaceable as would be<br />
any incandescent light bulb.<br />
Other lighting that is L.E.D. will require replacement<br />
along with the housing in which they<br />
are contained. This includes the underwater<br />
lights, courtesy lights and other auxiliary lighting.<br />
These lights will need to be replaced by an<br />
authorized <strong>MasterCraft</strong> dealer.<br />
Also note that the underwater lights should<br />
never be operated unless the boat is in the water.<br />
Even though these are L.E.D. lights, they<br />
generate some heat and require the cooling<br />
effect of the water to avoid premature burnout<br />
of the bulb.<br />
Refrigeration<br />
Some models offer optional refrigeration. In the 280V and X-80 models, it is a refrigerator unit, which is free of CFCs, and instructions are provided<br />
by the manufacturer.<br />
Note that the refrigerator functions off the boat’s electrical system. Attention should be paid to the Voltmeter(s) to be certain that these systems<br />
do not over-drain the electrical system.<br />
On the 280V and X-80 refrigerator unit note that it can be used in an ambient air temperature range of -4 degrees Fahrenheit (-20 Celsius) to 130<br />
F (55 C), and a maximum of 90 percent air humidity in constant operation. The device can cool goods in a temperature range of 28 degrees F (-2 C) to<br />
53 degrees F (12 C). It is equipped with a battery monitor that switches the compressor off and on again, protecting the battery and the compressor<br />
against damage.<br />
The refrigerator is suitable for cooling food. If you wish to cool medicine, please check to determine whether the cooling capacity is sufficient for<br />
the medicine in question.<br />
Food items or anything that can create an odor should not be left in the refrigerator or cold plate areas. Neither should anything that can leak be<br />
left in these units as they could potentially damage the units, and this type of damage is not covered under warranty. The condenser on the refrigerator<br />
should be kept free of dust, dirt and anything that inhibits its proper operation. The manufacturer also recommends leaving the drawer slightly<br />
open if it will not be used for a period of time. This helps prevent unpleasant odors from forming.<br />
Refrigerator cleaning instructions have been provided by the manufacturer. Note that it should always be OFF, and should never be cleaned<br />
under flowing water or submerged in any kind of body of water, including, but not limited to, a sink. Do not use abrasive cleaning agents. If it is<br />
necessary to defrost the interior, never remove layers of ice with hard or sharp tools as they can damage the plastic of the vaporizer. Allow the unit<br />
to air defrost.<br />
The refrigerator operates by opening the coolbox door and turning the thermostat knob clockwise. Shutting it off requires turning the thermostat<br />
knob counterclockwise.<br />
<strong>MasterCraft</strong> <strong>2012</strong> <strong>Owners</strong> <strong>Manual</strong> • Guide to Individual Models • Page 2-72
Seat Heaters<br />
For real comfort, some models offer a seat<br />
heater option, which will be for the driver’s seat,<br />
and sometimes in the observer’s seat. It is not<br />
offered for any other seating in the boat. Note<br />
that the ignition must be ON for the seat heater<br />
to work. The heater(s) operate by a switch on<br />
the control panel. If the switch is turned ON<br />
and the seat does not warm up, or appears to<br />
become too warm, turn the switch to OFF and<br />
seek assistance from your authorized Master-<br />
Craft dealer in remedying the issue.<br />
Seating<br />
Comfortable seating is a hallmark of <strong>MasterCraft</strong>.<br />
Not only does the seating enhance<br />
the overall boating experience but it also is the<br />
designated area for operators and passengers<br />
to be while the boat is underway.<br />
When boats are in motion, operators<br />
and passengers should always be<br />
seated on upholstered designated occupant<br />
seating. No other areas should<br />
be used during operation, including,<br />
but not limited to, the gunwales, towers,<br />
sun pads, engine boxes, or any area<br />
that is not clearly intended for seating<br />
while the boat is underway. People can<br />
become dislodged from locations that<br />
are not actual seating, which could result<br />
in injury during boat motion.<br />
Some specialized optional seating adds<br />
more comfort. Convertible seats allow the seat<br />
back to be moved forward or back, changing<br />
the orientation. (Be sure that the seat back<br />
locking mechanism is securely engaged before<br />
using the seat back. Failure to engage the locking<br />
mechanism may allow unintended movement<br />
that could result in a person losing balance<br />
or even falling.)<br />
The convertible seat back at the transom<br />
seating is intended to be used only when the<br />
boat is stationary and the engine is OFF. The<br />
seat back must be in the stowed position, never<br />
aft facing, when the engine is running or the<br />
boat is underway. Positioned aft facing, the<br />
seat back offers no security to persons seated<br />
at the back of the boat and they could slide off<br />
and into the water, with the possibility of making<br />
contact with the transom or swim platform,<br />
which could result in injury. Also, while the seat<br />
back is positioned to allow aft seating, individuals<br />
may be exposed to carbon monoxide if the<br />
engine is running.<br />
Optional jump seats also have latches to hold them in place. Open the observer seat adjacent<br />
to the jump seat and note that there is a lock pin that should be inserted to hold the jump seat secure<br />
against the side deck of the observer seat. Failure to do this could allow the jump seat to move<br />
during boat operation, which could result in passenger injury.<br />
Carbon monoxide is a colorless, tasteless, odorless and poisonous gas that accumulates<br />
rapidly and can cause serious injury or death. Exposure to carbon monoxide can be<br />
fatal in a matter of minutes. Exposure to even low concentrations of carbon monoxide<br />
must not be ignored because the effects of exposure to carbon monoxide can build up<br />
and be just as lethal as high concentrations. Carbon monoxide from exhaust pipes of<br />
inboard or outboard engines may build up inside and outside the boat in areas near<br />
exhaust vents, particularly during slow-speed operations. STAY AWAY from these<br />
exhaust vent areas, which are located at the stern of the boat, and DO NOT swim or<br />
engage in any watersports or other activities in or near the stern area of the boat, including,<br />
without limitation, the swim platform and the rear sun deck, when the engine is<br />
in operation. Under no circumstances should the owner and/or operator allow persons<br />
to hold onto the swim platform while the engine is operating and the boat is in motion.<br />
These activities (sometimes known as “teak surfing” or “platform dragging,” where the<br />
participant holds onto the swim platform and is pulled through the water, and/or “body<br />
surfs” immediately behind the boat) are extremely dangerous, highly likely to result in<br />
death or serious bodily injury, and are a misuse of this product.<br />
Convertible seat backs should always be in the stowed position when the boat is underway.<br />
Anyone seated facing aft could become dislodged when the boat is underway, which<br />
could result in sliding off the seating and making contact with the transom or swim platform.<br />
Jump seats should be secured against the deck with a lock pin accessible under the<br />
observer seat to avoid dislodging passengers while the boat is underway. Convertible seat<br />
backing should always be secured prior to use. Care should be taken to avoid pinching<br />
fingers or other skin when sliding the backing.<br />
<strong>MasterCraft</strong> <strong>2012</strong> <strong>Owners</strong> <strong>Manual</strong> • Guide to Individual Models • Page 2-73
Shower or Wash Down<br />
Many models offer a shower or wash down option.<br />
The switches are marked for each and may also include<br />
the underwater lights, where equipped. The switches<br />
are operated as ON-OFF and should always be left in<br />
the OFF position when the system(s) is not in use. The<br />
instructions work whether the boat is equipped with<br />
one (1) or both of the options, but will not be found in<br />
boats that are not equipped with either option.<br />
On V Series, the X-Star and the Saltwater Series<br />
a tank option within available models can provide a<br />
fresh-water wash of the boat interior. The tank will be<br />
eight (8), ten (10) or twenty-five (25) gallons capacity,<br />
depending on the boat model. The two-position<br />
switch is pressed up for ON and down for OFF.<br />
Do not use the shower with the engine running.<br />
Carbon monoxide is emitted from the engine’s<br />
exhaust system. Never run the engine<br />
without proper ventilation. Do not run the<br />
engine in a confined space or where fumes<br />
may be trapped.<br />
Routine maintenance is not required beyond occasionally<br />
checking the lines and shower head to be<br />
certain these elements are not damaged in any fashion.<br />
Be certain to follow the Storage & Winterization<br />
section’s instructions found elsewhere in this Owner’s<br />
<strong>Manual</strong>.<br />
Stereo Equipment<br />
All stereo equipment, whether standard or optional equipment, comes with extensive<br />
instruction material. Please refer to this material or to the manufacturer’s website for details<br />
and guidance.<br />
Tables<br />
If the cockpit table option was selected for the applicable<br />
models, the table can be removed and stored.<br />
In doing so, ensure that the table and leg are secure in<br />
a storage compartment. If they are left out on the deck<br />
of the boat, they may shift or move and cause injury.<br />
Stored away, they should also be situated so that the<br />
metal top and bottom of the leg cannot rub against<br />
the table top and cause scratches. This type of damage<br />
will not be covered under warranty.<br />
See the Cleaning the Boat section of this<br />
Owner’s <strong>Manual</strong> for information on cleaning the surfaces<br />
of all tables.<br />
<strong>MasterCraft</strong> <strong>2012</strong> <strong>Owners</strong> <strong>Manual</strong> • Guide to Individual Models • Page 2-74
Preparation
<strong>MasterCraft</strong> boats are equipped with a highly innovative fuel system. This system is<br />
designed to provide years of trouble-free service. Some of the latest innovations related to fuel<br />
Using Care<br />
handling safety are also incorporated into the fuel delivery system.<br />
The fuel pump system in your boat was specifically designed for the marine environment<br />
and contains a number of added safety components that are unique to the marine environment.<br />
Because of the special nature of the design, there are no user-serviceable parts. Any<br />
When Fueling<br />
parts in need of service or maintenance will need to be addressed by an authorized Master-<br />
Craft dealer. An authorized <strong>MasterCraft</strong> dealer is equipped with the special tools necessary to<br />
disassemble and service the fuel capsule and associated parts. Replacement parts must meet<br />
OEM requirements as specified by <strong>MasterCraft</strong>.<br />
The fuel line in the boat’s bilge area that goes from the tank to the engine is a special<br />
multi-layer armored line that is covered with a special material known as a fire sleeve. The<br />
fire sleeve affords protection to the fuel line in the unlikely event of a boat fire. The sleeve<br />
is colored orange for easy identification of the fuel line.<br />
During refueling you should reasonably expect to not have any fuel spitback or wellback when using an automatic shut-off fuel pump nozzle. All<br />
land-based gas stations are required to use these; some marinas may not. Therefore, we recommend that you never leave the fuel fill unattended<br />
when gassing up.<br />
A limited number of <strong>MasterCraft</strong> boat models are equipped with a different type of fuel fill cap from traditional caps. As shown below, these caps<br />
are hinged, and they snap open or closed to seal with an audible click. This is important for the system on these boat to operate correctly.<br />
<strong>MasterCraft</strong> recommends daily inspection of the bilge for foreign materials and the possibility of gas or oil leakage detection. As part of your<br />
daily inspection, include a visual check of the orange fire-sleeved fuel line. If you see damage to the sleeve or line or in any way suspect damage or<br />
fuel leakage, DO NOT START THE BOAT! Immediately call an authorized <strong>MasterCraft</strong> servicing dealer and let him or her assess the situation. Even if<br />
the outing is canceled, leaking fuel can cause serious damage to the environment and may be a potentially hazardous situation for people and property<br />
in the area. Therefore, it is critical to attend to any indication<br />
that there is fuel line damage or fuel leakage as soon as possible.<br />
Gasoline is extremely flammable and highly explosive<br />
under certain conditions. Always stop the engine and<br />
never smoke or allow open flames or sparks within fifty<br />
(50) feet of the fueling area when fueling.<br />
Take care not to spill gasoline. If gasoline is spilled accidentally,<br />
wipe up all traces of it with dry rags immediately<br />
and dispose of properly on shore.<br />
Gasoline is explosive. If a gasoline odor is present or<br />
gasoline is visually observed in the bilge area during inspection,<br />
DO NOT START YOUR ENGINE! Remove<br />
the ignition key from the ignition switch and call an authorized<br />
<strong>MasterCraft</strong> dealer for service.<br />
Allowing the fuel level in the fuel tank to fall below onequarter<br />
of a tank full may affect the reliability of the<br />
fuel pump or result in damage to the fuel pump, which<br />
is not covered under warranty.<br />
ILMOR MARINE Engines<br />
What Type of Gasoline To Use<br />
The ILMOR MV8 engine (5.7, 6.0 and 6.2L) requires a minimum of 87 octane<br />
fuel. The octane number is based on the pump octane number, which is<br />
(R + M)/2, where R is the research octane number and M is the motored octane<br />
number.<br />
For better performance, 93 octane fuel is recommended.<br />
Fuels other than specified will negatively alter performance, emissions<br />
and could damage the engine. Use of lower octane fuels will cause spark knock<br />
(pinging). Continued heavy spark knock can cause severe engine damage. The<br />
engines have knock detection systems that offer the best engine performance<br />
by controlling knock through precise ignition timing. The higher octane fuel<br />
will cause less knock for the ignition system to process and adjust for.<br />
<strong>MasterCraft</strong> <strong>2012</strong> <strong>Owners</strong> <strong>Manual</strong> • Preparation • Page 3-2
Poor quality or old fuels can cause problems such<br />
as loss of performance, rough idling, hard starting<br />
and hesitation. If the engine experiences any of these<br />
symptoms, first try another brand of gasoline and/or<br />
replace the old gasoline with fresh gasoline.<br />
Many engine manufacturers believe the U.S.<br />
Environmental Protection Agency’s (EPA’s) detergent<br />
levels in gasolines do not provide sufficient<br />
deposit controls to allow for optimal engine performance.<br />
As a result, TOP TIER Detergent Gasoline<br />
standards were created to ensure gasolines have all<br />
the necessary additives and detergents to reduce<br />
the build-up of deposits in an engine. ILMOR recommends<br />
purchasing fuel from a supplier that confirms<br />
their fuel meets TOP TIER specifications. For a list of<br />
TOP TIER retailers, check www.toptiergas.com, and<br />
click on “Retailers.”<br />
Damage to the engine by use of low-quality gasoline<br />
or gasoline with an octane rating below the minimum<br />
level listed for ILMOR MV8 engines will void<br />
the warranty on the engine.<br />
Using Oxygenated Fuels or Fuels with Alcohol<br />
E-85 fuels are not to be used! Use of this fuel may cause engine performance to suffer and may damage vital fuel system components.<br />
Fuel that is no more than 15 percent MTBE (methyl tertiary butyl ether) may be used in the MV8 engine. MTBE is an oxygenate and octane<br />
booster. MTBE is used in fuels to meet government mandates. However, because of environmental concerns MTBE is being phased out and replaced<br />
with ethanol or methanol.<br />
Leaded fuels may NOT be used in the MV8 engine. Also DO NOT use E15 fuel.<br />
Gasoline containing levels higher than 10 percent ethanol or methanol is NOT TO BE USED in the MV8 engine. This is primarily due to the fact<br />
that the alcohol in the fuel absorbs water. Water in the fuel can cause corrosion and extensive damage in the fuel system. If the presence of alcohol<br />
in the gasoline is unknown, frequent inspections of the fuel system are required.<br />
When the Boat Is Not Used<br />
for a While<br />
ILMOR recommends the use of Sta-Bil ® fuel stabilizer if the<br />
boat consumes less than a tank of fuel every couple of weeks. Today’s<br />
fuels are more susceptible to degradation, and the use of a<br />
quality stabilizer helps ensure fewer problems if the boat is used<br />
only on a limited basis.<br />
If the boat has not been run for more than thirty (30) days and<br />
fuel remains in the tank—even stabilized fuel—the engine may run<br />
with reduced performance until the existing fuel has been used.<br />
The manufacturer will not pay for repairs to components that are<br />
damaged from poor quality fuel as this is not covered under the<br />
engine warranty.<br />
Fuels Outside the United States<br />
and Canada<br />
If the boat is operated outside the United States or Canada, it may<br />
be more difficult to obtain lead-free fuel. As the engine components are<br />
manufactured to function properly only with unleaded gasoline, it may be<br />
necessary to search for refined unleaded gasoline.<br />
Extended storage with fuel in the system can affect fuel stability<br />
and may require system inspection and fuel filter replacement<br />
when the boat returns to service.<br />
<strong>MasterCraft</strong> <strong>2012</strong> <strong>Owners</strong> <strong>Manual</strong> • Preparation • Page 3-3
The following checks and services are essential to safe boating and must be<br />
performed. Get in the habit of performing these checks in the same order each<br />
outing so that it becomes routine.<br />
Safety Checks<br />
and Services<br />
DO NOT launch or operate the boat if any problem is found during the<br />
Safety Check. A problem could lead to an accident during the outing,<br />
resulting in death or serious injury. Any and all problems should receive<br />
attention immediately. See your authorized <strong>MasterCraft</strong> dealer’s<br />
service department for assistance.<br />
Before Each Operation<br />
These tasks are best accomplished before the boat<br />
is launched.<br />
• Follow all engine and drive train pre-operation<br />
maintenance and safety checks as outlined in the<br />
engine owner’s manual provided.<br />
• Check the weather report, wind and water conditions.<br />
• Check for recommended on-board tools and<br />
parts.<br />
• Check that all drain plugs are installed properly,<br />
including bilge and rear drain.<br />
• Check the propeller and shaft for damage.<br />
• Check that there is an adequate supply of fuel.<br />
• Check that the steering system operates properly.<br />
• Check that required safety equipment is on board.<br />
• Check that the windshield and extrusions do<br />
not show any damage.<br />
When boating, avoid using the windshield<br />
as an aid for balance or getting out of a<br />
seat. This causes undue stress to the window<br />
frame and could damage it, which may<br />
not be covered under warranty.<br />
• Check that the fire extinguisher is fully charged.<br />
• Check that no fuel, oil or water is leaking or has<br />
leaked into the bilge compartment.<br />
• Check all hoses and connections for leakage or<br />
damage.<br />
• Check that everything is secure, tower and mirror<br />
knobs are tightened, all latches and brackets<br />
are secure, and anything that might move around<br />
in the cockpit during operation has been stowed.<br />
Even soft objects can cause injury when underway.<br />
Under normal operations, there will be some<br />
vibration, and this may loosen hardware over<br />
time.<br />
• Check that all required Scheduled Maintenance<br />
Checks and Services (see following sections) were<br />
performed.<br />
During Operation<br />
• Check gauges frequently for operating conditions.<br />
• Pay attention that controls operate smoothly.<br />
• Note any excessive vibration.<br />
After Operation<br />
• Check for fluid leaks.<br />
• In boats equipped with a ballast system, drain water from the ballast system before<br />
placing the boat on the trailer. If the boat has ballast-pumping assistance to remove<br />
water from the ballast system, note that the engine must be running at least 1500 RPM<br />
during the pumping process (for both fill and empty operations). This will necessitate<br />
draining water prior to ceasing operation of the boat and loading on the trailer. More<br />
information regarding ballast systems appears in various sections of this Owner’s<br />
<strong>Manual</strong>.<br />
• Check the fins (where equipped), propeller, rudder and shaft for damage after removing the<br />
boat from the water.<br />
<strong>MasterCraft</strong> <strong>2012</strong> <strong>Owners</strong> <strong>Manual</strong> • Preparation • Page 3-4
The first fifty (50) hours of operation are the most important for the boat. Proper break-in will ensure maximum performance and the longest possible<br />
power-train life. The break-in period allows moving parts within the engine and transmission to wear-in properly. All <strong>MasterCraft</strong> boats are<br />
lake-tested on the water before leaving the factory, but the break-in must continue for the first fifty (50) hours of your ownership.<br />
To ensure proper break-in and<br />
lubrication, boat owners should<br />
not remove the factory break-in<br />
oil until after the initial ten (10)<br />
hours of operation and before<br />
twenty-five (25) hours. At that<br />
time, an oil change should be performed<br />
on the Ilmor engines by<br />
an authorized Ilmor/<strong>MasterCraft</strong><br />
dealer.<br />
Failure to follow the break-in procedure<br />
exactly as stated will void the<br />
engine warranty!<br />
NOTE: Before operating the boat<br />
for the first time you must read the engine<br />
manufacturer’s manual completely<br />
in addition to this <strong>Manual</strong>!<br />
Please follow the break-in procedure<br />
carefully. Close attention to the following<br />
is very important:<br />
• Maintain the proper oil level. Until<br />
the piston rings, cylinder and other<br />
working internal parts are thoroughly<br />
seated, oil consumption can be high<br />
and must be carefully watched. (This<br />
continues to be important after breakin,<br />
as well).<br />
• Pay close attention to the gauges. It<br />
is important to stop the engine immediately<br />
if the gauges indicate a problem.<br />
Low oil pressure and overheating<br />
are serious issues and require immediate<br />
attention.<br />
• Abnormal vibration or noises. These<br />
symptoms can precede trouble and<br />
should not be ignored. Occasionally,<br />
hardware may work loose, mountings<br />
may need to be tightened or the driveline<br />
may require attention.<br />
• Fuel, oil or water leaks. Leaks can<br />
pose a serious safety threat. If one occurs,<br />
it is most likely to do so after a<br />
few hours of operation.<br />
• Vary the engine speed. Never run the<br />
engine for more than three (3) minutes<br />
at any constant RPM during the<br />
break-in period. Doing this will assist<br />
in the proper break-in of rings and<br />
bearings.<br />
• Plane the boat quickly. Operating<br />
the boat at low speeds places an<br />
excessive load on the engine. Plane<br />
quickly, then back down to a slower<br />
speed.<br />
New Boat<br />
Break-In<br />
First Hours of Operation<br />
Each engine manufacturer has detailed and specific requirements for proper engine break-in.<br />
That information is found in the engine manual supplied, and must be followed exactly as indicated.<br />
Failure to do so could cause engine damage and/or failure that is not covered under warranty.<br />
After Break-In<br />
Once the break-in period is over, the boat may be operated continuously at any speed, but not<br />
beyond the maximum indicated in the engine manual.<br />
The engines are equipped with rev-limiters which will cause a fluttering sound when reached. If<br />
the boat has the correct propeller set-up, operators should never reach the limiter, but if that happens,<br />
it is a signal that you should reduce the throttle and check with an authorized <strong>MasterCraft</strong> dealer to<br />
determine the cause.<br />
Always remember that during normal operation you should allow the engine to warm up gradually.<br />
Be sure the engine is warm before accelerating. Pay careful attention to the gauges. Also, check<br />
the oil level frequently during the first fifty (50) hours of operation since the piston rings and cylinders<br />
require that much time to seat properly.<br />
See the Scheduled Maintenance Checks and Services section for more details.<br />
Failure to follow the engine oil recommendations listed in the engine manual can cause additional<br />
engine wear and increase the possibility of engine component failure. Damage to the<br />
engine due to incorrect oil usage can be costly to repair, and is not covered by the warranty!<br />
<strong>MasterCraft</strong> <strong>2012</strong> <strong>Owners</strong> <strong>Manual</strong> • Preparation • Page 3-5
NOTE: If you are operating this boat for the first time, you must follow the engine and drive train break-in procedures as described in the<br />
previous section and the engine manual. Failure to follow these procedures may result in serious damage and may void any warranties!<br />
Before Starting<br />
Familiarize yourself with the controls and indicators used on this <strong>MasterCraft</strong> boat. Perform all<br />
Safety Checks and Services as described earlier. Also perform all Scheduled Maintenance Checks and<br />
Services.<br />
Starting<br />
and Basic<br />
Operation<br />
Step 1: Lift the engine cover and inspect the bilge and engine compartment for any fluid/vapor leakage.<br />
<strong>MasterCraft</strong> recommends lifting the engine compartment cover for inspection before<br />
each use.<br />
Step 2: Check the hull drain plugs. Make sure they are installed and secure.<br />
Step 3: Operate the bilge blower for at least four (4) minutes. Leave the bilge blower ON through the<br />
starting process and until the boat has planed.<br />
To prevent a possible explosion, operate the blower for at least four (4) minutes before starting<br />
the engine and always when at idle or slow-running speed. Explosive gasoline and/or<br />
battery fumes may be present in the engine compartment. Failure to do so may result in<br />
serious injury or death!<br />
Before starting the engine, open the engine compartment and check for gasoline fumes, fuel<br />
and oil leaks or the presence of fuel or oil in the bilge.<br />
NOTE: Always start the engine with the control lever in the neutral position or with the shift disengaged.<br />
Your boat is equipped with a neutral-start safety switch that will not allow the engine to be<br />
started when in gear.<br />
Starting the Engine<br />
Step 1: Attach the emergency engine safety switch tether (lanyard) to an article of<br />
your clothing and to the switch.<br />
Step 2: For normal starting, leave the throttle lever in neutral. The electronic controls<br />
will meter the correct fuel and air automatically.<br />
To start a ProStar 190, 197, X-7 or X-1, following these steps:<br />
Insert the key in the ignition key slot. The key will be in one of four (4) positions:<br />
• OFF<br />
• Accessory (including running the stereo without the engine running)<br />
• ON (engine is running)<br />
• Start (turn the key to engage the engine starter, then release to allow the key to<br />
automatically return to the ON position)<br />
Never leave the ignition switch in the ON position without the engine running, as<br />
this will cause the battery to discharge.<br />
be no apparent leaks under pressure. Re-engage the<br />
control lever after warm-up by returning the lever to<br />
neutral and pushing the throttle button back into the<br />
engage position.<br />
Below left: ignition for ProStar 190, 197, X-7, X-1.<br />
Below right: ignition for all other models.<br />
All other models will have a removable ignition key. Its purpose is for safety and<br />
security. The key should be inserted prior to starting an outing, and removed at the<br />
conclusion. This is intended to prevent theft or unapproved use of the boat.<br />
The process for starting the boat is:<br />
• Insert the key and turn. This turns ON the electrical system and prompts the<br />
battery(ies) to provide power.<br />
• Momentarily press the ENGINE START-STOP button immediately above the<br />
key.<br />
Note: While the engine is warming up, check to see that all lights and gauges<br />
operate properly. Check that the steering system operates freely. There should<br />
<strong>MasterCraft</strong> <strong>2012</strong> <strong>Owners</strong> <strong>Manual</strong> • Preparation • Page 3-6
Shifting Gears<br />
When shifting gears, always move the control lever smoothly and<br />
quickly into gear. Do not hesitate. Slow gear engagement could damage<br />
the shifting mechanism in the transmission.<br />
NOTE: When shifting from forward to reverse or reverse to forward,<br />
be sure to stop the control lever in the neutral position and allow<br />
the engine to fall between 600-800 RPM before completing the shift.<br />
With the exception of the 280V/ X-80, a one-hand, single-lever control<br />
operates as both a gear shifter and a throttle. The lever automatically<br />
locks in the neutral position (straight up and down) for safety. The lever<br />
can be moved from neutral only by raising the lifter under the ball knob.<br />
Shifting is accomplished by moving the lever forward or backward. Center<br />
(straight up) is neutral. Moving the lever forward engages the running<br />
gear; moving it back from center puts the drive train into reverse.<br />
Never attempt to shift without the engine running!<br />
During regular warm-up of the engine, it is possible to temporarily<br />
increase the engine RPMs without moving the boat. To accomplish this,<br />
push in the button located at the bottom of the shift/throttle lever with<br />
one hand and pull up the “umbrella” (aluminum surround below the top<br />
of the knob). Move the lever to desired position and then simultaneously<br />
release the button and umbrella. The engine will run with increased RPMs<br />
and can be increased or decreased by moving the lever. Returning the<br />
handle to the neutral position (as shown in illustration above) will bring<br />
the system back to neutral and reduce the engine RPMs to pre-set levels.<br />
This function should be done sparingly. Over-revving the engine for any<br />
extended period can cause undue wear and tear on the engine. Avoid advancing<br />
to wide-open-throttle and holding the RPMs at that level.<br />
In the 280V and X-80 the boat is equipped with a four-lever control.<br />
The port side lever closest to the driver is the port engine shifter, which allows<br />
the boat to move forward when shifted forward, and backward when<br />
shifted aft. The next lever is the starboard engine shifter and performs the<br />
same function. If both engines are running and the boat is moving, the<br />
shifters should be shifted together and in the same direction.<br />
The next middle lever is the port engine throttle, which allows the boat<br />
to feed fuel into the engine and operate in motion. Pushing forward on it<br />
will signal the system that fuel should be sent to the port engine. The engines<br />
can be run at different levels of throttle. However, it requires more<br />
practice and skill in order to avoid potential damage to the boat. See<br />
Engine Synchronizing Switch in this section of the Owner’s <strong>Manual</strong><br />
for more details.<br />
Underway<br />
If the oil pressure gauge indicates low or no oil pressure, immediately<br />
stop the boat as outlined below and check the oil level. If the temperature<br />
gauge indicates overheating, stop the boat when it is safe to do so as outlined<br />
below and check the raw water system for blockage. DO NOT operate<br />
the boat until the cause for the warning has been found and corrected.<br />
Continued operation after the warning light has illuminated<br />
may cause severe engine damage. This will void your warranty.<br />
Stopping<br />
Step 1:<br />
Step 2:<br />
Step 3:<br />
Step 4:<br />
Slowly bring the control lever to the neutral position. If the boat<br />
has been driven for a long period of time or at high speed, allow<br />
the engine a 2-3 minute cool-down period at low idle (600-800<br />
RPM).<br />
Turn the ignition key to the OFF position (ProStar 190, 197, X-7,<br />
X-1) to stop the engine or press the ENGINE START-STOP button<br />
(all other models).<br />
If any problems were encountered during operation, have the<br />
boat inspected by an authorized <strong>MasterCraft</strong> dealer. Request<br />
any necessary repairs before resuming operation of the boat.<br />
At the conclusion of the outing, turn the key off and remove<br />
from the key slot. Doing so will ensure that you have turned OFF<br />
the electrical system, and prevent others from starting or running<br />
the boat.<br />
<strong>MasterCraft</strong> <strong>2012</strong> <strong>Owners</strong> <strong>Manual</strong> • Preparation • Page 3-7
Operational<br />
Hints<br />
<strong>MasterCraft</strong> urges all who will be operating the boat to seek certified instruction from the local<br />
boating authorities. This section is designed to present the most basic operational principles.<br />
It is NOT intended to cover all conditions encountered during operation. Therefore, the principles<br />
presented in this Owner’s <strong>Manual</strong> are limited to the facts related directly to the operation of the<br />
boat, while the responsibility for the proper application of these principles belongs with the boat<br />
owner and/or operator.<br />
Adding additional aftermarket ballast to a <strong>MasterCraft</strong> boat is not recommended,<br />
and can result in impaired visibility, diminished handling characteristics and instability<br />
when operating your boat, and may result in potential structural and/or engine<br />
damage to the boat, which damage will not be covered by your warranty.<br />
Loading<br />
Never overload the boat. The maximum weight<br />
capacity as listed on the certification plate includes all<br />
items added to the boat (including persons and gear).<br />
Proper distribution of weight is critical to boat performance.<br />
Allocate the load as evenly as possible.<br />
The maximum weight capacity includes filled, factoryinstalled<br />
ballast tanks and/or ballast bags, added by<br />
the customer.<br />
The maximum weight capacity is calculated<br />
with full factory installed fuel and ballast tanks. The<br />
weight of occupants, gear and water in any ballast<br />
bags added by the customer reduces the capacity of<br />
the boat. Failure to adhere to the total maximum<br />
capacity may result in too much strain on the drive<br />
train or may sink the boat. This is not covered under<br />
warranty! See the Common Sense Approach<br />
section of this Owner’s <strong>Manual</strong> regarding weight.<br />
Information regarding the maximum number<br />
of people and/or additional weight to the boat<br />
is included in the Guide to Individual Models<br />
section of this <strong>Manual</strong>. It is the boat operator’s<br />
responsibility to ensure that the boat is never<br />
overloaded. Too much additional weight may<br />
cause the boat to overturn or sink, which can<br />
result in serious bodily injury or death.<br />
Emergencies<br />
Know how to use and spot distress signals, and to<br />
offer assistance if possible. Remember, you may need<br />
assistance some day.<br />
Courtesy<br />
Always respect the rights of others on the water.<br />
Keep wide when passing, slow down in crowded areas,<br />
be alert and be aware of your wake and wash.<br />
<strong>MasterCraft</strong> <strong>2012</strong> <strong>Owners</strong> <strong>Manual</strong> • Preparation • Page 3-8
First Time Operation<br />
When taking to the water for the first time, you must keep in mind a few general<br />
guidelines:<br />
• Practice makes perfect! Start in calm water with no wind or current and plenty of<br />
room until you get the feel for the boat and its controls.<br />
• Proceed slowly! Give yourself time to think, react and maneuver.<br />
• Recognize outside forces! Check the wind direction and velocity, as well as water<br />
currents and waves.<br />
• Have a crew on hand! Have friends or family ready with fenders, lines and a boat<br />
hook to assist you when docking, as well as launching and loading.<br />
• Remember that a boat is not an automobile! Boats cannot be maneuvered and<br />
stopped like a car. Boats steer from the stern (rear) and have no brakes.<br />
Basic Maneuvering<br />
Steering response is dependent upon three (3) factors: rudder position, motion and<br />
throttle. While high-speed maneuvering is relatively easy and takes little practice, slowspeed<br />
maneuvering is far more difficult and requires time and practice to master.<br />
With both steering and propulsion at the rear of the boat, the initiation of a turn pushes<br />
the stern of the boat away from the direction of the turn. The stern follows a larger turning<br />
circle than the bow. This is especially important to remember when making maneuvers<br />
within close quarters.<br />
While the effects of unequal propeller thrust (torque steering), wind, and current<br />
may not always be present, a practiced driver will use them to his/her advantage.<br />
Unequal thrust is a phenomenon shared by all single-engine, propeller-driven boats.<br />
With the rudder in the straight-ahead position, a counterclockwise rotation propeller<br />
tends to cause the boat to drive to port when going forward, and to starboard when going<br />
backward.<br />
At high speed, there is compensation for this effect, and it is virtually non-existent.<br />
But, at slow speed—and especially during backing—the effect can be very pronounced.<br />
This is the main reason that most experienced drivers approach with the dock to the<br />
starboard of the boat.<br />
Stopping—or checking headway—is a technique that must be mastered. With no<br />
brakes, reverse must be used to stop the boat. The momentum of the boat will vary according<br />
to the load. Make it a practice to slow to no-wake speed before shifting into<br />
reverse.<br />
When practicing maneuvering techniques, always do so in open water that is free<br />
of traffic. Adequate practice may make the difference between a pleasurable boating<br />
experience or a potentially damaging (at the very least, embarrassing) one.<br />
High Speed Operation<br />
<strong>MasterCraft</strong> boats are designed to be a high-performance<br />
boat. Professional drivers with advanced operating<br />
skills perform high-speed maneuvers and turns ona-dime.<br />
DO NOT attempt to duplicate or simulate these<br />
feats. Paid, professional drivers log thousands of hours<br />
on the water and carefully choreograph every move.<br />
Plans are made in advance in the event the routine must<br />
be aborted. Maneuvers of this nature could cause serious<br />
injury or death, as well as damage to your <strong>MasterCraft</strong><br />
boat that will not be covered under warranty.<br />
Boat operators should never attempt to duplicate<br />
operational skills of professional drivers.<br />
When such maneuvers fail, it can result in serious<br />
injury or death.<br />
For the best engine performance and longevity, the<br />
wide-open-throttle (WOT) engine operation must be<br />
near the top of, but within, the specified WOT operating<br />
range. To adjust the WOT operating range, select a propeller<br />
with the proper diameter and pitch. The propeller<br />
supplied on the boat was chosen for best all-around<br />
performance under average operating conditions.<br />
Load, weather, altitude and boat condition all affect<br />
WOT engine operation. If the boat is used for several different<br />
applications such as wakeboarding, barefooting<br />
and cruising, it may be necessary to have two (2) or more<br />
propellers of differing size and pitch to allow the engine to<br />
operate in the WOT range for each application.<br />
Propping the boat should be done after the boat<br />
is loaded in the manner in which it would normally be<br />
loaded for each application. For example, in propping<br />
the boat for wakeboarding, fill the ballast tanks and add<br />
the people and gear that normally would be expected<br />
in the boat. Take the boat out and after warm-up, run<br />
it at wide-open-throttle and note the maximum RPM.<br />
EFI engines are equipped with RPM limiters to prevent<br />
over-revving. Take note if the RPM limiter is activated.<br />
If the WOT RPM is higher than the maximum RPM<br />
in your engine’s WOT operating range, the boat is under-propped.<br />
Installing a higher-pitched propeller will<br />
reduce the WOT RPMs. An engine that is over-revving<br />
may quickly experience catastrophic damage, which<br />
will not be covered under warranty.<br />
If the WOT RPM is lower than the minimum RPM<br />
in your engine’s WOT operating range, the boat is overpropped.<br />
Installing a lower-pitched propeller will increase<br />
WOT RPMs.<br />
An engine that is under-revving is “lugging.” This<br />
places a tremendous load on the pistons, crankshaft<br />
and bearings and can cause detonation, piston seizure<br />
and other engine damage, which will not be covered<br />
under warranty.<br />
<strong>MasterCraft</strong> <strong>2012</strong> <strong>Owners</strong> <strong>Manual</strong> • Preparation • Page 3-9
Engines should always be operated within<br />
engine manufacturer guidelines. Failure<br />
to do so may cause significant damage to<br />
the engine and drive train and is not covered<br />
under warranty!<br />
Elevation and weather also have a very noticeable<br />
effect on the wide-open-throttle power of<br />
an engine. Since oxygen gets thinner as elevation<br />
increases, the engine begins to starve for air. Humidity,<br />
barometric pressure and temperature have<br />
a noticeable effect on the density of air since heat<br />
and humidity thin the air.<br />
This phenomenon can become particularly<br />
apparent when an engine is propped for use on a<br />
cool, dry day in spring and then is operated on a<br />
hot, humid day in summer, and does not have the<br />
same performance. Although some performance<br />
can be regained by dropping to a lower-pitch propeller,<br />
the basic condition still exists. The propeller<br />
is too large in diameter for the reduced power output.<br />
An experienced marine dealer can determine<br />
how much diameter to remove from a lower-pitch<br />
propeller for specific high-elevation locations.<br />
<strong>MasterCraft</strong>’s engine manufacturers suggest<br />
that consumers consult with the dealer from<br />
whom the boat was purchased regarding the best<br />
propeller for the application in which the boat will<br />
primarily be run. However, be aware that changing<br />
the propeller may void the warranty. Again,<br />
working with an authorized <strong>MasterCraft</strong> dealer is<br />
your best bet to ensure excellent performance.<br />
Unusual Operating Conditions<br />
If the body of water is unknown, talk to local boaters about the type of obstacles that<br />
may be encountered beneath the water’s surface. Rocks, tree stumps and sandbars are<br />
all dangerous and damaging. Be especially wary of rivers and man-made lakes. Rapidly<br />
changing conditions can cause daily changes in underwater hazards.<br />
Stay well clear of floating debris. What looks to be a small branch in the water may well<br />
turn out to be an entire tree.<br />
When traveling through weedy areas, keep an eye on the engine temperature gauge.<br />
Weeds caught up and blocking the water flow through the raw water intake or transmission<br />
cooler will cause trouble. Also, after leaving the weedy area, shift to neutral for a few<br />
seconds and then to reverse for a few seconds to unwind any weeds that may have wrapped<br />
around the propeller.<br />
Docking and Tie-Up<br />
Approach the dock slowly, with the starboard side of the boat if possible. The natural<br />
tendency to torque steer with the rotation of the propeller at slow speeds makes docking easier<br />
on that side. Also, use wind and current to your advantage when docking.<br />
Before tying up the boat, be sure to use enough dock bumpers to protect the boat from<br />
damage. If possible, tie-up with the bow toward the waves. Use good quality double-braided<br />
nylon line. Tie-up only to the cleats or tie-down eyes. Never use the handrails or ski pylon.<br />
If the boat is to be moored for a long period of time, use chafing protectors to protect<br />
the gel coat finish. Leave a little slack in the lines, allowing for some wave movement or tidal<br />
action where applicable.<br />
If the boat is to be kept in or near water for the season, consider the purchase of a boat<br />
lift and bottom paint for the hull. These lifts prevent the build-up of marine growth on the<br />
hull as well as protecting the boat from damage typical of on-water storage, such as blistering.<br />
Make sure the boat lift supports the hull correctly. See the next section, Lifting the Boat.<br />
NOTE: On boats that are equipped with the engine synchronizing switch (models<br />
with two engines), this switch should be disengaged during docking or when loading<br />
and unloading the boat from a trailer. These maneuvers require a sensitive touch and<br />
control that may not be realized when the switch is engaged.<br />
<strong>MasterCraft</strong> <strong>2012</strong> <strong>Owners</strong> <strong>Manual</strong> • Preparation • Page 3-10
Care and Maintenance
When the boat is hoisted from the water, proper use of the stern eyes or a sling system is required for<br />
all <strong>MasterCraft</strong> models. Though stern eyes are designed to lift a boat from the water, care must be taken to<br />
ensure you do not damage your boat. A spreader bar used at the stern, will help ensure that the load at the<br />
stern eyes is vertical. A strap placed between stern eyes, and then lifted from the mid-point, is not the recommended<br />
method, and will put substantial additional stress on the stern eye mounting location.<br />
Lifting<br />
the Boat<br />
DO NOT use the ski pylon or any portion of any tower for lifting. They are NOT designed to be<br />
used as a central lifting point. Also, DO NOT use the stern ski tow as a lifting ring. The deck may be<br />
damaged. See the Storage Cradle sub-section of this section. Also never lift a boat with water in the<br />
bilge or containing a water-filled device such as a ballast system or sack. The extra stress will put an<br />
excessive load on the hull and lifting equipment that may seriously damage the boat. Such damage<br />
may not be covered by the warranty.<br />
Using Lifting Eyes<br />
An overhead hoist with an appropriate rating<br />
capacity should be used to lift your boat.<br />
Cables should be properly rated for each model.<br />
Each cable should be rated at or above the<br />
full weight of the model to be lifted. When lifting,<br />
keep the bow slightly higher than the stern<br />
to prevent any possibility of water running into<br />
the engine exhaust manifold.<br />
Storage Cradle<br />
If a storage cradle is used, the hull must be properly supported to prevent load damage.<br />
This can occur with as little as fifteen (15) pounds per square inch of pressure. DO NOT support<br />
the boat by resting the hull on the keel (the central fore-and-aft structural member in the<br />
bottom of the boat’s hull, extending from the bow to the stern). Vertical supports must extend<br />
from the chine (the angular intersection of the bottom and sides of the boat) to the keel<br />
with no gaps between the hull and cradle supports. A total support area of at least 250 square<br />
inches is required for proper support of boats under 25’ and 500 square inches for boats over<br />
25’. Protect all items extending from the hull (i.e., the rudder, propeller, fins, etc.) to prevent<br />
them from resting on the cradle or the ground. DO NOT apply any load stress to the propeller,<br />
shaft, rudder, swim platform, water intake grate or other protruding items.<br />
Using Lifting Slings<br />
An overhead hoist with an appropriate racing<br />
capacity should be used. Slings must be six<br />
(6) inches wide by twenty (20) feet long and<br />
each sling should have a minimum capacity rating<br />
that is equivalent to the weight of the model<br />
that is to be lifted. Use an eight-foot spreader<br />
bar on each sling to prevent damaging side<br />
pressure to the deck or gunwale molding.<br />
Lifting slings must never contact<br />
shafts, struts or hardware protruding<br />
from the hull. Damage may result that<br />
would void the warranty.<br />
When the boat is out of the water, it<br />
is important to support the hull correctly<br />
to avoid any hull damage. Such<br />
damage may void the warranty.<br />
<strong>MasterCraft</strong> <strong>2012</strong> <strong>Owners</strong> <strong>Manual</strong> • Care and Maintenance • Page 4-2
NOTE: DAMAGE DUE TO CORROSION IS NOT COVERED UNDER WARRANTY!<br />
Galvanic Corrosion<br />
Galvanic corrosion (electrolysis) to the boat is the decomposition of metal due<br />
to the effects of electrolytic action. When two (2) dissimilar metals are immersed in a<br />
conductive fluid (e.g., salt water), an electric current is produced, much like the action<br />
of a battery. As the current flows, it takes with it tiny bits of the softer metal. If left<br />
unchecked, severe damage may occur over time.<br />
If the boat is operated in salt, polluted or brackish waters, even temporarily, the<br />
boat should be equipped with a transom-mounted zinc anode to prevent damage to<br />
those metal parts coming in contact with the water.<br />
The zinc is, by design, self-sacrificing. It is slowly eroded away by electrolytic<br />
action and requires periodic inspection for deterioration. When the zinc has eroded<br />
to approximately one-half (1/2) of its original size, it must be replaced to continue<br />
protection, or damage to other metal parts may result.<br />
<strong>MasterCraft</strong> Saltwater Series boats come equipped with the zinc anode. For<br />
fresh water boats that may be operated in polluted or brackish water, an authorized<br />
<strong>MasterCraft</strong> dealer can provide guidance in securing and installing a zinc anode for<br />
protection.<br />
Salt Water Corrosion<br />
The boat has been designed for operation in fresh water unless it is a model in<br />
the <strong>MasterCraft</strong> Saltwater Series. If operating a fresh-water model temporarily in<br />
salt, polluted or brackish water, thoroughly flush the boat with fresh water as soon<br />
as possible afterward. The entire engine cooling system should be flushed with<br />
fresh water for at least ten (10) minutes after each use in such waters.<br />
Boats operated continuously in salt water should be equipped with the closed<br />
cooling system to preserve engine life.<br />
Marine Growth<br />
If accelerated marine growth is a problem in<br />
the area in which the boat will generally be<br />
operated, an anti-fouling bottom paint may<br />
be necessary to slow growth while protecting<br />
the gel coat.<br />
Before selecting a bottom paint, talk with<br />
other boaters and an authorized <strong>MasterCraft</strong><br />
dealer’s service department to determine the<br />
product that works best in the area. Many local<br />
variables may also affect the selection of<br />
paint. Be sure to follow the paint manufacturer’s<br />
directions exactly.<br />
Be sure all fasteners used are approved<br />
and rated for marine use.<br />
Most fasteners used on <strong>MasterCraft</strong><br />
boats are stainless steel or specially<br />
coated to resist corrosion.<br />
Corrosion<br />
Prevention<br />
Stainless Steel and Chrome<br />
Stainless steel and chrome-plated parts are not totally resistant to corrosion. Occasional cleaning<br />
and polishing with a marine chrome-and-stainless polish will maintain and extend the life of these<br />
parts. In salt water areas, it is imperative that you thoroughly rinse all hardware with fresh water and<br />
apply a light coating of protective oil to enhance the appearance after each use.<br />
Exposure to salt water will cause corrosion leading to significant damage to stainless<br />
steel and chrome parts. Failure to thoroughly rinse salt water from all hardware, and<br />
to apply protective oil after each exposure to salt water, will accelerate the corrosion of<br />
hardware and will void your warranty.<br />
Use of improper parts may cause<br />
component or engine failure. Such<br />
failure may result in death or serious<br />
injury!<br />
<strong>MasterCraft</strong> <strong>2012</strong> <strong>Owners</strong> <strong>Manual</strong> • Care and Maintenance • Page 4-3
Hull<br />
When washing the boat, use a mild detergent,<br />
such as Dawn or Ivory dish soap, or similar commercially-produced<br />
detergent, and warm water solution.<br />
DO NOT use abrasive cleaners, solvents, ammonia<br />
or chlorine, as these will damage the gel coat surface.<br />
Under extreme conditions, special cleaners<br />
may be used to remove marine growth from the hull.<br />
(See an authorized <strong>MasterCraft</strong> service department<br />
for further instructions.)<br />
Periodic cleaning is the best way to keep your boat looking like new. Regular<br />
washing and waxing keep dirt and build-up from deteriorating the finish. If you<br />
keep your boat in showroom-new condition then your personal satisfaction will<br />
be higher and the resale value of your boat will be greater.<br />
The boat is made of fiberglass-reinforced plastic resin material that is easy<br />
to clean and care for. Several layers of resin material are chemically bonded together<br />
to form the hull. The smooth outside surface of the hull is a layer of gel<br />
coat resin. The gel coat is a solid color that is only a few millimeters thick.<br />
Beneath the gel coat surface is a series of layers of chemical resin, fiberglass<br />
mat and woven roving. It is these layers that give the boat its strength and maintain<br />
the hull shape. The boat bottom also uses special core-mat material for its<br />
strength-to-weight and superior marine performance.<br />
Even though <strong>MasterCraft</strong> has carefully crafted boats from resilient materials,<br />
it is still the responsibility of the boat owner to perform regular and routine cleaning<br />
maintenance to ensure that the boat exterior, interior and components retain<br />
both their appearance and strength.<br />
Cleaning<br />
the Boat<br />
Carpet<br />
Occasionally washing with mild detergent and warm water or household<br />
carpet cleaners will help keep the carpet clean. Thoroughly hose<br />
the detergent out of the carpet and into the bilge. (This is a good time<br />
to clean the bilge also.) Allow the boat to remain uncovered to air dry<br />
for several days to prevent any mildew or odor caused by moisture.<br />
Teak Wood<br />
Full teak platforms:<br />
If shoes are worn when walking on the teak, they should be proper<br />
boating shoes. Black-soled shoes are likely to scuff the surface, resulting<br />
in marks that may be difficult to remove or even leave permanent marks<br />
that are not covered under warranty.<br />
Regular cleaning and oiling of teak wood will maintain its original appearance.<br />
Unprotected wood will turn gray and could split or separate.<br />
If this happens it may void the warranty.<br />
New teak platforms have been sealed and finished with an oil-based,<br />
wood preservative by the manufacturer. Platforms will keep the new look and last for many, many years if properly maintained. For best results reoil<br />
the platform and allow it to dry before the first use. If the boat spends a lot of long weekends on the lake with the swim platform in the water or<br />
if the platform sits uncovered in the sun, it should be oiled one or two times a month during the first season; then as needed after that. The platform<br />
should be covered when not in use or when stored for the winter.<br />
Many products such as boiled linseed oil, tongue oil, teak oil and other outdoor wood preservatives can be found at marinas, paint stores or home<br />
improvement stores. Some oils such as linseed oil should be thinned with a thinner like mineral spirits before use. (70 percent oil-30 percent thinner.)<br />
When oiling a platform, apply a coat of oil with a wet cloth, work into the seams, end grain and edges. Allow the oil to set approximately 15 minutes<br />
and then wipe off the excess oil with a dry cloth. Do not let the oil dry on the platform in the sun. Excess oil should be removed with a dry cloth.<br />
Teak inlay platforms:<br />
Wear proper boating shoes. Avoid black-soled shoes as they are likely to scuff the surface, resulting in marks that may be difficult to remove or even leave<br />
permanent marks that are not covered under warranty.<br />
The teak inlay platforms feature a specially developed synthetic surface that is durable and long-lasting, provided proper care is given to the inlay<br />
surface. This maintenance is different from the full teak platform care.<br />
<strong>MasterCraft</strong> <strong>2012</strong> <strong>Owners</strong> <strong>Manual</strong> • Care and Maintenance • Page 4-4
For the inlay, note:<br />
• Inlays do not require oiling or special sealants.<br />
• Inlays can be maintained by pressure washing.<br />
• Do NOT place hot metals of any kind on the inlay surface.<br />
This will create a permanent mark.<br />
• Do NOT use acetone to clean the inlay (or fiberglass surround).<br />
• Do NOT use oil, bleach, varnish, paint or lacquer.<br />
• Do NOT use a power sander.<br />
Most spills will brush away with soap and water, using a bristled brush and<br />
boat deck cleaner. After cleaning, rinse with water and allow to air dry. Sanded<br />
areas will appear lighter after sanding and will blend in with the surrounding<br />
areas within a day or two. If a chemical stain is allowed to dry and soap and water<br />
do not remove it, the surface can be lightly sanded with 60-grit sandpaper.<br />
Sand the stain in the same direction as the black caulk seams. Sanded areas will<br />
appear lighter after sanding and will blend in with the surrounding areas within<br />
a day or two.<br />
If bleach is used on areas surrounding the teak inlay deck, first spray the<br />
surface with water to dilute any bleach that may run onto the deck surface. After<br />
cleaning the other area(s) with bleach, re-spray both the bleached surfaces and<br />
the teak surfaces to rinse away any bleach residue. Note that bleach should<br />
never be applied directly to the teak!<br />
Fiberglass Swim Platform<br />
The fiberglass swim platform requires the same kind of regular—and gentle—<br />
cleaning that the rest of the boat needs. After cleaning off any environmental debris,<br />
wash with mild soap and warm water. Avoid the use of ArmorAll or similar types of<br />
rubber-shine products as these will speed the decay of the rubber rather than protecting<br />
it.<br />
Windshield<br />
In cleaning tempered glass windshields, the normal<br />
glass cleaners (from spray bottles or aerosol cans)<br />
work best. While the glass is very strong, it can be<br />
scratched if anything abrasive is used. Harsh chemicals<br />
or solvents should be avoided because they may<br />
affect the vinyl gaskets or powder-coated finish on the<br />
extrusions.<br />
More care should be taken when cleaning the clear<br />
Eisenglass curtains, which are an option on some boat<br />
models. Eisenglass curtains are usually made with<br />
clear vinyl sheeting, which is much softer and more<br />
prone to scratching and hazing than the windshield<br />
glass is, only soft cloths and mild detergents should be<br />
used.<br />
<strong>MasterCraft</strong> <strong>2012</strong> <strong>Owners</strong> <strong>Manual</strong> • Care and Maintenance • Page 4-5
Canvas Covers<br />
The material used in constructing Bimini tops<br />
and boat covers is made from 100 percent solution-dyed<br />
polyester fiber with a urethane coating<br />
to provide excellent water repellency and mildew<br />
resistance. This design allows the material to be<br />
easily maintained. By following a few simple care<br />
and cleaning steps, the fabric will continue to<br />
look good and maintain its fine qualities for seasons<br />
to come.<br />
Important Background Information<br />
Because the fabrics are woven, they are<br />
breathable. It’s also important to know that these<br />
fabrics are treated with a fluorocarbon finish,<br />
which enhances water repellency. This finish requires<br />
replenishment after vigorous cleaning.<br />
Polyester fabric will not support the growth<br />
of mildew. Mold and mildew need something on<br />
which to grow and polyester fabric is not a desirable<br />
substance for such growth. Dirt or dust on<br />
the fabric, however, is a perfect source for mildew<br />
growth, which makes regular cleaning of the fabric<br />
important.<br />
There is no set time for when the fabric<br />
should be cleaned, and the local environment has<br />
a great deal to do with determining cleaning frequency.<br />
Cleaning is required less frequently in a dry environment than in a humid<br />
one where heavy foliage exists.<br />
The material has an applied finish that deters mold and mildew growth, but it<br />
does not make it mold-proof. Keeping the fabric free of dirt and foreign substances<br />
is important in deterring mold growth.<br />
Cleaning<br />
One of the best ways to keep the material looking fresh and new, and to delay<br />
the need for deep or vigorous cleaning, is to hose off fabrics with clear water<br />
on at least a monthly basis with clear water. This practice will help prevent dirt<br />
from becoming deeply embedded in the fabric, and it will eliminate the need for<br />
more frequent and more vigorous cleanings.<br />
In most environments, a thorough cleaning will be needed approximately<br />
every two (2) years.<br />
The fabric can be cleaned while still in the boat. When cleaning, it is important<br />
to observe the following:<br />
• Always use a natural soap—never detergent.<br />
• Water should be cold to lukewarm, but never more than 100 degrees.<br />
• Air dry only. Never apply heat to the fabric.<br />
Begin by brushing off loose dirt, and then hose down the material. Prepare a<br />
cleaning mixture of water and a mild, natural soap that is free of detergents. Use<br />
a soft-bristle brush to clean, allowing the soap to soak in. Rinse thoroughly and<br />
allow the fabric to thoroughly air dry.<br />
If stubborn stains persist, you can use a diluted chlorine bleach/soap mixture<br />
for spot cleaning of mildew, roof run-off and other similar stains. Please keep<br />
in mind that chlorine bleach will not change the color of the fabric, but chlorine<br />
bleach will eventually break down the fiber of any fabric. Therefore, this cleaning<br />
method should be used as infrequently as possible.<br />
The cleaning mixture should be mixed as follows:<br />
• Four ounces (one-half cup) of chlorine bleach.<br />
• Two ounces (one-fourth cup) of natural soap.<br />
• One gallon of water.<br />
Clean with a soft-bristle brush and allow the mixture to<br />
soak no longer than twenty (20) minutes. Rinse thoroughly<br />
and allow to completely air dry. Repeat if necessary.<br />
If the top or boat cover is suitable in size for a washing<br />
machine, these steps should be followed:<br />
• Use only natural soaps—no detergent.<br />
• Wash and rinse in cold water.<br />
• Air dry. (Never put the fabric in a dryer.)<br />
As part of the finishing process, the material has been<br />
treated with a fluorocarbon finish, which enhances water repellency.<br />
This finish is designed to last for several years, but it<br />
must be replenished after a thorough cleaning. Based on test<br />
results, the manufacturer recommends 303 High Tech Fabric<br />
Guard as the preferred re-treatment product.<br />
After cleaning and air drying, apply 303 in a thin, even coat.<br />
When it has dried, apply a second thin, even coat. These two<br />
(2) light coatings are more effective in restoring fabric water<br />
resistance than a single heavy coating. Keep in mind that 303<br />
High Tech Fabric Guard will work only as well as it is applied.<br />
This means that the fabric must be free of dirt and detergents<br />
or the Fabric Guard will wash away with the dirt particles.<br />
Fabrics should be retreated after thorough cleaning or after<br />
five (5) years of use.<br />
<strong>MasterCraft</strong> <strong>2012</strong> <strong>Owners</strong> <strong>Manual</strong> • Care and Maintenance • Page 4-6
Enclosed Head<br />
An option on some models is the enclosed, portable head. This<br />
convenience should be emptied on-shore within an acceptable<br />
holding tank, septic system or sewer. It should never be emptied<br />
within the boating body of water or on-shore, except in an approved<br />
receptacle!<br />
The head should be cleaned after each outing. After thoroughly<br />
cleaning with a mild detergent, add a neutralizing chemical made<br />
especially for portable heads, such as that found in RV centers. The<br />
neutralizing chemical will help deal with potential odors that might<br />
otherwise be foul.<br />
Slick Boot<br />
The optional Slick Boot should periodically be dismantled, cleaned and<br />
the wand thoroughly rinsed. The Slick Boot material can sometimes become<br />
gelled, particularly in colder weather.<br />
Upholstery<br />
While the vinyl is made to withstand the elements, it is important to care for<br />
vinyl by keeping it clean at all times. Many substances may stain the vinyl if<br />
left untreated over a period of time. Remember to remove any contaminant<br />
and clean vinyl immediately.<br />
Regular washing with mild detergent (see attached information) and warm<br />
water or vinyl cleaners is sufficient to keep the cushion and vinyl coverings in<br />
good condition. Do not soak the cushion, and dry thoroughly after washing to<br />
prevent mildew accumulations when the boat is covered. Spray the cushions<br />
with a mildew repellent and prop them up in the boat when it is covered to<br />
take advantage of air circulation.<br />
<strong>MasterCraft</strong> vinyl is made to withstand the effects of sun, heat, acid rain and<br />
soiling, under normal conditions, but this does not preclude the cleaning requirements.<br />
Please consult the following cleaning recommendations before<br />
cleaning your upholstery.<br />
Certain household cleaners, powdered abrasives, steel wool, and industrial cleaners<br />
may cause damage and discoloration, and are not recommended for use. Dry<br />
cleaning fluids and lacquer solvents should not be used as they will remove the<br />
printed pattern and gloss. Waxes are not recommended, as many contain dyes and<br />
solvents that can permanently damage the vinyl’s protective coating.<br />
In some instances, consumers have reported the appearance of a pink stain<br />
on vinyl that is resistant to various cleaning methods. Although there can be<br />
other causes for pink staining in vinyls, most pink stains are caused by dyes<br />
produced by micro-organisms. These dyes are metabolic products of the micro-organisms,<br />
otherwise known as a form of fungi.<br />
<strong>MasterCraft</strong> <strong>2012</strong> <strong>Owners</strong> <strong>Manual</strong> • Care and Maintenance • Page 4-7
It is virtually impossible for consumers to avoid these micro-organisms as they exist in the atmosphere,<br />
which are more prevalent in high-humidity areas. Rain cleanses the air, with the result being<br />
that the micro-organisms are deposited on items such as marine vinyl.<br />
While the vinyl is treated to resist the growth of micro-organisms (meaning the vinyl is not a food<br />
source), the stain results from failure to properly clean and maintain the vinyl. This means that after<br />
use, the upholstery must be cleaned with a soft brush and warm soapy water, followed by a thorough<br />
rinse with clean water.<br />
This situation is worsened if the boat is stored without proper ventilation or if the boat cover is put<br />
on while the vinyl is still wet, creating a situation in which all forms of fungi (mold and mildew) thrive.<br />
Failure to follow these instructions in the proper care of upholstery may cause your warranty<br />
to be voided!<br />
The cleaning table presented in this section is offered only as a suggestion and as an aid in attempting<br />
to deal with stains. We do not guarantee that the cleaning methods will work. Stains from any external<br />
source are unlikely to be covered by warranty.<br />
Additional Upholstery Cleaning<br />
Information<br />
The following information refers to the performance of the upholstery product in specific tests<br />
conducted under laboratory conditions. Results may vary under actual conditions. This information<br />
is not a guarantee and does not relieve the user from the responsibility of the proper and safe use<br />
of the product and all cleaning agents. The use of certain agents can be harmful to the surface appearance<br />
and lifespan of the vinyl. The vinyl manufacturer and <strong>MasterCraft</strong> assume no responsibility<br />
resulting from the use of such cleaning agents to the vinyl. Please check compatibility when using<br />
this product in combination with painted or varnished surfaces.<br />
Recommended Products<br />
<strong>MasterCraft</strong> Vinyl Dressing<br />
Vinyl Finish Vinyl Cleaner<br />
Mild Dish Soap<br />
303 High Tech Fabric Guard<br />
Non-Recommended Products<br />
ArmorAll<br />
Bleach<br />
Baking Soda<br />
Fantastik<br />
Formula 409<br />
Murphy’s Oil Soap<br />
Simple Green<br />
Son-of-a-Gun<br />
Common Stains Steps 1 2 3<br />
General care A B<br />
Dirt build-up A B<br />
Ballpoint ink* B A<br />
Chewing gum B A<br />
Coffee, tea, chocolate B A<br />
Grease C B A<br />
Household soil A B<br />
Ketchup A B<br />
Latex paint A B<br />
Lipstick C A B<br />
Mildew or wet leaves* B A<br />
Motor oil C B A<br />
Oil-based paint C B A<br />
Permanent marker* B A<br />
Spray paint B A<br />
Suntan lotion* A B<br />
Tar/asphalt C B A<br />
Yellow mustard A B<br />
* Always remove stains immediately. Upholstery must be kept<br />
CLEAN AND DRY!<br />
A = Medium soft brush, with warm soapy water. Rinse and dry.<br />
B = 303 Fabric and Vinyl Cleaner. Rinse and dry.<br />
C = Wipe or scrape off excess (chill gum with ice before starting).<br />
All cleaning methods must be followed by a thorough rinse with clean,<br />
warm water. Failure to care for your vinyl properly, or the use of improper<br />
cleaners may void your warranty, as well as damaging your vinyl.<br />
Certain household cleaners, powdered abrasives, steel wool, and<br />
solvent cleaners can cause damage and discoloration and are not recommended.<br />
Dry cleaning fluids and lacquer solvents should not be used as<br />
they will remove printed pattern and gloss. Waxes should be used with<br />
caution as many contain dyes or solvents that can permanently damage<br />
the protective coating.<br />
Do not clean with power washers as they can generate 3,500 P.S.I.<br />
and could damage the surface of your interior. Do not use kerosene, gasoline<br />
or acetone, as they will remove the protective marine top coat. Do<br />
not use any silicone-based protectants. They will extract the plasticizer,<br />
leaving vinyl hard and brittle, and eventually cracking will occur.<br />
Your satisfaction is directly related to regular care of the upholstery!<br />
Vinyl upholstery should be covered when not in use to protect from<br />
further sun exposure, tree debris, air pollutants and acid rain.<br />
For storage, vinyl should be cleaned, protected, covered and stored in a<br />
dry, well-ventilated area.<br />
<strong>MasterCraft</strong> <strong>2012</strong> <strong>Owners</strong> <strong>Manual</strong> • Care and Maintenance • Page 4-8
At <strong>MasterCraft</strong> we have made every effort to produce the most environmentally friendly products available for our boat care line. We understand<br />
that as lovers of the outdoors, we should do our part to preserve our environment for the next generation of boaters.<br />
<strong>MasterCraft</strong> All Purpose Cleaner<br />
<strong>MasterCraft</strong> All Purpose Cleaner safely and effectively removes grease, oil, cosmetics,<br />
glue, blood, mildew, soap scum, ink, bird droppings, spider droppings, scuff marks, pet stains,<br />
dust, pollen, fingerprints, food, beverages, sea salt residue and more from all marine surfaces<br />
above and below deck. (See Cleaning the Boat section of this Owner’s <strong>Manual</strong> also.) Master-<br />
Craft All Purpose Cleaner is ideal for cleaning plastics, rubber, metal, fiberglass, stainless steel,<br />
railings, steering wheels and coolers. <strong>MasterCraft</strong> All Purpose Cleaner will leave surfaces clean<br />
and restore optimum brilliance.<br />
Part # 559125.<br />
<strong>MasterCraft</strong> Boat Cleaner & Polish<br />
<strong>MasterCraft</strong> Boat & PWC Cleaner & Polish is specially formulated to remove dirt, grease,<br />
bugs, bird and spider droppings, road grime from towing, and water spots on contact. This detailer<br />
requires no water and leaves a showroom shine that protects against sun damage, ozone<br />
damage and dirt accumulation in one easy step.<br />
Part #559129.<br />
<strong>MasterCraft</strong><br />
Boat Care<br />
Products<br />
<strong>MasterCraft</strong> Vinyl Dressing<br />
<strong>MasterCraft</strong> Vinyl Dressing is a one-step formula for the<br />
restoration and protection of vinyl, rubber, plastics and leather.<br />
When dry, <strong>MasterCraft</strong> Vinyl Dressing leaves a transparent and<br />
water-repellent gloss coating that beautifies and restores surfaces.<br />
Its UV protection helps to prevent drying and cracking.<br />
Part #559126.<br />
<strong>MasterCraft</strong> Glass Cleaner<br />
Formulated specifically for marine applications, Master-<br />
Craft Glass Cleaner will leave your marine surfaces streak-free<br />
and amazingly clear. Won’t harm tinted windows or Eisenglass.<br />
<strong>MasterCraft</strong> Glass Cleaner contains no ammonia, and it is fast<br />
drying. Use on windshields, mirrors, chrome and more.<br />
Part #559127.<br />
<strong>MasterCraft</strong> Bilge Cleaner<br />
<strong>MasterCraft</strong> Bilge Cleaner is specially formulated to dissolve oil, grease, gasoline, diesel fuel, and sludge. <strong>MasterCraft</strong> Bilge Cleaner will effortlessly<br />
remove those tough odor-causing elements that can make a day on the water less enjoyable. Safe for fiberglass, wood and metal boats, and<br />
requires no scrubbing.<br />
Part #559124.<br />
<strong>MasterCraft</strong> Hull Cleaner<br />
<strong>MasterCraft</strong> Hull Cleaner is the product of choice for the removal of water stains, iron and metal deposits and marine algae from fiberglass boat<br />
hulls and bottoms. This non-acid based cleaner is safe for you, your boat and the environment.<br />
Part #559121.<br />
<strong>MasterCraft</strong> <strong>2012</strong> <strong>Owners</strong> <strong>Manual</strong> • Care and Maintenance • Page 4-9
<strong>MasterCraft</strong> Spray Wax<br />
<strong>MasterCraft</strong> Spray Wax is a simple way to give your marine craft that<br />
showroom shine while gaining the important UV protection that helps to<br />
prevent damage from the sun. Simply spray on and buff off to maintain<br />
the original luster and protect your investment.<br />
Part #559123.<br />
<strong>MasterCraft</strong> Boat Wash & Wax<br />
<strong>MasterCraft</strong> Boat Wash & Wax is formulated as a premium-grade concentrated<br />
boat wash and wax. This super high sudsing formula has superior<br />
cleaning and rinsing properties in order to minimize streaking and spotting<br />
on cleaned surfaces. It is neutral in pH, and contains no harsh chemicals or<br />
phosphates. It will not affect any known finishes including fragile gel coat materials,<br />
and leaves a super bright, clear shine after rinsing. Inhibited to prevent<br />
corrosion of steel piping and equipment.<br />
Part #559122.<br />
<strong>MasterCraft</strong> Microfiber Detailing Cloths<br />
<strong>MasterCraft</strong> Microfiber Detailing Cloths are the product of recent developments in the manufacture<br />
and make-up of fine-quality detailing towels. They feature a soft surface that is ideal for high-quality cleaning<br />
and detailing. They are perfect for use in drying or polishing your boat, motorcycle, car, or any reflective<br />
surface and can absorb up to seven times their dry weight in water. You’ll be amazed at how well these cloths<br />
work.<br />
Part #559128.<br />
<strong>MasterCraft</strong> Cleaning & Detailing Kit<br />
The <strong>MasterCraft</strong> Cleaning & Detailing Kit combines seven different products in a handy reusable bucket.<br />
The kit includes <strong>MasterCraft</strong> All Purpose Cleaner, Glass Cleaner, Boat Wash & Wax, Vinyl Dressing, Boat<br />
Cleaner & Polish, Microfiber Detailing Cloths and wash sponge.<br />
Part #559120.<br />
NOTE: The parts order numbers have been provided to aid consumers in placing orders with an<br />
authorized <strong>MasterCraft</strong> dealer. These quality products are available ONLY through an authorized<br />
dealer!<br />
<strong>MasterCraft</strong> <strong>2012</strong> <strong>Owners</strong> <strong>Manual</strong> • Care and Maintenance • Page 4-10
Frequency and Scheduled Maintenance<br />
Proper care, maintenance and adjustment will contribute to the peak performance of the <strong>MasterCraft</strong><br />
boat, while also extending the overall service life and the resale value.<br />
The pages that follow provide instructions on how to accomplish the required checks, inspections<br />
and services listed. An authorized <strong>MasterCraft</strong> service department is the best source for proper maintenance.<br />
Note: The engine and drive train require scheduled maintenance checks and services in addition<br />
to the boat’s other maintenance requirements. Read and understand the engine owner’s<br />
manual that has been provided, and follow the maintenance schedule to ensure proper operation<br />
and quality service over the life of the boat and drive train. Failure to follow the maintenance<br />
requirements and instructions listed in this and all other manuals may result in damage<br />
to the components, systems and equipment of the boat, which resulting damage would not be<br />
covered by warranty! Safety issues are also directly impacted by proper maintenance!<br />
The following definitions apply to maintenance:<br />
Check—Verify the operational readiness by physical measurement, i.e., measuring the oil level<br />
with the dipstick or aligning with a feeler gauge.<br />
Inspect—Determine the operational readiness by examination, i.e., by sight, sound or feel.<br />
Change—Tasks required periodically to keep the boat in proper operating condition, i.e., drain,<br />
replenish or service.<br />
New Boat Break-In<br />
Note: <strong>MasterCraft</strong> recommends the following functions<br />
be performed by authorized <strong>MasterCraft</strong> technicians at an<br />
authorized <strong>MasterCraft</strong> dealer.<br />
• Check the alignment of the propeller shaft. (See Annual<br />
Maintenance also.)<br />
• Have an authorized <strong>MasterCraft</strong> service department<br />
change the fuel filter after the first fifty (50) hours of operation,<br />
and then again at one hundred (100) hours for Indmar<br />
engines. The fuel filter should be changed annually even if<br />
less than one hundred (100) hours are run during the previous<br />
season. The Volkswagen diesel engine requires oil and<br />
filter changes every two hundred (200) hours, or annually,<br />
whichever comes first.<br />
Before Each Use<br />
Before the engine has been started:<br />
• Review the engine manual and trailer manual before each<br />
outing.<br />
• Review the Safety Checks and Services section of this Owner’s<br />
<strong>Manual</strong>. There are important functions that must be<br />
followed before, during and after every outing, without<br />
fail!<br />
• Inspect the raw water intake water strainer for blockage.<br />
If there is blockage, also check the transmission cooler<br />
(where equipped).<br />
• For boats operating in salt water, check and clean as necessary<br />
the seacock strainer.<br />
• Check the cooling system level (fresh water coolingequipped<br />
boats only). See the engine owner’s manual for<br />
details.<br />
• Inspect the battery connections and hold-downs.<br />
• Inspect the drive train for loose or missing hardware.<br />
• Inspect the throttle and shift cables for kinks, wear and interference<br />
with other components.<br />
• Inspect the propeller shaft log for excessive water entry.<br />
• Inspect the fuel system lines and connections for leaks.<br />
• Inspect the exhaust system for leaks.<br />
As you start the engine:<br />
• Check that the voltmeter registers a fully charged battery.<br />
<strong>MasterCraft</strong><br />
Maintenance<br />
Service<br />
After Each Use<br />
• Refer to the Cleaning the Boat and Corrosion Prevention sections of this Owner’s<br />
<strong>Manual</strong> for guidance on a thorough approach to maintenance. Also pay<br />
attention to the information provided regarding the maintenance of teak<br />
platforms and accessories because the wood requires periodic maintenance<br />
as well.<br />
• Boats equipped with an optional flushing system for use in salt water or<br />
brackish water should operate the flushing system.<br />
Quarterly (Every Fifty [50] Hours)<br />
Note: <strong>MasterCraft</strong> recommends that the following functions be performed<br />
by authorized <strong>MasterCraft</strong> technicians at an authorized <strong>MasterCraft</strong> dealer.<br />
Before the engine has been started or after it has cooled:<br />
• Check the safety equipment.<br />
Annually<br />
(Every One Hundred [100] Hours)<br />
Note: <strong>MasterCraft</strong> recommends that the following be performed by authorized<br />
<strong>MasterCraft</strong> technicians at an authorized <strong>MasterCraft</strong> dealer.<br />
Before the engine has been started or after it has cooled:<br />
• Replace the fuel filter (to be performed by an authorized <strong>MasterCraft</strong> technician<br />
only).<br />
• Check the propeller shaft coupler alignment.<br />
• Lubricate the steering system.<br />
• Lubricate the throttle and shift cables.<br />
• Check the engine mounts.<br />
• Inspect the complete fuel system for leakage.<br />
• Check the fire extinguisher and suppression units on-board.<br />
Details follow in the next few sections.<br />
<strong>MasterCraft</strong> recommends that many of these functions be performed by authorized<br />
<strong>MasterCraft</strong> technicians at an authorized <strong>MasterCraft</strong> dealer!<br />
<strong>MasterCraft</strong> <strong>2012</strong> <strong>Owners</strong> <strong>Manual</strong> • Care and Maintenance • Page 4-11
Scheduled<br />
Maintenance<br />
Before Each Use<br />
(Prior to Starting the Engine)<br />
Review the Safety Checks and Services section of this Owner’s <strong>Manual</strong>.<br />
There are important functions that must be followed before, during and<br />
after every outing, without fail! The Safety Checks and Services notes that<br />
all drain plugs must be reinstalled prior to operating the boat!<br />
Inspect Seacock Strainer<br />
(where equipped)<br />
Because a clogged seacock strainer puts undue strain on the engine(s), the strainer<br />
should be checked prior to starting the boat. Boats with closed cooling systems are not<br />
equipped with this. The seacock strainer is standard on boats built for operation in salt<br />
water.<br />
Step 1:<br />
Step 2:<br />
Step 3:<br />
Remove the plastic nut on top of the strainer. Lift the cover.<br />
Remove the filter and inspect for debris. <strong>Manual</strong>ly clean the strainer.<br />
Return the filter in place and recover. Tighten the nut, but do not over-tighten<br />
as it may eventually strip the threads holding the nut in place.<br />
Inspect the Battery Connections and Hold-Downs<br />
Because poor connections or hold-downs may result in erroneous voltmeter readings, <strong>MasterCraft</strong> recommends doing this before starting the boat.<br />
Step 1:<br />
Step 2:<br />
Ensure the engine is OFF and the engine safety starting switch disconnected. Be certain that the throttle/shift control lever is in neutral.<br />
Locate the battery. Batteries are placed in a variety of locations, depending on the model. Check under the observer seat or behind the<br />
rear seat.<br />
Check that the battery post connections are clean and tight. If not:<br />
• Loosen and remove the negative terminal connection first. Be careful not to touch the positive terminal with the wrench.<br />
• Loosen and remove the positive terminal connection.<br />
• Remove the battery hold-downs and remove the battery from the boat.<br />
• Clean corrosion from the battery posts with a battery terminal cleaner.<br />
• Clean the battery with a water-and-baking-soda solution. Use care to avoid allowing the solution to enter the battery vents. Rinse the battery<br />
with fresh water.<br />
<strong>MasterCraft</strong> <strong>2012</strong> <strong>Owners</strong> <strong>Manual</strong> • Care and Maintenance • Page 4-12
Battery electrolyte fluid is dangerous. It contains<br />
sulfuric acid, which is poisonous, corrosive<br />
and caustic. If electrolyte fluid is spilled or<br />
placed on any part of the human body, immediately<br />
flush the area with large amounts of clean<br />
water and immediately seek medical attention.<br />
• Use a battery terminal cleaning brush to remove corrosion<br />
from the inside of the battery terminals. Clean the<br />
terminals with a water-and-baking-soda solution and<br />
rinse with fresh water.<br />
• Check the battery box that normally holds the battery<br />
in place to determine whether there is evidence of battery<br />
fluid inside it. Battery fluids are corrosive and can<br />
cause permanent damage to the battery box. If fluid is<br />
evident, wash out the box with the water-and-bakingsoda<br />
solution that is used in cleaning the terminals.<br />
Rinse with fresh water and dry with a cloth.<br />
• Reconnect the positive terminal first, then the negative.<br />
Tighten the terminals. Coat both terminals completely with<br />
a thin covering of marine dielectric grease. Be sure that the<br />
rubber boot covers the positive terminal completely.<br />
Note: The boat’s engine is designed to work with the<br />
standard electronics installed in the boat. Adding other electrical<br />
components or accessories can change the way the fuel<br />
injection controls the engine or the overall electrical system<br />
functions. Before adding electrical equipment, consult an<br />
authorized <strong>MasterCraft</strong> dealer’s service department. Otherwise,<br />
the engine may not perform properly.<br />
Inspect the Throttle and Shift<br />
Cables for Kinks, Wear and<br />
Interference<br />
Step 1:<br />
Step 2:<br />
Some engine parts become very hot during operation. This inspection<br />
must be completed while the engine is cool to prevent burns to your<br />
skin. Perform this task before starting the boat.<br />
Ensure the engine is OFF and the engine safety starting switch disconnected.<br />
Be certain that the throttle/shift control lever is in neutral.<br />
Open the engine compartment and locate the throttle and shift cables.<br />
Follow each cable back under the floorboards and feel for any kinks and<br />
wear on the outer jacket. Any sign of cable damage is cause for replacement.<br />
See your authorized <strong>MasterCraft</strong> dealer’s service department if<br />
you notice any cable damage.<br />
Inspect the Fuel System for Leaks<br />
This function should be performed prior to starting the engine; and then again<br />
after about three (3)-to-five (5) minutes to determine whether any leaks are apparent.<br />
Step 1:<br />
First ensure the engine is OFF and the engine safety starting switch is<br />
disconnected. Be certain that the throttle/shift control lever is in neutral.<br />
The engine must be cool.<br />
Add-on equipment may adversely affect the alternator<br />
output or overload the electrical system.<br />
Such damage may not be covered by the warranty.<br />
Gasoline is highly flammable and its vapors may ignite, resulting in<br />
fire or explosion. Be sure to keep all sparks and flames away from the<br />
area while inspecting the boat’s fuel system.<br />
If a replacement battery is required, be certain to select<br />
a marine battery with at least seven-hundred-fifty (750)<br />
cold-cranking-amps at zero degrees (0 o ) Fahrenheit. Before<br />
disconnecting the battery, make sure the ignition key and<br />
all accessories are in the OFF position. Also remember to reattach<br />
the cables in the proper order, with the negative cable<br />
connected to the negative [-] post and the positive cable<br />
connected to the positive [+] post.<br />
Step 2:<br />
Open the engine compartment and visually check as much of the fuel<br />
system from the tank to the engine as you can see. If the odor of gasoline<br />
is strong or if you see visual evidence of fuel outside the system,<br />
cease all operations and take the boat immediately to an authorized<br />
<strong>MasterCraft</strong> dealer’s service department to determine the source of<br />
the leak. The leak must be repaired before the engine is restarted. Because<br />
the lines on late model <strong>MasterCraft</strong> boats are pressurized, they<br />
can be disconnected and/or removed ONLY by using specialized tools.<br />
When charging, batteries generate small amounts of<br />
dangerous hydrogen gas. This gas is highly explosive.<br />
Keep all sparks, flames and smoking well away from<br />
the area. Failure to follow instructions when charging<br />
a battery may cause an electrical charge or even<br />
an explosion of the battery, which could result in<br />
death or serious injury.<br />
<strong>MasterCraft</strong> recommends the use of a spiral-cell type<br />
battery, such as the Optima brand. These batteries exceed<br />
other batteries in holding and extending a charge.<br />
The engine box serves as a machinery guard. The engine must be OFF<br />
whenever the box is open. Clothing for body parts can get caught in<br />
moving parts, causing death or serious injury. Keep away from moving<br />
parts!<br />
This is important! Fuel leakage can lead to a build-up of potentially explosive<br />
fumes within the engine compartment. DO NOT IGNORE OR OVERLOOK<br />
THIS INSPECTION AND REPAIR AS NECESSARY!<br />
<strong>MasterCraft</strong> <strong>2012</strong> <strong>Owners</strong> <strong>Manual</strong> • Care and Maintenance • Page 4-13
Inspect the Exhaust System for Leaks<br />
This function should be performed prior to starting the engine; and then again after<br />
about three (3)-to-five (5) minutes to determine whether any leaks are apparent.<br />
Step 1: First ensure that the engine is OFF and that the engine safety starting switch<br />
is disconnected. Be certain that the throttle/shift control lever is in neutral.<br />
The engine must be cool.<br />
The engine box serves as a machinery guard. The engine must be OFF<br />
whenever the box is open. Clothing or body parts can get caught in moving<br />
parts, causing death or serious injury. Keep away from moving parts.<br />
Step 2:<br />
Step 3:<br />
Open the engine compartment and visually check the exhaust system from<br />
the engine to the transom for any obvious damage to exhaust lines or the<br />
muffler.<br />
If leakage is apparent, tighten the hose clamps, being careful to avoid<br />
crimping the hose. If the leakage is significant, or is occurring at a location<br />
other than the joints (such as a split in a hose), see your authorized<br />
<strong>MasterCraft</strong> dealer’s service department for parts and service. This is<br />
important! Exhaust fumes can cause illness or impairment, including<br />
carbon monoxide poisoning. Equally important to consider, leakage<br />
can lead to a build-up of potentially explosive fumes within the engine<br />
compartment. DO NOT IGNORE OR OVERLOOK THIS INSPECTION!<br />
REPAIR AS NECESSARY!<br />
Check That the Battery Is Fully Charged<br />
As the boat is started, check all gauges, but pay particular attention to the voltmeter.<br />
Before Each Use<br />
(Prior to Starting the Engine)<br />
While starting the engine, check that the voltmeter reads between 12.4 and 14.5 volts. An erratic<br />
reading may be a sign of low voltage. The voltmeter is the best indication of the state of your battery.<br />
However, it is not fool-proof. While the reading may indicate that the battery is producing current,<br />
if during a previous operation you had reason to suspect a problem with your battery, check<br />
with an authorized <strong>MasterCraft</strong> dealer’s service department.<br />
Current models are equipped with a low-voltage battery alarm. In the event that the stereo has<br />
been functioning when the boat engine is OFF, the voltage drain on the battery may result in difficulties<br />
re-starting the boat. To avoid this situation, when the voltage level falls to 10.5 volts, the system<br />
will shut off the stereo system and sound an alarm for a period of two (2) minutes to allow the operator<br />
time to turn the ignition key ON and start the engine. Doing so will allow the engine’s alternator to<br />
recharge the battery.<br />
Charge dead batteries with a battery charger before attempting to start the engine. (Some<br />
<strong>MasterCraft</strong> models offer an optional battery charger; but never jump-start the battery.) Jumpstarting<br />
from another boat or battery is dangerous! Charging a dead battery from an engine will<br />
put undue stress on the alternator, which may cause it to fail.<br />
When charging, batteries generate small amounts of dangerous hydrogen gas. This gas<br />
is highly explosive. Keep all sparks, flames and smoking well away from the area. Failure<br />
to follow instructions when charging a battery may cause an electrical charge or<br />
even an explosion of the battery, which could cause death or serious injury.<br />
Crossing cables or jumper cables may result in damage to the electrical components due<br />
to incorrect battery connections. Such damages may not be covered by your warranty.<br />
<strong>MasterCraft</strong> <strong>2012</strong> <strong>Owners</strong> <strong>Manual</strong> • Care and Maintenance • Page 4-14
Inspect the Propeller<br />
Shaft Log for Water<br />
Entry<br />
After approximately three (3)-to-five (5)<br />
minutes of boat operation in the water, shut off<br />
the engine and open the engine compartment.<br />
Be careful to avoid burns from contact with hot<br />
engine parts. The boat is equipped with a dripless<br />
shaft log and if it is showing any signs of dripping,<br />
the boat must be taken to an authorized<br />
<strong>MasterCraft</strong> dealer’s service department for correction.<br />
The engine box serves as a machinery<br />
guard. The engine must be OFF<br />
whenever the box is open. Clothing<br />
or body parts can get caught in<br />
moving parts, causing death or serious<br />
injury. Keep away from moving<br />
parts!<br />
Attention must be paid to any leakage<br />
occurring in the propeller shaft<br />
log area. Water intrusion into the<br />
transmission, which can happen if<br />
excessive leakage is occurring may<br />
cause serious damage. Such damage<br />
may not be covered by the warranty.<br />
Inspect the Exhaust System for Leaks<br />
This function should be performed after about three (3)-to-five (5) minutes to determine whether<br />
any leaks are apparent.<br />
Step 1: First ensure that the engine is OFF and that the engine safety starting switch is disconnected.<br />
Be certain that the throttle/shift control lever is in neutral. The engine must<br />
be cool.<br />
Step 2:<br />
Step 3:<br />
The engine box serves as a machinery guard. The engine must be OFF whenever the<br />
box is open. Clothing or body parts can get caught in moving parts, causing death<br />
or serious injury. Keep away from moving parts.<br />
Open the engine compartment and visually check the exhaust system from the engine<br />
to the transom for any obvious damage to exhaust lines or the muffler.<br />
If leakage is apparent, tighten the hose clamps, being careful to avoid crimping the<br />
hose. If the leakage is significant, or is occurring at a location other than the joints (such<br />
as a split in a hose), see your authorized <strong>MasterCraft</strong> dealer’s service department for<br />
parts and service. This is important! Exhaust fumes can cause illness or impairment,<br />
including carbon monoxide poisoning. Equally important to consider, leakage can<br />
lead to a build-up of potentially explosive fumes within the engine compartment.<br />
DO NOT IGNORE OR OVERLOOK THIS INSPECTION! REPAIR AS NECESSARY!<br />
Inspect the Fuel System for Leaks<br />
This function should be performed after about three (3)-to-five (5) minutes of running the engine to determine whether any leaks are apparent.<br />
The engine box serves as a machinery guard. The engine must be OFF whenever the box is open. Clothing or body<br />
parts can get caught in moving parts, causing death or serious injury. Keep away from moving parts!<br />
After three (3)-to-five (5) minutes of operation, shut down the engine and ensure that the engine safety starting switch<br />
is disconnected. Be certain that the throttle/shift control lever is in neutral. Again, inspect the fuel system as well as<br />
possible. Inspect the fuel pump gasket, fastener gaskets, regulator seal and sender gasket for leaks. If the odor of gasoline<br />
is strong or if you see visual evidence of fuel outside the system, cease all operations and take the boat immediately to an<br />
authorized <strong>MasterCraft</strong> dealer’s service department to determine the source of the leak. The leak must be repaired before<br />
the engine is restarted. Because the lines on late model <strong>MasterCraft</strong> boats are pressurized, they can be disconnected and/or<br />
removed ONLY by using specialized tools that are not available to the public.<br />
Reinspect after the fuel tank has been filled full for the first time of the season.<br />
Note that fuel systems vary by model. The pump-in-tank location on top of the fuel tank will resemble one of the two<br />
adjacent photos.<br />
This is important! Fuel leakage can lead to a build-up of potentially explosive fumes within the engine compartment. DO<br />
NOT IGNORE OR OVERLOOK THIS INSPECTION AND REPAIR AS NECESSARY!<br />
<strong>MasterCraft</strong> <strong>2012</strong> <strong>Owners</strong> <strong>Manual</strong> • Care and Maintenance • Page 4-15
After Each Use<br />
General Cleaning and Storage<br />
Refer to the Corrosion Prevention and Cleaning the Boat sections of<br />
this Owner’s <strong>Manual</strong>. After each outing, the boat should receive a general<br />
cleaning and drying prior to being stored. Even if the boat is kept<br />
in a slip, owners/operators should wipe down the interior and should<br />
periodically remove the boat from the water for a general cleaning.<br />
Inspections<br />
As noted in the Before Each Use section, some functions there<br />
need to be performed following use of the boat, such as checking the<br />
intake strainer or seacock strainer if evidence has shown that debris<br />
collects during the outing. Wet debris is often easier to remove.<br />
Quarterly<br />
(Every Fifty [50] Hours)<br />
Check Safety Equipment<br />
Throughout this Owner’s <strong>Manual</strong>, boat owners, operators<br />
and users have been reminded to pay particular attention<br />
to any and all safety requirements. At the fifty (50) hour mark,<br />
it is appropriate to check that all required and recommended<br />
safety equipment be reviewed for condition and repaired or<br />
replaced as necessary. This includes all personal flotation devices.<br />
It is also advisable to check that all equipment and personal<br />
items onboard have been properly stowed and the routine<br />
maintenance performed.<br />
These efforts are in your best interest!<br />
<strong>MasterCraft</strong> <strong>2012</strong> <strong>Owners</strong> <strong>Manual</strong> • Care and Maintenance • Page 4-16
Annually<br />
(Every One Hundred [100] Hours)<br />
<strong>MasterCraft</strong> recommends that your annual—or one<br />
hundred (100) hour—maintenance requirements be performed<br />
by an authorized <strong>MasterCraft</strong> dealer. The staff<br />
there has the proper equipment and technical training<br />
to best meet your service needs.<br />
Annual Maintenance<br />
Some boat owners choose to personally execute<br />
some maintenance procedures on their boats. Master-<br />
Craft has provided information on several procedures.<br />
For safety reasons, a few must be performed by authorized<br />
<strong>MasterCraft</strong> service technicians only, such as<br />
anything involving checks and repairs on the fuel line,<br />
which is under pressure.<br />
These matters must be addressed on a regular basis,<br />
at one hundred (100) hours or annually, whichever<br />
comes first, and these procedures are in addition to seasonal<br />
preparation and winterization (see Storage and<br />
Winterization section for additional details). All of these<br />
issues are extremely important to continued boating<br />
pleasure, as well as long life for the boat, and the critical<br />
matter of safety.<br />
Even if the annual maintenance work is completed<br />
by an authorized <strong>MasterCraft</strong> service technician, boat<br />
owners and operators should still review this section<br />
and ensure that they have some understanding of what<br />
is necessary to keep the boat in top condition.<br />
Check the Propeller Shaft Coupling<br />
Alignment<br />
This function is critical to avoiding unnecessary wear and potential damage to the<br />
engine as well as the propeller and propeller shaft. Because it is a complex and<br />
exacting part of maintenance, this should be performed only by your authorized<br />
<strong>MasterCraft</strong> dealer as part of your annual maintenance.<br />
Check the<br />
Engine Mounts<br />
Some engine parts become very hot during<br />
operation. This inspection must be completed<br />
while the engine is cool to prevent burns to<br />
your skin. Perform this task before starting<br />
the boat.<br />
Step 1: Ensure the engine is OFF and disconnect the<br />
engine safety starting switch. Be sure that<br />
the throttle/shift control lever is in neutral.<br />
The engine must be cool.<br />
Step 2: Open the engine box and locate the four (4)<br />
motor mounts.<br />
Step 3: Check the tightness of the mounting hardware<br />
and adjustment lock-nuts. Tighten any<br />
loose hardware securely.<br />
<strong>MasterCraft</strong> <strong>2012</strong> <strong>Owners</strong> <strong>Manual</strong> • Care and Maintenance • Page 4-17
Inspect the Exhaust Flaps<br />
for Damage<br />
Step 1: Ensure the engine is OFF and disconnect the engine safety<br />
starting switch. Be sure that the throttle/shift control lever<br />
is in neutral.<br />
Step 2: Inspect the exhaust flap hinge for signs of deterioration. Replace<br />
the flap if necessary.<br />
Lubricate the<br />
Shift and Throttle System<br />
Because this process should be completed while all movable components<br />
of the drive train are NOT in motion, <strong>MasterCraft</strong> recommends this<br />
be done while the boat is out of the water.<br />
Lubricate the Steering System<br />
For cable systems only; hydraulic steering maintenance must be completed by an authorized <strong>MasterCraft</strong><br />
dealer only! Because this process should be completed while all movable components of the<br />
drive train are NOT in motion, <strong>MasterCraft</strong> recommends this be done while the boat is out of the water.<br />
Step 1: Ensure the engine is OFF and disconnect the engine safety starting switch. Be sure that the<br />
throttle/shift control lever is in neutral. The engine must be cool.<br />
Step 2: Remove the access panel in the rear trunk compartment in direct drive boats. In V-drive<br />
engines the steering is located in the engine compartment, beneath the engine.<br />
Step 3: Turn the steering wheel so that the maximum amount of steering cable is seen.<br />
Step 4: Use solvent to clean old lubricant from the cable end, pivot and rudder shaft.<br />
Step 5: Spread a generous amount of white lithium grease over the cable end. Work the steering<br />
wheel back and forth and re-apply grease if necessary.<br />
Step 6: Using the flexible end of a grease gun, give two (2) full shots of white lithium grease to the<br />
two (2) grease fittings: one on the rudder shaft, and one on the pivot. Clean up any old<br />
grease purged from the areas.<br />
Step 7: Rotate the steering wheel back and forth several times to work the lubricant in.<br />
Step 8: Re-install the access panel.<br />
Step 1:<br />
Step 2:<br />
Step 3:<br />
Step 4:<br />
Step 5:<br />
Step 6:<br />
Ensure the engine is OFF and disconnect the engine safety<br />
starting switch. Be sure that the throttle/shift control lever<br />
is in neutral. The engine must be cool.<br />
Open the engine box and locate the shift and throttle cable<br />
ends.<br />
Shift to full-throttle-forward.<br />
Lubricate the cable ends and connections with a coating of<br />
waterproof marine multi-purpose grease.<br />
Lubricate the pivots and linkages with a light grease.<br />
Shift the control lever from full-throttle-forward to full-throttle-reverse<br />
several times to work the lubricant in.<br />
Check the<br />
Ballast Pump Impeller<br />
This applies only to boats equipped with some type of ballast system.<br />
The number of ballast pumps varies from system to system.<br />
Authorized <strong>MasterCraft</strong> dealers can provide guidance to locate any<br />
and all pumps.<br />
Step 1: Remove two (2) of the cover screws and loosen the third<br />
screw. Retain the screws for the reinstallation process.<br />
Swing the cover out of the way to allow access to the<br />
impeller location.<br />
Step 2: Using needle-nose pliers, pull the old impeller out of<br />
the casing.<br />
Step 3: Install a new impeller. (It is intentionally larger than<br />
the case. While gently squeezing it in, ensure that the<br />
paddle wheels angle in the same direction—counterclockwise—all<br />
the way around.)<br />
Step 4: Slide the plate back into place. No silicone is necessary.<br />
Due to the built-in gasket, tightening the screws<br />
should prevent leakage.<br />
<strong>MasterCraft</strong> <strong>2012</strong> <strong>Owners</strong> <strong>Manual</strong> • Care and Maintenance • Page 4-18
Inspect the Complete Fuel System for<br />
Leakage<br />
Although the boat engine is similar to an automobile engine, the engine compartment differs<br />
substantially. The underside of an automobile engine compartment is totally open to the atmosphere.<br />
This allows complete air circulation and ventilation. A boat engine is housed in a closed<br />
compartment, the underside of which is the bottom (hull) of the boat.<br />
The enclosed engine compartment limits the ventilation of gasoline and oil fumes. Because<br />
confined gasoline vapors mixed with a little air can form an explosive atmosphere, it is important<br />
to be especially vigilant in performing the following two (2) operations:<br />
Step 1:<br />
Step 2:<br />
Inspect the boat bilge area under the engine for the evidence of oil and gasoline—or<br />
any gasoline odor. This inspection should take place the first time the boat is started<br />
each day. Raise the engine cover and visually look at the bilge area under the engine.<br />
Run the bilge blower for at least four (4) minutes to ventilate the bilge area each time<br />
before starting the engine.<br />
Gasoline is explosive. If a gasoline odor is present or gasoline is visually observed in<br />
the bilge area during inspection, DO NOT START YOUR ENGINE! Remove the<br />
ignition key from the ignition switch and call an authorized <strong>MasterCraft</strong> dealer for<br />
service.<br />
Note: If there is evidence of loose fuel fittings, deteriorated lines or other problems associated<br />
with the fuel system, call an authorized <strong>MasterCraft</strong> dealer. Fuel system service on later-model<br />
<strong>MasterCraft</strong> boats requires special service tools and special training. Due to the potential<br />
for serious consequences when errors occur in servicing the fuel system, <strong>MasterCraft</strong> strongly<br />
encourages all boat owners and operators to seek professional assistance from an authorized<br />
<strong>MasterCraft</strong> dealer’s service department whenever any service or perceived problems occur<br />
within the fuel system.<br />
All replaced fuel components must meet United States Coast Guard (“USCG”) and<br />
American Boat & Yacht Council, Inc. (“ABYC”) standards, and must be Underwriter’s<br />
Laboratory (“UL”)-approved. Inferior quality components pose a serious safety<br />
threat to you and others, and the use of inferior components may result in serious<br />
injury or death. Resulting damage may void the warranty.<br />
Some <strong>MasterCraft</strong> models are equipped with a fuel fill cap such as shown here. These caps are<br />
hinged, and they snap open or closed to seal with an audible click. This is important for the system<br />
on these boat to operate correctly. Be sure to fully snap shut the cap after each fill.<br />
Fire Extinguisher<br />
and<br />
Suppression Units<br />
<strong>MasterCraft</strong> recommends that boat<br />
owners include a check of the fire suppression<br />
and extinguisher units during<br />
the annual maintenance to be sure that<br />
they are always ready for use. Some units<br />
may not require annual checks; refer to<br />
the signage and labeling on the individual<br />
units for further guidance.<br />
Other<br />
Maintenance<br />
Boat owners are required to perform routine regular maintenance<br />
as well as annual requirements, as outlined in the engine<br />
owner’s manual. Some standard or optional equipment on<br />
boats may come with their own printed information that includes<br />
maintenance required to keep such components in excellent<br />
long-term operating condition. Always follow these instructions.<br />
<strong>MasterCraft</strong> <strong>2012</strong> <strong>Owners</strong> <strong>Manual</strong> • Care and Maintenance • Page 4-19
Storage or winter lay-up requires special preparation to prevent damage to the boat. Since winter storage is an annual event, it presents an excellent<br />
opportunity to perform the annual maintenance at this time, depending upon the amount of usage. Check with an authorized <strong>MasterCraft</strong><br />
dealer’s service department regarding the boat’s needs to determine if this is the appropriate time for annual service.<br />
Without proper preparation, storage for long periods of time (at any time of the year) may cause harm to various components of the boat and<br />
drive train. Also, if the boat has been stored in below-freezing temperatures with water inside the bilge or engine cooling system (including the<br />
heater or, shower, ballast tanks, wash down tanks, coolers, or any container or area in which water has been located), this condition may result in<br />
major damage from freezing, which would not be covered under the warranty.<br />
Refer to the engine owner’s manual for guidance regarding storage and winterization of the engine, transmission and components of the drive train.<br />
The following procedures will help avoid most potential types of damage during<br />
storage for a period not to exceed five (5) months!<br />
Storage and<br />
Winterization<br />
Because of the complexity of preparing a boat for proper winter storage, as<br />
well as the possibility of extreme damage to the drive train if a preparation error<br />
was made during winterization, <strong>MasterCraft</strong> recommends scheduling an<br />
appointment with an authorized <strong>MasterCraft</strong> dealer’s service department to<br />
permit a technician to perform all winterization procedures.<br />
General Preparation<br />
Before starting you will need the following supplies:<br />
• Sta-Bil® Gasoline Stabilizer<br />
• Fuel filter<br />
• Low tack tape<br />
Fuel System Treatment<br />
This preparation needs to be done prior to removing water from the<br />
engine, if that will be part of the process.<br />
Boats that are going to be stored for extended periods (more than<br />
forty-five [45] to sixty [60] days) or winterized should have attention for<br />
the fuel system. Even TOP TIER gasolines will experience some separation<br />
of elements and settling during these periods. Of considerable concern is<br />
that water condensation will occur within the fuel system, and water is an<br />
enemy of good-starting and running engine fuel systems. Therefore, follow<br />
this procedure:<br />
• The fuel tank should be ninety-to-ninety-five percent (90-95%) full<br />
of TOP TIER gasoline. This allows for minimal room in which air can<br />
oxygenate the fuel during diurnal cycles (daily periods of expansion/<br />
contraction of gasoline vapors and air as a result of temperature<br />
changes). As temperatures rise in the tank, the pressure also rises,<br />
pushing out gasoline vapor-and-air mixtures. When the temperature<br />
falls, pressure lowers and the system will seek to draw fresh air and<br />
water vapor (depending on the humidity level) into the tank. Fresh air<br />
is replaced with “light ends,” which are low-boiling components that<br />
vaporize at ambient temperatures. Light ends are required during<br />
cold starts to vaporize the fuel. Since the daily diurnal cycles eliminate<br />
the light ends, a nearly full tank helps to minimize the air volume<br />
entering the system.<br />
• Add a biocide additive in the fuel tank to limit microbial growth in<br />
gasoline. Follow the directions provided by the stabilizer’s manufacturer.<br />
• Add a fuel stabilizer, such as Sta-Bil ® , to the fuel tank. Follow the<br />
directions provided by the stabilizer’s manufacturer.<br />
• Run the engine for at least fifteen (15) minutes while in a body of<br />
water. This allows for the circulation of the additives throughout<br />
the fuel system.<br />
• If possible during storage, the tank vents should be sealed. If the<br />
vent is sealed, the tank must NOT be completely filled. A ninetyto-ninety-five<br />
percent (90-95%) filled tank allows room for expansion,<br />
which will be required at certain times when temperatures increase.<br />
The hydrocarbons in gasoline react with naturally occurring<br />
oxygen and create a by-product known as “gum.” The substance,<br />
as the name infers, plugs up fuel filters and injectors. Sealing the<br />
tank helps reduce gumming by significantly limiting the amount<br />
of oxygen available for interaction with the hydrocarbons.<br />
Completely filling the fuel tank prior to storage and then<br />
sealing the fuel tank vent does not allow room for necessary<br />
expansion. This can result, in extreme conditions, in<br />
fuel tank rupture. Such release of fuel into the boat and<br />
potentially into the storage area could result in substantial<br />
damage to the boat and contact with any spark (such as a<br />
flame-producing pilot light in a heater) could also result in<br />
property damage and serious injury or death.<br />
It is desirable to keep the fuel’s temperature below 80 F. (26 C.)<br />
The gumming will increase as temperatures increase.<br />
Note that fuel stabilizers work ONLY in fresh gasoline. Stabilizers<br />
will not cure oxygenated gasoline. Adding a stabilizer when the boat is<br />
being prepared for outings after storage will NOT clean the gumming<br />
<strong>MasterCraft</strong> <strong>2012</strong> <strong>Owners</strong> <strong>Manual</strong> • Care and Maintenance • Page 4-20
that has occurred or remove water from the fuel tank or otherwise eliminate<br />
any problems that have occurred due to failure to properly prepare the fueling<br />
system for storage.<br />
Engine manufacturers suggest using Federal or State of California reformulated<br />
gasoline whenever possible as it stores as well or better than conventional<br />
gasoline.<br />
Even quality gasoline that has been properly prepared for storage<br />
should never be stored for a period to exceed one (1) year.<br />
Fuel systems on all boats MUST be properly prepared for storage<br />
periods exceeding two (2) weeks, as outlined in this Owner’s<br />
<strong>Manual</strong>. Failure to do so will void the warranty.<br />
Other Winterization<br />
Preparations<br />
Step 1:<br />
Step 2:<br />
Step 3:<br />
Step 4:<br />
Remove the bilge drain plug immediately<br />
after taking the boat out of the water.<br />
After a general bow-to-stern washing,<br />
raise the bow of the boat higher than the<br />
stern to allow as much water as possible<br />
to drain from the bilge, while performing<br />
other storage preparations.<br />
Thoroughly clean the hull, deck and<br />
interior of the boat as soon as it is removed<br />
from the water. Cleaning at<br />
this time is easier because any marine<br />
growth is still wet. Be sure to allow a<br />
few days of air drying to prevent mildew<br />
that results from trapped moisture.<br />
(See the Cleaning section of this<br />
<strong>Manual</strong>.)<br />
Apply a coat of wax to the entire surface<br />
of the boat. We suggest <strong>MasterCraft</strong> Premium<br />
Marine Wax for excellent coverage.<br />
If the boat is equipped with a heater,<br />
shower or ballast bags/tanks, be sure<br />
to disconnect the hoses and drain any<br />
remaining water in the lines to avoid<br />
freezing. Even small amounts of water in<br />
any of these areas can cause significant<br />
damage upon freezing and such damage<br />
is not covered under the warranty!<br />
Note: Be sure that hoses will not become entangled<br />
in the engine V-belt when the engine turns<br />
over or the hose and/or the belt will be damaged.<br />
Step 7:<br />
General Power Package<br />
Preparation<br />
Step 1:<br />
Step 2:<br />
Step 3:<br />
Lubricate the throttle and shift linkages and cables<br />
with multi-purpose grease.<br />
<strong>MasterCraft</strong> recommends that batteries be removed<br />
from the boat for winter storage. Batteries<br />
should be fully charged before being stored in<br />
a cool, dry location, protected from the elements<br />
and fully re-charged before being re-installed in<br />
the boat. Never store batteries close to heat,<br />
spark or flame-producing devices.<br />
Leave the engine box cover propped open about<br />
two inches (2”) to ventilate the engine compartment.<br />
winterized to avoid freezing that may cause damage to the boat, the holding tank or<br />
the water heater. The water is removed by running the shower until all the water has<br />
come out or by disconnecting the plumbing fittings in the forward service bay under<br />
the helm seats.<br />
On 255V, X-55, 280V and X-80 equipped with heads, clean the tanks with a mild<br />
cleaner or warm soapy water that will not harm the finish. Avoid all petroleum-based<br />
household cleaners. Store the head dry and clean. Failure to do so may cause unnecessary<br />
odors and damage to the tanks, and this is not covered under warranty.<br />
If using anti-freeze in this head, drain the potable water tank and add freshwater<br />
anti-freeze to the potable water tank. Flush the anti-freeze and water mixture<br />
through the head and into the waste holding tank. Then empty the holding tank.<br />
Never use automotive-type anti-freeze in this freshwater system.<br />
Step 5:<br />
Step 6:<br />
Use duct tape to seal the exhaust flaps<br />
to prevent dirt and nesting rodents from<br />
entering.<br />
On CSX 265 models equipped with the<br />
hot water heater, any water in the tank<br />
must be removed to avoid the risk of<br />
freezing and damage to the tank. The<br />
water pumped into the heater comes<br />
from a freshwater holding tank, and it<br />
can be left in the water heater when<br />
the boat is not in use, EXCEPT during<br />
extended periods of storage. As with any<br />
part of the boat in which there is water, it<br />
must be removed at the time the boat is<br />
Step 9:<br />
Step 10:<br />
If the tower will be lowered during storage, be certain that the tower does not rest<br />
on the boat upholstery or on any support that rests on the upholstery. The tower<br />
or support(s) may leave a permanent imprint on the upholstery. This is not covered<br />
under warranty.<br />
Cover the boat with a boat cover or tarp.<br />
Note: If the boat is to be stored outside and subject to accumulations of snow, water<br />
and ice, a support should be made for the boat cover so that it will not sag, rip or tear, thereby<br />
allowing water to enter the boat. Two-inch diameter PVC plumbing pipe is ideal for this<br />
purpose. It is readily available at local hardware stores, and it is easy to work with. Also, its<br />
rounded shape will prevent damage to the canvas.<br />
<strong>MasterCraft</strong> <strong>2012</strong> <strong>Owners</strong> <strong>Manual</strong> • Care and Maintenance • Page 4-21
Re-Activating the Boat<br />
After Storage<br />
Step 1:<br />
Step 2:<br />
Remove the duct tape from the exhaust flaps.<br />
Fully charge the battery and install it in the boat, following all<br />
safety precautions associated with changing batteries.<br />
Ballast System<br />
Preparations<br />
Step 1: Attach a hose to the starboard side ballast hose that comes out of<br />
the deck at the rear seat.<br />
Step 2: Place the other end into a gallon of non-toxic, RV-type antifreeze.<br />
Step 3: Turn the pump on to empty and pump anti-freeze into the<br />
system until anti-freeze comes out of the thru-hull on the<br />
side.<br />
Step 4: Turn the pump on to fill and pump anti-freeze back into the<br />
jug.<br />
IMPORTANT NOTE: Often, batteries that have been stored over winter<br />
will require re-charging. If the battery is charged by utilizing a battery<br />
charger, use only a three-stage or more battery charger. It is important<br />
that the operator never turn a battery charger immediately to “start,”<br />
as the sudden jolt of voltage may cause damage to the electrical system,<br />
particularly control modules for ballast system. Regardless of whether<br />
it is during the re-activation process or at any time, care should also be<br />
used in charging the battery.<br />
Step 3:<br />
Step 4:<br />
Step 5:<br />
Step 6:<br />
Step 7:<br />
Step 8:<br />
Step 9:<br />
Follow all instructions for reactivating the drive train as detailed<br />
in the engine owner’s manual. NOTE: Due to the complex nature<br />
of the reactivation process, <strong>MasterCraft</strong> recommends having<br />
an authorized <strong>MasterCraft</strong> dealer perform this function.<br />
Ensure that all drain plugs throughout the boat and drive train<br />
have been reinstalled to avoid unwanted intrusion of water.<br />
If applicable, reconnect the hoses to your heater or shower.<br />
Check the engine compartment and bilge for signs of nesting<br />
animals. Clean as necessary.<br />
Check the entire engine system for fluid, oil and coolant levels.<br />
Add as necessary.<br />
Check the entire engine for cracks or leaks caused by freeze<br />
damage.<br />
Check all hose clamps for tightness. Install the bilge drain plug<br />
and the rear drain plug in boats equipped with certain types of<br />
ballast systems.<br />
Step 10: Grease the propeller shaft taper and install the propeller.<br />
Step 11: Fully re-charge and re-install the battery or batteries.<br />
Step 12: Perform the daily maintenance as noted previously in this Owner’s<br />
<strong>Manual</strong>. If it was not done prior to storage, perform the annual<br />
maintenance as well.<br />
Step 13: If the boat is equipped with the optional fresh water cooling system<br />
and was drained for storage, fill the system with fresh coolant<br />
solution per instructions.<br />
Step 14: Check the alignment between the output flange on the transmission<br />
and the propeller shaft flange. If the maximum feeler<br />
gauge that can clip between the flange faces at any point is<br />
0.003”, the unit is properly aligned. If a thicker gauge can be inserted<br />
at any point, the engine must be re-adjusted until proper<br />
alignment is obtained. This should be performed by an authorized<br />
<strong>MasterCraft</strong> dealer’s service department.<br />
Step 15: For all models, with the boat in the water, cycle the key ON and<br />
then OFF two (2) or three (3) times, allowing ten (10) seconds<br />
between key cycles, before cranking the engine. This allows the<br />
fuel pump to prime the fuel lines; then start the engine. In the<br />
event the engine does not respond, allow a two-minute cooldown<br />
period for every thirty (30) seconds of cranking. When the<br />
engine fires, keep a close watch over the gauge readings and<br />
check for leakage and abnormal noises. Keep speeds low for the<br />
first fifteen (15) minutes to allow the engine to reach normal operating<br />
temperatures.<br />
Step 16: In ProStar 197s equipped with ballast bags, when reconnecting the<br />
hook-ups, be sure to squeeze the prongs to help slide the connector<br />
back on. Dish soap or some similar product will help slide the<br />
connects back together. Note that the red ring goes over the raised<br />
ring to ensure a working connection.<br />
<strong>MasterCraft</strong> <strong>2012</strong> <strong>Owners</strong> <strong>Manual</strong> • Care and Maintenance • Page 4-22
Propeller damage is caused by striking solid objects. If the propeller<br />
is not rotating at the time it strikes a solid object, the damage is<br />
usually confined to just one blade and may be difficult to see. If the propeller<br />
is rotating when it strikes an object, usually the resulting damage<br />
can easily be seen on all blades.<br />
Checking/Repairing Propellers<br />
Step 1:<br />
Ensure the engine is OFF and the emergency safety stop<br />
switch is disconnected.<br />
Propeller<br />
Maintenance<br />
Step 2:<br />
Step 3:<br />
Clamp a small rule scale to the shaft strut, parallel to the shaft<br />
so that the end of the scale is 3/32-inches from the leading<br />
edge of a propeller blade.<br />
Rotate the propeller slowly. There should be no more than<br />
3/32-inch variance between the blades. If the propeller is<br />
damaged, see an authorized <strong>MasterCraft</strong> dealer.<br />
Changing Propellers<br />
Step 1:<br />
Step 2:<br />
Ensure the engine is OFF and the engine safety starting<br />
switch is disconnected.<br />
Remove and discard the cotter pin.<br />
Step 3:<br />
Step 4:<br />
Step 5:<br />
Step 6:<br />
Step 7:<br />
Step 8:<br />
Remove the propeller nut.<br />
Tap the center hub of the propeller with a rubber mallet<br />
to release the propeller. Inspect the shaft and propeller<br />
splines for damage.<br />
Thoroughly clean and apply a light coat of waterproof<br />
marine multi-purpose grease to the splined area of the<br />
shaft and propeller.<br />
Align the splines and carefully install the propeller onto<br />
the shaft. DO NOT FORCE THE PROPELLER INTO<br />
PLACE.<br />
Install the propeller nut and torque to 50-ft-lbs.<br />
Install a new cotter pin and bend the ends around the<br />
shaft to lock the propeller on the shaft.<br />
<strong>MasterCraft</strong> <strong>2012</strong> <strong>Owners</strong> <strong>Manual</strong> • Care and Maintenance • Page 4-23
The following chart will assist you in finding and correcting minor mechanical and electrical problems with your <strong>MasterCraft</strong> boat. Engine manuals<br />
include troubleshooting suggestions regarding drive train issues.<br />
To correct a problem, first determine what the symptom is. Start with the first cause and eliminate the possibility of each until the problem is<br />
corrected. Due to the specialized skill and tools needed to correct major issues, that information has not been discussed below. If a problem is not<br />
addressed herein, please contact an authorized <strong>MasterCraft</strong> dealer’s service department.<br />
When experiencing a problem, check the surroundings before shutting down the boat. If a sudden stop would place other boaters in jeopardy,<br />
continue on until it is safe to slow or stop to analyze the situation. Always be aware of the surroundings and how actions may impact other boaters!<br />
Throttle/shifting problems. Corroded cables. Clean and lubricate the cables or replace.<br />
Low transmission oil level.<br />
Replenish transmission fluid.<br />
Sticking transmission shift detent ball. Clean and lubricate the detent ball.<br />
Kink in cable(s).<br />
Have authorized <strong>MasterCraft</strong> technician<br />
replace the cable(s).<br />
Steering problems. Corroded cable. Clean and lubricate the cable or replace.<br />
Rudder worn.<br />
See authorized <strong>MasterCraft</strong> dealer’s<br />
service department.<br />
Excessive vibration. Bent strut. Replace the strut.<br />
Fouled propeller.<br />
Remove objects from the propeller shaft and rudder.<br />
Damaged propeller.<br />
Replace the propeller.<br />
Misaligned propeller shaft coupling.<br />
Seek proper alignment.<br />
Bent propeller shaft.<br />
See authorized <strong>MasterCraft</strong> dealer’s<br />
service department.<br />
Electrical problems. Open circuit breaker or blown fuse. Re-set the circuit breaker or replace the fuse.<br />
Loose wiring connections or corrosion. Clean and tighten wiring connections.<br />
Defective sending unit.<br />
Replace the sending unit.<br />
Shorted wiring harness.<br />
Have the wiring harness repaired.<br />
Defective switch or gauge.<br />
See authorized <strong>MasterCraft</strong> dealer’s<br />
service department.<br />
No speedometer reading. Defective speedometer. Have the speedometer checked or replaced.<br />
Defective speedometer paddle wheel. Have paddle wheel checked or replaced.<br />
Incorrect speedometer reading. Improper calibration. Follow calibration instructions in<br />
Instruments and Gauges section<br />
of this <strong>Manual</strong>.<br />
Gauges do not work or the Breaker has tripped. Re-set the breaker.<br />
accessory does not work. Fuse has blown. Replace the fuse.<br />
Low battery.<br />
Check the battery voltage for a loose ground.<br />
Insufficient battery supply.<br />
Replace battery with one that has at least 750CCAs.<br />
Troubleshooting<br />
<strong>MasterCraft</strong> <strong>2012</strong> <strong>Owners</strong> <strong>Manual</strong> • Care and Maintenance • Page 4-24
Limited Warranty Statement
Limited<br />
Warranty<br />
Statement<br />
1. Disclaimer and Limitation of Implied Warranties. THE EXPRESS LIMITED WARRAN-<br />
TY SET FORTH HEREIN IS IN LIEU OF ALL OTHER WARRANTIES AND REPRESENTA-<br />
TIONS, EXPRESS OR IMPLIED, AND TO THE MAXIMUM EXTENT PERMITTED BY AP-<br />
PLICABLE LAW, MASTERCRAFT DISCLAIMS, AND THE OWNER HEREBY EXPRESSLY<br />
WAIVES, ANY AND ALL OTHER WARRANTIES OR REPRESENTATIONS OF ANY KIND<br />
OR NATURE, INCLUDING, BUT NOT LIMITED TO, IMPLIED WARRANTIES OF MER-<br />
CHANTABILITY AND FITNESS FOR A PARTICULAR PURPOSE, OTHER THAN THOSE<br />
WARRANTIES WHICH ARE IMPLIED BY, AND ARE INCAPABLE OF EXCLUSION, RE-<br />
STRICTION OR MODIFICATION UNDER APPLICABLE LAW. THE TERM OF ANY IM-<br />
PLIED WARRANTIES THAT CANNOT BE DISCLAIMED UNDER APPLICABLE LAW,<br />
INCLUDING, BUT NOT LIMITED TO, IMPLIED WARRANTIES OF MERCHANTABILITY<br />
AND FITNESS FOR A PARTICULAR PURPOSE, SHALL BE LIMITED TO THE DURATION<br />
OF THE EXPRESS WARRANTY PERIODS APPLICABLE TO THE RESPECTIVE COMPO-<br />
NENTS. SOME STATES DO NOT ALLOW THE EXCLUSION OF IMPLIED WARRANTIES<br />
AND/OR DO NOT ALLOW LIMITATIONS ON THE AMOUNT OF TIME AN IMPLIED<br />
WARRANTY LASTS, SO THE ABOVE LIMITATIONS MAY NOT APPLY TO YOU. THIS<br />
LIMITED WARRANTY GIVES YOU SPECIFIC LEGAL RIGHTS. YOU MAY HAVE OTHER<br />
RIGHTS WHICH VARY FROM STATE TO STATE.<br />
2. Limited Warranty and Term. <strong>MasterCraft</strong> Boat<br />
Company, LLC. (“<strong>MasterCraft</strong>”) warrants to the<br />
original retail purchaser that the following components<br />
of each new boat shall be free from material<br />
defects in materials and workmanship to<br />
the extent set forth below, under normal use and<br />
when operated and maintained in accordance<br />
with <strong>MasterCraft</strong>’s instructions, for the period<br />
indicated:<br />
2.1. Deck, Hull, Liner and Stringers. From<br />
the date of the original retail purchase,<br />
the deck, hull, liner and stringer system<br />
(collectively, “Structural Components”) is<br />
warranted for as long as the original purchaser<br />
owns the boat.<br />
2.2. Gel Coat. On condition that the consumer<br />
has provided maintenance and care as described<br />
in the Corrosion and Cleaning the<br />
Boat sections of the <strong>MasterCraft</strong> Owner’s<br />
<strong>Manual</strong>, the gel coat, which is applied to<br />
all <strong>MasterCraft</strong> boats at the factory, will be<br />
warranted for a period of one (1) year from<br />
the date of the original retail purchase<br />
of the boat or the initial use of the boat,<br />
whichever first occurs, for stress crazing<br />
of the gel coat. However, no warranty is<br />
provided, and <strong>MasterCraft</strong> expressly disclaims<br />
any warranty for, scratching, discoloration<br />
or fading of the gel coat because environmental operating conditions and customer maintenance/care are factors that<br />
have a significant effect on the condition and durability of the gel coat.<br />
2.3. Other Component Parts (Excluding Engine and Transmission. <strong>MasterCraft</strong> provides the following warranty for other component<br />
parts of your <strong>MasterCraft</strong> boat:<br />
(a) Instrumentation is warranted for three (3) years, except depth finders and Zero Off;<br />
(b) marine carpeting for five (5) years;<br />
(c) upholstery vinyl material for five (5) years, plus upholstery stitching for one (1) year; and<br />
(d) fuel pump assembly for two (2) years provided the customer follows maintenance and care requirements.<br />
All other components (excluding engine and transmission), including upholstery stitching, are warranted for a period of one (1) year. All<br />
warranties are from the date of the original retail purchase of the boat or the initial use of the boat, whichever first occurs.<br />
2.4. Trailer and Trailer Component Parts. <strong>MasterCraft</strong> trailers have their own Limited Warranty Statement, which can be found in the <strong>MasterCraft</strong><br />
Trailer Owner’s <strong>Manual</strong> that accompanies trailers as they are delivered.<br />
<strong>MasterCraft</strong> <strong>2012</strong> <strong>Owners</strong> <strong>Manual</strong> • Limited Warranty Statement • Page 5-2
2.5. Warranty Period. All express warranties<br />
are for the time period set forth in this<br />
Section 2, unless a longer warranty period<br />
is required by applicable law, in which case<br />
such longer warranty period will apply.<br />
3. Engine and Transmission. The engines used<br />
in <strong>MasterCraft</strong> boats are supplied by ILMOR-<br />
MARINE L.L.C., in Mooresville, North Carolina<br />
(“ILMORMARINE”); or Volkswagen Marine Engines<br />
in Tampa, Florida (“Volkswagen Marine”).<br />
These companies provide a separate warranty<br />
of three (3) years from the date of the original<br />
retail purchase of the boat or the initial use of the<br />
boat, whichever first occurs, for the engine and<br />
transmission. A statement of the Indmar Power<br />
Train Warranty, ILMORMARINE Limited Warranty<br />
or the Volkswagen Marine Warranty is provided<br />
separately to the original retail purchaser.<br />
<strong>MasterCraft</strong> provides no independent warranty<br />
with regard to the engine and transmission;<br />
however, the owner may contact <strong>MasterCraft</strong> at<br />
the address or telephone number listed in Section<br />
7 of this Limited Warranty to obtain contact<br />
information for making claims or inquiries under<br />
the applicable engine manufacturer’s warranty.<br />
Contact information for Volkswagen Marine is<br />
provided in the warranty statement provided at<br />
the time of purchase to the original retail purchaser.<br />
4. Warranty Conditions, Limitations and Exclusions.<br />
<strong>MasterCraft</strong> boats are manufactured by<br />
trained craftspersons from high-quality materials<br />
and components. However, conditions outside<br />
<strong>MasterCraft</strong>’s control require specific limitations<br />
on, and exclusions from, coverage under<br />
this Limited Warranty. The Limited Warranty on<br />
the Structural Components set forth in Section<br />
2 of this Warranty does not cover or include any<br />
other components fastened or applied to the<br />
hull or deck. This Limited Warranty constitutes<br />
the final, complete and exclusive statement of<br />
warranty terms, and no other person or entity<br />
is authorized to make any other warranties or<br />
representations on behalf of <strong>MasterCraft</strong>. Furthermore,<br />
the Limited Warranty set forth in Section<br />
2 (including all subsections) hereof does not<br />
cover the following:<br />
(a)<br />
(b)<br />
(c)<br />
(d)<br />
(e)<br />
damage caused by misuse, negligence,<br />
accident; collision or impact with any<br />
object;<br />
damage caused by any improper alteration<br />
or modification to the boat or any<br />
of its component parts or accessories,<br />
including damage resulting from alteration,<br />
modification, repair or replacement<br />
in such a way as to increase the cubicinch<br />
capacity or horsepower output of<br />
the engine and boat as originally manufactured;<br />
damage caused by the use of improper<br />
or contaminated fuel or fluids;<br />
damage caused by the use of customerapplied<br />
chemicals or accidental spills;<br />
damage caused by failure to maintain<br />
(f)<br />
(g)<br />
(h)<br />
(i)<br />
(j)<br />
(k)<br />
(l)<br />
(m)<br />
(n)<br />
(o)<br />
(p)<br />
(q)<br />
(r)<br />
the boat in accordance with the maintenance provisions in the Owner’s <strong>Manual</strong><br />
or improper maintenance of the boat;<br />
damage caused by the failure to comply with any recall or request for repair;<br />
damage resulting from the use of the boat for any racing, speed, commercial competition<br />
or performance demonstration;<br />
damage resulting from use of the boat for rental, commercial or industrial purposes;<br />
damage to hardware and other components fastened or adhered to the hull,<br />
deck or liner;<br />
damage caused by fire, theft, freezing, vandalism, explosion, lightning, wind, hail<br />
storms, flooding or other natural disaster;<br />
damage to any component parts and accessories not manufactured by <strong>MasterCraft</strong>,<br />
including but not limited to, the engine, drivetrain, transmission,<br />
propeller, shift and throttle control levers and cables, pumps, blowers, windshields,<br />
canvas, upholstery, tower and accessories, instrumentation and steering<br />
systems; however, such items may be warranted by the individual manufacturer,<br />
and if possible, <strong>MasterCraft</strong> will provide the owner with a copy of the<br />
manufacturer’s warranty:<br />
damage caused by use of any non-<strong>MasterCraft</strong> trailer;<br />
damage caused by improper support of the boat on davits, hoist system or<br />
boat lift of any kind;<br />
damage to paints, varnishes, gel coat surfaces and colors, chrome-plated or<br />
anodized finishes, floor and floor covers and any other surface coatings, as<br />
well as damage due to in-water storage without proper barrier coat and bottom<br />
paints (NOTE: Although <strong>MasterCraft</strong> uses the highest-grade gel coat materials,<br />
a condition may develop where the bottom of the boat may show signs<br />
of discoloration and/or blisters if the boat is left in the water for long periods<br />
of time, which is defined as in excess of thirty (30) days); therefore, a proper<br />
barrier coat and bottom paint should be used whenever it is anticipated that<br />
the boat will be left in the water for an extended period of time);<br />
damage to the trailer and its parts or components due to abrasions, rock chips,<br />
rust, improper care or maintenance, or use in salt or brackish water; however,<br />
the finishes of galvanized trailers, which are designed for use in salt or brackish<br />
water, are warranted to be free from damage resulting from use in salt or<br />
brackish water for one (1) year from the date of the original retail purchase or<br />
the initial use of the trailer, whichever first occurs;<br />
damage caused by dealer-installed options or accessories;<br />
damage caused by consumer-installed options or accessories;<br />
and/or<br />
all warranty coverage will expire after ninety (90) days on boats used for commercial<br />
purposes.<br />
<strong>MasterCraft</strong> <strong>2012</strong> <strong>Owners</strong> <strong>Manual</strong> • Limited Warranty Statement • Page 5-3
5. Limitation of Liability.<br />
5.1. Liability Limitation: Exclusion of Consequential<br />
Damages. This Limited Warranty is<br />
for the benefit of the owner and <strong>MasterCraft</strong>,<br />
and shall not create or evidence any right in<br />
any third party. THE REPAIR OR REPLACE-<br />
MENT OF DEFECTIVE COMPONENT PARTS<br />
AS PROVIDED UNDER THIS LIMITED WAR-<br />
RANTY IS THE EXCLUSIVE REMEDY OF THE<br />
CONSUMER. TO THE MAXIMUM EXTENT<br />
PERMITTED BY APPLICABLE LAW, IN NO<br />
EVENT SHALL MASTERCRAFT BE LIABLE<br />
FOR ANY INCIDENTAL, CONSEQUENTIAL,<br />
SPECIAL, INDIRECT, PUNITIVE OR EX-<br />
EMPLARY DAMAGES OR LOST PROFITS<br />
WHATSOEVER ARISING OUT OF THE USE<br />
OR INABILITY TO USE THE BOAT OR ANY<br />
COMPONENT PART THEREOF, OR FOR<br />
ANY BREACH OF THIS LIMITED WARRANTY<br />
OR OTHERWISE, EVEN IF MASTERCRAFT<br />
HAS BEEN ADVISED OF THE POSSIBILITY<br />
OF SUCH DAMAGES OR SUCH DAMAGES<br />
COULD REASONABLY HAVE BEEN FORE-<br />
SEEN BY MASTERCRAFT. However, some<br />
states do not allow the exclusion or limitation<br />
of incidental or consequential damages, so<br />
the above limitation or exclusion may not apply<br />
to you.<br />
5.2. Purchase Price Limitation. In any event,<br />
<strong>MasterCraft</strong>’s entire liability under any provision<br />
of this Limited Warranty shall be limited<br />
to the repair or replacement of the boat,<br />
trailer or component part, or the refund of<br />
the purchase price paid by the consumer for<br />
the boat, trailer or component part found to<br />
be defective within the applicable warranty<br />
period. This shall constitute <strong>MasterCraft</strong>’s<br />
sole liability and obligation in the event of any<br />
claim arising out of its performance or nonperformance<br />
of any provision of this Limited<br />
Warranty. Because some states and jurisdictions<br />
do not allow the exclusion or limitation<br />
of liability, the above limitations may not apply<br />
to you.<br />
6. Transfer of Limited Warranty. Upon the first<br />
sale, conveyance or other transfer of the boat or<br />
trailer by the original retail purchaser, any remaining<br />
unexpired Limited Warranty coverage shall be<br />
transferred to the second owner and shall remain<br />
in effect for the remainder of the applicable warranty<br />
period(s) set forth in Sections 2.1, 2.2, 2.3 and<br />
2.4 hereof (which warranty periods begin to run<br />
from the date of the original retail purchase of the<br />
boat or trailer, or the first use of the boat or trailer,<br />
whichever first occurs, as applicable), upon delivery<br />
of the warranty transfer card and payment of the<br />
applicable warranty transfer fee to <strong>MasterCraft</strong>.<br />
With respect to the Lifetime Limited Warranty<br />
(granted only to the original retail purchaser) on<br />
the Structural Components set forth in Section 2.1<br />
hereof, if the sale, conveyance or other transfer of<br />
the boat by the original retail purchaser to another person or entity occurs within<br />
three (3) years of the date of the original retail purchase of the boat by the original<br />
retail purchaser, then the Limited Warranty on the Structural Components shall be<br />
transferred to the second owner and shall continue in effect for a period of ten (10)<br />
years from the date of the original retail purchase of the boat by the original retail<br />
purchaser. If the sale, transfer or conveyance of the boat by the original retail purchaser<br />
occurs more than three (3) years after the date of the original retail purchase<br />
of the boat, then the Limited Warranty on Structural Components (as well as all<br />
other warranties) shall be void as of the date of transfer and shall not be transferable<br />
to the second owner.<br />
Only one (1) transfer under the provisions of this Section 6 (from the original retail<br />
purchaser to the second owner), within the applicable time period, may be made.<br />
In the event of a sale or transfer of the boat or trailer by a second owner to a subsequent<br />
purchaser, all coverage under this Limited Warranty shall immediately be<br />
terminated and the Limited Warranty shall become null and void. No transfer of<br />
this Limited Warranty will operate to extend the warranty periods set forth in Section<br />
2 hereof. In order to effectuate the transfer of the Limited Warranty, the original<br />
retail purchaser and the new owner must properly fill out the warranty transfer<br />
card found in the back of the Owner’s <strong>Manual</strong> and deliver the completed card,<br />
together with a check made payable to “<strong>MasterCraft</strong> Boat Company, LLC.” in the<br />
amount of the warranty transfer fee, via U.S. Mail, postage prepaid, to <strong>MasterCraft</strong><br />
at the address shown on the warranty transfer card. The card and check for the<br />
warranty transfer must be post-marked within the time period specified above in<br />
this Section 6 in order for the warranty transfer from the original retail purchaser to<br />
the second owner to be effective.<br />
<strong>MasterCraft</strong> <strong>2012</strong> <strong>Owners</strong> <strong>Manual</strong> • Limited Warranty Statement • Page 5-4
7. Warranty Claims. In order to maintain warranty service under this Limited Warranty,<br />
the owner must return the defective boat or component part to an authorized<br />
<strong>MasterCraft</strong> dealer’s service department, or to <strong>MasterCraft</strong>’s factory at the<br />
below address, within the applicable warranty period. For questions regarding<br />
warranty service or to obtain information regarding warranty service or to obtain<br />
information regarding the nearest authorized <strong>MasterCraft</strong> dealer, please contact<br />
<strong>MasterCraft</strong> at the following address or telephone number:<br />
<strong>MasterCraft</strong> Boat Company, LLC<br />
Attention: Warranty/Customer Service Department<br />
100 Cherokee Cove Drive<br />
Vonore, Tennessee 37885<br />
1-423-884-2221<br />
Subject to the terms of this Limited Warranty, any<br />
covered boat or component part with a material defect<br />
in materials or workmanship that is returned to<br />
an authorized <strong>MasterCraft</strong> dealer’s service department<br />
or <strong>MasterCraft</strong>’s factory during the appropriate<br />
warranty period will be repaired or replaced, at<br />
<strong>MasterCraft</strong>’s sole option, without charge to the<br />
owner for parts and labor. This provision is subject<br />
to the following terms and conditions:<br />
(a)<br />
(b)<br />
(c)<br />
(d)<br />
<strong>MasterCraft</strong> shall be obligated only to repair<br />
or replace those items that prove defective,<br />
in <strong>MasterCraft</strong>’s sole discretion, upon examination<br />
by a <strong>MasterCraft</strong> authorized dealer<br />
service department or <strong>MasterCraft</strong>’s own<br />
personnel, as applicable;<br />
<strong>MasterCraft</strong> warrants its repairs or replacements<br />
only for the remainder of the applicable<br />
warranty period;<br />
<strong>MasterCraft</strong> shall, in its sole discretion, fulfill<br />
its obligation to repair or replace any defective<br />
item at its factory or authorized service<br />
department;<br />
The owner shall be responsible for all costs<br />
associated with the transportation of the<br />
boat, towing bills, trailer or component<br />
part(s) to the authorized <strong>MasterCraft</strong> service<br />
department and for any return transportation.<br />
8. No Modification of Warranty. No oral or written<br />
information, advice or communication of any<br />
nature by or from <strong>MasterCraft</strong> or its representatives,<br />
employees, dealers, agents, distributors or<br />
suppliers shall create a warranty or in any manner<br />
increase or modify the scope of this Limited Warranty<br />
in any manner whatsoever.<br />
<strong>MasterCraft</strong> <strong>2012</strong> <strong>Owners</strong> <strong>Manual</strong> • Limited Warranty Statement • Page 5-5
Warranty<br />
Registration<br />
and Transfer<br />
For the first purchase of a specific <strong>MasterCraft</strong> boat, the boat must be registered. You should be aware that under federal law, completion of the<br />
registration process is a requirement and should be completed as follows:<br />
1. Dealer must complete the warranty registration at date of sale.<br />
2. Dealer must secure buyer’s signature!<br />
3. Dealer must notify <strong>MasterCraft</strong>, via electronic registration that the boat has been purchased, and all required information must be submitted.<br />
As boat owner, you should ensure that the dealer has complied with this requirement. This is the method of providing information that will allow<br />
<strong>MasterCraft</strong> to notify you in case of any mandatory recalls or other issues requiring your attention.<br />
If the <strong>MasterCraft</strong> boat is subsequently sold by the original purchaser, <strong>MasterCraft</strong> offers a transferable warranty to the second owner. In accordance<br />
with the <strong>MasterCraft</strong> Limited Warranty, the remaining warranty against structural defects in the hull and deck will be transferred to the<br />
new owner when the following has been accomplished and verified within fourteen (14) days of the sale date:<br />
• Receipt of the completed form below.<br />
• Copy of the sales invoice.<br />
• Payment of $450.<br />
Upon verification, the remaining warranty will transfer, retroactive to the sale date.<br />
Warranty Registration Transfer<br />
(forward this copy to <strong>MasterCraft</strong>)<br />
Forward form and payment to:<br />
<strong>MasterCraft</strong> Boat Company, LLC<br />
100 Cherokee Cove Drive<br />
Vonore TN 37885<br />
Boat Serial Number __________________________________________________________________________________________________<br />
Model No. __________________________________________________________________________________________________________<br />
Engine Make _______________________________________________________________________________________________________<br />
Serial No. __________________________________________________________________________________________________________<br />
Trans. Type ________________________________________________________________________________________________________<br />
Serial No. __________________________________________________________________________________________________________<br />
Please Print<br />
Previous Owner ____________________________________________________________________________________________________<br />
New Owner’s Name _________________________________________________________________________________________________<br />
Street Address _____________________________________________________________________________________________________<br />
City ______________________________________________________________________________________________________________<br />
State _______________________________________________________ Zip Code ____________________________________________<br />
Home Phone (___________) _________________________________________________________________________________________<br />
Business Phone (__________) ________________________________________________________________________________________<br />
Date of Purchase ___________________________________________________________________________________________________<br />
Second Owner’s Signature ___________________________________________________________________________________________<br />
MUST BE SIGNED!<br />
Be sure to enclose payment and a copy of the purchase receipt within fourteen (14) days of the sale date.<br />
<strong>MasterCraft</strong> <strong>2012</strong> <strong>Owners</strong> <strong>Manual</strong> • Limited Warranty Statement • Page 5-6
Service Log<br />
As Needed Date Date Date Date<br />
Replace raw water impeller<br />
Replace ballast impeller(s)<br />
Add/change oil filter<br />
Every 50 Hours Date Date Date Date<br />
Lubricate starter gear and shaft<br />
Change engine oil and filter<br />
Check all safety equipment<br />
Every 100 Hours Date Date Date Date<br />
Replace impeller<br />
Engine tune-up<br />
Change transmission fluid<br />
Check engine mounts<br />
Check prop shaft coupling alignment<br />
Inspect exhaust flaps<br />
Lubricate steering system<br />
Lubricate shift and throttle system<br />
Check/replace ballast pump impeller<br />
Inspect complete fuel system<br />
Change fuel filter<br />
<strong>MasterCraft</strong> <strong>2012</strong> <strong>Owners</strong> <strong>Manual</strong> • Service Log • Page 5-7
Index<br />
12-Volt Receptacle................................................................................2-67<br />
190, ProStar.............................................................................................2-2<br />
197, X-7, ProStar.....................................................................................2-4<br />
200V, X-2...............................................................................................2-12<br />
215V, X-15.............................................................................................2-14<br />
225V, X-25.............................................................................................2-16<br />
235V, X-35.............................................................................................2-18<br />
245V, X-45.............................................................................................2-20<br />
255V, X-55.............................................................................................2-22<br />
280, X-80................................................................................................2-26<br />
Additional Upholstery Cleaning Information....................................4-8<br />
Aft Light Switch....................................................................................2-67<br />
After Operation......................................................................................3-4<br />
Alarm, Low Voltage Battery................................................................2-35<br />
Alarms, Other.......................................................................................2-35<br />
Alcohol, Using Oxygenated Fuels or Fuels with.................................3-3<br />
Alignment, Check Propeller Shaft Coupling....................................4-17<br />
All Purpose Cleaner...............................................................................4-9<br />
AM/FM Stereo, CD Player, Remote control, iPod and<br />
MP3 Player Connections..................................................................2-67<br />
Anchor Lights Switch, Navigation/....................................................2-32<br />
Anchor...................................................................................................2-69<br />
Anchoring..............................................................................................1-11<br />
Annual Maintenance............................................................................4-17<br />
Attitude Adjustment or Trim Tab Switch..........................................2-62<br />
Automatic Bilge Pump Switch, <strong>Manual</strong> and.....................................2-30<br />
Automatic Fire Suppression..................................................................1-3<br />
Backlighting Switch, Instrument Panel Gauge.................................2-68<br />
Ballast Empty/Fill Switches.................................................................2-63<br />
Ballast Pump Impeller, Check.............................................................4-18<br />
Ballast System Preparations................................................................4-22<br />
Basic Maneuvering.................................................................................3-9<br />
Basic Operation, Starting and...............................................................3-6<br />
Battery Alarm, Low Voltage................................................................2-35<br />
Battery Charger.....................................................................................2-33<br />
Battery Connections and Hold-Downs, Inspect..............................4-12<br />
Battery Is Fully Charged, Check.........................................................4-14<br />
Battery Operation Switch, Dual.........................................................2-31<br />
Before Each Operation..........................................................................3-4<br />
Before Starting........................................................................................3-6<br />
Bilge Cleaner...........................................................................................4-9<br />
Bilge Pump Switch, <strong>Manual</strong> and Automatic.....................................2-30<br />
Blower Switch........................................................................................2-30<br />
Boarding Platforms, Swim/.................................................................2-65<br />
Boat Care Products, <strong>MasterCraft</strong>.........................................................4-9<br />
Boat Cleaner & Polish............................................................................4-9<br />
Boat Wash & Wax.................................................................................4-10<br />
Breakers, Circuit...................................................................................2-30<br />
Break-In (Maintenance), New Boat...................................................4-11<br />
Break-In, New Boat................................................................................3-5<br />
Buoys and Other Markings, Reading.................................................1-15<br />
Cables, Inspect Throttle and Shift......................................................4-13<br />
Canvas Cover........................................................................................2-69<br />
Canvas Covers (Cleaning).....................................................................4-6<br />
Care and Maintenance...........................................................................4-1<br />
Carpet (Cleaning)...................................................................................4-4<br />
Changing Propellers.............................................................................4-23<br />
Charger, Battery....................................................................................2-33<br />
Chartplotter, GPS and..........................................................................2-32<br />
Charts, Nautical......................................................................................1-9<br />
Check Ballast Pump Impeller.............................................................4-18<br />
Check Battery Is Fully Charged..........................................................4-14<br />
Check Engine Mounts.........................................................................4-17<br />
Check Propeller Shaft Coupling Alignment.....................................4-17<br />
Check Safety Equipment.....................................................................4-16<br />
Checking/Repairing Propellers..........................................................4-23<br />
Chrome, Stainless Steel and..................................................................4-3<br />
Circuit Breakers....................................................................................2-30<br />
Cleaning & Detailing Kit.....................................................................4-10<br />
Cleaning and Storage, General...........................................................4-16<br />
Cleaning the Boat...................................................................................4-4<br />
Cold Water Survival.............................................................................1-10<br />
Comfort and Convenience..................................................................2-69<br />
Common Sense Approach..................................................................1-12<br />
Communications..................................................................................1-11<br />
Conditions, Unusual Operating.........................................................3-10<br />
Connections and Hold-Downs, Inspect Battery..............................4-12<br />
Control, Shift/Throttle.........................................................................2-35<br />
Controls Common to Most Models...................................................2-30<br />
Controls, Convenience........................................................................2-67<br />
Controls, Performance.........................................................................2-33<br />
Controls, Sport Enhancement............................................................2-62<br />
Convenience Controls.........................................................................2-67<br />
Convenience, Comfort and.................................................................2-69<br />
Coolers...................................................................................................2-69<br />
Corrosion Prevention............................................................................4-3<br />
Corrosion, Galvanic...............................................................................4-3<br />
Corrosion, Salt Water.............................................................................4-3<br />
Coupling Alignment, Check Propeller Shaft....................................4-17<br />
Courtesy Lights Switch........................................................................2-67<br />
Courtesy...................................................................................................3-8<br />
Covers (Cleaning), Canvas....................................................................4-6<br />
Covers, Canvas......................................................................................2-69<br />
Cradle, Storage........................................................................................4-2<br />
Crossing (Vessels).................................................................................1-14<br />
Cruise Control Gauge..........................................................................2-33<br />
Display Selector Switch........................................................................2-67<br />
Docking and Tie-Up............................................................................3-10<br />
Documentation, Registration and Numbering..................................1-6<br />
Dual Battery Operation Switch..........................................................2-31<br />
During Operation...................................................................................3-4<br />
Electronic Instrumentation.................................................................2-29<br />
Emergencies............................................................................................3-8<br />
Empty/Fill Switches, Ballast................................................................2-63<br />
Enclosed Head (Cleaning)....................................................................4-7<br />
Encountering Vessels, Rules When....................................................1-14<br />
<strong>MasterCraft</strong> <strong>2012</strong> <strong>Owners</strong> <strong>Manual</strong> • Index • Page 5-8
Engine Emergency Safety Stop Switch...............................................2-31<br />
Engine Hatch Switch............................................................................2-67<br />
Engine Mounts, Check........................................................................4-17<br />
Engine Oil Pressure Gauge..................................................................2-34<br />
Engine Synchronizing Switch.............................................................2-34<br />
Engine, Starting the................................................................................3-6<br />
Engines, ILMOR Marine.......................................................................3-2<br />
Equipment, Check Safety....................................................................4-16<br />
Equipment, Recommended..................................................................1-6<br />
Equipment, Required.............................................................................1-3<br />
Equipment, Safety...................................................................................1-3<br />
Exhaust Flaps for Damage, Inspect....................................................4-18<br />
Exhaust System for Leaks, Inspect...........................................4-14, 4-15<br />
Fiberglass Swim Platform (Cleaning)..................................................4-5<br />
Fill Switches, Ballast Empty/...............................................................2-63<br />
Fire Extinguisher and Suppression Units..........................................4-19<br />
Fire Extinguishers...................................................................................1-3<br />
Fire Port...................................................................................................1-4<br />
Fire Suppression and Extinguishing .........................................1-3, 2-70<br />
Fire Suppression, Automatic.................................................................1-3<br />
First Hours of Operation.......................................................................3-5<br />
First Time Operation.............................................................................3-9<br />
Fishing Vessel Right-of-Way...............................................................1-15<br />
Flaps for Damage, Inspect Exhaust....................................................4-18<br />
Float Plan.................................................................................................1-8<br />
Frequency and Scheduled Maintenance............................................4-11<br />
Fuel Gauge.............................................................................................2-35<br />
Fuel System for Leakage, Inspect Complete.....................................4-19<br />
Fuel System for Leaks, Inspect..................................................4-13, 4-15<br />
Fuel System Treatment.........................................................................4-20<br />
Fueling, Using Care When....................................................................3-2<br />
Fuels Outside the United States and Canada......................................3-3<br />
Fuels with Alcohol, Using Oxygenated Fuels or.................................3-3<br />
Galvanic Corrosion................................................................................4-3<br />
Gasoline to Use, What Type of.............................................................3-2<br />
Gauge Backlighting Switch, Instrument Panel.................................2-68<br />
Gauge, Cruise Control.........................................................................2-33<br />
Gauge, Engine Oil Pressure.................................................................2-34<br />
Gauge, Fuel............................................................................................2-35<br />
Gauge, Temperature.............................................................................2-36<br />
Gauge, Video Display (190, 197, X-7, X-1).......................................2-37<br />
Gauge, Video Display (All other models).........................................2-54<br />
Gauge, Video Display (X-Star)...........................................................2-46<br />
Gears, Shifting.........................................................................................3-7<br />
General Cleaning and Storage............................................................4-16<br />
General Power Package Preparation..................................................4-21<br />
General Precautions...............................................................................1-2<br />
General Preparation.............................................................................4-20<br />
General Prudential Rule......................................................................1-15<br />
Glass Cleaner..........................................................................................4-9<br />
GPS and Chartplotter..........................................................................2-32<br />
Growth, Marine......................................................................................4-3<br />
Guide to Individual Models..................................................................2-1<br />
Hatch Switch, Engine...........................................................................2-67<br />
Head (Cleaning), Enclosed...................................................................4-7<br />
Head.......................................................................................................2-70<br />
Heat Switches, Seat...............................................................................2-68<br />
Heater Switch........................................................................................2-68<br />
Heater.....................................................................................................2-71<br />
Heaters, Seat..........................................................................................2-73<br />
High Speed Operation...........................................................................3-9<br />
Hints, Operational..................................................................................3-8<br />
Hold-Downs, Inspect Battery Connections and..............................4-12<br />
Horn.......................................................................................................2-31<br />
Hull (Cleaning).......................................................................................4-4<br />
Hull Cleaner............................................................................................4-9<br />
Hydraulic Steering System..................................................................2-35<br />
Hypothermia.........................................................................................1-10<br />
Ignition Key Slot...................................................................................2-32<br />
Ignition START-STOP.........................................................................2-32<br />
ILMOR Marine Engines........................................................................3-2<br />
Immersion Suits....................................................................................1-10<br />
Individual Models, Guide to.................................................................2-1<br />
Inflatable Life Rafts...............................................................................1-10<br />
Inspect Battery Connections and Hold-Downs...............................4-12<br />
Inspect Complete Fuel System for Leakage......................................4-19<br />
Inspect Exhaust Flaps for Damage.....................................................4-18<br />
Inspect Exhaust System for Leaks............................................4-14, 4-15<br />
Inspect Fuel System for Leaks...................................................4-13, 4-15<br />
Inspect Propeller Shaft Log.................................................................4-15<br />
Inspect Seacock Strainer......................................................................4-12<br />
Inspect Throttle and Shift Cables.......................................................4-13<br />
Inspections............................................................................................4-16<br />
Instrument Panel Gauge Backlighting Switch..................................2-68<br />
Instrumentation, Electronic................................................................2-29<br />
Key Slot, Ignition..................................................................................2-32<br />
Labels, Warning Plates and...................................................................1-8<br />
Ladders..................................................................................................2-71<br />
Law Enforcement..................................................................................1-11<br />
Leakage, Inspect Complete Fuel System for.....................................4-19<br />
Leaks, Inspect Exhaust System for...........................................4-14, 4-15<br />
License, Operator’s.................................................................................1-6<br />
Life Rafts, Inflatable..............................................................................1-10<br />
Lifting Eyes, Using..................................................................................4-2<br />
Lifting Slings, Using...............................................................................4-2<br />
Lifting the Boat.......................................................................................4-2<br />
Light Switch, Aft...................................................................................2-67<br />
Lighting..................................................................................................2-72<br />
Lights Switch, Courtesy.......................................................................2-67<br />
Lights Switch, Navigation/Anchor ....................................................2-32<br />
Lights Switch, Tower............................................................................2-68<br />
Lights Switch, Underwater..................................................................2-68<br />
Limited Warranty Statement.................................................................5-1<br />
Loading....................................................................................................3-8<br />
Low Voltage Battery Alarm.................................................................2-35<br />
Lubricate Shift and Throttle System...................................................4-18<br />
Lubricate Steering System...................................................................4-18<br />
Maintenance Service, <strong>MasterCraft</strong>.....................................................4-11<br />
Maintenance, Annual...........................................................................4-17<br />
Maintenance, Care and..........................................................................4-1<br />
Maintenance, Frequency and Scheduled...........................................4-11<br />
Maintenance, Other.............................................................................4-19<br />
Maintenance, Propeller........................................................................4-23<br />
Maintenance, Scheduled......................................................................4-12<br />
Maneuvering, Basic................................................................................3-9<br />
<strong>Manual</strong> and Automatic Bilge Pump Switch......................................2-30<br />
Marine Growth.......................................................................................4-3<br />
Markings, Reading Buoys and Other.................................................1-15<br />
<strong>MasterCraft</strong> Boat Care Products..........................................................4-9<br />
<strong>MasterCraft</strong> Maintenance Service......................................................4-11<br />
Measurements.......................................................................................2-28<br />
Meeting (Vessels)..................................................................................1-14<br />
Microfiber Detailing Cloths................................................................4-10<br />
<strong>MasterCraft</strong> <strong>2012</strong> <strong>Owners</strong> <strong>Manual</strong> • Index • Page 5-9
Mirrors...................................................................................................2-63<br />
Models, Guide to Individual.................................................................2-1<br />
Mounts, Check Engine........................................................................4-17<br />
Nautical Charts.......................................................................................1-9<br />
Navigation/Anchor Lights Switch......................................................2-32<br />
New Boat Break-In (Maintenance)....................................................4-11<br />
New Boat Break-In.................................................................................3-5<br />
Non-Recommended Products (Cleaning)..........................................4-8<br />
Numbering and Documentation, Registration..................................1-6<br />
Oil Pressure Gauge, Engine.................................................................2-34<br />
Operating Conditions, Unusual.........................................................3-10<br />
Operation, After.....................................................................................3-4<br />
Operation, Before Each.........................................................................3-4<br />
Operation, During..................................................................................3-4<br />
Operation, First Hours of......................................................................3-5<br />
Operation, First Time............................................................................3-9<br />
Operation, Starting and Basic...............................................................3-6<br />
Operational Hints...................................................................................3-8<br />
Operator’s License..................................................................................1-6<br />
Operator’s Responsibilities....................................................................1-8<br />
Other Alarms........................................................................................2-35<br />
Other Maintenance..............................................................................4-19<br />
Other Special Situations......................................................................1-15<br />
Other Winterization Preparations.....................................................4-21<br />
Overtaking (Vessels)............................................................................1-15<br />
Oxygenated Fuels or Fuels with Alcohol, Using.................................3-3<br />
Performance Controls..........................................................................2-33<br />
Personal Flotation Devices....................................................................1-4<br />
PFD Accessibility....................................................................................1-5<br />
Plates and Labels, Warning...................................................................1-8<br />
Platform (Cleaning), Fiberglass Swim.................................................4-5<br />
Platforms, Swim/Boarding..................................................................2-65<br />
Plug ’n Play............................................................................................2-63<br />
Power Package Preparation, General.................................................4-21<br />
Preparation..............................................................................................3-1<br />
Preparation, General............................................................................4-20<br />
Preparations, Ballast System...............................................................4-22<br />
Preparations, other Winterization......................................................4-21<br />
Prevention, Corrosion...........................................................................4-3<br />
Products (Cleaning), Recommended..................................................4-8<br />
Products (Cleaning, Non-Recommended...........................................4-8<br />
Products, <strong>MasterCraft</strong> Boat Care.........................................................4-9<br />
Propeller Maintenance.........................................................................4-23<br />
Propeller Shaft Coupling Alignment, Check....................................4-17<br />
Propeller Shaft Log, Inspect................................................................4-15<br />
Propellers, Changing............................................................................4-23<br />
Propellers, Checking/Repairing.........................................................4-23<br />
ProStar 190..............................................................................................2-2<br />
ProStar 197, X-7......................................................................................2-4<br />
ProStar 214, X-14...................................................................................2-6<br />
ProStar 214V, X-14V..............................................................................2-8<br />
Pump Impeller, Check Ballast.............................................................4-18<br />
Pump Switch, <strong>Manual</strong> and Automatic Bilge.....................................2-30<br />
Rafts, Inflatable Life..............................................................................1-10<br />
Re-Activating the Boat After Storage.................................................4-22<br />
Reading Buoys and Other Markings..................................................1-15<br />
Receptacle, 12-Volt...............................................................................2-67<br />
Recommended Equipment...................................................................1-6<br />
Recommended Products (Cleaning)...................................................4-8<br />
Refrigeration.........................................................................................2-72<br />
Refrigerator Switch...............................................................................2-68<br />
Registration and Transfer, Warranty....................................................5-6<br />
Registration, Numbering and Documentation..................................1-6<br />
Required Equipment..............................................................................1-3<br />
Responsibilities, Operator’s...................................................................1-8<br />
Right-of-Way, Fishing Vessel..............................................................1-15<br />
Right-of-Way, Sailing Vessel...............................................................1-15<br />
Rope, Ski/Wakeboard..........................................................................2-64<br />
Rules of the Open Water......................................................................1-14<br />
Rules When Encountering Vessels.....................................................1-14<br />
Rules/Sound Signals, Steering and Sailing........................................1-14<br />
Safety Afloat............................................................................................1-7<br />
Safety Checks and Services...................................................................3-4<br />
Safety Equipment....................................................................................1-3<br />
Safety Equipment, Check....................................................................4-16<br />
Safety Knowledge...................................................................................1-1<br />
Safety Stop Switch, Engine Emergency..............................................2-31<br />
Safety........................................................................................................1-2<br />
Safety, Skiing and Wakeboarding.........................................................1-7<br />
Sailing Rules/Sound Signals, Steering and........................................1-14<br />
Sailing Vessel Right-of-Way................................................................1-15<br />
Salt Water Corrosion..............................................................................4-3<br />
Scheduled Maintenance.......................................................................4-12<br />
Seacock Strainer, Inspect.....................................................................4-12<br />
Seat Heat Switches................................................................................2-68<br />
Seat Heaters...........................................................................................2-73<br />
Seating....................................................................................................2-73<br />
Selector Switch, Display.......................................................................2-67<br />
Service Log..............................................................................................5-7<br />
Shaft Coupling Alignment, Check Propeller....................................4-17<br />
Shaft Log, Inspect Propeller................................................................4-15<br />
Shift and Throttle System, Lubricate..................................................4-18<br />
Shift/Throttle Control..........................................................................2-35<br />
Shifting Gears..........................................................................................3-7<br />
Shower and/or Slick Boot Switch.......................................................2-68<br />
Shower or Wash Down........................................................................2-74<br />
Situations, Other Special.....................................................................1-15<br />
Ski/Wakeboard Rope...........................................................................2-64<br />
Skiing and Wakeboarding Safety..........................................................1-7<br />
Slick Boot Switch, Shower and/or......................................................2-68<br />
Slick Boot.................................................................................................4-7<br />
Slings, Using Lifting...............................................................................4-2<br />
Slot, Ignition Key..................................................................................2-32<br />
Sound Producing Devices.....................................................................1-5<br />
Sound Signals, Steering and Sailing Rules........................................1-14<br />
Special Situations, Other.....................................................................1-15<br />
Speedometer..........................................................................................2-36<br />
Sport Enhancement Controls.............................................................2-62<br />
Spray Wax..............................................................................................4-10<br />
Stainless Steel and Chrome...................................................................4-3<br />
Starting and Basic Operation................................................................3-6<br />
Starting the Engine.................................................................................3-6<br />
Starting, Before.......................................................................................3-6<br />
START-STOP, Ignition.........................................................................2-32<br />
Staying Afloat........................................................................................1-10<br />
Steering and Sailing Rules/Sound Signals.........................................1-14<br />
Steering System, Hydraulic.................................................................2-35<br />
Steering System, Lubricate..................................................................4-18<br />
Stereo Equipment.................................................................................2-74<br />
Stopping...................................................................................................3-7<br />
Storage and Winterization...................................................................4-20<br />
Storage Cradle.........................................................................................4-2<br />
Storage, General Cleaning and...........................................................4-16<br />
Storage, Re-Activating the Boat After................................................4-22<br />
Strainer, Inspect Seacock.....................................................................4-12<br />
<strong>MasterCraft</strong> <strong>2012</strong> <strong>Owners</strong> <strong>Manual</strong> • Index • Page 5-10
Surf Tab Switch.....................................................................................2-64<br />
Survival, Cold Water............................................................................1-10<br />
Swim Platform (Cleaning), Fiberglass.................................................4-5<br />
Swim/Boarding Platforms...................................................................2-65<br />
Switch, Aft Light...................................................................................2-67<br />
Switch, Attitude Adjustment or Trim Tab.........................................2-62<br />
Switch, Blower.......................................................................................2-30<br />
Switch, Courtesy Lights.......................................................................2-67<br />
Switch, Display Selector.......................................................................2-67<br />
Switch, Dual Battery Operation.........................................................2-31<br />
Switch, Engine Emergency Safety Stop..............................................2-31<br />
Switch, Engine Hatch...........................................................................2-67<br />
Switch, Engine Synchronizing............................................................2-34<br />
Switch, Heater.......................................................................................2-68<br />
Switch, Instrument Panel Gauge Backlighting.................................2-68<br />
Switch, <strong>Manual</strong> and Automatic Bilge Pump.....................................2-30<br />
Switch, Navigation/Anchor Lights.....................................................2-32<br />
Switch, Refrigerator..............................................................................2-68<br />
Switch, Shower and/or Slick Boot......................................................2-68<br />
Switch, Surf Tab....................................................................................2-64<br />
Switch, Tower Lights............................................................................2-68<br />
Switch, Wash Down.............................................................................2-68<br />
Switches, Ballast Empty/Fill................................................................2-63<br />
Switches, Seat Heat...............................................................................2-68<br />
Synchronizing Switch, Engine............................................................2-34<br />
Tables......................................................................................................2-74<br />
Tachometer............................................................................................2-36<br />
Teak Wood (Cleaning)...........................................................................4-4<br />
Temperature Gauge..............................................................................2-36<br />
Throttle and Shift Cables, Inspect......................................................4-13<br />
Throttle Control, Shift/........................................................................2-35<br />
Throttle System, Lubricate Shift and..................................................4-18<br />
Tie-Up, Docking and...........................................................................3-10<br />
Tower Lights Switch.............................................................................2-68<br />
Towers....................................................................................................2-66<br />
Transfer, Warranty Registration and ...................................................5-6<br />
Trim Tab Switch, Attitude Adjustment or.........................................2-62<br />
Troubleshooting ...................................................................................4-24<br />
Vessel Right-of-Way, Fishing..............................................................1-15<br />
Vessel Right-of-Way, Sailing...............................................................1-15<br />
Vessels, Rules When Encountering....................................................1-14<br />
Video Display Gauge (190, 197, X-7, X-1)........................................2-37<br />
Video Display Gauge (All other models)..........................................2-54<br />
Video Display Gauge (X-Star)............................................................2-46<br />
Vinyl Dressing.........................................................................................4-9<br />
Visual Distress Signals...........................................................................1-5<br />
Voltage Battery Alarm, Low................................................................2-35<br />
Voltmeter...............................................................................................2-36<br />
Wakeboard Rope, Ski/.........................................................................2-64<br />
Wakeboarding Safety, Skiing and.........................................................1-7<br />
Warning Plates and Labels....................................................................1-8<br />
Warranty Registration and Transfer....................................................5-6<br />
Warranty Statement, Limited................................................................5-1<br />
Wash Down Switch..............................................................................2-68<br />
Wash Down, Shower or.......................................................................2-74<br />
Weather....................................................................................................1-9<br />
What Type of Gasoline to Use..............................................................3-2<br />
When the Boat Is Not Used for a While..............................................3-3<br />
Windshield (Cleaning)..........................................................................4-5<br />
Winterization Preparations, Other....................................................4-21<br />
Winterization, Storage and..................................................................4-20<br />
X-1..........................................................................................................2-10<br />
X-14, ProStar 214...................................................................................2-6<br />
X-14V, ProStar 214V..............................................................................2-8<br />
X-15, 215V ...........................................................................................2-14<br />
X-2, 200V...............................................................................................2-12<br />
X-25, 225V............................................................................................2-16<br />
X-35, 235V............................................................................................2-18<br />
X-45, 245V............................................................................................2-20<br />
X-55, 255V............................................................................................2-22<br />
X-7, ProStar 197......................................................................................2-4<br />
X-80, 280................................................................................................2-26<br />
X-Star.....................................................................................................2-24<br />
Underwater Lights Switch...................................................................2-68<br />
Underway................................................................................................3-7<br />
Unusual Operating Conditions..........................................................3-10<br />
Upholstery Cleaning Information, Additional...................................4-8<br />
Upholstery...............................................................................................4-7<br />
Using Care When Fueling.....................................................................3-2<br />
Using Lifting Eyes...................................................................................4-2<br />
Using Lifting Slings................................................................................4-2<br />
Using Oxygenated Fuels or Fuels with Alcohol..................................3-3<br />
<strong>MasterCraft</strong> <strong>2012</strong> <strong>Owners</strong> <strong>Manual</strong> • Index • Page 5-11