Ithaca 610 Programmer's Guide - TransAct
Ithaca 610 Programmer's Guide - TransAct
Ithaca 610 Programmer's Guide - TransAct

You also want an ePaper? Increase the reach of your titles
YUMPU automatically turns print PDFs into web optimized ePapers that Google loves.
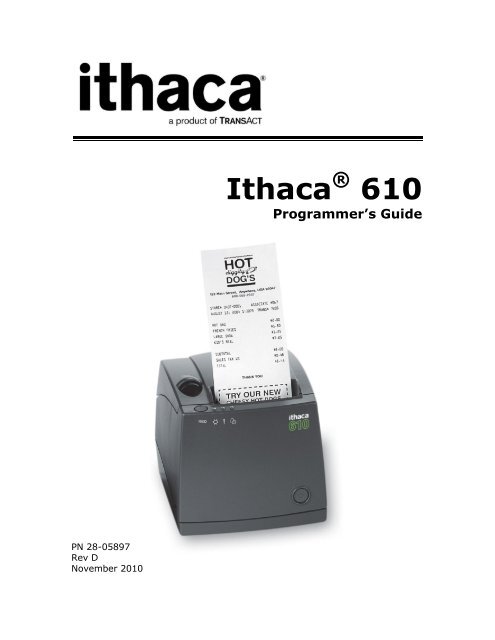
PN 28-05897<br />
Rev D<br />
November 2010<br />
<strong>Ithaca</strong> ® <strong>610</strong><br />
Programmer’s <strong>Guide</strong>
Change History<br />
Revision Description of change Date<br />
A Initial release<br />
B Added Las Vegas address<br />
C Removed all reference to the electronic journal Aug 06<br />
D Pg 27 Corrected the Cash Drawer Pin Assignment Chart. Nov 10<br />
Page ii Rev D 28-05897
Federal Communications Commission Radio<br />
Frequency Interference Statement<br />
The <strong>Ithaca</strong> ® <strong>610</strong> Printer complies with the limits for a Class A computing device in<br />
accordance with the specifications in Part 15 of FCC rules. These regulations are<br />
designed to minimize radio frequency interference during installation; however, there is<br />
no guarantee that radio or television interference will not occur during any particular<br />
installation. Interference can be determined by turning the equipment off and on while<br />
the radio or television is on. If the printer causes interference to radio or television<br />
reception, try to correct the interference by one or more of the following measures:<br />
1. Reorient the radio or television receiving antenna<br />
2. Relocate the printer with respect to the receiver<br />
3. Plug the printer and receiver into different circuits<br />
If necessary, the user should consult their dealer or an experienced radio/television<br />
technician for additional suggestions. The user may find the following booklet prepared<br />
by the Federal Communications Commission helpful: How to Identify and Resolve<br />
Radio/TV Interference Problems. This booklet is available from the US Government<br />
Printing Office, Washington, DC 20402. Ask for stock number 004-000-00345-4.<br />
Canadian Department of Communications Radio<br />
Interference Statement<br />
The <strong>Ithaca</strong> ® <strong>610</strong> Printer does not exceed Class A limits for radio noise emissions from<br />
digital apparatus set out in the Radio Interference Regulations of the Canadian<br />
Department of Communications.<br />
Regulatory Compliance<br />
FCC Class A<br />
ULc<br />
CE Mark<br />
UL 1950<br />
TUV<br />
28-05897 Rev D Page i
Disclaimer<br />
NOTICE TO ALL PERSONS RECEIVING THIS DOCUMENT:<br />
The information in this document is subject to change without notice. No part of this<br />
document may be reproduced, stored or transmitted in any form or by any means,<br />
electronic or mechanical, for any purpose, without the express written permission of<br />
<strong>TransAct</strong> Technologies, Inc. ("<strong>TransAct</strong>"). This document is the property of and contains<br />
information that is both confidential and proprietary to <strong>TransAct</strong>. Recipient shall not<br />
disclose any portion of this document to any third party.<br />
TRANSACT DOES NOT ASSUME ANY LIABILITY FOR DAMAGES INCURRED,<br />
DIRECTLY OR INDIRECTLY, FROM ANY ERRORS, OMISSIONS OR<br />
DISCREPANCIES IN THE INFORMATION CONTAINED IN THIS DOCUMENT.<br />
<strong>TransAct</strong> cannot guarantee that changes in software and equipment made by other<br />
manufacturers, and referred to in this publication, do not affect the applicability of<br />
information in this publication.<br />
Copyright<br />
© 2005 <strong>TransAct</strong> Technologies, Inc. All rights reserved.<br />
Revision Level D<br />
November 2010<br />
Printed in USA<br />
Trademarks<br />
Some of the product names mentioned herein are used for identification purposes only<br />
and may be trademarks and/or registered trademarks of their respective companies.<br />
BANKjet, 50Plus, Insta-Load, <strong>Ithaca</strong>, "Made to Order. Built to Last", Magnetec, PcOS,<br />
POSjet, PowerPocket, <strong>Ithaca</strong> and <strong>TransAct</strong> are registered trademarks and Epic 950,<br />
Flex-Zone, imPort, ithaColor, KITCHENjet, Momentum, QDT and TicketBurst are<br />
trademarks of <strong>TransAct</strong> Technologies, Inc.<br />
Page ii Rev D 28-05897
Table of Contents<br />
Change History ............................................................................................................... ii<br />
Federal Communications Commission Radio Frequency Interference Statement ............ i<br />
Canadian Department of Communications Radio Interference Statement ........................ i<br />
Regulatory Compliance .................................................................................................... i<br />
Disclaimer ....................................................................................................................... ii<br />
Copyright ......................................................................................................................... ii<br />
Trademarks ..................................................................................................................... ii<br />
Table of Contents ........................................................................................................... iii<br />
Figures .......................................................................................................................... vii<br />
Tables ........................................................................................................................... vii<br />
Introducing your <strong>Ithaca</strong> ® <strong>610</strong> Printer .................... 1<br />
About your <strong>Ithaca</strong> ® <strong>610</strong> Printer ........................................................................................ 3<br />
Who Should Read This <strong>Guide</strong>? ....................................................................................... 4<br />
What Is Included in This <strong>Guide</strong>? ...................................................................................... 4<br />
Warranty Options ............................................................................................................ 4<br />
Technical and Sales support ........................................................................................... 5<br />
On-line Technical Support ....................................................................................... 5<br />
Telephone Technical Support .................................................................................. 5<br />
Return Materials Authorization and Return Policies ................................................. 6<br />
Service Programs .................................................................................................... 6<br />
Sales Support .......................................................................................................... 6<br />
Contact Information ................................................................................................. 7<br />
<strong>Ithaca</strong> ® <strong>610</strong> Specifications and Requirements ........ 9<br />
<strong>Ithaca</strong> ® <strong>610</strong> Specifications and Requirements ............................................................... 11<br />
<strong>Ithaca</strong> ® <strong>610</strong> Thermal Printer Models .............................................................................. 11<br />
Standard Features ........................................................................................................ 11<br />
Optional Features .......................................................................................................... 13<br />
General Specifications .................................................................................................. 14<br />
Printing Specifications ........................................................................................... 14<br />
Character Pitch ...................................................................................................... 14<br />
Character Generation ............................................................................................ 15<br />
Physical Characteristics ................................................................................................ 18<br />
Dimensions ............................................................................................................ 18<br />
Weight ................................................................................................................... 18<br />
Electrical Characteristics ............................................................................................... 19<br />
Internal AC Powered ............................................................................................. 19<br />
External Powered DC ............................................................................................ 19<br />
Thermal Print Head ....................................................................................................... 19<br />
Media Specifications ..................................................................................................... 20<br />
Receipt Paper ........................................................................................................ 20<br />
Buzzer ........................................................................................................................... 22<br />
Cover Interlock .............................................................................................................. 22<br />
Display Pass Through ................................................................................................... 22<br />
Communications Interface ............................................................................................. 23<br />
Parallel Interface.................................................................................................... 23<br />
RS-232 Serial Interface ......................................................................................... 24<br />
28-05897 Rev D Page iii
USB Interface ........................................................................................................ 24<br />
Ethernet 10-Base-T adapter .................................................................................. 25<br />
802.11b Wireless Interface .................................................................................... 25<br />
Cash Drawer ......................................................................................................... 26<br />
Interface Description .............................................................................................. 26<br />
Cash Drawer Pin Assignments .............................................................................. 26<br />
Vertical Wall Mount Kit Option ....................................................................................... 28<br />
Setup Procedures ..............................................29<br />
Verifying the Configuration ............................................................................................ 31<br />
Verify the Communications Interface Card............................................................. 31<br />
Changing Interface Cards ...................................................................................... 31<br />
Removing the Old Interface Card .......................................................................... 31<br />
Cash Drawer Configuration ................................................................................... 32<br />
Configuring the Cash Drawer Interface .................................................................. 32<br />
Installing Cables ............................................................................................................ 33<br />
Connecting power .................................................................................................. 33<br />
Connecting Communications Cables ..................................................................... 34<br />
Verify the Firmware Configuration ......................................................................... 35<br />
Installing Paper ............................................................................................................. 35<br />
Installing Windows ® Printer Drivers ................................................................................ 36<br />
Printer Driver Installation for WIN95, 98, Me .......................................................... 36<br />
Printer Driver Installation for NT4.0, 2000 .............................................................. 36<br />
OPOS drivers Installation Instructions ................................................................... 37<br />
To Install the USB drivers ...................................................................................... 37<br />
How to Operate the <strong>Ithaca</strong> ® <strong>610</strong> Printer ...............39<br />
How to Operate the <strong>Ithaca</strong> ® <strong>610</strong> Printer ......................................................................... 41<br />
* Button ......................................................................................................................... 41<br />
FEED Button ................................................................................................................. 41<br />
Indicator Lights (LED) .................................................................................................... 42<br />
Power Indicator (LED) ........................................................................................... 42<br />
Error Indicator (LED) ............................................................................................. 42<br />
Paper Indicator (LED) ............................................................................................ 42<br />
Fault Indicators .............................................................................................................. 42<br />
Testing the Printer Overview ......................................................................................... 44<br />
Using Self-Test, Configuration, and Hex Dump Mode ............................................ 44<br />
Hex-dump Mode .................................................................................................... 45<br />
Level 0 Diagnostics ............................................................................................... 47<br />
Boot Loader Mode ................................................................................................. 47<br />
Configuring Your <strong>Ithaca</strong> ® <strong>610</strong> Printer ...................49<br />
Configuration Mode Overview ....................................................................................... 51<br />
Field Configuration Feature ................................................................................... 51<br />
Most Frequent Configuration Incompatibilities ....................................................... 54<br />
How to Manually Change Configuration Settings ........................................................... 54<br />
Entering into Manual Configuration Mode .............................................................. 54<br />
Using Configuration Mode ............................................................................................. 55<br />
Remote Configuration ................................................................................................... 57<br />
Programming Codes ...........................................59<br />
Control Codes Overview ............................................................................................... 61<br />
Nomenclature ................................................................................................................ 61<br />
Page iv Rev D 28-05897
Standard Emulation ............................................................................................... 62<br />
IPCL Codes ........................................................................................................... 62<br />
EPOS Emulation.................................................................................................... 62<br />
Application Development ............................................................................................... 62<br />
<strong>Ithaca</strong> Control Codes and Commands ........................................................................... 62<br />
PcOS Printer Control Codes .................................................................................. 62<br />
Quick PcOS Reference Chart ................................................................................ 64<br />
Quick PcOS Reference Chart (Alphabetic) ............................................................ 70<br />
Low Level Paper Motion Control ............................................................................ 75<br />
Horizontal Motion Control ...................................................................................... 76<br />
Vertical Motion Control .......................................................................................... 78<br />
Character Pitch ...................................................................................................... 84<br />
Character Font ...................................................................................................... 87<br />
Print Rotation Commands .................................................................................... 104<br />
Rotated Print Summary ....................................................................................... 107<br />
<strong>Ithaca</strong> ® <strong>610</strong> Page Mode ....................................................................................... 110<br />
Graphic Mode ...................................................................................................... 114<br />
Graphics Compression ........................................................................................ 120<br />
User Store (Graphic Save) .................................................................................. 120<br />
User Macros ........................................................................................................ 128<br />
Bar Codes ........................................................................................................... 130<br />
Unicode and Downloaded Fonts .......................................................................... 141<br />
Unicode Encoding ............................................................................................... 141<br />
Miscellaneous Control ......................................................................................... 146<br />
Remote Power Control ........................................................................................ 154<br />
Documented Extended Control commands .......................................................... 155<br />
Printer Status ....................................................................................................... 156<br />
Inquire Commands .............................................................................................. 157<br />
ESC/POS TM Codes ...................................................................................................... 165<br />
Differences between Epson TM T90 and <strong>Ithaca</strong> ® <strong>610</strong> .......................................... 165<br />
Supported TM-T88 Commands ................................................................................... 167<br />
Undocumented TM-T88 Commands ........................................................................... 170<br />
TM-T88 and ESC/POS TM Command Descriptions ....................................................... 171<br />
Print and Feed Commands.......................................................................................... 171<br />
Line Spacing Commands ............................................................................................ 173<br />
Character Commands ................................................................................................. 173<br />
Panel Button Commands ............................................................................................ 182<br />
Paper Sensor Commands ........................................................................................... 183<br />
Print Position Commands ............................................................................................ 185<br />
Bit-Image Commands .................................................................................................. 189<br />
Status Commands ....................................................................................................... 190<br />
Printing Paper Command ............................................................................................ 196<br />
Page Mode .................................................................................................................. 197<br />
Bar Code Commands .................................................................................................. 200<br />
Mechanism Control Commands .................................................................................. 203<br />
Miscellaneous Commands .......................................................................................... 204<br />
Macro Function Commands ........................................................................................ 210<br />
User-defined Images and Graphics Commands .......................................................... 211<br />
<strong>Ithaca</strong> ® Specific <strong>Ithaca</strong> ® <strong>610</strong> Commands ..................................................................... 216<br />
Panel Button Commands ..................................................................................... 216<br />
Paper Out/Low Sensor Commands ..................................................................... 216<br />
28-05897 Rev D Page v
<strong>Ithaca</strong> ® Star Emulation ................................................................................................ 218<br />
Unicode .......................................................... 219<br />
Unicode – A Software Font Solution ............................................................................ 221<br />
About Unicode ............................................................................................................. 221<br />
Memory ............................................................................................................... 222<br />
<strong>TransAct</strong>‘s implementation of Unicode in the <strong>Ithaca</strong> ® <strong>610</strong>. ........................................... 222<br />
<strong>Ithaca</strong> ® <strong>610</strong> Extended Printer Control ................. 223<br />
Communications .............................................. 229<br />
Protocol and Print Buffers ........................................................................................... 231<br />
USB ............................................................................................................................ 234<br />
USB Support ....................................................................................................... 234<br />
TCP/IP ........................................................................................................................ 235<br />
Print Server Features Standard Ethernet Connection .......................................... 235<br />
Supported Protocols ............................................................................................ 235<br />
User Interface/Configuration ................................................................................ 235<br />
Other ................................................................................................................... 235<br />
Parallel Port ................................................................................................................ 236<br />
Parallel Port Protocol ........................................................................................... 236<br />
Printer Buffer Size ............................................................................................... 237<br />
Parallel Port Inquire and IEEE 1284 .................................................................... 237<br />
Parallel Port Plug and Play .................................................................................. 239<br />
Serial Port ................................................................................................................... 241<br />
Serial Port Protocol .............................................................................................. 241<br />
Print Buffer Flow .................................................................................................. 243<br />
Printer Buffer Size ............................................................................................... 245<br />
Serial Mode Plug and Play .................................................................................. 245<br />
Using DSR ........................................................................................................... 245<br />
Serial Device Identification .................................................................................. 246<br />
Serial Port Inquire ................................................................................................ 247<br />
Display Pass Through ................................................................................................. 248<br />
Remote Power Control ................................................................................................ 248<br />
Remote Printer Reset .................................................................................................. 249<br />
Reset in Serial Mode ........................................................................................... 249<br />
Reset in Parallel Mode......................................................................................... 249<br />
Miscellaneous Communication Features ..................................................................... 250<br />
Power-cycle Recovery ......................................................................................... 250<br />
Data Pass-through ............................................................................................... 250<br />
Multi-drop Configuration ...................................................................................... 250<br />
Off-line Active ...................................................................................................... 251<br />
Recovery from Mechanical Errors ............................................................................... 252<br />
Programmer‘s Notes ................................................................................................... 253<br />
Appendix A: Code Page Definition Table ............. 255<br />
Appendix B: ASCII Code Table .......................... 257<br />
Appendix C: Ordering Supplies .......................... 259<br />
Index ............................................................. 261<br />
Page vi Rev D 28-05897
Figures<br />
Figure 1 Receipt Printing, Tear off Position .................................................................. 21<br />
Figure 2 Cash Drawer Pin Definitions ............................................................................ 26<br />
Figure 3 Cash Drawer Selection .................................................................................... 32<br />
Figure 4 Power and Cash Drawer ................................................................................. 33<br />
Figure 5 3-pin mini DIN plug .......................................................................................... 33<br />
Figure 6 Communications Ports .................................................................................... 34<br />
Figure 7. Startup message in Field Configuration mode. ............................................... 52<br />
Figure 8. Sample pre-loaded configuration. ................................................................... 53<br />
Figure 7 Page Mode entry Orientations ....................................................................... 110<br />
Figure 8 Code 39 full 128 character encoding ............................................................. 132<br />
Figure 9 Expanded Function coding ............................................................................ 134<br />
Figure 10 Code 128 encoding values .......................................................................... 136<br />
Figure 11 Typical POS System ................................................................................... 231<br />
Figure 12 Host to Printer Link ...................................................................................... 232<br />
Figure 13 Printer Communications Buffer Flow ........................................................... 233<br />
Figure 14 Parallel-port Data Timing ............................................................................. 236<br />
Figure 15 Parallel Port ACK Timing Options ................................................................ 237<br />
Figure 16 Serial Port Flow Control Using DTR ............................................................ 241<br />
Figure 17 XON/XOFF Serial Port Flow Control ............................................................ 242<br />
Tables<br />
Table 1 Possible Character Pitches ............................................................................... 14<br />
Table 2 Requested CPI and Resulting CPI .................................................................... 15<br />
Table 3 Cell Size for Small, Medium and Large Fonts ................................................... 15<br />
Table 4 Standard Power Input Requirements ................................................................ 19<br />
Table 5 Power Input Requirements with the 24-volt DC Power ..................................... 19<br />
Table 6: Paper Grades-Monochrome ............................................................................ 20<br />
Table 7 Parallel Interface Pin-outs ................................................................................. 23<br />
Table 8 Serial Interface Pin-outs ................................................................................... 24<br />
Table 9 Cash Drawer Pin Assignment ........................................................................... 27<br />
Table 10 Serial interface pin out .................................................................................... 34<br />
Table 11 Parallel interface pin out ................................................................................. 35<br />
Table 12 Error Blink Codes ........................................................................................... 43<br />
Table 13 Character Pitch ............................................................................................... 85<br />
Table 14 Inter-character Spacing .................................................................................. 86<br />
Table 15 Language Table ID‘s ...................................................................................... 90<br />
Table 16 Code Page Definition Table ............................................................................ 91<br />
Table 17 Euro Character Substitution Matrix ................................................................. 92<br />
Table 18 OCR MA-3 ...................................................................................................... 97<br />
Table 19 Paper Sensor Commands ............................................................................ 150<br />
Table 20 Paper Sensor Commands ............................................................................ 151<br />
Table 21 Supported TM-T90 Commands .................................................................... 169<br />
Table 22 Undocumented TM-T90 Commands ............................................................. 170<br />
Table 23 Select Character Font Table ......................................................................... 174<br />
Table 24 International Character Sets ......................................................................... 175<br />
Table 25 Character Code Pages ................................................................................. 177<br />
28-05897 Rev D Page vii
Table 26 Character Code Table .................................................................................. 178<br />
Table 27 Print Modes .................................................................................................. 179<br />
Table 28 Rotation Modes ............................................................................................ 180<br />
Table 29 Paper Sensor Commands ............................................................................ 183<br />
Table 30 Paper Sensor Commands ............................................................................ 184<br />
Table 31 Print Density Selection.................................................................................. 189<br />
Table 32 Automatic Status Back (ASB) Values for ............................................... 190<br />
Table 33 Automatic Status Back (ASB) First Byte (Printer Information) ....................... 191<br />
Table 34 Automatic Status Back (ASB) Second Byte (Error Information) .................... 191<br />
Table 35 Automatic Status Back (ASB) Third Byte (Paper Sensor Information) ........... 192<br />
Table 36 Automatic Status Back (ASB) Fourth Byte (Paper Sensor Information) ........ 192<br />
Table 37 Paper Sensor Status ( = 1, 49) ............................................................... 192<br />
Table 38 Drawer Kick-out Connector Status ( = 2, 50) .......................................... 193<br />
Table 39 Values for the Status Function, .............................................................. 193<br />
Table 40 Printer Status ( = 1) ................................................................................ 193<br />
Table 41 Off line Status ( = 2) ............................................................................... 194<br />
Table 42 Error Status ( = 3) ................................................................................... 194<br />
Table 43 Paper Roll Sensor Status ( = 4) .............................................................. 194<br />
Table 44 Peripheral Status ( = 0, 48) ..................................................................... 195<br />
Table 45 Paper Status ................................................................................................. 195<br />
Table 46 Bar Code System Based on ................................................................. 201<br />
Table 47 Printing Position of HRI Characters .............................................................. 202<br />
Table 48 Font for Human Readable Interpretation (HRI) Characters ........................... 202<br />
Table 49 Horizontal size of the bar code ..................................................................... 202<br />
Table 50 Printer ID ...................................................................................................... 204<br />
Table 51 Type ID ( = 2 or 50) ................................................................................ 204<br />
Table 52 Peripheral Device Bit Definitions ................................................................... 206<br />
Table 53 Macro Control Bit Definitions ........................................................................ 210<br />
Table 54 User-defined Bit-image Resolutions.............................................................. 215<br />
Table 55 Parallel-port Timing ...................................................................................... 237<br />
Table 56 Paper Ordering Information .......................................................................... 259<br />
Table 57 Cables Ordering Information ......................................................................... 259<br />
Page viii Rev D 28-05897
28-05897 Rev D Page ix
chapter 1<br />
Introducing your <strong>Ithaca</strong> ® <strong>610</strong> Printer<br />
28-05897 Rev D Page 1
This page intentionally left blank<br />
Page 2 Rev D 28-05897
About Your <strong>Ithaca</strong> ® <strong>610</strong> Printer<br />
<strong>Ithaca</strong> ® <strong>610</strong> Programmer’s <strong>Guide</strong><br />
About your <strong>Ithaca</strong> ® <strong>610</strong> Printer<br />
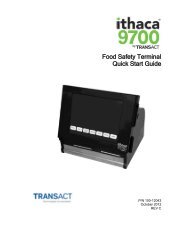
The <strong>Ithaca</strong> ® <strong>610</strong> printer represents the very latest technology for use for thermal receipt<br />
printing for point-of-sale and retail environments. It builds upon the architecture of<br />
<strong>Ithaca</strong>‘s proven thermal printers, together with a host of features specifically designed to<br />
improve the performance of your receipt-printing applications, including:<br />
Crisp, clear receipt printing<br />
Fast 12 inches per second print speed<br />
Rugged spill-resistant cover<br />
Large 4-inch paper roll capacity with drop-in loading<br />
Protected internal power supply<br />
Ethernet and USB interfaces<br />
Wireless option for reduced cable clutter<br />
Application-controllable buzzer<br />
Configurable cash drawer functionality<br />
The <strong>Ithaca</strong> ® <strong>610</strong> also offers a wide range of programmable features, including font<br />
control, APA graphics support, bar codes, and support for over 60 language character<br />
sets. These features let you quickly and easily integrate more layout and printing options<br />
than ever – while giving you the reliability, durability and uptime you have come to<br />
expect from <strong>Ithaca</strong> printers.<br />
28-05897 Rev D Page 3
About Your <strong>Ithaca</strong> ® <strong>610</strong> Printer<br />
<strong>Ithaca</strong> ® <strong>610</strong> Programmer’s <strong>Guide</strong><br />
Who Should Read This <strong>Guide</strong>?<br />
This document provides information and programming specifications for operators who<br />
will integrate the <strong>Ithaca</strong> ® <strong>610</strong> printer into their kitchen operations.<br />
What Is Included in This <strong>Guide</strong>?<br />
This Programmer‘s <strong>Guide</strong> includes information on the features and programming<br />
interface of the <strong>Ithaca</strong> ® <strong>610</strong> printer. It provides the following information to support your<br />
programming and implementation efforts:<br />
Warranty and technical support information.<br />
Specifications and functionality description.<br />
Programming information, including documentation of low-level and high-level<br />
command interfaces, as well as sample scripts to guide your own implementation<br />
efforts.<br />
We want you to have a trouble-free implementation with your <strong>Ithaca</strong> printer. For any<br />
issues not covered in this guide, quality technical support is available on-line at<br />
www.transact-tech.com, or by telephone at (607) 257-8901 or (877) 7-ITHACA.<br />
Consult the following pages for more details about our support services.<br />
Warranty Options<br />
All <strong>Ithaca</strong> ® <strong>610</strong> printers come with a standard 24-month standard warranty covering both<br />
parts and labor that starts upon shipment from the factory. An optional extended<br />
warranty, covering both parts and labor for an additional 12 months, may be purchased<br />
separately. For more information concerning the warranty options, please contact the<br />
Sales Department at <strong>TransAct</strong>‘s <strong>Ithaca</strong> facility. You are responsible for insuring any<br />
product returned for service, and you assume the risk of loss during shipment to <strong>Ithaca</strong>.<br />
C.O.D. packages are not accepted and warranty repairs are subject to the terms and<br />
conditions as stated on the <strong>Ithaca</strong> warranty policy.<br />
Page 4 Rev D 28-05897
About Your <strong>Ithaca</strong> ® <strong>610</strong> Printer<br />
<strong>Ithaca</strong> ® <strong>610</strong> Programmer’s <strong>Guide</strong><br />
Technical and Sales support<br />
Your <strong>Ithaca</strong> printer is backed by the resources of <strong>TransAct</strong> Technologies, a global<br />
technology firm with dedicated technical support and sales assistance. Here is how we<br />
can help you:<br />
On-line Technical Support<br />
Our web site at www.transact-tech.com is your on-line portal to obtaining technical<br />
assistance with your <strong>Ithaca</strong> printer. Click on <strong>Ithaca</strong> link and then the Technical Support<br />
link to find documentation for your <strong>Ithaca</strong> ® <strong>610</strong> printer, including a current copy of this<br />
Programmer‘s <strong>Guide</strong> featuring:<br />
o<br />
o<br />
o<br />
o<br />
Command codes and descriptions.<br />
Character fonts.<br />
Printer features.<br />
Communication specifics.<br />
Other utilities available include a font utility and a terminal application for communicating<br />
with your printer, as well as the following drivers and utilities:<br />
Windows 95/98/Me Print Driver with Documentation Part No. 100-9167<br />
Windows NT 4.0 2K and XP Print Driver with Documentation Part No. 100-9170<br />
OPOS Drivers with Documentation Part No. 100-9732<br />
Master Character Set Definitions Part No. 100-9785<br />
Our on-line support site also includes a convenient e-mail assistance request form,<br />
where you can submit support requests 24 hours a day, and receive a return contact<br />
from a <strong>TransAct</strong> support technician during regular business hours.<br />
Telephone Technical Support<br />
Live telephone support is available Monday through Friday from 8 AM to 8 PM Eastern<br />
US time, excluding holidays. We can provide general information about programming for<br />
your <strong>Ithaca</strong> ® <strong>610</strong> printer, technical support, documentation, or assistance in sending a<br />
printer for service. To obtain telephone support, call <strong>TransAct</strong>'s <strong>Ithaca</strong> Facility at (607)<br />
257-8901 and ask for Technical Support. To help us serve you faster, please have the<br />
following information ready when you call:<br />
The Model Number and Serial Number of the printer.<br />
A list of any other peripheral devices attached to the same port as the printer.<br />
What application software, operating system, and network (if any) you are using.<br />
What happened and what you were doing when the problem occurred.<br />
How you tried to solve the problem.<br />
28-05897 Rev D Page 5
About Your <strong>Ithaca</strong> ® <strong>610</strong> Printer<br />
<strong>Ithaca</strong> ® <strong>610</strong> Programmer’s <strong>Guide</strong><br />
Return Materials Authorization and Return Policies<br />
If the technical support person determines that the printer should be serviced at our<br />
facility, and you want to return the printer for repair, we will issue you the Returned<br />
Materials Authorization (RMA) number that is required before returning the printer.<br />
Repairs are warranted for 90 days from the date of repair or for the balance of the<br />
original warranty period, whichever is greater. Please prepare the printer being returned<br />
for repair as follows:<br />
Pack the printer to be returned in the original packing material.<br />
Packing material may be purchased from <strong>TransAct</strong>'s <strong>Ithaca</strong> Facility.<br />
Do not return any accessories unless asked to do so by a support technician.<br />
Write the RMA number clearly on the outside of the box.<br />
Service Programs<br />
<strong>TransAct</strong> Technologies Incorporated has a full service organization to meet your printer<br />
service and repair requirements. If your printer needs service, please contact your<br />
service provider first. If any problems still persist, you can directly contact the <strong>Ithaca</strong><br />
facility‘s Technical Support Department at (607) 257-8901 or (877) 7ithaca for a return<br />
authorization. International customers should contact your distributor for services.<br />
<strong>TransAct</strong> offers the following service programs to meet your needs.<br />
Extended Warranty.<br />
Depot Repair.<br />
Maintenance Contract.<br />
Internet Support.<br />
Sales Support<br />
To order supplies, receive information about other <strong>Ithaca</strong> products, or obtain information<br />
about your warranty, contact our Sales Department at the contact telephone or fax<br />
numbers listed below. To receive information on international distribution, visit our web<br />
site at www.transact-tech.com.<br />
Page 6 Rev D 28-05897
About Your <strong>Ithaca</strong> ® <strong>610</strong> Printer<br />
<strong>Ithaca</strong> ® <strong>610</strong> Programmer’s <strong>Guide</strong><br />
Contact Information<br />
<strong>TransAct</strong> Technologies Incorporated<br />
<strong>Ithaca</strong> Facility<br />
20 Bomax Drive<br />
<strong>Ithaca</strong>, NY 14850 USA<br />
<strong>TransAct</strong> Technologies<br />
World Gaming Headquarters<br />
6700 Paradise Road<br />
Suite D<br />
Las Vegas, NV 89119 USA<br />
Telephone (877) 7-ITHACA or (607) 257-8901<br />
Main fax (607) 257-8922<br />
Sales fax (607) 257-3868<br />
Technical Support fax (607) 257-3911<br />
Web site<br />
www.transact-tech.com<br />
28-05897 Rev D Page 7
chapter 2<br />
<strong>Ithaca</strong> ® <strong>610</strong> Specifications and Requirements<br />
28-05897 Rev D Page 9
This page intentionally left blank<br />
Page 10 Rev D 28-05897
Specifications and Requirements<br />
<strong>Ithaca</strong> ® <strong>610</strong> Programmer’s <strong>Guide</strong><br />
<strong>Ithaca</strong> ® <strong>610</strong> Specifications and Requirements<br />
<strong>Ithaca</strong> ® <strong>610</strong> Thermal Printer Models<br />
<strong>Ithaca</strong> ® <strong>610</strong>-P: parallel interface printer<br />
<strong>Ithaca</strong> ® <strong>610</strong>-S: serial interface printer<br />
<strong>Ithaca</strong> ® <strong>610</strong>-USB: USB interface printer<br />
Standard Features<br />
The following features are common to the entire family of thermal printers:<br />
Print speed for text is 8 inches per second (200 mm/sec)<br />
8.0 inches per second paper feed speed<br />
3.15 inch (80 mm.) print zone<br />
44/57 characters per line<br />
Built-in self-ranging external power supply<br />
Clam-shell paper loading<br />
Single RJ11 cash drawer driver with status (Single RJ12)<br />
Parallel (25 or 36 pin), serial (9 or 25 pin) RS232C, and USB interface<br />
Configurable receiver buffer<br />
Self diagnostics<br />
28-05897 Rev D Page 11
Specifications and Requirements<br />
<strong>Ithaca</strong> ® <strong>610</strong> Programmer’s <strong>Guide</strong><br />
Set up and configuration utility program<br />
CPI selections from 8 to 30 CPI 1<br />
Paper Out sensor<br />
Multiple printer emulations: <strong>Ithaca</strong> M80/M80+, Epson Extended, Epson TM-<br />
T88II/III, TM-T90, U200, U300 and Star<br />
Maximum 8K buffer (adjustable)<br />
2 Megabytes flash memory<br />
2 Megabytes RAM<br />
APA and Epson graphics<br />
Bar Codes: Code 39, Code 93, Code 128, Interleaved 2 of 5, UPC-A, UPC-<br />
E, EAN-8, EAN-13, EAN-14, PDF417 stacked symbology and Codabar<br />
65 Language sets (including Euro symbol)<br />
Metal receipt tear off<br />
8 dots/mm. thermal print head resolution<br />
ON/OFF button located on front of printer<br />
Cable routing strain relief<br />
Power/Error/Paper LEDs<br />
Paper feed button<br />
Cover open button<br />
Settable cash drawer configurations (<strong>Ithaca</strong>, Epson, or Star)<br />
Spill proof design- vertical main PCB mounting<br />
58 mm. or 80 mm. paper width – factory-settable<br />
4.0 inch (101 mm.) Paper roll diameter<br />
Portrait/landscape printing under Windows<br />
Page mode printing<br />
Cover Open sensor<br />
Internal counters for hours on, cuts, print lines and errors<br />
100 km print head life<br />
60 million print line printer MCBF (excluding knife)<br />
Strong break-away paper cover<br />
1,000,000 cuts cutter life (partial cut)<br />
Buzzer<br />
1 Character spacing is adjustable from 1 to 30 CPI. Typical values will be between 8 and 20 CPI<br />
depending on the font selected. Values of 13.3, 14.86, or 17.3 are typical for each resident font.<br />
2 CPI‘s greater than 16 will not be supported in NLQ fonts<br />
Page 12 Rev D 28-05897
Specifications and Requirements<br />
<strong>Ithaca</strong> ® <strong>610</strong> Programmer’s <strong>Guide</strong><br />
Optional Features<br />
The following options are available on some of the models:<br />
Vertical wall mount kit<br />
DC powered version through Hosiden type connector<br />
28-05897 Rev D Page 13
Specifications and Requirements<br />
<strong>Ithaca</strong> ® <strong>610</strong> Programmer’s <strong>Guide</strong><br />
General Specifications<br />
Printing Specifications<br />
Printing method:<br />
Vertical/Horizontal dot pitch:<br />
Resolution:<br />
Line feed pitch:<br />
Print zone (maximum)<br />
Print speed:<br />
Number of print elements:<br />
Thermal sensitive line dot system<br />
0.125 mm.<br />
8 dots per mm (203 DPI)<br />
3.2 mm. (.125 inches)<br />
80 mm (3.15 inch)<br />
8 inches per second<br />
640 dots in-line<br />
Character Pitch<br />
The <strong>Ithaca</strong> ® <strong>610</strong> has 3 basic resident fonts, as well as downloadable fonts. The smallest<br />
internal font is a 10 x 24 font and is typically printed in pitches from 16 to 20 characters<br />
per inch (CPI). The next larger font is 13 x 24, and is typically printed in pitches from 14<br />
to 16 CPI. The largest font is 15 x 24 and is typically printed in pitches from 10 to 14 CPI.<br />
The printer always prints at 203 dots per inch (dpi). Adding or subtracting space between<br />
characters achieves different character pitches. As each dot has a fixed size and<br />
position, only specific pitches are possible. The following table defines the fonts and<br />
pitches possible with each.<br />
Character Cell (H x W)<br />
10 x 24 Font<br />
(W x H)<br />
13 x 24 Font<br />
(W x H)<br />
15 x 24 Font<br />
(W x H)<br />
Horizontal Width<br />
10 Dots<br />
0.0493 inches<br />
13 Dots<br />
0.0640 inches<br />
15 Dots<br />
0.0739 inches<br />
Vertical Height<br />
24 Dots<br />
0.118 Inches<br />
24 Dots<br />
0.118 Inches<br />
24 Dots<br />
0.118 Inches<br />
Character spacing in Characters per Inch (CPI)<br />
Pitch at native cell size 20.30 15.62 13.5<br />
5 dot Removed 40.60 25.38 20.30<br />
4 dot Removed 33.83 22.56 18.45<br />
3 dot Removed 29.00 20.30 16.92<br />
2 dot Removed 25.38 18.45 15.62<br />
1 dot Removed 22.56 16.92 14.50<br />
0 dot added 20.30 15.62 13.53<br />
1 dot added 18.45 14.50 12.69<br />
2 dots added 16.92 13.53 11.94<br />
3 dots added 15.62 12.69 11.28<br />
4 dots added 14.50 11.94 10.68<br />
5 dots added 13.53 11.28 10.15<br />
6 dots added 12.69 10.68 9.67<br />
NOTE: Shaded Pitches are not recommended.<br />
Table 1 Possible Character Pitches<br />
Requested CPI<br />
Character<br />
Width Resulting CPI Requested CPI<br />
Character<br />
Width<br />
Resulting CPI<br />
1 203 1.00 16 12 16.92<br />
Page 14 Rev D 28-05897
Specifications and Requirements<br />
<strong>Ithaca</strong> ® <strong>610</strong> Programmer’s <strong>Guide</strong><br />
2 101 2.01 17 12 18.45<br />
3 67 3.03 18 11 18.45<br />
4 50 4.06 19 10 20.30<br />
5 40 5.08 20 10 20.30<br />
6 33 6.15 21 9 22.56<br />
7 29 7.00 22 9 22.56<br />
8 25 8.12 23 8 25.38<br />
9 22 9.23 24 8 25.38<br />
10 20 10.15 25 8 25.38<br />
11 18 11.28 26 7 29.00<br />
12 16 12.69 27 7 29.00<br />
13 15 13.53 28 7 29.00<br />
14 14 14.50 29 7 29.00<br />
15 13 15.62 30 6 33.83<br />
NOTE: Shaded Pitches are not recommended.<br />
Table 2 Requested CPI and Resulting CPI<br />
Character Generation<br />
Standard Print<br />
There are three resident fonts in the printer: Small, Medium, and Large. The cell size for<br />
each is different.<br />
Requested CPI<br />
Character<br />
Width Resulting CPI Requested CPI<br />
Character<br />
Width<br />
Resulting CPI<br />
1 203 1.00 16 12 16.92<br />
2 101 2.01 17 12 18.45<br />
3 67 3.03 18 11 18.45<br />
4 50 4.06 19 10 20.30<br />
5 40 5.08 20 10 20.30<br />
6 33 6.15 21 9 22.56<br />
7 29 7.00 22 9 22.56<br />
8 25 8.12 23 8 25.38<br />
9 22 9.23 24 8 25.38<br />
10 20 10.15 25 8 25.38<br />
11 18 11.28 26 7 29.00<br />
12 16 12.69 27 7 29.00<br />
13 15 13.53 28 7 29.00<br />
14 14 14.50 29 7 29.00<br />
15 13 15.62 30 6 33.83<br />
NOTE: Shaded Pitches are not recommended.<br />
Table 3 Cell Size for Small, Medium and Large Fonts<br />
Small 10 x 24 Font<br />
The 10 x 24 small font is defined in a 10 x 24 cell. The characters are typically 22 dots<br />
high and 8 dots wide; however to provide readable international characters, some<br />
characters are wider. In most cases this font can be printed at 22.5 CPI without having<br />
the characters touch. This font is recommended for printing from 16 to 20 CPI.<br />
28-05897 Rev D Page 15
Specifications and Requirements<br />
<strong>Ithaca</strong> ® <strong>610</strong> Programmer’s <strong>Guide</strong><br />
.<br />
01 ...00.....<br />
02 ..0000....<br />
03 ..0000....<br />
04 .00..00...<br />
05 .00..00...<br />
06 .00..00...<br />
07 .00..00...<br />
08 .00..00...<br />
09 00....00..<br />
10 00....00..<br />
11 00....00..<br />
12 00....00..<br />
13 00....00..<br />
14 00000000..<br />
15 00000000..<br />
16 00....00..<br />
17 00....00..<br />
18 00....00..<br />
19 00....00..<br />
20 00....00..<br />
21 00....00..<br />
22 00....00..<br />
23 ..........<br />
24 ..........<br />
Medium 13 x 24 Font<br />
The 13 x 24 medium font is defined in a 13 x 24 cell. The characters are typically 22 dots<br />
high and 11 dots wide; however to provide readable international characters, some<br />
characters are wider. In most cases this font can be printed at 16.9 CPI without having<br />
the characters touch. This font is recommended for printing from 14 to 16 CPI.<br />
01 ....000......<br />
02 ....000......<br />
03 ....000......<br />
04 ...00.00.....<br />
05 ...00.00.....<br />
06 ...00.00.....<br />
07 ...00.00.....<br />
08 ..00...00....<br />
09 ..00...00....<br />
10 ..00...00....<br />
11 ..00...00....<br />
12 .00.....00...<br />
13 .00.....00...<br />
14 .00.....00...<br />
15 .000000000...<br />
16 .000000000...<br />
17 00.......00..<br />
18 00.......00..<br />
19 00.......00..<br />
20 00.......00..<br />
21 00.......00..<br />
22 00.......00..<br />
23 .............<br />
24 .............<br />
Page 16 Rev D 28-05897
Specifications and Requirements<br />
<strong>Ithaca</strong> ® <strong>610</strong> Programmer’s <strong>Guide</strong><br />
Large 15x 24 Font<br />
The 15 x 24 medium font is defined in a 15 x 24 cell. The characters are typically 22<br />
dots high and 14 dots wide; however to provide readable international characters, some<br />
characters are wider. In most cases this font can be printed at 13.5 CPI without having<br />
the characters touch. This font is recommended for printing from 10 to 14 CPI. This font<br />
is only available in the <strong>Ithaca</strong> emulation, and provides a bigger and darker character for<br />
better readability.<br />
01 .....0000......<br />
02 ....000000.....<br />
03 ....000000.....<br />
04 ...000..000....<br />
05 ...000..000....<br />
06 ...000..000....<br />
07 ...000..000....<br />
08 ..000....000...<br />
09 ..000....000...<br />
10 ..000....000...<br />
11 ..000....000...<br />
12 .000......000..<br />
13 .000......000..<br />
14 .000......000..<br />
15 .000000000000..<br />
16 .000000000000..<br />
17 000........000.<br />
18 000........000.<br />
19 000........000.<br />
20 000........000.<br />
21 000........000.<br />
22 000........000.<br />
23 ...............<br />
24 ...............<br />
Rotated Print<br />
To provide printing flexibility, rotated print is available. Rotated print mode will rotate the<br />
print in any of three 90 orientations. The individual characters can be rotated, or a<br />
printer buffered mode is available. In printer buffered 90° and 270° rotated mode, the<br />
print data is first buffered by the printer, processed (rotated), and then printed.<br />
28-05897 Rev D Page 17
Specifications and Requirements<br />
<strong>Ithaca</strong> ® <strong>610</strong> Programmer’s <strong>Guide</strong><br />
Physical Characteristics<br />
Dimensions<br />
Weight<br />
Max Dimensions<br />
Dimensions in<br />
inches<br />
Approximate weight:<br />
Shipping weight:<br />
W D H<br />
6.25 8.50 5.87<br />
4.6 lb.<br />
6.0 lb.<br />
Page 18 Rev D 28-05897
Specifications and Requirements<br />
<strong>Ithaca</strong> ® <strong>610</strong> Programmer’s <strong>Guide</strong><br />
Electrical Characteristics<br />
Internal AC Powered<br />
The <strong>Ithaca</strong> ® <strong>610</strong> Printer is designed to be AC self-powered in domestic and international<br />
markets. The printer is equipped with a universal input power supply that is designed to<br />
operate worldwide without modification.<br />
Supply<br />
Voltage<br />
Rating<br />
(VAC)<br />
Supply<br />
Voltage<br />
Range<br />
(VAC)<br />
Frequency<br />
(Hz)<br />
Rated Power<br />
(watts)<br />
Idle Current<br />
(amps)<br />
100-240 90-264 47 – 63 45 .1A @ 120VAC<br />
.05 A @ 240VAC<br />
Table 4 Standard Power Input Requirements<br />
Printing Current<br />
(amps)<br />
1.4 A @ 120VAC<br />
.7 A @ 240VAC<br />
External Powered DC<br />
Optionally, the <strong>Ithaca</strong>® <strong>610</strong> Printer can be operated with 24-volt DC power supplied from<br />
a host terminal or external supply. Connection to this printer version is made via a threepin<br />
Hosiden type connector.<br />
Supply<br />
Voltage<br />
Rating<br />
(VDC)<br />
24<br />
-5+10%<br />
Supply<br />
Voltage<br />
Range<br />
(VDC)<br />
Frequency (Hz)<br />
Idle<br />
Current<br />
(amps)<br />
Current (amps)<br />
22.8 –<br />
DC 0.125 A 2.0 A (Cash Drawer Fire)<br />
26.4 2 3.5 A (Printing maximum for < 1 minute)<br />
4.8 A Peak (< 167 msec.)<br />
Table 5 Power Input Requirements with the 24-volt DC Power<br />
The <strong>Ithaca</strong> ® <strong>610</strong> can be configured to operate with various power supplies. If a DC<br />
power supply with less capability is used, the printer must be configured for reduced<br />
power and the printer will print slower.<br />
Thermal Print Head<br />
Thermal Print Head Overview:<br />
Number of heat elements: 640<br />
Heat element pitch:<br />
0.125 mm (8 dots/mm.)<br />
Print width:<br />
80 mm. +/- 0.2 mm.<br />
Pulse Life:<br />
100 million pulses<br />
Abrasion Life:<br />
100 km.<br />
Vertical dot pitch<br />
0.264 mm (0.0104 inch) or 96 DPI<br />
Operating Temperature<br />
5-45 degrees C<br />
Humidity:<br />
10-90 % RH (non-condensing)<br />
Operation Precautions:<br />
Do not print without paper.<br />
Clean the head with ethyl-alcohol after power is removed from the printer. This will<br />
remove foreign particles or paper dust which may degrade print quality.<br />
Be sure to set the paper width in the printer‘s configuration to agree with the paper<br />
being used (58 or 80 mm width).<br />
2 For DC powered printers, the cash drawer is supplied directly from the DC input supply. The<br />
cash drawer requirements may affect the allowable range of voltages.<br />
28-05897 Rev D Page 19
Specifications and Requirements<br />
<strong>Ithaca</strong> ® <strong>610</strong> Programmer’s <strong>Guide</strong><br />
Once narrow paper has been used, some part of the print head always contacts the<br />
platen. If 80 mm. paper is used after setting up and running 58 mm. paper, the head<br />
or the cutter blade may be worn out. Never change the paper width from narrow to<br />
wide (58 to 80 mm.) once you set the paper width to narrow (58 mm.).<br />
Media Specifications<br />
Receipt Paper<br />
Paper feed method<br />
Paper feed pitch<br />
Paper width<br />
Roll diameter<br />
Paper thickness<br />
Roll paper core<br />
Roll footage<br />
Friction feed<br />
Default - 1/8 inch<br />
80 mm: 79.5 +/- 0.5 mm. (3.13 +/- 0.02 inches)<br />
58 mm: 57.5 +/- 0.5 (2.26 +/- 0.02 inches)<br />
101.6 mm. (4.0 inches) Max.<br />
0.06 to 0.09 mm. (.00225 to .0035 inches)<br />
Inside diameter .445 to .635 inches<br />
Outside diameter .730 to .860 inches<br />
400 feet (min.)<br />
Thermal Paper Grades (Monochrome)<br />
Paper<br />
Kanzaki P-300 Kanzaki P-310 Appleton Alpha 400-2.3<br />
Manufacturer<br />
Basis Weight 14.1 lbs. 14.2 lbs. 14.5 lbs.<br />
Caliper .00225 mils .00226 mils .00235 inches<br />
Image color black Black Black<br />
Brightness 85% 85% 87%<br />
Activation Temp. Initial: 74+/-5°C<br />
Effective: 87 +/- 5°C<br />
Optimum: 100 +/- 5°C<br />
Initial:73 +/-5°C<br />
Effective: 83 +/- 5°C<br />
Optimum: 88 +/- 5°C<br />
Initial:77.2°C<br />
Optimum: 104.8 +/- 5°C<br />
Smoothness (bekk) 325 sec. Ave. 325 sec.Ave. 200 (bekk).<br />
Table 6: Paper Grades-Monochrome<br />
Paper Usage Precautions:<br />
Use only specified thermal paper. If other paper is used, print quality, head life, and<br />
cutter life may deteriorate.<br />
Paper Out<br />
A receipt paper out sensor is provided as a standard feature. It senses when there is<br />
approximately .5 inches length of paper left on the paper roll.<br />
Page 20 Rev D 28-05897
Specifications and Requirements<br />
<strong>Ithaca</strong> ® <strong>610</strong> Programmer’s <strong>Guide</strong><br />
1.00”<br />
2.83<br />
0.15<br />
3.15<br />
Figure 1 Receipt Printing, Tear off Position<br />
The paper tear off is positioned 1 inch from the last line of print<br />
28-05897 Rev D Page 21
Specifications and Requirements<br />
<strong>Ithaca</strong> ® <strong>610</strong> Programmer’s <strong>Guide</strong><br />
Receipt Printing, Auto Cutter Position<br />
A receipt auto-cutter is a standard feature with all <strong>Ithaca</strong> ® <strong>610</strong> Printers.<br />
Cutter type<br />
Rotary<br />
Media width<br />
3.13 +/- .02 inches (79.5 +/- .5 mm)<br />
Media thickness range 0.0025 to 0.0035 inch<br />
Cut to line of print<br />
0.70 inch<br />
Cutter life<br />
1,000,000 cuts<br />
Partial Cut tab:<br />
.125 inches +/- .0625 inches (right edge of receipt)<br />
Cut time:<br />
Less than 350 milliseconds<br />
Buzzer<br />
A buzzer is provided as a standard feature. It is triggered upon command from the host<br />
terminal to make a sound loud enough to be heard under noisy conditions. It will produce<br />
a sound pressure level of at least 90 dBA, 1 foot from the front of the printer.<br />
Cover Interlock<br />
A paper cover interlock switch is provided as a standard feature. When the paper cover<br />
is open, the printer is off-line, and will not print.<br />
Display Pass Through<br />
The display pass through feature allows a pole display to be interconnected with the<br />
printer. The printer is connected to a host system with a special serial cable. The host<br />
sends serial data to the printer and the printer sends serial data to the pole display. The<br />
printer does not provide power to the display. During normal printer operation, no data is<br />
passed to the display. In pass through mode, all received data is passed on to the<br />
display.<br />
Page 22 Rev D 28-05897
Specifications and Requirements<br />
<strong>Ithaca</strong> ® <strong>610</strong> Programmer’s <strong>Guide</strong><br />
Communications Interface<br />
Parallel Interface<br />
Your printer features two parallel interfaces:<br />
An IEEE 1284-A 25-pin, D-shell connector, with pin-outs that interface to a<br />
standard IBM PC parallel printer interface with a one-to-one cable.<br />
An IEEE 1284-B, which is a standard Centronics 36-pin connector.<br />
Both interface cards provide a dual cash drawer interface. The following table lists<br />
interface signals and corresponding pins.<br />
25-pin Connector<br />
36-pin<br />
Signal Description Direction<br />
Connector<br />
Pin 1 Pin 1 STROBE Clock data to printer Host to Printer<br />
Pins 2-9 Pins 2-9 D0 - D7 Data Host to Printer<br />
Pin 10 Pin 10 ACK\ Printer accepted data Printer to Host<br />
Pin 11 Pin 11 BUSY Printer busy Printer to Host<br />
Pin 12 Pin 12 PE Paper Out/Status Printer to Host<br />
Pin 13 Pin 13 SLCT Printer selected Printer to Host<br />
Pin 14 Pin 14 AUTOFD Autofeed paper Host to Printer<br />
Pin 15 Pin 32 FAULT\ Printer error Printer to Host<br />
Pin 16 Pin 31 INIT\ Initialize printer Host to Printer<br />
Pin 17 Pin 36 SLIN Select printer Host to Printer<br />
Pin 17 FG Frame ground Printer to Host<br />
- Pin 18 +5V Peripheral logic high Printer to Host<br />
Pins 18-25 Pins 16, 19-30 GND Ground<br />
Table 7 Parallel Interface Pin-outs<br />
Signal Levels<br />
Voltage levels<br />
Logic levels<br />
Logic one<br />
Driver<br />
Receiver<br />
Logic zero<br />
Driver<br />
Receiver<br />
0 V and +5 V (nominal)<br />
+2.4 V to +5 V<br />
+2.0 V to +5 V<br />
0 V to +0.4 V<br />
0 V to +0.8 V<br />
Current requirements<br />
Logic one Source 0.25 ma at +2.4 V<br />
Logic zero Sink 16 ma<br />
Line termination<br />
Data and control<br />
Strobe<br />
3.3k ohm to +5 V<br />
1.2k ohm to +5 V<br />
28-05897 Rev D Page 23
Specifications and Requirements<br />
<strong>Ithaca</strong> ® <strong>610</strong> Programmer’s <strong>Guide</strong><br />
RS-232 Serial Interface<br />
Serial Port Features<br />
The serial port features are as follows:<br />
Baud Rates 300, 600, 1200, 2400, 4800, 9600, 19.2K, 38.4K, and 57.6K<br />
Bit Patterns<br />
8-bit no parity; 8-bit odd; 8-bit even; 7-bit no parity; 7-bit odd; 7-bit even<br />
Flow Control<br />
DTR and XON/XOFF<br />
9-pin 25-pin Signal Description<br />
Pin 1 Pin 8 Not Connected<br />
Pin 2 Pin 3 RX Receive Data<br />
Pin 3 Pin 2 TX Transmit Data<br />
Pin 4 Pin 20 DTR Data Terminal Ready<br />
Pin 5 Pin 7 GND Signal Ground<br />
Pin 6 Pin 6 DSR Data Set Ready<br />
Pin 7 Pin 4 RTS Request to Send<br />
Pin 8 Pin 5 CTS Clear to Send<br />
Pin 9 Pin 11 Not Connected<br />
Table 8 Serial Interface Pin-outs<br />
Signal Voltage and Current levels<br />
The serial interface meets EIA RS232 interface specifications:<br />
Voltage Levels Max +-15 Volts<br />
Min +- 3 Volts<br />
Mark = Off = -3 to –15 Volts<br />
Space = On = +3 to +15 Volts<br />
Because both the host and printer are DTE's (Data Terminal Equipment), they use the<br />
same serial port pin-outs. If the cable that is used to connect the host to the printer is a<br />
pin-to-pin inter-connect, it will not work. Therefore, a null modem or turn-around cable<br />
must be used to interconnect the host and the printer.<br />
Display Pass Through<br />
The display pass through feature allows a pole display to be interconnected with the<br />
printer. The printer is connected to a host system with a special serial cable. The host<br />
sends serial data to the printer and the printer sends serial data to the pole display. The<br />
printer does not provide power to the display. During normal printer operation, no data is<br />
passed to the display. In pass through mode, all received data is passed on to the<br />
display.<br />
USB Interface<br />
The USB interface is a Version 1.1 interface that is Version 2.0 compliant. The standard<br />
USB interface card is implemented through a Standard Series "B" Receptacle as defined<br />
in the USB Specification. The printer is self-powered and does not draw power from the<br />
standard type B USB interface cable.<br />
The Standard USB Type B connector has the following pin functions:<br />
Page 24 Rev D 28-05897
Specifications and Requirements<br />
<strong>Ithaca</strong> ® <strong>610</strong> Programmer’s <strong>Guide</strong><br />
Pin Signal<br />
1 Vbus (+5 V dc) (Not used in the <strong>Ithaca</strong> ® <strong>610</strong>)<br />
2 Minus data<br />
3 Plus data<br />
4 Ground<br />
Note: The standard USB interface does not have enough power to run the<br />
printer.<br />
Ethernet 10-Base-T adapter<br />
An IP addressable 10-Base-T Ethernet adapter is available for the <strong>Ithaca</strong> ® <strong>610</strong> printer. It<br />
provides for web page configuration and supports bi-directional RAW and Telnet<br />
interfaces. All protocols are implemented to the extent necessary to support printing<br />
from Windows platforms; specific protocols supported include the following:<br />
Line Printer Daemon Protocol (LPR) – RFC1179<br />
Simple Network Management Protocol (SNMP) – RFC1157<br />
Printer MIB – RFC1759<br />
Port 9100 (Raw data)<br />
Service Location Protocol (SLP) – RFC2165<br />
The TFTP Protocol (Revision 2) – RFC1350<br />
Telnet COM Port Control Option – RFC2217<br />
Hypertext Transfer Protocol – HTTP/1.1 – RFC2616<br />
Refer to the 100-05072 Wired Ethernet Programmer‘s <strong>Guide</strong> for features and additional<br />
setup information.<br />
Note: The Ethernet adapter supports only the <strong>Ithaca</strong> Cash Drawer<br />
interface.<br />
802.11b Wireless Interface<br />
An 802.11b wireless interface is available for the <strong>Ithaca</strong> ® <strong>610</strong> printer, allowing wireless<br />
operation of the printer within a specified distance of a base unit. Contact <strong>TransAct</strong><br />
technical support for more information on this interface.<br />
28-05897 Rev D Page 25
Specifications and Requirements<br />
<strong>Ithaca</strong> ® <strong>610</strong> Programmer’s <strong>Guide</strong><br />
Cash Drawer<br />
Interface Description<br />
The <strong>Ithaca</strong> ® <strong>610</strong> Printer supports a single cash drawer with status. The driver in the<br />
printer is capable of supplying 24 V DC at up to 1.5 amps for up to 250 milliseconds. The<br />
<strong>Ithaca</strong> ® <strong>610</strong> Printer defines cash drawer closed as switch open. If the drawer is<br />
disconnected, it will be viewed by the printer as closed. Since the printer does not act on<br />
the cash drawer status, the application can interpret cash drawer status any way it<br />
wants.<br />
Driver connector type (standard)<br />
Driver voltage<br />
Driver current<br />
Pulse duration<br />
Drawer status<br />
Single RJ12 connectors with 24V sink drivers<br />
24 volts (Refer to power supply specification).<br />
1 amp maximum with current limit<br />
250 msec. maximum<br />
Open/close drawer status provided to printer<br />
Cash Drawer Pin Assignments<br />
<strong>Ithaca</strong> Epson Star<br />
1 2 3 4 5 6 1 2 3 4 5 6 1 2 3 4 5 6<br />
pin 1<br />
pin 2<br />
pin 3<br />
pin 4<br />
pin 5<br />
pin 6<br />
CD2-<br />
CD1 Sense<br />
Ground<br />
CD Drive + (+24V)<br />
CD1-<br />
Not Connected<br />
pin 1<br />
pin 2<br />
pin 3<br />
pin 4<br />
pin 5<br />
pin 6<br />
Not Connected<br />
CD1-<br />
CD1 Sense<br />
CD Drive + (+24V)<br />
CD2-<br />
Ground<br />
pin 1<br />
pin 2<br />
pin 3<br />
pin 4<br />
pin 5<br />
pin 6<br />
Not Connected<br />
CD1-<br />
CD Drive + (+24V)<br />
CD Drive + (+24V)<br />
CD2-<br />
CD1 Sense<br />
Figure 2 Cash Drawer Pin Definitions<br />
The cash drawer can be configured for one of three configurations; <strong>Ithaca</strong>, Epson, or<br />
Star. The Main Controller PCB has three (3) six-pin headers, one each configuration.<br />
The cash drawer harness is identical, and is plugged into the appropriate header at time<br />
of factory build. The header position defines the configuration of the cash drawer. This<br />
design allows for changing the cash drawer in the field by a trained technician. Refer to<br />
the markups on the board when determining where the harness should be installed to<br />
work in the three different configurations.<br />
Page 26 Rev D 28-05897
Pin Number<br />
Direction<br />
Direction<br />
Direction<br />
Specifications and Requirements<br />
<strong>Ithaca</strong> ® <strong>610</strong> Programmer’s <strong>Guide</strong><br />
<strong>Ithaca</strong> ® Epson (Standard) Star<br />
Signal Name<br />
Signal Name<br />
Signal Name<br />
pin 1<br />
pin 2<br />
pin 3<br />
pin 4<br />
pin 5<br />
pin 6<br />
CD2-<br />
CD1 Sense<br />
Ground<br />
CD Drive +(+24V)<br />
CD1-<br />
Not Connected<br />
1 Drawer 2 kick out drive<br />
signal<br />
Output<br />
Sink<br />
Drive<br />
pin 1<br />
pin 2<br />
pin 3<br />
pin 4<br />
pin 5<br />
pin 6<br />
Not Connected<br />
CD1-<br />
CD1 Sense<br />
CD Drive + (+24V)<br />
CD2-<br />
Ground<br />
Not Connected<br />
2 Drawer 1 open/close signal Input Drawer 1 kick out drive<br />
signal<br />
Output<br />
Sink<br />
Drive<br />
pin 1<br />
pin 2<br />
pin 3<br />
pin 4<br />
pin 5<br />
pin 6<br />
Not Connected<br />
CD1-<br />
CD Drive +(+24V)<br />
CD Drive +(+24V)<br />
CD2-<br />
CD1 Sense<br />
Not Connected<br />
3 Signal Ground Drawer 1 open/close signal Input +24V DC<br />
4 +24V DC +24V DC +24V DC<br />
5 Drawer 1 kick-out drive<br />
signal<br />
Output<br />
Sink<br />
Drive<br />
Drawer 2 kick out drive<br />
signal<br />
Output<br />
Sink<br />
Drive<br />
Drawer 1 kick out drive<br />
signal<br />
Drawer 2 kick out drive<br />
signal<br />
6 Not Connected Signal Ground Drawer 1 open/close<br />
signal<br />
Output<br />
Sink<br />
Drive<br />
Output<br />
Sink<br />
Drive<br />
Input<br />
Table 9 Cash Drawer Pin Assignment<br />
28-05897 Rev D Page 27
Specifications and Requirements<br />
<strong>Ithaca</strong> ® <strong>610</strong> Programmer’s <strong>Guide</strong><br />
Vertical Wall Mount Kit Option<br />
A kit is available as an add-on option that allows the <strong>Ithaca</strong> ® <strong>610</strong> printer to be vertically<br />
mounted to a wall. It is comprised of a metal mounting bracket that attaches to the base<br />
of the printer with two M6 thread-cutting screws. Additional hardware is required to<br />
mount the bracket to the wall. The hardware should be installed into wall studs to<br />
ensure that the printer mounting meets the following conditions:<br />
The mounting to the wall must withstand 4 times the printer weight in downward and<br />
outward directions.<br />
The kit must include mounting instructions to explain how to meet the load test<br />
The firewall or the outer housing of the printer is maintained between the controller<br />
PCB and the mounting wall.<br />
Page 28 Rev D 28-05897
chapter 3<br />
Setup Procedures<br />
28-05897 Rev D Page 29
This page intentionally left blank<br />
Page 30 Rev D 28-05897
Setup Procedures<br />
<strong>Ithaca</strong> ® <strong>610</strong> Programmer’s <strong>Guide</strong><br />
Verifying the Configuration<br />
Before you install an <strong>Ithaca</strong> ® <strong>610</strong> Printer into your system, you should verify that the printer is<br />
configured as required by your system. There are four parts to this verification process.<br />
1. Verify that the communications interface card is the correct one.<br />
2. Verify that the cash drawer interface is configured correctly.<br />
3. Verify that the power connection is correct.<br />
4. Verify that the firmware in the printer is configured correctly.<br />
Verify the Communications Interface Card<br />
There are several basic types of interface cards, and each has variations. Make sure your<br />
printer has the correct interface card.<br />
Parallel Interface<br />
Centronics 36-pin interface<br />
25-pin D shell<br />
Serial Interface<br />
9-pin D shell interface<br />
25-pin D shell interface<br />
USB Interface<br />
Standard 4-pin<br />
Ethernet 10-Base-T Adapter<br />
Standard Ethernet port connector<br />
802.11b Wireless Interface<br />
Wireless interface pre-installed within printer unit<br />
It is easy to distinguish most of the interface cards other than the 25-pin serial and 25-pin<br />
parallel interface cards. To determine what interface is installed, refer to the configuration<br />
receipt shipped with the printer, or enter configuration mode and look at the verification printout.<br />
If a serial interface card is installed, the printout will refer to the RS-232 serial interface. If the<br />
parallel interface card is installed, the printout will refer to the parallel interface.<br />
Changing Interface Cards<br />
The interface card on the <strong>Ithaca</strong> ® <strong>610</strong> Printer can be changed in the field.<br />
In most cases, interface cards are interchangeable without altering the printer firmware.<br />
However, you may have to load new firmware and/or a new boot loader before you change the<br />
interface cards. Check with Technical Support for firmware compatibility between interface<br />
cards before ordering.<br />
Removing the Old Interface Card<br />
1. Turn over the printer, taking care not to allow the cover to open or the paper to fall.<br />
2. Disconnect the current communications and cash drawer cables.<br />
3. If equipped, unsnap the power supply retainer and slide out the power supply.<br />
4. Disconnect the power supply from the interface card.<br />
5. Remove the interface retaining screw.<br />
6. Slide the interface card sideways-towards the power supply pocket-and remove it.<br />
28-05897 Rev D Page 31
Setup Procedures<br />
<strong>Ithaca</strong> ® <strong>610</strong> Programmer’s <strong>Guide</strong><br />
Cash Drawer Configuration<br />
Verify the Cash Drawer Interface<br />
The printer is shipped from the factory with a cash drawer interface label on the bottom of the<br />
printer. You should always verify that the cash drawer you are using matches the printer‘s cash<br />
drawer interface label. If there is no cash drawer label, you should remove the communications<br />
interface card and verify the setting. See "Configuring the Cash Drawer Interface" on page 32 .<br />
There are many vendors of cash drawers. If you are unsure what the cash drawer interface is,<br />
contact the cash drawer vendor for more information.<br />
If you find that the cash drawer does not match the printer, you may change the printer's cash<br />
drawer interface configuration. If the cash drawer interface no longer matches the label on the<br />
printer, please remove the label.<br />
Install the new interface card<br />
1. Slide the interface card into the printer. Make sure the interface card sits flush with the<br />
printer. The retaining screws should also line up with the mounting holes.<br />
2. Install the retaining screws.<br />
3. Connect the communications interface card and any cash drawer cables.<br />
4. Turn over the printer, and reconnect the power.<br />
Configuring the Cash Drawer Interface<br />
CD interface drawing not yet available.<br />
Figure 3 Cash Drawer Selection<br />
The cash drawer connector may be connected to one of three internal connectors on the<br />
controller board. To access the internal connector, you must first remove the interface adapter.<br />
Removing the interface card<br />
1. Unplug the printer<br />
2. Turn over the printer. Take care not to allow the cover to open or the paper to fall.<br />
3. Disconnect the current communications and cash drawer cables.<br />
4. Remove the interface retaining screw2.<br />
5. Slide the interface card towards the back of the printer and remove it.<br />
Reconfigure the cash drawer<br />
1. Slide the cash drawer socket out of the slot in the frame.<br />
2. Unplug the socket harness from the main circuit board.<br />
3. Plug the harness into the connector for the desired interface.<br />
4. Reinstall the cash drawer socket into the frame.<br />
Re-Install the interface card<br />
1. Slide the interface card into the printer. Make sure the interface card sits flush with the<br />
printer. The retaining screws should also line up with the mounting holes.<br />
2. Install the retaining screws.<br />
3. Connect the communications interface card and any cash drawer cables.<br />
4. Turn over the printer, and reconnect the power.<br />
Page 32 Rev D 28-05897
Setup Procedures<br />
<strong>Ithaca</strong> ® <strong>610</strong> Programmer’s <strong>Guide</strong><br />
Installing Cables<br />
Figure 4 Power and Cash Drawer<br />
Connecting power<br />
The <strong>Ithaca</strong> ® <strong>610</strong> Printer is generally supplied with a built-in power supply. As an option, the<br />
printer is available without a power supply.<br />
Internal Supply<br />
The internal supply connects to an outside power source with a standard two wire power cord.<br />
External Supply<br />
If an external supply is used a 3 pin mini DIN plug is provided for the external 24 Volt supply.<br />
Earth Ground<br />
+24 Volt Supply<br />
Ground (+24 V dc)<br />
Figure 5 3-pin mini DIN plug<br />
28-05897 Rev D Page 33
Setup Procedures<br />
<strong>Ithaca</strong> ® <strong>610</strong> Programmer’s <strong>Guide</strong><br />
Figure 6 Communications Ports<br />
Connecting Communications Cables<br />
The <strong>Ithaca</strong> ® <strong>610</strong> has a number of different communications interfaces.<br />
Serial<br />
The serial interface connector is either a 9-pin or 25-pin mail D shell interface. The pin-out is<br />
shown below<br />
9-pin 25-pin Signal Description<br />
Pin 2 Pin 3 RX Receive Data<br />
Pin 3 Pin 2 TX Transmit Data<br />
Pin 4 Pin 20 DTR Data Terminal Ready<br />
Pin 5 Pin 7 GND Signal Ground<br />
Pin 6 Pin 6 DSR Data Set Ready<br />
Pin 7 Pin 4 RTS Request to Send<br />
Pin 8 Pin 5 CTS Clear to Send<br />
Table 10 Serial interface pin out<br />
Parallel<br />
The parallel interface connection is very similar to the serial interface connection. It can be a<br />
36-pin Centronics (IEEE 1284-B) or a 25-Pin female D-Shell (IEEE 1284-A) connector. The pinout<br />
of both connectors are shown below<br />
25-pin<br />
36-pin<br />
Signal Description Direction<br />
Connector Connector<br />
Pin 1 Pin 1 STROBE Clock data to printer Host to Printer<br />
Pins 2-9 Pins 2-9 D0 - D7 Data Host to Printer<br />
Page 34 Rev D 28-05897
Setup Procedures<br />
<strong>Ithaca</strong> ® <strong>610</strong> Programmer’s <strong>Guide</strong><br />
Pin 10 Pin 10 ACK\ Printer accepted data Printer to Host<br />
Pin 11 Pin 11 BUSY Printer busy Printer to Host<br />
Pin 12 Pin 12 PE Paper Out/Status Printer to Host<br />
Pin 13 Pin 13 SLCT Printer selected Printer to Host<br />
Pin 14 Pin 14 AUTOFD Auto-feed paper Host to Printer<br />
Pin 15 Pin 32 FAULT\ Printer error Printer to Host<br />
Pin 16 Pin 31 INIT\ Initialize printer Host to Printer<br />
Pin 17 Pin 36 SLIN Select printer Host to Printer<br />
Pin 17 FG Frame ground Printer to Host<br />
- Pin 18 +5V Peripheral logic high Printer to Host<br />
Pins 18-25 Pins 16, 19-30 GND Ground<br />
Table 11 Parallel interface pin out<br />
USB<br />
The USB connector can be one of two types: a standard Type B connector, as in commonly<br />
used in the PC industry, or a POS Powered USB connector. In the case of the powered USB<br />
connector, there are a number of different versions. Make sure you are using a 24 volt DC<br />
version, and the 24 volt supply meets the requirements of the <strong>Ithaca</strong> ® <strong>610</strong> printer and any cash<br />
drawer that is connected to the printer.<br />
A powered USB interface is a special order option. There are several standards for the power<br />
interface. Make sure that you inform <strong>TransAct</strong> is aware of what interface you require, and that<br />
that interface connector is supported by the <strong>Ithaca</strong> ® <strong>610</strong>.<br />
Verify the Firmware Configuration<br />
An example receipt is included in the box your printer shipped in that will show how the printer<br />
was configured before it shipped from our <strong>Ithaca</strong> facility. Compare this information to your<br />
system requirements. Pay attention to the emulation and the communications link. If they are<br />
wrong, the printer may appear inoperative. If the configuration is not correct, refer to the section<br />
on changing the <strong>Ithaca</strong> ® <strong>610</strong> configuration. If there are a number of printers to be installed and<br />
you want the identical configuration in each, you can use the universal configuration program to<br />
record the configuration on one printer, and replicate it over a group. The configuration program<br />
is available from Transact technical support.<br />
Installing Paper<br />
It is easy to install paper in the <strong>Ithaca</strong> ® <strong>610</strong>.<br />
1. Open the paper cover by grasping the green cover release between your thumb and<br />
forefinger, and squeeze the release. This will pop the cover up.<br />
2. Open the cover and install a roll of paper with the paper coming off of the bottom of the<br />
roll.<br />
3. Lay the paper tail over the front of the printer and center it over the paper path.<br />
4. Close the cover. When the cover is closed, the printer will feed several inches of paper<br />
to make sure the paper is aligned in the printer. If equipped with a cutter, the printer will<br />
automatically cut the paper tail and the printer is now ready to print. If the printer is not<br />
equipped with a cutter, the operator should remove the paper tail.<br />
28-05897 Rev D Page 35
Setup Procedures<br />
<strong>Ithaca</strong> ® <strong>610</strong> Programmer’s <strong>Guide</strong><br />
Installing Windows ® Printer Drivers<br />
Printer Driver Installation for WIN95, 98, Me<br />
1. Insert the ―Windows 95, 98, Me printer driver‖ disk into your diskette drive.<br />
2. Click on ―Start‖ menu -> ―Settings‖ -> ―Printers‖.<br />
3. Double Click on ―Add Printer‖ Icon.<br />
4. Select ―Next‖.<br />
5. Select ―Local printer‖ and ―Next‖.<br />
6. Click on ―Have Disk‖. If your floppy is A: use A:\ and then ―OK‖.<br />
7. Select the printer you have (i.e. Series <strong>Ithaca</strong> ® <strong>610</strong>) and then ―Next‖.<br />
8. If you are asked ―Keep existing driver‖ or ―Replace existing driver‖. Choose<br />
―Replace existing driver‖ and then ―Next‖.<br />
9. Select the port the printer is connected to, and then ―Next‖.<br />
10. Select ―Yes‖ or No‖ for default printer, Printer name should not be altered, so<br />
choose ―Next‖.<br />
11. If you wish, you can print a test page. Due to the narrow paper stock that this<br />
printer uses, and the margins Windows chooses, there will not be enough room<br />
to print all the images of the test page. Some of the large text will word-wrap and<br />
be truncated.<br />
12. Select ―Finish‖. The printer driver is now installed.<br />
13. If you selected ―Replace existing driver‖, reboot your machine to ensure all<br />
components are installed.<br />
Printer Driver Installation for NT4.0, 2000<br />
1. Insert the ―Windows NT, 2000 printer driver‖ floppy disk into your diskette drive.<br />
2. Click on ―Start‖ menu -> ―Settings‖ -> ―Printers‖.<br />
3. Double-click on the ―Add Printer‖ Icon.<br />
4. Select ―My Computer‖ and ―Next‖.<br />
5. Select the port the printer will be connected to, and then ―Next‖.<br />
6. Click on ―Have Disk‖. If your floppy is A: use A:\ and then ―OK‖.<br />
7. Select the printer you have (i.e. Series <strong>Ithaca</strong> ® <strong>610</strong>) and then ―Next‖.<br />
8. If you are asked ―Keep existing driver‖ or ―Replace existing driver‖. Choose<br />
―Replace existing driver‖ and then ―Next‖.<br />
9. Printer name should not be altered, so choose ―Next‖.<br />
10. Select ―Not Shared‖ ―Next‖.<br />
11. If you wish, you can print a test page. Due to the narrow paper stock that this<br />
printer uses, and the margins Windows chooses, there will not be enough room<br />
to print all the images of the test page. Some of the large text will word wrap and<br />
be truncated.<br />
12. Select ―Finish‖. The printer driver is now installed.<br />
13. If you selected ―Replace existing driver‖, reboot your machine to ensure all<br />
components are installed.<br />
Page 36 Rev D 28-05897
Setup Procedures<br />
<strong>Ithaca</strong> ® <strong>610</strong> Programmer’s <strong>Guide</strong><br />
OPOS drivers Installation Instructions<br />
1. Run Setup OPOS.exe.<br />
2. The communications will be defaulted to ―COM2‖. If the communication port is<br />
not setup at installation, the first time the printer service object Open method is<br />
called, a Com port setup dialog will be displayed.<br />
3. After running Setup.exe there will be an OPOS setup utility in the OPOS program<br />
group/start menu, and also in the Windows Control Panel. Use this utility to set<br />
up the OPOS printer ―driver‖ and cash drawer ―driver‖.<br />
To Install the USB drivers<br />
1. Ensure that USB is enabled in your system's BIOS. To verify that USB is<br />
enabled, click on "Start", "Settings", "Control Panel". Double click "System" and<br />
select the "Device Manager". If you see "Universal Serial Bus controllers" in the<br />
list, USB is enabled. Check you PC's documentation for more information about<br />
USB if needed.<br />
2. Ensure that power is applied to the printer and plug in the USB cable to both the<br />
PC and printer.<br />
3. Follow the on screen directions. Please note that several drivers are installed in<br />
this process. Therefore the "Found new hardware" prompt will appear several<br />
times. If the system needs a file, direct it to the location of the USB driver install<br />
disk (usually the floppy drive).<br />
See ―readme.txt‖ or ―usbman.htm‖ on the install disk for more information.<br />
28-05897 Rev D Page 37
chapter 4<br />
How to Operate the <strong>Ithaca</strong> ® <strong>610</strong> Printer<br />
28-05897 Rev D Page 39
This page intentionally left blank<br />
Page 40 Rev D 28-05897
How to Operate the <strong>Ithaca</strong> ® <strong>610</strong><br />
<strong>Ithaca</strong> ® <strong>610</strong> Programmer’s <strong>Guide</strong><br />
How to Operate the <strong>Ithaca</strong> ® <strong>610</strong> Printer<br />
Your <strong>Ithaca</strong> ® <strong>610</strong> printer contains two buttons and three (LED) indicator lights. In addition<br />
to power control and feeding paper, these two buttons can be used to perform functions<br />
like self-testing, clearing errors and printer configuration. They are:<br />
* BUTTON This is the standby or power down button, located on front face of the<br />
printer‘s cabinet<br />
FEED Located on bottom portion of printer‘s keypad<br />
* Button<br />
The <strong>Ithaca</strong> ® <strong>610</strong> has been designed to remain connected to a power source at all times.<br />
The * button on the <strong>Ithaca</strong> ® <strong>610</strong> Printer does not completely remove power from the<br />
printer. Because of this, the * button is used to alternately switch the printer between<br />
OFF and ON modes. The * button does not disconnect power to the printer. The printer<br />
is truly off only when the AC power supply is disconnected. You will notice that none of<br />
the indicator lights will be on when the printer is in OFF. When the printer enters ON<br />
mode, the green power indicator light will be activated. The operational state of the<br />
<strong>Ithaca</strong>® <strong>610</strong> can be determined by looking at the Power Indicator Light (LED).<br />
When the * button is pressed or the power down command is received, the <strong>Ithaca</strong> ® <strong>610</strong><br />
Printer enters an OFF low power mode. The printer is not completely off, but is in<br />
Standby mode 3 .<br />
Standby mode is remembered even if the power is removed. Whenever power is turned<br />
back on, the printer starts, performs Level 0 diagnostics, and re-enters Standby mode.<br />
FEED Button<br />
The FEED button feeds paper through the printer. By pressing the FEED button<br />
momentarily, the paper will be fed one line at a time. Pressing and holding the FEED<br />
button will make the printer feed paper continuously until the button is released.<br />
3 The printer draws about four watts of power in Standby.<br />
28-05897 Rev D Page 41
How to Operate the <strong>Ithaca</strong> ® <strong>610</strong><br />
<strong>Ithaca</strong> ® <strong>610</strong> Programmer’s <strong>Guide</strong><br />
Indicator Lights (LED)<br />
The three <strong>Ithaca</strong> ® <strong>610</strong> indicator lights are:<br />
Power LED<br />
Error LED<br />
Paper LED<br />
Indicates printer activity and non-recoverable errors<br />
Indicates problems and probability of recovery<br />
Indicates paper status (paper low)<br />
Power Indicator (LED)<br />
The power indicator lets the user know that the printer is ON. If the POWER indicator<br />
blinks in conjunction with the ERROR indicator, the printer is experiencing a nonrecoverable<br />
error: see the fault indicators discussed below. If the POWER indicator blinks<br />
and there is no error indicator blinking, the printer is being held in reset by the host.<br />
Error Indicator (LED)<br />
The ERROR indicator lets the user know that the printer is experiencing a problem. If the<br />
POWER indicator is lit (not blinking), the error is generally recoverable without data loss.<br />
If the POWER indicator is blinking, a non-recoverable error has occurred: see the fault<br />
indicators below. If the error is not operator recoverable, a power cycle may correct the<br />
problem. If a power cycle does not correct the fault, the printer must be serviced.<br />
Paper Indicator (LED)<br />
The PAPER indicator signals the paper status. If the printer is equipped with a paper low<br />
option, the PAPER indicator will blink when the paper is low. The low sensor is adjustable,<br />
and the amount of paper remaining is dependent on the adjustment. If the PAPER<br />
indicator is lit with the error indicator, the printer is out of paper: in this case, the printer<br />
stops printing and waits for the paper to be changed.<br />
Fault Indicators<br />
The ERROR indicator is the primary fault indicator, and is either always on or blinking if a<br />
fault has occurred. There are three types of faults:<br />
Fully-recoverable faults<br />
Semi-recoverable faults<br />
Non-recoverable faults<br />
Paper out or cover open<br />
Head jam<br />
Component failure<br />
Page 42 Rev D 28-05897
How to Operate the <strong>Ithaca</strong> ® <strong>610</strong><br />
<strong>Ithaca</strong> ® <strong>610</strong> Programmer’s <strong>Guide</strong><br />
Fully-recoverable and Status<br />
A fully-recoverable error will restart printing exactly where it stopped when the error<br />
occurred. Printing will resume after error has been properly addressed. A status<br />
recoverable error is very similar to a fully-recoverable error. Additionally, status is used<br />
to display when the printer consumables may need replacing.<br />
Semi-recoverable<br />
A semi-recoverable error is determined by whether or not the printer has to be shut off<br />
and turned back on while attending to the problem. The amount of information lost is<br />
dependent on the type of error and the state of the information being processed.<br />
Non-recoverable<br />
A non-recoverable error produces information loss.<br />
Error Blink Codes<br />
If during normal operation, the ERROR indicator is lit and the POWER indicator is blinking,<br />
a minor error occurred. The POWER indicator shows the error by blinking a pattern.<br />
Cycling the power restarts the printer. Blink patterns are defined as follows.<br />
1 Blink (1 blink, pause)<br />
__█__________________█______<br />
2 Blink (2 blinks, pause)<br />
__█__█_______________█__█___<br />
3 Blink (3 blinks pause)<br />
__█__█__█____________█__█__█_<br />
A similar pattern is followed for other blink counts. Error indications are as follows:<br />
Error Indicated<br />
Blink Count<br />
Unused 1<br />
Configuration Read 2<br />
Configuration Write 3<br />
Software Error 4<br />
Auto Cutter Error 5<br />
Unused 6<br />
User Store Format Error 7<br />
Flash Operation Error 9<br />
Internal Memory Error 12<br />
Communication Adapter Error 14<br />
Operating System Error 15<br />
Table 12 Error Blink Codes<br />
28-05897 Rev D Page 43
How to Operate the <strong>Ithaca</strong> ® <strong>610</strong><br />
<strong>Ithaca</strong> ® <strong>610</strong> Programmer’s <strong>Guide</strong><br />
Testing the Printer Overview<br />
Using Self-Test, Configuration, and Hex Dump Mode<br />
Self-Test Mode allows you to perform a series of tests to show if the printer is functioning<br />
correctly. Self-Test Mode also allows you to print a summary of how your <strong>Ithaca</strong> ® <strong>610</strong> is<br />
currently configured. Use this printout to compare your printer‘s settings to your system‘s<br />
requirements. Specific attention should be given to emulation and communications<br />
settings. For serial printers, the baud rate and other RS-232 interface settings are<br />
important. If there is a configuration problem, you should use Configuration Mode to<br />
make any changes necessary.<br />
Entering Self-Test, and Configuration mode<br />
To enter self test and or configuration mode, perform the following sequence of<br />
operations:<br />
1. Press and release the * button to turn the printer OFF. (The power indicator light<br />
will be off.)<br />
2. Press and hold the Feed button.<br />
3. While holding the Feed button, press and release the * button.<br />
4. When the red, error indicator light blinks, release the Feed button<br />
5. Follow the directions printed on the receipt to cycle through and select the<br />
desired TEST option.<br />
The <strong>Ithaca</strong> ® <strong>610</strong> has a total of seven Self-Test and or configuration options. Two are<br />
designed to be useful when performing on-site print evaluations. One option allows the<br />
printers configuration to be changed, and two are designed for factory setup by<br />
<strong>TransAct</strong>.<br />
Testing the printer<br />
Use the following two TEST options when verifying basic printer operation.<br />
TEST-Receipt<br />
The receipt test is the primary test option to use when determining if the printer is<br />
functioning correctly.<br />
The receipt test is mostly used during the early stages of troubleshooting, to eliminate<br />
the possibility that the problem is occurring with the printer. If the printer experiences a<br />
failure, and the error indicator light is activated, call <strong>TransAct</strong>‘s <strong>Ithaca</strong> Facility Technical<br />
Support Department.<br />
TEST-Head Test<br />
This test performs a test pattern that will print all the head print elements and verify that<br />
the drive roll is free from defects. The print head has two heating elements per dot<br />
position. A print element is not considered bad unless both elements are missing. If the<br />
head test shows that there is an inconsistency in the drive roll it may be debris or a void.<br />
If debris is indicated, cleaning the drive roll should correct the problem. If this does not<br />
correct the problem, contact <strong>TransAct</strong>‘s <strong>Ithaca</strong> Facility Technical Support Department.<br />
Page 44 Rev D 28-05897
How to Operate the <strong>Ithaca</strong> ® <strong>610</strong><br />
<strong>Ithaca</strong> ® <strong>610</strong> Programmer’s <strong>Guide</strong><br />
Configuring Options<br />
The configuration option allows the configuration of the printer to be printed and, if<br />
necessary, changed. When configuration mode is entered, the current configuration, the<br />
Current User store status, and the current totals are printed. If any printer errors have<br />
occurred, a hardware and software error log may also be printed. At the end of the print<br />
out are instructions on how to use configuration mode. Please read these instructions<br />
carefully, as they are not the same as Self-Test. You may exit configuration mode at<br />
any time, without affecting the printer configuration, by pressing the power button.<br />
TEST- Configuration<br />
The content of the configurable features will alter based on the hardware installed.<br />
There will be at least three groups of options:<br />
1. Emulation<br />
2. Communications<br />
3. General Options<br />
Under emulation the instruction set or emulation of the printer may be changed.<br />
Available options will depend on the model of printer, however <strong>Ithaca</strong> PcOS is always<br />
available. Other options may be Epson TM88, TM90, Microline, and <strong>Ithaca</strong> M50.<br />
Under Communications, the way the printer deals with the communications port can be<br />
adjusted. The printer will only show communications options that deal with the<br />
communications adapter installed.<br />
Under General Options, all other configurable features of the printer can be adjusted.<br />
The default language, paper options and print defaults may be set.<br />
Details of all printer options and features will de discussed later in this manual.<br />
Factory Test<br />
The printer is equipped with several factory test modes. These test options are only used<br />
for factory burn-in and testing.<br />
TEST-Burn-in<br />
TEST-Rolling ASCII<br />
Hex-dump Mode<br />
Hex-dump mode is used to diagnose communication problems with the printer. As<br />
information is received by the printer, the information is converted to a Hex/ASCII format<br />
and printed. No translation is made, which means no commands are interpreted. All<br />
information is converted to Hex/ASCII and printed on the receipt tape. If a carriage return<br />
is sent to the printer, it is translated to 0D in the hexadecimal field and "." in the ASCII<br />
field.<br />
Entering Hex-dump Mode<br />
To enter hex-dump mode, perform the following sequence of operations:<br />
28-05897 Rev D Page 45
How to Operate the <strong>Ithaca</strong> ® <strong>610</strong><br />
<strong>Ithaca</strong> ® <strong>610</strong> Programmer’s <strong>Guide</strong><br />
1. Press and release the * button to turn the printer OFF. (The power indicator light<br />
will be off.)<br />
2. Press and hold the Feed button.<br />
3. While holding the Feed button, press and release the * button.<br />
4. When the red, error indicator light blinks, continue to hold the Feed button until<br />
the blink pattern changes (about 5 seconds). After the pattern changes, release<br />
the line feed button and the printer will enter Hex-dump mode.<br />
Hex-dump format<br />
The format follows.<br />
54 68 69 73 20 69 73 20 This is<br />
61 20 74 65 73 74 0D 0A a test..<br />
Several indications of printer and host communication problems can be deduced from<br />
hex dump mode. If the printer is printing all 3F "?" symbols, the parity or the number of<br />
bits is wrong. If the printer is printing 3F "?" symbols when it should be printing other<br />
characters, the communications are probably incorrect, such as the parity, baud rate, or<br />
bit length setting. If the printer prints incorrect characters (like Hex C1 instead of Hex 41<br />
"A"), it is set for 8-bit data, and the host is set for 7-bit. In most cases, the print problem<br />
can be traced to the host and printer being configured differently.<br />
Page 46 Rev D 28-05897
How to Operate the <strong>Ithaca</strong> ® <strong>610</strong><br />
<strong>Ithaca</strong> ® <strong>610</strong> Programmer’s <strong>Guide</strong><br />
Level 0 Diagnostics<br />
Level 0 diagnostics always and only run at power up, e.g. power being applied. These<br />
diagnostics perform the following tasks:<br />
Cold Power On<br />
1. Basic System Integrity<br />
2. Vector Integrity<br />
3. RAM Test<br />
4. Flash Boot Loader Integrity<br />
5. Flash Firmware Integrity (NOTE: If the firmware is corrupted, the printer will remain in boot load.)<br />
6. Start Normal Firmware<br />
7. Verify Configuration Integrity<br />
8. Interface Card Configuration<br />
9. User-store Integrity<br />
10. Start Kernel, Verify Multitasking, Start Tasks<br />
Once the kernel is running, the following tests must pass to allow operation. However, if any test<br />
fails (except the knife home test), the remaining tests will generate recoverable faults and normal<br />
operation will start as soon as the fault is cleared. These tests are also run when operation is<br />
resumed from OFF.<br />
11. Cover Closed Check<br />
12. Knife Home (if installed)<br />
13. Paper Present<br />
14. Place Printer On-line, Start Normal Operation<br />
The first phase of testing consists of step 1-5, and determines that the boot loader is<br />
accurate and the printer firmware is correct. Tests 1 through 4 produce non-recoverable<br />
errors if they fail, in which case the power must be removed from the printer and the<br />
printer returned for service. If the boot loader is intact, but the main firmware is<br />
corrupted, the printer automatically enters boot loader mode, where the firmware can<br />
then be reloaded into the printer.<br />
Boot Loader Mode<br />
The boot loader cannot be entered during normal operation. Boot loader mode can only<br />
be entered in one of two ways: (1) when Level 0 Diagnostics finds that the firmware<br />
check (also known as a cyclical redundancy check, or CRC) is bad, or (2) manually.<br />
To manually enter the boot loader, hold the * button while the power is applied. The<br />
ERROR Indicator comes on, and the POWER indicator blinks. At this time, the firmware<br />
boot program is operating and the boot load file may be sent to the printer. When the<br />
printer receives the boot load file, the printer will automatically restart if the firmware load<br />
was successful. If the load fails, the printer will remain in boot load mode. If the load<br />
fails, reset the printer by removing the power and restarting it.<br />
28-05897 Rev D Page 47
chapter 5<br />
Configuring Your <strong>Ithaca</strong> ® <strong>610</strong> Printer<br />
28-05897 Rev D Page 49
This page intentionally left blank<br />
Page 50 Rev D 28-05897
Configuring Your <strong>Ithaca</strong> ® <strong>610</strong> Printer<br />
<strong>Ithaca</strong> ® <strong>610</strong> Programmer’s <strong>Guide</strong><br />
Configuration Mode Overview<br />
There are three ways to configure the <strong>Ithaca</strong> ® <strong>610</strong> printer: The first is an automated field<br />
configuration option available at initial power-up, the second is to use the manual<br />
configuration sequence by using the keypad controls, and the third is to use <strong>TransAct</strong>‘s<br />
remote configuration software. <strong>TransAct</strong> Technologies offers the use of a remote<br />
CONFIG program as a fast, easy way for system integrators to configure or reconfigure<br />
your <strong>Ithaca</strong> ® <strong>610</strong> printer. To obtain more information, or the latest version of the CONFIG<br />
program, call our Sales Department or Technical Support.<br />
Field Configuration Feature<br />
An optional field configuration feature allows easy setup and configuration of your <strong>Ithaca</strong><br />
500/510 printer. This feature provides a one-time prompt, on initial power-up, that lets<br />
you select from a number of configurations that are pre-loaded for you at the factory.<br />
This feature is an option, and must be set up and activated at <strong>TransAct</strong>. It stores a<br />
specified number of complete, commonly-used configurations in the printer, together<br />
with a text description and optional configuration summary. A comprehensive feature list<br />
is also available upon request.<br />
Using Field Configuration<br />
When the power is initially applied to the printer, it will automatically enter field<br />
configuration mode. If a printer is configured for and loaded with multiple field<br />
configurations, this option remains active until the printer is actually configured, and the<br />
printer will not be functional until this configuration step is completed.<br />
When powered on, the printer will print the following startup message in large bold<br />
characters, as shown in Figure 7:<br />
28-05897 Rev D Page 51
Configuring Your <strong>Ithaca</strong> ® <strong>610</strong> Printer<br />
<strong>Ithaca</strong> ® <strong>610</strong> Programmer’s <strong>Guide</strong><br />
This printer must be<br />
configured before use.<br />
There are x<br />
stored configurations<br />
to select from.<br />
Press and release FEED<br />
to move between options.<br />
Press and hold the<br />
FEED button to select<br />
an option.<br />
Press ON-OFF to exit<br />
Figure 7. Startup message in Field Configuration mode.<br />
Note: The ―x‖ value shown in this figure will be the actual number of<br />
loaded configurations, and can range from 2 to 20.<br />
The first option presented is an option to print all the stored configurations in summary<br />
form. Press and hold the FEED button after this option is displayed to select it. This<br />
summary includes the configuration name, a text description and a brief list of features<br />
for each pre-loaded configuration.<br />
After the ―Print all option‖, each configuration is sequentially presented by name with its<br />
description. Press the FEED button once to move to the next configuration in the list, or<br />
press and hold the FEED button to select the displayed configuration. A sample<br />
configuration is shown in Figure 8.<br />
Page 52 Rev D 28-05897
Configuring Your <strong>Ithaca</strong> ® <strong>610</strong> Printer<br />
<strong>Ithaca</strong> ® <strong>610</strong> Programmer’s <strong>Guide</strong><br />
ID: MX1011<br />
Configuration description:<br />
<strong>Ithaca</strong><br />
Configuration Summary:<br />
Emulation<br />
Emulation mode -<strong>Ithaca</strong> PcOS<br />
Paper Selection<br />
Print Energy Control:<br />
Paper -Generic Black<br />
RS232 Serial Interface<br />
Baud Rate : 19200 BPS<br />
Mode : 8 Bit No Parity 1 Stop Bit<br />
Handshaking : Ready/Busy<br />
Receive Error : Prints ‘?’<br />
DTR/RTS Signal : RTS and DTR<br />
CTS/DSR Signal : None<br />
General Options<br />
Code Page : 437<br />
CPI : 17<br />
Carriage Return : Normal<br />
Off-Line Option : Normal<br />
Line Spacing : 8.1 LPI<br />
Input Buffer : 8192 Char.<br />
Figure 8. Sample pre-loaded configuration.<br />
Once a selection is made, a summary will be printed, and the user will be asked to<br />
confirm the selection by pressing the FEED button. If not confirmed, the printer resets<br />
and the process starts over. The printer will not exit this mode until one of the predefined<br />
configurations is selected and accepted.<br />
If confirmed, the selected configuration is recorded in the printer and made active, after<br />
which the printer then resets. Once a selected configuration is activated, the printer will<br />
then power on normally, and this mandatory configuration mode will be disabled. The<br />
printer can be reconfigured or field configuration may be restarted.<br />
Note: This is a one-time configuration selection that takes place on initial<br />
power-up. This configuration can be changed later by entering<br />
Configuration Mode or using the external CONFIG program, as described<br />
subsequently in this chapter.<br />
28-05897 Rev D Page 53
Configuring Your <strong>Ithaca</strong> ® <strong>610</strong> Printer<br />
<strong>Ithaca</strong> ® <strong>610</strong> Programmer’s <strong>Guide</strong><br />
Most Frequent Configuration Incompatibilities<br />
Parallel Printer<br />
Emulation<br />
Carriage Return Options<br />
Serial Printer<br />
Emulation<br />
RS-232 Serial Interface (baud rate)<br />
Carriage Return Options<br />
How to Manually Change Configuration Settings<br />
Entering into Manual Configuration Mode<br />
1) Place the printer in standby by pressing the * button.<br />
2) Press and hold the Feed button while pressing and releasing the * button.<br />
3) When the error indicator blinks, indicating a stuck key, release the Feed key and<br />
enter Self Test Mode.<br />
4) Press and hold the Feed button until the next test is printed. Then release the Feed<br />
button.<br />
5) Repeat step 4 until ―Test-Configuration‖ is printed.<br />
6) Press and release the Feed button briefly. The current configuration will then be<br />
printed.<br />
7) You are now in Configuration Mode.<br />
After you enter Configuration Mode, the printer will print the current configuration, the<br />
current totals and the error logs, if any. Save this printout as a guide to changing the<br />
configuration, and in case you wish to return the printer to the previous configuration.<br />
Each emulation can have different configurable features. If you are changing the<br />
emulation, note that the printout that was printed at the beginning of the configuration<br />
process may be incorrect for the new emulation, and the configurable features may be<br />
different. If you are using this print out as a configuration guide, and you are changing<br />
the emulation, you may wish to save the new emulation and then re-enter Configuration<br />
Mode to change other options. This will print all the available features for the new<br />
emulation.<br />
Page 54 Rev D 28-05897
Configuring Your <strong>Ithaca</strong> ® <strong>610</strong> Printer<br />
<strong>Ithaca</strong> ® <strong>610</strong> Programmer’s <strong>Guide</strong><br />
Using Configuration Mode<br />
The Feed button is used to select and change configuration setting. By pressing and<br />
releasing the Feed button, the parameter to be changed can be selected. By pressing<br />
and holding the Feed button, the value of the selected parameter will change.<br />
The following chart lists some of the potential parameters and their options.<br />
Parameter Definition Options Default<br />
Emulation Mode Printers command set <strong>Ithaca</strong> PcOS, Epson TM- <strong>Ithaca</strong> PcOS<br />
TXX, ESC/POS,<br />
Microline, <strong>Ithaca</strong> M50<br />
Model Type of Epson Printer TM-T85, TM-T88II, TM- TM-T88II<br />
T88III, TM-T90<br />
Print Dot Eo<br />
This option allows the 10 to 40 24<br />
Custom Black energy to<br />
be set.<br />
Density Adjust<br />
This is a fine adjustment -50 to + 50 0<br />
for the print density.<br />
Baud Rate<br />
Serial Communications<br />
Bit rate<br />
300, 600, 1200, 2400,<br />
4800, 9600, 19200,<br />
19200<br />
Mode<br />
Number of bits, parity<br />
and stop bits.<br />
38400, 57600,115200<br />
7 bit or 8 bit<br />
Even, Odd, No Parity<br />
1 or 2 Stop Bits<br />
Handshaking Flow control options Ready/Busy<br />
Xon/Xoff<br />
None<br />
8 Bit, No parity, 1 Stop<br />
bit<br />
Ready/Busy<br />
Receive Error<br />
What happens when an Prints ?<br />
Prints ?<br />
error is detected. Ignores the data.<br />
Windows PnP<br />
Flag for Windows Plug Enabled,<br />
Enabled.<br />
and Play active.<br />
Disabled<br />
DTR/RTS Signal What RS232 signals are DTR, RTS, or Both DTR Both DTR and RTS<br />
used for flow control and RST<br />
CTS/DSR Signal How CTS and DSR used None (Not used) None (Not used)<br />
Multidrop Mode Flag for multidrop active Off, A, B, or C Address Off<br />
Busy-to-ACK<br />
Relationship of Busy to<br />
ACK on the IEEE1284<br />
interface.<br />
ACK while Busy<br />
ACK in Busy<br />
ACK after Busy<br />
ACK in Busy<br />
Select/Deselect<br />
Code Page or<br />
Language Set<br />
Zero<br />
Font<br />
CPI<br />
Smoothing<br />
Paper Width<br />
Bar Code Width<br />
Command used for<br />
printer select and<br />
deselect (Microline and<br />
M50 only)<br />
What character set is<br />
used for a default.<br />
Is the zero slashed, unslashed<br />
or defined by<br />
the language set.<br />
Sets the size of the<br />
default font<br />
Sets the default<br />
characters per inch<br />
Flag for whether scaled<br />
characters smoothed.<br />
Width of the paper<br />
installed.<br />
Default barcode line<br />
width.<br />
DC3/DC1<br />
DC1/DC3<br />
DC3/DC1<br />
See appendix 0 or 437<br />
Slashed<br />
Un-Slashed<br />
Follow Language set<br />
9x24, 10x24, 13x24, or<br />
15x24<br />
Value may be form 10 to<br />
24 characters per inch<br />
Enabled, Disabled<br />
Defined by the language<br />
set.<br />
12 x 24<br />
28-05897 Rev D Page 55<br />
15<br />
Enabled<br />
80 or 58 mm paper and 80 mm and 576 dots.<br />
print zone from 608 to<br />
256 dots<br />
1 to 8 3
Configuring Your <strong>Ithaca</strong> ® <strong>610</strong> Printer<br />
<strong>Ithaca</strong> ® <strong>610</strong> Programmer’s <strong>Guide</strong><br />
10CPI (DC2)<br />
ESC v<br />
nINIT/ENQ<br />
Carriage Return<br />
Off-Line Option<br />
Line Spacing<br />
Input Buffer<br />
Print Energy Control<br />
Paper<br />
This option defines how<br />
CR and LF characters<br />
are used.<br />
This option defines what<br />
conditions place the<br />
printer off line.<br />
How many lines per inch<br />
are printed by default.<br />
This option specifies<br />
how large the input<br />
buffer is.<br />
This option will select a<br />
paper type by brand<br />
name.<br />
Normal, Ignore LF,<br />
Ignore CR ,<br />
Add LF to CR,<br />
Add CR to LF,<br />
Add to Both,<br />
Use CR as Print<br />
Normal: Cover open,<br />
paper out, and buffer<br />
full.<br />
Buffer full only.<br />
6, 7.5, or 8 lines per<br />
inch.<br />
40 Characters<br />
256 Characters<br />
1024 Characters<br />
2048 Characters<br />
4096 Characters<br />
8192 Characters<br />
One Line<br />
Generic Black<br />
Custom Black<br />
Optima POS<br />
Kanzaki P-320<br />
Kanzaki P-350<br />
<strong>Ithaca</strong> Emulation:<br />
Normal<br />
Epson Emulation: Ignore<br />
CR.<br />
Axiohm Emulation: Use<br />
CR as Print.<br />
Normal.<br />
<strong>Ithaca</strong> Emulation: 8<br />
Most others: 6<br />
8192 Characters<br />
Generic Black<br />
PreHeat Temp.<br />
Power Supply<br />
Page Length<br />
Cash Drawer CMD<br />
CD ESC BEL Parm.<br />
Microline Mode<br />
Cash Drawer Time<br />
Cash Drawer Sense<br />
External User Store<br />
This sets the<br />
temperature that the pint<br />
head tries to maintain.<br />
The printer uses an 80W<br />
internal supply. If an<br />
external supply is used,<br />
this adjustment will limit<br />
the printer to the power<br />
indicated.<br />
This options sets the<br />
default form feed page<br />
length.<br />
The Microline option has<br />
two potential cash<br />
drawer commands<br />
The Microline Emulation<br />
has the option of using<br />
the ESC BEL command<br />
to operate the cash<br />
drawer<br />
There are three<br />
Microline modes<br />
The cash drawer fire<br />
time is adjustable in the<br />
<strong>Ithaca</strong> emulation.<br />
The sense of the cash<br />
drawer open status can<br />
be reversed.<br />
Flag for user store in use<br />
or configurable. If the<br />
user store is in use and<br />
has data in it, it can not<br />
See the section on Head 25<br />
pre-heat later in the<br />
manual.<br />
60 to 120 Watts 80<br />
0 – 60 lines.<br />
0 disables the form feed<br />
ESC +<br />
BEL<br />
Enabled<br />
Disabled<br />
40<br />
BEL<br />
Disabled<br />
M50, M50 Plus, OKI M50<br />
ML192<br />
10 to 250 Ms 250 Ms<br />
Normal,<br />
Inverted<br />
In use or configurable.<br />
Normal<br />
Not Settable.<br />
Page 56 Rev D 28-05897
Configuring Your <strong>Ithaca</strong> ® <strong>610</strong> Printer<br />
<strong>Ithaca</strong> ® <strong>610</strong> Programmer’s <strong>Guide</strong><br />
User Store<br />
On/Off Switch<br />
Audio Alert<br />
Cutter Option<br />
Pre-Cut Feed or Tear<br />
Point Adjust<br />
Cutter Speed<br />
be reconfigured.<br />
This option sets a lock<br />
on user store that<br />
prevents any changes to<br />
the data.<br />
This option disables the<br />
On/Off switch<br />
This option configures<br />
the operation of the<br />
audio alert<br />
This activates or<br />
deactivates the auto<br />
cutter<br />
This option sets how<br />
much the cut point is<br />
adjusted before the auto<br />
cut or manual tear-off.<br />
This option adjusts the<br />
auto cutter speed to<br />
allow the use of thicker<br />
paper.<br />
Unlocked<br />
Locked<br />
Enabled<br />
Disabled<br />
Off, 50 ms to 1 Second<br />
in 50 mSec steps<br />
Active<br />
Inactive<br />
0 or none to 20 mm. 0<br />
130 to 80 where 80 is<br />
the slowest speed.<br />
Unlocked<br />
Enabled<br />
250 mS<br />
Active if the printer is<br />
equipped with an auto<br />
cutter.<br />
100<br />
Note: There are other features that may be configurable. It is intended<br />
that if you need to change them, you will contact <strong>TransAct</strong> Technical<br />
support for assistance.<br />
Remote Configuration<br />
Remote configuration is provided for all printers, and is accessed through a series of<br />
extended diagnostic and configuration commands. The <strong>TransAct</strong> universal configuration<br />
program will allow the configuration to be read, edited, and written back to the printer. It<br />
will also allow the configuration of one printer to be recorded and replicated over a<br />
number of printers. The program is available from <strong>TransAct</strong> Technical Support or by<br />
downloading it from the Internet – consult the section On-line Technical Support for<br />
further details.<br />
DO NOT EXCEED 0.40 mJ/sq.mm, or the paper may start to stick to the<br />
print head and cause paper jams. Setting the Print energy too high will<br />
also slow the printer down.<br />
28-05897 Rev D Page 57
chapter 6<br />
Programming Codes<br />
28-05897 Rev D Page 59
This page intentionally left blank<br />
Page 60 Rev D 28-05897
Programming Codes<br />
<strong>Ithaca</strong> ® <strong>610</strong> Programmer’s <strong>Guide</strong><br />
Control Codes Overview<br />
This <strong>Programmer's</strong> <strong>Guide</strong> is designed to help users of the <strong>Ithaca</strong> ® <strong>610</strong> printer develop<br />
applications. <strong>Ithaca</strong> ® <strong>610</strong> Printers are specialized point-of-sale printers that have several<br />
features not normally found on general-purpose printers. Because of these special<br />
features, <strong>Ithaca</strong> ® <strong>610</strong> Printers have unique control codes. This programmer's guide<br />
documents the control codes that are unique to the <strong>Ithaca</strong> ® <strong>610</strong> Printer.<br />
Nomenclature<br />
When describing control codes, confusion often occurs as to whether the description is<br />
decimal, hexadecimal, or ASCII. To minimize the problem, this programmer‘s guide uses<br />
the following nomenclature when describing control code sequences.<br />
[ ] Encloses a control character. [ ] represents a single, 8-bit value as<br />
defined in the standard ASCII tables. The ASCII Code Table in Appendix<br />
B lists the control codes. An example would be [ESC], which would<br />
represent a 1BH or 27 decimal.<br />
< > Encloses an 8-bit value in decimal format. The value is from zero to 255.<br />
An example is , which represents 02H or 2 decimal.<br />
<br />
Indicates a variable parameter. The variable parameter, , can have a<br />
value from zero to 255. The meaning of is described and defined in<br />
the description of the command.<br />
Indicates that there are two parameters, and , where both can<br />
have values from zero to 255.<br />
Is an <strong>Ithaca</strong> ® Printer Control Language (IPCL) parameter consisting of<br />
two digits where and are ASCII characters from zero to nine.<br />
The parameter is combined to form a value from zero to 99. If is<br />
included, the parameter is combined to be from zero to 999. If two values<br />
are specified, there must be two bytes added to the IPCL code. That is, if<br />
the command specifies and the desired value is five, it must<br />
be specified as 05.<br />
x<br />
All other characters in control strings represent ASCII characters. For<br />
example, [ESC] 1 represents 1BH followed by 31H.<br />
In many cases, applications require that control sequences be specified in hexadecimal<br />
or decimal codes. In most cases, commands are specified in ASCII, hexadecimal, and<br />
decimal. The ASCII Code Table in Appendix B (page 257) lists ASCII, hexadecimal, and<br />
decimal equivalents.<br />
28-05897 Rev D Page 61
Programming Codes<br />
<strong>Ithaca</strong> ® <strong>610</strong> Programmer’s <strong>Guide</strong><br />
Standard Emulation<br />
The standard control codes for the <strong>Ithaca</strong> ® <strong>610</strong> Printer are extensions and subsets of the<br />
PcOS IBM emulation provided on other <strong>Ithaca</strong> ® products. In some cases, an application<br />
designed for a Series 50 Printer with IBM code sets will function with an <strong>Ithaca</strong> ® <strong>610</strong><br />
Printer.<br />
IPCL Codes<br />
<strong>Ithaca</strong> ® Printer Control Language (IPCL) codes are part of PcOS and designed to control<br />
a printer without using control characters (i.e. characters less than 20H). Only the<br />
standard PcOS emulation supports IPCL.<br />
In rare cases, an IPCL code will interfere with the text that is to be printed. The IPCL<br />
translator can be disabled with an [ESC] y command.<br />
EPOS Emulation<br />
ESC/POS 4 is referred to here as EPOS. The <strong>Ithaca</strong> ® <strong>610</strong> Printer supports two Epson<br />
emulations. One emulation is for the TM-T88, and the other is an enhanced TM-T90<br />
emulation.<br />
Specific EPSON compatibility features, such as its Automated Status Back<br />
(ASB) feature, are available as an option from <strong>TransAct</strong> Technologies.<br />
Command codes pertaining to these features are documented as<br />
―licensed‖ within the command description.<br />
It is intended that the standard <strong>Ithaca</strong> ® PcOS emulation be used for new<br />
applications. Not all features of <strong>Ithaca</strong> ® <strong>610</strong> Printers are supported by EPOS –<br />
specifically, the ability to print color horizontal graphics is not supported.<br />
Application Development<br />
To aid application development, several chapters in this manual are designed to help the<br />
programmer understand the <strong>Ithaca</strong> ® <strong>610</strong> Printer. The next chapter provides a detailed<br />
description of each of the commands. Subsequent chapters provide explanations of<br />
how the printer works, including a description of the internal print buffer, communications<br />
link, and interaction between the host computer and printer.<br />
<strong>Ithaca</strong> Control Codes and Commands<br />
Throughout this <strong>Programmer's</strong> <strong>Guide</strong>, charts and tables list commands and features. In<br />
most cases, the charts cross-reference the page that describes the command. Code<br />
summary charts, arranged by code and function, are provided to help quickly find<br />
commands.<br />
PcOS Printer Control Codes<br />
The following section defines the <strong>Ithaca</strong> ® <strong>610</strong> <strong>Ithaca</strong> ® PcOS emulation. The native,<br />
<strong>Ithaca</strong> ® PcOS emulation provides the most flexibility and control over the printer. It is<br />
4 ESC/POS is a registered trademark of the Seiko Epson Corporation.<br />
Page 62 Rev D 28-05897
Programming Codes<br />
<strong>Ithaca</strong> ® <strong>610</strong> Programmer’s <strong>Guide</strong><br />
consistent with most previous <strong>Ithaca</strong> ® PcOS products, and should be used when the<br />
printer is placed in a new application.<br />
28-05897 Rev D Page 63
Programming Codes<br />
<strong>Ithaca</strong> ® <strong>610</strong> Programmer’s <strong>Guide</strong><br />
Quick PcOS Reference Chart<br />
Description ASCII Hex IPCL<br />
Page<br />
equivalent<br />
code<br />
Low Level paper Motion<br />
Line feed. [LF] 0AH &%LF 75<br />
Carriage return. [CR] 0DH &%CR 75<br />
Horizontal Motion<br />
Back space. [BS] 08H &%BS 76<br />
Horizontal tab. [HT] 09H &%HT 76<br />
Set horizontal tab stops. [ESC] D 1BH,44H none 76<br />
... <br />
<br />
Set horizontal position. [ESC] n 1BH,6EH &%HP 77<br />
Set justification.<br />
n=0 Left<br />
n=1 Center<br />
n=2 Right<br />
n=8 Left (No line feed)<br />
n=9 Center (No line feed)<br />
n=10 Right (No line feed)<br />
<br />
<br />
[ESC] a 1BH,61H &%JR {n=2}<br />
&%JC {n=1}<br />
&%JL {n=0}<br />
Reset horizontal and vertical tab stops. [ESC] R 1BH,52H &%HV 77<br />
Set left/right print margins.<br />
[ESC] X 1BH,58H none 146<br />
n 1 = Left margin, n 2 = Right margin<br />
<br />
Vertical Motion<br />
Perform a fine line feed. [ESC] J 1BH,4AH &%FM <br />
<br />
78<br />
Set 1/8-inch line spacing. [ESC] 0 1BH,30H &%ST 79<br />
Set 7/72-inch line spacing. [ESC] 1 1BH,31H &%SG 79<br />
Begin variable line spacing. (Enable [ESC] [ESC] 2 1BH,32H none 80<br />
A ).<br />
Set variable line spacing to n/216 inch. [ESC] 3 1BH,33H &%SV 78<br />
<br />
Set variable line spacing to n/72 inch. [ESC] A 1BH,41H none 79<br />
Feed lines at current spacing. [ESC] d 1BH,64H &%FL 80<br />
<br />
Set vertical tab stops. [ESC] B <br />
...<br />
0<br />
1BH,42H none 81<br />
Vertical tab. [VT] 0BH &%VT 81<br />
Form feed. [FF] 0CH &%FF 82<br />
Set top of form. [ESC] 4 1BH,34H &%TF 82<br />
Set form length in lines. [ESC] C 1BH,43H &%SL 82<br />
<br />
Begin auto line feed. (n=0, end n=1) [ESC] 5 1BH,35H &%CA {n=0} 82<br />
&%MA {n=1}<br />
Set form length in inches.<br />
[ESC] C [NUL] 1BH,43H &%SI 82<br />
<br />
<br />
Reverse line feed. [ESC] ] 1BH,5DH &%LR 83<br />
Character Pitch<br />
Begin 10 CPI character pitch. [DC2] 12H &%F3 84<br />
77<br />
Page 64 Rev D 28-05897
Programming Codes<br />
<strong>Ithaca</strong> ® <strong>610</strong> Programmer’s <strong>Guide</strong><br />
Description ASCII Hex IPCL<br />
Page<br />
equivalent<br />
code<br />
Begin 12 CPI character pitch. [ESC] : 1BH,3AH &%F2 84<br />
Begin 17 CPI character pitch. [SI] 0FH &%F1 84<br />
Set character pitch. [ESC] [ P 1BH,5BH, &%F 85<br />
50H<br />
Set inter-character spacing. [ESC] V 1BH,56H none 86<br />
Begin 24 CPI character pitch [ESC][SI] 1BH,0FH &%F4 84<br />
Character Font<br />
Begin 12 x 12 draft print. [ESC] # 1BH,23H,<br />
00H<br />
Set print quality mode.<br />
n=0 Draft (12 x 12)<br />
n=1 Large draft (12 x 14)<br />
n=2 NLQ (24 x 16)<br />
n=3 NLQ (24 x 16)<br />
n=4-7 Repeats 0-3<br />
Begin rotated font. (See command<br />
description).<br />
Select character code page. [ESC] [ T <br />
<br />
&%QT 87<br />
[ESC] I 1BH,49H &%QT {n=0}<br />
&%QU {n=1}<br />
&%QL {n=2}<br />
&%QS {n=3}<br />
[ESC] P 1BH,50H &%RI<br />
&%RF<br />
&%RN<br />
1BH,5BH,<br />
54H<br />
&%CP <br />
<br />
<br />
Insert Euro character. [ESC] [ C 1BH,5BH, &%EU 92<br />
43H<br />
Print control character. [ESC] ^ 1BH,5EH &%CC 92<br />
<br />
Redefine character set. [ESC] [ S … 1BH,5BH,<br />
93<br />
53H…<br />
Define user-defined characters.<br />
[ESC] = 1BH,3DH none 94<br />
…<br />
Enable user-defined characters. [ESC] > 1BH,3EH none 95<br />
Enable OCR characters. [ESC] y 1BH,79H, &%YX011 95<br />
0BH<br />
Disable OCR characters. [ESC] y 1BH,79H, &%YX012 95<br />
0CH<br />
Cancel user-defined characters. [ESC] $ 1BH,24H none 95<br />
Character Attributes<br />
Begin one-line double-wide print. [SO] 0EH &%MW 98<br />
Cancel one-line double-wide print. [DC4] 14H &%MN 98<br />
Multi-line double-wide double-high mode.<br />
n=0 Standard mode<br />
n=1 Double-wide<br />
n=2 Double-high<br />
3 = Both<br />
Enable/disable overscore.<br />
n=0 End<br />
n=1 Begin<br />
Begin underline mode.<br />
n = 0 End<br />
n = 1 Begin<br />
[ESC] W 1BH,57H &%FS {n=0}<br />
&%FD {n=1}<br />
&%FH {n=3}<br />
[ESC] _ 1BH,5FH &%CO {n=0}<br />
&%MO {n=1}<br />
[ESC] - 1BH,2DH &%CU {n=0}<br />
&%MU {n=1}<br />
Begin enhanced print. [ESC] G 1BH,47H &%ME 101<br />
End enhanced print. [ESC] H 1BH,48H &%CE 101<br />
87<br />
88<br />
90<br />
99<br />
99<br />
101<br />
28-05897 Rev D Page 65
Programming Codes<br />
<strong>Ithaca</strong> ® <strong>610</strong> Programmer’s <strong>Guide</strong><br />
Description ASCII Hex IPCL<br />
Page<br />
equivalent<br />
code<br />
Begin emphasized print. [ESC] E 1BH,45H &%MM 101<br />
End emphasized print. [ESC] F 1BH,46H &%CM 102<br />
Set print style. (See command description.) [ESC] [ @ ... 1BH,5BH, &%DH 100<br />
40H… &%SH<br />
Select superscript. [ESC] S 1BH,53H, &%SP 102<br />
00H<br />
Select subscript. [ESC] S 1BH,53H, &%SB 102<br />
01H<br />
End superscript or subscript. [ESC] T 1BH,54H &%SE 102<br />
Begin italics. [ESC] % G 1BH,25H, &%MI 103<br />
47H<br />
End italics. [ESC] % H 1BH,25H, &%CI 103<br />
Rotated Print<br />
Begin rotated print. (See Rotated Print [ESC] r 1BH,72H &%RX 105<br />
Summary on page 107.)<br />
Set rotated print line length. [ESC] s 1BH,73H &%RL 109<br />
<br />
Set rotated print line spacing. [ESC] u … 1BH,75H none 109<br />
Page Mode<br />
Select page mode [ESC] t 1BH,74H &%PM 111<br />
Set page mode page position [ESC] o … 1BH,6FH 112<br />
Exit page mode [FF] 0CH &%FF 113<br />
APA Graphics<br />
Print single-density graphics.<br />
=0...255<br />
=0…3<br />
len= + 256 * <br />
[ESC] K <br />
<br />
Print half-speed double-density graphics. [ESC] L <br />
<br />
Print full-speed double-density graphics. [ESC] Y <br />
<br />
Print quad-density graphics. [ESC] Z <br />
<br />
Select bidirectional or unidirectional print.<br />
n=0 Bidirectional<br />
n=1 Unidirectional<br />
Print graphics in mode .<br />
[ESC] * <br />
<br />
Reassign graphic mode. [ESC] ?<br />
<br />
Process horizontal graphics data.<br />
[ESC] h <br />
<br />
<br />
<br />
Set horizontal graphic mode.<br />
User Store<br />
Begin named macro record.<br />
48H<br />
1BH,4BH none 114<br />
1BH,4CH none 114<br />
1BH,59H none 115<br />
1BH,5AH none 115<br />
[ESC] U 1BH,55H &%GU {n=1}<br />
&%GB {n=0}<br />
[ESC] * <br />
<br />
[ESC] [US] b<br />
<br />
116<br />
1BH,2AH none 115<br />
1BH,3FH none 116<br />
1BH,68H none 118<br />
1BH,2AH none 119<br />
1BH,1FH,<br />
62H<br />
&%UB<br />
<br />
123<br />
Page 66 Rev D 28-05897
Programming Codes<br />
<strong>Ithaca</strong> ® <strong>610</strong> Programmer’s <strong>Guide</strong><br />
Description ASCII Hex IPCL<br />
Page<br />
equivalent<br />
code<br />
Save macro data in user store.<br />
[ESC] [US] m 1BH,1FH, &%UM 124<br />
6DH <br />
End named macro record.<br />
[ESC] [US] e 1BH,1FH, &%UG 124<br />
65H <br />
Load item from user store.<br />
[ESC] [US] l 1BH,1FH, &%UL 125<br />
6CH <br />
Save user-defined characters.<br />
[ESC] [US] c 1BH,1FH, &%UC 124<br />
63H <br />
Run macro data from user store.<br />
[ESC] [US] r 1BH,1FH, &%UR 125<br />
72H <br />
Flag item as a start-up macro.<br />
[ESC] [US] s 1BH,1FH, &%US 125<br />
6DH <br />
Delete item from user store.<br />
[ESC] [US] d 1BH,1FH, &%UD 126<br />
64H <br />
Flush information from user store.<br />
[ESC] [US] f 1BH,1FH, &%UF 126<br />
ALL 66H,00H<br />
Transfer user store to extended user store [ESC] [US] t 1BH,1FH, &%UF 126<br />
ALL 66H,00H<br />
Report on user store.<br />
[ESC] [US] q 1BH,1FH, &%UQ 127<br />
72H <br />
Return a report on user store [ESC] [US] ? 1BH,1FH, &%UQ 127<br />
72H <br />
Process user macro. [ESC] g 1BH,67H, &%GP 129<br />
00H<br />
Start macro record. [ESC] g 1BH,67H, &%GS 129<br />
01H<br />
Stop macro record. [ESC] g 1BH,67H, &%GE 129<br />
02H<br />
Stop macro record and save. [ESC] g 1BH, &%GW 129<br />
Bar Codes<br />
Print bar code.<br />
n=0 Interleave 2 of 5<br />
n=1 Code 39<br />
n=2 Code 128<br />
n=3 UPC A<br />
n=4 EAN-13<br />
n=5 UPC E<br />
n=6 EAN-8<br />
n= 7 Code 93<br />
n = 8 Codabar<br />
PDF 417 bar code control<br />
Set bar code height.<br />
n=0 Restore defaults<br />
n=1 - 9 Number of passes<br />
(0.11 inch per pass)<br />
Set bar code width<br />
Set bar code justification, HRI print mode,<br />
and print direction.<br />
[ESC] b ...<br />
[ETX]<br />
[ESC] [EM] E<br />
<br />
[ESC] [EM] B<br />
<br />
[ESC] [EM] W<br />
<br />
[ESC] [EM] J<br />
<br />
67H, 03H<br />
1BH,62H<br />
1BH 19H<br />
45H<br />
1BH,19H,<br />
42H<br />
1BH 19H<br />
57H<br />
1BH,19H,<br />
4AH<br />
&%25 {n=0}<br />
&%39 {n=1}<br />
&%12 {n=2}<br />
&%UP {n=3}<br />
&%EA {n=4}<br />
&%UE {n=5}<br />
&%E8 {n=6}<br />
&%93 {n=7}<br />
130<br />
none 138<br />
&%BH<br />
<br />
139<br />
&%BW 139<br />
&%BJ<<br />
m 2 ><br />
139<br />
28-05897 Rev D Page 67
Programming Codes<br />
<strong>Ithaca</strong> ® <strong>610</strong> Programmer’s <strong>Guide</strong><br />
Description ASCII Hex IPCL<br />
equivalent<br />
code<br />
Unicode<br />
Set font ID<br />
[ESC] + 1 <br />
1BH 2BH<br />
31H<br />
Set font descriptor [ESC] + 2 1BH 2BH<br />
32H<br />
Select font<br />
[ESC] + 3 <br />
Set character code ID<br />
Send character definition<br />
[ESC] + 4 <br />
[ESC] + 5 <br />
<br />
1BH 2BH<br />
34H<br />
1BH 2BH<br />
35H<br />
Delete current selected soft font [ESC] + 6 1BH 2BH<br />
36H<br />
Delete all soft fonts [ESC] + 7 1BH 2BH<br />
37H<br />
Query soft/RAM font information [ESC] + Q 1BH 2BH<br />
51H<br />
Copy soft font from RAM to user<br />
memory/flash memory.<br />
[ESC] + U<br />
1BH 2BH<br />
55H<br />
Initiate Unicode UTF-16BE encoding [ESC] + H 1BH 2BH<br />
48H<br />
Initiate Unicode UTF-16LE encoding [ESC] + L 1BH 2BH<br />
4CH<br />
Initiate Unicode UTF-8 encoding (MBCS) [ESC] + M 1BH 2BH<br />
4DH<br />
Initiate normal 8-bit character encoding [ESC] + A 1BH 2BH<br />
41H<br />
Page 68 Rev D 28-05897<br />
Page<br />
none 142<br />
none 142<br />
none 142<br />
none 142<br />
none 143<br />
none 143<br />
none 143<br />
none 143<br />
none 143<br />
none 144<br />
none 144<br />
none 145<br />
none 145<br />
Miscellaneous Commands<br />
Disable paper out sensor. [ESC] 8 1BH,38H &%PF 146<br />
Enable paper out sensor. [ESC] 9 1BH,39H &%PO 146<br />
Set left/right margins.<br />
n 1 = Left margin<br />
n 2 = Right margin<br />
[ESC] X<br />
<br />
1BH,58H none 146<br />
Clear print buffer. [CAN] 18H &%RP 147<br />
Query marker. [ESC] q 1BH,71H none 147<br />
Open cash drawer.<br />
n=1 Cash Drawer 1<br />
n=2 Cash Drawer 2<br />
[ESC] x 1BH,78H &%D1 {n=1}<br />
&%D2 {n=2}<br />
148<br />
Perform Auto Cut [ESC] v 1BH,76H &%FC 148<br />
Audio alert. [BEL] 07H &%BL 149<br />
Configure audio alert.<br />
[ESC] [BEL]<br />
<br />
1BH,07H none 149
Programming Codes<br />
<strong>Ithaca</strong> ® <strong>610</strong> Programmer’s <strong>Guide</strong><br />
Description ASCII Hex IPCL<br />
Page<br />
equivalent<br />
code<br />
Print suppress<br />
and data pass through.<br />
[ESC] < 1BH,3CH &%PT 151<br />
Initialize printer. [ESC] @ 1BH,40H none 148<br />
Enable paper error mode operation. [ESC] p 1BH,70H &%PE 149<br />
<br />
Begin multi-drop control. [SOH] 01H none 155<br />
Inquire status. (Refer to command<br />
[ENQ] 05H none 157<br />
descriptions.)<br />
Inquire cash drawer 1 status [ENQ] 05H01H none 157<br />
Extended Diagnostics<br />
Set control feature commands. [ESC] y 1BH,79H &%Y0 - 9 or 152<br />
&%YX<br />
<br />
(for numbers<br />
>9)<br />
Extended diagnostics. [ESC] ~ 1BH,7EH none 153<br />
28-05897 Rev D Page 69
Programming Codes<br />
<strong>Ithaca</strong> ® <strong>610</strong> Programmer’s <strong>Guide</strong><br />
Quick PcOS Reference Chart (Alphabetic)<br />
Description ASCII Hex IPCL Page<br />
equivalent<br />
code<br />
Begin multi-drop control [SOH] 01H none 155<br />
Inquire status (Refer to command [ENQ] 05H none 157<br />
descriptions.)<br />
Audio alert [BEL] 07H &%BL 149<br />
Back space [BS] 08H &%BS 76<br />
Horizontal tab [HT] 09H &%HT 76<br />
Line feed [LF] 0AH &%LF 75<br />
Vertical tab [VT] 0BH &%VT 81<br />
Form feed [FF] 0CH &%FF 82<br />
Exit page mode [FF] 0CH &%FF 113<br />
Carriage return [CR] 0DH &%CR 75<br />
Begin one-line double-wide print [SO] 0EH &%MW 98<br />
Begin 17 CPI character pitch [SI] 0FH &%F1 84<br />
Begin 10 CPI character pitch [DC2] 12H &%F3 84<br />
Cancel one-line double-wide print [DC4] 14H &%MN 98<br />
Clear print buffer [CAN] 18H &%RP 147<br />
Configure audio alert<br />
[ESC] [BEL] 1BH,07H none 149<br />
<br />
<br />
Begin 24 CPI character pitch [ESC][SI] 1BH,0FH &%F4 84<br />
Set bar code height<br />
[ESC] [EM] B 1BH,19H, &%BH 139<br />
n=0 Restore defaults<br />
n=1 - 9 Number of passes<br />
(0.11 inch per pass)<br />
<br />
42H <br />
Set bar code justification, HRI print mode, [ESC] [EM] J 1BH,19H, &%BJ< 139<br />
and print direction<br />
<br />
Return a report on user store [ESC] [US] ?<br />
<br />
Begin named macro record<br />
Save user-defined characters<br />
Delete item from user store<br />
End named macro record<br />
Flush information from user store<br />
Load item from user store<br />
[ESC] [US] b<br />
<br />
[ESC] [US] c<br />
<br />
[ESC] [US] d<br />
<br />
[ESC] [US] e<br />
<br />
[ESC] [US] f<br />
ALL or<br />
EXT <br />
[ESC] [US] l<br />
<br />
4AH<br />
1BH,1FH,<br />
72H<br />
1BH,1FH,<br />
62H<br />
1BH,1FH,<br />
63H<br />
1BH,1FH,<br />
64H<br />
1BH,1FH,<br />
65H<br />
1BH,1FH,<br />
66H,00H<br />
1BH,1FH,<br />
6CH<br />
m 2 ><br />
&%UQ<br />
<br />
<br />
&%UB<br />
<br />
<br />
&%UC<br />
<br />
<br />
&%UD<br />
<br />
<br />
&%UG<br />
<br />
<br />
127<br />
123<br />
124<br />
126<br />
124<br />
&%UF 126<br />
&%UL<br />
<br />
<br />
125<br />
Page 70 Rev D 28-05897
Programming Codes<br />
<strong>Ithaca</strong> ® <strong>610</strong> Programmer’s <strong>Guide</strong><br />
Description ASCII Hex IPCL<br />
equivalent<br />
code<br />
Save macro data in user store<br />
Report on user store<br />
Run macro data from user store<br />
Flag item as a start-up macro<br />
[ESC] [US] m<br />
<br />
[ESC] [US] q<br />
<br />
[ESC] [US] r<br />
<br />
[ESC] [US] s<br />
<br />
1BH,1FH,<br />
6DH<br />
1BH,1FH,<br />
72H<br />
1BH,1FH,<br />
72H<br />
1BH,1FH,<br />
6DH<br />
Page<br />
&%UM 124<br />
<br />
<br />
&%UQ 127<br />
<br />
<br />
&%UR 125<br />
<br />
<br />
&%US 125<br />
<br />
<br />
&%UF 126<br />
Transfer user store to extended user store [ESC] [US] t<br />
ALL <br />
1BH,1FH,<br />
66H,00H<br />
Begin 12 x 12 draft print [ESC] # 1BH,23H, &%QT 87<br />
00H<br />
Cancel user-defined characters [ESC] $ 1BH,24H none 95<br />
Begin italics [ESC] % G 1BH,25H, &%MI 103<br />
47H<br />
End italics [ESC] % H 1BH,25H, &%CI 103<br />
48H<br />
Set horizontal graphic mode<br />
[ESC] * 1BH,2AH none 119<br />
<br />
Print graphics in mode <br />
[ESC] * 1BH,2AH none 115<br />
<br />
Begin underline mode<br />
n = 0 End<br />
n = 1 Begin<br />
[ESC] - 1BH,2DH &%CU {n=0}<br />
&%MU {n=1}<br />
Set 1/8-inch line spacing [ESC] 0 1BH,30H &%ST 79<br />
Set 7/72-inch line spacing [ESC] 1 1BH,31H &%SG 79<br />
Begin variable line spacing (Enable [ESC] 2 1BH,32H none 80<br />
[ESC] A )<br />
Set variable line spacing to n/216 inch [ESC] 3 1BH,33H &%SV 78<br />
<br />
Set top of form [ESC] 4 1BH,34H &%TF 82<br />
Begin auto line feed n=0 End n=1 [ESC] 5 1BH,35H &%CA {n=0} 82<br />
&%MA {n=1}<br />
Disable paper out sensor [ESC] 8 1BH,38H &%PF 146<br />
Enable paper out sensor [ESC] 9 1BH,39H &%PO 146<br />
Begin 12 CPI character pitch [ESC] : 1BH,3AH &%F2 84<br />
Print suppress<br />
[ESC] < 1BH,3CH &%PT 151<br />
and data pass through<br />
Define user-defined characters<br />
[ESC] = 1BH,3DH none 94<br />
…<br />
Enable user-defined characters [ESC] > 1BH,3EH none 95<br />
Reassign graphic mode [ESC] ? 1BH,3FH none 116<br />
<br />
Initialize printer [ESC] @ 1BH,40H none 148<br />
101<br />
28-05897 Rev D Page 71
Programming Codes<br />
<strong>Ithaca</strong> ® <strong>610</strong> Programmer’s <strong>Guide</strong><br />
Description ASCII Hex IPCL Page<br />
equivalent<br />
code<br />
Set variable line spacing to n/72 inch [ESC] A 1BH,41H none 79<br />
Set vertical tab stops [ESC] B 1BH,42H none 81<br />
<br />
... 0<br />
Set form length in lines [ESC] C 1BH,43H &%SL 82<br />
<br />
Set form length in inches<br />
[ESC] C [NUL] 1BH,43H &%SI 82<br />
<br />
<br />
Set horizontal tab stops [ESC] D 1BH,44H none 76<br />
... <br />
<br />
Begin emphasized print [ESC] E 1BH,45H &%MM 101<br />
End emphasized print [ESC] F 1BH,46H &%CM 102<br />
Begin enhanced print [ESC] G 1BH,47H &%ME 101<br />
End enhanced print [ESC] H 1BH,48H &%CE 101<br />
Set print quality mode<br />
[ESC] I 1BH,49H &%QT {n=0} 87<br />
n=0 Draft (12 x 12)<br />
n=1 Large draft (12 x 14)<br />
n=2 NLQ (24 x 16)<br />
n=3 NLQ (24 x 16)<br />
n=4-7 Repeats 0-3<br />
&%QU {n=1}<br />
&%QL {n=2}<br />
&%QS {n=3}<br />
Perform a fine line feed [ESC] J 1BH,4AH &%FM 78<br />
Print single-density graphics<br />
=0...255<br />
=0…3<br />
len= + 256 * <br />
[ESC] K <br />
<br />
<br />
1BH,4BH none 114<br />
Print half-speed double-density graphics [ESC] L 1BH,4CH none 114<br />
<br />
Perform a fine line feed in reverse [ESC] M 1BH,4DH &%FR 83<br />
<br />
Begin rotated font (See command<br />
description).<br />
[ESC] P 1BH,50H &%RI<br />
&%RF<br />
88<br />
&%RN<br />
Reset horizontal and vertical tab stops [ESC] R 1BH,52H &%HV 77<br />
Select superscript [ESC] S 1BH,53H, &%SP 102<br />
00H<br />
Select subscript [ESC] S 1BH,53H, &%SB 102<br />
01H<br />
End superscript or subscript [ESC] T 1BH,54H &%SE 102<br />
Select bi-directional or unidirectional print [ESC] U 1BH,55H &%GU {n=1} 116<br />
n=0 Bi-directional<br />
&%GB {n=0}<br />
n=1 Unidirectional<br />
Set inter-character spacing [ESC] V 1BH,56H none 86<br />
Multi-line double-wide double-high mode<br />
n=0 Standard mode<br />
n=1 Double-wide<br />
n=2 Double-high<br />
3 = Both<br />
[ESC] W 1BH,57H &%FS {n=0}<br />
&%FD {n=1}<br />
&%FH {n=3}<br />
99<br />
Page 72 Rev D 28-05897
Programming Codes<br />
<strong>Ithaca</strong> ® <strong>610</strong> Programmer’s <strong>Guide</strong><br />
Description ASCII Hex IPCL<br />
equivalent<br />
code<br />
Set left/right print margins<br />
n 1 = Left margin<br />
n 2 = Right margin<br />
[ESC] X<br />
<br />
Page<br />
1BH,58H none 146<br />
Print full-speed double-density graphics [ESC] Y 1BH,59H none 115<br />
<br />
Print quad-density graphics [ESC] Z 1BH,5AH none 115<br />
<br />
Set print style (See command<br />
[ESC] [ @ ... 1BH,5BH, &%DH 100<br />
description.)<br />
40H… &%SH<br />
Insert euro character [ESC] [ C 1BH,5BH, &%EU 92<br />
43H<br />
Set character pitch [ESC] [ P 1BH,5BH, &%F 85<br />
50H<br />
Redefine character set [ESC] [ S … 1BH,5BH,<br />
93<br />
53H…<br />
Select character code page [ESC] [ T <br />
<br />
1BH,5BH,<br />
54H<br />
&%CP <br />
<br />
90<br />
<br />
Reverse line feed [ESC] ] 1BH,5DH &%LR 83<br />
Print control character [ESC] ^ 1BH,5EH &%CC 92<br />
<br />
Enable/disable overscore<br />
[ESC] _ 1BH,5FH &%CO {n=0} 99<br />
n=0 End<br />
&%MO {n=1}<br />
n=1 Begin<br />
Set justification<br />
n=0 Left<br />
n=1 Center<br />
n=2 Right<br />
n=8 Left (No line feed)<br />
n=9 Center (No line feed)<br />
n=10 Right (No line feed)<br />
Print bar code<br />
n=0 Interleave 2 of 5<br />
n=1 Code 39<br />
n=2 Code 128<br />
n=3 UPC A<br />
n=4 EAN-13<br />
n=5 UPC E<br />
n=6 EAN-8<br />
n= 7 Code 93<br />
n = 8 Codabar<br />
[ESC] a 1BH,61H &%JR {n=2}<br />
&%JC {n=1}<br />
&%JL {n=0}<br />
[ESC] b ...<br />
[ETX]<br />
1BH,62H<br />
&%25 {n=0}<br />
&%39 {n=1}<br />
&%12 {n=2}<br />
&%UP {n=3}<br />
&%EA {n=4}<br />
&%UE {n=5}<br />
&%E8 {n=6}<br />
&%93 {n=7}<br />
Feed lines at current spacing [ESC] d 1BH,64H &%FL 80<br />
<br />
Feed lines at current spacing in [ESC] e 1BH,65H &%FB 80<br />
reverse<br />
<br />
Process user macro [ESC] g 1BH,67H, &%GP 129<br />
00H<br />
Start macro record [ESC] g 1BH,67H, &%GS 129<br />
01H<br />
Stop macro record [ESC] g 1BH,67H,<br />
02H<br />
&%GE 129<br />
77<br />
130<br />
28-05897 Rev D Page 73
Programming Codes<br />
<strong>Ithaca</strong> ® <strong>610</strong> Programmer’s <strong>Guide</strong><br />
Description ASCII Hex IPCL Page<br />
equivalent<br />
code<br />
Stop macro record and save [ESC] g 1BH, 67H, &%GW 129<br />
Process horizontal graphics data<br />
[ESC] h<br />
<br />
<br />
<br />
<br />
Set horizontal position [ESC] n <br />
<br />
Set page mode page position [ESC] o <br />
…<br />
03H<br />
1BH,68H none 118<br />
1BH,6EH &%HP<br />
<br />
77<br />
1BH,6FH &%PY 112<br />
<br />
Enable paper error mode operation [ESC] p 1BH,70H &%PE 149<br />
<br />
Query marker [ESC] q 1BH,71H none 147<br />
Begin/end rotated print [ESC] r 1BH,72H &%RX 105<br />
Set rotated print line length [ESC] s 1BH,73H &%RL 109<br />
Select page mode [ESC] t 1BH,74H &%PM 111<br />
Perform auto cut [ESC] v 1BH,76H &%FC 148<br />
Open cash drawer<br />
n=1 Cash Drawer 1<br />
n=2 Cash Drawer 2<br />
[ESC] x 1BH,78H &%D1 {n=1}<br />
&%D2 {n=2}<br />
Set control feature commands [ESC] y 1BH,79H &%Y0 - 9 or<br />
&%YX<br />
<br />
(for numbers<br />
>9)<br />
Enable OCR characters [ESC] y 1BH,79H, &%YX011 95<br />
0BH<br />
Disable OCR characters [ESC] y 1BH,79H, &%YX012 95<br />
0CH<br />
Extended diagnostics [ESC] ~ 1BH,7EH none 153<br />
148<br />
152<br />
Page 74 Rev D 28-05897
Programming Codes<br />
<strong>Ithaca</strong> ® <strong>610</strong> Programmer’s <strong>Guide</strong><br />
Low Level Paper Motion Control<br />
Print/Paper Motion<br />
[CR]<br />
ASCII [CR]<br />
Hexadecimal 0DH<br />
Decimal <br />
IPCL &%CR<br />
EPOS 0DH<br />
Carriage return<br />
Description<br />
[LF]<br />
The [CR] command prints the contents of the print buffer (if any) and<br />
resets the next character print position to the left margin. A line feed is<br />
not performed unless auto-feed is active. The print rotation direction and<br />
the left margin command define the left margin.<br />
Line feed<br />
ASCII [LF]<br />
Hexadecimal 0AH<br />
Decimal <br />
IPCL &%LF<br />
EPOS 0AH<br />
Description<br />
The [LF] command prints the contents of the buffer (if any) and advances<br />
paper one line at the current default line spacing. The next character<br />
print position is not reset to the left margin unless auto-CR is active.<br />
28-05897 Rev D Page 75
Programming Codes<br />
<strong>Ithaca</strong> ® <strong>610</strong> Programmer’s <strong>Guide</strong><br />
Horizontal Motion Control<br />
Several commands can be used to control the horizontal position of characters. Many<br />
applications use space control to position fields. However, the <strong>Ithaca</strong> ® <strong>610</strong> Printer has<br />
the ability to control character position with horizontal tab stops. This is done using the<br />
horizontal tab [HT] to move to those tab stops.<br />
[HT]<br />
Horizontal tab<br />
ASCII [HT]<br />
Hexadecimal 09H<br />
Decimal <br />
IPCL &%HT<br />
EPOS [HT]<br />
Description<br />
[BS]<br />
The [HT] command inserts spaces in the print buffer up to the next tab<br />
stop. The default tab locations are every eight spaces.<br />
Back space<br />
ASCII [BS]<br />
Hexadecimal 08H<br />
Decimal <br />
IPCL &%BS<br />
EPOS [BS]<br />
Description<br />
[ESC] D<br />
The [BS] command moves the print buffer one character width to the left.<br />
The pointer position cannot be moved to the left of the left margin. [BS]<br />
does not cause the buffer to be printed; rather, the following data is OR'ed<br />
with the previous data.<br />
Set horizontal tab stops<br />
ASCII [ESC] D ... 0<br />
Hexadecimal 1BH 44H ... 00H<br />
Decimal ... <br />
IPCL none<br />
EPOS [ESC] D ... 0<br />
Description<br />
The [ESC] D ... 0 command sets tab stops at the<br />
character columns specified by . The end of the settings is specified<br />
by a . All previously set tabs will be cleared. The restore-default<br />
procedure is another method to re-specify the tabs. Column sizes are in<br />
accordance with the current character pitch. Setting tabs that are beyond<br />
the station width is possible. A [CR] is inserted when the tab is used.<br />
Printing begins at the home position. The power up default is every eight<br />
spaces, i.e., 9, 17, 25, and so on.<br />
Page 76 Rev D 28-05897
Programming Codes<br />
<strong>Ithaca</strong> ® <strong>610</strong> Programmer’s <strong>Guide</strong><br />
[ESC] R<br />
Reset horizontal and vertical tab stops<br />
ASCII [ESC] R<br />
Hexadecimal 1BH 52H<br />
Decimal <br />
IPCL &%HV<br />
EPOS none<br />
Description<br />
[ESC] a<br />
The [ESC] R command resets horizontal and vertical tab stops to the<br />
power up configuration. The power up horizontal default is every eight<br />
spaces, i.e., 9, 17, 25, and so on. The vertical default is every line.<br />
Set Justification<br />
ASCII [ESC] a <br />
Hexadecimal 1BH 61H <br />
Decimal <br />
IPCL &%JL, &%JC, &%JR<br />
EPOS [ESC] a <br />
Description The [ESC] a command sets the horizontal justification.<br />
Where 0 = Left justified &%JL<br />
1 = Center justified &%JC<br />
2 = Right justified &%JR<br />
8 = Left justified (no line feed) None<br />
9 = Center justified (no line feed) None<br />
10 = Right justified (no line feed) None<br />
The print format of the printer can be right, center, or left justified. The<br />
value of specifies the justification. The power on default is left<br />
justified.<br />
Note: The justify commands also affect graphics.<br />
[ESC] n<br />
Set horizontal position<br />
ASCII [ESC] n <br />
Hexadecimal 1BH 6EH <br />
Decimal <br />
IPCL &%HP <br />
EPOS [ESC]$ <br />
Description The [ESC] command sets the print position to + <br />
* 256 in 1/196 inches.<br />
28-05897 Rev D Page 77
Programming Codes<br />
<strong>Ithaca</strong> ® <strong>610</strong> Programmer’s <strong>Guide</strong><br />
Vertical Motion Control<br />
[ESC] j<br />
Perform a fine line feed<br />
ASCII [ESC] J <br />
Hexadecimal 1BH 4AH <br />
Decimal <br />
IPCL &%FM <br />
EPOS [ESC] J <br />
Description<br />
[ESC] 3<br />
The [ESC] J command prints the contents of the buffer and performs<br />
a line feed of n/216 inch. The default line spacing value is not changed.<br />
The next character print position is reset to the left margin if the Auto-CR<br />
mode is set.<br />
Notes:<br />
In EPOS mode, the command performs feeds in n/144-inch<br />
increments.<br />
Immediately after APA graphics, the command is adjusted for the<br />
difference between 72 dpi graphics and 96 dpi print.<br />
Set variable line spacing to n/216 inch<br />
ASCII [ESC] 3 <br />
Hexadecimal 1BH 33H <br />
Decimal <br />
IPCL &%SV <br />
EPOS [ESC] 3 <br />
Description<br />
The [ESC] 3 command sets the default line spacing to n/216 inch.<br />
Set n = 1 to 255. The line feed spacing used by [LF] is set to values other<br />
than 1/8 or 7/72 inch. The command takes effect immediately.<br />
Note: In EPOS mode, the command performs line feeds in n/144-inch<br />
increments.<br />
Page 78 Rev D 28-05897
Programming Codes<br />
<strong>Ithaca</strong> ® <strong>610</strong> Programmer’s <strong>Guide</strong><br />
[ESC] 0<br />
Set line spacing to 1/8 inch<br />
ASCII [ESC] 0<br />
Hexadecimal 1BH 30H<br />
Decimal <br />
IPCL &%ST<br />
EPOS [ESC] 2<br />
Description The [ESC] 0 command sets the default line spacing to 1/8 inch (27/216<br />
inch), which is the standard eight lines per inch line spacing at initial<br />
power-up.<br />
Note: In EPOS mode, the command sets 1/6-inch spacing or six lines per<br />
inch.<br />
[ESC] 1<br />
Set line spacing to 21/216 inch or 7/72 inch<br />
ASCII [ESC] 1<br />
Hexadecimal 1BH 31H<br />
Decimal <br />
IPCL &%SG<br />
EPOS none<br />
Description<br />
[ESC] A<br />
The [ESC] 1 command sets the default line spacing to 21/216 inch. Use<br />
21/216-inch line spacing for all-points-addressable (APA) graphics<br />
printing.<br />
Set variable line spacing to n/72 inch<br />
ASCII [ESC] A <br />
Hexadecimal 1BH 41H <br />
Decimal <br />
IPCL none<br />
EPOS none<br />
Description The [ESC] A command sets the default line spacing to n/72. Set n =<br />
1 to 85. Variable line spacing does not take effect until enabled by the<br />
[ESC] 2 command. The command is provided to maintain backward<br />
compatibility with the <strong>Ithaca</strong> ® Series 50, OKIDATA, IBM, and other<br />
printers. It can also be used to print on preprinted forms.<br />
28-05897 Rev D Page 79
Programming Codes<br />
<strong>Ithaca</strong> ® <strong>610</strong> Programmer’s <strong>Guide</strong><br />
[ESC] 2<br />
Enable [ESC] A variable line spacing<br />
ASCII [ESC] 2<br />
Hexadecimal 1BH 32H<br />
Decimal <br />
IPCL none<br />
EPOS none<br />
Description<br />
[ESC] d<br />
The [ESC] 2 command is a companion to the [ESC] A command and<br />
puts the specified line spacing into effect. It remains in effect until<br />
another line spacing command is issued.<br />
Feed lines at the current spacing<br />
ASCII [ESC] d <br />
Hexadecimal 1BH 64H <br />
Decimal <br />
IPCL &%FL <br />
EPOS [ESC] d<br />
Description<br />
The [ESC] d command prints the contents of the buffer (if any) and<br />
performs line feeds at the current line spacing. The command does<br />
not change the default line spacing value. The next character print<br />
position is reset to the left margin.<br />
Note: The IPCL command prints from 00 to 99 lines. For example, if you<br />
wish to feed 12 lines, the IPCL command would be as follows: &%FL12.<br />
Function Reverse feed lines at the current spacing<br />
ASCII [ESC] e <br />
Hexadecimal 1BH 65H <br />
Decimal <br />
IPCL &%FB <br />
EPOS [ESC] e<br />
Description The [ESC] e command prints the contents of the buffer (if any) and<br />
performs reverse line feeds at the current line spacing. The<br />
command does not change the default line spacing value. The next<br />
character print position is reset to the left margin.<br />
Note: The IPCL command prints from 00 to 99 lines. For example, if you<br />
wish to feed 12 lines, the IPCL command would be as follows: &%FL12.<br />
Page 80 Rev D 28-05897
Programming Codes<br />
<strong>Ithaca</strong> ® <strong>610</strong> Programmer’s <strong>Guide</strong><br />
[VT]<br />
Vertical tab<br />
ASCII [VT]<br />
Hexadecimal 0BH<br />
Decimal <br />
IPCL &%VT<br />
EPOS (VT)<br />
Description<br />
[ESC] B<br />
The printer sets a line counter to the top of the form at reset and when a<br />
set top of form command is issued. By setting vertical tab stops, various<br />
form positions can be reached with a [VT] operation.<br />
Set vertical tab stops<br />
ASCII [ESC] B ... 0<br />
Hexadecimal 1BH 42H ... 00H<br />
Decimal ... <br />
IPCL none<br />
EPOS [ESC] B ... 0<br />
Description<br />
[ESC] R<br />
The [ESC] B ... 0 command sets tab stops at line<br />
positions specified by . The end of the setting is specified by a .<br />
All previously set tabs will be cleared. If n n is less than n n-1 , then the<br />
command is in error, and all of the following information is printed. In<br />
other words, tab stops must be entered sequentially in order to be<br />
accepted. A total of 64 tab stops can be specified. (The power on default<br />
is a vertical tab on every line).<br />
Reset horizontal and vertical tab stops<br />
ASCII [ESC] R<br />
Hexadecimal 1BH 52H<br />
Decimal <br />
IPCL &%HV<br />
EPOS none<br />
Description<br />
The [ESC] R command resets horizontal and vertical tab stops to power<br />
up configuration. The power up horizontal default is every eight spaces,<br />
i.e., 9, 17, 25, etc. The vertical default is every line.<br />
28-05897 Rev D Page 81
Programming Codes<br />
<strong>Ithaca</strong> ® <strong>610</strong> Programmer’s <strong>Guide</strong><br />
[FF]<br />
Form feed<br />
ASCII [FF]<br />
Hexadecimal 0CH<br />
Decimal <br />
IPCL &%FF<br />
EPOS none<br />
Description<br />
[ESC] 4<br />
The [FF] command performs a form feed to the top of the form.<br />
Note: The form feed command can be disabled. Set the form length to<br />
zero.<br />
Set top of form<br />
ASCII [ESC] 4<br />
Hexadecimal 1BH 34H<br />
Decimal <br />
IPCL &%TF<br />
EPOS [ESC] L<br />
Description<br />
[ESC] C<br />
The [ESC] 4 command sets the top of form to the current position.<br />
Set form length in lines<br />
ASCII [ESC] C <br />
Hexadecimal 1BH 43H <br />
Decimal <br />
IPCL &%SL <br />
EPOS [ESC] C <br />
Description<br />
[ESC] C [NUL]<br />
The [ESC] C command sets the form length to lines at the<br />
current line spacing. If the current page position is greater than the new<br />
page length, the command also sets the current position as the top of<br />
form.<br />
Set form length in inches<br />
ASCII [ESC] C [NUL] <br />
Hexadecimal 1BH 43H <br />
Decimal <br />
IPCL &%SI <br />
EPOS none<br />
Description<br />
[ESC] 5<br />
The [ESC] C [NUL] command sets the form length to inches. If<br />
the current page position is greater than the new page length, the<br />
command also sets the current position as the top of form. If zero inches<br />
are specified, the form feed and vertical tab commands are ignored.<br />
Begin auto line feed<br />
Page 82 Rev D 28-05897
Programming Codes<br />
<strong>Ithaca</strong> ® <strong>610</strong> Programmer’s <strong>Guide</strong><br />
ASCII [ESC] 5 <br />
Hexadecimal 1BH 35H <br />
Decimal <br />
IPCL &%MA (Begin)<br />
IPCL &%CA (End)<br />
EPOS none<br />
Description The [ESC] 5 command sets auto line feed mode. [ESC] 5 <br />
command ends auto line feed mode.<br />
Note: The begin and end auto line feed command overrides the<br />
configuration setting.<br />
[ESC] ] Reverse line feed<br />
ASCII [ESC] ]<br />
Hexadecimal 1BH 5DH<br />
Decimal <br />
IPCL &%LR<br />
EPOS none<br />
Description The [ESC] ] command performs a reverse line feed at the current line<br />
spacing.<br />
Note: The <strong>Ithaca</strong> ® <strong>610</strong> Printer can tolerate no more than 1/2 inch of<br />
reverse feed.<br />
28-05897 Rev D Page 83
Programming Codes<br />
<strong>Ithaca</strong> ® <strong>610</strong> Programmer’s <strong>Guide</strong><br />
Character Pitch<br />
Character pitch commands that set specific characters per inch (cpi) disable any rightside<br />
spacing set by the [ESC] V command. In addition, when font changes are<br />
made, the character pitch is maintained.<br />
[DC2]<br />
Begin 10 cpi character pitch<br />
ASCII [DC2]<br />
Hexadecimal 12H<br />
Decimal <br />
IPCL &%F3<br />
EPOS [ESC][SP] <br />
Description<br />
[ESC] :<br />
The [DC2] command sets 9.905 characters per inch print pitch.<br />
Begin 12 cpi character pitch<br />
ASCII [ESC] :<br />
Hexadecimal 1BH 3AH<br />
Decimal <br />
IPCL &%F2<br />
EPOS [ESC] [SP] <br />
Description<br />
[SI]<br />
The [ESC] : command sets 12.235 characters per inch print pitch.<br />
Begin 17 cpi character pitch<br />
ASCII [SI]<br />
Hexadecimal 0FH<br />
Decimal <br />
IPCL &%F1<br />
EPOS [ESC] [SP] <br />
Description<br />
[ESC] [SI]<br />
The [SI] command sets 17.333 characters per inch print pitch.<br />
Begin 24 cpi character pitch<br />
ASCII [ESC] [SI]<br />
Hexadecimal 1BH 0FH<br />
Decimal <br />
IPCL &%F4<br />
EPOS [ESC] [SP] <br />
Description<br />
The [ESC] [SP] command sets 23.111 characters per inch print pitch.<br />
Page 84 Rev D 28-05897
Programming Codes<br />
<strong>Ithaca</strong> ® <strong>610</strong> Programmer’s <strong>Guide</strong><br />
[ESC] [ P<br />
Set character pitch<br />
ASCII [ESC] [ P <br />
Hexadecimal 1BH 5BH 50H <br />
Decimal <br />
IPCL &%F1, &%F2, &%F3, &%F4, &%F5, &%F6, &%F7<br />
EPOS [ESC] [SP] <br />
Description<br />
The [ESC] [ P command sets character per inch print pitch to .<br />
The printer resolution limits the exact print pitch. The following table lists<br />
the exact pitch for various values on .<br />
<br />
Resulting<br />
Characters<br />
IPCL<br />
per Inch<br />
1 1.00<br />
2 2.00<br />
3 3.01<br />
4 4.00<br />
5 4.95<br />
6 5.94<br />
7 6.93<br />
8 8.00 &%F7<br />
9 9.04<br />
10 9.90 &%F3<br />
11 10.95<br />
12 12.23 &%F2<br />
13 13.00<br />
14 13.87<br />
15 14.86 &%F6<br />
<br />
Resulting<br />
Characters<br />
IPCL<br />
per Inch<br />
16 16.00<br />
17 17.33 &%F1<br />
18 17.33<br />
19 18.91<br />
20 20.8 &%F5<br />
21 20.8<br />
22 23.11<br />
23 23.11<br />
24 23.11 &%F4<br />
25 23.11<br />
26 26<br />
27 26<br />
28 26<br />
29 29.71<br />
30 29.71<br />
Table 13 Character Pitch<br />
This command disables any right-side spacing set by the [ESC] V command. In addition<br />
when font changes are made, the character pitch is maintained.<br />
28-05897 Rev D Page 85
Programming Codes<br />
<strong>Ithaca</strong> ® <strong>610</strong> Programmer’s <strong>Guide</strong><br />
[ESC] V<br />
Set inter-character spacing<br />
Mode Global<br />
ASCII [ESC] V <br />
Hexadecimal 1BH 56H <br />
Decimal <br />
IPCL none<br />
EPOS [ESC] [SP] <br />
Description<br />
The [ESC] V command sets inter-character spacing by adding white<br />
space between characters. The value of sets the spacing in 216ths<br />
of an inch. The printer can only set the spacing in 208ths of an inch and<br />
converts 216ths to the nearest 208th of an inch. Each font has a basic<br />
size, and the inter-character spacing value is added to the basic size.<br />
Therefore, the affect of this command on characters per inch (cpi) will<br />
depend on the font selected.<br />
Note 1: The [ESC] V command disables any pitch settings<br />
established by pitch set commands that establish a cpi (like [ESC] [ P<br />
). After a set right-side spacing command is issued, the pitch will vary<br />
with font selection. Font selections use the current, active, right-side<br />
spacing.<br />
Note 2: With the inter-character spacing command, the pitch cannot be<br />
set less than the font size. Therefore, it is not as effective as the pitch<br />
command, [ESC] [ P . The following table lists the cpi equivalent for<br />
several values of .<br />
The following table lists the cpi equivalent for several values of .<br />
Small Draft (cpi) Large Draft (cpi) NLQ (cpi)<br />
0 17.33 14.86 13<br />
1 16 13.9 12.24<br />
2 14.86 13 11.6<br />
3 13.9 12.24 10.9<br />
4 13 11.6 10.4<br />
5 12.24 10.9 9.90<br />
Table 14 Inter-character Spacing<br />
Page 86 Rev D 28-05897
Programming Codes<br />
<strong>Ithaca</strong> ® <strong>610</strong> Programmer’s <strong>Guide</strong><br />
Character Font<br />
[ESC] #<br />
Begin 12 x 12 draft print mode<br />
ASCII [ESC] # <br />
Hexadecimal 1BH 23H 00H<br />
Decimal <br />
IPCL &%QT<br />
EPOS [ESC] ! <br />
Description<br />
[ESC] I<br />
The [ESC] # command begins 12 x 12 draft print mode. Draft print is<br />
provided to maintain compatibility with other <strong>Ithaca</strong> ® products.<br />
Set print quality mode<br />
ASCII [ESC] I <br />
Hexadecimal 1BH 49H <br />
Decimal <br />
IPCL &%QT 12 x 12 draft mode<br />
&%QU 12 x 14 large draft mode<br />
&%QL 24 x 16 near letter quality (NLQ) mode<br />
&%QS 24 x 16 near letter quality (NLQ) mode<br />
EPOS [ESC] x and/or [ESC] ! <br />
Description<br />
Where n<br />
The [ESC] I (e.g. capital ―i‖) command begins draft, large draft or<br />
near letter quality print mode.<br />
0 = 12 x 12 draft<br />
1 = 12 x 14 large draft<br />
2 = 24 x 16 near letter quality (NLQ)<br />
3 = 24 x 16 near letter quality (NLQ)<br />
4 - 7 repeats 0 - 3<br />
Draft print modes are high-speed print modes intended to provide quality<br />
print with minimal ink usage. The 12 x 12 draft font is the most efficient.<br />
The 12 x 14 large draft font produces a larger more readable character<br />
but with added ink usage. NLQ print mode is a two pass half-speed font.<br />
It provides what is generally regarded as near letter quality print at<br />
reduced speed with greater ink usage.<br />
Note 1: In EPOS mode, [ESC] x is similar to [ESC] I . [ESC] ! <br />
performs a similar function; however, NLQ is not available.<br />
Note 2: NLQ fonts cannot be rotated 90 or 270 .<br />
Note 3: Switching from draft to NLQ modes causes the printer to print all<br />
previously received information. Consequently, auto-center and right<br />
justify do not print mixed draft and NLQ font as expected.<br />
28-05897 Rev D Page 87
Programming Codes<br />
<strong>Ithaca</strong> ® <strong>610</strong> Programmer’s <strong>Guide</strong><br />
[ESC] P<br />
Begin rotated font/Right to left entry<br />
ASCII [ESC] P <br />
Hexadecimal 1BH 50H <br />
Decimal <br />
IPCL &%RI {n=2}<br />
&%RF {n=1}<br />
&%RN {n=0}<br />
EPOS [ESC] V <br />
Description The [ESC] P command sets the print font to a rotated 90 or 270<br />
font.<br />
Where n n = 0 Normal<br />
n = 1 Rotate 90 (Single pass, 12 x 12 draft)<br />
n = 2 Rotate 270 (Single pass, 12 x 12 draft)<br />
n = 5 Rotate 90 (Two pass, 12 x 12 draft or 12 x 14 large draft)<br />
n = 6 Rotate 270 (Two pass, 12 x 12 draft or 12 x 14 large draft)<br />
n = 8 Enter Text right to left<br />
n = 9 Enter Text right to left and Rotate 90 (Single pass, 12 x 12 draft)<br />
n = 10 Enter Text right to left and Rotate 270 (Single pass, 12 x 12 draft)<br />
n = 11 Enter Text right to left and Rotate 90 (Two pass, 12 x 12 draft or<br />
12 x 14 large draft)<br />
n = 12 Enter Text right to left and Rotate 270 (Two pass, 12 x 12 draft or<br />
12 x 14 large draft)<br />
In Modes 1 and 2, 12 x 12 draft font is rotated 90 or 270 and printed in a<br />
single pass. Double wide and double high fonts are available. However,<br />
because the font is rotated, double wide makes the characters taller and<br />
double high makes the characters wider. Modes 1 and 2 distort the font,<br />
but they produce the fastest rotated print.<br />
Modes 5 and 6 rotate the 12 x 12 draft or 12 x 14 large draft and maintain<br />
the aspect ratio of the fonts. Modes 5 and 6 require two passes by the<br />
print cartridge, which slows the print time considerably. The font that is<br />
rotated by Mode 5 or 6 is selected by the [ESC] I command. <br />
may be zero or one.<br />
NLQ fonts cannot be rotated 90 or 270 . The current pitch sets the<br />
spacing between lines. If eight characters per inch (cpi) is set, the printer<br />
produces the equivalent of eight lines per inch (lpi) rotated print.<br />
Modes 8-12 allow right to left text entry. (Note: right to left text entry is<br />
not supported in formatted rotated print mode (See the [ESC]r command<br />
for formatted rotated print.)<br />
Page 88 Rev D 28-05897
Programming Codes<br />
<strong>Ithaca</strong> ® <strong>610</strong> Programmer’s <strong>Guide</strong><br />
Character sets and Code Pages<br />
The <strong>Ithaca</strong> ® <strong>610</strong> Printer supports 65 different international character sets. In IBM and<br />
EPOS printers, there are two ways of selecting a character set. One way substitutes<br />
international characters in the upper 128 characters of a standard character set. The<br />
substitution technique supports a few different countries. However, as more and more<br />
countries were added, too many characters were being replaced, and it became a<br />
problem for the application to match the characters displayed and printed.<br />
To solve this problem, a second method of selecting a character set was developed -<br />
code pages. The printer and display use the same code page, and the application<br />
displays and prints the same characters. IBM and EPOS defined new commands to<br />
select code pages, and left the old commands in effect.<br />
The <strong>Ithaca</strong> ® <strong>610</strong> Printer supports international character sets as well as code pages. To<br />
allow the most flexibility for the application programmer, both methods are extended in<br />
the <strong>Ithaca</strong> ® <strong>610</strong> Printer. In IBM mode, there are 19 character sets and 60 code pages. In<br />
EPOS mode, there are 57 character sets and five code pages. 5<br />
The <strong>Ithaca</strong> ® <strong>610</strong> Printer allows the IBM code page selection command to choose<br />
character sets as well as normal IBM code pages. The EPOS character set select<br />
command has been extended to allow additional character sets over and above the 11<br />
defined by EPOS. The EPOS code page select command has not been extended<br />
because there is no EPOS definition beyond the first six ID‘s.<br />
All characters in code pages as well as character sets are addressed as zero through<br />
255. (Characters below 32 must be addressed with the [ESC] ^ command.) Code<br />
pages may be changed at any time and are active for all features including rotated print.<br />
To allow other code pages to be created by an application, a redefine character set<br />
command is provided.<br />
As discussed above, there are two commands for language selection in IBM mode. The<br />
first is [ESC] !, which selects one of 19 international character sets. The [ESC] !<br />
command does not allow all of the possible character sets to be selected, it is provided<br />
for compatibility with older programs only. The second is [ESC] [ T, which selects any of<br />
the 58 code pages. In EPOS mode, the [ESC] R command has been expanded to<br />
select any of the 59 international character sets or code pages.<br />
[ESC] !<br />
Select international character set<br />
ASCII [ESC] ! <br />
Hexadecimal 1BH 21H <br />
Decimal <br />
IPCL &%CS <br />
EPOS [ESC] R <br />
Description<br />
The [ESC] ! command selects international character set . In<br />
standard mode, the value of is as follows.<br />
5 Epson provides limited code page support through ID to code page translation. Only six<br />
translations are defined.<br />
28-05897 Rev D Page 89
Programming Codes<br />
<strong>Ithaca</strong> ® <strong>610</strong> Programmer’s <strong>Guide</strong><br />
Language Language<br />
64-‗@‘ ASCII (slashed zero) 73-‗I‘ Italian<br />
65-‗A‘ ASCII (unslashed zero) 74-‗J‘ French Canadian<br />
66-‗B‘ British 75-‗K‘ Spanish<br />
67-‗C‘ German 76-‗L‘ Swedish II<br />
68-‗D‘ French 77 -‗M‘ Swedish III<br />
69-‗E‘ Swedish 78-‗N‘ Swedish IV<br />
70-‗F‘ Danish 79-‗O‘ Turkish<br />
71-‗G‘ Norwegian 80-‗P‘ Swiss I<br />
72-‗H‘ Dutch 81-‗Q‘ Swiss II<br />
Table 15 Language Table ID‘s<br />
[ESC] [ T<br />
Select character code page<br />
ASCII [ESC] [ T <br />
Hexadecimal 1BH 5BH 54H <br />
Decimal <br />
IPCL &%CP <br />
EPOS [ESC] t <br />
Description The [ESC] [ T command selects character code page <br />
. The <strong>Ithaca</strong> ® <strong>610</strong> Printer supports many code pages. The following<br />
code pages are supported.<br />
Code<br />
Country Code/Language<br />
Decimal <br />
Hex <br />
Page<br />
Set<br />
64 USA (Slashed 0) 0,64 0H,040H<br />
65 USA (Unslashed 0) 0,65 0H,041H<br />
66 British 0,66 0H,042H<br />
67 German 0,67 0H,043H<br />
68 French 0,68 0H,044H<br />
69 Swedish I 0,69 0H,045H<br />
70 Danish 0,70 0H,046H<br />
71 Norwegian 0,71 0H,047H<br />
72 Dutch 0,72 0H,048H<br />
73 Italian 0,73 0H,049H<br />
74 French Canadian 0,74 0H,04AH<br />
75 Spanish 0,75 0H,04BH<br />
76 Swedish II 0,76 0H,04CH<br />
77 Swedish III 0,77 0H,04DH<br />
78 Swedish IV 0,78 0H,04EH<br />
79 Turkish 0,79 0H,04FH<br />
80 Swiss I 0,80 0H,050H<br />
81 Swiss II 0,81 0H,051H<br />
91 Welsh 0,91 0H,05BH<br />
437 USA 1,181 1H,0B5H<br />
774 Baltic 774 3,6 3H,006H<br />
850 Multilingual 3,82 3H,052H<br />
852 East Europe Latin II-852 3,84 3H,054H<br />
855 Cyrillic I-855 3,87 3H,057H<br />
857 Turkey 857 3,89 3H,059H<br />
858 Multilingual Euro 3,90 3H,05AH<br />
860 Portugal 3,92 3H,05CH<br />
861 Icelandic-861 3,93 3H,05DH<br />
Page 90 Rev D 28-05897
Programming Codes<br />
<strong>Ithaca</strong> ® <strong>610</strong> Programmer’s <strong>Guide</strong><br />
862 Hebrew NC (862) 3,94 3H,05EH<br />
863 Canada French 3,95 3H,05FH<br />
865 Norway 3,97 3H,061H<br />
866 Cyrillic II-866 3,98 3H,062H<br />
869 Greek 869 3,101 3H,065H<br />
895 Kamenicky (MJK) 3,127 3H,07FH<br />
1008 Greek 437 3,240 3H,0F0H<br />
1009 Greek 928 3,241 3H,0F1H<br />
1011 Greek 437 Cyprus 3,243 3H,0F3H<br />
1012 Turkey 3,244 3H,0F4H<br />
1013 Cyrillic II-866 3,245 3H,0F5H<br />
1014 Polska Mazovia 3,246 3H,0F6H<br />
1015 ISO Latin 2 3,247 3H,0F7H<br />
1016 Serbo Croatic I 3,248 3H,0F8H<br />
1017 Serbo Croatic II 3,249 3H,0F9H<br />
1018 ECMA-94 3,250 3H,0FAH<br />
1019 Windows East Europe 3,251 3H,0FBH<br />
1020 Windows Greek 3,252 3H,0FCH<br />
1021 Latin 5 (Windows Turkey) 3,253 3H,0FDH<br />
1022 Windows Cyrillic 3,254 3H,0FEH<br />
1024 Hungarian CWI 4,0 4H,000H<br />
1026 ISO Latin 4 (8859/4) 4,2 4H,002H<br />
1027 Ukrainian 4,3 4H,003H<br />
1028 Roman-8 4,4 4H,004H<br />
1029 ISO Latin 6 (8859/10) 4,5 4H,005H<br />
1030 Hebrew NC (862) 4,6 4H,006H<br />
1031 Hebrew OC 4,7 4H,007H<br />
1032 Windows Hebrew 4,8 4H.008H<br />
1033 KBL- Lithuanian 4,9 4H,009H<br />
1034 Windows Baltic 4,10 4H,00AH<br />
1035 Cyrillic-Latvian 4,11 4H,00BH<br />
1072 Bulgarian 4,48 4H,030H<br />
Table 16 Code Page Definition Table<br />
Note: The code page field is a 16-bit field that is a function of the code<br />
page numbers and , e.g. ( * 256) +. For example, 1 *<br />
256 + 181 = 437. For the IPCL command, the page is specified in ASCII<br />
as a 4-byte field.<br />
28-05897 Rev D Page 91
Programming Codes<br />
<strong>Ithaca</strong> ® <strong>610</strong> Programmer’s <strong>Guide</strong><br />
[ESC] ^<br />
Print control character<br />
ASCII [ESC] ^ <br />
Hexadecimal 1BH 5EH <br />
Decimal <br />
IPCL &%CC <br />
EPOS [ESC] ^ <br />
Description<br />
[ESC] [ C<br />
The [ESC] ^ command allows characters from zero to 31 codes to be<br />
printed. During normal operation, characters from zero to 31 are control<br />
characters. The command turns off control code translation for the<br />
following character. can be from zero to 255.<br />
Insert Euro character<br />
ASCII ESC] [ C <br />
Hexadecimal 1BH 5BH 43H <br />
Decimal <br />
IPCL &%EU<br />
Description<br />
The [ESC] [ C command allows an application to replace any<br />
character in the currently active character set with the Euro character.<br />
The character to be replaced is defined by . For example, if the<br />
currently active character set is CP 850 (multi-lingual) and 0D5H<br />
character is to be the Euro character, "1BH 5BH 43H 0D5H" replaces the<br />
character at 0D5H with the Euro symbol.<br />
Euro Character Substitution Matrix<br />
Name Epson IBM Code Page Insertion Point (hex)<br />
850 26 850 0xD5<br />
Turkey 857 57 857 0XD5<br />
Win Cyrillic 52 1022 0X88<br />
Win Turkish 51 1021 0X80<br />
Win Greek 50 1020 0X80<br />
Win Hebrew 62 1032 0X80<br />
Win Baltic 68 1034 0X80<br />
Table 17 Euro Character Substitution Matrix<br />
Page 92 Rev D 28-05897
Programming Codes<br />
<strong>Ithaca</strong> ® <strong>610</strong> Programmer’s <strong>Guide</strong><br />
[ESC] [ S<br />
Redefine character set<br />
ASCII [ESC] [ S <br />
…<br />
Hexadecimal 1BH 5BH 53H …<br />
Decimal …<br />
IPCL none<br />
Description<br />
The [ESC] [ S …<br />
command allows an application to replace or redefine the<br />
active character set mapping in the printer, where defines the<br />
total length of the following data:<br />
+ 256 * = 1 + 2 * the total number of characters to be replaced;<br />
is the first character in the active map to be replaced<br />
6 is the internal address of the replacement character image.<br />
The mapping of a print pattern to each character address is referred to a<br />
code page or character set. At any given time, the printer character set is<br />
comprised of 256 characters. Each character is addressed by an 8-bit<br />
value generally referred to as a character code. For example, if you want<br />
to print an ‗A‘, it would be addressed by sending a decimal to the<br />
printer. Sixty-five predefined code pages or character maps assign<br />
characters to a particular address built into the printer. Occasionally, an<br />
application needs to redefine a character or group of characters in a code<br />
page. The <strong>Ithaca</strong> ® <strong>610</strong> Printer allows the map for any code page to be<br />
redefined or replaced. The define character set command allows any<br />
character or group of characters to be replaced with any other printable<br />
character. Over 500 printable master characters are defined in the<br />
printer. For example, to redefine the character map for the 35th character<br />
and replace it with internal master character 346, the redefine character<br />
set command is used as follows:<br />
[ESC] [ S <br />
^^^^^ ^^ ^^^^^^<br />
| | +- 346 th Character in the Master Set<br />
| | [(1 * 256) + 90]<br />
| +------- 35 th Character<br />
+--------------- 3 bytes to follow [(0 * 256) + 3]<br />
The new map remains until the printer is power cycled or the character set is<br />
redefined. The code page and character set commands completely redefine the<br />
table.<br />
6<br />
The internal character map is provided in the Master Character Set Definitions <strong>Guide</strong>, PN<br />
100-9785.<br />
28-05897 Rev D Page 93
Programming Codes<br />
<strong>Ithaca</strong> ® <strong>610</strong> Programmer’s <strong>Guide</strong><br />
Note: The OCR character set disable command, [ESC] y , also<br />
restores the character set to the original definition.<br />
[ESC] =<br />
Define user-defined characters<br />
ASCII [ESC] = [ … d(y x x 1 )] … [ … d (y x x k )]<br />
Hexadecimal 1BH 3DH …<br />
Decimal …<br />
Range y = 2 or 3<br />
32 c 1 c 2 126<br />
0 x 12 (12 x 12 font)<br />
0 x 14 (12 x 14 font)<br />
0 x 16 (24 x 16 font)<br />
0 d 1 … d (y x x) 255<br />
IPCL none<br />
Description<br />
The [ESC] = [ … d(y x x 1 )] … [ … d (y x<br />
x k )] command defines user-defined characters from character code <br />
to . and are the configurations of a user-defined character.<br />
specifies the number of bytes in the vertical direction. specifies<br />
the number of bytes in the horizontal direction. Character code ranges<br />
from 32 (20H) to 126 (7EH) can be defined by and . Up to 32<br />
user-defined characters can be defined. Data () specifies a bit printed<br />
to one and not printed to zero. At the default, user-defined characters are<br />
not defined and the internal character set is printed. Once the userdefined<br />
characters have been defined, they are available until [ESC] $ is<br />
executed; the user-defined characters are redefined; the power is turned<br />
off; or the printer is reset.<br />
Each internal font (draft, large draft, and NLQ) has its own 32-character<br />
storage area. If possible, the currently selected font will be used to select<br />
which user-defined font is defined. If the font being defined is not suitable<br />
for the currently selected mode, a suitable font will be temporarily<br />
selected for the definition. If = 2, the 12 x 12 draft font or the 12 x 14<br />
large draft font can be defined. If = 3, only the 16 x 24 NLQ font can<br />
be defined. If = 2 and the NLQ font is active, the large draft userdefined<br />
font will be loaded. If = 3 and a draft font is active, the NLQ<br />
user-defined font will be loaded.<br />
Page 94 Rev D 28-05897
Programming Codes<br />
<strong>Ithaca</strong> ® <strong>610</strong> Programmer’s <strong>Guide</strong><br />
[ESC] $<br />
Cancel user-defined characters<br />
ASCII [ESC] $<br />
Hexadecimal 1BH 24H<br />
Decimal <br />
IPCL none<br />
Description<br />
[ESC] ><br />
The [ESC] $ command removes all user-defined characters from the<br />
printer‘s memory. After the user-defined characters are canceled, the<br />
internal character set is printed.<br />
Enable user-defined characters<br />
ASCII [ESC] > <br />
Hexadecimal 1BH 3EH <br />
Decimal <br />
Range , , 0, or 1<br />
1 Enables the characters<br />
0 Disables the characters<br />
IPCL none<br />
Description<br />
The [ESC] > command enables or disables the user-defined<br />
characters. The internal character set is printed.<br />
[ESC] y Enable OCR characters<br />
ASCII [ESC] y <br />
Hexadecimal 1BH 79H 0BH<br />
Decimal <br />
IPCL &%YX011<br />
EPOS [ESC] y <br />
Description<br />
The [ESC] y command replaces 30 characters in the currently<br />
selected character set with OCR-MA3 characters. OCR characters are<br />
only available in NLQ mode; NLQ mode is automatically selected when<br />
OCR is enabled.<br />
Note 1: Do not switch out of NLQ mode until after the OCR characters are<br />
disabled. Other fonts do not contain these characters and will not print<br />
correctly.<br />
Note 2: The characters printed by the <strong>Ithaca</strong> ® <strong>610</strong> Printer follow the format<br />
defined in the ANSI X3.111-1986 Standard. They should be printed in ten<br />
or 12 cpi. By enabling enhanced print, the characters have improved<br />
definition but print at a slower speed.<br />
[ESC] y Disable OCR characters<br />
28-05897 Rev D Page 95
Programming Codes<br />
<strong>Ithaca</strong> ® <strong>610</strong> Programmer’s <strong>Guide</strong><br />
ASCII [ESC] y <br />
Hexadecimal 1BH 79H 0CH<br />
Decimal <br />
IPCL &%YX012<br />
EPOS [ESC] y <br />
Description<br />
The [ESC] y command returns the 30 OCR characters to the<br />
previously selected character set. It does not restore the print mode.<br />
Note: Any character definitions defined by the redefine character set<br />
command are also replaced by the [ESC] y command, documented<br />
in the section Character Attribute Commands<br />
Page 96 Rev D 28-05897
Programming Codes<br />
<strong>Ithaca</strong> ® <strong>610</strong> Programmer’s <strong>Guide</strong><br />
OCR Characters<br />
Character Name Location Hex, Dec ASCII Equivalent<br />
0 Number 0 30H,48 0<br />
1 Number 1 31H,49 1<br />
2 Number 2 32H,50 2<br />
3 Number 3 33H,51 3<br />
4 Number 4 34H,52 4<br />
5 Number 5 35H,53 5<br />
6 Number 6 36H,54 6<br />
7 Number 7 37H,55 7<br />
8 Number 8 38H,56 8<br />
9 Number 9 39H,57 9<br />
A Letter A 41H,65 A<br />
B Letter B 42H, 66 B<br />
C Letter C 43H,67 C<br />
D Letter D 44H,68 D<br />
E Letter E 45H, 69 E<br />
F Letter F 46H, 70 F<br />
G Letter G 47H, 71 G<br />
H Letter H 48H, 72 H<br />
I Letter I 49H, 73 I<br />
J Letter J 4AH, 74 J<br />
K Letter K 4BH, 75 K<br />
L Letter L 4CH, 76 L<br />
M Letter M 4DH,77 M<br />
N Letter N 4EH,78 N<br />
O Letter O 4FH, 79 O<br />
P Letter P 50H,80 P<br />
Q Letter Q 51H, 81 Q<br />
R Letter R 52H,82 R<br />
S Letter S 53H, 83 S<br />
T Letter T 54H, 84 T<br />
U Letter U 55H,85 U<br />
V Letter V 56H, 86 V<br />
W Letter W 57H, 87 W<br />
X Letter X 58H,88 X<br />
Y Letter Y 59H,89 Y<br />
Z Letter Z 5AH, 90 Z<br />
Symbol Hook 7EH,126 ~<br />
Symbol Chair 60H,96 `<br />
Symbol Fork 5FH,95 _<br />
+ Plus Sign 2BH,43 +<br />
- Minus Sign 2DH,45 -<br />
. Period 2EH,46 .<br />
/ Slant 2FH,47 /<br />
$ Dollar Sign 24H,36 $<br />
> Greater Than Sign 3EH,62 ><br />
“ Quotation Mark 22H,34 ―<br />
Table 18 OCR MA-3<br />
28-05897 Rev D Page 97
Programming Codes<br />
<strong>Ithaca</strong> ® <strong>610</strong> Programmer’s <strong>Guide</strong><br />
Character Attributes<br />
[SO] Begin one-line double-wide print<br />
ASCII [SO]<br />
Hexadecimal 0EH<br />
Decimal <br />
IPCL &%MW<br />
EPOS none<br />
Description<br />
[DC4]<br />
The [SO] command causes subsequent characters to be printed at twice<br />
the currently selected character width. For example, ten cpi becomes five<br />
cpi, 17 cpi becomes 8.5 cpi, etc. The [SO] command remains in effect<br />
until a valid line terminator is received ([CR], [LF], or [ESC] J (fine<br />
line feed)), the command is canceled; or the maximum number of<br />
characters per line is reached and the printer performs an auto-print.<br />
Cancel one-line double-wide print<br />
ASCII [DC4]<br />
Hexadecimal 14H<br />
Decimal <br />
IPCL &%MN<br />
EPOS none<br />
Description<br />
The [DC4] command cancels one-line double-wide mode set by the [SO]<br />
command and allows single- and double-wide characters to be printed on<br />
the same line.<br />
Page 98 Rev D 28-05897
Programming Codes<br />
<strong>Ithaca</strong> ® <strong>610</strong> Programmer’s <strong>Guide</strong><br />
[ESC] _<br />
Enable/Disable over-score<br />
ASCII [ESC] _ <br />
Hexadecimal 1BH 5FH 01H<br />
Decimal <br />
IPCL &%MO (Begin)<br />
IPCL &%CO (End)<br />
EPOS [ESC] ! <br />
Description The [ESC] _ command begins over-score print mode. All<br />
subsequent text, leading spaces, and trailing spaces are over-scored.<br />
[ESC] _ ends the mode.<br />
Note: In EPOS mode, [ESC] ! performs a similar function; however,<br />
near letter quality (NLQ) is not available.<br />
[ESC] W<br />
Multi-line double-wide and double-high mode<br />
ASCII [ESC] W <br />
Hexadecimal 1BH 57H <br />
Decimal <br />
IPCL &%FD {n = 1}<br />
&%FS {n = 0}<br />
&%FHA {n = 3}<br />
(Note: Single-wide, double-high mode is not available in IPCL mode.)<br />
EPOS [ESC] ! <br />
Description<br />
The [ESC] W command controls multi-line double-wide or doublehigh<br />
mode, where n specifies the mode:<br />
n = 0 is standard single-wide and single-high;<br />
n = 1 begins double-wide;<br />
n = 2 begins double-high; and<br />
n = 3 begins double-wide double-high.<br />
Note: The [ESC] W command does not affect line spacing.<br />
Note: In EPOS mode, [ESC] ! performs a similar function; however,<br />
near letter quality (NLQ) is not available.<br />
Where n Bits 76543210 Function<br />
1------- Underline<br />
--1----- Double-wide<br />
---1---- Double-high<br />
-------X Font: 0 = draft; 1 = large draft<br />
28-05897 Rev D Page 99
Programming Codes<br />
<strong>Ithaca</strong> ® <strong>610</strong> Programmer’s <strong>Guide</strong><br />
[ESC] [ @<br />
Set print style: double-wide, double-high, italic control<br />
ASCII [ESC] [ @ [EOT] [NUL] [NUL] <br />
Hexadecimal 1BH 5BH 40H 04H 00H 00H <br />
Decimal <br />
IPCL &%DH Double-high, double-wide, and double-space<br />
&%SH Single-high, single-wide, and single-space<br />
Also, see [ESC] W above.<br />
Description The [ESC] [ @ [EOT] [NUL] [NUL] command sets doublewide,<br />
double-high, and italic print mode.<br />
Where k bits k 76543210<br />
----xxxx Italic control<br />
0 ----0000 No change<br />
1 ----0001 Italics On<br />
2 ----0010 Italics Off<br />
Where n bits n 76543210<br />
----0nnn Height multiplier (Maximum 4)<br />
0 ----0000 No change<br />
xxxx---- Line spacing<br />
0 0000---- No change<br />
Where m bits m 76543210<br />
----0nnn Width multiplier (Maximum 4)<br />
0 ----0000 No change<br />
Note: The maximum height and width multiplier is four.<br />
Page 100 Rev D 28-05897
Programming Codes<br />
<strong>Ithaca</strong> ® <strong>610</strong> Programmer’s <strong>Guide</strong><br />
[ESC] -<br />
Begin underline<br />
ASCII [ESC] - <br />
Hexadecimal 1BH 2DH 01H<br />
Decimal <br />
IPCL &%MU (Begin)<br />
IPCL &%CU (End)<br />
EPOS [ESC] ! <br />
Description<br />
[ESC] G<br />
The [ESC] - command begins underline print mode. All subsequent<br />
text, leading spaces, and trailing spaces are underlined. [ESC] - <br />
ends the mode.<br />
Note: In EPOS mode, [ESC] ! performs a similar function; however,<br />
near letter quality (NLQ) is not available.<br />
Begin enhanced print<br />
ASCII [ESC] G<br />
Hexadecimal 1BH 47H<br />
Decimal <br />
IPCL &%ME<br />
EPOS [ESC] G <br />
Description<br />
[ESC] H<br />
All subsequent text is printed in enhanced print mode (two passes with a<br />
vertical offset). Enhanced printing provides a deeper resolution of each<br />
character and may enhance multiple part forms printing.<br />
End enhanced print mode<br />
ASCII [ESC] H<br />
Hexadecimal 1BH 48H<br />
Decimal <br />
IPCL &%CE<br />
EPOS [ESC] G <br />
Description<br />
[ESC] E<br />
The [ESC] H command cancels enhanced print mode and returns to the<br />
currently selected font.<br />
Begin emphasized print mode<br />
ASCII [ESC] E<br />
Hexadecimal 1BH 45H<br />
Decimal <br />
IPCL &%MM<br />
EPOS [ESC] E <br />
Description<br />
The [ESC] E command begins emphasized print mode (one pass with<br />
horizontal offset). Emphasized print is bolder than normal print.<br />
28-05897 Rev D Page 101
Programming Codes<br />
<strong>Ithaca</strong> ® <strong>610</strong> Programmer’s <strong>Guide</strong><br />
[ESC] F<br />
End emphasized print mode<br />
ASCII [ESC] F<br />
Hexadecimal 1BH 46H<br />
Decimal <br />
IPCL &%CM<br />
EPOS [ESC] E <br />
Description<br />
The [ESC] F command cancels emphasized print mode.<br />
[ESC] S Select superscript<br />
ASCII [ESC] S <br />
Hexadecimal 1BH 53H 00H<br />
Decimal <br />
IPCL &%SP<br />
EPOS none<br />
Description<br />
The [ESC] S command selects superscript. The following characters<br />
are printed half size on the upper side of the print line.<br />
Note: Superscript is not available in all print modes.<br />
[ESC] S Select subscript<br />
ASCII [ESC] S <br />
Hexadecimal 1BH 53H 01H<br />
Decimal <br />
IPCL &%SB<br />
EPOS none<br />
Description<br />
The [ESC] S command selects subscript. The following characters<br />
are printed half size on the bottom side of the print line.<br />
Note: Subscript is not available in all print modes.<br />
[ESC] T<br />
End superscript or subscript<br />
ASCII [ESC] T<br />
Hexadecimal 1BH 54H<br />
Decimal <br />
IPCL &%SE<br />
EPOS none<br />
Description<br />
The [ESC] T command ends superscript or subscript.<br />
Page 102 Rev D 28-05897
Programming Codes<br />
<strong>Ithaca</strong> ® <strong>610</strong> Programmer’s <strong>Guide</strong><br />
[ESC] % G<br />
Begin italics<br />
ASCII [ESC] % G<br />
Hexadecimal 1BH 25H 47H<br />
Decimal <br />
IPCL &%MI<br />
EPOS [ESC] 4<br />
Description<br />
The [ESC] % G command begins italic print mode.<br />
Note: Italics are not available in all print modes.<br />
[ESC] % H<br />
End italics<br />
ASCII [ESC] % H<br />
Hexadecimal 1BH 25H 48H<br />
Decimal <br />
IPCL &%CI<br />
EPOS [ESC] 5<br />
Description<br />
The [ESC] % H command ends italic print mode.<br />
28-05897 Rev D Page 103
Programming Codes<br />
<strong>Ithaca</strong> ® <strong>610</strong> Programmer’s <strong>Guide</strong><br />
Print Rotation Commands<br />
Rotated print capabilities are available. The print mode commands listed below rotate<br />
the print in any of three 90° orientations. In 90° and 270° rotated mode, the print data is<br />
first buffered by the printer, processed (rotated), and then printed in one of three fonts.<br />
Consequently, printing time is delayed. In 180° mode, the print is simply inverted and<br />
mirrored, and no delay occurs.<br />
In rotated 90° and 270° mode, the printer can support up to 40 lines of rotated print with<br />
up to 128 characters per line. One single pass and two double pass fonts with<br />
emphasize and enhanced attributes are available.<br />
In free format rotated 90° and 270° mode, the print length is determined by the length of<br />
the longest line entered. In line formatted mode, the line length is set not by the longest<br />
line entered but by the maximum line length specified by the set line length command.<br />
A line spacing table controls the spacing between lines. The table is defined by the<br />
rotated print line spacing ([ESC] u ...) command or by inserting [LF] or [ESC] J <br />
commands in the rotated data. The [ESC] u command specifies the number of dots to be<br />
added between each printed line. Each line has an entry in the table. There is space for<br />
40 lines. The default spacing is 1/8 inch between lines.<br />
If a [LF] is used to specify the line spacing, it overrides the default table and sets spacing<br />
to 1/8 inch or eight lines per inch. If [ESC] J is used, specifies the spacing in<br />
n/216.<br />
Page 104 Rev D 28-05897
Programming Codes<br />
<strong>Ithaca</strong> ® <strong>610</strong> Programmer’s <strong>Guide</strong><br />
[ESC] r<br />
Begin rotated print<br />
ASCII [ESC] r <br />
Hexadecimal 1BH 72H <br />
Decimal <br />
IPCL &%RX<br />
EPOS [ESC] T <br />
Description<br />
The [ESC] r command starts rotated print mode where n defines the<br />
mode as follows, where n = x bits:<br />
76543210 Function<br />
----xx00 End rotated print<br />
----xx01 Rotate 90<br />
----0010 Rotate 180<br />
----xx11 Rotate 270<br />
----x1xx Use line formatting<br />
When n = 1 or 9, the print mode is rotated 90 . Print data is entered<br />
normally from left to right, top to bottom. When an end rotated print<br />
([ESC] r ) command is received, the printer formats and prints the<br />
data.<br />
When n = 5 or 13, the print mode is rotated by 90 with formatting. The<br />
command differs from the [ESC] r command because the line length<br />
is determined not by the longest line entered but by the line length set by<br />
the [ESC] s command. If input extends past the end of a line, it wraps<br />
around to the next line.<br />
When n = 3 or 11, the print mode is rotated 270 according to the<br />
currently stored format parameters.<br />
When n = 7 or 15, the print mode is rotated 270 according to the<br />
currently stored format parameters. The [ESC] r command differs<br />
from the [ESC] r command by spacing out the lines to the line length<br />
specified by the [ESC] s command. If input extends past the end of a<br />
line, it wraps around to the following line.<br />
When n = 2, the print mode is rotated 180 . All subsequent lines are<br />
rotated 180 and positioned at the opposite margin. All normal fonts and<br />
modes are available in 180 rotated mode. Format and font bits are<br />
ignored, and the command remains in effect until rotation is cancelled<br />
with an end rotated print ([ESC] r ) or a station select command.<br />
Note 1: The last line of print must end with a line terminator before the end<br />
rotated command is issued. Any characters in the buffer that have not<br />
printed are printed un-rotated when a line terminator is received.<br />
Note 2: In EPOS mode, the <strong>Ithaca</strong> Printer does not fully implement page<br />
mode. The [ESC] T command functions identically to normal mode,<br />
[ESC] r , except the definition of is different.<br />
28-05897 Rev D Page 105
Programming Codes<br />
<strong>Ithaca</strong> ® <strong>610</strong> Programmer’s <strong>Guide</strong><br />
Note 3: Use the [ESC] I command to select two-pass rotated font.<br />
The font selection must be made before the rotate command.<br />
Note 4: Only enhanced and emphasized attributes are available for<br />
formatted, rotated print. These attributes are not available on a character<br />
basis. They affect all of the rotated text after the [ESC] r command.<br />
Enhanced and emphasized attributes must be set before the [ESC] r<br />
command is issued.<br />
Page 106 Rev D 28-05897
Programming Codes<br />
<strong>Ithaca</strong> ® <strong>610</strong> Programmer’s <strong>Guide</strong><br />
Rotated Print Summary<br />
[ESC] r <br />
Begin 90 rotated print<br />
ASCII [ESC] r <br />
Hexadecimal 1BH 72H 01H<br />
Decimal <br />
IPCL &%R1<br />
[ESC] r <br />
ASCII [ESC] r <br />
Hexadecimal 1BH 72H 05H<br />
Not available in page mode<br />
Begin 90 rotated print with line formatting<br />
Not available in page mode<br />
Decimal <br />
IPCL &%R5<br />
[ESC] r <br />
Begin 270 rotated print<br />
ASCII [ESC] r <br />
Hexadecimal 1BH 72H 03H<br />
Decimal <br />
IPCL &%R3<br />
Not available in page mode<br />
[ESC] r Begin 270 rotated print with line formatting<br />
Not available in page mode<br />
ASCII [ESC] r <br />
Hexadecimal 1BH 72H 07H<br />
Decimal <br />
IPCL &%R7<br />
EPOS [ESC] T <br />
[ESC] r Begin 90 rotated print with two pass font<br />
Not available in page mode<br />
ASCII [ESC] r <br />
Hexadecimal 1BH 72H 09H<br />
Decimal <br />
IPCL &%R9 or &%RX09<br />
EPOS none<br />
[ESC] r Begin 90 rotated print with two pass font and line formatting<br />
Not available in page mode<br />
ASCII [ESC] r <br />
Hexadecimal 1BH 72H 0BH<br />
Decimal <br />
IPCL &%RX13<br />
EPOS none<br />
28-05897 Rev D Page 107
Programming Codes<br />
<strong>Ithaca</strong> ® <strong>610</strong> Programmer’s <strong>Guide</strong><br />
[ESC] r Begin 270 rotated print with two pass font<br />
Not available in page mode<br />
ASCII [ESC] r <br />
Hexadecimal 1BH 72H 0BH<br />
Decimal <br />
IPCL &%RX11<br />
EPOS none<br />
[ESC] r Begin 270 rotated print with two pass font and line formatting<br />
Not available in page mode<br />
ASCII [ESC] r <br />
Hexadecimal 1BH 72H 0FH<br />
Decimal <br />
IPCL &%RX15<br />
EPOS [ESC] T <br />
[ESC] r <br />
End rotated print<br />
ASCII [ESC] r <br />
Hexadecimal 1BH 72H 00H<br />
Decimal <br />
IPCL &%R0<br />
EPOS [ESC] { <br />
Description<br />
The [ESC] r command prints the contents of the rotated print buffer<br />
(when in 90 or 270 rotated mode) and returns to normal print<br />
orientation. In 180 rotated mode, the printer returns to normal mode.<br />
Characters in the print buffer that have not been printed are not printed.<br />
Page 108 Rev D 28-05897
Programming Codes<br />
<strong>Ithaca</strong> ® <strong>610</strong> Programmer’s <strong>Guide</strong><br />
[ESC] s<br />
Set rotated print line length<br />
ASCII [ESC] s <br />
Hexadecimal 1BH 73H <br />
Decimal <br />
IPCL &%RL <br />
EPOS none<br />
Not available in page mode<br />
Description<br />
The [ESC] s command sets the print line length used in autoformat<br />
rotated print mode. The maximum number of characters per line is 128.<br />
The power on default line length is 80 characters. To determine the<br />
number of available print lines, divide 1760 by the number of characters<br />
per line and round down to the nearest whole number. There must be a<br />
minimum of 80 characters per line, which allows up to 22 lines of print. A<br />
value less than 80 does not allow additional print lines. Values of n<br />
greater than 80 reduce the number of lines.<br />
[ESC] u Set rotated print line spacing<br />
Not available in page mode<br />
ASCII [ESC] u ... <br />
Hexadecimal 1BH 75H ... 00H<br />
Decimal ... <br />
IPCL none<br />
EPOS none<br />
Description<br />
The [ESC] u ... command adjusts<br />
the line spacing for each rotated print line, where n i is the line number and<br />
m i is the spacing, in 1/8-inch intervals, between lines. The n i value can be<br />
from one to 40, while the value of m i can be from one to 255. For the first<br />
print line, the distance is calculated from the left margin. If n i or m i is zero,<br />
the command is terminated. Any unspecified spacing is set to 1/8 inch.<br />
The values are used as a template for all subsequently rotated print. On<br />
power up, spacing is preset to 1/8 inch or eight lines per inch for all lines.<br />
The command is only effective during 90° and 270° rotated modes. It<br />
remains in effect until a new table is received or until the printer is power<br />
cycled. An [ESC] u sets all lines to 1/8 inch. The table can be<br />
overridden by [LF] or [ESC] J commands for rotated print data.<br />
28-05897 Rev D Page 109
B > > > > ><br />
C > > > > ><br />
D > > > > ><br />
Programming Codes<br />
<strong>Ithaca</strong> ® <strong>610</strong> Programmer’s <strong>Guide</strong><br />
<strong>Ithaca</strong> ® <strong>610</strong> Page Mode<br />
The <strong>Ithaca</strong> ® <strong>610</strong> supports two operational modes, standard and page mode. In standard<br />
mode, as a line of text is received it is buffered and printed when the line feed is<br />
received. In page mode the printer waits for a complete ―page‖ (a number of lines) to be<br />
received before printing the complete page. The advantage of page mode is that text<br />
and/or graphics can be placed anywhere on the page, in any order, and in any of 4<br />
orientations.<br />
How to use page mode<br />
Page mode requires two phases to operate correctly.<br />
1) Page definition (placing data on the page)<br />
2) Printing the page.<br />
Page Definition<br />
The [ESC]t command will start page definition and define the initial orientation. An<br />
[ESC]t command during page definition will change the orientation and reset the entry<br />
location back to the top left corner of that orientation.<br />
Receipt or<br />
Inserted Form<br />
Initial entry<br />
location<br />
A > > > > ><br />
Figure 9 Page Mode entry Orientations<br />
Auto-cutter and page mode<br />
You may embed an auto-cutter command with in a page definition, provided the page<br />
will be printed on the receipt station. The auto-cut command may be placed anywhere in<br />
the page definition, however, it will be processed after the page is printed. To prevent<br />
the cut from occurring in the page, it will be preceded with a feed that will place the end<br />
of the page about 0.125 inches above the auto-cut position.<br />
Mechanism commands in page mode<br />
In general, mechanism commands received during page mode will be processed if the<br />
result will not effect the printed result. For example, the bell and cash drawer commands<br />
will be processed as they are received.<br />
Page 110 Rev D 28-05897
Programming Codes<br />
<strong>Ithaca</strong> ® <strong>610</strong> Programmer’s <strong>Guide</strong><br />
Stopping page mode definition<br />
Several things will stop a page mode definition.<br />
1) [ESC]@ Printer initialize command.<br />
2) Real time reset request [ENQ]<br />
3) Parallel port INIT request.<br />
4) Turning the printer off.<br />
Printing the page<br />
The [FF] command starts the printing process.<br />
Printing starts at the current left margin and at the current paper position. The complete<br />
page definition is printed excluding any blank information at the bottom of the page.<br />
If the [FF] command is used to print the page, the memory used to store the page image<br />
is not maintained and is released to be used by other functions.<br />
Function Select page mode<br />
ASCII [ESC] t<br />
Hexadecimal 1BH 74H<br />
Decimal <br />
IPCL &%PM<br />
EPOS [ESC] L<br />
Description This command activates page mode and sets the orientation.<br />
This command may also be issued during page definition. When issued<br />
in page mode it resets the orientation and entry position but does not<br />
cause the currently defined image to be erased or printed.<br />
Where<br />
x = 0 for standard orientation (Direction A).<br />
x = 1 for 270 Rotation (Direction B)<br />
x = 2 for 180 Rotation (Direction C)<br />
x = 3 for 90 Rotation (Direction D)<br />
28-05897 Rev D Page 111
B > > > > ><br />
C > > > > ><br />
D > > > > ><br />
Programming Codes<br />
<strong>Ithaca</strong> ® <strong>610</strong> Programmer’s <strong>Guide</strong><br />
Receipt or<br />
Inserted Form<br />
Initial entry<br />
location<br />
A > > > > ><br />
Note 1: This command saves the current right and left margin and sets<br />
them to the maximum values for the orientation currently defined.<br />
Note 2: During page mode definition almost all printer commands are<br />
active. The following table lists the exceptions.<br />
Command Active Action<br />
Cash drawer Yes<br />
Immediate action<br />
commands<br />
Bell command Yes Immediate action<br />
Auto cut commands Delayed The printer will perform a feed to cut and then operate the auto<br />
cutter after the page is printed. The cut command may be<br />
anywhere in the definition. If the page is printed twice, the Auto<br />
cut command must be reissued after the first print to generate<br />
additional cuts.<br />
Status requests Yes The status is returned during definition.<br />
Printer initialize<br />
command<br />
Yes<br />
Cancels page mode definition and returns the printer to standard<br />
mode.<br />
Set top of form No You must set the top of form outside of page mode. The form<br />
position is maintained after the page is printed.<br />
Vertical tab No The definition of a vertical tab is ambiguous in page mode and is<br />
ignored.<br />
Macro definitions No You can not define or delete a macro while in page mode. You<br />
can, however, invoke a macro or stored graphic. You can not<br />
enter page mode while in a macro definition.<br />
Function Set Page Mode Entry Position<br />
ASCII [ESC] o <br />
Hexadecimal 1BH 6FH <br />
Decimal <br />
Page 112 Rev D 28-05897
Programming Codes<br />
<strong>Ithaca</strong> ® <strong>610</strong> Programmer’s <strong>Guide</strong><br />
EPOS<br />
Description<br />
Note:<br />
[ESC] W<br />
This command sets horizontal and vertical entry position to anywhere on<br />
the page. It is only valid in page mode. If the value specified is beyond<br />
the page boundary, the command is ignored. (X and Y refers to the<br />
current active orientation specified by the [ESC]t command and is not<br />
same as the page definition of X and Y.<br />
The X and Y positions are in dots.<br />
Y = Y h * 256 + Y l dots from the top<br />
X = X h * 256 + X l dots from the left<br />
The F parameter is a flag that specifies if this command is an absolute<br />
position command or relative to the current position. If this is the<br />
command is processed as a relative position command. If this is ,<br />
then the command is interpreted as an absolute position command.<br />
You can also use the [ESC]J, [ESC]M. [ESC]d and [ESC]e commands to<br />
position the print on the page.<br />
Function Exit Page Mode<br />
ASCII [FF]<br />
Hexadecimal 0CH<br />
Decimal <br />
IPCL &%FF<br />
EPOS [FF]<br />
Description This command exits page mode definition and starts the print process. If<br />
the printer is not in page mode this command is treated as a normal form<br />
feed command.<br />
Note: When page mode finishes printing, the left and right margins are<br />
restored to the values before the select page mode command. All other<br />
format changes are preserved.<br />
28-05897 Rev D Page 113
Programming Codes<br />
<strong>Ithaca</strong> ® <strong>610</strong> Programmer’s <strong>Guide</strong><br />
Graphic Mode<br />
The <strong>Ithaca</strong> ® <strong>610</strong> Printer conforms to the basic definition of IBM all-points-addressable<br />
(APA) graphic commands. It is not designed to print large quantities of graphical data.<br />
The printer only prints graphics that are 2.5 inches wide. At this time, there is not a<br />
graphics mode for Epson emulation.<br />
The <strong>Ithaca</strong> ® <strong>610</strong> Printer always prints in one of the native resolutions of 104 x 96, 208 x<br />
96, 104 x 192, or 208 x 192 dpi. To provide compatibility with the standard IBM APA<br />
resolutions, the printer internally modifies the graphics to print as expected. The printer<br />
converts the vertical resolution by altering the [ESC] J command (which is typically used<br />
for vertical spacing) and adjusting it so that horizontal passes touch as expected. The<br />
requested horizontal resolution is converted by data scaling. Because the vertical dpi of<br />
the printer is always greater, the resulting APA graphics printed on the <strong>Ithaca</strong> ® <strong>610</strong><br />
Printer are slightly smaller than the same graphic printed on an impact printer. All of this<br />
is done transparently to the application; however, loss of resolution may result in some<br />
modes. If desired the [ESC] * command can be used to select the native resolution.<br />
Standard APA Graphics<br />
[ESC] K<br />
Note 1: If the <strong>Ithaca</strong> ® <strong>610</strong> Printer is used with programs that convert text to<br />
graphics, the printer is slower than if the printer is sent ASCII text. The<br />
<strong>Ithaca</strong> ® <strong>610</strong> Printer is supported by a Windows‘ print driver that allows<br />
applications to select supported fonts.<br />
Note 2: Generally, the horizontal graphic commands provide faster print<br />
than the APA graphic commands.<br />
Print single-density graphics (60h x 72v dpi)<br />
ASCII [ESC] K <br />
Hexadecimal 1BH 4BH <br />
Decimal <br />
IPCL none<br />
Description<br />
[ESC] L<br />
The [ESC] K command prints + 256 * bytes of<br />
single-density graphics (60 dpi).<br />
Print half-speed double-density graphics (120h x 72v dpi)<br />
ASCII [ESC] L <br />
Hexadecimal 1BH 4CH <br />
Decimal <br />
IPCL none<br />
Description<br />
The [ESC] L command prints + 256 * bytes of<br />
double-density graphics (120 dpi) at half speed, allowing full and half dots<br />
to be printed.<br />
Page 114 Rev D 28-05897
Programming Codes<br />
<strong>Ithaca</strong> ® <strong>610</strong> Programmer’s <strong>Guide</strong><br />
[ESC] Y<br />
Print full-speed double-density graphics (120h x 72v dpi)<br />
ASCII [ESC] Y <br />
Hexadecimal 1BH 59H <br />
Decimal <br />
IPCL none<br />
Description<br />
[ESC] Z<br />
The [ESC] Y command prints + 256 * bytes of<br />
double-density graphics (120 dpi) at full speed with no consecutive dots.<br />
(The mode is generally used to print 120h by 144v dpi resolutions in two<br />
passes).<br />
Print quad-density graphics (240h x 72v dpi)<br />
ASCII [ESC] Z <br />
Hexadecimal 1BH 5AH <br />
Decimal <br />
IPCL none<br />
Description<br />
The [ESC] Z command prints + 256 * bytes of quaddensity<br />
graphics (240 dpi) at half speed with no consecutive dots. (The<br />
mode is generally used to print 240h by 144v dpi resolutions in two<br />
passes).<br />
Extended APA Graphics<br />
[ESC] *<br />
Print graphics in mode (60h/ 120h/ 240h x 72v dpi)<br />
ASCII [ESC] * <br />
Hexadecimal 1BH 2AH <br />
Decimal <br />
IPCL none<br />
Description The [ESC] * command selects one of three graphic<br />
modes as specified by .<br />
Where 0 60 dpi Full speed 8-bit slices<br />
1 120 dpi Half speed 8-bit slices<br />
2 120 dpi Full speed 8-bit slices<br />
3 240 dpi Full speed 8-bit slices<br />
4 80 dpi Full speed 8-bit slices<br />
5 72 dpi Full speed 8-bit slices<br />
6 90 dpi Full speed 8-bit slices<br />
7 144 dpi Full speed 8-bit slices<br />
8,9 Not supported<br />
10 104 x 96 dpi 1 horizontal 1 vertical pass<br />
11 208 x 96 dpi 2 horizontal 1 vertical pass<br />
12 104 x 192 dpi 1 horizontal 2 vertical passes<br />
13 208 x 192 dpi 2 horizontal 2 vertical passes<br />
15,16 Not supported<br />
28-05897 Rev D Page 115
Programming Codes<br />
<strong>Ithaca</strong> ® <strong>610</strong> Programmer’s <strong>Guide</strong><br />
[ESC] ?<br />
Reassign graphic mode<br />
ASCII [ESC] ? <br />
Hexadecimal 1BH 3FH <br />
Decimal <br />
IPCL none<br />
Description The [ESC] ? command reassigns graphic mode to<br />
resolution . Possible values for are K, L, Y, or Z. Resolutions,<br />
, are zero to seven as follows:<br />
Where 0 60 dpi Full speed 8-bit slices Default for K<br />
1 120 dpi Half speed 8-bit slices Default for L<br />
2 120 dpi Full speed 8-bit slices Default for Y<br />
3 240 dpi Full speed 8-bit slices Default for Z<br />
4 80 dpi Full speed 8-bit slices<br />
5 72 dpi Full speed 8-bit slices<br />
6 90 dpi Full speed 8-bit slices<br />
7 144 dpi Full speed 8-bit slices<br />
10 104 x 96 dpi 1 horizontal, 1 vertical pass<br />
11 208 x 96 dpi 2 horizontal, 1 vertical pass<br />
12 104 x 192 dpi 1 horizontal, 2 vertical passes<br />
13 208 x 192 dpi 2 horizontal, 2 vertical passes<br />
Note: Modes 11 through 13 are designed to support horizontal graphics<br />
and not intended for APA graphics.<br />
[ESC] U Select unidirectional print<br />
ASCII [ESC] U <br />
Hexadecimal 1BH 55H 01H<br />
Decimal <br />
IPCL &%GU<br />
EPOS ESC] U <br />
Description<br />
The [ESC] U command prints all data in unidirectional print mode to<br />
improve line to line registration for graphical data.<br />
Note: Unidirectional print should be canceled before normal text is printed.<br />
Print time is slowed if it is not canceled.<br />
Page 116 Rev D 28-05897
Programming Codes<br />
<strong>Ithaca</strong> ® <strong>610</strong> Programmer’s <strong>Guide</strong><br />
[ESC] U Select bidirectional print<br />
ASCII [ESC] U <br />
Hexadecimal 1BH 55H 00H<br />
Decimal <br />
IPCL &%GB<br />
EPOS [ESC] U <br />
Description<br />
The [ESC] U command prints all data in bi-directional, logic-seeking<br />
print mode.<br />
28-05897 Rev D Page 117
Programming Codes<br />
<strong>Ithaca</strong> ® <strong>610</strong> Programmer’s <strong>Guide</strong><br />
Horizontal Graphics (Color Graphics)<br />
The <strong>Ithaca</strong> ® <strong>610</strong> Printer does not support color graphics, however to provide<br />
compatibility with the iTherm ® 280, this command may be used to print monochrome<br />
graphics. Unlike the iThem ® 280, the <strong>Ithaca</strong> ® <strong>610</strong> does not support a monochrome gray<br />
scale.<br />
Although the <strong>Ithaca</strong> ® <strong>610</strong> Printer only supports monochrome printing, the horizontal<br />
graphic command interface gives full color support for printer graphics. Full color support<br />
is provided to establish a full color standard for future printers. Color data is sent in one<br />
of three color planes. Typically, a red plane or scan line is sent, then green and blue.<br />
The sequence of lines defines one row of dots that is printed on the paper.<br />
The horizontal graphic commands do not include resolution information. Therefore, only<br />
once before sending graphics data, set the graphics resolution by sending the [ESC] *<br />
command with a zero length (no data). The graphic resolution sets the internal graphic<br />
mode of the printer. The printer stays in graphic mode until it is changed by another<br />
command. Note that the bar code generation and other graphic commands change<br />
graphics mode. The format of the horizontal graphic command follows.<br />
[ESC] h<br />
Process horizontal graphics data<br />
ASCII [ESC] h <br />
Hexadecimal 1BH 68H<br />
Decimal <br />
IPCL None<br />
EPOS None<br />
Description<br />
=<br />
=<br />
=<br />
The [ESC] h command processes<br />
horizontal graphic data, where is a byte that specifies the color of<br />
the data being sent.<br />
0 Use previously selected color<br />
The <strong>Ithaca</strong> ® <strong>610</strong> does not support color print. Use 7 for black.<br />
byte specifying the length of the data including the format byte, ranging<br />
from 0 to 254 (255 is reserved for future use.)<br />
byte specifying the format of the graphics data.<br />
0 for raw data<br />
1 for bit wise RLE compression<br />
8 for byte wise RLE compression<br />
254 for difference compression<br />
255 for same as previous scan line data<br />
= the data bytes that define the graphics to be printed.<br />
Page 118 Rev D 28-05897
Programming Codes<br />
<strong>Ithaca</strong> ® <strong>610</strong> Programmer’s <strong>Guide</strong><br />
[ESC] *<br />
Set horizontal graphic mode<br />
ASCII [ESC] * <br />
Hexadecimal 1BH 2AH <br />
Decimal <br />
IPCL none<br />
Description<br />
The [ESC] * command selects one of the three graphic<br />
modes specified by . The two bytes after the mode must be zero.<br />
Where 0,2,3,4,5,6,7 Standard Graphic Modes (See ESC *<br />
command documentation in previous section.)<br />
8,9 Not supported<br />
10 104 x 96 dpi 1 horizontal, 1 vertical pass<br />
11 208 x 96 dpi 2 horizontal, 1 vertical pass<br />
12 104 x 192 dpi 1 horizontal, 2 vertical passes<br />
13 208 x 192 dpi 2 horizontal, 2 vertical passes<br />
14,15,16 Not supported<br />
Note 1: Only modes 10 thorough 13 should be selected for horizontal<br />
graphics.<br />
Example Command Comment<br />
[ESC] * <br />
Set resolution to 100x96 dpi.<br />
[ESC] h Send 8-bytes red pixels.<br />
[ESC] h Send 8-bytes green pixels.<br />
[ESC] h Send 8-bytes blue pixels.<br />
LF Send line feed to force print of any buffered data not yet printed.<br />
Note 2: Graphic data is committed to paper when more than 12 dot rows<br />
have been transmitted to the printer. If less than 12 dot rows have been<br />
sent, they are not printed until the line is terminated (i.e. a line feed<br />
command is sent). To make graphics faster to send and smaller to store,<br />
several algorithms are included with the graphic command to compress<br />
the data.<br />
28-05897 Rev D Page 119
Programming Codes<br />
<strong>Ithaca</strong> ® <strong>610</strong> Programmer’s <strong>Guide</strong><br />
Graphics Compression<br />
Although the printer compression algorithms are documented, it is recommended that<br />
our Windows‘ printer driver be used to generate a graphic image. Our Windows‘ printer<br />
driver selects the best compression method to use on a scan line by scan line basis.<br />
The print driver can be directed to print to file, creating a .prn file. When creating a .prn<br />
file, it is recommended that the Start/End Doc settings be cleared in the Start/End Doc<br />
tab of the printer properties page. After the .prn file is created, it can be read and sent to<br />
the printer by the host application.<br />
Bit wise RLE. In bit wise RLE compression, the Most Significant Bit (MSB) compression<br />
of each data byte denotes if the compressed data represents one or zero bits. Bits zero<br />
through six indicate how many bits are represented as a one or zero. A 34 Hex (34H)<br />
represents 34H bits set to zero. A 97H represents 17H bits set to one.<br />
[ESC] h <br />
Byte wise RLE. In byte wise RLE compression, data is represented in byte compression<br />
pairs. The first byte is a count, and the second is the graphics data. The graphics data<br />
byte is repeated the number of times represented by the count byte.<br />
[ESC] h <br />
Where means repeat ffH nine times and means repeat 55H<br />
two times.<br />
Difference Compression. In difference compression, data is represented in byte pairs.<br />
In compression, the first byte is an index into the byte stream, as it would exist if sent in<br />
an uncompressed format. The second byte is the data that is different in the new scan<br />
line data. Think of compression mode as, ―The scan line is the same as the previous<br />
except for the byte at a specific position.‖<br />
[ESC] h <br />
Where means use the previously transmitted scan line data but change<br />
byte 3 to a d5H and change byte 11 (0bH) to a 51H.<br />
Same-as-previous Compression. In same-as-previous compression, the command<br />
does not contain any graphics data. The command specifies that the printer is to use the<br />
previous scan line data for the current scan line.<br />
[ESC] h .<br />
User Store (Graphic Save)<br />
The <strong>Ithaca</strong> ® <strong>610</strong> Printer maintains a 16K (16384 bytes) section of flash memory and up<br />
to 192K of extended flash memory to save user information. The information can be<br />
either macros or user-defined characters. These groups of data are indexed by name,<br />
and may be called up at any time after they are stored. See the sections on Macros and<br />
User-defined Characters for definitions of these functions.<br />
To allow the host application to maintain these groups of data, a series of user store<br />
maintenance commands are available. As referenced earlier in this manual, the user can<br />
Page 120 Rev D 28-05897
Programming Codes<br />
<strong>Ithaca</strong> ® <strong>610</strong> Programmer’s <strong>Guide</strong><br />
define a limited number of custom characters and define a macro. These<br />
character/macro definitions can also be saved in user store. However, only one<br />
character definition and one macro can be active at any time. One macro and one userdefined<br />
character definition can be flagged to load and run at startup. If a flag is set, the<br />
printer will automatically process the macro and/or load the user-defined character set at<br />
initialization.<br />
Because user store is intended to be loaded only a few times and then printed as part of<br />
normal operation, the programmer must take some care during the definition phase.<br />
The programmer must assume the responsibility to assure the 16K buffer size is not<br />
exceeded. User store can save macros and user-defined character sets.<br />
When the basic user store is full, it can be moved to extended user store. Individual<br />
items in the extended user store can not be erased. The entire extended user store must<br />
be erased all at once. You may place two items in user store with the same name and<br />
the last defined item will be used.<br />
Defining Macros<br />
Macros can be defined two ways. The first is by using the begin and end named macro<br />
commands. These commands start the recording process and automatically save the<br />
macro when it is complete. The macro data is not processed, as it is sent to the printer.<br />
Function Begin named macro record<br />
ASCII [ESC] [US] b <br />
Then send the data to be recorded. The printer does not process the<br />
data. The terminating may be replaced with an & or redefined. See<br />
[ESC] [EM]T or &%UT on page 127.<br />
Function End name macro record<br />
ASCII [ESC] [US] e <br />
The second way to define macros is to use [ESC] g commands to define<br />
the macro, and then the save macro data command to save the data.<br />
The terminating may be replaced with an & or redefined. See [ESC]<br />
[EM]T or &%UT on page 127.<br />
Function<br />
ASCII<br />
Function<br />
ASCII<br />
Function<br />
ASCII<br />
Start macro record<br />
[ESC] g Then send the data to be recorded. (The data is processed<br />
and printed).<br />
Stop macro record<br />
[ESC] g Then save the macro.<br />
Save macro data<br />
[ESC] [US] m <br />
Saving User-defined Characters. To save user-defined characters, first<br />
define the character set.<br />
28-05897 Rev D Page 121
Programming Codes<br />
<strong>Ithaca</strong> ® <strong>610</strong> Programmer’s <strong>Guide</strong><br />
Function<br />
ASCII<br />
Define user-defined characters<br />
[ESC] = [x 1 d 1 … d(y x x 1 )] … [xk d 1 … d(y x xk)]<br />
Second, save the definition in the nonvolatile flash memory with the<br />
appropriate command.<br />
Save the definition. Note the "Save user-defined characters" command<br />
saves all three character definitions.<br />
Function Save user-defined characters<br />
ASCII [ESC] [US] c <br />
Third, load the character set or load and run the macro.<br />
To restore the character definitions, issue a load item command with the<br />
name of the character set to be loaded.<br />
The terminating may be replaced with an & or redefined. See [ESC]<br />
[EM]T or &%UT on page 127.<br />
Function Load item from user store<br />
ASCII [ESC] [US] l <br />
If the item referenced is a user-defined character set, it is loaded into the<br />
current definition. If it is a macro, it is loaded into the macro buffer. It is<br />
not processed or printed.<br />
To help maintain the user-store area, the following commands can be<br />
used.<br />
The terminating may be replaced with an & or redefined. See [ESC]<br />
[EM]T or &%UT on page 127.<br />
Function Flag as a start-up macro<br />
ASCII [ESC] [US] s <br />
The [ESC] [US] s command flags the referenced item to<br />
be processed at startup. No more than one user character definition and<br />
user data item may be flagged.<br />
The terminating may be replaced with an & or redefined. See [ESC]<br />
[EM]T or &%UT on page 127.<br />
Function Remove item from user store<br />
ASCII [ESC] [US] e <br />
The [ESC] [US] e command removes an item from user<br />
store and frees up its space. The terminating may be replaced with<br />
an & or redefined. See [ESC] [EM]T or &%UT on page 127.<br />
Page 122 Rev D 28-05897
Programming Codes<br />
<strong>Ithaca</strong> ® <strong>610</strong> Programmer’s <strong>Guide</strong><br />
Function<br />
ASCII<br />
or<br />
Description<br />
Flush information from user store<br />
[ESC] [US] f ALL Base User Store<br />
[ESC] [US] f EXT Extended User Store.<br />
The [ESC] [US] f ALL command clears all of the information to the<br />
user store and frees the data space. The [ESC] [US] f EXT command<br />
clears all of the information in the extended the user store.<br />
The terminating may be replaced with an & or redefined. See [ESC]<br />
[EM]T or &%UT on page 127.<br />
Function Report on user store<br />
ASCII ESC] [US] q <br />
Description The [ESC] [US] q prints or returns information about the contents of<br />
and available space in user store.<br />
Note: A configuration option is available that locks the user store data.<br />
The configuration option prevents the occurrence of new user store data<br />
operation until the lock is manually reset and accidental deletion of the<br />
saved information. The user-defined character buffer and/or user data<br />
buffer may be redefined and used but cannot be stored.<br />
The terminating may be replaced with an & or redefined. See [ESC]<br />
[EM]T or &%UT on page 127.<br />
User-Store Commands<br />
Function Begin named macro record<br />
ASCII [ESC] [US] b <br />
Hexadecimal 1BH 1FH 62H<br />
Decimal <br />
IPCL &%UB <br />
EPOS none<br />
Description The [ESC] [US] b command erases the current macro,<br />
initializes the macro buffer structure, and redirects the following data to<br />
the macro buffer. It uses the field as a reference. If the name<br />
already exists in the flash user store, the command is ignored. The<br />
command must be followed by the "End name macro record" command<br />
with the same name. If the data that follows is larger than the macro<br />
buffer (about 16K), the macro definition is terminated without saving any<br />
data.<br />
The terminating may be replaced with an & or redefined. See [ESC]<br />
[EM]T or &%UT on page 127.<br />
28-05897 Rev D Page 123
Programming Codes<br />
<strong>Ithaca</strong> ® <strong>610</strong> Programmer’s <strong>Guide</strong><br />
Function End named macro record<br />
ASCII [ESC] [US] e <br />
Hexadecimal 1BH 1FH 65H<br />
Decimal <br />
IPCL &%UG <br />
EPOS none<br />
Description The [ESC] [US] e command ends the macro record<br />
operation and saves the macro to flash. It uses the field to<br />
verify the command end and must match the "Begin named macro<br />
record" command. If the name already exists in the flash user store or<br />
the macro memory is exceeded, the command is valid, and the <br />
field prints. If there is not enough room in the flash user store for the<br />
macro, the save is not performed, but the macro buffer is valid.<br />
The terminating may be replaced with an & or redefined. See [ESC]<br />
[EM]T or &%UT on page 127.<br />
Function Save macro data in user store<br />
ASCII [ESC] [US] m <br />
Hexadecimal 1BH 1FH 6DH<br />
Decimal <br />
IPCL &%UM <br />
EPOS [GS] -… is from one to 15 characters and must be null<br />
terminated.<br />
Description The [ESC] [US] m command saves the current macro<br />
buffer structure into the flash user-store area. It uses the field<br />
as a reference name. If the name already exists in the flash user store,<br />
the command does not store the data.<br />
The terminating may be replaced with an & or redefined. See [ESC]<br />
[EM]T or &%UT on page 127.<br />
Function Save user-defined characters<br />
ASCII [ESC] [US] c <br />
Hexadecimal 1BH 1FH 63H<br />
Decimal <br />
IPCL &%UC <br />
EPOS [GS] 6 is from one to 15 characters and must be null<br />
terminated.<br />
Description The [ESC] [US] c command saves the current userdefined<br />
character structure in the flash user-save storage area. It uses<br />
the field as a reference. If the name already exists in the flash<br />
user store, the command will not store the data.<br />
The terminating may be replaced with an & or redefined. See [ESC]<br />
[EM]T or &%UT on page 127.<br />
Page 124 Rev D 28-05897
Programming Codes<br />
<strong>Ithaca</strong> ® <strong>610</strong> Programmer’s <strong>Guide</strong><br />
Function Load item from user store<br />
ASCII [ESC] [US] l <br />
Hexadecimal 1BH 1FH 6CH<br />
Decimal <br />
IPCL &%UL <br />
EPOS [GS] 0 is from one to 15 characters and must be null<br />
terminated.<br />
Description The [ESC] [US] l command loads the referenced item into<br />
the appropriate structure. If the item referenced is a user-defined<br />
character set, it is loaded into the current user-character definition, which<br />
does not affect the active state of user-defined characters. If it is a<br />
macro, it is loaded into the macro buffer, but it is not inserted into the data<br />
stream. [ESC] g inserts the macro buffer into the data stream. If the<br />
named item does not exist, the command does nothing.<br />
The terminating may be replaced with an & or redefined. See [ESC]<br />
[EM]T or &%UT>n> on page 127.<br />
Function Run macro data from user store<br />
ASCII [ESC] [US] r <br />
Hexadecimal 1BH 1FH 72H<br />
Decimal <br />
IPCL &%UR <br />
EPOS [GS] 0 is from one to 15 characters and must be null<br />
terminated.<br />
Description The [ESC] [US] r command loads the referenced macro<br />
into the macro buffer. The macro buffer is then inserted into the data<br />
stream. If the named item does not exist or is not a macro, nothing<br />
happens.<br />
The terminating may be replaced with an & or redefined. See [ESC]<br />
[EM]T or &%UT on page 127.<br />
Function Flag item as a start-up macro<br />
ASCII [ESC] [US] s <br />
Hexadecimal 1BH 1FH 73H<br />
Decimal <br />
IPCL &%US <br />
EPOS [GS] 0 is from one to 15 characters and must be null<br />
terminated.<br />
Description The [ESC] [US] s command flags the referenced item to<br />
be processed at startup. Only one user character definition and one<br />
macro may be flagged to run at startup.<br />
Note: If a character definition is loaded at startup, it is automatically made<br />
active.<br />
The terminating may be replaced with an & or redefined. See [ESC]<br />
[EM]T or &%UT on page127<br />
28-05897 Rev D Page 125
Programming Codes<br />
<strong>Ithaca</strong> ® <strong>610</strong> Programmer’s <strong>Guide</strong><br />
Function Delete item from user store<br />
ASCII [ESC] [US] d <br />
Hexadecimal 1BH 1FH 64H<br />
Decimal <br />
IPCL &%UD <br />
EPOS [GS] 1 is from one to 15 characters and must be null<br />
terminated.<br />
Description The [ESC] [US] d command removes an item from user<br />
store and frees up space. If the item does not exist, the command does<br />
nothing.<br />
The terminating may be replaced with an & or redefined. See [ESC]<br />
[EM]T or &%UT>n> on page 127.<br />
Function Transfer all items from user store to extended user store.<br />
ASCII [ESC] [US] t <br />
Hexadecimal 1BH 1FH 74H<br />
Decimal <br />
IPCL &%UX <br />
EPOS None<br />
Description This command transfers the information in the base 16K user store to the<br />
extended user store. The base user store is erased if the transfer was<br />
successful.<br />
The terminating may be replaced with an & or redefined. See [ESC]<br />
[EM]T or &%UT>n> on page 127.<br />
Function Flush information from user store or extended user store<br />
ASCII [ESC] [US] f ALL User Store.<br />
Or<br />
[ESC] [US] f EXT Extended User Store.<br />
Hexadecimal 1BH 1FH 66H 00H<br />
Decimal <br />
IPCL &%UF<br />
EPOS [GS] 5<br />
Description The [ESC] [US] f ALL command clears all entries in user store and<br />
frees the data space. It must have the name, ―ALL‖ (in uppercase)<br />
attached. If ―EXT‖ is substituted for ―ALL‖, extended user store (If any) is<br />
cleared.<br />
The terminating may be replaced with an & or redefined. See [ESC]<br />
[EM]T or &%UT>n> on page 127.<br />
Page 126 Rev D 28-05897
Programming Codes<br />
<strong>Ithaca</strong> ® <strong>610</strong> Programmer’s <strong>Guide</strong><br />
Function Report on user store<br />
ASCII [ESC] [US] q Print a user store report<br />
Or [ESC] [US] ? Return a formatted user store report<br />
Hexadecimal 1BH 1FH 71H<br />
Decimal <br />
IPCL &%UQ <br />
EPOS [GS] 3<br />
Description The [ESC] [US] q command prints a status report. The file<br />
name is ignored and may be omitted. The NUL must be present. The<br />
intention of the command is to aid in macro development.<br />
The terminating may be replaced with an & or redefined. See [ESC]<br />
[EM]T or &%UT on page 127.<br />
Note: The report is also printed as part of the configuration report.<br />
Function Redefine User Store Termination Character<br />
ASCII [ESC] [EM] T <br />
Hexadecimal 1BH 19H 54H <br />
Decimal <br />
IPCL &%UT <br />
EPOS None<br />
Description This command allows the terminator used to signal the end of the name<br />
field in User Store commands to be modified. The value of is used<br />
(in addition to the ) for the terminator. The value of n may be from 0<br />
to 255.<br />
The default value for the second terminator is &. If this command<br />
redefines the terminator to something other than &, the & will no longer<br />
function.<br />
Example If &%UT% were sent to the printer, the user store command to run macro<br />
"Demo" would be &%URDemo%.<br />
28-05897 Rev D Page 127
Programming Codes<br />
<strong>Ithaca</strong> ® <strong>610</strong> Programmer’s <strong>Guide</strong><br />
User Macros<br />
The user macro feature works by inserting the macro data buffer into the printer data<br />
stream when the print user-store data command is encountered.<br />
Macros can be any data normally sent to the printer including graphics. (Note: user-store<br />
maintenance and inquire commands may not be included in the macro definitions.) The<br />
printer stores macro data in a RAM-based storage buffer as it is received and<br />
processed. The storage buffer may then be saved to a flash-based user store or inserted<br />
into the print data stream. If a macro is recalled from user store, it is expanded into the<br />
macro buffer and replaces whatever is currently there.<br />
Programming Considerations<br />
The flash (nonvolatile) memory has a limited number of write cycle operations.<br />
Consequently, the number of saves should be limited. The buffer should not be saved on<br />
a transaction by transaction basis, but rather a maximum of once per day.<br />
The buffer is initially about 16K 7 bytes long. All commands 8 and print data are placed in<br />
the buffer and must be included in the size limits. The printer does not indicate when the<br />
buffer is full. The application must make sure that the buffer is not overfilled. The printer<br />
simply stops saving information when it is full. As the buffer fills, the input data is printed<br />
normally. The effect of the macro start command is to clear the buffer and to start to<br />
save the input data. The macro stop command stops saving data and initializes internal<br />
pointers for the next print. To store the data in the nonvolatile flash, it must be named<br />
and saved by one of the user-store save commands.<br />
When the macro buffer is inserted into the data stream, configuration commands (like<br />
font or pitch changes) remain in effect after the macro is processed. Illegal commands<br />
are placed in the buffer and take up space.<br />
Horizontal graphics should be sent to the printer compressed. If the data is not<br />
compressed, it is saved in the macro buffer. If the buffer is saved into the user-store<br />
nonvolatile flash, there must be enough room in the user store for all of the data. As<br />
user-store space is used, the macro buffer will be larger than the available space in user<br />
store. Only the used space is saved, but it is possible to define a macro that does not fit<br />
in the remaining user-store space.<br />
7 The actual buffer is smaller because of the overhead.<br />
8 IPCL commands are converted by the printer into an equivalent [ESC] code and then placed in<br />
the save buffer. The equivalent [ESC] code should be used to calculate the size of the save<br />
buffer data.<br />
Page 128 Rev D 28-05897
Programming Codes<br />
<strong>Ithaca</strong> ® <strong>610</strong> Programmer’s <strong>Guide</strong><br />
[ESC] g Process user macro<br />
ASCII [ESC] g <br />
Hexadecimal 1BH 67H 00H<br />
Decimal <br />
IPCL &%GP<br />
EPOS [ESC] g <br />
Description<br />
The [ESC] g command prints the user-store data buffer.<br />
[ESC] g Start macro record<br />
ASCII [ESC] g <br />
Hexadecimal 1BH 67H 01H<br />
Decimal <br />
IPCL &%GS<br />
EPOS ESC] g <br />
Description<br />
The [ESC] g command clears the user-store data buffer and begins<br />
recording data. The next 2000 bytes (including characters and<br />
commands) are recorded.<br />
[ESC] g Stop macro record<br />
ASCII [ESC] g <br />
Hexadecimal 1BH 67H 02H<br />
Decimal <br />
IPCL &%GE<br />
EPOS [ESC] g <br />
Description<br />
The [ESC] g command stops recording user-store data information.<br />
The buffer is not saved into the nonvolatile memory.<br />
[ESC] g Stop macro record and save<br />
ASCII [ESC] g <br />
Hexadecimal 1BH 67H 03H<br />
Decimal <br />
IPCL &%GW<br />
EPOS [ESC] g <br />
Description<br />
The [ESC] g command stops recording graphic save information.<br />
The buffer is saved into the user-store nonvolatile memory under the<br />
name, "ESCg3_Save"<br />
Note: The [ESC] g command is supplied for compatibility with the<br />
Series 80PLUS and 90PLUS printers.<br />
28-05897 Rev D Page 129
Programming Codes<br />
<strong>Ithaca</strong> ® <strong>610</strong> Programmer’s <strong>Guide</strong><br />
Bar Codes<br />
The <strong>Ithaca</strong> ® <strong>610</strong> Printer supports the ability to print bar codes. The printer offers a number of<br />
formats as defined below. The host does not need to form the graphic image for these bar<br />
codes. The host need only send the printer the information to be bar coded and a graphic is<br />
generated by the printer. In some cases, a check character is required by the format. In most<br />
cases, the printer generates the check character and inserts it correctly in the format. The<br />
printer uses internal graphic modes to form bar code images, and the images are adjusted for<br />
ink bleed. In general, the bar codes generated by sending graphic data to the printer are not as<br />
readable as the bar codes the printer generates. Bar codes are printed at a 203 x 203<br />
resolution.<br />
Barcodes may be printed horizontally or vertically. When printed vertically the length of the<br />
barcode can be greater (i.e. more characters can be printed). You can not print human readable<br />
interpretation (HRI) characters in vertical mode. It is generally better to print vertical barcodes by<br />
printing horizontal barcodes in page mode rotated 90 or 270 . You can then mix HRI and other<br />
text with the barcodes.<br />
Function Print bar code<br />
ASCII [ESC] b {information} [ETX]<br />
Hexadecimal 1BH 62H ... 03H<br />
Decimal ... <br />
IPCL &%25 ... [CR] Interleaved 2 of 5<br />
&%39 ... [CR] Code 39<br />
&%12 ... [CR] Code 128<br />
&%28 . Code 128 (allows a two character length,<br />
preceding the information)<br />
&%UP ... [CR] UPC A<br />
&%UE ... [CR] UPC E<br />
&%EA .. [CR] EAN-13<br />
&%E8 ... [CR] EAN-8<br />
&%93 .. [CR] Code 93<br />
&%CB .. [CR] Codabar<br />
EPOS [ESC] b or [GS] k <br />
Description The [ESC] b {information} [ETX] command prints information as a bar code.<br />
The bar code is centered on the print zone.<br />
Where n = 0 Interleaved 2 of 5 Numeric (0-9) only; must be even number of digits<br />
1 Code 39 26 uppercase letters (A-Z); 10 digits (0-9)<br />
(See description for full 128 character set support)<br />
2 Code 128 Three sets of 106 different characters<br />
(See description for character set selection)<br />
3 UPC A Numeric (0-9) only; 11 digits<br />
4 EAN-13 Numeric (0-9) only; 12 digits<br />
5 UPC E Numeric (0-9) only; 11 digits<br />
6 EAN-8 Numeric (0-9) only; 7 digits<br />
7 Code 93 26 letters; 10 digits (0-9); and 7 special characters<br />
8 Codabar 10 digits (0-9); 4 start/stop characters,<br />
A, B, C, and D; and 6 special characters.<br />
Page 130 Rev D 28-05897
Programming Codes<br />
<strong>Ithaca</strong> ® <strong>610</strong> Programmer’s <strong>Guide</strong><br />
9 PDF-417 2D alpha Numeric (See notes below)<br />
12 EAN-14 Numeric (0-9) only 14 digits<br />
Note: You may print barcodes in page mode. If you rotate these barcodes<br />
90 or 180 you can get significantly longer barcodes.<br />
Interleaved 2 of 5<br />
Interleaved 2 of 5 is a high-density, self-checking, continuous, numeric bar code. It is mainly<br />
used where fixed-length numeric fields are required. The data field must be an even number of<br />
characters. If an odd data field is sent to the <strong>Ithaca</strong> ® <strong>610</strong> printer, it will be zero padded. Due to<br />
space limitations, only 16 characters can be printed.<br />
28-05897 Rev D Page 131
Programming Codes<br />
<strong>Ithaca</strong> ® <strong>610</strong> Programmer’s <strong>Guide</strong><br />
Code 39<br />
Code 39 is an alphanumeric bar code. It is a discrete, self-checking, variable-length code. The<br />
printer prints the complete data field. The number of characters that can be printed depends on<br />
the bar width scaling. If the bar code scale is set to 2, 17 characters may be printed per line.<br />
There are two modes of operation for the Code 39 barcodes. The first is in a variable length<br />
format. In this mode all characters sent to the printer will be printed up to the termination<br />
character. Only 0-9, A-Z -, period, and space may be printed. $, %, +, and / Characters may be<br />
used as escape characters for full 128 character support. If illegal characters are passed to the<br />
printer, they are converted to legal codes. (For example, a would be converted to A).<br />
In full 128 character mode, the printer will encode the full 128 character set. In this mode, the<br />
first character received must be the length. IE. [ESC]k… where n specifies the number<br />
of characters to follow. The characters following n characters may be from 0 to 127. Values<br />
greater than 127 are converted to printable characters by removing the 8 th bit.<br />
The following table specifies the Code 39 character set.<br />
ASCII Code<br />
NUL %U<br />
SOH $A<br />
STX $B<br />
ETH $C<br />
EOT $D<br />
ENQ $E<br />
ACK $F<br />
BEL $G<br />
BS $H<br />
HT $I<br />
LF $J<br />
VT $K<br />
FF $L<br />
CR $M<br />
SO $N<br />
SI $O<br />
DLE $P<br />
DC1 $Q<br />
DC2 $R<br />
DC3 $S<br />
DC4 $T<br />
NAK $U<br />
SYN $V<br />
ETB $W<br />
CAN $X<br />
EM $Y<br />
SUB $Z<br />
ESC %A<br />
FS %B<br />
GS %C<br />
RS %D<br />
US %E<br />
ASCII Code<br />
SP Space<br />
! /A<br />
" /B<br />
# /C<br />
$ /D<br />
% /E<br />
& /F<br />
' /G<br />
( /H<br />
) /I<br />
* /J<br />
+ /K<br />
, /L<br />
- -<br />
. .<br />
/ /O<br />
0 0<br />
1 1<br />
2 2<br />
3 3<br />
4 4<br />
5 5<br />
6 6<br />
7 7<br />
8 8<br />
9 9<br />
: /Z<br />
; %F<br />
< %G<br />
= %H<br />
> %I<br />
? %J<br />
ASCII Code<br />
@ %V<br />
A A<br />
B B<br />
C C<br />
D D<br />
E E<br />
F F<br />
G G<br />
H H<br />
I<br />
I<br />
J<br />
J<br />
K K<br />
L L<br />
M M<br />
N N<br />
O O<br />
P P<br />
Q Q<br />
R R<br />
S S<br />
T T<br />
U U<br />
V V<br />
W W<br />
X X<br />
Y Y<br />
Z Z<br />
[ %K<br />
\ %L<br />
] %M<br />
^ %N<br />
_ %O<br />
ASCII Code<br />
` %W<br />
a +A<br />
b +B<br />
c +C<br />
d +D<br />
e +E<br />
f +F<br />
g +G<br />
h +H<br />
i +I<br />
j +J<br />
k +K<br />
l +L<br />
m +M<br />
n +N<br />
o +O<br />
p +P<br />
q +Q<br />
r +R<br />
s +S<br />
t +T<br />
u +U<br />
v +V<br />
w +W<br />
x +X<br />
y +Y<br />
z +Z<br />
{ %P<br />
| %Q<br />
} %R<br />
~ %S<br />
DEL %T<br />
Figure 10 Code 39 full 128 character encoding<br />
Code 128<br />
Code 128 is an alphanumeric bar code. It is a high-density, variable-length, continuous code,<br />
which employs multiple element widths. Code 128 has three possible start codes. The start<br />
Page 132 Rev D 28-05897
Programming Codes<br />
<strong>Ithaca</strong> ® <strong>610</strong> Programmer’s <strong>Guide</strong><br />
code defines the code set, Code A, B, or C that will be used to generate the barcode. The<br />
<strong>Ithaca</strong> ® <strong>610</strong> allows the code set to be specified, or it can be select by the printer based on the<br />
information in the data field.<br />
To specify code set: [ESC] b {information} [ETX]<br />
If the first character in the data field is a start code as shown in Figure 11 below, the<br />
printer will print the complete data field from the selected set. Due to space limitations, only ten<br />
characters can be printed. The check digit is generated and printed by the printer. Characters<br />
are also specified as shown in Figure 11.<br />
To have the printer selected code set and automatically generate an optimal barcode, the value<br />
of Code should be the length.<br />
[ESC] b {information}<br />
If the first character is from 1 to 31, the printer will automatically select Code A, B, or<br />
C depending on the data present. If the data is all numeric, the data can be printed as pairs.<br />
This effectively doubles the amount of data that can be printed. The check digit is generated<br />
and printed by the printer.<br />
Note: If the first character is greater than and not through<br />
, the printer will discard the first character and print the data as<br />
defined in Code A..<br />
Space is defined as a , which makes programming difficult and causes control character<br />
conflicts for the printer. To solve the problem, the <strong>Ithaca</strong> ® <strong>610</strong> Printer subtracts 32 from all<br />
characters that are to be included in the bar code. In the Code 128 definition, an ‗A‘ is ;<br />
however, the printer converts an ASCII ‗A‘ () to a internally. This sets Code 128C and<br />
the start codes off by 32.<br />
Barcode 128 consists of 107 unique symbols. 101 of the symbols take on different meanings<br />
based on the start code or an embedded shift code sequence. Code stick A consists of<br />
alphanumeric characters and ASCII control codes (see the table below). Code stick B consists<br />
of Alpha numeric with lower case alpha, Code stick C consists of numeric pairs.<br />
In automatic mode, any ASCII data from 0 to 127 could be entered. Values less than 32 will be<br />
encoded as Code stick A NUL- US, values from 96 through 127 will be encoded from Code stick<br />
B. Where ever possible numeric pairs will be encoded from Code stick C.<br />
In the past, FNC1, FNC2, FNC3, and FNC4 have not been accessible to the programmer. The<br />
EAN 128 barcode requires that FNC1 be made available. To provide EAN 128 compatibility, the<br />
acceptable character range has been expanded by 10 to include the ability to specify FNC1,<br />
FNC2, FNC3 and FNC4. In automatic mode, values of 130-132 will be accepted, however, the<br />
resulting barcode may be unreadable.<br />
128 Code Value in Value in<br />
Decimal Hex<br />
FNC3 128 80<br />
28-05897 Rev D Page 133
Programming Codes<br />
<strong>Ithaca</strong> ® <strong>610</strong> Programmer’s <strong>Guide</strong><br />
FNC2 129 81<br />
Not Valid 130 82<br />
131 83<br />
132 84<br />
FNC4 133 85<br />
FNC1 134 86<br />
Start A 135 87<br />
Start B 136 88<br />
Start C 137 89<br />
Figure 11 Expanded Function coding<br />
Note: In automatic mode, FNC4 is always specified as 133 regardless of<br />
what code stick is currently active.<br />
In most cases, the <strong>Ithaca</strong> ® supreme will generate the most compact barcode for you. However,<br />
if it is desirable to have complete control, the programmer should use manual mode.<br />
Page 134 Rev D 28-05897
Programming Codes<br />
<strong>Ithaca</strong> ® <strong>610</strong> Programmer’s <strong>Guide</strong><br />
Code 128 Encoding<br />
<strong>Ithaca</strong> Manual<br />
Encoding<br />
Code Stick<br />
Code Decimal Hex<br />
Code<br />
A<br />
Code<br />
B<br />
Code<br />
C<br />
128<br />
Value<br />
Value Value<br />
Space Space 00 00 32 20<br />
! ! 01 01 33 21<br />
" " 02 02 34 22<br />
# # 03 03 35 23<br />
$ $ 04 04 36 24<br />
% % 05 05 37 25<br />
& & 06 06 38 26<br />
' ' 07 07 39 27<br />
( ( 08 08 40 28<br />
) ) 09 09 41 29<br />
* * 10 10 42 2A<br />
+ + 11 11 43 2B<br />
, , 12 12 44 2C<br />
- - 13 13 45 2D<br />
. . 14 14 46 2E<br />
/ / 15 15 47 2F<br />
0 0 16 16 48 30<br />
1 1 17 17 49 31<br />
2 2 18 18 50 32<br />
3 3 19 19 51 33<br />
4 4 20 20 52 34<br />
5 5 21 21 53 35<br />
6 6 22 22 54 36<br />
7 7 23 23 55 37<br />
8 8 24 24 56 38<br />
9 9 25 25 57 39<br />
: : 26 26 58 3A<br />
; ; 27 27 59 3B<br />
< < 28 28 60 3C<br />
= = 29 29 61 3D<br />
> > 30 30 62 3E<br />
? ? 31 31 63 3F<br />
@ @ 32 32 64 40<br />
A A 33 33 65 41<br />
B B 34 34 66 42<br />
C C 35 35 67 43<br />
D D 36 36 68 44<br />
E E 37 37 69 45<br />
F F 38 38 70 46<br />
G G 39 39 71 47<br />
H H 40 40 72 48<br />
I I 41 41 73 49<br />
J J 42 42 74 4A<br />
K K 43 43 75 4B<br />
L L 44 44 76 4C<br />
M M 45 45 77 4D<br />
N N 46 46 78 4E<br />
O O 47 47 79 4F<br />
P P 48 48 80 50<br />
Q Q 49 49 81 51<br />
R R 50 50 82 52<br />
S S 51 51 83 53<br />
T T 52 52 84 54<br />
U U 53 53 85 55<br />
Code 128 Encoding<br />
<strong>Ithaca</strong> Manual<br />
Encoding<br />
Code Stick<br />
Code Decimal Hex<br />
Code<br />
A<br />
Code<br />
B<br />
Code<br />
C<br />
128<br />
Value<br />
Value Value<br />
V V 54 54 86 56<br />
28-05897 Rev D Page 135
Programming Codes<br />
<strong>Ithaca</strong> ® <strong>610</strong> Programmer’s <strong>Guide</strong><br />
W W 55 55 87 57<br />
X X 56 56 88 58<br />
Y Y 57 57 89 59<br />
Z Z 58 58 90 5A<br />
[ [ 59 59 91 5B<br />
\ \ 60 60 92 5C<br />
] ] 61 61 93 5D<br />
^ ^ 62 62 94 5E<br />
_ _ 63 63 95 5F<br />
NUL ` 64 64 96 60<br />
SOH a 65 65 97 61<br />
STX b 66 66 98 62<br />
ETH c 67 67 99 63<br />
EOT d 68 68 100 64<br />
ENQ e 69 69 101 65<br />
ACK f 70 70 102 66<br />
BEL g 71 71 103 67<br />
BS h 72 72 104 68<br />
HT i 73 73 105 69<br />
LF j 74 74 106 6A<br />
VT k 75 75 107 6B<br />
FF l 76 76 108 6C<br />
CR m 77 77 109 6D<br />
SO n 78 78 110 6E<br />
SI o 79 79 111 6F<br />
DLE p 80 80 112 70<br />
DC1 q 81 81 113 71<br />
DC2 r 82 82 114 72<br />
DC3 s 83 83 115 73<br />
DC4 t 84 84 116 74<br />
NAK u 85 85 117 75<br />
SYN v 86 86 118 76<br />
ETB w 87 87 119 77<br />
CAN x 88 88 120 78<br />
EM y 89 89 121 79<br />
SUB z 90 90 122 7A<br />
ESC { 91 91 123 7B<br />
FS | 92 92 124 7C<br />
GS } 93 93 125 7D<br />
RS ~ 94 94 126 7E<br />
US DEL 95 95 127 7F<br />
FNC3 FNC3 96 96 128 80<br />
FNC2 FNC2 97 97 129 81<br />
Shift Shift 98 98 130 82<br />
Code Code 99 99 131 83<br />
C C<br />
Code FNC4 Code 100 132 84<br />
B<br />
B<br />
FNC4 Code Code 101 133 85<br />
A A<br />
FNC1 102 134 86<br />
Start Code A 103 135 87<br />
Start Code B 104 136 88<br />
Start Code C 105 137 89<br />
Stop - -<br />
Figure 12 Code 128 encoding values<br />
Page 136 Rev D 28-05897
Programming Codes<br />
<strong>Ithaca</strong> ® <strong>610</strong> Programmer’s <strong>Guide</strong><br />
UPC A<br />
UPC A is a fixed-length, numeric, continuous code that employs four element widths.<br />
The printer supports Universal Product Code Version A, E, EAN-8, and EAN-13. Version<br />
A encodes 11 digits. Typically, the UPC A format starts with a number system digit, fivedigit<br />
manufacturer‘s code, five-digit product code, and a check digit. The printer makes<br />
no assumptions about any of the codes except the check digit. The printer prints an UPC<br />
bar code with the 11 digits sent to it and generates the check digit. If fewer than 11 digits<br />
are sent, the remaining digits will be zeros. The printer prints an UPC that is about 130%<br />
the size of the UPC nominal standard, which provides optimal readability.<br />
UPC E<br />
UPC E is a zero suppression version of UPC. The printer requires that the first digit is<br />
zero for number system zero. If it is not zero, the bar code is not printed. The printer<br />
does the compression based on the compression rules for UPC E, prints an UPC bar<br />
code based on the 11 digits sent to it, and generates the check digit. If fewer than 11<br />
digits are sent, the remaining digits will be zeros. The printer prints an UPC that is about<br />
130% the size of the UPC nominal standard, which provides optimal readability.<br />
EAN-13<br />
EAN-13 is a fixed-length, numeric, continuous code that employs four element widths.<br />
The printer supports EAN-13, which is a superset of UPC that encodes 12 digits.<br />
Typically, the format starts with a number set digit, which defines how the next six digits<br />
are encoded. The next five digits have fixed encoding. The last is a check digit. The<br />
printer prints an EAN-13 bar code with the 12 digits sent to it and generates the check<br />
digit. If fewer than 12 digits are sent, the remaining digits will be zeros. The printer prints<br />
an EAN-13 bar code that is about 130% the size of the nominal standard, which provides<br />
optimal readability.<br />
EAN-8<br />
EAN-8 is a fixed-length, numeric, continuous code that employs four element widths.<br />
The printer supports EAN-8, which is a superset of UPC that encodes seven digits. The<br />
printer prints an EAN-8 bar code with the seven digits sent to it and generates the check<br />
digit. If fewer than seven digits are sent, the remaining digits will be zeros. The printer<br />
prints an EAN-8 bar code that is about 130% the size of the nominal standard, which<br />
provides optimal readability.<br />
EAN-14<br />
EAN-14 It is a high-density, fixed-length, numeric, continuous code, which employs<br />
multiple element widths. EAN-14, is a subset of Code 128 that encodes FNC1 and 14<br />
digit pairs. If fewer than 14 digits are sent, leading zeros will be added to complete the<br />
code.<br />
Code 93<br />
Code 93 is a variable-length, alphanumeric bar code. The complete data field is printed<br />
by the printer. Due to space limitations, only 10 characters can be printed.<br />
Codabar<br />
Codabar is a variable-length format, primarily used for numeric symbols. It offers 16 data<br />
characters, including the numeric digits zero through nine, and -, $, :, /, ., and +. Four<br />
unique start/stop characters, designated A, B, C, and D, are also available. Due to space<br />
limitations, only 12 characters can be printed.<br />
28-05897 Rev D Page 137
Programming Codes<br />
<strong>Ithaca</strong> ® <strong>610</strong> Programmer’s <strong>Guide</strong><br />
Note 1: A [CR] may also be used in place of the [ETX] to end the bar code<br />
data field.<br />
Note 2: Only information that is usable in a particular bar code will be<br />
printed.<br />
PDF 417<br />
PDF 417 is a two dimensional barcode that will encode the full ASCII character set. As it<br />
encodes the full set including control characters, the length of the following data must be<br />
provided to the printer. The form of the command is as follows:<br />
[ESC]b … <br />
Where the data length is (nH * 256) + nL. The length is limited to be from 1 to 2048<br />
characters.<br />
To control the formation of the barcode, the x and y aspect ratios, rows and columns,<br />
and error correction levels can be altered.<br />
Function PDF 417 bar code control<br />
ASCII [ESC] [EM] E <br />
Hexadecimal 1BH 19H 45H <br />
Decimal <br />
IPCL None<br />
EPOS None<br />
Description This command alters the way PDF 417 barcodes are generated and<br />
printed.<br />
Where f = Feature to control and v = the value of the feature.<br />
f = C, 43H, 67 Set encoding columns. v = 1-30, 0 sets to auto.<br />
f = R, 52H, 82 Set encoding rows. v = 3-90, 0 sets to auto.<br />
f = X, 58H, 88 Set encoding X aspect. v = 2-6, 3 is default.<br />
f = Y, 59H, 89 Set encoding Y aspect. v = 2-32, 9 is default.<br />
f = E, 45H, 69 Set error correction level.<br />
If v between 1 and 40 it is interpreted as a percentage of the data.<br />
If v is between 48 and 56 it is set to a specific level of 0 to 8.<br />
If v = 0, it will return it to the default setting of 10%.<br />
Typically the row and columns should be set to 0 so that auto encoding will be used.<br />
The X and Y aspect represent the number of dots horizontally and vertically to form the<br />
smallest image element. Values of 2 for each produce very small elements, and is<br />
probably too small unless good paper is used. The defaults are 3 by 9, which produce<br />
easily readable barcodes.<br />
Page 138 Rev D 28-05897
Programming Codes<br />
<strong>Ithaca</strong> ® <strong>610</strong> Programmer’s <strong>Guide</strong><br />
Error correcting levels are selected using one of two methods. The first is a fixed level.<br />
v Level Code Word<br />
48 Level 0 2<br />
49 Level 1 4<br />
50 Level 2 8<br />
51 Level 3 16<br />
52 Level 4 32<br />
53 Level 5 64<br />
54 Level 6 128<br />
55 Level 7 256<br />
56 Level 8 512<br />
The second way is to determine correction level based on the amount of data in the<br />
barcode. This is determined by calculating a correction ration based on the formula<br />
Cf = (v * 0.1 * Len)<br />
Cf Level Code Word<br />
0-3 Level 1 4<br />
4-10 Level 2 8<br />
11-20 Level 3 16<br />
21-45 Level 4 32<br />
46-100 Level 5 64<br />
101-200 Level 6 128<br />
201-400 Level 7 256<br />
401 Up Level 8 512<br />
Function Set bar code height<br />
ASCII [ESC] [EM] B <br />
Hexadecimal 1BH 19H 42H <br />
Decimal <br />
IPCL &%BH <br />
EPOS [GS] h <br />
Description The [ESC] [EM] B command sets the bar code height where *24<br />
is the number dots. The default is n = 4, and results in a barcode that is<br />
about 0.47 inches high.<br />
Function Set bar code width<br />
ASCII [ESC] [EM] W <br />
Hexadecimal 1BH 19H 57H <br />
Decimal <br />
IPCL &%BW <br />
EPOS [GS] w <br />
Description The [ESC] [EM] w command sets the minimum bar width. The value<br />
may be between 1 and 8. The default is 3.<br />
Note: A value of 1 may result in barcodes that are unreadable with some<br />
readers.<br />
28-05897 Rev D Page 139
Programming Codes<br />
<strong>Ithaca</strong> ® <strong>610</strong> Programmer’s <strong>Guide</strong><br />
Function Set bar code justification, human readable interpretation (HRI)<br />
character print mode, and print direction<br />
ASCII [ESC] [EM] J <br />
Hexadecimal 1BH 19H 4AH <br />
Decimal <br />
IPCL &%BJ <br />
EPOS none<br />
The power on default is center justified with HRI characters not printed.<br />
Description The [ESC] [EM] J command selects the operation of the bar code<br />
justification, HRI characters, and print direction.<br />
Where n bits n IPCL 76543210<br />
------xx Justified<br />
0 00 ------00 Left<br />
1 01 ------01 Center<br />
2 02 ------10 Right<br />
--xx---- HRI characters<br />
0 00 --00---- Not printed<br />
16 16 --01---- Printed above the bar code<br />
32 32 --10---- Printed below the bar code<br />
48 48 --11---- Printed above and below the bar code<br />
-x------ Vertical print mode. (Page mode may<br />
work better)<br />
0 00 -0------ Bar code printed in horizontal<br />
direction (default)<br />
64 64 -100---- Bar code printed in vertical direction<br />
Note 1: The [ESC] [EM] J command only affects bar code printing.<br />
Note 2: HRI is not available in vertical print mode. You may print normal<br />
barcodes in page mode, which will provide for HRI and significantly longer<br />
barcodes.<br />
Page 140 Rev D 28-05897
Programming Codes<br />
<strong>Ithaca</strong> ® <strong>610</strong> Programmer’s <strong>Guide</strong><br />
Unicode and Downloaded Fonts<br />
The <strong>Ithaca</strong>® <strong>610</strong> Printer supports Unicode encoding. This Unicode support is exclusive<br />
to the downloaded fonts.<br />
You must have downloaded and selected the downloaded font before you can reference<br />
the font via Unicode encoding. See the following group of commands for how to select<br />
and use a download font.<br />
There is a font downloading utility available from <strong>TransAct</strong>; contact your sales person or<br />
tech support for more information.<br />
WARNING: You must have proper rights to use a font in this manner.<br />
Do not download a font to the printer if you do not have the right to use<br />
the font as a downloaded printer font.<br />
The commands that control access to the downloaded fonts are all in the group that<br />
starts as ―[ESC]+‖ commands. Other commands that manipulate the resident fixed pitch<br />
fonts do not apply to the downloaded fonts described in this section. If commands that<br />
reference internal fonts or change the pitch are selected, the down loaded font will be<br />
deactivated and the last used internal font selected.<br />
To access characters located above 255 you must use a Unicode encoding method.<br />
Unicode Encoding<br />
UTF-16 is the most straightforward way to access characters above 255. UTF-16 is<br />
basically sending two 8-bit bytes that form a 16-bit address to access the desired<br />
character.<br />
UTF-16BE uses the big-endian method of sending the two bytes. This method sends the<br />
high byte first and then the low byte.<br />
UTF-16LE uses the little-endian method of sending the two bytes. This method sends<br />
the low byte first and then the high byte.<br />
UTF-8 uses a Multiple Byte Character Sequence (MBCS) to identify the desired Unicode<br />
character. This encoding method is less straightforward. This method uses unique bit<br />
sequences at the MSBs of a byte to determine its location and meaning within the MBCS<br />
encoding. See the table below for more information.<br />
Scalar Value 1 st Byte 2nd Byte 3rd Byte<br />
000000000xxxxxxx 0xxxxxxx<br />
00000yyyyyxxxxxx 110yyyyy 10xxxxxx<br />
Zzzzyyyyyyxxxxxx 1110zzzz 10yyyyyy 10xxxxxx<br />
28-05897 Rev D Page 141
Programming Codes<br />
<strong>Ithaca</strong> ® <strong>610</strong> Programmer’s <strong>Guide</strong><br />
Function Set Font ID<br />
ASCII [ESC] + 1 <br />
Hexadecimal 1BH 2BH 31H<br />
Decimal <br />
Description The [ESC] + 1 command sets the download font ID. This command is<br />
used to set the font ID before sending/downloading character definitions.<br />
This command does NOT select the font for printing. This command is<br />
not used during normal printing use of the printer.<br />
Function Set Font Descriptor<br />
ASCII [ESC] + 2<br />
Hexadecimal 1BH 2BH 32H<br />
Decimal <br />
Description The [ESC] + 2 command is used to send a font header/descriptor to the<br />
printer. The first byte of the descriptor is the length of the header<br />
description. This length must be 64. The format of this font header uses<br />
the ―HP PCL Soft Font Design‖ version 4 (PCL4). The description of PLC<br />
Soft Font technology is not discussed here. Not all of the values in the<br />
header are used, but they should be set to a reasonable value in case<br />
they are used in future implementations. . This command is not used<br />
during normal printing use of the printer.<br />
NOTE: There is a font downloading utility available from <strong>TransAct</strong>. Call<br />
<strong>TransAct</strong> sales or technical support for more information.<br />
WARNING: You must have proper rights to use a font in this manner.<br />
Do not download a font to the printer if you do not have the right to use<br />
the font as a downloaded printer font.<br />
Function Select Font<br />
ASCII [ESC] + 3 <br />
Hexadecimal 1BH 2BH 31H<br />
Decimal <br />
Description The [ESC] + 3 command selects the downloaded font for printing. This<br />
command is used to select the previously downloaded font for printing.<br />
Function Set Character Code ID<br />
ASCII [ESC] + 4 <br />
Hexadecimal 1BH 2BH 34H<br />
Decimal <br />
Description The [ESC] + 4 command sets the download character ID. This command<br />
is used to set the character ID before sending/downloading the<br />
character‘s definition. This command is not used during normal printing<br />
use of the printer.<br />
Page 142 Rev D 28-05897
Programming Codes<br />
<strong>Ithaca</strong> ® <strong>610</strong> Programmer’s <strong>Guide</strong><br />
Function Send Character Definition<br />
ASCII [ESC] + 5 <br />
Hexadecimal 1BH 2BH 35H<br />
Decimal <br />
Description The [ESC] + 5 command is sent before sending the character definition.<br />
The format of this character definition uses the ―HP PCL Soft Font<br />
Design‖ version 4 (PCL4). The description of PLC Soft Font technology is<br />
not discussed here. Not all of the values in the character definition are<br />
used, but they should be set to a reasonable value in case they are used<br />
in future implementations. This command is not used during normal<br />
printing use of the printer.<br />
Function Delete Current Selected Soft Font<br />
ASCII [ESC] + 6<br />
Hexadecimal 1BH 2BH 36H<br />
Decimal <br />
Description The [ESC] + 6 command deletes the current selected font from RAM. It<br />
will not delete a font from flash memory for from ROM<br />
NOTE: This command will reselect the last used internal font. If another<br />
soft font is to be used, it must be selected.<br />
Function Delete All Soft Fonts<br />
ASCII [ESC] + 7<br />
Hexadecimal 1BH 2BH 37H<br />
Decimal <br />
Description<br />
The [ESC] + 7 command deletes all the soft fonts from RAM. It will not<br />
delete a font from flash memory for from ROM<br />
NOTE: This command will reselect the last used internal font.<br />
Function Query Soft/RAM Font Information<br />
ASCII [ESC] + Q<br />
Hexadecimal 1BH 2BH 51H<br />
Decimal <br />
Return 64 bytes of font header.<br />
Description The [ESC] + Q command will return the raw font header data for the<br />
currently selected font.<br />
Function Copy Soft Font from RAM to User memory/flash memory.<br />
ASCII [ESC] + U<br />
Hexadecimal 1BH 2BH 55H<br />
Decimal <br />
Description The [ESC] + U command will copy the currently selected soft font from<br />
RAM to user/flash memory to make the font permanent.<br />
28-05897 Rev D Page 143
Programming Codes<br />
<strong>Ithaca</strong> ® <strong>610</strong> Programmer’s <strong>Guide</strong><br />
Function Initiate Unicode UTF-16BE Encoding<br />
ASCII [ESC] + H<br />
Hexadecimal 1BH 2BH 48H<br />
Decimal <br />
Description The [ESC] + H command will put the printer into UTF-16BE character<br />
encoding mode of operation. If you wish to access characters above<br />
255, You must select a Unicode encoding such as UTF-16BE.<br />
You must select a downloaded font, as described in this section, before<br />
issuing this command.<br />
UTF-16 is the most straightforward way to access characters above 255.<br />
UTF-16 is basically sending two 8-bit bytes that form a 16-bit address to<br />
access the desired character.<br />
UTF-16BE uses the big-endian method of sending the two bytes. This<br />
method sends the high byte first and then the low byte.<br />
NOTE: All information sent to the printer must now use this encoding,<br />
even for non-print commands.<br />
Function Initiate Unicode UTF-16LE Encoding<br />
ASCII [ESC] + L<br />
Hexadecimal 1BH 2BH 4CH<br />
Decimal <br />
Description The [ESC] + L command will put the printer into UTF-16LE character<br />
encoding mode of operation. If you wish to access characters above<br />
255, You must select a Unicode encoding such as UTF-16LE.<br />
You must select a downloaded font, as described in this section, before<br />
issuing this command.<br />
UTF-16 is the most straightforward way to access characters above 255.<br />
UTF-16 is basically sending two 8-bit bytes that form a 16-bit address to<br />
access the desired character.<br />
UTF-16LE uses the little-endian method of sending the two bytes. This<br />
method sends the low byte first and then the high byte.<br />
NOTE: All information sent to the printer must now use this encoding,<br />
even for non-print commands.<br />
Page 144 Rev D 28-05897
Programming Codes<br />
<strong>Ithaca</strong> ® <strong>610</strong> Programmer’s <strong>Guide</strong><br />
Function Initiate Unicode UTF-8 Encoding (MBCS)<br />
ASCII [ESC] + M<br />
Hexadecimal 1BH 2BH 4DH<br />
Decimal <br />
Description The [ESC] + M command will put the printer into UTF-8 character<br />
encoding mode of operation. If you wish to access characters above<br />
255, You must select a Unicode encoding such as UTF-8.<br />
You must select a downloaded font, as described in this section, before<br />
issuing this command.<br />
UTF-8 uses a Multiple Byte Character Sequence (MBCS) to identify the<br />
desired Unicode character. This encoding method is less straightforward.<br />
This method uses unique bit sequences at the MSBs of a byte to<br />
determine its location and meaning within the MBCS encoding. See the<br />
table below for more information.<br />
NOTE: All information sent to the printer must now use this encoding,<br />
even for non-print commands.<br />
Scalar Value 1 st Byte 2nd Byte 3rd Byte<br />
000000000xxxxxx 0xxxxxxx<br />
x<br />
00000yyyyyxxxxxx 110yyyyy 10xxxxxx<br />
zzzzyyyyyyxxxxxx 1110zzzz 10yyyyyy 10xxxxxx<br />
Function Initiate Normal 8-bit Character Encoding<br />
ASCII [ESC] + A<br />
Hexadecimal 1BH 2BH 41H<br />
Decimal <br />
Description The [ESC] + A command will put the printer into normal character<br />
encoding mode of operation. One byte = one character.<br />
28-05897 Rev D Page 145
Programming Codes<br />
<strong>Ithaca</strong> ® <strong>610</strong> Programmer’s <strong>Guide</strong><br />
Miscellaneous Control<br />
[ESC] 8<br />
ASCII [ESC] 8<br />
Hexadecimal 1BH 38H<br />
Decimal <br />
IPCL &%PF<br />
EPOS none<br />
Disable paper out sensor<br />
Description<br />
[ESC] 9<br />
The [ESC] 8 command temporally disables the paper out sensor. The<br />
printer does not stop printing or go off-line when it senses it is out of<br />
paper. The inquire commands still return paper out status.<br />
Enable paper out sensor<br />
ASCII [ESC] 9<br />
Hexadecimal 1BH 39H<br />
Decimal <br />
IPCL &%PO<br />
EPOS none<br />
Description<br />
[ESC] X<br />
The [ESC] 9 command enables paper sensing and is intended to reverse<br />
the effect of the disable paper out sensor command. If the printer is out<br />
of paper when the command is issued, it goes off-line.<br />
Set left/right print margins<br />
ASCII [ESC] X <br />
Hexadecimal 1BH 58H <br />
Decimal <br />
IPCL none<br />
EPOS [ESC] l, [ESC] Q<br />
Description<br />
The [ESC] X command sets left and right print margins in<br />
characters from the home position. Where n 1 = left margin and n 2 = right<br />
margin, the absolute position depends on the current print pitch. If the left<br />
and right margins are set to the right of the current horizontal position, the<br />
new margins become valid in the same line. If the left margin is set to the<br />
left of the current horizontal position and the right margin set to the right<br />
of the current horizontal position, the right margin setting becomes valid in<br />
the same line, but the left margin setting becomes valid in the next line.<br />
When the left and right margins are set to the left of the current horizontal<br />
position, both left and right margin settings appear to become valid in the<br />
next line because an auto-CR is performed by the subsequent data.<br />
Page 146 Rev D 28-05897
Programming Codes<br />
<strong>Ithaca</strong> ® <strong>610</strong> Programmer’s <strong>Guide</strong><br />
[CAN]<br />
Clear print buffer<br />
ASCII [CAN]<br />
Hexadecimal 18H<br />
Decimal <br />
IPCL &%RP<br />
EPOS [CAN]<br />
Description<br />
[ESC] q<br />
The [CAN] command clears the print buffer and any unprinted information<br />
in the printer received before it. If the input buffer is not being processed<br />
because the printer is out of paper or a form is not inserted, the [CAN]<br />
command will not be processed until after the error is cleared. The [CAN]<br />
command does not restore default conditions; it only clears the print<br />
buffer.<br />
Query marker<br />
ASCII [ESC] q <br />
Hexadecimal 1BH 71H <br />
Decimal <br />
IPCL none<br />
EPOS none<br />
Description<br />
Response<br />
The [ESC] q command returns a status to the host when it is<br />
processed.<br />
[SOH] <br />
The [ESC] q command may be placed in the print data and, when<br />
processed by the printer, will return a progress status marker. The value<br />
of can be any 8-bit value. It is returned to the host unaltered. The<br />
intent is for it to be a sequence number. The command can be used to<br />
track the print progress of the printer or verify that data has been printed.<br />
Note: The [ESC] q command is a line terminator that causes the<br />
printer to print all previous data. If a normal line terminator like a [CR] is<br />
not supplied, right justify and auto-center do not function correctly. All<br />
data is left justified. [ESC] q does not perform a [CR] or [LF] function.<br />
28-05897 Rev D Page 147
Programming Codes<br />
<strong>Ithaca</strong> ® <strong>610</strong> Programmer’s <strong>Guide</strong><br />
[ESC] x<br />
Open cash drawer<br />
ASCII [ESC] x <br />
Hexadecimal 1BH 78H <br />
Decimal <br />
IPCL &%D1 (Cash Drawer 1)<br />
&%D2 (Cash Drawer 2)<br />
EPOS [ESC] p<br />
Description The [ESC] x command charges the cash drawer, , for 150 ms.<br />
Where = (01H) or 1 (31H) for Cash Drawer 1<br />
(02H) or 2 (32H) for Cash Drawer 2<br />
The time period that drawer is activated can be changed in the<br />
configuration menu. Activation time ranges from 25 ms to 250 ms.<br />
Note 1: Cash drawer open commands are processed as part of print data.<br />
They are not immediate commands and are not processed until found in<br />
the input buffer by the print processor.<br />
[ESC] v<br />
Note 2: Cash Drawer 2 is factory configurable in one of two modes. Either<br />
pin 2 or 3 is active depending on an internal jumper setting. The factory<br />
default is pin 3. Cash Drawer 1 is always on pin 2. The cash drawer<br />
status is defined as an open circuit for drawer closed.<br />
Perform Auto Cut<br />
ASCII [ESC] v<br />
Hexadecimal 1BH 76H <br />
Decimal <br />
IPCL &%FC &%PC<br />
EPOS [ESC] i or [ESC] m<br />
Description<br />
The [ESC] v command operated the auto cutter.<br />
Note: The auto cutter is optional. If the auto cutter is not installed this<br />
command will be ignored.<br />
[ESC] @<br />
Initialize the printer<br />
ASCII [ESC] @<br />
Hexadecimal 1BH 40H<br />
Decimal <br />
Description The [ESC] @ command initializes the printer. All settings, including<br />
character font and line spacing, are canceled.<br />
Page 148 Rev D 28-05897
Programming Codes<br />
<strong>Ithaca</strong> ® <strong>610</strong> Programmer’s <strong>Guide</strong><br />
[BEL]<br />
Audio alert<br />
ASCII [BEL]<br />
Hexadecimal 07H<br />
Decimal <br />
IPCL &%BL<br />
EPOS [BEL]<br />
Description<br />
When enabled, the [BEL] command starts the audio alert sequence. The<br />
default is a single sound, lasting the period of time defined by the audio<br />
alert setting. If the audio alert is off, it does not function.<br />
[ESC] [BEL] Configure audio alert<br />
ASCII [ESC] [BEL] <br />
Hexadecimal 1BH 07H <br />
Decimal <br />
IPCL None<br />
EPOS None<br />
Description The [ESC] [BEL] command alters the way the audio alert<br />
sounds.<br />
The default is a single sound lasting the period of time defined by the audio alert setting.<br />
The [ESC] [BEL] command allows the sound to be<br />
altered.<br />
Where is the number of alert cycles<br />
is the on time of the alert cycle in ten Ms intervals<br />
is the off time of the alert cycle in ten Ms intervals<br />
[ESC] p 5<br />
Enable/disable paper feed<br />
ASCII [ESC] p 5 <br />
Hexadecimal 1BH 70H 35H <br />
Decimal <br />
Range 0 n 255<br />
Description<br />
Where <br />
The [ESC] p 5 command enables or disables the FEED button. When<br />
the least significant bit (LSB) of = one, the FEED button is disabled;<br />
when it is zero, the button is enabled. To prevent problems caused by<br />
accidentally pressing the FEED button, use the command to disable it.<br />
The FEED button is temporarily enabled, regardless of how the command<br />
is set during the wait time set by the [GS] z 0 command for paper<br />
insertion and during the recovery confirmation time.<br />
Bit 0 = 1 the FEED button is disabled<br />
Bit 0 = 0 the button is enabled.<br />
28-05897 Rev D Page 149
Programming Codes<br />
<strong>Ithaca</strong> ® <strong>610</strong> Programmer’s <strong>Guide</strong><br />
[ESC] p 4<br />
Select paper sensor(s) to stop printing<br />
ASCII [ESC] p 4 <br />
Hexadecimal 1BH 70H 34H <br />
Decimal <br />
Range 0 n 255<br />
Description<br />
The [ESC] p 4 command selects the sensors that tell the printer to<br />
stop printing. The default setting occurs when only the Paper Out sensor<br />
stops printing. When the paper roll near-end sensor is enabled and the<br />
sensor detects a near-end condition during printing, the printer completes<br />
the current line and then automatically goes off-line. Replacing a new<br />
paper roll restarts the printing. When the paper roll near-end sensor is<br />
disabled and a paper near-end condition is detected during printing, the<br />
paper out LED comes on, but the printer continues to print.<br />
Note: The <strong>Ithaca</strong> ® does not allow the Paper Out sensor to be disabled. It<br />
is always on.<br />
is defined as follows:<br />
Bit On/Off Hexadecimal Decimal Function<br />
0,1 Off 00H Paper roll near-end sensor disabled<br />
On 01H,02H,03H ,, Paper roll near-end sensor enabled<br />
7 - 00H Undefined<br />
Table 19 Paper Sensor Commands<br />
[ESC] p 3<br />
Select paper sensor(s) to output paper-end signals<br />
ASCII [ESC] p 3 <br />
Hexadecimal 1BH 70H 33H <br />
Decimal <br />
Range 0 n 255<br />
Description<br />
The [ESC] p 3 command selects the paper sensor that outputs a<br />
paper-end signal to the parallel interface when a paper-end is detected.<br />
The default setting is when all sensors are enabled. ( = 15). It is<br />
possible to select multiple sensors to output signals. If any of the sensors<br />
detect a paper end, the paper end signal is output. The command is only<br />
available with a parallel interface. The paper-end sensor is an option. If<br />
the sensor is not equipped, the settings of bits 0 and 1 of the command<br />
are not effective.<br />
Page 150 Rev D 28-05897
Programming Codes<br />
<strong>Ithaca</strong> ® <strong>610</strong> Programmer’s <strong>Guide</strong><br />
Bit On/Off Hexadecimal Decimal Function<br />
0 Off 00H Paper roll near-end sensor disabled<br />
On 01H Paper roll near-end sensor enabled<br />
1 Off 00H Paper roll near-end sensor disabled<br />
On 02H Paper roll near-end sensor enabled<br />
2 Off 00H Paper roll end sensor disabled<br />
On 04H Paper roll end sensor enabled<br />
3 Off 00H Paper roll end sensor disabled<br />
On 08H Paper roll end sensor enabled<br />
4-7 - - - Undefined<br />
Table 20 Paper Sensor Commands<br />
[ESC] <<br />
Enable print suppress and data pass through<br />
ASCII [ESC] < <br />
Hexadecimal 1BH 3CH <br />
Decimal <br />
IPCL &%PT <br />
EPOS [ESC] = <br />
Description The [ESC] < command provides print suppress and data pass<br />
through features.<br />
Where Bit 0 Printer select<br />
Bit 1 Pass through On<br />
Bits 2 - 7 Undefined<br />
If Bit 0 is clear, the printer stops processing data. If Bit 1 is set, the data<br />
is passed through the printer and sent out on the serial port.<br />
Note 1: The pass through command is preprocessed. It is processed as<br />
soon as it is received. The printer may continue to print while previously<br />
received data is processed. The printer must be on-line and ready to<br />
activate the command.<br />
Note 2: Pass through should only be used with serial printers. If the<br />
printer is configured for parallel operation, the data is still pass through on<br />
the IEEE 1284 port. In most cases this is not useful.<br />
Note 3: When <strong>Ithaca</strong> ® Series 50 Printer compatibility is being used, these<br />
commands do not function. Series 50 Printer pass through must be used.<br />
Note 4: Multi-drop is not operational during suppress and pass through. If<br />
a multi-drop address is present in the pass through data, it is not<br />
processed.<br />
28-05897 Rev D Page 151
Programming Codes<br />
<strong>Ithaca</strong> ® <strong>610</strong> Programmer’s <strong>Guide</strong><br />
[ESC] y<br />
Set control feature commands<br />
ASCII [ESC] y <br />
Hexadecimal 1BH 79H <br />
Decimal <br />
IPCL &%Y0-9 or &%YX (for numbers greater than nine)<br />
EPOS [ESC] y <br />
Where n 0 Reinitializes the printer and forces Citizen mode<br />
1 Reinitializes the printer and forces Star mode<br />
2 Reinitializes the printer and forces <strong>Ithaca</strong>® <strong>610</strong> mode<br />
3 Reinitializes the printer and forces extended EPOS mode<br />
4 Disables IPCL commands<br />
5 Enables IPCL commands<br />
6 Disables inquire processing (All command preprocessing is<br />
disabled.)<br />
7 Enables inquire processing<br />
8 Enables extended diagnostics<br />
9 Print Current Configuration<br />
10 Not used<br />
11 Overlays the current character chart with Group 2 OCR MA<br />
Characters<br />
12 Replaces the OCR characters with normal characters<br />
13 Not used<br />
14 Forces head maintenance<br />
15 Print Current totals<br />
16 Enable Test Font<br />
17 Requests the printer to enter remote OFF.<br />
18 Requests the printer to exit remote OFF.<br />
20 Print alignment settings<br />
Description<br />
The [ESC] y command enables and disables command set features.<br />
It is possible that the IPCL commands will interfere with print data. If this<br />
occurs, the IPCL can be disabled with an [ESC] y command.<br />
Note 1: Once IPCL commands are disabled, the Enable IPLC command<br />
will not be a valid IPCL code.<br />
Note 2: [ESC] y , , , and allow the printer to switch<br />
between emulation modes. When the switch takes place, the current print<br />
buffer is printed, and the printer reinitializes. These commands do not<br />
permanently change the configuration. A power on reset restores the<br />
mode that was configured in menu mode. A reset by command or from<br />
the INIT pin does not restore the mode.<br />
Page 152 Rev D 28-05897
Programming Codes<br />
<strong>Ithaca</strong> ® <strong>610</strong> Programmer’s <strong>Guide</strong><br />
Note 3: [ESC] y and enable and disable the inquire process.<br />
These commands are not processed as they are received, but are<br />
buffered then processed. The buffering process allows inquire commands<br />
sent after a disable to be answered. In addition, inquires sent after an<br />
enable may not be answered. (See additional notes 3 and 4 on the next<br />
page).<br />
Note 4: The printer has a resident OCR-MA font. It is defined and<br />
mapped per ANSI X3.111-1986. Once mapped into a code page, it can<br />
be removed by issuing an [ESC] y command or a code-page select<br />
command.<br />
Note 5: In EPOS mode, the [ESC] y command is active.<br />
[ESC] ~<br />
Extended Configuration and Control<br />
ASCII [ESC] ~ <br />
Hexadecimal 1BH 7EH <br />
Decimal <br />
IPCL none<br />
EPOS [ESC] ~ <br />
Description<br />
The [ESC] ~ commands are extended diagnostics commands. They<br />
must all be preceded with an enabling command. These commands (in<br />
general) are not intended to be used by the end user.<br />
28-05897 Rev D Page 153
Programming Codes<br />
<strong>Ithaca</strong> ® <strong>610</strong> Programmer’s <strong>Guide</strong><br />
Remote Power Control<br />
The <strong>Ithaca</strong> ® <strong>610</strong> Printer has a remote power control command that instructs it to enter<br />
OFF mode. When the command is issued, the printer performs print cartridge<br />
maintenance and enters OFF mode. Unlike pushing the * button, remote power mode<br />
leaves the communications active. All commands except the exit power down command<br />
are ignored.<br />
[ESC] y<br />
Remote Power Control<br />
ASCII [ESC] y <br />
Hexadecimal 1BH 79H <br />
Decimal <br />
IPCL &%YX17 or &%YX18<br />
EPOS [ESC] y <br />
Where n 17 Requests the printer to enter remote OFF.<br />
18 Requests the printer to exit remote OFF<br />
Description<br />
Inquiry (ENQ) commands are accepted and answered in remote power<br />
down mode. The printer reactivates if the * button is pressed or a power<br />
up command is received.<br />
Note 1: If power is lost after the power down command is issued, the<br />
printer remembers it is in power down mode but does not reactivate the<br />
communications link. The * button must be pushed to return the printer to<br />
full operation.<br />
Note 2: This command is not available in STAR mode.<br />
Page 154 Rev D 28-05897
<strong>Programmer's</strong> <strong>Guide</strong> <strong>Ithaca</strong> ® 1000 Control Codes<br />
Documented Extended Control commands<br />
The <strong>Ithaca</strong> ® <strong>610</strong> has a number of Extended Control commands designed to make<br />
operation and maintenance of the printer easier for the host application. For further<br />
details, refer to the <strong>Ithaca</strong> ® Extended Control discussion in Chapter 8.<br />
[SOH]<br />
Begin multi-drop control<br />
ASCII [SOH] <br />
Hexadecimal 01H <br />
Decimal <br />
IPCL none<br />
Where is the printer address. Addresses of A, B, or C are configurable.<br />
Description<br />
The printer must be addressed in multi-drop mode. [SOH] is the<br />
addressing command. If the printer is configured with an address of ‗A,‘ it<br />
operates when addressed. When any other address is sent to the printer,<br />
it enters print suppress mode. An address of ‗Z‘ is n universal address<br />
that activates the printer.<br />
28-05897 Rev D Page 155
Programming Codes<br />
<strong>Ithaca</strong> ® <strong>610</strong> Programmer’s <strong>Guide</strong><br />
Printer Status<br />
Status Inquire<br />
The <strong>Ithaca</strong> ® <strong>610</strong> Printer is designed for use as part of an automated system where the<br />
host computer makes every attempt to correct problems with the printer. In addition, the<br />
host application requires that it be able to obtain more information from the printer than<br />
is typical of normal computer printers. For example, a normal computer printer does not<br />
have cash drawers, such additional features require that the standard printer protocol be<br />
extended to deal with the added features of a point-of-sale (POS) printer.<br />
All inquire commands are processed as they are received (preprocessed or real time)<br />
and require a response from the printer. Consequently, parallel, IEEE 1284 bidirectional<br />
communications, USB or bidirectional serial operation is required.<br />
The <strong>Ithaca</strong> ® <strong>610</strong> Printer looks at and evaluates all commands as they are received, and<br />
does not respond to inquire commands that happen to be embedded in graphics or other<br />
commands. (Refer to the buffer and preprocessor descriptions in later sections.)<br />
In all cases, inquire commands are responded to by an acknowledged (ACK) or a not<br />
acknowledged (NAK) and then the command ID, which allows the host application to<br />
make multiple requests and receive identifiable responses. If the printer is configured for<br />
serial or USB operation the status is automatically returned to the host. If the printer is<br />
configured for parallel, IEEE 1284 operation, the HOST must initiate a reverse channel<br />
request to return the status.<br />
Serial and USB Mode Inquire<br />
All inquire (ENQ) commands require a response from the printer. During serial operation,<br />
all inquire commands are responded to by an acknowledged (ACK) or not acknowledged<br />
(NAK), the command ID, and in some cases status. Most status responses sequences<br />
contain a length field to help decode and separate responses.<br />
In general the printer should be configured for ―Buffer Full Only‖ off-line operation if<br />
inquire commands are used. This prevents the printer from using flow control for<br />
anything but buffer full. The programmer must take on the responsibility for assuring that<br />
inquire commands are used to maintain status of the printer.<br />
The printer always accepts serial data even when it is off-line. The printer has reserve<br />
buffer space that allows additional information to be received even if the printer is<br />
signaling buffer full or off-line. Because inquire commands are processed before they go<br />
into the buffer, the printer responds even when it is busy printing.<br />
In serial mode, the response to an inquiry should be received by the host before another<br />
inquire command is issued to the printer. When the printer receives an inquiry, it<br />
generates a response. If inquiries are sent to the printer too quickly, the printer spends<br />
all of its time responding and does not have time to print.<br />
Page 156 Rev D 28-05897
Programming Codes<br />
<strong>Ithaca</strong> ® <strong>610</strong> Programmer’s <strong>Guide</strong><br />
IEEE 1284 Mode Inquire<br />
In parallel, IEEE 1284 mode, status information can be returned to the host through the<br />
IEEE 1284 reverse channel. After the host makes an inquire request, it activates IEEE<br />
1284 mode 0 reverse channel and waits for a response from the printer. The response to<br />
the inquire is identical to serial mode in format.<br />
The printer always accepts IEEE 1284 reverse-channel requests but does not accept<br />
inquire commands when off-line. It is possible to obtain status when off-line by placing<br />
the printer in dynamic response mode before the printer goes off-line. The IEEE 1284<br />
reverse channel responds to status changes even when the printer is off-line.<br />
In general, the printer should be configured for ―Buffer Full Only‖ off-line operation if<br />
inquire commands are used. This prevents the printer from using flow control for<br />
anything but buffer full. The programmer must take on the responsibility for assuring that<br />
inquire commands are used to maintain status of the printer.<br />
Inquire Commands<br />
[ENQ]<br />
Inquire printer status<br />
ASCII [ENQ] <br />
Hexadecimal 05H <br />
Decimal <br />
IPCL none<br />
EPOS [GS] r or [DLE] [ENQ] or [DLE] [EOT]<br />
Description<br />
The [ENQ] command inquires about the printer‘s status and returns a<br />
result.<br />
Note: When the printer is off-line, inquires may not be accepted.<br />
[ENQ] <br />
Inquire Cash Drawer 1 status<br />
ASCII [ENQ] <br />
Hexadecimal 05H 01H<br />
Decimal <br />
Function Cash Drawer 1 Status<br />
Response ACK (06H 01H) Cash Drawer 1 is closed.<br />
NAK (15H 01H) Cash Drawer 1 is open.<br />
Cash drawer status is defined as open circuit being drawer closed.<br />
[ENQ] <br />
ASCII [ENQ] <br />
Hexadecimal 05H 03H<br />
Decimal <br />
Function<br />
Response<br />
Inquire receipt paper low status<br />
Receipt paper low<br />
ACK (06H 03H) Receipt paper is present.<br />
NAK (15H 03H) Receipt paper is low.<br />
28-05897 Rev D Page 157
Programming Codes<br />
<strong>Ithaca</strong> ® <strong>610</strong> Programmer’s <strong>Guide</strong><br />
[ENQ] <br />
Inquire receipt paper out status<br />
ASCII [ENQ] <br />
Hexadecimal 05H 04H<br />
Decimal <br />
Function<br />
Response<br />
[ENQ] <br />
ASCII [ENQ] <br />
Hexadecimal 05H 08H<br />
Decimal <br />
Function<br />
Response<br />
[ENQ] <br />
Receipt paper exhausted<br />
ACK (06H 04H) Receipt paper is present<br />
NAK (15H 04H) Receipt paper is exhausted<br />
Inquire cover open status<br />
Cover open/closed status<br />
ACK (06H 08H) The cover is closed<br />
NAK (15H 08H) The cover is open<br />
Is the buffer empty? Clear the IEEE 1284 buffer.<br />
ASCII [ENQ] <br />
Hexadecimal 05H 09H<br />
Decimal <br />
Function The [ENQ] command allows the host to know when the print buffer is<br />
empty. If IEEE 1284 is active, the command also clears the response<br />
buffer.<br />
Response ACK (06H 09H) The buffer is empty.<br />
NAK (15H 09H) The buffer is not empty.<br />
[ENQ] Request printer reset<br />
ASCII [ENQ] <br />
Hexadecimal 05H 0AH<br />
Decimal <br />
Function Reset printer<br />
Response Serial Parallel<br />
ACK (06H 0AH) No response<br />
The command was accepted.<br />
NAK (15H 0AH)<br />
The command was rejected.<br />
Description<br />
The ENQ , EPOS DLE ENQ commands and the INIT pin all<br />
have the same effect and are referred to as reset commands. To prevent<br />
data loss, the printer tries to finish printing the buffered data. When<br />
operator intervention with the printer is required for any reason, data loss<br />
results. The reset operation is saved until the printer goes idle.<br />
In the case of a slip request command or any command that waits for the<br />
operator, the printer is idle. If the printer is idle and a reset command is<br />
received or pending, the printer resets, and the buffer clears. If the host<br />
resets an operator intervention operation, any remaining buffered data is<br />
cleared.<br />
Page 158 Rev D 28-05897
Programming Codes<br />
<strong>Ithaca</strong> ® <strong>610</strong> Programmer’s <strong>Guide</strong><br />
When the printer receives a reset command, the printer goes off-line<br />
and/or busy until the reset completes. In serial mode, the printer may<br />
have information in its high-speed buffer that was received after the reset<br />
command but before the reset was processed. If the host application<br />
continues to send information to the printer after a reset command, some<br />
of that information may be processed before the reset is processed. In<br />
parallel mode, the printer goes busy after the reset is received but before<br />
the next byte is accepted. The printer accepts an [ENQ] in parallel<br />
mode. It, however, is not acknowledged. If both the serial and parallel<br />
ports are active, the serial reset is not acknowledged either because the<br />
reset operation removes the parallel response. In IEEE 1284 mode, the<br />
response buffer is cleared by a reset command, which prevents<br />
responses in IEEE 1284 mode as well.<br />
Note: If reset inhibit is set in the configuration menu, this command is<br />
ignored.<br />
[ENQ] <br />
Inquire power cycle status<br />
ASCII [ENQ] <br />
Hexadecimal 05H 0BH<br />
Decimal <br />
Function<br />
Response<br />
Has the printer been power cycled since the last request?<br />
ACK (06H 0BH)<br />
Printer has been power cycled since the last [ENQ] <br />
NAK (15H 0BH)<br />
Printer has not power cycled since the last [ENQ] <br />
Description<br />
[ENQ] <br />
The first time after a reset, the command returns [ACK] , after that<br />
the command returns [NAK] . The command allows the application<br />
to determine if the printer has been power cycled and needs to be<br />
reinitialized. The [ENQ] command and the INIT signal on the<br />
parallel port both cause the printer to return power up status.<br />
Inquire Mechanical error status<br />
ASCII [ENQ] <br />
Hexadecimal 05H 0EH<br />
Decimal <br />
Function Error status<br />
Response ACK (06H 0EH) No mechanical errors<br />
NAK (15H 0EH)<br />
Mechanical error has occurred<br />
(Use [ENQ] to identify the error)<br />
Note: For this status request to function, the "Buffer Full Only" off-line<br />
option should be selected.<br />
28-05897 Rev D Page 159
Programming Codes<br />
<strong>Ithaca</strong> ® <strong>610</strong> Programmer’s <strong>Guide</strong><br />
[ENQ] Inquire printer state<br />
ASCII [ENQ] <br />
Hexadecimal 05H 11H<br />
Decimal <br />
Function The [ENQ] command returns the current printer state<br />
Note [ENQ] also returns the current printer state, but it should not be<br />
used as it conflicts with XON/XOFF flow control.<br />
Response [ACK] …<br />
Where<br />
<br />
is the echo of the command ID.<br />
is the number of return bytes + 40 (28H)<br />
(to prevent confusion with XON/XOFF).<br />
: bit 0 = 1 always<br />
bit 1 = Cover is closed.<br />
bit 2 = Receipt paper is out.<br />
bit 3 = 0<br />
bit 4 = Printer is waiting in an error mode. Use [ENQ] to identify the<br />
specific error and [ENQ] to recover<br />
bit 5 = 0<br />
bit 6 = 1 always<br />
bit 7 = 0 always<br />
: bit 0 - 5 = 0 always<br />
bit 6 = 1 always<br />
bit 7 = 0 always<br />
Note: For this status request to function, the "Buffer Full Only" off-line<br />
option should be selected.<br />
Page 160 Rev D 28-05897
Programming Codes<br />
<strong>Ithaca</strong> ® <strong>610</strong> Programmer’s <strong>Guide</strong><br />
[ENQ] <br />
Inquire all printer status<br />
ASCII [ENQ] <br />
Hexadecimal 05H 14H<br />
Decimal <br />
Function The [ENQ] command returns all status flags<br />
Response [ACK] …<br />
Where is the echo of command ID.<br />
is the number of return bytes + 40<br />
(28H) (to prevent confusion with XON/XOFF).<br />
: bit 0 = Cash Drawer 1 is open.<br />
bit 1 = Cash Drawer 2 is open<br />
bit 2 = Receipt paper is out.<br />
bit 3 = 0<br />
bit 4 = Receipt paper error occurred. (low or out)<br />
bit 5 = 0<br />
bit 6 = 1 always<br />
bit 7 = 0 always<br />
: bit 0 = 1 always<br />
bit 1 = Cover is closed.<br />
bit 2 = Buffer is empty.<br />
bit 3 = Printer has been power cycled,<br />
Reading this does not affect the state of the power-cycled flag.<br />
(Use [ENQ] to reset the power cycled bit.)<br />
bit 4 = Printer is waiting in an error mode. Use [ENQ] to identify the<br />
specific error and [ENQ] to recover<br />
bit 5 = 0<br />
bit 6 = 1 always<br />
bit 7 = 0 always<br />
: bit 0 = 1 always (Receipt Station)<br />
bit 1 = 0<br />
bit 2 = 0<br />
bit 3 = 0<br />
bit 4 = Undefined<br />
bit 5 = Printer is blocking print (Cover is open or out of paper.)<br />
bit 6 = 1 always<br />
bit 7 = 0 always<br />
: bit 0 = Printer supports receipts.<br />
bit 1 = Printer supports inserted forms.<br />
bit 2 = Printer supports multiple colors<br />
bit 3 = Printer supports cutter.<br />
bit 4 = Printer supports partial cuts.<br />
bit 5 = 0<br />
bit 6 = 1 always<br />
bit 7 = 0 always<br />
: Percentage of ink remaining on Head 1 (0-100) + 40 (28H)<br />
: Percentage of ink remaining on Head 2 (0-100) + 40 (28H)<br />
: Current multi-head alignment (0-16, 8 = 0 offset)<br />
28-05897 Rev D Page 161
Programming Codes<br />
<strong>Ithaca</strong> ® <strong>610</strong> Programmer’s <strong>Guide</strong><br />
[ENQ] <br />
Inquire printer ID<br />
ASCII [ENQ] <br />
Hexadecimal 05H 15H<br />
Decimal <br />
Function The [ENQ] command returns the printer IEEE 1284 ID string.<br />
Response [ACK] {ID string}<br />
Where is the echo of the command ID and is the number of return bytes in<br />
the ID string {ID string} is the IEEE ID return string, which follows:<br />
MFG:<strong>Ithaca</strong>-Periph.;<br />
CMD:PJ1000CL,IPCL;<br />
CLS:PRINTER;<br />
MDL:1000 PcOS;<br />
DES:<strong>Ithaca</strong>-Peripherals <strong>Ithaca</strong> ® <strong>610</strong>;<br />
REV:PE1200-01.16<br />
OPTS:$20xy<br />
Where x is a bit field defined as follows:<br />
bit 0 = 1 Red pen support<br />
bit 1 = 1 Green pen support<br />
bit 2 = 1 Blue pen support<br />
bit 3 = Always 0<br />
bit 4 = Always 1<br />
bit 5 = Always 1<br />
bit 6 = Always 0<br />
bit 7 = Always 0<br />
The y is a bit field defined as follows:<br />
bit 0 = 0<br />
bit 1 = Knife is installed.<br />
bit 2 = 0<br />
bit 3 = Always 0<br />
bit 4 = Always 1<br />
bit 5 = Always 1<br />
bit 6 = Always 0<br />
bit 7 = Always 0<br />
Page 162 Rev D 28-05897
Programming Codes<br />
<strong>Ithaca</strong> ® <strong>610</strong> Programmer’s <strong>Guide</strong><br />
[ENQ] <br />
Inquire Error status<br />
ASCII [ENQ] <br />
Hexadecimal 05H 17H<br />
Decimal <br />
Function The [ENQ] command reports on the error status.<br />
Response [ACK] <br />
Where<br />
is the echo of the command ID.<br />
is the number of return bytes + 40 (28H)<br />
(to prevent confusion with XON/XOFF).<br />
: Bit status as follows:<br />
bit 0 = Cover is open.<br />
bit 1 = Receipt Paper is Low<br />
bit 2 = Receipt paper is out.<br />
bit 3 = Ink is Low (This is set if either cartridge is low)<br />
bit 4 = Either or Both Cartridges are removed.<br />
bit 5 = The Auto-Cutter has faulted.<br />
bit 6 = 1 always<br />
bit 7 = An serious error has occurred.<br />
Note 1: If bit 7 is set, a serious error has occurred. The printer is not able<br />
to recover from type of error without operator intervention. If bit 7 is set<br />
without bit 5 (Auto-cutter fault) then the print carriage has faulted, which is<br />
probably caused by a paper jam or a component failure. The host system<br />
may issue an [ENQ] (Reset Request command) to attempt to<br />
recover. The Reset Request will reset the printer to an initial power up<br />
state. All data will be lost.<br />
Note 2: When a serious error occurs (bit 7 set) the printer enters a static<br />
state. Status responses will reflect the state of the printer when the error<br />
occurred.<br />
Note 3: For this status request to function during a serious error, the<br />
"Buffer Full Only" off line option should be selected.<br />
28-05897 Rev D Page 163
Programming Codes<br />
<strong>Ithaca</strong> ® <strong>610</strong> Programmer’s <strong>Guide</strong><br />
[ENQ] <br />
Inquire user-store status<br />
ASCII [ENQ] <br />
Hexadecimal 05H 17H<br />
Decimal <br />
Function The [ENQ] command reports on the user-store status.<br />
Response [ACK] <br />
Where is the echo of command ID. The report is a null terminated string with the<br />
following format:<br />
12345[CR][LF] (Free user store)<br />
12345 Type Name…[CR][LF] (First entry) etc.<br />
12345 Type Name…[CR][LF] (Last entry) <br />
Type<br />
[ENQ] <br />
The type field describes the type of information.<br />
M = macro<br />
C = character definition<br />
Inquire Color status<br />
ASCII [ENQ] <br />
Hexadecimal 05H 18H<br />
Decimal <br />
Function The [ENQ] command reports Color capibility status.<br />
Response [ACK] <br />
Where Is the echo of command<br />
Secondary Color 0 = Not available, 1 = Red, 2 = Green, 4 = Blue<br />
Primary Color 16 = Black<br />
Pen Status<br />
bit 0 = Not defined<br />
bit 1 = Not defined<br />
bit 2 = 1 always<br />
bit 3 = 0 always<br />
bit 4 = 0 always<br />
bit 5 = 0 always<br />
bit 6 = 1 always<br />
bit 7 = 0 always<br />
Page 164 Rev D 28-05897
Programming Codes<br />
<strong>Ithaca</strong> ® <strong>610</strong> Programmer’s <strong>Guide</strong><br />
ESC/POS TM Codes<br />
The EPOS codes that are supported by the <strong>Ithaca</strong> ® <strong>610</strong> Printer are listed in this section.<br />
<strong>TransAct</strong> Technologies, Inc. has no control over how Epson extends or changes these<br />
control codes, and can make no guarantees as to the operation of our printer when it<br />
replaces an Epson printer. The TM-T90 and EPOS emulation‘s are intended to make it<br />
as easy as possible to replace an Epson printer with an <strong>Ithaca</strong> ® <strong>610</strong> Printer.<br />
The <strong>Ithaca</strong> ® <strong>610</strong> Printer provides two Epson emulations. The first emulation is as close<br />
as possible to the TM-T90 Printer and tries to make the <strong>Ithaca</strong> ® <strong>610</strong> Printer a drop in<br />
replacement. However, when the <strong>Ithaca</strong> ® <strong>610</strong> Printer is in Epson TM-T90 emulation<br />
mode, it is subject to the same limitations as a TM-T90 Printer.<br />
The second Epson emulation is EPOS mode. It extends and enhances the TM-T90<br />
emulation to remove some of the restrictions and give access to some of the <strong>Ithaca</strong> ® <strong>610</strong><br />
Printer features not addressed by the TM-T90. It is intended that the standard <strong>Ithaca</strong> ®<br />
PcOS emulation be used for new applications.<br />
The following section lists all TM-T90 and EPOS commands that are processed. They<br />
are as close as possible to Epson‘s definitions. The user must remember that the <strong>Ithaca</strong> ®<br />
<strong>610</strong> EPOS emulation, unlike the TM-T90 emulation, is not designed as a drop in<br />
replacement for an Epson printer. The <strong>Ithaca</strong> ® <strong>610</strong> Printer is designed to bring new and<br />
unique features and functionality‘s to a point-of-sale receipt printer. These features are<br />
not always compatible with Epson printers.<br />
Note: The Epson emulation does not support Unicode, Double Byte or<br />
downloaded True Type fonts.<br />
Differences between Epson TM T90 and <strong>Ithaca</strong> ® <strong>610</strong><br />
In a few minor ways, the operation and programming <strong>Ithaca</strong> ® <strong>610</strong> is not identical to a<br />
TM-T90. The following is a summary of key differences.<br />
Page Mode<br />
The page mode in the <strong>Ithaca</strong> ® <strong>610</strong> operates in the same way as the TM-T88 and the TM-<br />
T90, however, the page size can be larger if the ESC/POS emulation is selected.<br />
Undocumented Epson Commands<br />
There are a number of undocumented commands in Epson printers. Where <strong>TransAct</strong> is<br />
aware of these commands, they have been duplicated in the <strong>Ithaca</strong> ® <strong>610</strong> Printer.<br />
Real-time Status<br />
The <strong>Ithaca</strong> ® <strong>610</strong> Printer is available in serial and parallel versions. Epson supports<br />
parallel operation through a parallel to serial interface. Consequently, the response times<br />
for the <strong>Ithaca</strong> ® <strong>610</strong> Printer are generally faster. The <strong>Ithaca</strong> ® <strong>610</strong> Printer implements the<br />
IEEE 1284 nibble-mode standard. If an application requires real-time status from the<br />
printer, the IEEE 1284 bi-directional protocol must be used. The <strong>Ithaca</strong> ® <strong>610</strong> Printer does<br />
not support byte mode. If the <strong>Ithaca</strong> ® <strong>610</strong> Printer is used in an IEEE 1284 compliant<br />
system, byte mode should be an extension and the default should be nibble mode.<br />
28-05897 Rev D Page 165
Programming Codes<br />
<strong>Ithaca</strong> ® <strong>610</strong> Programmer’s <strong>Guide</strong><br />
The <strong>Ithaca</strong> ® <strong>610</strong> Printer supports the EPOS real-time status commands [DLE] [ENQ] and<br />
[DLE] [EOT] and are preprocessed by the printer. The printer supports all the response<br />
bit fields as defined by the TM-T88 and TM-T90 Printers. See the descriptions below.<br />
The <strong>Ithaca</strong> ® <strong>610</strong> Printer looks at and evaluates all commands as they are received and<br />
does not respond to [DLE] [ENQ] or [DLE] [EOT] commands that happen to be<br />
embedded in graphics or other commands. (Refer to the buffer and preprocessor<br />
descriptions in later sections.)<br />
Page 166 Rev D 28-05897
Programming Codes<br />
<strong>Ithaca</strong> ® <strong>610</strong> Programmer’s <strong>Guide</strong><br />
Supported TM-T88 Commands<br />
Print and Feed Commands<br />
Command Name Page<br />
LF 0AH Print and line feed 171<br />
CR 0DH Print and carriage return 171<br />
ESC d 1BH,64H Print and feed lines 171<br />
ESC J 1BH,4AH Print and feed paper vertical units 172<br />
Line Spacing Commands<br />
Command Name Page<br />
ESC 2 1BH,32H Select default line spacing, 1/6 lpi 173<br />
ESC 3 1BH,33H Set line spacing 173<br />
Character Commands<br />
Command Name Page<br />
ESC SP 1BH,20H Set right-side character spacing 173<br />
ESC ! 1BH,21H Select print mode(s) 179<br />
ESC % 1BH,25H Select/cancel user-defined character sets 173<br />
ESC & 1BH,26H Define user-defined characters 174<br />
ESC - 1BH,2DH Turn underline mode on/off 179<br />
ESC ? 1BH,3FH Cancel user-defined characters 174<br />
ESC E 1BH,45H Turn emphasized mode on/off 179<br />
ESC G 1BH,47H Turn double-strike mode on/off 180<br />
ESC M 1BH,4DH Select character font 174<br />
ESC R 1BH,52H Select an international character set 175<br />
ESC V 1BH,56H Turn on/off 90 rotation mode 180<br />
ESC t 1BH,74H Select character code table 178<br />
ESC { 1BH,7BH Turn upside-down printing mode on/off 180<br />
GS ! 1DH,21H Select character size 181<br />
GS B 1DH,42H Turn white/black reverse printing mode on/off 178<br />
Panel Button Commands<br />
Command Name Page<br />
ESC c 5<br />
1BH,63H, Enable/disable panel buttons 182<br />
35H<br />
Paper Sensor Commands<br />
Command Name Page<br />
ESC c 4<br />
1BH,63H, Select paper sensor(s) to stop printing 183<br />
34H<br />
ESC c 3<br />
1BH,63H,<br />
33H<br />
Select paper sensor(s) to output paper out<br />
signals<br />
184<br />
28-05897 Rev D Page 167
Programming Codes<br />
<strong>Ithaca</strong> ® <strong>610</strong> Programmer’s <strong>Guide</strong><br />
Supported TM-T88 Commands<br />
Print Position Commands<br />
Command Name Page<br />
HT 09H Set horizontal tab positions 186<br />
ESC $ 1BH,24H Set absolute print position 185<br />
ESC D 1BH,44H Set horizontal tab positions 187<br />
ESC \ 1BH,5CH Set relative print position 185<br />
ESC a 1BH,61H Select justification 186<br />
GS L 1DH,4CH Set left margin 187<br />
GS T 1DH,54H Set print position to the beginning of the line 185<br />
GS W 1DH,57H Set printing area width 187<br />
Bit-image Command<br />
Command Name Page<br />
ESC * 1BH,2AH Select bit-image mode 189<br />
GS v 0<br />
1DH,76H,30<br />
H<br />
Print raster bit image 189<br />
Status Commands<br />
Command Name Page<br />
DLE EOT 10H,04H Real-time status transmission 193<br />
DLE ENQ 10H,05H Real-time status request to printer 193<br />
GS a 1DH,61H Enable/disable Automatic Status Back (ASB) 190<br />
GS r 1DH,72H Transmit status 192<br />
Bar Code Commands<br />
Command Name Page<br />
GS H 1DH,48H Select printing position of HRI characters 202<br />
GS f 1DH,66H Select font HRI characters 202<br />
GS h 1DH,68H Set bar code height 201<br />
GS k 1DH,6BH Print bar code 200<br />
GS w 1DH,77H Set bar code width 200<br />
Mechanism Control Commands<br />
Command Name Page<br />
GS V 1DH,56H Select cut mode and cut paper 203<br />
Page 168 Rev D 28-05897
Programming Codes<br />
<strong>Ithaca</strong> ® <strong>610</strong> Programmer’s <strong>Guide</strong><br />
Supported TM-T88 Commands<br />
Miscellaneous Commands<br />
Command Name Page<br />
DLE DC4 10H,14H,01H Generate pulse in real-time 205<br />
DLE DC4 10H,14H,02H Execute power-off sequence 205<br />
DLE DC4 10H,14H,08H Clear buffers 206<br />
ESC = 1BH,3DH Select peripheral device status 206<br />
ESC @ 1BH,40H Initialize printer 204<br />
ESC p 1BH,70H Generate pulse 205<br />
GS ( A<br />
1DH,28H,41 Enter Test Mode 208<br />
H<br />
GS I 1DH,49H Transmit printer ID 204<br />
GS P 1DH,50H Set horizontal and vertical motion units 204<br />
GS b 1DH,62H Turns smoothing mode on/off 181<br />
GS c 1DH,63H Print counter 208<br />
GS g 0<br />
1DH,67H,30 Initialize maintenance counter 208<br />
H<br />
GS g 2<br />
1DH,67H,32<br />
H<br />
Transmit maintenance counter value 209<br />
Macro Function Commands<br />
Command Name Page<br />
GS : 1DH,3AH Start/end macro definition 210<br />
GS ^ r t m 1DH,5EH Execute macro 210<br />
Page Mode Commands<br />
Command Name Page<br />
FF 0CH Print and return to standard mode 82<br />
CAN 18H Cancel print data in page mode 197<br />
ESC FF 1BH,0CH Print data in page mode 200<br />
ESC L 1BH,4CH Select Page mode 198<br />
ESC S 1BH,53H Switches from page mode to standard 198<br />
mode<br />
ESC T 1BH,54H Select print direction in page mode 198<br />
ESC W 1BH,57H Set printing area in page mode 198<br />
GS $ 1DH,24H Set absolute vertical print position in page 200<br />
mode<br />
GS \ 1DH,5CH Set relative vertical print position in page<br />
mode<br />
200<br />
User-defined Memory Commands<br />
Command Name Page<br />
GS * 1DH,2AH Define single user-defined bit-image 214<br />
GS / 1DH,2FH Print single user-defined bit-image 215<br />
Table 21 Supported TM-T90 Commands<br />
28-05897 Rev D Page 169
Programming Codes<br />
<strong>Ithaca</strong> ® <strong>610</strong> Programmer’s <strong>Guide</strong><br />
Undocumented TM-T88 Commands<br />
Command<br />
Name<br />
ESC I Auto Cut 203<br />
ESC m Auto Cut 203<br />
ESC u Transmit Peripheral Device Status 194<br />
ESC v Transmit Paper status 195<br />
Table 22 Undocumented TM-T90 Commands<br />
Page 170 Rev D 28-05897
Programming Codes<br />
<strong>Ithaca</strong> ® <strong>610</strong> Programmer’s <strong>Guide</strong><br />
TM-T88 and ESC/POS TM Command Descriptions<br />
The TM-T88 and EPOS emulation‘s are grouped together. The TM-T88 emulation is a subset of<br />
the EPOS emulation. The EPOS-only commands are noted.<br />
Print and Feed Commands<br />
Function Print and Line Feed<br />
ASCII [LF]<br />
Hexadecimal 0AH<br />
Decimal <br />
Description The [LF] command prints the data in the print buffer and feeds one line. The<br />
amount of paper fed per line is based on the value set using the line spacing<br />
command. The default setting is 1/6 inch.<br />
Function Print and Carriage Return<br />
ASCII [CR]<br />
Hexadecimal 0DH<br />
Decimal <br />
Description When auto line feed is enabled, [CR] functions in the same way as [LF]. When<br />
auto line feed is disabled, [CR] prints the data in the print buffer and does not<br />
feed the paper.<br />
Function Print and Feed Lines<br />
ASCII [ESC] d <br />
Hexadecimal 1BH 64H <br />
Decimal <br />
Range 0 n 255<br />
Description The [ESC] d command prints the data in the print buffer and feeds lines.<br />
The amount of paper fed per line is based on the value set using the line spacing<br />
command. The maximum paper feed amount is 40 inches. The default setting of<br />
the paper feed amount is 1/6 inch.<br />
Function Print and Reverse Feed Lines<br />
ASCII [ESC] e <br />
Hexadecimal 1BH 65H <br />
Decimal <br />
Range 0 n 255<br />
Description The [ESC] e command prints the data in the print buffer and feeds lines<br />
in the reverse direction. The amount of paper fed per line is based on the value<br />
set using the line spacing command. The maximum reverse paper feed amount<br />
is 48/144 inch. The default setting of the paper feed amount is 1/6 inch.<br />
28-05897 Rev D Page 171
Programming Codes<br />
<strong>Ithaca</strong> ® <strong>610</strong> Programmer’s <strong>Guide</strong><br />
Function Print and Feed Paper<br />
ASCII [ESC] J <br />
Hexadecimal 1BH 4AH <br />
Decimal <br />
Range 0 n 255<br />
Description The [ESC] J command prints the data in the print buffer and feeds the paper<br />
[n x (1/144)] inches, which means that the printer can feed the paper in half-dot<br />
units. The command is used to temporarily feed a specific length without<br />
changing the line spacing set by other commands.<br />
Function Print and Reverse Feed Lines<br />
ASCII [ESC] K <br />
Hexadecimal 1BH 4BH <br />
Decimal <br />
Range 0 n 48<br />
Description The [ESC] K command prints the data in the print buffer and feeds the paper<br />
[ x (1/144)] inches in the reverse direction. Consequently, the printer can<br />
feed the paper in half-dot units in the reverse direction. The command is used to<br />
temporarily feed a specific length without changing the line spacing set by other<br />
commands.<br />
Function Print and Reverse Feed<br />
ASCII [ESC] j<br />
Hexadecimal 1BH 6AH<br />
Decimal <br />
Range 0 n 48<br />
Description The [ESC] j command prints the data in the print buffer and feeds the paper one<br />
line in reverse.<br />
Page 172 Rev D 28-05897
Programming Codes<br />
<strong>Ithaca</strong> ® <strong>610</strong> Programmer’s <strong>Guide</strong><br />
Line Spacing Commands<br />
Function Select Default Line Spacing<br />
ASCII [ESC] 2<br />
Hexadecimal 1BH 32H<br />
Decimal <br />
Description The [ESC] 2 command sets the line spacing to 1/6 inch, which is equivalent to 12<br />
dots.<br />
Function Set Line Spacing<br />
ASCII [ESC] 3 <br />
Hexadecimal 1BH 33H <br />
Decimal <br />
Range 0 n 255<br />
Description The [ESC] 3 command sets the line spacing to [ x (1/144)] inches. The<br />
default setting of the paper feed amount is 1/6 inch ( = 24). The line spacing<br />
can be set in half-dot units.<br />
Character Commands<br />
Function Set Right-Side Character Spacing<br />
ASCII [ESC] SP <br />
Hexadecimal 1BH 20H <br />
Decimal <br />
Range 0 n 255<br />
Description The [ESC] SP sets the right-side character spacing in [ x (1/160)] inches.<br />
It is used to change the spacing between characters. The default right-side<br />
character spacing is set to zero. ( = 0). Right-side character spacing can be<br />
set in half-dot units.<br />
Function Select/Cancel User-Defined Character Set<br />
ASCII [ESC] % <br />
Hexadecimal 1BH 25H <br />
Decimal <br />
Range 0 n 255<br />
Description The [ESC] % command selects or cancels the user-defined character set.<br />
When the least significant bit (LSB) of is one, the user-defined character set<br />
is selected. When is zero, the internal character set is selected, which is the<br />
default setting.<br />
28-05897 Rev D Page 173
Programming Codes<br />
<strong>Ithaca</strong> ® <strong>610</strong> Programmer’s <strong>Guide</strong><br />
Function Define User-Defined Characters<br />
ASCII [ESC] & [x1 d1 … d(y x x1)] … [xk d1 … d(y x xk)]<br />
Hexadecimal 1BH 26H y c1 c2 [x1 d1 … d(y x x1)] … [xk d1 … d(y x xk)]<br />
Decimal y c1 c2 [x1 d1 … d(y x x1)] … [xk d1 … d(y x xk)]<br />
Range y = 2<br />
32 c 1 c 2 126<br />
0 x 12 (9 x 9 font)<br />
0 x 9 (7 x 9 font)<br />
0 d 1 … d(y x x) 255<br />
Description The [ESC] & [x 1 d 1 … d(y x x 1 )] … [x k d 1 … d(y x x k )] command<br />
defines user-defined characters from character code to . and <br />
are the configurations of user-defined characters. specifies the number of<br />
bytes in the vertical direction. specifies the number of bytes in the horizontal<br />
direction. Character codes ranging from ASCII code 20H (32) to 7EH (126) can<br />
be defined by and . Up to 19 user-defined characters can be defined.<br />
Data () specifies a bit printed to one and not printed to zero. At the default,<br />
user-defined characters are not defined, and the internal character set is printed.<br />
Once the user-defined characters have been defined, they are available until<br />
[ESC] @ or [ESC] ? is executed; the user-defined characters are redefined; the<br />
power is turned off; or the printer is reset.<br />
Function Cancel User-Defined Characters<br />
ASCII [ESC] ? <br />
Hexadecimal 1BH 3FH <br />
Decimal <br />
Range 32 n 126<br />
Description The [ESC] ? command cancels the user-defined characters defined for<br />
character code . After the user-defined characters are canceled, the internal<br />
character set is printed.<br />
Function Select Character Font<br />
ASCII [ESC] M <br />
Hexadecimal 1BH 4DH <br />
Decimal <br />
Range 0,1,48,49<br />
Description The [ESC] M command selects one-byte character font.<br />
<br />
Function<br />
0, 48 Page 0 [PC437 (U.S.A. and Standard Europe)]<br />
1, 49 Page 1 [PC850 (Multilingual)]<br />
Table 23 Select Character Font Table<br />
Page 174 Rev D 28-05897
Programming Codes<br />
<strong>Ithaca</strong> ® <strong>610</strong> Programmer’s <strong>Guide</strong><br />
Function Select an International Character Set<br />
ASCII ESC R <br />
Hexadecimal 1BH 52H <br />
Decimal <br />
Range 0 n 74<br />
Default = 0<br />
Description The ESC R command selects an international character set, , from the<br />
following table.<br />
International Character Sets<br />
Country Epson ID Country Epson ID<br />
ASCII 0 Greek 437 38<br />
French 1 Greek 928 39<br />
German 2 Greek 437 CYPRUS 41<br />
British 3 ECMA-94 42<br />
Danish I 4 Canada French 43<br />
Swedish I 5 Cyrillic I-855 44<br />
Italian 6 Cyrillic II-866 45<br />
Spanish I 7 East Europe Latin II-852 46<br />
Japanese 8 Greek 869 47<br />
Norwegian 9 Windows East Europe 49<br />
Danish II 10 Windows Greek 50<br />
Spanish II 11 Latin 5 (Windows Turkey) 51<br />
Latin American 12 Windows Cyrillic 52<br />
French Canadian 13 Hungarian CWI 54<br />
Dutch 14 Kamenicky (MJK) 55<br />
Swedish II 15 ISO Latin 4 (8859/4) 56<br />
Swedish III 16 Turkey_857 57<br />
Swedish IV 17 Roman-8 58<br />
Turkish 18 Hebrew NC (862) 60<br />
Swiss I 19 Hebrew OC 61<br />
Swiss II 20 Windows Hebrew 62<br />
Cyrillic II-866 21 KBL- Lithuanian 63<br />
Polska Mazovia 22 Ukrainian 66<br />
ISO Latin 2 23 ISO Latin 6 (8859/10) 67<br />
Serbo Croatic I 24 Windows Baltic 68<br />
Serbo Croatic II 25 Cyrillic-Latvian 69<br />
Multilingual 26 Bulgarian 72<br />
Norway 27 Icelandic-861 73<br />
Portugal 28 Baltic 774 74<br />
Turkey 29 Arabic 93<br />
Table 24 International Character Sets<br />
28-05897 Rev D Page 175
Programming Codes<br />
<strong>Ithaca</strong> ® <strong>610</strong> Programmer’s <strong>Guide</strong><br />
Function Select Character Code Table<br />
ASCII ESC [ T <br />
Hexadecimal 1BH 5BH 54H <br />
Decimal <br />
Default = 1<br />
= 181 (Code Page 437)<br />
Description The ESC [ T command selects a code page, , from the character<br />
code table.<br />
Code Page Country Decimal Hex <br />
64 USA (Slashed 0) 64 0H,040H<br />
65 USA (Unslashed 0) 0,65 0H,041H<br />
66 British 0,66 0H,042H<br />
67 German 0,67 0H,043H<br />
68 French 0,68 0H,044H<br />
69 Swedish I 0,69 0H,045H<br />
70 Danish 0,70 0H,046H<br />
71 Norwegian 0,71 0H,047H<br />
72 Dutch 0,72 0H,048H<br />
73 Italian 0,73 0H,049H<br />
74 French Canadian 0,74 0H,04AH<br />
75 Spanish 0,75 0H,04BH<br />
76 Swedish II 0,76 0H,04CH<br />
77 Swedish III 0,77 0H,04DH<br />
78 Swedish IV 0,78 0H,04EH<br />
79 Turkish 0,79 0H,04FH<br />
80 Swiss I 0,80 0H,050H<br />
81 Swiss II 0,81 0H,051H<br />
91 Welsh 0,91 0H,05BH<br />
93 Arabic 0,93 0H,05DH<br />
437 USA 1,181 1H,0B5H<br />
774 Baltic 774 3,6 3H,006H<br />
850 Multilingual 3,82 3H,052H<br />
852 East Europe Latin II-852 3,84 3H,054H<br />
855 Cyrillic I-855 3,87 3H,057H<br />
857 Turkey 857 3,89 3H,059H<br />
858 Multilingual Euro 3,90 3H,05AH<br />
860 Portugal 3,92 3H,05CH<br />
861 Icelandic-861 3,93 3H,05DH<br />
862 Hebrew NC (862) 3,94 3H,05EH<br />
863 Canada French 3,95 3H,05FH<br />
865 Norway 3,97 3H,061H<br />
Page 176 Rev D 28-05897
Programming Codes<br />
<strong>Ithaca</strong> ® <strong>610</strong> Programmer’s <strong>Guide</strong><br />
Code Page Country Decimal Hex <br />
866 Cyrillic II-866 3,98 3H,062H<br />
869 Greek 869 3,101 3H,065H<br />
895 Kamenicky (MJK) 3,127 3H,07FH<br />
1008 Greek 437 3,240 3H,0F0H<br />
1009 Greek 928 3,241 3H,0F1H<br />
1011 Greek 437 CYPRUS 3,243 3H,0F3H<br />
1012 Turkey 3,244 3H,0F4H<br />
1013 Cyrillic II-866 3,245 3H,0F5H<br />
1014 Polska Mazovia 3,246 3H,0F6H<br />
1015 ISO Latin 2 3,247 3H,0F7H<br />
1016 Serbo Croatic I 3,248 3H,0F8H<br />
1017 Serbo Croatic II 3,249 3H,0F9H<br />
1018 ECMA-94 3,250 3H,0FAH<br />
1019 Windows East Europe 3,251 3H,0FBH<br />
1020 Windows Greek 3,252 3H,0FCH<br />
1021 Latin 5 (Windows Turkey) 3,253 3H,0FDH<br />
1022 Windows Cyrillic 3,254 3H,0FEH<br />
1024 Hungarian CWI 4,0 4H,000H<br />
1026 ISO Latin 4 (8859/4) 4,2 4H,002H<br />
1027 Ukrainian 4,3 4H,003H<br />
1028 Roman-8 4,4 4H,004H<br />
1029 ISO Latin 6 (8859/10) 4,5 4H,005H<br />
1030 Hebrew NC (862) 4,6 4H,006H<br />
1031 Hebrew OC 4,7 4H,007H<br />
1032 Windows Hebrew 4,8 4H.008H<br />
1033 KBL- Lithuanian 4,9 4H,009H<br />
1034 Windows Baltic 4,10 4H,00AH<br />
1035 Cyrillic-Latvian 4,11 4H,00BH<br />
1072 Bulgarian 4,48 4H,030H<br />
Table 25 Character Code Pages<br />
28-05897 Rev D Page 177
Programming Codes<br />
<strong>Ithaca</strong> ® <strong>610</strong> Programmer’s <strong>Guide</strong><br />
Function Print Control Character<br />
ASCII [ESC] ^ <br />
Hexadecimal 1BH 5EH <br />
Decimal <br />
Range 0 n 255<br />
Description The [ESC] ^ command allows characters from zero to 31 codes to be<br />
printed. During normal operation, characters from zero to 31 are control<br />
characters. Control code translation is turned off for the following character.<br />
Function Insert Euro Character<br />
ASCII GS # <br />
Hexadecimal 1DH 23H <br />
Decimal <br />
Description The GS # command allows an application to replace any character in the<br />
currently active character set with the Euro character. The character to be<br />
replaced is defined by . For example, if the currently active character set is<br />
code page 850 (multilingual) and the 0D5H character is to be the Euro character,<br />
1DH 23H replaces the character at 0D5H with the Euro symbol.<br />
Function Turn Color Mode ON/OFF<br />
ASCII [ESC] r <br />
Hexadecimal 1BH 72H <br />
Decimal <br />
Range = 0, 1, 48, 49<br />
Description The <strong>Ithaca</strong> ® <strong>610</strong> does not support Color print. This command may be configured<br />
to be ignored or set inverse print.<br />
The [ESC] r command optionally turns on or off Inverse print. When = 1<br />
or 49, inverse mode is turned on, and when = 0 or 48, inverse mode is<br />
turned off. The default setting is = 0.<br />
Function Select Character Code Table<br />
ASCII [ESC] t <br />
Hexadecimal 1BH 74H <br />
Decimal <br />
Range 0 n 5; = 254, 255<br />
Description The [ESC] t command selects a page, , from the character code table as<br />
follows. The alphanumeric characters (20H to 7FH) are the same for each page.<br />
The graphic characters (80H to FFH) are different for each page. The default<br />
setting is page 0.<br />
<br />
Character Code Table<br />
0 Page 0 [PC437 (U.S.A. and Standard Europe)]<br />
1 Page 1 [PC850 (Multilingual)]<br />
2 Page 2 [PC850 (Multilingual)]<br />
3 Page 3 [PC860 (Portuguese)]<br />
4 Page 4 [PC863 (Canadian-French)]<br />
5 Page 5 [PC865 (Nordic)]<br />
255 Page 255 [Space page]<br />
Table 26 Character Code Table<br />
Page 178 Rev D 28-05897
Programming Codes<br />
<strong>Ithaca</strong> ® <strong>610</strong> Programmer’s <strong>Guide</strong><br />
Function Select Print Mode(s)<br />
ASCII [ESC] ! <br />
Hexadecimal 1BH 21H <br />
Decimal <br />
Range 0 n 255<br />
Description The [ESC] ! command selects print modes using as follows. The default<br />
character font is 7 x 9. The defaults for the other print modes are set to = 1.<br />
Bit Off/On Hexadecimal Decimal Function<br />
0 Off 00H Select 9 x 9 character font.<br />
On 01H Select 7 x 9 character font.<br />
1,2 - - - Undefined<br />
3 Off 00H Emphasized mode is not selected.<br />
On 08H Emphasized mode is selected.<br />
4 Off 00H Double-height mode is not selected.<br />
On 10H Double-height mode is selected.<br />
5 Off 00H Double-wide mode is not selected.<br />
On 20H Double-wide mode is selected.<br />
6 - - - Undefined<br />
7 Off 00H Underline mode is not selected.<br />
On 80H Underline mode is selected.<br />
Table 27 Print Modes<br />
Function Turn ON/OFF Underline Mode<br />
ASCII [ESC] - <br />
Hexadecimal 1BH 2DH <br />
Decimal <br />
Range = 0, 1, 48, 49<br />
Description The [ESC] - command turns on or off underline mode. When = 1 or 49,<br />
underline mode is turned on, and when = 0 or 48, underline mode is turned<br />
off. The default setting is = 0.<br />
Function Turn ON/OFF Emphasized Mode<br />
ASCII [ESC] E <br />
Hexadecimal 1BH 45H <br />
Decimal <br />
Range 0 n 255<br />
Description The [ESC] E command turns on or off emphasized mode. When the least<br />
significant bit (LSB) of = 1, emphasized mode is turned on; when it is 0,<br />
emphasized mode is turned off. The default setting is = 0. Emphasized and<br />
double-strike printing appear the same.<br />
28-05897 Rev D Page 179
Programming Codes<br />
<strong>Ithaca</strong> ® <strong>610</strong> Programmer’s <strong>Guide</strong><br />
Function Turn ON/OFF Double-Strike Mode<br />
ASCII [ESC] G <br />
Hexadecimal 1BH 47H <br />
Decimal <br />
Range 0 n 255<br />
Description The [ESC] G command turns on or off double-strike mode. When the least<br />
significant bit (LSB) of = 1, double-strike mode is turned on; when it is 0,<br />
double-strike mode is turned off. The default setting is = 0. Double-strike<br />
and emphasized printing appear the same.<br />
Function Turn ON/OFF Upside-Down Print Mode<br />
ASCII [ESC] { <br />
Hexadecimal 1BH 7BH <br />
Decimal <br />
Range 0 n 255<br />
Description The [ESC] { turns on or off upside-down printing mode. When the least<br />
significant bit of = 1, upside-down printing mode is turned on; when it is 0,<br />
upside-down printing mode is turned off. The default setting is = 0. When<br />
upside-down mode is turned on, the printer prints 180 rotated characters from<br />
right to left. The line printing order is not reversed, so the order of the data<br />
transmitted is important. The command is enabled only when input at the<br />
beginning of a line.<br />
Function Turn ON/OFF 90° Rotation Mode<br />
ASCII ESC V <br />
Hexadecimal 1BH 56H <br />
Decimal <br />
Range = 0, 1, 2, 48, 49, 50<br />
Description The ESC V command turns on/off 90° clockwise rotation mode. The<br />
command is only enabled in standard mode. In page mode, an internal flag is<br />
activated, and the command is enabled when the printer returns to standard<br />
mode.<br />
<br />
Function<br />
0, 48 Turns off all rotation modes<br />
1, 49 Turns on 90° clockwise rotation mode<br />
2, 50 Turns on 90° counterclockwise rotation mode<br />
Table 28 Rotation Modes<br />
Page 180 Rev D 28-05897
Programming Codes<br />
<strong>Ithaca</strong> ® <strong>610</strong> Programmer’s <strong>Guide</strong><br />
Function Set Character Size<br />
ASCII GS ! <br />
Hexadecimal 1DH 21H <br />
Decimal <br />
Description The GS ! command sets the horizontal and vertical scaling. The upper<br />
nibble is the horizontal scale, and the lower nibble is the vertical scale. The<br />
minimum size is x1, and the maximum size is x2.<br />
Where xxxx0000 Vertical scale 1<br />
xxxx0001 Vertical scale 2<br />
0000xxxx Horizontal scale 1<br />
0001xxxx Horizontal scale 2<br />
Function Begin Italics<br />
ASCII [ESC] 4<br />
Hexadecimal 1BH 34H<br />
Decimal <br />
Description The [ESC] 4 command begins italics print mode.<br />
Note: Italics are not available in all print modes.<br />
Function End Italics<br />
ASCII [ESC] 5<br />
Hexadecimal 1BH 35H<br />
Decimal <br />
Description The [ESC] 5 command ends italics print mode.<br />
Description The [ESC] % H command ends italic print mode.<br />
Function Turns smoothing on/off<br />
ASCII [GS] b <br />
Hexadecimal 1DH 62H <br />
Decimal <br />
Description The [GS] b command turns smoothing mode on or off.<br />
• When the LSB of n is 0, smoothing mode is turned off.<br />
• When the LSB of n is 1, smoothing mode is turned on.<br />
28-05897 Rev D Page 181
Programming Codes<br />
<strong>Ithaca</strong> ® <strong>610</strong> Programmer’s <strong>Guide</strong><br />
Panel Button Commands<br />
Function Enable/Disable Paper Feed<br />
ASCII [ESC] c 5 <br />
Hexadecimal 1BH 63H 35H <br />
Decimal <br />
Range 0 n 255<br />
Description The [ESC] c 5 command enables or disables the FEED Button. When the<br />
least significant bit (LSB) of = one, the FEED Button is disabled; when it is<br />
zero, the button is enabled. To prevent problems caused by accidentally<br />
pressing the FEED Button, use the command to disable it. The FEED Button is<br />
temporarily enabled, regardless of how the command is set during the wait time<br />
set by the [GS] z 0 command for paper insertion and during the recovery<br />
confirmation time.<br />
Where Bit 0 = 1 the FEED Button is disabled<br />
Bit 0 = 0 the button is enabled.<br />
Page 182 Rev D 28-05897
Programming Codes<br />
<strong>Ithaca</strong> ® <strong>610</strong> Programmer’s <strong>Guide</strong><br />
Paper Sensor Commands<br />
Function Select Paper Sensor(s) to Stop Printing<br />
ASCII [ESC] c 4 <br />
Hexadecimal 1BH 63H 34H <br />
Decimal <br />
Range 0 n 255<br />
Description<br />
ESC c 4 n selects whether to stop printing or not when the paper low is detected.<br />
There are three sensors in the TM-88 or TM-90 that are simulated in the <strong>Ithaca</strong> ®<br />
<strong>610</strong>: the paper roll low, paper roll end sensor, and validation sensor. The paper<br />
roll low sensor is enabled when either bit 0 or bit 1 is on. The paper roll end<br />
sensor is enabled when either bit 2 or bit 3 is on. The validation sensor is<br />
enabled when either bit 6 or bit 7 is on. When a paper low or a paper out is<br />
detected, printing stops after printing the current line. The printer goes off line<br />
after printing stops. Installing a new roll starts printing again. The default setting<br />
is n=12. If the paper roll low sensor or paper roll end sensor is disabled and a<br />
paper out is detected, printing does not stop. The printer does not go off line, and<br />
the Paper Out LED comes on. When the validation sensor is enabled and a<br />
paper-end is detected, the printer ejects the paper after printing as much as<br />
possible and enters the paper waiting state. When the validation sensor is<br />
disabled and a paper-end is detected, the printer does not stop printing and eject<br />
the paper. It is possible to select multiple sensors to stop printing. Then when<br />
any sensor detects a paper-end, printing stops. When a paper sensor is enabled<br />
with this command, printing stops only when the corresponding paper is selected<br />
for printing. Print sheet can be selected by using ESC c 0.<br />
Note: The <strong>Ithaca</strong> ® <strong>610</strong> does not allow the paper out sensor to be disabled.<br />
The paper sensor(s) used to stop printing are selected by using n as follows:<br />
Bit Off/On Hex Decimal Function<br />
0 Off 00 0 Paper roll low sensor disabled.<br />
On 01 1 Paper roll low sensor enabled.<br />
1 Off 00 0 Paper roll low sensor disabled.<br />
On 02 2 Paper roll low sensor enabled.<br />
2- 3 — — — Paper roll end sensor enabled (always on)<br />
4-5 — — — Undefined.<br />
6 Off 00 0 Validation sensor disabled.<br />
On 40 64 Validation sensor enabled.<br />
7 Off 00 0 Validation sensor disabled.<br />
On 80 128 Validation sensor enabled.<br />
Table 29 Paper Sensor Commands<br />
28-05897 Rev D Page 183
Programming Codes<br />
<strong>Ithaca</strong> ® <strong>610</strong> Programmer’s <strong>Guide</strong><br />
Function Select Paper Sensor(s) to Output Paper-End Signals<br />
ASCII [ESC] c 3 <br />
Hexadecimal 1BH 63H 33H <br />
Decimal <br />
Range 0 n 255<br />
Description ESC c 3 n selects whether to output paper-end signals or not to a parallel<br />
interface. The default setting is n=15. The paper roll low, paper roll end, and<br />
validation sensors can be selected. When the sensors are selected to output<br />
signals and any sensor detects a paper-end, the paper-end signal is output.<br />
When all sensors are disabled, and a paper out is detected, status is always a<br />
paper present. The paper roll low sensor is enabled when either bit 0 or bit 1 or<br />
both is on. The paper roll end sensor is enabled when either 2 or 3 or both bits is<br />
on. The validation sensor is enabled when either 6 or 7 or both bits are on. This<br />
command is enabled only with a parallel interface and is ignored with a serial<br />
interface.<br />
The paper sensor(s) used to output paper-end signals are selected by using n as<br />
follows:<br />
Bit Off/On Hex Decimal Function<br />
0 Off 00 0 Paper roll low sensor disabled.<br />
On 01 1 Paper roll low sensor enabled.<br />
1 Off 00 0 Paper roll low sensor disabled<br />
On 04 2 Paper roll low sensor enabled.<br />
2 Off 00 0 Paper roll end sensor disabled.<br />
On 04 4 Paper roll end sensor enabled.<br />
3 Off 00 0 Paper roll end sensor disabled.<br />
On 08 8 Paper roll end sensor enabled.<br />
4-5 — — — Undefined.<br />
6 Off 00 0 Validation sensor disabled.<br />
On 40 64 Validation sensor enabled.<br />
7 Off 00 0 Validation sensor disabled.<br />
On 80 128 Validation sensor enabled.<br />
Table 30 Paper Sensor Commands<br />
Note: Bits 0,1,2 and 3 all control the receipt station.<br />
Page 184 Rev D 28-05897
Programming Codes<br />
<strong>Ithaca</strong> ® <strong>610</strong> Programmer’s <strong>Guide</strong><br />
Print Position Commands<br />
Function Set Print Position to the beginning of print line<br />
ASCII [GS] T <br />
Hexadecimal 1DH 54H <br />
Decimal <br />
Range 0 n 1<br />
48 n 49<br />
Description The GS T command sets the print position to the beginning of the print line.<br />
<br />
Function<br />
0, 48 Sets the print position after the data in the print buffer is deleted.<br />
1, 49 Sets the print position after the data in the print buffer is printed<br />
When printing is specifies (n=1,49), the printer prints the data in the print buffer<br />
and executes a line feed based on the line feed amount set.<br />
When deleting is specified (n=0,48), the printer cancels the print data in the print<br />
buffer, and keeps other data or setting values except for the print data.<br />
Function Set Absolute Print Position<br />
ASCII [ESC] $ <br />
Hexadecimal 1BH 24H <br />
Decimal <br />
Range 0 n l 255<br />
0 n h 255<br />
Description The ESC $ command sets the print starting position from the beginning<br />
of the line.<br />
Function Set Relative Print Position<br />
ASCII [ESC] \ <br />
Hexadecimal 1BH 5CH <br />
Decimal <br />
Range 0 n l 255<br />
0 n h 255<br />
Description The ESC \ command sets the print starting position based on the<br />
current position and the distance from the current position to [(n l + n h x 256) x<br />
horizontal unit]. When standard more is selected, the horizontal motion unit set<br />
by GS P is used. When page mode is selected, the horizontal or vertical motion<br />
unot set by GS P is used for the print direction set by ESC T.<br />
28-05897 Rev D Page 185
Programming Codes<br />
<strong>Ithaca</strong> ® <strong>610</strong> Programmer’s <strong>Guide</strong><br />
Function Select Justification<br />
ASCII [ESC] a <br />
Hexadecimal 1BH 61H <br />
Decimal <br />
Range 0 n 2<br />
48 n 50<br />
Description The [ESC] a command aligns all the data in one line to a specified position.<br />
Left justification is selected when = 0 or 48, centering is selected when <br />
= 2 or 50. The default setting is left justification. ( = 0). The command is<br />
enabled only when input at the beginning of a line.<br />
Function Set Back Space<br />
ASCII [BS]<br />
Hexadecimal 08H<br />
Decimal <br />
Description The [BS] command moves the print buffer one character width to the left. The<br />
pointer position cannot be moved to the left of the left margin. [BS] does not<br />
cause the buffer to be printed; the following data is OR‘ed with the previous data.<br />
Function Set Horizontal Tab<br />
ASCII [HT]<br />
Hexadecimal 9H<br />
Decimal <br />
Description The [HT] command moves the print position to the next horizontal tab position.<br />
The command is used to align character columns. The command is ignored<br />
unless another horizontal tab position has been set.<br />
Page 186 Rev D 28-05897
Programming Codes<br />
<strong>Ithaca</strong> ® <strong>610</strong> Programmer’s <strong>Guide</strong><br />
Function Set Horizontal Tab Positions<br />
ASCII [ESC] D … NUL<br />
Hexadecimal 1BH 44H … 00<br />
Decimal … <br />
Range 1 n 255<br />
0 k 32<br />
Description The [ESC] D … NUL command sets the horizontal tab positions. <br />
specifies the column number for setting a horizontal tab position. The command<br />
deletes any previously set, horizontal tab positions. Up to 32 tab positions can<br />
be set. The default tab positions are at intervals of eight characters for 7 x 9 font.<br />
Function Set Left Margin<br />
ASCII GS L <br />
Hexadecimal 1DH 4CH <br />
Decimal <br />
Range 0 n l 255<br />
0 n h 255<br />
Description The GS L command sets the left margin using n l and n h . The left<br />
margin is set to [(n l + n h 256) horizontal motion unit)] from the beginning of<br />
the line. In standard mode, the command is enabled only when input at the<br />
beginning of a line. In page mode, an internal flag is activated, and the<br />
command is enabled when the printer returns to standard mode.<br />
Function Set Printing Area Width<br />
ASCII GS W <br />
Hexadecimal 1DH 57H <br />
Decimal <br />
Range 0 n l 255<br />
0 n h 255<br />
Description The printing area width is set to [(n l + n h 256) horizontal motion unit)] from the<br />
left margin. In standard mode, the command is enabled only when input at the<br />
beginning of a line. In page mode, an internal flag is activated, and the<br />
command is enabled when the printer returns to standard mode.<br />
Function Turn ON/OFF Uni-Directional Printing Mode<br />
ASCII [ESC] U <br />
Hexadecimal 1BH 55H <br />
Decimal <br />
Range 0 n 255<br />
Description The [ESC] U command turns on/off unidirectional printing mode. When the<br />
least significant bit (LSB) of = 1, unidirectional printing is turned on. When<br />
LSB = 0, unidirectional printing is turned off, and i-directional printing is turned<br />
on. Unidirectional printing can be turned on when printing double-high<br />
characters to ensure that the top and bottom of the characters are aligned. <br />
= 0 is the default setting.<br />
28-05897 Rev D Page 187
Programming Codes<br />
<strong>Ithaca</strong> ® <strong>610</strong> Programmer’s <strong>Guide</strong><br />
Function Set Left Margin<br />
ASCII [ESC] l <br />
Hexadecimal 1BH 6CH <br />
Decimal <br />
Range 0 n 255<br />
Description The [ESC] 1 command sets the left margin using . The left margin is set<br />
to characters from the beginning of the line.<br />
Function Set Right Margin<br />
ASCII [ESC] Q <br />
Hexadecimal 1BH 51H <br />
Decimal <br />
Range 0 n 255<br />
Description The [ESC] Q command sets the right margin using . The right margin is<br />
set to characters from the beginning of the line.<br />
Function Return Home<br />
ASCII [ESC] <<br />
Hexadecimal 1BH 3CH<br />
Decimal <br />
Description The [ESC] < command moves the print head to the home position.<br />
Page 188 Rev D 28-05897
Programming Codes<br />
<strong>Ithaca</strong> ® <strong>610</strong> Programmer’s <strong>Guide</strong><br />
Bit-Image Commands<br />
Function Select Bit-Image Mode<br />
ASCII [ESC] * … <br />
Hexadecimal 1BH 2AH … <br />
Decimal … <br />
Range = 0, 1, 32, 33<br />
0 nl 255<br />
0 nh 3<br />
0 d 255<br />
k = nl + nh x 256 for = 0 or 1<br />
k = (nl + nh x 256) * 3 for = 32 or 33<br />
Description<br />
[ESC] * … command selects a bit-image mode using<br />
for the number of dots specified by (n l + n h x 256) in mode 0 or 1 and (n l +<br />
n h x 256)*3 in mode 32 or 33 and indicates the bit image data. Set a bit to<br />
one to print a dot, or set a bit to zero to not print a dot. Use the command to print<br />
a predefined picture or logo. The modes selectable by are listed below.<br />
Mode Vertical Direction Horizontal Direction<br />
Dot Density<br />
Number of<br />
Dot Density<br />
Dots<br />
Dots<br />
0 8-dot single density 101 dpi 8 80 dpi 200<br />
1 8-dot double density 101 dpi 8 160 dpi 400<br />
32 24 dot single density 101 dpi 24 120 dpi 300<br />
33 24 dot double density 203 dpi 24 240 dpi 600<br />
Table 31 Print Density Selection<br />
Number of<br />
28-05897 Rev D Page 189
Programming Codes<br />
<strong>Ithaca</strong> ® <strong>610</strong> Programmer’s <strong>Guide</strong><br />
Status Commands<br />
Function Enable/Disable Automatic Status Back (ASB)<br />
ASCII [GS] a <br />
Hexadecimal 1DH 61H <br />
Decimal <br />
Range 0 n 255<br />
Description The [GS] a command selects a status for ASB transmission. ASB is enabled<br />
if any status item is selected. The printer automatically transmits a 4-byte status<br />
message whenever the status changes. Multiple status items can be enabled or<br />
disabled. When = 0, ASB is disabled.<br />
The default depends on the offline mode configuration. If offline buffer full only is<br />
set the ASB is defaulted on. When the printer is disabled by the [ESC] =<br />
command and ASB is enabled, the printer transmits a 4-byte status message<br />
every time the status changes. The paper roll low sensor is an option. If the<br />
printer is not equipped with the paper low sensor, bits 0 and 1 of the third byte<br />
are always on, with paper adequate status. Bit 3 of the second byte is always,<br />
―No error.‖ The status items are selected using as follows:<br />
Bit Off/On Hex Decimal Status for Automatic Status Back (ASB)<br />
0 Off 00H Drawer kick-out connector pin 3 status<br />
disabled<br />
On 01H Drawer kick-out connector pin 3 status enabled<br />
1 Off 00H On-line/off line disabled<br />
On 02H On-line/off line enabled<br />
2 Off 00H Error status disabled<br />
On 04H Error status enabled<br />
3 Off 00H Paper roll sensor status disabled<br />
On 08H Paper roll sensor status enabled<br />
- - - - Undefined<br />
Table 32 Automatic Status Back (ASB) Values for <br />
Note: This command and the Automatic Status Back feature are licensed<br />
from Epson, and is only available in the Full Epson Emulation of the<br />
firmware. Problems with this command are frequently caused by not using<br />
the correct version of the firmware. Contact <strong>TransAct</strong> sales and/or<br />
technical support for this added cost option.<br />
Page 190 Rev D 28-05897
Programming Codes<br />
<strong>Ithaca</strong> ® <strong>610</strong> Programmer’s <strong>Guide</strong><br />
Bit Off/On Hex Decimal Status for Automatic Status Back (ASB)<br />
0 Off 00H Not used; fixed to Off<br />
1 Off 00H Not used; fixed to Off<br />
2 Off 00H Drawer kick-out connector pin 3 low<br />
On 04H Drawer kick-out connector pin 3 high<br />
3 Off 00H On-line<br />
On 08H Off line<br />
4 On 10H Not used; fixed to On<br />
5 - - - Undefined<br />
6 Off 00H Paper is not being fed by the FEED Button<br />
On 40H Paper is being fed by the FEED Button<br />
7 Off 00H Not used; fixed to Off<br />
Table 33 Automatic Status Back (ASB) First Byte (Printer Information)<br />
Bit Off/On Hex Decimal Status for Automatic Status Back (ASB)<br />
0 - - Undefined<br />
1 - - Undefined<br />
2 Off 00H No mechanical error<br />
On 04H Mechanical error occurred<br />
3 Off 00H No Auto-cutter error<br />
On 08H Auto-cutter error occurred<br />
4 Off 00H Not used; fixed to off<br />
5 Off 00H No unrecoverable error 9<br />
On 20H Unrecoverable error occurred<br />
6 Off 00H No temporary abnormality of the print head<br />
temperature (high temperature)<br />
On 40H Temporary abnormality of the print head<br />
temperature (high temperature) occurred<br />
7 Off 00H Not used; fixed to Off<br />
Table 34 Automatic Status Back (ASB) Second Byte (Error Information)<br />
9<br />
The <strong>Ithaca</strong> ® <strong>610</strong> can not recover from mechanical errors without flushing the input buffer. All print<br />
data will be lost if a mechanical error occurs.<br />
28-05897 Rev D Page 191
Programming Codes<br />
<strong>Ithaca</strong> ® <strong>610</strong> Programmer’s <strong>Guide</strong><br />
Bit Off/On Hex Decimal Status for Automatic Status Back (ASB)<br />
1 Off 00H Paper low sensor: paper adequate<br />
On 02H Paper low sensor: paper low<br />
3 Off 00H Paper out sensor: paper present<br />
On 08H Paper out sensor: paper not present<br />
4 Off 00H Not used; fixed to Off<br />
5,6 - - - Undefined<br />
7 Off 00H Not used; fixed to Off<br />
Table 35 Automatic Status Back (ASB) Third Byte (Paper Sensor Information)<br />
Bit Off/On Hex Decimal Status for Automatic Status Back (ASB)<br />
0-3 - - - Undefined<br />
4 Off 00H Not used; fixed to Off<br />
5,6 - - - Undefined<br />
7 Off 00H Not used; fixed to Off<br />
Table 36 Automatic Status Back (ASB) Fourth Byte (Paper Sensor Information)<br />
Function Transmit Status<br />
ASCII [GS] r <br />
Hexadecimal 1DH 72H <br />
Decimal <br />
Range 1 n 2<br />
49 n 50<br />
Description The [GS] r command transmits the status specified by as follows: paper<br />
sensor status as one byte of data when = 1 or 49, and drawer kick-out<br />
connector status when = 2 or 50. The paper present status of bits 2 and 3<br />
for the paper sensor status is not transmitted because the printer goes off line<br />
when a paper out is detected by the paper out sensor. The paper roll low sensor<br />
is an option. If the sensor is not installed, bits 0 and 1 for the paper sensor status<br />
are always in the ―Paper adequate‖ status.<br />
Bit Off/On Hex Decimal Status<br />
1 Off 00H Paper low sensor: paper adequate<br />
On 02H Paper low sensor: paper low<br />
3 Off 00H Paper out sensor: paper present<br />
On 08H Paper out sensor: paper not present<br />
4 Off 00H Not used; fixed to Off<br />
5,6 - - - Undefined<br />
7 Off 00H Not used; fixed to Off<br />
Table 37 Paper Sensor Status ( = 1, 49)<br />
Page 192 Rev D 28-05897
Programming Codes<br />
<strong>Ithaca</strong> ® <strong>610</strong> Programmer’s <strong>Guide</strong><br />
Bit Off/On Hex Decimal Status<br />
0 Off 00H Drawer kick-out connector pin 3 low<br />
On 01H Drawer kick-out connector pin 3 high<br />
1-3 - - - Undefined<br />
4 Off 00H Not used; fixed to Off<br />
5,6 - - - Undefined<br />
7 Off 00H Not used; fixed to Off<br />
Table 38 Drawer Kick-out Connector Status ( = 2, 50)<br />
Function Transmit Real-Time Status<br />
ASCII [DLE] [EOT] <br />
Hexadecimal 10H 04H <br />
Decimal <br />
Range 1 n 4<br />
Description The [DLE] EOT command transmits the specified status in real time. The<br />
command is executed if the printer is off line, the print buffer is full, or an error<br />
occurs. If the printer goes off line due to a paper-end condition, bit 5 of the<br />
printer status (waiting for on-line recovery) is on from the time the paper roll is<br />
inserted to the time the printer goes on-line. See the [GS] z 0 command for<br />
details of the on-line recovery wait time. The paper roll low sensor is an option.<br />
If the printer does not have a paper low sensor, bits 2 and 3 of the paper roll<br />
sensor status will always be ―Paper adequate.‖ Bit 3 of the second byte is always<br />
―No error occurred.‖<br />
<br />
Function<br />
1 Transmit printer status<br />
2 Transmit off line status<br />
3 Transmit error status<br />
4 Transmit paper roll sensor status<br />
Table 39 Values for the Status Function, <br />
Bit Off/On Hexl Decimal Status<br />
0 Off 00H Not used; fixed to off<br />
1 On 02H Not used; fixed to on<br />
2 Off 00H Drawer kick-out connector pin 3 low<br />
On 04H Drawer kick out connector pin 3 high<br />
3 Off 00H On-line<br />
On 08H Off line<br />
4 On 10H Not used; fixed to on<br />
5 - - - Undefined<br />
6 - - - Undefined<br />
7 Off 00H Not used; fixed to off<br />
Table 40 Printer Status ( = 1)<br />
28-05897 Rev D Page 193
Programming Codes<br />
<strong>Ithaca</strong> ® <strong>610</strong> Programmer’s <strong>Guide</strong><br />
Bit Off/On Hexl Decimal Status<br />
0 Off 00H Not used; fixed to off<br />
1 On 02H Not used; fixed to on<br />
2 - - - Undefined<br />
3 Off 00H Paper is not being fed by the FEED<br />
Button<br />
On 08H Paper is being fed by the FEED Button<br />
4 On 10H Not used; fixed to on<br />
5 Off 00H No paper out stop<br />
On 20H Printing stops due to paper out<br />
6 Off 00H No error<br />
On 40H Error occurs<br />
7 Off 00H Not used; fixed to off<br />
Table 41 Off line Status ( = 2)<br />
Bit Off/On Hex Decimal Status<br />
0 Off 00H Not used; fixed to off<br />
1 On 02H Not used; fixed to on<br />
2 Off 00H No mechanical error<br />
On 04H Mechanical error occurred<br />
3 Off 00H No auto-cutter error<br />
On 08H Auto-cutter error occurred<br />
4 On 10H Not used; fixed to on<br />
5 Off 00H Unrecoverable error occurred 10<br />
On 20H Recoverable error occurred<br />
6 Off 00H Not used; fixed to off<br />
7 Off 00H Not used; fixed to off<br />
Table 42 Error Status ( = 3)<br />
Bit Off/On Hex Decimal Status<br />
0 Off 00H Not used; fixed to off<br />
1 On 02H Not used; fixed to on<br />
2,3 Off 00H Paper low sensor: paper adequate<br />
On (0CH) () Paper low sensor: paper low<br />
4 On 10H Not used; fixed to on<br />
5,6 Off 00H Paper out sensor: paper adequate<br />
On 60H Paper out sensor: paper not present<br />
7 Off 00H Not used; fixed to off<br />
Table 43 Paper Roll Sensor Status ( = 4)<br />
Function Transmit Peripheral Status<br />
ASCII [ESC] u <br />
Hexadecimal 1BH 75H <br />
Decimal <br />
Range n = 0<br />
Description The [ESC] r command transmits peripheral status has been replaced by the<br />
[GS] r command. The <strong>Ithaca</strong> ® <strong>610</strong> return cash drawer status as specified below.<br />
Bit Off/On Hex Decimal Status<br />
10<br />
The <strong>Ithaca</strong> ® <strong>610</strong>does not allow buffer recovery on unrecoverable errors. Following the recovery<br />
process will not restore the data buffers.<br />
Page 194 Rev D 28-05897
Programming Codes<br />
<strong>Ithaca</strong> ® <strong>610</strong> Programmer’s <strong>Guide</strong><br />
0 Off 00H Pin 3 is Low<br />
On (03H) (3) Pin 3 is High<br />
1 – 7 Off 00H Not used; fixed to Off<br />
Table 44 Peripheral Status ( = 0, 48)<br />
Function Transmit Paper Sensor Status<br />
ASCII [ESC] v<br />
Hexadecimal 1BH 76H<br />
Decimal <br />
Description The [ESC] v command has been replaced by the [GS] r command. The [ESC] v<br />
command transmits paper status has been replaced by the [GS] r command.<br />
The <strong>Ithaca</strong> ® <strong>610</strong> return paper status as specified below<br />
Electronic Journal Disabled<br />
Bit Off/On Hex Decimal Status<br />
0,1 Off 00 Receipt Paper present<br />
On 02H Receipt Paper Low or not present<br />
2,3 Off 00 Cover is closed<br />
On 04H Cover is open<br />
4 Off 00 Not used, fixed Off<br />
5 Off 00 Slip is present<br />
On 04H Slip is not present<br />
6 ON 20H Fixed On<br />
7 Off 00 Not used, fixed Off<br />
Electronic Journal Enabled<br />
Bit Off/On Hex Decimal Status<br />
0 Off 00H Journal Space adequate > 8K<br />
On 01H Journal Space Low < 8K<br />
1 Off 00 Receipt Paper present<br />
On 02H Receipt Paper Low or not present<br />
2 Off 00 Cover is closed<br />
On 04H Cover is open<br />
3 Off 00 Journal is active and not full (Cover<br />
Closed)<br />
On 08H Journal Full and has been disabled (or<br />
Cover Open)<br />
4 Off 00 Not used, fixed Off<br />
5 Off 00 Slip is present<br />
On 04H Slip is not present<br />
6 ON 20H Fixed On<br />
7 Off 00 Not used, fixed Off<br />
Table 45 Paper Status<br />
28-05897 Rev D Page 195
Programming Codes<br />
<strong>Ithaca</strong> ® <strong>610</strong> Programmer’s <strong>Guide</strong><br />
Printing Paper Command<br />
Function Select Paper Type for Printing<br />
ASCII [ESC] c 0 <br />
Hexadecimal 1BH 63H 30H <br />
Decimal <br />
Range n = 1, 1 n 3, 8 n 11<br />
Description ESC c 0 n selects paper type(s) for printing. User‘s have the option to select<br />
either Paper roll or validation paper. Both bits 0 and 1 indicate paper roll and if<br />
either of them is available, the paper roll is selected as the print sheet. Validation<br />
and paper roll can be selected simultaneously, but in this case, be sure to use a<br />
pressure sensitive paper so that the printing result is on the paper roll. At this<br />
time, the setting values for validation are available for ESC 2, ESC 3, GS L, and<br />
GS W. This command is enabled only when processed at the beginning of a line.<br />
When previously disabled validation paper is enabled, the printer waits for the<br />
validation to be inserted. When previously enabled validation paper is disabled,<br />
the printer ejects the paper. The default setting is n = 1. The paper type(s) are<br />
selected for printing by using n as follows:<br />
Bit Off/On Hex Decimal Function<br />
0 Off 00 0 Electronic Journal disabled.<br />
On 01 1 Electronic Journal enabled<br />
1 Off 00 0 Paper roll disabled.<br />
On 02 2 Paper roll enabled.<br />
2 Off 00 0 Slip Paper Disabled (EPOS only)<br />
On 04 4 Slip Paper enabled (EPOS only)<br />
3 Off 00 0 Validation paper disabled.<br />
On 08 8 Validation paper enabled.<br />
4–7 — — — Undefined.<br />
Note: In EPOS emulation the <strong>Ithaca</strong> ® <strong>610</strong> printer will recognize the Epson<br />
Slip Select command and enter Validation mode.<br />
Page 196 Rev D 28-05897
Programming Codes<br />
<strong>Ithaca</strong> ® <strong>610</strong> Programmer’s <strong>Guide</strong><br />
Function Select Paper Type for Command Settings<br />
ASCII [ESC] c 1 <br />
Hexadecimal 1BH 63H 31H <br />
Decimal <br />
Range n = 1, 1 n 3, 8 n 11<br />
Description<br />
ESC c 1 n selects paper type(s) for setting. Paper roll and validation paper are<br />
available. Both bits 0 and 1 indicate paper roll and if either of them is available,<br />
the paper roll is selected as the print sheet. The commands that need to select<br />
paper types for setting are ESC 2, ESC 3, GS L, and GS W. The value of n is<br />
used as follows:<br />
Bit Off/On Hex Decimal Function<br />
0 Off 00 0 Not Used.<br />
On 01 1 Not Used.<br />
1 Off 00 0 Paper roll disabled.<br />
On 02 2 Paper roll enabled.<br />
2 — — — Undefined.<br />
3 Off 00 0 Validation paper disabled.<br />
On 08 8 Validation paper enabled.<br />
4–7 — — — Undefined.<br />
Function Select Paper Type for Command Settings<br />
ASCII [ESC] f <br />
Hexadecimal 1BH 66H <br />
Decimal <br />
Range 0 t 1 15<br />
0 t 2 64<br />
Description ESC f t1 t2 sets the time that the printer waits for validation paper to be inserted<br />
to t 1 1 minutes, and the time from detection of the validation to the start of<br />
printing to t 2 0.1 seconds. When t1=0, the validation waiting time is not set and<br />
the printer continues waiting for a validation to be inserted. The default validation<br />
waiting time is not set, and the start operation time is set to 10 seconds (t 1 =0,<br />
t 2 =10). This setting alone, however, does not cause the printer to immediately<br />
start waiting for a validation to be inserted. The setting becomes effective when<br />
validation paper is used. DLE ENQ is used to cancel the validation waiting state.<br />
Page Mode<br />
Function Cancel Print Data in Page Mode<br />
ASCII [CAN]<br />
Hexadecimal 18H<br />
Decimal <br />
Description CAN In page mode, deletes all the print data in the current printable area.<br />
28-05897 Rev D Page 197
Programming Codes<br />
<strong>Ithaca</strong> ® <strong>610</strong> Programmer’s <strong>Guide</strong><br />
Function Select Page Mode<br />
ASCII [ESC] L<br />
Hexadecimal 1BH 4CH<br />
Decimal <br />
Description ESC L Switches from standard mode to page mode and starts the page mode<br />
definition.<br />
Function Set Printing Area in Page Mode<br />
ASCII [ESC] W xL xH yL yH dxL dxH dyL dyH<br />
Hexadecimal 1BH 57H xL xH yL yH dxL dxH dyL dyH<br />
Decimal xL xH yL yH dxL dxH dyL dyH<br />
Range 0 (xL + xH x 256) 65535 (0 xL 255, 0 xH 255)<br />
0 (yL + yH x 256) 65535 (0 yL 255, 0 yH 255)<br />
1 (dxL + dxH x 256) 65535 (0 dxL 255, 0 dxH 255)<br />
1 (dyL + dyH x 256) 65535 (0 dyL 255, 0 dyH 255)<br />
Description ESC W sets the position and the size of the printing area.<br />
• Horizontal starting position = [(xL + xH × 256) × (horizontal motion units)].<br />
• Vertical starting position = [(yL + yH × 256) × (vertical motion units)].<br />
• Horizontal printing area width = [(dxL + dxH × 256) × (horizontal motion units)].<br />
• Vertical printing area width = [(dyL + dyH × 256) × (vertical motion units)].<br />
Function Select Standard Mode<br />
ASCII [ESC] S<br />
Hexadecimal 1BH 53H<br />
Decimal <br />
Description ESC S Switches from page mode to standard mode with out printing the page.<br />
All page definition is lost.<br />
Function Select Page Mode Entry Direction<br />
ASCII [ESC] T <br />
Hexadecimal 1BH 54H <br />
Decimal <br />
Description ESC T Select print direction in page mode<br />
This command may also be issued during page definition. When issued in page mode it resets<br />
the orientation and entry position but does not cause the currently defined image<br />
to be erased or printed.<br />
Where x = 0 for standard orientation (Direction A).<br />
x = 1 for 270 Rotation (Direction B)<br />
x = 2 for 180 Rotation (Direction C)<br />
x = 3 for 90 Rotation (Direction D)<br />
Page 198 Rev D 28-05897
B > > > > ><br />
C > > > > ><br />
D > > > > ><br />
Programming Codes<br />
<strong>Ithaca</strong> ® <strong>610</strong> Programmer’s <strong>Guide</strong><br />
Receipt or<br />
Inserted Form<br />
Initial entry<br />
location<br />
A > > > > ><br />
Function Print and return to standard mode (in page mode0<br />
ASCII [FF]<br />
Hexadecimal 0CH<br />
Decimal <br />
Description [FF] In page mode, prints the data in the print buffer collectively and returns to<br />
standard mode.<br />
28-05897 Rev D Page 199
Programming Codes<br />
<strong>Ithaca</strong> ® <strong>610</strong> Programmer’s <strong>Guide</strong><br />
Function Print data in page mode<br />
ASCII [ESC][FF]<br />
Hexadecimal 1BH,0CH<br />
Decimal <br />
Description [ESC][FF] Prints the page as it is currently defined and reenters page mode<br />
without deleting the page definition.<br />
Function Set Absolute Vertical Print Position in Page Mode<br />
ASCII [GS]$<br />
Hexadecimal 1DH,24H<br />
Decimal <br />
Description GS $ sets the absolute vertical print starting position to [nL + nH x 256)<br />
x (vertical or horizontal motion units)] in page mode.<br />
Function Set Relative Vertical Print Position in page mode<br />
ASCII [GS] \ <br />
Hexadecimal 1BH 5CH <br />
Decimal <br />
Range 0 n l 255<br />
0 n h 255<br />
Description The [GS] \ command sets the print starting position based on the<br />
current position and the distance from the current position to [(n l + n h × 256) ×<br />
vertical or horizontal unit.<br />
Bar Code Commands<br />
Function Print Bar Code<br />
1 ASCII GS k … NUL Mode 1 between 0 and 6<br />
Hexadecimal 1DH 6BH … 00<br />
Decimal … 0<br />
2 ASCII GS k … Mode 2 between 65 and 73 = Length of<br />
<br />
Hexadecimal 1DH 6BH … <br />
Decimal … <br />
Range<br />
1<br />
0 m 6 (k and d depend on the bar code system used.)<br />
2<br />
65 m 73 (n and d depend on the bar code system used.)<br />
Description<br />
The GS k … NUL command selects a bar code system and prints<br />
the bar code. If is between 65 and 73, the length must be specified. If <br />
is between 0 and 6, the data must be null terminated. (See the descriptions<br />
below.)<br />
Mode Bar Code System Number of Characters Remarks<br />
1 0 UPC A 11 k 12 48 d 57<br />
1 1 UPC E 11 k 12 48 d 57<br />
1 2 JAN-13 (EAN-13) 12 k 13 48 d 57<br />
1 3 JAN-8 (EAN-8) 7 k 8 48 d 57<br />
1 4 Code 39 1 k 48 d 57, 65 d 90<br />
d = 32, 36, 37, 43, 45, 46, 47<br />
1 5 ITF 1 k (even number) 48 d 57<br />
Page 200 Rev D 28-05897
Programming Codes<br />
<strong>Ithaca</strong> ® <strong>610</strong> Programmer’s <strong>Guide</strong><br />
1 6 Codabar 1 k 48 d 57, 65 d 68<br />
d = 32, 36, 37, 43, 45, 46, 47, 58<br />
2 65 UPC A 11 k 12 48 d 57<br />
2 66 UPC E 11 k 12 48 d 57<br />
2 67 JAN-13 (EAN-13) 12 k 13 48 d 57<br />
2 68 JAN-8 (EAN-8) 7 k 8 48 d 57<br />
2 69 Code 39 1 n 255 48 d 57, 65 d 90<br />
d = 32, 36, 37, 43, 45, 46, 47<br />
2 70 ITF 1 n 255<br />
48 d 57<br />
(even number)<br />
2 71 Codabar 1 n 255 48 d 57, 65 d 68<br />
d = 32, 36, 37, 43, 45, 46, 47, 58<br />
2 72 Code 93 1 n 255 0 d 127<br />
2 73 Code 128 2 n 255 0 d 127<br />
Table 46 Bar Code System Based on <br />
[Description for 1 ]<br />
indicates the character code to be printed. A null (00 Hex) character ends<br />
the bar code definition.<br />
[Description for 2 ]<br />
indicates the number of bytes of bar code data to be processed immediately<br />
following . Additionally, indicates the character code to be printed.<br />
The following apply to both<br />
GS k … NUL<br />
GS k … :<br />
If the horizontal width exceeds the printing area, the printer only feeds the paper.<br />
These commands feed as much paper as necessary to print the bar code<br />
according to the GS h command. These commands are enabled only when no<br />
data exists in the print buffer. When data does exist in the print buffer, the printer<br />
processes the data following as normal data. After printing a bar code, the<br />
print position is set at the beginning of the line. These commands are not<br />
effected by print modes (emphasized, underline, character size, etc.)<br />
Note: Barcode 39 allows the ―*‖ character to be used as a start and stop<br />
flag. If the ―*‖ is used, the length specified must be at least as long as the<br />
desired barcode.<br />
Function Set Bar Code Height<br />
ASCII GS h <br />
Hexadecimal 1DH 68H <br />
Decimal <br />
Range 1 n 255<br />
Default 0.90 inch high<br />
Description The GS h command sets the height of the bar code. The bar code height is<br />
set to n/180 inch.<br />
28-05897 Rev D Page 201
Programming Codes<br />
<strong>Ithaca</strong> ® <strong>610</strong> Programmer’s <strong>Guide</strong><br />
Function Select Printing Position of HRI Characters<br />
ASCII GS H <br />
Hexadecimal 1DH 48H <br />
Decimal <br />
Range 0 n 3, 48 n 51<br />
Description The GS H command selects the printing position of HRI (Human Readable<br />
Interpretation) characters when printing a bar code. selects the printing<br />
position as follows.<br />
<br />
Printing position<br />
0, 48 Not printed<br />
1, 49 Above bar code<br />
2, 50 Below bar code<br />
3, 51 Both above and below the bar code<br />
Table 47 Printing Position of HRI Characters<br />
Function Select Font for HRI Characters<br />
ASCII GS f <br />
Hexadecimal 1DH 66H <br />
Decimal <br />
Range = 0, 1, 48, 49<br />
Description The GS f command selects a font for the HRI (Human Readable<br />
Interpretation) characters used when printing a bar code. selects a font from<br />
the following table.<br />
<br />
Font<br />
0, 48 Font A (14 x 12)<br />
1, 49 Font B (12 x 12)<br />
Table 48 Font for Human Readable Interpretation (HRI) Characters<br />
Function Set Bar Code Width<br />
ASCII GS w <br />
Hexadecimal 1DH 77H <br />
Decimal <br />
Range 2 n 6<br />
Description The GS w command sets the size of the bar code as follows.<br />
N Multi-level bar code Binary-level bar code<br />
Module width (mm) Thin element width (mm) Thick element width (mm)<br />
2 0.250 0.250 0.626<br />
3 0.375 0.375 1.001<br />
4 0.500 0.500 1.251<br />
5 0.626 0.626 1.627<br />
6 0.751 0.751 2.002<br />
Table 49 Horizontal size of the bar code<br />
Page 202 Rev D 28-05897
Programming Codes<br />
<strong>Ithaca</strong> ® <strong>610</strong> Programmer’s <strong>Guide</strong><br />
Mechanism Control Commands<br />
Function Select cut mode and cut paper<br />
ASCII [GS] V <br />
Hexadecimal 1DH 56H <br />
Decimal <br />
Description When = 1 or 49, is not used and a partial cut is performed. When <br />
= 66, [GS] V executes a partial cut (one point left uncut) after paper is<br />
fed [cutting position ( x approximately 1/144 inch)]. When using the<br />
command, there is a gap between the auto-cutter position and the print position.<br />
The [GS] V command is only effective when input at the beginning of a<br />
line. The [GS] V command executes paper feeding to the manual<br />
cutting position.<br />
Function Partial knife cut<br />
ASCII [ESC] i<br />
Hexadecimal 1BH 69H<br />
Decimal <br />
Description The [ESC] i command performs a partial knife cut.<br />
Function Perform a partial knife cut<br />
ASCII [ESC] m<br />
Hexadecimal 1BH 6DH<br />
Decimal <br />
Description The [ESC] m command performs a partial knife cut.<br />
Function Sound buzzer<br />
ASCII [BEL]<br />
Hexadecimal 07H<br />
Decimal <br />
Description The [BEL] command sounds the internal buzzer, if equipped.<br />
Function Sound buzzer<br />
ASCII [ESC] BEL<br />
Hexadecimal 1BH 07H<br />
Decimal <br />
Description The [ESC] BEL command sounds the internal buzzer, if equipped.<br />
28-05897 Rev D Page 203
Programming Codes<br />
<strong>Ithaca</strong> ® <strong>610</strong> Programmer’s <strong>Guide</strong><br />
Miscellaneous Commands<br />
Function Set Horizontal and Vertical Motion Units<br />
ASCII [GS] P x y<br />
Hexadecimal 1DH 50H x y<br />
Decimal x y<br />
Range 0 x 255<br />
Default x = 180, y = 360<br />
Description The GS P x y command sets the horizontal and vertical motion units to 1/x inches<br />
and 1/y inches, respectively. When x and y are set to zero, the default setting of<br />
each value is used.<br />
Note: This feature is licensed from Epson, and is only available in the Full<br />
Epson Emulation of the firmware. Problems with this command are<br />
frequently caused by not using the correct version of the firmware.<br />
Contact <strong>TransAct</strong> sales and/or technical support for this added cost option.<br />
Function Initialize the Printer<br />
ASCII [ESC] @<br />
Hexadecimal 1BH 40H<br />
Decimal <br />
Description The [ESC] @ command initializes the printer. All settings, including character<br />
font and line spacing, are canceled.<br />
Function Transmit Printer ID<br />
ASCII [GS] I <br />
Hexadecimal 1DH 49H <br />
Decimal <br />
Range 1 n 3<br />
49 n 51<br />
Description The [GS] I command transmits the printer ID specified by below. Each<br />
printer ID consists of one byte of data.<br />
Printer ID Hex ID<br />
1,49 Printer model ID 0DH<br />
2,50 Type ID 20H or 32D 11<br />
3,51 ROM version ID 2H or 2D.<br />
Table 50 Printer ID<br />
Bit Off/On Hex Decimal Function<br />
0 Off 00H No two-byte character code<br />
1 Off 00H Not Auto-cutter equipped<br />
On 02H Auto-cutter equipped<br />
2,3 - - - Undefined<br />
4 Off 00H Not used; fixed to off<br />
5,6 - - - Undefined<br />
7 Off 00H Not used; fixed to off<br />
Table 51 Type ID ( = 2 or 50)<br />
11<br />
The Epson Type ID and ROM version are based on the Epson TM-88 documentation and a<br />
sample printer. This value can be reconfigured to any 8 bit value.<br />
Page 204 Rev D 28-05897
Programming Codes<br />
<strong>Ithaca</strong> ® <strong>610</strong> Programmer’s <strong>Guide</strong><br />
Function Generate Pulse<br />
ASCII [ESC] p <br />
Hexadecimal 1BH 70H <br />
Decimal <br />
Range = 0, 1, 48, 49<br />
0 t1 255<br />
0 t2 255<br />
Description The [ESC] p command sends a pulse (on time = x 2 msec) to<br />
the specified connector pin. When = 1 or 48, the pulse is sent to drawerkick-out<br />
connector pin 2. When = 0 or 48, the pulse is sent to drawer-kickout<br />
connector pin 2; when = 1 or 49, the pulse is sent to drawer-kick-out<br />
connector pin 5.<br />
Function Generate Pulse in real time<br />
ASCII [DLE] [DC4] <br />
Hexadecimal 10H 14H <br />
Decimal <br />
Range 0 m 8<br />
0 t 8<br />
Description The [DLE] [DC4] command sends a pulse specified by in realtime<br />
to the connector pin specified by as follows:<br />
<br />
Connector pin<br />
0 Drawer kick-out connector pin 2<br />
1 Drawer kick-out pin 5<br />
Note: This feature is licensed from Epson, and is only available in the Full<br />
Epson Emulation of the firmware. Problems with this command are<br />
frequently caused by not using the correct version of the firmware.<br />
Contact <strong>TransAct</strong> sales and/or technical support for this added cost option.<br />
Function Execute power-off sequence<br />
ASCII [DLE] [DC4] <br />
Hexadecimal 10H 14H <br />
Decimal <br />
Range a = 1<br />
b = 8<br />
Description The [DLE] [DC4] command executes the printer power-off<br />
sequence as follows:<br />
Stores the values of the maintenance counter.<br />
Transmits the following power-off status (Header + Status + NUL)<br />
Power off status Hex Decimal Amount of data<br />
Header 3BH 59 1 byte<br />
Status 30H 48 1 byte<br />
NUL 00H 0 1 byte<br />
Executes the printer power off<br />
28-05897 Rev D Page 205
Programming Codes<br />
<strong>Ithaca</strong> ® <strong>610</strong> Programmer’s <strong>Guide</strong><br />
Function Clear buffer(s)<br />
ASCII [DLE] [DC4] d1…d7<br />
Hexadecimal 10H 14H d1…d7<br />
Decimal d1…d7<br />
Range d1=1, d2=3, d3=20, d4=1, d5=6, d6=2, d7=8<br />
Description The [DLE] [DC4] command clears all data stored in the receive buffer and<br />
the print buffer.<br />
Transmits the following three bytes of data<br />
Hex Decimal Amount of data<br />
Header 37H 55 1 byte<br />
Flag 25H 37 1 byte<br />
NUL 00H 0 1 byte<br />
Enters in standard mode<br />
Function Select Peripheral Device Status<br />
ASCII [ESC] = <br />
Hexadecimal 1BH 3DH <br />
Decimal <br />
Range 1 n 3<br />
Description The [ESC] = command selects the device to which the host computer sends<br />
data, based on the value of listed below.<br />
Bit Off/On Hex Decimal Function<br />
0 Off 00H Printer disabled<br />
On 01H Printer enabled<br />
1 Off 00H Customer display disabled<br />
On 02H Customer display enabled<br />
2-7 - - - Undefined<br />
Table 52 Peripheral Device Bit Definitions<br />
Note: Epson Customer display is not supported by the <strong>Ithaca</strong> ® <strong>610</strong> printer.<br />
Page 206 Rev D 28-05897
Programming Codes<br />
<strong>Ithaca</strong> ® <strong>610</strong> Programmer’s <strong>Guide</strong><br />
Function Real-Time Request to Printer<br />
ASCII [DLE] [ENQ] <br />
Hexadecimal 10H 05H <br />
Decimal <br />
Range = 0, 2<br />
Description The [DLE] ENQ command responds to a request from the host computer<br />
specified by as shown below. The command is also executed when the<br />
printer is disabled. When the printer stops printing due to a paper-end condition,<br />
= 0 is only effective when the printer is waiting for on-line recovery from the<br />
time the paper roll is inserted to the time the printer goes on-line. The on-line<br />
recovery wait time is confirmed by the printer status of ASB or the [DLE] EOT<br />
command. = 2 is only effective when a recoverable error occurs. The<br />
printer can recover from an error without turning off the power. Whether an error<br />
occurs or not can be confirmed by the ASB status or the error status of the [DLE]<br />
EOT command.<br />
Where 0 Recovers to on-line<br />
2 Recovers from an error after clearing the receive and print buffers<br />
Note: This feature is licensed from Epson, and is only available in the Full<br />
Epson Emulation of the firmware. Problems with this command are<br />
frequently caused by not using the correct version of the firmware.<br />
Contact <strong>TransAct</strong> sales and/or technical support for this added cost option.<br />
28-05897 Rev D Page 207
Programming Codes<br />
<strong>Ithaca</strong> ® <strong>610</strong> Programmer’s <strong>Guide</strong><br />
Function Enter Test Mode<br />
ASCII [GS] ( A <br />
Hexadecimal 1DH 28H 41H <br />
Decimal <br />
Description This command places the printer into test mode based on the parameters <br />
and .<br />
Where may be 0, 1, 2, 48, 49, or 50. It is intended to select the print station. The<br />
<strong>Ithaca</strong> ® <strong>610</strong> will accept any of these values<br />
Where 1 or 49 Selects Hex Dump mode. You must press the * Button to exit this mode<br />
2 or 50 Selects Printer Configuration print out.<br />
3 or 51 Selects Rolling ASCII test pattern. You must press * Button to exit this<br />
mode.<br />
Function Print counter<br />
ASCII [GS] c:<br />
Hexadecimal 1DH 63H<br />
Decimal <br />
Description Sets the serial counter value in the print buffer and increments or decrements the<br />
counter value.<br />
• After setting the current counter value in the print buffer as print data (a<br />
character string), the printer counts up or down based on the count mode set<br />
Function Initialize maintenance counter<br />
ASCII [GS] g 0 m nl nh:<br />
Hexadecimal 1DH 67H 30H<br />
Decimal <br />
Description Initializes the resettable maintenance counter to 0.<br />
• nl, nh specifies the maintenance counter number as (nl + nh x 256)<br />
Counter number<br />
Counter [Unit]<br />
Hex<br />
Decimal<br />
14 20 Number of line feeds: Roll paper<br />
15 21 Number of energizing head: Roll paper<br />
32 50 Number of autocutter operation<br />
46 70 Print operation time<br />
• Frequent write command executions by this command may damage the NV<br />
memory. Therefore, it is recommended to write to the NV memory no more than<br />
10 times a day.<br />
• While processing this command, the printer is BUSY while writing data to the<br />
NV counter memory and stops receiving data. Therefore it is prohibited to<br />
transmit data including the real-time commands during the execution of this<br />
command<br />
Page 208 Rev D 28-05897
Programming Codes<br />
<strong>Ithaca</strong> ® <strong>610</strong> Programmer’s <strong>Guide</strong><br />
Function Transmit maintenance counter<br />
ASCII [GS] g 2 m nl nh:<br />
Hexadecimal 1DH 67H 32H<br />
Decimal <br />
Description Transmits the value of the specified maintenance counter.<br />
• nl, nh specifies the maintenance counter number as (nl + nh x 256)<br />
Counter number Counter [Units] Kind of counter<br />
Hex Decimal<br />
14 20 Number of line feeds: roll paper can be reset<br />
14 20 Number of times energizing head: roll paper<br />
14 20 Number of autocutter operations<br />
14 20 Printer operation time<br />
14 20 Number of line feeds: roll paper cumulative<br />
14 20 Number of times energizing head: roll paper<br />
14 20 Number of autocutter operations<br />
14 20 Printer operation time<br />
• The contents of the maintenance counter are as follows:<br />
Hexadecima<br />
Decimal<br />
l<br />
Header 5FH 95 1 byte<br />
Amount of data<br />
Data 30H-39H 48-57 1-10 bytes<br />
NUL 00H 0 1 byte<br />
• During the transmission of block data values in the maintenance counter, the printer ignores<br />
the real-time commands. Also, the printer does not transmit ASB even when the ASB is<br />
enabled. Therefore, the user cannot confirm changes in the printer status during these periods.<br />
• The counter values may be different from the actual counts depending on time differences at<br />
power off or the occurrence of an error.<br />
28-05897 Rev D Page 209
Programming Codes<br />
<strong>Ithaca</strong> ® <strong>610</strong> Programmer’s <strong>Guide</strong><br />
Macro Function Commands<br />
Function Start/End Macro Definition<br />
ASCII [GS] :<br />
Hexadecimal 1DH 3AH<br />
Decimal <br />
Description The [GS] : command starts or ends macro definition. Macro definition starts<br />
when the command is received during normal operation and ends when it is<br />
received during the macro definition. The macro definition can contain up to<br />
2048 bytes. If the definition exceeds 2048 bytes, the excess data will not be<br />
stored.<br />
Function Execute Macro<br />
ASCII GS ^ r t m<br />
Hexadecimal 1DH 5EH r t m<br />
Decimal r t m<br />
Range 0 r 255<br />
0 t 255<br />
m = See below<br />
Description The GS ^ r t m command executes a macro definition. The r specifies the<br />
number of times to execute the macro. When Bit 1 of m is set, r is ignored, and<br />
the macro is executed infinitely. t specifies the waiting time for executing the<br />
macro; it is t 100 msec for every macro execution. m specifies macro<br />
executing mode. When the LSB of m = 0, the macro executes r times<br />
continuously with the interval specified by t. When the LSB of m = 1, the printer<br />
remains idle and waits for the FEED Button to be pressed (after waiting for the<br />
period specified by t). After the button is pressed, the printer executes the macro<br />
once. The printer repeats the operation r times. When Bit 5 of m is set, the<br />
current macro definition is saved into the printer‘s nonvolatile flash memory as a<br />
start-up macro without executing it. The macro definition is executed upon<br />
power-up using the parameters specified by the GS ^ r t m command. If the<br />
printer is powered-up into self-test mode, the macro definition will not be<br />
executed. A saved macro definition can be deleted with the GS _ command.<br />
Bit Off/On Hexl Decimal Function<br />
0 Off 00 0 Macro executes r times continuously with<br />
the interval specified by t<br />
On 01 1 FEED Button controlled operation with<br />
time interval t<br />
1-4 - - - Undefined<br />
5 On 20 32 Value given by r is ignored and macro is<br />
run infinitely<br />
6 On 40 64 Save start-up macro definition to flash<br />
memory without executing<br />
7 - - - Undefined<br />
Table 53 Macro Control Bit Definitions<br />
Page 210 Rev D 28-05897
Programming Codes<br />
<strong>Ithaca</strong> ® <strong>610</strong> Programmer’s <strong>Guide</strong><br />
Function Delete Start-Up Macro Definition<br />
ASCII GS _<br />
Hexadecimal 1DH 5FH<br />
Decimal <br />
Description The GS _ command deletes a start-up macro definition previously created by the<br />
GS ^ command. If a start-up macro was not previously defined, the command<br />
will be ignored.<br />
User-defined Images and Graphics Commands<br />
Function Define user-defined bit image<br />
ASCII GS - x y d 1 … d(x x y x 8)<br />
Hexadecimal 1DH 2DH x y d 1 … d(x x y x 8)<br />
Decimal x y d 1 … d(x x y x 8)<br />
Range 1 x 255<br />
1 y 255<br />
0 d 255<br />
= a 15-byte maximum length name to identify the image<br />
Description GS - defines a bit-image for storage in the nonvolatile memory pool. The printer<br />
maintains an area of flash memory specifically designated for multiple bit-image<br />
storage. The area can contain as many bit-images as its size permits. (A<br />
printout of the amount of nonvolatile memory remaining can be obtained by<br />
performing a printer self test.) Each image is uniquely identified by the name<br />
given to it by the parameter. The name of the bit-image can be from<br />
one to 15 bytes long and contain any alphanumeric characters as well as spaces.<br />
The format of the bit-image is identical to that defined by the GS * command.<br />
The GS _ command must be entered in standard mode only at the beginning of a<br />
print line. Any image may be up to 2048 bytes long. If the size of the image is<br />
larger than the space remaining in the nonvolatile buffer, the image will not be<br />
saved. When the last byte of bit-image data is received and there is ample<br />
space in the nonvolatile buffer for the bit-image, the bit image will be saved.<br />
The following basic example demonstrates how to define an 8-bit x 8-bit block<br />
with the name ―MY IMAGE‖. A representation of the format of a downloaded bitimage<br />
is depicted below.<br />
28-05897 Rev D Page 211
Programming Codes<br />
<strong>Ithaca</strong> ® <strong>610</strong> Programmer’s <strong>Guide</strong><br />
Column one<br />
d1<br />
dy<br />
+1<br />
... ... ....<br />
MSB<br />
d2<br />
dy<br />
+2<br />
d<br />
n<br />
.... .... .... .... .... ....<br />
LSB<br />
dy<br />
d(x y 8)<br />
PRINT #1, CHR$(29),CHR$(45),<br />
PRINT #1, ‖MY IMAGE‖,CHR$(0);<br />
PRINT #1, CHR$(1),CHR$(1);<br />
PRINT #1, CHR$(255),CHR$(255),CHR$(255),CHR$(255);<br />
PRINT #1, CHR$(255),CHR$(255),CHR$(255),CHR$(255)<br />
REM Enter the GS command<br />
REM Define the image name<br />
REM Image size (8 x 8 bits)<br />
REM Send 8 bytes of image<br />
REM data<br />
Page 212 Rev D 28-05897
Programming Codes<br />
<strong>Ithaca</strong> ® <strong>610</strong> Programmer’s <strong>Guide</strong><br />
Function Print User-Defined Bit Image<br />
ASCII GS 0 <br />
Hexadecimal 1DH 30H 0H<br />
Decimal <br />
Range = a 15-byte maximum length name to identify the image.<br />
Description GS 0 prints a bit-image from storage in the nonvolatile memory pool. The name<br />
of the bit-image can be from one to 15 bytes long and contain any alphanumeric<br />
characters as well as spaces. GS searches the nonvolatile memory pool for the<br />
first occurrence of the image identified by . If the image is found, it will<br />
be printed. If the image cannot be found, the command will be ignored. The<br />
following basic example demonstrates how to print the stored bit-image named<br />
―MY IMAGE‖:<br />
PRINT #1 CHR$(29), CHR$(48) REM Enter the GS 0 command<br />
PRINT #1 ―MY IMAGE‖, CHR$(0) CHR$(0) REM Enter the image name<br />
Where selects a mode from the table below.<br />
Hex Decimal Mode Vertical Dot Density<br />
(dpi)<br />
Horizontal Dot<br />
Density (dpi)<br />
00 0 Normal 203 203<br />
01 1 Double-wide 203 101<br />
02 2 Double-high 101 203<br />
03 3 Quadruple 101 101<br />
Function Erase single entry from nonvolatile memory EPOS ONLY<br />
ASCII GS 1 <br />
Hexadecimal 1DH 31H 0H<br />
Decimal <br />
Range = a 15-byte maximum alphanumeric name to identify the image<br />
Description GS 1 deletes a single entry (bit-image or character set) from storage in the<br />
nonvolatile memory pool.<br />
Function Erase all entries from nonvolatile memory EPOS ONLY<br />
ASCII GS 5<br />
Hexadecimal 1DH 35H<br />
Decimal <br />
Description GS 5 erases the entire contents of the nonvolatile memory pool and frees up the<br />
memory for new entries.<br />
Note 1 No protection for the GS 5 command exists. All user store will be erased.<br />
28-05897 Rev D Page 213
Programming Codes<br />
<strong>Ithaca</strong> ® <strong>610</strong> Programmer’s <strong>Guide</strong><br />
Function Define Single User-Defined Bit-Image<br />
ASCII GS * x y d 1 … d(x x y x 8)<br />
Hexadecimal 1DH 2AH x y d 1 … d(x x y x 8)<br />
Decimal x y d 1 … d(x x y x 8)<br />
Range 1 x 255<br />
1 y 48<br />
0 d 255<br />
Description The GS * x y d 1 … d(x x y x 8) command defines a single downloaded bit-image<br />
using the number of dots specified by x and y in the RAM buffer area (volatile<br />
memory). The number of dots in the horizontal direction is x x 8. The number of<br />
dots in the vertical direction is y x 8. If (x x y x 8) exceeds the size of the buffer,<br />
the image is truncated. d indicates bit-image data and specifies a bit printed to<br />
one and not printed to zero. After a downloaded bit-image is defined, it may be<br />
saved to the nonvolatile flash storage buffer using the ESC ‗ command where it<br />
remains indefinitely. Otherwise, the image remains in the RAM buffer where it is<br />
available until ESC @ or ESC & is executed; the power is turned off; or the<br />
printer is reset. A representation of the format of a downloaded bit-image is<br />
depicted below.<br />
Column one<br />
d1<br />
dy<br />
+1<br />
... ... ....<br />
MSB<br />
d2<br />
dy<br />
+2<br />
d<br />
n<br />
.... .... .... .... .... ....<br />
LSB<br />
dy<br />
d(x y 8)<br />
Page 214 Rev D 28-05897
Programming Codes<br />
<strong>Ithaca</strong> ® <strong>610</strong> Programmer’s <strong>Guide</strong><br />
Function Print single user-defined bit-image<br />
ASCII GS / <br />
Hexadecimal 1DH 2FH <br />
Decimal <br />
Description The GS / command prints a downloaded or stored bit-image using the mode<br />
specified by . selects a mode from the table below.<br />
Hex Decimal Mode Vertical Dot Density<br />
(dpi)<br />
Horizontal Dot<br />
Density (dpi)<br />
00 0 Normal 203 203<br />
01 1 Double-wide 203 101<br />
02 2 Double-high 101 203<br />
03 3 Quadruple 101 101<br />
Table 54 User-defined Bit-image Resolutions<br />
Function Save User-Defined Character Set<br />
ASCII GS 6 <br />
Hexadecimal 1DH 36H 0H<br />
Decimal <br />
Range = a 15-byte maximum alphanumeric name to identify the image.<br />
Description GS 6 saves the current character set created by the [ESC] &<br />
command to the nonvolatile memory pool. If no character set has been defined,<br />
the command stores an empty definition structure.<br />
Function Select User-Defined Character Set<br />
ASCII GS 7 <br />
Hexadecimal 1DH 37H 0H<br />
Decimal <br />
Range = a 15-byte maximum alphanumeric name to identify the image.<br />
Description GS 7 selects a previously saved user-defined character set. If the<br />
character set does not exist, the command is ignored.<br />
Function Query Nonvolatile Memory Pool Information<br />
ASCII GS 3<br />
Hexadecimal 1DH 33H<br />
Decimal <br />
Description The GS 3 command prints a summary of the user-store usage. It is intended to<br />
help with the generation and maintenance of user store.<br />
Note 1 The report is printed as part of the configuration report.<br />
28-05897 Rev D Page 215
Programming Codes<br />
<strong>Ithaca</strong> ® <strong>610</strong> Programmer’s <strong>Guide</strong><br />
<strong>Ithaca</strong> ® Specific <strong>Ithaca</strong> ® <strong>610</strong> Commands<br />
The <strong>Ithaca</strong>® <strong>610</strong> has a number of extended control commands designed to make operation and<br />
maintenance of the printer easier for the host application refer to the <strong>Ithaca</strong>® <strong>610</strong> extended<br />
control discussion on page 155.<br />
Panel Button Commands<br />
Function Enable/Disable Paper Feed<br />
ASCII [ESC] p 5 <br />
Hexadecimal 1BH 70H 35H <br />
Decimal <br />
Range 0 n 255<br />
Description The [ESC] c 5 command enables or disables the FEED Button.<br />
Where Bit 0 = 1 the FEED Button is disabled<br />
Bit 0 = 0 the button is enabled.<br />
Paper Out/Low Sensor Commands<br />
Function Paper Low Sensor<br />
ASCII [ESC] p 4 <br />
Hexadecimal 1BH 70H 34H <br />
Decimal <br />
Range 0 n 255<br />
Description The [ESC] c 4 command determines if the printer stops printing when paper<br />
low is detected.<br />
Where 0 Printer continues to print with paper low.<br />
1 Printer stops printing when paper low is detected.<br />
Function Paper Error Signal Control<br />
ASCII [ESC] p 3 <br />
Hexadecimal 1BH 70H 33H <br />
Decimal <br />
Range 0 n 255<br />
Description The [ESC] c 3 command controls how the paper error pin on the parallel<br />
interface operates.<br />
Where Bit 0 controls paper low operation.<br />
If Bit 0 = 1 Paper low will set the paper error pin.<br />
If Bit 0 = 0 Paper low will not effect the paper error pin.<br />
Bit 2 controls how paper out effects the paper error pin.<br />
If Bit 2 = 1 Paper out will set the paper error pin.<br />
If Bit 2 = 0 Paper out will not effect the paper error pin.<br />
Note: The paper out sensor will always stop printing.<br />
The default setting allows only paper out to control the paper error pin.<br />
The Epson section has the following description of the enable/disable paper feed command.<br />
Page 216 Rev D 28-05897
Programming Codes<br />
<strong>Ithaca</strong> ® <strong>610</strong> Programmer’s <strong>Guide</strong><br />
Description<br />
The [ESC] c 5 command enables or disables the FEED Button. When the<br />
least significant bit (LSB) of = one, the FEED Button is disabled; when it is<br />
zero, the button is enabled.<br />
28-05897 Rev D Page 217
Programming Codes<br />
<strong>Ithaca</strong> ® <strong>610</strong> Programmer’s <strong>Guide</strong><br />
<strong>Ithaca</strong> ® Star Emulation<br />
The <strong>Ithaca</strong>® <strong>610</strong> printer has Star emulation that will allow the <strong>Ithaca</strong> to replace most Star<br />
printers with similar features to the <strong>Ithaca</strong>.<br />
Star used a real time cash drawer command that uses features patented by Epson. If<br />
you use the Star real time cash drawer command, you must use the added cost licensed<br />
firmware.<br />
Page 218 Rev D 28-05897
chapter 8<br />
Unicode<br />
28-05897 Rev D Page 219
This page intentionally left blank<br />
Page 220 Rev D 28-05897
Unicode<br />
<strong>Ithaca</strong> ® <strong>610</strong> Programmer’s <strong>Guide</strong><br />
Unicode – A Software Font Solution<br />
In the beginning there was five. Five bits of information per character. In the beginning<br />
this was enough (barely). For with five bits you could represent 32 different characters.<br />
This is how the Electro-mechanical Teletype received the characters it was to print.<br />
But soon people wanted both upper and lower case characters and other symbols. So in<br />
the second age of electronic communication we advanced to seven bits of data to<br />
represent the characters we wanted to communicate to electronic devices. Now we had<br />
127 different characters we could use, both upper and lower case and many symbols.<br />
Surely this is enough, now we can rest…<br />
―This is good, but I am Spanish and I need to communicate a ‗c‘ cedilla character.‖<br />
Hmmm, we can add a bit, now we will use eight bits of data and we can have up to 255<br />
characters that we can use. This is good, now we use eight bits, a byte.<br />
But then… ―I am Greek, I am Russian, I am Arabic…‖ was heard, ―We need to use<br />
characters that we are familiar with.‖<br />
What can be done to accommodate these languages? We will create code pages, one<br />
for each language. Now with these code pages each language will have its own 255<br />
characters that that language can use. This is the third age of electronic communication;<br />
code pages.<br />
Surely this is enough, now we can rest…<br />
In a land far, far away, there are a people that use characters so different to us that they<br />
do not look like characters at all, more like mini-pictures. And they have over 13,000<br />
different characters.<br />
Now, the fullness of time has come and we need to unify all these languages and<br />
symbol sets into one coherent system, we will call it ―Unicode‖. Unicode code will use<br />
two bytes, 16 bits, to communicate characters to and from electronic devices. Now we<br />
can communicate more than 65,000 different characters and symbols.<br />
Surely this is enough, so we rest.<br />
About Unicode<br />
Unicode is a way of mapping all characters and symbols in use by modern languages. A<br />
Unicode character consists of two bytes. These two bytes, 16 bits, allows us to represent<br />
more than 65,000 characters.<br />
Most legacy computing devices use one byte to represent a character or symbol. This<br />
single byte design causes a problem when we want to use Unicode to represent<br />
characters. Some steps have been taken to accommodate this two byte character<br />
representation. One is the creation of a new operating system using a new technology.<br />
28-05897 Rev D Page 221
Unicode<br />
<strong>Ithaca</strong> ® <strong>610</strong> Programmer’s <strong>Guide</strong><br />
This new technology uses 16 bit data values to represent textual data. This new<br />
technology works well to manipulate data on a computer, but legacy communication<br />
technology only transmits data via a byte (8 bits) at a time.<br />
MBCS (Multiple Byte Character Set) to the rescue, sometimes referred to as DBCS<br />
(Double Byte Character Set). This is a way of encoding the Unicode data so that an<br />
electronic device that uses bytes will not get confused when working with a Unicode<br />
character.<br />
Memory<br />
A full Unicode font would have more than 50,000 characters. If each character was 16-<br />
dots wide and-16 dots tall, each character would require 32 bytes of memory. 32 x<br />
50,000 = 1,600,000 bytes to store all the characters‘ images. This is a very conservative<br />
estimate, in reality, many characters take 32 dots wide and 32 dots high to represent the<br />
image of the character. A 32-dot by 32-dot character image uses 128 bytes of memory.<br />
128 x 50,000 = 6,400,000 bytes of memory to store all the characters.<br />
Even though memory is much cheaper than in the past, 6.4MB is too big.<br />
<strong>TransAct</strong>’s implementation of Unicode in the<br />
<strong>Ithaca</strong> ® <strong>610</strong>.<br />
Since each printer is likely not to need all the characters of all languages, we don‘t need<br />
to store all the 50,000+ characters. Also, many applications will desire a custom font<br />
style (i.e. fixed pitch, Arial, Script…).<br />
To address both these criteria (custom font style and sub set of Unicode characters), we<br />
have implemented a way to download any kind of font to the <strong>Ithaca</strong> ® <strong>610</strong>. Different sizes<br />
and styles are supported, as well as fixed and variable pitch. The only real limit is the<br />
amount of memory the printer has.<br />
<strong>TransAct</strong> has created a font download utility program that runs on Windows 2000 and<br />
Windows XP. This utility is available upon request. You must agree to use this utility with<br />
fonts that you have the right to download to a printer. Contact your salesperson for more<br />
information.<br />
WARNING: You must have proper rights to use a font in this manner.<br />
Do not download a font to the printer if you do not have the right to use<br />
the font as a downloaded printer font.<br />
Page 222 Rev D 28-05897
chapter 9<br />
<strong>Ithaca</strong> ® <strong>610</strong> Extended Printer Control<br />
28-05897 Rev D Page 223
This page intentionally left blank<br />
Page 224 Rev D 28-05897
<strong>Programmer's</strong> <strong>Guide</strong> <strong>Ithaca</strong> ® <strong>610</strong> Extended Control Codes<br />
The <strong>Ithaca</strong> ® <strong>610</strong> printer has a number of Extended Control commands that allow an application<br />
to better track and maintain the printer. These commands are in all emulations 12 .<br />
The printer maintains a log of printer activity. This activity may be returned to the host with the<br />
[ESC]~ T command. This command returns a ~T followed by four binary bits that make up a 32<br />
bit unsigned integer. The description of the command below describes the format in full.<br />
The printer also contains a number of commands that will force the printer to perform specific<br />
functions to help maintain the printer or print information about the printer. The functions<br />
available are:<br />
1) Print Current Configuration<br />
2) Print current log totals<br />
Note: Each of these commands follow the ESC~ or ESCy format. Other<br />
functions are performed by these basic commands. Do not attempt to use<br />
any undocumented version of these commands. The extended diagnostics<br />
commands may affect the print quality and performance of the printer. In<br />
some cases, the commands may degrade the performance of the print<br />
cartridge or mechanism.<br />
Function Read and Return Totals<br />
ASCII [ESC] ~ T <br />
Hexadecimal 1BH 7EH 54H <br />
Decimal <br />
Description This command returns the current statistics for parameter n. The value returned<br />
will be ~T with the next 4 bytes being an unsigned integer. For example:<br />
Returns:<br />
[ESC]~T Request cover open count<br />
~T or 256 + 100 or 356 cover opens<br />
Values of n Request:<br />
0 Black Dots<br />
1 Red Dots<br />
2 Pink Dots<br />
3 Cover Opens<br />
4 Paper Outs<br />
5 Line Feeds<br />
6 Characters Printed<br />
7 Cash Drawer1<br />
8 Cash Drawer2<br />
9 Standby Cycles<br />
12 The Star emulation does not allow the use of [ESC] y commands for extended diagnostics. The [ESC]<br />
y commands are not available.<br />
28-05897 Rev D Page 225
Extended Control Codes <strong>Ithaca</strong> ® <strong>610</strong> <strong>Programmer's</strong> <strong>Guide</strong><br />
10 Power Up Resets<br />
11 Watchdog Resets<br />
12 Base Flash Erases<br />
13 Ext Flash Erases<br />
14 Auto Cutter Cycles<br />
15 Init Requests<br />
16 Error Vectors<br />
17 Auto Cutter Faults<br />
18 Power On Time (Min.)<br />
19 System Active Time (Min.)<br />
20 Over Temperature<br />
21 Cutter Re-Home<br />
Page 226 Rev D 28-05897
<strong>Ithaca</strong> TM Extended Printer Control<br />
<strong>Ithaca</strong> ® <strong>610</strong> Programmer’s <strong>Guide</strong><br />
Function Print Current Configuration and Totals<br />
ASCII [ESC] y or [ESC] ~ <br />
Hexadecimal 1BH 79H 09H<br />
Decimal <br />
Description This command forces the printer to print the current configuration. To<br />
function correctly it must be issued with the printer in the proper emulation<br />
mode. It is intended to be printed in the default <strong>Ithaca</strong> ® configuration but<br />
will print in any configuration.<br />
Note: This command must be preceded with an ESC y .<br />
Function Print Current Totals<br />
ASCII [ESC] y <br />
Hexadecimal 1BH 79H 0FH<br />
Decimal <br />
Description This command forces the printer to print the current totals log.<br />
Note: This command must be preceded with an ESC y .<br />
Function Print Current Print Setup Values<br />
ASCII [ESC] y or [ESC] ~ <br />
Hexadecimal 1BH 79H 14H<br />
Decimal <br />
Description This command forces the printer to print the current setup values.<br />
Note: This command must be preceded with an ESC y .<br />
28-05897 Rev D Page 227
chapter 10<br />
Communications<br />
28-05897 Rev D Page 229
This page intentionally left blank<br />
Page 230 Rev D 28-05897
Communications<br />
<strong>Ithaca</strong> ® <strong>610</strong> Programmer’s <strong>Guide</strong><br />
Protocol and Print Buffers<br />
The following figure illustrates the communication flow from host computer to printer and<br />
from printer to cash drawer.<br />
Host to printer link<br />
Host computer<br />
Printer<br />
Host to<br />
keypad<br />
Printer to cash<br />
drawer<br />
Keypad<br />
Cash drawer<br />
Figure 13 Typical POS System<br />
For the host to printer communication link, the <strong>Ithaca</strong> ® <strong>610</strong> printer supports serial or<br />
parallel communications. The serial and parallel ports both follow standards developed<br />
for the personal computer environment.<br />
28-05897 Rev D Page 231
Communications<br />
<strong>Ithaca</strong> ® <strong>610</strong> Programmer’s <strong>Guide</strong><br />
Data to printer<br />
Host computer<br />
Printer<br />
Status and flow control back<br />
Figure 14 Host to Printer Link<br />
In most cases, the host computer is capable of sending information to the printer much<br />
faster than the printer can print it. To prevent information from being lost, a flow control<br />
mechanism is provided. The mechanism is called the flow control protocol. The goal of<br />
the flow control protocol is to exchange as much information as possible as fast as<br />
possible without losing any data. The <strong>Ithaca</strong> ® <strong>610</strong> printer supports three flow control<br />
protocols, two in serial mode and one in parallel.<br />
From the printer‘s point of view, four basic functions are required of communications. All<br />
four are common to all three flow control protocols. There must be a communication<br />
driver, status inquire procedure, storage buffer, and print control mechanism that is using<br />
the data.<br />
The communication port is either the serial port hardware or the parallel port hardware<br />
and the associated communication software driver.<br />
A means for the host to bypass the buffer for status information, referred to here as an<br />
inquirer processor, is also required because the buffer offsets the printer in time from the<br />
host. (The printer is generally behind the host).<br />
The storage print buffer is a software implemented, first-in first-out (FIFO) circular buffer.<br />
It stores information in an asynchronous fashion where information can be placed in it at<br />
any rate and retrieved from it at any rate, but the information order is not altered. All<br />
buffers have a finite size, and if information is put in faster than it is removed, the buffer<br />
will overflow. To avoid overflow, a flow control mechanism is required.<br />
The print control mechanism is the remainder of the printer hardware and control<br />
software. It interprets control codes and operates the control panel, print head, and cash<br />
drawer interface.<br />
Page 232 Rev D 28-05897
Communications<br />
<strong>Ithaca</strong> ® <strong>610</strong> Programmer’s <strong>Guide</strong><br />
The following figure illustrates the four basic parts of printer flow control.<br />
Printer<br />
Communications<br />
port<br />
ENQ<br />
processor<br />
Print buffer<br />
Print control<br />
Serial or parallel<br />
connection<br />
Data<br />
Data<br />
Data<br />
Data<br />
Print head<br />
Status<br />
Status<br />
Getting full/<br />
getting empty<br />
Figure 15 Printer Communications Buffer Flow<br />
The communication port is either serial or parallel and is controlled by a software<br />
communication driver. The driver receives data and returns requested status. As<br />
information is received from the host, data is taken from the communication port<br />
hardware by the driver, preprocessed to look for status inquire commands, and placed in<br />
the buffer. When the buffer input function finds that the buffer is getting full, it notifies the<br />
communication driver to implement flow control. Flow control attempts to stop further<br />
information from being sent from the host.<br />
The print control software takes information from the buffer, as it needs it and can use it.<br />
When the buffer output function finds that the buffer is getting low, it notifies the<br />
communication driver that the information flow can be resumed (if it was stopped) and<br />
allows more information to be placed in the buffer.<br />
The <strong>Ithaca</strong> ® <strong>610</strong> printer has a configurable input buffer. The printer can be configured to<br />
allow from 40 to 8196 bytes of input buffer. Consequently, up to 8196 characters (or<br />
control codes) can be sent to the printer before they are interpreted and printed. In<br />
effect, the host computer can get 8196 characters ahead of the printer. In all cases, the<br />
buffer resumes communications when it is half empty. For example, if the buffer is<br />
configured to be 2048, the printer will signal stop when 2048 bytes are in the buffer;<br />
resume will be signaled when 1024 bytes remain. Inquire commands are preprocessed,<br />
which means they are found in the input data stream and acted upon as they are<br />
received. The status returned is valid as of the time the command is received. This is<br />
termed real-time status even though inquire commands are preprocessed and still<br />
placed in the buffer. Real-time status assures that data is not lost when the inquire<br />
sequence is part of another command. However, the buffer may also be filled by inquire<br />
commands if the printer is waiting for some activity.<br />
28-05897 Rev D Page 233
Communications<br />
<strong>Ithaca</strong> ® <strong>610</strong> Programmer’s <strong>Guide</strong><br />
USB<br />
USB stands for Universal Serial Bus. It was originally conceived in the early 90‘s and<br />
officially recognized by Compaq, Intel, Microsoft and NEC. The development of USB<br />
has been slow, however, with the release of Windows 95 SR2 development accelerated.<br />
Windows 2000 now fully supports USB as do Windows 98 SE, and Windows Me. A<br />
technical discussion of USB is beyond the scope of this document. If you would like<br />
more information about USB, visit the USB web site at www.usb.org.<br />
USB Support<br />
POS printers are different from typical Windows printers in several ways. Microsoft has<br />
recognized these differences and has been working with the USB Device Working Group<br />
to generate a set of standards that would abstract all point-of-sale devices at the<br />
application level. At this time a workable standard for POS is years away. So while<br />
Microsoft is interested in POS in the long term, Microsoft‘s immediate goal is to enable<br />
POS USB devices a way that is compatible with existing service objects.<br />
In order to support USB POS devices under the existing software architecture, Microsoft<br />
is providing the POSUSB driver model to allow USB POS devices to interface as serial<br />
COM ports to service object DLLs.<br />
The Transact USB Printer interface is based on this Microsoft POSUSB driver model. It<br />
provides full bi-directional interface to the printer and allows most existing applications to<br />
interface to the USB <strong>Ithaca</strong> ® <strong>610</strong> as if it were on a serial COM port. In addition we have<br />
allowed the printer to register as a composite device. This allows the printer to appear in<br />
the system as a USB print device as well as a COM port. If you are using a windows<br />
printer driver (ours or the Generic driver) you can assign the printer to the USB port.<br />
We hope that supporting the USB <strong>Ithaca</strong> ® <strong>610</strong> as a composite device provides the best<br />
of both worlds to our customer.<br />
The USB Driver is available from customer support and by download from our web site.<br />
Transact has written a POSPrinter.OCX ActiveX that will allow you to easily interface to<br />
our printers. It is used by all of our demonstration programs. This OCX is available for<br />
use with customer applications. It works with printers installed on Serial COM ports, LPT<br />
ports, TCP/IP and USB. A USB compatible version is available from customer support<br />
or from our web site.<br />
Page 234 Rev D 28-05897
Communications<br />
<strong>Ithaca</strong> ® <strong>610</strong> Programmer’s <strong>Guide</strong><br />
TCP/IP<br />
A 10-BaseT Ethernet adapter is available for the <strong>Ithaca</strong> ® <strong>610</strong> printer. This Wired Ethernet<br />
Adapter provides a fast and easiest way to network and share printers in your system.<br />
Ethernet provides a consistent common connection between printers and computers<br />
using standard protocols supported by Windows ® 95, 98, Me, NT, 2000, XP, as well as<br />
many other platforms. Ethernet is probably the most common networking medium, and<br />
thus allows printers to be easily added, moved and removed with inexpensive common<br />
cabling and off the self components.<br />
Print Server Features Standard Ethernet Connection<br />
10 Mbps Speed<br />
10 Base T RJ45 network connection<br />
Network Traffic LED indicator<br />
Configured through networked PC Web Browser<br />
Works with Virtually All Major Operating Systems<br />
Integrated into the Printer<br />
Large RAM Buffer for fast continuous printing<br />
512K Flash Memory for Future Upgrades<br />
Supported Protocols<br />
Line Printer Daemon Protocol (LPR)<br />
Port 9100 (RAW)<br />
The TFTP Protocol (Revision 2)<br />
Telnet COM Port<br />
Hypertext Transfer Protocol (for configuration)<br />
User Interface/Configuration<br />
Other<br />
HTTP/Web Interface<br />
Login Page<br />
Configuration Page<br />
o IP Address / Subnet Mask<br />
o Auto-IP, DHCP, Static IP…<br />
o Printer Textual Name (User Defined)<br />
o Printer Location String (User Defined)<br />
o Protocols Enabled/Disabled, Port<br />
o LPR, Port 9100, Telnet<br />
Adapter Firmware Update<br />
Push Button for Initial IP Address reset and adapter reset.<br />
Self-Diagnostics<br />
Firmware Upgrade via TFTP and HTTP<br />
For more information and a users guide refer to the Transact Ethernet Users <strong>Guide</strong><br />
(100-05072).<br />
28-05897 Rev D Page 235
Communications<br />
<strong>Ithaca</strong> ® <strong>610</strong> Programmer’s <strong>Guide</strong><br />
Parallel Port<br />
Parallel Port Protocol<br />
The <strong>Ithaca</strong> ® <strong>610</strong> parallel port behaves just as any printer connected to a personal<br />
computer. The parallel interface accepts 8-bits of data from the host. The strobe signal<br />
from the host is used to indicate that data is available. When the printer sees the strobe<br />
signal and accepts the data, it asserts a busy signal. The busy signal indicates to the<br />
host that the printer has accepted the data and is working on it. After the printer absorbs<br />
the data and is ready to accept another byte, the printer asserts acknowledged (ACK),<br />
negates busy, and then finally negates ACK.<br />
The host computer should meet the following parallel-port specifications and timing. In a<br />
standard personal computer, the strobe signal is generated by software writes to the<br />
parallel-port control port, which is typically done in the bios or some parallel-port driver.<br />
As personal computers become faster, it is up to the software to assure that the strobe<br />
signal does not get too narrow. One microsecond is the minimum pulse width that<br />
should be sent down a cable. Shorter pulse widths (500 nanoseconds) will be accepted<br />
by the printer. The cable can introduce significant signal degeneration and skew.<br />
The data must be valid before the strobe signal is asserted and remain so until the<br />
strobe is removed. A 500 nanosecond setup and hold time is required by the printer.<br />
The following chart illustrates parallel-port timing.<br />
INIT<br />
Pin 16<br />
DATA<br />
Pins 2-9<br />
STROBE<br />
Pin 1<br />
BUSY<br />
Pin 11<br />
ACK<br />
Pin 10<br />
< ---- Rdly<br />
Dstu---> < ><br />
><br />
Data<br />
<<br />
Ahld ----> <<br />
Data<br />
Rdly Approx. 2 seconds<br />
Dstu 500 nS (Min)<br />
Dhld 500 nS (Min)<br />
Tstb 1 uS (Min)<br />
Figure 16 Parallel-port Data Timing<br />
Bhld Approx. 5 uS<br />
Ahld Approx. 5 uS<br />
Sdly 3 uS (Min)<br />
Tcycle 200 - 280 uS Typ.<br />
To implement flow control, the busy signal is asserted by the printer outside the normal<br />
data-transfer sequence. The busy signal has several uses, but it always indicates that<br />
the printer cannot accept information. The busy signal may happen at any time and may<br />
not adhere to the above timing chart in all cases. It is up to the host's parallel-port driver<br />
to handle all possible busy states. It is important that the host driver does not hang up if<br />
it takes some time for an acknowledged (ACK) response to a strobe signal. Standard<br />
personal computer parallel-port hardware implements an interrupt on the ACK signal to<br />
make flow control easier.<br />
Page 236 Rev D 28-05897
Communications<br />
<strong>Ithaca</strong> ® <strong>610</strong> Programmer’s <strong>Guide</strong><br />
Some systems may wish to change the details of how the strobe, busy, and<br />
acknowledged signals interact. The parallel-port option features define how the strobe,<br />
busy, and acknowledged signals operate. In normal mode, the printer follows the<br />
standard (Centronics) parallel-port conventions. With Options 1 and 3, the<br />
acknowledged and busy signals change simultaneously, which is sometimes referred to<br />
as ack-after-busy. Options 2 and 3 force busy high on the rising edge of the strobe,<br />
which is sometimes referred to as busy-while-strobe timing. In all cases, the data is<br />
latched on the rising edge of the strobe. In most cases, the normal timing mode gives<br />
the best results.<br />
Data<br />
STB<br />
BUSY<br />
t1<br />
t2<br />
t3<br />
t4<br />
ACK<br />
ACK<br />
ACK<br />
ACK-while-BUSY<br />
ACK-in-BUSY<br />
ACK-after-BUSY<br />
t5<br />
Figure 17 Parallel Port ACK Timing Options<br />
Legend Time Interval Minimum Maximum<br />
t1 DATA Setup to STB 0.5 uS<br />
t2 STB Width 0.5 uS 500 uS<br />
t3 DATA Hold after STB 0.5 uS<br />
t4 BUSY Delay after STB 0 0.5 uS<br />
t5 ACK Pulse Width 2.5 uS<br />
Table 55 Parallel-port Timing<br />
Note: Altered STB timing to take data on the falling edge of STB can be generated as a<br />
factory option.<br />
Printer Buffer Size<br />
The <strong>Ithaca</strong> ® <strong>610</strong> printer has a configurable buffer size. It can be set from 40 to 8192<br />
bytes. The configurable buffer allows an application to control how far ahead the buffer<br />
gets from the printer. The smaller the buffer, the tighter the control will be. It is up to the<br />
application developer to select the optimal buffer size.<br />
Parallel Port Inquire and IEEE 1284<br />
The <strong>Ithaca</strong> ® <strong>610</strong> printer supports the IEEE 1284 bidirectional parallel peripheral interface<br />
standard. The IEEE 1284 standard provides for a bidirectional link on the parallel port.<br />
The <strong>Ithaca</strong> ® <strong>610</strong> Printer only supports Modes 0 and 4, which provide a nibble mode<br />
reverse channel for printer identification and status inquire commands. It is beyond the<br />
28-05897 Rev D Page 237
Communications<br />
<strong>Ithaca</strong> ® <strong>610</strong> Programmer’s <strong>Guide</strong><br />
scope of this guide to describe the IEEE 1284 protocol. The complete specification is<br />
available from the Institute of Electrical and Electronic Engineers, Inc. at www.ieee.org.<br />
IEEE 1284 Response Buffer<br />
The <strong>Ithaca</strong> ® <strong>610</strong> printer has a 256-byte buffer that contains information to be returned by<br />
the IEEE 1284 reverse link. Information is placed in the buffer in the same format as<br />
RS-232 serial information is returned.<br />
Inquire commands sent to the printer in IEEE 1284 mode place responses to the<br />
commands in the IEEE 1284 reverse-channel buffer. The buffer is then transmitted to<br />
the host when it requests the reverse channel.<br />
Mode 4<br />
Mode 4 allows the printer to return identification information to the host system. The<br />
<strong>Ithaca</strong> ® <strong>610</strong> printer returns:<br />
xx,yy length of following data, 2 bytes with MSB first<br />
MANUFACTURER <strong>TransAct</strong> Technologies<br />
COMMAND SET<br />
IPCL<br />
MODEL 1000<br />
COMMENT<br />
Rev. x.xx<br />
ACTIVE COMMAND SET IPCL<br />
When a Mode 4 request is made, the IEEE 1284 buffer is cleared before the ID is sent.<br />
Mode 0<br />
Mode 0 provides a reverse channel for information from the printer. Normal responses<br />
to inquire commands are placed in the IEEE 1284 reverse-channel buffer. The Mode 0<br />
reverse-channel request begins returning information to the host. The host may<br />
terminate the transmission at any time. If the link is terminated between nibbles, the last<br />
nibble is retransmitted on the next request. If a complete byte is transmitted, it is deleted<br />
from the IEEE 1284 reverse-channel buffer.<br />
An inquire command can clear the reverse-channel buffer before placing its response in<br />
the buffer.<br />
The IEEE 1284 buffer is limited to 1000 characters. If the buffer is not emptied by<br />
reverse-channel requests, the buffer overflows. The buffer is a first-in first-out (FIFO)<br />
buffer, and the last data placed in the buffer is lost.<br />
Time-outs<br />
IEEE 1284 specifies time-outs for various phases of the protocol. The <strong>Ithaca</strong> ® <strong>610</strong><br />
printer treats time-outs as minimums. The printer time outs at the specified period only if<br />
it is idle during the complete phase.<br />
Active State<br />
The IEEE 1284 reverse channel may be activated at any time as long as the printer is<br />
not busy with data. If the printer is off-line or the cover is open, the reverse channel may<br />
be activated. If the printer is placed back on-line while the reverse channel is active, the<br />
printer will not exit the reverse-channel mode.<br />
Page 238 Rev D 28-05897
Communications<br />
<strong>Ithaca</strong> ® <strong>610</strong> Programmer’s <strong>Guide</strong><br />
Inquire Responses<br />
In general, inquire commands place two-byte responses in the IEEE 1284 reversechannel<br />
buffer. The two bytes are the same as the serial mode responses. In IEEE<br />
1284 mode, the printer remains busy until the inquire command is processed, assuring<br />
responses in real time. To receive the response, the host must ask for it. It is possible<br />
for the host to make a number of requests and wait for the responses; however, the<br />
status returned is valid at the time the request was made.<br />
It is also possible for the dynamic response mode to be activated and the reversechannel<br />
mode to be opened. The reverse channel then changes from reverse-idle to<br />
reverse-data available as the status changes. The application must be careful in<br />
dynamic response mode that the dynamic responses are not left active when the reverse<br />
channel is closed. If the dynamic responses are active when the reverse channel<br />
closes, the output buffer overflows. If data is in the buffer when dynamic responses are<br />
activated, it will not be replaced by the current status. If dynamic response is off and a<br />
buffer-clear command is issued followed by activation of dynamic responses, the buffer<br />
will contain fresh data. If the buffer-clear command is issued after the dynamic response<br />
is activated, the buffer will be cleared and any unread responses will be lost.<br />
Parallel Port Plug and Play<br />
Microsoft Windows implements Plug and Play (PnP) by doing a special parallel, IEEE<br />
1284 inquire during boot. The <strong>Ithaca</strong>® <strong>610</strong> Printer responds to the inquiry if IEEE 1284<br />
is active.<br />
If the Windows PnP configuration flag is set in the printer, IEEE 1284 will be active for all<br />
parallel-port modes. For example, PnP in parallel mode forces IEEE 1284. For PnP to<br />
work, the host must have an IEEE 1284-compatible port adapter, and the cable used to<br />
connect to the printer must support all of the interface signals.<br />
The Plug and Play response follows.<br />
Device ID string:<br />
Manufacturer:<br />
PnP ID:<br />
Device Description:<br />
Device Class:<br />
OPTS Field Description<br />
<strong>TransAct</strong>.;<br />
CMD:M<strong>610</strong>CL,IPCL;<br />
CLS:PRINTER;MDL M<strong>610</strong> PcOS;<br />
DES:<strong>Ithaca</strong> M<strong>610</strong>;<br />
REV:x.xx;OPTS;$9xyz<br />
LPTENUM\<strong>Ithaca</strong>-Perph.M<strong>610</strong>_P4D21<br />
<strong>Ithaca</strong> M<strong>610</strong><br />
Printer<br />
OPTS;$6XYZ<br />
where X is a model definition. X will be 3 if the printer is in the native <strong>Ithaca</strong> ® <strong>610</strong><br />
emulation. 5 indicates that the printer is in some other emulation. Y and Z are bit fields<br />
that designate the options attached to the printer.<br />
28-05897 Rev D Page 239
Communications<br />
<strong>Ithaca</strong> ® <strong>610</strong> Programmer’s <strong>Guide</strong><br />
Bit Y Z<br />
Bit 0 0 0<br />
Bit 1 Undefined Knife module attached<br />
Bit 2 Undefined 0<br />
Bit 3 0 0<br />
Bits 4-5 1 1<br />
Bits 6-7 0 0<br />
Page 240 Rev D 28-05897
Communications<br />
<strong>Ithaca</strong> ® <strong>610</strong> Programmer’s <strong>Guide</strong><br />
Serial Port<br />
Serial Port Protocol<br />
The serial port supports two flow control standards, XON/XOFF and Ready/Busy<br />
(sometimes called Data Terminal Ready (DTR) or hardware handshake).<br />
When Ready/Busy flow control is selected, the printer can be configured to use DTR,<br />
Request to Send (RTS), or both for flow control. If only DTR is selected for flow control,<br />
RTS will indicate the cover is open or the printer has faulted. The following discussion<br />
assumes the DTR is being used for flow control.<br />
The Ready/Busy protocol generally uses the DTR signal to indicate to the host computer<br />
that the printer is not ready to accept data. The host should stop sending data to the<br />
printer as soon as possible. Because the host may not notice the DTR signal until it has<br />
transmitted several bytes of data to the printer, the printer continues to except up to<br />
255 13 bytes of data after it indicates that it is not ready. Figure 18 Serial Port Flow<br />
Control Using DTR illustrates how the Ready/Busy protocol works, and Figure 19<br />
XON/XOFF Serial Port Flow Control illustrates how the XON/XOFF protocol works.<br />
Serial<br />
Data In<br />
Serial<br />
Data Out<br />
(Not Used for<br />
Flow Control)<br />
DTR<br />
Communications<br />
Port<br />
Data<br />
Inquire<br />
Response<br />
Clear<br />
DTR<br />
Set<br />
Data<br />
ENQ Response<br />
ENQ<br />
Proc.<br />
Buffer Getting Full<br />
Data<br />
Buffer Getting Empty<br />
Print<br />
Buffer<br />
40 - 8K<br />
Data<br />
Printer Control<br />
Software<br />
RTS<br />
Select Key<br />
RTS = Request to Send<br />
DTR = Data Terminal Ready<br />
Figure 18 Serial Port Flow Control Using DTR<br />
13 The buffer always signals it is full before it overflows. The size of the reserve depends on the<br />
buffer size selected. It is always at least 255 bytes.<br />
28-05897 Rev D Page 241
Communications<br />
<strong>Ithaca</strong> ® <strong>610</strong> Programmer’s <strong>Guide</strong><br />
Serial<br />
Data In<br />
Serial<br />
Data Out<br />
DTR<br />
RTS<br />
(Not Used for<br />
Flow Control)<br />
Communications<br />
Port<br />
Data<br />
Inquire<br />
Commands<br />
Send<br />
XOFF<br />
Send<br />
XON<br />
Send<br />
XON or XOFF<br />
Data<br />
ENQ Response<br />
ENQ<br />
Proc.<br />
Buffer Getting Full<br />
Buffer Getting Empty<br />
Select Key<br />
Data<br />
Print<br />
Buffer<br />
40 - 8K<br />
Data<br />
Printer Control<br />
Software<br />
RTS = Request to Send<br />
Figure 19 XON/XOFF Serial Port Flow Control<br />
DTR = Data Terminal Ready<br />
Page 242 Rev D 28-05897
Communications<br />
<strong>Ithaca</strong> ® <strong>610</strong> Programmer’s <strong>Guide</strong><br />
Print Buffer Flow<br />
Flow Chart 1 illustrates how the communications driver acquires data from the serial port<br />
and places it in the buffer using Ready/Busy or XON/XOFF flow control.<br />
Wait for data from the<br />
host.<br />
Place data in the print<br />
buffer.<br />
Is the<br />
buffer full?<br />
Yes<br />
No<br />
Update the buffer<br />
pointers.<br />
Is the buffer<br />
past the high<br />
watermark?<br />
Yes<br />
Clear the DTR signal or<br />
transmit XOFF.<br />
No<br />
Flow Chart 1 Serial Buffer Operation<br />
At the top of this flow chart, the driver is waiting for data. When data is received from the<br />
host, the printer checks to see if it is an inquire command. If the data is an inquire, it is<br />
responded to and placed in the buffer. If not, the data is placed in the buffer without<br />
response. The buffer is then checked to see if it is full before the internal pointer is<br />
incremented. If it is not full, the pointer is incremented in preparation for the next data<br />
byte. The buffer is checked by looking to see if it has passed a high watermark. If the<br />
buffer has, the communication driver is notified, and it resets DTR to indicate to the host<br />
that no more data should be sent.<br />
28-05897 Rev D Page 243
Communications<br />
<strong>Ithaca</strong> ® <strong>610</strong> Programmer’s <strong>Guide</strong><br />
Flow Chart 2 illustrates how the print control software takes data from the buffer and<br />
controls flow. At the top of the chart, the print control software asks for data. If there is<br />
no data in the buffer, a ―no data flag‖ is returned. The print software must then wait for<br />
data. If there is data in the buffer, it is read, and the pointers are updated. The buffer is<br />
then checked to see how much information is left. If the buffer is below a low watermark<br />
(about 100 bytes left), the communication driver is notified, and DTR is reasserted.<br />
When XON/XOFF flow control is used, the flow is similar to DTR flow except that DTR is<br />
not used and XON/XOFF control characters are transmitted back to the host on the<br />
serial link. The XON/XOFF advantage is that only three wires are required to<br />
interconnect to a printer. The disadvantage is that a serial-port receiver driver must be<br />
written for the host.<br />
The print controller needs<br />
data to print or a<br />
command to decode.<br />
Loop through idle<br />
task, and then look<br />
for more data.<br />
Is there any<br />
data in the<br />
buffer?<br />
No<br />
Return to print controller<br />
with no data available.<br />
Yes<br />
Acquire data from the<br />
buffer.<br />
Move buffer pointers to<br />
the next data byte.<br />
Is the buffer<br />
below the low<br />
watermark?<br />
Yes<br />
Set DTR or transmit<br />
XON.<br />
No<br />
Return data to print<br />
controller.<br />
Flow Chart 2 Print Controller Using Data<br />
Page 244 Rev D 28-05897
Communications<br />
<strong>Ithaca</strong> ® <strong>610</strong> Programmer’s <strong>Guide</strong><br />
When the printer is on, the print controller looks for data. If there is data, it processes it.<br />
Flow control is done when the data is taken from the buffer and the amount of data in the<br />
buffer is less than a prescribed amount. The low watermark is set based on the<br />
expected environment. The <strong>Ithaca</strong> ® <strong>610</strong> Printer sets the low watermark at half the buffer<br />
size or 1024 characters whichever is smaller. The low watermark gives the host<br />
application time to get more data to the printer before the printer uses up what it has.<br />
When XON/XOFF protocol is implemented, it is possible for the host to miss an XON or<br />
an XOFF. To prevent this from causing a communication lockup, the printer sends an<br />
XOFF for every character received after the high watermark is reached. If the printer<br />
detects that the serial data link is inactive, it sends out an XON about every two<br />
seconds. When the printer cover is opened, an XOFF is sent. An XOFF is sent even<br />
when the internal data buffer is past the high watermark and is done to allow the host to<br />
know that the printer is not ready.<br />
Printer Buffer Size<br />
The size of the <strong>Ithaca</strong> ® <strong>610</strong> buffer is configurable, which allows an application to control<br />
how far ahead of the printer it can get before being asked to wait. The buffer size can be<br />
set from 256 to 6144 bytes (not including the 64-character high-speed buffer). The<br />
smaller the buffer, the tighter the control will be. It is up to the developer to select the<br />
optimal buffer size for an application.<br />
Serial Mode Plug and Play<br />
Microsoft has defined a Plug and Play (PnP) protocol to identify devices on serial links.<br />
The enumeration process is designed to find and automatically configure a device driver<br />
for the printer. It is done by toggling the control lines in a specific sequence that is<br />
recognized by the printer. The peripheral then responds such that Windows can identify<br />
the device.<br />
To allow the printer to look for and respond to the sequence, EISA PnP must be<br />
enabled. When enabled in serial mode, the flow control is forced to Request to Send<br />
(RTS) with Data Terminal Ready (DTR) static.<br />
Using DSR<br />
Windows uses the host‘s Data Set Ready (DSR) line (the printer‘s DTR line) on the<br />
serial port to determine whether a device is attached to the port. When Windows is<br />
booted (or does PnP), the system sets the host‘s DTR and RTS to zero and waits<br />
approximately 200 milliseconds. It then sets the DTR to one and waits another 200<br />
milliseconds. After 200 milliseconds, the system checks to see whether the DSR line is<br />
high. This indicates that a serial device is attached to the serial port. The system<br />
responds by setting RTS high and waits to receive the device identification string.<br />
In some devices, such as the serial mouse, the DSR line can be held high by tying it<br />
directly to the DTR line. When the mouse is connected to the serial port on the personal<br />
computer, the power supplied through the DTR line also raises DSR high. For Plug and<br />
Play compatibility, RTS flow control is used at the printer, because DSR must stay high<br />
as long as the device is attached to the serial port.<br />
28-05897 Rev D Page 245
Communications<br />
<strong>Ithaca</strong> ® <strong>610</strong> Programmer’s <strong>Guide</strong><br />
Serial Device Identification<br />
The serial device must report its identification to the system using an identification string<br />
at 1200 baud. The identification string consists of 18 fields that identify the device, class<br />
of the device, and other compatible devices. Only five of the fields are required by all<br />
serial devices; all others are optional. The identification string used by the <strong>Ithaca</strong> ® <strong>610</strong><br />
Printer follows.<br />
028H<br />
Start of ASCII response<br />
0,1 PnP Rev<br />
'IPR0210'<br />
Unique ID (IPR plus revision level)<br />
\PRINTER<br />
Printer<br />
\M<strong>610</strong> PcOS Model<br />
\SC:<br />
19200,N,8,1<br />
Serial Configuration: Baud, Parity, Bits, Stop Bits<br />
xxH<br />
Check-sum<br />
029H<br />
End PnP<br />
Note: The model field may be altered to generate PnP ID‘s other than<br />
―M<strong>610</strong> PcOS‖ by special order.<br />
When the identification is complete, the printer returns to the baud rate<br />
specified in the configuration.<br />
Page 246 Rev D 28-05897
Communications<br />
<strong>Ithaca</strong> ® <strong>610</strong> Programmer’s <strong>Guide</strong><br />
Serial Port Inquire<br />
The serial port inquire is more straightforward than parallel mode. The serial<br />
acknowledged (ACK) or not acknowledged (NAK) responses follow a uniform format, the<br />
ACK or NAK is always followed by the command ID that requested it. This makes the<br />
design of the host application easier because the response can be identified and always<br />
follows the same format.<br />
The host sends an<br />
inquire to the printer<br />
asking for the form<br />
sensor status.<br />
The printer receives<br />
the request and<br />
preprocesses it.<br />
The host receives the<br />
response and<br />
decodes it.<br />
The printer responds<br />
with an [ACK] or<br />
[NAK] indicating<br />
the form sensor<br />
status.<br />
Flow Chart 3 Inquire Flow<br />
The host sends an [ENQ] (form sensor status) request to the printer. The printer<br />
responds with an [ACK] indicating that the request was identified, status true.<br />
Inquire commands affect the printer‘s performance. Communication is a high priority for<br />
the printer. Inquire commands take processing time away from the print tasks. It is<br />
possible to ask for so much status that the printer slows. In serial mode, it is important<br />
that the response to an inquiry is received by the host before another command is<br />
issued. When an inquiry is received by the printer, it is buffered in a high-speed<br />
processing queue. When the printer has time, it empties the queue and processes the<br />
inquiries. The printer responds to the command as soon as the second byte of the<br />
command is taken from the high-speed buffer. If the host is looking for a form to be<br />
inserted, it should not send status requests as fast as it can. The host will receive a<br />
response to all of them. If the host did not wait for a response to each, there would be<br />
unnecessary responses.<br />
In IEEE 1284 mode, inquire responses are placed in an IEEE 1284 transmit queue.<br />
When the IEEE 1284 reverse channel is open, the responses are returned to the host. It<br />
is important that after each request the reverse channel be opened. Inquire responses<br />
remain in the queue until read. If the [ENQ] command is sent to the printer, the<br />
IEEE 1284 buffer will be cleared, and only the response to the [ENQ] will remain.<br />
28-05897 Rev D Page 247
Communications<br />
<strong>Ithaca</strong> ® <strong>610</strong> Programmer’s <strong>Guide</strong><br />
Display Pass Through<br />
The display pass through feature allows a pole display to be interconnected with the<br />
printer. The printer is connected to a host system with a special serial cable. The host<br />
sends serial data to the printer and the printer sends serial data to the pole display. The<br />
printer does not provide power to the display. During normal printer operation, no data is<br />
passed to the display. In pass through mode, all received data is passed on to the<br />
display.<br />
The restrictions and considerations for pass through are:<br />
1. Pass through only works on serial printers with DTR flow control.<br />
2. XON/XOFF mode does not work correctly.<br />
3. All inquire ([ENQ]) commands are active when not in actual pass through mode.<br />
If, for example, an [ENQ] command for cash drawer status is received by the<br />
printer, the response is transmitted. When pass through is active, all data except<br />
the [ENQ] is passed. The printer does not look for or act on any commands<br />
other than inquires.<br />
4. If pass through data is sent to the printer in continuous mode (i.e. as fast as<br />
possible), each [ENQ] character in the sequence delays the transmit data by one<br />
byte. The printer buffer size is limited. If the buffer overruns, data will be lost.<br />
5. Modem handshake signals from the printer are not controlled during past<br />
through. Their state is set by printer status. Opening the cover toggles the<br />
control lines. When the printer cover is open, it accepts data, including all [ENQ]<br />
commands. If an [ENQ] # is received when off-line, pass through is entered.<br />
6. Previously buffered data is processed by the printer in pass through mode.<br />
Printer performance is degraded by the processing of pass through data.<br />
7. In 8-bit, no parity mode, data is passed through unaltered. In all other modes,<br />
the parity is checked, stripped, and then regenerated by the printer.<br />
8. Pass through has no affect on a printer in parallel mode.<br />
Remote Power Control<br />
The <strong>Ithaca</strong> ® <strong>610</strong> Printer has a remote power control command that instructs it to enter<br />
OFF. When the command is issued, the printer performs print cartridge maintenance<br />
and enters OFF. Unlike pushing the * button, remote power mode leaves the<br />
communications active. All commands except the exit power down command are<br />
ignored.<br />
[ESC] y<br />
Remote Power Control<br />
ASCII [ESC] y <br />
Hexadecimal 1BH 79H <br />
Decimal <br />
IPCL &%YX17 or &%YX18<br />
EPOS [ESC] y <br />
Where n 17 Requests the printer to enter remote OFF<br />
18 Requests the printer to exit remote OFF<br />
Page 248 Rev D 28-05897
Communications<br />
<strong>Ithaca</strong> ® <strong>610</strong> Programmer’s <strong>Guide</strong><br />
Description<br />
Note:<br />
Note:<br />
Inquiry (ENQ) commands are accepted and answered in remote power<br />
down mode. The printer reactivates if the * button is pressed or a power<br />
up command is received.<br />
If power is lost after the power down command is issued, the printer<br />
remembers it is in power down mode but does not reactivate the<br />
communications link. The * button must be pushed to return the printer to<br />
full operation.<br />
This command is not available in STAR mode.<br />
Remote Printer Reset<br />
Reset in Serial Mode<br />
It is possible to generate a software printer reset in serial mode. The [ENQ] <br />
command requests that the printer reset. (This is not a hardware reset). The reset<br />
completely initializes the hardware and software, but the printer does not recover from a<br />
loss of software control.<br />
Note: If the printer mode was changed by the [ESC] y or <br />
command, a soft reset will not return to the power on default.<br />
The command flow is as follows:<br />
The [ENQ] is acknowledged. During cleanup and initialization, the printer is<br />
placed off-line. Before the printer initializes, it tries to clean up its input buffer<br />
and other internal processes.<br />
The printer‘s software is reinitialized.<br />
The power-cycled flag is set.<br />
The print head is homed and re-calibrated.<br />
The printer goes back on-line.<br />
Reset in Parallel Mode<br />
In parallel mode, driving the INIT signal on the parallel port for 100 milliseconds<br />
generates a software reset. It takes about two seconds for the printer to recover from a<br />
reset. The [ENQ] command has the same effect, but it is not acknowledged.<br />
28-05897 Rev D Page 249
Communications<br />
<strong>Ithaca</strong> ® <strong>610</strong> Programmer’s <strong>Guide</strong><br />
Miscellaneous Communication Features<br />
Power-cycle Recovery<br />
Sometimes the host needs to know if the printer was power cycled. An example would<br />
be after the receipt tape was changed. It is not necessary to turn off the printer to<br />
change the receipt. However, if the operator does, any information sent to the printer<br />
before the power cycle will be lost.<br />
The <strong>Ithaca</strong> ® <strong>610</strong> Printer has a flag that is set after a reset. The flag stays set until the<br />
host requests a reset. The [ENQ] command reads the flag. If the command<br />
returns power-cycled status, the power has been reset or power cycled since the last<br />
request. All unprinted information has been lost.<br />
If the print operation is critical, it is a good idea to check the power-cycle flag before and<br />
after all transactions. An alternate approach is to check the flag after every off-line to<br />
on-line transition.<br />
Note: If the printer mode was changed by the [ESC] y or command, a powercycle<br />
reset will return to the initial configuration.<br />
Data Pass-through<br />
The <strong>Ithaca</strong> ® <strong>610</strong> Printer supports data pass-through (sometimes referred to as display<br />
pass-through). Data pass-through is activated by the print-suppress command with the<br />
pass-through bit set. In pass-through mode, the printer can be requested to transmit any<br />
data that it receives. When this is the case, the printer‘s inquire commands are active<br />
but of little use. Typically, the printer‘s transmit data is connected to the next device in<br />
line. Inquire commands have no data path back to the host. If pass-through is to be<br />
used, it is a good idea to deactivate the inquire commands. (Use [ESC] y ).<br />
Before pass-through data can be used, it must be activated in the configuration menu,<br />
which is the third selection in the print-suppress/pass option.<br />
All data after, but not including, the print-suppress command is pass through. When<br />
deactivated, the print-suppress command is again not pass through. During pass<br />
through the multi-drop commands are active (if configured).<br />
The printer will act upon a multi-drop control command found in the pass-through data.<br />
If the printer is deselected during pass-through, it stops passing on the data. When the<br />
printer is re-addressed, data pass-through is active.<br />
Multi-drop Configuration<br />
The <strong>Ithaca</strong> ® <strong>610</strong> Printer supports a multi-drop configuration where up to three printers<br />
can be connected in parallel. Each printer has a different address A, B, or C. The<br />
printer does not accept any print information unless it is addressed. Multi-drop<br />
configuration is only available in serial mode, as parallel printers cannot be connected<br />
together.<br />
Page 250 Rev D 28-05897
Communications<br />
<strong>Ithaca</strong> ® <strong>610</strong> Programmer’s <strong>Guide</strong><br />
Off-line Active<br />
A configuration flag that prevents the printer from going off-line (in most cases) is<br />
available. Off-line mode allows the application to query the printer for status rather than<br />
assume a status from the control signals. The feature allows the host application to<br />
query the printer at all times except when there is no power; a full input buffer; or a hard<br />
failure. For example, when the printer‘s cover is open, the printer stops printing but still<br />
accepts data and inquiries. The inquire cover status command returns, ―Cover open.‖<br />
Hard failures result when there is no power or a printer fault occurs. If the printer is offline,<br />
either the input buffer is full or a hard fault has occurred. The host application<br />
should not allow the input buffer to fill.<br />
28-05897 Rev D Page 251
Communications<br />
<strong>Ithaca</strong> ® <strong>610</strong> Programmer’s <strong>Guide</strong><br />
Recovery from Mechanical Errors<br />
The <strong>Ithaca</strong> Inquire commands and the Epson [DLE][ENQ] and [DLE][EOT] commands<br />
allow most printer error status to be read and in some cases recovery attempted. Paper<br />
jams and auto-cutter faults can be recovered, however, any data not previously printed<br />
will be lost.<br />
If the application is to support error recovery, the application should use the appropriate<br />
status request commands to query the printer periodically. If an error response is such<br />
that the fault is recoverable, the host application should interact with the operator and<br />
request that the fault be corrected. (IE. Clear Paper Jam) When the operator indicates<br />
that the problem has been corrected, the host can issue a reset request.<br />
If a serious error occurs, the printer will halt and enter fault error mode. If the fault is<br />
such that the printer can maintain communications with the host, the print status request<br />
and response system will remain active. The status of the system will however remain<br />
static, i.e. the status responses will reflect the state of the system when the fault<br />
occurred.<br />
There are errors that cannot be reported to the host system. These errors are such that<br />
the integrity of the printer do not allow continued operation. That is there is no way to<br />
report the error. These errors occur (for the most part) during power up diagnostics.<br />
They are as follows:<br />
EEPROM READ ERROR<br />
Power up only<br />
The Internal EEPROM is not readable or the check sum is bad.<br />
Pressing the Power Button will attempt to rewrite the configuration information.<br />
This may leave the printer configured incorrectly.<br />
EEPROM WRITE ERROR<br />
Power up/down and Configuration only<br />
The Internal EEPROM is defective. There is no recovery.<br />
SOFTWARE ERROR VECTOR<br />
Can occur at any time.<br />
These errors can occur during operation. They signal a serious problem with the<br />
system. In most cases this error will also generate a Watch Dog reset. A power<br />
cycle will generally recover normal printer operation. An ESD event or a<br />
firmware bug generally causes these errors. The printer maintains an error log,<br />
this log contains additional information about the fault and is printed during<br />
manual configuration. The information in this log should be reported to Transact<br />
to identify the exact cause of the fault.<br />
USERSTORE FORMAT ERROR Power up or User Store Write Operations<br />
The User Store data in FLASH has an invalid format. Pressing the Power Button<br />
will erase the user store and reformat it. This can be caused by a firmware<br />
update.<br />
FLASH WRITE ERROR<br />
Power up or User Store Write Operation.<br />
The Program Flash has failed. There is no recovery from this error.<br />
COM ADAPTER ERROR<br />
Power up only<br />
The communications interface card is not supported by the firmware or is<br />
missing. There is no recovery.<br />
Page 252 Rev D 28-05897
Communications<br />
<strong>Ithaca</strong> ® <strong>610</strong> Programmer’s <strong>Guide</strong><br />
Programmer’s Notes<br />
When the serial port is used, it is important that the output lines from the printer not be<br />
shorted or back driven. If the signals are not to be used, they should be left open.<br />
Pins 3, 4, and 7 (of the 9 pin connector) are outputs from the printer. If any one of these<br />
signals is grounded or back driven, the other two outputs will be degraded.<br />
The best time to configure the printer by the host with remote configuration is during<br />
system setup or software update.<br />
28-05897 Rev D Page 253
Appendix A: Code Page Definition Table<br />
<strong>Ithaca</strong> ® <strong>610</strong> Programmer’s <strong>Guide</strong><br />
Appendix A: Code Page Definition Table<br />
Code<br />
Page<br />
Country Code/<br />
Language Set<br />
Decimal<br />
<br />
Hex<br />
<br />
ASCII <br />
<br />
Epson<br />
64 USA (Slashed 0,64 0H,040H 0,0,6,4 NA<br />
0)<br />
65 USA<br />
0,65 0H,041H 0,0,6,5 NA<br />
(Unslashed 0)<br />
66 British 0,66 0H,042H 0,0,6,6 3<br />
67 German 0,67 0H,043H 0,0,6,7 2<br />
68 French 0,68 0H,044H 0,0,6,8 NA<br />
69 Swedish I 0,69 0H,045H 0,0,6,9 5<br />
70 Danish I 0,70 0H,046H 0,0,7,0 NA<br />
71 Norwegian 0,71 0H,047H 0,0,7,1 NA<br />
72 Dutch 0,72 0H,048H 0,0,7,2 14<br />
73 Italian 0,73 0H,049H 0,0,7,3 NA<br />
74 French<br />
0,74 0H,04AH 0,0,7,4 13<br />
Canadian<br />
75 Spanish I 0,75 0H,04BH 0,0,7,5 NA<br />
76 Swedish II 0,76 0H,04CH 0,0,7,6 15<br />
77 Swedish III 0,77 0H,04DH 0,0,7,7 16<br />
78 Swedish IV 0,78 0H,04EH 0,0,7,8 17<br />
79 Turkish 0,79 0H,04FH 0,0,7,9 18<br />
80 Swiss I 0,80 0H,050H 0,0,8,0 19<br />
81 Swiss II 0,81 0H,051H 0,0,8,1 20<br />
91 Welsh 0,91 0H,05BH 0,0,9,1 NA<br />
93 Arabic 0,93 0H,05DH 0,0,9,3 93<br />
437 USA 1,181 1H,0B5H 0,4,3,7 0<br />
774 Baltic 3,6 3H,006H 0,7,7,4 74<br />
850 Multilingual 3,82 3H,052H 0,8,5,0 26<br />
852 East European 3,84 3H,054H 0,8,5,2 46<br />
Latin II<br />
855 Cyrillic I 3,87 3H,057H 0,8,5,5 44<br />
857 Turkey 3,89 3H,059H 0,8,5,7 57<br />
860 Portugal 3,92 3H,05CH 0,8,6,0 28<br />
861 Icelandic 3,93 3H,05DH 0,8,6,1 73<br />
862 Hebrew NC 3,94 3H,05EH 0,8,6,2 60<br />
863 Canada French 3,95 3H,05FH 0,8,6,3 43<br />
865 Norway 3,97 3H,061H 0,8,6,5 27<br />
866 Cyrillic II 3,98 3H,062H 0,8,6,6 45<br />
869 Greek_869 3,101 3H,065H 0,8,6,9 47<br />
895 Kamenicky<br />
(MJK)<br />
3,127 3H,07FH 0,8,9,5 55<br />
ID<br />
28-05897 Rev D Page 255
Appendix A: Code Page Definition Table<br />
<strong>Ithaca</strong> ® <strong>610</strong> Programmer’s <strong>Guide</strong><br />
Code<br />
Page<br />
Country Code/<br />
Language Set<br />
Decimal<br />
<br />
Hex<br />
<br />
ASCII <br />
<br />
Epson<br />
1008 Greek 437 3,240 3H,0F0H 1,0,0,8 38<br />
1009 Greek 928 3,241 3H,0F1H 1,0,0,9 39<br />
1011 Greek 437<br />
3,243 3H,0F3H 1,0,1,1 41<br />
Cyprus<br />
1012 Turkey 3,244 3H,0F4H 1,0,1,2 29<br />
1014 Polska Mazovia 3,246 3H,0F6H 1,0,1,4 22<br />
1015 ISO Latin 2 3,247 3H,0F7H 1,0,1,5 23<br />
1016 Serbo Croatic I 3,248 3H,0F8H 1,0,1,6 24<br />
1017 Serbo Croatic II 3,249 3H,0F9H 1,0,1,7 25<br />
1018 ECMA-94 3,250 3H,0FAH 1,0,1,8 42<br />
1019 Windows East 3,251 3H,0FBH 1,0,1,9 49<br />
Europe<br />
1020 Windows Greek 3,252 3H,0FCH 1,0,2,1 50<br />
1021 Latin 5<br />
3,253 3H,0FDH 1,0,2,2 51<br />
Windows<br />
Turkey<br />
1022 Windows Cyrillic 3,254 3H,0FEH 1,0,2,4 52<br />
1024 Hungarian CWI 4,0 4H,000H 1,0,2,5 54<br />
1026 ISO Latin 4 4,2 4H,002H 1,0,2,6 56<br />
1027 Ukrainian 4,3 4H,003H 1,0,2,7 66<br />
1028 Roman-8 4,4 4H,004H 1,0,2,8 58<br />
1029 ISO Latin 6 4,5 4H,005H 1,0,2,9 67<br />
1031 Hebrew OC 4,7 4H,007H 1,0,3,0 61<br />
1032 Windows<br />
4,8 4H.008H 1,0,3,2 62<br />
Hebrew<br />
1033 KBL-Lithuanian 4,9 4H,009H 1,0,3,3 63<br />
1034 Windows Baltic 4,10 4H,00AH 1,0,3,4 68<br />
1035 Cyrillic-Latvian 4,11 4H,00BH 1,0,3,5 69<br />
1072 Bulgarian 4,48 4H,030H 1,0,7,2 72<br />
NA French 1<br />
NA Danish I 4<br />
NA Italian 6<br />
NA Spanish I 7<br />
NA Japanese 8<br />
NA Norwegian 9<br />
NA Danish II 10<br />
NA Spanish II 11<br />
NA Latin American 12<br />
ID<br />
Page 256 Rev D 28-05897
Appendix B: ASCII Code Table<br />
<strong>Ithaca</strong> ® <strong>610</strong> Programmer’s <strong>Guide</strong><br />
Appendix B: ASCII Code Table<br />
Hex Decimal ASCII<br />
00 0 NULL<br />
01 1 SOH<br />
02 2 STX<br />
03 3 ETX<br />
04 4 EOT<br />
05 5 ENQ<br />
06 6 ACK<br />
07 7 BEL<br />
08 8 BS<br />
09 9 HT<br />
0A 10 LF<br />
0B 11 VT<br />
0C 12 FF<br />
0D 13 CR<br />
0E 14 SO<br />
0F 15 SI<br />
10 16 DLE<br />
11 17 DC1<br />
12 18 DC2<br />
13 19 DC3<br />
14 20 DC4<br />
15 21 NAK<br />
16 22 SYN<br />
17 23 ETB<br />
18 24 CAN<br />
19 25 EM<br />
1A 26 SUB<br />
1B 27 ESC<br />
1C 28 FS<br />
1D 29 GS<br />
1E 30 RS<br />
1F 31 US<br />
Hex Decimal ASCII<br />
20 32 (SP)<br />
21 33 !<br />
22 34 "<br />
23 35 #<br />
24 36 $<br />
25 37 %<br />
26 38 &<br />
27 39 '<br />
28 40 (<br />
29 41 )<br />
2A 42 *<br />
2B 43 +<br />
2C 44 ,<br />
2D 45 -<br />
2E 46 .<br />
2F 47 /<br />
30 48 0<br />
31 49 1<br />
32 50 2<br />
33 51 3<br />
34 52 4<br />
35 53 5<br />
36 54 6<br />
37 55 7<br />
38 56 8<br />
39 57 9<br />
3A 58 :<br />
3B 59 ;<br />
3C 60 <<br />
3D 61 =<br />
3E 62 ><br />
3F 63 ?<br />
Hex Decimal ASCII<br />
40 64 @<br />
41 65 A<br />
42 66 B<br />
43 67 C<br />
44 68 D<br />
45 69 E<br />
46 70 F<br />
47 71 G<br />
48 72 H<br />
49 73 I<br />
4A 74 J<br />
4B 75 K<br />
4C 76 L<br />
4D 77 M<br />
4E 78 N<br />
4F 79 O<br />
50 80 P<br />
51 81 Q<br />
52 82 R<br />
53 83 S<br />
54 84 T<br />
55 85 U<br />
56 86 V<br />
57 87 W<br />
58 88 X<br />
59 89 Y<br />
5A 90 Z<br />
5B 91 [<br />
5C 92 \<br />
5D 93 ]<br />
5E 94 ^<br />
5F 95 _<br />
Hex Decimal ASCII<br />
60 96 `<br />
61 97 a<br />
62 98 b<br />
63 99 c<br />
64 100 d<br />
65 101 e<br />
66 102 f<br />
67 103 g<br />
68 104 h<br />
69 105 i<br />
6A 106 j<br />
6B 107 k<br />
6C 108 l<br />
6D 109 m<br />
6E 110 n<br />
6F 111 o<br />
70 112 p<br />
71 113 q<br />
72 114 r<br />
73 115 s<br />
74 116 t<br />
75 117 u<br />
76 118 v<br />
77 119 w<br />
78 120 x<br />
79 121 y<br />
7A 122 z<br />
7B 123 {<br />
7C 124 |<br />
7D 125 }<br />
7E 126 ~<br />
7F 127 (sp)<br />
28-05897 Rev D Page 257
Appendix C: Ordering Supplies<br />
<strong>Ithaca</strong> ® <strong>610</strong> Programmer’s <strong>Guide</strong><br />
Appendix C: Ordering Supplies<br />
<strong>Ithaca</strong>® supplies can be ordered easily direct from the <strong>TransAct</strong> website (www.transacttech.com)<br />
or our telephone number within the US toll free: (877) 7ithaca. (other inquires:<br />
(607) 257-8901). When calling by phone, please ask for the Sales Department.<br />
Receipt Paper Type Dimensions Stock Number<br />
Black Monochrome One-Ply, 24 rolls per box 3.125‖ wide x 4‖ diameter 100-04410<br />
Thermal<br />
Table 56 Paper Ordering Information<br />
Cables<br />
110V Power Cable (USA) 98-02174<br />
220V Power Cable (Australia) 98-02178<br />
230V Power Cable (International) 98-02175<br />
230V Power Cable (IND/South Africa) 98-02179<br />
240V Power Cable (UK) 98-02176<br />
Parallel Communication Cable<br />
25-pin male to 25-pin male<br />
36-pin Centronics to 25-pin male<br />
Serial Communication Cable<br />
9-pin Female to 9-pin Female<br />
9-pin Female to 25-pin Female<br />
Table 57 Cables Ordering Information<br />
Domestic and International power cables available. Call for more information<br />
Drivers Available:<br />
Windows ® 95/98/Me Print Driver and Documentation 98-9171<br />
Windows ® 2000/NT 4.0 Print Driver and Documentation 98-9172<br />
OPOS Print Driver Manual 100-9730<br />
OPOS Print Driver Disk 1 / Disk 2 100-9731 / 100-9732<br />
Software Developer‘s Toolkit (CD-ROM) 100-02440<br />
Stock Number<br />
253-9800007<br />
253-9800002<br />
10-2020<br />
10-2021<br />
28-05897 Rev D Page 259
Appendix C: Ordering Supplies<br />
<strong>Ithaca</strong> ® <strong>610</strong> Programmer’s <strong>Guide</strong><br />
Index<br />
[BEL] Audio alert, 148, 149<br />
[BEL] Sound buzzer, 203<br />
[BS] Insert back space, 76<br />
[BS] Set back space, 186<br />
[CAN] Clear print buffer, 147<br />
[CR] Print and carriage return, 171<br />
[CR] Set carriage return, 75<br />
[DC2] Begin 10 cpi, 84<br />
[DC4] End one-line double-wide print, 98<br />
[DLE] [DC4] Generate pulse in real<br />
time, 205<br />
[DLE] [DC4] Executes the printer<br />
power-off sequence, 205<br />
[DLE] [DC4] d1…d7 Clear Buffer(s), 206<br />
[DLE] ENQ Real-time request to printer, 207<br />
[DLE] EOT Transmit real-time status, 193<br />
[ENQ] Inquire Cash Drawer 1 status, 157<br />
[ENQ] Request printer reset, 158<br />
[ENQ] Request printer power cycle status, 159<br />
[ENQ] Inquire mechanical error status, 159<br />
[ENQ] Inquire printer state, 160<br />
[ENQ] Inquire all printer status, 161<br />
[ENQ] Inquire printer ID, 162<br />
[ENQ] Inquire Error Status, 163<br />
[ENQ] Inquire user-store status, 164<br />
[ENQ] Inquire receipt paper low status, 157<br />
[ENQ] Inquire receipt paper out status, 158<br />
[ENQ] Inquire cover open status, 158<br />
[ENQ] Inquire buffer status, 158<br />
[ENQ] Inquire printer status, 157<br />
[ESC] - Begin underline, 99, 101<br />
[ESC] - Turn on/off underline mode, 179<br />
[ESC] \ Set relative print position, 185<br />
[ESC] ! Select international character set, 89, 142,<br />
143, 144, 145<br />
[ESC] ! Select print mode(s), 179<br />
[ESC] # Begin 12 x 12 draft print, 87<br />
[ESC] $ Set absolute print position, 185<br />
[ESC] $ Set print position to beginning, 185<br />
[ESC] $ Cancel user-defined characters, 95<br />
[ESC] % Select/cancel user-defined character set,<br />
173<br />
[ESC] % G Begin italics, 103<br />
[ESC] % H End italics, 103<br />
[ESC] & … Define user-defined<br />
characters, 174<br />
[ESC] * Set horizontal graphics mode,<br />
119<br />
[ESC] * Print graphics in mode ,<br />
115<br />
[ESC] * … Select bitimage<br />
mode, 189<br />
[ESC] ? Reassign graphic mode, 116<br />
[ESC] ? Cancel user-defined characters, 174<br />
[ESC] @ Initialize the printer, 148, 204<br />
[ESC] [ @ ... Double-wide, double-high italics, 100<br />
[ESC] [ C Insert Euro character, 92<br />
[ESC] [ P Set character pitch, 85<br />
[ESC] [ S... Redefine character set, 93<br />
[ESC] [ T Select character code page, 90<br />
[ESC] [BEL] Audio alert control, 149<br />
[ESC] [EM] B Set bar code height, 139<br />
[ESC] [EM] J Set bar code justification and HRI<br />
modes, 140<br />
[ESC] [SI] Begin 24 cpi, 84<br />
[ESC] [US] 1 Load item process, 122<br />
[ESC] [US] b Begin named macro<br />
record, 121, 123<br />
[ESC] [US] c Save user-defined<br />
characters, 122, 124<br />
[ESC] [US] d Delete item from user<br />
store, 126<br />
[ESC] [US] e End name macro record,<br />
124<br />
[ESC] [US] e Remove item from user<br />
store, 122<br />
[ESC] [US] e Stop name macro record,<br />
121<br />
[ESC] [US] f ALL Flush user store, 123, 126<br />
[ESC] [US] l Load macro/character, 125<br />
[ESC] [US] m Save macro data, 124<br />
[ESC] [US] m Save macro data, 121<br />
[ESC] [US] q Query user store, 127<br />
[ESC] [US] r Run macro data, 125<br />
[ESC] [US] s Flag as a start-up macro,<br />
122<br />
[ESC] [US] s Flag start-up macro, 125<br />
[ESC] ] Reverse line feed, 83<br />
[ESC] ^ Print control character, 92, 178<br />
[ESC] { Turn on/off upside-down print mode,<br />
180<br />
[ESC] < Enable data pass through, 151<br />
[ESC] < Enable print suppress, 151<br />
[ESC] < Return home, 188<br />
[ESC] Set horizontal position, 77<br />
[ESC] = Select peripheral device status, 206<br />
[ESC] = … Define user-defined<br />
characters, 94<br />
[ESC] = y c 1 c 2 …Define user-defined characters, 122<br />
[ESC] > Enable user-defined characters, 95<br />
[ESC] 0 Set line spacing to 27/216 inch, 79<br />
[ESC] 1 Set left margin, 188<br />
[ESC] 1 Set line spacing to 7/72 inch, 79<br />
[ESC] 2 Enable variable line spacing, 80<br />
[ESC] 2 Select default line spacing, 173<br />
[ESC] 3 Set line spacing, 173<br />
[ESC] 3 Set line spacing to n/216 inch, 78<br />
[ESC] 4 Begin italics, 181<br />
[ESC] 4 Set top of form, 82<br />
[ESC] 5 Begin auto line feed, 83<br />
[ESC] 5 End italics, 181<br />
[ESC] 8 Disable paper out sensor, 146<br />
[ESC] 9 Enable paper out sensor, 146<br />
[ESC] a Select justification, 186<br />
[ESC] a Set justification, 77<br />
[ESC] A Set variable line spacing to n/72 inch, 79<br />
28-05897 Rev D Page 261
Index<br />
<strong>Ithaca</strong> ® <strong>610</strong> Programmer’s <strong>Guide</strong><br />
[ESC] b ... Print bar code, 130, 138<br />
[ESC] B … 0 Set vertical tab stops,<br />
81<br />
[ESC] Begin 12 cpi, 84<br />
[ESC] BEL Sound buzzer, 203<br />
[ESC] C [NUL] Set form length in inches, 82<br />
[ESC] C Set form length in lines, 82<br />
[ESC] c 3 Select paper sensor(s) to output paperend<br />
signals, 184, 216<br />
[ESC] c 4 Select paper sensor(s) to stop printing,<br />
183, 216<br />
[ESC] c 5 Enable/disable paper feed, 182, 216<br />
[ESC] d Feed lines at current spacing, 80<br />
[ESC] d Print and feed lines, 171<br />
[ESC] D … 0 Set horizontal tab<br />
stops, 76<br />
[ESC] D … NUL Set horizontal tab<br />
positions, 187<br />
[ESC] e Print and reverse feed lines, 171<br />
[ESC] E Turn on/off emphasized mode, 179<br />
[ESC] E Begin emphasized print, 101<br />
[ESC] F End emphasized print, 102<br />
[ESC] f Select receipt station, 111, 113<br />
[ESC] g Process user macro, 129<br />
[ESC] g Start macro record, 121, 129<br />
[ESC] g Stop macro record, 121, 129<br />
[ESC] g Stop macro record and save, 129<br />
[ESC] G Turn on/off double-strike mode, 180<br />
[ESC] G Begin enhanced print, 101<br />
[ESC] h Process<br />
color graphics, 118<br />
[ESC] h Process<br />
horizontal graphics, 118<br />
[ESC] H End enhanced print, 101<br />
[ESC] I Set print quality mode, 87<br />
[ESC] i Partial knife cut, 203<br />
[ESC] J Fine line feed, 78<br />
[ESC] J Print and feed paper, 172<br />
[ESC] j Print and reverse feed, 172<br />
[ESC] K Print and reverse feed lines, 172<br />
[ESC] K Print single-density graphics, 114<br />
[ESC] L Print half-speed double-density<br />
graphics, 114<br />
[ESC] M Select character font table, 174<br />
[ESC] m Perform a partial knife cut, 203<br />
[ESC] p Generate pulse, 205<br />
[ESC] P Begin rotated font, 88<br />
[ESC] p 3 Select paper sensor(s) to output paperend<br />
signals, 150<br />
[ESC] p 4 Select paper sensor(s) to stop printing,<br />
150<br />
[ESC] p 5 Enable/disable paper feed, 149<br />
[ESC] q Query marker, 147<br />
[ESC] Q Set right margin, 188<br />
[ESC] r End rotated print, 108<br />
[ESC] r Rotate 90 , 107<br />
[ESC] r Rotate 270 with two pass font, 108<br />
[ESC] r Rotate 90 with two pass font and line<br />
formatting, 107<br />
[ESC] r Rotate 270 with two pass font and line<br />
formatting, 108<br />
[ESC] r Rotate 270 , 107<br />
[ESC] r Rotate 90 with line formatting, 107<br />
[ESC] r Rotate 270 with line formatting, 107<br />
[ESC] r Rotate 90 with two pass font, 107<br />
[ESC] r Rotate 90 , 180 , or 270 , 105<br />
[ESC] R Select an international character set, 175<br />
[ESC] r Turn color mode on/off, 178<br />
[ESC] R Reset horizontal and vertical tab stops, 77, 81<br />
[ESC] S Select superscript, 102<br />
[ESC] S Select subscript, 102<br />
[ESC] s Set rotated print line length, 109<br />
[ESC] SP Set right-side character spacing, 173<br />
[ESC] t Select character code table, 178<br />
[ESC] T End superscript or subscript, 102<br />
[ESC] U Begin bi-directional print, 117<br />
[ESC] U Begin unidirectional print, 116<br />
[ESC] U Turn on/off unidirectional printing<br />
mode, 187<br />
[ESC] u Set rotated print line spacing, 109<br />
[ESC] V Set intercharacter spacing, 86<br />
[ESC] V Turn on/off 90 rotation mode, 180<br />
[ESC] W Double-wide, double-high mode, 99<br />
[ESC] x Open cash drawer, 148<br />
[ESC] X Set left/right print margin, 146<br />
[ESC] y OCR character enable, 95<br />
[ESC] y OCR character disable, 96<br />
[ESC] y Set feature control, 152<br />
[ESC] Y Print full-speed double-density<br />
graphics, 115<br />
[ESC] Z Print quad-density graphics, 115<br />
[FF] Set form feed, 82<br />
[GS] \ Set relative vertical print position in<br />
page mode, 200<br />
[GS] a Enable/disable Automatic Status Back,<br />
190<br />
[GS] b Turns smoothing on/off, 181<br />
[GS] c Print counter, 208<br />
[GS] g 0 Initialize maintenance counter, 208<br />
[GS] g 2 Transmits maintenance counter, 209<br />
[GS] I Transmit printer ID, 204<br />
[GS] P x y Set horizontal and vertical motion units,<br />
204<br />
[GS] r Transmit status, 192<br />
[GS] Start/end macro definition, 210<br />
[GS] V Select cut mode and cut paper, 203<br />
[HT] Set horizontal tab, 76, 186<br />
[LF] Print and line feed, 171<br />
[LF] Set line feed, 75<br />
[SI] Begin 17 cpi, 84<br />
[SO] Begin one-line double-wide print, 98<br />
[SOH] Begin multi-drop control, 155<br />
[VT] Set vertical tab, 81<br />
10 CPI Character Pitch, Beginning, 84<br />
12 CPI Character Pitch, Beginning, 84<br />
12 x 12 Draft Print Mode, Beginning, 87<br />
17 CPI Character Pitch, Beginning, 84<br />
24 CPI Character Pitch, Beginning, 84<br />
APA Graphics, Printing, 115<br />
Appendix A<br />
Ordering Supplies, 259<br />
Application Development, 62<br />
Audio Alert, Configuring, 149<br />
Auido alert, 149<br />
Page 262 Rev D 28-05897
Appendix C: Ordering Supplies<br />
<strong>Ithaca</strong> ® <strong>610</strong> Programmer’s <strong>Guide</strong><br />
Auto cut, Performing, 148<br />
Auto Line Feed, Beginning, 83<br />
Automatic Status back, Enable/Disable, 190<br />
Back Space, 76<br />
Bar Code Commands, 200<br />
Bar Code, Print, 130, 138<br />
Bar Code, Set height, 139<br />
Bar Code, Set Justification, Print Direction, 140<br />
Bar Codes, 130<br />
Begin Italics, 103<br />
Bi-directional Printing, Beginning, 117<br />
Bit Image Mode, Selecting, 189<br />
Bit-Image Command, 189<br />
Boot Loader Mode, 47<br />
Buffer, 238<br />
Carriage Return, 75<br />
Cash Drawer 1 Status, Inquire, 157<br />
Cash drawer, Opening, 148<br />
Change User Store Terminator, 127<br />
Changing Interface Cards, 31<br />
Character attributes, 98<br />
Character Code Page, Setting, 90<br />
Character Code table, Selecting, 176<br />
Character Code Table, Selecting, 178<br />
Character Commands, 173<br />
Character Pitch, Setting, 85<br />
Character Set, Redefining, 93<br />
Character Spacing, Setting, 173<br />
Clear Buffer(s), 206<br />
Code Page Definitions, 255<br />
Color Mode, Turning on/off, 178<br />
Commands, User-store, 123<br />
Communication<br />
Features, 250<br />
Parallel Port, 236<br />
Serial Port, 241<br />
Communications Interface, 23<br />
Configuration<br />
Remote, 57<br />
Configuration Control, Extending, 153<br />
Configuration Mode<br />
Overview, 51<br />
Connecting Communication Cables, 34<br />
Connecting Power, 33<br />
Control Character, Printing, 92<br />
Control Codes<br />
Overview, 61<br />
Control Codes and Commands, 62<br />
Control Feature, Setting, 152<br />
Cover Open Status, Inquire, 158<br />
Current Requirements, 23<br />
Cut Mode/Cut paper, Selecting, 203<br />
Data pass-through, 250<br />
Display Pass Through, 24, 248<br />
Display pass-through, 250<br />
Double Density Graphics, Full-Speed Printing, 115<br />
Double Density Graphics, Half-Speed Printing, 114<br />
Double Strike Mode, On/Off, 180<br />
Emphasized Mode, On/Off, 179<br />
Emphasized Print Mode, Beginning, 101<br />
Emphasized Print Mode, Ending, 102<br />
End Italics, 103<br />
Enhanced Print Mode, Ending, 101<br />
Enhanced print, Beginning, 101<br />
Entering Configuration Mode, 54<br />
Entering Self-Test Mode, 44<br />
EPOS<br />
Codes, 165<br />
EPOS 90° Rotation Mode, On/Off, 180<br />
EPOS Absolute Print Position, Setting, 185<br />
EPOS Back Space, Setting, 186<br />
EPOS Bar Code Height, Setting, 201<br />
EPOS Bar Code, Printing, 200<br />
EPOS Character Size, Setting, 181<br />
EPOS Control Character, Printing, 178<br />
EPOS Emulation, 62<br />
EPOS Euro Character, Insert, 178<br />
EPOS Execute Macro, 210<br />
EPOS HRI Characters, Selecting Font, 202<br />
EPOS HRI Characters-Printing Position, Selecting,<br />
202<br />
EPOS Italics, Beginning, 181<br />
EPOS Italics, Ending, 181<br />
EPOS Knife Cut-Partial, 203<br />
EPOS Knife Cut-Partial, Performing, 203<br />
EPOS Macro Definition, Start/End, 210<br />
EPOS margin-eft, Setting, 188<br />
EPOS Margin-left, Setting, 187<br />
EPOS Margin-Right, Setting, 188<br />
EPOS Motion Units, Setting, 204<br />
EPOS Nonvolatile Memory, Erasing All Entries, 213<br />
EPOS Nonvolatile Memory, Erasing Single Entry, 213<br />
EPOS Page Mode Commands, 197<br />
EPOS Paper Error Signal Control, 216<br />
EPOS Printing Area Width, Setting, 187<br />
EPOS Query Nonvolatile Memory Pool Information,<br />
215<br />
EPOS Relative Print Position, Setting, 185<br />
EPOS Relative Vertical Print Position in page mode,<br />
Setting, 200<br />
EPOS Set Print to beginning of print line, 185<br />
EPOS Sound Buzzer, 203<br />
EPOS Startup Macro Definition, Deleting, 211<br />
EPOS Unidirectional Printing Mode, On/Off, 187<br />
EPOS User Defined Bit Image, Define, 214<br />
EPOS User Defined Bit Image, Defining, 211<br />
EPOS User Defined Bit Image, Printing, 213, 215<br />
EPOS User Defined Character Set, Saving, 215<br />
EPOS User Defined Character Set, Selecting, 215<br />
EPOS, Print and Reverse Feed, 172<br />
Error Status, Inquire, 163<br />
ESC [ T Select character code table, 176<br />
Euro Character, Inserting, 92<br />
Executes power-off sequence, 205<br />
Extended APA Graphics, 115<br />
Extended Diagnostics<br />
Hex-Dump, 46<br />
Firmware Configuration, 35<br />
Flow control<br />
Data Terminal Ready (DTR), 241<br />
Ready/Busy, 241<br />
XON/XOFF, 241<br />
Form Feed, 82<br />
Form Length, Setting Inches, 82<br />
28-05897 Rev D Page 263
Index<br />
<strong>Ithaca</strong> ® <strong>610</strong> Programmer’s <strong>Guide</strong><br />
Form Length, Setting Lines, 82<br />
Forming characters, 15<br />
Generate Pulse, 205<br />
Generate Pulse in real time, 205<br />
Graphic<br />
Mode, 114<br />
Graphic Data, Processing, 118<br />
Graphic Mode, Reassigning, 116<br />
Graphic mode, Set Horizontal, 119<br />
Graphic save, 120<br />
Graphics<br />
color, 118<br />
horizontal, 118<br />
GS - x y d 1 …d(x x y x 8)Define userdefined<br />
bit image, 211<br />
GS ! Set character size, 181<br />
GS # Insert Euro character, 178<br />
GS * x y d 1 … d(x x y x 8) Define single user-defined<br />
bit-image, 214<br />
GS / Print single user-defined bit-image, 215<br />
GS ^ r t m Execute macro, 210<br />
GS _ Delete start-up macro definition, 211<br />
GS 0 Print user-defined bit image, 213<br />
GS 1 Erase single entry from<br />
nonvolatile memory, 213<br />
GS 3 Query nonvolatile memory pool information,<br />
215<br />
GS 5 Erase all entries from nonvolatile memory pool,<br />
213<br />
GS 6 Save user-defined character set,<br />
215<br />
GS 7 Select user-defined character set,<br />
215<br />
GS f Select font for HRI characters, 202<br />
GS H Select printing position of HRI characters,<br />
202<br />
GS h Set bar code height, 201<br />
GS k … NUL Print bar code, 200<br />
GS L Set left margin, 187<br />
GS w Set bar code width, 202<br />
GS W Set printing area width, 187<br />
Home, Returning, 188<br />
Horizontal Motion Control, 76<br />
Horizontal Position, Setting, 77<br />
Horizontal Tab, 76<br />
Horizontal Tab Positions, Setting, 187<br />
Horizontal tab Stops, Setting, 76<br />
Horizontal Tab, Setting, 186<br />
IEEE 1284 buffer, Clearing, 158<br />
Indicator Lights, 42<br />
Indicators<br />
Fault, 42<br />
Initialize maintenance counter, 208<br />
Initialize the Printer, 148, 204<br />
Ink Cartridges<br />
Ordering, 259<br />
Inquire Commands, 157<br />
Installing Cables, 33<br />
Installing New Interface Cards, 32<br />
Installing OPOS Printer Drivers, 37<br />
Installing Paper, 35<br />
Installing Printer Drivers, 36<br />
Installing USB Printer Drivers, 37<br />
Intercharacter Spacing, Setting, 86<br />
International Character Set, Selecting, 89, 142, 143,<br />
144, 145, 175<br />
International Character Sets, 175<br />
IPCL Codes, 62<br />
<strong>Ithaca</strong> Specific <strong>Ithaca</strong> ® <strong>610</strong> Commands, 216<br />
Justification, Selecting, 186<br />
Justification, Setting, 77<br />
LED indicator<br />
error, 42<br />
paper, 42<br />
power, 42<br />
Level 0 diagnostics, 47<br />
Line feed, 75<br />
Line Feed Button, 41<br />
Line Feed, Performing, 78<br />
Line Feed, Reverse, 83<br />
Line Spacing Commands, 173<br />
Line Spacing, Enabling, 80<br />
Line Spacing, Feeding Lines, 80<br />
Line Spacing, Select Default, 173<br />
Line Spacing, Set at 2 ½, 16-inch and 7/72 inch, 79<br />
Line Spacing, Set-1/8 inch, 79<br />
Line Spacing, Set-n/216 inch, 78<br />
Line Spacing, Setting, 173<br />
Line Spacing-Variable, Setting, 79<br />
Machanical Error Status, Inquire, 159<br />
Macro Data, Run from user Store, 125<br />
Macro Data, Saving, 121<br />
Macro Data, Saving in user Store, 124<br />
Macro Record, Beginning, 121<br />
Macro Record, Ending, 124<br />
Macro Record, Ending name, 121<br />
Macro Record, Start, 129<br />
Macro Record, Starting, 121, 123<br />
Macro Record, Stop, 129<br />
Macro Record, Stop and Save, 129<br />
Macro Record, Stopping, 121<br />
Macro, Flag on Startup, 125<br />
Macro-Function Commands, 210<br />
Mechanism Control Commands, 203<br />
Miscellaneous Commands, 204<br />
Multidrop configuration, 250<br />
Multi-Drop Control, Beginning, 155<br />
Multiline Mode, 99<br />
OCR character<br />
disable, 96<br />
enable, 95<br />
OCR Character, Disable, 96<br />
OCR Characters, Enabling, 95<br />
OFF Button, 41<br />
Off-line active, 251<br />
One Line/Double Wide Print, Beginning, 98<br />
One Line/Double Wide Print, Canceling, 98<br />
Output Paper end Signals, Selecting Paper Sensors,<br />
150, 184<br />
Panel Button Commands, 182<br />
paper Feed, Enable, Disable, 149, 182<br />
Paper Feed, Enable/Disable, 216<br />
Paper Low Sensor, 216<br />
Paper Motion, 75<br />
Page 264 Rev D 28-05897
Appendix C: Ordering Supplies<br />
<strong>Ithaca</strong> ® <strong>610</strong> Programmer’s <strong>Guide</strong><br />
Paper Out Sensor, disable, 146<br />
Paper Out Sensor, enabling, 146<br />
Paper Out Status, Inquire, 158<br />
Paper Sensor Commands, 183<br />
Paper Sensors, Selecting to Stop Printing, 150, 183<br />
Parallel Interface Connector, 34<br />
Parallel port timing, 236<br />
PcOS Control Codes, 62<br />
PcOS Quick Reference Chart, 64<br />
Peripheral Devise Status, Selecting, 206<br />
Plug and Play<br />
parallel, 239<br />
Serial, 245<br />
Power Control, Remote, 154, 248<br />
Power Cycle Status, Inquire, 159<br />
Power-cycle recovery, 250<br />
Print<br />
rotation, 104<br />
Print and Carriage Return, 171<br />
Print and Feed Lines, 171<br />
Print and Feed Paper, 172<br />
Print and Line Feed, 171<br />
Print and Reverse Feed Lines, 171, 172<br />
Print Buffer Flow, 243<br />
Print Buffer Size, 245<br />
Print buffer, control, 147<br />
Print buffers, 231<br />
Print counter, 208<br />
Print Current Configuration, 227<br />
Print Current totals, 227<br />
Print margins, setting, 146<br />
Print Modes, Selecting, 179<br />
Print Position Commands, 185<br />
Print Quality Mode, Setting, 87<br />
Print Style, Setting, 100<br />
Print Supress/Data Pass Through, Enabling, 151<br />
Printer Care, 41<br />
Printer ID, Inquire, 162<br />
Printer Reset, Requesting, 158<br />
Printer State, Inquire, 160<br />
Printer Status, 156<br />
Printer Status, Inquire, 157, 161<br />
Process User Macro, 129<br />
Programmer’s Notes, 253<br />
Programming Considerations, 128<br />
Quad Density Graphics, Printing, 115<br />
Query marker, 147<br />
Read and return Totals, 225<br />
Real Time Status, Transmitting, 193<br />
real-time Request to Printer, 207<br />
Recovery form Mechanical Errors, 252<br />
Regulatory Compliance, i<br />
Remote Power Control, 154, 248<br />
Remote Reset, 249<br />
Removing Old Interface Cards, 31, 32<br />
Rotated Font, Beginning, 88<br />
Rotated Print, 270 , 107<br />
Rotated Print, 270 with 2 Pass Font, 108<br />
Rotated Print, 270 with 2 Pass Font and line<br />
formatting, 108<br />
Rotated Print, 270 with Line Formatting, 107<br />
Rotated Print, 90 , 107<br />
Rotated Print, 90 with 2 Pass Font and Line<br />
Formatting, 107<br />
Rotated Print, 90 with Line Formatting, 107<br />
Rotated Print, Begin 90 with 2 pass font, 107<br />
Rotated Print, Beginning, 105<br />
Rotated Print, Ending, 108<br />
Rotated Print, Line Length, 109<br />
Rotated Print, Line Spacing, 109<br />
Select Character Font Table, 174<br />
Select Subscript, 102<br />
Select Superscript, 102<br />
Self-Test<br />
Using, 44<br />
Serial Device Identification, 246<br />
Serial Interface Communication, 24<br />
Serial Interface Connector, 34<br />
Serial port<br />
flow control, 241<br />
Serial Port<br />
Inquire, 247<br />
Signal Levels, 23<br />
Single Density Graphics, Printing, 114<br />
Specifications and Requirements, 11<br />
Standard APA Graphics, 114<br />
Standard Emulation, 62<br />
Start up Macro, Flagging, 122<br />
Status Commands, 190<br />
Status Inquire, 156<br />
Status, Inquire Receipt Paper Low, 157<br />
Superscript and Subscript, 102<br />
Supplies<br />
Ink Cartridges, 259<br />
Ordering Cables, 259<br />
Ordering Paper, 259<br />
Tab Stops, Resetting, 77, 81<br />
Testing the Printer, 44<br />
TM T90 and EPOS Command Descriptions, 171<br />
TM-90<br />
Command Summary, 167<br />
Top of Form, Setting, 82<br />
Transmit Printer ID, 204<br />
Transmit Status, 192<br />
Transmits maintenance counter, 209<br />
Turns smoothing on/off, 181<br />
Underline Mode, On/Off, 179<br />
Underline, Beginning, 99, 101<br />
Unicode, 221<br />
Unidirectional Printing, Beginning, 116<br />
Upside down Print Mode, On/Off, 180<br />
USB Interface Connector, 35<br />
User Defined Character Set, Selecting, 173<br />
User Defined Character, Saving, 122, 124<br />
User Defined Characters, Canceling, 95, 174<br />
User Defined Characters, Defining, 94, 122, 174<br />
User Defined Characters, Enabling, 95<br />
User macros, 128<br />
User store, 120<br />
User Store Status, Inquire, 164<br />
User Store, Delete item, 126<br />
User Store, Flush Information, 123, 126<br />
User Store, Load item, 125<br />
User Store, Loading item, 122<br />
28-05897 Rev D Page 265
Index<br />
<strong>Ithaca</strong> ® <strong>610</strong> Programmer’s <strong>Guide</strong><br />
User Store, Removing Item, 122<br />
User Store, Report, 127<br />
User Store, Reporting, 123<br />
User-Defined Memory Commands, 211<br />
Using Configuration Mode, 55<br />
Using DSR, 245<br />
Verify Cash Drawer Interface, 32<br />
Vertical Tab, 81<br />
Vertical Tab Stops, Setting, 81<br />
Page 266 Rev D 28-05897