S1000 Install.pdf - Aztec
S1000 Install.pdf - Aztec
S1000 Install.pdf - Aztec

Create successful ePaper yourself
Turn your PDF publications into a flip-book with our unique Google optimized e-Paper software.
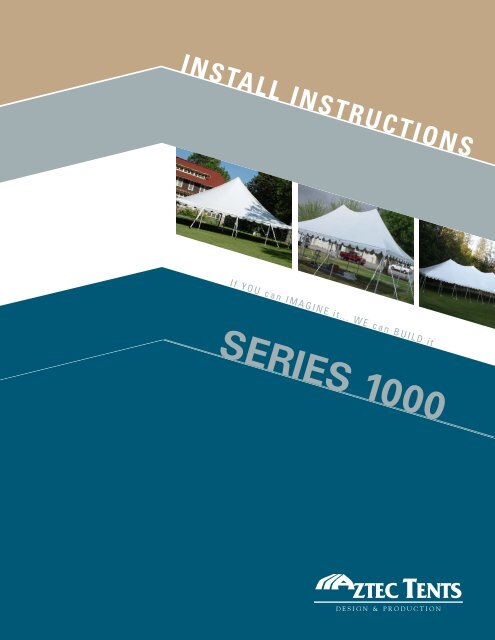
INSTALL INSTRUCTIONS<br />
If YOU can IMAGINE it... WE can BUILD it<br />
SERIES 1000
WARNING!<br />
The safe installation and use of commercial tenting products can vary from site to site and during varying climactic<br />
conditions. Careful consideration should be paid to any installation during windy conditions and shall be monitored<br />
throughout the duration of the installation. Periodic maintenance and monitoring of the installation by the installer is<br />
required. Techniques other than those specified in this document may be required during these types of conditions.<br />
Users and installers shall indemnify and hold harmless <strong>Aztec</strong> Tent for any claim resulting from the improper installation<br />
and/or maintenance of this unit.<br />
Soil conditions also vary from site to site. The included anchoring package for this tent may need to be supplemented<br />
with alternate anchoring during windy conditions and in areas with questionable soil holding power. Full product<br />
engineering may be available.<br />
NOTICE<br />
This tent product is not intended to be used as a shelter from severe weather. <strong>Aztec</strong> assumes no liability for such use.<br />
An evacuation plan for the area covered within this tented space is imperative and shall be thoroughly posted for all<br />
users and potential occupants of the tent. Severe weather including electrical storm systems, moderate to severe<br />
wind, heavy rains, snow, or any condition that raises any doubt to the structural integrity of the tent are immediate<br />
signs that an evacuation is necessary. Severe bodily injury and/or death can occur.<br />
The installation of electrical, plumbing, lighting, appliances and/or HVAC equipment are not covered within this manual.<br />
Users/<strong>Install</strong>ers shall follow local code requirements for the installation of these items using certified personnel.<br />
<strong>Aztec</strong> Tents shall be indemnified and held harmless from any such use or injury resulting from its use.<br />
***IMPORTANT SAFETY INFORMATION***<br />
Proper personnel safety equipment should be worn at all times during the<br />
installation of any tenting products.<br />
Hard Hat<br />
Safety Glasses<br />
Work Gloves<br />
Long Pants<br />
Steel Toe Boots<br />
OSHA Approved Harness and restraint system (for off<br />
ground activities)<br />
www.aztectents.com
Thank you for your recent purchase from <strong>Aztec</strong> Tents. The following procedures will help you through your installation. If<br />
you ever run into problems with the installation of your <strong>Aztec</strong> Tent give one of our sales/service professionals a call. A<br />
complete listing of sales, service, and operational support is always available on our website at www.aztectents.com.<br />
Contents<br />
<strong>Install</strong> Instructions 4-7<br />
20’x Diagrams 8-10<br />
30’x Diagrams 11-16<br />
40’x Diagrams 17-18<br />
50’x Diagrams 19-20<br />
60’x Diagrams 21-23<br />
Replacement Parts 24<br />
Questions? Call us.<br />
<strong>Aztec</strong> Tents<br />
2665 Columbia Street<br />
Torrance, CA 90503 USA<br />
Direct (310) 347-3010<br />
Toll Free (800) 228-3687<br />
Fax (310) 381-0722<br />
www.aztectents.com
<strong>Install</strong>ation-<br />
Step 1:<br />
Square the tent area. Use the below squaring diagram to determine<br />
the diagonal or “C” Dimension your tent installation. To<br />
calculate your own squaring dimension for your width/length<br />
combination use the formula A 2 +B 2 =C 2.<br />
Step 2:<br />
Mark on the ground with chalk or spray paint the location of the<br />
leg and center poles. These locations are identified on the drawing<br />
to the right. All legs are spaced 10’ on center around the<br />
perimeter of the tent. (Legs on the 30’ wide units and all legs for<br />
15’ middle sections are spaced at 7.5’)<br />
Step 3:<br />
Mark on the ground the location of each stake location. Stakes<br />
should be placed at a distance of the length of the leg less 2<br />
feet. (ie. if you use an 8’ leg the stake should be placed 6’ from<br />
the bottom of the leg pole.<br />
Step 4:<br />
Drive the anchoring stakes. Drive the 1” double headed stake<br />
with a sledge hammer into the ground until 6” is left above<br />
ground. Tie the tie-down rope to the stake with a clove hitch<br />
knot or attach the tie-down ratchetto the stake as close to the<br />
ground as possible.<br />
Leave plenty of slack in the tie-down ropes at this time.<br />
Adjustments will be made with the tensioning of the tent, so<br />
you will want to try to keep from tieing off the knot at this time.<br />
www.aztectents.com
Step 5:<br />
Layout a ground cloth over the ground in the tent area. This will<br />
protect the tent top fabric. Layout the centerpoles on top of the<br />
ground cloth. The top of each centerpole shall be placed at the<br />
marked point “A”<br />
Step 6:<br />
Begin laying out the tent fabric. Some tents are constructed<br />
with a one piece top while expandable versions utilize sections<br />
that are modular allowing the tent to become longer by adding<br />
more modular “middle” sections. This illustration shows a<br />
40x60 3pc Expandable Top.<br />
Step 7:<br />
<strong>Install</strong> the 2” round ring located at the top of each tent fabric<br />
piece over the top of the centerpole. The ring for the end and<br />
the ring for the middle will be placed through the pipe & flange<br />
and then slid over the centerpole pin. Begin lacing the tent sections<br />
together from the center rings toward the sides. See to<br />
illustration to the right for proper lacing technique. As each<br />
Series 1000 section is combo LACE/GROMMET you will need to<br />
twist the laceline next to the center ring to allow the sections to<br />
lace together properly. As you lace the sections together, close<br />
the weather flap on the exterior of the tent as you go.<br />
Pipe & Flange<br />
Twist Here<br />
Lace on Top<br />
Lace on Top<br />
Center Rings<br />
Grommet on Bottom<br />
Grommet on Bottom<br />
Step 8:<br />
Begin installing the legs of the tent. First insert the top fitting of<br />
the corner leg pole through the ring on the corner of the tent.<br />
Attach the rope tie-down/ratchet to the leader ring on the corner<br />
leg and connect to the anchoring stake to make the leg<br />
almost vertical. Continue down the length of the tent installing<br />
legs and attaching the tie-down ropes/ratchets to the anchoring<br />
stakes. Continue with the other long side of the tent, starting at<br />
the corner and working down the tent.<br />
www.aztectents.com
Step 9:<br />
<strong>Install</strong> the legs on the end of the tent as shown in illustration<br />
and apply slight tension to the tie-down ropes/ratchets.<br />
Step 10:<br />
Begin raising the centerpoles of the tent. Manual laborers can<br />
push the centerpole from its laying position. Make sure that as<br />
the centerpole raises, you watch that the base of the centerpole<br />
ends up at the mark placed in step 2. This is crucial to proper fit<br />
and safety of the installed unit. As you raise the first centerpole<br />
the next centerpole will lift slightly off the ground from tension<br />
of the tent fabric. Be sure as the centerpoles begin to raise the<br />
tops do not snag the tent top fabric.<br />
Step 11:<br />
Raise remaining centerpole at this time, making sure the base of<br />
each centerpole rests on the mark you painted/chalked on the<br />
ground in step 2.<br />
Step 12:<br />
Once all centerpoles are installed and in proper location you can<br />
move on to step 13.<br />
www.aztectents.com
Step 13:<br />
You can now straighten the side legs of the tent. Start at one<br />
corner and assure that the corner leg is placed on the mark of<br />
the corner measured in step 1. Loosen the rope/ratchet on this<br />
first leg and reapply tension until the corner leg pole is plumb.<br />
Continue with the other three corner legs, then straighten the<br />
legs along the length of the tent. Finally straighten the legs on<br />
the end of the tent.<br />
Step 14:<br />
Now your tent is ready for installation of sidewalls (if required).<br />
The final product will look like the photo shown below and to<br />
the right.<br />
www.aztectents.com
20x20 Series 1000<br />
K:\cad files\Pole Tent\Series 1000\20x\20x20.dwg, 6/30/2009 11:16:21 AM, <strong>pdf</strong>Factory.pc3<br />
www.aztectents.com
20x30 Series 1000<br />
K:\cad files\Pole Tent\Series 1000\20x\20x30.dwg, 6/30/2009 11:18:19 AM, <strong>pdf</strong>Factory.pc3<br />
www.aztectents.com
20x40 Series 1000<br />
K:\cad files\Pole Tent\Series 1000\20x\20x40.dwg, 6/30/2009 11:21:54 AM, <strong>pdf</strong>Factory.pc3<br />
www.aztectents.com
30x30 Series 1000<br />
K:\cad files\Pole Tent\Series 1000\30x\30x30.dwg, 6/30/2009 11:36:29 AM, <strong>pdf</strong>Factory.pc3<br />
www.aztectents.com
30x40 Series 1000<br />
K:\cad files\Pole Tent\Series 1000\30x\30x40.dwg, 6/30/2009 11:38:15 AM, <strong>pdf</strong>Factory.pc3<br />
www.aztectents.com
30x45 Series 1000<br />
K:\cad files\Pole Tent\Series 1000\30x\30x45.dwg, 6/30/2009 11:41:29 AM, <strong>pdf</strong>Factory.pc3<br />
www.aztectents.com
30x50 Series 1000<br />
K:\cad files\Pole Tent\Series 1000\30x\30x50.dwg, 6/30/2009 11:40:09 AM, <strong>pdf</strong>Factory.pc3<br />
www.aztectents.com
30x60 Series 1000 w/ 2 CP<br />
K:\cad files\Pole Tent\Series 1000\30x\30x60.dwg, 6/30/2009 11:42:43 AM, <strong>pdf</strong>Factory.pc3<br />
www.aztectents.com
30x60 Series 1000 w/3 CP<br />
K:\cad files\Pole Tent\Series 1000\30x\30x60x15.dwg, 6/30/2009 11:44:17 AM, <strong>pdf</strong>Factory.pc3<br />
www.aztectents.com
40x40 Series 1000<br />
K:\cad files\Pole Tent\Series 1000\40x\40x40.dwg, 6/30/2009 11:50:31 AM, <strong>pdf</strong>Factory.pc3<br />
www.aztectents.com
40x60 Series 1000<br />
K:\cad files\Pole Tent\Series 1000\40x\40x60.dwg, 6/30/2009 12:00:28 PM, <strong>pdf</strong>Factory.pc3<br />
www.aztectents.com
50x50 Series 1000<br />
K:\cad files\Pole Tent\Series 1000\50x\50x50.dwg, 6/30/2009 12:12:48 PM, <strong>pdf</strong>Factory.pc3<br />
www.aztectents.com
50x70 Series 1000<br />
K:\cad files\Pole Tent\Series 1000\50x\50x70.dwg, 6/30/2009 12:11:40 PM, <strong>pdf</strong>Factory.pc3<br />
www.aztectents.com
60x60 Series 1000<br />
K:\cad files\Pole Tent\Series 1000\60x\60x60.dwg, 6/30/2009 12:41:43 PM, <strong>pdf</strong>Factory.pc3<br />
www.aztectents.com
60x80 Series 1000<br />
K:\cad files\Pole Tent\Series 1000\60x\60x80.dwg, 6/30/2009 1:05:10 PM, <strong>pdf</strong>Factory.pc3<br />
www.aztectents.com
60x90 Series 1000<br />
K:\cad files\Pole Tent\Series 1000\60x\60x90.dwg, 6/30/2009 1:06:25 PM, <strong>pdf</strong>Factory.pc3<br />
www.aztectents.com
Parts Listing<br />
Item<br />
20x20 1pc Series 1000 Top UW<br />
20x30 1pc Series 1000 Top UW<br />
20x40 1pc Series 1000 Top UW<br />
30x30 1pc Series 1000 Top UW<br />
30x40 1pc Series 1000 Top UW<br />
30x45 1pc Series 1000 Top UW<br />
30x50 1pc Series 1000 Top UW<br />
30x60 1pc Series 1000 Top UW<br />
30x60 1pc Series 1000 Top UW<br />
40x40 1pc Series 1000 Top UW<br />
40x60 1pc Series 1000 Top UW<br />
*20x10 End Series 1000 UW<br />
*20x10 Mid Series 1000 UW<br />
*30x15 End Series 1000 UW<br />
*30x10 Mid Series 1000 UW<br />
*30x15 Mid Series 1000 UW<br />
*30x20 Mid Series 1000 UW<br />
*30x30 Mid Series 1000 UW<br />
*40x20 End Series 1000 UW<br />
*40x20 Mid Series 1000 UW<br />
*40x40 1pc Series 1000 Top UW<br />
*40x60 1pc Series 1000 Top UW<br />
*50x25 End Series 1000 UW<br />
*50x20 Mid Series 1000 UW<br />
*60x30 End Series 1000 UW<br />
*60x20 Mid Series 1000 UW<br />
*60x30 Mid Series 1000 UW<br />
1.75" Alum CP Section "G"<br />
1.75" Alum CP Section "J"<br />
2.5" 1pc Alum SP x 7'0"<br />
2.5" 1pc Alum SP x 8'0"<br />
2.5" 2pc S1500 CP x 14'0"<br />
2.5" 2pc <strong>S1000</strong> CP x 16'0"<br />
4.0" 2pc <strong>S1000</strong> CP x 17'0"<br />
4.0" 2pc <strong>S1000</strong>/1500 CP x 18'0"<br />
4.0" 2pc S1500 CP x 19'0"<br />
4.0" 3pc <strong>S1000</strong> CP x 20'0"<br />
4.0" 3pc <strong>S1000</strong>/1500 CP x 21'0"<br />
4.0" 4pc S1500 CP x 24'0"<br />
4"SCH40 2pc <strong>S1000</strong> CP x 23'6"<br />
4"SCH40 2pc <strong>S1000</strong> CP x 24'6"<br />
4"SCH40 2pc <strong>S1000</strong> CP x 27'0"<br />
4"SCH40 2pc <strong>S1000</strong> CP x 28'0"<br />
4.0" Alum CP x 3' EXT<br />
4.0" Alum CP x 4' EXT<br />
1.75 OD Pole End Cap (Black)<br />
1.75 OD Pole Pin- Plastic<br />
2.5" OD Pole End Cap (Blk)<br />
2.5" OD Pole Pin- Plastic<br />
4.0" OD Pole Pin- Steel<br />
4.0" OD Pole Base- Steel<br />
1" Inline Ratchet<br />
2" Inline Ratchet<br />
Tens. Ratchet W/Plate (Only)<br />
2" Web Guy x 20' (Only)<br />
1" Pipe & Flange<br />
1" x 42" Double Headed Stake<br />
Item No.<br />
Z31420TT2002<br />
Z31420TT3002<br />
Z31420TT4002<br />
Z31430TT3002<br />
Z31430TT4002<br />
Z31430TT4502<br />
Z31430TT5002<br />
Z31430TT60022C<br />
Z31430TT60023C<br />
Z31440TT4002<br />
Z31440TT6002<br />
Z314Z0001002<br />
Z314Z0002002<br />
Z314Z0003002<br />
Z314Z0004002<br />
Z314Z0005002<br />
Z314Z0006002<br />
Z314Z0007002<br />
Z314Z0008002<br />
Z314Z0009002<br />
Z314Z0010002<br />
Z314Z0011002<br />
Z314Z0012002<br />
Z314Z0013002<br />
Z314Z0014002<br />
Z314Z0015002<br />
Z314Z0016002<br />
Z3971.750TXG<br />
Z3971.750TXJ<br />
Z3912.5BX07<br />
Z3912.5BX08<br />
Z3932.5TX14<br />
Z3932.5TX16<br />
Z3934.000TX17<br />
Z3934.000TX18<br />
Z3934.000TX19<br />
Z3934.000TX20<br />
Z3934.000TX21<br />
Z3934.000TX24<br />
Z3934SCH40X2306<br />
Z3934SCH40X2406<br />
Z3934SCH40X27<br />
Z3934SCH40X28<br />
Z3974.000TX03<br />
Z3974.000TX04<br />
Z39900030<br />
Z39900040<br />
Z39900080<br />
Z39900090<br />
Z39900120<br />
Z39900130<br />
Z39900280<br />
Z39900290<br />
Z39900320<br />
Z39900330<br />
Z39900380<br />
Z51100070<br />
Weight lbs<br />
75<br />
128<br />
135<br />
190<br />
245<br />
265<br />
280<br />
300<br />
320<br />
370<br />
605<br />
65<br />
65<br />
95<br />
140<br />
213<br />
282<br />
419<br />
185<br />
245<br />
370<br />
520<br />
275<br />
240<br />
405<br />
267<br />
405<br />
1<br />
1<br />
7<br />
8<br />
0<br />
0<br />
0<br />
0<br />
0<br />
0<br />
0<br />
0<br />
0<br />
0<br />
0<br />
0<br />
6<br />
8<br />
0<br />
0<br />
0<br />
1<br />
4<br />
3<br />
3<br />
6<br />
6<br />
2<br />
2<br />
10<br />
www.aztectents.com
www.aztectents.com
If YOU can IMAGINE it... WE can BUILD it<br />
www.aztectents.com<br />
<strong>Aztec</strong> Tents<br />
2665 Columbia Street<br />
Torrance, CA 90503<br />
Toll Free (800) 228-3687<br />
Fax (310) 381-0722