Oil-Free Air Compressor
Oil-Free Air Compressor
Oil-Free Air Compressor
Create successful ePaper yourself
Turn your PDF publications into a flip-book with our unique Google optimized e-Paper software.
INSTRUCTION MANUAL<br />
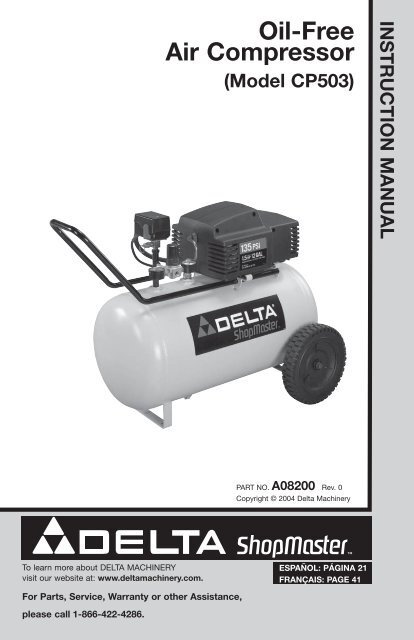
<strong>Oil</strong>-<strong>Free</strong><br />
<strong>Air</strong> <strong>Compressor</strong><br />
(Model CP503)<br />
PART NO. A08200 Rev. 0<br />
Copyright © 2004 Delta Machinery<br />
To learn more about DELTA MACHINERY<br />
visit our website at: www.deltamachinery.com.<br />
ESPAÑOL: PÁGINA 21<br />
FRANÇAIS: PAGE 41<br />
For Parts, Service, Warranty or other Assistance,<br />
please call 1-866-422-4286.
SAFETY GUIDELINES - DEFINITIONS<br />
This manual contains information that is important for you to know and<br />
understand. This information relates to protecting YOUR SAFETY and<br />
PREVENTING EQUIPMENT PROBLEMS. To help you recognize this<br />
information, we use the symbols below. Please read the manual and pay<br />
attention to these symbols.<br />
Indicates an<br />
imminently hazardous<br />
situation which, if not avoided, will result<br />
in death or serious injury.<br />
Indicates a potentially<br />
hazardous situation<br />
which, if not avoided, could result in<br />
death or serious injury.<br />
Indicates a potentially<br />
hazardous situation<br />
which, if not avoided, may result in minor<br />
or moderate injury.<br />
Used without the<br />
safety alert symbol<br />
indicates a potentially hazardous situation<br />
which, if not avoided, may result in<br />
property damage.<br />
IMPORTANT SAFETY INSTRUCTIONS<br />
Some dust created by power sanding, sawing, grinding,<br />
drilling, and other construction activities contains<br />
chemicals known (to the State of California) to cause cancer, birth defects<br />
or other reproductive harm. Some example of these chemicals are:<br />
• lead from lead-based paints<br />
• crystalline silica from bricks and cement and other masonry products<br />
• arsenic and chromium from chemically-treated lumber<br />
Your risk from these exposures varies, depending on how often you do<br />
this type of work. To reduce your exposure to these chemicals: work in<br />
a well ventilated area, and work with approved safety equipment, always<br />
wear MSHA/NIOSH approved, properly fitting face mask or respirator when<br />
using such tools.<br />
When using air tools, basic safety precautions should always be followed<br />
to reduce the risk of of personal injury.<br />
A08200<br />
2- ENG
IMPORTANT SAFETY INSTRUCTIONS<br />
Save these instructions<br />
Improper operation or maintenance of this product could result in serious injury and<br />
property damage. Read and understand all warnings and operation instructions before<br />
using this equipment.<br />
HAZARD<br />
WARNING: Risk of explosion or fire<br />
What Could Happen<br />
It is normal for electrical contacts<br />
within the motor and pressure switch to<br />
spark.<br />
If electrical sparks from compressor<br />
come into contact with flammable<br />
vapors, they may ignite, causing fire or<br />
explosion.<br />
Restricting any of the compressor<br />
ventilation openings will cause serious<br />
overheating and could cause fire.<br />
Unattended operation of this product<br />
could result in personal injury or<br />
property damage. To reduce the risk<br />
of fire, do not allow the compressor to<br />
operate unattended.<br />
How To Prevent It<br />
Always operate the compressor in a<br />
well ventilated area free of combustible<br />
materials, gasoline, or solvent vapors.<br />
If spraying flammable materials, locate<br />
compressor at least 20 feet away from<br />
spray area. An additional length of hose<br />
may be required.<br />
Store flammable materials in a secure<br />
location away from compressor.<br />
Never place objects against or on top<br />
of compressor. Operate compressor<br />
in an open area at least 12 inches<br />
away from any wall or obstruction that<br />
would restrict the flow of fresh air to the<br />
ventilation openings.<br />
Operate compressor in a clean, dry well<br />
ventilated area. Do not operate unit<br />
indoors or in any confined area.<br />
Always remain in attendance with the<br />
product when it is operating.<br />
Always disconnect electrical power by<br />
moving pressure switch lever to the off<br />
position and drain tank daily or after<br />
each use.<br />
3- ENG A08200
HAZARD<br />
WARNING: Risk of Bursting<br />
<strong>Air</strong> Tank: The following conditions could lead to a weakening of the tank, and result<br />
in a violent tank explosion and could cause property damage or serious injury.<br />
What Could Happen<br />
Failure to properly drain condensed<br />
water from tank, causing rust and<br />
thinning of the steel tank.<br />
Modifications or attempted repairs to<br />
the tank.<br />
Unauthorized modifications to the<br />
unloader valve, safety valve, or any<br />
other components which control tank<br />
pressure.<br />
Excessive vibration can weaken the<br />
air tank and cause rupture or<br />
explosion<br />
ATTACHMENTS & ACCESSORIES:<br />
Exceeding the pressure rating of<br />
air tools, spray guns, air operated<br />
accessories, tires, and other inflatables<br />
can cause them to explode or fly apart,<br />
and could result in serious injury.<br />
How To Prevent It<br />
Drain tank daily or after each use.<br />
If tank develops a leak, replace it<br />
immediately with a new tank or replace<br />
the entire compressor.<br />
Never drill into, weld, or make any<br />
modifications to the tank or its<br />
attachments.<br />
The tank is designed to withstand specific<br />
operating pressures. Never make<br />
adjustments or parts substitutions<br />
to alter the factory set operating<br />
pressures.<br />
For essential control of air pressure,<br />
you must install a pressure regulator<br />
and pressure gauge to the air outlet<br />
(if not equipped) of your compressor.<br />
Follow the equipment manufacturers<br />
recommendation and never exceed the<br />
maximum allowable pressure rating of<br />
attachments. Never use compressor<br />
to inflate small low pressure objects<br />
such as children’s toys, footballs,<br />
basketballs, etc.<br />
HAZARD<br />
WARNING: Risk from Flying Objects<br />
What Could Happen<br />
The compressed air stream can cause<br />
soft tissue damage to exposed skin<br />
and can propel dirt, chips, loose<br />
particles, and small objects at high<br />
speed, resulting in property damage or<br />
personal injury.<br />
How To Prevent It<br />
Always wear ANSI Z87.1 approved safety<br />
glasses with side shields when using the<br />
compressor.<br />
Never point any nozzle or sprayer<br />
toward any part of the body or at other<br />
people or animals.<br />
Always turn the compressor off and<br />
bleed pressure from the air hose and tank<br />
before attempting maintenance, attaching<br />
tools or accessories.<br />
A08200<br />
4- ENG
HAZARD<br />
WARNING: Risk of Electrical Shock<br />
What Could Happen<br />
Your air compressor is powered by<br />
electricity. Like any other electrically<br />
powered device, If it is not used<br />
properly it may cause electric shock.<br />
Repairs attempted by unqualified<br />
personnel can result in serious injury<br />
or death by electrocution.<br />
Electrical Grounding: Failure to provide<br />
adequate grounding to this product<br />
could result in serious injury or death<br />
from electrocution.<br />
See grounding instructions.<br />
How To Prevent It<br />
Never operate the compressor outdoors<br />
when it is raining or in wet conditions.<br />
Never operate compressor with<br />
protective covers removed or damaged.<br />
Any electrical wiring or repairs required<br />
on this product should be performed by<br />
authorized service center personnel<br />
in accordance with national and local<br />
electrical codes.<br />
Make certain that the electrical circuit<br />
to which the compressor is connected<br />
provides proper electrical grounding,<br />
correct voltage and adequate fuse<br />
protection.<br />
HAZARD<br />
WARNING: Risk to Breathing<br />
What Could Happen<br />
The compressed air directly from your<br />
compressor is not safe for breathing.<br />
The air stream may contain carbon<br />
monoxide, toxic vapors, or solid<br />
particles from the tank. Breathing these<br />
contaminants can cause serious injury<br />
or death.<br />
Sprayed materials such as paint, paint<br />
solvents, paint remover, insecticides,<br />
weed killers, may contain harmful<br />
vapors and poisons.<br />
How To Prevent It<br />
<strong>Air</strong> obtained directly from the compressor<br />
should never be used to supply air for<br />
human consumption. In order to use air<br />
produced by this compressor for breathing,<br />
suitable filters and in-line safety<br />
equipment must be properly installed.<br />
In-line filters and safety equipment<br />
used in conjunction with the compressor<br />
must be capable of treating air to all<br />
applicable local and federal codes prior<br />
to human consumption.<br />
Work in an area with good cross<br />
ventilation. Read and follow the safety<br />
instructions provided on the label or<br />
safety data sheets for the materials<br />
you are spraying. Use a NIOSH/ MSHA<br />
approved respirator designed for use with<br />
your specific application.<br />
5- ENG A08200
HAZARD<br />
WARNING: Risk of Burns<br />
What Could Happen<br />
Touching exposed metal such as the<br />
compressor head or outlet tubes, can<br />
result in serious burns.<br />
How To Prevent It<br />
Never touch any exposed metal parts<br />
on compressor during or immediately<br />
after operation. <strong>Compressor</strong> will remain<br />
hot for several minutes after operation.<br />
Do not reach around protective shrouds<br />
or attempt maintenance until unit has<br />
been allowed to cool.<br />
HAZARD<br />
WARNING: Risk from Moving Parts<br />
What Could Happen<br />
Moving parts such as the pulley, flywheel,<br />
and belt can cause serious injury if<br />
they come into contact with you or your<br />
clothing.<br />
Attempting to operate compressor with<br />
damaged or missing parts or attempting<br />
to repair compressor with protective<br />
shrouds removed can expose you to<br />
moving parts and can result in serious<br />
injury.<br />
How To Prevent It<br />
Never operate the compressor with<br />
guards or covers which are damaged or<br />
removed.<br />
Any repairs required on this product<br />
should be performed by authorized<br />
service center personnel.<br />
HAZARD<br />
WARNING: Risk of Falling<br />
What Could Happen<br />
A portable compressor can fall from<br />
a table, workbench, or roof causing<br />
damage to the compressor and could<br />
result in serious injury or death to the<br />
operator.<br />
How To Prevent It<br />
Always operate compressor in a stable<br />
secure position to prevent accidental<br />
movement of the unit. Never operate<br />
compressor on a roof or other elevated<br />
position. Use additional air hose to<br />
reach high locations.<br />
A08200<br />
6- ENG
WARNING: Risk of Serious Injury or Property Damage When<br />
Transporting <strong>Compressor</strong><br />
(Fire, Inhalation, Damage to Vehicle Surfaces)<br />
What Could Happen<br />
<strong>Oil</strong> can leak or spill and could result<br />
in fire or breathing hazard; serious<br />
injury or death can result. oil leaks will<br />
damage carpet, paint or other surfaces<br />
in vehicles or trailers.<br />
HAZARD<br />
How To Prevent It<br />
Always place COMPRESSOR on a<br />
protective mat when transporting to<br />
protect against damage to vehicle from<br />
leaks. Remove COMPRESSOR from<br />
vehicle immediately upon arrival at your<br />
destination.<br />
HAZARD<br />
WARNING: Risk of Unsafe Operation<br />
What Could Happen<br />
Unsafe operation of your air compressor<br />
could lead to serious injury or death to<br />
you or others.<br />
How To Prevent It<br />
Review and understand all instructions<br />
and warnings in this manual.<br />
Become familiar with the operation and<br />
controls of the air compressor.<br />
Keep operating area clear of all persons,<br />
pets, and obstacles.<br />
Keep children away from the air<br />
compressor at all times.<br />
Do not operate the product when<br />
fatigued or under the influence of<br />
alcohol or drugs. Stay alert at all times.<br />
Never defeat the safety features of this<br />
product.<br />
Equip area of operation with a fire<br />
extinguisher.<br />
Do not operate machine with missing,<br />
broken, or unauthorized parts.<br />
SAVE THESE INSTRUCTIONS<br />
7- ENG A08200
GLOSSARY<br />
Become familiar with these terms before operating the unit.<br />
CFM: Cubic feet per minute.<br />
SCFM: Standard cubic feet per minute; a unit of measure of air delivery.<br />
PSIG: Pounds per square inch gauge; a unit of measure of pressure.<br />
Code Certification: Products that bear one or more of the following marks: UL,<br />
CUL, ETL, CETL, have been evaluated by OSHA certified independent safety<br />
laboratories and meet the applicable Underwriters Laboratories Standards for<br />
Safety.<br />
Cut-In Pressure: While the motor is off, air tank pressure drops as you<br />
continue to use your accessory. When the tank pressure drops to a certain low<br />
level the motor will restart automatically. The low pressure at which the motor<br />
automatically restarts is called "cut-in" pressure.<br />
Cut-Out Pressure: When an air compressor is turned on and begins to run,<br />
air pressure in the air tank begins to build. It builds to a certain high pressure<br />
before the motor automatically shuts off - protecting your air tank from<br />
pressure higher than its capacity. The high pressure at which the motor shuts<br />
off is called "cut-out" pressure.<br />
Branch Circuit: Circuit carrying electricity from electrical panel to outlet.<br />
DUTY CYCLE<br />
This air compressor pump is capable of running continuously. However, to<br />
prolong the life of your air compressor, it is recommended that a 50%-75%<br />
average duty cycle be maintained; that is, the air compressor pump should not<br />
run more than 30-45 minutes in any given hour.<br />
SPECIFICATIONS<br />
Model No.<br />
CP503<br />
Running Horsepower 1.5<br />
Bore 1-7/8"<br />
Stroke 1-1/4"<br />
Voltage/Hertz/ Phase 120/60/1<br />
Minimum Branch Circuit Requirement 15 amps<br />
*Fuse Type<br />
Time Delay<br />
<strong>Air</strong> Tank Capacity<br />
12 gallons<br />
Approximate Cut-in Pressure 100<br />
Approximate Cut-out Pressure 135<br />
SCFM @ 40 PSIG 4.9<br />
SCFM @ 90 PSIG 3.5<br />
ACCESSORIES<br />
Accessories for this unit are available at the store the unit was purchased.<br />
A08200<br />
8- ENG
ASSEMBLY (does not apply to all units)<br />
Assembly for "Tank" units<br />
The wheels and handle do not provide adequate<br />
clearance, stability or support for pulling the unit up and<br />
down stairs or steps. The unit must be lifted, or pushed up a ramp.<br />
1. Submerge handle grip into warm<br />
soapy water to make installation<br />
easier. Remove handle grip from<br />
soapy water and slide onto handle.<br />
2. Slide handle through holes in<br />
compressor saddle onto tabs.<br />
Secure with screws, one on each<br />
side.<br />
It will be necessary to<br />
brace or support one<br />
side of the outfit when installing the<br />
wheels because the compressor will<br />
have a tendency to tip over.<br />
3. Install one shoulder bolt and one<br />
nut for each wheel. Tighten securely.<br />
The outfit will sit level if the wheels<br />
are properly installed.<br />
4. Clean and dry underside of air tank<br />
leg opposite wheels. Remove the<br />
protective strip from the adhesive<br />
backed molded foot bumpers.<br />
Attach the foot bumpers to the<br />
bottom of leg on each end. Press<br />
firmly into place.<br />
Handle<br />
Nut<br />
<strong>Compressor</strong> Saddle<br />
Screw<br />
Wheel<br />
Molded Foot Bumpers<br />
Tab<br />
Shoulder Bolt<br />
HOW TO SET UP YOUR UNIT<br />
INSTALLATION<br />
Location of the <strong>Air</strong> <strong>Compressor</strong><br />
Locate the air compressor in a clean, dry and well ventilated area. The air<br />
compressor should be located at least 12" away from the wall or other<br />
obstructions that will interfere with the flow of air. The air compressor pump<br />
and shroud are designed to allow for proper cooling. The ventilation openings<br />
on the compressor are necessary to maintain proper operating temperature. Do<br />
not place rags or other containers on or near these openings.<br />
9- ENG A08200
GROUNDING INSTRUCTIONS<br />
RISK OF ELECTRICAL SHOCK. In the event of a short<br />
circuit, grounding reduces the risk of shock by providing<br />
an escape wire for the electric current. This air compressor must be<br />
properly grounded.<br />
The portable air compressor is equipped with a<br />
cord having a grounding wire with an appropriate<br />
grounding plug (see illustrations). The plug must<br />
be used with an outlet that has been installed and<br />
grounded in accordance with all local codes and<br />
ordinances.<br />
1. The cord set and plug with this unit contains a<br />
grounding pin. This plug MUST be used with a<br />
grounded outlet.<br />
IMPORTANT: The outlet being used must be<br />
installed and grounded in accordance with all local<br />
codes and ordinances.<br />
2. Make sure the outlet being used has the same<br />
configuration as the grounded plug. DO NOT<br />
USE AN ADAPTER.<br />
Grounding<br />
Pin<br />
120 Volt U.S.A. Plug<br />
Grounding<br />
Pin<br />
240 Volt U.S.A. Plug<br />
When used outside of the United States of America a<br />
conversion kit may be required for local use.<br />
3. Inspect the plug and cord before each use. Do not use if there are signs<br />
of damage.<br />
4. If these grounding instructions are not completely understood, or if in<br />
doubt as to whether the compressor is properly grounded, have the<br />
installation checked by a qualified electrician.<br />
IMPROPER GROUNDING CAN RESULT IN ELECTRICAL<br />
SHOCK.<br />
Do not modify the plug provided. If it does not fit the available outlet, a<br />
correct outlet should be installed by a qualified electrician. Repairs to the<br />
cord set or plug MUST be made by a qualified electrician.<br />
Extension Cords<br />
Using extension cords is not recommended. The use of extension cords will<br />
cause voltage to drop resulting in power loss to the motor and overheating.<br />
Instead of using an extension cord, increase the working reach of the air hose<br />
by attaching another length of hose to its end. Attach additional lengths of<br />
hose as needed.<br />
If an extension cord must be used, be sure it is:<br />
• a 3-wire extension cord that has a 3-blade grounding plug, and a 3-slot<br />
receptacle that will accept the plug on the product<br />
• in good condition<br />
• no longer than 50 feet<br />
• 14 gauge (AWG) or larger. (Wire size increases as gauge number<br />
decreases. 12 AWG, 10 AWG, and 8 AWG may also be used. DO NOT<br />
USE 16 OR 18 AWG.)<br />
A08200<br />
10- ENG
Voltage and Circuit Protection<br />
Refer to the Parts Manual for the voltage and minimum branch circuit<br />
requirements.<br />
Certain air compressors can be operated on a 15 amp circuit if the following<br />
conditions are met.<br />
1. Voltage supply through branch circuit is 15 amps.<br />
2. Circuit is not used to supply any other electrical needs (lights, appliances,<br />
etc.).<br />
3. Extension cords comply with specifications.<br />
4. Circuit is equipped with a 15 amp circuit breaker or 15 amp time delay<br />
fuse. NOTE: If compressor is connected to a circuit protected by fuses,<br />
use only time delay fuses marked "D" for Canada and "T" for US.<br />
If any of the above conditions cannot be met, or if operation of the compressor<br />
repeatedly causes interruption of the power, it may be necessary to operate it<br />
from a 20 amp circuit. It is not necessary to change the cord set.<br />
11- ENG A08200
OPERATION<br />
Know Your <strong>Air</strong> <strong>Compressor</strong><br />
READ THIS OWNER’S MANUAL AND SAFETY RULES BEFORE OPERATING<br />
YOUR UNIT. Compare the illustrations with your unit to familiarize yourself with<br />
the location of various controls and adjustments. Save this manual for future<br />
reference.<br />
Description of Operation<br />
Become familiar with these controls before operating the unit.<br />
On/Auto/Off Switch: Turn this switch "ON/AUTO" to provide automatic power<br />
to the pressure switch and "OFF" to<br />
remove power at the end of each use.<br />
Pressure Switch: The pressure switch<br />
automatically starts the motor when the<br />
air tank pressure drops below the factory<br />
set "cut-in" pressure. It stops the motor<br />
when the air tank pressure reaches the<br />
factory set "cut-out" pressure.<br />
Safety Valve: If the pressure switch<br />
does not shut off the air compressor at<br />
its "cut-out" pressure setting, the safety<br />
valve will protect against high pressure by<br />
"popping out" at its factory set pressure<br />
(slightly higher than the pressure switch<br />
"cut-out" setting).<br />
On/Auto/Off<br />
Switch<br />
Safety<br />
Valve<br />
Outlet<br />
Pressure Gauge<br />
Outlet Pressure Gauge: The outlet pressure gauge indicates the air pressure<br />
available at the outlet side of the regulator. This pressure is controlled by the<br />
regulator and is always less than or equal to the tank pressure.<br />
Tank Pressure Gauge: The tank pressure gauge indicates the reserve air<br />
pressure in the tank.<br />
Regulator: Controls the air pressure shown on the outlet pressure gauge. Pull<br />
the knob out and turn clockwise to increase pressure and counterclockwise to<br />
decrease pressure. When the desired pressure is reached push knob in to lock<br />
in place.<br />
Drain Valve: The drain valve is located at the base of the air tank and is used<br />
to drain condensation at the end of each use.<br />
Cooling System (not shown): This compressor contains an<br />
advanced design cooling system. At the heart of this cooling<br />
system is an engineered fan. It is perfectly normal for this fan<br />
to blow air through the vent holes in large amounts. You know<br />
that the cooling system is working when air is being expelled.<br />
Regulator<br />
Pressure<br />
Switch<br />
Tank<br />
Pressure Gauge<br />
Drain<br />
Valve<br />
<strong>Air</strong> <strong>Compressor</strong> Pump (not shown): Compresses air into the air tank.<br />
Working air is not available until the compressor has raised the air tank<br />
pressure above that required at the air outlet.<br />
Check Valve: When the air compressor is operating, the<br />
check valve is "open", allowing compressed air to enter<br />
the air tank. When the air compressor reaches "cut-out"<br />
pressure, the check valve "closes", allowing air pressure<br />
to remain inside the air tank.<br />
Check Valve<br />
A08200<br />
12- ENG
How to Use Your Unit<br />
How to Stop:<br />
1. Set the On/Auto/Off lever to "OFF".<br />
Before Starting<br />
Break-in Procedure<br />
Serious damage (for units with a tank) may result if the<br />
following break-in instructions are not closely followed.<br />
This procedure is required before the air compressor is put into service and<br />
when the check valve or a complete compressor pump has been replaced.<br />
1. Make sure the On/Auto/Off lever is in the "OFF" position.<br />
2. Plug the power cord into the correct branch circuit receptacle. (Refer to<br />
Voltage and Circuit Protection paragraph in the Installation section of this<br />
manual.)<br />
3. Open the drain valve fully (counterclockwise) to permit air to escape and<br />
prevent air pressure build up in the air tank during the break-in period.<br />
4. Move the On/Auto/Off lever to "ON/AUTO" position. The compressor will<br />
start.<br />
5. Run the compressor for 15 minutes. Make sure the drain valve is open and<br />
there is minimal air pressure build-up in tank.<br />
6. After 15 minutes, close the drain valve (clockwise). The air receiver will fill<br />
to "cut-out" pressure and the motor will stop.<br />
The compressor is now ready for use.<br />
Before Each Start-Up:<br />
1. Place On/Auto/Off lever to "OFF".<br />
2. Pull regulator knob out, turn counterclockwise until it stops. Push knob in<br />
to lock in place.<br />
3. Attach hose and accessories. NOTE: The hose or accessory will require a<br />
quick connect plug if the air outlet is equipped with a quick connect<br />
socket.<br />
Too much air pressure causes a hazardous risk<br />
of bursting. Check the manufacturer’s maximum<br />
pressure rating for air tools and accessories. The regulator outlet<br />
pressure must never exceed the maximum pressure rating.<br />
13- ENG A08200
How to Start:<br />
1. Turn the On/Auto/Off lever to "ON/AUTO" and allow tank pressure to build.<br />
Motor will stop when tank pressure reaches "cut-out" pressure.<br />
2. Pull the regulator knob out and turn clockwise to increase pressure.<br />
When the desired pressure is reached push knob in to lock in place. The<br />
compressor is ready for use.<br />
NOTE: Always operate the air compressor in well-ventilated areas free of<br />
gasoline or other combustible vapors. If the compressor is being used to<br />
operate a sprayer DO NOT place near the spray area.<br />
Customer Responsibilities<br />
Check Safety Valve<br />
Drain Tank<br />
MAINTENANCE<br />
Before each use<br />
●<br />
Daily or after<br />
each use<br />
To Check Safety Valve<br />
If the safety valve does not work properly, overpressurization<br />
may occur, causing air tank<br />
rupture or an explosion. Before starting compressor, pull the ring<br />
on the safety valve to make sure that the safety valve operates<br />
freely. If the valve is stuck or does not operate smoothly, it must<br />
be replaced with the same type of valve.<br />
To Drain Tank<br />
1. Set the On/Auto/Off lever to "OFF".<br />
2. Pull the regulator knob out and turn clockwise to set the outlet pressure to<br />
zero.<br />
3. Remove the air tool or accessory.<br />
4. Pull ring on safety valve allowing air to bleed from the tank until tank<br />
pressure is approximately 20 psi. Release safety valve ring.<br />
5. Drain water from air tank by opening drain valve (counter-clockwise) on<br />
bottom of tank.<br />
Water will condense in the air tank. If not drained,<br />
water will corrode and weaken the air tank<br />
causing a risk of air tank rupture.<br />
6. After the water has been drained, close the drain valve (clockwise). The air<br />
compressor can now be stored.<br />
NOTE: If drain valve is plugged, release all air pressure. The valve can then be<br />
removed, cleaned, then reinstalled.<br />
●<br />
A08200<br />
14- ENG
SERVICE AND ADJUSTMENTS<br />
Unit cycles automatically when power is on. When doing<br />
Maintenance, you may be exposed to voltage sources,<br />
compressed air or moving parts. Personal injuries can occur. Before<br />
performing any Maintenance or repair, unplug the compressor and bleed<br />
off all air pressure.<br />
ALL MAINTENANCE AND REPAIR OPERATIONS NOT LISTED MUST BE<br />
PERFORMED BY TRAINED SERVICE TECHNICIAN.<br />
Before servicing:<br />
• Unplug or disconnect electrica supply to the air compressor.<br />
• Bleed tank of pressure.<br />
• Allow the air compressor to coo.<br />
To Replace or Clean Check Valve<br />
1. Release all air pressure from air tank. See "To Drain Tank" in the<br />
Maintenance section.<br />
2. Unplug outfit.<br />
3. Loosen the nut on the outlet tube<br />
and move the outlet tube to the<br />
side.<br />
4. Unscrew the check valve (turn<br />
counterclockwise) using a socket<br />
wrench.<br />
5. Make sure the valve disc moves<br />
freely inside the check valve and<br />
the spring holds the disc in the<br />
upper, closed position. The check<br />
valve may be cleaned with a<br />
solvent, such as paint and<br />
varnish remover.<br />
6. Apply sealant to the check valve<br />
threads. Reinstall the check valve<br />
(turn clockwise).<br />
7. Replace the outlet tube and tighten<br />
the nut.<br />
Outlet Tube<br />
In open<br />
position<br />
nothing is<br />
visible.<br />
8. Perform the Break-in Procedure.<br />
See "Break-in Procedure" in the Operation section.<br />
Screwdriver<br />
In closed position<br />
disc is visible.<br />
Nut<br />
Check<br />
Valve<br />
15- ENG A08200
To Replace Regulator<br />
1. Release all air pressure from air tank. See "To Drain Tank" in the<br />
Maintenance section.<br />
2. Unplug outfit.<br />
3. Using an adjustable wrench remove the gauges and hose from the<br />
regulator.<br />
4. Remove the regulator.<br />
5. Apply pipe sealant tape to the nipple on the standpipe.<br />
6. Assemble the regulator and orient as shown.<br />
NOTE: Arrow indicates flow of air. Make sure it is pointing<br />
in the direction of air flow.<br />
7. Reapply pipe sealant to gauges and hose.<br />
8. Reassemble gauges and hose. Orient gauges to read<br />
correctly. Tighten hose with wrench.<br />
Regulator<br />
Arrow<br />
Before you store the air compressor, make sure you do the following:<br />
1. Review the "Maintenance" section on the preceding pages and perform<br />
scheduled maintenance as necessary.<br />
2. Set the On/Auto/Off lever to "OFF".<br />
3. Turn the regulator counterclockwise and set the outlet pressure to zero.<br />
4. Remove the air tool or accessory.<br />
5. Pull ring on safety valve allowing air to bleed from the tank until tank<br />
pressure is approximately 20 psi. Release safety valve ring.<br />
6. Drain water from air tank by opening drain valve on bottom of tank.<br />
tank rupture.<br />
STORAGE<br />
Water will condense in the air tank. If not drained, water<br />
will corrode and weaken the air tank causing a risk of air<br />
7. After the water has been drained, close the drain or drain valve.<br />
NOTE: If drain valve is plugged, release all air pressure. The valve can then be<br />
removed, cleaned, then reinstalled.<br />
8. Protect the electrical cord and air hose from damage (such as being<br />
stepped on or run over). Wind them loosely around the compressor<br />
handle (If so equipped).<br />
9. Store the air compressor in a clean and dry location.<br />
A08200<br />
16- ENG
Performing repairs may expose voltage sources, moving<br />
parts or compressed air sources, moving parts or<br />
compressed air sources. Personal injury may occur. Prior to attempting<br />
any repairs, unplug the air compressor and bleed off all air tank air<br />
pressure.<br />
PROBLEM CAUSE CORRECTION<br />
Excessive tank<br />
pressure - safety<br />
valve pops off.<br />
TROUBLESHOOTING<br />
Pressure switch does<br />
not shut off motor when<br />
compressor reaches "cutout"<br />
pressure.<br />
Move On/Auto/Off lever<br />
to the "OFF" position, if<br />
the outfit does not shut off<br />
contact a Trained Service<br />
Technician.<br />
<strong>Air</strong> leaks at<br />
fittings.<br />
<strong>Air</strong> leaks at<br />
pressure switch<br />
release valve<br />
(if equipped).<br />
<strong>Air</strong> leaks in air<br />
tank or at air<br />
tank welds.<br />
<strong>Air</strong> leaks<br />
between head<br />
and valve plate.<br />
<strong>Air</strong> leak from<br />
safety valve.<br />
Pressure switch "cut-out"<br />
too high.<br />
Tube fittings are not tight<br />
enough.<br />
Defective pressure switch<br />
release valve.<br />
Defective air tank.<br />
Leaking seal.<br />
Possible defect in safety<br />
valve.<br />
Contact a Trained Service<br />
Technician.<br />
Tighten fittings where air<br />
can be heard escaping.<br />
Check fittings with soapy<br />
water solution. Do Not<br />
Overtighten.<br />
Contact a Trained Service<br />
Technician.<br />
<strong>Air</strong> tank must be replaced.<br />
Do not repair the leak.<br />
Do not<br />
drill into,<br />
weld or otherwise modify<br />
air tank or it will weaken.<br />
The tank can rupture or<br />
explode.<br />
Contact a Trained Service<br />
Technician.<br />
Operate safety valve manually<br />
by pulling on ring. If valve still<br />
leaks, it should be replaced.<br />
Knocking Noise.<br />
Possible defect in safety<br />
valve.<br />
Operate safety valve manually<br />
by pulling on ring. If valve still<br />
leaks, it should be replaced.<br />
17- ENG A08200
PROBLEM CAUSE CORRECTION<br />
Pressure reading<br />
on the regulated<br />
pressure gauge<br />
drops when an<br />
accessory is<br />
used.<br />
It is normal for "some"<br />
pressure drop to occur.<br />
If there is an excessive<br />
amount of pressure drop<br />
when the accessory is used,<br />
adjust the regulator following<br />
the instructions in the<br />
"Description of Operation"<br />
paragraph in the "Operation"<br />
Section.<br />
NOTE: Adjust the regulated<br />
pressure under flow<br />
conditions (while accessory is<br />
being used).<br />
<strong>Compressor</strong> is<br />
not supplying<br />
enough air<br />
to operate<br />
accessories.<br />
Prolonged excessive use of<br />
air.<br />
<strong>Compressor</strong> is not large<br />
enough for air requirement.<br />
Hole in hose.<br />
Check valve restricted.<br />
<strong>Air</strong> leaks.<br />
Decrease amount of air<br />
usage.<br />
Check the accessory<br />
air requirement. If it is<br />
higher than the SCFM or<br />
pressure supplied by your<br />
air compressor, you need a<br />
larger compressor.<br />
Check and replace if<br />
required.<br />
Remove and clean, or<br />
replace.<br />
Tighten fittings.<br />
Regulator knob<br />
has continuous<br />
air leak.<br />
Damaged regulator.<br />
Replace.<br />
Regulator will<br />
not shut off air<br />
outlet.<br />
Damaged regulator.<br />
Replace.<br />
A08200<br />
18- ENG
PROBLEM CAUSE CORRECTION<br />
Motor will not<br />
run.<br />
Fuse blown, circuit breaker<br />
tripped.<br />
Check fuse box for blown<br />
fuse and replace as<br />
necessary. Reset circuit<br />
breaker. Do not use a fuse<br />
or circuit breaker with higher<br />
rating than that specified for<br />
your particular branch circuit.<br />
Check for proper fuse. You<br />
should use a time delay fuse.<br />
Check for low voltage<br />
problem.<br />
Check the extension cord.<br />
Disconnect the other<br />
electrical appliances from<br />
circuit or operate the<br />
compressor on its own<br />
branch circuit.<br />
Extension cord is wrong<br />
length or gauge.<br />
Loose electrical<br />
connections.<br />
Faulty motor.<br />
Check the extension cord.<br />
Check wiring connection<br />
inside terminal box.<br />
Have checked by a Trained<br />
Service Technician.<br />
19- ENG A08200
LIMITED WARRANTY<br />
DELTA MACHINERY warrants to the original purchaser that all products covered under this warranty are free<br />
from defects in material and workmanship. Products covered under this warranty include air compressors, air<br />
tools, service parts, pressure washers, and generators, which have the following warranty periods:<br />
3 YEARS - Limited warranty on 2-stage oil-free air compressor pumps that operate at 1725 RPM.<br />
2 YEARS - Limited warranty on oil-lubricated air compressor pumps.<br />
1 YEAR - Limited warranty on all other air compressor components.<br />
2 YEARS - Limited warranty on electric generator alternators.<br />
1 YEAR - Limited warranty on other generator components.<br />
2 YEARS - Limited warranty on pneumatic air tools as described in Delta general catalog.<br />
1 YEAR - Limited warranty on pressure washers used in consumer applications (i.e. personal residential<br />
household usage only).<br />
90 DAY - Pressure washers used for commercial applications (income producing) and service parts.<br />
1 YEAR - Limited warranty on all accessories.<br />
Delta will repair or replace, at Delta's option, products or components which have failed within the warranty<br />
period. Service will be scheduled according to the normal work flow and business hours at the service<br />
center location, and the availability of replacement parts. All decisions of Delta Corporation with regard to<br />
this limited warranty shall be final.<br />
This warranty gives you specific legal rights, and you may also have other rights which vary from state to<br />
state.<br />
RESPONSIBILITY OF ORIGINAL PURCHASER (initial User):<br />
• To process a warranty claim on this product, DO NOT return it to the retailer. The product must be<br />
evaluated by an Delta Authorized Warranty Service Center. For the location of the nearest Authorized<br />
Warranty Service Center call 1-866-422-4286, 24 hours a day, 7 days a week.<br />
• Retain original cash register sales receipt as proof of purchase for warranty work.<br />
• Use reasonable care in the operation and maintenance of the product as described in the Owners<br />
Manual(s).<br />
• Deliver or ship the product to the nearest Authorized Warranty Service Center. Freight costs, if any, must<br />
be paid by the purchaser.<br />
• <strong>Air</strong> compressors with 60 and 80 gallon tanks will be inspected at the site of installation. Contact<br />
the nearest Authorized Warranty Service Center that provides on-site service calls, for service call<br />
arrangements.<br />
• If the purchaser does not receive satisfactory results from the Authorized Warranty Service Center, the<br />
purchaser should contact .<br />
THIS WARRANTY DOES NOT COVER:<br />
• Merchandise sold as reconditioned, used as rental equipment, and floor or display models.<br />
• Merchandise that has become damaged or inoperative because of ordinary wear, misuse*, cold, heat,<br />
rain, excessive humidity, freeze damage, use of improper chemicals, negligence, accident, failure to<br />
operate the product in accordance with the instructions provided in the Owners Manual(s) supplied with<br />
the product, improper maintenance, the use of accessories or attachments not recommended by , or<br />
unauthorized repair or alterations.<br />
* An air compressor that pumps air more than 50% during a one hour period is considered misuse<br />
because the air compressor is undersized for the required air demand.<br />
• Repair and transportation costs of merchandise determined not to be defective.<br />
• Costs associated with assembly, required oil, adjustments or other installation and start-up costs.<br />
• Expendable parts or accessories supplied with the product which are expected to become inoperative or<br />
unuseable after a reasonable period of use, including but not limited to sanding disks or pads, saw and<br />
shear blades, grinding stones, springs, chisels, nozzles, o-rings, air jets, washers and similar accessories.<br />
• Merchandise sold by which has been manufactured by and identified as the product of another company,<br />
such as gasoline engines. The product manufacturer's warranty, if any, will apply.<br />
• ANY INCIDENTAL, INDIRECT OR CONSEQUENTIAL LOSS, DAMAGE, OR EXPENSE THAT MAY<br />
RESULT FROM ANY DEFECT, FAILURE OR MALFUNCTION OF THE PRODUCT IS NOT COVERED<br />
BY THIS WARRANTY. Some states do not allow the exclusion or limitation of incidental or consequential<br />
damages, so the above limitation or exclusion may not apply to you.<br />
• IMPLIED WARRANTIES, INCLUDING THOSE OF MERCHANTABILITY OR FITNESS FOR A<br />
PARTICULAR PURPOSE, ARE LIMITED TO ONE YEAR FROM THE DATE OF ORIGINAL PURCHASE.<br />
Some states do not allow limitations on how long an implied warranty lasts, so the above limitations may<br />
not apply to you.<br />
Jackson, TN USA<br />
1-866-422-4286<br />
A08200<br />
20- ENG


