

1 Million Spotlight
1 Million Spotlight
1 Million Spotlight

You also want an ePaper? Increase the reach of your titles
YUMPU automatically turns print PDFs into web optimized ePapers that Google loves.
VEC117BD_Manual_122905 2/20/06 3:31 PM Page 8<br />
VEC117BD<br />
TWO YEAR LIMITED WARRANTY PROGRAM<br />
This limited warranty program is the only one that applies to this product, and it sets forth all the<br />
responsibilities of Vector Manufacturing, regarding this product. There is no other warranty, other than<br />
those described herein. Any implied warranty of merchantability or fitness for a particular purpose on<br />
this product is limited in duration to the duration of this warranty.<br />
This Vector Manufacturing product is warranted, to the original purchaser only, to be free of defects in<br />
materials and workmanship for two years from the date of purchase without additional charge. The<br />
warranty does not extend to subsequent purchasers or users. Manufacturer will not be responsible for<br />
any amount of damage in excess of the retail purchase price of the product under any circumstances.<br />
Incidental and consequential damages are specifically excluded from coverage under this warranty.<br />
This product is not intended for commercial use. This warranty does not apply to damage to units from<br />
misuse or incorrect installation/connection. Misuse includes wiring or connecting to improper polarity<br />
power sources.<br />
RETURN/REPAIR POLICY: Defective products may be returned to manufacturer. Any defective product<br />
that is returned to manufacturer within 30 days of the date of purchase will be replaced free of charge.<br />
If such a product is returned more than 30 days but less than two years from the purchase date,<br />
manufacturer will repair the unit or, at its option, replace it, free of charge.<br />
If the unit is repaired, new or reconditioned replacement parts may be used, at manufacturer’s option.<br />
A unit may be replaced with a new or reconditioned unit of the same or comparable design. The<br />
repaired or replaced unit will then be warranted under the terms of the remainder of the warranty<br />
period. The customer is responsible for the shipping charges on all returned items. During the warranty<br />
period, manufacturer will be responsible for the return shipping charges to the customer in the United<br />
States.<br />
LIMITATIONS: This warranty does not cover accessories, such as charging adapters, bulbs, fuses and<br />
batteries, damage or defects resulting from normal wear and tear (including chips, scratches, abrasions,<br />
discoloration or fading due to usage or exposure to sunlight), accidents, damage during shipping to our<br />
service facility, alterations, unauthorized use or repair, neglect, misuse, abuse, failure to follow<br />
instructions for care and maintenance, fire, flood and Acts of God.<br />
If your problem is not covered by this warranty, call our Technical Support Department toll free at (800)<br />
618-5178 for general repair information and charges if applicable. You may also contact us through<br />
our website at www.vectormfg.com.<br />
STATE LAW RIGHTS: This warranty gives you specific legal rights. Some states do not allow limitations<br />
on how long an implied warranty lasts or the exclusion or limitation of incidental or consequential<br />
damages, so the exclusions or limitations stated herein may not apply. This warranty gives the purchaser<br />
specific legal rights; other rights, which vary from state to state, may apply.<br />
TO REQUEST WARRANTY SERVICE FOR THIS PRODUCT: Contact Technical Support by telephone, fax<br />
or mail (see below). We suggest that you keep the original packaging in case you need to ship the unit.<br />
When returning a product, include your name, address, phone number, dated sales receipt (or copy)<br />
and a description of the reason for return and product serial number. After repairing or replacing the<br />
unit, we will make every effort to return it to you within four weeks.<br />
WARRANTY ACTIVATION: Please complete Warranty Activation Card and mail to Vector<br />
Manufacturing. Enter “VEC117BD” as Model and “VectorLite ® Power Series 1 <strong>Million</strong> <strong>Spotlight</strong>” as<br />
Product Type. All Vector products must be registered within 30 days of purchase to activate this warranty.<br />
Mail the completed registration form, along with a copy of the original sales receipt, to:<br />
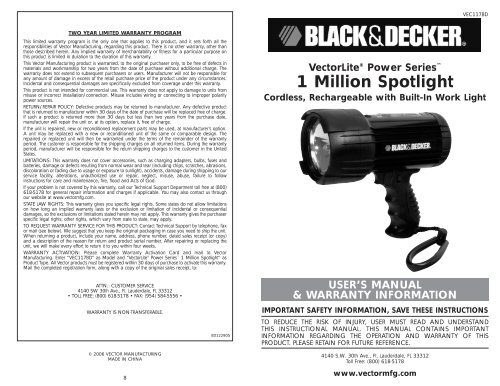
VectorLite ® Power Series <br />
1 <strong>Million</strong> <strong>Spotlight</strong><br />
Cordless, Rechargeable with Built-In Work Light<br />
ATTN.: CUSTOMER SERVICE<br />
4140 SW 30th Ave., Ft. Lauderdale, FL 33312<br />
• TOLL FREE: (800) 618-5178 • FAX: (954) 584-5556 •<br />
WARRANTY IS NON-TRANSFERABLE.<br />
© 2006 VECTOR MANUFACTURING<br />
MADE IN CHINA<br />
8<br />
BD122905<br />
USER’S MANUAL<br />
& WARRANTY INFORMATION<br />
IMPORTANT SAFETY INFORMATION, SAVE THESE INSTRUCTIONS<br />
TO REDUCE THE RISK OF INJURY, USER MUST READ AND UNDERSTAND<br />
THIS INSTRUCTIONAL MANUAL. THIS MANUAL CONTAINS IMPORTANT<br />
INFORMATION REGARDING THE OPERATION AND WARRANTY OF THIS<br />
PRODUCT. PLEASE RETAIN FOR FUTURE REFERENCE.<br />
4140 S.W. 30th Ave., Ft. Lauderdale, FL 33312<br />
Toll Free: (800) 618-5178<br />
www.vectormfg.com
VEC117BD_Manual_122905 2/20/06 3:31 PM Page ii<br />
IMPORTANT SAFETY INSTRUCTIONS<br />
GENERAL WARNINGS<br />
TO REDUCE THE RISK OF FIRE, ELECTRIC SHOCK OR INJURY TO PERSONS:<br />
1. Turn the <strong>Spotlight</strong> OFF, disconnect all charging adapters and allow the unit to cool<br />
before replacing the lamb bulb.<br />
2. THIS LAMP GETS HOT QUICKLY. Only contact switch when turning ON. Do not touch<br />
the lens, quard or enclosure when the unit is ON.<br />
3. Never place the <strong>Spotlight</strong> face-down on any surface when lit and keep the<br />
<strong>Spotlight</strong> away from materials that may burn.<br />
4. Never look directly into the light or shine the light into another person’s eyes.<br />
5. Keep protective guard in place when operating this <strong>Spotlight</strong>.<br />
6. DO NOT operate or attempt to charge this <strong>Spotlight</strong> with a missing or damaged<br />
safety guard (bezel) or lens.<br />
7. Use only a 6 volt H3 55 watt replacement bulb. See the “Parts Replacement”<br />
section on page 4.<br />
8. Do not immerse this spotlight in water. This unit is NOT WATERPROOF — it is water<br />
resistant. Use in a dry location only.<br />
9. Do not substitute power cords or charging adapters. Only charge with supplied<br />
AC and DC Charging Adapters. Consult the manufacturer for replacement.<br />
10. Keep sharp objects away from lens — it is glass and can break.<br />
11. Do not drop or throw <strong>Spotlight</strong>. It contains glass and a sealed lead acid battery.<br />
12. Do not crush, cut, pull or expose Charging Adapter cords to extreme heat.<br />
13. Position Charging Adapter cords so that they do not become entangled or become<br />
a safety hazard. Keep Charging Adapter cords away from sharp edges.<br />
14. Do not operate while recharging.<br />
15. Keep children away from spotlight. This is not a toy!<br />
BATTERY WARNINGS<br />
• Contains non-spillable sealed lead acid battery. Must be recycled or disposed of<br />
properly. See the “Battery Disposal” section on page 5.<br />
• DO NOT dispose of batteries in fire, as this may result in an explosion.<br />
• DO NOT open battery or short circuit, as this may cause the battery to leak or get<br />
hot causing personal injury. Any disposal questions call toll-free (877) 288-7722.<br />
CAUTIONS<br />
• When changing the bulb, use a soft cloth and do not touch the bulb at any time. Oil from skin may<br />
damage the bulb.<br />
• Use only with AC or DC Charging Adapters that are provided with this unit. Contact manufacturer for<br />
replacement.<br />
• Except for the halogen bulb, this unit contains no user-replaceable parts. Attempts to service this unit<br />
other than bulb replacement will void any warranty.<br />
• Plug the Charging Adapter into the <strong>Spotlight</strong> first, then plug into the charging source.<br />
• DO NOT OVERCHARGE:<br />
– First time charge (AC): 15 hours<br />
– AC recharge: 12-15 hours<br />
– DC recharge: 3-4 hours<br />
Please read this User’s Manual completely before use.<br />
SAVE THESE INSTRUCTIONS
VEC117BD_Manual_122905 2/20/06 3:31 PM Page iv<br />
TABLE OF CONTENTS<br />
Introduction . . . . . . . . . . . . . . . . . . . . . . . . . . . . . . . . . . . . . . . . . . . . . . . . . . . 1<br />
Features . . . . . . . . . . . . . . . . . . . . . . . . . . . . . . . . . . . . . . . . . . . . . . . . . . . . . 1<br />
Controls and Functions . . . . . . . . . . . . . . . . . . . . . . . . . . . . . . . . . . . . . . . . . 2<br />
Operating Instructions . . . . . . . . . . . . . . . . . . . . . . . . . . . . . . . . . . . . . . . . . . . 2<br />
<strong>Spotlight</strong> Operation . . . . . . . . . . . . . . . . . . . . . . . . . . . . . . . . . . . . . . . . . . . 2<br />
Work Light Operation . . . . . . . . . . . . . . . . . . . . . . . . . . . . . . . . . . . . . . . . . . 3<br />
Recharging the <strong>Spotlight</strong> . . . . . . . . . . . . . . . . . . . . . . . . . . . . . . . . . . . . . . . . . . 3<br />
Charging from a 120 Volt AC Source . . . . . . . . . . . . . . . . . . . . . . . . . . . . . . 3<br />
Charging from a 12 Volt DC Source . . . . . . . . . . . . . . . . . . . . . . . . . . . . . . . . 3<br />
Periodic Maintenance . . . . . . . . . . . . . . . . . . . . . . . . . . . . . . . . . . . . . . . . . . . 4<br />
Parts Replacement . . . . . . . . . . . . . . . . . . . . . . . . . . . . . . . . . . . . . . . . . . . . . 4<br />
<strong>Spotlight</strong> Bulb Replacement . . . . . . . . . . . . . . . . . . . . . . . . . . . . . . . . . . . . . 4<br />
Battery Replacement/Disposal . . . . . . . . . . . . . . . . . . . . . . . . . . . . . . . . . . . 5<br />
DC Plug Fuse Replacement . . . . . . . . . . . . . . . . . . . . . . . . . . . . . . . . . . . . . 6<br />
Troubleshooting . . . . . . . . . . . . . . . . . . . . . . . . . . . . . . . . . . . . . . . . . . . . . . . . 6<br />
Operating Issues . . . . . . . . . . . . . . . . . . . . . . . . . . . . . . . . . . . . . . . . . . . . . 6<br />
Specifications . . . . . . . . . . . . . . . . . . . . . . . . . . . . . . . . . . . . . . . . . . . . . . . . . . 6<br />
INTRODUCTION<br />
Thank you for purchasing the Black & Decker ® VectorLite ® Power Series <br />
<strong>Spotlight</strong> with Built-In Work Light. Please read this manual carefully before use<br />
to ensure optimum performance and to avoid damage to the unit.<br />
FEATURES<br />
• Powerful, focused, replaceable quartz halogen bulb in <strong>Spotlight</strong><br />
• Work Light (with separate ON/OFF Pushbutton) provides up to 7 hours of<br />
continuous operation<br />
• 3-position Trigger Switch offers brightness control to conserve power<br />
and extend runtimes<br />
• Trigger Switch Lock maintains the Trigger Switch in the OFF position or<br />
ON position (allowing <strong>Spotlight</strong> operation without continually depressing the<br />
Trigger Switch)<br />
• Rubber safety guard (bezel) around lens protects <strong>Spotlight</strong><br />
• Comfortable Pistol Grip Handle<br />
• Convenient Carry Lanyard<br />
• Battery Status LED Indicators display battery charge level while charging or<br />
whenever the Work Light is turned ON<br />
• UL listed 120 Volt AC Charging Adapter<br />
• Fused 12 Volt DC Charging Adapter<br />
• Rechargeable, sealed lead-acid battery (non-spillable)<br />
Note: This unit is shipped in a partially charged state. Charge unit BEFORE first<br />
use using the AC Charging Adapter for 15 hours or until the green Battery<br />
Charge Level Indicator LED lights. Charge after each use until green LED lights<br />
(see “Recharging the <strong>Spotlight</strong>,” page 3).<br />
1
VEC117BD_Manual_122905 2/20/06 3:31 PM Page 2<br />
Controls and Functions<br />
Work Light Operation<br />
RUBBER SAFETY<br />
GUARD (BEZEL)<br />
WORK LIGHT<br />
PUSHBUTTON<br />
WORK LIGHT<br />
RECHARGE<br />
PORT<br />
ON/OFF operation of the Work Light is controlled by the Work Light Pushbutton. This<br />
long-lasting light can continuously operate up to seven hours on a full battery charge.<br />
This pushbutton also enables the Battery Status Display, a series of three LEDs. The red<br />
LED indicates a discharged battery, the green LED indicates a fully charged battery<br />
and the amber LED indicates a partially discharged battery.<br />
.<br />
RECHARGING THE SPOTLIGHT<br />
QUARTZ HALOGEN<br />
BULB<br />
TRIGGER SWITCH<br />
LOCK<br />
120 VOLT AC<br />
ADAPTER<br />
TRIGGER<br />
SWITCH<br />
PISTOL GRIP HANDLE<br />
CARRY<br />
LANYARD<br />
12 VOLT DC<br />
ADAPTER<br />
RECHARGE PORT<br />
OPERATING INSTRUCTIONS<br />
<strong>Spotlight</strong> Operation<br />
The <strong>Spotlight</strong> has a digital electronic dimmer control with three levels of brightness.<br />
Depressing the Trigger Switch advances the brightness of the <strong>Spotlight</strong> from Dim to<br />
Bright to Brightest.<br />
Depress the Trigger Switch once to turn the <strong>Spotlight</strong> ON in the Dim setting. Depress<br />
the Trigger Switch at one-second intervals to allow the internal circuits to set to the<br />
next level.<br />
Note: Lower brightness operation extends <strong>Spotlight</strong> runtime.<br />
The <strong>Spotlight</strong> may be locked in the ON position to provide continuous light at any<br />
level without continuously depressing the Trigger Switch. Simply select the brightness<br />
setting, then slide the Trigger Switch Lock to the LOCKED position. To turn the <strong>Spotlight</strong><br />
OFF, slide the Trigger Switch Lock to the UNLOCKED position.<br />
The <strong>Spotlight</strong>'s circuitry will automatically dim the light when the battery’s power is<br />
reducing. This preserves the runtime of the <strong>Spotlight</strong>. The circuit also prevents deep<br />
discharge of the battery even if the <strong>Spotlight</strong> shuts down from battery discharge.<br />
Recharge as soon as possible, as allowing a discharged battery to remain so will<br />
reduce the battery life.<br />
To lock the trigger into the ON position pull the Trigger Switch and move the Trigger<br />
Switch Lock down. This will lock the trigger into the ON position. To shut it off, simply<br />
move the Trigger Switch lock up to the OFF position.<br />
Charging From a 120 Volt AC Source<br />
• Make sure the <strong>Spotlight</strong> is OFF and the Trigger Switch is in the OFF position (not<br />
depressed).<br />
• Connect the 120 Volt AC Adapter’s barrel tip to the Recharge Port on the bottom<br />
of the unit behind the handle.<br />
• Connect the plug end into a standard North American 120 volt AC outlet. When<br />
a proper connection has been made, the Battery Charge Level Indicator LEDs will<br />
light to indicate the unit is charging.<br />
• Charge for 12-15 hours or until the green Battery Charge Level Indicator LED lights.<br />
Charging From a 12 Volt DC Source<br />
Make sure the DC source (jump-starter, battery pack, vehicle accessory outlet, etc.) is<br />
12 volt DC and is able to supply at least one-half amp at 12 volt DC for 10 hours.<br />
This means a battery pack should be charged with at least 5 amp hours capacity.<br />
• Make sure the <strong>Spotlight</strong> is OFF and the Trigger Switch is in the OFF position (not<br />
depressed).<br />
• Plug the 12 Volt DC Recharge/Power Adapter’s barrel tip into the Recharge Port on<br />
the bottom of the unit behind the handle.<br />
• Insert the fused 12 volt DC plug end into the accessory outlet of your vehicle or<br />
other 12 volt DC power source. When a proper connection has been made, the<br />
Battery Charge Level Indicator LEDs will light to indicate the unit is charging.<br />
• Charge for approximately 3-4 hours, or until the green Battery Charge Level<br />
Indicator LED lights.<br />
Note: Some vehicles require that the ignition be switched to the accessory position in<br />
order to power the accessory outlet.<br />
Do not charge for more than 4 hours using this method.<br />
2<br />
3
VEC117BD_Manual_122905 2/20/06 3:31 PM Page 4<br />
PERIODIC MAINTENANCE<br />
All batteries lose charge with time, especially when they are warm. Recharging using<br />
the 120 volt AC method is recommended every two months, when not in frequent use.<br />
If the unit gets dirty, gently clean the outer surfaces of the spotlight unit with a soft cloth<br />
moistened with a mild solution of water and detergent. NEVER submerge this unit in<br />
liquids of any kind.<br />
Periodically inspect the condition of the recharge adapters, connectors and wires.<br />
Replace any components that may have become worn or broken.<br />
PARTS REPLACEMENT<br />
One part is user replaceable. The quartz halogen bulb is proprietary and is<br />
available through Vector; however a substitute 6 volt H3 55 watt bulb may be used<br />
when replacing this bulb. These can be purchased from popular automotive parts<br />
suppliers nationwide. For replacement parts and any additional information you<br />
may need, contact Technical Support at (800) 618-5178.<br />
<strong>Spotlight</strong> Bulb Replacement<br />
To replace the H3 type 6 volt bulb you will need a small Phillips screwdriver and a<br />
replacement bulb (Vector Part VEC193). Bulb life may be shortened by installing a<br />
bulb with dirt or fingerprints on it. The bulb can be wiped clean with a cloth<br />
moistened with alcohol. During bulb installation, avoid touching the glass part of<br />
the bulb.<br />
LENS<br />
QUARTZ HALOGEN BULB<br />
RUBBER GUARD COVER<br />
RETAINING RING<br />
4<br />
RUBBER “O” RING<br />
REFLECTOR<br />
1. Disconnect the unit from any charging adapters.<br />
2. Push the rubber bezel forward toward the front of the spotlight to reveal two small<br />
Phillips screws in the retaining ring.<br />
3. Using the screwdriver, remove (counterclockwise) the two screws. Set them aside.<br />
4. Lift off the retaining ring, glass lens and rubber “O” ring and set them aside.<br />
5. Carefully remove the reflector and bulb assembly.<br />
6. Disconnect the bulb wire from the red power wire.<br />
7. Unsnap the hairpin retaining wires from the reflector’s flange.<br />
8. Using the screwdriver, loosen the retaining screw to remove the bulb from the<br />
reflector (no need to completely remove this screw).<br />
9. Lift out the bulb and detach wire.<br />
10. Insert the replacement bulb into the reflector’s flange.<br />
11. Put back and secure the hairpin retaining wires.<br />
12. Connect the bulb power wire to the red power wire.<br />
13. Tighten the retaining screw on the flange.<br />
14. Place the reflector in position in the body of the spotlight.<br />
15. Replace the rubber “O” ring in the groove around the perimeter of the reflector.<br />
16. Replace glass and retaining ring so the screw holes are aligned.<br />
17. Secure retaining ring with two screws.<br />
18. Replace the rubber bezel.<br />
19. Depress the Trigger Switch to ensure proper operation of spotlight.<br />
CAUTION<br />
To reduce the risk of electric shock replace bulb with a 55 watt 6 volt<br />
H3 bulb only.<br />
Battery Replacement/Disposal<br />
Battery Replacement<br />
Battery should last the service life of the unit and is not userreplaceable.<br />
Contact Technical Support at (800) 618-5178 for<br />
any information you may need.<br />
Safe Battery Disposal<br />
Contains a maintenance-free, sealed, non-spillable, lead-acid<br />
battery, which must be disposed of properly. Recycling is required<br />
— contact your local authority for information. Failure to comply<br />
with local, state and federal regulations can result in fines or<br />
imprisonment. For more information on recycling this battery,<br />
call toll-free (877) 288-7722.<br />
WARNINGS<br />
Do not dispose of the battery in fire, as this may result in an explosion.<br />
Before disposing of the battery, protect exposed terminals with<br />
heavy-duty electrical tape to prevent shorting (shorting can result in<br />
injury or fire).<br />
Do not expose battery to fire or intense heat, as it may explode.<br />
5<br />
Closed<br />
Open
VEC117BD_Manual_122905 2/20/06 3:31 PM Page 6<br />
DC Plug Fuse Replacement<br />
The fuse in the DC plug protects the charging circuit of the DC recharge adapter. If<br />
the AC recharger operates but the DC charging adapter does not, then the fuse may<br />
be opened (blown).<br />
To replace the fuse:<br />
1. Unscrew the end cap of the DC plug (counterclockwise).<br />
2. Remove spring center contact and fuse.<br />
3. Check fuse with a continuity checker.<br />
4. If blown, locate replacement fuse with same type and rating.<br />
5. Replace the fuse, spring, contact and end cap.<br />
6. Screw end cap clockwise until it is finger tight – DO NOT OVER-TIGHTEN.<br />
7. Check for proper operation of DC charger adapter.<br />
TROUBLESHOOTING<br />
No red charge light<br />
If the red LED does not turn on when charging, do the following:<br />
A) Check for bad connection to the <strong>Spotlight</strong> Recharge Port<br />
B) Check for bad connection to the AC or DC adapter<br />
C) Confirm that the adapter is connected to a functioning 120 volt AC or 12 volt<br />
DC current<br />
Operating Issues<br />
1. When charging, spotlight will not operate. Be sure <strong>Spotlight</strong> Charge Port is<br />
disconnected before main beam usage.<br />
2. If Trigger can’t be fully depressed, check to see if Trigger Switch is locked. If it<br />
is, release the Trigger Lock.<br />
3. If unit does not operate, battery may be completely discharged. Charge unit<br />
using AC adapter following the directions in the manual.<br />
4. If you suspect a bulb is blown, check the bulb filament. If the filament is coiled<br />
and unbroken, the bulb is not blown. If the filament is broken, replace the bulb.<br />
SPECIFICATIONS<br />
<strong>Spotlight</strong> Bulb:<br />
Battery:<br />
AC Charger:<br />
DC Plug Fuse:<br />
6 volt, H3 series, 55 watt<br />
Maintenance-free, sealed lead-acid,<br />
6 volt, 3 amp/hour<br />
UL Listed Class 2, 12 volt DC (300 mA)<br />
0.5A/250 V<br />
6<br />
7


