Bag Boy Electric Cart Manual rev2 - Bag Boy Company
Bag Boy Electric Cart Manual rev2 - Bag Boy Company
Bag Boy Electric Cart Manual rev2 - Bag Boy Company

You also want an ePaper? Increase the reach of your titles
YUMPU automatically turns print PDFs into web optimized ePapers that Google loves.
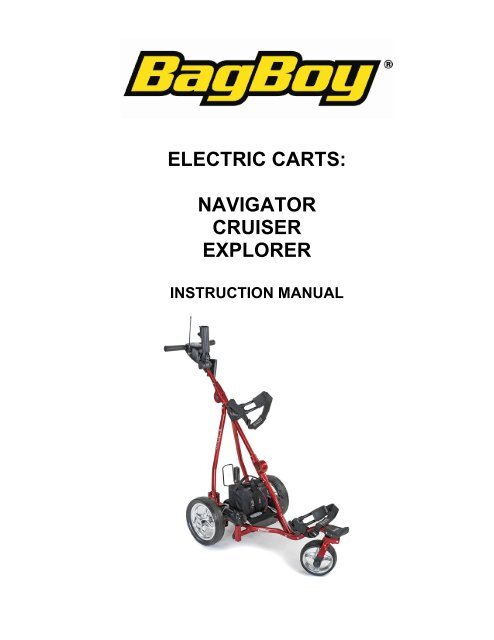
ELECTRIC CARTS:<br />
NAVIGATOR<br />
CRUISER<br />
EXPLORER<br />
INSTRUCTION MANUAL
INDEX<br />
1. Most Important Points to Read Prior to Using<br />
2. Charging and Care of the Battery<br />
3. Fitting the Battery<br />
4. Attaching/Removing Wheels<br />
5. Folding/Unfolding the <strong>Cart</strong><br />
6. Navigator – Programming for the Chosen Handle Height<br />
7. Cruiser – The Differential Gear System<br />
8. Explorer – Free Wheeling Gear System<br />
9. Fitting your Golf <strong>Bag</strong><br />
10. Positioning the Seat<br />
11. Assembling the Umbrella Holder<br />
12. Inserting the Antenna<br />
13. Sand/Seed Bottle<br />
14. Engaging the 4 th Wheel<br />
15. The Front Wheel and Suspension System<br />
16. Top Handle Control Box Features – Navigator<br />
17. Top Handle Control Box Features – Cruiser and Explorer<br />
18. Transmitter – Features<br />
19. The Navigation System – How it works<br />
20. <strong>Cart</strong> Tracking<br />
21. Maintaining your <strong>Cart</strong><br />
22. Product Warranty<br />
23. Repair Work during Warranty Period<br />
24. Warranty Exclusions<br />
25. Electronics Warranty<br />
26. Wheel Warranty<br />
27. Battery Warranty<br />
28. Charger Warranty<br />
29. Fair Wear and Tear<br />
30. Useful Operating Hints for the Navigator<br />
31. Understanding your <strong>Cart</strong> and Suggestions for Dealing with unusual Situations – Navigator<br />
32. Frequently Asked Questions<br />
2
Congratulations on the purchase of your <strong>Bag</strong> <strong>Boy</strong> motorized cart. <strong>Bag</strong> <strong>Boy</strong> is the world leader in<br />
motorized golf cart technology and we welcome you as one of our customers. To ensure you<br />
enjoy trouble free operation throughout the life of the cart, it is important that you adhere to the<br />
instructions for use and care, particularly the battery and the charger.<br />
If you have any additional questions or concerns in the use or performance of this product, please<br />
feel free to contact <strong>Bag</strong> <strong>Boy</strong> Customer Service at the following numbers:<br />
800-955-2269 Customer Service Center VA (Primary Contact)<br />
888-391-0200 <strong>Electric</strong> <strong>Cart</strong> Service Center CA (Charge repair service)<br />
1. Most Important points to read prior to using<br />
a. Complete the owner’s registration form on the last page and return to <strong>Bag</strong> <strong>Boy</strong>.<br />
b. Charge the battery (see page 3)<br />
c. Assemble the cart placing the rear wheels on their correct side (see page 6)<br />
d. Program the cart to match your needs (see page 8)<br />
Important<br />
The battery must be charged for 12 hours prior to its first use.<br />
Failure to charge the battery for its initial charging period will result in permanent battery<br />
damage and void the battery warranty.<br />
2. Charging and care of the battery<br />
a. Prior to the first and after every use, charge the Battery. The battery and charger<br />
come with an easy connection system. Red to Red and Black to Black.<br />
b. Your battery is designed for 18 holes only. If you play more than 18 holes before<br />
recharging, the battery’s life could be compromised.<br />
c. Please note: Your new <strong>Bag</strong> <strong>Boy</strong> <strong>Electric</strong> <strong>Cart</strong> has a 40-amp fuse connected to the<br />
battery lead. The battery lead is used to connect to the electric cart’s control box and<br />
the battery charger.<br />
The 40-amp fuse helps protect the cart’s three control boards against a power<br />
surge.<br />
An extra fuse is supplied with your cart.<br />
Below is a photo of the fused battery lead and the extra 40-amp fuse.<br />
In the event your electric cart should stop responding, it may be due to a blown<br />
fuse. Please check and replace if necessary.<br />
3
d. Always recharge the battery as soon as possible after use, no matter how short the<br />
period of use.<br />
e. In between use, always leave the charger connected to the battery.<br />
f. If you are not playing golf for 3 months, you may disconnect the battery once it is<br />
charged. The battery will need recharging at least every 3 months and must be<br />
recharged prior to use. The battery should be stored in a dry and dark environment.<br />
Additionally, the battery will not fully charge when stored and charged in an<br />
environment below 50 degrees F. To maximize the battery potential, make sure you<br />
store and charge the battery in an insulated climate controlled room.<br />
g. The battery is a sealed battery. If you are intending to take your cart and battery on air<br />
travel, we advise that you make contact with your airline prior to travel.<br />
4
3. Fitting the battery<br />
Once charged, the battery can be fitted to the cart. The battery comes with a battery cover, carry<br />
handle and battery leads.<br />
a. Place your battery in the tray with the leads facing the front of the cart.<br />
b. The battery tray has a battery securing strap.<br />
c. The securing strap is to be used at all times as it protects your battery against damage<br />
from falling out.<br />
d. The battery lead can now be connected to the battery tray. Connect red to red and<br />
black to black.<br />
Navigator Only: A five point battery level indicator is located on the front of the battery tray.<br />
Push the red button and the level indicator will highlight the capacity of the battery. Five is the<br />
maximum and one is the minimum. Please note this indicator is only an indication of battery<br />
capacity. It is however wise to check the battery's capacity before playing golf. If only one or two<br />
lights are displayed, there is not enough battery energy to complete a round of golf.<br />
Fail Safe Connection:<br />
Your cart has been equipped with fail safe battery connection. Your cart will only start once you<br />
increase the speed control.<br />
5
4. Attaching / Removing Wheels<br />
If your cart comes with the wheels off, they should be placed in position prior to unfolding. You<br />
will need to put the wheels on the correct sides. The wheels are marked ‘L’ and ‘R’ on the inside<br />
of the hub. The left and right of the cart is determined by looking from the rear of the cart. You<br />
will need to align the four slots on the inside of the wheel with the same four on the drive dog on<br />
the axle. To engage the rear wheel, depress the quick release catch until the wheel is in place.<br />
Align the four slots on the wheel with those on the drive dog teeth<br />
Depress the quick release catch, while putting wheel in position on the axle<br />
Navigator and Cruiser Only: Your <strong>Bag</strong> <strong>Boy</strong> electric cart uses a gear system, whereby the<br />
two rear drive wheels do not free wheel. The motor needs to be running for the cart to move.<br />
Drive will only occur when the speed control is turned on.<br />
If for some reason your cart stops operating during your golf round, your cart can free wheel.<br />
Simply depress the quick release tag and at the same time move the wheel outwards about 1 inch<br />
from its current position. Release the tag and allow the wheel to click into its outer position. By<br />
doing this, you have disconnected the wheels from the drive and they can rotate freely.<br />
6
5. Folding/unfolding your cart<br />
Practice unfolding and folding the cart using the steps below. This means when you go to play<br />
golf you will be somewhat familiar with this task.<br />
1. Press the button on the lower folding mechanism and fold the lower handle<br />
2. Press the button on the upper folding mechanism and fold the upper handle<br />
3. Collapse the handle until both folding mechanisms lock into place<br />
4. Bend your knees and lift the cart using the front lifting handle and center handle piece<br />
Step 1 Step 2<br />
Step 4 Step 3<br />
The following order of steps is suggested when folding your cart down:<br />
a. Seat off first<br />
b. Golf bag off second<br />
c. Battery off and directly into the car. This will save double handling<br />
d. Sand/Seed Bottle and holder off<br />
e. Disengage 4 th wheel (Optional on the Explorer)<br />
f. Remove antenna<br />
g. Fold down cart and place into the car<br />
7
6. Programming your Navigator for the chosen handle height.<br />
For the electronic compass to work at its optimum, the compass must be calibrated to understand<br />
the handle height.<br />
The following steps outline how to do this.<br />
Step 1<br />
Place your cart on relatively flat ground with no steel around you for 20 meters or 65 feet. An<br />
area of approximately two square meters or 6 square feet needs to be clear of all obstacles to<br />
allow the cart to rotate freely. At this point it is preferable not to have your golf bag on your cart,<br />
but it is not imperative.<br />
Step 2<br />
On the top handle control box there is a button labelled ON/OFF – If your cart is on turn it off.<br />
Step 3<br />
Choose the handle height that is most comfortable for you to use from the available three<br />
positions.<br />
Step 4<br />
On the same top handle control box there is a “PROG” button. Press and hold until the red light<br />
flashes. This will take approximately five seconds.<br />
Step 5<br />
On the transmitter Press the “NAV ON” button – the cart will now rotate on its axis in a counterclockwise<br />
direction for approximately 40 seconds. Once complete the compass is calibrated only<br />
at the handle height you selected.<br />
Step 6<br />
Your Navigator is now ready for use. Simply turn your cart on by pressing the ON/OFF button on<br />
the top handle.<br />
Important Notes about programming for the chosen handle height:<br />
1. If you choose to change the handle height at any time you will need to re program<br />
your cart to reflect the new handle height.<br />
2. In some situations the lowest handle height may not produce the best result. In this case<br />
another handle height should be chosen.<br />
7. CRUISER MODEL – The Differential Gear System<br />
The Cruiser uses a differential gear system, whereby the rear drive wheels do not free wheel.<br />
The motor needs to be running for the cart to move. Drive will only occur when the speed control<br />
is turned on.<br />
If for some reason your cart stops operating, your cart can free wheel. Simply depress the quick<br />
release tag and at the same time move the wheel outwards about 1 inch from its current position.<br />
Release the tag and allow the wheel to click into its outer position. By doing this, you have<br />
disconnected the wheels from the drive and they can rotate freely.<br />
8
8. EXPLORER MODEL – Free Wheeling Gear System<br />
The Explorer uses a free wheeling gear system. This means that drive will only occur when the<br />
speed control is turned on. Also as a free wheeling cart, it is important that when the cart is<br />
stopped, the cart is positioned so that it cannot roll forward. The Explorer will not easily roll<br />
backwards.<br />
9. Fitting your Golf <strong>Bag</strong><br />
a. Separate the velcro straps located on the top and bottom bag supports<br />
b. Expand the straps enough to fit around the golf bag<br />
c. Place your golf bag on the cart<br />
d. Bring both straps together by overlapping the velcro<br />
e. Pull the straps tight<br />
9
10. Positioning the Seat<br />
Place the seat stems into their position in the seat brackets on the right hand side of the cart.<br />
MOST IMPORTANT: DEPRESS THE SEAT WITH YOUR HAND BEFORE SITTING. DO NOT<br />
USE THE SEAT ON UNEVEN SURFACES.<br />
Please note <strong>Bag</strong> <strong>Boy</strong> does not warrant any support brackets that are damaged or bent.<br />
11. Assembling the Umbrella Holder<br />
Your cart comes with an umbrella holder. The umbrella holder needs to be secured into position.<br />
Simply follow the pictures above. When not in use the umbrella holder can be turned to its side.<br />
If you take your cart home in your car, you may need to do that prior to folding the cart down.<br />
Your umbrella holder can be adjusted both front and back and side to side.<br />
The umbrella is secured inside the umbrella holder by tightening the plastic bolt located near the<br />
top of the holder.<br />
DO NOT LEAVE YOUR UMBRELLA UP IN THE UMBRELLA HOLDER IN WINDY<br />
CONDITIONS.<br />
If the wind catches the umbrella, it could cause your cart to tip over and cause damage, which will<br />
not be covered by warranty.<br />
10
12. Inserting the Antenna – Navigator<br />
Before each use, insert the antenna into the receptacle, which is located on the handlebar control<br />
box.<br />
You may wish to store the antenna in your seat when not in use.<br />
13. Sand/Seed Bottle Holder<br />
Place the sand/seed bottle and holder into position at the rear of the cart.<br />
14. Engaging the 4 th Wheel (Navigator & Cruiser Only)<br />
Important: To avoid damage to your cart always engage the 4 th wheel prior to playing golf,<br />
regardless of the terrain you are playing on.<br />
To engage the 4 th wheel, pull on the spring loaded locking pin, begin to slide the 4 th wheel back<br />
release the locking pin and continue sliding the 4 th wheel back until the locking pin locates itself<br />
into position.<br />
11
15. The Front Wheel and Suspension System:<br />
Your cart has a unique front wheel system. The front wheel can swivel 360 degrees. The main<br />
advantage of this is that your cart is highly maneuverable. You only need to turn the cart handle<br />
and your cart will turn. The suspension helps reduce the amount of shock the cart will take when<br />
going over hills, bumps, ruts, etc.<br />
For Cruiser and Explorer:<br />
If you decide to lock the front wheel, ensure the front wheel is behind the cart and protected by<br />
the bumper and carrying handle is at the front of your cart. In a locked situation your cart will go<br />
straight and will not wander as it can if left to motor by itself with the front wheel in an unlocked<br />
position.<br />
To lock or unlock:<br />
1. Press down the latch to unlock. Release to lock the front wheel.<br />
2. When unlocked the front wheel can rotate 360 degrees.<br />
3. When locked the front wheel sits in a recessed position.<br />
12
16. Top Handle Control Box Features – Navigator<br />
a. On/Off – Press the on/off button to turn the cart on and off<br />
b. Forward Arrow – Press to accelerate the cart. The longer you depress the<br />
button, the faster the cart travels<br />
c. Down Arrow – This enables you to decrease the speed and also to operate<br />
the Navigator in reverse. To reverse your Navigator, the cart must first be stopped.<br />
d. The cart will move in the backward direction only while you keep the down arrow<br />
depressed. If you take your finger off the down arrow, the cart will stop (safety<br />
feature).<br />
e. <strong>Cart</strong> Mode – When the cart is on, the green light means Navigation is on. The red<br />
light means Navigation is off.<br />
f. Battery Status – Battery Light (located on top handle control box) - when the battery<br />
is charged the light is green. If the battery status becomes red, you will only have a<br />
few holes to go and it will stop.<br />
g. Programming - If you need to change the operation of the cart using programming<br />
features, the light will change to indicate that programming is happening.<br />
Please note: When you touch any of the buttons on the top handle control box, the cart senses<br />
that you want to take personal control over it and will turn the Navigation system off.<br />
13
17. Top Handle Control Box Features – Cruiser and Explorer<br />
When you connect your battery to your cart, lights will come on. These lights are designed to stay<br />
on while connected to the battery.<br />
a. Start/Stop light. When the cart is stopped the light will be red. When the cart is moving<br />
forward the light will be green.<br />
b. Battery Status. When the battery is charged the light is green. If the battery status<br />
becomes red, you will only have a few holes to go and it will stop.<br />
c. ECDF light (Electronic Controlled Distance Function). The light is a solid red. When the<br />
ECDF is activated the light will flash.<br />
[For Cruiser Only]<br />
Your Cruiser and Explorer carts have been equipped with fail safe battery connection. If your<br />
control knob has been accidentally turned on prior to the battery being connected it will not take<br />
off. The speed control knob needs to be in its off position prior to you wanting the cart to motor<br />
forward.<br />
For all models the off position is achieved by turning the control knob fully in a counter-clockwise<br />
direction. You will hear a click as it turns fully off.<br />
By rotating the speed switch slowly forward, the cart will move forward. Rotate clockwise until the<br />
desired speed is obtained.<br />
To turn the cart off, either the start/stop button can be used or the rotating switch can be turned<br />
counter-clockwise until the cart stops [you will hear the switch click off]<br />
Battery indication<br />
Green – charged<br />
Red – requires charging<br />
TOP CONTROL BOX FOR THE EXPLORER<br />
14<br />
Start / Stop Button
Cruiser Only<br />
Reverse on/off<br />
Battery indication<br />
Green – charged<br />
Red – requires charging<br />
TOP CONTROL BOX FOR THE CRUISER<br />
ECDF – Electronic Controlled Distance Function<br />
ECDF allows you to send your cart three preset distances. They are 10, 20 and 30 yards.<br />
How to Operate the ECDF:<br />
1. Aim your cart in the direction of where you would like to send it<br />
2. Determine the distance you would like to send it. Choose 10, 20 or 30 yard. If you are<br />
unsure, choose the least distance.<br />
3. Press the distance button: 10, 20 or 30.<br />
4. Turn the cart speed on to the relevant speed and the let the cart move forward. The cart<br />
will stop once the selected distance has been reached.<br />
5. You can select a distance at any time while the cart is both stopped and moving.<br />
6. You can cancel the distance control function at any time by turning the cart off.<br />
Please Note: Before you operate the ECDF function ensure the rear 4 th wheel is in position.<br />
The Cruiser comes with three LCD lights. While the battery is connected each of the three lights<br />
will be displayed. These lights take minimal energy to remain lit.<br />
Electronic Cruise Control on the Cruiser<br />
The electronic cruise control is permanently on and provides automatic braking down hills and<br />
gives you total control over your cart without having to hold on.<br />
15<br />
Distance<br />
Off – No Light<br />
On – Flashing Green<br />
Start / Stop Button<br />
Green-Start / Red-Stop
18. Transmitter Features - Navigator<br />
a. Forward Arrow - Press to accelerate the cart. The longer you depress the<br />
button, the faster the cart travels. Please note: If you wish to regain the speed you<br />
were travelling at prior to the last stop, simply press the forward button twice in<br />
succession. The cart will accelerate to the last speed setting. This feature works only<br />
when you press the stop button to stop the cart rather than pressing the down arrow.<br />
b. Down Arrow - Decreases the speed and provides for reverse. If you are<br />
moving forward, the down arrow can be used to decrease speed, the longer the<br />
pressure, the slower the speed until it stops.<br />
To operate the Reverse mode you must stop the cart first. Press the down arrow and<br />
the cart will reverse. To increase the speed in reverse, depress the down arrow until<br />
the desired speed is obtained. To stop the cart while in reverse, and using the<br />
transmitter, press the Stop button.<br />
c. Left and Right Arrows -<br />
Press the appropriate turn command and<br />
keep pressed until the degree of turn achieved. Momentary pressure will make a small<br />
adjustment to the direction, while prolonged will increase the amount of turn.<br />
d. Soft Braking - the Navigator is equipped with electronic soft braking. This means<br />
when you apply a left or right turn for less than a second, braking will be soft. This is<br />
most useful when you are using your cart to make small or part turns. If you press<br />
either turn button for more than one second, your cart will sense you are wanting a<br />
strong turn. At this point full braking is applied.<br />
e. Indicator Light - [in top right corner of transmitter] each time you press a command<br />
using the remote, the light in the top right corner of the transmitter will display a green<br />
light or red light. The green light indicates the Navigation system is on and the red<br />
light indicates the Navigation system is off.<br />
16
f. Transmitter range and Heart Beat: The range of the Navigator is up to 220 yards.<br />
Your Navigator also has a heart beat between the transmitter and receiver. This<br />
means that they stay on contact with each other at all times. If for some reason the<br />
cart was to go out of range of the transmitter your Navigator will stop automatically.<br />
19. The Navigation System – Navigator - How it works:<br />
a. Navigation on [Nav On] - by pressing Nav on, the Navigation system is turned on.<br />
The indicator light on the top right hand side of the remote will illuminate green each<br />
time you use a command while Navigation is on.<br />
The Navigation system when turned on will ensure the cart will maintain its direction<br />
regardless of the terrain. The cart will automatically brake or accelerate either wheel<br />
to maintain its direction.<br />
Useful hint: On a steep incline, the gradient may force the cart off line. You do not<br />
need to adjust the cart. The cart will work its way back on course. In addition, if the<br />
cart hits a tuft of grass or other object, the cart will momentarily be forced off course.<br />
Do not be concerned. The cart knows where to go and will get back on track quickly.<br />
b. Navigation off [Nav off] - by pressing Nav off, the Navigation system is turned off.<br />
The indicator light on the top right hand side of the remote will illuminate red each time<br />
you use a command while Navigation is off.<br />
Important: When you use the controls on the cart’s handlebar, the Navigation system<br />
turns off automatically. This will enable you to maneuver the cart. The mode light on<br />
the handlebar will turn red when Navigation turns off.<br />
When you change from using the handlebar controls back to the remote, the cart<br />
remembers if the remote was in the mode of “Navigation On” or “Navigation Off”. If<br />
the last command on the remote was with Navigation on, the first command using the<br />
remote will also be Navigation on. If that is not what you want, simply press “Nav off“<br />
and the Navigation system will turn off.<br />
When your cart is turned on, the remote control can be used in the same way as the<br />
controls on the handlebar.<br />
17
21. Maintaining Your <strong>Bag</strong> <strong>Boy</strong> <strong>Electric</strong> <strong>Cart</strong>:<br />
a. <strong>Cart</strong>.<br />
To give you years of good operation, your cart requires some care and attention. Your<br />
cart has a number of nuts and bolts. Each month they should be checked and tightened<br />
when necessary. Do not over tighten, but tighten just enough in order that everything is<br />
firm. To keep your cart clean, use warm water with a mild detergent. Do not hose down<br />
your cart under any circumstance, as your cart has electronic components.<br />
b. Wheels.<br />
The rear wheel axles need to be lubricated. Use Petroleum Jelly or light grease. Use a<br />
very small amount as the grease can attract sand. If you do play in very sandy conditions<br />
you should clean your axle and regrease often.<br />
Remove the rear wheels by depressing the spring clip and at the same time pull off the<br />
wheel. You will need to align the wheel’s four-sided slot to its equivalent on the cart to<br />
ensure the wheels are properly engaged. Ensure that the wheels are put on the correct<br />
side ‘L’ and ‘R’.<br />
c. Battery.<br />
Your battery will charge best standing up in a warm and air flowing location. In winter, it is<br />
best charged off any concrete floor. Your battery charger is best laying flat. Be very<br />
careful not to drop your battery. The battery casing is easily cracked and the battery’s<br />
subsequent life will be severely compromised.<br />
22. Product Warranty:<br />
New Product Warranty<br />
The Warranty applies to the <strong>Cart</strong>. It is provided to the original and subsequent<br />
owners using the cart within the country of purchase during the Warranty Period.<br />
Warranty Period<br />
The coverage commences from the date of purchase from the retailer (or in the case<br />
of a demo cart the date when the cart was sold to the retailer). The coverage<br />
expires at the end of the 24 month Warranty Period from the date of purchase on<br />
the golf cart (comprising frame, motor and gearbox), and a 12 month Warranty<br />
Period from the date of purchase on the electronics, wheels, battery and battery<br />
charger.<br />
23. Repair work during warranty period<br />
Warranty work undertaken (including parts and labor) will be carried out at no cost to<br />
the cart owner. However, this work should not be confused with servicing for which<br />
a charge is payable. The owner is responsible for getting the cart to a repair center.<br />
18
24. Warranty Exclusions<br />
a. Damage<br />
Your Warranty does not extend to the following damage:<br />
o Damage caused by an accident, misuse, neglect, fire, theft or moving<br />
objects striking the cart<br />
o Damage caused by chemicals or sealants<br />
o Damage caused by flood, hail, salt, etc<br />
o Damage caused to batteries by over discharging or sulphation due to<br />
leaving in a discharged state for prolonged periods.<br />
o Damage caused by overheating due to inadequate ventilation during<br />
charging<br />
o Indirect, incidental or consequential damages<br />
o Bent seat support bracket on cart frame<br />
b. Misuse<br />
This Warranty does not cover damage caused by:<br />
o Misuse or abuse of the cart<br />
o Operation of the cart after the defect is known<br />
o Failure to carry out proper maintenance services (refer to owner’s<br />
manual)<br />
o Fitting of parts or accessories not recommended by <strong>Bag</strong> <strong>Boy</strong><br />
o Any work carried out on the cart by anyone except an Authorized <strong>Bag</strong><br />
<strong>Boy</strong> Retailer or Authorized Service Center<br />
c. Transport<br />
<strong>Bag</strong> <strong>Boy</strong> accepts responsibility for any cart only after arrival at its premises.<br />
25. Electronics Warranty<br />
The electronics are warranted for 12 months from the date of purchase.<br />
26. Wheels Warranty<br />
Wheels are warranted for 12 months from the date of purchase.<br />
27. Battery Warranty<br />
Batteries are warranted for 12 months from the date of purchase. If the battery fails during<br />
the warranty period and is replaced, the warranty is from the date of purchase of the first<br />
battery and continues for a total of 12 months.<br />
28. Charger Warranty<br />
The charger is warranted for 12 months from the date of purchase.<br />
29. Normal Wear and Tear<br />
Items such as the variable speed controller and wheels which are subject to wear and tear<br />
will only be covered for normal wear and tear.<br />
19
30. Useful Hints in Operating the Navigator<br />
a. Your Navigator has sophisticated electronics onboard. Avoid sending your Navigator<br />
through puddles of water. Your electronics are designed to handle all types of bad<br />
weather, but not to be immersed in water.<br />
b. Use handlebar controls in parking lots. The Navigation system can be upset around<br />
steel products.<br />
c. Use handlebar control in confined spaces. To maintain maximum control in confined<br />
spaces such as pathways it is recommended that the remote is not used.<br />
d. Your Navigator has a range of up to 220 yards. Golf etiquette is essential at all times.<br />
Do not operate your Navigator in the vicinity of people playing their shots.<br />
e. Trust your Navigator – When operating in “Nav on” mode, you do not need to<br />
constantly adjust the Navigator’s direction. If the Navigator is diverted from its course<br />
by uneven surfaces or steep inclines, the Navigator will quickly correct its position to<br />
regain its former course.<br />
31. Understanding your <strong>Cart</strong> and Suggestions for Dealing with Unusual Situations<br />
The Navigator is the product of many years of research and development and the result of many<br />
years of evolution on the golf course.<br />
We have listed some unusual cart behaviors and given suggestions to check and correct.<br />
Situation 1: The Navigator cart stops responding to its remote control.<br />
What to do: This list is not a stepped list.<br />
If the transmitter battery has not been replaced for a long time, then this could be the<br />
cause of the transmitter not working. Also, check the battery terminals inside the remote<br />
control to ensure they are clean and provide good tension against the battery when the<br />
battery is re-installed.<br />
Replace the battery. The battery should be replaced every six months or less if used<br />
often.<br />
Ensure you are using YOUR remote control, not one from another Navigator<br />
Check that the LED on the top right of the remote changes color when you press “Nav<br />
Off” [red] and “Nav On” [green]. If there is no color or the color does not change,<br />
remove and reinstall the battery.<br />
When Replacing or reinstalling the transmitter battery ensure the battery is installed the<br />
correct way: positive to positive and negative to negative. Check the remote’s operation<br />
again.<br />
Check that the cart’s wheels are properly engaged with the drive dogs on the axles. If<br />
the rear wheels are not properly engaged, the Navigator will not move.<br />
Check that the cart has not been accidentally turned OFF by the “ON/OFF” button<br />
20
Check that the main battery is properly connected. At this point, disconnect the battery<br />
lead from the battery tray and then reconnect.<br />
Check to see that the battery indicator light on the Top Box is green and that you have<br />
more than one light on the battery level indicator on the battery tray.<br />
Ask yourself, was the main battery charged after its last use?<br />
Check to see if the Navigator responds normally to the operation of the Top Box<br />
buttons. If not, disconnect the cart battery and check both battery connector parts for<br />
dirt or damaged contacts. If OK, re-connect the battery and check the cart’s operation<br />
again.<br />
If the remote still does not operate, contact your <strong>Bag</strong> <strong>Boy</strong> customer service center.<br />
Situation 2: The cart remote range is not up to expectation or has reduced over time.<br />
.<br />
Check that the antenna is fitted on the cart’s top box. Your cart will work better with an<br />
antenna.<br />
Check that the antenna connection is firm. If not firm, re-tension the antenna plug.<br />
Check the remote’s battery. It could be near flat and require replacement. If you have not<br />
replaced for some time it should be replaced. Every six months it should be replaced. If<br />
you play a lot of golf, it may need replacing more often.<br />
Most Important:<br />
The Navigator’s remote uses radio frequency (RF) transmissions to control the cart. On some<br />
occasions, it is possible to experience RF propagation problems, which can temporarily reduce<br />
the control range. In addition, the cart can be ‘deafened’ by some close-by RF interference.<br />
Situation 3: My Navigator does not always keep on the “straight and narrow”.<br />
The Navigator uses highly sophisticated and patented electronic compassing to steer the cart<br />
when in ‘Nav On’ mode. The compass system is tilt compensated to enable true steering over a<br />
wide range of grades, which you could expect to encounter on the average golf course.<br />
In reality, there are some circumstances or locations where the electronic compass may not<br />
accurately steer the Navigator. These conditions are described below:<br />
Your Navigator comes with a multi positioned handle. The handle may be in a position<br />
other than the position in which the compass was calibrated. If this is the case, the<br />
compass must be re-calibrated with the handle set at the desired height.<br />
Please refer to the cart setup procedures within the manual. Once this procedure is<br />
completed, your cart’s compass will be calibrated for the new handle position only. The<br />
procedure will need to be repeated if you change the handle height when you have the<br />
cart in the “Nav On” mode.<br />
When the Navigator is travelling across the side of a grade, it will tend to keep the nose of<br />
the cart pointed in the correct direction but will slip or crab sideways down the grade. The<br />
magnitude of the sideslip is variable but is mainly dependent on the gradient and the cart’s<br />
speed. The Navigator will perform best across a gradient when its speed is less than full<br />
throttle. This will enable the Navigator to increase speed and brake to better stay on<br />
course.<br />
21
When the Navigator is used in or approaches areas with a significant amount of steel or<br />
other made of iron material the Navigator’s performance is compromised. Areas such as<br />
parking lots, near steel sheds, steel bridges and fences or large underground steel pipes<br />
cause distortions in the local earth’s magnetic field. Such distortions affect the control of<br />
the Navigator.<br />
Therefore, the “Nav Off” mode should be used when in or near each of the areas referred<br />
to above. When the Navigator has passed theses affected areas normal navigation can<br />
be resumed.<br />
The cart’s steering can also be affected by the proximity of large steel headed clubs /<br />
drivers for the same reason as the point above. If you use such clubs, their location within<br />
your bag is important. The compass sensors are located inside the cart’s top box towards<br />
the front face. Always place steel headed drivers and putters as far as possible away from<br />
the top handle control box. In addition, it is advisable to choose the middle handle<br />
position.<br />
Most important: You must reprogram your cart if you change the handle height.<br />
In addition, minimizing side to side movement of the heads of these clubs will help<br />
optimize the Navigator’s performance.<br />
The earth’s magnetic field is not of equal strength in all locations and its characteristics<br />
change between the equator and either of the poles. In some situations, when the<br />
Navigator is travelling predominately north or south and is travelling up or down a<br />
particular gradient, the compass may not detect enough field by which to steer.<br />
In such circumstances, the Navigator may wander off course. You will quickly learn if your<br />
favorite course has any of these rare ‘black holes’. If you do encounter one such location<br />
on your course, the best action is to operate in “Nav Off” mode until the area is cleared.<br />
MOST IMPORTANT: Do not have magnets or magnetized steel come near the cart top box. The<br />
Navigator is very sensitive and any magnetic force introduced to it will affect the Navigator’s<br />
performance in the “Nav On” position.<br />
32. Frequently Asked Questions and Answers:<br />
Question: Is it important to register my purchase for warranty purposes?<br />
Answer: You should register your purchase as soon as possible with <strong>Bag</strong> <strong>Boy</strong>. You can<br />
register on line or through the mail. The serial number for your cart is located<br />
underneath the top handle control box.<br />
Question: How often should my battery be charged?<br />
Answer: Your battery should be left on charge in between use. You should put your used<br />
battery back on charge as soon as possible. Leaving your battery in a discharged<br />
state will shorten its life.<br />
Question: Should I discharge my battery fully to get rid of memory?<br />
Answer: NO – Gel batteries do not have memory problems. Fully discharging the battery<br />
will damage it and the charger will not be able to recharge the battery.<br />
22
Question: Does my cart need regular maintenance?<br />
Answer: If you are using your buggy at least twice a week, it should be serviced at least on<br />
an annual basis. This is preventative maintenance and will require on average one<br />
hour chargeable labor.<br />
Question: What can I do to help maintain my cart?<br />
Answer: Keep it clean using warm water with a mild detergent. Do not use a hose under<br />
any circumstances. Your cart has many electronic components.<br />
Question: Do the rear wheels require greasing?<br />
Answer: The rear wheel axles on which the rear wheels go should be kept greased. Only<br />
use a minimal amount of grease as the grease will attract sand etc. Petroleum jelly<br />
or some other light grease can be used.<br />
Question: Where can I take my cart to be serviced?<br />
Answer: <strong>Bag</strong> <strong>Boy</strong> Service Center<br />
Kaddy Mart<br />
629 south cleveland street<br />
Oceanside, CA 92054<br />
Service Center Telephone: 888-391-0200<br />
<strong>Bag</strong> <strong>Boy</strong> Service Center: 800-955-2269<br />
Service Center Email: ron@mgikaddies.com<br />
Question: My Navigator cart does not track in a straight line<br />
Answer: a) Ensure that the cart is in the “Navigation On” mode. See “Using your Navigation<br />
System”<br />
b) See <strong>Cart</strong> Tracking Adjustment Procedure<br />
c) If problem persists please contact the service center.<br />
Question: My Navigator cart turns in circles.<br />
Answer: a) Ensure that each rear wheel is locked in position.<br />
b) If the wheels are locked in position then the drive pin on the drive dog may be<br />
broken.<br />
c) If problem persists please contact the service center.<br />
d) Check the status of your main battery. Your cart will go in circles when the<br />
battery is near flat.<br />
Question: My Navigator cart does not respond to my remote.<br />
Answer: a) The battery inside the remote most probably needs replacing.<br />
b) If the battery is okay and your cart works in the manual mode please contact the<br />
service centre.<br />
<strong>Bag</strong> <strong>Boy</strong> invests large amounts of capital into advancing the mechanical and electronic features of<br />
its range of carts. Should you have any feedback or suggestion, which would further enhance<br />
the performance of our carts, we would welcome your correspondence.<br />
If you have any concerns relating to the use of your Navigator do not hesitate to call us at<br />
1-800-955-2269. Thank you for your assistance and continued support.<br />
Most importantly could you please provide us with your email address for further technical<br />
updates to be sent to you. Please email <strong>Bag</strong> <strong>Boy</strong> at marketing@bagboyllc.com.<br />
23
Warranty Registration Form:<br />
As part of your warranty this form must be returned to <strong>Bag</strong> <strong>Boy</strong> at:<br />
8575 Magellan Parkway, Suite 1000 Richmond, VA 23227.<br />
Or<br />
You can register your cart purchase on line at www.bagboycompany.com<br />
Owners Name:<br />
Last name ………………………………………..First Name ……………………………<br />
Date of Birth ……………………….. Gender [m/f] …………….<br />
Owner’s Details:<br />
Number and Street……………………………………………………<br />
Town/City …………………………….……State …………………… Zipcode………………<br />
Contact Number [home]………………………….[mobile] ………………………..<br />
Email Address ………………………………………………..<br />
<strong>Cart</strong> Details:<br />
Model Purchased……………………………Serial Number………………………..<br />
Date of Purchase ……………………..<br />
Retailer Details:<br />
From whom did you purchase your <strong>Bag</strong> <strong>Boy</strong> cart? ………………………………<br />
Retailers address ……………………………………………………………….<br />
Golf Club Details:<br />
Do you belong to a golf club? [Y/N] …………<br />
Which Club? ………………………………………<br />
Name of golf Professional …………………………….<br />
How often do you play golf?..........................................................<br />
Are you the only person using your new <strong>Bag</strong> <strong>Boy</strong> Golf <strong>Cart</strong> [Y/N] ………..<br />
24