

Ford F-450 2011 - Quick Reference Guide Printing 2 (pdf)
Ford F-450 2011 - Quick Reference Guide Printing 2 (pdf)
Ford F-450 2011 - Quick Reference Guide Printing 2 (pdf)

Create successful ePaper yourself
Turn your PDF publications into a flip-book with our unique Google optimized e-Paper software.
This <strong>Quick</strong> <strong>Reference</strong> <strong>Guide</strong> is not intended to replace your vehicle Owner’s<br />
<strong>Guide</strong> which contains more detailed information concerning the features of<br />
your vehicle, as well as important safety warnings designed to help reduce<br />
the risk of injury to you and your occupants. Please read your entire<br />
Owner’s <strong>Guide</strong> carefully as you begin learning about your new vehicle and<br />
refer to the appropriate chapters when questions arise.<br />
All information contained in this <strong>Quick</strong> <strong>Reference</strong> <strong>Guide</strong> was accurate at<br />
the time of duplication. We reserve the right to change features, operation<br />
and/or functionality of any vehicle specification at any time. Your <strong>Ford</strong><br />
dealer is the best source for the most current information. For detailed<br />
operating and safety information, please consult your Owner’s <strong>Guide</strong>.<br />
<strong>Ford</strong> Motor Company Customer Relationship Center<br />
P.O. Box 6248 | Dearborn, MI 48121<br />
1-800-392-3673 (FORD)<br />
(TDD for the hearing impaired: 1-800-232-5952)<br />
www.fordowner.com<br />
www.ford.ca<br />
October 2010<br />
Second <strong>Printing</strong><br />
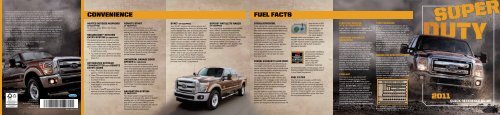
<strong>Quick</strong> <strong>Reference</strong> <strong>Guide</strong><br />
Super Duty<br />
Litho in U.S.A.<br />
BC3J 19G217 CA<br />
Convenience<br />
Heated outside mirrors<br />
(if equipped)<br />
To activate, press<br />
control panel.<br />
on the climate<br />
SecuriCode keyless<br />
entry system (if equipped)<br />
This system allows you to lock or unlock<br />
the doors without a key. Ensure that you<br />
have your 5-digit factory code, located on<br />
your owner’s wallet card in the glove box.<br />
• To unlock the driver’s door, enter your<br />
5-digit factory code.<br />
• To unlock all doors, enter your 5-digit<br />
factory code and, within five seconds,<br />
press 3-4.<br />
Integrated Keyhead<br />
Transmitter (IKT) remote<br />
entry icons<br />
• Press once to lock all doors. Press<br />
again to confirm all doors are closed.<br />
• Press once to unlock the driver’s<br />
door. Press again within three seconds<br />
to unlock all doors.<br />
• Press to activate the panic alarm.<br />
Press again or turn the ignition on<br />
to deactivate.<br />
• Car finder: Press twice within three<br />
seconds to locate your vehicle. The horn<br />
will chirp and the turn lamps will flash.<br />
Remote Start<br />
(if equipped)<br />
If your IKT has the 2x icon, you have<br />
remote start, which allows you to start the<br />
engine from outside the vehicle. To use,<br />
press on your IKT to lock all the doors.<br />
Press 2x twice. (If you have a diesel engine,<br />
there will be a few second delay before the<br />
engine starts.) When you are ready to leave,<br />
insert the key into the ignition and turn to<br />
the on position before driving. To turn the<br />
engine off after using remote start, press 2x<br />
once. Refer to the Locks and Security chapter<br />
in your Owner’s <strong>Guide</strong> for more information<br />
on the Remote Start feature.<br />
Universal garage door<br />
opener (if equipped)<br />
Your vehicle may be equipped with a<br />
universal transmitter located on the driver’s<br />
visor. This system has two primary features<br />
– a garage door opener and a platform<br />
for remote activation of devices in your<br />
home. This system’s garage door opener<br />
function replaces the common hand-held<br />
garage door opener with a three button<br />
transmitter. For more information, refer<br />
to the Driver Controls chapter of your<br />
Owner’s <strong>Guide</strong>.<br />
Navigation system<br />
(if equipped)<br />
Your touch screen navigation system<br />
allows you to record CDs, listen to SIRIUS ®<br />
satellite radio or HD Radio broadcasts,<br />
play DVDs and access SIRIUS ® Travel<br />
Link in addition to navigating the vehicle.<br />
For more information, refer to your<br />
Navigation System Supplement.<br />
SYNC® (if equipped)<br />
Your SYNC ® system has unique phone and<br />
media features which allow you to make and<br />
receive hands-free calls as well as play your<br />
media selections by artist, album, genre<br />
or similar music. You can receive Vehicle<br />
Health Reports and set up and use 911<br />
Assist which can call emergency services<br />
if you have an accident. SYNC ® also offers<br />
Traffic, Directions and Information which, if<br />
activated, can provide turn–by–turn directions,<br />
access to traffic reports, sports scores and<br />
business searches. To learn more about<br />
SYNC ® and to set up your profile which will<br />
allow you to use Vehicle Health Reports<br />
and the Traffic, Directions and Information<br />
feature, please visit www.SyncMyRide.com<br />
and see your SYNC ® Supplement.<br />
SIRIUS® satellite radio<br />
(if equipped)<br />
Your vehicle may be equipped with satellite<br />
radio. SIRIUS ® satellite radio broadcasts<br />
music, sports, news and entertainment<br />
programming. For more information and a<br />
complete list of SIRIUS ® satellite radio channels,<br />
visit www.sirius.com in the United States,<br />
www.sirius-canada.ca in Canada, or call<br />
SIRIUS ® at 1–888–539–7474. Satellite radio<br />
is only available with a valid SIRIUS ®<br />
radio subscription.<br />
Fuel facts<br />
Diesel/Biodiesel<br />
If your vehicle has a green colored fuel cap,<br />
you have a diesel vehicle which is compatible<br />
with diesel fuel and also biodiesel B20 or less.<br />
Biodiesel is a renewable fuel derived from<br />
vegetable oils and/or animal fats. Your<br />
diesel engine can operate on diesel fuels<br />
containing up to 20% biodiesel, or B20.<br />
(Use only biodiesel that meets ASTM<br />
D975 diesel or the ASTM D7467 B6-B20<br />
biodiesel industry specifications.)<br />
Ensure that you purchase biodiesel<br />
from a reputable source. Do not store<br />
biodiesel fuel in the fuel tank for more<br />
than one month.<br />
Diesel exhaust fluid (def)<br />
The emissions system uses Diesel Exhaust<br />
Fluid (DEF) which MUST be replenished at<br />
regular intervals. Failure to do so could cause<br />
vehicle speed limitations and/or result in the<br />
vehicle entering an idle-only mode.<br />
Your message center will alert you when<br />
you begin to get low on DEF. The first alert<br />
will appear in the message center when you<br />
have approximately 800 miles left to empty.<br />
Certain conditions such as driving styles,<br />
trailer towing or fast acceleration will require<br />
filling the tank more often.<br />
The DEF tank has a blue capped filler port<br />
and is next to your diesel fuel inlet. This tank<br />
can be filled using a nozzle at a DEF filling<br />
station or using a DEF bottle with a spout.<br />
Motorcraft ® DEF bottles are recommended<br />
as they are designed to be spill proof and will<br />
stop the flow of DEF<br />
when the tank is full.<br />
Ensure that you do<br />
NOT put DEF in<br />
the fuel tank as this<br />
can cause engine<br />
damage which is not covered by your<br />
vehicle’s warranty. Immediately wipe away<br />
any DEF that has spilled on painted surfaces<br />
with water and a damp cloth to prevent<br />
damage to the paint.<br />
Use only DEF certified by<br />
the American Petroleum<br />
Institute (API) such<br />
as Motorcraft ®<br />
DEF or equivalent.<br />
Look for the API<br />
certification trademark.<br />
For more information on this system, refer to<br />
Selective Catalytic Reduction (SCR) System<br />
in your Diesel Supplement.<br />
Fuel filter<br />
Your <strong>Ford</strong> truck includes a LOW FUEL<br />
PRESSURE monitor to let you know<br />
that the engine is not receiving the fuel it<br />
needs. Driving with low fuel pressure can<br />
damage injection equipment and void your<br />
warranty. Check or switch your fuel source<br />
if you are replacing filters more often than<br />
the recommended interval.<br />
Flex Fuel Vehicle<br />
(FFV, if equipped)<br />
If your vehicle has a yellow colored fuel<br />
cap, you have a flex fuel vehicle. Use only<br />
unleaded fuel or ethanol fuel (E85).<br />
Draining the water<br />
separator<br />
Your vehicle is equipped with a state of the<br />
art diesel fuel delivery system. It includes<br />
a Diesel Fuel Conditioning Module (DFCM)<br />
and engine mounted fine filter. The DFCM<br />
includes a filter, electronic fuel pump and<br />
water separator/drain mounted on the frame<br />
just below the cab driver side. Drain the<br />
DFCM (with engine off) during oil changes<br />
or as soon as possible when the WATER<br />
IN FUEL message is displayed. Ignoring<br />
the Water In Fuel message can cause the<br />
accumulated water to be passed to the<br />
engine resulting in fuel system damage.<br />
Coolant<br />
Your Super Duty uses Motorcraft ®<br />
Specialty Orange Engine Coolant<br />
(orange-colored). DO NOT use glycol<br />
coolant as it is not compatible with your<br />
vehicle. DO NOT MIX different colors or<br />
types of coolant in your vehicle. DO NOT<br />
MIX recycled coolant and new (unused)<br />
coolant together in the vehicle as the mixing<br />
of engine coolants may harm your engine’s<br />
cooling system. The use of an improper<br />
coolant may harm engine and cooling system<br />
components and may void the warranty.<br />
Ensure that ONLY the correct coolant is used.<br />
Tire Pressure<br />
The recommended specifications are on<br />
the Safety Compliance Certification Label<br />
or Tire Label located on the on the B-Pillar<br />
or the edge of the driver’s door. As an<br />
added safety feature, your vehicle may be<br />
equipped with a Tire Pressure Monitoring<br />
System (TPMS) that illuminates a low tire<br />
pressure warning light when one or more<br />
of your tires is significantly under-inflated.<br />
Refer to the Tires, Wheels and Loading<br />
chapter in your Owner’s <strong>Guide</strong> for<br />
more information.<br />
Engine oil SpecificationS<br />
Quality engine oils help achieve good<br />
engine performance and durability. For<br />
normal or severe service, use Motorcraft ®<br />
oil or an equivalent oil conforming to <strong>Ford</strong><br />
Specifications as listed in the Maintenance<br />
product specifications and capacities in your<br />
Diesel Supplement or API service categories<br />
CJ-4 or CJ-4/SM. To determine which oil<br />
viscosity best suits your needs, use the SAE<br />
viscosity grade chart.<br />
F˚<br />
SAE VISCOSITY GRADES<br />
10W-30 (Normal Usage)<br />
5W-40 1,2<br />
0W-30 / 0W-40<br />
15W-40 2<br />
-20 -10 0 10 20 30 40 50 60 70 80 90 100<br />
C˚ -29 -23 -18 -12 -7 -1 4 10 16 21 27 32 38<br />
EXPECTED TEMPERATURE RANGE<br />
1 For severe duty usage, use SAE 5W-40 API CJ-4.<br />
2 For biodiesel (grades B5-B20) usage, use SAE<br />
5W-40 or SAE 15W-40 API CJ-4.<br />
<strong>2011</strong><br />
<strong>Quick</strong> reference guide
message center<br />
The message center monitors many vehicle systems and alerts you to potential vehicle<br />
problems and conditions. Your message center also allows you to program and configure<br />
certain features without taking your hands off the wheel. Use the steering wheel controls to<br />
scroll, make selections and adjustments which will appear in the message center display<br />
in the instrument cluster. If equipped with an LCD screen, your main menu selections are:<br />
Gauge Mode, Trip A/B, Fuel Economy, Truck Apps, Settings and Information.<br />
turn signal operation<br />
• To operate the left turn signal, push the lever down until it stops and release.<br />
• To operate the right turn signal, push the lever up until it stops and release.<br />
• To indicate a lane change, push the lever up/down to the first stop position and<br />
release. The turn signals will flash three times and stop.<br />
AdvanceTrac® with RSC®<br />
stability enhancement system<br />
Helps you maintain stability and steerability of your vehicle during a variety of road<br />
conditions. Roll Stability Control (RSC ® ) helps to avoid a vehicle roll-over. If your vehicle<br />
becomes stuck, try turning off the AdvanceTrac ® system (by pressing the control) to allow<br />
wheel spin and help increase momentum to help dig the vehicle out.<br />
Electronic Locking differential (ELD, if equipped)<br />
The ELD is a device housed in the rear axle which allows both rear wheels to turn at<br />
the same speed. You can engage or disengage the ELD on the fly. When the axle is<br />
disengaged, it will function like a standard rear wheel axle. When it is engaged, the rear<br />
wheels will rotate at the same speed when turning, thereby being helpful on slippery<br />
and/or off road surfaces, particularly when one wheel is on a poor traction surface.<br />
For vehicles with an electronic shift 4WD system, pull the knob on the 4WD control toward<br />
you. The indicator light will display in the instrument cluster indicating the system<br />
is engaged.<br />
For 2WD vehicles and vehicles equipped with a manual shift 4WD system, turn the<br />
control to ON. The indicator light will appear in the instrument cluster indicating the system<br />
is engaged.<br />
Use extreme caution when using any device or feature that may take your attention off the<br />
road. <strong>Ford</strong> recommends against the use of any hand-held device while driving and that you<br />
comply with all applicable laws. Your primary responsibility is the safe operation of<br />
the vehicle.<br />
SelectShift Automatic transmission (SST)<br />
Your vehicle is equipped with a SST gearshift lever which allows you to change<br />
gears without a clutch. Put the gearshift into M (manual) and press + to upshift<br />
and - to downshift.<br />
To lock gears, put the gearshift lever into D (Overdrive). Press – to lock out the<br />
gears. Only the available gears will be displayed. Press + to unlock the gears.<br />
Steering wheel controls<br />
Use the arrow controls to scroll through the message center menus and use OK to make<br />
selections. Use SET +/-, RSM and OFF to set and adjust the speed. Use the steering<br />
wheel controls on the right side to adjust volume, media selections and access voice<br />
commands (if equipped).<br />
Tow/Haul Switch<br />
To eliminate excessive transmission shifting, activate the Tow/Haul feature. This feature also<br />
provides engine exhaust braking in all forward gears when the transmission is in D (Overdrive).<br />
The engine exhaust braking will help slow the vehicle and assist the driver in controlling the<br />
vehicle when descending a grade. (Exhaust braking available on diesel only.)<br />
Power adjustable foot<br />
pedals (if equipped)<br />
Press the control to move the pedals<br />
closer or farther away from you. The<br />
pedals should only be adjusted when<br />
the vehicle is stopped and in P (Park).<br />
Upfitter controls<br />
(if equipped)<br />
The Upfitter package provides four<br />
switches which can be customized to<br />
perform additional functions. They provide<br />
8 amps, 12 amps or 20 amps of electrical<br />
battery power.<br />
Electronic Shift on the Fly System (if equipped)<br />
This system allows you shift on the fly and select from the following modes:<br />
• 2H (2WD)- Use for general on-road driving.<br />
• 4H (4x4 High)- Use for extra traction. This mode is NOT intended for use on dry pavement.<br />
• 4L (4x4 Low)- Uses extra gearing to provide maximum power to all four wheels at<br />
reduced speeds.<br />
Hill descent control (if equipped)<br />
This allows you to maintain vehicle speed while<br />
descending steep grades in a variety of road<br />
conditions. To enable, press the hill descent button.<br />
A light in the cluster will illuminate and a chime<br />
will sound. To increase descent speed, press the<br />
accelerator until the desired speed is reached. To<br />
decrease speed, press the brake until the desired<br />
speed is reached. Hill Descent Control can maintain<br />
vehicle speeds on downhill grades and can be<br />
engaged between 2 mph (3 km/h) to 12 mph<br />
(20 km/h). Note: Hill descent control requires a<br />
cooling down interval after sustained use. The<br />
amount of time that the feature can remain active<br />
before cooling varies with conditions. The system<br />
will provide a warning in the message center and<br />
a chime will sound when the system is about to<br />
disengage for cooling. At this time, manually apply<br />
the brakes as needed to maintain descent speed.<br />
Trailer Brake controller (if equipped)<br />
Your vehicle may be equipped with a fully integrated electronic Trailer Brake Controller (TBC).<br />
Use the GAIN adjustment buttons (+ , -) and the manual controller lever to make adjustments.<br />
The system will display any necessary messages through your message center. For complete<br />
information on using the TBC, please refer to the Tires, Wheels and Loading chapter in your<br />
Owner’s <strong>Guide</strong>.<br />
Safety<br />
Rearview camera<br />
(if equipped)<br />
This system provides a visual display of<br />
the area behind the vehicle. The display<br />
automatically appears on the navigation<br />
screen (if equipped) or in the rear view mirror<br />
when the vehicle is in Reverse (R) and uses<br />
colors (green, yellow and red) to alert you<br />
of your proximity to<br />
objects. Note: Visibility<br />
aids do not replace the<br />
need to watch where<br />
the vehicle is moving.<br />
Reverse sensing system<br />
(if equipped)<br />
The reverse sensing system may warn you<br />
if there is an object behind the vehicle that<br />
may be too low for you to see. A warning<br />
tone will sound which increases in frequency<br />
as the object gets closer and then will sound<br />
continuously when the object is less than 10<br />
inches away. The system is active when the<br />
vehicle is in R (Reverse) and traveling less<br />
than 3 mph (5 km/h). Note: Visibility aids<br />
do not replace the need to watch where the<br />
vehicle is moving.<br />
Engine only<br />
traction control<br />
(all dual rear wheel vehicles)<br />
This system helps you maintain stability and<br />
steerability of your vehicle, especially on<br />
slippery road surfaces such as snow, ice or<br />
gravel. During traction control operation, the<br />
traction control light will illuminate.<br />
Roadside Assistance<br />
Your new <strong>Ford</strong> Super Duty comes with the<br />
assurance and support of 24-hour emergency<br />
roadside assistance. Roadside assistance<br />
includes such services as: lockout assistance,<br />
limited fuel delivery, battery jump starts,<br />
changing a flat tire, towing, and winch out.<br />
To receive roadside assistance in the United<br />
States, call 1 (800) 241-3673. In Canada,<br />
call 1 (800) 665-2006.<br />
Trailer Sway (if equipped)<br />
Trailer sway uses the vehicle’s AdvanceTrac ®<br />
with RSC ® system to detect and help reduce<br />
trailer sway by applying brake force at<br />
individual wheels and, if necessary, reducing<br />
engine power. This feature defaults to on. To<br />
turn off, refer to the Message Center section<br />
in the Instrument Cluster chapter of your<br />
Owner’s <strong>Guide</strong>.<br />
Side AirBags and Safety<br />
Canopy System (if equipped)<br />
Your vehicle may be equipped with side<br />
airbags and a safety canopy system which<br />
help protect you in the event of a crash.<br />
Function<br />
Center console (if equipped)<br />
• One 12V power point inside the<br />
storage compartment and one on<br />
the rear of the console<br />
• 110V/150W AC power point outlet<br />
on the rear of the console<br />
Tailgate step (if equipped)<br />
Your vehicle may be equipped with a tailgate<br />
step that allows easy entry into the truck<br />
bed. To use, open the tailgate. Pull the yellow<br />
latch lever to the unlock position to release<br />
the grab handle from its stowed position and<br />
raise the handle upright until you feel it latch<br />
and see the latch lever in the lock position.<br />
(The yellow lever only needs to be used when<br />
releasing the grab handle.) Rotate the center<br />
molding to unlatch the tailgate. Flip open<br />
the panel to widen the step. Always use the<br />
grab handle when stepping up or down on the<br />
tailgate step. Keep the step load (you + load)<br />
below 350 lb. (159 kg).<br />
To close the tailgate step, fold the step panel,<br />
then lift and fully slide the tailgate step into<br />
the tailgate. Slide the latch at the bottom<br />
of the handle, then lower the handle. Never<br />
drive with the step deployed. Ensure that you<br />
fully close and latch the tailgate step before<br />
moving the vehicle.<br />
Under Seat locking<br />
storage (if equipped)<br />
The under seat storage<br />
compartment in the<br />
second row has a<br />
programmable lock<br />
which provides a safe<br />
place to store items.<br />
Use your ignition key<br />
to program the lock.<br />
There is also an auxiliary power point within<br />
the compartment which you can use to power<br />
or charge your electronic devices.<br />
MyKey (if equipped)<br />
Allows you to program certain driving<br />
restrictions in order to promote good driving<br />
habits. When MyKey is programmed, the<br />
following features are adjusted:<br />
• Belt-Minder ® will sound continuously and<br />
the audio will be muted until the safety<br />
belt is buckled<br />
• Audible and visual low fuel warnings<br />
• Audio volume is limited<br />
• Vehicle speed is limited<br />
• Audible and visual speed warnings at<br />
preselected speeds<br />
• AdvanceTrac ® cannot be programmed off


