(IgG) ELISA Kit - MyBioSource
(IgG) ELISA Kit - MyBioSource
(IgG) ELISA Kit - MyBioSource

Create successful ePaper yourself
Turn your PDF publications into a flip-book with our unique Google optimized e-Paper software.
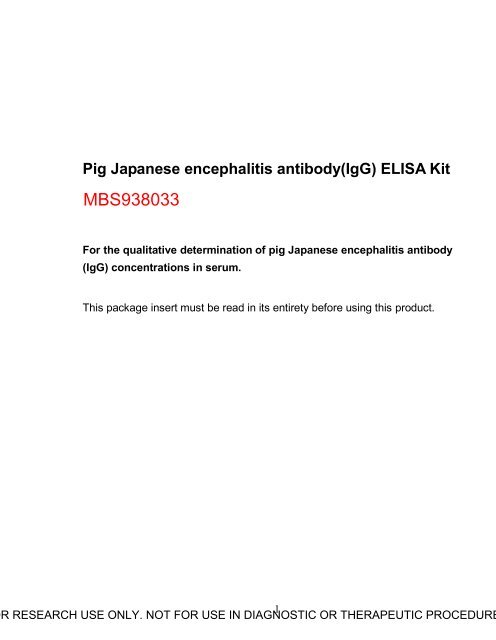
Pig Japanese encephalitis antibody(<strong>IgG</strong>) <strong>ELISA</strong> <strong>Kit</strong><br />
For the qualitative determination of pig Japanese encephalitis antibody<br />
(<strong>IgG</strong>) concentrations in serum.<br />
This package insert must be read in its entirety before using this product.<br />
1<br />
R RESEARCH USE ONLY. NOT FOR USE IN DIAGNOSTIC OR THERAPEUTIC PROCEDURE
PRINCIPLE OF THE ASSAY<br />
This assay employs the qualitative enzyme immunoassay technique.<br />
The microtiter plate provided in this kit has been pre-coated with antigen.<br />
Samples are pipetted into the wells with anti-pig <strong>IgG</strong> conjugated Horseradish<br />
Peroxidase (HRP). Any antibodies specific for the antigen present will bind to the<br />
pre-coated antigen. Following a wash to remove any unbound reagent, a<br />
substrate solution is added to the wells and color develops in proportion to the<br />
amount of pig Japanese encephalitis antibody(<strong>IgG</strong>) bound in the initial step. The<br />
color development is stopped and the intensity of the color is measured.<br />
SPECIFICITY<br />
This assay has high sensitivity and excellent specificity for detection of pig<br />
Japanese encephalitis antibody(<strong>IgG</strong>). No significant cross-reactivity or<br />
interference between pig Japanese encephalitis antibody(<strong>IgG</strong>) and analogues<br />
was observed.<br />
Note: Limited by current skills and knowledge, it is impossible for us to complete<br />
the cross-reactivity detection between pig Japanese encephalitis antibody(<strong>IgG</strong>)<br />
and all the analogues, therefore, cross reaction may still exist.<br />
PRECISION<br />
Intra-assay Precision (Precision within an assay): CV%
LIMITATIONS OF THE PROCEDURE<br />
• FOR RESEARCH USE ONLY. NOT FOR USE IN DIAGNOSTIC<br />
PROCEDURES.<br />
• The kit should not be used beyond the expiration date on the kit label.<br />
• Do not mix or substitute reagents with those from other lots or sources.<br />
• Any variation in operator, pipetting technique, washing technique,<br />
incubation time or temperature, and kit age can cause variation in binding.<br />
• This assay is designed to eliminate interference by soluble receptors,<br />
binding proteins, and other factors present in biological samples. Until all<br />
factors have been tested in the Immunoassay, the possibility of<br />
interference cannot be excluded.<br />
MATERIALS PROVIDED<br />
Reagents<br />
Quantity<br />
Coated assay plate<br />
1(96 wells)<br />
Negative Control<br />
1 x 0.5 ml<br />
Positive Control<br />
1 x 0.5 ml<br />
Sample Diluent<br />
1 x 25 ml<br />
HRP-conjugate<br />
1 x 11 ml<br />
Wash Buffer (20 x concentrate)<br />
1 x 25 ml<br />
Substrate A<br />
1 x 6 ml<br />
Substrate B<br />
1 x 6 ml<br />
Stop Solution<br />
1 x 6 ml<br />
Adhesive Strip (For 96 wells) 4<br />
Instruction manual 1<br />
STORAGE<br />
Unopened kit<br />
Store at 2 - 8°C. Do not use the kit beyond the expiration date.<br />
Opened kit May be stored for up to 1 month at 2 - 8° C.<br />
*Provided this is within the expiration date of the kit.<br />
R RESEARCH USE ONLY. NOT FOR USE IN DIAGNOSTIC OR THERAPEUTIC PROCEDURE<br />
3
OTHER SUPPLIES REQUIRED<br />
• Microplate reader capable of measuring absorbance at 630 nm.<br />
• An incubator which can provide stable incubation conditions up to<br />
37°C±0.5°C.<br />
• Squirt bottle, manifold dispenser, or automated microplate washer.<br />
• Absorbent paper for blotting the microtiter plate.<br />
• 100ml and 500ml graduated cylinders.<br />
• Deionized or distilled water.<br />
• Pipettes and pipette tips.<br />
• Test tubes for dilution.<br />
PRECAUTIONS<br />
The Stop Solution provided with this kit is an acid solution. Wear eye, hand, face,<br />
and clothing protection when using this material.<br />
SAMPLE COLLECTION AND STORAGE<br />
• Serum Use a serum separator tube (SST) and allow samples to clot for<br />
two hours at room temperature or overnight at 4°C before centrifugation<br />
for 15 minutes at 1000 ×g . Remove serum and assay immediately or<br />
aliquot and store samples at -20°C or -80°C. Avoid repeated freeze-thaw<br />
cycles.<br />
SAMPLE PREPARATION<br />
Serum samples require a 40-fold dilution into Sample Diluent before test. The<br />
suggested 40-fold dilution can be achieved by adding 6μl sample to 234μl of<br />
Sample Diluent.<br />
R RESEARCH USE ONLY. NOT FOR USE IN DIAGNOSTIC OR THERAPEUTIC PROCEDURE<br />
4
Note:<br />
1. ̀ is only responsible for the kit itself, but not for the samples<br />
consumed during the assay. The user should calculate the possible<br />
amount of the samples used in the whole test. Please reserve sufficient<br />
samples in advance.<br />
2. Samples to be used within 2 days may be stored at 2-8°C , otherwise<br />
samples must be stored at -20°C (≤1month) or -80°C (≤2month) to avoid<br />
loss of bioactivity and contamination.<br />
3. Grossly hemolyzed samples are not suitable for use in this assay.<br />
4. If the samples are not indicated in the manual, a preliminary experiment to<br />
determine the validity of the kit is necessary.<br />
5. Influenced by the factors including cell viability, cell number and also<br />
sampling time, samples from cell culture supernatant may not be detected<br />
by the kit.<br />
6. Fresh samples without long time storage are recommended for the test.<br />
Otherwise, protein degradation and denaturalization may occur in those<br />
samples and finally lead to wrong results.<br />
REAGENT PREPARATION<br />
Note:<br />
• Kindly use graduated containers to prepare the reagent. Please don't<br />
prepare the reagent directly in the Diluent vials provided in the kit.<br />
• Bring all reagents to room temperature (18-25°C) before use for 30min.<br />
• Distilled water is recommended to be used to make the preparation for<br />
reagents or samples. Contaminated water or container for reagent<br />
preparation will influence the detection result.<br />
Wash Buffer(1x)- If crystals have formed in the concentrate, warm up to<br />
room temperature and mix gently until the crystals have completely<br />
dissolved. Dilute 25 ml of Wash Buffer Concentrate (20 x) into deionized or<br />
distilled water to prepare 500 ml of Wash Buffer (1 x).<br />
R RESEARCH USE ONLY. NOT FOR USE IN DIAGNOSTIC OR THERAPEUTIC PROCEDURE<br />
5
ASSAY PROCEDURE<br />
Bring all reagents and samples to room temperature before use. Centrifuge<br />
the sample again after thawing before the assay. It is recommended that all<br />
samples and controls be assayed in duplicate.<br />
1. Prepare all reagents, and samples as directed in the previous sections.<br />
2. Refer to the Assay Layout Sheet to determine the number of wells to be<br />
used and put any remaining wells and the desiccant back into the pouch<br />
and seal the ziploc, store unused wells at 4°C.<br />
3. Set a Blank well without any solution.<br />
4. Add 100μl of Negative Control, Positive Control or diluted Sample per<br />
well. Cover with the adhesive strip provided. Incubate for 30 minutes at<br />
37°C. Samples and controls should be assayed in duplicate<br />
5. Aspirate each well and wash, repeating the process two times for a total of<br />
three washes. Wash by filling each well with Wash Buffer (300μl) using a<br />
squirt bottle, multi-channel pipette, manifold dispenser, or autowasher,<br />
and let it stand for 3 minutes, complete removal of liquid at each step is<br />
essential to good performance. After the last wash, remove any remaining<br />
Wash Buffer by aspirating ordecanting. Invert the plate and blot it against<br />
clean paper towels.<br />
6. Add 100μl of HRP-conjugate to each well (not to Blank!). Cover the<br />
microtiter plate with the adhesive strip. Incubate for 30 minutes at 37°C.<br />
7. Repeat the aspiration/wash process for three times as in step 5.<br />
8. Add 50μl of Substrate A and 50μl Substrate B to each well. Incubate for<br />
10 minutes at room temperature(25°C). Protect from light.<br />
9. Add 50μl of Stop Solution to each well, gently tap the plate to ensure<br />
thorough mixing.<br />
10. Take blank well as zero, determine the optical density of each well within<br />
10 minutes, using a microplate reader set to 630 nm.<br />
*Samples may require dilution. Please refer to Sample Preparation section.<br />
R RESEARCH USE ONLY. NOT FOR USE IN DIAGNOSTIC OR THERAPEUTIC PROCEDURE<br />
6
Note:<br />
1. The final experimental results will be closely related to validity of the<br />
products, operation skills of the end users and the experimental<br />
environments.<br />
2. Samples or reagents addition: Please carefully add samples to wells and<br />
mix gently to avoid foaming. Do not touch the well wall as possible. For<br />
each step in the procedure, total dispensing time for addition of reagents<br />
or samples to the assay plate should not exceed 10 minutes. This will<br />
ensure equal elapsed time for each pipetting step, without interruption.<br />
Duplication of all specimens, although not required, is recommended. To<br />
avoid cross-contamination, change pipette tips between sample additions,<br />
and between reagent additions. Also, use separate reservoirs for each<br />
reagent.<br />
3. Incubation: To ensure accurate results, proper adhesion of plate sealers<br />
during incubation steps is necessary. Do not allow wells to sit uncovered<br />
for extended periods between incubation steps. Once reagents have been<br />
added to the well strips, DO NOT let the strips DRY at any time during the<br />
assay. Incubation time and temperature must be observed.<br />
4. Washing: The wash procedure is critical. Complete removal of liquid at<br />
each step is essential to good performance. After the last wash, remove<br />
any remaining Wash Solution by aspirating or decanting and remove any<br />
drop of water and fingerprint on the bottom of the plate. Insufficient<br />
washing will result in poor precision and falsely elevated absorbance<br />
reading. When using an automated plate washer, adding a 30 second<br />
soak period following the addition of wash buffer, and/or rotating the plate<br />
180 degrees between wash steps may improve assay precision.<br />
5. Controlling of reaction time: Observe the change of color after adding TMB<br />
Substrate (e.g. observation once every 10 minutes), TMB Substrate<br />
should change from colorless or light blue to gradations of blue. If the color<br />
is too deep, add Stop Solution in advance to avoid excessively strong<br />
reaction which will result in inaccurate absorbance reading.<br />
6. TMB Substrate is easily contaminated. TMB Substrate should remain<br />
colorless or light blue until added to the plate. Please protect it from light.<br />
7. Stop Solution should be added to the plate in the same order as the TMB<br />
Substrate. The color developed in the wells will turn from blue to yellow<br />
upon addition of the Stop Solution. Wells that are green in color indicate<br />
that the Stop Solution has not mixed thoroughly with the TMB Substrate.<br />
R RESEARCH USE ONLY. NOT FOR USE IN DIAGNOSTIC OR THERAPEUTIC PROCEDURE<br />
7
CALCULATION OF RESULTS<br />
For calculation the valence of pig Japanese encephalitis antibody(<strong>IgG</strong>), compare<br />
the sample well with control.<br />
The OD value of Negative Control must less than 0.2, and the OD value of<br />
Positive Control must no less than 0.4. If not, repeat the test.<br />
• While ODsample>0.4: Positive<br />
• While 0.2≤ODsample≤0.4: Suspicious samples<br />
• While ODsample
Notes<br />
R RESEARCH USE ONLY. NOT FOR USE IN DIAGNOSTIC OR THERAPEUTIC PROCEDURE<br />
9
R RESEARCH USE ONLY. NOT FOR USE IN DIAGNOSTIC OR THERAPEUTIC PROCEDURE<br />
10
R RESEARCH USE ONLY. NOT FOR USE IN DIAGNOSTIC OR THERAPEUTIC PROCEDURE<br />
11
R RESEARCH USE ONLY. NOT FOR USE IN DIAGNOSTIC OR THERAPEUTIC PROCEDURE<br />
12
R RESEARCH USE ONLY. NOT FOR USE IN DIAGNOSTIC OR THERAPEUTIC PROCEDURE<br />
13


![Intact-PTH [Parathyroid Hormone] ELISA [Enzyme ... - IBL-America](https://img.yumpu.com/38260466/1/184x260/intact-pth-parathyroid-hormone-elisa-enzyme-ibl-america.jpg?quality=85)