Safety and Health Field Manual - the Sealant, Waterproofing and ...
Safety and Health Field Manual - the Sealant, Waterproofing and ...
Safety and Health Field Manual - the Sealant, Waterproofing and ...

You also want an ePaper? Increase the reach of your titles
YUMPU automatically turns print PDFs into web optimized ePapers that Google loves.
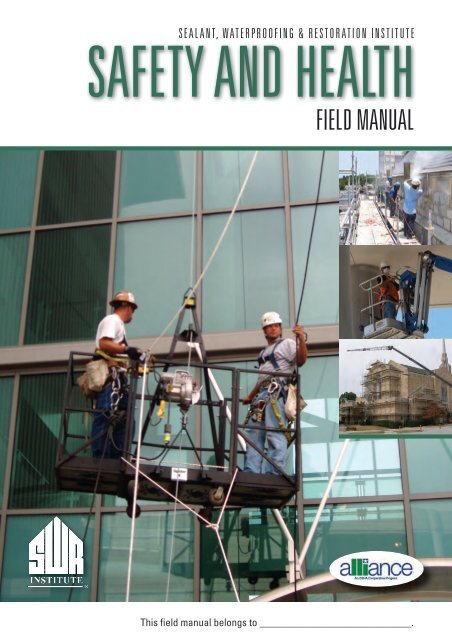
<strong>Sealant</strong>, <strong>Waterproofing</strong> & Restoration Institute<br />
<strong>Safety</strong> <strong>and</strong> <strong>Health</strong><br />
FIELD MANUAL<br />
This field manual belongs to _____________________________.
<strong>Sealant</strong>, <strong>Waterproofing</strong> & Restoration Institute<br />
SAFETY AND HEALTH<br />
FIELD MANUAL<br />
Table of Contents<br />
Introduction 2<br />
Disclaimer 2<br />
Competent Person 3<br />
General Duty Clause 3<br />
Aerial Lifts 4<br />
Barricades & Signs 5<br />
Compressed Gas Cylinders 6<br />
Confined Space 8<br />
Drinking Water 10<br />
Electrical <strong>Safety</strong> 11<br />
Excavation <strong>and</strong> Trenching 13<br />
Fall Protection 15<br />
Fire Extinguishers 16<br />
First Aid 18<br />
Hazard Communication 20<br />
Hazardous Waste Operations 22<br />
Hearing Protection 23<br />
Histoplasmosis 24<br />
Housekeeping 26<br />
Illumination 27<br />
Ladders 28<br />
Lead 30<br />
PPE – Personal Protective<br />
Equipment 31<br />
Powder Actuated Tools 32<br />
Power Tools 33<br />
Powered Platforms 34<br />
Respiratory Protection 36<br />
<strong>Safety</strong> Netting 37<br />
Scaffolds – Supported &<br />
Suspended 39<br />
Silica 41<br />
Stairs 43<br />
Welding, Cutting, <strong>and</strong> Heating 44<br />
Wire Ropes 47<br />
Additional Resources 49<br />
Aknowledgments 50<br />
Signature Page 51<br />
Through <strong>the</strong> OSHA <strong>and</strong> SWRInstitute Alliance, <strong>the</strong> SWRInstitute developed this <strong>Field</strong> <strong>Manual</strong> for<br />
informational purposes only. It does not necessarily reflect <strong>the</strong> official views of OSHA, <strong>the</strong><br />
U.S. Department of Labor or SWRInstitute. 09/2009
Introduction<br />
This <strong>Safety</strong> <strong>and</strong> <strong>Health</strong> <strong>Field</strong> <strong>Manual</strong> is intended to cover some of <strong>the</strong> basic topics<br />
for use on <strong>the</strong> job site. Knowledge of safety <strong>and</strong> health st<strong>and</strong>ards is essential<br />
in reducing work-related injuries <strong>and</strong> illnesses <strong>and</strong> in maintaining a safe <strong>and</strong><br />
healthful work environment. This <strong>Field</strong> <strong>Manual</strong> is a product of <strong>the</strong> Alliance<br />
between <strong>the</strong> Occupational <strong>Safety</strong> <strong>and</strong> <strong>Health</strong> Administration (OSHA) <strong>and</strong> <strong>the</strong><br />
<strong>Sealant</strong>, <strong>Waterproofing</strong> & Restoration Institute (“SWRInstitute”). Most of <strong>the</strong><br />
information covered in this <strong>Field</strong> <strong>Manual</strong> has been taken directly from OSHA<br />
st<strong>and</strong>ards, but does not cover all <strong>the</strong> requirements in <strong>the</strong> OSHA st<strong>and</strong>ards. The<br />
specific subsection of <strong>the</strong> OSHA st<strong>and</strong>ard will be listed following <strong>the</strong> title of each<br />
section in this <strong>Field</strong> <strong>Manual</strong>. For a more complete underst<strong>and</strong>ing of <strong>the</strong>se topics,<br />
please review <strong>the</strong> entire OSHA st<strong>and</strong>ard, that can be found at Title 29 Code of<br />
Federal Regulations beginning at Part 1910 or OSHA’s website (www.osha.gov).<br />
The sealant, waterproofing <strong>and</strong> restoration contractor can use this <strong>Safety</strong><br />
<strong>and</strong> <strong>Health</strong> <strong>Field</strong> <strong>Manual</strong> to help identify <strong>the</strong> key hazards <strong>and</strong> OSHA<br />
requirements in this industry. The work performed by sealant, waterproofing<br />
<strong>and</strong> restoration contractors covers one of <strong>the</strong> widest ranges of activities in <strong>the</strong><br />
construction industry.<br />
Contractors can use this <strong>Field</strong> <strong>Manual</strong> as part of an overall workplace safety<br />
<strong>and</strong> health program that promotes <strong>the</strong> culture of safety, where everyone takes<br />
personal responsibility for <strong>the</strong>ir own safety as well as those around <strong>the</strong>m. It<br />
is also your responsibility <strong>and</strong> obligation to work safely <strong>and</strong> to correct unsafe<br />
acts, practices, <strong>and</strong> or conditions for <strong>the</strong> protection of yourself <strong>and</strong> o<strong>the</strong>rs.<br />
Disclaimer<br />
This <strong>Safety</strong> & <strong>Health</strong> <strong>Field</strong> <strong>Manual</strong> has been prepared by <strong>the</strong> <strong>Sealant</strong>, <strong>Waterproofing</strong> & Restoration<br />
Institute (“SWRInstitute”) for use in <strong>the</strong> field as a quick reference tool of <strong>the</strong> basic safety <strong>and</strong> health<br />
topics for <strong>the</strong> job site. SWRInstitute has merely compiled information from industry representatives<br />
<strong>and</strong> from <strong>the</strong> Occupational <strong>Safety</strong> <strong>and</strong> <strong>Health</strong> Administration (“OSHA”). Accordingly, SWRInstitute,<br />
its members, employees <strong>and</strong> agents expressly disclaim any responsibility whatsoever for <strong>the</strong><br />
accuracy of <strong>the</strong> terms, methods, procedures, specifications, views <strong>and</strong> opinions discussed herein.<br />
As <strong>the</strong>re may be o<strong>the</strong>r safety <strong>and</strong> health topics not specifically addressed herein which may apply<br />
to a job site, <strong>the</strong> employer should evaluate all of <strong>the</strong> factors pertaining to potential hazards at a<br />
particular worksite with respect to employee safety <strong>and</strong> health. This <strong>Safety</strong> & <strong>Health</strong> <strong>Field</strong> <strong>Manual</strong><br />
should not be considered a substitute for a written <strong>Safety</strong> & <strong>Health</strong> Program, as required by OSHA,<br />
provisions of <strong>the</strong> Occupational <strong>Safety</strong> <strong>and</strong> <strong>Health</strong> Act or for any st<strong>and</strong>ards issued by OSHA or<br />
o<strong>the</strong>r federal, state <strong>and</strong> local agencies. SWRInstitute, its members, employees <strong>and</strong> agents expressly<br />
disclaim any responsibility whatsoever for damages arising from <strong>the</strong> use, application or reliance on<br />
<strong>the</strong> recommendations <strong>and</strong> information contained in this <strong>Safety</strong> & <strong>Health</strong> <strong>Field</strong> <strong>Manual</strong>.<br />
Copyright Notice<br />
© Copyright 2009 by <strong>the</strong> <strong>Sealant</strong>, <strong>Waterproofing</strong> & Restoration Institute.<br />
All rights reserved. This work may not be reproduced or transmitted in any form or by any means,<br />
electronically or mechanically, including photocopying, recording, or by an information storage <strong>and</strong><br />
retrieval system without <strong>the</strong> prior written permission from <strong>the</strong> <strong>Sealant</strong>, <strong>Waterproofing</strong> & Restoration<br />
Institute.<br />
2 <strong>Safety</strong> <strong>and</strong> <strong>Health</strong> <strong>Field</strong> <strong>Manual</strong>
COMPETENT PERSON – 1926.32(f)<br />
COMPETENT PERSON | GENERAL DUTY CLAUSE<br />
OSHA defines a Competent Person as one who is capable of identifying<br />
existing <strong>and</strong> predictable hazards in <strong>the</strong> surroundings or working conditions<br />
which are unsanitary, hazardous, or dangerous to employees, <strong>and</strong> who has<br />
authorization to take prompt corrective measures to eliminate <strong>the</strong>m.<br />
This term is used in a number of OSHA’s construction st<strong>and</strong>ards. For example,<br />
<strong>the</strong> scaffolding st<strong>and</strong>ard in section 1926.451(f)(3) requires that “scaffolds <strong>and</strong><br />
scaffold components shall be inspected for visible defects by a competent<br />
person before each work shift, <strong>and</strong> after any occurrence which could affect a<br />
scaffold’s structural integrity.”<br />
GENERAL DUTY CLAUSE<br />
The General Duty Clause, Section 5(a)(1) of <strong>the</strong> Occupational <strong>Safety</strong> <strong>and</strong><br />
<strong>Health</strong> Act, covers serious hazards for which no specific OSHA st<strong>and</strong>ard<br />
applies. OSHA can issue citations for violations of <strong>the</strong> General Duty Clause<br />
even if an employer is in compliance with OSHA st<strong>and</strong>ards.<br />
The General Duty Clause requires that employers:<br />
Must furnish to each of his employees employment <strong>and</strong> a place of employment<br />
which are free from recognized hazards that are causing or are likely to cause<br />
death or serious physical harm to his employees.<br />
DO:<br />
• Identify all hazards at your worksite, including those that may not be<br />
covered by specific OSHA st<strong>and</strong>ards.<br />
• Conduct regular safety meetings where employees discuss hazards.<br />
• Implement protocols to prevent accidents as a result of <strong>the</strong>se hazards.<br />
• Monitor all hazards in <strong>the</strong> workplace <strong>and</strong> jobsites.<br />
<strong>Sealant</strong>, waterproofing & Restoration Institute 3
AERIAL LIFTS<br />
AERIAL LIFTS – 1926.453<br />
DO:<br />
• Keep entire body inside <strong>the</strong> man<br />
basket when maneuvering it near o<strong>the</strong>r<br />
structures. Hazards include pinch points<br />
<strong>and</strong> trapping your body between <strong>the</strong> man<br />
lift <strong>and</strong> solid objects.<br />
• Always use 100% tie off procedures while<br />
working in <strong>the</strong> man basket<br />
• Always move <strong>the</strong> man basket to ano<strong>the</strong>r<br />
position instead of over reaching <strong>the</strong><br />
Aerial Lift<br />
h<strong>and</strong>rails<br />
• Keep man lift clear of Lines. Getting caught, hooked, or snared could cause<br />
<strong>the</strong> man lift to tip over as it is moved or raised<br />
• Always use <strong>the</strong> man lift on sound, stable surfaces<br />
• Always avoid soft, muddy ground, s<strong>and</strong> or unstable gravel<br />
• Always follow manufacturer’s restriction recommendations regarding<br />
wind speeds<br />
WIND RESTRICTIONS<br />
25 MPH – Swingstages<br />
30 MPH – Manlifts<br />
35 MPH – Lift Platforms<br />
DON’T:<br />
• Do not st<strong>and</strong> on <strong>the</strong> h<strong>and</strong>rails to reach <strong>the</strong> work area<br />
• Do not overload <strong>the</strong> man lift. This can cause it to topple over<br />
• Many man lifts are rated ONLY for two (2) employees <strong>and</strong> fifty (50) lbs.<br />
of material, tools <strong>and</strong> equipment<br />
• Do not exceed <strong>the</strong> man lift load rating by pulling up grout lines, concrete<br />
pump lines or o<strong>the</strong>r heavy weighted lines<br />
• Do not work directly under <strong>the</strong> man basket or close to <strong>the</strong> equipment – it<br />
could move at any time causing injury<br />
• Do not move <strong>the</strong> lift while it is in an extended position<br />
• Do not put a lateral load on <strong>the</strong> lift<br />
• Use a ladder or step stool to extend <strong>the</strong> reach of <strong>the</strong> man basket.<br />
4 <strong>Safety</strong> <strong>and</strong> <strong>Health</strong> <strong>Field</strong> <strong>Manual</strong>
BARRICADES<br />
BARRICADES – 1926.202 & SIGNS -1926.200<br />
Barricades for protection of employees shall conform to portions of <strong>the</strong><br />
<strong>Manual</strong> on Uniform Traffic Control Devices for Streets <strong>and</strong> Highways, relating<br />
to barricades. Consideration must be taken on each jobsite to ensure public<br />
safety from hazards including:<br />
• Moving Equipment • Debris • Electrical Shocks<br />
• Dust • Slip Hazards • Men Working<br />
• Exhaust • Fires • Vapors/Fumes<br />
• Open Holes • Noise • Falling Debris<br />
• Traffic • Trip Hazards • Trenches<br />
One or more of <strong>the</strong> following types of protection should be used based on <strong>the</strong><br />
hazards present.<br />
<strong>Sealant</strong>, waterproofing & Restoration Institute 5
BARRICADES | COMPRESSED GAS CYLINDERS<br />
Signage can play a crucial role in helping <strong>the</strong> public underst<strong>and</strong> how to<br />
avoid job site hazards.<br />
Signs shall be visible at all times while work is being performed <strong>and</strong> shall be<br />
promptly removed or covered when <strong>the</strong> hazards no longer exist.<br />
DO:<br />
• Provide pedestrians with a safe, convenient travel path that replicates<br />
as nearly as possible <strong>the</strong> most desirable characteristics of sidewalks or<br />
footpaths.<br />
DON’T:<br />
• Lead pedestrians into direct conflicts with work site vehicles, equipment, or<br />
operations.<br />
• Lead pedestrians into direct conflicts with mainline traffic moving through<br />
or around <strong>the</strong> work site.<br />
COMPRESSED GAS CYLINDERS – 1926.350<br />
H<strong>and</strong>ling <strong>and</strong> Storing Cylinders<br />
• Oxygen <strong>and</strong> fuel gas cylinders or o<strong>the</strong>r flammable materials must be stored<br />
separately. The storage areas should be separated by 20ft or by a wall 5ft<br />
high with a ½ hour burn rating.<br />
• Inert gas (e.g., helium, argon, nitrogen) cylinders should be stored separately,<br />
<strong>and</strong> all cylinders should be stored with protective caps, <strong>and</strong> in <strong>the</strong> vertical<br />
position.<br />
• Cylinders must be secured with a chain or o<strong>the</strong>r device so <strong>the</strong>y cannot be<br />
knocked over accidentally.<br />
• Protective caps should be kept in place at all times, (especially during<br />
transport) unless <strong>the</strong> cylinder is in use. Cylinders should never be lifted by<br />
<strong>the</strong> safety cap or <strong>the</strong> valve.<br />
6 <strong>Safety</strong> <strong>and</strong> <strong>Health</strong> <strong>Field</strong> <strong>Manual</strong>
COMPRESSED GAS CYLINDERS<br />
General Precautions<br />
• Any cylinder that is leaking or has a bad valve should be replaced <strong>the</strong><br />
cylinder tagged or identify of <strong>the</strong> potential problem.<br />
• Acetylene cylinders that are transported in <strong>the</strong> horizontal position should be<br />
allowed to set for 15 minutes or more in <strong>the</strong> vertical position before use.<br />
• Fire is a constant danger to <strong>the</strong> welder. Combustible materials should be<br />
35ft or more away from any welding. A fire watch can be provided by any<br />
person who knows how to sound <strong>the</strong> alarm <strong>and</strong> use a fire extinguisher.<br />
(Dry chemical, Type A, B, C fire extinguishers are best suited <strong>and</strong> can be<br />
used on most fires.)<br />
• Hoses must be used only for <strong>the</strong> gas or liquid for which <strong>the</strong>y were designed.<br />
Green hoses are to be used only for oxygen, <strong>and</strong> red hoses are to be used<br />
only for acetylene or o<strong>the</strong>r fuel gases. Hoses should also be kept out of<br />
<strong>the</strong> direct line of sparks. Any leaking or bad joints in gas hoses must be<br />
replaced.<br />
DO:<br />
• Move cylinders by tilting <strong>and</strong> rolling <strong>the</strong>m on <strong>the</strong>ir bottom edges.<br />
• Store compressed gas cylinders in an upright position at all times.<br />
DON’T:<br />
• Use a damaged or defective cylinder.<br />
• Use oil, grease, lead or o<strong>the</strong>r pipe fitting compounds for any joints or on<br />
cylinder valves.<br />
• Use full or empty cylinders as rollers or supports<br />
• Attempt to mix gases in a cylinder<br />
• Plug, remove, or tamper with any pressure relief device. Under normal<br />
conditions, <strong>the</strong>se containers will periodically vent <strong>the</strong> product.<br />
• Expose cylinder to an open flame or to any temperature above 125 degrees<br />
Fahrenheit.<br />
• Expose cylinders to continuous dampness or store near salt or o<strong>the</strong>r<br />
corrosive chemicals or fumes. Corrosion may damage cylinders <strong>and</strong> cause<br />
<strong>the</strong>ir valve protection caps to stick.<br />
<strong>Sealant</strong>, waterproofing & Restoration Institute 7
CONFINED SPACE<br />
CONFINED SPACE – 1926.21(b)(6) <strong>and</strong> 1910.146(b)<br />
OSHA defines a confined space as an area which:<br />
• Is large enough <strong>and</strong> so configured that an employee can bodily enter <strong>and</strong><br />
perform assigned work; <strong>and</strong><br />
• Has limited or restricted means for entry or exit (for example, tanks,<br />
vessels, silos, storage bins, hoppers, vaults, <strong>and</strong> pits are spaces that may<br />
have limited means of entry.); <strong>and</strong><br />
• Is not designed for continuous employee occupancy.<br />
OSHA’s construction st<strong>and</strong>ard for confined spaces require employees entering<br />
confined or enclosed spaces to be instructed as to <strong>the</strong> nature of <strong>the</strong> hazards<br />
involved, <strong>the</strong> necessary precautions to be taken, <strong>and</strong> in <strong>the</strong> use of protection<br />
<strong>and</strong> emergency equipment required.<br />
PERMITS<br />
Under OSHA’s general industry st<strong>and</strong>ard, confined spaces are classified as<br />
ei<strong>the</strong>r “non-permit required confined spaces” or “permit required confined<br />
spaces.”<br />
The OSHA St<strong>and</strong>ard “Permit Required Confined Spaces” requires that<br />
employees be protected from life threatening hazards associated with entry<br />
into confined spaces.<br />
A Permit Required Confined Space contains or has <strong>the</strong> potential to contain<br />
one or more of <strong>the</strong> following hazards:<br />
• Atmospheric hazards: Oxygen enrichment or deficiency, flammable /<br />
explosive vapors or gases, or toxic vapors <strong>and</strong> gases.<br />
• Engulfment hazards: Materials within <strong>the</strong> space that could engulf<br />
entrant(s).<br />
• Internal configuration hazards: Spaces whose internal configuration<br />
(inwardly converging walls) could trap or asphyxiate entrant(s).<br />
• O<strong>the</strong>r recognized serious safety or health hazards.<br />
Entry Permit: Written document developed by <strong>the</strong> employer that allows<br />
authorized entry into permitted spaces when conditions of <strong>the</strong> confined entry<br />
st<strong>and</strong>ards are met.<br />
Entry Supervisor: The person (employer, foreman, or crew chief) responsible<br />
for determining if acceptable entry conditions are present at a permit space,<br />
authorizing entry, overseeing entry operations, <strong>and</strong> terminating entry when<br />
required. Entry supervisors may also serve as attendants or entrant provided<br />
<strong>the</strong>y have received <strong>the</strong> required training.<br />
8 <strong>Safety</strong> <strong>and</strong> <strong>Health</strong> <strong>Field</strong> <strong>Manual</strong>
CONFINED SPACE<br />
TRAINING<br />
Employees associated with entry into confined spaces are required to be<br />
trained before any entry is performed into a confined space. The training<br />
addresses hazards associated with <strong>the</strong> spaces <strong>and</strong> specific hazards contained<br />
in <strong>the</strong> workplace.<br />
Each employee working inside <strong>and</strong> outside <strong>the</strong> confined space shall be<br />
adequately trained in rescue <strong>and</strong> cardiac pulmonary resuscitation.<br />
A qualified attendant shall be posted near <strong>the</strong> entrance for <strong>the</strong> duration of <strong>the</strong><br />
work. The qualified attendant shall be in constant communication with <strong>the</strong><br />
entrants while <strong>the</strong> job is in progress. The qualified attendant is responsible for:<br />
monitoring atmospheric conditions, personnel entry/exit, potential hazards,<br />
sign in log, <strong>and</strong> emergency assistance as needed.<br />
INSPECTION<br />
Inspections associated with hazards of confined space entry are required prior<br />
to <strong>and</strong> during entry.<br />
Air quality testing shall be performed:<br />
• Prior to every entry when <strong>the</strong> space is vacant;<br />
• After a 10 minute ventilation period (if ventilation is necessary);<br />
• At least hourly for permit-required confined spaces.<br />
• More frequently, if conditions or suspicions warrant.<br />
In addition, air monitors shall be worn by all persons entering <strong>the</strong> confined<br />
space.<br />
Rescue <strong>and</strong> Emergency Services<br />
Employers shall develop <strong>and</strong> implement procedures <strong>and</strong> provide rescue <strong>and</strong><br />
emergency equipment needed to reach a victim(s) within an appropriate time<br />
frame.<br />
DO:<br />
• Have a rescue plan in place before entering a confined space<br />
• Have a competent person determine if entry conditions are acceptable to<br />
enter a permit space<br />
• Have a competent person must always serve as attendant or entrant as long<br />
as <strong>the</strong>y have received adequate <strong>and</strong> required training<br />
• Have a written document developed by <strong>the</strong> employer which authorizing<br />
entry into spaced which are permitted <strong>and</strong> that meet <strong>the</strong> conditions of<br />
confined space<br />
• Perform air quality testing prior to <strong>and</strong> during entry into confined space<br />
• Wear air monitors when entering confined space<br />
<strong>Sealant</strong>, waterproofing & Restoration Institute 9
CONFINED SPACE | DRINKING WATER<br />
DON’T:<br />
• Enter a confined space without proper training or proper supervision<br />
• Enter a confined space without proper air quality testing <strong>and</strong> without<br />
wearing air monitors<br />
• Enter a confined space without verifying that all employees working both<br />
inside <strong>and</strong> outside of <strong>the</strong> confined space have had rescue training <strong>and</strong> are<br />
able to perform CPR (cardiac pulmonary resuscitation)<br />
• Enter a confined space without reviewing hazard with attendant <strong>and</strong><br />
signing log that you are entering<br />
DRINKING WATER – 1926.51<br />
An employer is required to provide an adequate supply of potable water in all<br />
places of employment. This applies to offices, field offices, <strong>and</strong> jobsites.<br />
“Potable water” is defined in Section 1926.51: water which<br />
meets <strong>the</strong> quality st<strong>and</strong>ards prescribed in <strong>the</strong> U.S. Public<br />
<strong>Health</strong> Service Drinking Water St<strong>and</strong>ards, published in<br />
42 CFR Part 721, or water which is approved for drinking<br />
purposes by <strong>the</strong> State or local authority having jurisdiction.<br />
Portable containers used to dispense<br />
drinking water shall be capable of being<br />
tightly closed <strong>and</strong> equipped with a tap.<br />
Water shall not be dipped from an open<br />
container.<br />
DO:<br />
• Have an adequate supply of potable<br />
water in all places of employment; office, field office, jobsites.<br />
• Provide single service (one time use) drinking cups. Common drinking<br />
cups are prohibited.<br />
• Provide a sanitary container for unused cups <strong>and</strong> a receptacle for used<br />
cups.<br />
• Clearly mark <strong>the</strong> container used to distribute drinking water as to <strong>the</strong><br />
nature of its contents <strong>and</strong> that it is not to be used for any o<strong>the</strong>r purpose.<br />
DON’T:<br />
• Use outlets for non-potable water such as water for industrial or firefighting<br />
purposes for drinking water.<br />
• Allow cross contamination, open or potential, between a system furnishing<br />
potable water <strong>and</strong> a system furnishing non-potable water.<br />
10 <strong>Safety</strong> <strong>and</strong> <strong>Health</strong> <strong>Field</strong> <strong>Manual</strong>
ELECTRICAL SAFETY – 1926.400 to 1926.449<br />
Electric shock can cause serious injuries <strong>and</strong> death!<br />
ELECTRICAL SAFETY<br />
General safety precautions:<br />
<strong>Safety</strong> to personnel <strong>and</strong> safe operation of machines <strong>and</strong> tools should be<br />
uppermost in all considerations of using electricity on <strong>the</strong> job site. Electrical<br />
problems are among <strong>the</strong> most commonly cited OSHA violations. There are<br />
many specific st<strong>and</strong>ards that address electrical safety. Refer to <strong>the</strong> OSHA<br />
regulations for specific applications.<br />
The OSHA Construction st<strong>and</strong>ard says:<br />
1926.404(b) (1) (ii) Ground-fault circuit interrupters. All 120-volt, single-phase<br />
15 <strong>and</strong> 20-ampere receptacle outlets on construction sites, which are not a part<br />
of <strong>the</strong> permanent wiring of <strong>the</strong> building or structure <strong>and</strong> which are in use<br />
by employees, shall have approved fault circuit interrupters for personnel<br />
protection.<br />
Examples of GFI’s<br />
Ground Fault Circuit Interrupters. The GFCI is a fast acting device that senses<br />
a small current leakage to ground. Within 1/40 of a second it shuts off <strong>the</strong><br />
electricity <strong>and</strong> “interrupts” <strong>the</strong> current flow. It provides effective protection<br />
against shocks <strong>and</strong> electrocution. GFCI’s are required for use on all construction<br />
sites <strong>and</strong> projects. A few variations of GFCI’s are shown above.<br />
Extension Cords: Extension cords are convenient ways to provide power to<br />
portable equipment. However, <strong>the</strong>y are often misused, resulting in injuries<br />
<strong>and</strong> expensive OSHA fines. Extension cords may only be used for remodeling,<br />
maintenance, repair or demolition of buildings <strong>and</strong> for temporary, holiday<br />
needs.<br />
Electrical Fires: On construction sites, one type of an electrical fire that may<br />
occur is when portable tools overload a power source. If possible to do safely,<br />
immediately disconnect <strong>the</strong> tool or power cord from <strong>the</strong> power source; this<br />
usually results in <strong>the</strong> electrical fire being extinguished. An extinguishing<br />
agent may also be used to ensure <strong>the</strong> fire is out.<br />
<strong>Sealant</strong>, waterproofing & Restoration Institute 11
ELECTRICAL SAFETY<br />
DO:<br />
• Provide adequate overload <strong>and</strong> short-circuit protection for safe operation.<br />
The interrupting capacity of all breakers <strong>and</strong> fuses must be sufficient to<br />
clear <strong>the</strong> fault current rapidly <strong>and</strong> without damage to itself.<br />
• Provide cord protection for flexible cords <strong>and</strong> cables passing through<br />
doorways or o<strong>the</strong>r pinch points.<br />
• Keep a fire extinguisher on work site at ALL times. The st<strong>and</strong>ard procedure<br />
for fighting electrical fires is to open <strong>the</strong> circuit <strong>and</strong> <strong>the</strong>n apply an approved<br />
extinguishing agent. A carbon dioxide (CO2) extinguisher offers <strong>the</strong><br />
advantage of extinguishing <strong>the</strong> fire, cooling <strong>the</strong> apparatus, leaving no<br />
residue, <strong>and</strong> having no adverse affect on <strong>the</strong> insulation <strong>and</strong> metal parts; it<br />
may be used on live circuits. CO2 should not be used in confined spaces,<br />
unless a breathing apparatus is used. A dry chemical extinguisher may be<br />
used; however it will leave a residue.<br />
DON’T:<br />
• Use Shop Made Cords with Receptacle Boxes. Among <strong>the</strong> most common<br />
electrical violations is when a multiple receptacle box, designed to be<br />
surface mounted, is fitted with a flexible cord <strong>and</strong> is placed on <strong>the</strong> floor to<br />
provide power to various tools or equipment. These are not permitted <strong>and</strong><br />
should be taken out of service.<br />
• Use a length or size (wire gauge) extension cord that exceeds <strong>the</strong> max<br />
recommended by tool manufacturer.<br />
• Splice extension cords with electrical tape. Splices should be approved<br />
permanent splices.<br />
12 <strong>Safety</strong> <strong>and</strong> <strong>Health</strong> <strong>Field</strong> <strong>Manual</strong>
EXCAVATING AND TRENCHING<br />
EXCAVATION AND TRENCHING – 1926.650 - 652<br />
Each employee in an excavation shall be protected from cave-ins by an<br />
adequate protective system except when:<br />
• Excavations are made entirely in stable rock; or<br />
• Excavations are less than 5ft in depth <strong>and</strong> examination of <strong>the</strong> ground by a<br />
competent person provides no indication of a potential cave-in.<br />
Some of <strong>the</strong> protective systems for trenches are:<br />
• Sloped for stability; or<br />
• Cut to create stepped benched grades; or<br />
• Supported by a system made with posts,<br />
beams, shores or planking <strong>and</strong> hydraulic<br />
jacks; or<br />
• Supported by a trench box to protect workers<br />
in a trench.<br />
Additionally, excavated or o<strong>the</strong>r materials<br />
must be at least 2 feet back from <strong>the</strong> edge of<br />
a trench; <strong>and</strong><br />
A safe means of egress shall be provided<br />
within 25 feet of workers in a trench.<br />
<strong>Sealant</strong>, waterproofing & Restoration Institute 13
EXCAVATING AND TRENCHING<br />
DO:<br />
• Provide ladders, stairways, ramps or o<strong>the</strong>r means of egress in all trenches<br />
that are 4ft deep or more.<br />
• Position means of egress within 25 lateral feet of workers.<br />
• Make sure that structural ramps that are used solely for access or egress<br />
from trenches are designed by a competent person.<br />
• Use ear<strong>the</strong>n ramps as a means of egress only if a worker can walk <strong>the</strong>m in<br />
an upright position <strong>and</strong> only if <strong>the</strong>y have been evaluated by a competent<br />
person.<br />
• Make sure that protective systems for trenches 20 feet deep or greater have<br />
been designed by a registered professional engineer.<br />
• Make sure that trenches are inspected by a competent person prior to entry<br />
<strong>and</strong> after any hazard-increasing event such as a rainstorm, vibration or<br />
excessive surcharge loads.<br />
• Keep spoils at least 2ft back from <strong>the</strong> edge of a trench.<br />
• Call <strong>the</strong> national “ Call Before You Dig” number 811 or locally designated<br />
number to locate underground utilities.<br />
DON’T:<br />
• Enter an unprotected trench.<br />
These workers are protected from a<br />
cave-in <strong>and</strong> have safe access <strong>and</strong><br />
egress from <strong>the</strong> trench.<br />
These workers are not protected<br />
from a cave-in, nor do <strong>the</strong>y have any<br />
apparent safe access or egress from<br />
<strong>the</strong> trench.<br />
14 <strong>Safety</strong> <strong>and</strong> <strong>Health</strong> <strong>Field</strong> <strong>Manual</strong>
FALL PROTECTION<br />
FALL PROTECTION – 1926.500-503<br />
Section 1926.500-503, outlines <strong>the</strong> requirements for fall protection. Section 29<br />
CFR 1926.501(b)(1) states that “Each employee on a walking/working surface<br />
(horizontal <strong>and</strong> vertical surface) with an unprotected side or edge which<br />
is 6 feet (1.8 m) or more above a lower level shall be protected from falling<br />
by <strong>the</strong> use of guardrail systems, safety net systems or personal fall arrest<br />
systems.” The st<strong>and</strong>ard stresses that employers are required to “determine<br />
if <strong>the</strong> walking/working surfaces on which its employees are to work have<br />
<strong>the</strong> strength <strong>and</strong> structural integrity to support employees safely.” Employers<br />
must also provide guardrail systems, safety net systems, or personal fall arrest<br />
systems for employees working at heights above 6ft.<br />
There are two types of fall protection systems. A fall restraint system <strong>and</strong> a<br />
fall arrest system.<br />
• A fall restraint system such as a guardrail <strong>and</strong> a tie off system keeps you<br />
from reaching a “fall” point.<br />
• The fall arrest system STOPS you if you’re falling.<br />
• Refer to The <strong>Safety</strong> Netting Section below for additional Fall Protection<br />
methods.<br />
If you are at risk for falling 6 ft or more you should wear <strong>the</strong> appropriate<br />
fall protection equipment. The entire fall arrest system must be capable of<br />
withst<strong>and</strong>ing <strong>the</strong> tremendous impact forces involved in a fall. The person<br />
without protection will free fall 4ft in ½ second <strong>and</strong> 16ft in 1 second!<br />
Fall Arrest System<br />
Fall Restraint System<br />
Five Parts of a Fall Arrest System<br />
1. Anchorage – 5000 lb. minimum<br />
2. Lifeline<br />
3. Rope Grab<br />
4. Lanyard<br />
5. Full Body Harness<br />
Note: The first option for Fall Prevention should be a guard rail or similar type<br />
of Fall Protection System.. The use of a Personal Fall Arrest or Fall Restraint<br />
System should be used in lieu of a Fixed Fall Protection Guarding System.<br />
<strong>Sealant</strong>, waterproofing & Restoration Institute 15
FALL PROTECTION | FIRE EXTINGUISHERS<br />
DO:<br />
• Inspect your equipment daily.<br />
• Look for fraying ropes, crack of o<strong>the</strong>r defects in hardware.<br />
• Replace defective equipment.<br />
• Make sure you are attached to a Sound Anchorage.<br />
• Replace any equipment, including ropes, involved in a fall.<br />
• Pick an anchorage point that will support 5000 pounds per worker.<br />
• Tie off above your head. A six foot tall person who ties off at <strong>the</strong> feet could<br />
free-fall as much as 12ft.<br />
• If tying off below <strong>the</strong> waist is <strong>the</strong> only option, be sure to use a lanyard<br />
designed for <strong>the</strong> greater fall distance.<br />
• Use <strong>the</strong> shortest lanyard possible. The shorter <strong>the</strong> tie-off, <strong>the</strong> shorter <strong>the</strong><br />
fall. Place your anchorage directly above your work area to avoid potential<br />
swing fall hazards<br />
DON’T:<br />
• Use equipment if <strong>the</strong>re is any doubt about <strong>the</strong> safety of <strong>the</strong> equipment.<br />
• Tie a knot in <strong>the</strong> lanyard. This will reduce its strength.<br />
• Use pipes, electrical conduits, light fixtures, or guardrails as anchor points.<br />
• Use any lanyards without double-action snap hooks.<br />
• Join multiple lanyards toge<strong>the</strong>r to reach an anchorage.<br />
• Allow more than one worker to tie-off to <strong>the</strong> same anchorage unless it is<br />
designed <strong>and</strong> approved by an engineer.<br />
FIRE EXTINGUISHERS – 1926.150<br />
Types of Fire Extinguishers:<br />
• Water – Filled with water <strong>and</strong> pressurized air.<br />
• Carbon Dioxide – Contains a non-flammable gas extinguishing agent.<br />
• Dry Chemical – Multipurpose, contain a dry powder extinguishing agent.<br />
Choosing The Right Fire Extinguisher <strong>and</strong> <strong>the</strong>ir Classes:<br />
16 <strong>Safety</strong> <strong>and</strong> <strong>Health</strong> <strong>Field</strong> <strong>Manual</strong>
FIRE EXTINGUISHERS<br />
CLASS A: Class A fires involve common combustibles such as wood, paper,<br />
cloth, rubber, trash <strong>and</strong> plastics. They are common in typical commercial <strong>and</strong><br />
home settings, but can occur anywhere <strong>the</strong>se types of materials are found.<br />
CLASS B: Class B fires involve flammable liquids’ gases, solvents, oil,<br />
gasoline, paint, lacquers, tars <strong>and</strong> o<strong>the</strong>r syn<strong>the</strong>tic or oil-based products. Class<br />
B fires often spread rapidly <strong>and</strong>, unless properly secured, can re-flash after <strong>the</strong><br />
flames are extinguished.<br />
CLASS C: Class C fires involve energized electrical equipment, such as wiring,<br />
controls, motors, data processing panels or appliances. They can be caused by<br />
a spark, power surge or short circuit <strong>and</strong> typically occur in locations that are<br />
difficult to reach <strong>and</strong> see.<br />
NOTE: Although ABC <strong>and</strong> BC Dry Chemical extinguishers can control a fire involving<br />
electronic equipment, <strong>the</strong> National Fire Code (NFPA 75-1999 edition), Section 6-3-2,<br />
specifically advises against dry-chemical extinguishers for fires involving computers or<br />
o<strong>the</strong>r delicate electronic equipment due to <strong>the</strong> potential damage from residues.<br />
CLASS D: Class D fires involve combustible metals such as magnesium <strong>and</strong><br />
sodium. Combustible metal fires are unique industrial hazards which require<br />
special dry powder agents.<br />
CLASS K: Class K fires involve combustible cooking media such as oils <strong>and</strong><br />
grease commonly found in commercial kitchens. The new cooking media<br />
formulations used form commercial food preparation require a special wet<br />
chemical extinguishing agent that is specially suited for extinguishing <strong>and</strong><br />
suppressing <strong>the</strong>se extremely hot fires that have <strong>the</strong> ability to re-flash.<br />
Fire Extinguishers Essentials:<br />
• All fire extinguishers should be inspected monthly by a responsible person.<br />
• All fire extinguishers should be serviced by a qualified technician on a<br />
yearly basis.<br />
• Fire extinguishers have operating instructions listed in <strong>the</strong> name plate;<br />
familiarize yourself with <strong>the</strong>m.<br />
• Fire extinguishers of <strong>the</strong> proper type <strong>and</strong> size for <strong>the</strong> exposure shall be<br />
readily available.<br />
• Be familiar with <strong>the</strong> location of fire extinguishers on <strong>the</strong> job site.<br />
• When fueling equipment, always have a fire extinguishers close by.<br />
• Most fire extinguishers operate using <strong>the</strong> P.A.S.S. method:<br />
P – Pull <strong>the</strong> locking pin.<br />
A – Aim at <strong>the</strong> base of <strong>the</strong> flames.<br />
S – Squeeze <strong>the</strong> h<strong>and</strong>le.<br />
S – Sweep back <strong>and</strong> forth over <strong>the</strong> burning area.<br />
<strong>Sealant</strong>, waterproofing & Restoration Institute 17
FIRE EXTINGUISHERS | FIRST AID<br />
DO:<br />
• Know <strong>the</strong> locations of extinguishers on <strong>the</strong> job site.<br />
DON’T:<br />
• Use water agents on grease <strong>and</strong> oil fires or use dry chemical extinguishers<br />
on electrical devices or anything with metal because it is corrosive.<br />
• Aim at <strong>the</strong> flames of <strong>the</strong> fire.<br />
• St<strong>and</strong> too close to <strong>the</strong> fire or even plan to walk on those extinguished<br />
areas.<br />
• Put <strong>the</strong>m on areas where fire is most likely to happen making <strong>the</strong>m<br />
unreachable.<br />
• Leave <strong>the</strong>m on corridors or any anything that is highly magnetic.<br />
• Violate <strong>the</strong> st<strong>and</strong>ards because even with <strong>the</strong>ir presence you might still be at<br />
risk or more prone to <strong>the</strong> dangers of fire.<br />
• Play with <strong>the</strong> device or even play with its substances use because of <strong>the</strong><br />
possibility of injuring you.<br />
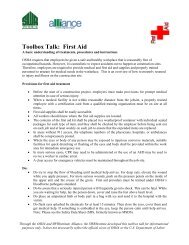
FIRST AID – 1926.50<br />
The OSHA st<strong>and</strong>ard states:<br />
• The employer shall ensure <strong>the</strong> availability of medical personnel for advice<br />
<strong>and</strong> consultation on matters of occupational health.<br />
• Provisions shall be made prior to commencement of <strong>the</strong> project for prompt<br />
medical attention in case of serious injury.<br />
• In <strong>the</strong> absence of an infirmary, clinic, hospital, or physician, that is reasonably<br />
accessible in terms of time <strong>and</strong> distance to <strong>the</strong> worksite, which is available<br />
for <strong>the</strong> treatment of injured employees, a person who has a valid certificate<br />
in first-aid training from <strong>the</strong> U.S. Bureau of Mines, <strong>the</strong> American Red Cross,<br />
or equivalent training that can be verified by documentary evidence, shall be<br />
available at <strong>the</strong> worksite to render first aid.<br />
• First aid supplies shall be easily accessible when required.<br />
• The contents of <strong>the</strong> first aid kit shall be placed in a wea<strong>the</strong>rproof container<br />
with individual sealed packages for each type of item, <strong>and</strong> shall be checked<br />
by <strong>the</strong> employer before being sent out on each job <strong>and</strong> at least weekly on each<br />
job to ensure that <strong>the</strong> expended items are replaced.<br />
• Proper equipment for prompt transportation of <strong>the</strong> injured person to a<br />
physician or hospital, or a communication system for contacting necessary<br />
ambulance service, shall be provided.<br />
• In areas where 911 is not available, <strong>the</strong> telephone numbers of <strong>the</strong> physicians,<br />
hospitals, or ambulances shall be conspicuously posted.<br />
18 <strong>Safety</strong> <strong>and</strong> <strong>Health</strong> <strong>Field</strong> <strong>Manual</strong>
FIRST AID<br />
• Where <strong>the</strong> eyes or body of any person may<br />
be exposed to injurious corrosive materials,<br />
suitable facilities for quick drenching or flushing<br />
of <strong>the</strong> eyes <strong>and</strong> body shall be provided within<br />
<strong>the</strong> work area for immediate emergency use.<br />
DO:<br />
• Make sure emergency numbers are posted by phones.<br />
• Know <strong>the</strong> location of <strong>the</strong> closest emergency medical facility.<br />
• Know <strong>the</strong> location of <strong>the</strong> nearest first aid kit <strong>and</strong> know how to use it.<br />
• Try to stop <strong>the</strong> flow of bleeding until medical help arrives. For deep cuts,<br />
elevate <strong>the</strong> wound while you apply pressure. For more serious wounds,<br />
push on <strong>the</strong> pressure points on <strong>the</strong> inside of <strong>the</strong> upper arm <strong>and</strong> crease of <strong>the</strong><br />
groin.<br />
• Be aware that a seriously injured person will frequently go into shock. This<br />
can be fatal. While you are waiting for help, lay <strong>the</strong> person down, cover<br />
<strong>and</strong> raise <strong>the</strong> feet above heart level.<br />
• Place an amputated <strong>the</strong> limb or body part in a bag with ice <strong>and</strong> send it to <strong>the</strong><br />
hospital with <strong>the</strong> victim<br />
• Keep <strong>the</strong> person still <strong>and</strong> wait for emergency help.<br />
• Flush eyes splashed by chemicals for at least 15 minutes. Then close <strong>the</strong><br />
eyes, cover <strong>the</strong>m <strong>and</strong> get medical help. If something is embedded in <strong>the</strong><br />
eye, keep <strong>the</strong> person calm until help arrives. Note: Please see Material<br />
<strong>Safety</strong> Data Sheet (“MSDS”).<br />
• Cool burns with cool (not cold) running water or a cool water compress<br />
(wet towel or h<strong>and</strong>kerchief). Elevate burned limbs.<br />
DON’T:<br />
• Touch blood or o<strong>the</strong>r bodily fluids without protective gloves.<br />
• Provide anything to drink to a person in shock.<br />
• Move <strong>the</strong> victim unless absolutely necessary until you are sure what <strong>the</strong><br />
injury is <strong>and</strong> first aid has been rendered<br />
• Move a person with broken bones. The wrong move can cause serious<br />
injury - even death.<br />
• Use ice, lotion or ointment on a burn.<br />
<strong>Sealant</strong>, waterproofing & Restoration Institute 19
HAZARD COMMUNICATION<br />
HAZARD COMMUNICATION (HAZ COM) – 1926.59<br />
(identical to 1910.1200)<br />
The purpose of OSHA’s hazard communication st<strong>and</strong>ard is to ensure that<br />
employees underst<strong>and</strong> <strong>the</strong> hazards of <strong>the</strong> chemicals <strong>the</strong>y work with, know<br />
how to safely use those chemicals <strong>and</strong> know what protective measures are<br />
available to prevent adverse effects from occurring.<br />
A Material <strong>Safety</strong> Data Sheet (MSDS) provides information <strong>the</strong> manufacturer<br />
of a product considers necessary for you to determine what chemicals are in it<br />
<strong>and</strong> what steps to take to protect yourself when using <strong>the</strong> product.<br />
MSDSs must be readily accessible to employees at all applicable work<br />
locations. MSDSs provide <strong>the</strong> following information:<br />
Chemical Identity: This uses <strong>the</strong> name that is on <strong>the</strong> label. This section also<br />
tells you who makes or sells it <strong>and</strong> where <strong>the</strong>y’re located. It may also say<br />
when <strong>the</strong> MSDS was prepared.<br />
Hazardous Ingredients/Identity. This area lists all hazardous ingredients<br />
which have been determined to be health hazards <strong>and</strong> which compromise 1%<br />
or greater of <strong>the</strong> composition or any carcinogenic ingredients which comprise<br />
0.1% of <strong>the</strong> composition will also be listed.<br />
Physical Data. This section explains <strong>the</strong> chemical’s normal appearance <strong>and</strong><br />
odor. Anything different should alert you to possible danger. This also lists<br />
all o<strong>the</strong>r physical properties of <strong>the</strong> product: Boiling point, melting point,<br />
vapor pressure <strong>and</strong> density, etc.<br />
Fire <strong>and</strong> Explosion Data. This section gives you <strong>the</strong> fire hazard risk. Flash<br />
point is <strong>the</strong> minimum temperature at which a flammable liquid’s vapors<br />
could catch fire if <strong>the</strong>y contact a spark or o<strong>the</strong>r ignition source. The lower<br />
<strong>the</strong> number, <strong>the</strong> higher <strong>the</strong> risk. Flammable limits are <strong>the</strong> minimum <strong>and</strong><br />
maximum amounts of vapor in <strong>the</strong> air (%) that can catch fire. It also gives you<br />
information on how to put out <strong>the</strong> fire.<br />
Reactivity Data. This tells you what could happen if this particular chemical<br />
is combined with o<strong>the</strong>r specific chemicals or air or water. This section also<br />
tells if <strong>the</strong> chemical is stable or unstable <strong>and</strong>/or if it is incompatible with any<br />
o<strong>the</strong>r chemicals.<br />
<strong>Health</strong> Hazard Data. Tells how this chemical could affect your health – acute<br />
or chronic. Acute happens immediately, for example, if you spill acid on your<br />
skin it burns. A chronic injury occurs over time – usually years. For example,<br />
inhalation of a chemical day after day, year after year may lead to respiratory<br />
problems. Also shown in this section are signs <strong>and</strong> symptoms of exposure<br />
<strong>and</strong> medical conditions aggravated by exposure. Chemicals can only enter<br />
your body one of three ways: inhaling, swallowing <strong>and</strong> through <strong>the</strong> skin.<br />
20 <strong>Safety</strong> <strong>and</strong> <strong>Health</strong> <strong>Field</strong> <strong>Manual</strong>
HAZARD COMMUNICATION<br />
Precautions for Safe H<strong>and</strong>ling <strong>and</strong> Use. Tells you what to do if <strong>the</strong>re is a spill.<br />
Control Measures. This section tells you how to protect yourself when you<br />
work with <strong>the</strong> chemical. What personal protective equipment is required &<br />
when to wear it. This includes: type of respirator, type of protective gloves,<br />
eye protection, <strong>and</strong> o<strong>the</strong>r protective clothing or equipment.<br />
HazCom signs to look for<br />
DO:<br />
• Use <strong>and</strong> h<strong>and</strong>le all chemicals in accordance with manufacturers label <strong>and</strong><br />
within Federal, State <strong>and</strong> Local regulations.<br />
• Discontinue use of chemicals if wind speeds or wea<strong>the</strong>r conditions affect<br />
<strong>the</strong> safety of workers or <strong>the</strong> public.<br />
• Use MSDS sheets for any chemical being used.<br />
• Use adequate personal protective equipment.<br />
• Remember that employees have both a need <strong>and</strong> a right to know <strong>the</strong> hazards<br />
<strong>and</strong> <strong>the</strong> identities of <strong>the</strong> chemicals <strong>the</strong>y are exposed to when working.<br />
• Make sure you are properly trained in each chemical that you use.<br />
• Make sure all containers are labeled or properly disposed of.<br />
DON’T:<br />
• Have any eye or skin contact with chemicals.<br />
• Use or store chemicals that are not labeled.<br />
• Use chemicals without proper training <strong>and</strong> protection.<br />
<strong>Sealant</strong>, waterproofing & Restoration Institute 21
HAZARDOUS WASTE OPERATIONS AND EMERGENCY RESPONSE<br />
HAZARDOUS WASTE OPERATIONS AND EMERGENCY<br />
RESPONSE – 1926.65 (identical to 1910.120)<br />
OSHA’s Hazardous Waste Operations <strong>and</strong> Emergency Response (HAZWOPER)<br />
st<strong>and</strong>ard covers clean up operations or emergency response operations for<br />
releases of hazardous substances. A hazardous substance means, by reason<br />
of being explosive, flammable, poisonous, corrosive, oxidizing, irritating, or<br />
o<strong>the</strong>rwise harmful, is likely to cause death or injury. Hazardous Materials<br />
(HAZ MAT) are regulated by several government agencies including <strong>the</strong><br />
Environmental Protection Agency (EPA), <strong>the</strong> Department of Transportation<br />
(DOT) <strong>and</strong> OSHA.<br />
Additional information about hazardous materials is covered under <strong>the</strong><br />
Hazard Communication (HAZ COM) section of this h<strong>and</strong>book. Methods<br />
for protection against exposure to hazardous materials are covered under<br />
<strong>the</strong> Personal Protective Equipment (PPE) section of this h<strong>and</strong>book. The<br />
transportation of hazardous materials is not covered in this h<strong>and</strong>book.<br />
The clean up <strong>and</strong> disposal of hazardous materials requires special training<br />
<strong>and</strong> is strictly regulated.<br />
DO:<br />
• Assure that general site workers engaged in hazardous substance removal<br />
or o<strong>the</strong>r activities which expose or potentially expose workers to hazardous<br />
substances <strong>and</strong> health hazards shall receive a minimum of 40 hours of<br />
HAZWOPER training.<br />
• Develop a written safety <strong>and</strong> health program for <strong>the</strong>ir employees involved<br />
in hazardous waste operation. The requirements of <strong>the</strong> safety <strong>and</strong> health<br />
program are extensive. Refer to 29 CFR 1926.65 for specific HAZWOPER<br />
requirements.<br />
• Always have <strong>the</strong> Material <strong>Safety</strong> Data Sheet (“MSDS”) available for<br />
materials you are using. They may be required in case of an emergency.<br />
• Follow emergency procedures or call 911 in case of an accidental release.<br />
DON’T:<br />
• Use any hazardous material without proper training.<br />
• Attempt to clean up hazardous materials without proper training.<br />
22 <strong>Safety</strong> <strong>and</strong> <strong>Health</strong> <strong>Field</strong> <strong>Manual</strong>
HEARING PROTECTION/OCCUPATIONAL NOISE EXPOSURE<br />
HEARING PROTECTION/OCCUPATIONAL NOISE<br />
EXPOSURE – 1926.52<br />
• Exposure to high noise levels can cause hearing loss or impairment.<br />
• There is no cure for noise-induced hearing loss.<br />
• Specifically designed protection is required.<br />
• Waxed cotton, foam, or fiberglass wool ear plugs are self-forming <strong>and</strong> work<br />
as well as most molded ear plugs when inserted properly.<br />
• Plain cotton is ineffective as protection against hazardous noise.<br />
• Earmuffs need to make a perfect<br />
seal around <strong>the</strong> ear to be effective.<br />
• Noise levels of many construction<br />
operations frequently exceed 90<br />
dBA.<br />
• When workers are subjected to<br />
sound levels listed in <strong>the</strong> below<br />
table, <strong>the</strong>y must wear hearing<br />
protection:<br />
Properly inserted<br />
foam ear plugs<br />
Disposable foam<br />
ear plugs; coins to<br />
show scale<br />
Allowable Exposure Levels to Sound<br />
DO:<br />
Sound level (dBA)<br />
Time per day (hours)<br />
90 8<br />
95 4<br />
100 2<br />
Sound level (dBA)<br />
Time per day (hours)<br />
105 1<br />
110 ½<br />
115 ¼ or less<br />
• Wear hearing protection when sound levels exceed 90 dBA.<br />
• Train workers to properly use hearing protection devices.<br />
DON’T:<br />
• Reuse disposable ear plugs.<br />
• Use earmuffs as hearing protection if glasses, sideburns, long hear, or facial<br />
movements prevent a perfect seal.<br />
<strong>Sealant</strong>, waterproofing & Restoration Institute 23
HISTOPLASMOSIS<br />
HISTOPLASMOSIS<br />
• Histoplasmosis [his-toh-plaz-MOH-sis] is a fungal infection that varies<br />
in symptoms <strong>and</strong> seriousness. Histoplasmosis is caused by Histoplasma<br />
capsulatum, a fungus. This fungus comes from <strong>the</strong> droppings of birds<br />
<strong>and</strong> bats. The fungus can become airborne when disturbed by a variety of<br />
construction activities. This health risk can be significant <strong>and</strong> <strong>the</strong>refore it is<br />
important to prevent exposure to Histoplasmosis.<br />
The distribution of histoplasmosis throughout <strong>the</strong> world (marked white).<br />
• The fungus produces spores that can be inhaled when <strong>the</strong>y get into <strong>the</strong> air.<br />
Spores are hardy forms of <strong>the</strong> fungus that can live in <strong>the</strong> environment for a<br />
long time.<br />
• Histoplasmosis usually affects <strong>the</strong> lungs <strong>and</strong> causes a short-term,<br />
treatable lung infection. When it affects o<strong>the</strong>r parts of <strong>the</strong> body, it is called<br />
disseminated histoplasmosis, <strong>and</strong> can be fatal. Acute histoplasmosis can<br />
also spread from <strong>the</strong> lungs <strong>and</strong> lead to <strong>the</strong> disseminated form, especially in<br />
persons with weakened immune systems.<br />
Chest X-ray of a patient with acute pulmonary histoplasmosis<br />
24 <strong>Safety</strong> <strong>and</strong> <strong>Health</strong> <strong>Field</strong> <strong>Manual</strong>
HISTOPLASMOSIS<br />
• The histoplasmosis fungus lives in soil, especially soil that is enriched with<br />
bat or bird droppings.<br />
• People get histoplasmosis when <strong>the</strong>y brea<strong>the</strong> in dust that contains <strong>the</strong><br />
fungus.<br />
• Symptoms of acute disease usually appear in 5 to 18 days after exposure<br />
<strong>and</strong> are tiredness, fever, chills, chest pains, <strong>and</strong> a dry cough. The chronic<br />
lung infection is like tuberculosis <strong>and</strong> occurs mostly in persons who already<br />
have lung disease.<br />
• Histoplasmosis is treatable with fungus-killing medicines.<br />
• The disease does not spread from person to person.<br />
• To prevent histoplasmosis:<br />
• Avoid exposure to dust from soil that may be contaminated.<br />
• Avoid disturbing accumulations of bat or bird droppings, as often found<br />
in open air clock <strong>and</strong> bell towers.<br />
• Have contaminated areas abated prior to working in vicinity.<br />
• Wear proper personal protective equipment <strong>and</strong> disposable clothing<br />
when working in high-risk areas.<br />
DO:<br />
• Consult <strong>the</strong> “Histoplasmosis: Protecting Workers at Risk” document prepared<br />
by <strong>the</strong> National Institute for Occupational <strong>Safety</strong> <strong>and</strong> <strong>Health</strong>/National Center<br />
for Infection Diseases* for more information on work practices <strong>and</strong> personal<br />
protective equipment that will reduce <strong>the</strong> risk of infection.<br />
• Have contaminated areas abated to create a safe work atmosphere.<br />
DON’T:<br />
• Work in an area with visible accumulation of bird or bat droppings without<br />
proper training <strong>and</strong> protection.<br />
Additional Information:<br />
• http://www.dhpe.org/infect/histo.html<br />
• * http://icwdm.org/publications/pdf/Diseases/HistoCDC2004.pdf<br />
<strong>Sealant</strong>, waterproofing & Restoration Institute 25
HOUSEKEEPING<br />
HOUSEKEEPING – 1926.25<br />
The OSHA st<strong>and</strong>ard states:<br />
• During <strong>the</strong> course of construction, alteration, or repairs, form <strong>and</strong> scrap<br />
lumber with protruding nails, <strong>and</strong> all o<strong>the</strong>r debris, shall be kept cleared<br />
from work areas, passageways, <strong>and</strong> stairs, in <strong>and</strong> around buildings or o<strong>the</strong>r<br />
structures.<br />
• Combustible scrap <strong>and</strong> debris shall be removed at regular intervals during<br />
<strong>the</strong> course of construction. Safe means shall be provided to facilitate such<br />
removal.<br />
• Containers shall be provided for <strong>the</strong> collection <strong>and</strong> separation of waste,<br />
trash, oily <strong>and</strong> used rags, <strong>and</strong> o<strong>the</strong>r refuse. Containers used for garbage <strong>and</strong><br />
o<strong>the</strong>r oily, flammable, or hazardous wastes, such as caustics, acids, harmful<br />
dusts, etc. shall be equipped with covers. Garbage <strong>and</strong> o<strong>the</strong>r waste shall be<br />
disposed of at frequent <strong>and</strong> regular intervals.<br />
DO:<br />
• Secure tools, materials <strong>and</strong> any o<strong>the</strong>r object that can become a falling or<br />
dropping hazard.<br />
• Verify toeboards are installed properly to prevent kicking materials off <strong>the</strong><br />
scaffold or swingstage.<br />
• Regularly inspect <strong>the</strong> jobsite for hazards in material storage, debris buildup,<br />
tripping hazards or o<strong>the</strong>r workplace dangers.<br />
• Identify <strong>the</strong> employees who will pick up waste <strong>and</strong> debris <strong>and</strong> define cleanup<br />
intervals.<br />
• Verify that signs, signals <strong>and</strong> barricades are intact <strong>and</strong> legible.<br />
DON’T:<br />
• Store materials such that <strong>the</strong>y will obstruct exits.<br />
• Allow debris, trash, ice, snow, slippery or o<strong>the</strong>r materials to build up on<br />
scaffold decks or swing stage platforms.<br />
• Allow stacked material to slide, fall or collapse.<br />
• Store excess material or equipment onsite if avoidable.<br />
• Walk past a hazard. Correct it immediately or notify a qualified person to<br />
correct it.<br />
26 <strong>Safety</strong> <strong>and</strong> <strong>Health</strong> <strong>Field</strong> <strong>Manual</strong>
ILLUMINATION<br />
ILLUMINATION (LIGHTING) – 1926.26<br />
Poor lighting on construction sites creates a hazard to employees <strong>and</strong> civilians<br />
<strong>and</strong> increases <strong>the</strong> potential for accidents. All means of access <strong>and</strong> walkways<br />
leading to working areas in addition to <strong>the</strong> working areas <strong>the</strong>mselves must be<br />
adequately illuminated.<br />
Halogen-St<strong>and</strong>up Light String Light Wobble Light<br />
Temporary lights shall meet <strong>the</strong> following requirements:<br />
• Lights shall be equipped with guards to prevent accidental contact with <strong>the</strong><br />
bulb (excludes guards that are not required when <strong>the</strong> construction of <strong>the</strong><br />
reflector is such that <strong>the</strong> bulb is deeply recessed).<br />
• Temporary lights shall be equipped with heavy duty electric cords with<br />
connections <strong>and</strong> insulation maintained in safe condition. Temporary lights<br />
shall not be suspended by <strong>the</strong>ir electric cords. String lights are designed for<br />
this means <strong>and</strong> suspension.<br />
• Splices which have insulation equal to that of <strong>the</strong> cable are permitted.<br />
• Cords shall be kept clear of working spaces <strong>and</strong> walkways or o<strong>the</strong>r locations<br />
in which <strong>the</strong>y are readily exposed to damage or wear.<br />
• Exposed non-current-carrying metal parts of temporary lights furnished by<br />
<strong>the</strong> employer shall be grounded ei<strong>the</strong>r through a third wire in <strong>the</strong> cable<br />
containing <strong>the</strong> circuit conductors or through a separate wire which is<br />
grounded at <strong>the</strong> source of <strong>the</strong> current.<br />
DO:<br />
• Arrange temporary lighting stringers in a way that does not overload<br />
branch circuits. Each branch current must be equipped with over current<br />
protection of capacity not exceeding <strong>the</strong> rated current carrying capacity of<br />
<strong>the</strong> cord used.<br />
DON’T:<br />
• Permit employees to enter dark holds, compartments, decks or o<strong>the</strong>r spaces<br />
without a flashlight or o<strong>the</strong>r portable light.<br />
• Use matches or open flames.<br />
<strong>Sealant</strong>, waterproofing & Restoration Institute 27
LADDERS<br />
LADDERS – 1926.1053<br />
The following requirements apply to all ladders:<br />
• A double-cleated ladder or two or more ladders must be provided when<br />
ladders are <strong>the</strong> only way to enter or exit a work area having 25 or more<br />
employees, or when a ladder serves simultaneous two-way traffic.<br />
• Ladder rungs, cleats, <strong>and</strong> steps must be parallel, level, <strong>and</strong> uniformly<br />
spaced when <strong>the</strong> ladder is in position for use.<br />
• A ladder must have nonconductive side rails if <strong>the</strong>y are used where <strong>the</strong><br />
worker or <strong>the</strong> ladder could contact energized electrical equipment<br />
• Portable <strong>and</strong> fixed ladders with structural defects such as broken<br />
or missing rungs, cleats or steps, broken or split rails, or corroded<br />
components shall be withdrawn from service immediately. They must<br />
be tagged “Do Not Use” or identified as defective. Repairs must restore<br />
ladder to its original design criteria.<br />
• The ladder must be capable of supporting your weight <strong>and</strong> <strong>the</strong> weight of<br />
any material you will be using<br />
The following diagrams illustrate <strong>the</strong> proper ways to set up a ladder & choose <strong>the</strong><br />
correct ladder for <strong>the</strong> job:<br />
Ladder should extend<br />
3 feet from above<br />
l<strong>and</strong>ing<br />
28 <strong>Safety</strong> <strong>and</strong> <strong>Health</strong> <strong>Field</strong> <strong>Manual</strong>
LADDERS<br />
RATING<br />
Extra heavy duty (1-A)<br />
Heavy duty (1)<br />
Medium duty (II)<br />
Light duty(III)<br />
WORK LOAD<br />
300 pounds<br />
250 pounds<br />
225 pounds<br />
200 pounds<br />
DO:<br />
• Set up <strong>the</strong> ladder on <strong>the</strong> ground floor, or o<strong>the</strong>r level stable surface.<br />
• Take your time <strong>and</strong> climb one rung at a time while using 3 points of contact.<br />
2 feet <strong>and</strong> 1 h<strong>and</strong> at all times or 2 h<strong>and</strong>s <strong>and</strong> 1 foot when climbing.<br />
• Climb down <strong>and</strong> move <strong>the</strong> ladder to get proper access to <strong>the</strong> work area.<br />
Keep your belt buckle between <strong>the</strong> rails.<br />
• Climb all ladders facing <strong>the</strong> rungs. Use a bucket or o<strong>the</strong>r means to lift objects<br />
to <strong>the</strong> work area.<br />
• Look overhead before placing a ladder. Pay special attention to power lines<br />
<strong>and</strong> o<strong>the</strong>r electrical hazards.<br />
• Block off or lock <strong>the</strong> area around <strong>the</strong> ladder to warn o<strong>the</strong>rs of your<br />
presence.<br />
DON’T:<br />
• Place a ladder on unstable surfaces such as boxes, carts, tables, etc.<br />
• Hurry up a ladder to complete a task.<br />
• Overreach beyond <strong>the</strong> side rails to conduct work.<br />
• Turn your back to <strong>the</strong> ladder at any time.<br />
• Carry heavy objects up <strong>the</strong> ladder.<br />
• Assume that <strong>the</strong> area above <strong>the</strong> ladder is clear of hazards.<br />
• Tie or fasten ladders toge<strong>the</strong>r to create longer sections unless <strong>the</strong>y are<br />
specifically designed for such use.<br />
<strong>Sealant</strong>, waterproofing & Restoration Institute 29
LEAD<br />
LEAD – 1926.62<br />
Lead is hazardous when it gets into <strong>the</strong><br />
bloodstream where it can move around<br />
<strong>the</strong> body. High exposures over a short<br />
period of time or lower exposures spread<br />
out over longer time periods can cause<br />
lead poisoning. Lead can damage <strong>the</strong><br />
brain <strong>and</strong> nervous system, kidneys,<br />
<strong>and</strong> reproductive systems. Lead also<br />
contributes to high blood pressure.<br />
Most of <strong>the</strong> absorbed lead is eventually<br />
stored in <strong>the</strong> bones where it may stay for<br />
decades. Under certain conditions, <strong>the</strong> lead<br />
stored in <strong>the</strong> bone may leach slowly into<br />
<strong>the</strong> bloodstream. The early effects of lead<br />
poisoning are not specific <strong>and</strong> resemble <strong>the</strong><br />
flu symptoms. Lead poisoning is preventable. Many of <strong>the</strong> health problems<br />
caused are reversible if exposure is eliminated or reduced.<br />
Engineering <strong>and</strong> work practice controls are required to minimize lead<br />
exposure. Always follow <strong>the</strong> compliance program set in place by <strong>the</strong> employer<br />
with regards to preventing prolonged lead exposure.<br />
DO:<br />
• Wash h<strong>and</strong>s <strong>and</strong> face with soap <strong>and</strong> water before eating or drinking<br />
• Use showers if provided by employer before leaving a job site. If showers<br />
are not provided wash h<strong>and</strong>s, arms <strong>and</strong> face before returning to street<br />
clo<strong>the</strong>s.<br />
• Change into clean clo<strong>the</strong>s <strong>and</strong> shoes at <strong>the</strong> job site in designated area before<br />
leaving job site. Keep dirty work clo<strong>the</strong>s <strong>and</strong> shoes separate from clean<br />
street clo<strong>the</strong>s.<br />
• Do what you can to lower <strong>the</strong> amount of lead you brea<strong>the</strong> in. Use wet<br />
cleaning methods. Wet wipe surfaces <strong>and</strong> wet clean or HEPA vacuum <strong>the</strong><br />
work area daily.<br />
• Use a respirator if instructed by employer to minimize lead inhalation.<br />
• Contact employer if symptoms of lead poisoning exist.<br />
DON’T:<br />
Exposure to lead in <strong>the</strong> waterproofing<br />
<strong>and</strong> restoration industry<br />
will typically come from <strong>the</strong> operation<br />
of paint removal as shown in<br />
this photo.<br />
• Eat, drink, or smoke in <strong>the</strong> work area. Move to an employer-designated<br />
clean area for lunch or breaks.<br />
• Forget to cover work area to keep dust particles/paint chips from settling<br />
on surfaces or seeping in to ground water.<br />
30 <strong>Safety</strong> <strong>and</strong> <strong>Health</strong> <strong>Field</strong> <strong>Manual</strong>
PPE: PERSONAL PROTECTIVE EQUIPMENT<br />
PPE: PERSONAL PROTECTIVE EQUIPMENT –<br />
1926.28, 1926.95 to 1926.107<br />
The OSHA st<strong>and</strong>ard states that <strong>the</strong> employer is responsible for requiring <strong>the</strong><br />
wearing of appropriate personal protective equipment in all operations where<br />
<strong>the</strong>re is an exposure to hazardous conditions or where this part indicates <strong>the</strong><br />
need for using such equipment to reduce <strong>the</strong> hazards to <strong>the</strong> employees.<br />
Head Protection: The hardhat must be used in any work operations, <strong>and</strong> must<br />
meet American National St<strong>and</strong>ards Institute (ANSI) Z89.1 1986 specifications<br />
for protection. Faceshields that attach to hardhats provide added protection.<br />
A combination that leaves no gap between <strong>the</strong> shield <strong>and</strong> <strong>the</strong> brim of <strong>the</strong> cap<br />
is best. The faceshield must also meet ANSI Z87.1 1989 specifications.<br />
Eye Protection: <strong>Safety</strong> glasses should be st<strong>and</strong>ard safety gear when no<br />
faceshield is worn, <strong>and</strong> must meet ANSI Z87.1 1989. Both safety glasses/<br />
goggles <strong>and</strong> a faceshield are advisable.<br />
Foot Protection: Footwear worn during site activities are to include lea<strong>the</strong>r<br />
work boots <strong>and</strong> rubber boots (or must meet <strong>the</strong> specific site requirements).<br />
Protection against liquid hazardous chemicals requires a boot of neoprene,<br />
PVC, butyl rubber, to some o<strong>the</strong>r chemical resistant material. With chemical<br />
resistant boots, <strong>the</strong> pant leg should be outside <strong>and</strong> over <strong>the</strong> boots to prevent<br />
liquids from entering.<br />
Protective footwear should comply with <strong>the</strong> American Society of Testing Materials<br />
(ASTM) St<strong>and</strong>ards: F2412-05 (St<strong>and</strong>ard Test Methods for Foot Protection) <strong>and</strong><br />
F2413-05 (St<strong>and</strong>ard Specification for Performance Requirements for Foot Protection)<br />
in order to provide both impact <strong>and</strong> compression protection.<br />
Ear Protection: Hearing protection is required starting at 90 decibels,<br />
regardless of <strong>the</strong> duration. If a decibel meter is not available, use hearing<br />
protection when you have to raise your voice to talk to someone at a normal<br />
talking distance. Common forms of hearing protection are ear plugs, <strong>and</strong> ear<br />
muffs.<br />
H<strong>and</strong> Protection – Gloves: Gloves must resist puncturing <strong>and</strong> tearing as well<br />
as provide <strong>the</strong> necessary chemical resistance. The type of glove used should<br />
be appropriately suited for <strong>the</strong> specific task.<br />
<strong>Sealant</strong>, waterproofing & Restoration Institute 31
PPE: PERSONAL PROTECTIVE EQUIPMENT | POWER ACTUATED TOOLS<br />
Body Protection: Clothing to protect <strong>the</strong> body should consist at a minimum<br />
of long work pants <strong>and</strong> a sleeved shirt. When hazardous liquids, gases,<br />
vapors or debris are present, <strong>the</strong> level of protection needed increases. This<br />
may include garments of Tyvek, Nomex, or PVC.<br />
DO:<br />
• Maintain Personal Protective Equipment (PPE) in a clean sanitary,<br />
serviceable condition.<br />
• Make sure to have PPE meet applicable recognized performance st<strong>and</strong>ards,<br />
such as ANSI, National Institute for Occupational Safetry <strong>and</strong> <strong>Health</strong>, Mine<br />
<strong>Safety</strong> <strong>and</strong> <strong>Health</strong> Administration, etc.<br />
DON’T:<br />
• Use PPE in lieu of sound engineering <strong>and</strong> manufacturing practices<br />
• Use PPE without proper training in its use <strong>and</strong> limitations.<br />
• Use damaged or inferior equipment.<br />
POWDER ACTUATED TOOLS – 1926.302(e)<br />
Before employees are permitted to use powder actuated tools, <strong>the</strong>y shall have<br />
been thoroughly instructed by a competent<br />
person. Only employees that have been<br />
trained in <strong>the</strong> operation of <strong>the</strong> particular<br />
tool in use shall be allowed to operate a<br />
powder actuated tool.<br />
Powder actuated<br />
nail gun<br />
DO:<br />
• Test powder actuated tools each day before loading to insure that <strong>the</strong> safety<br />
devices are in proper working condition. Any tool found not to be in proper<br />
working order shall be immediately removed from service until repairs are<br />
made.<br />
• Use tools with <strong>the</strong> type of shield or muzzle guard appropriate for a particular<br />
use.<br />
• Wear Personal Protective Equipment (PPE), such as eye <strong>and</strong> hearing<br />
protection, when using powder actuated fastening tools.<br />
• Before using a tool, inspect it to determine that it is clean, that all moving<br />
parts operate freely <strong>and</strong> that <strong>the</strong> barrel is free from obstructions.<br />
DON’T:<br />
• Point <strong>the</strong> tool, whe<strong>the</strong>r loaded or not, at any person.<br />
• Load <strong>the</strong> tool until just prior to <strong>the</strong> intended firing time.<br />
• Leave tools or powder charges unattended in places where <strong>the</strong>y would be<br />
available to unauthorized persons.<br />
32 <strong>Safety</strong> <strong>and</strong> <strong>Health</strong> <strong>Field</strong> <strong>Manual</strong>
POWER ACTUATED TOOLS | POWER TOOLS<br />
• Use a powder actuated tool in an explosive or flammable atmosphere.<br />
• Drive fasteners into very hard or brittle materials such as cast iron, glazed tile,<br />
surfaced hardened steel, glass block, live rock, face brick or hollow tile.<br />
• Drive fasteners into soft materials unless such materials are backed by<br />
a substance that will prevent <strong>the</strong> pin or fastener from passing completely<br />
through <strong>and</strong> creating a flying missile hazard on <strong>the</strong> opposite side.<br />
• Do not drive fasteners into an existing hole unless a positive guide is used to<br />
secure accurate alignment<br />
• Attempt to drive a fastener into a spalled area caused by an unsatisfactory<br />
fastening.<br />
POWER TOOLS – 1926.302<br />
Power tools include electric, fuel-powered,<br />
hydraulic, pneumatic, <strong>and</strong> powder actuated<br />
tools. Always follow <strong>the</strong> manufacturer’s<br />
instructions on proper use, safety<br />
precautions, inspection <strong>and</strong> troubleshooting<br />
procedures. Maintain power tools in a safe<br />
condition.<br />
Proper use:<br />
• Only trained employees are allowed to operate power tools.<br />
• All power tools must be tested daily before use <strong>and</strong> all defects must be<br />
corrected.<br />
• Employees using h<strong>and</strong> <strong>and</strong> power tools who are exposed to <strong>the</strong> hazard of<br />
falling, flying, abrasive, <strong>and</strong> splashing objects, or exposed to harmful dusts,<br />
fumes, mists, vapors, or gases must wear <strong>the</strong> particular personal protective<br />
equipment necessary to protect <strong>the</strong>m from <strong>the</strong> hazard.<br />
• Never carry a tool by <strong>the</strong> cord.<br />
• Never yank <strong>the</strong> cord to disconnect it from <strong>the</strong> receptacle.<br />
• Keep cords away from heat, oil, <strong>and</strong> sharp edges (including <strong>the</strong> cutting<br />
surface of a power saw or drill).<br />
• Disconnect tools when not in use, before servicing, <strong>and</strong> when changing<br />
accessories such as blades, bits, etc.<br />
• Avoid accidental starting. Do not hold fingers on <strong>the</strong> switch button while<br />
carrying a plugged-in tool.<br />
• Use gloves <strong>and</strong> appropriate safety footwear when using electric tools.<br />
• Store electric tools in a dry place when not in use.<br />
Power<br />
S<strong>and</strong>er<br />
<strong>Sealant</strong>, waterproofing & Restoration Institute 33
POWER TOOLS | POWERED PLATFORMS<br />
• Do not use electric tools in damp or wet locations unless <strong>the</strong>y are approved<br />
for that purpose.<br />
• Keep work areas well lighted when operating electric tools.<br />
• Ensure that cords from electric tools do not present a tripping hazard.<br />
• Remove all damaged portable electric tools from use <strong>and</strong> tag <strong>the</strong>m: “Do Not<br />
Use.”<br />
• Use Double-Insulated Tools.<br />
DO:<br />
• Use tools with <strong>the</strong> correct shield, guard or attachment recommended by <strong>the</strong><br />
manufacturer.<br />
• Follow manufacturer’s instructions for proper voltage or safe operating<br />
pressure.<br />
• Remove from service any tool found not in proper working order, or that<br />
develops a defect during use.<br />
• Ground electric tools appropriately.<br />
• Inspect tools at regular intervals <strong>and</strong> repair <strong>the</strong>m in accordance with <strong>the</strong><br />
manufacturer’s specifications.<br />
• Keep labels showing safe use instructions <strong>and</strong> safety warnings properly<br />
affixed to tools <strong>and</strong> legible.<br />
DON’T:<br />
• Load tools until immediately before use.<br />
• Leave loaded tools unattended.<br />
• Use tools in explosive or flammable environments.<br />
• Override, damage or disable operating switches or safety devices<br />
• Lower or hoist tools using hoses or electrical cord.<br />
• Use defective equipment until properly repaired.<br />
POWERED PLATFORMS – 1910.66<br />
This section covers powered platform installations permanently dedicated<br />
to interior or exterior building maintenance of a specific structure or group<br />
of structures. This section does not apply to suspended scaffolds (swinging<br />
scaffolds) used to service buildings on a temporary basis or to suspended<br />
scaffolds used for construction work.<br />
The following are some of <strong>the</strong> key requirements from <strong>the</strong> OSHA st<strong>and</strong>ard:<br />
• Building owners are required to provide a letter informing that <strong>the</strong><br />
installation meets <strong>the</strong> requirements for design, installation, inspections <strong>and</strong><br />
maintenance.<br />
34 <strong>Safety</strong> <strong>and</strong> <strong>Health</strong> <strong>Field</strong> <strong>Manual</strong>
POWERED PLATFORMS<br />
• Related building supporting structures (Davit Pedestals & Tie Backs)<br />
shall undergo periodic inspection by a competent person at intervals not<br />
exceeding 12 months.<br />
• The building owner shall keep a certification record of each periodic<br />
inspection <strong>and</strong> test required. The certification record shall include <strong>the</strong> date<br />
of <strong>the</strong> inspection, <strong>the</strong> signature of <strong>the</strong> person who performed <strong>the</strong> inspection,<br />
<strong>and</strong> <strong>the</strong> number, or o<strong>the</strong>r identifier, of <strong>the</strong> building support structure <strong>and</strong><br />
equipment which was inspected. This certification record shall be kept<br />
readily available for review by <strong>the</strong> Assistant Secretary of Labor or <strong>the</strong><br />
Assistant Secretary’s representative <strong>and</strong> by <strong>the</strong> employer.<br />
• Working platforms <strong>and</strong> <strong>the</strong>ir components shall be inspected by <strong>the</strong> employer<br />
for visible defects before every use <strong>and</strong> after each occurrence which could<br />
affect <strong>the</strong> platform’s structural integrity.<br />
• “Maintenance inspections <strong>and</strong> tests.” A maintenance inspection <strong>and</strong>, where<br />
necessary, a test shall be made of each platform installation every 30 days,<br />
or where <strong>the</strong> work cycle is less than 30 days such inspection <strong>and</strong>/or test<br />
shall be made prior to each work cycle. This inspection <strong>and</strong> test shall follow<br />
procedures recommended by <strong>the</strong> manufacturer, <strong>and</strong> shall be made by a<br />
competent person.<br />
• The building owner shall keep a certification record of each maintenance<br />
inspection <strong>and</strong> test performed. The certification record shall include <strong>the</strong><br />
date of <strong>the</strong> inspection <strong>and</strong> test, <strong>the</strong> signature of <strong>the</strong> person who performed<br />
<strong>the</strong> inspection <strong>and</strong>/or test, <strong>and</strong> an identifier for <strong>the</strong> platform installation<br />
which was inspected. The certification record shall be kept readily available<br />
for review by <strong>the</strong> Assistant Secretary of Labor or <strong>the</strong> Assistant Secretary’s<br />
representative <strong>and</strong> by <strong>the</strong> employer.<br />
DO:<br />
• Prior to using <strong>the</strong> house rig, get a letter from <strong>the</strong> owner assuring system<br />
compliance for design, installation, inspection <strong>and</strong> maintenance.<br />
• Make sure <strong>the</strong> house rig has been inspected in <strong>the</strong> last thirty days <strong>and</strong> every<br />
thirty days during <strong>the</strong> work.<br />
• Make sure any Davit systems have been inspected <strong>and</strong> where necessary<br />
tested within <strong>the</strong> last twelve (12) months.<br />
DON’T:<br />
• Do not use a house rig without <strong>the</strong> proper certifications, inspections <strong>and</strong><br />
maintenance.<br />
• Do not use Davits <strong>and</strong> without assurance that <strong>the</strong> system has past an<br />
inspection or test within <strong>the</strong> last twelve (12) months.<br />
<strong>Sealant</strong>, waterproofing & Restoration Institute 35
REPIRATORY PROTECTION<br />
RESPIRATORY PROTECTION – 1926.103<br />
(identical to 1910.134)<br />
When work has potential to create harmful dusts, fog, fumes, mists, gases,<br />
smokes, spray, or vapors, <strong>the</strong> primary objective is to reduce or eliminate <strong>the</strong><br />
atmospheric contamination by use of engineering control measures. When<br />
engineering controls are not feasible, appropriate respiratory protection must<br />
be used.<br />
Where respirators are necessary to protect <strong>the</strong> health of <strong>the</strong> employee or<br />
whenever respirators are required by <strong>the</strong> employer, <strong>the</strong> employer must establish<br />
<strong>and</strong> implement a written respiratory protection program with worksitespecific<br />
procedures. The written program must include <strong>the</strong> following:<br />
• Procedures for selecting respirators for use in <strong>the</strong> workplace;<br />
• Medical evaluation of employees required to use respirators;<br />
• Fit testing procedures for tight-fitting respirators;<br />
• Procedures for proper use in routine <strong>and</strong> emergency situations;<br />
• Procedures <strong>and</strong> schedules for cleaning, disinfecting, storing, inspecting,<br />
<strong>and</strong> o<strong>the</strong>rwise maintaining respirators;<br />
• Procedures to ensure adequate air quality, quantity, <strong>and</strong> flow of breathing<br />
air for atmosphere-supplying respirators;<br />
• Training of employees in <strong>the</strong> respiratory hazards to which <strong>the</strong>y are<br />
potentially exposed;<br />
• Training of employees in <strong>the</strong> proper use <strong>and</strong> limitations of respirators;<br />
• Determination of contaminants present <strong>and</strong> appropriate protection<br />
required; Cartridge-type respirators require specific cartridges depending<br />
on atmospheric conditions present;<br />
• Procedures for regularly evaluating <strong>the</strong> effectiveness of <strong>the</strong> program.<br />
36 <strong>Safety</strong> <strong>and</strong> <strong>Health</strong> <strong>Field</strong> <strong>Manual</strong>
SAFETY NETTING<br />
SAFETY NETTING – 1926.502(c)<br />
<strong>Safety</strong> nets are one of several acceptable means of providing fall protection.<br />
Proper Use:<br />
• <strong>Safety</strong> nets must be installed as close as practicable under <strong>the</strong> surface on<br />
which employees are working, but in no case more than 30 ft below.<br />
• When nets are used on bridges, <strong>the</strong> potential fall area must be<br />
unobstructed.<br />
• <strong>Safety</strong> nets must extend outward from <strong>the</strong> outermost projection of <strong>the</strong> work<br />
surface as follows:<br />
DO:<br />
Vertical distancefrom working<br />
level tohorizontal plane of net<br />
Up to 5 feet<br />
Minimum required horizontal<br />
distance of outer edge of net from<br />
<strong>the</strong> edge of <strong>the</strong> working surface<br />
8 feet<br />
5 to 10 feet 10 feet<br />
More than 10 feet<br />
13 feet<br />
• Install safety nets with sufficient clearance to prevent contact with <strong>the</strong><br />
surface or structures under <strong>the</strong>m when subjected to an impact force equal<br />
to <strong>the</strong> required drop test.<br />
• Verify that <strong>the</strong> maximum mesh size must not exceed 6 inches by 6 inches. All<br />
mesh crossings must be secured to prevent enlargement of <strong>the</strong> mesh opening,<br />
which must be no longer than 6 inches, measured center-to-center.<br />
• Use safety nets or sections <strong>the</strong>reof that have a border rope for webbing with<br />
a minimum breaking strength of 5,000 pounds.<br />
• Use connections between safety net panels that are as strong as integral net<br />
components <strong>and</strong> spaced not more than 6 inches apart.<br />
• Use safety nets that when installed are capable of absorbing an impact force<br />
equal to <strong>the</strong> drop test described in OSHA 1926.502(c)(4)(i).<br />
• Perform <strong>the</strong> drop-test at <strong>the</strong> job site after initial installation <strong>and</strong> before being<br />
used, whenever nets are relocated, after major repairs, <strong>and</strong> at 6-month<br />
intervals if left in one place.<br />
• Certify <strong>the</strong> net if it is unreasonable to perform <strong>the</strong> drop-test. The employer<br />
or a designated competent person must certify that <strong>the</strong> net <strong>and</strong> net<br />
installation have sufficient clearance <strong>and</strong> impact absorption by preparing<br />
a certification record prior to <strong>the</strong> net being used as a fall protection system.<br />
The certification must include:<br />
• Identification of <strong>the</strong> net <strong>and</strong> net installation.<br />
• Date that it was determined that <strong>the</strong> net <strong>and</strong> net installation were in<br />
compliance.<br />
<strong>Sealant</strong>, waterproofing & Restoration Institute 37
SAFETY NETTING<br />
• Signature of <strong>the</strong> person making <strong>the</strong> determination <strong>and</strong> certification.<br />
• The most recent certification record for each net <strong>and</strong> net installation must<br />
be available at <strong>the</strong> jobsite for inspection.<br />
• Inspect safety nets for wear, damage, <strong>and</strong> o<strong>the</strong>r deterioration at least once<br />
a week, <strong>and</strong> after any occurrence which could affect <strong>the</strong> integrity of <strong>the</strong><br />
system.<br />
• Remove objects such as scrap pieces, equipment, <strong>and</strong> tools which have<br />
fallen into <strong>the</strong> safety net as soon as possible <strong>and</strong> at least before <strong>the</strong> next<br />
work shift.<br />
• Instruct crane operators on net locations to reduce <strong>the</strong> hazard of entangling<br />
a moving load in net hardware, cables or safety nets.<br />
DON’T:<br />
• Use defective nets. Remove defective components from service.<br />
• Guess at safety net strength – consult <strong>the</strong> net manufacturer or fall protection<br />
professional if in doubt.<br />
38 <strong>Safety</strong> <strong>and</strong> <strong>Health</strong> <strong>Field</strong> <strong>Manual</strong>
SCAFFOLDS<br />
SCAFFOLDS – 1926.451 to 1926.454<br />
Scaffold types <strong>and</strong> requirements vary greatly from adjustable suspension<br />
scaffolds to window jack scaffolds. Consult sections 1926.451 <strong>and</strong> 1926.452 for<br />
exact requirements of each type. Two of <strong>the</strong> most common types of scaffold<br />
are supported scaffolds (built-up) <strong>and</strong> suspended scaffolds (swing stage).<br />
General Requirements:<br />
• Scaffolds <strong>and</strong> <strong>the</strong>ir components must be capable of supporting at least 4<br />
times <strong>the</strong> maximum rated load without failure.<br />
• Scaffolds must be designed by a qualified person <strong>and</strong> constructed <strong>and</strong><br />
loaded according to that design.<br />
• Every work shift should have a Competent Person who can identify existing<br />
<strong>and</strong> potential hazards <strong>and</strong> has <strong>the</strong> authority to take prompt corrective action<br />
to eliminate or control <strong>the</strong> hazard.<br />
• Scaffolds <strong>and</strong> scaffold components shall be inspected for visible defects by<br />
a competent person before each work shift, <strong>and</strong> after any occurrence which<br />
could affect a scaffold’s structural integrity.<br />
• Scaffolds shall be erected, moved, dismantled, or altered only under <strong>the</strong><br />
supervision <strong>and</strong> direction of a competent person qualified in scaffold<br />
erection, moving, dismantling or alteration. Such activities shall be<br />
performed only by experienced <strong>and</strong> trained employees selected for such<br />
work by <strong>the</strong> competent person.<br />
• Each employee on a scaffold more than 10ft (3.1 m) above a lower level shall<br />
be protected from falling to that lower level by <strong>the</strong> use of personal fall arrest<br />
systems or guardrail systems.<br />
• Each employee who performs work while on a scaffold shall be trained<br />
by a qualified person to recognize <strong>the</strong> hazards associated with <strong>the</strong> type of<br />
scaffold being used <strong>and</strong> to underst<strong>and</strong> <strong>the</strong> procedures to control or minimize<br />
those hazards.<br />
• When scaffold platforms are more than 2ft above or below a point of access,<br />
portable ladders, hook-on ladders, attachable ladders, stair towers (scaffold<br />
stairways/towers), stairway-type ladders (such as ladder st<strong>and</strong>s), ramps,<br />
walkways, integral prefabricated scaffold access, or direct access from<br />
ano<strong>the</strong>r scaffold, structure, personnel hoist, or similar surface shall be used.<br />
Cross braces shall not be used as a means of access.<br />
<strong>Sealant</strong>, waterproofing & Restoration Institute 39
SCAFFOLDS<br />
SUPPORTED SCAFFOLDS<br />
A supported scaffold is<br />
defined as one or more<br />
platforms supported by<br />
outrigger beams, brackets,<br />
poles, legs, uprights, posts,<br />
frames or similar rigid<br />
supports.<br />
SUSPENDED SCAFFOLDS<br />
Suspended scaffolds are platforms suspended by ropes, or o<strong>the</strong>r nonrigid<br />
means, from an overhead structure. Two-point adjustable suspension<br />
scaffolds, also known as swing-stage scaffolds, are perhaps <strong>the</strong> most common<br />
type of suspended scaffold.<br />
The illustration below outlines <strong>the</strong> counterweight formula for suspended scaffolds:<br />
40 <strong>Safety</strong> <strong>and</strong> <strong>Health</strong> <strong>Field</strong> <strong>Manual</strong>
SCAFFOLDS | SILICA<br />
DO:<br />
• Consult <strong>the</strong> Codes of Safe Practice published by <strong>the</strong> Scaffold Industry<br />
Association (www.Scaffold.org) <strong>and</strong> Scaffolding, Shoring <strong>and</strong> Forming<br />
Institute (www.SSFI.org) for guidelines on erection of <strong>and</strong> safe use of<br />
various scaffold types.<br />
• Follow all manufacturers’ instructions <strong>and</strong> take particular care when<br />
combining equipment from multiple manufacturers.<br />
• Inspect <strong>the</strong> equipment before each use. Do consult your scaffold supplier if<br />
in doubt about <strong>the</strong> equipment.<br />
• Survey <strong>the</strong> job site for hazards such as exposed electrical wires, obstructions<br />
that can overload a suspended scaffold or inadequate or missing tiebacks<br />
on rigging devices. Correct <strong>the</strong>se hazards prior to installing or using<br />
suspended scaffolds.<br />
• Always wear fall protection.<br />
DON’T:<br />
• Misuse or abuse scaffold equipment.<br />
• Overload scaffold equipment.<br />
• Disable, destroy, modify or remove safety devices.<br />
• Erect, dismantle or alter scaffold systems unless under <strong>the</strong> supervision of a<br />
competent person.<br />
• Take chances. Always wear fall protection equipment <strong>and</strong> consult your<br />
scaffold supplier if unsure about scaffold use.<br />
SILICA – 1926.55<br />
Silicosis is caused by exposure to respirable crystalline<br />
silica dust. Crystalline silica is a basic component of soil,<br />
s<strong>and</strong>, granite, <strong>and</strong> most o<strong>the</strong>r types of rock, <strong>and</strong> it is used<br />
as an abrasive blasting agent. Silicosis is a progressive,<br />
disabling, <strong>and</strong> often fatal lung disease. Cigarette smoking<br />
adds to <strong>the</strong> lung damage caused by silica.<br />
Effects of Silicosis<br />
• Lung cancer – Silica has been classified as a human lung carcinogen.<br />
• Bronchitis/Chronic Obstructive Pulmonary Disorder.<br />
• Tuberculosis – Silicosis makes an individual more susceptible to Tuberculosis<br />
(“TB”).<br />
• Scleroderma – a disease affecting skin, blood vessels, joints <strong>and</strong> skeletal<br />
muscles.<br />
<strong>Sealant</strong>, waterproofing & Restoration Institute 41
SILICA<br />
• Possible renal disease.<br />
Symptoms of Silicosis<br />
• Shortness of breath; possible fever.<br />
• Fatigue; loss of appetite.<br />
• Chest pain; dry, nonproductive cough.<br />
• Respiratory failure, which may eventually lead to death.<br />
Sources of Exposure<br />
• S<strong>and</strong>blasting for surface preparation.<br />
• Crushing <strong>and</strong> drilling rock <strong>and</strong> concrete.<br />
• Masonry <strong>and</strong> concrete work (e.g., building <strong>and</strong> road construction <strong>and</strong><br />
repair).<br />
• Mining/tunneling; demolition work.<br />
• Cement <strong>and</strong> asphalt pavement manufacturing.<br />
Permissible Exposure Limit (PEL) This is <strong>the</strong> airborne concentration of silica<br />
above which employees can not be exposed.<br />
Prevention of Silicosis<br />
DO:<br />
• Evaluate engineering controls such as dust collection <strong>and</strong> wet methods to<br />
limit <strong>the</strong> concentrations <strong>and</strong> exposure to crystalline silica in order to meet<br />
<strong>the</strong> Permissible Exposure Limit (PEL).<br />
• Use water sprays, wet methods for cutting, chipping, drilling, sawing,<br />
grinding, etc.<br />
• Substitute non-crystalline silica for blasting material.<br />
• Use respirators approved for protection against silica; if s<strong>and</strong>blasting, use<br />
abrasive blasting respirators.<br />
• Wash h<strong>and</strong>s <strong>and</strong> face before eating, drinking or smoking away from<br />
exposure area.<br />
DON’T:<br />
• Eat, drink or smoke near crystalline silica dust.<br />
• Use compressed air for cleaning surfaces.<br />
• Start removing, cutting, s<strong>and</strong>ing, grinding or disturbing in any fashion, a<br />
location that has been determined to containing any level of exposure to<br />
crystalline silica without a proper assessment, engineering control measures<br />
<strong>and</strong> proper personal protection to meet <strong>the</strong> PEL.<br />
42 <strong>Safety</strong> <strong>and</strong> <strong>Health</strong> <strong>Field</strong> <strong>Manual</strong>
STAIRS<br />
STAIRS – 1926.1052<br />
Stairs are a leading source of injuries <strong>and</strong> fatalities among construction workers<br />
each year. Work on <strong>and</strong> around stairways is hazardous. The following general<br />
requirements apply to all stairways used in construction, alteration, repair<br />
(including painting <strong>and</strong> decorating), <strong>and</strong> demolition of work sites.<br />
Temporary Staircase<br />
Stair Tower<br />
• A stairway or ladder must be provided at all worker points of access where<br />
<strong>the</strong>re is a break in elevation of 19 inches (48 cm) or more <strong>and</strong> no ramp, runway,<br />
embankment, or personnel hoist is provided.<br />
• When <strong>the</strong>re is only a single point of access between levels, it must be kept clear<br />
to permit free passage by workers. If free passage becomes restricted, a second<br />
point of access must be provided <strong>and</strong> used.<br />
• Where <strong>the</strong>re are more than two points of access between levels, at least one<br />
point of access must be kept clear.<br />
• All stairway systems required by <strong>the</strong>se rules must be installed <strong>and</strong> all duties<br />
required by <strong>the</strong> stairway must be performed before employees begin work that<br />
requires <strong>the</strong>m to use <strong>the</strong> stairway.<br />
• Stairways that will not be a permanent part of <strong>the</strong> structure where construction<br />
work is being performed must have l<strong>and</strong>ings at least 30 inches deep <strong>and</strong> 22<br />
inches wide at every 12ft or less or vertical rise.<br />
• Stairways must be installed at least 30 degrees, <strong>and</strong> no more than 50 degrees,<br />
from <strong>the</strong> horizontal.<br />
• Variations in riser height or stair tread depth must not exceed ¼ inch in any<br />
stairway system, including any foundation structure used as one or more<br />
treads.<br />
• Where doors or gates open directly into a stairway a platform must be provided<br />
that is a minimum of 20 inches in width beyond <strong>the</strong> swing of <strong>the</strong> door.<br />
• Metal pan l<strong>and</strong>ings <strong>and</strong> metal pan treads must be secured in place before<br />
filling.<br />
<strong>Sealant</strong>, waterproofing & Restoration Institute 43
STAIRS | WELDING, CUTTING & HEATING<br />
• Temporary h<strong>and</strong>rails must have a minimum clearance of 3 inches (7.62<br />
centimeters) between <strong>the</strong> h<strong>and</strong>rail <strong>and</strong> walls, stair-rail systems, <strong>and</strong> o<strong>the</strong>r<br />
objects.<br />
• Unprotected sides <strong>and</strong> edges of stairway l<strong>and</strong>ings must be provided with a<br />
st<strong>and</strong>ard 42-inch (106.68 cm) guardrail system.<br />
DO:<br />
• Make sure all stairway parts are free of dangerous projections such as<br />
protruding nails.<br />
• Correct slippery conditions on stairways.<br />
DON’T:<br />
• Obstruct stairways with construction debris, tools, materials, etc.<br />
• Use stairways that are under construction (i.e., in a repair or build<br />
condition).<br />
WELDING, CUTTING, & HEATING – 1926.350 to 1926.354<br />
The employer shall thoroughly instruct employees in <strong>the</strong> safe use of fuel<br />
gas, appropriate use of shielding, personal protective equipment <strong>and</strong> proper<br />
insulating precautions for scaffolds.<br />
Proper Use:<br />
• Proper precautions (isolating welding <strong>and</strong> cutting, removing fire hazards<br />
from <strong>the</strong> vicinity, providing a fire watch) for fire prevention shall be taken in<br />
areas where welding or o<strong>the</strong>r hot work is being done. No welding, cutting<br />
or heating shall be done where <strong>the</strong> application of flammable paints or <strong>the</strong><br />
presence of o<strong>the</strong>r flammable compounds or heavy dust concentrations<br />
create a fire hazard.<br />
• Fuel gas <strong>and</strong> oxygen hoses shall be easily distinguishable <strong>and</strong> cannot be<br />
interchangeable.<br />
• General mechanical ventilation, local exhaust ventilation, air line respirators<br />
<strong>and</strong> o<strong>the</strong>r protection must be provided when welding, cutting or heating:<br />
• Zinc, lead, cadmium, chromium, mercury or materials bearing, based or<br />
coated with beryllium in enclosed spaces,<br />
• Stainless steel <strong>and</strong> inert gas equipment,<br />
• In confined spaces, <strong>and</strong><br />
• Where an unusual condition can cause an unsafe accumulation of<br />
contaminants.<br />
44 <strong>Safety</strong> <strong>and</strong> <strong>Health</strong> <strong>Field</strong> <strong>Manual</strong>
WELDING, CUTTING & HEATING<br />
• When welding from suspended platforms:<br />
• Be sure <strong>the</strong> platform is grounded to <strong>the</strong> structure using a conductor at<br />
least <strong>the</strong> same size as <strong>the</strong> welding machine ground lead.<br />
• Verify <strong>the</strong> grounding conductor is not attached in series with <strong>the</strong> welding<br />
process or <strong>the</strong> work piece<br />
• Insulate wire rope at least 4ft above <strong>and</strong> below <strong>the</strong> platform to protect<br />
from damage by <strong>the</strong> welding torch or electrode.<br />
• Insulate wire rope at <strong>the</strong> suspension point <strong>and</strong> be sure it does not contact<br />
<strong>the</strong> structure along its entire length.<br />
• Guide <strong>and</strong>/or retain <strong>the</strong> tail line of <strong>the</strong> suspension wire rope so that it<br />
does not become grounded.<br />
<strong>Sealant</strong>, waterproofing & Restoration Institute 45
WELDING, CUTTING & HEATING<br />
• Use insulated protective covers for <strong>the</strong> hoists.<br />
• Take care to prevent contact of <strong>the</strong> weld lead to <strong>the</strong> platform <strong>and</strong> its wire<br />
ropes.<br />
DO:<br />
• Shield all welding <strong>and</strong> cutting operations by noncombustible or flameproof<br />
screens to protect from direct arc rays.<br />
• Remove electrodes from unattended electrode holders <strong>and</strong> protect <strong>the</strong><br />
holder so it cannot make electrical contact with people or conducting<br />
objects.<br />
• Use arc welding <strong>and</strong> cutting cables which are completely insulated, flexible<br />
type, capable of h<strong>and</strong>ling <strong>the</strong> maximum current requirements of <strong>the</strong> job.<br />
There shall be no repairs of splices within 10ft of <strong>the</strong> electrode holder, except<br />
where splices are insulated equal to <strong>the</strong> insulation of <strong>the</strong> cable.<br />
• Inspect hoses at <strong>the</strong> beginning of each shift.<br />
• Use proper eye protective equipment to prevent exposure of personnel.<br />
DON’T:<br />
• Use defective cable. Repair it or replace it with new.<br />
• Fail to ground <strong>the</strong> suspended platform, insulate <strong>the</strong> wire ropes <strong>and</strong> hoists.<br />
• Guess at how to weld safely from scaffold or swingstage components.<br />
Consult <strong>the</strong> manufacturer or a reputable scaffold supplier for assistance<br />
Don’t leave any skin exposed as shown below<br />
46 <strong>Safety</strong> <strong>and</strong> <strong>Health</strong> <strong>Field</strong> <strong>Manual</strong>
WIRE ROPE – 1926.451, 1926.452, 1926.500, 1926.502, <strong>and</strong><br />
1926.552<br />
WIRE ROPE<br />
Wire rope is a mechanical system of moving parts intended to support a load.<br />
It requires lubrication to operate correctly <strong>and</strong> begins to deteriorate from <strong>the</strong><br />
time it is first put in service.<br />
Proper Use:<br />
• Choose <strong>the</strong> proper wire rope for <strong>the</strong> job.<br />
• Make appropriate connections to <strong>the</strong> structure.<br />
• Inspect <strong>the</strong> wire rope <strong>and</strong> its termination point.<br />
• Re-torque J-clamp terminations under load, if using, on suspension wire<br />
ropes.<br />
• H<strong>and</strong>le <strong>the</strong> wire rope carefully to retain <strong>the</strong> rope’s strength.<br />
• Suspended scaffold hoists are designed to work only with wire rope of <strong>the</strong><br />
specified size <strong>and</strong> construction. Do not make substitutions.<br />
• Wire ropes used with traction hoists must have prepared ends in accordance<br />
with <strong>the</strong> manufacturer’s recommendations.<br />
• Refer to <strong>the</strong> hoist manufacturer’s Operators <strong>Manual</strong> for specifications on<br />
acceptable terminations.<br />
• Inspect <strong>the</strong> wire rope prior to use on each shift or as needed during use to<br />
ensure safety.<br />
J-clamp Birdchaged Wire Rope Store excess wire on roof<br />
Do Not Use.<br />
<strong>Sealant</strong>, waterproofing & Restoration Institute 47
WIRE ROPE<br />
DO:<br />
• Inspect wire ropes for deterioration <strong>and</strong> remove <strong>the</strong>m from service if<br />
damaged.<br />
• Use approved wire rope terminations as specified by <strong>the</strong> equipment<br />
manufacturer.<br />
• Use eye splicing or equivalent means such as J-clamps or swaged fittings.<br />
• Space <strong>the</strong> J-clamps at approximately 3 to 4 fingers in width.<br />
• Do ensure eye splices <strong>and</strong> swaged terminations are made by a qualified<br />
person.<br />
• Preload wire rope <strong>and</strong> equipment with <strong>the</strong> maximum working load, <strong>the</strong>n<br />
retighten J-clamps or rigging clamps to manufacturer’s recommendations<br />
at initial loading <strong>and</strong> at <strong>the</strong> beginning of each work shift.<br />
• Use thimbles at all wire rope suspension terminations.<br />
• Clean, lubricate <strong>and</strong> h<strong>and</strong>le wire rope in accordance with <strong>the</strong> wire rope or<br />
hoist manufacturer’s recommendations.<br />
• Coil <strong>and</strong> uncoil wire rope in accordance with <strong>the</strong> wire rope or hoist<br />
manufacturer’s recommendations to avoid kinks <strong>and</strong> damage.<br />
• Coil extra wire rope at <strong>the</strong> top of <strong>the</strong> structure to avoid traffic damage to <strong>the</strong><br />
free hanging end.<br />
• Be sure wire rope is long enough to reach <strong>the</strong> lowest possible l<strong>and</strong>ing. If<br />
it is not, secure <strong>the</strong> tail line to prevent <strong>the</strong> platform from running off <strong>the</strong><br />
suspension rope.<br />
DON’T:<br />
• Use job shop hooks or makeshift fasteners or links.<br />
• Use U-bolts on a swingstage wire rope.<br />
• Loop two wire rope tails toge<strong>the</strong>r to make a longer suspension wire rope.<br />
• Expose wire rope to fire, temperatures above 200º, <strong>the</strong> passage of electrical<br />
current, corrosive atmospheres or chemicals, or damage from tools or<br />
h<strong>and</strong>ling.<br />
• Bend or kink <strong>the</strong> wire rope over a sharp edge.<br />
• Use wire rope that is kinked, birdcaged, corroded, undersized or damaged<br />
in any way. If in doubt, throw it out.<br />
48 <strong>Safety</strong> <strong>and</strong> <strong>Health</strong> <strong>Field</strong> <strong>Manual</strong>
ADDITIONAL RESOURCES<br />
For more detailed information refer to <strong>the</strong> OSHA website, www.osha.gov or call<br />
1-800-321-OSHA (6742)<br />
• Competent Person – www.osha.gov 1926.451(f)(3)<br />
• General Duty Clause – www.osha.gov Section 5(a)(1) of <strong>the</strong> Occupational<br />
<strong>Safety</strong> <strong>and</strong> <strong>Health</strong> Act<br />
• Aerial Lifts – www.osha.gov 1926.453<br />
• Barricades & Signs – www.osha.gov 1926.202 & SIGNS -1926.200<br />
• Compressed Gas Cylinders – www.osha.gov 1926.350<br />
• Confined Space – www.osha.gov 1926.21(b)(6) <strong>and</strong> 1910.146(b)<br />
• Drinking Water – www.osha.gov 1926.51<br />
• Electrical <strong>Safety</strong> – www.osha.gov 1926.400 to 1926.449<br />
• Excavation <strong>and</strong> Trenching – www.osha.gov 1926.650 - 652<br />
• Fall Protection – www.osha.gov 1926.500-503<br />
• Fire Extinguishers – www.osha.gov 1926.150<br />
• First Aid – www.osha.gov 1926.50<br />
• Hazard Communication (Haz Com) – www.osha.gov 1926.59 (identical to 1910.1200)<br />
• Hazardous Waste Operations – www.osha.gov 1926.65 (identical to 1910.120)<br />
• Hearing Protection – www.osha.gov 1926.52<br />
• Histoplasmosis – http://www.dhpe.org/infect/histo.html<br />
• Housekeeping – www.osha.gov 1926.25<br />
• Illumination – www.osha.gov 1926.26<br />
• Ladders – www.osha.gov 1926.1053<br />
• Lead – www.osha.gov 1926.62<br />
• PPE – Personal Protective Equipment – www.osha.gov 1926.28, 1926.95 to 1926.107<br />
• Powder Actuated Tools – www.osha.gov 1926.302(e)<br />
• Power Tools – www.osha.gov 1926.302<br />
• Powered Platforms – www.osha.gov 1910.66<br />
• Respiratory Protection – www.osha.gov 1926.103 (identical to 1910.134)<br />
• <strong>Safety</strong> Netting – www.osha.gov 1926.502(c)<br />
• Scaffolds – Supported & Suspended – www.osha.gov 1926.451 to 1926.454<br />
• Silica – www.osha.gov 1926.55<br />
• Stairs – www.osha.gov 1926.1052<br />
• Welding, Cutting, <strong>and</strong> Heating – www.osha.gov 1926.350 to 1926.354<br />
• Wire Ropes – www.osha.gov 1926.451, 1926.452, 1926.500, 1926.502, 1926.552<br />
<strong>Sealant</strong>, waterproofing & Restoration Institute 49
Acknowledgements<br />
SWRInstitute would like to thank <strong>the</strong> following people for making this<br />
field manual possible.<br />
SWRInstitute <strong>Safety</strong> <strong>and</strong> health Committee<br />
Dan Bagley<br />
Otto Baum Company, Inc.<br />
Chris Bates<br />
Spider<br />
Dan Cain<br />
The George D. Alan Company<br />
Dave Grady<br />
Tri-State High Rise Services<br />
Rick Heckel<br />
Structural Preservation Systems, LLC<br />
Mark Howell<br />
Structural Preservation Systems, LLC<br />
Ronald L. Pilla<br />
Valcourt Exterior Building Services, LLC<br />
OSHA Representatives<br />
Jackie Annis<br />
John Franklin<br />
Barney Lawrence<br />
Rob Swick<br />
Bea Way<br />
American Subcontrators Association of New Mexico<br />
50 <strong>Safety</strong> <strong>and</strong> <strong>Health</strong> <strong>Field</strong> <strong>Manual</strong>
<strong>Sealant</strong>, <strong>Waterproofing</strong> & Restoration Institute<br />
SAFETY AND HEALTH<br />
FIELD MANUAL<br />
CONFIRMATION OF RECEIPT OF SAFETY AND HEALTH FIELD MANUAL<br />
I acknowledge that I have received a copy of <strong>the</strong> <strong>Safety</strong> <strong>and</strong> <strong>Health</strong> <strong>Field</strong><br />
<strong>Manual</strong> (<strong>Field</strong> <strong>Manual</strong>). I acknowledge that I have read <strong>and</strong> underst<strong>and</strong><br />
<strong>the</strong> safety <strong>and</strong> health practices discussed in <strong>the</strong> <strong>Field</strong> <strong>Manual</strong>. I have<br />
had an opportunity to ask any questions that I have concerning <strong>the</strong><br />
information discussed in <strong>the</strong> <strong>Field</strong> <strong>Manual</strong>. I agree to abide by <strong>the</strong> safety<br />
<strong>and</strong> health practices set forth in <strong>the</strong> <strong>Field</strong> <strong>Manual</strong>.<br />
I underst<strong>and</strong> that <strong>the</strong> company reserves <strong>the</strong> right to revise, supplement or<br />
rescind any of <strong>the</strong> safety <strong>and</strong> heath practices outlined in <strong>the</strong> <strong>Field</strong> <strong>Manual</strong>,<br />
any portion of <strong>the</strong> <strong>Field</strong> <strong>Manual</strong>, or <strong>the</strong> entire <strong>Field</strong> <strong>Manual</strong>, from time to<br />
time, as it deems appropriate in its sole discretion.<br />
✁<br />
_____________________________<br />
Witness<br />
_____________________________<br />
Employee’s Signature<br />
_____________________________<br />
Employee’s Name – Typed or Printed<br />
_____________________________<br />
Date<br />
A copy of this confirmation sheet will be kept in <strong>the</strong> employee’s personnel file<br />
<strong>Sealant</strong>, waterproofing & Restoration Institute 51