Single Exit Radiator Pipe Guide and Seal: Fitting Instructions
Single Exit Radiator Pipe Guide and Seal: Fitting Instructions
Single Exit Radiator Pipe Guide and Seal: Fitting Instructions

You also want an ePaper? Increase the reach of your titles
YUMPU automatically turns print PDFs into web optimized ePapers that Google loves.
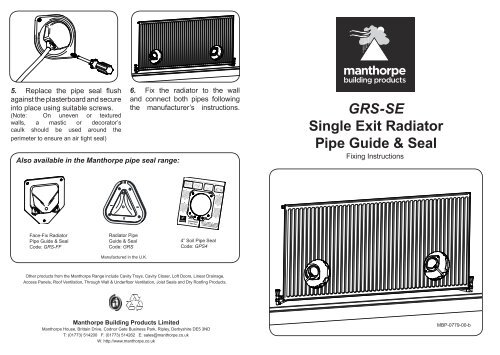
Bend the plastic<br />
seal open <strong>and</strong><br />
slide it around<br />
i together <strong>and</strong><br />
press the snap<br />
pins into position,<br />
this wi l form a<br />
MANTHORPE<br />
4” <strong>Pipe</strong> <strong>Seal</strong><br />
2 3<br />
Used to reduce air leakage<br />
around the opening created by<br />
a 4” soil pipe protruding through<br />
a ceiling or suspended floor.<br />
Ensure tha the<br />
Slide the product<br />
along the pipe<br />
adhesive onto<br />
the surrounding<br />
structure to form<br />
a seal over the<br />
5. Replace the pipe seal flush<br />
against the plasterboard <strong>and</strong> secure<br />
into place using suitable screws.<br />
(Note: On uneven or textured<br />
walls, a mastic or decorator’s<br />
caulk should be used around the<br />
perimeter to ensure an air tight seal)<br />
Also available in the Manthorpe pipe seal range:<br />
6. Fix the radiator to the wall<br />
<strong>and</strong> connect both pipes following<br />
the manufacturer’s instructions.<br />
GRS-SE<br />
<strong>Single</strong> <strong>Exit</strong> <strong>Radiator</strong><br />
<strong>Pipe</strong> <strong>Guide</strong> & <strong>Seal</strong><br />
Fixing <strong>Instructions</strong><br />
This longer top edge can be used to cover any unequal openings by rotating the seal around the pipe.<br />
1<br />
1<br />
the back of the<br />
pipe, bending it<br />
back fla to locate<br />
it around the<br />
pipe.<br />
3<br />
Peel away the<br />
backing strip<br />
covering the<br />
adhesive tape.<br />
2<br />
To clamp the seal<br />
in place, push<br />
contact surfaces<br />
are dry <strong>and</strong> are<br />
clear of dust <strong>and</strong><br />
debris.<br />
seal around the<br />
pipe.<br />
to the opening<br />
<strong>and</strong> press the<br />
GPS4<br />
gap.<br />
Face-Fix <strong>Radiator</strong><br />
<strong>Pipe</strong> <strong>Guide</strong> & <strong>Seal</strong><br />
Code: GRS-FF<br />
<strong>Radiator</strong> <strong>Pipe</strong><br />
<strong>Guide</strong> & <strong>Seal</strong><br />
Code: GRS<br />
Manufactured in the U.K.<br />
4” Soil <strong>Pipe</strong> <strong>Seal</strong><br />
Code: GPS4<br />
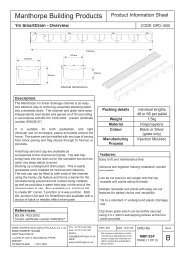
Other products from the Manthorpe Range include Cavity Trays, Cavity Closer, Loft Doors, Linear Drainage,<br />
Access Panels, Roof Ventilation, Through Wall & Underfloor Ventilation, Joist <strong>Seal</strong>s <strong>and</strong> Dry Roofing Products.<br />
Manthorpe Building Products Limited<br />
Manthorpe House, Brittain Drive, Codnor Gate Business Park, Ripley, Derbyshire DE5 3ND<br />
T: (01773) 514200 F: (01773) 514262 E: sales@manthorpe.co.uk<br />
W: http://www.manthorpe.co.uk<br />
MBP-0779-00-b
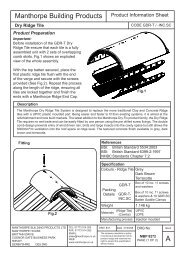
Description<br />
The <strong>Single</strong> <strong>Exit</strong> <strong>Radiator</strong> <strong>Pipe</strong> <strong>Guide</strong> & <strong>Seal</strong> has been developed to<br />
reduce air leakage behind radiators at the point where the heating pipes<br />
penetrate the wall <strong>and</strong> it is not practical to use the double exit Face-Fix<br />
<strong>Radiator</strong> <strong>Pipe</strong> <strong>Guide</strong> & <strong>Seal</strong> (GRS-FF) . It is particularly suited to situations<br />
where a larger radiator is being used which has a third mounting bracket<br />
running down the centre of the radiator <strong>and</strong> where the distance from the<br />
centre of the radiator to the valves is large enough to cause excessive<br />
pipe sag which could become visible below the bottom of the radiator.<br />
Due to the face-fix nature of the product, it is also well suited to studded<br />
wall details. The product should be placed close to the radiator valves<br />
in a position which avoids conflict with the outer two radiator brackets<br />
<strong>and</strong> provides an uninterrupted route between the pipe <strong>and</strong> the valve.<br />
Installation<br />
3a. 3b.<br />
2. When dry-lining, cut 2,<br />
60mm diameter circular holes<br />
using the centre of each of the<br />
crosses as the centre point<br />
for the holes (for best results,<br />
use a 60mm hole-saw). Pull<br />
each length of pipe through each<br />
hole <strong>and</strong> plaster as normal, being<br />
careful not to plaster over the holes.<br />
<strong>Radiator</strong> Bracket<br />
<strong>Radiator</strong> Bracket<br />
Bottom of radiator<br />
<strong>Radiator</strong> Bracket<br />
3a. The product can be orientated in any direction required.<br />
3b. Thread the pipes through the grommet in each of the radiator<br />
pipe seals. Push each product flush with the plastered wall, centralise<br />
the product around the hole <strong>and</strong> direct it towards the valve. Mark the<br />
centres of each of the holes.<br />
Floor level<br />
Centre of cross<br />
to valve<br />
Centre of cross<br />
to valve<br />
1. Run the pipes <strong>and</strong> secure to the wall. Mark a cross on the wall at each<br />
of the points where the pipes will exit through the dry-line board. Allow<br />
enough excess to ensure that the pipes will meet the radiator valves. (The<br />
pipes can be left in a loop at this point to pressure test the system, but must be cut before<br />
dry-lining)<br />
4. Pull the radiator pipe seal away<br />
from the wall <strong>and</strong> screw a self-drive<br />
plug into the plasterboard at each<br />
of the points previously marked.<br />
Warning: Take care not to<br />
pierce any pipes or wiring<br />
behind the dry-lining when<br />
driving the self-drive plugs.