Genesis HR Installation Instructions - VIP Payroll
Genesis HR Installation Instructions - VIP Payroll
Genesis HR Installation Instructions - VIP Payroll

You also want an ePaper? Increase the reach of your titles
YUMPU automatically turns print PDFs into web optimized ePapers that Google loves.
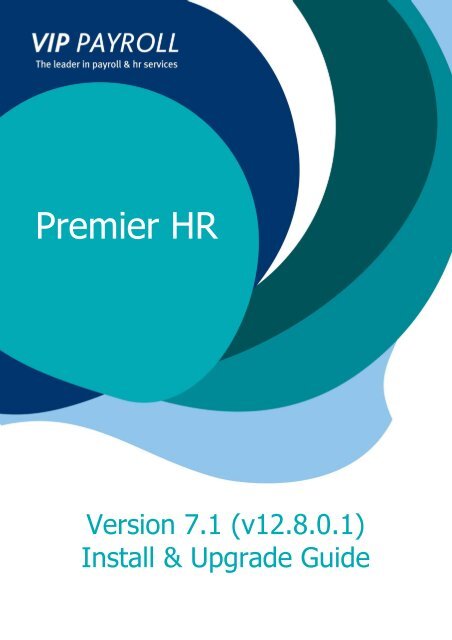
Premier <strong>HR</strong><br />
Version 7.1 (v12.8.0.1)<br />
Install & Upgrade Guide<br />
Premier <strong>HR</strong> – <strong>Installation</strong> Notes 1
Contents<br />
<strong>VIP</strong> Premier Total Solution Upgrade ..................................................................................... 3<br />
Upgrading the Total Solutions <strong>Installation</strong>..................................................................................... 3<br />
Premier <strong>HR</strong> Server & Workstation Upgrade .......................................................................... 5<br />
Upgrading the Premier <strong>HR</strong> Server or Workstation .......................................................................... 5<br />
Premier <strong>HR</strong> Server & Workstation Upgrade .......................................................................... 8<br />
Upgrade the Premier <strong>HR</strong> Server Install ......................................................................................... 8<br />
Integrator Workstation Upgrade <strong>Instructions</strong> .................................................................... 10<br />
Upgrading the Premier <strong>HR</strong> Integrator Workstation ...................................................................... 10<br />
Premier Integrator Comms Service Upgrade ...................................................................... 11<br />
Upgrading the Premier <strong>HR</strong> Integrator Comms Service.................................................................. 11<br />
<strong>VIP</strong> Premier Total Solution <strong>Installation</strong> .............................................................................. 12<br />
<strong>HR</strong> Server <strong>Installation</strong> <strong>Instructions</strong> .................................................................................... 13<br />
Installing the Premier <strong>HR</strong> System on a Server ............................................................................. 13<br />
Premier <strong>HR</strong> Workstation <strong>Installation</strong> <strong>Instructions</strong> ............................................................. 16<br />
Installing the Premier <strong>HR</strong> Workstation <strong>Installation</strong> ....................................................................... 16<br />
Integrator Workstation Install <strong>Instructions</strong> ....................................................................... 18<br />
Installing the Premier <strong>HR</strong> Integrator Workstation ........................................................................ 18<br />
Premier Integrator Comms Service ..................................................................................... 20<br />
Installing the Premier Integrator Comms Service......................................................................... 20<br />
Premier <strong>HR</strong> – <strong>Installation</strong> Notes 2
Upgrade <strong>Instructions</strong><br />
<strong>VIP</strong> Premier Total Solution Upgrade<br />
Upgrade to Version 7.1 (v 12.8.0.1)<br />
Upgrading the Total Solutions <strong>Installation</strong><br />
1. Check that you are on version V6.0 (released as version v11.10.1) or V6.1 (released as<br />
version v11.12.0.1) or V7.0 (released as version 12.5.0.001)<br />
2. Make sure that All operators are out of Premier <strong>HR</strong>. If they are not, the installation will not<br />
successfully run.<br />
3. Make sure you know the Drive letter from which you will install the upgrade (usually D: for<br />
CD’s).<br />
4. Make a Full System Backup of Premier <strong>Payroll</strong>, Premier <strong>HR</strong> Data and Collective<br />
Database backup, Premier Integrator Database and Premier ESS backup for the GUESS<br />
database, before installing the upgrade.<br />
5. Premier <strong>Payroll</strong> and Premier ESS Users:<br />
Please note that the Premier <strong>HR</strong> Application cannot be upgraded without also upgrading the<br />
Premier <strong>Payroll</strong> Application and ESS Application. These applications have to be upgrade<br />
simultaneously. The upgrades for the Premier <strong>Payroll</strong> and ESS Applications may be<br />
downloaded from the Softline <strong>VIP</strong> website.<br />
The following install sequence needs to be followed for an installation or upgrade of the Total<br />
Solution:<br />
Premier <strong>Payroll</strong><br />
1. Ensure that you are currently running Premier <strong>Payroll</strong> 4.0a.<br />
2. If you are still on a previous version of Premier <strong>Payroll</strong> please contact the <strong>VIP</strong> Call Centre for<br />
assistance.<br />
Premier ESS<br />
1. Ensure that you are on version 4.1 of Premier ESS.<br />
Premier <strong>HR</strong><br />
1. Run the installation or Upgrade CD for Premier <strong>HR</strong> Version 7.1 (v12.8.0.1) and upgrade<br />
the Premier <strong>HR</strong> and Integrator Databases.<br />
2. If the Integrator Comms Service is on another server, then run the installation or upgrade to<br />
the Integrator Comms Service from the CD.<br />
3. If the <strong>HR</strong> installation requires workstation installations, then run the Premier <strong>HR</strong> workstation<br />
upgrade or install on the workstations which needs to have access to Premier <strong>HR</strong>.<br />
4. If the <strong>HR</strong> installation requires workstation installations of the Premier Integrator, then run the<br />
Premier <strong>HR</strong> Integrator workstation upgrade or install on the workstations which needs to have<br />
access to the Premier Integrator.<br />
Premier <strong>HR</strong> – <strong>Installation</strong> Notes 3
Please ensure that before loading this upgrade that you have made the following<br />
backups:<br />
<br />
<br />
<br />
<br />
Premier <strong>Payroll</strong> Full Systems backup.<br />
Premier <strong>HR</strong> Data and Collective Database backup.<br />
Premier Integrator Database backup.<br />
Premier ESS backup for the GUESS database.<br />
If you are unsure about ANY of the above instructions, please contact the <strong>VIP</strong> Call Centre<br />
for assistance.<br />
Premier <strong>HR</strong> – <strong>Installation</strong> Notes 4
Upgrade <strong>Instructions</strong><br />
Premier <strong>HR</strong> Server & Workstation Upgrade<br />
Upgrade to Version 7.1 (v 12.8.0.1)<br />
Upgrading the Premier <strong>HR</strong> Server or Workstation<br />
Before proceeding with the <strong>Installation</strong> <strong>Instructions</strong> below, please ensure that:<br />
A backup of the Premier <strong>HR</strong> Data as well as Collective Database have been made.<br />
The Premier <strong>HR</strong> Server upgrade must be run before the workstation upgrades are run.<br />
Once the system upgrade has been successfully run, the databases must be upgraded.<br />
The Microsoft .Net Framework 4.0 is installed on the server and all workstations.<br />
Steps to follow when Installing the Premier <strong>HR</strong> Upgrade<br />
1. Download the Premier <strong>HR</strong> Upgrade software from the Softline <strong>VIP</strong> website.<br />
A message will be displayed should the Premier <strong>HR</strong> system still be open or the services still be<br />
running while the upgrade tries to run.<br />
2. The Compatibility Check screen below will be displayed. The Compatibility Wizard will<br />
check that the minimum system requirements necessary for running the Premier <strong>HR</strong> System<br />
are met before proceeding with the installation:<br />
The table on the Compatibility Check screen will display the results from the compatibility<br />
check.<br />
Premier <strong>HR</strong> – <strong>Installation</strong> Notes 5
The green tick icon below represents that this specific system requirement has been met.<br />
You may proceed with the installation, provided that there are no red icons displayed on the<br />
compatibility check table.<br />
The yellow warning icon below represents that this specific requirement has not been met.<br />
You may still proceed with the installation, provided that there are no red icons displayed on<br />
the compatibility check table.<br />
The red icon below represents that this specific requirement has not been met. You may<br />
not proceed any further with the installation until this requirement has been updated.<br />
Please note that if any of the minimum system requirements with a red icon have not been<br />
met, you will not be allowed to continue any further with the installation.<br />
A Redistributables Folder has been added onto the Premier <strong>HR</strong> <strong>Installation</strong><br />
CD containing the following programmes:<br />
Adobe Reader 9.0<br />
MS .Net Framework 3.5 SP1 / MS .Net Framework 4.0<br />
MS SQL Server Express 2005<br />
The above programmes must be installed before proceeding with the Premier <strong>HR</strong> installation,<br />
providing they are currently not available on your workstation or network server.<br />
Once all the minimum system requirements have been met you may click on Next .<br />
3. The system will uninstall the previous version of Premier <strong>HR</strong> and install the new version. The<br />
installer will display Progress screens during the upgrade process.<br />
Close the applications or services indicated on the screen and click on Upgrade .<br />
4. The Upgrade <strong>Installation</strong> screen will be displayed.<br />
Click on Upgrade .<br />
5. After the process has been completed, the <strong>Installation</strong> Result screen will be displayed.<br />
Click on Finish .<br />
When a service does not start within a reasonable time, an information message will be<br />
displayed. Click on OK , and consult the service page once the installation has been<br />
completed to ensure that the service has started.<br />
The Premier <strong>HR</strong> services may be found under your services:<br />
Select: Start<br />
Select: Run<br />
Type: services.msc<br />
The install will close as soon as the upgrade has been completed successfully.<br />
Premier <strong>HR</strong> – <strong>Installation</strong> Notes 6
You may access Premier <strong>HR</strong> System from the icon on your desktop, or alternatively you<br />
may access the <strong>VIP</strong> Premier <strong>HR</strong> System from the Windows Start Menu.<br />
Please note if the upgrade was done on a Vista or Windows 7 machine,, with UAC enabled,<br />
the “Run as Administrator” option must be selected again on the shortcut properties.<br />
Please note that if the Premier <strong>HR</strong> System requires workstation upgrades, then run the<br />
Premier <strong>HR</strong> System upgrade on the workstations which need to have access to the Premier<br />
<strong>HR</strong> System.<br />
If you are unsure about ANY of the above instructions, please contact the <strong>VIP</strong> Call<br />
Centre for assistance.<br />
Premier <strong>HR</strong> – <strong>Installation</strong> Notes 7
Upgrade <strong>Instructions</strong><br />
Premier <strong>HR</strong> Server & Workstation Upgrade<br />
Upgrade to Version 7.1 (v 12.8.0.1)<br />
Upgrade the Premier <strong>HR</strong> Server Install<br />
Before proceeding with the <strong>Installation</strong> <strong>Instructions</strong> below, please ensure that:<br />
A backup of the Premier <strong>HR</strong> Data as well as Collective Database have been made.<br />
The Premier <strong>HR</strong> Server upgrade must be run before the workstation upgrades are run.<br />
Once the system upgrade has been successfully run, the databases must be upgraded.<br />
Steps to follow when Installing the Premier <strong>HR</strong> Upgrade<br />
1. Insert the <strong>VIP</strong> Premier <strong>HR</strong> System <strong>Installation</strong> CD. This <strong>Installation</strong> CD has a built-in auto run<br />
function. If previous versions of Premier <strong>HR</strong> exist, these versions will be uninstalled when the<br />
upgrade CD is loaded.<br />
A message will be displayed should the Premier <strong>HR</strong> system still be open or the services still be<br />
running while the upgrade tries to run.<br />
2. The system will uninstall the previous version of Premier <strong>HR</strong> and install the new version. The<br />
installer will display Progress screens during the upgrade process.<br />
Close the applications or services indicated on the screen and click on Upgrade .<br />
3. The Upgrade <strong>Installation</strong> screen will be displayed.<br />
Click on Upgrade .<br />
4. After the process has been completed, the <strong>Installation</strong> Result screen will be displayed.<br />
Click on Finish .<br />
When a service does not start within a reasonable time, an information message will be<br />
displayed. Click on OK , and consult the service page once the installation has been completed<br />
to ensure that the service has started.<br />
The Premier <strong>HR</strong> services may be found under your services:<br />
Select: Start<br />
Select: Run<br />
Type: services.msc<br />
The install will close as soon as the upgrade has been completed successfully.<br />
You may access Premier <strong>HR</strong> System from the icon on your desktop, or alternatively you may access<br />
the <strong>VIP</strong> Premier <strong>HR</strong> System from the Windows Start Menu.<br />
Please note if the upgrade was done on a Vista or Windows 7 machine, with UAC enabled,<br />
the “Run as Administrator” option must be selected again on the shortcut properties.<br />
Premier <strong>HR</strong> – <strong>Installation</strong> Notes 8
Please note that if the Premier <strong>HR</strong> System requires workstation upgrades, then run the<br />
Premier <strong>HR</strong> System upgrade on the workstations which need to have access to the Premier<br />
<strong>HR</strong> System.<br />
If you are unsure about ANY of the above instructions, please contact the <strong>VIP</strong> Call<br />
Centre for assistance.<br />
Premier <strong>HR</strong> – <strong>Installation</strong> Notes 9
Integrator Workstation Upgrade <strong>Instructions</strong><br />
Upgrade to Version 7.1 (v 12.8.0.1)<br />
Upgrading the Premier <strong>HR</strong> Integrator Workstation<br />
Before proceeding with the <strong>Installation</strong> <strong>Instructions</strong> below, please ensure that:<br />
The Premier <strong>HR</strong> Integrator Server upgrade must be run before the workstation upgrades are<br />
run.<br />
The Premier <strong>HR</strong> Integrator Workstation upgrade requires that a workstation upgrade of the<br />
Premier <strong>HR</strong> System has already been run on your computer.<br />
Steps to follow when Upgrading <strong>HR</strong> Integrator Workstation<br />
1. The installation program for the Premier <strong>HR</strong> Integrator Workstation can be located on the<br />
Premier <strong>HR</strong> <strong>Installation</strong> CD in the Premier <strong>HR</strong> Integrator Workstation folder. Double-click<br />
on Premier <strong>HR</strong> Integrator.exe to launch the <strong>Installation</strong> wizard.<br />
A message will be displayed should the Premier Integrator system still be open or the services<br />
still be running while the upgrade tries to run.<br />
2. The system will uninstall the previous version of the Premier Integrator and install the new<br />
version. The installer will display Progress screens during the upgrade process.<br />
Close the applications or services indicated on the screen and click on Upgrade .<br />
3. After the process is complete, the <strong>Installation</strong> Result screen will be displayed.<br />
Click on Finish .<br />
The install will close as soon as the upgrade has been completed successfully.<br />
Please note if the upgrade was done on a Vista or Windows 7 machine, with UAC enabled,<br />
the “Run as Administrator” option must be selected on the shortcut properties.<br />
If you are unsure about ANY of the above instructions, please contact the <strong>VIP</strong> Call<br />
Centre for assistance.<br />
Premier <strong>HR</strong> – <strong>Installation</strong> Notes 10
Upgrade <strong>Instructions</strong><br />
Premier Integrator Comms Service Upgrade<br />
Upgrade to Version 7.1 (v 12.8.0.1)<br />
Upgrading the Premier <strong>HR</strong> Integrator Comms Service<br />
Before proceeding with the <strong>Installation</strong> <strong>Instructions</strong> below, please ensure that:<br />
The Premier <strong>HR</strong> system is on Version 7.1 (v 12.8.0.1).<br />
The Premier <strong>Payroll</strong> system is upgraded to Release 4.0a.<br />
The destination folder for the Premier <strong>Payroll</strong> system is specified when installing the Premier<br />
Integrator Comms Service. The Service needs to be reinstalled if the Premier <strong>Payroll</strong><br />
destination folder should change.<br />
Steps to follow when upgrading the Premier <strong>HR</strong> Integrator Comms Service<br />
1. The installation program for the Premier Integrator Comms Service can be located on the<br />
Softline <strong>VIP</strong> website. Double-click on Premier Integrator Comms Service.exe to launch<br />
the <strong>Installation</strong> wizard.<br />
2. The Upgrade <strong>Installation</strong> screen will be displayed.<br />
Click on Upgrade .<br />
3. The Upgrade Progress screen will be displayed.<br />
When a service does not start within a reasonable time, an information message will be<br />
displayed. Click on OK , and consult the service page once the installation has been completed<br />
to ensure that the service has started.<br />
The Premier Integrator Comms Service may be found under your services:<br />
Select: Start<br />
Select: Run<br />
Type: services.msc<br />
4. Once the installation has been completed, the <strong>Installation</strong> Result screen will be displayed.<br />
If you are unsure about ANY of the above instructions, please contact the <strong>VIP</strong> Call<br />
Centre for assistance.<br />
Premier <strong>HR</strong> – <strong>Installation</strong> Notes 11
<strong>Installation</strong> <strong>Instructions</strong><br />
<strong>VIP</strong> Premier Total Solution <strong>Installation</strong><br />
Upgrade to Version 7.1 (v 12.8.0.1)<br />
The following Install Sequence needs to be followed for an installation of the Premier<br />
Solution:<br />
Premier <strong>Payroll</strong>:<br />
Ensure that you are currently running Premier <strong>Payroll</strong> 4.0a<br />
If you are still on a previous version of Premier <strong>Payroll</strong> please contact the <strong>VIP</strong> Call Centre for<br />
assistance.<br />
Premier ESS:<br />
<br />
Ensure that you are on version 4.1 of Premier ESS.<br />
Premier <strong>HR</strong>:<br />
1. Run the installation for Premier <strong>HR</strong> Version 7.1 (v 12.8.0.1).<br />
2. If the Integrator Comms Service is on another server, then run the installation of the<br />
Integrator Comms Service from the CD.<br />
3. If the <strong>HR</strong> installation requires workstation installations, then run the Premier <strong>HR</strong> workstation<br />
install on the workstations which need to have access to Premier <strong>HR</strong>.<br />
4. If the <strong>HR</strong> installation requires workstation installations of the Premier Integrator, then run the<br />
Premier <strong>HR</strong> Integrator workstation install on the workstations which need to have access to<br />
the Premier Integrator.<br />
If you are unsure about ANY of the above instructions, please contact the <strong>VIP</strong> Call Centre<br />
for assistance.<br />
Premier <strong>HR</strong> – <strong>Installation</strong> Notes 12
<strong>HR</strong> Server <strong>Installation</strong> <strong>Instructions</strong><br />
Version 7.1 (v 12.8.0.1)<br />
Installing the Premier <strong>HR</strong> System on a Server<br />
The Premier <strong>HR</strong> Server <strong>Installation</strong> will install the following components on the<br />
Server:<br />
<br />
<br />
<br />
<br />
Premier <strong>HR</strong> System.<br />
Premier <strong>HR</strong> Integrator.<br />
Premier <strong>HR</strong> Scheduler Service.<br />
Premier <strong>HR</strong> Timer Service.<br />
The above Premier <strong>HR</strong> components will need to be installed separately:<br />
<br />
Premier <strong>HR</strong> Integrator Comms Service.<br />
You can find the Comms Service installation on the Premier <strong>HR</strong> <strong>Installation</strong> CD in the folder <strong>HR</strong><br />
<strong>VIP</strong>Comms Service. Please refer to the Premier <strong>HR</strong> Comms Service <strong>Installation</strong> instructions for<br />
information on how to run the Comms Service install.<br />
Steps to follow when Installing the Premier <strong>HR</strong> System<br />
1. Insert the <strong>VIP</strong> Premier <strong>HR</strong> System <strong>Installation</strong> CD.<br />
This <strong>Installation</strong> CD has a built-in auto run function and the InstallAware Wizard screen<br />
will automatically be displayed.<br />
Click on Next .<br />
2. The Type of <strong>Installation</strong> screen will be displayed.<br />
The following options are available:<br />
Workstation Install: (do not select if this is a server installation)<br />
Select this option if you only want to install the system on a user’s computer. This option<br />
requires that Microsoft SQL Server 2005 or higher is already installed on a network server.<br />
Workstation <strong>Installation</strong> will install:<br />
The Premier <strong>HR</strong> Application.<br />
<br />
Server/Standalone:<br />
Select this option if it is the server on which the Premier <strong>HR</strong> System will run or if it is a<br />
standalone computer which will be the only computer running the Premier <strong>HR</strong> System.<br />
Server <strong>Installation</strong> will install:<br />
SQL Express, if SQL Server 2005 is not installed.<br />
The Scheduler Service.<br />
The Timer Service.<br />
The Integrator Service.<br />
The Premier <strong>HR</strong> application.<br />
Optional Selections:<br />
Adobe Reader 9.<br />
Premier <strong>HR</strong> – <strong>Installation</strong> Notes 13
The default installation will be a workstation installation. Choose the Server / Standalone<br />
Install option.<br />
Click on Next .<br />
3. The SQL Server Setup Information screen will be displayed if the option to install SQL<br />
Express was checked on the Type of <strong>Installation</strong> screen.<br />
Enter the name of the new SQL Instance to be created. The Premier <strong>HR</strong> System uses SQL<br />
Authentication for security purposes. Enter the Password for the “sa” user and confirm<br />
that the password is correct.<br />
The following option is available:<br />
SQL Express Management Studio:<br />
If your computer does not already have SQL Express Management Studio or SQL<br />
Management Studio installed, this option will be available. Tick this option to install SQL<br />
Express Management Studio 2005 for managing the SQL Databases that will be created.<br />
Click on Next .<br />
4. The Scheduler Service Configuration screen will be displayed.<br />
The password to provide access to these services need to be provided. Enter your User<br />
Name and Password in the fields provided on this screen.<br />
Click on Next .<br />
The Premier <strong>HR</strong> installation verifies that the user name and password provided entered are<br />
valid. The installation cannot continue without valid user credentials.<br />
5. The Select Destination Folder screen will be displayed.<br />
The preferred location for Premier <strong>HR</strong> Systems is C:\Softline<strong>VIP</strong>\<strong>HR</strong> but may be changed if<br />
absolutely necessary.<br />
To change the location for Premier <strong>HR</strong>:<br />
Click on Browse to locate another destination.<br />
Click on Next .<br />
6. The Shortcuts screen will be displayed.<br />
The system will default to group Softline\Premier <strong>HR</strong>.<br />
A shortcut will be created on your desktop. You may also select to create shortcuts for all<br />
users.<br />
Click on Next .<br />
7. The Ready to Install screen will display.<br />
The system is now ready to be installed at the location provided.<br />
Click on Install .<br />
8. The <strong>Installation</strong> Progress screen will be displayed.<br />
Premier <strong>HR</strong> – <strong>Installation</strong> Notes 14
When a service does not start within a reasonable time, an information message will be<br />
displayed.<br />
Click on OK , and consult the service page once the installation has been completed to ensure<br />
that the service has started.<br />
The Services may be found under your services:<br />
Select: Start<br />
Select: Run<br />
Type: services.msc<br />
9. The <strong>Installation</strong> Result screen will be displayed.<br />
The message will be displayed to indicate that the installation has been successful.<br />
Click on Finish .<br />
You may now click on the Premier <strong>HR</strong> icon on your desktop to access the <strong>VIP</strong> Premier <strong>HR</strong> System:<br />
Premier <strong>HR</strong><br />
Alternatively, you may access the <strong>VIP</strong> Premier <strong>HR</strong> System from the Windows Start Menu.<br />
Please note if the installation was done on a Vista or Windows 7 machine, with UAC enabled,<br />
the “Run as Administrator” option must be selected on the shortcut properties.<br />
If you are unsure about ANY of the above instructions, please contact the <strong>VIP</strong> Call<br />
Centre for assistance.<br />
Premier <strong>HR</strong> – <strong>Installation</strong> Notes 15
Premier <strong>HR</strong> Workstation <strong>Installation</strong> <strong>Instructions</strong><br />
Version 7.1 (v 12.8.0.1)<br />
Installing the Premier <strong>HR</strong> Workstation <strong>Installation</strong><br />
In the <strong>Installation</strong> <strong>Instructions</strong> below:<br />
The Premier <strong>HR</strong> Workstation must only be installed after the Premier <strong>HR</strong> Server installation has<br />
been completed.<br />
Steps to follow when Installing the Premier <strong>HR</strong> Workstation <strong>Installation</strong><br />
1. Insert the <strong>VIP</strong> Premier <strong>HR</strong> System <strong>Installation</strong> CD. This <strong>Installation</strong> CD has a built-in auto run<br />
function. The <strong>Installation</strong> Wizard for Premier <strong>HR</strong> Setup screen will be displayed.<br />
Click on Next .<br />
2. The Type of <strong>Installation</strong> screen will automatically be displayed.<br />
The following options are available:<br />
Workstation:<br />
Select this option if you only want to implement the system on a user’s computer. This<br />
option requires that Microsoft SQL Server 2005 or higher is already installed on a network<br />
server.<br />
Workstation <strong>Installation</strong> will install:<br />
The Premier <strong>HR</strong> Application.<br />
The .Net Framework 4.0 (if not already installed on this machine).<br />
<br />
Server/Standalone:<br />
Select this option if it is the server on which the Premier <strong>HR</strong> System will run or if it is a<br />
standalone computer which will be the only computer running the Premier <strong>HR</strong> System.<br />
Server <strong>Installation</strong> will install:<br />
SQL Express, if SQL Server 2005 is not installed.<br />
The Scheduler Service.<br />
The Timer Service.<br />
The Integrator Service.<br />
The Premier <strong>HR</strong> application.<br />
Optional Selections:<br />
Adobe Reader 9.0.<br />
The default installation will be a workstation installation.<br />
Click on Next .<br />
3. The Select Destination Folder screen will automatically be displayed.<br />
The preferred location for the Premier <strong>HR</strong> systems is C:\Softline<strong>VIP</strong>\<strong>HR</strong>, but it may be<br />
changed if absolutely necessary.<br />
If the location must be changed, click on the Browse button and locate the new location.<br />
Premier <strong>HR</strong> – <strong>Installation</strong> Notes 16
The location for future updates to Premier <strong>HR</strong> workstation installs may be specified on this<br />
screen. When a new upgrade is available, the upgrade may be loaded on a central place on<br />
the server. If this option is selected, the user will be able to check for new updates in the<br />
specified location. The user will be able to click on the shortcut under Start\All<br />
Programmes\Softline<strong>VIP</strong>\Premier <strong>HR</strong>\Updates\Premier <strong>HR</strong> to upgrade to a newer<br />
version of Premier <strong>HR</strong> System.<br />
Click on Next .<br />
4. The Shortcuts screen will be displayed.<br />
A shortcut will be created on your desktop. You may also select to create shortcuts for all<br />
users.<br />
Click on Next .<br />
5. The Ready to Install screen will be displayed.<br />
Review the installation settings and make sure that it is correct before continuing.<br />
Click on Install .<br />
6. The Install Progress screens will be displayed.<br />
After the process is complete, the <strong>Installation</strong> Result screen will be displayed.<br />
Click on Finish .<br />
You can now click on the Premier <strong>HR</strong> icon on your desktop to access the <strong>VIP</strong> Premier <strong>HR</strong> System:<br />
Premier <strong>HR</strong><br />
Alternatively, you may access the <strong>VIP</strong> Premier <strong>HR</strong> System from the Windows Start Menu.<br />
If you are unsure about ANY of the above instructions, please contact the <strong>VIP</strong> Call<br />
Centre for assistance.<br />
Premier <strong>HR</strong> – <strong>Installation</strong> Notes 17
Integrator Workstation Install <strong>Instructions</strong><br />
Version 7.1 (v 12.8.0.1)<br />
Installing the Premier <strong>HR</strong> Integrator Workstation<br />
In the <strong>Installation</strong> <strong>Instructions</strong> below:<br />
The Premier <strong>HR</strong> Integrator Workstation must only be installed if integrations between Premier<br />
<strong>HR</strong> and Premier <strong>Payroll</strong> will be performed, and the user of this computer should have access<br />
to the Premier <strong>HR</strong> Integrator application.<br />
The Premier <strong>HR</strong> Integrator Workstation requires that a workstation installation of the Premier<br />
<strong>HR</strong> System already exists on your computer.<br />
Steps to follow when Installing <strong>HR</strong> Integrator Workstation<br />
1. The installation program for the Premier <strong>HR</strong> Integrator Workstation can be located on the<br />
Premier <strong>HR</strong> <strong>Installation</strong> CD in the Premier <strong>HR</strong> Integrator Workstation folder. Double-click<br />
on Premier <strong>HR</strong> Integrator.exe to launch the <strong>Installation</strong> wizard.<br />
2. The InstallAware Wizard screen will automatically be displayed.<br />
Click on Next .<br />
3. The Select Destination folder screen will be displayed.<br />
The preferred location for the Premier <strong>HR</strong> systems is C:\Program<br />
Files\Softline<strong>VIP</strong>\<strong>HR</strong>\Premier<strong>HR</strong>, but it may be changed if absolutely necessary.<br />
If the location must be changed, click on the Browse button and locate the new location.<br />
The location for future updates to Premier Integrator workstation installs may be specified on<br />
this screen. When a new upgrade is available, the upgrade may be loaded on a central place<br />
on the server. If this option is selected, the user will be able to check for new updates in the<br />
specified location. You will be able to click on the shortcut under Start\All<br />
Programmes\Softline<strong>VIP</strong>\Premier <strong>HR</strong>\Updates\Premier Integrator to upgrade to a<br />
newer version of Premier Integrator.<br />
Click on Next .<br />
4. The Shortcuts screen will be displayed.<br />
A shortcut will be created on your desktop. You may also select to create shortcuts for all<br />
users.<br />
Click on Next .<br />
5. The Ready to Install screen will be displayed.<br />
Review the installation settings and make sure that it is correct before continuing.<br />
Click on Install .<br />
6. The <strong>Installation</strong> Result screen will be displayed.<br />
A message will be displayed to indicate that the installation has been successful.<br />
Click on Finish .<br />
Premier <strong>HR</strong> – <strong>Installation</strong> Notes 18
You can access the Premier Integrator System by clicking on the Premier Integrator icon on your<br />
desktop:<br />
Premier<br />
Integrator<br />
Alternatively, you may access the <strong>VIP</strong> Premier Integrator System from the Windows Start Menu.<br />
Please note if the installation was done on a Vista or Windows 7 machine, with UAC enabled,<br />
the “Run as Administrator” option must be selected on the shortcut properties.<br />
If you are unsure about ANY of the above instructions, please contact the <strong>VIP</strong> Call<br />
Centre for assistance.<br />
Premier <strong>HR</strong> – <strong>Installation</strong> Notes 19
<strong>Installation</strong> <strong>Instructions</strong><br />
Premier Integrator Comms Service<br />
Version 7.1 (v 12.8.0.1)<br />
Installing the Premier Integrator Comms Service<br />
Please note: The destination folder for the Premier <strong>Payroll</strong> system is specified when installing<br />
the Premier Integrator Comms Service. The service needs to be reinstalled if the Premier<br />
<strong>Payroll</strong> destination folder was incorrectly specified.<br />
Steps to follow when installing the Premier Integrator Comms Service<br />
1. The installation program for the Premier Integrator Comms Service can be located on the<br />
Premier <strong>HR</strong> <strong>Installation</strong> CD in the Premier Integrator Comms Service folder. Double-click<br />
on Premier Integrator Comms Service.exe to launch the <strong>Installation</strong> wizard.<br />
2. The InstallAware Wizard screen will be displayed.<br />
Click on Next .<br />
3. The Integrator Comms Service Configuration screen will be displayed.<br />
Enter your User Name and Password for the account under which the service should run in<br />
the fields provided on this screen. The Integrator Comms Service verifies that the User Name<br />
and Password provided are valid. The installation cannot continue without valid credentials.<br />
Click on Next .<br />
4. The Select Destination Folder screen will be displayed.<br />
The preferred location for the Premier Integrator Comms Service is<br />
C:\Softline<strong>VIP</strong>\<strong>HR</strong>, but it may be changed if necessary. If the location must be changed,<br />
click on the Browse button and locate the new location.<br />
The location of the Premier <strong>Payroll</strong> folder for the Premier <strong>HR</strong> and Premier <strong>Payroll</strong> integration<br />
needs to be specified on the Select Destination Folder screen. If the location must be<br />
changed, click on the Browse button and locate the new location. The installation cannot<br />
continue without a valid Premier <strong>Payroll</strong> path.<br />
Click on Next .<br />
5. The Ready to Install screen will be displayed.<br />
Review the installation settings and make sure that it is correct before continuing.<br />
Click on Install .<br />
6. The Install Progress screen will be displayed.<br />
When a service does not start within a reasonable time, an information message will be given<br />
to this effect. Click on OK , and consult the service page once the installation has been<br />
completed, to ensure that the service has started.<br />
Premier <strong>HR</strong> – <strong>Installation</strong> Notes 20
The Premier Integrator Comms Service may be found under your services:<br />
Select: Start<br />
Select: Run<br />
Type: services.msc<br />
7. Once the installation has been completed, the <strong>Installation</strong> Result screen will be displayed.<br />
Please see the notes for the Integrator Setup for additional information on how to<br />
configure your connection settings.<br />
If you are unsure about ANY of the above instructions, please contact the <strong>VIP</strong> Call<br />
Centre for assistance.<br />
Premier <strong>HR</strong> – <strong>Installation</strong> Notes 21