ApeosPort 650I/750I - Fuji Xerox Malaysia
ApeosPort 650I/750I - Fuji Xerox Malaysia
ApeosPort 650I/750I - Fuji Xerox Malaysia

You also want an ePaper? Increase the reach of your titles
YUMPU automatically turns print PDFs into web optimized ePapers that Google loves.
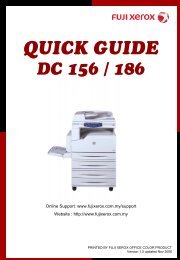
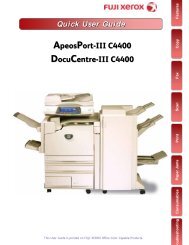
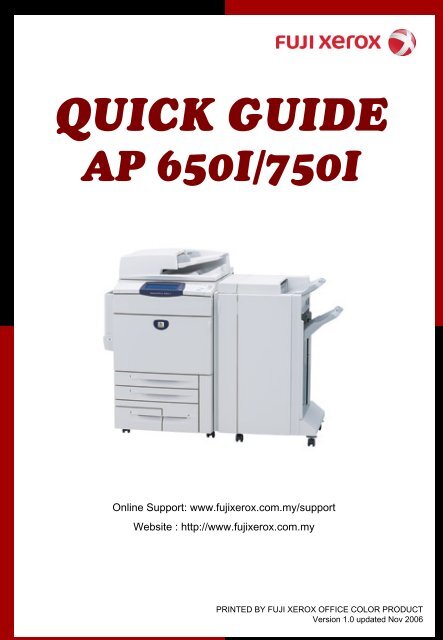
QUICK GUIDE<br />
AP <strong>650I</strong>/<strong>750I</strong><br />
Online Support: www.fujixerox.com.my/support<br />
Website : http://www.fujixerox.com.my<br />
PRINTED BY FUJI XEROX OFFICE COLOR PRODUCT<br />
Version 1.0 updated Nov 2006
INTRODUCTION<br />
The main objective of compiling this Quick Guide is to serve<br />
as an easy reference to customers. We understand customers<br />
are tight up with daily schedules and can only learn up limited<br />
machine feature in the training sessions. Thus, we hope this Quick<br />
Guide will provide you with all the essential feature should you<br />
encounter any operation problems with the machine.<br />
Kindly contact the following number :<br />
For General Service & Supplies<br />
Toll Free : 1-300-88-1163<br />
Or<br />
To contact us kindly email to us at:<br />
mysallcto@mys.fujixerox.com
Section A: Copy Features<br />
1. 2-Sided Copy<br />
2. IC Copy – 2 Methods<br />
3. Reduce / Enlarge<br />
4. Finishing<br />
5. Edge Erase .<br />
6. Margin Shift.<br />
7. Book Copying<br />
8. Multi-Up.<br />
9. Booklet Creation<br />
10. Repeat Image + Original Size<br />
TABLE OF CONTENTS<br />
Section B : Scan to FTP / SMB Feature<br />
Section C : Scan to Mailbox Feature<br />
Section D : Printing Features<br />
Section E : Maintenance<br />
1. Checking Billing Meter<br />
2. Checking Consumables Status<br />
3. Replacing Toner Cartridge<br />
4. Replacing Waste Toner Container<br />
5. Clearing Paper Jams<br />
Online Service & Support Request<br />
Online Support Assistant
Section A: COPY<br />
2-Sided Copying<br />
Steps: 1. Load document on feeder<br />
2.Goto [Scan Options Tab]<br />
3. Select required options:<br />
1 1Sided<br />
Makes a copy of a 1 sided document on one side of the paper.<br />
1 2 Sided<br />
Makes a copy of a 1 sided document on both sides of the paper.<br />
2 2 Sided<br />
Makes a copy of a 2 sided document on both sides of the paper.<br />
2 1Sided<br />
Makes a copy of a 2 sided document on one side of the paper.<br />
4. Press Start
IC Copy – 2 methods<br />
I.) Copy IC both sides on the same page<br />
1. Goto [Basic Copying Tab] – Select A4 Paper (Portrait) – Press Save<br />
2. Goto [Image Quality Tab] – Select Original Type: Text/Photograph – Press<br />
Save<br />
3. Put IC onto platen glass (Top Left corner) and press Start<br />
4. Take the printed copy and load it to Tray 5 (Bypass)<br />
(Note: Do not change paper order)<br />
5. Open the Cover and Flip IC to the opposite point of A4, press Start<br />
II.) Copy IC both sides front and back page<br />
1. Goto [Basic Copying Tab] – Select A4 Paper (Portrait) – Press Save<br />
2. Goto [Image Quality Tab] – Select Original Type: Text/Photograph – Press<br />
Save<br />
3. Goto [Scan Options Tab] – Select 2 Sided – Change to 1 2 – Press Save<br />
4. Load the first side of your IC onto platen glass (Top Left corner) and<br />
press Start<br />
5. Open the Cover and Flip IC to the opposite point of A4, press Start
Reduce/ Enlarge<br />
(Allows to select/specify the reduction/enlargement ratio within range of 25 - 400%)<br />
Steps:<br />
1. Load document on feeder<br />
2. Goto [Basic Copying Tab]<br />
3. Select Reduce / Enlarge<br />
4. Select copy ratio<br />
5. Select Save<br />
6. Press Start<br />
¨ 100%<br />
Copies are made at the same size as the original document.<br />
¨ Auto%<br />
The copy ratio is automatically set based upon the document and paper sizes,<br />
and the document is copied to fit in the selected paper.<br />
¨ Presets % (7 Types)<br />
Select from among 7 preset ratios.<br />
¨ Variable %<br />
You can enter any ratio for copying. Set the ratio within the range from 25 to<br />
400% in 1% increments.
Finishing<br />
(Allows to sort copy outputs collated or uncollated)<br />
Steps:<br />
1. Load document on feeder<br />
2. Goto [Output Format Tab]<br />
3. Select Finishing<br />
4. Select required options<br />
5. Select Save<br />
6. Press Start<br />
¨ Auto<br />
Copies are output collated<br />
¨ Collated / Stapling / Punching<br />
The machine can output sheets sorted into sets that are arranged in page order.<br />
¨ Uncollated<br />
The machine can output the specified number of copies and sort sheets by page
Edge Erase<br />
(To erase shadows/unwanted marks e.g. hole punch from edges or centre of page)<br />
Steps:<br />
1. Load document on feeder<br />
2. Goto [Scan Options Tab]<br />
3. Select Edge Erase<br />
4. Change the default from Normal to Edge Erase<br />
5. Use the arrow up or down button to set the amount of area to<br />
be erased<br />
6. Select Save<br />
7. Press Start<br />
Image Shift<br />
(Allows to change the position of the image on an output page)<br />
Steps:<br />
1. Load document on feeder<br />
2. Goto [Scan Options Tab]<br />
3. Select Image Shift/Variable Shift<br />
4. Select any items for image shift options<br />
- Auto Center; Corner Shift or Variable Shift<br />
5. Select Save twice<br />
6. Press Save
Book Copying<br />
(To copy bound documents using document glass into 2 separate pages)<br />
Steps:<br />
1. Open and place book at top left on the platen glass<br />
2. Goto [Scan Option Tab]<br />
3. Select Book Copying<br />
4. Select required option<br />
- Left Page then Right OR Right Page then Left<br />
5. Select Save<br />
6. Press Start<br />
Multi-up<br />
(To copy 2, 4 or 8 documents onto 1 sheet of paper. Document Centre will<br />
automatically reduce/enlarge the images)<br />
Steps:<br />
1. Load document on feeder<br />
2. Goto [Output Format Tab]<br />
3. Select Multiple-Up<br />
4. Select 2up, 4up or 8up<br />
5. Select required Image Order<br />
6. Select Save<br />
7. Press Start
Booklet Creation<br />
(To print the images side by side on both sides of each pages in the correct order to make<br />
a booklet. Fold the copies in half and staple in the middle to create a finished booklet)<br />
Steps:<br />
1. Load document on feeder<br />
2. Goto [Output Format Tab]<br />
3. Select Booklet Creation<br />
4. Select Left Bind/ Top Bind or Right Bind<br />
5. Select Save<br />
6. Goto [Basic Copying Tab]<br />
7. Select paper tray that contains of Landscape paper<br />
9. Press Start<br />
Repeat Image + Original Size<br />
(Print original image repeatedly on one sheet of paper)<br />
Steps:<br />
1. Load document on platen glass<br />
2. Goto [Output Format Tab]<br />
3. Select Repeat Image<br />
4. Select Auto Repeat<br />
5. Select Save<br />
6. Goto [Scan Options Tab]<br />
7. Select Originals Size<br />
8. Set document size using left-right for value “X” and top-bottom<br />
for value “Y”<br />
9. Select Save<br />
10. Press Start
Section B: SCAN TO PC (FTP/SMB)<br />
Scan to PC (FTP/SMB) – From Address Book<br />
Steps: 1. Press All Services button<br />
2. Select Scan to FTP/SMB<br />
3. Select Address Book<br />
4. Select Recipient Name<br />
5. Select Save<br />
6. Under [Basic Scanning Tab], select File Format<br />
7. Goto [Output Format Tab]<br />
8. Select File Name (example: PDF)<br />
9. Key in File Name<br />
10. Select Save<br />
11. Press Start
Section C: SCAN TO MAILBOX<br />
Scan to Mailbox<br />
(This feature scan and save document(s) on the machine mailbox an import/retrieve<br />
scanned documents using specific program.)<br />
Steps: 1. Press All Services button<br />
2. Select Scan to Mailbox<br />
3. Select your own Mailbox Number<br />
4. Goto [Scan Options Tab] to change optional settings:<br />
- Select 2 sided originals (Head to Head)<br />
- Select Scan Size<br />
- Select Reduce/Enlarge<br />
5. Goto [Output Format Tab]<br />
6. Select Document Name<br />
7. Key in Document Name<br />
8. Select Save<br />
9. Press Start<br />
Retrieving / Importing Scanned Documents<br />
Steps: 1. Go to START > PROGRAMS > FUJI XEROX > UTILITY ><br />
MAILBOX VIEWER2<br />
2. Identify the scanner (by printer name) and press Select<br />
Scanner button<br />
3. Enter your Mailbox Number into the text box (e.g. 1)<br />
4. Enter your 4-digit password (if any)<br />
5. Click on Open Mailbox button<br />
6. Click ‘Import’ to import the scanned file<br />
7. Select Close button once completed file transfer<br />
8. By default the Scanned documents are stored in<br />
My Documents folder, <strong>Fuji</strong> <strong>Xerox</strong>, Network Scan
Section D: PRINTING<br />
Printing Job Types<br />
Main Features<br />
1. Normal Print<br />
To print documents from your PC as a normal print job<br />
2. Secure Print<br />
Allows you to set user ID and password for the document on your<br />
PC. When send for printing, it temporary stores the documents on<br />
the machine and only prints out when you select your user ID and<br />
password on the physical machine<br />
3. Sample Print<br />
Before printing multiple sets of a document, you may print one<br />
sample set for trial before proceeding the next sets<br />
4. Save to Mailbox<br />
Allows you to store your documents in your own mailbox before<br />
printing out<br />
5. Delay Print<br />
• Allows you to print your documents at a specific time
Normal Print<br />
Steps :<br />
1. Go to File, Select Print<br />
2. Select Printing Preferences<br />
3. Under Job Type, Select Normal Print<br />
4. Select OK
Secure Print<br />
Steps : 1. Go to File, Select Print<br />
2. Select Printing Preferences<br />
3. Under Job Type, Select Secure Print<br />
4. Under Secure Print Message Box, key in:-<br />
-User ID<br />
- Password<br />
- Document Name<br />
Secure Print (Document Retrieval)<br />
Steps: 1. Select Job Status Button (at the machine)<br />
2. Click Stored Documents<br />
3. Select User ID<br />
4. Select Document List<br />
5. Key-in Password and Confirm<br />
6. Select Job and Print
2-sided Print<br />
Steps :<br />
1. Go to File, Select Print<br />
2. Select Printing Preferences<br />
3. Under 2 Sided Print, Select Flip on Long Edge or Short Edge<br />
4. Select OK<br />
Note: Flip on Long Edge is known as Head to Head<br />
Flip on Short Edge is known as Head to Toe
Multi-Up<br />
Steps :<br />
1. Go to File, Select Print<br />
2. Select Printing Preferences<br />
3. Goto [Tray/Layout Tab]<br />
4. Select Multiple-Up (1Up to 32 Up)<br />
5. Select OK
Booklet Printing<br />
Steps :<br />
1. Go to File, Select Print<br />
2. Select Printing Preferences<br />
3. Goto [Tray/Layout Tab]<br />
4. Select Booklet/ Poster/ Mix Document/ Rotation<br />
5. Select Booklet Creation Option Button<br />
6. Select OK to the pop-up message box<br />
7. Select OK
Section E: Maintenance<br />
Checking Billing Meter<br />
1. Press button on the control panel.<br />
2. Select Billing Meter/Print Report Tab<br />
3. Select Billing Meter<br />
4. Press Close button once done<br />
Notes:<br />
Serial Number – Displays the serial number of the machine<br />
Meter 1 – Meter 2 + Meter 3<br />
Meter 2 – Number of B/W copies + Number of B/W prints<br />
Meter 3 – Number of B/W prints
Checking Consumables<br />
You can check the status of consumables in the [Consumables] screen. The<br />
status of consumables is shown as "Ready", "Replace Soon", or "Replace<br />
Now". For toner, the amount is shown in percentage (0 to 100%).<br />
Steps: 1. Press button on the control panel<br />
2. Select Consumables Tab<br />
3. Press Close button once done<br />
*Consumables Status Reminder:<br />
REPLACE SOON: To Order New Cartridges<br />
REPLACE NOW: To Replace Immediately and Place New Order for Standby
How to Replace Toner Cartridge<br />
1. Open the toner cover.<br />
2. Hold the lower part of the toner cartridge of<br />
the color indicated in the message and gently<br />
pull it out<br />
3. Remove the toner cartridge by holding the<br />
handle on the top of the cartridge while gently<br />
pulling it out.<br />
4. Take out the new toner cartridge of the same<br />
color as the old one from its box, and gently<br />
tilt the cartridge up and down, and then left<br />
and right several times.<br />
5. Insert the toner cartridge in gently until it<br />
comes to a stop.<br />
6. Close the toner cover.
How to Replace Waste Toner Container<br />
1. Make sure that the machine has stopped<br />
before opening the front cover.<br />
2. Open the waste toner container cover.<br />
3. Grip the handle of the waste toner container<br />
and pull out about half of it.<br />
4. Hold the center part on the top of the<br />
container, and then remove it.
5. Hold the used waste toner container firmly<br />
with both hands and put it into the provided<br />
plastic bag.<br />
6. Hold the center part on the top of a new<br />
container and insert it until it comes to a stop.<br />
7. Close the waste toner container cover.<br />
8. Close the front cover.
How to Clear Paper Jam<br />
From Document Feeder (Cover)<br />
1. Grip the handle of the top cover of the<br />
document feeder, and open the top cover<br />
until it comes to a stop.<br />
2. Open the left cover until it comes to a stop.<br />
3. If the document is not caught in the entry<br />
of the document feeder, pull out the<br />
document.<br />
4. If there are instructions to open the inner<br />
cover, lift up the lever with the green label<br />
on it, and open the inner cover. Then<br />
remove the jammed paper.
How to Clear Paper Jam<br />
From Document Feeder (Cover)<br />
5. When the inside of the left cover is indicated,<br />
remove the jammed document.<br />
6. Close the top cover of the inner cover until you hear it click into place.<br />
7. Close the left cover of the document feeder until you hear it click into<br />
place.<br />
8. Gently return the document feeder tray.
How to Clear Paper Jam<br />
From Document Feeder (Cover – For 2 Sided)<br />
1. Open the document cover.<br />
2. Open the belt of the document cover while<br />
gripping the lever, and remove the jammed<br />
document.<br />
3. Gently return the belt to the original position.<br />
4. Return the document cover to the original position.
How to Clear Paper Jam<br />
From Tray 1 and 2<br />
1. Pull out the tray where the paper jam<br />
occurred.<br />
2. Remove the jammed paper.<br />
3. Push the tray in gently until it comes to<br />
a stop.<br />
From Tray 3<br />
1. Pull out the Tray 3.<br />
2. Remove the jammed paper.<br />
3. Push the tray in gently until it comes to<br />
a stop.
How to Clear Paper Jam<br />
From Tray 4<br />
1. Pull out the Tray 4.<br />
2. Remove the jammed paper.<br />
3. If paper is jammed in the paper feed section,<br />
open the inner cover and remove the paper.<br />
4. Push the tray in gently until it comes to<br />
a stop.
How to Clear Paper Jam<br />
From Tray 5<br />
1. Open the Tray 5 (bypass) top cover<br />
to remove the jammed paper.<br />
2. Remove all paper loaded in theTray 5<br />
(bypass).<br />
3. Close the top cover.<br />
4. Fan the paper you removed making sure that all four corners are neatly<br />
aligned.<br />
5. Insert the paper into the tray with the printing<br />
side facing up until its leading edge lightly<br />
comes up against the paper feed entrance.
How to Clear Paper Jam<br />
From Transfer Module<br />
1. Make sure that the machine has stopped<br />
before opening the front cover.<br />
2. Turn the green lever 2 at the center of the<br />
transfer module to the right until it is in the<br />
horizontal position and then pull the transfer<br />
module out to the end.<br />
3. Remove the visible jammed paper.<br />
4. Move lever 2a to the right and remove the<br />
jammed paper.
5. Return the lever 2a and 2b to the original<br />
position.<br />
6. Insert the transfer module completely and<br />
turn the green lever 2 to the left.<br />
7. Close the front cover.<br />
From Bottom Left Cover<br />
1. Open the bottom left cover while gripping<br />
the release lever.<br />
2. Remove the upper jammed paper.<br />
3. Remove the lower jammed paper.<br />
4. Close the bottom left cover.
How to Clear Paper Jam<br />
From Bottom Right Cover<br />
1. If the finisher is installed, open the front<br />
cover of the finisher and then pull down<br />
the lever 1a.<br />
2. Open the bottom right cover while pressing<br />
the downward arrow button.<br />
3. Remove the upper jammed paper.<br />
4. Remove the lower jammed paper.<br />
5. Check the lower parts of the machine. If<br />
there is jammed paper, remove it.<br />
6. Close the bottom right cover.<br />
7. If the finisher is installed, return the lever 1a to the original position and then<br />
close the front cover of the finisher.
How to Clear Paper Jam<br />
From Output Tray<br />
1. Remove jammed paper from the output tray.
1<br />
Log onto<br />
www.fujixerox.com.my<br />
& Select Online Support Assistant<br />
Select product 2<br />
3<br />
Type a problem & search<br />
You’ve got the solution ! 4<br />
5<br />
Feedback from you !<br />
Select Contact <strong>Xerox</strong> Support<br />
if you can’t find a solution- you<br />
can report your problem online
Online Service & Support Request<br />
1<br />
Log onto<br />
www.fujixerox.com.my<br />
& Select Service & Support<br />
Request<br />
Another service to bring us closer to you<br />
Upon receiving your request by<br />
FXM Call Center, the request<br />
will be logged into our system<br />
and you will be notified through<br />
e-mail with a report number.<br />
2 Input the machine’s info<br />
Benefits :<br />
1. No phone call is<br />
require<br />
2. No more<br />
waiting/holding on<br />
the phone line<br />
3. Your call will be<br />
logged into our<br />
service system on<br />
time<br />
3<br />
Submit your request-<br />
You’ve done it !!<br />
<strong>Fuji</strong> <strong>Xerox</strong> Asia Pacific Pte. Ltd.<br />
Call Center Manager
SAFETY NOTE<br />
ITEM DO DON’T<br />
1.Sharing of Supply socket One socket for one plug Do not share socket with<br />
heavy load unit. Do not use<br />
cable extension/multiple<br />
socket extension.<br />
2.Power cord length<br />
Proper length to allow<br />
certain loosening<br />
Do not allow cable pull to<br />
tension<br />
3.Power cord routing<br />
Avoid obstruction. Keep away<br />
from combustable/water/<br />
twisting around table& chair<br />
4.Power cord surface<br />
condition<br />
Discard if surface found<br />
stripped<br />
/exposed/cracked/burnt<br />
5.Ground/Earthing<br />
Do not use 2-pin plug type<br />
without grounding wire<br />
6.Condition of Plug/socket<br />
Discard if found cracked/<br />
discolored/deterioration/defor<br />
med<br />
7.Plug/socket contact<br />
Ensure plug & socket are<br />
tightly connected.