Detailed User's Manual - Sans Digital
Detailed User's Manual - Sans Digital
Detailed User's Manual - Sans Digital

You also want an ePaper? Increase the reach of your titles
YUMPU automatically turns print PDFs into web optimized ePapers that Google loves.
Version: 1.00<br />
Issue Date: September, 2006<br />
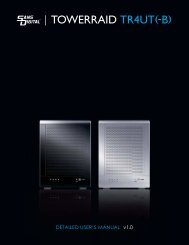
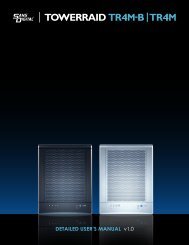
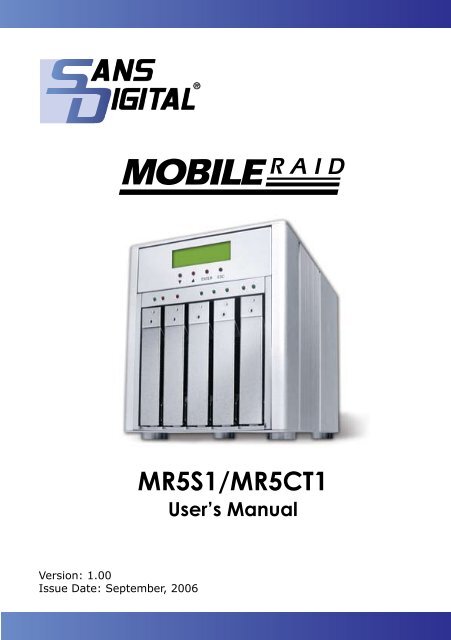
MR5S1/MR5CT1<br />
User’s <strong>Manual</strong>
WARRANTY<br />
The information in this document is subject to change without notice.<br />
We make no warranty of any kind regarding this material, including, but<br />
not limited to, the implied warranties or merchantability and fitness for<br />
a particular purpose. Furthermore, we shall not be liable for errors contained<br />
herein or for incidental or consequential damage in connection<br />
with the furnishing, performance, or use of this material.<br />
FCC STATEMENT<br />
This equipment has been tested and found to comply with the limits for<br />
a Class B digital device, pursuant to part 15 of the FCC Rules. These<br />
limits are designed to provide reasonable protection against interference<br />
in a residential installation. This equipment generates, uses, and<br />
can radiate radio frequency energy and, if not installed and used in accordance<br />
with the instructions, may cause harmful interference to radio<br />
communications. However, there is no guarantee that interference will<br />
not occur in a particular installation.<br />
CE Mark<br />
This equipment is in confirmity with EM directive.
Contents<br />
1. Introduction............................................................... 10<br />
1.1 System Architecture.......................................................... 11<br />
1.1.1 Firewire 800/ USB 2.0/ eSATA Host Interface .................. 11<br />
1.1.2 Ultra 320 Host Interface ............................................... 11<br />
1.1.3 Serial ATA ll Drive Interface .......................................... 11<br />
1.2 RAID subsystem Controller Board ...................................... 12<br />
1.2.1 Cache Memory Subsystem ........................................... 12<br />
1.2.2 User Interface............................................................. 12<br />
1.2.3 Controller Firmware...................................................... 13<br />
1.3 RAID Concept .................................................................. 13<br />
1.3.1 RAID Set.................................................................... 13<br />
1.3.2 Volume Set................................................................. 14<br />
1.3.3 Easy of Use Features................................................... 14<br />
1.3.3.1 Instant Availability/Background Initialization.............. 14<br />
1.3.3.2 Array Roaming....................................................... 15<br />
1.3.3.3 Online Capacity Expansion....................................... 15<br />
1.3.3.4 Online RAID Level and Stripe Size Migration............... 17<br />
1.3.3.5 Online Volume Expansion......................................... 17<br />
1.4 High availability................................................................ 18<br />
1.4.1 Global Hot Spares........................................................ 18<br />
1.4.2 Hot-Swap Disk Drive Support........................................ 19<br />
1.4.3 Auto Declare Hot-Spare ............................................... 19<br />
1.4.4 Auto Rebuilding .......................................................... 19<br />
1.4.5 Adjustable Rebuild Priority............................................ 20<br />
1.5 High Reliability................................................................. 21<br />
1.5.1 Hard Drive Failure Prediction......................................... 21<br />
1.5.2 Auto Reassign Sector.................................................... 21<br />
1.5.3 Consistency Check....................................................... 22<br />
1.6 Data Protection................................................................ 22<br />
1.6.1 RECOVERY ROM........................................................... 22<br />
1.7 Understanding RAID.......................................................... 22<br />
1.7.1 RAID 0....................................................................... 23<br />
1.7.2 RAID 1....................................................................... 24<br />
1.7.3 RAID 10..................................................................... 24<br />
1.7.4 RAID 3....................................................................... 25<br />
1.7.5 RAID 5....................................................................... 26<br />
1.7.6 RAID 6....................................................................... 26
2. Hardware Installation................................................ 29<br />
2.1 Overview......................................................................... 29<br />
2.2 RAID Subsystem Requirements ......................................... 29<br />
2.3 Step Action...................................................................... 29<br />
2.4 Hot-plug Drive Replacement............................................... 36<br />
2.4.1 Recognizing a Drive Failure............................................ 36<br />
2.4.2 Replacing a Failed Drive................................................ 36<br />
3. Configuration Methods............................................... 38<br />
3.1 Using local front panel touch-control keypad........................ 38<br />
3.2 VT100 terminal (Using the controller’s serial port)................. 40<br />
3.2.1 RAID Subsystem RS-232C Port Pin Assignment................ 40<br />
3.2.2 Start-up VT100 Screen................................................. 41<br />
3.3 Web browser-based RAID manager..................................... 44<br />
3.3.1 Web browser-based RAID manager via HTTP Proxy (Using<br />
the controller’s serial port).................................................... 44<br />
3.3.1.1 Start-up Web Browser-based RAID Management for Local<br />
Administration..................................................................... 45<br />
3.3.1.1.1 For Windows....................................................... 45<br />
3.3.1.1.2 For Linux............................................................ 48<br />
3.3.1.2 Start-up Web Browser-based RAID Management for Remote<br />
Administration........................................................... 48<br />
3.3.2 Firmware-embedded TCP/IP & web browser-based RAID<br />
manager (using the controller’s 10/100 Ethernet LAN port)........ 49<br />
3.4 Configuration Menu Tree.................................................... 49<br />
4. LCD Configuration Menu............................................. 51<br />
4.1 Starting LCD Configuration Utility....................................... 51<br />
4.2 LCD Configuration Utility Main Menu Options........................ 52<br />
4.3 Configuring RAID Sets and Volume Sets............................... 52<br />
4.4 Designating Drives as Hot Spares....................................... 53<br />
4.5 Using Quick Volume and RAID Set Setup ............................. 53<br />
4.6 Using RAID Set and Volume Set Functions ........................... 55<br />
4.7 Navigation Map of the LCD For MR5CT1/MR5S1.................... 56<br />
4.7.1 Quick Volume/RAID Setup............................................. 57<br />
4.7.2 RAID Set Function........................................................ 58<br />
4.7.2.1 Create A New RAID Set ........................................... 59<br />
4.7.2.2 Delete Existed RAID Set........................................... 59<br />
4.7.2.3 Expand Existed RAID Set.......................................... 59<br />
4.7.2.4 Activate Incomplete RAID Set................................... 60<br />
4.7.2.5 Create Hot Spare Disk............................................. 60<br />
4.7.2.6 Delete Hot Spare Disk.............................................. 60<br />
4.7.2.7 Display RAID Set Information................................... 60
4.7.3 Volume Set Function .................................................... 61<br />
4.7.3.1 Create RAID Volume Set ......................................... 61<br />
4.7.3.1.1 Capacity............................................................. 63<br />
4.7.3.1.2 RAID Level ........................................................ 63<br />
4.7.3.1.3 Strip Size........................................................... 63<br />
4.7.3.1.4 Volume Name..................................................... 63<br />
4.7.3.1.5 IDE Host Channel (MR5CT1)................................. 63<br />
4.7.3.1.6 IDE Drive Select (MR5CT1)................................... 64<br />
4.7.3.1.7 SCSI Channel (MR5S1)........................................ 64<br />
4.7.3.1.8 SCSI ID (MR5S1)................................................ 64<br />
4.7.3.1.9 SCSI LUN (MR5S1).............................................. 64<br />
4.7.3.1.10 Cache Mode...................................................... 64<br />
4.7.3.1.11 Tag Queuing...................................................... 64<br />
4.7.3.1.12 IDE Xfer Mode (MR5CT1).................................... 65<br />
4.7.3.1.13 Max Sync Rate (MR5S1)..................................... 65<br />
4.7.3.2 Delete Volume Set................................................... 65<br />
4.7.3.3 Modify Volume Set.................................................. 67<br />
4.7.3.3.1 Volume Set Migration........................................... 67<br />
4.7.3.4 Check Volume Set Consistency.................................. 67<br />
4.7.3.5 Stop Volume Set Consistency Check.......................... 68<br />
4.7.3.6 Display Volume Set Information................................ 68<br />
4.7.4 Physical Drive ............................................................. 68<br />
4.7.4.1 Display Drive Information ........................................ 71<br />
4.7.4.2 Create Pass-Through ............................................... 71<br />
4.7.4.3 Modify Pass-Through ............................................... 71<br />
4.7.4.4 Delete Pass-Through ............................................... 72<br />
4.7.4.5 Identify Selected Drive............................................. 72<br />
4.7.5 RAID System Function.................................................. 73<br />
4.7.5.1 Mute The Alert Beeper ............................................ 73<br />
4.7.5.2 Alert Beeper Setting ............................................... 74<br />
4.7.5.3 Change Password.................................................... 74<br />
4.7.5.4 JBOD/RAID Configuration......................................... 74<br />
4.7.5.5 RAID Rebuild Priority............................................... 75<br />
4.7.5.6 Maximum SATA Mode .............................................. 75<br />
4.7.5.7 Disk Capacity Truncation Mode.................................. 75<br />
4.7.5.8 Terminal Port Configuration ...................................... 76<br />
4.7.5.9 Restart Controller.................................................... 76<br />
4.7.6 U320 SCSI Target Configuration(MR5S1)......................... 77<br />
4.7.7 Ethernet Configuration.................................................. 77<br />
4.7.8 Show System Events.................................................... 77<br />
4.7.9 Clear all Event Buffers.................................................. 77<br />
4.7.10 Hardware Information................................................. 77
4.7.11 System Information.................................................... 78<br />
5. VT-100 Utility Configuration ...................................... 79<br />
5.1 Configuring RAID Sets and Volume Sets............................... 79<br />
5.2 Designating Drives as Hot Spares....................................... 80<br />
5.3 Using Quick Volume /RAID Setup Configuration.................... 80<br />
5.4 Using RAID Set/Volume Set Function Method........................ 82<br />
5.5 Main Menu ...................................................................... 84<br />
5.5.1 Quick Volume/RAID Setup............................................. 85<br />
5.5.2 RAID Set Function........................................................ 88<br />
5.5.2.1 Create RAID Set ..................................................... 88<br />
5.5.2.2 Delete RAID Set...................................................... 89<br />
5.5.2.3 Expand RAID Set.................................................... 90<br />
• Migrating........................................................................ 91<br />
5.5.2.4 Activate Incomplete RAID Set................................... 91<br />
5.5.2.5 Create Hot Spare.................................................... 92<br />
5.5.2.6 Delete Hot Spare..................................................... 92<br />
5.5.2.7 RAID Set Information.............................................. 93<br />
5.5.3 Volume Set Function .................................................... 94<br />
5.5.3.1 Create Volume Set.................................................. 94<br />
5.5.3.1.1 For MR5S1.......................................................... 94<br />
5.5.3.1.1.1 Volume Name................................................... 96<br />
5.5.3.1.1.2 Capacity.......................................................... 97<br />
5.5.3.1.1.3 RAID Level....................................................... 97<br />
5.5.3.1.1.4 Strip Size ........................................................ 98<br />
5.5.3.1.1.5 SCSI Channel................................................... 98<br />
5.5.3.1.1.6 SCSI ID........................................................... 99<br />
5.5.3.1.1.7 SCSI LUN........................................................ 99<br />
5.5.3.1.1.8 Cache Mode................................................... 100<br />
5.5.3.1.1.9 Tag Queuing................................................... 100<br />
5.5.3.1.1.10 Max Sync Rate.............................................. 101<br />
5.5.3.1.2 For MR5CT1...................................................... 101<br />
5.5.3.1.2.1 Volume Name................................................. 103<br />
5.5.3.1.2.2 Capacity........................................................ 104<br />
5.5.3.1.2.3 RAID Level..................................................... 104<br />
5.5.3.1.2.4 Strip Size ...................................................... 105<br />
5.5.3.1.2.5 IDE Channel................................................... 105<br />
5.5.3.1.2.6 Drive Select................................................... 106<br />
5.5.3.1.2.7 Cache Mode................................................... 106<br />
5.5.3.1.2.8 Tag Queuing................................................... 107<br />
5.5.3.1.2.9 IDE Xfer Mode................................................ 107<br />
5.5.3.2 Delete Volume Set................................................. 108
5.5.3.3 Modify Volume Set................................................ 108<br />
5.5.3.3.1 Volume Expansion............................................. 109<br />
5.5.3.3.2 Volume Set Migration......................................... 110<br />
5.5.3.4 Check Volume Set................................................. 111<br />
5.5.3.5 Stop Volume Set Check.......................................... 111<br />
5.5.3.6 Display Volume Set Info......................................... 112<br />
5.5.3.6.1 For MR5S1........................................................ 112<br />
5.5.3.6.2 For MR5CT1...................................................... 113<br />
5.5.4 Physical Drives.......................................................... 113<br />
5.5.4.1 View Drive Information ......................................... 114<br />
5.5.4.2 Create Pass-Through Disk....................................... 114<br />
5.5.4.2.1 For MR5S1........................................................ 114<br />
5.5.4.2.2 For MR5CT1...................................................... 115<br />
5.5.4.3 Modify Pass-Through Disk....................................... 115<br />
5.5.4.4 Delete Pass-Through Disk....................................... 116<br />
5.5.4.5 Identify Selected Drive........................................... 116<br />
5.5.5 RAID System Function................................................ 117<br />
5.5.5.1 Mute The Alert Beeper .......................................... 117<br />
5.5.5.2 Alert Beeper Setting.............................................. 118<br />
5.5.5.3 Change Password.................................................. 118<br />
5.5.5.4 JBOD/RAID Configuration....................................... 119<br />
5.5.5.5 RAID Rebuild Priority............................................. 119<br />
5.5.5.6 Maximum SATA Mode............................................. 120<br />
5.5.5.7 HDD Read Ahead Cache........................................ 121<br />
5.5.5.8 Stagger Power On................................................. 121<br />
5.5.5.9 HDD SMART Status Polling...................................... 122<br />
5.5.5.10 Disk Capacity Truncation Mode.............................. 123<br />
5.5.5.11 Terminal Port Configuration................................... 124<br />
5.5.5.12 Update Firmware................................................. 125<br />
5.5.5.13 Restart Controller................................................ 125<br />
5.5.6 U320 SCSI Target Configuration (MR5S1 only)............... 126<br />
5.5.7 Ethernet Configuration ............................................... 127<br />
5.5.7.1 DHCP Function...................................................... 127<br />
5.5.7.2 Local IP address.................................................... 128<br />
5.5.7.3 Ethernet Address.................................................. 129<br />
5.5.8 View System Events................................................... 129<br />
5.5.9 Clear Events Buffer.................................................... 130<br />
5.5.10 Hardware Monitor Information................................... 130<br />
5.5.11 System Information.................................................. 131<br />
6. Web Browser-based Configuration .......................... 132<br />
6.1 Firmware-embedded TCP/IP & web browser-based RAID man-
ager (using the controller’s 10/100 Ethernet LAN port).............. 132<br />
6.2 Configuring RAID Sets and Volume Sets............................. 133<br />
6.3 Designating Drives as Hot Spares..................................... 133<br />
6.4 Using Quick Volume /RAID Setup Configuration.................. 133<br />
6.5 Using RAID Set/Volume Set Function Method...................... 135<br />
6.6 Configuring RAID Sets and Volume Sets............................. 137<br />
6.6.1 Main Menu ............................................................... 138<br />
6.7 Quick Create.................................................................. 138<br />
6.8 RAID Set Functions......................................................... 139<br />
6.8.1 Create RAID Set ....................................................... 139<br />
6.8.2 Delete RAID Set ........................................................ 140<br />
6.8.3 Expand RAID Set....................................................... 140<br />
6.8.4 Activate Incomplete RAID Set...................................... 141<br />
6.8.5 Create Hot Spare....................................................... 142<br />
6.8.6 Delete Hot Spare....................................................... 142<br />
6.8.7 Rescue RAID Set ...................................................... 142<br />
6.9 Volume Set Functions...................................................... 143<br />
6.9.1 Create Volume Set .................................................... 143<br />
6.9.1.1 For MR5S1........................................................... 143<br />
6.9.1.2 For MR5CT1.......................................................... 145<br />
6.9.3 Modify Volume Set..................................................... 148<br />
6.9.3.1 For MR5S1........................................................... 149<br />
6.9.3.2 For MR5CT1.......................................................... 149<br />
6.9.3.3 Volume Expansion................................................. 149<br />
6.9.3.4 Volume Set Migration............................................. 149<br />
6.9.4 Check Volume Set...................................................... 150<br />
6.9.5 Stop Volume Set Check............................................... 150<br />
6.10 Physical Drive .............................................................. 150<br />
6.10.1 Create Pass-Through Disk.......................................... 151<br />
6.10.1.1 For MR5S1.......................................................... 151<br />
6.10.1.2 For MR5CT1........................................................ 151<br />
6.10.2 Modify Pass-Through Disk.......................................... 152<br />
6.10.2.1 For MR5S1.......................................................... 152<br />
6.10.2.2 For MR5CT1........................................................ 152<br />
6.10.3 Delete Pass-Through Disk.......................................... 153<br />
6.10.4 Identify Drive.......................................................... 153<br />
6.11 System Controls........................................................... 153<br />
6.11.1 System Configuration............................................... 153<br />
6.11.1.1 For MR5S1.......................................................... 153<br />
6.11.1.2 For MR5CT1........................................................ 157<br />
6.11.2 U320 SCSI Target Config (MR5S1).............................. 159<br />
6.11.3 EtherNet Config ...................................................... 160
6.11.4 Alert By Mail Config ................................................. 160<br />
6.11.5 SNMP Configuration ................................................. 161<br />
6.11.6 NTP Configuration ................................................... 162<br />
• NTP Sever Address ........................................................ 162<br />
• Time Zone.................................................................... 162<br />
• Automatic Daylight Saving.............................................. 163<br />
6.11.7 View Events/ Mute Beeper......................................... 163<br />
6.11.8 Generate Test Event................................................. 163<br />
6.11.9 Clear Events Buffer................................................... 164<br />
6.11.10 Modify Password..................................................... 164<br />
6.11.11 Upgrade Firmware.................................................. 164<br />
6.11.12 Restart Controller .................................................. 164<br />
6.12 Information Menu......................................................... 165<br />
6.12.1 RAIDSet Hierarchy................................................... 165<br />
6.12.2 System Information.................................................. 165<br />
6.12.3 Hardware Monitor..................................................... 165<br />
APPENDIX A................................................................. 167<br />
Specifications...................................................................... 167<br />
Adapter Architecture........................................................... 167<br />
RAID Features................................................................... 167<br />
Disk Bus Interface.............................................................. 167<br />
IDE/SATA to SATA ll Host Bus Interface................................. 167<br />
SCSI to SATA ll Host Bus Interface........................................ 168<br />
RAID Management ............................................................ 168<br />
Software Drivers................................................................ 168<br />
Mechanical........................................................................ 168<br />
Environmental ................................................................. 169<br />
Electrical........................................................................... 169<br />
Appendix B .................................................................. 170<br />
Upgrading Flash Firmware Programming Utility......................... 170<br />
Establishing the Connection for the RS-232............................. 170<br />
Upgrade Firmware Through ANSI/VT-100 Terminal Emulation..... 171<br />
Upgrade Firmware Through HTTP Proxy Web Browser Manager... 173<br />
Appendix C................................................................... 175<br />
Pin Definitions .................................................................... 175<br />
Appendix D.................................................................. 176<br />
SNMP Operation & Definition.................................................. 176<br />
Appendix E................................................................... 178<br />
Technical Support................................................................. 178
INTRODUCTION<br />
1. Introduction<br />
<strong>Sans</strong> <strong>Digital</strong> MobileRAID RAID subsystem is designed for SOHO or<br />
small business to extend storage capacity and secure their data as<br />
hard disk failed. The MR5CT1 comes with Firewire 800, USB2.0 &<br />
eSATA host interfaces and five SATA ll channels for disk drives. The<br />
MR5S1 supports 320 SCSI host channel and five SATA ll channels<br />
for disk drives. The RAID subsystem is designed with a high-performance<br />
SATA ll drive bus disk array Controller. When properly<br />
configured, the RAID subsystem can provide non-stop service with<br />
a high degree of fault tolerance through the use of RAID technology<br />
and advanced array management features. The RAID subsystem<br />
connects to the host system through Firewire 800 or USB2.0<br />
or eSATA or SCSI interface. The HOST interface on the host may<br />
be located either on the system board, or on a plug-in host bus<br />
adapter (HBA) card.<br />
The RAID subsystem allows easy scalability from RAID 0 to RAID 6.<br />
It can be configured to RAID levels 0, 1, 10, 3, 5 and 6. The RAID 6<br />
function allows two HDD failure without impact on the existing data<br />
and failed drive Data can be reconstructed from the remaining data<br />
and parity drives. RAID configuration and monitoring can be done<br />
through the LCD front control panel or serial port/LAN port.<br />
MobileRAID subsystem is the only available RAID solution that does<br />
not require a conventional PCI slot. It uses the standard protocol to<br />
connect the host system controller, just like SCSI or SATA. It is also<br />
a standard part of all major operating systems such as Windows<br />
95/98/2000/NT/ME/XP, Novell, MAC, Linux, UNIX, etc., the host<br />
system does not require additional or proprietary software to work<br />
with the controller.<br />
1.1 System Architecture<br />
1.1.1 Firewire 800/ USB 2.0/ eSATA Interface<br />
The MR5CT1 host interface appears to the host system as a eSATA<br />
target device or a removable Firewire/USB device . The eSATA interface<br />
can support transfer rates of up to 150MB per second. The<br />
Firewire 800 can support transfer rates of up to 80MB per second.<br />
Both Firewire 800 and eSATA interfaces can concurrently access<br />
10
different volume sets (logical drives).<br />
1.1.2 Ultra 320 Host Interface<br />
INTRODUCTION<br />
The MR5S1 appears to the host system as an SCSI Ultra 320 target<br />
device. The Ultra 320 can support transfer rates up to 320MB per<br />
second.<br />
1.1.3 Serial ATA ll Drive Interface<br />
<strong>Sans</strong> <strong>Digital</strong> MobileRAID communicates directly with the array’s 5<br />
Serial ATA ll drives via a built-in SATA interface. When the host is<br />
directly controlling the drives. The RAID subsystem uses the RAID<br />
subsystem SATA ll I/O controller chip on each SATA channel to allow<br />
the controller to simultaneously communicate with the host<br />
system, and read or write data on several drives. Up to five disk<br />
drives can be installed to each RAID subsystem.<br />
1.2 RAID subsystem Controller Board<br />
<strong>Sans</strong> <strong>Digital</strong> MobileRAID series have an SATA ll controller which<br />
supports SATA ll support up to 5 SATA ll Hard drives. The RAID<br />
6 engine supports a XOR engine and RAID 6 engine for P+Q and<br />
parity generator/checker, one RS-232 and LAN port interface for<br />
system management (Remote Control, and Local Monitor) and an<br />
interface to a display/operation panel.<br />
11
INTRODUCTION<br />
1.2.1 Cache Memory Subsystem<br />
<strong>Sans</strong> <strong>Digital</strong> MobileRAID series’ new high-performance architecture<br />
comes from Intel 80219 I/O processor, a 133MHz/64-<br />
bit PCI-X, and DDR200 memory architecture. The data flow at<br />
133MHz/64 bit PCI-X bus and 64-bit 200Mhz ECC DDR SDRAM<br />
makes its high data throughput. Data can be transferred between<br />
the controller and the drives through a high-speed 133MHz/64-<br />
bit path at a burst rate up to 1000MB/S. The system’s overall<br />
performance can support up to Ultra320 SCSI host channels. The<br />
controller default supports 128MB on-board cache.<br />
1.2.2 User Interface<br />
<strong>Manual</strong> configuration and monitoring can be done through the<br />
LCD front control panel. The firmware also contains an embedded<br />
management program that can support the RS-232C (Serial<br />
Console) port out-of-band management. The subsystem can use<br />
any of the interfaces to simplify the setup and management of<br />
their associated disk drives. This out-of-band method is a convenient<br />
platform-independent management utility. User can through<br />
this port to implement Bootable CD VT-100, VT-100 Terminal and<br />
HTTP Proxy browser-based management utility.The controller has<br />
embedded the web browser-based RAID manager in the firmware.<br />
User can remote manage the RAID system without adding<br />
any user specific software (platform independent) via standard<br />
web browsers directly connected to the 10/100 Ethernet RJ45<br />
LAN port.<br />
1.2.3 Controller Firmware<br />
The system provides RAID levels 0, 1, 10, 3, 5 and 6 RAID configurations.<br />
It can be managed either through the LCD control panel<br />
or by the system-embedded configuration utilities. Its high data<br />
availability and protection derives from the following capabilities:<br />
Online Capacity Expansion, Online RAID Level Migration, Dynamic<br />
Volume Extension, Array Roaming, Global Online Spare, Automatic<br />
Drive Failure Detection, Automatic Failed Drive Rebuilding, Disk<br />
Hot Spare, and Instant Availability/Background Initialization.<br />
12
INTRODUCTION<br />
The RAID subsystem firmware is stored on the controller flash<br />
ROM and is executed by the Intel 80219 I/O processor. The firmware<br />
can also be updated through the RS-232or LAN port without<br />
the need to replace any hardware chips. During the controller<br />
ROM flash process, it is possible for a problem to occur resulting<br />
in corruption of the controller firmware. A corrupted firmware in<br />
the controller firmware would make the controller inoperable and<br />
bring the system down. The Redundant Flash provides a unique<br />
redundancy feature that helps ensure against controller availability.<br />
This reduces the risk of system failure due to firmware crash.<br />
In addition to the stored programs in ROM. The NVRAM store<br />
the event log and lists of pending write operation issued to any<br />
drives. These data are checksum protected so that after a power<br />
failure, the controller will consistency for all check outstanding<br />
writes on region.<br />
1.3 RAID Concept<br />
1.3.1 RAID Set<br />
A RAID Set is a group of disk containing one or more volume sets.<br />
It has the following features in the RAID controller. A volume Set<br />
must be created either on an existing RAID set or on a group of<br />
available individual disks (disks that are not yet a part of an RAID<br />
set). If there are pre-existing RAID sets with available capacity<br />
and enough disks for specified RAID level desired, then the volume<br />
set will be created in the existing RAID set of the user’s choice. If<br />
physical disk of different capacity are grouped together in a RAID<br />
set, then the capacity of the smallest disk will become the effective<br />
capacity of all the disks in the RAID set.<br />
13
INTRODUCTION<br />
1.3.2 Volume Set<br />
A Volume Set is seen by the host system as a single logical device.<br />
It is organized in a RAID level with one or more physical disks.<br />
RAID level refers to the level of data performance and protection of<br />
a Volume Set. A Volume Set capacity can consume all or a portion<br />
of disk capacity available in a RAID Set. Multiple Volume Sets can<br />
exist on a group of disks in a RAID Set.<br />
In the illustration below, Volume 1 can be assigned a RAID 5 level<br />
of operation while Volume 0 might be assigned a RAID 10 level of<br />
operation.<br />
1.3.3 Easy of Use Features<br />
1.3.3.1 Instant Availability/Background Initialization<br />
RAID 0 and RAID 1 volume sets can be used immediately after<br />
creation because they do not create parity data. However, RAID<br />
3, 5 and 6 volume sets must be initialized to generate parity<br />
information. In Normal Initialization, the initialization proceeds<br />
as a background task, and the volume set is fully accessible for<br />
system reads and writes. The operating system can instantly<br />
access the newly created arrays without requiring a reboot and<br />
without waiting for initialization to complete. Furthermore, the<br />
RAID volume set is protected against a single disk failure while<br />
initialing. If using Fast Initialization, the initialization process<br />
must be completed before the volume set is ready for system<br />
accesses.<br />
14
INTRODUCTION<br />
1.3.3.2 Array Roaming<br />
The MobileRAID stores RAID configuration information on the<br />
disk drives. The adapters therefor protect the configuration<br />
settings in the event of controller failure. Array roaming allows<br />
the administrators the ability to move a completele RAID set to<br />
another system without losing RAID configuration information<br />
or data on that RAID set. So, if a server fails, the RAID set disk<br />
drives can be moved to another server with an identical RAID<br />
card and the disks can be inserted in any order.<br />
1.3.3.3 Online Capacity Expansion<br />
Online Capacity Expansion makes it possible to add one or more<br />
physical drives to a volume set without interrupting server<br />
operation, eliminating the need to backup and restore after<br />
reconfiguration of the RAID set. When disks are added to a<br />
RAID set, unused capacity is added to the end of the RAID set.<br />
Then, data on the existing volume sets (residing on the newly<br />
expanded RAID set) is redistributed evenly across all the disks.<br />
A contiguous block of unused capacity is made available on the<br />
RAID set. The unused capacity can be used to create additional<br />
volume sets.<br />
A disk, to be added to a RAID set, must be in normal mode (not<br />
failed), free (not spare, in a RAID set, or passed through to<br />
host) and must have at least the same capacity as the smallest<br />
disk capacity already in the RAID set.<br />
Capacity expansion is only permitted to proceed if all volumes<br />
on the RAID set are in the normal status. During the expansion<br />
process, the volume sets being expanded can be accessed by the<br />
host system. In addition, the volume sets with RAID levels 0, 1,<br />
10, 3, 5 or 6 are protected against data loss in the event of disk<br />
failure(s). In the case of disk failure, the volume set transitions<br />
from “migrating” state to “migrating+degraded“ state. When the<br />
expansion is completed, the volume set would then transition to<br />
“degraded” mode. If a global hot spare is present, then it further<br />
transitions to the “rebuilding” state.<br />
The expansion process is illustrated as following figure.<br />
The RAID subsystem controller redistributes the original volume<br />
15
INTRODUCTION<br />
set over the original and newly added disks, using the same<br />
fault-tolerance configuration. The unused capacity on the expand<br />
RAID set can then be used to create an additional volume set,<br />
with a different fault tolerance setting (if required by the user.)<br />
The RAID subsystem controller redistributes the original volume<br />
set over the original and newly added disks, using the same<br />
fault-tolerance configuration. The unused capacity on the expand<br />
RAID set can then be used to create an additional volume sets,<br />
with a different fault tolerance setting if user need to change.<br />
1.3.3.4 Online RAID Level and Stripe Size Migration<br />
16
INTRODUCTION<br />
For those who wish to later upgrade to any RAID capabilities,<br />
a system with online RAID level/stripe size migration allows a<br />
simplified upgrade to any supported RAID level without having<br />
to reinstall the operating system.<br />
The MobileRAID can migrate both the RAID level and stripe size<br />
of an existing volume set, while the server is online and the<br />
volume set is in use. Online RAID level/stripe size migration<br />
can prove helpful during performance tuning activities as well<br />
as when additional physical disks are added to the SATA RAID<br />
controller. For example, in a system using two drives in RAID<br />
level 1, it is possible to add a single drive and add capacity and<br />
retain fault tolerance. (Normally, expanding a RAID level 1 array<br />
would require the addition of two disks). A third disk can be<br />
added to the existing RAID logical drive and the array can then<br />
be migrated from RAID level 1 to 5. The result would be parity<br />
fault tolerance and double the available capacity without taking<br />
the system down. A forth disk could be added to migrate to<br />
RAID level 6. It is only possible to migrate to a higher RAID level<br />
by adding a disk; disks in an existing array can’t be reconfigured<br />
for a higher RAID level without adding a disk.<br />
Online migration is only permitted to begin. If all volume to<br />
be migrated are in the normal mode. During the migration<br />
process, the volume sets being migrated are accessed by the<br />
host system. In addition, the volume sets with RAID levels 1,<br />
10, 3, 5 or 6 are protected against data loss in the event of disk<br />
failure(s). In the case of disk failure, the volume set transitions<br />
from migrating state to (migrating+degraded) state. When the<br />
migration is completed, the volume set transitions to degraded<br />
mode. If a global hot spare is present, then it further transitions<br />
to rebuilding state.<br />
1.3.3.5 Online Volume Expansion<br />
Performing a volume expansion on the controller is the process<br />
of growing the size of a volume. A more flexible option is for the<br />
array to concatenate an additional drive into the RAID set and<br />
then expand the volumes on the fly. This happens transparently<br />
while the volumes are online, but, at the end of the process,<br />
the operating system will detect free space at after the existing<br />
17
INTRODUCTION<br />
volume; the free space will not automatically be incorporated<br />
into the existing operating system partition.<br />
Windows, NetWare, and other advanced operating systems<br />
support volume expansion, which enables you to incorporate<br />
the additional free space within the volume into the operating<br />
system partition. The operating system partition is extended to<br />
incorporate the free space so it can be used by the operating<br />
system without creating a new operating system partition.<br />
You can use the Diskpart.exe command line utility, included with<br />
Windows Server 2003 or the Windows 2000 Resource Kit, to<br />
extend an existing partition into free space in the Dynamic disk.<br />
Third-party software vendors have created utilities that can be<br />
used to repartition disks without data loss. Most of these utilities<br />
work offline. Partition Magic is one such utility.<br />
1.4 High availability<br />
1.4.1 Global Hot Spares<br />
A Global Hot Spare is an unused online available drive, which is<br />
ready for replacing the failure disk. The Global Hot Spares is one<br />
of the most important features that MobileRAID subsystem RAID<br />
controller provide to deliver a high degree of fault-tolerance. A<br />
global Hot Spare is a spare physical drive that has been marked<br />
as a global hot spare and therefore is not a member of any RAID<br />
set. If a disk drive used in a RAID Volume Set fails, then the<br />
Global Hot spare will automatically take its place and he data<br />
previously located on the failed drive is reconstructed on the<br />
Global Hot spare.<br />
For this feature to work properly, the global hot spare must have<br />
at least the same capacity as the drive it replaces. Global Hot<br />
spares only work with RAID level 1, 10, 3, 5, or 6 volume set. You<br />
can configure up to three Global hot spares with MobileRAID.<br />
The Create Hot Spare option gives you the ability to define a<br />
18
INTRODUCTION<br />
global hot spare disk drive. To effectively use the global hot spare<br />
feature, you must always maintain at least one drive that is<br />
marked as a global spare.<br />
Important:<br />
The hot spare must have at least the same capacity as the drive<br />
it replaces.<br />
1.4.2 Hot-Swap Disk Drive Support<br />
The SATA RAID controller includes a protection circuit that<br />
supports the replacement of SATA hard disk drives without having<br />
to shut down or reboot the system. A removable hard drive tray<br />
can deliver “hot swappable” fault-tolerant RAID solutions at prices<br />
much less than the cost of conventional SCSI hard disk SATA<br />
RAID controllers. This feature provides advanced fault tolerant<br />
RAID protection and “online” drive replacement.<br />
1.4.3 Auto Declare Hot-Spare<br />
If a disk drive is brought online into a system operating in<br />
degraded mode, MR5CT1/MR5S1 subsystem RAID controller will<br />
automatically declare the new disk as a spare and begin rebuilding<br />
the degraded volume. The Auto Declare Hot-Spare function<br />
requires that the smallest drive contained within the volume set in<br />
which the failure occurred.<br />
In the normal status, the newly installed drive will be reconfigured<br />
an online free disk. But, the newly-installed drive is automatically<br />
assigned as a hot spare if any hot spare disk was used to rebuild<br />
and without new installed drive replaced it. In this condition,<br />
the Auto Declare Hot-Spare status will disappeared if the RAID<br />
subsystem has since powered off/on.<br />
The Hot-Swap function can be used to rebuild disk drives in arrays<br />
with data redundancy such as RAID level 0, 1, 10, 3, 5, and 6.<br />
1.4.4 Auto Rebuilding<br />
19
INTRODUCTION<br />
If a hot spare is available, the rebuild starts automatically when a<br />
drive fails. MobileRAID subsystem RAID controller automatically<br />
and transparently rebuild failed drives in the background at userdefinable<br />
rebuild rates.<br />
If a hot spare is not available, the failed disk drive must be<br />
replaced with a new disk drive so that the data on the failed drive<br />
can be automatically rebuilt and so that fault tolerance can be<br />
maintained.<br />
The MobileRAID subsystem RAID controller will automatically<br />
restart the system and the rebuild process if the system is<br />
shut down or powered off abnormally during a reconstruction<br />
procedure condition.<br />
When a disk is Hot Swapped, although the system is functionally<br />
operational, the system may no longer be fault tolerant. Fault<br />
tolerance will be lost until the removed drive is replaced and the<br />
rebuild operation is completed.<br />
During the automatic rebuild process, system activity will continue<br />
as normal, however, the system performance and fault tolerance<br />
will be affected.<br />
1.4.5 Adjustable Rebuild Priority<br />
Rebuilding a degraded volume incurs a load on the RAID<br />
subsystem. The MobileRAID subsystem RAID controller allows<br />
the user to select the rebuild priority to balance volume access<br />
and rebuild tasks appropriately. The Background Task Priority is<br />
a relative indication of how much time the controller devotes to a<br />
background operation, such as rebuilding or migrating.<br />
The RAID subsystem allows user to choose the task priority (Ultra<br />
Low (5%), Low (20%), Medium (50%), High (80%)) to balance<br />
volume set access and background tasks appropriately. For high<br />
array performance, specify an Ultra Low value. Like volume<br />
initialization, after a volume rebuilds, it does not require a system<br />
reboot.<br />
20
INTRODUCTION<br />
1.5 High Reliability<br />
1.5.1 Hard Drive Failure Prediction<br />
In an effort to help users avoid data loss, disk manufacturers are<br />
now incorporating logic into their drives that acts as an "early<br />
warning system" for pending drive problems. This system is called<br />
SMART. The disk integrated controller works with multiple sensors<br />
to monitor various aspects of the drive's performance, determines<br />
from this information if the drive is behaving normally or not, and<br />
makes available status information to RAID controller firmware<br />
that probes the drive and look at it.<br />
S.M.A.R.T. can often predict a problem before failure occurs.<br />
MobileRAID controllers will recognize a S.M.A.R.T. error code and<br />
notify the administer of an impending hard drive failure.<br />
1.5.2 Auto Reassign Sector<br />
Under normal operation, even initially defect-free drive media<br />
can develop defects. This is a common phenomenon. The bit<br />
density and rotational speed of disks is increasing every year,<br />
and so is the potential of problems. Usually a drive can internally<br />
remap bad sectors without external help using cyclic redundancy<br />
check (CRC) checksums stored at the end of each sector.<br />
SATA drives perform automatic defect re-assignment for both<br />
read and write errors. Writes are always completed - if a location<br />
to be written is found to be defective, the drive will automatically<br />
relocate that write command to a new location and map out the<br />
defective location. If there is a recoverable read error, the correct<br />
data will be transferred to the host and that location will be<br />
tested by the drive to be certain the location is not defective. If<br />
it is found to have a defect, data will be automatically relocated,<br />
and the defective location is mapped out to prevent future write<br />
attempts.<br />
In the event of an unrecoverable read error, the error will be<br />
reported to the host and the location flagged as potentially<br />
defective. A subsequent write to that location will initiate a sector<br />
test and relocation should that location have a defect. Auto<br />
21
INTRODUCTION<br />
22<br />
Reassign Sector does not affect disk subsystem performance<br />
because it runs as a background task. Auto Reassign Sector<br />
discontinues when the operating system makes a request.<br />
1.5.3 Consistency Check<br />
A consistency check is a process that verifies the integrity of<br />
redundant data. For example, performing a consistency check<br />
of a mirrored drive assures that the data on both drives of the<br />
mirrored pair is exactly the same. To verify RAID 3, 5 or 6 redundancy,<br />
a consistency check reads all associated data blocks, computes<br />
parity, reads parity, and verifies that the computed parity<br />
matches the read parity.<br />
Consistency checks are very important because they detect and<br />
correct parity errors or bad disk blocks in the drive. A consistency<br />
check forces every block on a volume to be read, and any<br />
bad blocks are marked; those blocks are not used again. This is<br />
critical and important because a bad disk block can prevent a disk<br />
rebuild from completing. We strongly recommend that you run<br />
consistency checks on a regular basis—at least once per week.<br />
Note that consistency checks degrade performance, so you should<br />
run them when the system load can tolerate it.<br />
1.6 Data Protection<br />
1.6.1 RECOVERY ROM<br />
The RAID subsystem firmware is stored on the controller flash<br />
ROM and is executed by the I/O processor. The firmware can also<br />
be updated through Ethernet port (if equipped) without the need<br />
to replace any hardware chips. During the controller firmware upgrade<br />
flash process, it is possible for a problem to occur resulting<br />
in corruption of the controller firmware. With our Redundant Flash<br />
image feature, the controller will revert back to the last known<br />
version of firmware and continue operating. This reduces the risk<br />
of system failure due to firmware crash.<br />
1.7 Understanding RAID<br />
RAID is an acronym for Redundant Array of Independent Disks. It
INTRODUCTION<br />
is an array of multiple independent hard disk drives that provides<br />
high performance and fault tolerance. The SATA RAID controller<br />
implements several levels of the Berkeley RAID technology. An<br />
appropriate RAID level is selected when the volume sets are<br />
defined or created. This decision should be based on the desired<br />
disk capacity, data availability (fault tolerance or redundancy),<br />
and disk performance. The following section discusses the RAID<br />
levels supported by the SATA RAID controller.<br />
The SATA RAID controller makes the RAID implementation and<br />
the disks’ physical configuration transparent to the host operating<br />
stem. This means that the host operating system drivers and<br />
software utilities are not affected, regardless of the RAID level<br />
selected. Correct installation of the disk array and the controller<br />
requires a proper understanding of RAID technology and the<br />
concepts.<br />
1.7.1 RAID 0<br />
RAID 0, also referred to as striping, writes stripes of data across<br />
multiple disk drives instead of just one disk drive. RAID 0 does<br />
not provide any data redundancy, but does offer the best highspeed<br />
data throughput. RAID 0 breaks up data into smaller blocks<br />
and then writes a block to each drive in the array. Disk striping<br />
enhances performance because multiple drives are accessed<br />
simultaneously; the reliability of RAID Level 0 is less because the<br />
entire array will fail if any one disk drive fails, due to a lack of<br />
23
INTRODUCTION<br />
redundancy.<br />
1.7.2 RAID 1<br />
RAID 1 is also known as “disk mirroring”; data written to one disk<br />
drive is simultaneously written to another disk drive. Read performance<br />
may be enhanced if the array controller can, in parallel,<br />
accesses both members of a mirrored pair. During writes, there<br />
will be a minor performance penalty when compared to writing<br />
to a single disk. If one drive fails, all data (and software applications)<br />
are preserved on the other drive. RAID 1 offers extremely<br />
high data reliability, but at the cost of doubling the required data<br />
24<br />
storage capacity.<br />
1.7.3 RAID 10<br />
RAID 10 is a combination of RAID 0 and RAID 1, combing stripping<br />
with disk mirroring. RAID Level 10 combines the fast performanceof<br />
Level 0 with the data redundancy of Leve1 1. In<br />
this configuration, data is distributed across several disk drives,<br />
similar to Level 0, which are then duplicated to another set of<br />
drive for data protection. RAID 10 has been traditionally implemented<br />
using an even number of disks, some hybrids can use an<br />
odd number of disks as well. Figure 2 illustrates an example of a<br />
hybrid RAID 10 array comprised of five disks; A, B, C, D and E. In<br />
this configuration, each strip is mirrored on an adjacent disk with<br />
wrap-around. In fact this scheme - or a slightly modified version<br />
of it - is often referred to as RAID 1E and was originally proposed<br />
by IBM. When the number of disks comprising a RAID 1E is even,<br />
the striping pattern is identical to that of a traditional RAID 10,
INTRODUCTION<br />
with each disk being mirrored by exactly one other unique disk.<br />
Therefore, all the characteristics for a traditional RAID 10 apply<br />
to a RAID 1E when the latter has an even number of disks. <strong>Sans</strong><br />
<strong>Digital</strong> RAID 10 offers a little more flexibility in choosing the number<br />
of disks that can be used to constitute an array. The number<br />
can be even or odd.<br />
1.7.4 RAID 3<br />
RAID 3 provides disk striping and complete data redundancy<br />
though a dedicated parity drive. RAID 3 breaks up data into<br />
smaller blocks, calculates parity by performing an exclusive-or<br />
on the blocks, and then writes the blocks to all but one drive in<br />
the array. The parity data created during the exclusive-or is then<br />
written to the last drive in the array. If a single drive fails, data<br />
is still available by computing the exclusive-or of the contents<br />
corresponding strips of the surviving member disk. RAID 3 is best<br />
for applications that require very fast data- transfer rates or long<br />
25
INTRODUCTION<br />
data blocks.<br />
1.7.5 RAID 5<br />
RAID 5 is sometimes called striping with parity at byte level. In<br />
RAID 5, the parity information is written to all of the drives in the<br />
controllers rather than being concentrated on a dedicated parity<br />
disk. If one drive in the system fails, the parity information can<br />
be used to reconstruct the data from that drive. All drives in the<br />
array system can be used for seek operations at the same time,<br />
greatly increasing the performance of the RAID system. This<br />
relieves the write bottleneck that characterizes RAID 4, and is the<br />
primary reason that RAID 5 is more often implemented in RAID<br />
arrays.<br />
1.7.6 RAID 6<br />
RAID 6 provides the highest reliability, but is not yet widely<br />
used. It is similar to RAID 5, but it performs two different parity<br />
computations or the same computation on overlapping subsets<br />
of the data. RAID 6 can offer fault tolerance greater than RAID<br />
1 or RAID 5 but only consumes the capacity of 2 disk drives for<br />
distributed parity data. RAID 6 is an extension of RAID 5 but uses<br />
a second, independent distributed parity scheme. Data is striped<br />
on a block level across a set of drives, and then a second set of<br />
parity is calculated and written across all of the drives.<br />
26
INTRODUCTION<br />
Summary of RAID Levels<br />
SATA RAID controller supports RAID Levels 0, 1, 10, 3, 5 and 6. Table<br />
below provides a summary of RAID levels.<br />
Features and Performance<br />
RAID<br />
Level<br />
Description<br />
Min.<br />
Drives<br />
Max.<br />
Drives<br />
Data<br />
Reliability<br />
Data<br />
Transfer<br />
Rate<br />
I/O Request<br />
Rates<br />
0 Also known as stripping<br />
Data distributed across multiple drives in<br />
the array. There is no data protection<br />
1 5 No data<br />
Protection<br />
Very High<br />
Very High<br />
for<br />
Both Reads<br />
and Writes<br />
1 Also known as mirroring<br />
All data replicated on N<br />
Separated disks. N is almost always 2.<br />
This is a high availability<br />
Solution, but due to the 100% duplication,<br />
it is also a costly solution.<br />
2 2 Lower<br />
than RAID<br />
6;<br />
Higher<br />
than<br />
RAID 3,5<br />
Reads are<br />
higher<br />
Than a<br />
single disk;<br />
Writes<br />
similar to a<br />
single disk<br />
Reads are<br />
twice faster<br />
than a single<br />
disk;<br />
Write are<br />
similar to a<br />
single disk.<br />
10 Also known Block-Interleaved Parity.<br />
Data and parity information is subdivided<br />
and distributed across all disk. Parity must<br />
be the equal to the smallest disk capacity<br />
in the array. Parity information normally<br />
stored on a dedicated parity disk.<br />
3 5 Lower<br />
than RAID<br />
6;<br />
Higher<br />
than<br />
RAID 3,5<br />
Transfer<br />
rates more<br />
similar<br />
to RAID<br />
1 than<br />
RAID 0<br />
Reads are<br />
twice faster<br />
than a single<br />
disk;<br />
Writes are<br />
similar to a<br />
single disk.<br />
3 Also known Bit-Interleaved Parity.<br />
Data and parity information is subdivided<br />
and distributed across all disk. Parity must<br />
be the equal to the smallest disk capacity<br />
in the array. Parity information normally<br />
stored on a dedicated parity disk.<br />
3 5 Lower<br />
than RAID<br />
1, 10, 6;<br />
Higher<br />
than a<br />
single<br />
drive<br />
Reads are<br />
similar to<br />
RAID 0;<br />
Writes are<br />
slower<br />
than a<br />
single disk<br />
Reads are<br />
similar twice<br />
faster than a<br />
single disk;<br />
Writes are<br />
similar to a<br />
single disk.<br />
27
INTRODUCTION<br />
5 Also known Block-Interleaved Distributed<br />
Parity.<br />
Data and parity information is subdivided<br />
and distributed across all disk. Parity must<br />
be the equal to the smallest disk capacity<br />
in the array. Parity information normally<br />
stored on a dedicated parity disk.<br />
3 5 Lower<br />
than RAID<br />
1, 10, 6;<br />
Higher<br />
than a<br />
single<br />
drive.<br />
Reads are<br />
similar to<br />
RAID 0;<br />
Writes are<br />
slower<br />
than a<br />
single disk.<br />
Reads are<br />
similar to<br />
RAID 0;<br />
Writes are<br />
slower than<br />
a single<br />
disk.<br />
6 RAID 6 provides highest reliability, but not<br />
widely used. Similar to RAID 5, but does<br />
two different parity computations or the<br />
same computation on overlapping subsets<br />
of the data. The RAID 6 can offer fault tolerance<br />
greater that RAID 1 or RAID 5 but<br />
only consumes the capacity of 2 disk drives<br />
for distributed parity data.<br />
4 5 highest<br />
reliability<br />
Reads/<br />
Writes are<br />
similar to<br />
RAID 5.<br />
Reads are<br />
similar to<br />
RAID 0;<br />
Writes are<br />
slower than<br />
the RAID 5.<br />
28
HARDWARE INSTALLATION<br />
2. Hardware Installation<br />
This section describes the procedures for installing MobileRAID series.<br />
2.1 Overview<br />
This chapter describes how to install the RAID Subsystem and connect<br />
UDMA/SATA ll drives to make the RAID subsystem ready to<br />
use. The following contains step-by-step instructions to successfully<br />
install your new RAID subsystem in your computer system.<br />
2.2 RAID Subsystem Requirements<br />
MobileRAID is a stand alone RAID subsystem with standard<br />
Firewire 800 or USB2.0 or eSATA or SCSI Ultra 320 (MR5S1).<br />
Before installing MobileRAID, please verify that the channel on host<br />
system is working well.<br />
2.3 Step Action<br />
1. Unpack the RAID subsystem and inspect for damage. Make<br />
sure all items are in the package.<br />
2. Identify RAID subsystem Part.<br />
3. Turn off the computer.<br />
4. Mounting RAID subsystem in system.<br />
5. Connecting HOST Firewire800/USB2.0/SATA/(MobileRAID-5S-<br />
WBS1) or SCSI Ultra 320(MR5S1) to RAID subsystem.<br />
6. Loading Drive to the Drive Tray.<br />
7. RAID Creation Method.<br />
8. Turn on the host computer power.<br />
9. Configure the RAID subsystem.<br />
• Step 1 Unpack<br />
Unpack and install the hardware in a static-free environment. The<br />
RAID subsystem is packed inside an anti-static bag between two<br />
sponge sheets. Remove it and inspect it for damage. If the RAID<br />
subsystem appears damaged, or if any items of the contents listed<br />
below are missing or damaged, please contact your dealer or distributor<br />
immediately.<br />
29
HARDWARE INSTALLATION<br />
Checklist<br />
The RAID subsystem kit may have included the following items in<br />
the ship package:<br />
Item<br />
Quantity<br />
MobileRAID<br />
1 (For MR5CT1)<br />
USB cable<br />
1 (For MR5CT1)<br />
1394b cable<br />
1 (For MR5CT1)<br />
eSATA cable<br />
1 (For MR5CT1)<br />
SCSI cable<br />
1 (For MR5S1)<br />
Terminator<br />
1 (For MR5S1)<br />
RS232 cable 1<br />
Removable Tray Module 5<br />
<strong>User's</strong> Guide 1<br />
CD Title 1<br />
Power cord 1<br />
Screws 32<br />
(including 22 x 6#-32 screws and 10 x M3 X 6 screws, 2 x keys)<br />
• Step 2 Identify RAID subsystem part<br />
The following figures illustrate the indicator and connector locations<br />
for the RAID subsystem.<br />
Figure 2-1 MobileRAID Front View<br />
30
HARDWARE INSTALLATION<br />
MR55S1 (Back)<br />
MR55S1 (Back)<br />
• Step 3 Power Down the System<br />
• Step 4 Loading Drive to the Drive Tray<br />
The RAID subsystem supports five channel SATA ll channels. For<br />
SATA ll drive each channel can run up to 300MB/S.<br />
1. Press the key in the lock hole.<br />
2. Demount the transport holder.<br />
3. Mount the HDD into the tray.<br />
4. Push the tray with the HDD back to the case.<br />
31
HARDWARE INSTALLATION<br />
32<br />
• Step 5 Connecting RAID subsystem Power<br />
Connect AC power cable to the power connector on the rear side<br />
of the RAID subsystem.<br />
• Step 6 Connecting MR5CT1 RAID subsystem to<br />
HOST Channel<br />
1. Connect the eSATA/USB2.0/Firewire 800 cable to RAID<br />
subsystem eSATA/USB2.0/Firewire 800 connector on rear Panel<br />
of MobileRAID.<br />
2. There are two Firewire 800 connectors on MobileRAID Rear<br />
Panel to support daisy-chained configuration.<br />
• Step 7 Connecting MR5S1 RAID Subsystem to<br />
HOST SCSI Channel<br />
There are two SCSI connectors are provided on the back of the<br />
RAID subsystem for connecting the array to SCSI HOST Adapter.<br />
Installation of the RAID subsystem is very similar to the installation<br />
of a standard SCSI drive. Refer to your system and/or SCSI<br />
host adapter manual for additional installation procedures that<br />
may apply to your system or host adapter. By installing HOST<br />
SCSI Channel and RAID subsystem using the SCSI cables included<br />
in your kits.<br />
Follow these steps to connect HOST SCSI Channel and RAID subsystem:<br />
1. The RAID subsystem is the last internal device in the<br />
daisy-chained configuration.<br />
a. Add the other SCSI LVD cable supplied with the RAID subsystem<br />
kit to its SCSI- OUT connector and place an LVD<br />
SCSI active terminator on the other end of this connector.<br />
2. The RAID subsystem is the first internal device in the<br />
daisy-chained configuration.<br />
a. Plug the SCSI cable supplied with the RAID subsystem kit to<br />
the SCSI adapter internal connector and the its SCSI-IN<br />
connector.<br />
b. Add the SCSI LVD cable supplied with the SCSI adapter kit<br />
to RAID subsystem SCSI OUT connector. The end of the<br />
SCSI bus farthest from its SCSI OUT must have a<br />
terminator installed.
HARDWARE INSTALLATION<br />
• Step 8 RAID Creation Method<br />
Method 1: LCD Panel with Keypad<br />
The LCD status panel informs you of the Disk Array’s current operating<br />
status at a glance. For additional information on using the<br />
LCD panel and keypad to configure the RAID subsystem see “LCD<br />
Configuration” on Chapter 6.<br />
Method 2: Serial Port Connection<br />
The RAID subsystem can be configured via a VT-100 compatible<br />
terminal or a PC running a VT-100 terminal emulation program.<br />
You can attach a serial (Character-Based) terminal or server com<br />
port to the RAID subsystem for access to the text-based Setup<br />
Menu, note the following:<br />
1. Connect a serial terminal to the port labelled COM1.<br />
2. Connect the Host system serial port to the port labelled<br />
COM1.<br />
Method 3: Lan Port Connection<br />
The controller has embedded the TCP/IP & Web Browser-based<br />
RAID manager in the firmware. User can remote manage the<br />
RAID system without adding any user specific software (platform<br />
independent) via standard web browsers directly connected to the<br />
10/100 Ethernet RJ45 LAN port.<br />
• Step 9 Turn on the host computer Power<br />
• Step 10 Configure RAID Subsystems<br />
You can configure RAID subsystem either through the LCD Configuration<br />
utility or RS232C/LAN port out of band management<br />
utility. The RAID subsystem supports VT-100 terminal or CD-ROM<br />
bootable VT-100 utility and HTTP Proxy web-browser management<br />
through the RS-232C port. Please reference the Chapter 4, Chapter<br />
5 and Chapter 6 for the configuration.<br />
33
HARDWARE INSTALLATION<br />
Note: SCSI Termination<br />
All SCSI buses require termination on both ends of the bus to<br />
prevent signal degradation. Most SCSI card supplies the termination<br />
on the origination end of the SCSI bus. Termination for<br />
the opposite end if the bus is provide by the vendor.<br />
Note: LCD status Termination<br />
There are a variety of failure conditions that cause the RAID<br />
subsystem monitoring LED to light. Table1-1 provides a summary<br />
of the front panel LED and RAID subsystem LED.<br />
LED Normal Status Problem Indication<br />
Power LED<br />
(LCD panel)<br />
BUSY LED<br />
(LCD panel)<br />
FAULT LED<br />
(LCD panel)<br />
Disk Activity<br />
LED<br />
(LCD panel)<br />
Bright Green<br />
Blink yellow during host<br />
computer accessing the<br />
RAID subsystem<br />
LED never light up<br />
This LED blinks during<br />
hard drive read and write<br />
activity<br />
This LED does not light up after<br />
power switched on<br />
LED never flickers<br />
This LED light up: “Red”, when the<br />
disk drive fail<br />
34
HARDWARE INSTALLATION<br />
Voltage LED<br />
(LCD panel)<br />
Themperature<br />
LED<br />
(LCD panel)<br />
Fan LED<br />
(LCD panel)<br />
This LED will remain on<br />
green when the power<br />
is on<br />
This LED will remain on<br />
green when the power<br />
is on<br />
This LED will remain on<br />
green when the power<br />
is on<br />
This LED will blink red if there is a<br />
voltage error<br />
This LED will blink red if there is a<br />
fan problem<br />
This LED will blink red if the internal<br />
temperature rises above the Spec<br />
setting<br />
35
HARDWARE INSTALLATION<br />
36<br />
2.4 Hot-plug Drive Replacement<br />
The RAID subsystem supports the ability of performing a hot-swap<br />
drive replacement without powering down the system. A disk can<br />
be disconnected, removed, or replaced with a different disk without<br />
taking the system off-line. The RAID rebuilding will be processed<br />
automatically in the background. When a disk is hot swap, the<br />
RAID subsystem may no longer be fault tolerant. Fault tolerance<br />
will be lost until the hot swap drive is subsequently replaced and<br />
the rebuild operation is completed.<br />
2.4.1 Recognizing a Drive Failure<br />
A drive failure can be identified in one of the following ways:<br />
1. An error status message lists failed drives in the.<br />
2. Amber LED illuminates on the front of RAID subsystem system<br />
if failed drives are inside.<br />
2.4.2 Replacing a Failed Drive<br />
With our RAID subsystem drive tray, you can replace a defective
HARDWARE INSTALLATION<br />
physical drive while your computer is still operating. When a new<br />
drive has been installed, data reconstruction will be automatically<br />
started to rebuild the contents of the disk drive.<br />
Follow the follow below and refer to the pictures to replace the<br />
“Hot-Swap” drive.<br />
Step a. Gently pull-out the HDD tray<br />
(When a HDD error occurs, the HDD LED indicator lights up “Amber”)<br />
Remove the drive tray you wish to replace from the RAID subsystem<br />
by firmly pulling on the drive carrier’s handle and sliding<br />
out the drive tray.<br />
Step b. Unscrew<br />
Remove all the four mounting screws<br />
Step c. Replace a new drive<br />
Step d. Gently plug-in the HDD tray<br />
Note:<br />
The capacity of the replacement drives must be at least as<br />
large as the capacity of the other drives in the RAID set. Drives<br />
of insufficient capacity will be failed immediately by the RAID<br />
subsystem without starting the Automatic Data Rebuild.<br />
37
CONFIGURATION METHOD<br />
3. Configuration Methods<br />
After the hardware installation, the SATA disk drives connected to the<br />
internal RAID subsystem must be configured and the volume set units<br />
initialized before they are ready to use. This can be accomplished by<br />
one of the following methods:<br />
• Front panel touch-control keypad.<br />
• VT100 terminal connected through the controller’s serial port.<br />
• Using HTTP Proxy through the controller’s serial port to access web<br />
browser-based RAID manager in Windows and Linux system.<br />
• Firmware-embedded & web browser-based RAID manager/SNMP a<br />
gent/SMTP via the controller’s 10/100 Ethernet LAN port.<br />
Those user interfaces can access the built-in configuration and administration<br />
utility that resides in the controller’s firmware. They provide<br />
complete control and management of the controller and disk arrays,<br />
eliminating the need for additional hardware or software.<br />
3.1 Using local front panel touch-control<br />
keypad<br />
The front panel keypad and liquid crystal display (LCD) is the primary<br />
user interface for the RAID subsystem. All configuration and<br />
management of the controller and its properly connected disk arrays<br />
can be performed from this interface.<br />
The front panel keypad and LCD are connected to the RAID subsystem<br />
to access the built-in configuration and administration utility<br />
that resides in the controller’s firmware. Complete control and<br />
management of the array’s physical drives and logical units can be<br />
performed from the front panel, requiring no additional hardware<br />
or software drivers for that purpose.<br />
This technical manual provides, in quick reference form, procedures<br />
that use the built-in LCD panel to configure and operate the<br />
controller.<br />
A touch-control keypad and a liquid crystal display (LCD) mounted<br />
on the front panel of the RAID subsystem is the primary operational<br />
interface and monitor display for the disk array controller. This<br />
user interface controls all configuration and management functions<br />
38
CONFIGURATION METHOD<br />
for the RAID subsystem controller and for all or SATA disk array<br />
subsystems to which it is properly connected.<br />
The LCD provides a system of screens with areas for information,<br />
status indication, or menus. The LCD screen displays up to two<br />
lines at a time of menu items or other information.<br />
The Initial screen as the following:<br />
Function Key Definitions<br />
The four function buttons on the front panel perform the following<br />
functions:<br />
For additional information on using the LCD panel and keypad to<br />
MobileRAID<br />
configure the RAID controller see ‘‘LCD Configuration” on Chapter 4<br />
Key<br />
Up Arrow<br />
Down Arrow<br />
ENT Key<br />
ESC Key<br />
Function<br />
Use to scroll the cursor Upward/Rightward<br />
Use to scroll the cursor Downward/Leftward<br />
Submit Select ion Function (Confirm a selected Item)<br />
Return to Previous Screen (Exit a selection configuration)<br />
39
CONFIGURATION METHOD<br />
3.2 VT100 terminal (Using the controller’s<br />
serial port)<br />
The serial port on the controller’s back panel can be used in VT100<br />
mode. The firmware-based terminal array management interface<br />
can access the array through this RS-232 port. You can attach a<br />
VT-100 compatible terminal or a PC running a VT-100 terminal<br />
emulation program to the serial port for accessing the text-based<br />
Setup Menu.<br />
3.2.1 RAID Subsystem RS-232C Port Pin Assignment<br />
To ensure proper communications between the RAID subsystem<br />
and the VT-100 Terminal Emulation, Please configure the VT100<br />
terminal emulation settings to the values shown below:<br />
Keyboard Navigation<br />
Terminal requirment<br />
Connection<br />
Null-modem cable<br />
Baud Rate 115,200<br />
Data bits 8<br />
Stop 1<br />
Flow Control<br />
None<br />
40
CONFIGURATION METHOD<br />
The following definition is the VT-100 RAID configuration utility<br />
keyboard navigation.<br />
Key<br />
Arrow Key<br />
Enter Key<br />
ESC Key<br />
L Key<br />
X Key<br />
Function<br />
Move cursor<br />
Submit selection function<br />
Return to previous screen<br />
Line draw<br />
Redraw<br />
3.2.2 Start-up VT100 Screen<br />
By connecting a VT100 compatible terminal, or a PC operating<br />
in an equivalent terminal emulation mode, all RAID subsystem<br />
monitoring, configuration and administration functions can be<br />
exercised from the VT100 terminal.<br />
There are a wide variety of Terminal Emulation packages, but for<br />
the most part they should be very similar. The following setup<br />
procedure is an example Setup VT100 Terminal in Windows system<br />
using Hyper Terminal use Version 3.0 or higher.<br />
Step 1. From the Desktop open the Start menu. Pick Programs,<br />
Accessories, Communications and Hyper Terminal. Open Hyper<br />
Terminal (requires version 3.0 or higher)<br />
41
CONFIGURATION METHOD<br />
Step 2. Open HYPERTRM.EXE and Enter a name for your Terminal.<br />
Click OK.<br />
Step 3. Select an appropriate connecting port in your Terminal.<br />
Click OK. Configure the port parameter settings. Bits per second:<br />
“115200”, Data bits: “8”, Parity:”None”, Stop bits: “1”, Flow<br />
control:”None”. Click OK<br />
Step 4. Open the File menu, and then open Properties.<br />
42
CONFIGURATION METHOD<br />
Step 5. Open the Settings Tab.<br />
Step 6. Open the Settings Tab. Function, arrow and ctrl keys act<br />
as: Terminal Keys, Backspace key sends: Crtl+H, Emulation:<br />
VT100, Telnet terminal: VT100, Back scroll buffer lines: 500. Click<br />
OK.<br />
Now, the VT100 is ready to use.<br />
After you have finished the VT100 Terminal setup, you may press<br />
“ X “ key (in your Terminal) to link the RAID subsystem and Terminal<br />
together.<br />
Press” X ” key to display the disk array Monitor Utility screen on<br />
your VT100 Terminal.<br />
43
CONFIGURATION METHOD<br />
3.3 Web browser-based RAID manager<br />
Firmware-embedded web browser RAID manager is an HTTP<br />
–based application, which utilizes the browser installed on your operating<br />
system. Web browser-based RAID manager can be used to<br />
manage all the RAID function via RS-232C port after starts up the<br />
operating system. Please reference the section 3.3 to connect the<br />
controller’s serial port.<br />
The controller also embeds the TCP/IP protocol in the controller’s<br />
firmware. User can use the Ethernet LAN port to configure the<br />
controller without adding any application and device drive. User<br />
can plug and play the web browser RAID manager in the remote<br />
station. The provided LAN interface cable connects the RAID controller’s<br />
LAN port into a LAN port from your local network. Use only<br />
shield cable to avoid radiated emission that may cause interruptions.<br />
The Storage Console current configuration screen displays the<br />
current configuration of your RAID subsystem. Detail procedures<br />
please reference the Chapter 6 Web Browser-based configuration<br />
method.<br />
44<br />
3.3.1 Web browser-based RAID manager via<br />
HTTP Proxy (Using the controller’s serial port)<br />
User needs to install Com2Http Proxy Server software to the RAID<br />
controller server system. Com2Http Proxy Server software is an<br />
S/W utility, which allows user through web browser to create<br />
and modify RAID set, volume set, and monitor RAID subsystem<br />
status.
CONFIGURATION METHOD<br />
3.3.1.1 Start-up Web Browser-based RAID<br />
Management for Local Administration<br />
MobileRAID now offers an alternative means of communication<br />
for the RAID Subsystem - Web Browser-based RAID Management<br />
program.. The Web Browser-based RAID Manager program is an<br />
HTML-based application, which utilizes the browser (IE, Netscape<br />
and Mozilla etc) installed on your monitor station.<br />
3.3.1.1.1 For Windows<br />
Screen in this section are taken from a Windows/XP installation.<br />
If you are running other Windows, your installing screen may<br />
look different, but the Com2http proxy server installation is<br />
essentially the same.<br />
1. Insert the RAID subsystem CD in the CD-ROM drive.<br />
2. Run the setup.exe file that resides at: CD-ROM:\MobileRAID<br />
Series\GUI-Com2.Http\windows\setup.exe<br />
3. Click on the Setup file then the Welcome screen appears.<br />
Follow the on-screen prompts to complete Com2Http Proxy<br />
Server software installation.<br />
A program bar appears that measures the progress of<br />
MobileRAID Com2http setup. When this screen complete, you<br />
have completed the Com2Http Proxy Server software setup.<br />
4. After a successful installation, the Setup Complete dialog<br />
box of the installation program is displayed. Click the Finish<br />
button to complete the installation.<br />
45
CONFIGURATION METHOD<br />
5. Click on the Start Button in the Windows 2000/XP task<br />
bar and then click Program, select the Com2http and run<br />
“Com2Http Proxy Server”. The Com2http dialog box appears.<br />
If user doesn’t want to launch the web browser, goes to step<br />
9.<br />
The Parameters for the General Setting:<br />
(1). TCP Port value = 1 ~ 65535.<br />
(2). RAID Connected to value = 1 ~ 10 where 1 for COM1, 2<br />
for COM2 and so on...<br />
(3). BaudRate value = {2400, 4800, 9600, 19200, 38400,<br />
Note:<br />
RAID subsystem controller default setting baud rate is<br />
115200.<br />
57600, 115200}<br />
46<br />
6. To start the com2Http Proxy Server web-browser<br />
management, click the Start Button.
CONFIGURATION METHOD<br />
The Enter Network Password dialog screen appears, type the<br />
User Name and Password. The RAID subsystem controller<br />
default User Name is “admin” and the Password is “0000”<br />
. After completing entering user name and password, press<br />
Enter to start-up the Com2Http Proxy Server.<br />
Note: It is strongly recommended to modify the password<br />
after the first login.<br />
7. The Storage Console current configuration screen displays<br />
the current configuration of your RAID subsystem.<br />
8. If you don’t default start-up the web browser, clear “the<br />
Launch Web Browser when server started!!” setting. To start<br />
the Com2Http Proxy Server web-browser management, click<br />
the Start button.<br />
47
CONFIGURATION METHOD<br />
9. User may execute the Com2Http Proxy Server by entering<br />
http://[IP Address] in your web browser.<br />
3.3.1.1.2 For Linux<br />
The following is the Linux installation procedure in the local<br />
server.<br />
1. Insert the RAID subsystem CD in the CD-ROM drive.<br />
2. Run the Com2http file that resides at:CD-ROM:\MobileRAID<br />
Series\GUI-Com2Http\Linux<br />
3. Usage: Com2Http TCP_PORT COM_PORT BAUDRATE<br />
Parameters: TCP_PORT value = 1 ~ 65535<br />
COM_PORT value = 1 ~ 10 where 1 for COM1, 2 for COM2<br />
and so on...<br />
BAUDRATE value = {2400, 4800, 9600, 19200, 38400,<br />
57600, 115200}<br />
For Example:<br />
Start the Com2Http Proxy Server for TCP_PORT = 6666,<br />
COM_PORT = 1 and BAUDRATE = 115200, user can type “./<br />
Com2Http 6666 1 115200” on command line and enter to<br />
execute it.<br />
2. Execute the Com2Http Proxy Server by entering http://[IP<br />
Address] in the Netscape browser provided with Linux. Note<br />
that Linux prompts you to login to the machine with an ID of<br />
root.<br />
Note:<br />
The RAID subsystem controller default User Name (ID)<br />
is “admin” and the Password is “0000”. It is strongly<br />
recommended to modify the password after the first login.<br />
3.3.1.2 Start-up Web Browser-based RAID Management<br />
for Remote Administration<br />
To configure MobileRAID RAID subsystem on a remote machine,<br />
you need to know its IP Address. You must first start up your<br />
local Com2Http Proxy Server. (Please reference this chapter<br />
section 6.1.2.1). Launch your com2Http Proxy Server by<br />
entering http://[IP Address] in the remote web browser.<br />
48
Note:<br />
CONFIGURATION METHOD<br />
You must be logged in as administrator with local admin<br />
rights on the remote machine to remotely configure it.<br />
The RAID subsystem controller default User Name is “admin”<br />
and the Password is “0000”.<br />
3.3.2 Firmware-embedded TCP/IP & web browser-based<br />
RAID manager (using the controller’s<br />
10/100 Ethernet LAN port)<br />
To ensure proper communications between the RAID subsystem<br />
and Web browser-based RAID management, Please connect the<br />
RAID system Ethernet LAN port to any LAN switch port.<br />
The controller has embedded the TCP/IP & Web Browser-based<br />
RAID manager in the firmware. User can remote manage the<br />
RAID system without adding any user specific software (platform<br />
independent) via standard web browsers directly connected to the<br />
10/100 Ethernet RJ45 LAN port.<br />
To configure Internal RAID subsystem on a local or remote<br />
machine, you need to know its IP Address. The IP address will<br />
default show in the LCD screen. Launch your firmware-embedded<br />
TCP/IP & Web Browser-based RAID manager by entering http://<br />
[IP Address] in the web browser.<br />
Note:<br />
You must be logged in as administrator with local admin<br />
rights on the remote machine to remotely configure it.<br />
The RAID subsystem controller default User Name is “admin”<br />
and the Password is “0000”.<br />
3.4 Configuration Menu Tree<br />
The following is an expansion of the menus in configuration Utility<br />
that can be accessed through the LCD panel, RS-232 serial port<br />
and Ethernet LAN port.<br />
49
CONFIGURATION METHOD<br />
Note:<br />
Ethernet Configuration, Alert By Mail Config, and SNMP Config<br />
can only be set in the web-based configuration.<br />
* U320 SCSI Target configuration available on MR5S1<br />
only.<br />
50
LCD CONFIGURATION MENU<br />
4. LCD Configuration Menu<br />
The RAID subsystem LCD configuration utility is a character-based<br />
utility that you can run after powering the unit. Use LCD Configuration<br />
Utility to:<br />
• Create RAID set,<br />
• Expand RAID set,<br />
• Define volume set,<br />
• Add physical drive,<br />
• Modify volume set,<br />
• Modify RAID level/stripe size,<br />
• Define pass-through disk drives,<br />
• Modify system function and,<br />
• Designate drives as hot spares.<br />
The LCD display front panel function keys are the primary user interface<br />
for the RAID subsystem. Except for the “Firmware update”, all<br />
configurations can be performed through this interface.<br />
Function Key Definitions<br />
The four function keys at the button of the front panel perform the following<br />
functions:<br />
Key<br />
Up Arrow<br />
Down Arrow<br />
ENT Key<br />
ESC Key<br />
Function<br />
Use to scroll the cursor Upward/Rightward<br />
Use to scroll the cursor Downward/Leftward<br />
Submit Select ion Function (Confirm a selected Item)<br />
Return to Previous Screen (Exit a selection configuration)<br />
4.1 Starting LCD Configuration Utility<br />
The main menu appears on the LCD screen, as shown below:<br />
Use the up and down arrow buttons to move left and right and<br />
highlight a menu item. Press Enter to select the highlighted item.<br />
Press the UP/DOWN to browse the selection. Press ESC to return<br />
to the previous screen.<br />
51
LCD CONFIGURATION MENU<br />
4.2 LCD Configuration Utility Main Menu<br />
Options<br />
Select an option and the related information or submenu items display<br />
beneath it. The submenus for each item are explained on the<br />
section 4.8.3. The configuration utility main menu options are:<br />
Option<br />
Quick Volume and RAID Set<br />
Setup<br />
RAID Set Functions<br />
Volume Set Functions<br />
Physical Drive Functions<br />
RAID System Functions<br />
U320 SCSI Target Configuration<br />
Ethernet Configuration<br />
Show System Events<br />
Clear All Event Buffer<br />
Hardware Monitor Information<br />
Show System informatiaon<br />
Description<br />
Create a default configurations which are based<br />
on the number of physical disk installed<br />
Create a customized RAID set<br />
Create a customized volume set<br />
View individual disk information<br />
Setting the RAID system configurations<br />
SCSI Ultra 320 configuration (for MR5S1 only)<br />
Ethernet LAN setting<br />
Record all system events in the buffer<br />
Clear all event buffer information<br />
Show all system environment status<br />
View the controller information<br />
4.3 Configuring RAID Sets and Volume Sets<br />
You can configure RAID sets and volume sets with LCD configuration<br />
utility using Quick Volume And RAID Set Setup, RAID Set<br />
Functions/Volume Set Functions configuration method. Each configuration<br />
method requires a different level of user input. The general<br />
flow of operations for RAID set and volume set configuration is:<br />
Step<br />
Action<br />
1 Designate hot spares/pass-through (optional)<br />
2 Choose a configuration method<br />
3 Create RAID set using the available physical drives<br />
4 Define volume set using the space in the RAID set<br />
5 Initialize the volume set and use volume set in the HOST OS<br />
52
LCD CONFIGURATION MENU<br />
4.4 Designating Drives as Hot Spares<br />
To designate drives as hot spares, press Enter to enter the Main<br />
menu. Press UP/DOWN to select the RAID Set Functions option<br />
and then press Enter. All RAID set functions will be displayed.<br />
Press UP/DOWN to select the Create Hot Spare Disk option and<br />
then press Enter. The first unused physical device connected to<br />
the current controller appears: Press UP/DOWN to scroll the unused<br />
physical devices and select the target disk to assign as a Hot<br />
Spare and press Enter to designate it as a hot spare.<br />
4.5 Using Quick Volume and RAID Set<br />
Setup<br />
In Quick Volume And RAID Setup Configuration, The RAID set you<br />
create is associated with exactly one volume set, and you can modify<br />
the RAID level, stripe size, and capacity. Designating Drives as<br />
Hot Spares will also combine with RAID level in this setup.<br />
Parameter<br />
Volume Name<br />
SCSI Channel/SCSI ID/SCSI LUN<br />
IDE Host Channel/IDE Drive Select<br />
Cache Mode<br />
Tag Queuing<br />
Max Sync Rate<br />
IDE Xfer Mode<br />
Volume Set#00<br />
0/0/0 (For MR5S1)<br />
Setting<br />
0/0-Master (For MR5CT1)<br />
Write Back<br />
Yes<br />
Depend your host adapter setting (For<br />
MR5S1)<br />
Depend your host adapter setting (For<br />
MobileRAID-5S-WBS1)<br />
The volume set default settings will be:<br />
The default setting values can be changed after configuration is<br />
complete.<br />
Follow the steps below to create RAID set using Quick Volume And<br />
53
LCD CONFIGURATION MENU<br />
Step<br />
Action<br />
1 Choose Quick Volume /RAID Setup from the main menu. The available<br />
RAID levels with hot spare for the current volume set drive are displayed.<br />
2 Recommend use drives have same capacity in a specific array. If you use<br />
drives with different capacities in an array, all drives in the RAID set will select<br />
the lowest capacity of the drive in the RAID set.<br />
The numbers of physical drives in a specific array determine the RAID levels<br />
that can be implemented with the array.<br />
RAID 0 requires 1 or more physical drives<br />
RAID 1 requires at least 2 physical drives<br />
RAID 1+Spare requires at least 3 physical drives<br />
RAID 3 requires at least 3 physical drives<br />
RAID 5 requires at least 3 physical drives<br />
RAID 6 requires at least 4 physical drives.<br />
RAID 3 +Spare requires at least 4 physical drives<br />
RAID 5 + Spare requires at least 4 physical drives<br />
RAID 6 + Spare requires at least 5 physical drives.<br />
Highlight RAID level for the volume set and press Enter key to confirm.<br />
3 Set the capacity size for the current volume set. After Highlight RAID level<br />
and press Enter key.<br />
The selected capacity for the current volume set is displayed. Using the UP<br />
and DOWN arrow key to create the current volume set capacity size and<br />
press Enter key to confirm. The available stripe sizes for the current volume<br />
set are displayed.<br />
4 Using UP and DOWN arrow key to select the current volume set stripe size<br />
and press Enter key to confirm it. This parameter specifies the size of the<br />
stripes written to each disk in a RAID 0, 1, 5 or 6 Volume Set. You can set the<br />
stripe size to 4 KB, 8 KB, 16 KB, 32 KB, 64 KB, or 128 KB. A larger stripe size<br />
provides better-read performance, especially if your computer does mostly<br />
sequential reads. However, if you are sure that your computer does random<br />
read requests more often, choose a small stripe size.<br />
5 When you are finished defining the volume set, press Enter key to confirm<br />
the Quick Volume And RAID Set Setup function.<br />
6 Press Enter key to define fast initialization or Selected the Background (Instant<br />
Available). When background Initialization, the initialization proceeds<br />
as a background task, the volume set is fully accessible for system reads and<br />
writes. The operating system can instantly access to the newly created arrays<br />
without requiring a reboot and waiting the initialization complete. When<br />
Initialization, the initialization proceeds must be completed before the volume<br />
set ready for system accesses.<br />
7 Initialize the volume set you have just configured.<br />
8 If you need to add additional volume set, using main menu Create Volume Set<br />
function<br />
54
LCD CONFIGURATION MENU<br />
4.6 Using RAID Set and Volume Set Functions<br />
In RAID Set Function, you can use the Create RAID Set function to<br />
generate the new RAID set. In Volume Set Function, you can use<br />
the create volume set function to generate its associated volume<br />
set and parameters. If the current controller has unused physical<br />
devices connected, you can choose the Create Hot Spare option in<br />
the RAID Set Function to define a global hot spare.<br />
Select this method to configure new RAID sets and volume sets.<br />
This configuration option allows you to associate volume set with<br />
partial and full RAID set.<br />
Step<br />
Action<br />
1 To setup the Hot Spare (option), choose RAID Set Function from the<br />
main menu. Select the Create Hot Spare and press Enter key to set the<br />
Hot Spare.<br />
2 Choose RAID Set Function from the main menu. Select the Create RAID<br />
Set and press Enter key.<br />
3 Select a Drive For RAID Set window is displayed showing the SATA drive<br />
connected to the current controller.<br />
4 Press UP and DOWN arrow keys to select specific physical drives. Press<br />
the Enter key to associate the selected physical drive with the current<br />
RAID set.<br />
Recommend use drives has same capacity in a specific RAID set. If you<br />
use drives with different capacities in an array, all drives in the RAID set<br />
will select the lowest capacity of the drive in the RAID set.<br />
The numbers of physical drives in a specific RAID set determine the RAID<br />
levels that can be implemented with the RAID set.<br />
RAID 0 requires 1 or more physical drives per RAID set.<br />
RAID 1 requires at least 2 physical drives per RAID set.<br />
RAID 1 + Spare requires at least 3 physical drives per RAID set.<br />
RAID 3 requires at least 3 physical drives per RAID set.<br />
RAID 5 requires at least 3 physical drives per RAID set.<br />
RAID 6 requires at least 4 physical drives per RAID set.<br />
RAID 3 + Spare requires at least 4 physical drives per RAID set.<br />
RAID 5 + Spare requires at least 4 physical drives per RAID set.<br />
RAID 6 + Spare requires at least 5 physical drives.<br />
5 After adding physical drives to the current RAID set as desired, press Yes<br />
to confirm the Create RAID Set function.<br />
6 An Edit The RAID Set Name dialog box appears. Enter 1 to 15 alphanumeric<br />
characters to define a unique identifier for a RAID set. The default<br />
RAID set name will always appear as RAID Set. #. Press Enter to finish<br />
the name editing.<br />
55
LCD CONFIGURATION MENU<br />
7 Press Enter key when you are finished creating the current RAID set. To<br />
continue defining another RAID set, repeat step 3. To begin volume set<br />
configuration, go to step 8.<br />
8 Choose Volume Set Function from the Main menu. Select the Create<br />
Volume Set and press Enter key.<br />
9 Choose one RAID set from the Create Volume From RAID Set window.<br />
Press Enter key to confirm it.<br />
10 The volume set attributes screen appers:<br />
The volume set attributes screen shows the volume set default configuration<br />
value that is currently being configured. The volume set attributes<br />
are:<br />
RAID Level,<br />
Stripe Size,<br />
SCSI HOST/SCSI ID/SCSI LUN/ (For MR5S1)<br />
IDE HOST Channel/IDE Drive Select (For MR5CT1)<br />
Cache Mode,<br />
TaggedQueuing,<br />
SCSI Max Rate (For MR5S1)<br />
IDE Xfer Mode (For MR5CT1), and<br />
Volume Name (number).<br />
All value can be changing by the user. Press the UP/DOWN to select the<br />
attributes. Press the Enter to modify each attribute of the default value.<br />
Using the UP/DOWN to select attribute value and press the Enter to accept<br />
the default value.<br />
11 After user completes modifying the attribute, press the ESC to enter the<br />
select Capacity for the volume set. Using the UP/DOWN to set the volume<br />
set capacity and press Enter to confirm it.<br />
12 When you are finished defining the volume set, press Enter to confirm<br />
the Create function.<br />
13 Press Enter to define fast initialization and ESC to normal initialization.<br />
The controller will begin to initialize the volume set, you have just<br />
configured. If space remains in the RAID set, the next volume set can be<br />
configured. Repeat steps 8 to 13 to configure another volume set.<br />
56<br />
4.7 Navigation Map of the LCD For MobileRAID<br />
The password option allows user to set or clear the RAID subsystem’s<br />
password protection feature. Once the password has been<br />
set, the user can only monitor and configure the RAID subsystem<br />
by providing the correct password. The password is used to protect<br />
the RAID subsystem from unauthorized entry. The controller<br />
will check the password only when entering the Main menu from<br />
the initial screen. The RAID subsystem will automatically go back
LCD CONFIGURATION MENU<br />
to the initial screen when it does not receive any command in<br />
twenty seconds. The RAID subsystem password is default setting<br />
at 0000 by the manufacture.<br />
MobileRAID<br />
MR5CT1 XXX Ready<br />
Figure 4.7-1<br />
MR5CT1<br />
4.7.1 Quick Volume/RAID Setup<br />
Quick Volume And RAID Setup is the fastest way to prepare<br />
a RAID set and volume set. It only needs a few keystrokes to<br />
complete it. Although disk drives of different capacity may be<br />
used in the RAID set, it will use the smallest capacity of the<br />
disk drive as the capacity of all disk drives in the RAID set.<br />
The Quick Volume And RAID Setup option creates a RAID set<br />
with the following properties:<br />
Figure 4.7.1-1<br />
MR5CT1<br />
<strong>Sans</strong> <strong>Digital</strong><br />
MR5CT1 Ready<br />
57
LCD CONFIGURATION MENU<br />
1. All of the physical disk drives are contained in a RAID set.<br />
2. The RAID levels associated with hot spare, capacity, and<br />
stripe size are selected during the configuration process.<br />
3. A single volume set is created and consumed all or a portion<br />
of the disk capacity available in this RAID set.<br />
4. If you need to add additional volume set, using main menu<br />
Volume Set functions Detail procedure references to this<br />
chapter section 4.5.<br />
4.7.2 RAID Set Function<br />
User manual configuration can complete control of the RAID set<br />
setting, but it will take longer time to complete than the Quick<br />
Volume And RAID Setup configuration. Select the RAID Set Function<br />
to manually configure the RAID set for the first time or deletes<br />
existing RAID set and reconfigures the RAID set.<br />
To enter a RAID Set Functions, press Enter to enter the Main<br />
menu. Press UP/DOWN to select the RAID Set Functions option<br />
and then press Enter to enter further submenus. All RAID set<br />
submenus will be displayed.<br />
Figure 4.7.2-1<br />
58
LCD CONFIGURATION MENU<br />
4.7.2.1 Create A New RAID Set<br />
Detail procedure references to this chapter section 4.6.<br />
4.7.2.2 Delete Existed RAID Set<br />
Press UP/DOWN to choose the Delete Existed RAID Set option.<br />
Using UP/DOWN to select the RAID set number that user want<br />
to delete and then press Enter to accept the RAID set number.<br />
The Confirmation screen appears, then press Enter to accept<br />
the delete existed RAID set function. The double confirmation<br />
screen appears, then press Yes to make sure of the delete existed<br />
RAID set function<br />
4.7.2.3 Expand Existed RAID Set<br />
Instead of deleting a RAID set and recreating it with additional<br />
disk drives, the Expand Existed RAID Set function allows the<br />
user to add disk drives to the RAID set that was created.<br />
To expand existed RAID set, press UP/DOWN to choose the<br />
Expand Existed RAID Set option. Using UP/DOWN to select the<br />
RAID set number that user want to expand and then press Enter<br />
to accept the RAID set number. If there is an available disk,<br />
then the Select Drive IDE Channel x appears. Using UP/DOWN<br />
to select the target disk and then press Enter to select it. Press<br />
Enter to start expanding the existed RAID set.<br />
The new add capacity will be define one or more volume sets.<br />
Follow the instruction presented in the Volume Set Function to<br />
create the volume sets.<br />
Note:<br />
1. Once the Expand RAID Set process has started, user cannot<br />
stop it. The process must be completed.<br />
2. If a disk drive fails during RAID set expansion and a hot<br />
spare is available, an auto rebuild operation will occur after the<br />
RAID set expansion completes.<br />
59
LCD CONFIGURATION MENU<br />
Migrating occurs when a disk is added to a RAID set. Migration<br />
status is displayed in the RAID status area of the RAID Set<br />
information when a disk is added to a RAID set. Migrating status<br />
is also displayed in the associated volume status area of the volume<br />
set Information when a disk is added to a RAID set<br />
4.7.2.4 Activate Incomplete RAID Set<br />
When one of the disk drive is removed in power off state, the<br />
RAID set state will change to Incomplete State. If user wants to<br />
continue to work, when the RAID subsystem is power on. User<br />
can use the Activate Incomplete RAID Set option to active the<br />
RAID set. After user complete the function, the RAID State will<br />
change to Degraded Mode.<br />
4.7.2.5 Create Hot Spare Disk<br />
Please refer to this chapter section 4.4: Designating Drives as<br />
Hot Spares.<br />
4.7.2.6 Delete Hot Spare Disk<br />
To delete hot spare, press UP/DOWN to choose the Delete Hot<br />
Spare Disk option. Using UP/DOWN to select the hot spare<br />
number that user want to delete and then press Enter to select<br />
it. The confirmation screens appear and press Enter to delete<br />
the hot spare.<br />
4.7.2.7 Display RAID Set Information<br />
Using UP/DOWN to choose the Display RAID Set Information<br />
option and press Enter. Using UP/DOWN to select the RAID<br />
set number that user want to display. The RAID set information<br />
will be displayed.<br />
Using UP/DOWN to scroll the RAID set information, it shows<br />
RAID Set Name, Total Capacity, Free Capacity, Number of Member<br />
Disks, Min. Member Disk Capacity and RAID Set State.<br />
60
LCD CONFIGURATION MENU<br />
4.7.3 Volume Set Function<br />
A volume set is seen by the host system as a single logical device.<br />
It is organized in a RAID level with one or more physical<br />
disks. RAID level refers to the level of data performance and protection<br />
of a Volume Set. A Volume Set capacity can consume all<br />
or a portion of the disk capacity available in a RAID Set. Multiple<br />
Volume Sets can exist on a group of disks in a RAID Set. Additional<br />
Volume Sets created in a specified RAID Set will reside on<br />
all the physical disks in the RAID Set. Thus each Volume Set on<br />
the RAID Set will have its data spread evenly across all the disks<br />
in the RAID Set.<br />
To enter a Volume Set Functions, press Enter to enter the main<br />
menu. Press UP/DOWN to select the Volume Set Functions option<br />
and then press Enter to enter further submenus. All volume<br />
set submenus will be displayed.<br />
4.7.3.1 Create RAID Volume Set<br />
To create a volume set, Please refer to this chapter section 4.6:<br />
Using RAID Set and Volume Set Functions. The volume set attributes<br />
screen shows the volume set default configuration value<br />
that is currently being configured.<br />
For MR5CT1<br />
1. The attributes for MR5CT1 are RAID Level, Stripe<br />
Size, ache Mode, IDE Host Channel, IDE Drive Select,<br />
Tagged Queuing, IDE Xfer Mode, and Volume Name (num<br />
ber). See Figure 4.7.3.1-1<br />
For MR5S1<br />
1. The attributes for MR5S1 are RAID Level, Stripe<br />
Size, Cache Mode, SCSI HOST, SCSI ID, SCSI LUN, Tagged<br />
Queuing, SCSI Max Rate, and Volume Name (number). See<br />
Figure 4.7.3.1-2<br />
All value can be changed by user. Press the UP/DOWN to select<br />
attribute. Press the Enter to modify the default value. Using<br />
the UP/DOWN to select attribute value and press the Enter to<br />
accept the default value. The following is the attributes descriptions.<br />
Please reference this chapter section 4.6 Using RAID Set<br />
61
LCD CONFIGURATION MENU<br />
and Volume Set Functions to complete the create volume set<br />
function.<br />
Figure 4.7.3.1-1<br />
MR5CT1<br />
Figure 4.7.3.1-2<br />
MR5S1<br />
62
LCD CONFIGURATION MENU<br />
4.7.3.1.1 Capacity<br />
The maximum volume size is default in the first setting. Enter<br />
the appropriate volume size to fit your application. The capacity<br />
can also increase or decrease by the UP and DOWN arrow key.<br />
Each volume set has a selected capacity which is less than or<br />
equal to the total capacity of the RAID set on which it resides.<br />
4.7.3.1.2 RAID Level<br />
The controller can support RAID level 0, 1, 10, 3, 5 and 6.<br />
4.7.3.1.3 Strip Size<br />
This parameter sets the size of the segment written to each<br />
disk in a RAID 0, 1, 5 or 6 logical drive. You can set the stripe<br />
size to 4 KB, 8 KB, 16 KB, 32 KB, 64 KB, or 128 KB.<br />
A larger stripe size produces better-read performance, especially<br />
if your computer does mostly sequential reads. However,<br />
if you are sure that your computer does random reads more<br />
often, select a small stripe size.<br />
4.7.3.1.4 Volume Name<br />
The default volume name will always appear as Volume Set.<br />
#. You can rename the volume set name providing it does not<br />
exceed the 15 characters limit.<br />
4.7.3.1.5 IDE and SATA Host Channel<br />
(MR5CT1)<br />
IDE Channels:The MR5CT1 can support dual host channels<br />
IDE(for Firewire/USB) (Channel 0) and Serial ATA (Channel 1).<br />
Multiple channels can be applied to the RAID subsystem if user<br />
selects the Independent option in the Interface Mode at RAID<br />
System Function. Single channel can be applied to the RAID<br />
subsystem if user selects the Share Volume option in the Interface<br />
Mode at RAID System Function. Both IDE and SATA con-<br />
63
LCD CONFIGURATION MENU<br />
64<br />
nection are setting as Channel 0&1.<br />
4.7.3.1.6 IDE Drive Select (MR5CT1)<br />
Host Channel setting at IDE (for Firewire/USB) and SATA host<br />
channel can concurrently access different volume sets. The IDE<br />
(Channel 0) can support one master and one slave volume sets<br />
. The SATA (Channel 1) can support one master volume set.<br />
The Max volume set can be accessed by MR5CT1 is 3.<br />
Host Channel setting at Share Volume-The MR5CT1 can support<br />
dual IDE and Serial ATA accesses same volume set. But user<br />
can only connect one channel at one time. If user connects the<br />
Firewire/USB (Host Channel 0), the RAID subsystem supports<br />
2 volumes (Master/Slave). If user connects the SATA, the RAID<br />
subsystem supports 1 volume (Master) (Host Channel 0). Both<br />
IDE and SATA connection are setting as Channel 0&1.<br />
4.7.3.1.7 SCSI Channel (MR5S1)<br />
MR5S1 only support one ultra 320 SCSI channel.<br />
4.7.3.1.8 SCSI ID (MR5S1)<br />
Each SCSI device attached to the SCSI card, as well as the card<br />
itself, must be assigned a unique SCSI ID number. A Wide SCSI<br />
channel can connect up to 15 devices. RAID subsystem is as a<br />
large SCSI device. We should assign an ID from a list of SCSI<br />
IDs.<br />
4.7.3.1.9 SCSI LUN (MR5S1)<br />
Each SCSI ID can support up to 8 LUNs. Most SCSI host adapter<br />
treats each LUN like a SCSI disk.<br />
4.7.3.1.10 Cache Mode<br />
User can set the cache mode as Write-Through Cache or Write-<br />
Back Cache.<br />
4.7.3.1.11 Tag Queuing<br />
The Enabled option is useful for enhancing overall system
LCD CONFIGURATION MENU<br />
performance under multi-tasking operating systems. The Command<br />
Tag (Drive Channel) function controls the SCSI command<br />
tag queuing support for each drive channel. This function<br />
should normally remain enabled. Disable this function only<br />
when using older SCSI drives that do not support command tag<br />
queuing.<br />
4.7.3.1.12 IDE Xfer Mode (MR5CT1)<br />
The MR5CT1 RAID subsystem supports ATA133, ATA100,<br />
ATA66, and ATA33 Mode.<br />
4.7.3.1.13 Max Sync Rate (MR5S1)<br />
The RAID subsystem supports 320MB/sec for MR5S1 as the<br />
highest data transfer rate.<br />
4.7.3.2 Delete Volume Set<br />
Press UP/DOWN to choose the Delete Existed Volume Set option.<br />
Using UP/DOWN to select the RAID set number that user<br />
want to delete and press Enter. Scrolling the UP/DOWN to<br />
select the volume set number that user want to delete and press<br />
Enter. The Confirmation screen appears, and then press Enter<br />
to accept the delete volume set function. The double confirmation<br />
screen appears, then press Yes to make sure of the delete<br />
volume set function.<br />
65
LCD CONFIGURATION MENU<br />
Figure 4.7.3.2-1<br />
MR5CT1<br />
Figure 4.7.3.2-2<br />
MR5S1<br />
66
LCD CONFIGURATION MENU<br />
4.7.3.3 Modify Volume Set<br />
Use this option to modify volume set configuration. To modify<br />
volume set attributes from RAID set system function, press<br />
UP/DOWN to choose the Modify Volume Set Attribute option.<br />
Using UP/DOWN to select the RAID set number that user want<br />
to modify and press Enter. Scrolling the UP/DOWN to select<br />
the volume set number that user want to modify and press<br />
Enter. Press Enter to select the existed volume set attribute.<br />
The volume set attributes screen shows the volume set setting<br />
configuration attributes that was currently being configured.<br />
The attributes are RAID Level, Stripe Size, Cache Mode, SCSI<br />
HOST/Fibre SCSI ID/SCSI LUN/Tagged Queuing, SCSI Max Rate,<br />
and Volume Name (number). All value can be modifying by the<br />
user. Press the UP/DOWN to select attribute. Press the Enter<br />
to modify the default value. Using the UP/DOWN to select attribute<br />
value and press the Enter to accept the selection value.<br />
Choose this option to display the properties of the selected Volume<br />
Set.<br />
4.7.3.3.1 Volume Set Migration<br />
Migrating occurs when a volume set is migrating from one RAID<br />
level to another, a volume set strip size changes, or when a<br />
disk is added to a RAID set. Migration status is displayed in the<br />
volume state area of the Display Volume Set Information when<br />
one RAID level to another, a Volume set strip size changes or<br />
when a disk is added to a RAID set.<br />
4.7.3.4 Check Volume Set Consistency<br />
Use this option to check volume set consistency. To check volume<br />
set consistency from volume set system function, press<br />
UP/DOWN to choose the Check Volume Set Consistency option.<br />
Using UP/DOWN to select the RAID set number that user want<br />
to check and press Enter. Scrolling the UP/DOWN to select the<br />
volume set number that user want to check and press Enter.<br />
The Confirmation screen appears, press Enter to start the check<br />
volume set consistency.<br />
67
LCD CONFIGURATION MENU<br />
4.7.3.5 Stop Volume Set Consistency Check<br />
Use this option to stop volume set consistency check. To stop<br />
volume set consistency check from volume set system function,<br />
press UP/DOWN to choose the Stop Volume Set Consistency<br />
Check option and then press Enter to stop the check volume set<br />
consistency.<br />
4.7.3.6 Display Volume Set Information<br />
This option is display volume set information. To display volume<br />
set information from Volume set system function, press UP/<br />
DOWN to choose the Display Volume Set Information option.<br />
Using UP/DOWN to select the RAID set number that user wants<br />
to show and press Enter. Scrolling the UP/DOWN to select<br />
the volume set number that user want to display and press<br />
Enter. The volume set attributes screen shows the volume set<br />
setting configuration value that was currently being configured.<br />
The attributes are RAID Level, Stripe Size, Cache Mode, SCSI<br />
HOST, SCSI ID, SCSI LUN, Tagged Queuing, SCSI Max Rate, and<br />
Volume Name (number). All value cannot be modifying by this<br />
option.<br />
4.7.4 Physical Drive<br />
Choose this option from the Main Menu to select a physical disk<br />
and to perform the operations listed below. To enter a Physical<br />
Drive Functions, press Enter to enter the main menu. Press<br />
UP/DOWN to select the Physical Drive Functions option and then<br />
press Enter to enter further submenus. All physical drive submenus<br />
will be displayed.<br />
68
LCD CONFIGURATION MENU<br />
Figure 4.7.4-1<br />
MR5CT1<br />
69
LCD CONFIGURATION MENU<br />
Figure 4.7.4-2<br />
MR5S1<br />
70
LCD CONFIGURATION MENU<br />
4.7.4.1 Display Drive Information<br />
Using UP/DOWN to choose the View Drive Information option<br />
and press Enter. Using UP/DOWN to select the drive IDE<br />
number that user want to display. The drive information will be<br />
displayed. The drive information screen shows the Model Name,<br />
Serial Number, Firmware Rev., Device Capacity, Device PIO<br />
Mode, Current UDMA, Supported UDMA, and Device State.<br />
4.7.4.2 Create Pass-Through<br />
Disk is no controlled by the RAID subsystem firmware and thus<br />
cannot be a part of a RAID set. The disk is available to the<br />
operating system as an individual disk. It is typically used on a<br />
system where the operating system is on a disk not controlled<br />
by the RAID subsystem firmware.<br />
Using UP/DOWN to choose the Create Pass-Through Disk option<br />
and press Enter. Using UP/DOWN to select the drive IDE<br />
number that user want to create. The drive attributes will be<br />
displayed.<br />
For MR5CT1<br />
1. The attributes for MR5CT1 show the Cache<br />
Model, IDE Host Channel, IDE Drive Select, Tagged Queu<br />
ing, and IDE Xfer Mode.<br />
For MR5S1<br />
1. The attributes for MR5S1 show the Cache Mode,<br />
SCSI Host, SCSI ID, SCSI LUN, Tagged Queuing, and SCSI<br />
Sync Rate.<br />
All values can be changing by the user. Press the UP/DOWN<br />
to attribue and then press the Enter to modify the efault value.<br />
Using the UP/DOWN to select attribute value and press the Enter<br />
to accept the selection value.<br />
4.7.4.3 Modify Pass-Through<br />
Use this option to modify the Pass-Through Disk attributes. To<br />
modify Pass-Through Disk attributes from Pass-Through Disk<br />
pool, press UP/DOWN to choose the Modify Pass-Through<br />
71
LCD CONFIGURATION MENU<br />
Drive option, and then press Enter key. The Select Drive Function<br />
menu will show all Pass-Through Drive number items. Using<br />
UP/DOWN to select the Pass-Through Disk that user wants to<br />
modify and press Enter. The attributes screen shows the Pass-<br />
Through Disk setting value that was currently being configured.<br />
For MR5CT1<br />
1. The attributes for MR5CT1 are the Cache Model,<br />
IDE Host Channel, IDE Drive Select, Tagged Queuing, and<br />
IDE Xfer Mode.<br />
For MR5CT1<br />
1. The attributes for MR5S1 are the Cache Mode,<br />
SCSI Host, SCSI ID, SCSI LUN, Tagged Queuing, and SCSI<br />
Max Rate.<br />
All value can be modifying by the user. Press the UP/DOWN<br />
arrow keys to select attribute. Press the Enter to modify the default<br />
value. Using the UP/ DOWN key to select attribute value<br />
and press the Enter to accept the selection value. After completing<br />
the modification, press ESC to enter the confirmation<br />
screen and then press Enter to accept the Modify Pass-Through<br />
Disk function.<br />
4.7.4.4 Delete Pass-Through<br />
To delete pass-through drive from the pass-through drive pool,<br />
press UP/DOWN to choose the Delete Pass-Through Drive option,<br />
and then press Enter. The Select Drive Function menu will<br />
show all Pass-Through Drive number items. Using UP/DOWN to<br />
select the Pass-Through Disk that user want to delete and press<br />
Enter. The Delete Pass-Through confirmation screen will appear,<br />
presses Enter to delete it.<br />
4.7.4.5 Identify Selected Drive<br />
To prevent removing the wrong drive, the selected disk HDD<br />
LED Indicator will light for physically locating the selected disk<br />
when the Identify Selected Drive function is selected..<br />
To identify selected drive from the physical drive pool, press<br />
UP/DOWN to choose the Identify Selected Drive option, then<br />
72
LCD CONFIGURATION MENU<br />
press Enter key. The Select Drive function menu will show all<br />
physical drive number items. Using UP/DOWN to select the<br />
Disk that user want to identify and press Enter. The selected<br />
disk HDD LED indicator will flash.<br />
4.7.5 RAID System Function<br />
To enter a RAID System Function, press Enter to enter the Main<br />
menu. Press UP/DOWN to select the RAID System Function option<br />
and then press Enter to enter further submenus. All RAID<br />
system submenus will be displayed. Using UP/DOWN to select<br />
the submenus option and then press Enter to enter the selection<br />
function.<br />
4.7.5.1 Mute The Alert Beeper<br />
The Mute The Alert Beeper function item is used to control the<br />
RAID subsystem Beeper. Select the “No” and press Enter key in<br />
73
LCD CONFIGURATION MENU<br />
the dialog box to turn the beeper off temporarily. The beeper will<br />
still activate on the next event.<br />
4.7.5.2 Alert Beeper Setting<br />
The Alert Beeper function item is used to Disabled or Enable the<br />
RAID subsystem controller alarm tone generator. Using the UP/<br />
DOWN to select alert beeper and then press the ENT to accept<br />
the selection. After completing the selection, the confirmation<br />
screen will be displayed and then press ENT to accept the function.<br />
Select the Disabled and press Enter key in the dialog box<br />
to turn the beeper off temporarily. The beeper will still activate<br />
on the next event.<br />
4.7.5.3 Change Password<br />
To set or change the RAID subsystem password, press the UP/<br />
DOWN to select Change Password and then press the Enter to<br />
accept the selection. The New Password: screen appears and<br />
enter new password that user want to change. Using the UP/<br />
DOWN to set the password value. After completing the modification,<br />
the confirmation screen will be displayed and then press<br />
Enter to accept the function. To disable the password, presses<br />
Enter only in the New Password: column. The existing password<br />
will be cleared. No password checking will occur when entering<br />
the main menu from the starting screen.<br />
4.7.5.4 JBOD/RAID Configuration<br />
For MR5CT1<br />
JBOD is an acronym for “Just a Bunch Of Disk”. It represents a<br />
volume set that is created by the concatenation of partitions on<br />
the disks. For the MR5CT1, it can only see the first two disks,<br />
when you select the JBOD option. User needs to delete the<br />
RAID set, when you want to change the option from the RAID to<br />
the JBOD function.<br />
For MR5S1<br />
JBOD is an acronym for “Just a Bunch Of Disk”. It represents a<br />
volume set that is created by the concatenation of partitions on<br />
the disks. For the MR5S1, it can see the five individual disks,<br />
74
LCD CONFIGURATION MENU<br />
when you select the JBOD option. User needs to delete the<br />
RAID set, when you want to change the option from the RAID to<br />
the JBOD function.<br />
4.7.5.5 RAID Rebuild Priority<br />
The “RAID Rebuild Priority” is a relative indication of how much<br />
time the controller devotes to a rebuild operation. The RAID<br />
subsystem allows user to choose the rebuild priority (low, normal,<br />
high) to balance volume set access and rebuild tasks appropriately.<br />
To set or change the RAID subsystem RAID Rebuild Priority,<br />
press the UP/DOWN to select RAID Rebuild Priority and press<br />
the Enter to accept the selection. The rebuild priority selection<br />
screen appears and uses the UP/DOWN to set the rebuild value.<br />
After completing the modification, the confirmation screen<br />
will be displayed and then press Enter to accept the function.<br />
4.7.5.6 Maximum SATA Mode<br />
Within the subsystem, the SCSI chip acts as a target and 5 SATA<br />
ll bus are connected to the drive. The 5 SATA drive channel can<br />
support up to SATA ll, which runs up to 300MB/s. NCQ is a command<br />
protocol in Serial ATA that can only be implemented on<br />
native Serial ATA hard drives. It allows multiple commands to be<br />
outstanding within a drive at the same time. Drives that support<br />
NCQ have an internal queue where outstanding commands<br />
can be dynamically rescheduled or re-ordered, along with the<br />
necessary tracking mechanisms for outstanding and completed<br />
portions of the workload. The RAID subsystem allows user<br />
to choose the SATA Mode: SATA150, SAT150+NCQ, SAT300,<br />
SATA300+NCQ.<br />
4.7.5.7 Disk Capacity Truncation Mode<br />
MobileRAID RAID controllers use drive truncation so that drives<br />
from differing vendors are more likely to be able to be used as<br />
spares for each other. Drive truncation slightly decreases the usable<br />
capacity of a drive that is used in redundant units.<br />
The controller provides three truncation modes in the system<br />
configuration: Multiples Of 10G, Multiples Of 1G, and No<br />
75
LCD CONFIGURATION MENU<br />
Truncation.<br />
Multiples Of 10G: If you have 120 GB drives from different<br />
vendors; chances are that the capacity varies slightly. For<br />
example, one drive might be 123.5 GB, and the other 120 GB.<br />
<strong>Sans</strong> <strong>Digital</strong> drive Truncation mode Multiples Of 10G uses the<br />
same capacity for both of these drives so that one could replace<br />
the other.<br />
Multiples Of 1G: If you have 123 GB drives from different vendors;<br />
chances are that the capacity varies slightly. For example,<br />
one drive might be 123.5 GB, and the other 123.4 GB. <strong>Sans</strong><br />
<strong>Digital</strong> drive Truncation mode Multiples Of 1G uses the same<br />
capacity for both of these drives so that one could replace the<br />
other.<br />
No Truncation: It does not truncate the capacity.<br />
4.7.5.8 Terminal Port Configuration<br />
Parity value is fixed at None.<br />
Handshaking value is fixed at None.<br />
Speed setting values are 1200, 2400, 4800, 9600,<br />
19200,38400, 57600, and 115200.<br />
Stop Bits values are 1 bit and 2 bits.<br />
To set or change the RAID subsystem COMA configuration, press<br />
the UP/DOWN to select COMA Configuration and then press the<br />
ENT to accept the selection. The baud rate setting or number of<br />
stop bit screen appears and uses the UP/DOWN select the setting<br />
function. The respect selection screen appears and uses the<br />
UP/DOWN arrow to set the value. After completing the modification,<br />
the confirmation screen will be displayed and then press<br />
Enter to accept the function.<br />
4.7.5.9 Restart Controller<br />
Use the Restart Controller function to restart the RAID subsystem<br />
controller. To restart the RAID subsystem, press the UP/<br />
DOWN to select Restart Controller and then press the Enter to<br />
accept the selection. The confirmation screen will be displayed<br />
and then press Enter to accept the function.<br />
76
LCD CONFIGURATION MENU<br />
Note:<br />
It only can work properly at Host and Drive without any activity.<br />
4.7.6 U320 SCSI Target Configuration<br />
(MR5S1)<br />
Use this feature to Enable/Disable the Ch0 QAS, press Enter to<br />
enter the Main menu. Press UP/DOWN key to select the Show<br />
U320 SCSI Target option, and then press Enter.<br />
4.7.7 Ethernet Configuration<br />
To configuration Ethenet function, press Enter to enter the Main<br />
menu. Press UP/DOWN key to select the option.<br />
4.7.8 Show System Events<br />
To view the RAID subsystem events, press Enter to enter the<br />
Main menu. Press UP/DOWN key to select the Show System<br />
Events option, and then press Enter. The system events will be<br />
displayed. Press UP/DOWN to browse all the system events.<br />
4.7.9 Clear all Event Buffers<br />
Use this feature to clear the entire events buffer information.<br />
To clear all event buffers, press Enter to enter the main menu.<br />
Press UP/DOWN to select the Clear all Event Buffers option, and<br />
then press Enter. The confirmation message will be displayed and<br />
press the Enter to clear all event buffers or ESC to abort the action.<br />
4.7.10 Hardware Information<br />
To view the RAID subsystem controller’s hardware monitor information,<br />
press Enter to enter the main menu. Press UP/DOWN<br />
to select the Hardware Information option, and then press Enter.<br />
All hardware information will be displayed. Press UP/DOWN to<br />
77
LCD CONFIGURATION MENU<br />
browse all the hardware information.<br />
The Hardware Monitor Information provides the temperature,<br />
fan speed (chassis fan) and voltage of the internal RAID subsystem.<br />
The temperature items list the current states of the controller<br />
board and backplane. All items are also unchangeable. The<br />
warning messages will indicate through the LCM, LED and alarm<br />
Item<br />
Warning Condition<br />
Controller Board Temperature<br />
> 60 O<br />
Backplane Temperature<br />
> 55 O<br />
Controller Fan Speed<br />
< 1900 RPM<br />
Power Supply +12V < 10.5V or > 13.5V<br />
Power Supply +5V < 4.7V or > 5.3V<br />
Power Supply +3.3V < 3.0V or > 3.6V<br />
CPU Core Voltage +1.5V < 1.35V or > 1.65V<br />
buzzer.<br />
4.7.11 System Information<br />
Choose this option to display Main processor, CPU Instruction<br />
cache and data cache size, firmware version, serial number,<br />
controller model name, and the cache memory size. To check the<br />
system information, press Enter to enter the main menu. Press<br />
UP/DOWN to select the Show System Information option, and<br />
then press Enter. All major controller system information will be<br />
displayed. Press UP/DOWN to browse all the system informa-<br />
78
VT-100 UTILITY CONFIGURATION<br />
5. VT-100 Utility Configuration<br />
The RAID subsystem configuration utility is firmware-based and uses<br />
to configure RAID sets and volume sets. Because the utility resides in<br />
the RAID controller firmware, its operation is independent of the operating<br />
systems on your computer. Use this utility to:<br />
• Create RAID set,<br />
• Expand RAID set,<br />
• Define volume set,<br />
• Add physical drive,<br />
• Modify volume set,<br />
• Modify RAID level/stripe size,<br />
• Define pass-through disk drives,<br />
• Update firmware,<br />
• Modify system function and,<br />
• Designate drives as hot spares.<br />
Keyboard Navigation<br />
The following definition is the VT-100 RAID configuration utility keyboard<br />
navigation.<br />
Key<br />
Arrow Key<br />
Enter Key<br />
ESC Key<br />
L Key<br />
X Key<br />
Function<br />
Move Cursor<br />
Submit selection function<br />
Return to previous screen<br />
Line Draw<br />
Redraw<br />
5.1 Configuring RAID Sets and Volume Sets<br />
You can configure RAID sets and volume sets with VT-100 terminal<br />
function using Quick Volume/RAID Setup, or RAID Set/Volume Set<br />
Function configuration method. Each configuration method requires<br />
a different level of user input. The general flow of operations for<br />
RAID set and volume set configuration is:<br />
79
VT-100 UTILITY CONFIGURATION<br />
Step<br />
Action<br />
1 Designate hot spares/pass-through (optional).<br />
2 Choose a configuration method.<br />
3 Create RAID sets using the available physical drives.<br />
4 Define volume sets using the space in the RAID set.<br />
5 Initialize the volume sets (logical drives) and use volume sets in the host<br />
OS.<br />
5.2 Designating Drives as Hot Spares<br />
All unused disk drive that is not part of a RAID set can be created<br />
as a Hot Spare. The Quick Volume/RAID Setup configuration will<br />
automatically add the spare disk drive with the RAID level for user<br />
to select. For the RAID Set Function configuration, user can use the<br />
Create Hot Spare option to define the hot spare disk drive.<br />
A Hot Spare disk drive can be created when you choose the Create<br />
Hot Spare option in the RAID Set Function, all unused physical<br />
devices connected to the current controller appear:<br />
Select the target disk by clicking on the appropriate check box.<br />
Press the Enter key to select a disk drive, and press Yes in the<br />
Create Hot Spare to designate it as a hot spare.<br />
5.3 Using Quick Volume /RAID Setup Configuration<br />
In Quick Volume /RAID Setup Configuration, it collects all drives in<br />
the tray and include them in a RAID set. The RAID set you create<br />
is associated with exactly one volume set, and you can modify<br />
the default RAID level, stripe size, and capacity of the volume set.<br />
Designating Drives as Hot Spares will also show in the RAID level<br />
selection option. The volume set default settings will be:<br />
Parameter<br />
Volume Name Volume Set # 00<br />
SCSI Channel/SCSI ID/SCSI LUN<br />
IDE Host Channel/IDE Drive Select<br />
Cache Mode<br />
Tag Queuing<br />
0/0/0 (For MR5S1)<br />
Setting<br />
0/0-Master (For MR5CT1)<br />
Write Back<br />
Yes<br />
80
VT-100 UTILITY CONFIGURATION<br />
Max Sync Rate<br />
IDE Xfer Mode<br />
Depend on your hous adapter setting (For<br />
MR5S1)<br />
Depend on your host adapter setting (For<br />
MobileRAID-5S-WBS1)<br />
The default setting values can be changed after configuration is complete.<br />
Follow the steps below to create arrays using Quick Volume<br />
/RAID Setup Configuration:<br />
Step<br />
Action<br />
1 Choose Quick Volume /RAID Setup from the main menu. The available<br />
RAID levels with hot spare for the current volume set drive are displayed.<br />
2 Recommend use drives have same capacity in a specific array. If you use<br />
drives with different capacities in an array, all drives in the RAID set will<br />
select the lowest capacity of the drive in the RAID set.<br />
The numbers of physical drives in a specific array determine the RAID<br />
levels that can be implemented with the array.<br />
RAID 0 requires 1 or more physical drives.<br />
RAID 1 requires at least 2 physical drives.<br />
RAID 1+Spare requires at least 3 physical drives.<br />
RAID 3 requires at least 3 physical drives.<br />
RAID 5 requires at least 3 physical drives.<br />
RAID 6 requires at least 4 physical drives.<br />
RAID 3 +Spare requires at least 4 physical drives.<br />
RAID 5 + Spare requires at least 4 physical drives.<br />
RAID 6 + Spare requires at least 5 physical drives.<br />
Highlight RAID level for the volume set and press Enter key to confirm.<br />
3 Set the capacity size for the current volume set. After Highlight RAID level<br />
and press Enter key.<br />
The selected capacity for the current volume set is displayed. Using the<br />
UP and DOWN arrow key to create the current volume set capacity size<br />
and press Enter key to confirm. The available stripe sizes for the current<br />
volume set are displayed.<br />
4 Using UP and DOWN arrow key to select the current volume set stripe<br />
size and press Enter key to confirm it. This parameter specifies the size<br />
of the stripes written to each disk in a RAID 0, 1, 5 or 6 Volume Set. You<br />
can set the stripe size to 4 KB, 8 KB, 16 KB, 32 KB, 64 KB, or 128 KB.<br />
A larger stripe size provides better-read performance, especially if your<br />
computer does mostly sequential reads. However, if you are sure that<br />
your computer does random read requests more often, choose a small<br />
stripe size.<br />
5 When you are finished defining the volume set, press Enter key to confirm<br />
the Quick Volume And RAID Set Setup function.<br />
81
VT-100 UTILITY CONFIGURATION<br />
6 Press Enter key to define fast initialization or Selected the Background<br />
(Instant Available). When background Initialization, the initialization proceeds<br />
as a background task, the volume set is fully accessible for system<br />
reads and writes. The operating system can instantly access to the newly<br />
created arrays without requiring a reboot and waiting the initialization<br />
complete. When Fast Initialization, the initialization proceeds must be<br />
completed before the volume set ready for system accesses.<br />
7 Initialize the volume set you have just configured.<br />
8 If you need to add additional volume set, using main menu Create Volume<br />
Set function<br />
5.4 Using RAID Set/Volume Set Function<br />
Method<br />
In RAID Set Function, you can use the Create RAID Set function to<br />
generate the new RAID set. In Volume Set Function, you can use<br />
the Create Volume Set function to generate its associated volume<br />
set and parameters.<br />
If the current controller has unused physical devices connected,<br />
you can choose the Create Hot Spare option in the RAID Set Function<br />
to define a global hot spare. Select this method to configure<br />
new RAID sets and volume sets. The RAID Set/Volume Set Function<br />
configuration option allows you to associate volume set with<br />
partial and full RAID set.<br />
Note:<br />
User can use this method to examine the existing configuration.<br />
Modify volume set configuration method provides the same functions<br />
as create volume set configuration method. In volume set<br />
function, you can use the modify volume set function to modify<br />
the volume set parameters except the capacity size:<br />
82
VT-100 UTILITY CONFIGURATION<br />
Step<br />
Action<br />
1 To setup the Hot Spare (option), choose RAID Set Function from the main<br />
menu. Select the Create Hot Spare and press Enter key to set the Hot<br />
Spare.<br />
2 Choose RAID Set Function from the main menu. Select the Create RAID Set<br />
and press Enter key.<br />
3 Select a Drive For RAID Set window is displayed showing the IDE drive connected<br />
to the current controller.<br />
4 Press UP and DOWN arrow keys to select specific physical drives. Press the<br />
Enter key to associate the selected physical drive with the current RAID set.<br />
Recommend use drives has same capacity in a specific RAID set. If you use<br />
drives with different capacities in an array, all drives in the RAID set will select<br />
the lowest capacity of the drive in the RAID set.<br />
The numbers of physical drives in a specific RAID set determine the RAID<br />
levels that can be implemented with the RAID set.<br />
RAID 0 requires 1 or more physical drives.<br />
RAID 1 requires at least 2 physical drives.<br />
RAID 1+Spare requires at least 3 physical drives.<br />
RAID 3 requires at least 3 physical drives.<br />
RAID 5 requires at least 3 physical drives.<br />
RAID 6 requires at least 4 physical drives.<br />
RAID 3 +Spare requires at least 4 physical drives.<br />
RAID 5 + Spare requires at least 4 physical drives<br />
RAID 6 + Spare requires at least 5 physical drives.<br />
5 After adding physical drives to the current RAID set as desired, press Yes to<br />
confirm the Create RAID Set function.<br />
6 An Edit The RAID Set Name dialog box appears. Enter 1 to 15 alphanumeric<br />
characters to define a unique identifier for a RAID set. The default RAID set<br />
name will always appear as RAID Set. #. Press Enter to finish the name editing.<br />
7 Press Enter key when you are finished creating the current RAID set. To continue<br />
defining another RAID set, repeat step 3. To begin volume set configuration,<br />
go to step 8.<br />
8 Choose Volume Set Function from the Main menu. Select the Create Volume<br />
Set and press Enter key.<br />
9 Choose one RAID set from the Create Volume From RAID Set window. Press<br />
Enter key to confirm it.<br />
10 Foreground (Fast Completion) Press Enter key to define fast initialization or<br />
Selected the Background (Instant Available). In the background Initialization,<br />
the initialization proceeds as a background task, the volume set is fully<br />
accessible for system reads and writes. The operating system can instantly<br />
access to the newly created arrays without requiring a reboot and waiting the<br />
initialization complete. In Fast Initialization, the initialization proceeds must<br />
be completed before the volume set ready for system accesses.<br />
11 If space remains in the RAID set, the next volume set can be configured. Repeat<br />
steps 8 to 10 to configure another volume set.<br />
83
VT-100 UTILITY CONFIGURATION<br />
5.5 Main Menu<br />
The main menu shows all function that enables the customer to<br />
execute actions by clicking on the appropriate link.<br />
Main Menu<br />
Main Menu<br />
Quick Volume/RAID Setup<br />
RAID Set Function<br />
Volume Set Function<br />
Physical Drives<br />
RAID System Function<br />
Ethernet Configuration<br />
View System Events<br />
Clear Event Buffer<br />
Hardware Monitor<br />
System information<br />
Verify Password<br />
Quick Volume/RAID Setup<br />
RAID Set Function<br />
Volume Set Function<br />
Physical Drives<br />
RAID System Function<br />
U320 SCSI Target config<br />
Ethernet Configuration<br />
View System Events<br />
Clear Event Buffer<br />
Hardware Monitor<br />
System information<br />
Verify Password<br />
Arrow Key: Move Cursor, Enter: Select, ESC: Escape, L:Line Draw, X: Redraw<br />
MR5CT1<br />
Arrow Key: Move Cursor, Enter: Select, ESC: Escape, L:Line Draw, X: Redraw<br />
MR5S1<br />
Note:<br />
The manufacture default password is set at 0000, this password<br />
can be by selected the Change Password in the section<br />
of RAID System Function.<br />
Option<br />
Quick Volume/RAID Setup<br />
RAID Set Function<br />
Volume Set Function<br />
Physical Drives<br />
RAID System Function<br />
View System Events<br />
Clear Event Buffer<br />
Hardware Monitor<br />
System Information<br />
Description<br />
Create a default configuration which based on<br />
numbers of physical disk installed<br />
Create a customized RAID set<br />
Create a customized volume set<br />
View individual disk information<br />
Setting the RAID system configuration<br />
Record all system events in the buffer<br />
Clear all event buffer information<br />
Show all system environment status<br />
View the controller information<br />
84
VT-100 UTILITY CONFIGURATION<br />
This password option allows user to set or clear the RAID controller’s<br />
password protection feature. Once the password has been<br />
set, the user can only monitor and configure the RAID controller<br />
by providing the correct password. The password is used to protect<br />
the internal RAID controller from unauthorized entry. The controller<br />
will check the password only when entering the Main menu from<br />
the initial screen. The RAID controller will automatically go back to<br />
5.5.1 Quick Volume/RAID Setup<br />
Quick Volume/RAID Setup is the fastest way to prepare a RAID<br />
set and volume set. It only needs a few keystrokes to complete<br />
it. Although disk drives of different capacity may be used in the<br />
RAID set, it will use the smallest capacity of disk drive as the capacity<br />
of all disk drives in the RAID set. The Quick Volume/RAID<br />
Setup option creates a RAID set with the following properties:<br />
1. All of the physical drives are contained in a RAID set.<br />
2. The RAID levels associated with hot spare, capacity, and<br />
stripe size are selected during the configuration process.<br />
3. A single volume set is created and consumed all or a portion<br />
of the disk capacity available in this RAID set.<br />
4. If you need to add additional volume set, using main menu<br />
Create Volume set function.<br />
The total physical drives in a specific RAID set determine the<br />
RAID levels that can be implemented with the RAID set. Press the<br />
Quick Volume/RAID Setup from the main menu; all possible<br />
RAID levels screen will be displayed.<br />
85
VT-100 UTILITY CONFIGURATION<br />
Main Menu<br />
Quick Volume/RAID Setup<br />
RAID Set Function<br />
Volume Set Function<br />
Total 4 Drives<br />
Physical Drives RAID 0<br />
RAID System Function RAID 10<br />
Ethernet Configuration RAID 10 + Spare<br />
View System Events RAID 3<br />
Clear Event Buffer<br />
RAID 5<br />
Hardware MonitorRAID 6<br />
System information RAID 3 + Spare<br />
RAID 5 + Spare<br />
RAID 6 + Spare<br />
Arrow Key: Move cursor, Enter: Select, ESC: Escape, L:Line Draw, X: Redraw<br />
A single volume set is created and consumed all or a portion of<br />
the disk capacity available in this RAID set. Define the capacity<br />
of volume set in the Available Capacity popup. The default value<br />
for the volume set is displayed in the selected capacity. To enter<br />
a value less than the available capacity, type the value and press<br />
the Enter key to accept this value. If it only use part of the RAID<br />
set capacity, you can use the Create Volume Set option to define<br />
another volume sets.<br />
Main Menu<br />
Available Capacity : 160.1GB<br />
Quick Volume/RAID Setup Selected Capacity : 160.1GB<br />
RAID Set Function<br />
Volume Set Function<br />
Total 4 Drives<br />
Physical Drives RAID 0<br />
RAID System Function RAID 10<br />
Ethernet Configuration RAID 10 + Spare<br />
View System Events RAID 3<br />
Clear Event Buffer<br />
RAID 5<br />
Hardware Monitor RAID 6<br />
System informationRAID 3 + Spare<br />
RAID 5 + Spare<br />
RAID 6 + Spare<br />
Arrow Key: Move cursor, Enter: Select, ESC: Escape, L:Line Draw, X: Redraw<br />
Stripe size This parameter sets the size of the stripe written<br />
to each disk in a RAID 0, 1, 5 or 6 logical drive. You can set the<br />
stripe size to 4 KB, 8 KB, 16 KB, 32 KB, 64 KB, or 128 KB.<br />
A larger stripe size produces better-read performance, especially<br />
86
VT-100 UTILITY CONFIGURATION<br />
if your computer does mostly sequential reads. However, if you<br />
are sure that your computer does random reads more often, select<br />
a small stripe size.<br />
Main Menu<br />
Available Capacity : 160.1GB<br />
Quick Volume/RAID Setup<br />
RAID Set Function<br />
Volume Set Function<br />
Total 4 Drives<br />
Physical Drives RAID 0<br />
RAID System Function RAID 10<br />
Ethernet Configuration RAID 10 + Spare<br />
View System Events RAID 3<br />
Clear Event Buffer<br />
RAID 5<br />
Hardware MonitorRAID 6<br />
System information RAID 3 + Spare<br />
RAID 5 + Spare<br />
RAID 6 + Spare<br />
Selected Capacity : 160.1GB<br />
Select Strip Size<br />
4K<br />
8K<br />
16K<br />
32K<br />
64K<br />
128K<br />
Arrow Key: Move cursor, Enter: Select, ESC: Escape, L:Line Draw, X: Redraw<br />
Press the Yes key in the Create Vol/RAID Set dialog box, the Initialization<br />
dialog box will appear. Select the mode for intialize, the<br />
RAID set and volume set will start to initialize it.<br />
Main Menu<br />
Available Capacity : 160.1GB<br />
Quick Volume/RAID Setup Selected Capacity : 160.1GB<br />
RAID Set Function<br />
Volume Set Function<br />
Total 4 Drives<br />
Physical Drives RAID 0<br />
RAID System Function RAID<br />
Initialization<br />
0 + 1<br />
Mode Select Strip Size<br />
Ethernet Configuration<br />
Create Vol/RAID Set<br />
RAID 0 + 1 + Spare<br />
View System Events Foreground (Faster Completion) 4K<br />
RAID 3<br />
Clear Event Buffer<br />
Background (Instant Available) Yes 8K<br />
RAID 5<br />
No<br />
Hardware Monitor<br />
16K<br />
RAID 3 + Spare<br />
System information<br />
32K<br />
RAID 5 + Spare<br />
64K<br />
128K<br />
Arrow Key: Move cursor, Enter: Select, ESC: Escape, L:Line Draw, X: Redraw<br />
87
VT-100 UTILITY CONFIGURATION<br />
5.5.2 RAID Set Function<br />
User manual configuration can complete control of the RAID set<br />
setting, but it will take longer to complete than the Quick Volume/RAID<br />
Setup configuration. Select the RAID Set Function<br />
to manually configure the RAID set for the first time or deletes<br />
existing RAID set and reconfigures the RAID set.<br />
Main Menu<br />
Quick Volume/RAID Set Function Setup<br />
RAID Set Function<br />
Volume Create Set Function RAID Set<br />
Physical Delete Drives RAID Set<br />
RAID System Expand Function RAID Set<br />
Ethernet Activate Configuration RAID Set<br />
View System Create Events Hot Spare<br />
Clear Event Delete Buffer Hot Spare<br />
Hardware RAID Monitor Set Information<br />
System information<br />
Arrow Key: Move Cursor, Enter: Select, ESC: Escape, L:Line Draw, X: Redraw<br />
5.5.2.1 Create RAID Set<br />
To define RAID set, follow the procedure below:<br />
1. Select RAID Set Function from the main menu.<br />
2. Select Create RAID Set option from the RAID Set Function<br />
dialog box.<br />
3. A Select IDE Drive For RAID Set window is displayed showing<br />
the IDE drive connected to the current controller. Press the<br />
UP and DOWN arrow keys to select specific physical drives.<br />
Press the Enter key to associate the selected physical drive<br />
with the current RAID set. Repeat this step, as many disk<br />
drives as user want to add in a single RAID set.<br />
To finish selecting IDE drives For RAID Set, press Esc key. A<br />
Create RAID Set confirmation screen appears, Press Yes key to<br />
confirm it.<br />
88
VT-100 UTILITY CONFIGURATION<br />
Main Menu<br />
Quick Volume/RAID Set Function Setup<br />
RAID Set Function<br />
Volume Create Set Function RAID Set<br />
Physical Delete Drives RAID Set Select IDE Drives For RAID Set<br />
RAID System Expand Function RAID Set<br />
Ethernet Activate Configuration [*]Ch01| RAID 80.0GBST380013AS<br />
Set<br />
View System Create [ ]Ch02|<br />
Events Hot Spare 80.0GBST380013AS<br />
Clear Event Delete [<br />
Buffer<br />
]Ch03| Hot Spare 80.0GBST380013AS<br />
Hardware RAID Monitor<br />
[ ]Ch04| Set Information 80.0GBST380013AS<br />
System information<br />
Arrow Key: Move Cursor, Enter: Select, ESC: Escape, L:Line Draw, X: Redraw<br />
4. An Edit The RAID Set Name dialog box appears. Enter 1 to 15<br />
alphanumeric characters to define a unique identifier for a RAID<br />
set. The default RAID set name will always appear as RAID Set.<br />
Main Menu<br />
Quick Volume/RAID Set Function Setup<br />
RAID Set Function<br />
Volume Create Set Function RAID Set<br />
Physical Delete Drives RAID Set Select IDE Drives For RAID Set<br />
RAID System Expand Function RAID Set<br />
Ethernet Activate Configuration [*]Ch01| RAID 80.0GBST380013AS<br />
Set<br />
View System Create [ ]Ch02|<br />
Events Hot<br />
Edit<br />
Spare<br />
The 80.0GBST380013AS<br />
RAID Set Name<br />
Clear Event Delete [<br />
Buffer<br />
]Ch03| Hot R aid Spare Set 80.0GBST380013AS<br />
# 00<br />
Hardware RAID Monitor<br />
[ ]Ch04| Set Information 80.0GBST380013AS<br />
System information<br />
Arrow Key: Move Cursor, Enter: Select, ESC: Escape, L:Line Draw, X: Redraw<br />
5.5.2.2 Delete RAID Set<br />
To change a RAID set, you should first delete it and re-create<br />
the RAID set. To delete a RAID set, select the RAID set number<br />
that user want to delete in the Select RAID Set to Delete screen.<br />
The Delete RAID Set dialog box appears, then press Yes key to<br />
delete it.<br />
89
VT-100 UTILITY CONFIGURATION<br />
Main Menu<br />
Quick Volume/RAID Set Function Setup<br />
RAID Set Function<br />
Volume Create Set Function RAID Set<br />
Physical Delete Drives RAID Set<br />
Select RAID Set To Delete<br />
RAID System Expand Function RAID Set<br />
Ethernet Activate Configuration RAID Set RAID Set # 00<br />
View System Create Events Hot SpareRAID Set # 01<br />
Clear Event Delete Buffer Hot Spare<br />
Hardware RAID Monitor Set Information<br />
System information<br />
Are you Sure?<br />
Yes<br />
No<br />
Arrow Key: Move Cursor, Enter: Select, ESC: Escape, L:Line Draw, X: Redraw<br />
5.5.2.3 Expand RAID Set<br />
Instead of deleting a RAID set and recreating it with additional<br />
disk drives, the Expand RAID Set function allows the users to<br />
add disk drive to the RAID set that was created.<br />
Main Menu<br />
Quick Volume/RAID Set Function Setup<br />
RAID Set Function<br />
Volume Create Set Function RAID Set<br />
Physical Delete Drives RAID Set<br />
RAID System Expend Expand Function RAID Select Set<br />
IDE Drives For RAID Set Expansion<br />
Ethernet Activate Configuration [*]Ch03| RAID Set 80.0GBST380013AS Are you Sure?<br />
View System Create Events Hot [ ]Ch04| Spare 80.0GBST380013AS<br />
Clear Event Delete Buffer Hot Spare<br />
Yes<br />
Hardware RAID Monitor Set Information<br />
No<br />
System information<br />
Arrow Key: Move Cursor, Enter: Select, ESC: Escape, L:Line Draw, X: Redraw<br />
To expand a RAID set:<br />
Click on Expand RAID Set option. If there is an available disk,<br />
then the Select IDE Drives For RAID Set Expansion screen appears.<br />
Select the target RAID Set by clicking on the appropriate radial<br />
button. Select the target disk by clicking on the appropriate<br />
check box.<br />
Presses Yes key to start expand the RAID set.<br />
The new add capacity will be define one or more volume sets.<br />
Follow the instruction presented in the Volume Set Function to<br />
create the volume set’s.<br />
90
VT-100 UTILITY CONFIGURATION<br />
• Migrating<br />
Main Menu<br />
Quick Volume/RAID Set Function Setup<br />
RAID Set Function<br />
Volume Create Set Function RAID The Set RAID Set Information<br />
Physical Delete Drives RAID Set<br />
RAID System Expand Function RAID RAID Set Set Name : RAID Set #<br />
Ethernet Activate Configuration RAID 00 Set<br />
View System Create Events Hot Member Disks : 4<br />
Clear Event Delete Buffer Hot RAID SpareState<br />
: Migrating<br />
Hardware RAID Monitor Set Information<br />
Total Capacity : 160.1GB<br />
Free Capacity : 144.1GB<br />
System information<br />
Min Member Disk Size : 40.0GB<br />
Arrow Key: Move Cursor, Enter: Select, ESC: Escape, L:Line Draw, X: Redraw<br />
Migrating occurs when a disk is added to a RAID Set. Migration<br />
status is displayed in the RAID status area of the RAID Set<br />
information when a disk is added to a RAID set. Migrating status<br />
is also displayed in the associated volume status area of the Volume<br />
Set Information when a disk is added to a RAID set.<br />
5.5.2.4 Activate Incomplete RAID Set<br />
The following screen is the RAID Set Information after one of its<br />
disk drive has removed in the power off state.<br />
Main Menu<br />
Quick Volume/RAID Set Function Setup<br />
RAID Set Function<br />
Volume Create Set Function RAID The Set RAID Set Information<br />
Physical Delete Drives RAID Set<br />
RAID System Expand Function RAID RAID Set Set Name : RAID Set #<br />
Ethernet Activate Configuration RAID 00 Set<br />
View System Create Events Hot Member Disks : 4<br />
Clear Event Delete Buffer Hot RAID SpareState<br />
: Incomplete<br />
Hardware RAID Monitor Set Information<br />
Total Capacity : 160.1GB<br />
Free Capacity : 160.1GB<br />
System information<br />
Min Member Disk Size : 40.0GB<br />
Arrow Key: Move Cursor, Enter: Select, ESC: Escape, L:Line Draw, X: Redraw<br />
When one of the disk drive is removed in power off state, the<br />
RAID set state will change to Incomplete State. If user wants to<br />
continue to work, when the SATA RAID controller is power on.<br />
User can use the Activate RAID Set option to active the RAID<br />
91
VT-100 UTILITY CONFIGURATION<br />
set. After user complete the function, the RAID State will change<br />
to Degraded Mode.<br />
5.5.2.5 Create Hot Spare<br />
Main Menu<br />
Quick Volume/RAID Set Function Setup<br />
RAID Set Function<br />
Volume Create Set Function RAID Set<br />
Physical Delete Drives RAID Set<br />
RAID System Expand Select<br />
Function RAID Drives Set For HotSpare, Max 3 HotSpare Supported<br />
Ethernet Activate Configuration RAID Set<br />
[*]Ch03| 80.0GBST380013AS Are you Sure?<br />
View System Create [ Events Hot ]Ch08| Spare<br />
80.0GBST380013AS<br />
Clear Event Delete Buffer Hot Spare<br />
Yes<br />
Hardware RAID Monitor Set Information<br />
No<br />
System information<br />
Arrow Key: Move Cursor, Enter: Select, ESC: Escape, L:Line Draw, X: Redraw<br />
When you choose the Create Hot Spare option in the RAID Set<br />
Function, all unused physical devices connected to the current<br />
controller appear:<br />
Select the target disk by clicking on the appropriate check box.<br />
Press the Enter key to select a disk drive and press Yes in the<br />
Create Hot Spare to designate it as a hot spare.<br />
The create Hot Spare option gives you the ability to define a<br />
global hot spare.<br />
5.5.2.6 Delete Hot Spare<br />
Select the target Hot Spare disk to delete by clicking on the appropriate<br />
check box.<br />
Press the Enter keys to select a disk drive, and press Yes in the<br />
Delete Hot Spare to delete the hot spare.<br />
92
VT-100 UTILITY CONFIGURATION<br />
Main Menu<br />
Quick Volume/RAID Set Function Setup<br />
RAID Set Function<br />
Volume Create Set Function RAID Set<br />
Physical Delete Drives RAID Set<br />
RAID System Expand Function RAID Set<br />
Ethernet Activate Configuration RAID Select Set Drives HotSpare Drive To Be Deleted<br />
View System Create Events Hot Spare<br />
Clear Event [*]Ch03|<br />
Delete Buffer Hot Spare<br />
80.0GBST380013AS Are you Sure?<br />
[ ]Ch05| 80.0GBST380013AS<br />
Hardware RAID Monitor Set Information<br />
Yes<br />
System information<br />
No<br />
Arrow Key: Move Cursor, Enter: Select, ESC: Escape, L:Line Draw, X: Redraw<br />
5.5.2.7 RAID Set Information<br />
To display RAID Set information, move the cursor bar to the<br />
desired RAID Set number, then press Enter key. The RAID Set<br />
Information will show as above.<br />
You can only view the information of this RAID Set.<br />
Main Menu<br />
Quick Volume/RAID Set Function Setup<br />
RAID Set Function<br />
Volume Create Set Function RAID The Set RAID Set Information<br />
Physical Delete Drives RAID Set<br />
RAID System Expand Function RAID RAID Set Set Name : RAID Set #<br />
Ethernet Activate Configuration RAID 00 Set<br />
View System Create Events Hot Member Disks : 4<br />
Clear Event Delete Buffer Hot RAID SpareState<br />
: Normal<br />
Hardware RAID Monitor Set Information<br />
Total Capacity : 160.1GB<br />
Free Capacity : 160.1GB<br />
System information<br />
Min Member Disk Size : 40.0GB<br />
Arrow Key: Move Cursor, Enter: Select, ESC: Escape, L:Line Draw, X: Redraw<br />
93
VT-100 UTILITY CONFIGURATION<br />
5.5.3 Volume Set Function<br />
Main Menu<br />
Quick Volume/RAID Setup<br />
Volume Set Function<br />
RAID Set Function<br />
Volume Create Set Function Volume Set<br />
Physical Delete DrivesVolume Set<br />
RAID System Modify Function Volume Set<br />
Ethernet Check Configuration Volume Set<br />
View System StopVolume EventsCheck<br />
Clear Event Display Buffer Volume Info.<br />
Hardware Monitor<br />
System information<br />
Arrow Key: Move Cursor, Enter: Select, ESC: Escape, L:Line Draw, X: Redraw<br />
94<br />
A Volume Set is seen by the host system as a single logical device.<br />
It is organized in a RAID level with one or more physical<br />
disks. RAID level refers to the level of data performance and protection<br />
of a Volume Set. A Volume Set capacity can consume all<br />
or a portion of the disk capacity available in a RAID Set. Multiple<br />
Volume Sets can exist on a group of disks in a RAID Set. Additional<br />
Volume Sets created in a specified RAID Set will reside on<br />
all the physical disks in the RAID Set. Thus each Volume Set on<br />
the RAID Set will have its data spread evenly across all the disks<br />
in the RAID Set.<br />
5.5.3.1 Create Volume Set<br />
5.5.3.1.1 For MR5S1<br />
The following steps is the volume set features:<br />
1. Volume sets of different RAID levels may coexist on the<br />
same RAID set.<br />
2. Up to 16 volume sets in a RAID set can be created by the<br />
RAID subsystem controller.<br />
3. The maximum addressable size of the single volume set is<br />
2 TB (32-bit mode).<br />
4. Support greather than 2TB capacity per volume set (64-bit<br />
LBA mode).<br />
To Create a volume set, follow the following steps:
VT-100 UTILITY CONFIGURATION<br />
1. Select the Volume Set Function from the Main menu.<br />
2. Choose the Create Volume Set from Volume Set Functions<br />
dialog box screen.<br />
3. The Create Volume From RAID Set dialog box appears. This<br />
screen displays the existing arranged RAID sets. Select the<br />
RAID set number and press Enter key. The Volume Creation<br />
is displayed in the screen.<br />
Main Menu<br />
Quick Volume/RAID Set Function Setup<br />
RAID Set Function<br />
Volume<br />
Volume<br />
Create Set Function<br />
Set Function<br />
Volume Set<br />
Physical Delete DrivesVolume Create<br />
Set<br />
Volume From RAID Set<br />
RAID System Modify Function Volume Set<br />
Ethernet Check Configuration Volume Set RAID Set # 00<br />
View System StopVolume EventsCheckRAID Set # 01<br />
Clear Event Buffer<br />
Hardware Monitor<br />
System information<br />
Arrow Key: Move Cursor, Enter: Select, ESC: Escape, L:Line Draw, X: Redraw<br />
4. A window with a summary of the current volume set’s settings.<br />
The “Volume Creation” option allows user to select<br />
the Volume name, capacity, RAID level, strip size, SCSI ID/<br />
LUN, Cache mode and tag queuing. User can modify the default<br />
values in this screen; the modification procedures are at<br />
5.5.3.1.1.1 to 5.5.3.1.1.10 section.<br />
Main Menu<br />
Quick Volume/RAID Setup<br />
Volume Set<br />
RAID Set FunctionVolume Function<br />
Creation<br />
Volume Create Set Function Volume<br />
Volume<br />
Set<br />
Name : Volume Set # 00<br />
Physical Delete DrivesVolume Capacity<br />
Set<br />
: 160.1GB<br />
RAID System Modify Function Volume<br />
RAID<br />
Set<br />
Level : 5<br />
Ethernet Check Configuration Volume<br />
Stripe<br />
Set<br />
Size : 64K<br />
View System StopVolume Events<br />
SCSI<br />
Check<br />
Channel : 0<br />
Clear Event Display Buffer Volume<br />
SCSI<br />
Info.<br />
ID : 0<br />
Hardware Monitor<br />
SCSI LUN : 0<br />
System information<br />
Cache Mode : Write Back<br />
Tag Queuing : Enabled<br />
Max Sync Rate : 320 MB/sec<br />
Arrow Key: Move Cursor, Enter: Select, ESC: Escape, L:Line Draw, X: Redraw<br />
5. After completing the modification of the volume set, press<br />
Esc key to confirm it. A Fast Initialization screen is presented<br />
(only RAID Level 3, and 5).<br />
95
VT-100 UTILITY CONFIGURATION<br />
• Select Yes Key to start the Fast Initialization of the selected<br />
volume set.<br />
• Select No Key to start the Normal Initialization of the selected<br />
volume set.<br />
Main Menu<br />
Quick Volume/RAID Setup<br />
Volume Set<br />
RAID Set FunctionVolume Function<br />
Creation<br />
Volume Create Set Function Volume Volume Set Name : Volume Set # 00<br />
Physical Delete DrivesVolume Capacity<br />
Set<br />
: 160.1GB Initialization Mode<br />
RAID System Modify Function Volume<br />
RAID<br />
Set<br />
Level : 5<br />
Ethernet Check Configuration Volume<br />
Stripe<br />
Set<br />
Size<br />
View System StopVolume Events<br />
Foreground : 64K (Faster Completion)<br />
SCSI<br />
Check<br />
Channel Background : 0 (Instant Available)<br />
Clear Event Display Buffer Volume<br />
SCSI<br />
Info.<br />
ID : 0<br />
Hardware Monitor<br />
SCSI LUN : 0<br />
System information<br />
Cache Mode : Write Back<br />
Tag Queuing : Enabled<br />
Max Sync Rate : 320 MB/sec<br />
Arrow Key: Move Cursor, Enter: Select, ESC: Escape, L:Line Draw, X: Redraw<br />
6. Repeat steps 3 to 5 to create additional volume sets.<br />
7. The initialization percentage of volume set will be displayed<br />
at the button line.<br />
5.5.3.1.1.1 Volume Name<br />
Main Menu<br />
Quick Volume/RAID Setup<br />
Volume Set<br />
RAID Set FunctionVolume Function<br />
Creation<br />
Volume Create Set Function Volume<br />
Volume<br />
Set<br />
Name : Volume Set # 00<br />
Physical Delete DrivesVolume Capacity<br />
Set<br />
: 160.1GB<br />
RAID System Modify Function Volume<br />
RAID<br />
Set<br />
Level : 5<br />
Ethernet Check Configuration Volume<br />
Stripe<br />
Set<br />
Size : 64K<br />
View System StopVolume Events<br />
SCSI<br />
Check<br />
Channel : 0<br />
Clear Event Display Buffer Volume Info.<br />
Edit The Volume Name<br />
SCSI ID : 0<br />
Hardware Monitor<br />
SCSI LUN : 0 Volume Set # 00<br />
System information<br />
Cache Mode : Write Back<br />
Tag Queuing : Enabled<br />
Max Sync Rate : 320 MB/sec<br />
Arrow Key: Move Cursor, Enter: Select, ESC: Escape, L:Line Draw, X: Redraw<br />
96<br />
The default volume name will always appear as Volume Set.<br />
#. You can rename the volume set name providing it does not<br />
exceed the 15 characters limit.
VT-100 UTILITY CONFIGURATION<br />
5.5.3.1.1.2 Capacity<br />
Main Menu<br />
Available Capacity : 160.1GB<br />
Quick Volume/RAID Setup<br />
Selected Capacity : 160.1GB<br />
Volume Set<br />
RAID Set FunctionVolume Function<br />
Creation<br />
Volume Create Set Function Volume Volume Set Name : Volume Set # 00<br />
Physical Delete DrivesVolume Capacity<br />
Set<br />
: 160.1GB<br />
RAID System Modify Function Volume<br />
RAID<br />
Set<br />
Level : 5<br />
Ethernet Check Configuration Volume<br />
Stripe<br />
Set<br />
Size : 64K<br />
View System StopVolume Events<br />
SCSI<br />
Check<br />
Channel : 0<br />
Clear Event Display Buffer Volume<br />
SCSI<br />
Info.<br />
ID : 0<br />
Hardware Monitor<br />
SCSI LUN : 0<br />
System information<br />
Cache Mode : Write Back<br />
Tag Queuing : Enabled<br />
Max Sync Rate : 320 MB/sec<br />
Arrow Key: Move Cursor, Enter: Select, ESC: Escape, L:Line Draw, X: Redraw<br />
The maximum volume size is default in the first setting. Enter<br />
the appropriate volume size to fit your application. The capacity<br />
can also increase or decrease by the UP and DOWN arrow key.<br />
Each volume set has a selected capacity which is less than or<br />
equal to the total capacity of the RAID set on which it resides.<br />
5.5.3.1.1.3 RAID Level<br />
Main Menu<br />
Quick Volume/RAID Setup<br />
Volume Set<br />
RAID Set FunctionVolume Function<br />
Creation<br />
Volume Create Set Function Volume Volume Set Name : Volume Set # 00<br />
Physical Delete DrivesVolume Capacity<br />
Set<br />
: 160.1GB Select RAID Level<br />
RAID System Modify Function Volume Set<br />
Ethernet Check Configuration<br />
RAID Level : 5<br />
Volume<br />
Stripe<br />
Set<br />
Size : 64K 0<br />
View System StopVolume Events<br />
SCSI<br />
Check<br />
Channel : 0<br />
10<br />
Clear Event Display Buffer Volume<br />
SCSI<br />
Info.<br />
ID : 0<br />
3<br />
Hardware Monitor<br />
SCSI LUN : 0<br />
5<br />
System information<br />
Cache Mode : Write Back<br />
Tag Queuing : Enabled<br />
Max Sync Rate : 320 MB/sec<br />
Arrow Key: Move Cursor, Enter: Select, ESC: Escape, L:Line Draw, X: Redraw<br />
Set the RAID level for the Volume Set. Highlight RAID Level and<br />
press .<br />
The available RAID levels for the current Volume Set are displayed.<br />
Select a RAID level and press Enter key to confirm.<br />
97
VT-100 UTILITY CONFIGURATION<br />
5.5.3.1.1.4 Strip Size<br />
Main Menu<br />
Quick Volume/RAID Setup<br />
Volume Set<br />
RAID Set FunctionVolume Function<br />
Creation<br />
Volume Create Set Function Volume Volume Set Name : Volume Set # 00<br />
Physical Delete DrivesVolume Capacity<br />
Set<br />
: 160.1GB<br />
RAID System Modify Function Volume<br />
RAID<br />
Set<br />
Level : 5<br />
Select Strip Size<br />
Ethernet Check Configuration Volume Stripe<br />
Set<br />
Size<br />
: 64K<br />
View System StopVolume EventsCheck<br />
4K<br />
SCSI Channel : 0<br />
Clear Event Display Buffer Volume<br />
SCSI<br />
Info.<br />
8K<br />
ID : 0<br />
Hardware Monitor<br />
16K<br />
SCSI LUN : 0<br />
System information<br />
32K<br />
Cache Mode : Write Back<br />
64K<br />
Tag Queuing : Enabled 128K<br />
Max Sync Rate : 320 MB/sec<br />
Arrow Key: Move Cursor, Enter: Select, ESC: Escape, L:Line Draw, X: Redraw<br />
This parameter sets the size of the segment written to each<br />
disk in a RAID 0, 1, or 5 logical drive. You can set the stripe<br />
size to 4 KB, 8 KB, 16 KB, 32 KB, 64 KB, or 128 KB.<br />
5.5.3.1.1.5 SCSI Channel<br />
Main Menu<br />
Quick Volume/RAID Setup<br />
Volume Set<br />
RAID Set FunctionVolume Function<br />
Creation<br />
Volume Create Set Function Volume Volume Set Name : Volume Set # 00<br />
Physical Delete DrivesVolume Capacity<br />
Set<br />
: 160.1GB<br />
RAID System Modify Function Volume<br />
RAID<br />
Set<br />
Level : 5<br />
Ethernet Check Configuration Volume<br />
Stripe<br />
Set<br />
Size : 64K<br />
View System StopVolume EventsCheck<br />
Select SCSI Channel<br />
SCSI Channel : 0<br />
Clear Event Display Buffer Volume<br />
SCSI<br />
Info.<br />
ID : 0<br />
Hardware Monitor<br />
0<br />
SCSI LUN : 0<br />
System information<br />
Cache Mode : Write Back<br />
Tag Queuing : Enabled<br />
Max Sync Rate : 320 MB/sec<br />
Arrow Key: Move Cursor, Enter: Select, ESC: Escape, L:Line Draw, X: Redraw<br />
One SCSI channel can be appllied to the internal RAID subsystem.<br />
Choose the SCSI channel. A Select SCSI Channel dialog<br />
box appears, select the channel number and press Enter key to<br />
confirm it.<br />
98
VT-100 UTILITY CONFIGURATION<br />
5.5.3.1.1.6 SCSI ID<br />
Main Menu<br />
Quick Volume/RAID Setup<br />
Volume Set<br />
RAID Set FunctionVolume Function<br />
Creation<br />
Volume Create Set Function Volume Volume Set Name : Volume SEt # 00<br />
Physical Delete DrivesVolume Capacity<br />
Set<br />
: 160.1GB<br />
RAID System Modify Function Volume<br />
RAID<br />
Set<br />
Level : 5<br />
Ethernet Check Configuration Volume<br />
Stripe<br />
Set<br />
Size : 64K<br />
View System StopVolume Events<br />
SCSI<br />
Check<br />
Channel : 0<br />
Clear Event Display Buffer Volume Info.<br />
SCSI ID : 0<br />
Hardware Monitor<br />
SCSI LUN : 0<br />
System information<br />
Cache Mode : Write Back<br />
Tag Queuing : Enabled<br />
Max Sync Rate : 320 MB/sec<br />
Select SCSI ID<br />
Arrow Key: Move Cursor, Enter: Select, ESC: Escape, L:Line Draw, X: Redraw<br />
Each SCSI device attached to the SCSI card, as well as the<br />
card itself, must be assigned a unique SCSI ID number. A SCSI<br />
channel can connect up to 15 devices. The SATA RAID controller<br />
is as a lots of large SCSI device. We should assign an ID from a<br />
list of SCSI IDs.<br />
5.5.3.1.1.7 SCSI LUN<br />
0<br />
1<br />
2<br />
3<br />
4<br />
5<br />
6<br />
7<br />
8<br />
9<br />
10<br />
11<br />
12<br />
13<br />
14<br />
15<br />
Main Menu<br />
Quick Volume/RAID Setup<br />
Volume Set<br />
RAID Set FunctionVolume Function<br />
Creation<br />
Volume Create Set Function Volume Volume Set Name : Volume SEt Select # 00SCSI LUN<br />
Physical Delete DrivesVolume Capacity<br />
Set<br />
: 160.1GB<br />
RAID System Modify Function Volume Set<br />
0<br />
RAID Level : 5<br />
Ethernet Check Configuration<br />
1<br />
Volume<br />
Stripe<br />
Set<br />
Size : 64K<br />
2<br />
View System StopVolume Events<br />
SCSI<br />
Check<br />
Channel : 0<br />
3<br />
Clear Event Display Buffer Volume<br />
SCSI<br />
Info.<br />
ID : 0<br />
4<br />
Hardware Monitor<br />
5<br />
System information<br />
SCSI LUN : 0<br />
6<br />
Cache Mode : Write Back 7<br />
Tag Queuing : Enabled<br />
Max Sync Rate : 320 MB/sec<br />
Arrow Key: Move Cursor, Enter: Select, ESC: Escape, L:Line Draw, X: Redraw<br />
Each SCSI ID can support up to 8 LUNs. Most SCSI controller<br />
treats each LUN like a SCSI disk.<br />
99
VT-100 UTILITY CONFIGURATION<br />
5.5.3.1.1.8 Cache Mode<br />
Main Menu<br />
Quick Volume/RAID Setup<br />
Volume Set<br />
RAID Set FunctionVolume Function<br />
Creation<br />
Volume Create Set Function Volume Volume Set Name : Volume Set # 00<br />
Physical Delete DrivesVolume Capacity<br />
Set<br />
: 160.1GB<br />
RAID System Modify Function Volume<br />
RAID<br />
Set<br />
Level : 5 Volume Cache Mode<br />
Ethernet Check Configuration Volume<br />
Stripe<br />
Set<br />
Size : 64K<br />
View System StopVolume EventsCheck<br />
Write Through<br />
SCSI Channel : 0<br />
Clear Event Display Buffer Volume<br />
SCSI<br />
Info.<br />
Write Back<br />
ID : 0<br />
Hardware Monitor<br />
SCSI LUN : 0<br />
System information<br />
Cache Mode :: Write Back<br />
Tag Queuing : Enabled<br />
Max Sync Rate : 320 MB/sec<br />
Arrow Key: Move Cursor, Enter: Select, ESC: Escape, L:Line Draw, X: Redraw<br />
User can set the cache mode to: Write-Through Cache or Write-<br />
Back Cache.<br />
5.5.3.1.1.9 Tag Queuing<br />
Main Menu<br />
Quick Volume/RAID Setup<br />
Volume Set<br />
RAID Set FunctionVolume Function<br />
Creation<br />
Volume Create Set Function Volume Volume Set Name : Volume SEt<br />
Physical Delete DrivesVolume Set<br />
Tagged # 00 Command Queuing<br />
Capacity : 160.1GB<br />
RAID System Modify Function Volume<br />
RAID<br />
Set<br />
Level : 5<br />
Enabled<br />
Ethernet Check Configuration Volume<br />
Stripe<br />
Set<br />
Size : 64K<br />
Disabled<br />
View System StopVolume Events<br />
SCSI<br />
Check<br />
Channel : 0<br />
Clear Event Display Buffer Volume<br />
SCSI<br />
Info.<br />
ID : 0<br />
Hardware Monitor<br />
SCSI LUN : 0<br />
System information<br />
Cache Mode : Write Back<br />
Tag Queuing<br />
: Enabled<br />
Max Sync Rate : 320 MB/sec<br />
Arrow Key: Move Cursor, Enter: Select, ESC: Escape, L:Line Draw, X: Redraw<br />
The Enabled option is useful for enhancing overall system<br />
performance under multi-tasking operating systems. The Command<br />
Tag (Drive Channel) function controls the SCSI command<br />
tag queuing support for each drive channel. This function<br />
should normally remain enabled. Disable this function only<br />
when using older SCSI drives that do not support command tag<br />
queuing.<br />
100
VT-100 UTILITY CONFIGURATION<br />
5.5.3.1.1.10 Max Sync Rate<br />
Main Menu<br />
Quick Volume/RAID Setup<br />
Volume Set<br />
RAID Set FunctionVolume Function<br />
Creation<br />
Volume Create Set Function Volume Volume Set Name : Volume Set # 00<br />
Physical Delete DrivesVolume Capacity<br />
Set<br />
: 160.1GB<br />
Max Sync Xfer Rate<br />
RAID System Modify Function Volume<br />
RAID<br />
Set<br />
Level : 5<br />
Ethernet Check Configuration Volume Set<br />
Async<br />
Stripe Size : 64K<br />
View System StopVolume EventsCheck<br />
20 MB/Sec<br />
SCSI Channel : 0<br />
Clear Event Display Buffer Volume<br />
SCSI<br />
Info.<br />
40 MB/Sec<br />
ID : 0<br />
Hardware Monitor<br />
80 MB/Sec<br />
SCSI LUN : 0<br />
System information<br />
160 MB/Sec<br />
Cache Mode : Write Back 320MB/Sec<br />
Tag Queuing : Enabled<br />
Max Sync Rate : 160 320MB/sec<br />
Arrow Key: Move Cursor, Enter: Select, ESC: Escape, L:Line Draw, X: Redraw<br />
5.5.3.1.2 For MR5CT1<br />
The following steps is the volume set features:<br />
1. Volume sets of different RAID levels may coexist on the<br />
same RAID set.<br />
2. Up to 3 volume sets in a RAID set can be created by the<br />
RAID subsystem controller. (PATA support Master/Slave volume<br />
set, SATA supports Master volume set)<br />
3. The maximum addressable size of the single volume set is<br />
2 TB(32-bit Mode).<br />
To Create a volume set, following the below steps:<br />
1. Select the Volume Set Function from the Main menu.<br />
2. Choose the Create Volume Set from Volume Set Functions<br />
dialog box screen.<br />
3. The Create Volume From RAID Set dialog box appears. This<br />
screen displays the existing arranged RAID sets. Select the<br />
RAID set number and press Enter key. The Volume Creation<br />
is displayed in the screen.<br />
101
VT-100 UTILITY CONFIGURATION<br />
Main Menu<br />
Quick Volume/RAID Setup<br />
Volume Set Function<br />
RAID Set Function<br />
Volume Create Set Function Volume Set<br />
Physical Drives<br />
Create Volume From RAID Set<br />
Delete Volume Set<br />
RAID System Modify Function Volume SetRAID Set # 00<br />
Ethernet Check Configuration Volume Set RAID Set # 01<br />
View System StopVolume EventsCheck<br />
Clear Event Display Buffer Volume Info.<br />
Hardware Monitor<br />
System information<br />
Arrow Key: Move Cursor, Enter: Select, ESC: Escape, L:Line Draw, X: Redraw<br />
4. A window with a summary of the current volume set’s settings.<br />
The “Volume Creation” option allows user to select the<br />
Volume name, capacity, RAID level, strip size, IDE Channel/IDE<br />
Drive Select, Cache mode and tag queuing. User can modify the<br />
default values in this screen; the modification procedures are at<br />
5.5.3.1.2.1 to 5.5.3.1.2.9 section.<br />
Main Menu<br />
Quick Volume/RAID Setup<br />
Volume Set Function<br />
RAID Set Function<br />
Volume Creation<br />
Volume Create Set Function Volume Set<br />
Physical Delete DrivesVolume Volume Set Name : Volume Set # 00<br />
RAID System Modify Function Volume Capacity Set : 160.1GB<br />
Ethernet Check Configuration Volume RAID SetLevel : 5<br />
View System StopVolume Events Stripe Check Size : 64K<br />
Clear Event Display Buffer Volume IDE Channel Info. : 0<br />
Hardware MonitorDrive Select : 0-Master<br />
System informationCache Mode : Write Back<br />
Tag Queuing : Enabled<br />
IDE Xfer Mode : ATA133<br />
Arrow Key: Move Cursor, Enter: Select, ESC: Escape, L:Line Draw, X: Redraw<br />
5. After completing the modification of the volume set,<br />
press Esc key to confirm it. A Fast Initialization screen is<br />
presented(only RAID Level 3 and 5).<br />
• Select Yes Key to start the Fast Initialization of the selected<br />
volume set.<br />
• Select No Key to start the Normal Initialization of the selected<br />
volume set.<br />
102
VT-100 UTILITY CONFIGURATION<br />
Main Menu<br />
Quick Volume/RAID Creation Setup<br />
Volume Set Function<br />
RAID Set Function<br />
Volume Name : Volume Set # 00<br />
Volume Create Set Function Capacity Volume Set : 160.1GB Fast Initialization<br />
Physical Delete Drives<br />
RAID Volume Level Set : 5<br />
RAID System Modify Function<br />
Stripe Volume Size Set : 64K<br />
Yes<br />
Ethernet Check Configuration Volume Set<br />
No<br />
IDE Channel : 0<br />
View System StopVolume Events<br />
Drive Select Check : 0-Master<br />
Clear Event Display Buffer<br />
Cache Volume Mode Info. : Write Back<br />
Hardware Monitor<br />
Tag Queuing : Enabled<br />
System information<br />
IDE Xfer Mode : ATA133<br />
Arrow Key: Move Cursor, Enter: Select, ESC: Escape, L:Line Draw, X: Redraw<br />
6. Repeat steps 3 to 5 to create additional volume sets.<br />
7. The initialization percentage of volume set will be displayed<br />
at the button line.<br />
5.5.3.1.2.1 Volume Name<br />
Main Menu<br />
Quick Volume/RAID Setup<br />
Volume Set Function<br />
RAID Set Function<br />
Volume Create Set Function Volume<br />
Volume<br />
Set<br />
Creation<br />
Physical Delete DrivesVolume Volume<br />
Set<br />
Name : Volume Set # 00<br />
RAID System Modify Function Volume<br />
Capacity<br />
Set<br />
: 160.1GB<br />
Ethernet Check Configuration Volume<br />
RAID<br />
Set<br />
Level : 5<br />
View System StopVolume Events<br />
Stripe<br />
Check<br />
Size : 64K<br />
Clear Event Display Buffer Volume<br />
IDE Channel<br />
Info.<br />
: 0<br />
Hardware Monitor<br />
Edit The Volume Name<br />
Drive Select : 0-Master<br />
System information<br />
Cache Mode : Write Back Volume Set # 00<br />
Tag Queuing : Enabled<br />
IDE Xfer Mode : ATA133<br />
Arrow Key: Move Cursor, Enter: Select, ESC: Escape, L:Line Draw, X: Redraw<br />
The default volume name will always appear as Volume Set.<br />
#. You can rename the volume set name providing it does not<br />
exceed the 15 characters limit.<br />
103
VT-100 UTILITY CONFIGURATION<br />
5.5.3.1.2.2 Capacity<br />
Main Menu<br />
Available Capacity : 160.1GB<br />
Quick Volume/RAID Setup<br />
Selected Capacity : 160.1GB<br />
Volume Set Function<br />
RAID Set Function Volume Creation<br />
Volume Create Set Function Volume Set<br />
Physical Delete Drives<br />
Volume Set Name : Volume Set # 00<br />
RAID System Modify Function Volume Capacity Set<br />
: 160.1GB<br />
Ethernet Check Configuration Volume RAID Level Set : 5<br />
View System StopVolume Events Stripe Check Size : 64K<br />
Clear Event Display Buffer IDE Volume Channel Info. : 0<br />
Hardware Monitor Drive Select : 0-Master<br />
System information Cache Mode : Write Back<br />
Tag Queuing : Enabled<br />
IDE Xfer Mode : ATA133<br />
Arrow Key: Move Cursor, Enter: Select, ESC: Escape, L:Line Draw, X: Redraw<br />
The maximum volume size is default in the first setting. Enter<br />
the appropriate volume size to fit your application. The capacity<br />
can also increase or decrease by the UP and DOWN arrow key.<br />
Each volume set has a selected capacity which is less than or<br />
equal to the total capacity of the RAID set on which it resides.<br />
5.5.3.1.2.3 RAID Level<br />
Main Menu<br />
Quick Volume/RAID Setup<br />
Volume Set Function<br />
RAID Set Function Volume Creation<br />
Volume Create Set Function Volume Set<br />
Physical Delete DrivesVolume Volume Set Name : Volume Set # 00<br />
RAID System Modify Function Volume Capacity Set : 160.1GB<br />
Ethernet Check Configuration Volume RAID Set<br />
Level : 5 Select RAID Level<br />
View System StopVolume EventsStripe CheckSize<br />
: 64K<br />
Clear Event Display Buffer Volume IDE Info. Channel : 0<br />
0<br />
Hardware Monitor Drive Select : 0-Master 10<br />
System information Cache Mode : Write Back 3<br />
Tag Queuing : Enabled 5<br />
IDE Xfer Mode : ATA133 6<br />
Arrow Key: Move Cursor, Enter: Select, ESC: Escape, L:Line Draw, X: Redraw<br />
Set the RAID level for the Volume Set. Highlight RAID Level and<br />
press .<br />
The available RAID levels for the current Volume Set are displayed.<br />
Select a RAID level and press Enter key to confirm.<br />
104
VT-100 UTILITY CONFIGURATION<br />
5.5.3.1.2.4 Strip Size<br />
Main Menu<br />
Quick Volume/RAID Setup<br />
Volume Set Function<br />
RAID Set Function<br />
Volume Creation<br />
Volume Create Set Function Volume Set<br />
Physical Delete DrivesVolume Volume Set Name : Volume Set # 00<br />
RAID System Modify Function Volume Capacity Set : 160.1GB Select Strip Size<br />
Ethernet Check Configuration Volume RAID SetLevel : 5<br />
View System StopVolume EventsCheck<br />
4K<br />
Stripe Size<br />
: 64K<br />
Clear Event Display Buffer Volume IDE Channel Info.<br />
8K<br />
: 0<br />
Hardware Monitor<br />
16K<br />
Drive Select : 0-Master<br />
System information<br />
32K<br />
Cache Mode : Write Back<br />
64K<br />
Tag Queuing : Enabled<br />
128K<br />
IDE Xfer Mode : ATA150<br />
Arrow Key: Move Cursor, Enter: Select, ESC: Escape, L:Line Draw, X: Redraw<br />
This parameter sets the size of the segment written to each<br />
disk in a RAID 0, 1, 5 or 6 logical drive. You can set the stripe<br />
size to 4 KB, 8 KB, 16 KB, 32 KB, 64 KB, or 128 KB.<br />
5.5.3.1.2.5 IDE Channel<br />
Main Menu<br />
Quick Volume/RAID Setup<br />
Volume Set Function<br />
RAID Set Function<br />
Volume Creation<br />
Volume Create Set Function Volume Set<br />
Physical Delete DrivesVolume Volume Set Name : Volume Set # 00<br />
RAID System Modify Function Volume Capacity Set<br />
Ethernet Check Configuration Volume RAID Set Level<br />
View System StopVolume EventsStripe CheckSize<br />
Clear Event Display Buffer Volume IDE Info.<br />
Channel<br />
: 160.1GB<br />
: 5<br />
: 64K<br />
: 0 Select IDE Channel<br />
Hardware Monitor Drive Select : 0-Master<br />
0<br />
System informationCache Mode : Write Back<br />
1<br />
Tag Queuing : Enabled<br />
0&1 for Sharing<br />
IDE Xfer Mode : ATA150<br />
Arrow Key: Move Cursor, Enter: Select, ESC: Escape, L:Line Draw, X: Redraw<br />
The MR5CT1 can support dual ATA Host channel-Parallel ATA(For<br />
Firewire/USB) (Connect to Channel 0) and Serial ATA (Connect to<br />
Channel 1). Multiple ATA Host is the IDE Host Channel. Each ATA<br />
Host channel can be applied to different volume sets if user selects<br />
the 0 or 1 option in the IDE Host Channel Mode, 0, for Parallel ATA<br />
host channel and 1 for Serial ATA host channel. The volume set<br />
initializes for Parallel ATA host channel, now user wants to change<br />
to the Serial ATA. User needs to modify configurations the IDE<br />
Host Channel =1 and IDE Drive select = 0.<br />
105
VT-100 UTILITY CONFIGURATION<br />
5.5.3.1.2.6 Drive Select<br />
Select IDE Drv#<br />
Main Menu<br />
0-Master<br />
Quick Volume/RAID Setup<br />
1-Slave<br />
Volume Set Function<br />
2-Reserved<br />
RAID Set Function<br />
Volume Creation<br />
3-Reserved<br />
Volume Create Set Function Volume Set<br />
4-Reserved<br />
Physical Delete DrivesVolume Volume Set Name : Volume Set # 5-Reserved 00<br />
RAID System Modify Function Volume Capacity Set : 160.1GB 6-Reserved<br />
Ethernet Check Configuration Volume RAID Set Level : 5 7-Reserved<br />
8-Reserved<br />
View System StopVolume EventsStripe CheckSize<br />
: 64K<br />
9-Reserved<br />
Clear Event Display Buffer Volume IDE Info. Channel : 0<br />
10-Reserved<br />
Hardware Monitor<br />
Drive Select<br />
: 0-Master 11-Reserved<br />
System informationCache Mode : Write Back 12-Reserved<br />
Tag Queuing : Enabled 13-Reserved<br />
14-Reserved<br />
IDE Xfer Mode : ATA150<br />
15-Reserved<br />
Arrow Key: Move Cursor, Enter: Select, ESC: Escape, L:Line Draw, X: Redraw<br />
IDE Host Channel setting at 0 or 1-PATA and SATA host channel<br />
can concurrently access different volume sets. The PATA (For<br />
Firewire/USB)(Channel 0) can support Master and Slave volume<br />
set. The SATA (Channel 1) can support one master volume set.<br />
The Max volume set can be accessed by MR5CT1 is 3.<br />
IDE Host Channel setting at 0&1 Cluster - The MR5CT1 can support<br />
dual ATA host Channel-Paralle ATA Master and Serial ATA<br />
accesses the same volume set. But user can only write through<br />
one channel at the time.<br />
5.5.3.1.2.7 Cache Mode<br />
Main Menu<br />
Quick Volume/RAID Setup<br />
Volume Set Function<br />
RAID Set FunctionVolume Creation<br />
Volume Create Set Function Volume Set<br />
Physical Delete DrivesVolume Volume Set Name : Volume Set # 00<br />
RAID System Modify Function Volume Capacity Set : 160.1GB<br />
Volume Cache Mode<br />
Ethernet Check Configuration Volume RAID SetLevel : 5<br />
View System StopVolume Events Stripe Check Size : 64K Write Through<br />
Clear Event Display Buffer Volume IDE Channel Info. : 0<br />
Write Back<br />
Hardware MonitorDrive Select : 0-Master<br />
System information<br />
Cache Mode :: Write Back<br />
Tag Queuing : Enabled<br />
IDE Xfer Mode : ATA150<br />
Arrow Key: Move Cursor, Enter: Select, ESC: Escape, L:Line Draw, X: Redraw<br />
User can set the cache mode to: Write-Through Cache or Write-<br />
Back Cache.<br />
106
VT-100 UTILITY CONFIGURATION<br />
5.5.3.1.2.8 Tag Queuing<br />
Main Menu<br />
Quick Volume/RAID Setup<br />
Volume Set Function<br />
RAID Set FunctionVolume Creation<br />
Volume Create Set Function Volume Set<br />
Physical Delete DrivesVolume Volume Set Name : Volume Set Tagged # 00Command Queuing<br />
RAID System Modify Function Volume Capacity Set : 160.1GB<br />
Enabled<br />
Ethernet Check Configuration Volume RAID SetLevel : 5<br />
Disabled<br />
View System StopVolume Events Stripe CheckSize<br />
: 64K<br />
Clear Event Display Buffer Volume IDE Channel Info. : 0<br />
Hardware Monitor Drive Select : 0-Master<br />
System informationCache Mode : Write Back<br />
Tag Queuing<br />
: Enabled<br />
IDE Xfer Mode : ATA150<br />
Arrow Key: Move Cursor, Enter: Select, ESC: Escape, L:Line Draw, X: Redraw<br />
The Enabled option is useful for enhancing overall system performance<br />
under multi-tasking operating systems.<br />
Note:<br />
Because OS drive doesn’t support this function yet, therefore,<br />
it needs special driver to support this fuction.<br />
5.5.3.1.2.9 IDE Xfer Mode<br />
Main Menu<br />
Quick Volume/RAID Setup<br />
Volume Set Volume FunctionCreation<br />
RAID Set Function<br />
Volume Create Set Function Volume Volume Set Name : Volume Set # 00<br />
Physical Delete DrivesVolume Capacity Set : 160.1GB Host IDE Xfer Mode<br />
RAID System Modify Function Volume RAID Set Level : 5<br />
ATA33<br />
Ethernet Check Configuration Volume Stripe SetSize<br />
: 64K<br />
ATA66<br />
View System StopVolume EventsIDE Check Channel : 0<br />
ATA100<br />
Clear Event Display Buffer Volume Drive Info. Select : 0-Master<br />
ATA-133<br />
Hardware Monitor Cache Mode : Write Back<br />
System informationTag Queuing : Enabled<br />
IDE Xfer Mode : ATA150<br />
Arrow Key: Move Cursor, Enter: Select, ESC: Escape, L:Line Draw, X: Redraw<br />
The MR5CT1 RAID subsytem supports ATA/133, ATA/100,<br />
ATA/66, and ATA/33 Mode.<br />
107
VT-100 UTILITY CONFIGURATION<br />
5.5.3.2 Delete Volume Set<br />
To delete Volume set from RAID set system function, move the<br />
cursor bar to the Volume Set Functions menu and select the<br />
Delete Volume Set item, then press Enter key. The Volume Set<br />
Functions menu will show all RAID Set # item. Move the cursor<br />
bar to an RAID Set number, then press Enter key to show all<br />
Volume Set # in the RAID set. Move cursor to the deleted Volume<br />
Set number, press Enter key to delete it.<br />
Main Menu<br />
Quick Volume/RAID Setup<br />
Volume Set Function<br />
RAID Set Function<br />
Select Volume To Delete<br />
Volume Create Set Function Volume Set<br />
Physical Delete DrivesVolume Delete Set<br />
Volume Volume From RAID Set Set # 00<br />
RAID System Modify Function Volume SetRAID Set # 00 Delete Volume Set<br />
Ethernet Check Configuration Volume Set RAID Set # 01<br />
View System StopVolume EventsCheck<br />
Yes<br />
Clear Event Display Buffer Volume Info.<br />
No<br />
Hardware Monitor<br />
System information<br />
Arrow Key: Move Cursor, Enter: Select, ESC: Escape, L:Line Draw, X: Redraw<br />
5.5.3.3 Modify Volume Set<br />
Main Menu<br />
Quick Volume/RAID Setup Select Volume to Modify<br />
Volume Set Function<br />
RAID Set Function<br />
Volume Create Set Function Volume Set<br />
RAID Set # 00<br />
Modify Volume From<br />
Physical Drives<br />
RAID Set Set # 01<br />
Delete Volume Set<br />
RAID System Modify Function Volume Set<br />
RAID Set # 00<br />
Ethernet Check Configuration Volume Set RAID Set # 01<br />
View System StopVolume EventsCheck<br />
Clear Event Display Buffer Volume Info.<br />
Hardware Monitor<br />
System information<br />
Arrow Key: Move Cursor, Enter: Select, ESC: Escape, L:Line Draw, X: Redraw<br />
108<br />
Use this option to modify volume set configuration. To modify<br />
Volume Set values from RAID Set system function, move the<br />
cursor bar to the Volume Set Functions menu and select the
VT-100 UTILITY CONFIGURATION<br />
Modify Volume Set item, then press Enter key. The Volume Set<br />
Functions menu will show all RAID Set number items. Move the<br />
cursor bar to an RAID Set number item, then press Enter key<br />
to show all Volume Set item Select the Volume Set from the list<br />
you which to change, press Enter key to modify it.<br />
5.5.3.3.1 Volume Expansion<br />
Use the RAID set expands to expand a RAID set, when a disk is<br />
added to your system. The expand capacity can use to enlarge<br />
the volume set size or create another volume set. The modify<br />
volume set function can support the volume set expansion<br />
function. To expand volume set capacity value from RAID set<br />
system function, move the cursor bar to the volume set Volume<br />
capacity item and entry the capacity size. Tick on the Confirm<br />
The Operation and click on the Submit button to complete the<br />
action. The volume set start to expand.<br />
For MR5S1<br />
Main Menu<br />
Select Volume to Modify<br />
Quick Volume/RAID Setup<br />
Volume Set Function<br />
RAID Set Function Volume Modification<br />
RAID Set # 00<br />
Volume Create Set Function Volume Set<br />
Modify RAID Set # 01<br />
Volume Volume Name From : RAID Volume Set<br />
Set # 00<br />
Physical Delete DrivesVolume Capacity<br />
Set<br />
: 160.1GB<br />
RAID System Modify Function Volume RAID Set<br />
RAID Level Set #: 500<br />
Ethernet Check Configuration Volume<br />
Stripe<br />
Set RAID Size Set :# 64K 01<br />
View System StopVolume EventsCheck<br />
SCSI Channel : 0<br />
Clear Event Display Buffer Volume<br />
SCSI<br />
Info.<br />
ID : 0<br />
Hardware Monitor<br />
SCSI LUN : 0<br />
System information<br />
Cache Mode : Write Back<br />
Tag Queuing : Enabled<br />
Max Sync Rate : 320 MB/sec<br />
Arrow Key: Move Cursor, Enter: Select, ESC: Escape, L:Line Draw, X: Redraw<br />
As shown in the above can be modified at this screen. Choose<br />
this option to display the properties of the selected Volume set.<br />
109
VT-100 UTILITY CONFIGURATION<br />
For MR5CT1<br />
Main Menu<br />
Select Volume to Modify<br />
Quick Volume/RAID Setup<br />
Volume Set Function<br />
RAID Set Function<br />
Volume Modification RAID Set # 00<br />
Volume Create Set Function Volume Set RAID Set # 01<br />
Modify Volume From RAID Set<br />
Physical Delete DrivesVolume Set Volume Name : Volume Set # 00<br />
RAID System Modify Function Volume Capacity Set<br />
RAID Set #: 160.1GB 00<br />
Ethernet Check Configuration Volume Set RAID RAID Level Set # : 01 5<br />
View System StopVolume EventsCheck<br />
Stripe Size : 64K<br />
Clear Event Display Buffer Volume IDE Info. Channel : 0<br />
Hardware Monitor Drive Select : 0-Master<br />
System information Cache Mode : Write Back<br />
Tag Queuing : Enabled<br />
IDE Xfer Mode : ATA133<br />
Arrow Key: Move Cursor, Enter: Select, ESC: Escape, L:Line Draw, X: Redraw<br />
As shown in the above can be modified at this screen. Choose<br />
this option to display the properties of the selected Volume set.<br />
5.5.3.3.2 Volume Set Migration<br />
Main Menu<br />
The Volume Set Information<br />
Quick Volume/RAID Setup<br />
Volume Set Volume Function<br />
Name :: Volume Set Set # 00<br />
RAID Set Function<br />
RAID Set Name : RAID Set # 00<br />
Volume Create Set Function Volume Volume Set Capacity : 160.1GB<br />
Physical Delete DrivesVolume Volume Set State : Migrating<br />
RAID System Modify Function Volume SCSI Set Ch/Id/Lun : 0/0/0<br />
Ethernet Check Configuration Volume Stripe SetSize<br />
: 64K<br />
View System StopVolume Events<br />
RAID CheckLevel : 5<br />
Clear Event Display Buffer Volume Member Info.<br />
Disks : 3<br />
Hardware Monitor<br />
Cache Attribute : Write Back<br />
System information<br />
Tag Queuing : Enabled<br />
Max SCSI Speed : 320MB/sec<br />
Current Speed : Async<br />
Arrow Key: Move Cursor, Enter: Select, ESC: Escape, L:Line Draw, X: Redraw<br />
Migrating occurs when a volume set is migrating from one RAID<br />
level to another, a Volume set strip size changes, or when a<br />
disk is added to a RAID Set. Migration status is displayed in the<br />
volume status area of the Volume Set Information when one<br />
RAID level to another, a Volume set strip size changes or when<br />
a disk is added to a RAID set.<br />
110
VT-100 UTILITY CONFIGURATION<br />
5.5.3.4 Check Volume Set<br />
Main Menu<br />
Quick Volume/RAID Setup<br />
Volume Set Function<br />
RAID Set Function<br />
Select Volume To Check<br />
Volume Create Set Function Volume Set<br />
Check Volume Volume From RAID Set Set # 00<br />
Physical Delete DrivesVolume Set<br />
RAID System Modify Function Volume SetRAID Set # 00 Check Volume Set<br />
Ethernet Check Configuration Volume Set<br />
RAID Set # 01<br />
View System StopVolume EventsCheck<br />
Yes<br />
Clear Event Display Buffer Volume Info.<br />
No<br />
Hardware Monitor<br />
System information<br />
Arrow Key: Move Cursor, Enter: Select, ESC: Escape, L:Line Draw, X: Redraw<br />
Use this option to verify the correctness of the redundant data<br />
in a volume set. For example, in a system with dedicated parity,<br />
volume set check means computing the parity of the data disk<br />
drives and comparing the results to the contents of the dedicated<br />
parity disk drive. To check Volume Set from RAID Set system<br />
function, move the cursor bar to the Volume Set Functions menu<br />
and select the Check Volume Set item, then press Enter key.<br />
The Volume Set Functions menu will show all RAID Set number<br />
items. Move the cursor bar to an RAID Set number item, then<br />
press Enter key to show all Volume Set item Select the Volume<br />
Set from the list you which to check, press Enter key to select<br />
it. After completing the selection, the confirmation screen appears,<br />
presses Yes to start check.<br />
5.5.3.5 Stop Volume Set Check<br />
Use this option to stop all the Check Volume Set function.<br />
111
VT-100 UTILITY CONFIGURATION<br />
5.5.3.6 Display Volume Set Info.<br />
Main Menu<br />
Quick Volume/RAID Setup<br />
Volume Set Function<br />
RAID Set Function<br />
Select Volume To Display<br />
Volume Create Set Function Volume Set<br />
Display Volume Volume From RAID Set Set # 00<br />
Physical Delete DrivesVolume Set<br />
RAID System Modify Function Volume SetRAID Set # 00<br />
Ethernet Check Configuration Volume Set RAID Set # 01<br />
View System StopVolume EventsCheck<br />
Clear Event Display Buffer Volume Info.<br />
Hardware Monitor<br />
System information<br />
Arrow Key: Move Cursor, Enter: Select, ESC: Escape, L:Line Draw, X: Redraw<br />
To display Volume Set information, move the cursor bar to the<br />
desired Volume Set number, then press Enter key. The Volume<br />
Set Information will show as following. You can only view the<br />
information of this Volume Set.<br />
5.5.3.6.1 For MR5S1<br />
Main Menu<br />
The Volume Set Information<br />
Quick Volume/RAID Setup<br />
Volume Set Volume Function<br />
Name :: Volume Set Set # 00<br />
RAID Set Function<br />
RAID Set Name : RAID Set # 00<br />
Volume Create Set Function Volume Volume Set Capacity : 160.1GB<br />
Physical Delete DrivesVolume Volume Set State : Normal<br />
RAID System Modify Function Volume SCSI Set Ch/Id/Lun : 0/0/0<br />
Ethernet Check Configuration Volume RAID SetLevel : 5<br />
View System StopVolume Events<br />
Stripe CheckSize<br />
: 64K<br />
Clear Event Display Buffer Volume Member Info.<br />
Disks : 3<br />
Hardware Monitor<br />
Cache Attribute : Write Back<br />
System information<br />
Tag Queuing : Enabled<br />
Max SCSI Speed : 320 MB/sec<br />
Current Speed : Async<br />
Arrow Key: Move Cursor, Enter: Select, ESC: Escape, L:Line Draw, X: Redraw<br />
112
VT-100 UTILITY CONFIGURATION<br />
5.5.3.6.2 For MR5CT1<br />
Main Menu<br />
The Volume Set Information<br />
Quick Volume/RAID Setup<br />
Volume Set Volume Function<br />
Name :: Volume Set Set # 00<br />
RAID Set Function<br />
RAID Set Name : RAID Set # 00<br />
Volume Create Set Function Volume Volume Set Capacity : 160.1GB<br />
Physical Delete DrivesVolume Volume Set State : Normal<br />
RAID System Modify Function Volume IDE Ch/Drive Set : 0/0-Master<br />
Ethernet Check Configuration Volume RAID SetLevel : 5<br />
View System StopVolume Events<br />
Stripe CheckSize<br />
: 64K<br />
Clear Event Display Buffer Volume Member Info.<br />
Disks : 3<br />
Hardware Monitor<br />
Cache Attribute : Write Back<br />
System information<br />
Tag Queuing : Enabled<br />
IDE Xfer Mode : ATA133<br />
Current Speed : PIO Mode<br />
Arrow Key: Move Cursor, Enter: Select, ESC: Escape, L:Line Draw, X: Redraw<br />
5.5.4 Physical Drives<br />
Main Menu<br />
Quick Volume/RAID Setup<br />
RAID Physical Set Function Drive Function<br />
Volume Set Function<br />
Physical View Drives Drive Information<br />
RAID Create System Pass-Through Function Disk<br />
Ethernet Modify Configuration Pass-Through Disk<br />
View System Delete Pass-Through Events Disk<br />
Clear Event Identify Buffer Selected Drive<br />
Hardware Identify Monitor Bad Drive<br />
System information<br />
Arrow Key: Move Cursor, Enter: Select, ESC: Escape, L:Line Draw, X: Redraw<br />
Choose this option from the Main Menu to select a physical disk<br />
and to perform the operations listed above.<br />
113
VT-100 UTILITY CONFIGURATION<br />
5.5.4.1 View Drive Information<br />
Main Menu<br />
Quick Volume/RAID Setup<br />
RAID Physical Set Function Drive Function<br />
Volume Set Function<br />
Physical View Drives Drive Ch01 Information<br />
MAXTOR 6L04<br />
RAID Create System Pass-Through Function Disk<br />
Model Name : MAXTOR 6L040J2<br />
Ethernet Modify Configuration Pass-Through Disk<br />
Serial Number : 662132645525<br />
View System Delete Pass-Through Events Disk<br />
Firmware Rev. : A93.0500<br />
Clear Event Identify Buffer Selected Drive<br />
Disk Capacity : 40.0GB<br />
Hardware Identify Monitor Bad Drive<br />
PIO Mode : Mode 4<br />
System information<br />
Current UDMA : ATA133<br />
Support UDMA : ATA133<br />
Device State : RaisSet Member<br />
Arrow Key: Move Cursor, Enter: Select, ESC: Escape, L:Line Draw, X: Redraw<br />
When you choose this option, the physical disks in the SATA<br />
RAID controller are listed. Move the cursor to the desired drive<br />
and press Enter. The following appears:<br />
5.5.4.2 Create Pass-Through Disk<br />
5.5.4.2.1 For MR5S1<br />
Main Menu<br />
Quick Volume/RAID Setup<br />
RAID Physical Set Function Drive Function<br />
Volume Set Function<br />
Physical View Drives Drive Information<br />
RAID Create System Pass-Through Pass-Through Function Disk<br />
Disk Attribute Create Pass-Through<br />
Ethernet Modify Configuration Pass-Through Disk<br />
SCSI Channel : 0<br />
View System Delete Pass-Through Events Disk<br />
Yes<br />
SCSI ID : 0<br />
Clear Event Identify Buffer Selected Drive<br />
No<br />
SCSI LUN : 2<br />
Hardware Identify Monitor Bad Drive<br />
Cache Mode : Write Back<br />
System information Tag Queuing : Enabled<br />
Max Sync Rate : 320MB/sec<br />
Arrow Key: Move Cursor, Enter: Select, ESC: Escape, L:Line Draw, X: Redraw<br />
Disk drive is not controlled by the RAID subsystem firmware<br />
and thus cannot be a part of a Volume Set. The disk is available<br />
to the operating system as an individual disk. It is typically<br />
used on a system where the operating system is on a disk<br />
not controlled by the RAID subsystem firmware. The SCSI<br />
114
VT-100 UTILITY CONFIGURATION<br />
Channel, SCSI ID, SCSI LUN, Cache Mode, Tag Queuing, and<br />
Max Sync Rate items detail descriptioini can reference the Create<br />
Volume Set for MR5S1 section.<br />
5.5.4.2.2 For MR5CT1<br />
Main Menu<br />
Quick Volume/RAID Setup<br />
RAID Physical Set Function Drive Function<br />
Volume Set Function<br />
Physical View Drives Drive Information<br />
RAID Create System Pass-Through Pass-Through Function Disk<br />
Disk Attribute Create Pass-Through<br />
Ethernet Modify Configuration Pass-Through Disk<br />
IDE Channel : 0<br />
View System Delete Pass-Through Events Disk<br />
Yes<br />
Drive Select : 2-Reserved<br />
Clear Event Identify Buffer Selected Drive<br />
No<br />
Cache Mode : Write Back<br />
Hardware Identify Monitor Bad Drive<br />
Tag Queuing : Enabled<br />
System information IDE Xfer Mode : ATA133<br />
Arrow Key: Move Cursor, Enter: Select, ESC: Escape, L:Line Draw, X: Redraw<br />
Disk drive is not controlled by the RAID subsystem firmware<br />
and thus cannot be a part of a Volume Set. The disk is available<br />
to the operating system as an individual disk. It is typically<br />
used on a system where the operating system is on a disk not<br />
controlled by the RAID subsystem firmware. The IDE Channel,<br />
Drive Select, Cache Mode, Tag Queuing, and IDE Xfer Mode<br />
items detail descriptioini can reference the Create Volume Set<br />
for MR5CT1 section.<br />
5.5.4.3 Modify Pass-Through Disk<br />
Use this option to modify the Pass-Through Disk Attribute. To<br />
modify Pass-Through Disk parameters values from Pass-Through<br />
Disk pool, move the cursor bar to the Physical Drive Function<br />
menu and select the Modify Pass-Through Drive option and then<br />
press Enter key. The Physical Drive Function menu will show all<br />
RAID Pass-Through Drive number option. Move the cursor bar to<br />
a desired item, then press Enter key to show all Pass-Through<br />
Disk Attribute. Select the parameter from the list you which to<br />
change, press Enter key to modify it.<br />
115
VT-100 UTILITY CONFIGURATION<br />
5.5.4.4 Delete Pass-Through Disk<br />
Main Menu<br />
Quick Volume/RAID Setup<br />
RAID Physical Set Function Drive Function<br />
Volume Set Function<br />
Physical View Drives Drive Information<br />
RAID Create System Pass-Through Function Disk<br />
Ethernet Modify Configuration Pass-Through Disk<br />
View System Delete Pass-Through Events<br />
Select The Disk<br />
Drive<br />
Delete Pass-Through<br />
Clear Event Identify Buffer Selected<br />
Ch01|<br />
Drive<br />
80.0GB| Pass Through |ST380013AS<br />
Hardware Identify Monitor Bad Drive<br />
Yes<br />
System information<br />
No<br />
Arrow Key: Move Cursor, Enter: Select, ESC: Escape, L:Line Draw, X: Redraw<br />
To delete Pass-through drive from the Pass-through drive pool,<br />
move the cursor bar to the Physical Drive Function menu and<br />
select the Delete pass-through drive item, then press Enter key.<br />
The Delete Pass-Through confirmation screen will appear and<br />
press Yes key to delete it.<br />
5.5.4.5 Identify Selected Drive<br />
Main Menu<br />
Quick Volume/RAID Setup<br />
RAID Physical Set Function Drive Function<br />
Volume Set Function<br />
Physical View Drives Drive<br />
Select<br />
Information<br />
The Drive<br />
RAID Create System Pass-Through Function Disk<br />
Ethernet Modify Configuration Pass-Through Ch01| 80.0GB|RAIDSet Disk Member|ST380013AS<br />
View System Delete Pass-Through Events Ch02| 80.0GB|RAIDSet Disk Member|ST380013AS<br />
Clear Event Identify Buffer Selected Ch03| Drive<br />
80.0GB|RAIDSet Member|ST380013AS<br />
Hardware Identify Monitor Bad Ch04| Drive 80.0GB| Pass Throught |ST380013AS<br />
System information<br />
Arrow Key: Move Cursor, Enter: Select, ESC: Escape, L:Line Draw, X: Redraw<br />
To prevent removing the wrong drive, the selected disk HDD<br />
LED Indicator will light for physically locating the selected disk<br />
when the Identify Selected Device is selected.<br />
116
VT-100 UTILITY CONFIGURATION<br />
5.5.5 RAID System Function<br />
Main Menu<br />
Quick Volume/RAID Setup<br />
RAID Set Function<br />
Volume Set Function<br />
Physical Drives<br />
RAID System Function<br />
Ethernet Configuration<br />
View System Events<br />
Clear Event Buffer<br />
Hardware Monitor<br />
System information<br />
Arrow Key: Move Cursor, Enter: Select, ESC: Escape, L:Line Draw, X: Redraw<br />
To set the RAID system function, move the cursor bar to the main<br />
menu and select the “RAID System Function” item and then<br />
press Enter key. The RAID System Function menu will show all<br />
items. Move the cursor bar to an item, then press Enter key to<br />
select the desired function.<br />
5.5.5.1 Mute The Alert Beeper<br />
Main Menu<br />
Quick Volume/RAID System Setup Function<br />
RAID Set Function<br />
Volume Set Mute Function The Alert Beeper<br />
Physical Drives Alert Beeper Setting<br />
Mute Alert Beeper<br />
RAID System Change Function Password<br />
Ethernet Configuration JBOD/RAID Function<br />
Yes<br />
View System RAID Events Rebuild Priority<br />
No<br />
Clear Event Maximum Buffer ATA Mode<br />
Hardware Monitor HDD Read Ahead Cache<br />
System information Stagger Power On<br />
HDD SMART Stautus<br />
Polling<br />
Capacity Truncation<br />
Arrow Key: Move Terminal Cursor, Port Enter: Config Select, ESC: Escape, L:Line Draw, X: Redraw<br />
Update Firmware<br />
The Mute The Alert Beeper function item is used to control the<br />
SATA RAID controller Beeper. Select the No and press Enter key<br />
in the dialog box to turn the beeper off temporarily. The beeper<br />
will still activate on the next event.<br />
117
VT-100 UTILITY CONFIGURATION<br />
5.5.5.2 Alert Beeper Setting<br />
Main Menu<br />
RAID System Function<br />
Quick Volume/RAID Setup<br />
RAID Set Function Mute The Alert Beeper<br />
Volume Set Function Alert Beeper Setting<br />
Physical Drives Change Password<br />
Alert Beeper Setting<br />
JBOD/RAID Function<br />
RAID System Function<br />
Disabled<br />
Ethernet Configuration RAID Rebuild Priority<br />
Enabled<br />
View System Maximum Events ATA Mode<br />
Clear Event Buffer HDD Read Ahead Cache<br />
Hardware Monitor Stagger Power On<br />
System information HDD SMART Stautus<br />
Polling<br />
Capacity Truncation<br />
Terminal Port Config<br />
Arrow Key: Move Update Cursor, Firmware Enter: Select, ESC: Escape, L:Line Draw, X: Redraw<br />
The Mute The Alert Beeper function item is used to control the<br />
SATA RAID controller Beeper. Select the No and press Enter key<br />
in the dialog box to turn the beeper off temporarily. The beeper<br />
will still activate on the next event.<br />
5.5.5.3 Change Password<br />
118<br />
Main Menu<br />
Quick Volume/RAID System Setup Function<br />
RAID Set Function<br />
Mute The Alert Beeper<br />
Volume Set Function<br />
Alert Beeper Setting<br />
Physical Drives<br />
Change Password<br />
Enter New Password<br />
RAID System<br />
JBOD/RAID<br />
Function<br />
Function<br />
Ethernet Configuration<br />
RAID Rebuild Priority<br />
View System Events<br />
Maximum ATA Mode<br />
Clear Event Buffer<br />
HDD Read Ahead Cache<br />
Hardware Monitor<br />
Stagger Power On<br />
System information<br />
HDD SMART Stautus<br />
Polling<br />
Capacity Truncation<br />
Arrow Key: Move<br />
Terminal<br />
Cursor, Enter:<br />
Port Config<br />
Select, ESC: Escape, L:Line Draw, X: Redraw<br />
Update Firmware<br />
The password option allows user to set or clear the password<br />
protection feature. Once the password has been set, the user<br />
can only monitor and configure the controller by providing the<br />
correct password. This feature is used to protect the internal<br />
RAID system from unauthorized entry. The controller will check<br />
the password only when entering the Main menu from the initial<br />
screen. The system will automatically go back to the initial
VT-100 UTILITY CONFIGURATION<br />
screen when it does not received any command in 20 seconds.<br />
To set or change the password, move the cursor to RAID System<br />
Function screen, press the Change Password item. The Enter<br />
New Password screen appears.<br />
To disable the password, press Enter only in both the Enter<br />
New Password and Re-Enter New Password column. The existing<br />
password will be cleared. No password checking will occur when<br />
entering the main menu from the starting screen.<br />
5.5.5.4 JBOD/RAID Configuration<br />
Main Menu<br />
Quick Volume/RAID RAID Setup System Function<br />
RAID Set Function<br />
Volume Set Function<br />
Mute The Alert Beeper<br />
Physical Drives<br />
Alert Beeper Setting<br />
Change Password<br />
RAID System Function<br />
JBOD/RAID Function<br />
JBOD/RAID<br />
Ethernet Configuration<br />
Function<br />
View System Events<br />
RAID Rebuild Priority<br />
RAID<br />
Clear Event Buffer<br />
Maximum ATA Mode<br />
JBOD<br />
Hardware Monitor<br />
HDD Read Ahead Cache<br />
System information<br />
Stagger Power On<br />
HDD SMART Stautus<br />
Polling<br />
Capacity Truncation<br />
Arrow Key: Move Cursor, Terminal Enter: Port Select, Config ESC: Escape, L:Line Draw, X: Redraw<br />
Update Firmware<br />
JBOD/RAID Configuration (For MR5CT1)<br />
JBOD is an acronym for “just a Bunch Of Disk”. It represents<br />
a volume set that is created by the concatenation of partitions<br />
on the disk. For MR5CT1, it only can see 2 disks, when<br />
you selected the JBOD option. User needs to deleted the RAID<br />
set, when you want to change the option from the RAID to the<br />
JBOD function.<br />
JBOD/RAID Configuration (For MR5S1)<br />
JBOD is an acronym for “just a Bunch Of Disk”. It represents<br />
a volume set that is created by the concatenation of partitions<br />
on the disk. For MR5S1, it can see 5 individual disks, when<br />
you selected the JBOD option. User needs to deleted the RAID<br />
set, when you want to change the option from the RAID to the<br />
JBOD function.<br />
119
VT-100 UTILITY CONFIGURATION<br />
5.5.5.5 RAID Rebuild Priority<br />
Main Menu<br />
Quick Volume/RAID System Setup Function<br />
RAID Set Function<br />
Mute The Alert Beeper Background Track Priority<br />
Volume Set Function<br />
Alert Beeper Setting<br />
Physical Drives<br />
Ultra Low (5%)<br />
Change Password<br />
Low (20%)<br />
RAID System JBOD/RAID Function Function<br />
Ethernet Configuration<br />
Medium (50%)<br />
RAID Rebuild Priority<br />
View System Events<br />
High (80%)<br />
Maximum ATA Mode<br />
Clear Event Buffer<br />
HDD Read Ahead Cache<br />
Hardware Monitor<br />
Stagger Power On<br />
System information<br />
HDD SMART Stautus<br />
Polling<br />
Capacity Truncation<br />
Terminal Port Config<br />
Arrow Key: Move Cursor, Enter: Select, ESC: Escape, L:Line Draw, X: Redraw<br />
Update Firmware<br />
The “RAID Rebuild Priority” is a relative indication of how<br />
much time the controller devotes to a background operation,<br />
such as rebuild or migrating. The RAID controller allows user<br />
to choose the rebuild priority to balance volume set access and<br />
background tasks appropriately.<br />
5.5.5.6 Maximum SATA Mode<br />
Main Menu<br />
Quick Volume/RAID System Setup Function<br />
RAID Set Function<br />
Mute The Alert Beeper<br />
Volume Set Function<br />
Alert Beeper Setting<br />
Physical Drives<br />
Maximum SATA Mode<br />
Change Password<br />
RAID System FunctionEth-<br />
JBOD/RAID Function<br />
Ethernet Configuration<br />
SATA ATA33 150<br />
RAID Rebuild Priority<br />
View System Events<br />
SATA 150+NCQ<br />
Maximum ATA Mode<br />
Clear Event Buffer<br />
SATA 320<br />
HDD Read Ahead Cache<br />
Hardware Monitor<br />
SATA 320+NCQ<br />
Stagger Power On<br />
System information<br />
HDD SMART Stautus<br />
Polling<br />
Capacity Truncation<br />
Terminal Port Config<br />
Arrow Key: Move Cursor, Enter: Select, ESC: Escape, L:Line Draw, X: Redraw<br />
Update Firmware<br />
120<br />
Within the subsystem, the SCSI chip acts as a target and 5 SATA<br />
ll bus are connected to the drive. The 5 SATA drive channel can<br />
support up to SATA ll, which runs up to 300MB/s. NCQ is a command<br />
protocol in Serial ATA that can only be implemented on
VT-100 UTILITY CONFIGURATION<br />
native Serial ATA hard drives. It allows multiple commands to be<br />
outstanding within a drive at the same time. Drives that support<br />
NCQ have an internal queue where outstanding commands<br />
can be dynamically rescheduled or re-ordered, along with the<br />
necessary tracking mechanisms for outstanding and completed<br />
portions of the workload. The RAID subsystem allows user<br />
to choose the SATA Mode: SATA150, SAT150+NCQ, SAT300,<br />
SATA300+NCQ.<br />
5.5.5.7 HDD Read Ahead Cache<br />
Allow Read Ahead (Default: Enabled)—When Enabled, the drive’<br />
s read ahead cache algorithm is used, providing maximum<br />
performance under most circumstances.<br />
Main Menu<br />
Quick Volume/RAID System Setup Function<br />
RAID Set Function<br />
Mute The Alert Beeper<br />
Volume Set Function<br />
Alert Beeper Setting<br />
Physical Drives<br />
HDD Read Ahead Cache<br />
Change Password<br />
RAID System Function JBOD/RAID Function<br />
Enabled<br />
Ethernet Configuration<br />
RAID Rebuild Priority<br />
Disable Maxtor<br />
View System Events<br />
Maximum ATA Mode<br />
Disabled<br />
Clear Event Buffer<br />
HDD Read Ahead Cache<br />
Hardware Monitor<br />
Stagger Power On<br />
System information<br />
HDD SMART Stautus<br />
Polling<br />
Capacity Truncation<br />
Terminal Port Config<br />
Arrow Key: Move Cursor, Enter: Select, ESC: Escape, L:Line Draw, X: Redraw<br />
Update Firmware<br />
5.5.5.8 Stagger Power On<br />
In a PC system with only one or two drives, the power can<br />
supply enough power to spin up both drives simultaneously. But<br />
in systems with more than two drives, the startup current from<br />
spinning up the drives all at once can overload the power supply,<br />
causing damage to the power supply, disk drives and other<br />
system components. This damage can be avoided by allowing<br />
the host to stagger the spin-up of the drives. New SATA drives<br />
have support staggered spin-up capabilities to boost reliability.<br />
Staggered spin-up is a very useful feature for managing multiple<br />
disk drives in a storage subsystem. It gives the host the ability<br />
121
VT-100 UTILITY CONFIGURATION<br />
to spin up the disk drives sequentially or in groups, allowing<br />
the drives to come ready at the optimum time without straining<br />
the system power supply. Staggering drive spin-up in a multiple<br />
drive environment also avoids the extra cost of a power supply<br />
designed to meet short-term startup power demand as well as<br />
steady state conditions.<br />
<strong>Sans</strong> <strong>Digital</strong> has supported the fixed value staggered power up<br />
function in its previous version firmware. But from firmware<br />
version 1.39, <strong>Sans</strong> <strong>Digital</strong> RAID controller has included the<br />
option for customer to select the disk drives sequentially stagger<br />
power up value. The values can be selected from 0.4ms to 6ms<br />
per step which powers up one drive.<br />
Main Menu<br />
Quick Volume/RAID System Setup Function<br />
RAID Set Function<br />
Mute The Alert Beeper<br />
Volume Set Function<br />
Alert Beeper Setting<br />
Physical Drives<br />
Stagger Power On<br />
Change Password<br />
RAID System Function JBOD/RAID Function<br />
0.4<br />
Ethernet Configuration<br />
RAID Rebuild Priority<br />
0.7<br />
View System Events<br />
Maximum ATA Mode<br />
1.0<br />
Clear Event Buffer<br />
HDD Read Ahead Cache<br />
1.5<br />
Hardware Monitor<br />
Stagger Power On<br />
.<br />
System information<br />
HDD SMART Stautus<br />
.<br />
Polling<br />
6.0<br />
Capacity Truncation<br />
Terminal Port Config<br />
Arrow Key: Move Cursor, Enter: Select, ESC: Escape, L:Line Draw, X: Redraw<br />
Update Firmware<br />
5.5.5.9 HDD SMART Status Polling<br />
An external RAID enclosure has the hardware monitor in the<br />
dedicated backplane that can report HDD temperature status<br />
to the controller. However, PCI cards do not use backplanes if<br />
the drives are internal to the main server chassis. The type of<br />
enclosure cannot report the HDD temperature to the controller.<br />
For this reason, HDD SMART Status Polling was added to enable<br />
scanning of the HDD temperature function in the version 1.36<br />
date: 2005-05-19 (and later). It is necessary to enable “HDD<br />
SMART Status Polling” function before SMART information is<br />
accessible. This function is disabled by default.<br />
122
VT-100 UTILITY CONFIGURATION<br />
The following screen shot shows how to change the BIOS setting<br />
to enable the Polling function.<br />
Main Menu<br />
Quick Volume/RAID System Setup Function<br />
RAID Set Function<br />
Mute The Alert Beeper<br />
Volume Set Function<br />
Alert Beeper Setting<br />
Physical Drives<br />
HDD SMART Stautus Polling<br />
Change Password<br />
Disabled<br />
RAID System Function JBOD/RAID Function<br />
Ethernet Configuration<br />
Enabled<br />
RAID Rebuild Priority<br />
View System Events<br />
Maximum ATA Mode<br />
Clear Event Buffer<br />
HDD Read Ahead Cache<br />
Hardware Monitor<br />
Stagger Power On<br />
System information<br />
HDD SMART Stautus Polling<br />
Polling<br />
Capacity Truncation<br />
Terminal Port Config<br />
Arrow Key: Move Cursor, Enter: Select, ESC: Escape, L:Line Draw, X: Redraw<br />
Update Firmware<br />
5.5.5.10 Disk Capacity Truncation Mode<br />
<strong>Sans</strong> <strong>Digital</strong> RAID controllers use drive truncation so that drives<br />
from differing vendors are more likely to be able to be used as<br />
spares for each other. Drive truncation slightly decreases the usable<br />
capacity of a drive that is used in redundant units.<br />
The controller provides three truncation modes in the system<br />
configuration: Multiples Of 10G, Multiples Of 1G, and No<br />
Truncation.<br />
Main Menu<br />
Quick Volume/RAID RAID Setup System Function<br />
RAID Set Function<br />
Volume Set Function<br />
Mute The Alert Beeper<br />
Physical Drives<br />
Alert Beeper Setting<br />
Truncation Disk Capacity<br />
Change Password<br />
RAID System Function<br />
Ethernet Configuration<br />
JBOD/RAID Function<br />
Multiples ATA33 of 10G<br />
View System Events<br />
RAID Rebuild Priority<br />
Multiples of 1G<br />
Disable<br />
Clear Event Buffer<br />
Maximum ATA Mode<br />
Hardware Monitor<br />
HDD Read Ahead Cache<br />
System information<br />
Stagger Power On<br />
HDD SMART Stautus<br />
Capacity Polling Truncation<br />
Capacity Truncation<br />
Arrow Key: Move Cursor, Terminal Enter: Port Select, Config ESC: Escape, L:Line Draw, X: Redraw<br />
Update Firmware<br />
123
VT-100 UTILITY CONFIGURATION<br />
Multiples Of 10G: If you have 120 GB drives from different<br />
vendors; chances are that the capacity varies slightly. For<br />
example, one drive might be 123.5 GB, and the other 120 GB.<br />
<strong>Sans</strong> <strong>Digital</strong> drive Truncation mode Multiples Of 10G uses the<br />
same capacity for both of these drives so that one could replace<br />
the other.<br />
Multiples Of 1G: If you have 123 GB drives from different vendors;<br />
chances are that the capacity varies slightly. For example,<br />
one drive might be 123.5 GB, and the other 123.4 GB. <strong>Sans</strong><br />
<strong>Digital</strong> drive Truncation mode Multiples Of 1G uses the same<br />
capacity for both of these drives so that one could replace the<br />
other.<br />
No Truncation: It does not truncate the capacity.<br />
Main Menu<br />
Quick Volume/RAID Setup System Function<br />
RAID Set Function<br />
Mute The Alert Beeper<br />
Volume Set Function<br />
RS232 Speed Selection<br />
Alert Beeper Setting<br />
Physical Drives<br />
Change Password<br />
1200<br />
RAID System Function<br />
JBOD/RAID Function<br />
Ethernet Configuration<br />
2400<br />
RAID Rebuild Priority<br />
View System Events<br />
4800<br />
Maximum<br />
Clear Event Buffer Terminal ATA Mode Port Config 9600<br />
HDD Read Ahead Cache<br />
Hardware Monitor<br />
19200<br />
Stagger Power On<br />
System information<br />
Baud 1200 Rate 38400<br />
HDD SMART Stautus Stop Bits 57600<br />
Polling<br />
115200<br />
Terminal Capacity Port Truncation Config<br />
Arrow Key: Move Cursor,<br />
Terminal<br />
Enter:<br />
Port<br />
Select,<br />
Config<br />
ESC: Escape, L:Line Draw, X: Redraw<br />
Update Firmware<br />
Parity Value is fixed at None.<br />
Handshaking value is fixed at None.<br />
Speed sending values are 1200, 2400, 4800, 9600, 19200,<br />
38400, 57600, and 115200.<br />
124
VT-100 UTILITY CONFIGURATION<br />
Main Menu<br />
Quick Volume/RAID System Setup Function<br />
RAID Set Function<br />
Mute The Alert Beeper<br />
Volume Set Function<br />
Alert Beeper Setting<br />
Physical Drives<br />
Change Password<br />
RAID System JBOD/RAID<br />
Function<br />
Function<br />
Ethernet Configuration<br />
RAID Rebuild Priority<br />
View System Events<br />
Maximum ATA Mode<br />
Clear Event Buffer Terminal Port Config Select Stop Bits<br />
HDD Read Ahead Cache<br />
Hardware Monitor<br />
Stagger Power On Baud 1200 Rate 1200<br />
System information<br />
1 bit<br />
HDD SMART Stautus Stop Bits 2 bits<br />
Polling<br />
Terminal Capacity Port Truncation Config<br />
Arrow Key: Move<br />
Terminal<br />
Cursor, Enter:<br />
Port Config<br />
Select, ESC: Escape, L:Line Draw, X: Redraw<br />
Update Firmware<br />
Stop Bits values are 1 bit and 2 bits.<br />
5.5.5.12 Update Firmware<br />
Please refer to the appendix B firmware utility for updating firmware.<br />
Note:<br />
1. The Bootable CD VT100 utility connected through the con<br />
troller’s serial port cannot support the update firmware feature.<br />
2. User can only update the firmware through the VT100<br />
Terminal or web browser-based RAID Management via HTTP<br />
Proxy through the controller’s serial port or LAN port.<br />
5.5.5.13 Restart Controller<br />
Use the Restart Controller Function to restart the RAID subsystem<br />
controller. To restart the controller, move the cursor bar to<br />
the Main menu RAID System Function itme and then press the<br />
Enter key. The RAID system Function menu appears on the<br />
screen. Press Enter key to select Restart Controller item. The<br />
Restart Controller confirmation screen appers. Select Yes key to<br />
restart entire RAID System.<br />
125
VT-100 UTILITY CONFIGURATION<br />
Main Menu<br />
Quick Volume/RAID System Setup Function<br />
RAID Set Function<br />
Volume Set Mute Function The Alert Beeper<br />
Physical Drives Alert Beeper Setting<br />
RAID System Change Function Password<br />
Ethernet Configuration JBOD/RAID Function<br />
View System RAID Events Rebuild Priority<br />
Clear Event Maximum Buffer ATA Mode<br />
Hardware Monitor Capacity Truncation<br />
System information Terminal Port Config<br />
Update Firmware<br />
Restart Controller<br />
Restart Controller?<br />
1200 Yes<br />
No<br />
Arrow Key: Move Cursor, Enter: Select, ESC: Escape, L:Line Draw, X: Redraw<br />
Note:<br />
It can only work properly at Host and Drive without any activity.<br />
5.5.6 U320 SCSI Target Configuration<br />
(MR5S1 only)<br />
Main Menu<br />
Quick Volume/RAID Setup<br />
RAID Set Function<br />
Volume Set Function U320 SCSI Target Config<br />
Physical Drives<br />
RAID System Function Mute The Ch0 Alert QAS Beeper<br />
U320 SCSI Target Config<br />
Ethernet Configuration<br />
View System Events<br />
Clear Event Buffer<br />
Hardware Monitor<br />
System information<br />
Ch0 QAS<br />
Enable 1200<br />
Disable<br />
Arrow Key: Move Cursor, Enter: Select, ESC: Escape, L:Line Draw, X: Redraw<br />
Arbitration allows one SCSI device to gain control of the SCSI bus<br />
to allow that SCSI device to initiate or resume a task. There are<br />
two methods that a SCSI device may use to arbitrate for the SCSI<br />
126
VT-100 UTILITY CONFIGURATION<br />
bus: normal arbitration and QAS. Normal arbitration is mandatory<br />
and requires the detection of a BUS FREE phase on the SCSI bus<br />
before starting. QAS is optional and, when enabled, requires the<br />
initiation and detection of a QAS REQUEST message before starting.<br />
Press Enter to enter the Main menu. Press UP/DOWN key<br />
to select the U320 SCSI Target option, and then press Enter.<br />
5.5.7 Ethernet Configuration<br />
Use this feature to set the controller Ethernet port configuration.<br />
Customer doesn’t need to create a reserved space on the arrays<br />
before the Ethernet port and HTTP service working.<br />
5.5.7.1 DHCP Function<br />
DHCP (Dynamic Host Configuration Protocol) is a protocol that<br />
lets network administrators manage centrally and automate the<br />
assignment of IP (Internet Protocol) configurations on a computer<br />
network. When using the Internet’s set of protocols (TCP/<br />
IP), in order for a computer system to communicate to another<br />
computer system it needs a unique IP address. Without DHCP,<br />
the IP address must be entered manually at each computer system.<br />
DHCP lets a network administrator supervise and distribute<br />
IP addresses from a central point. The purpose of DHCP is to<br />
provide the automatic (dynamic) allocation of IP client configurations<br />
for a specific time period (called a lease period) and to<br />
eliminate the work necessary to administer a large IP network.<br />
To manually configure the IP address of the controller, move the<br />
cursor bar to the Main menu Ethernet Configuration Function<br />
item and then press the Enter key. The Ethernet Configuration<br />
menu appears on the screen. Move the cursor bar to DHCP<br />
Function item, then press Enter key to show the DHCP setting.<br />
Select the “Disabled’ or ‘Enabled” option to enable or disable the<br />
DHCP function.<br />
127
VT-100 UTILITY CONFIGURATION<br />
Main Menu<br />
Quick Volume/RAID Setup<br />
RAID Set Function<br />
Ethernet Configuration<br />
Volume Set Function<br />
Physical DHCP Drives<br />
Function : Enable<br />
RAID Local System IP Function Address : 192.168.001.100<br />
U320 SCSI Target Config<br />
Select DHCP Setting<br />
HTTP Port Number : 00080<br />
Ethernet Telnet Configuration Port Number : 00023 Disabled<br />
View System SMTP Port Events Number : 00025<br />
Enabled<br />
Clear Event Ethernet Buffer Address : 00.04.D9.7F.FF.FF<br />
Hardware Monitor<br />
System information<br />
Arrow Key: Move Cursor, Enter: Select, ESC: Escape, L:Line Draw, X: Redraw<br />
5.5.7.2 Local IP address<br />
If you intend to set up your client computers manually, make<br />
sure that the assigned IP address is in the same range of your<br />
default router address and that it is unique to your private network.<br />
However we would highly recommend that if you have a<br />
network of computers and the option to assign your TCP/IP client<br />
configurations automatically, please do. An IP address allocation<br />
scheme will reduce the time it takes to set-up client computers<br />
and eliminate the possibilities of administrative errors.<br />
To manually configure the IP address of the controller, move the<br />
cursor bar to the Main menu Ethernet Configuration Function<br />
item and then press the Enter key. The Ethernet Configuration<br />
menu appears on the screen.<br />
Main Menu<br />
Quick Volume/RAID Setup<br />
RAID Set Function<br />
Ethernet Configuration<br />
Volume Set Function<br />
Physical DHCP Drives Function : Enable<br />
RAID Local System IP Function Address : 192.168.001.100<br />
U320 HTTP SCSI Target Port Number Config : 00080<br />
Ethernet Telnet Configuration Port Number :<br />
Edit<br />
00023<br />
The local IP Address<br />
View System SMTP Port Events Number : 00025<br />
Clear Event Ethernet Buffer 1 92.168.001.100<br />
Address : 00.04.D9.7F.FF.FF<br />
Hardware Monitor<br />
System information<br />
Arrow Key: Move Cursor, Enter: Select, ESC: Escape, L:Line Draw, X: Redraw<br />
128
VT-100 UTILITY CONFIGURATION<br />
Move the cursor bar to Local IP Address item, then press Enter<br />
key to show the default address setting in the RAID controller.<br />
You can reassign the IP address of the controller.<br />
5.5.7.3 Ethernet Address<br />
A MAC address stands for Media Access Control address and is<br />
your computer’s unique hardware number. On an Ethernet LAN,<br />
it’s the same as your Ethernet address. When you’re connected<br />
to the Internet from the RAID controller Ethernet port, a correspondence<br />
table relates your IP address to the RAID controller’s<br />
physical (MAC) address on the LAN.<br />
Main Menu<br />
Quick Volume/RAID Setup<br />
RAID Set Function<br />
Ethernet Configuration<br />
Volume Set Function<br />
Physical DHCP Drives Function : Enable<br />
RAID Local System IP Function Address : 192.168.001.100<br />
U320 HTTP SCSI Target Port Number Config : 00080<br />
Ethernet Telnet Configuration Port Number : 00023<br />
View System SMTP Port Events Number : 00025<br />
Clear Ethernet Event Buffer Address<br />
: 00.04.D9.7F.FF.FF<br />
Hardware Monitor<br />
System information<br />
Arrow Key: Move Cursor, Enter: Select, ESC: Escape, L:Line Draw, X: Redraw<br />
5.5.8 View System Events<br />
To view the SATA RAID controller’s information, move the cursor<br />
bar to the main menu and select the View Events link, then press<br />
the Enter key The SATA RAID controller’s events screen appear.<br />
Choose this option to view the system events information: Timer,<br />
Device, Event type, Elapse Time and Errors. The RAID system<br />
does not built the real time clock. The Time information is the<br />
relative time from the SATA RAID controller power on.<br />
129
VT-100 UTILITY CONFIGURATION<br />
Main Menu<br />
Quick Volume/RAID Setup<br />
RAID Set Function<br />
Volume Set Function<br />
Physical<br />
Time<br />
Drives<br />
Device Event Type ElapseTime Errors<br />
2004-1-1 RAID System 12:00:00 Function H/W Monitor RAID Powered On<br />
2004-1-1 View System 12:00:00 Events H/W Monitor RAID Powered On<br />
2004-1-1 Clear Event 12:00:00 Buffer H/W Monitor RAID Powered On<br />
Hardware Monitor<br />
System information<br />
Arrow Key: Move Cursor, Enter: Select, ESC: Escape, L:Line Draw, X: Redraw<br />
5.5.9 Clear Events Buffer<br />
Use this feature to clear the entire events buffer information.<br />
5.5.10 Hardware Monitor Information<br />
The Hardware Monitor Information provides the temperature,<br />
fan speed (chassis fan) and voltage of the internal RAID subsystem.<br />
The temperature items list the current states of the controller<br />
board and backplane. All items are also unchangeable. The<br />
warning messages will indicate through the LCM, LED and alarm<br />
buzzer.<br />
Below screen is Hardware Monitor Information.<br />
Main Menu<br />
Quick Volume/RAID Setup<br />
RAID Set Function<br />
The Harware Monitor Information<br />
Volume Set Function<br />
Physical Drives Controller Temp. : 36 (Celsius)<br />
RAID System Function BackPlane Temp. : 33 (Celsius)<br />
Ethernet Configuration Fan Speed (RPM) : 3013<br />
View System Events Power +12V : 11.977<br />
Clear Event BufferPower +5V : 4.892<br />
Hardware MonitorPower +3V : 3.296<br />
System information Power +1.5V : 1.520<br />
Arrow Key: Move Cursor, Enter: Select, ESC: Escape, L:Line Draw, X: Redraw<br />
130
VT-100 UTILITY CONFIGURATION<br />
Item<br />
Warning Condition<br />
Controller Board Temperature<br />
> 60 O<br />
Backplane Temperature<br />
> 55 O<br />
Controller Fan Speed<br />
< 1900 RPM<br />
Power Supply +12V < 10.5V or > 13.5V<br />
Power Supply +5V < 4.7V or > 5.3V<br />
Power Supply +3.3V < 3.0V or > 3.6V<br />
CPU Core Voltage +1.5V < 1.35V or > 1.65V<br />
5.5.11 System Information<br />
Choose this option to display Main processor, CPU Instruction<br />
cache and data cache size, firmware version, serial number,<br />
controller model name, and the cache memory size. To check the<br />
system information, move the cursor bar to System Information<br />
item, then press Enter key. All major controller system information<br />
will be displayed.<br />
131
WEB BROWSER-BASED CONFIGURATION<br />
6. Web Browser-based Configuration<br />
The RAID subsystem web browser-based configuration utility is firmware-based<br />
and uses to configure RAID sets and volume sets. Use this<br />
utility to:<br />
132<br />
• Create RAID set,<br />
• Expand RAID set,<br />
• Define volume set,<br />
• Add physical drive,<br />
• Modify volume set,<br />
• Modify RAID level/stripe size,<br />
• Define pass-through disk drives,<br />
• Modify system function,<br />
• Update firmware and,<br />
• Designate drives as hot spares.<br />
If you need to boot the operating system from a RAID system, you<br />
must first create a RAID volume by using front panel touch-control<br />
keypad, Bootable CD VT-100 utility at X86-based system, Web Browser<br />
through Ethernet LAN, or VT-100 terminal.<br />
6.1 Firmware-embedded TCP/IP & web<br />
browser-based RAID manager (using the<br />
controller’s 10/100 Ethernet LAN port)<br />
To ensure proper communications between the RAID subsystem<br />
and Web browser-based RAID management, Please connect the<br />
RAID system Ethernet LAN port to any LAN switch port.<br />
The controller has embedded the TCP/IP & Web Browser-based<br />
RAID manager in the firmware. User can remote manage the RAID<br />
system without adding any user specific software (platform independent)<br />
via standard web browsers directly connected to the<br />
10/100 Ethernet RJ45 LAN port.<br />
To configure Internal RAID subsystem on a local or remote machine,<br />
you need to know its IP Address. The IP address will default<br />
show in the LCD screen. Launch your firmware-embedded TCP/IP &<br />
Web Browser-based RAID manager by entering http://[IP Address]<br />
in the web browser.<br />
Note that you must be logged in as administrator with local admin
WEB BROWSER-BASED CONFIGURATION<br />
rights on the remote machine to remotely configure it. The RAID<br />
subsystem controller default User Name is “admin” and the Password<br />
is “0000”.<br />
6.2 Configuring RAID Sets and Volume Sets<br />
You can configure RAID sets and volume sets with web browserbased<br />
RAID manager using Quick Create automatically, or RAID<br />
Set/Volume Set Function manually configuration method. Each<br />
configuration method requires a different level of user input. The<br />
general flow of operations for RAID set and volume set configuration<br />
is:<br />
Step<br />
Action<br />
1 Designate hot spares/pass-through (optional)<br />
2 Choose a configuration method<br />
3 Create RAID set using the available physical drives<br />
4 Define volume set using the space in the RAID set<br />
5 Initialize the volume set and use volume set in the HOST OS<br />
6.3 Designating Drives as Hot Spares<br />
All unused disk drive that is not part of a RAID set can be created<br />
as a Hot Spare. The Quick Create configuration will automatically<br />
add the spare disk drive with the RAID level for user to select. For<br />
the RAID Set Function configuration, user can use the Create Hot<br />
Spare option to define the hot spare disk drive. Reference the 6.9.5<br />
Create Hot Spare section.<br />
6.4 Using Quick Volume /RAID Setup Configuration<br />
In Quick Create Configuration, it collects all drives in the tray and<br />
include them in a RAID set. The RAID set you create is associated<br />
with exactly one volume set, and you can modify the default<br />
RAID level, stripe size, and capacity of the volume set. Designating<br />
Drives as Hot Spares will also show in the RAID level selection option.<br />
The volume set default settings will be:<br />
133
WEB BROWSER-BASED CONFIGURATION<br />
Parameter<br />
Volume Name Volume Set # 00<br />
SCSI Channel/SCSI ID/SCSI LUN 0/0/0<br />
Cache Mode<br />
Tag Queuing<br />
Max Sync Rate<br />
Write Back<br />
Yes<br />
Setting<br />
Depend on your hous adapter setting<br />
The default setting values can be changed after configuration is<br />
complete.<br />
Follow the steps below to create arrays using Quick Create Configuration:<br />
Step<br />
Action<br />
1 Choose Quick Volume /RAID Setup from the main menu. The available<br />
RAID levels with hot spare for the current volume set drive are displayed.<br />
2 Recommend use drives have same capacity in a specific array. If you use<br />
drives with different capacities in an array, all drives in the RAID set will<br />
select the lowest capacity of the drive in the RAID set.<br />
The numbers of physical drives in a specific array determine the RAID<br />
levels that can be implemented with the array.<br />
RAID 0 requires 1 or more physical drives.<br />
RAID 1 requires at least 2 physical drives.<br />
RAID 1+Spare requires at least 3 physical drives.<br />
RAID 3 requires at least 3 physical drives.<br />
RAID 5 requires at least 3 physical drives.<br />
RAID 6 requires at least 4 physical drives.<br />
RAID 3 + Spare requires at least 4 physical drives.<br />
RAID 5 + Spare requires at least 4 physical drives.<br />
RAID 6 + Spare requires at least 5 physical drives.<br />
Highlight RAID level for the volume set and press Enter key to confirm.<br />
3 Set the capacity size for the current volume set. After Highlight RAID<br />
level and press Enter key.<br />
The selected capacity for the current volume set is displayed. Using the<br />
UP and DOWN arrow key to create the current volume set capacity size<br />
and press Enter key to confirm. The available stripe sizes for the current<br />
volume set are displayed.<br />
4 Using UP and DOWN arrow key to select the current volume set stripe<br />
size and press Enter key to confirm it. This parameter specifies the size<br />
of the stripes written to each disk in a RAID 0, 1, 5 or 6 Volume Set. You<br />
can set the stripe size to 4 KB, 8 KB, 16 KB, 32 KB, 64 KB, or 128 KB.<br />
A larger stripe size provides better-read performance, especially if your<br />
computer does mostly sequential reads. However, if you are sure that<br />
your computer does random read requests more often, choose a small<br />
stripe size.<br />
134
WEB BROWSER-BASED CONFIGURATION<br />
5 When you are finished defining the volume set, press Enter key to confirm<br />
the Quick Volume And RAID Set Setup function.<br />
6 Press Enter key to define fast initialization or Selected the Background<br />
(Instant Available). When background Initialization, the initialization proceeds<br />
as a background task, the volume set is fully accessible for system<br />
reads and writes. The operating system can instantly access to the newly<br />
created arrays without requiring a reboot and waiting the initialization<br />
complete. When Initialization, the initialization proceeds must be completed<br />
before the volume set ready for system accesses.<br />
7 Initialize the volume set you have just configured.<br />
8 If you need to add additional volume set, using main menu Create Volume<br />
Set function.<br />
6.5 Using RAID Set/Volume Set Function<br />
Method<br />
In RAID Set Function, you can use the Create RAID Set function to<br />
generate the new RAID set. In Volume Set Function, you can use<br />
the Create Volume Set function to generate its associated volume<br />
set and parameters.<br />
If the current controller has unused physical devices connected,<br />
you can choose the Create Hot Spare option in the RAID Set Function<br />
to define a global hot spare. Select this method to configure<br />
new RAID sets and volume sets. The RAID Set/Volume Set Function<br />
configuration option allows you to associate volume set with<br />
partial and full RAID set.<br />
Note:<br />
User can use this method to examine the existing configuration.<br />
Modify volume set configuration method provides the same functions<br />
as create volume set configuration method. In volume set<br />
function, you can use the modify volume set function to modify<br />
the volume set parameters except the capacity size:<br />
Step<br />
Action<br />
1 To setup the Hot Spare (option), choose RAID Set Function from the<br />
main menu. Select the Create Hot Spare and press Enter key to set the<br />
Hot Spare.<br />
2 Choose RAID Set Function from the main menu. Select the Create RAID<br />
Set and press Enter key.<br />
135
WEB BROWSER-BASED CONFIGURATION<br />
3 Select a Drive For RAID Set window is displayed showing the IDE drive<br />
connected to the current controller.<br />
4 Press UP and DOWN arrow keys to select specific physical drives. Press<br />
the Enter key to associate the selected physical drive with the current<br />
RAID set.<br />
Recommend use drives has same capacity in a specific RAID set. If you<br />
use drives with different capacities in an array, all drives in the RAID set<br />
will select the lowest capacity of the drive in the RAID set.<br />
The numbers of physical drives in a specific RAID set determine the RAID<br />
levels that can be implemented with the RAID set.<br />
RAID 0 requires 1 or more physical drives.<br />
RAID 1 requires at least 2 physical drives.<br />
RAID 1+Spare requires at least 3 physical drives.<br />
RAID 3 requires at least 3 physical drives.<br />
RAID 5 requires at least 3 physical drives.<br />
RAID 6 requires at least 4 physical drives.<br />
RAID 3 + Spare requires at least 4 physical drives.<br />
RAID 5 + Spare requires at least 4 physical drives.<br />
RAID 6 + Spare requires at least 5 physical drives.<br />
5 After adding physical drives to the current RAID set as desired, press Yes<br />
to confirm the Create RAID Set function.<br />
6 An Edit The RAID Set Name dialog box appears. Enter 1 to 15 alphanumeric<br />
characters to define a unique identifier for a RAID set. The default<br />
RAID set name will always appear as RAID Set. #. Press Enter to finish<br />
the name editing.<br />
7 Press Enter key when you are finished creating the current RAID set. To<br />
continue defining another RAID set, repeat step 3. To begin volume set<br />
configuration, go to step 8.<br />
8 Choose Volume Set Function from the Main menu. Select the Create<br />
Volume Set and press Enter key.<br />
9 Choose one RAID set from the Create Volume From RAID Set window.<br />
Press Enter key to confirm it.<br />
10 The Volume Creation screen shows the volume set default attribute values<br />
that are currently being configured. The attribute column headings<br />
are:<br />
The RAID Level,<br />
The Stripe Size,<br />
The SCSI HOST/SCSI ID/SCSI LUN (MR5S1)<br />
The IDE Host channel /IDE Driver select (MR5CT1)<br />
The Cache Mode,<br />
The Tagged Queuing,<br />
The SCSI Max Rate (MR5S1),<br />
The IDE Xfer Mode (MR5CT1) and<br />
The Volume Name (number).<br />
The user can change all values<br />
After the current volume set attributes are defined, press Esc key to enter<br />
Initialization selection screen.<br />
136
WEB BROWSER-BASED CONFIGURATION<br />
11 Fast Initialization Press Enter key to define fast initialization and Esc key<br />
to normal initialization. In the Normal Initialization, the initialization proceeds<br />
as a background task, the volume set is fully accessible for system<br />
reads and writes. The operating system can instantly access to the newly<br />
created arrays without requiring a reboot and waiting the initialization<br />
complete. In Fast Initialization, the initialization proceeds must be completed<br />
before the volume set ready for system accesses.<br />
12 If space remains in the RAID set, the next volume set can be configured.<br />
Repeat steps 8 to 10 to configure another volume set.<br />
6.6 Configuring RAID Sets and Volume Sets<br />
The web browser start-up screen will display the current configuration<br />
of your RAID subsystem. It displays the RAID Set List, Volume<br />
Set List and Physical Disk List. The RAID set information, volume<br />
set information and drive information can also be viewed by clicking<br />
on the RAIDSet Hierarchy screen. The current configuration can<br />
also be viewed by clicking on RAIDSet Hierarchy in the menu.<br />
To display RAID set information, move the mouse cursor to the desired<br />
RAID set number, then click it. The RAID set Information will<br />
show in the screen.<br />
To display volume set information, move the mouse cursor to the<br />
desired Volume Set number, then click it. The volume set Information<br />
will show in the screen.<br />
To display drive information, move the mouse cursor to the desired<br />
physical drive number, then click it. The drive Information will show<br />
in the screen.<br />
137
WEB BROWSER-BASED CONFIGURATION<br />
6.6.1 Main Menu<br />
The Main Menu shows all function that enables the customer to<br />
execute actions by clicking on the appropriate link.<br />
Individual Category<br />
Quick Function<br />
RAIDSet Functions<br />
VolumeSet Functions<br />
Physical Drives<br />
System Controls<br />
Information<br />
Description<br />
Create a default configuration, which is based on<br />
the number of physical disk installed; it can modify<br />
the volume set Capacity, RAID Level, and Stripe<br />
Size.<br />
Create a customized RAID set.<br />
Create customized volume sets and modify the<br />
existed volume sets parameter.<br />
Create pass through disks and modify the existed<br />
pass through drives parameter. It also provides the<br />
function to identify the respect disk drive.<br />
Setting the RAID system configurations<br />
View the controller information. The RAID Set Hierarchy<br />
can also view through the RAIDSet Hierarchy<br />
item.<br />
6.7 Quick Create<br />
138<br />
The number of physical drives in the RAID subsystem determines<br />
the RAID levels that can be implemented with the RAID set. You<br />
can create a RAID set associated with exactly one volume set. The<br />
user can change the RAID level, stripe size, and capacity. A hot<br />
spare option is also created depending upon the existing configuration.<br />
Tick on the Confirm The Operation and click on the Submit button<br />
in the Quick Create screen, the RAID set and volume set will start
WEB BROWSER-BASED CONFIGURATION<br />
Note:<br />
In Quick Create your volume set is automatically configured<br />
based on the number of disks in your system. Use the RAID Set<br />
Function and Volume Set Function if you prefer to customize your<br />
system.<br />
6.8 RAID Set Functions<br />
Use the RAID Set Function and Volume Set Function if you prefer to<br />
customize your system. User manual configuration can full control<br />
of the RAID set setting, but it will take longer to complete than the<br />
Quick Volume/RAID Setup configuration. Select the RAID Set Function<br />
to manually configure the RAID set for the first time or deletes<br />
existing RAID set and reconfigures the RAID set. A RAID set is a<br />
group of disks containing one or more volume sets.<br />
6.8.1 Create RAID Set<br />
To create a RAID set, click on the Delete RAID Set link. A Select<br />
The SATA Drive For RAID Set screen is displayed showing the IDE<br />
drive connected to the current controller. Click on the selected<br />
physical drives with the current RAID set. Enter 1 to 15 alphanumeric<br />
characters to define a unique identifier for a RAID set. The<br />
default RAID set name will always appear as RAID Set. #.<br />
Tick on the Confirm The Operation and click on the Submit button<br />
in the screen, the RAID set will start to initialize.<br />
139
WEB BROWSER-BASED CONFIGURATION<br />
6.8.2 Delete RAID Set<br />
To delete a RAID set, click on the Create RAID Set link. A Select<br />
The RAID SET To Delete screen is displayed showing all RAID set<br />
existing in the current controller. Click the RAID set number you<br />
which to delete in the select column to delete screen.<br />
Tick on the Confirm The Operation and click on the Submit button<br />
in the screen to delete it.<br />
6.8.3 Expand RAID Set<br />
Use this option to expand a RAID set, when a disk is added to<br />
your system. This function is active when at least one drive is<br />
available.<br />
To expand a RAID set, click on the Expand RAID Set link. Select<br />
the target RAID set, which you want to expand it.<br />
Tick on the available disk and Confirm The Operation, and then<br />
click on the Submit button in the screen to add disks to the RAID<br />
set.<br />
140
WEB BROWSER-BASED CONFIGURATION<br />
6.8.4 Activate Incomplete RAID Set<br />
When one of the disk drive is removed in power off state, the<br />
RAID set state will change to Incomplete State. If user wants to<br />
continue to work, when the RAID subsystem is power on. User<br />
can use the Activate RAID Set option to active the RAID set. After<br />
user complete the function, the RAID State will change to Degraded<br />
Mode.<br />
To activate the incomplete the RAID set, click on the Activate<br />
RAID Set link. A “Select The RAID SET To Activate” screen is<br />
displayed showing all RAID set existing in the current controller.<br />
Click the RAID set number you which to activate in the select<br />
column.<br />
Click on the Submit button in the screen to activate the RAID set<br />
141
WEB BROWSER-BASED CONFIGURATION<br />
6.8.5 Create Hot Spare<br />
When you choose the Create Hot Spare option in the RAID Set<br />
Function, all unused physical devices connected to the current<br />
controller appear: Select the target disk by clicking on the appropriate<br />
check box. Tick on the Confirm The Operation, and click on<br />
the Submit button in the screen to create the hot spares.<br />
The create Hot Spare option gives you the ability to define a<br />
global hot spare.<br />
6.8.6 Delete Hot Spare<br />
Select the target Hot Spare disk to delete by clicking on the appropriate<br />
check box.<br />
Tick on the Confirm The Operation, and click on the Submit button<br />
in the screen to delete the hot spares.<br />
6.8.7 Rescue RAID Set<br />
When the system is power off in the RAID set update period, it<br />
may be disappeared in this abnormal condition. The “RESCUE”<br />
function can recover the missing RiaidSet information.<br />
The RAID controller uses the time as the RAIDSet signature. The<br />
RAIDSet may have different time after the RAID Set is recovered.<br />
The “SIGANT” function can regenerate the signature for the Riaid-<br />
Set.<br />
142
WEB BROWSER-BASED CONFIGURATION<br />
6.9 Volume Set Functions<br />
A volume set is seen by the host system as a single logical device.<br />
It is organized in a RAID level with one or more physical disks.<br />
RAID level refers to the level of data performance and protection of<br />
a volume set. A volume set capacity can consume all or a portion<br />
of the disk capacity available in a RAID set. Multiple volume sets<br />
can exist on a group of disks in a RAID set. Additional volume sets<br />
created in a specified RAID set will reside on all the physical disks<br />
in the RAID set. Thus each volume set on the RAID set will have its<br />
data spread evenly across all the disks in the RAID set.<br />
6.9.1 Create Volume Set<br />
6.9.1.1 For MR5S1<br />
The following is the volume set features<br />
1. Volume sets of different RAID levels may coexist on the<br />
same RAID set.<br />
2. Up to 16 volume sets in a RAID set can be created by the<br />
SATA RAID controller.<br />
3. The maximum addressable size of a single volume set is 2<br />
TB(32-bit mode).<br />
4. Support greather than 2TB capacity per volume set (64-bit<br />
LBA mode).<br />
To create volume set from RAID set system, move the cursor<br />
bar to the main menu and click on the Create Volume Set link.<br />
The Select The RAID Set To Create On It screen will show all<br />
RAID set number. Tick on a RAID set number that you want to<br />
143
WEB BROWSER-BASED CONFIGURATION<br />
create and then click on the Submit button.<br />
The new create volume set allows user to select the Volume<br />
name, capacity, RAID level, strip size, SCSI ID/LUN, Cache<br />
mode, tag queuing and Max Sync Rate.<br />
144<br />
• Volume Name:<br />
The default volume name will always appear as Volume Set.<br />
#. You can rename the volume set name providing it does not<br />
exceed the 15 characters limit.<br />
• Capacity:<br />
The maximum volume size is default in the first setting. Enter<br />
the appropriate volume size to fit your application. The capacity<br />
can also increase or decrease by the .UP and DOWN arrow key.<br />
• RAID Level:<br />
Set the RAID level for the Volume Set. Highlight RAID Level and<br />
press .<br />
The available RAID levels for the current Volume Set are displayed.<br />
Select a RAID level and press to confirm.<br />
• Strip Size:<br />
This parameter sets the size of the stripe written to each disk in<br />
a RAID 0, 1, 5 or 6 logical drive. You can set the stripe size to 4<br />
KB, 8 KB, 16 KB, 32 KB, 64 KB, or 128 KB.<br />
A larger stripe size produces better-read performance, especially<br />
if your computer does mostly sequential reads. However, if you<br />
are sure that your computer does random reads more often,<br />
select a small stripe size.<br />
• Cache Mode:<br />
The RAID subsystem supports Write-Through Cache and Write-<br />
Back Cache.
WEB BROWSER-BASED CONFIGURATION<br />
• Tag Queuing:<br />
The Enabled option is useful for enhancing overall system performance<br />
under multi-tasking operating systems. The Command<br />
Tag (Drive Channel) function controls the SCSI command tag<br />
queuing support for each drive channel. This function should<br />
normally remain enabled. Disable this function only when using<br />
older SCSI drives that do not support command tag queuing.<br />
• Max SCSI Speed:<br />
The RAID subsystem supports 320.00 MB/sec ......as the highest<br />
data transfer rate.<br />
• SCSI Channel/SCSI/ID<br />
SCSI Channel: The RAID subsystem only supports one SCSI<br />
Channel.<br />
SCSI ID: Each SCSI device attached to the SCSI card, as well<br />
as the card itself, must be assigned a unique SCSI ID number. A<br />
Wide SCSI channel can connect up to 15 devices. The RAID subsystem<br />
is as a large SCSI device. We should assign an ID from a<br />
list of SCSI IDs.<br />
SCSI LUN: Each SCSI ID can support up to 8 LUNs. Most SCSI<br />
host adapter treats each LUN like a SCSI disk.<br />
6.9.1.2 For MR5CT1<br />
The following is the volume set features<br />
1. Volume sets of different RAID levels may coexist on the<br />
same RAID set.<br />
2. Up to 16 volume sets in a RAID set can be created by the<br />
SATA RAID controller.<br />
3. The maximum addressable size of a single volume set is 2<br />
TB.<br />
To create volume set from RAID set system, move the cursor<br />
bar to the main menu and click on the Create Volume Set link.<br />
The Select The RAID Set To Create On It screen will show all<br />
RAID set number. Tick on a RAID set number that you want to<br />
create and then click on the Submit button.<br />
The new create volume set allows user to select the Volume<br />
name, capacity, RAID level, strip size, SCSI ID/LUN, Cache<br />
145
WEB BROWSER-BASED CONFIGURATION<br />
mode, tag queuing, IDE Data Xfer Mode and IDE Channel/IDE<br />
Drive#ID.<br />
• Volume Name:<br />
The default volume name will always appear as Volume Set.<br />
146<br />
#. You can rename the volume set name providing it does not<br />
exceed the 15 characters limit.<br />
• Capacity:<br />
The maximum volume size is default in the first setting. Enter<br />
the appropriate volume size to fit your application. The capacity<br />
can also increase or decrease by the .UP and DOWN arrow key<br />
• RAID Level:<br />
Set the RAID level for the Volume Set. Highlight RAID Level and<br />
press .<br />
The available RAID levels for the current Volume Set are displayed.<br />
Select a RAID level and press to confirm.<br />
• Strip Size:<br />
This parameter sets the size of the stripe written to each disk in<br />
a RAID 0, 1, 5 or 6 logical drive. You can set the stripe size to 4<br />
KB, 8 KB, 16 KB, 32 KB, 64 KB, or 128 KB.<br />
A larger stripe size produces better-read performance, especially<br />
if your computer does mostly sequential reads. However, if you<br />
are sure that your computer does random reads more often,<br />
select a small stripe size.<br />
• Cache Mode:<br />
The RAID subsystem supports Write-Through Cache and Write-<br />
Back Cache.<br />
• Tag Queuing:
WEB BROWSER-BASED CONFIGURATION<br />
The Enabled option is useful for enhancing overall system performance<br />
under multi-tasking operating systems. The Command<br />
Tag (Drive Channel) function controls the SCSI command tag<br />
queuing support for each drive channel. This function should<br />
normally remain enabled. Disable this function only when using<br />
older SCSI drives that do not support command tag queuing<br />
• IDE Host Channel:<br />
IDE Channel: The MR5CT1 can support dual ATA Host channel-<br />
Parallel ATA (For Firewire/USB)(Connect to Channel 0) and Serial<br />
ATA (Connect to Channel 1). Multiple ATA Host channel can be<br />
applied to the same volume set if user selects the 0&1 Cluster<br />
option in the IDE Host Channel. Each ATA Host channel can be<br />
applied to different volume sets if user selects the 0&1 option in<br />
the IDE Host Channel Mode, 0 for Parallel ATA host channel and<br />
1 for Serial ATA host channel. The volume set initializes for Parallel<br />
ATA host channel, now user wants to change to Serial ATA,<br />
user needs to modify configuration as the IDE Host Channel =1<br />
and IDE Drive select=0.<br />
• IDE Drive Select:<br />
IDE Host Channel setting at 0 or 1 PATA(for Firewire&USB) and<br />
SATA host channel can concurrently access different volume<br />
sets. The PATA (Channel 0) can support Master and Slave volume<br />
set. The SATA (Channel 1) can support one Master volume<br />
set. The Max volume set can be accessed by MR5CT1 is 3.<br />
IDE Host Channel setting at 0&1 Cluster. The MR5CT1 can support<br />
dual ATA Host Channel - Parellel ATA Master and Serial ATA<br />
accesses the same volume set. But user only can write through<br />
one channel at the time.<br />
6.9.2 Delete Volume Set<br />
To delete Volume from RAID set system function, move the cursor<br />
147
WEB BROWSER-BASED CONFIGURATION<br />
bar to the main menu and click on the Delete Volume Set link.<br />
The Select The RAID Set To Delete screen will show all RAID set<br />
number. Tick on a RAID set number and the Confirm The Operation<br />
and then click on the Submit button to show all volume set<br />
item in the selected RAID set. Tick on a volume set number and<br />
the Confirm The Operation and then click on the Submit button to<br />
delete the volume set.<br />
6.9.3 Modify Volume Set<br />
To modify a volume set from a RAID set:<br />
(1). Click on the Modify Volume Set link.<br />
(2). Tick on the volume set from the list that you wish to modify.<br />
Click on the Submit button.<br />
The following screen appears.<br />
Use this option to modify volume set configuration. To modify<br />
volume set attribute values from RAID set system function, move<br />
the cursor bar to the volume set attribute menu and click on it.<br />
The modify value screen appears. Move the cursor bar to an attribute<br />
item, and then click on the attribute to modify the value.<br />
After you complete the modification, tick on the Confirm The<br />
Operation and click on the Submit button to complete the action.<br />
User can modify all values except the capacity.<br />
6.9.3.1 For MR5S1<br />
6.9.3.2 For MR5CT1<br />
148
WEB BROWSER-BASED CONFIGURATION<br />
6.9.3.3 Volume Expansion<br />
Use this RAID set expands to expand a RAID set, when a disk is<br />
added to your system. The expand capacity can use to enlarge<br />
the volume set size or create another volume set. The modify<br />
volume set function can support the volume set expansion function.<br />
To expand volume set capacity value from RAID set system<br />
function, move the cursor bar to the volume set Volume capacity<br />
item and entry the capacity size. Tick on the Confirm The Operation<br />
and click on the Submit button to complete the action. The<br />
volume set start to expand.<br />
6.9.3.4 Volume Set Migration<br />
Migrating occurs when a volume set is migrating from one RAID<br />
level to another, a volume set strip size changes, or when a<br />
disk is added to a RAID set. Migration status is displayed in the<br />
volume status area of the RAIDSet Hierarchy screen when one<br />
RAID level to another, a Volume set strip size changes or when a<br />
disk is added to a RAID set.<br />
149
WEB BROWSER-BASED CONFIGURATION<br />
6.9.4 Check Volume Set<br />
To check a volume set from a RAID set:<br />
1. Click on the Check Volume Set link.<br />
2. Tick on the volume set from the list that you wish to check.<br />
Tick on Confirm The Operation and click on the Submit button.<br />
Use this option to verify the correctness pf the redundant data in<br />
a volume set. For example, in a system with dedicated parity, volume<br />
set check means computing the parity of the data disk drives<br />
and comparing the results to the contents of the dedicated parity<br />
disk drive. The checking percentage can also be viewed by clicking<br />
on RAIDSet Hierarchy in the main menu.<br />
6.9.5 Stop VolumeSet Check<br />
Use this option to stop the Check Volume Set function.<br />
6.10 Physical Drive<br />
Choose this option from the Main Menu to select a physical disk<br />
and to perform the operations listed below.<br />
150
WEB BROWSER-BASED CONFIGURATION<br />
6.10.1 Create Pass-Through Disk<br />
6.10.1.1 For MR5S1<br />
To create pass-through disk, move the mouse cursor to the main<br />
menu and click on the Create Pass-Through link. The relative<br />
setting function screen appears.<br />
Disk is no controlled by the internal RAID subsystem firmware<br />
and thus cannot be a part of a volume set. The disk is available<br />
to the operating system as an individual disk. It is typically<br />
used on a system where the operating system is on a disk not<br />
controlled by the RAID firmware. User can also select the cache<br />
mode, Tagged Command Queuing, Max SCSI speed and SCSI<br />
channel/SCSI_ID/SCSI_LUN for this volume.<br />
6.10.1.2 For MR5CT1<br />
To create pass-through disk, move the mouse cursor to the main<br />
menu and click on the Create Pass-Through link. The relative<br />
setting function screen appears.<br />
Disk is no controlled by the internal RAID subsystem firmware<br />
and thus cannot be a part of a volume set. The disk is available<br />
to the operating system as an individual disk. It is typically<br />
151
WEB BROWSER-BASED CONFIGURATION<br />
used on a system where the operating system is on a disk not<br />
controlled by the RAID firmware. User can also select the cache<br />
mode, Tagged Command Queuing, IDE Data Xfer Mode and IDE<br />
Channel/IDE Drive# for this volume.<br />
6.10.2 Modify Pass-Through Disk<br />
Use this option to modify the Pass-Through Disk Attribute. User<br />
can modify the cache mode, Tagged Command Queuing, Max<br />
SCSI speed and SCSI channel/ID/LUN on an existed pass through<br />
disk.<br />
To modify the pass-through drive attribute from the pass-through<br />
drive pool, move the mouse cursor bar to click on Modify Pass-<br />
Through link. The Select The Pass Through Disk For Modification<br />
screen appears tick on the Pass-Through Disk from the passthrough<br />
drive pool and click on the Submit button to select drive.<br />
The Enter Pass-Through Disk Attribute screen appears, modify the<br />
drive attribute values, as you want.<br />
6.10.2.1 For MR5S1<br />
6.10.2.2 For MR5CT1<br />
152<br />
After you complete the selection, tick on the Confirm The Operation<br />
and click on the Submit button to complete the selection<br />
action.
WEB BROWSER-BASED CONFIGURATION<br />
6.10.3 Delete Pass-Through Disk<br />
To delete pass-through drive from the pass-through drive pool,<br />
move the mouse cursor bar to the main menus and click on<br />
Delete Pass Through link. After you complete the selection, tick<br />
on the Confirm The Operation and click on the Submit button to<br />
complete the delete action.<br />
6.10.4 Identify Drive<br />
To prevent removing the wrong drive, the selected disk LED will<br />
light for physically locating the selected disk when the Identify<br />
Selected Drive is selected.<br />
To identify the selected drive from the drives pool, move the<br />
mouse cursor bar to click on Identify Selected Drive link. The<br />
Select The SATA Device For identification screen appears tick on<br />
the SATA device from the drives pool and Flash method. After<br />
completing the selection, click on the Submit button to identify<br />
selected drive.<br />
6.11 System Controls<br />
6.11.1 System Configuration<br />
To set the RAID system function, move the cursor bar to the main<br />
menu and click on the System Configuration link. The System<br />
Configuration menu will show all items. Move the cursor bar to an<br />
item, then press Enter key to select the desired function.<br />
6.11.1.1 For MR5S1<br />
• System Beeper Setting:<br />
The Alert Beeper function item is used to Disabled or Enable the<br />
153
WEB BROWSER-BASED CONFIGURATION<br />
RAID subsystem controller alarm tone generator.<br />
• Background Track Priority:<br />
The RAID background Track Priority is a relative indication of<br />
how much time the controller devotes to a background operation<br />
such as rebuilding or migrating. The RAID subsystem allows<br />
user to choose the background priority to balance volume set<br />
access and background tasks appropriately. For high array performance,<br />
specify a Low value.<br />
• Terminal Port Configuration:<br />
Speed setting values are 1200, 2400, 4800, 9600, 19200,<br />
38400, 57600, and 115200.<br />
Stop Bits values are 1 bit and 2 bits.<br />
Note: Parity value is fixed at None.<br />
Data Bits value is fixed at 8 bits.<br />
154<br />
• JBOD/RAID Configuration:<br />
JBOD is an acronym for “Just a Bunch Of Disk”. It repressents<br />
a volume set that is created by the concatenation of partitions<br />
on the disks. For the MobileRAID, it can see the five individual<br />
disks, when you select the JBOD option. User needs to delete<br />
the RAID set, when you want to change the option from the<br />
RAID to the JBOD function.<br />
• Maximum SATA Mode Supported:<br />
Within the subsystem, the SCSI chip acts as a target and 5 SATA<br />
ll bus are connected to the drive. The 5 SATA drive channel can<br />
support up to SATA ll, which runs up to 300MB/s. NCQ is a command<br />
protocol in Serial ATA that can only be implemented on<br />
native Serial ATA hard drives. It allows multiple commands to be<br />
outstanding within a drive at the same time. Drives that support<br />
NCQ have an internal queue where outstanding commands<br />
can be dynamically rescheduled or re-ordered, along with the
WEB BROWSER-BASED CONFIGURATION<br />
necessary tracking mechanisms for outstanding and completed<br />
portions of the workload. The RAID subsystem allows user<br />
to choose the SATA Mode: SATA150, SAT150+NCQ, SAT300,<br />
SATA300+NCQ.<br />
• HDD Read Ahead Cache<br />
Allow Read Ahead (Default: Enabled)—When Enabled, the<br />
drive’s read ahead cache algorithm is used, providing maximum<br />
performance under most circumstances.<br />
• Stagger Power on<br />
In a PC system with only one or two drives, the power can<br />
supply enough power to spin up both drives simultaneously. But<br />
in systems with more than two drives, the startup current from<br />
spinning up the drives all at once can overload the power supply,<br />
causing damage to the power supply, disk drives and other<br />
system components. This damage can be avoided by allowing<br />
the host to stagger the spin-up of the drives. New SATA drives<br />
have support staggered spin-up capabilities to boost reliability.<br />
Staggered spin-up is a very useful feature for managing multiple<br />
disk drives in a storage subsystem. It gives the host the ability<br />
to spin up the disk drives sequentially or in groups, allowing<br />
the drives to come ready at the optimum time without straining<br />
the system power supply. Staggering drive spin-up in a multiple<br />
drive environment also avoids the extra cost of a power supply<br />
designed to meet short-term startup power demand as well as<br />
steady state conditions.<br />
<strong>Sans</strong> <strong>Digital</strong> has supported the fixed value staggered power up<br />
function in its previous version firmware. But from firmware<br />
version 1.39, <strong>Sans</strong> <strong>Digital</strong> RAID controller has included the<br />
option for customer to select the disk drives sequentially stagger<br />
power up value. The values can be selected from 0.4ms to 6ms<br />
per step which powers up one drive.<br />
• HDD SMART Status Polling<br />
An external RAID enclosure has the hardware monitor in the<br />
dedicated backplane that can report HDD temperature status<br />
to the controller. However, PCI cards do not use backplanes if<br />
the drives are internal to the main server chassis. The type of<br />
enclosure cannot report the HDD temperature to the controller.<br />
155
WEB BROWSER-BASED CONFIGURATION<br />
For this reason, HDD SMART Status Polling was added to enable<br />
scanning of the HDD temperature function in the version 1.36<br />
date: 2005-05-19 (and later). It is necessary to enable “HDD<br />
SMART Status Polling” function before SMART information is<br />
accessible. This function is disabled by default.<br />
The following screen shot shows how to change the BIOS setting<br />
to enable the Polling function.<br />
• Disk Capacity Truncation Mode:<br />
<strong>Sans</strong> <strong>Digital</strong> RAID controllers use drive truncation so that drives<br />
from differing vendors are more likely to be able to be used as<br />
spares for each other. Drive truncation slightly decreases the usable<br />
capacity of a drive that is used in redundant units.<br />
The controller provides three truncation modes in the system<br />
configuration: Multiples Of 10G, Multiples Of 1G, and No<br />
Truncation.<br />
Multiples Of 10G: If you have 120 GB drives from different<br />
vendors; chances are that the capacity varies slightly. For example,<br />
one drive might be 123.5 GB, and the other 120 GB. <strong>Sans</strong><br />
<strong>Digital</strong> drive Truncation mode Multiples Of 10G uses the same<br />
capacity for both of these drives so that one could replace the<br />
other.<br />
Multiples Of 1G: If you have 123 GB drives from different vendors;<br />
chances are that the capacity varies slightly. For example,<br />
one drive might be 123.5 GB, and the other 123.4 GB. <strong>Sans</strong><br />
<strong>Digital</strong> drive Truncation mode Multiples Of 1G uses the same<br />
capacity for both of these drives so that one could replace the<br />
other.<br />
156
WEB BROWSER-BASED CONFIGURATION<br />
6.11.1.2 For MR5CT1<br />
• System Beeper Setting<br />
The Alert Beeper function item is used to Disabled or Enable the<br />
RAID subsystem controller alarm tone generator.<br />
• Background Track Priority<br />
The RAID background Track Priority is a relative indication of<br />
how much time the controller devotes to a background operation<br />
such as rebuilding or migrating. The RAID subsystem allows<br />
user to choose the background priority to balance volume set<br />
access and background tasks appropriately. For high array performance,<br />
specify a Low value.<br />
• Terminal Port Configuration<br />
Speed setting values are 1200, 2400, 4800, 9600, 19200,<br />
38400, 57600, and 115200.<br />
Stop Bits values are 1 bit and 2 bits.<br />
Note: Parity value is fixed at None.<br />
Data Bits value is fixed at 8 bits.<br />
• JBOD/RAID Configuration<br />
JBOD is an acronym for “Just a Bunch Of Disk”. It repressents<br />
a volume set that is created by the concatenation of partitions<br />
on the disks. For the MR5CT1, it can only see the first two disks,<br />
when you select the JBOD option. User needs to delete the RAID<br />
set, when you want to change the option from the RAID to the<br />
JBOD function.<br />
• Max SATA Mode Supported<br />
Within the subsystem, the host IDE channels act as a target<br />
and 5 Serial ATA ll bus are connected to the drive. The 5 SATA<br />
ll drive channel can support up to SATA ll, which runs up to<br />
157
WEB BROWSER-BASED CONFIGURATION<br />
300MB/s. NCQ is a command protocol in Serial ATA that can<br />
only be implemented on native Serial ATA hard drives. It allows<br />
multiple commands to be outstanding within a drive at the<br />
same time. Drives that support NCQ have an internal queue<br />
where outstanding commands can be dynamically rescheduled<br />
or re-ordered, along with the necessary tracking mechanisms for<br />
outstanding and completed portions of the workload. The RAID<br />
subsystem allows user to choose the SATA Mode: SATA150,<br />
SAT150+NCQ, SAT300, SATA300+NCQ.<br />
158<br />
• HDD Read Ahead Cache<br />
Allow Read Ahead (Default: Enabled)—When Enabled, the drive’s<br />
read ahead cache algorithm is used, providing maximum performance<br />
under most circumstances.<br />
• Stagger Power on<br />
In a PC system with only one or two drives, the power can supply<br />
enough power to spin up both drives simultaneously. But in<br />
systems with more than two drives, the startup current from<br />
spinning up the drives all at once can overload the power supply,<br />
causing damage to the power supply, disk drives and other<br />
system components. This damage can be avoided by allowing<br />
the host to stagger the spin-up of the drives. New SATA drives<br />
have support staggered spin-up capabilities to boost reliability.<br />
Staggered spin-up is a very useful feature for managing multiple<br />
disk drives in a storage subsystem. It gives the host the ability<br />
to spin up the disk drives sequentially or in groups, allowing<br />
the drives to come ready at the optimum time without straining<br />
the system power supply. Staggering drive spin-up in a multiple<br />
drive environment also avoids the extra cost of a power supply<br />
designed to meet short-term startup power demand as well as<br />
steady state conditions.
WEB BROWSER-BASED CONFIGURATION<br />
<strong>Sans</strong> <strong>Digital</strong> has supported the fixed value staggered power up<br />
function in its previous version firmware. But from firmware<br />
version 1.39, <strong>Sans</strong> <strong>Digital</strong> RAID controller has included the<br />
option for customer to select the disk drives sequentially stagger<br />
power up value. The values can be selected from 0.4ms to 6ms<br />
per step which powers up one drive.<br />
• HDD SMART Status Polling<br />
An external RAID enclosure has the hardware monitor in the<br />
dedicated backplane that can report HDD temperature status<br />
to the controller. However, PCI cards do not use backplanes if<br />
the drives are internal to the main server chassis. The type of<br />
enclosure cannot report the HDD temperature to the controller.<br />
For this reason, HDD SMART Status Polling was added to enable<br />
scanning of the HDD temperature function in the version 1.36<br />
date: 2005-05-19 (and later). It is necessary to enable “HDD<br />
SMART Status Polling” function before SMART information is accessible.<br />
This function is disabled by default.<br />
• Disk Capacity Truncation Mode<br />
<strong>Sans</strong> <strong>Digital</strong> RAID controllers use drive truncation so that drives<br />
from differing vendors are more likely to be able to be used as<br />
spares for each other. Drive truncation slightly decreases the usable<br />
capacity of a drive that is used in redundant units.<br />
The controller provides three truncation modes in the system<br />
configuration: Multiples Of 10G, Multiples Of 1G, and No<br />
Truncation.<br />
Multiples Of 10G: If you have 120 GB drives from different<br />
vendors; chances are that the capacity varies slightly. For example,<br />
one drive might be 123.5 GB, and the other 120 GB. <strong>Sans</strong><br />
<strong>Digital</strong> drive Truncation mode Multiples Of 10G uses the same<br />
capacity for both of these drives so that one could replace the<br />
other.<br />
Multiples Of 1G: If you have 123 GB drives from different vendors;<br />
chances are that the capacity varies slightly. For example,<br />
one drive might be 123.5 GB, and the other 123.4 GB. <strong>Sans</strong><br />
<strong>Digital</strong> drive Truncation mode Multiples Of 1G uses the same<br />
capacity for both of these drives so that one could replace the<br />
other.<br />
159
WEB BROWSER-BASED CONFIGURATION<br />
No Truncation: It does not truncate the capacity.<br />
6.11.2 U320 SCSI Target Config<br />
(MR5S1)<br />
Arbitration allows one SCSI device to gain control of the SCSI bus<br />
to allow that SCSI device to initiate or resume a task. There are<br />
two methods that a SCSI device may use to arbitrate for the SCSI<br />
bus: normal arbitration and QAS. Normal arbitration is mandatory<br />
and requires the detection of a BUS FREE phase on the SCSI bus<br />
before starting. QAS is optional and, when enabled, requires the<br />
initiation and detection of a QAS REQUEST message before starting.<br />
6.11.3 EtherNet Config<br />
Use this feature to set the controller Ethernet port configuration.<br />
Customer doesn’t need to create a reserved space on the arrays<br />
before the Ethernet port and HTTP service working. The firmwareembedded<br />
Web Browser-based RAID manager can access it from<br />
any standard internet browser or from any host computer either<br />
directly connected or via a LAN or WAN with no software or patches<br />
required.<br />
DHCP (Dynamic Host Configuration Protocol) is a protocol that<br />
lets network administrators manage centrally and automate the<br />
assignment of IP (Internet Protocol) configurations on a computer<br />
network. When using the Internet’s set of protocols (TCP/IP), in<br />
order for a computer system to communicate to another computer<br />
system it needs a unique IP address. Without DHCP, the<br />
IP address must be entered manually at each computer system.<br />
DHCP lets a network administrator supervise and distribute IP<br />
addresses from a central point. The purpose of DHCP is to provide<br />
the automatic (dynamic) allocation of IP client configurations for<br />
a specific time period (called a lease period) and to eliminate the<br />
work necessary to administer a large IP network.<br />
To configure the RAID controller EtherNet port, move the cursor<br />
bar to the main menu and click on the System Controls link. The<br />
System Controls menu will show all items. Move the cursor bar<br />
160
WEB BROWSER-BASED CONFIGURATION<br />
to the EtherNet Config item, then press Enter key to select the<br />
desired function.<br />
6.11.4 Alert By Mail Config<br />
To configure the RAID controller email function, move the cursor<br />
bar to the main menu and click on the System Controls link. The<br />
System Controls menu will show all items. Move the cursor bar<br />
to the Alert By Mail Config item, then press Enter key to select<br />
the desired function. This function can only set by the web-based<br />
configuration.<br />
The firmware contains SMTP manager monitors all system events<br />
6.11.5 SNMP Configuration<br />
To configure the RAID controller SNMP function, move the cursor<br />
bar to the main menu and click on the System Controls link. The<br />
System Controls menu will show all items. Move the cursor bar<br />
to the SNMP Configuration item, then press Enter key to select<br />
the desired function. This function can only set by the web-based<br />
configuration.<br />
The firmware contains SNMP Agent manager monitors all system<br />
events and user can use the SNMP function from the web setting<br />
with no Agent software required.<br />
161
WEB BROWSER-BASED CONFIGURATION<br />
Please reference to Appendix D SNMP operation & Definition for<br />
more detail information about the SNMP trap and definition.<br />
6.11.6 NTP Configuration<br />
The Network Time Protocol (NTP) is used to synchronize the time<br />
of a computer client or server to another server or reference time<br />
source, such as a radio or satellite receiver or modem. It provides<br />
accuracies typically within a millisecond on LANs and up to a few<br />
tens of milliseconds on WANs relative to Coordinated Universal<br />
Time (UTC) via a Global Positioning Service (GPS) receiver, for<br />
example:<br />
• NTP Sever Address<br />
The most important factor in providing accurate, reliable time<br />
is the selection of NTP servers to be used in the configuration<br />
file. Typical NTP configurations utilize multiple redundant servers<br />
and diverse network paths in order to achieve high accuracy and<br />
reliability. Our NTP configuration supports two existing public<br />
NTP synchronization subnets.<br />
• Time Zone<br />
Time Zone conveniently runs in the system tray and allows you<br />
to easily view the date and time in various locations around the<br />
world. You can also quickly and easily add your own personal<br />
locations to customize Time Zone the way you want.<br />
162
WEB BROWSER-BASED CONFIGURATION<br />
• Automatic Daylight Saving<br />
Automatic Daylight Saving will normally attempt to automatically<br />
adjust the system clock for daylight saving changes based on<br />
the computer time zone. This tweak allows you to disable the<br />
automatic adjustment.<br />
6.11.7 View Events/ Mute Beeper<br />
To view the RAID subsystem controller’s information, move the<br />
mouse cursor to the main menu and click on the View Events/<br />
Mute Beeper link. The RAID Subsystem events Information screen<br />
appears.<br />
Choose this option to view the system events information: Timer,<br />
Device, Event type, Elapse Time and Errors. The RAID system<br />
does not built the real time clock. The Time information is the<br />
relative time from the RAID subsystem power on.<br />
6.11.8 Generate Test Event<br />
Use this feature to generate a event to test the email address<br />
which configures by the “Altert By Mail Config” option.<br />
163
WEB BROWSER-BASED CONFIGURATION<br />
6.11.9 Clear Events Buffer<br />
Use this feature to clear the entire events buffer information.<br />
6.11.10 Modify Password<br />
To set or change the RAID subsystem password, move the mouse<br />
cursor to RAID System Function screen, and click on the Change<br />
Password link. The Modify System Password screen appears.<br />
The password option allows user to set or clear the RAID<br />
subsystem’s password protection feature. Once the password<br />
has been set, the user can only monitor and configure the RAID<br />
subsystem by providing the correct password.<br />
The password is used to protect the internal RAID subsystem from<br />
unauthorized entry. The controller will check the password only<br />
when entering the Main menu from the initial screen. The RAID<br />
subsystem will automatically go back to the initial screen when it<br />
does not receive any command in ten seconds.<br />
To disable the password, press Enter key only in both the Enter<br />
New Password and Re-Enter New Password column. Once the user<br />
confirms the operation and clicks the Submit button. The existing<br />
password will be cleared. No password checking will occur when<br />
entering the main menu from the starting screen.<br />
164<br />
6.11.11 Upgrade Firmware<br />
Please refer to the appendix B firmware utility.<br />
6.11.12 Restart Controller<br />
Use the Restart Controller Function to restart the RAID subsystem<br />
controller.
WEB BROWSER-BASED CONFIGURATION<br />
6.12 Information Menu<br />
6.12.1 RAID Set Hierarchy<br />
Use this feature to view the internal RAID subsystem current<br />
RAID set, current volume set and physical disk configuration.<br />
Please reference this chapter “Configuring RAID Sets and Volume<br />
Sets”<br />
6.12.2 System Information<br />
To view the RAID subsystem controller’s information, move the<br />
mouse cursor to the main menu and click on the System Information<br />
link. The RAID Subsystem Information screen appears.<br />
Use this feature to view the RAID subsystem controller’s information.<br />
The controller name, firmware version, serial number, main<br />
processor, CPU data/instruction cache size and system memory<br />
size/speed appear in this screen.<br />
6.12.3 Hardware Monitor<br />
To view the RAID subsystem controller’s hardware monitor information,<br />
move the mouse cursor to the main menu and click the<br />
Hardware Monitor link. The Hardware Information screen appears.<br />
The Hardware Monitor Information provides the temperature, fan<br />
speed (chassis fan) and voltage of the internal RAID subsystem.<br />
All items are also unchangeable. The warning messages will indicate<br />
through the LCM, LED and alarm buzzer.<br />
165
WEB BROWSER-BASED CONFIGURATION<br />
Item<br />
Warning Condition<br />
Controller Board Temperature<br />
> 60 O<br />
Backplane Temperature<br />
> 55 O<br />
Controller Fan Speed<br />
< 1900 RPM<br />
Power Supply +12V < 10.5V or > 13.5V<br />
Power Supply +5V < 4.7V or > 5.3V<br />
Power Supply +3.3V < 3.0V or > 3.6V<br />
CPU Core Voltage +1.5V < 1.35V or > 1.65V<br />
166
APPENDIX<br />
APPENDIX A<br />
Specifications<br />
Adapter Architecture<br />
• Intel 80219 400MHz I/O processor<br />
• 128MB on-board DDR200 SDRAM with ECC protection<br />
• Marvell 8 channels SATA ll controller<br />
• <strong>Sans</strong> <strong>Digital</strong> ASIC to support extreme performance RAID 6<br />
function<br />
• NVRAM for RAID configuration & transaction log<br />
• Write-through or write-back cache support<br />
• Firmware in Flash ROM for easy upgrades<br />
RAID Features<br />
• RAID level 0, 1, 10, 3, 5, 6 (if RAID Engine installed) and JBOD<br />
• Multiple RAID selection<br />
• Online Array roaming<br />
• Online RAID level/ stripe size migration<br />
• Online capacity expansion and RAID level migration<br />
simultaneously<br />
• Online Dynamic Volume set capacity expansion<br />
• Greater than 2TB per volume set (MR5S1 only)<br />
• Instant availability and background initialization<br />
• Automatic insertion / removal detection and rebuild<br />
• Support SMART, NCQ and OOB staggered spin-up capable<br />
drivers<br />
Disk Bus Interface<br />
• SATA II compatible-3.0Gbps (300MB/Sec)<br />
Firewire 800/USB2.0/SATA to SATA ll Host Bus<br />
Interface<br />
• Firewire 800 & USB2.0 & eSATA 1.5Gbps<br />
167
APPENDIX<br />
SCSI to SATA ll Host Bus Interface<br />
• Ultra 320-Wide LVD SCSI; Transfer rate up to 320MB/sec<br />
• Tagged Command Queuing<br />
• Concurrent I/O commands<br />
RAID Management<br />
• Field-upgradeable firmware in flash ROM via RS-232 port<br />
• Web browser-based RAID management via HTTP PROXY through<br />
RS-232 port for windows, Linux and FreeBSD system<br />
• Firmware-embedded manager via RS-232 port (platform<br />
independent)<br />
• Firmware-embedded web browser-based RAID manager, SMTP<br />
manager, SNMP agent and Telnet function via LAN port (plat<br />
form independent)<br />
Software Drivers<br />
• Host OS Independent<br />
Mechanical<br />
• Dimension (W x H x D)<br />
• 148 x 128 x 220 mm<br />
• Weight<br />
• 4.84 lbs/2.2 kg (w/o disk drive)<br />
• I/O Interface<br />
• 1 * AC Power Jack<br />
• 2 * 68 pin LVD SCSI connector (MR5S1)<br />
• 2 * Firewire 800 and 1*USB2.0 and 1 * SATA connector<br />
(MR5CT1 to SATA)<br />
• 1 * RJ45 Ethernet LAN connector<br />
• 1 * DB9 RS232 connector<br />
168
APPENDIX<br />
Environmental<br />
• Operating Temperature<br />
• Temperature: +5 C to +35 C<br />
• Humidity: 15-80%, non-condensing<br />
• Storage Temperature<br />
• Temperature: -40 C to 70 C<br />
• Humidity: 5-90%, non-condensing<br />
Electrical<br />
• Input Voltage : AC 100V ~AC 240V<br />
169
APPENDIX<br />
Appendix B<br />
Upgrading Flash Firmware Programming<br />
Utility<br />
170<br />
Since the RAID subsystem controller features flash firmware, it is<br />
not necessary to change the hardware flash chip in order to upgrade<br />
the RAID firmware. The user can simply re-program the old<br />
firmware through the RS-232 port or Lane Port. New releases of<br />
the firmware are available in the form of a DOS file at OEM’s FTP.<br />
The file available at the FTP site is usually a self-extracting file that<br />
contains the following:<br />
XXXXVVV.BIN Firmware Binary (where “XXXX” refers to the model<br />
name and “VVV” refers to the firmware version)<br />
README.TXT it contains the history information of the firmware<br />
change. Read this file first before upgrading the firmware.<br />
These files must be extracted from the compressed file and copied<br />
to one directory in drive A: or C:.<br />
Establishing the Connection for the RS-232<br />
The firmware can be downloaded to the RAID subsystem controller<br />
by using an ANSI/VT-100 compatible terminal emulation program<br />
or HTTP web browser management. You must complete the appropriate<br />
installation procedure before proceeding with this firmware<br />
upgrade. Please refer to chapter 4.3, “VT100 terminal (Using the<br />
controller’s serial port)” for details on establishing the connection.<br />
Whichever terminal emulation program is used must support the<br />
ZMODEM file transfer protocol.<br />
Configuration of the internal RAID subsystem web browser-based<br />
RAID management is an HTTP based application, which utilizes the<br />
browser installed on your operating system. Web browser-based<br />
RAID management can be used to update the firmware. You must<br />
complete the appropriate installation procedure before proceeding<br />
with this firmware upgrade. Please refer to chapter 6.1, “Web<br />
browser-based RAID management via HTTP Proxy (Using the<br />
controller’s serial port)” for details on establishing the connection.
APPENDIX<br />
Note: CD-ROM bootable VT-100 utility cannot support the update<br />
firmware function.<br />
Upgrade Firmware Through ANSI/VT-100<br />
Terminal Emulation<br />
Get the new version firmware for your RAID subsystem controller.<br />
For Example, download the bin file from your OEM’s web site onto<br />
the c:<br />
1. From the Main Menu, scroll down to “RAID System Function”<br />
2. Choose the “Update Firmware”, The Update The RAID Firmware<br />
dialog box appears.<br />
3. Go to the tool bar and select Transfer. Open Send File.<br />
4. Select “ZMODEM modem” under Protocol. ZMODEM as the file<br />
transfer protocol of your terminal emulation software.<br />
171
APPENDIX<br />
5. Click Browse. Look in the location where the Firmware upgrade<br />
software is located. Select the File name:<br />
6. Click Send. Send the Firmware Binary to the controller.<br />
7. When the Firmware completes downloading, the confirmation<br />
screen appears. Press Yes to start program the flash ROM.<br />
8. When the Flash programming starts, a bar indicator will show<br />
“Start Updating Firmware. Please Wait”.<br />
172
APPENDIX<br />
9. The Firmware upgrade will take approximately thirty seconds to<br />
complete.<br />
10. After the Firmware upgrade is complete, a bar indicator will<br />
show “Firmware Has Been Updated Successfully”.<br />
Note:<br />
The user doesn’t need to reconfigure all of the settings after the<br />
firmware upgrade is complete, because all of the settings will<br />
keep us the vaules before upgrade.<br />
Upgrade Firmware Through HTTP Proxy<br />
Web Browser Manager<br />
Get the new version firmware for your RAID subsystem controller.<br />
For Example, download the bin file from your OEM’s web site onto<br />
the c:<br />
1. To upgrade the RAID subsystem firmware, move the mouse<br />
cursor to Upgrade Firmware link. The Upgrade The RAID System<br />
Firmware screen appears.<br />
2. Click Browse. Look in the location where the Firmware upgrade<br />
173
APPENDIX<br />
software is located. Select the File name:<br />
“6010FIRM.BIN” and click open.<br />
3.Click the Confirm The Operation and press the Submit button.<br />
4. The Web Browser begins to download the firmware binary to the<br />
controller and start to update the flash ROM.<br />
5. After the firmware upgrade is complete, a bar indicator will show<br />
“Firmware has Been Updated Successfully”<br />
Note:<br />
The user doesn’t need to reconfigure all of the settings after the<br />
firmware upgrade is complete, because all of the settings will<br />
keep us the vaules before upgrade.<br />
174
APPENDIX<br />
Appendix C<br />
Pin Definitions<br />
DC Cooling Fan Power Connector<br />
Pin Pin Name Description<br />
1 GND Signal Ground<br />
2 +12V +12V Voltage Input<br />
3 FAN CNT PULSE FAN RPM Detection<br />
RS232 Connector<br />
Pin Pin Name Pin Description<br />
1 N/C 2 RXD0<br />
3 TXD0 4 N/C<br />
5 GND 6 N/C<br />
7 RTS0 8 CTS0<br />
9 N/C 10 N/C<br />
175
APPENDIX<br />
Appendix D<br />
SNMP Operation & Definition<br />
Overview<br />
The Internal RAID subsystem firmware-embedded Simple Network<br />
Management Protocol (SNMP) agent for the connect array.<br />
An SNMP-based management application (also known as an SNMP<br />
manager) can monitor the disk array. An example of An SNMP<br />
management application is Hewlett-Packard’s Open View. The<br />
firmware-embedded SNMP agent ca be used to augment the RAID<br />
controller if you are already running a SNMP management application<br />
at your site.<br />
SNMP Definition<br />
SNMP, an IP-based protocol, has a set of commands for getting the<br />
status of target devices. The SNMP management platform is called<br />
the SNMP manager, and the managed devices have the SNMP<br />
agent loaded. Management data is organized in a hierarchical data<br />
structure called the management Information Base (MIB). These<br />
MIBs are defined and sanctioned by various industry associations.<br />
The objective is for all vendors to create products in compliance<br />
with these MIBs so that inter-vendor interoperability can be<br />
achieved. If a vendor wishes to include additional device information<br />
that is not specified in a standard MIB, then that is usually<br />
done through MIB extensions.<br />
176
APPENDIX<br />
SNMP Installation<br />
The installation of the SNMP manager is accomplished in several<br />
phases:<br />
• Installing the Manager software on the client<br />
• Placing a copy of the management information base (MIB) in a<br />
directory which is accessible to the management application<br />
• Compiling the MIB description file with the management<br />
application<br />
MIB Compilation and Definition File creation<br />
Before the manager application accesses the RAID controller, user<br />
needs to integrate the MIB into the management application’s database<br />
of events and status indicator codes. This process is known<br />
as compiling the MIB into the application. This process is highly<br />
vendor-specific and should be well-covered in the User’s Guide of<br />
your SNMP application. Ensure the compilation process successfully<br />
integrates the contents of the <strong>Sans</strong> <strong>Digital</strong>RAID.MIB file into the<br />
traps database.<br />
Location for MIB<br />
Depending upon the SNMP management application used, the MIB<br />
must be placed in a specific directory on the network management<br />
station running the management application. The MIB file must be<br />
manually copied to this directory. For example:<br />
SNMP Management Application<br />
HP OpenView<br />
Netware NMS<br />
\OV\MIBS<br />
MIB Location<br />
\NMS\SNMPMIBS\CURRENT<br />
Your management application may have a different target directory.<br />
Consult the management application’s user manual for the<br />
correct location.<br />
177
APPENDIX<br />
Appendix E<br />
Technical Support<br />
<strong>Sans</strong> <strong>Digital</strong> Technical Support provides several options for our users<br />
to access information and updates. We encourage you to use<br />
one of our electric services, which provide product information<br />
updates for the most efficient service and support. If you decide<br />
to contact us, please have all information such as Product model<br />
and serial number, BIOS and driver version, and a description of<br />
the problem.<strong>Sans</strong> <strong>Digital</strong> provides online answers to your technical<br />
questions. Please go http://www.sansdigital.com or e-mail us<br />
at support@sansdigital.com We will help you to solve it.<br />
178
APPENDIX<br />
Copyright Statement<br />
<strong>Sans</strong> <strong>Digital</strong><br />
© COPYRIGHT 2006<br />
ALL RIGHTS RESERVED. First Edition.<br />
All trademarks are the properties of their respective owners. No portion of this document<br />
may be reproduced, altered, adapted or translated without the prior written approval.<br />
179