Instruction Manual FCX-AII SERIES TRANSMITTERS - Fagerberg
Instruction Manual FCX-AII SERIES TRANSMITTERS - Fagerberg
Instruction Manual FCX-AII SERIES TRANSMITTERS - Fagerberg
Create successful ePaper yourself
Turn your PDF publications into a flip-book with our unique Google optimized e-Paper software.
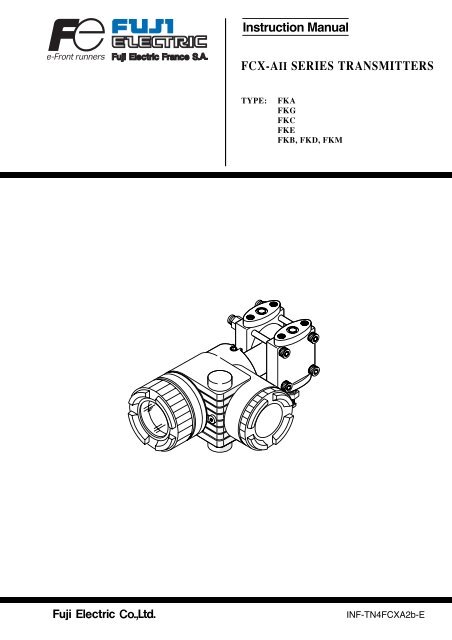
<strong>Instruction</strong> <strong>Manual</strong><strong>FCX</strong>-<strong>AII</strong> <strong>SERIES</strong> <strong>TRANSMITTERS</strong>TYPE:FKAFKGFKCFKEFKB, FKD, FKMINF-TN4<strong>FCX</strong>A2b-E
INTRODUCTIONThank you very much for your purchase of the Fuji <strong>FCX</strong>-A2 Series Transmitter.This instruction manual covers version 4 of the <strong>FCX</strong> series and contains information about the installation,piping, wiring, operation and maintenance of 9 types belonging to the <strong>FCX</strong>-A2 series.•First read this instruction manual carefully until an adequate understanding is required, and thenproceed to installation, operation and maintenance of the <strong>FCX</strong>-A2 Series transmitter.• The specifications of the transmitter will be changed without prior notice for further product improvement.• Modification of the transmitter without permission is strictly prohibited. Fuji will not bear any responsibilityfor a trouble caused by such a modification.• This instruction manual should be kept by a person who is actually using the transmitter.•After reading this manual, keep it at a place easier to access.• This manual should be delivered to the end user without fail.• For detail specifications and outline diagrams, refer to the specifications furnished separately.The product conforms to the requirements of the Electromagneticcompatibility Directive 89/336/EEC as detailed within thetechnical construction file number TN513035. The applicablestandards used to demonstrate compliance are :EN 50081-2 : 1993Conducted and Radiated emissionsEN 50082-2 : 1995Radiated immunity, ESD and FBTManufacturer:Type:Date of manufacture:Product nationality:Fuji Electric Instruments Co., Ltd.Described in nameplate on main frame (see Page iv)Described in nameplate on main frameJapanRequest• Transcription of a part or the whole of this manual without permission isprohibited.• The contents of this manual are subject to change without prior notice.© Fuji Electric Instruments Co., Ltd. 2001Issued in February, 2001i
CAUTION ON SAFETYFirst of all, read this “Caution on Safety” to ensure correct operation of the transmitter.• The cautionary descriptions listed here contain important information about safety, so they should beobserved without fail. Those safety precautions are classified into ranks "DANGER" and "CAUTION".DANGERWrong handling may cause a dangerous situation, in which there is arisk of death or heavy injury.CAUTIONWrong handling may invite a dangerous situation, in which there is apossibility of medium-level trouble or slight injury or only physicaldamage is predictable.On items listed under “ CAUTION ”, they may also lead to serious accidents depending on circumstances,and must be fully observed.• The signs of prohibition and indication are explained in the following.PROHIBITIONINDICATIONGeneral items which pertain to prohibition (DO NOT)General items which pertain to user’s actionInstallation and PipingDANGER• Non-explosion-proof transmitter must not be used in a place with explosive gases to prevent seriousaccidents such as explosion, fire, etc.CAUTION• The transmitter is heavy. Be careful when handling it.• The transmitter should be installed in a place that meets the operating conditions shown in DS sheetor this instruction manual.•Install the transmitter according to the instruction manual. Improper installation may lead to thecause of fall, trouble or incorrect operation.• When installing, make sure that the transmitter interior is free from cable chips and other foreignobjects to prevent fire, trouble, or incorrect operation.• When power is ON, do not change the position of the field indicator in an explosion-proof area.• When power is ON, do not change the position of the transmission unit in an explosion-proof area.• When power is ON, do not change the angle of the indicator.•Main valve used for piping should be selected with the maximum pressure of the process taken intoaccount (piping parts such as main valve, etc. should be furnished by user). If the main valve andother parts do not meet the rating, it may result in leakage of gas or liquid which could lead to hazard.•Pressure pipes to be used must meet the temperature/pressure rating.ii
WiringDANGER• On explosion-proof type transmitter, its wiring work must be performed according to the requiredlaws and regulations. Incorrect wiring may cause explosion, fire or other serious accidents.CAUTION•Before making wiring work, be sure to turn OFF the main power to prevent electric shocks.•Use wiring materials of correct rating to prevent fire accidents.• Connect a power source of correct rating to prevent fire accidents.• The transmitter should be grounded as specified to prevent electric shocks or incorrect operation.•After installing the transmitter, firmly close the covers of the transmission unit and terminal box. Ifnot, rain water enter the transmitter which may result in trouble or incorrect operation.AdjustmentDANGER• When using a flame-proof transmitter, do not connect HHC to the transmitter terminals and junctionterminals.Replacement of Maintenance PartsDANGER• When removing an explosion-proof transmitter, turn OFF the main power, then disconnect the pipingand wiring. Do not remove it when the power is ON to prevent serious accident such as explosion,fire, etc.iii
CAUTIONS ON USEBe sure to observe the following instructionsStorage for a long periodStore the transmitter in a dry room at normal temperature and humidity.Keep protection caps in place at the conduit connection and process connection.For installation, select an appropriate placeSite at location with minimal vibration, dust and corrosive gasAt a place allowing an adequate space for checkupSite at location large enough to allow maintenance and checking.Mounting angleMount to a pipe horizontally or vertically.Attention to overloadDo not apply a pressure outside the specified range.OtherBesides the above, be sure to observe the cautions given in this manual.CONFIRMATION OF YOUR SPECIFICATIONThe instrument nameplate as shown below is attached at the transmission unit of this transmitter. Before use,make sure the contents of the nameplate agree exactly with your specifications.Tag No.TypeRangeTransmitterPower SupplyOutputSpan Limit4 – 20mADCM.W.P.Ser.No.Mfd.Made in JapanTK4G5370iv
CONTENTSINTRODUCTION ....................................................................................................................... iCAUTION ON SAFETY ............................................................................................................ iiCAUTIONS ON USE ............................................................................................................... ivCONFIRMATION OF YOUR SPECIFICATION .................................................................... ivCONTENTS ............................................................................................................................... v1. OUTLINE ........................................................................................................................... 12. OPERATING PARTS AND THEIR FUNCTIONS ............................................................. 23. OPERATION AND SHUTDOWN ..................................................................................... 43.1 Preparation for operation ................................................................................................................... 43.2 Operation ............................................................................................................................................ 53.3 Shutdown ............................................................................................................................................ 64. ADJUSTMENT ................................................................................................................... 84.1 Adjustment with HHC ....................................................................................................................... 84.1.1 Connection of HHC ...................................................................................................................... 94.1.2 Outline of HHC operation ........................................................................................................... 84.1.3 Operating procedure ................................................................................................................... 10• TAG NO. .................................................................................................................................. 10• TYPE ........................................................................................................................................ 11• Display of SERIAL NO. .......................................................................................................... 11• Industrial value unit ................................................................................................................. 12• Range limit, Range change (LRV, URV) ............................................................................... 13• Damping adjustment ................................................................................................................ 14• Output mode ............................................................................................................................. 15• Burnout direction ..................................................................................................................... 16• Zero/span adjustment ............................................................................................................... 17• Calibration of output circuit (D/A) ......................................................................................... 18• Indication of measured data ..................................................................................................... 19• Self-diagnosis ........................................................................................................................... 19• Printer function ........................................................................................................................ 20• Lock of adjustment function .................................................................................................... 21• Indication of digital indicator .................................................................................................. 22• Programmable linearization function ...................................................................................... 25• Rerange (Set LRV/URL calibration) ....................................................................................... 274.2 Zero adjustment by the external screw ............................................................................................ 284.3 Span adjustment by the external screw ........................................................................................... 294.4 Local adjustment unit with LCD display ........................................................................................ 305. MAINTENANCE ............................................................................................................... 335.1 Periodic inspection .......................................................................................................................... 335.2 Troubleshooting ............................................................................................................................... 34v
5.3 Replacement of parts ....................................................................................................................... 355.4 Adjustment after replacement of unit .............................................................................................. 426. INSTALLATION AND PIPING ....................................................................................... 436.1 Installation ....................................................................................................................................... 436.2 Piping ................................................................................................................................................ 476.2.1 Piping of differential pressure (flow) transmitters (type: FKC) .............................................. 476.2.2 Piping of pressure and absolute pressure transmitters (types: FKG, FKA) ........................... 516.2.3 Piping of level transmitter (type: FKE, FKY) ......................................................................... 536.2.4 Piping of remote seal type transmitter (types: FKB, FKD, FKM) .......................................... 567. WIRING ............................................................................................................................ 617.1 Wiring procedure .............................................................................................................................. 617.2 Power voltage and load resistance .................................................................................................. 637.3 Grounding ........................................................................................................................................ 648. SPARE PARTS .................................................................................................................. 65A1 BUILT-IN ARRESTER ...................................................................................................... 78A2 CALIBRATION ................................................................................................................ 70A3 PARAMETER SETTING PRIOR TO DELIVERY ............................................................ 73A4 HAZARDOUS LOCATION INSTALLATION INFORMATION ...................................... 74vi
1. OUTLINEThe <strong>FCX</strong>-A2 series transmitter detects the differential pressure or pressure of various fluids, converts itinto a current signal of 4 to 20mA DC and transmits it.All the adjustment functions are incorporated in the transmission unit for making adjustments easily andexactly.Transmitter settings (such as range and damping time constant, etc.) can be changed from an HHC (HandHeld Communicator).PrincipleThe operating principle of the <strong>FCX</strong>-A2 series transmitter is shown in the block diagram below.The input pressure is changed into an electrostatic capacitance in the detecting unit. The changeproportional to the pressure undergoes conditioning and amplification in the transmission unit, and isthen output as a current of 4 to 20mA DC.InputdifferentialpressureDiaphragmDisplacementSensorCapacitancechangeMeasur-ingcircuitOperationalamplificationcircuitOutputcurrentDetecting unitTransmission unit1
2. OPERATING PARTS AND THEIR FUNCTIONS<strong>FCX</strong>-A2 Series transmitterTerminal unitTransmission unit–CK–CK+Analog indicator connector+Detecting unitProcess connectionDigital indicator connector(Digital)Indicator(Analog)Vent/drainplugTransmissionunitZero adjustment screwFIXOUTDISP%ZEROabs02040%6080100Description of <strong>FCX</strong>-A2 Series transmitterPart nameDetecting unitTransmission unitVent/drain plugProcess connectionConduit connectionDescriptionDetects pressure, differential pressure or level of fluid.Converts the detected signal into an output signal.Used for gas discharge or draining.(Attention should be paid under a high pressure.)Connects impulse pipes from the process.Connects the output cable.Zero adjustment screw Adjusts zero (Refer to Section 7.)Transmission unitPart nameAnalog indicator connectorDigital indicator connectorIndicator (option)DescriptionUsed for connecting an analog indicator.Used for connecting a digital indicator.Analog or digital indicator, available.TerminalsSymbolDescription+, – Connects the output cable.CK+, CK–Used for checking the output or connecting an indicator.An external terminal used for grounding.2
Mode indicating function of digital indicatorFIXOUTDISP%ZEROabsMode indicationMode%ZERODISPOUTFIXWhen indicated% outputExternal zero adjustment possibleDigital indicator displayoutputFixed current modeWhen not indicatedActual scaleExternal zero adjustment impossibleDigital indicator proportional displayProportional outputMeasurement modeabs–NAbsolute pressureOutput value < ZeroSampling status (Flicker)Gage pressureOutput value Zero(a part of unit indicator)3
3. OPERATION AND SHUTDOWN3.1 Preparation for operationBefore operating the transmitter, be sure to perform the following checks and procedures. On zeropoint check or zero adjustment in hazardous area, do not open terminal cover and do not use HHC.Use the transmitter indicator and the external adjustment screw.Preparation procedure(1) Check for liquid or gas leakage from the process connection,etc. by applying soapy water or the like.(2) Check the signal wiring according to the “Terminalblock connection diagram” shown in 7.1.(3) Vent gas from the transmitter in the case of liquidmeasurement.ImportantWhen the plant requires chemical cleaning at the start of operation, be sure to close thevalve of the transmitter to prevent entry of cleaning liquid into the pressure receivingunit.(4) Perform zero point adjustment.Zero point checkTurn on the power to the transmitter.Check the output signal of the transmitter by connecting a DC ammeter across CK+ and CK– of theterminal block.After ten minutes or longer, adjust the transmitter output current to 4 mA (zero adjustment). (Seebelow.)Zero adjustment(1) Adjustment by zero adjustment screwAdjust zero point of the transmitter to 4 mA byturning the zero adjustment screw.Note 1) If the transmitter is locked (see section 4.1.3Operating procedure, Lock of adjustmentfunction.), this adjustment cannot be madewith the external adjustment screw.Note 2) When a digital indicator is attached to thetransmitter, make sure that the LCD lamp“ZERO” is ON.(2) Adjustment by HHCRefer “zero adjustment” explained in section 4.1.DecreaseIncreaseFine adjustment : turning slowlyRough adjustment: turning quicklyImportant1. After adjustment of the transmitter, it should be kept energized for about 10 secondsto write the adjustment results into memory.2. Use a blade-edge screwdriver for adjusting the zero adjustment screw.4
3.2 Operation(1) Operation of pressure transmitterOpen the valve slowly to apply a pressure. When a pressure is applied, the transmitter is set inthe operating status.Open(2) Operation of differential pressure transmitterSet the operating status by manipulating the manifold valve.Stop valve on the low pressure sideOpenMake sure the equalizing valve is open.Equalizing valveStop valve on the high pressure sideOpenOpen the stop valve on the high pressure sideslowly.CloseClose the equalizing valve.5
OpenFinally, open the stop valve on the low pressure side slowly.Check of operating statusUse a field indicator, receiving instrument or HHC to check the operating status.3.3 Shutdown(1) Shutdown of pressure transmitterClose the valve slowly to stop applying a pressure. The transmitter is set in the measurementstop status.Close6
(2) Shutdown of differential pressure transmitterSet the shutdown status by manipulating the manifold valve.Turn off power supply.Close the stop valve on the high pressure side (H side)slowly.CloseOpenOpen the equalizing valve.CloseClose the stop valve on the low pressure side (L side)slowly.ImportantBefore a long shutdown, discharge the process fluid and drain completely from the transmitter.This is to protect the transmitter from freezing, corrosion, etc.7
4. ADJUSTMENTTo operate the <strong>FCX</strong>-A2 series transmitter, the HHC is used for each adjustment.4.1 Adjustment with HHCStartup and usage of the Hand Held Communicator (HHC) are detailed in the instruction manual forHHC. Please refer to this manual before commencing adjustment.ImportantAfter adjustment of the transmitter, it should be kept energized for about 10 secondsto write the adjustment results into memory.4.1.1 Connection of HHCThe HHC can be connected to the transmitter, junction terminal or the terminals in the instrumentroom.–CK–CK++Field deviceTo HHCTo junctionterminal orinstrumentroomInstrument roomJunction terminalZener barrierTerminal blockLoad resistor250Ω or more Note)DC power supply16.1 to 45V DCNote) See 7.2 “Power voltage and load resistance”.DANGERIn the case of a flameproof transmitter, never connect the HHC to the terminalblock of the transmitter in hazardous area installations.8
4.1.2 Outline of HHC operationThe following shows the flow of key operations, explained for FXW Version 6.0(FXW 1- 3).FXW prior to Version 6.0 (FXW 1- 3) are not available of operation of <strong>FCX</strong>-A2sereis transmitter.In this case, the user is requested to contract our office for ROM Version Up.Classification Display symbol Key symbolReferentialpage1TAG No.INC1: TAG NMENU102TypeINC2: TYPEMENUINC113Display of serial No.INC3: SERIAL No.MENU INC INC114Industrial value unitINC4: UNITUNIT125Range limitINC5: RANGE LIMITUNITINC136Range change(LRV, URV)INC6: RANGERANG137 Damping adjustmentINC7: DAMPINGDAMP148Output modeINC8: OUTPUT MODELIN/159Burnout directionINC9: BURNOUTLIN/INC16AZero/span adjustmentINCA: CALIBRATECALB17BCalibration ofoutput circuitINCB: OUTPUT ADJOUT18CIndication ofmeasured dataINCC: DATADATA19DSelf-diagnosisINCD: SELF CHECKDATAINC19EPrinter functionINCE: PRINTDATA INC INC20FGHLock of adjustmentfunctionsIndication of digitalindicatorProgrammable LinearizationfunctionINCINCINCF: XMTR EXT.SWG: XMTR DISPLAYH: LINEARIZEDATA INC INC INCDATA INC INC INC INCDATA INC INC INC INC INC212225IRerange (Set LRV/URVcalibration)INCI: RERANGEDATA INC INC INC INC INC INC29
4.1.3 Operating procedureIn case of a flameproof transmitter, never connect the HHC to the terminal block oftransmitter in hazardous area installations.TAG N°.0: PUSH MENU KEYMENU1: TAG NoFICRA-1234 xxxxxxxxx xxxxxxxxxxxxxxxxxxx < INC > < CHANGE>INCTo menu2 : TYPECHNG1-1: TAG CHANGEFICRA-1234 xxxxxxxxxCL xxxxxxxxxxxxxxxxxxx < ENT > < CL >1 ENT21-1: TAG CHANGECLFICRA-4321 xxxxxxxxx xxxxxxxxxxxxxxxxxxx CHNG OK?< ENT/CL >after setting3ENT1-2: TAG WRITEFICRA-4321 xxxxxxxxx xxxxxxxxxxxxxxxxxxx4To set the TAG N°. of each field device,use the procedures shown inthe following diagram. TAG N°.can be inputted up to 26 charactersof alphanumeric codes.• After PUSH MENU KEY is displayed,press the key to displayTAG N°.• To make changes press the key and the cursor will be displayedunder display 1 .• Set the alphanumeric keys as necessaryunder display 2 . To set the alphabet,press the key first.Using < >< > keys, cursor positioncan be moved.• At the completion of setting, press the key and a prompt is displayedcheck entry under display 2 .• If the entry is correct, press the key to input it to the fielddevice under display 3 and 4 and theinitial image 1 is displayed.• To display TYPE display, press the key under display 1 .10
TYPEMenu 1 : TAG N°INC 2: TYPEFKCXXXXX-XXXXX < INC > < CHANGE>INCTo Menu3 : SERIAL N°CHNG2-1: TYPE CHANGEFKCXXXXX-XXXXXCL< ENT > < CL >1 ENT22-1: TYPE CHANGEFKCXXXXX-XXXXX CHNG OK?< ENT/CL >after settingENT2-2: TYPE WRITEFKCXXXXX-XXXXX34CLType of field device is displayed andchanged (ex. of differential pressuretransmitter).• After TAG N°. is displayed, press the key to display TYPE image.• To make changes press the key under display 1 and the cursorwill be displayed under display 2 .• Set the alphanumeric keys asnecessary under display 2 . To set thealphabet, press the key first. Using < >< > keys, cursorposition can be moved.• At the completion of setting, press the key and a prompt is displayedcheck entry under display 2 .• If the entry is correct, press the key to input it to the fielddevice under display 3 and 4 and theinitial image 1 is displayed.• To display SERIAL NO., press the key under display 1 .2 : TYPEINC3: SERIAL No. N8G07131 VERSION 1.1 < INC >INCDisplay of SERIAL N°.4 : UNITSERIAL N°. and transmitterssoftware version are displayed.• After setting TYPE, press the key to display SERIALNO. and software version oftransmitter.• By pressing the key,UNIT setting image is displayed.11
Menu N°3 :SERIAL N°4: UNITINCINC< INC >To menu N° 5 :RANGE LIMITkPa< CHNG >CHNG14-1: UNIT CHANGEkPa(NEXT MPa)< INC > < ENT > < CL >INC< UNIT CHANG >4-1: UNIT CHANGEkPa(NEXT MPa)CHNG OK? < ENT/CL >4-1: UNIT WRITEkPaENTENTNot suitable unit display4-1: UNIT WRITEPaNOT SUITABLEUNIT < CL >CLCLCL234Industrial value unitAvailable unit for <strong>FCX</strong>-A2INCmmH 2 OcmH 2 OmH 2 Og/cm 2kg/cm 2PahPakPaMPambarbarpsiinH 2 OftH 2 OmmAqcmAqmAqmmWCcmWCmWCmmHgcmHgmHginHg< Torr >< atm >DECNote: The mark < > is settable for absolutepressure transmitter only.• When pressing underdisplay 1 , the display for changingthe unit of industrial value 2appears.• The desired unit of industrialvalue is selectable by using or under display2 .• Display 3 is provided for confirmingyour change.• Display 4 is for registering theunit of industrial value.ImportantThe unit of industrial value is set according to the range as ordered, but the displayresolution lowers depending on the unit being set.When4-1:UNIT CHANGEPaNOT SUITABLEUNIT is displayed upon changing the unit of industrial value, output cannot be displayed in theengineering unit selected.12In this case, press the CL key and change the engineering unit to a different one.
Menu N°4 :UNITRange limitINC5: RANGE LIMIT× × × kPa< INC >INCIndicates the maximum measuringrange of this transmitter.Range change (LRV, URV)6: RANGE LRV ±× × × . × kPa URV ±× × × . × kPa< INC > < CHANGE >INC1CHNGCL6-1: RANGE CHANGE LRV ±× × × . × kPa URV ±× × × . × kPa < LRV > < URV > < CL >2LRVCLLRV: Lower range value (0% point)URV: Upper range value (100% point)• When pressing under display1 , display changes to the LRVand URV selection screen.To menu N°7 :DAMPING6-2: RANGE CHANGE LRV ±× × × . × kPa URV ±× × × . × kPa < LRV > < URV > < CL >3URVCL6-2: RANGE CHANGE LRV ±× × × . × kPa URV ±× × × . × kPa < LRV > < URV > < CL >4ENTCL6-2: RANGE CHANGE LRV ±× × × . × kPa URV ±× × × . × kPaCHNG OK? < ENT/CL >5ENTPress for presenting the displayfor setting the zero point range(display 3 ), or for presentingthe display for setting the spanrange (display 4 ).• Under displays 3 and 4 , input zeropoint and span values.* Press after setting LRVand URV.• When pressing under display3 , 4 , negative value is available.6-3: RANGE WRITE LRV ±× × × . × kPa URV ±× × × . × kPa6Selectable setting rangeOutput (mA)20ReverseactionNormalactionURV LRV LRV 4 URVMaximum measuring rangeInputImportantIn case of the actual scale specification with a digital indicator provided, if therange is changed, indicator display does not match. So, setting is requiredagain in response to the display in the digital indicator (G: XMTR DIS-PLAY). In case of the actual scale specification with an analog indicatorprovided, if the range is changed, indicator display does not match. So, replacementof the analog indicator is required.13
Menu N°6 :RANGEDamping adjustment7: DAMPING0.3SECINC< INC > < CHANGE >1CHNGCL7-1: DAMP CHANGE0.3SEC< ENT > < CL >after settingCLENT7-1: DAMP CHANGE1.2SEC2When process input changes excessively,an appropriate damping timeconstant should be set.Input time constant value under display2 , time constant can be changed.To menu N°8 :OUTPUT MODEENTCHNG OK? < ENT/CL >37-2: DAMP WRITE1.2SEC4Note)Selectable time constant valueNo damping ( = measuring period) to32 secThe above damping constants areused only for the electronics unit.The detecting unit has its own constantsindependent of theelectronics unit (for details, refer tothe data sheet).14
Output modeMenu No.9INC(DP)LIN/ D8: OUTPUT MODE XMTR:DP OUT=LIN < INC > < CHANGE >8-1: MODE CHANGEXMTR : DPOUT=LIN< INC > < ENT > < CL >*1 ENT CL 2 In case of OUT= SQR8-1: MODE CHANGEXMTR:DPOUT=SQRCHNG OK? < ENT/CL >8-2: MODE WRITEXMTR:DPOUT=SQR8-3: LOW CUTPOINT=××.××%FLOWMODE=< CHANGE > < CL >CHNG8-4: POINT CHANGE ××.××%FLOW< ENT > < CL >8-4: POINT CHANGE ××.××%FLOWENTCHNG8-5: POINT WRITE××.××%FLOW8-7: LOW CUT MODE< 1 > LINEAR < 2 > ZERO< 1 > < 2 > 1 2 CL(a)1GP, AP, LL (Liquid Level)8 : OUTPUT MODE XMTR:GP OUT=LIN< INC > < CHANGE >INC CHNG 18-1: MODE CHANGEXMTR : GPOUT=LIN< ENT > < CL >8-1: MODE CHANGE XMTR:DP OUT=LINCHNG OK? < ENT/CL >ENT CL 5ENT CL 3ENT 6ENTCLCL8-6: LOW CUT MODELINEARCLCL< CHANGE > < CL >CHNG(a)CHNG OK? < ENT/CL >789108-2: MODE WRITE XMTR:DP OUT=LIN8-6: LOW CUT MODEZEROCL1 OUT=LIN2 OUT=SQR< CHANGE > < CL >11 CHNG CL 1213*2*1 < INC >In case of OUT=LIN = LINEAR or ZERO< DEC > Available ModeNote) GP, AP, LL : OUT = LIN only*2 0.00% Cut Point 20.00% FLOW4OutputThe output mode is used to select theproportional mode (proportional toinput differential pressure) or squareroot extraction mode (proportinal toflow rate) for output signal (4 to 20mA). In case of square rootextraction mode, the cut point andthe mode below the cut point can beset. Under display 2 , press or for selection of the squareroot extraction mode or proportionalmode.Change of output mode a OUT=LINb OUT=SQRSince display 7 is presented whenthe square root extraction mode isselected, the low flow cut pointshould be set.Cut point is adjustable within therange of 0.00 to 20.00%. The cutpoint is used for stabilizing outputnear 0% when the square root extractionmode is selected for outputsignal. There are two modes; in onemode, proportional output is selectedfor output below a cut point (Fig. A)and in the other mode, output is forciblyreduced to 0% for output belowa cut point (Fig. B).Output8-7: MODE CHANGELINEAR8-7: MODE CHANGEZEROCHNG OK? < ENT/CL >ENT CL 148-8: MODE WRITE LINEARCHNG OK? < ENT/CL >ENT CL 168-8: MODE WRITE ZERO15 17DifferentialinputFig. A: With linearoutput selected inlow cut modeDifferentialinputFig. B: With zerooutput selected inlow cut modeUnder display 13 , linear or zerooutput is selectable for output belowthe cut point.15
Burnout direction9:BURNOUTNOT USED(HOLD)< INC > < CHANGE >INCA : CALIBRATECL9-5: BURNOUTSaturate Current3.8-20.8mA< CL >61CHNGUNDER SCALE (burnout current)Y.YmA3.8mA3.7mA3.6mAINC 3.5mA DEC3.4mA3.3mA3.2mACL1 2 3or orSelection ofburnout direction(ex)9-2: BURNOUTCHANGEUNDER SCALE< ENT > < CL >CL9-2: BURNOUTCHANGEUNDER SCALECHNG OK? < ENT/CL >ENT 4CHNG9-1: BURNOUT< 1 > NOT USED< 2 > OVER SCALE< 3 > UNDER SCALEENT39-4: BURNOUTUNDER SCALEY.YmA< CHANGE > < CL >CL9-5: BURNOUT CHNGUNDER SCALEY.YmA< DEC > < CL >ENT9-5: BURNOUT CHNGUNDER SCALEY.YmACHNG OK? < ENT/CL >ENTCL23578CLUsed for selecting output at occurrenceof a fault in the detecting unit. Burnoutdirection is selectable under display 2• For selection of NOT USED, press.• For selection of OVER SCALE, press.• For selection of UNDER SCALE,press .The meaning of each conditionabove is as follows.• NOT USED Not used(Output hold)Saturation current = 3.8, 20.8mANote) Output value just before the occurrenceof trouble is given in the outputhold mode.• OVER SCALE Over scale(Output 20.8 to 21.6mA)Saturation current = 3.8, 20.8mA• UNDER SCALE Under scale(Output 3.2 to 3.8 mA)Saturation current = 3.8, 20.8mABurnout Current of <strong>FCX</strong>-CII seriestransmitterOver scale burnout current = 20.8 to21.6mAUnder scale burnout current=3.2 to3.8mASaturation current=3.8, 20.8mAUpon pressing or burnout current can be changed.(See above.)9-7: BURNOUTSaturate Current3.8-20.8mA< CL >CL9: BURNOUTUNDER SCALEY.YmA< INC > < CHANGE >INCCHNG910Change of Over scale current21.6mA21.5mA21.4mAINC 21.3mA21.2mA21.1mA21.0mA20.9mA20.8mADECA : CALIBRATE16
A:INCCALIBRATE< INC > < LRV > < URV >B : OUTPUT ADJImportantURV1LRV < Zero adjustment >A-1: CALIBRATELRV ×××.××%×××.× kPa< ENT > < CL >CLENTCLA-1: CALIBRATELRV ×××.××%×××.× kPaCHNG OK? < ENT/CL > 3ENTA-2: CALIBRATINGLRV ×××.××%×××.× kPa< Span adjustment >A-3: CALIBRATEURV ×××.××%×××.× kPa< ENT > < CL >CLA-3: CALIBRATEURV ×××.××%×××.× kPaCHNG OK? < ENT/CL > 6A-4: CALIBRATINGURV ×××.××%×××.× kPaCLENTENTPress LRV or URV at display of 1 .When the following is displayed, it means that calibration can not be made becauseMenu No. H: LINEARIZE is effective. In this case, set INVALID on the panel of No. H: LIN-EARIZE.1. Span adjustment should be performed after zero adjustment is completed.2. When the actual input exceeds the adjustable range, [NOT CALB ] is displayed.In this case, adjustment is required again.Adjustable rangeZero adjustment: Within ±40% of maximum spanSpan adjustment: Within ±20% of calibrated span3. When the adjustment point does not meet the following condition,[SETTING ERR] is displayed. In this case, adjustment is required again.Adjustment point setting condition–1.000%CS (*) PL 100.000%CS (*) 0.000%CS (*) PH 110.000%CS (*)PL =PH =(Lower adjustment point) - LRVURV - LRV(Higher adjustment point) - LRVURV - LRV× 100× 1002457A-1:CALIBRATECan’t proceed.Set Linearizeinvalid (*) : CS (Calibrated Span) is equal to measuring range.Zero/span adjustmentZero and span are adjustable by applyingan actual pressure.When pressing under display 1the screen for zero adjustment 2appears, and that for span adjustment 5appears when pressing .Under display 2 , after applying actualpressure equal to zero point, press two times. Zero adjustment willbe over.When adjustment is made at any pointother than zero, input the pressure valueat that point at the display of 2 , thenpress the key at the display of 3while applying a corresponding pressureto the transmitter.Under display 5 , after applying actualpressure equal to desired span, press two times. Span adjustmentwill be over.When adjustment is made at any pointother than span, input the pressure valueat that point at the display of 5 , thenpress the key at the display of 6while applying a corresponding pressureto the transmitter.17
Calibration of output circuit (D/A)B:INCGOUTOUTPUT ADJ< INC > < CHANGE >1CHNGB-1:OUTPUT SET0mA< LRV/URV/ENT/CL >LRV URV ENT CL(Input of XX.XXXmA at 1 )The output circuit (D/A) should becalibrated by the following procedurewhen necessary.Make calibration wiring transmitter accordingto "Calibration" in AppendixA2, and calibrate the output circuitwith the HHC using the followingprocedure.B-1: OUTPUT SET4.000mACHANGE OK? < ENT/CL > CHANGE OK? < ENT/CL > CHANGE OK? < ENT/CL >2 ENT CL 7 ENT CL 8 ENT CL(4 , 20mA)< OTHERS >B-2: OUTPUT MODEXX.XXXmAB-2: OUTPUT MODEXX.XXXmA CURRENT CONST.< CALB > < CHNG > < CL > CURRENT CONST.< CHANGE > < CL >3 CALB CHNG CL 9 CHNG CLB-3: OUTPUT CALIBXX.XXXmA CONST.0mA (EXT.mA)< ENT > < CL >4 ENT CLB-1: OUTPUT SET20.000mAB-1: OUTPUT SETXX.XXXmA(OTHERS)When the key is pressed at thedisplay of 1 , the display 2 for 4mAcurrent output and its calibration willappear on the screen. When the key is pressed, the display 7for 20mA current output and itscalibration will appear on the screen.Under display 1 , input a desired valuewithin a range of 3.8 to 20.8mA andthen press two times.At this input value, a regulated currentoutput is available.Under display 4 , input digital valuesmeasured by digital voltmeter.B-3: OUTPUT CALIBXX.XXXmA CONST.YY.YYYmA (EXT.mA)CHANGE OK? < ENT/CL >5ENT CLUnder display 4 , the output circuit iscalibrated when pressing .C:B-4: OUTPUT XX.XXXmA CONST.YY.YYYmA (EXT.mA)CALIBRATING6CalibrationimpossibleB-4: OUTPUT XX.XXXmA CONST.YY.YYYmA (EXT.mA)NOT CAL1B. < CL >10CLDATA10 appears when theadjustable range isexceeded.ImportantAfter setting and calibrating the constantcurrent output, be sure to reset the HHCdisplay to the initial display.B:OUTPUT ADJ In this way, the transmitter output is resetto the measurement output. It shouldbe noted that if HHC is removed fromthe transmitter loop or the HHC power isturned OFF when the constant currentoutput has been set, the transmitteroutput is retained at the constant currentoutput.18
Indication of measured dataC:INCDATA< INC > < ENT >ENTBDATAC-1: DATAXXX. X%FLOWXXXXXkPa< CHANGE > < CL >CHNG CLThe measured value can be indicated.For more information about operatingprocedure, refer to the instructionmanual of HHC.:"FLOW" is displayedwhen output mode issquare root extractionmode.:" flicker" is displayedwhen the communica-tion between transmitterand HHC is normal.C-1: DATAXXX. XX %FLOWXXXXX kPa< CHANGE > < CL >CHNG CL(HHC is not used for 10 minutes)STANDBYPUSH CL KEYSelf-diagnosisD:INCSELF CHECK< INC > < ENT >ENTCLD-1: SELF CHECK< 1 > AMP TEMP< 2 > ALM CHECK< 1 > < 2 > 1 1 2 CL2D-2: SELF CHECKTEMP=XXX.X °C (YYY.Y °F)< CL > CL3Use for displaying the measured temperaturein the transmitter and thealarm information.When pressing on display 2 , thetemperature in the amplifier (AMPTEMP) is displayed. When pressing, result of self-diagnosis abouttransmitter (ALM CHECK) isdisplayed.Result of diagnosisD-2: SELF CHECKALM CHECKGOOD< CL >CL4When the temperature in the amplifieris normal:D-2: SELF CHECKTEMP= ×××.×ûC(Temperature alarm is displayed)E:PRINTD-2: SELF CHECKTEMP=XXX.X °CTEMP.ALARMINC(Trouble in transmitter)D-2: SELF CHECKCELL FAULT (C1)< CL > < INC >Temperature is displayed in °C and °F alternately at each press of the key.CL56When temperature alarm is detected:D-2: SELF CHECKTEMP= ×××.×ûCTEMP. ALARMWhen no error has occurred:D-2: SELFCHECKALM CHECKGOODWhen an error has occurred:D-2: SELF CHECKCELL FAULT (C1) For contents of error, refer to "Contentsof message" on the next page.19
[Contents of message]As a result of self-diagnosis, the message below is appeared on the LCD display of HHC, whenthere are trouble in the transmitter. For each error, its cause and remedy are suggested.MessageIndication ondigital indicatorCauseRemedyCELL FAULT (C1)FL-1Error of detecting unitReplacement of detecting unitCELL FAULT (C9) (*1)EEPROM (AMP) FLTFL-2EEPROM error on amplifier sideReplacement of amplifierEEPROM (CELL) FLTFL-3EEPROM error on cell sideReplacement of detecting unitTEMP. ALARMT.ALMZERO(*2)Transmitter temperature is notwithin the allowable range (–45to 90°C).Transmitter temperature isnormalized.XMTR FAULTFL-1Amplifier errorReplacement of amplifierOVER(*2)Input pressure is 105% or higherof setting range.Properly controlled.ZEROUnder(*2)Input pressure is –1.25% orlower of setting range.Properly controlled.ZERO(*1) CELL FALUT (C5) to (C9) are appeared in case of “9” in 6th digit code of FKC.(*2) Real indicationE:With Printer UnitPRINTPrinter functionINC< INC > < ENT >ENT Set Year/Month/DateTime (Hour, Minute)E-1: PRINTDATEYY : MM : DD TIME HH : MM< ENT > < CL > ENTCL(Indicated when the printer unit is active)E-2: PRINT OUTUsable only when a printer is connected.Refer to the instruction manual ofHHC.INCE-3: PRINT OUTPRINT OUT END< INC >PAPER FEED< CL >CLPaper Feed (Printer)Without Printer UnitE: PRINTNO CONNECTIONINC< INC >F : XMTR EXT.SW20
Lock of adjustment functionF: XMTR EXT. SWENABLE < INC > < CHANGE >INC1CHNGCLF-1: XMTR EXT. SW< 1 > INHIBIT< 2 > ENABLE< 1 > < 2 > < CL >1F-2: XMTR EXT. SWCHANGEINHIBIT< ENT > < CL >CL23The zero adjustment function can belocked by the transmitter adjust screw.When pressing (INHIBIT) underdisplay 2 , the external switch lockfunction is activated, and it is releasedwhen pressing (ENABLE).ENTF-2: XMTR EXT. SWCHANGEINHIBITCHNG OK? < ENT/CL >CLENT4F-3: XMTR EXT. SWWRITEINHIBIT5F : XMTR DISPLAY21
1 2G : XMTR DISPLAY G : XMTR DISPLAY ±YYYYYY=XMTR DISPLAY% DISPLAY or ±YYYYYY/±ZZZZZZ at 4mAX.XX-XXX.XX%YYYYNote 1 UUUUUUU±ZZZZZZ=XMTR DISPLAY< INC > < CHANGE > < INC > < CHANGE > at 20mAUUUUUUU=XTMR DISPLAY CHNG INC CHNG UNITNote1) 0.00-100.00%LININC 0.0-100.0% LIN3 G-1: DISP. CHANGE 0-100% LIN< 1 > % DISPLAY 0.00-100.00%FLOW< 2 >ACTUAL DISP. 0.0-100.0% FLOWH : LINEARISE < 1 > < 2 > < CL > 0-100% FLOW1 2 CL4G-2: DISP. CHANGE< 1 > % LIN< 2 > % FLOW< 1 > < 2 > < CL >1 2ACL1 or 2 % FLOW5 % LIN8DPG-3: DISP. CHANGE1 < 1 > 0.00-100.00% 12 < 2 > 0.0-100.0% 2< 3 > 0-100% < CL >33CL46G-4: DISP. CHANGE9X.XX-XXX.XX%LINCHNG OK?ENT CL4ENT7G-4: DISP. WRITE10X.XX-XXX.XX%LING-3: DISP. CHANGE< 1 > 0.00-100.00%< 2 > 0.0-100.0%< 3 > 0-100% < CL >CLG-4: DISP. CHANGEX.XX-XXX.XX%FLOWCHNG OK?CLG-4: DISP. WRITEX.XX-XXX.XX%FLOW44GP, AP, LL(liquid Level)G-3: DISP. CHANGECan't proceed.XMTR doesn'tsupport. < CL >CL40.00-100.00%or 0.0-100.0%or 0-100%Indication of digital indicatorFor digital indicator, either % displayor actual-scale display is selectable.In display on the actual scale, displayvalues corresponding to 0% (4mA)and 100% (20mA) are settable.In setting % display, proportionalmode and square root extraction modeis selectable as shown in 4 .In 4 , %LIN is displayed in % in theproportional mode %FLOW is set by % in the squareroot extraction mode (proportional toflow)In case of pressure transmitter,absolute pressure transmitter andlevel transmitter, % FLOWcannot be set in 4 .1B22
NC181112G-2 : DISP. CHANGELRV: 4mA=±YYYYYYURV: 20mA=±ZZZZZZ< LRV >< URV >LRVENTAURVURVCLG-2 : DISP. CHANGELRV: 4mA=±YYYYYYURV: 20mA=±ZZZZZZ< ENT >< URV >CL1314G-2 : DISP. CHANGELRV: 4mA=±YYYYYYURV: 20mA=±ZZZZZZSET OK?< ENT >Already set value of transmitter31311G-2 : DISP. CHANGELRV: 4mA=±YYYYYYURV: 20mA=±ZZZZZZ< ENT >< URV >ENTURVCL1215G-2 : DISP. CHANGELRV: 4mA=±YYYYYYURV: 20mA=±ZZZZZZSETTING ERR ENT CLCL111116G-3 : DISP. CHANGEDispUNIT=UUUUUUUAlready set value of transmitter () = PRESS./LEVEL/FLOWCHNG ENT CL4011 GP, AP, LL19(liquid Level)17G-4 : DISP. CHANGE G-2: DISP. CHANGEPRESS.FLOW Can’t proceed.LEVELXMTR doesn'tsupport. < CL >1 2 3 CLCL1617FLOW40PRESSLEVELDP1818G-5 : DISP. CHANGE G-5 : DISP. CHANGE G-5 : DISP. CHANGEDispUNIT=UUUUUUU DispUNIT=UUUUUUU DispUNIT=UUUUUUU(NEXT XXXXXXX) (NEXT XXXXXXX) (NEXT XXXXXXX) INC ENT CL INC ENT CL INC ENT CL171717(b)(c)(a)1919G-5 : DISP. CHANGE DispUNIT=UUUUUUU(a) (b) (c) mmH2OmmNm /s SET OK?cmH2OcmNm 3 /min ENT CLm Nm 3 /h17in Nm 3 /d 20ft m 3 /s G-6 : DISP. CHANGE±YYYYYY/±ZZZZZZUUUUUUUCHNG OK?DECmH2Og/cm 2kg/cm 2PahPakPaMPambarbarpsiinH2OftH2OmmAqcmAqmAqmmWCcmWCmWCmmHgcmHgmHginHg(Torr)(atm)( ) is availablefor GP and AP.m 3 /minm 3 /hm 3 /dt/st/mint/ht/dl/sl/minl/hl/dgal/sgal/mingal/hgal/dft 3 /sft 3 /min21ft 3 /hft 3 /dbbl/sbbl/minbbl/hbbl/dENTCLG-7 : DISP. CHANGE±YYYYYY/±ZZZZZZUUUUUUU2(UNIT=PRESS. LEVEL)1111G-5 : DISP. CHANGEDispUNIT=UUUUUUUSET OK?ENT CL1720G-6 : DISP. CHANGE±YYYYYY/±ZZZZZZUUUUUUUCHNG OK?ENT CL1121G-7 : DISP. CHANGE±YYYYYY/±ZZZZZZUUUUUUUB(UNIT=FLOW)When setting the actual-scaledisplay, first select ACTUALDISP in 3 . Next, after setting theactual-scale display value ( 11 to 14), perform the actual-scale displayunit setting( 16 to 19 ).In case of pressure transmitter,absolute pressure transmitter andlevel transmitter, the flow units cannotbe set as shown in 17 .After making sure of the setting ofthe actual scale display 20 , enterthe [ENT] and then data is writtenin the transmitter.(C) is available for DP.23
22BOUT=LIN at Menu No.823G-8 : LOW CUTPOINT=XX.XX%FLOWMODE=YYYYYYCHNG CL1 or 224G-9 : POINT CHANGEXX.XX%FLOWENT CL2225G-9 : POINT CHANGEXX.XX%FLOWCHNG OK?ENT CL26G-A : POINT WRITEXX.XX%FLOWOUT=SQR at Menu No.8G-8 : LOW CUTPOINT=XX.XX%FLOWMODE=YYYYYY24CL1 or 2Note2) CUT POINT and CUT MODE are set at Menu No.8YYYYYY=LINEAR or ZEROWhen setting of % Flow in %display orFlow unit in actual scale display, lowflow cut point and low flow cut modeare displayed ( 22 or 23 ).When, in the OUTPUT MODE (MenuNo. 8), OUT = SQR is set, already setlow flow cut point and low flow cutmode are displayed ( 23 ).With OUT = LIN set, the present lowflow cut point and low flow cut modeare displayed (22). Then, enter, and the setting can be renewed.272827G-B : LOW CUT MODELINEARCHNG CL1 or 2G-C : MODE CHANGELINEARZERO1 2 CL272929G-D : MODE CHANGELINEARCHNG OK?ENT CL2830G-D : MODE WRITE30LINEARG-B : LOW CUT MODEZEROCHNGG-B : MODE CHANGEZEROCHNG OK?ENTCLCLG-B : MODE WRITEZERO281 or 224
H:INCLINEARIZEINVALID< INC > < CHNG >CHNGH-1: LINEARIZEINVALID< INC > < CHNG > < CL >INC2POINT 0< INC > < CHNG > < CL >3CHNGH-3: LINEARIZECHANGEPOINT 0< ENT > < CL >Input the value ofpoint and pressCL4ENT (POINT XX)ENT CHNGINCIn the caseH-2: LINEARIZEwhere POINTXX has beenPOINT XXset< INC > < CHNG > < CL >INCCL 51 2INCINCI : Rerange1CLCLH-2: LINEARIZEH-3: LINEARIZE< 1 >Lin. point:LP< 2 >Comp value:CV< 1 > < 2 > < CL >CLH-4: LINEARIZELP1 XXX.XX%< INC > < CNG/ENT/CL >15 16H-4: LINEARIZELP2 XXX.XX%< INC > < CNG/ENT/CL >for display15 1667CL8CLCHNGCLfor display 11H-2: LINEARIZE< 1 > INVALID< 2 > EFFECTIVE< 1 > < 2 > < CL >2CLH-3: LINEARIZECHANGEEFFECTIVECHNG OK? < ENT/CL >ENT1920For DPH-3:LINEARIZESet Output ModeLIN-LIN or SQR-SQR < CL >21H-4: LINEARIZELP3 XXX.XX%< INC > < CNG/ENT/CL >INCNextparameter 15H-4: LINEARIZEINC16LP14 XXX.XX%< INC > < CNG/ENT/CL >for display7 15 16ImportantNote) In the key stroke for Linearization, please seteach parameter in the below sequence.1. Set the number of compensation points in therange of 2 to 14.2. Set each linearization option point (LP*) correctly,and write them.3. Set each compensation value (CV*) correctly, andwrite them.4. Set linearization option into EFFECTIVE andwrite.CLCL9CL10CLProgrammable linearization functionUser can set output compensationagainst the input using 14compensation points, (X 1 , Y 1 ), (X 2 ,Y 2 )…(X 14 , Y 14 ). Each compensationvalue between (Xn, Yn) and (Xn+1,Yn+1) is connected by first orderapproximate formula.This linearization function is useful tocompensate the tank figure in levelmeasurement application and the flowrate of steam or gas in flow measurementapplication .Functions for LINEARIZE areavailable for FXW Version 6.0 andupward.By pressing INC at display of 2 , thedisplay is shifted to the setting of LIN-EARIZE POINT 3 . Press CHNG atdisplay of 3 and input POINT XX tobe compensated. Then press ENT andthe display will be shifted to 5 .Press INC at display of 5 and the displaywill be shifted to y for selection of Lin. point: LP and Comp.value : CV.Select Lin. point: LP at display of6 and input XXX.XX% to each point(LP1-LP ).At the completion of input to all thecompensated points, press ENT twiceand the write of LP will be finished.At this time, the display is shifted to 6 .Select Comp. point: CV at displayof 6 and input XXX. XX% to eachpoint (CV1-CV ) in the same manneras noted in LP. At the completionof input to all the compensated points,press ENT twice and the write of CVwill be finished.At the completion of write of compensatedprogram for LP/CV, press CLtwice at the display of 6 for shifting to2 . Then, press CHNG for selection of INVALID and EFFECTIVEof 19 . At display of 19 , press and the display will be changed toEFFECTIVE.Change of compensatedpoint for LPINCLP1LP2LP3LP14DEC25
INC2H-4:LINEARIZECV1 XXX.XX%< INC> < CNG/ENT/CL >H-4:17 18LINEARIZE11CLH-4:LINEARIZECV3 XXX.XX%< INC> < CNG/ENT/CL >INCNextparameter 17 18H-4:LINEARIZECL13Change of compensatedpoint for CVCV1CV2CV3INCCV14DECCV2 XXX.XX%< INC> < CNG/ENT/CL >INCH-5: LINEARIZECHANGELPM XXX.XX%< ENT > ENTCL8CLCV14 XXX.XX%< INC> < CNG/ENT/CL >for display 17 18for display 11 17 18for display 7 , 8 , 9 , 10H-5: LINEARIZECHANGECVM XXX.XX%< ENT > ENTCLfor display 11, 12 , 13, 14Important1517When ENT is pressed at display of @0, the followingis displayed,H-3: LINEARIZESet LINEARIZEPoint, LP and CVcorrectly. Requirement of setting1. LP LP2 LP3…LP8 LP9…LP13 LP14 (Inthe case that LP1-LP14=All Zero, it is inhibited tobe set enable)2. If CVa≠CVb, then it must be LPa < LPb. (Note 1)3. If LPa =LPb, then it must be CVa= CVb. (Note 1)Note 1) a, b show next numeral such as a=1 b=2or a=2 b=3 or ………a=13 b=14.4. The compensate value CV 1 and CV n correspondingto start point LP 1 and last point LP n , should beset as below;CV 1 =0.00% CV n =0.00%orthe following is displayed.H-3: LINEARIZESet OUTPUT MODELIN-LIN orSQR-SQR INCH-5: LINEARIZECHANGELP1-14CHNG OK? < ENT/CL >ENTfor display 8CLfor display 7 , 8 , 9 , 10H-5: LINEARIZECHANGECV1-14CHNG OK? < ENT/CL >ENTfor display 8CLCLfor display 11, 12 , 13, 14141618ImportantWhen INC is pressed at display of e,the following is displayed,H-2: LINEARIZEPOINT 0SETTING ERR orWhen ENT is pressed at display of r,the following is displayed,H-3: LINEARIZEPOINT 15POINT SETSETTING ERR POINT=2 (number of correction) 14setting err=00 or 01 or 15When ENT is pressed at display of !5,the following is displayed,H-5: LINEARIZECHANGELPM 150.01%SETTING ERR Requirement of setting-1.25% LP1 LP2… LP14 +105%When ENT is pressed at display of !7,the following is displayed,H-5: LINEARIZECHANGECVM 100.01%SETTING ERR Requirement of setting-100% CV1, CV2… CV14 +100%Before performing the LINEARIZE setting,set either of the following equationsin the OUTPUT mode (Menu No.8) and XMTR DISPLAY (Menu No. G):OUT = LIN SMTR DISP = LIN orOUT =SQR XMTR DISP = FLOW(Note 1)Note 1)XMTR DISP = FLOW meansthe settings of % FLOW in%display or of FLOW units inactual-scale display.26
I:RERANGERerange (Set LRV/URV calibration)< INC > < CHNG >INCI-1:1: TAG N°ImportantCHNGRERANGE< LRV >< URV > < CL >LRV CL 2I-2: RERANGELRV 0.00%< ENT > < CL >ENT1CLI-3: RERANGECHANGELRV . %CHNG OK? < ENT/CL >ENTI-5:RERANGELRV ± kPaLRV ± kPa < CL >3CL45CLURVI-2: RERANGEURV 100.00%< ENT > < CL >ENT CLCLI-3: RERANGECHANGEURV %CHNG OK? < ENT/CL >ENTI-5:RERANGELRV ± kPaURV ± kPa < CL >Adjustment point setting condition-1.00% LRV 100.00% 0.00% URV 110.00%In the case that point is out of setting limit.(Ex)1-2: RERANGELRV 100.01%SETTING ERR In case of the actual scale specification with a digitalindicator provided, if the range is changed, indicatordisplay might not match. So, setting is required again inresponse to the display in the digital indicator(G:XMTR DISPLAY).In case of the actual scale specification with an analogindicator provided, if the range is changed, the scale forindicator might not ensure exact reading.When CHNG is pressed at display of q, the following isdisplayed.1-1: RERANGECan’t proceed.Set Linearizeinvalid. This means that RERANGE cannot be made becauseMENU No. H: LINEARIZE is set in EFFECTIVE. Inthis case, press the CL key and set in INVALID on thepanel of No. H: LINEARIZE.CL786(application to level measurement) atchange of level (LRV/URV)Functions of RERANGE can be madewith FXW Version 6.0 or upward.When the lower range value (LRV) anduppeer range value (URV) need to beadjusted again during measurement oftank level, the measurement levels canbe changed at the same time by settingthe LRV or URV to be adjusted fromFXW.Apply an input pressure required forrerange of LRV at display of 3 andpress ENT twice.In this way, the rerange of LRV is completed,then the new measurementrange LRV and URV, which conformsto the actual input pressure, is displayed.When rerange is made at a point otherthan 0%, input the set value (PV%) ofthat point at display of 3 , and pressENT at display of 4 while applying acorresponding pressure. In this way,the measurement range can be changedto the input corresponding to that pressure.Apply an input pressure required forrerange of URV at display of 6 andpress ENT twice. The rerange of URVis completed, then the newmeasurement range LRV and URVcorresponding to the actual input pressureis displayed. When rerange ismade at a point other than 100%, inputthe set value (PV%) of that point at displayof 6 and press ENT at display of7 while applying a corresponding pressure.In this way, the measurementrange can be changed to the input correspondingto that pressure.Note)The unit of LRV/URV at 5 and 8 aredisplayed in theunit selected by Menu No.4:UNIT.27
4.2 Zero adjustment by the screwZero point of the transmitter is adjustable by the outside screw with the mode setting switch in thehousing set at zero position. The figure shown below is an example of “Mode setting switch” isattached.(1) Set the zero/span switch to zero position.Zero/Span switchSet switch to “zero”for zero calibration(2) Apply standard input pressure corresponding to new Lower Range Value(3) Adjust output to 4mA by turning the outside screwDecreaseIncreaseFor zero suppression or elevation, apply thespecified input pressure in advance and adjust theoutput to 4mA using the outside screw.Fine adjustment : turning slowlyRough adjustment: turning quicklyNote 1)Note 2)If the transmitter is locked, it cannot be adjusted by the external adjustment screw.When a digital indicator is attached to the transmitter, make sure that the LCD lamp “ZERO” is ON.ImportantAfter adjustment, the transmitter should be kept energized at about 10 seconds towrite the adjustment results into memory.28
4.3 Span adjustment by the screwThe measuring range for each transmitter is determinated according to its type.Span is changed by the outside screw with the mode setting switch in the housing set at spanposition. The figure shown below is an example of “Mode setting switch” is attached.(1) Set the zero/span switch to span position.zero/span switchSet switch to “span”for span calibration(2) Apply standard input pressure corresponding to new Upper Range Value.(3) Adjust output to 20mA by turning the outside screwDecreaseIncreaseFine adjustment : turning slowlyRough adjustment: turning quickly(4) Then return to applying input pressure of zero again and make sure output is 4mA.Note 1)Note 2)If the transmitter is locked, it cannot be adjusted by the external adjustment screw.When a digital indicator is attached to the transmitter, make sure that the LCD lamp “ZERO” is ON.ImportantAfter adjustment, the transmitter should be kept energized at about 10 seconds towrite the adjustment results into memory.29
4.4 Local adjustment unit with LCD display1. OutlineWhen local adjustment unit with LCD display (Parts number is *ZZP<strong>FCX</strong>4-A055) is installed in the<strong>FCX</strong>-<strong>AII</strong> transmitter, some functions are available without HHC (Hand Held Communicator).Name of each part in local adjustment unit with LCD display and their functions are indicatedbelow.Damping settingswitchMode settingswitchLCD displayLOCAL/COMM.changing switchTable 1.Functions of Mode setting switchPositions ofswitchFunctions of externaladjustment screwTable 2.Functions of Damping setting switchPositions of Time constant (sec.)switch0 01 0,32 0,63 1,24 2,45 4,86 9,67 19,2OutputDifference pressure & Flow transmitter(Model:FKC)Pressure and Absolute pressuretransmitter (Model:FKG,FKA)0 Zero adjustment Proportional to differential pressure Proportional to pressure1 Span adjustment Proportional to differential pressure Proportional to pressure2 Locking of function Proportional to differential pressure Proportional to pressure3 Adj. fixed current 4mA fixed current 4mA fixed current4 Adj. fixed current 12mA fixed current 12mA fixed current5 Adj. fixed current 20mA fixed current 20mA fixed current6 Span adjustment Proportional to flow Proportional to pressure7 Locking of function Proportional to flow Proportional to pressureTable 3. LOCAL/COMM. Changing switchPositions of switchLOCALCOMM.Adjustment methodsAdjustments of transmitter are carriedout by Mode setting switch and Dampingsetting switch.Adjustments of transmitter are carriedout by HHC.30
2.Selection of transmitter adjustment methodLOCAL/COMM. Changing switch decides the method of <strong>FCX</strong>-<strong>AII</strong> transmitter adjustment. If switchis set to “COMM.” side, adjustment of transmitter is carried out by HHC. This method is explainedin instruction manual.If switch is set to “LOCAL” side, adjustment of transmitter is carried out by Mode setting switchand Damping setting switch.This method is explain below.3.Range change procedureFor changing the measuring range, carry out zero adjustment first, and span adjustment next. (Ifzero adjustment is performed after span adjustment, the 100% point may not be adjusted correctly.).There is no interference between zero adjustment and span adjustment.3.1 Zero adjustment (Change Lower Range Value)Zero point of the transmitter is adjustable by the external adj. screw with the mode settingswitch set at “0” position.(1) Check if “ZERO” is lit on the LCD indicator.If not lit, set the mode setting switch to “0” position.(2) Apply standard input pressure corresponding to new Lower Range Value(3) Adjust output signal to 4.00mA by turning the external adj. screwDecreaseIncreaseFor zero suppression or elevation ranges, apply the specified LRV pressure in advance and adjustthe output signal to 4.00mA using the external adj. screw.Max zero elevation with :max spanOutputsignalmin span100% (20mA)Max Zero suppression with :min spanmax span-100%0%(4mA)0%Zero elevation Zero suppressionInput signal%URL+100%31
3.2 Span adjustment (Change Upper Range Value)The measuring range for each transmitter is determined according to its type.The span is changed by the external adj. screw when the mode setting switch is set at “1” or ”6"position.(1) Set the mode setting switch to “1” or ”6” position.(2) Apply standard input pressure corresponding to new Upper Range Value.(3) Adjust output to 20.00mA by turning the external adj. screw.DecreaseIncrease(4) Then, apply input pressure corresponding to new Lower Range Value again and make sureoutput is 4mA.(5) After span adjustment according to above procedure from 3.2-(1) to (4), please set modesetting switch to appropriate positionImportantAfter adjustment, the transmitter should be kept energized at about 10 seconds to writethe adjustment parameter into memory.4. Damping adjustmentIf a pulsation of the output current is caused due to flow noise etc., it can be attenuated by performingdamping adjustment.Damping is adjustable in 8 steps. The damping constant becomes lager in the order of 0,1,2,3and 4.These damping constant correspond to time constant 0, 0.3, 0.6, 1.2, 2.4, 4.8, 9.6, 19.2 seconds for thetransmission unit regardless of span.The relationship between position of switch and time constant are indicated in table 2.Note)The damping constant above is a time constant applied to the transmission unit only. Thedetecting unit has additional time constant(Please see data sheet about details)ImportantWhen the transmitter respose speed is changed, the time constant of the control systemis also changed. Be sure to check the controllability again.5. Fixed current output and its adjustmentOutput of fixed current regardless of input is available.Output of fixed current is convenient for loop check.When the output(4 or 20mA)is in error, it can be adjusted by the external adjustment screw.32
5. MAINTENANCE5.1 Periodic inspectionIn order to ensure the measurement accuracy and long life of the transmitter, it is essential to inspectthe transmitter periodically according to the operating conditions.Visual inspectionVisually inspect each part of the transmitter for damage, corrosion, etc.If you detect any material which may cause corrosion, it should be cleaned off.Check of cover and O-ringThe transmitter has a water and dust-proof construction.Make sure the O-ring of the case cover is not damaged or deteriorated.Carefully prevent foreign materials from sticking to threads.Piping leakage checkUsing soapy water or the like, check the all process connections for leakage of process fluid. Ifnecessary, drain the moisture which has accumulated in the transmitter and process pipe.33
5.2 TroubleshootingIf an abnormality occurred in the process or transmitter, action should be taken with reference to thetable below.Symptom Cause RemedyOutput currentovershoots scale(exceeds 20mA).No outputcurrent (less than3.8 mA).Output currenterror(1) The manifold valve doesnot open/close normally.(2) Pressure leak is occurring.(3) Process piping is improper.(4) Process pipe is clogged.(5) Power supply voltageand/or load resistance isimproper.(6) Voltage between theexternal connectionterminals of transmissionunit is wrong.(7) Zero and span are notadjusted.(8) Electronics unit is faulty.(1) Same as (1) to (4) above(2) Power supply polarity iswrong.(3) Power supply voltageand/or load resistance isimproper.(4) Voltage between theexternal connectionterminals is wrong.(5) Electronics unit is faulty.(1) Process piping is improper.(2) Gas or solution is mixed in.(3) Liquid density changes.(4) Ambient temperaturechanges widely.(5) Zero or span has deviated.(6) Electronics unit is faulty.Repair the valve so that it opens/closes normally.Repair a leak.Make correct piping.Eliminate the cause of clogging.Make arrangement to obtain proper values. Forpower supply voltage and load resistance, refer to7.2.(For intrinsically safe installations, the powersupply voltage should be 16.1 to 26V DC.)Check for faulty cable, insulation, etc. and repairas needed.For power supply voltage and load resistance,refer to “7.2”.(For intrinsically safe installations, the powersupply voltage should be 16.1 to 26V DC.)Readjust according to chapter 4.Replace the electronics unit according to 5.3.Correct wiring according to 7.1.Make arrangement to obtain proper values.(For power supply voltage and load resistance,refer to 7.2.)(For intrinsically safe installations, the powersupply voltage should be 16.1 to 26V DC.)Check for faulty cable, insulation, etc. and repairas needed.(For power supply voltage and load resistance,refer to 7.2.)(For intrinsically safe installations, the powersupply voltage should be 16.1 to 26V DC.)Replace the electronics unit according to 5.3.Correct the piping.Vent or drain the transmitter.Perform density compensation.Minimize the temperature change.Readjust zero or span.Replace the electronics unit according to 5.3.If remedy is impossible, contact Fuji Electric’s service department.34
5.3 Replacement of partsIf the transmitter requires a replacement part, drain process fluid from the transmitter, disconnect itfrom the process and carry out replacement in an instrument room.DANGERWhen removing an explosion-proof transmitter, turn OFF the main power, then disconnectthe piping and wiring. Do not remove it when the power is ON to prevent seriousaccident such as explosion, fire, etc.To identify faulty partReplace the transmission unit with a spare one in order to determine whether it is the detecting unit ortransmission unit which is faulty.When the faulty unit is identified, it should be replaced with a new one.Replacement of electronics unitElectronics unitIndicatorConnection at rearof electronics unitReplacing procedure(1) Turn off the power supply.(2) Remove the indicator.(3) Remove the electronics unit.Unplug each connector.(4) Replace the electronics unit with a new one and assemble it by reversing the above procedurefrom (3) to (1).ImportantWhen installing the electronics unit, make sure that thezero adjust screw end is in front of the groove in theGrooveZero amplifier unit.adjustment screw(5) After completion of replacement, perform zero and span adjustments.ImportantThe electronics unit should be removed carefully so as not to damage the internalwiring.35
Replacement of detecting unitHexagonal socket boltTransmission unitDetecting unitFlatcableReplacing procedure(1) Remove the electronics unit according to "Replacement of electronics unit."(2) Remove the hex. socket bolts from the electronic housing.Pull the electronics housing straight forward and away from the detecting unit.(3) Replace the detecting unit with a new one of the same type.(4) Fit the transmission unit to the detecting unit and tighten it.(5) Connect each connector of the electronics unit and attach it to the transmission unit.(6) After reassembly, carry out zero and span adjustments.Important • Ensure that replacement detector unit is the same specification as the originalby comparing dataplates.• When removing the transmitter case, pay attention not to damage the flatcable.36
Replacement of the internal parts of detecting unitIn case of differential and flow transmitter (code symbol: FKC)NutO-ring (or gasket)Seal diaphragmMeasurementchamber coverBoltSeal tapeReplacing procedure(1) Remove four hexagon socket head bolts with a torque wrench, etc..(2) Disassembly gives access to the casing covers, O-rings (or gasket), hexagon socket head boltsand nuts.(3) After disassembly, replace the faulty part with a new one.(4) Before reassembly, clean the O-ring face of casing cover with the soft cloth immersed in water,alcohol, or similar detergent.(5) Reassemble the detecting unit by reversing the disassembling procedure. The casing coversshould be assembled so as to be symmetrical with each other in the left-right direction and carefullyso as not to damage the seal diaphragm. Tightening torque should follow the table below.Tightening Maximum workingtorque pressureBolt size Bolt material [N·m] [MPa] Application(kgf·m) {bar} 50 42M10 Cr-Mo steel (5) {420} Working pressure 42 MPa {420 bar} or less SUS304 30 10M10 ASTMB7M (3) {100} Working pressure 10MPa {100 bar} or lessASTML7M 50 42M10 SUS630 (5) {420} Working pressure 42 MPa {420 bar} or less (6) After assembly, carry out a pressure test. Apply a pressure equal to 150% of the maximumworking pressure to both high pressure (H) and low pressure (L) measurement chambers of thetransmitter simultaneously for 15 minutes, and make sure there is no leakage.37
In case of absolute pressure and gauge pressure transmitter (code symbol: FKA and FKG)NutIn case of FKASeal diaphragmBoltO ring (or gasket)Measurementchamber cover38(1) Remove four bolts with a torque wrench, etc..(2) Disassembly gives access to casing covers, O-rings (or gasket), bolts and nuts.(3) After disassembly, replace the faulty part with a new one.(4) Before reassembly, clean the O-ring face of casing cover with the soft cloth immersed in water,alcohol, or similar detergent.(5) Reassemble the detecting unit by reversing the disassembling procedure. The casing coversshould be assembled so as to be symmetrical with each other in the left-right direction and carefullyso as not to damage the seal diaphragm. Tightening torque should follow the table below.In case of absolute pressure transmitter (FKA)Tightening Maximum workingtorque pressureBolt size Bolt material [N·m] [kPa] Application(kgf·m) {bar abs} 50 3000M10 Cr-Mo steel (5) {30} SUS304 30 3000Common over entire rangeM10 ASTMB7M (3) {30}ASTML7M In case of gauge pressure transmitter (FKG)Tightening Maximum workingtorque pressureBolt size Bolt material [N·m] [kPa] Application(kgf·m) {bar} 50 50000M10 Cr-Mo steel (5) {500} Common over entire range SUS304 30 10000M10 ASTMB7M (3) {100} Range 10000 [kPa] or lessASTML7M 50 50000M10 SUS630 (5) {500} Exclusive for range 50000 [kPa] • After assembly, carry out a pressure test.Apply a pressure equal to 150% of the maximum working pressure to the high pressure measurementchamber of the transmitter for 15 minutes, and make sure there is no leakage.
In case of level transmitter (code symbol: FKE)BoltMeasurementchamber coverO-ring (or gasket)Seal tapeSeal diaphragm(1) Remove four hexagon socket head bolts with a torque wrench, etc..(2) Disassembly gives access to the casing cover, O-ring (or gasket) and hexagon socket head bolts.(3) After disassembly, replace the faulty part with a new one.(4) Before reassembly, clean the O-ring face of casing cover with the soft cloth immersed in water,alcohol, or similar.(5) Reassemble the detecting unit by reversing the disassembling procedure. The casing covershould be assembled carefully so as not to damage the seal diaphragm. Tightening torque shouldfollow the table below.Tightening torqueBolt size Bolt material[N·m](kgf·m)Maximum working pressure50M10 Cr-Mo steel (5) Up to rated flange oressureSUS304 30M10 ASTMB7M (3) Up to rated flange pressureASTML7M (6) After assembly, carry out a pressure test. Apply a pressure equal to 150% of the maximumworking pressure to both flange side (high pressure side) and low pressure (L) measurementchamber of the transmitter simultaneously for 15 minutes, and make sure there is no leakage.39
Replacement of field indicator1. Replacement of analog indicatorAnalog indicatorTransmitter coverReplacing procedure(1) Detach the transmitter cover.(2) Remove the analog indicator.(3) Pull out the connector extending from the analog indicator.(4) Connect the connector of a new analog indicator to the electronics section. (See the figure below.)(5) Then, mount the analog indicator at the electronics section.6) Attach the transmitter cover.40
2. Replacement of digital indicatorDigital indicator mounting boardDigital indicatorTransmitter coverReplacing procedure(1) Detach the transmitter cover.(2) Remove two fixing screws which fasten the digital indicator and separate the indicator.(3) Pull out the leading end of the flatcable extending from the digital indicator after raising theslider (white knob) in the electronics section. (See the figure below.)(4) Insert the leading end of the flatcable of a new digital indicator into the connector plug-in port ofthe electronics section and fix it by pushing in the slider. Before inserting the flexible PC board,confirm its correct orientation.(5) Fasten the digital indicator to the electronics section by tightening two fixing screws.Digital indicaterplugin portPin plugBefore tightening, make sure a small recess on the surface is positioned at the top as shownbelow.When twisting the flexible PC board for mounting, adequate attention should be paid not todamage the board.Fixing screws(6) Attach the transmitter cover.Small recess41
5.4 Adjustment after replacement of unitAdjustmentAfter completion of the assembly work mentioned above, use the following procedures for adjustmentand setting. Adjustment should be performed using the HHC.(1) After replacement of electronics unit (including replacement of internal parts)Step Adjustment item Relevant page1 Constant current output (output circuit) P182 TAG. No. P103 Type P114 Industrial value unit P125 Range (zero/span) P136 Zero/span adjustment P177 Damping P148 Output mode (LIN/ selection) P159 Burnout direction P1610 Lock of adjustment function P21(2) After replacement of detecting unit (including replacement of internal parts)Step Adjustment item Relevant page1 Range (zero/span) P1342
6. INSTALLATION AND PIPING6.1 InstallationAfter unpacking, check the delivered items.This transmitter can be mounted on a pipe or on a wall.(However, level transmitters (types: FKE) require flange mounting).Note that the bolts (M8) for wall mounting should be supplied by the customer.CAUTION• The transmitter is heavy. Be careful when handling it.• The transmitter should be installed in a place that meets the operating conditionsshown in DS sheet or instruction manual.• Install the transmitter according to the instruction manual. Improper installation maylead to the cause of fall, trouble or incorrect operation.• When installing, make sure that the transmitter interior is free from cable chips andother foreign objects to prevent fire, trouble or incorrect operation.DANGER• Non-explosion-proof transmitter must not be used in a place with explosive gas toprevent serious accidents such as explosion, fire, etc.ImportantIf the transmitter is not used soon after delivery, then leave it packed and store it in aroom at the normal temperature and humidity (25°C , 60%RH).Bracket mountingMount the bracket to the transmitter.The bracket should be mounted to the process cover as shown below.(Differential pressure/flow transmitters, pressure (Remote seal type transmitters, types: FKD, FKB,transmitters, and absolute pressure transmitters, types: FKM)FKC, FKG, FKA)MountingPipe mountingTransmitterMesurement chamber coverBracketPlain washerSpring washerMounting bolt(M8 12)(1) Fasten the transmitter to a vertical or horizontalpipe using the supplied U-bolt(Tightening torque approximately 15 N·m(1.5 kgf·m)).(2) Use a pipe of outside diameterø60.5
Change of field indicator positionCAUTIONAvoid the following procedure in an explosionproof area.It is sometimes preferable to mount the indicator on the terminal block side due to installation location.In such a case, the following mounting procedure should be followed for analog indicator.Digital indicator cannot be mounted on the terminal block side.Indicator attachedto electronics unitside.1 Remove the cover withwindow and indicator.2 Remove the cover.Pin plug3 Mount the suppliedattachment to thepin plug.Attachment4 Mount the supplied studson the terminal block.Studs5 Attach the cover.6 Connect the red wire(+) of the indicator toCK+ and the blackwire (-) of the indicatorto CK-, then attach thecover with window.Indicator attached toterminal block side.44
204060800%1000100%080602040Change of transmission unit positionCAUTIONAvoid the following procedure in an explosionproof area.Wiring is sometimes difficult depending on the installation location. In such a case, it is convenientto carry out the following.Before turning the transmission unit, remove the electronics unit.The transmission unit is secured by 2 hex socket bolts.Loosen the bolts, turn the transmission unit at 90˚ or 180˚ in the clockwise or counterclockwise directionand fix it by the screws. Then, carry out wiring.ImportantIf the transmission unit has been turned excessivelywithout removing the electronicsunit, straighten the flatcable which connectsthe electronics unit in the transmission unitand the detecting unit, and set the transmissionunit again.Hexsocket boltChange of indicator angleCAUTIONAvoid the following procedure in anexplosionproof area.In case of an analog or digital indicator, it can be turned ±180˚ in 90˚ increments becauseit is connected with a pin plug.2040%608010045
Check spaceEnsure a space of about 500mm against the cover in order to facilitate check, adjustment, etc.500500Change of vent/drain plug positionGrasp the hexagon part of vent/drain plug and rotate it to remove.Bind vent/drain plug's thread with new seal tape and mount vent/drain plugs to new process connections.Tightening torque : 25N·m (2.5kgf·m) Process connection46
6.2 PipingIt is generally recognized that there are appropriate positioning relationship between the transmitterand main process piping for accurate measurement to avoid harmful gas or liquid accumulation.General recognizations are;1 Mount transmitter below main process piping for liquid or steam measurement.2 Mount transmitter above main process piping for gas measurement.The standard style of <strong>FCX</strong>-A2 series transmitter correspond to the piping procedure 1 mentionedabove. Change the vent/drain plug to correspond to the piping procedure 2.CAUTIONMain valve used for piping should be selected with the maximum pressure of the processtaken into account (piping parts such as main valve, etc. should be furnished byuser). If the main valve and other parts do not meet the rating, it may result in leakageof gas or liquid which could lead to a hazard.6.2.1 Piping of differential pressure and flow transmitters (type: FKC.)Check of high/low pressure sides of transmitterThe detecting unit of the differential pressure transmitterbears symbols H and L which represent high and low pressuresides, respectively.Also, vent/drain plugs are provided at the lower processconnection, while impulse pipes are connected at the upperprocess connections.LHRemoval of protective capThe process connection ports of the transmitter and manifold (equalizer) valve are fitted withprotective caps. Before piping, be sure to remove the caps. When removing the caps, carefullyprotect the threaded portion and sealing face from damage.Connection of transmitter and impulse pipes(1) When using the manifold valve, it should be fixed to the transmitter by tightening four ovalflange setbolts (7/16-20UNF), and then the impulse pipe should be connected to the manifoldvalve. Tightening torque of 7/16-20UNF mounting bolt should be 30 to 40 N·m (3 to 4 kgf·m).(2) If a manifold valve is not used, the impulse pipes can directly be screwed into the transmitter. Ifthread size does not match between the transmitter and impulse pipes, an oval flange should beused. Tightening torque of 7/16-20UNF mounting bolt in an oval flange should be 30 to 40 N·m(3 to 4 kgf·m).Position of process taps (Horizontal main process piping)The position of the process tap is determined by the relationship between the condition, characteristicsand measuring point of the process fluid.Note the following figures when planning and installing the piping.Gas measurementLiquid measurementSteam measurement45°45°UpperMain process pipingUpperDifferential pressure source45°45°Lower45°45°LowerDifferential pressuresource is located upperside of main process pipingWithin 45°upward fromvertical directionDifferential pressuresource is located lowerside of main process pipingWithin 45° downwardfrom horizontal directionDifferential pressuresource is located upperside of main process pipingWithin 45° upward fromhorizontal direction47
0204000%2060204080%401 060%6080801 01 002040%60801 0Typical examples of piping1Flow measurement (in case of gas)Place the transmitter above the differential pressuresource.Manifold valveImpulse pipeStop valveProcess pipe2Flow measurement (in case of liquid)Place the transmitter below the differential pressuresource.Make piping so that gas in the impulse pipe is notdelivered to the transmitter, and incorporate gasreservoirs as required.Differencial pressure source (orifice)Differencial pressure source (orifice)Process pipeStop valveImpulse pipeManifold valve3Flow measurement (in case of steam)Set two condensers at the same height near the processtap. Fill the line between the condensers andtransmitter with condensed water.Stop valveProcess pipeCondenserInstall a drain port as required.Manifold valveImpulse pipe4Pressure measurement (in case of liquid)Zero point can be checked with a manifold valveinstalled.Pressure sourceAtmospheric air inletProcess pipeStop valveImpulse pipeManifold valve48
02040%0602080401 0%60801 002040%60801 0Important(1) Protection is required to prevent dust from entering through the atmosphericair inlet after installation of the manifold valve.(2) If process pressure range is narrow (below 10kPa (1000mmH 2O)), the followingshould be considered.•Pressure variation due to wind around atmospheric air inlet•Temperature variation near process taps•Difference in atmospheric pressure between process tap and transmitter locationTo overcome this, provide atmospheric pressure-side pipe with a proper orificeand consider accommodating the transmitter and atmospheric air inlet in a box.56Pressure measurement (in case of gas)Mount the transmitter above the process pipes topreventing moisture from entering the inside oftransmitter.Level measurement(1) In case of wet leg:For measurement, connect the highest liquid level tapping of tank with the low pressureside of transmitter, and the lowest liquid level tapping of tank with the high pressureside of transmitter.Level calculation formulaLRV : ρH 2– ρ 0H 1URV : ρH 2+ ρ 1h – ρ 0H 1Span (∆P): ρ 1hLRV : Low limit of measurement(0% point)URV : High limit of measurement(100% point)ρ 0,ρ,ρ 1: DensityH 1, H 2:Liquid level, h: Liquid level changeAtmosphericair inletCondensorManifold valveImpulse pipeStop valveProcess pipePressure sourceMax. liquid levelhMin. liquid levelρ 0 ρH 1 H 2ManifoldvalveLow pressure High pressuresidesideρ 1(2) In case of dry leg:For an open tank, leave the lowpressure side of transmitter open toatmosphere.Atomosphericair inletLevel calculation formulaLRV: ρH 1URV: ρH 1+ ρ 1hSpan (DP): ρ 1hLRV: Low limit of measurement (0% point)URV: High limit of measurement (100% point)ρ,ρ 1: DensityH 1: Liquid level, h: Liquid level changeLow pressuresideρρ 1Max. liquid levelhMin. liquid levelH 1ManifoldvalveHigh pressure side49
Cautions on impulse piping• For liquid, the impulse pipes should have an upward slope of 1/10 or more between theprocess connection and the transmitter to prevent accumulation of gas, etc. in the detectingunit.• For gas, the impulse pipes should have a downward slope of 1/10 or more between theprocess connection and transmitter to prevent accumulation of moisture, etc. in the detectingunit.• Avoid any sharp bends in impulse pipe which may cause gas or moisture to accumulate inthe impulse pipe.• In order to prevent vibration of the transmitter body and capillary from interfering withoutput, the transmitter body should be installed at a vibration-free place and the capillaryshould be fixed to a stable support.• Take care not to apply an excessive force to the transmitter during its connection.• The impulse pipes used should be suitable for the working temperature, pressure, etc.• When the measuring fluid is likely to freeze in the cover of the measurement chamber, thecover needs to be warmed up with steam or a heater.50
6.2.2 Piping of pressure and absolute pressure transmitters(types: FKG, FKA)Removal of protective capThe process connection port of the transmitter is fitted with a protective cap. Before piping,remove the cap carefully. When removing the cap, carefully protect the threaded portion andsealing face from damage.Connection of transmitter and impulse pipe• Impulse pipe should be connected with an oval flange. Also, the pipe can directly bescrewed into the transmitter. Tightening torque of 7/16-20UNF mounting bolt in an ovalflange should be 30 to 40 N·m (3 to 4 kgf·m).• After connection, close the stop valve of transmitter in order to prevent foreign materialsfrom entering the inside.Position of process taps (Horizontal main process piping)The position of the process tap is determined by the relationship between condition, characteristicsand measurement point of process fluid. Note the following figures when planning andinstalling the piping.Gas measurement Liquid measurement Steam measurement45°45°UpperMain process pipingUpper45°Pressure source45°Lower45°45°LowerPressure source islocated upper side ofmain process pipingWithin 45°upward fromvertical directionPressure source islocated lower side ofmain process pipingWithin 45° downwardfrom horizontal directionPressure source islocated upper side ofmain process pipingWithin 45° upward fromhorizontal direction51
0204060801 0020400204060608080Typical examples of piping1Gas measurementPlace the transmitter above the pressure source.%<strong>Manual</strong> valveImpulse pipeStop valveProcess pipe2Liquid measurementPlace the transmitter below the pressure source.Pressure sourcePressure sourceMake piping so that gas in the process pipe is notdelivered to the transmitter, and incorporate gasreservoirs as required.Stop valveProcess pipeImpulse pipe<strong>Manual</strong> valve%1003Steam measurementPlace the transmitter below the pressure source.Pressure sourceStop valveImpulse pipe<strong>Manual</strong> valveCautions on impulse piping%100• For liquid, the impulse pipe should have an upward slope of 1/10 or more between the processconnection and transmitter to prevent accumulation of gas, etc. in the detecting unit.• For gas, the impulse pipe should have a downward slope of 1/10 or more between processconnection and transmitter to prevent accumulation of moisture, etc. in the detecting unit.• Avoid any sharp bends in impulse pipe which may cause gas or moisture to accumulate inthe impulse pipe.• In order to prevent vibration of the transmitter body and capillary from interfering withoutput, the transmitter body should be installed at a vibration-free place and the capillaryshould be fixed to a stable support.• Take care not to apply an excessive force to the transmitter during its connection.CAUTIONThe impulse pipe used should be suitable for the working temperature, pressure,etc.• When the measuring fluid is likely to freeze in the cover of the measurement chamber, thecover needs to be warmed up with steam or a heater.52
6.2.3 Piping of level transmitter (type: FKE)Check of high/low pressure sides of transmitterThe detecting unit of the level transmitter bears symbols H and L which represent high and lowpressure sides, respectively.LHSeal on mounting flange faceWhen mounting the flange on the high pressure side, a gasket should be inserted as follows.Transmitter flangeProcess side flangeGasketMinimum internal diameter of non-projection type gasketFlange size Minimum internal diameter of gasketDN80/3”SS : 49mmDN100/4”SS : 100mmImportantIt should be noted that leakage of fluid from the wetted parts would affect theperformance due to the progress of corrosion.53
Connecting method of the mounting flangeTighten bolts of mounting flange and process flange in a diagonal order and about three cycles.Removal of protective cap from process connection portThe process connection port on the low pressure side is fitted with a protective cap. Beforepiping, remove the cap carefully. When removing the cap, carefully protect the threaded portionand sealing face from damage.Connection of transmitter and impulse pipe• The pipe on the low pressure side can be connected with an oval flange. Also, the impulsepipe can directly be screwed into the transmitter. Tightening torque of 7/16-20UNF mountingbolt in an oval flange should be 30 to 40 N·m (3 to 4 kgf·m).• After connection, close the stop valve of transmitter in order to prevent foreign materialsfrom entering the inside.Typical examples of piping1Level measurement of open tankLeave the low pressure side of transmitteropen to atmosphere.Max. liquid levelLevel calculation formulahLRV: ρH Min. liquid level1URV: ρ (H 1+ h)H1Span (∆P): ρhLRV: Low limit of measurement (0%)URV: High limit of measurement (100%)ρ: Measuring liquid densityH 1: Liquid level (Refer to “Cautions on installation”)h: Liquid level changeρ2Level measurement of enclosed tank(1) In case of wet leg:Connect the highest liquid level tapping of tank to the low pressure side of transmitter,and the lowest liquid level tapping of tank to the high pressure side (flange side) oftransmitter.Level calculation formulaρStop valve Drain portLRV: ρH 1– ρ 0H 2URV: ρ (H 1+ h) – ρ 0H 2Max. liquid levelSpan (∆P): ρhρLRV: Low limit of measurementh 0Min. liquid level(0%)H1URV: High limit of measurementH 2(100%)ρ: Measuring liquid densityρ 0: Seal liquid densityH 1: Liquid level (Refer to "Cautions on installation")h: Liquid level changeH 2: Seal liquid level54
(2) In case of dry leg:Connect the highest liquid level tapping of tank to the low pressure side of transmitter,and the lowest liquid level tapping of tank to the high pressure side (flange side) oftransmitter.Level calculation formulaLRV: ρH 1ρStop valveURV: ρ (H 1+ h)Max. liquid levelhSpan (∆P): ρhLRV: Low limit of measurement (0%) Min. liquid levelURV: High limit of measurementH1(100%)ρ: Measuring liquid densityH 1: Liquid level (Refer to “Cautions on installation”)h: Liquid level changeCautions on installation• Restriction on H 1Liquid level is not proportional to the transmitter output at some points inside the seal diaphragm.Therefore, H 1should be set higher than the value shown in the table below.• In order to prevent vibration of the transmitter body and capillary from interfering withoutput, the transmitter body should be installed at a vibration-free place and the capillaryshould be fixed to a stable support.• Do not shock the seal diaphragm by hitting hard object against it, for example.• Take care not to apply an excessive force to the flange during connection.• When the measuring fluid is likely to freeze in the cover of the low pressure measurementchamber, the cover needs to be warmed up with steam or a heater.Minimum value of H 1Flange size Non-projection type Projection type40A (1 1 / 2 B) 30mm ––––50A (2B) 30mm 30mm80A (3B) 55mm 40mm100A (4B) 55mm 55mm55
6.2.4 Piping of remote seal type transmitter(types: FKB, FKD, FKM)(1) Piping of remote seal type differential pressure transmitter (type : FKD)Check of high/low pressure sides of transmitterThe detecting unit of the remote seal type differential pressure transmitter bears symbols H and Lwhich represent high and low pressure sides, respectively. Both high and low pressure sidesemploy flange connection.HLSeal on mounting flange faceWhen mounting the flange, a gasket should be inserted as follows.ImportantOn the non-projection type, be sure to use a gasket with an internal diameterlarger than shown in the table below, to prevent the gasket from touching theseal diaphragm.On the 80A (3B) type particularly, it should be noted that the 80A (3B) gasketavailable from the market is such that its inside diameter is smaller than thesize shown below. If it is used, it touches the seal diaphragm and cause errorsin measurements.Minimum internal diameter of non-projection type gasketFlange size Minimum internal diameter of gasket40A (1 1 / 2 B), 50A (2B) 49mm80A (3B), 100A (4B) 100mmTransmitter flangeGasketProcess sideflangeImportantWhen measuring a highly corrosive process fluid, care should be taken ascorrosion may occur if the fluid leaks past wetted parts.Connecting method of the mounting flangeTighten the bolts of mounting flange and process flange in a diagonal order and about threecycles.56
Piping for small flange transmitter with direct mount adaptorWhen connecting the direct mount adaptor to theProcessprocess piping, make sure that the 2 vent/drainpipingplugs fitted to the adaptor are positioned up anddown, respectively.Gaskets, bolt and nuts used for connecting the processpiping are not supplied from Fuji, and shouldbe prepared by user.Typical examples of pipingLevel measurement(1) Open tankAn open tank should be piped so that the flange onthe low pressure side is open to atmosphere.Level calculation formulaLRV: ρH 1– ρ’DURV: ρ (H 1+ h) – ρ’DSpan (∆P): ρhLRV: Low limit of measurement (0%)URV: High limit of measurement (100%)ρ: Measuring liquid densityρ’: Seal liquid densityH 1: Liquid level (Refer to “Cautions on installation”)h: Level changeLow pressure sideMax. liquid levelMin. liquid level(2) Enclosed tankConnect the low pressure side flange to the highestliquid level tapping of tank, and the high pressureside flange to the lowest liquid level tapping of tank. hLevel calculation formulaH1LRV: ρH 1– ρ’DURV: ρ (H 1+ h) – ρ’DSpan (∆P): ρhLRV: Low limit of measurement (0%)URV: High limit of measurement (100%)ρ: Measuring liquid densityLow pressure sideρ’: Seal liquid densityH 1: Liquid level (Refer to “Cautions on installation”)h: Level changeH1hDirect mountadaptorMax. liquid levelMin. liquid levelρρ’High pressuresideCapillaryVent/drainplugScope of supply from FujiρDρ’High pressuresideD57
* The seal liquid density ρ’ is a value at 25°C.13th digit of type code Density DescriptionY, G 0.95 For general measurement (silicone oil)W, A, D 1.9H, S, K 1.07J, T 1.09For oxygen and chlorine measurement(fluorine-group oil)For high temperature, high temperature andvacuum, and high temperature and high vacuum(silicone oil)ImportantThe transmitter body should be installed below any pressure receiving unit. Thisis mandatory where process pressure may become vacuum due to application.Cautions on installation• Restriction on H 1Liquid level is not proportional to the transmitter output at some pints inside the seal diaphragm.Therefore, H 1should be set higher than the value shown in the table below.Minimum value of H 1Flange size Non-projection type Projection type40A (1 1 / 2 B) 30mm ––––50A (2B) 30mm 30mm80A (3B) 55mm 40mm100A (4B) 55mm 55mm• In order to prevent vibration of the transmitter body and capillary from interfering withoutput, the transmitter body should be installed at a vibration-free place and the capillaryshould be fixed to a stable support.• For minimizing the influence by a difference in the ambient temperature, the capillaries onthe high and low pressure sides should be laid together.• Do not shock the seal diaphragm by hitting a hard object against it, for example.• Water head pressure due to difference in the height of flangeWhen there is a difference (D) in flange mounting position between the high-pressure sideand the low-pressure side, a water pressure head “–ρ’D” is applied to the transmitter, so azero point shift for the water head pressure (–ρ’D) due to difference in height of flange isrequired at range setting as shown in the example of typical piping.On the <strong>FCX</strong>-A2 series transmitter, it is made by setting LRV, URV and –ρ’D with HHC (fordetails, refer to Item 4 “Adjustment”, 4.1 Adjustment with HHC and operation procedure,range change).58
(2) Piping of remote seal type pressure transmitter (type: FKB, FKM)Seal on mounting flange faceWhen mounting the flange, a gasket should be inserted as follows.Transmitter flangeGasketProcess sideflangeImportantWhen measuring a highly corrosive process fluid, care should be taken ascorrosion may be aggravated if the fluid leaks out of wetted parts.Minimum internal diameter of non-projection type gasketFlange size Minimum internal diameter of gasketDN80/3”SS : 73mmDN100/3”SS : 100mmConnecting method of the mounting flangeTighten the bolts of mounting flange and process pipe flange in a diagonal order and about threecycles.Mounting of flange and bedThe bed has two screw holes on the back face. It is therefore recommended to mount the bed tothe flange in advance by tightening screws (M6). The flange should be supplied by the customer.BedFlange59
Typical examples of piping1 Gas measurementLocate the process tap above the pressure source.Pressure receiving unitTransmitterAtmosphericair leak valveStop valveProcess tap2Liquid measurementLocate the process tap below the pressure source.Pressure sourcePressure sourceProcess tapStop valvePressure receiving unitAtmospheric air leak valve3Level measurementOpen tankTransmitterAn open tank should be connected on the lowestliquid level tapping point.• Restriction on H 1Liquid level is not proportional to thetransmitter output at some pints inside theseal diaphragm. Therefore, H 1should beset higher than the value shown in thetable below.Pressure receiving unitTransmitterMinimum value of H 1Flange size Non-projection type Projection type40A (1 1 / 2 B) 30mm ––––50A (2B) 30mm 30mm80A (3B) 55mm 40mm100A (4B) 55mm 55mmStop valveMax. liquidlevelMin. liquidlevelH 1ImportantThe transmitter body should be installed below any pressure receiving unit. Thisis mandatory where process pressure becomes vacuum due to application.Cautions on process piping• In order to prevent vibration of the transmitter body and capillary from interfering withoutput, the transmitter body should be installed at a vibration-free place and the capillaryshould be fixed to a stable support.• Do not shock the seal diaphragm by hitting hard object against it, for example.60
7. WIRINGCautions on wiring(1) Application of a voltage exceeding 60 V DC or 40 V AC (exceeding 33 V DC or 23 V AC whenarrester equipped) between “+” and “–” terminals may result in damage to the transmitter.(2) Use a shielded cable for the transmission line where possible.(3) Avoid installation of signal cable and power cable in same conduit or cable tray in order toprevent increased noise. Also, do not bring the signal cable close to large electrical equipment.DANGERIn case of an explosionproof arrangement, wiring shall be made in accordance with therelevant regulations to ensure the explosionproofing.7.1 Wiring procedureCAUTION• Before making wiring work, be sure to turn OFF the main power to prevent electricshocks.• Use wiring materials of correct rating to prevent fire accidents.• After installing the transmitter, firmly close the covers of the transmission unit andterminal box. If not, rain water enter the transmitter which may result in trouble orincorrect operation.Sealing of conduit connectionUse sealing tape, if using metal pipe screw coupling or rubber gasket and fastening gland in the caseof cable (outside diameter ø11)
Terminal block connection diagramTighten the terminal screws (M4 ✕ 10) to a torque of approximately 1.5 N·m (15 kgf·cm) so that the wires will not loosen.After connection, fasten the cover until it does not turn.Terminal–CK–CK++10.5 to 45 V DCOutput DC4 to 20mAConveterWhen using an external field indicatorFor direct connection to an external field indicator, connect the “+” and “–” sides of the fieldindicator to CK+ and CK– of the transmitter as shown below.Use an external field indicator with internal resistance of 12Ω or less.4 to 20mA DC–+–CK –CK++10.5 to 45 V DCOutput DC4 to 20mAConverter62
Things convenient to know beforehandWhen using conduit connection at the top(In the case of 4th digit of type code “S, T, V, W, X”)For wiring from the top conduit connection, use the following procedure.(1) Remove the screw plug of the top conduit connection.(2) Screw the removed screw plug into the bottom conduit connection.(3) Insert the cable from the top and connect it.Hexagon keywrenchFlash screwImportant• The unused conduit connection is of great importance to flameproofing and moistureprevention. So be sure to tighten the flush screw and packing into the connection.• When performing an insulation check after wiring, use a Megger (insulation resistancemeter) of 250 V DC or less and avoid applying a high voltage. If an arrester isequipped, avoid the insulation resistance test and the dielectric strength measurement.7.2 Power voltage and load resistanceMake sure the load resistance of the wiring connected to the loop is within the range shown below.CAUTIONConnect power source of correct rating. Use of power source in excess of the ratingmay cause a fire.1533Load resistance ( )600250Operating zoneNote)010.5 16.1 24 45Power voltage (VDC)Note) For communication with HHC, minimum load resistance of 250 Ω required.63
7.3 GroundingCAUTIONThe transmitter must be grounded. Otherwise, it may cause electric shocks or incorrectoperation.Grounding terminals are provided at two places (at the inside of terminal box and on the side ofconduit connection).By any of the methods given below, ground the transmitter in compliance with the relevant stipulationin the standard on explosionproof installation (for example, grounding resistance 100 Ω or lessby one of the methods given below). In case of intrinsically safe and flameproof installation, be sureto use the ground terminal for grounding.Grounding of transmitter casingGrounding from ground terminal–CK –CK ++External grounding terminal64
8. SPARE PARTSThis diagram shows main parts of the differential pressure (flow) transmitter (FKC) and pressuretransmitter (FKG). For details, contact our office.66A80A6264A6564101FKG10080A103686266A64A2A66A656461FKC6061626813A11A20A66A31A12122812A24A4039, 426101A553A65
No. Parts No. Part Name Q'ty Material Remarks1A *ZZP<strong>FCX</strong>4-A010 Cover 1 ADC12 Blind cover for electronics compartment.2A *ZZP<strong>FCX</strong>4-A021 Cover 1 ADC12 Blind cover for terminal box cover.3A *ZZP<strong>FCX</strong>4-A030 Cover ass'y 1 Aluminum Window cover for indicator option.alloy5 *ZZP<strong>FCX</strong>4-A050 Incicator kit 1ADC12Analog, 0- 100% linear.*ZZP<strong>FCX</strong>4-A051 Indicator kit 1 Analog, 0- 100% square - root.*ZZP<strong>FCX</strong>4-A052 Incicator kit 1 Analog, dual scale.*ZZP<strong>FCX</strong>4-A053 Indicator kit 1 Analog, actual scale.*ZZP<strong>FCX</strong>4-A054 Indicator kit 1 LCD Meter.6 *ZZP<strong>FCX</strong>4-A060 Amplifier Unit 1 Common for any <strong>FCX</strong>-A2 models.10 *ZZP<strong>FCX</strong>4-A101 Electronics housing 1 ADC12 With G1/2 connection. Conduit connection1 location.*ZZP<strong>FCX</strong>4-A102 Electronics housing 1 ADC12 With Pg13.5 connection. Conduitconnection 1 location.*ZZP<strong>FCX</strong>4-A103 Electronics housing 1 ADC12 With 1/2 - 14NPT connection. Conduitconnection 1 location.*ZZP<strong>FCX</strong>4-A104 Electronics housing 1 ADC12 With M20 ✕ 1.5 connection. Conduitconnection 1 location.*ZZP<strong>FCX</strong>4-A109 Electronics housing 1 ADC12 With G1/2 connection. Conduit connection2 locations.*ZZP<strong>FCX</strong>4-A10A Electronics housing 1 ADC12 With Pg13.5 connection. Conduitconnection 2 locations.*ZZP<strong>FCX</strong>4-A10B Electronics housing 1 ADC12 With 1/2 - 14NPT connection. Conduitconnection 2 locations.*ZZP<strong>FCX</strong>4-A10C Electronics housing 1 ADC12 With M20 ✕ 1.5 connection. Conduitconnection 2 locations.11A *ZZP<strong>FCX</strong>1-A110A Cable gland kit 1 Requires only for JIS flameproof.G1/2 connection.4th digit oftype code12A *ZZP<strong>FCX</strong>4-A120A Plug kit 1 Plug for G1/2 connection.S*ZZP<strong>FCX</strong>4-A121A Plug kit 1 Plug for Pg13.5 connection. V*ZZP<strong>FCX</strong>4-A123A Plug kit 1 Plug for M20 ✕ 1.5 connection. W12 *ZZP<strong>FCX</strong>1-A122 Plug 1 Stainless steel Plug for NPT1/2 connection. T13A *ZZP<strong>FCX</strong>4-A132 Terminal block unit 1 Round washer type.*ZZP<strong>FCX</strong>4-A133 Terminal block unit 1 Wire retaining washer type.*ZZP<strong>FCX</strong>4-A134 Terminal block unit 1 Round washer type with arrester.*ZZP<strong>FCX</strong>4-A135 Terminal block unit 1 Wire retaining washer type with arrester.20A *ZZP<strong>FCX</strong>1-A200A Cable gland kit 1 Required only for transmitter with Pg13.5connections.Minimum order q’ty 10 pcs.Note)24A *ZZP<strong>FCX</strong>2-A241A Fastener kit 1 Required only for BASEEFA or JISflameproof (Exd) transmitters.Minimum order q’ty 10 pcs.31A *ZZP<strong>FCX</strong>1-A310A Hex. socket screw kit 2 Minimum order q’ty 10 pcs.66
⎧ ⎨⎩No. Parts No. Part Name Q'ty Material Remarks39 *ZZP<strong>FCX</strong>2-A391 Blank name plate 1 Stainless steel Standard.Minimum order q’ty 5 pcs.Note)*ZZP<strong>FCX</strong>4-A392 Blank name plate 1 Stainless steel FM Explosionproof.Minimum order q’ty 5 pcs.Note)*ZZPFHX4-A393 Blank name plate 1 Stainless steel CSA Explosionproof.Minimum order q’ty 5 pcs.Note)*ZZP<strong>FCX</strong>4-A394 Blank name plate 1 Stainless steel BASEEFA Explosionproof.Minimum order q’ty 5 pcs.Note)*ZZP<strong>FCX</strong>4-A395 Blank name plate 1 Stainless steel FM Intrinsic safety.Minimum order q’ty 5 pcs.Note)*ZZP<strong>FCX</strong>4-A396 Blank name plate 1 Stainless steel CSA Intrinsic safety.Minimum order q’ty 5 pcs.Note)*ZZP<strong>FCX</strong>4-A397 Blank name plate 1 Stainless steel BASEEFAS intrinsic safety. Minimumorder q’ty 5 pcs.Note)*ZZP<strong>FCX</strong>4-A398 Blank name plate 1 Stainless steel BASEEFA type N intrinsic safety.Minimum order q’ty 5 pcs.40 *ZZP<strong>FCX</strong>1-A400 Rivet 2 Stainless steel Minimum order q’ty 50 pcs.Note)42 *ZZP<strong>FCX</strong>1-A420 Ex. plate 1 Alminum JIS Explosionproof and Intrinsic safety*ZZP<strong>FCX</strong>1-A42RMinimum order q’ty 5 pcs.Need inquiry.60 –––––––– Detecting unit 1 Contact our office for inquiry.61 *ZZP<strong>FCX</strong>4-B080 O - Ring 2 VitonMinimum order q’ty 10 pcs.*ZZP<strong>FCX</strong>4-B081 Gasket 2 Teflon62 *ZZP<strong>FCX</strong>4-B091 Cover 2 SCS14*ZZP<strong>FCX</strong>4-B093 Cover 2 SCS14*ZZP<strong>FCX</strong>4-B095 Cover 2 SCS14*ZZP<strong>FCX</strong>4-B097 Cover 2 SCS144th digit of 5th digit oftype code type codeA,SB,E,T,XV,W 1,2,3V,W 464A *ZZPFHC1-B121 Vent / drain kit 2 Stainless steel Rc 1/4*ZZPFHC1-B122 Vent / drain kit 2 Stainless steel NPT 1/466A *ZZPFHC1-B143 Bolt / Nut kit 4 C.S. Hexagon socket head cap screw15th digit of type code*ZZPFHC1-B144 Bolt / Nut kit 4 Stainless steelE,S*ZZPFHC1-B145 Bolt / Nut kit 4 Stainless steelF,T68 *ZZPFHC1-B160 O - Ring 1 Chloroprene Minimum order q’ty 10 pcs.80A *ZZPFHC1-B171 Mounting braket kit 1 Stainless steelNote) Approval pending67
A1 BUILT-IN ARRESTERGeneralAn arrester is used to protect a transmitter or receiver from an abnormal voltage such as lightningsurges induced into signal lines. A built-in type arrester is mounted behind the terminal unit. Anameplate marked “with arrester” is attached to the terminal unit of transmitter with a built-in arrester.InstallationThe built-in arrester should be used in combination with panel mounting type arrester (type PXC) fordistributor protection.+1PXC2–PTL–5E6 + ETransmitter(with arrester)Panel mountingtype arresterDistributorGroundingSince transmitter and arrester groundings are internally connected together, user have only to connectthe external grounding terminals to ground.Grounding terminal must be used, in case of the explosionproof or intrinsic safety type transmitter.<strong>FCX</strong>-A2 series transmitterGrounding terminal–CK –CK++External grounding terminalImportant1. Grounding resistance should be 100Ω or less.2. Avoid common grounding with a lightning rod.68
MaintenanceCheck of arrester• Measure output current from the transmitter check terminals and output current to flow intotransmitter (see figure below).When current is measured with an ammeter connected to CK+ and CK– terminals, the internalresistance of the ammeter should be 12Ω or less.• If the measured two output current are the same, the arrester is normal.• In case the measured values have a difference of 0.1% (0.016mA) or more, the arrester is notfunctioning.• In the above case, the arrester unit (terminal unit) should be replaced with a new one.Limitation of insulation resistance and dielectric strength testAn insulation resistance and dielectric strength test should be avoided as a rule, since it maydamage the arrester.Output measurement at check terminalsDigital voltmeterTo CK +To CK –Standard resistor(1 or 10 )Output measurement outside transmitter* Disconnect the wire from the – (minus)terminal and connect the measurementdevice a shown below.To (–) terminalDigital voltmeterTo (+) terminalDC powersupplyTo (+) side wiringTo (–) sidewiringStandard resistance69
A2 CALIBRATIONPreparation for calibrationThe transmitter should be calibrated in a calibration room. For calibration of each transmitter, thefollowing devices are required.• Pressure source and pressure measuring equipment (should have as high an accuracy as possible)*Measurable ranges are listed in the table below.• Power supply: DC power supply (24 V DC) or Fuji Electric FC series power supply unit(type PXJ)• Load resistor: Standard resistor 250 W (within ±0.0125 W)• Measuring device: Digital voltmeter (capable of measuring transmitter output with an accuracybetter than 0.1%)*Use meter having a 5-digit display.• Hand Held Communicator (HHC) type FXWMeasurable rangeDifferential pressure range of FKCDifferential pressure range[kPa] {mbar} 0.1 to 1 {1 to 10} 0.1 to 6 {1 to 60} 0.32 to 32 {3.2 to 320} 1.3 to 130 {13 to 1300} 5 to 500 {50 to 5000} 30 to 3000 {300 to 30000} Pressure range of FKGPressure range[kPa] {bar} 1.3 to 130 {0.013 to 1.3} 5 to 500 {0.05 to 5} 30 to 3000 {0.3 to 30} 100 to 10000 {1 to 100} 500 to 50000 {5 to 500} Pressure range of FKAPressure range[kPa abs] {bar•abs} 1.6 to 16 {0.016 to 0.16} 1.6 to 130 {0.16 to 1.3} 5 to 500 {0.05 to 5} 30 to 3000 {0.3 to 30} 70
Differential pressure range of FKDDifferential pressure range[kPa] {bar} 0.32 to 32 {0.0032 to 0.32} 1.3 to 130 {0.013 to 1.3} 5 to 500 {0.05 to 5} Pressure range of FKBPressure range[kPa] {bar} 1.3 to 130 {0.013 to 1.3} 5 to 500 {0.05 to 5} 30 to 3000 {0.3 to 30} 100 to 10000 {1 to 100} 500 to 50000 {5 to 500} Differential pressure range of FKEDifferential pressure range[kPa] {mbar} 0.32 to 32 {3.2 to 320} 1.3 to 130 {13 to 1300} 5 to 500 {50 to 5000} 71
Calibration procedure(1) Make wiring according to the diagram below.Connect DC power supply (power source), digital voltmeter (measuring device), standard resistanceand HHC (Hand Held Communicator):When current is measured with an ammeter connected to CK+ and CK – terminals, the internalresistance of the ammeter should be 12Ω or less.HHCDigital voltmeterDC power supplyLoad resistanceStandard resistanceImportantFor communication with the HHC, a load resistor of 250Ω is necessary.(2) Calibration of output circuit (D/A)Calibrate the output circuit with reference to “Calibration of output circuit” in “ADJUSTMENT”in Chapter 4.(3) Zero/span adjustmentRefer to “Zero/span adjustment” in Chapter 4.(4) Accuracy testApply input pressures in the order of 0%, 25%, 50%, 75%, 100%, 75%, 50%, 25% and 0%, andread output at each input pressure.Make sure the difference between each output value and input pressure (%) is within the accuracyrating listed in the table below.The voltage values in the table are dependent on use of “DC power supply + standard resistor250Ω + digital voltmeter (measuring device).Measurement category Reference valueAccuracy (example)Accuracy:0.1% Accuracy:0.2%Percent display (%) 0, 25, 50, 75, 100 ±0.1 ±0.2Current measurement (mA) 4, 8, 12, 16, 20 ±0.016 ±0.032Voltage measurement (V) 1, 2, 3, 4, 5 ±0.004 ±0.00872
A3 PARAMETER SETTING PRIOR TO DELIVERYThe damping value (time constant), function of zero/span adjust screw, output current mode, indicatorscale, cut point, mode below cut point and burnout, have been set prior to delivery as shown in thefollowing. Each parameter is changed by using HHC.No.ItemContents of parameter1Damping value(time constant)No damping(= measuring period)2Zero adjustscrew functionZero point adjustment possible(Note 1)34Current output modeDigital indicator scale(9th digit of codesymbols)Cut point(square-root extractionmode setting)To be set by designationwhen ordering (Note 2)To be set by designating typewhen ordering7.07%5Mode below cut point(square-root setting)Linear6BurnoutTo be set by designationwhen ordering (Note 3)7Linearization functionInvalidNote 1) For span adjustment, HHC should be used. HHC can also be used for zero adjustment.Note 2) In both the differential pressure transmitter (Type: FKC) and remote seal type (Type:FKD), the output current mode is set in linear unless it is designated.Note 3) Burnout direction is selectable from HHC, Hold, Over scale (20.8 to 21.6mA), under scale(3.2 to 3.8mA).73
A4 HAZARDOUS LOCATION INSTALLATION INFORMATIONThis appendix contains documents that present installation instruction for the <strong>FCX</strong>-<strong>AII</strong> SeriesTransmitter in a hazardous location. refer to these figures when installing or servicing a transmittermounted in a hazardous location.When installed, the apparatus must be provided with a voltage limited device which prevent the ratedvoltage of 45V being exceeded.74
INSTALLATION INSTRUCTIONS+4-20mA–FM approved<strong>FCX</strong>-A TransmittersFM approvedsafety barrierAny electrical devices≤ 250Vrms / 250VdcVmax = 42.4VImax = 113mALi ≤ 1.134mHCi ≤ 34.2nF<strong>FCX</strong>-A Transmitters :Class I, II, IIDivision 1, 2Groups A,B,C,D,E,F and GFM approvedHand Held CommunicatorModel FXWJ.I. 4R3A2. AXVmax = 42.4VImax = 225mALi = 0Ci 10nFHand Held CommunicatorClass IDivision 1, 2Groups A,B,C and DHazardous LocationsNon Hazardous LocationsNotes :1) The Intrinsic Safety Entity concept allows the interconnection of FM Approved Intrinsically safedevices with entity parameters not specifically examinated in combination as a system when :Uo orVoc or Vt ≤ Vmax, Io or Isc or It ≤ Imax, Ca or Co ≥ Ci+Ccable, La or Lo ≥ Li + Lcable, Po ≤ Pi.2) The Hand Held Communicator, Model FXW may be connected at any point between the transmitterand the safety barrier, Provided the hand held communicator is a FM Approved model.3) Dust-tight conduit seal must be used when installed in Class II and Class III environments.4) Control equipment connected to the Associated Apparatus must not use or generate more than250Vrms or Vdc.5) Installation should be in accordance with ANSI/ISA RP12.6 “Installation of Intrinsically Safe systemsfor Hazardous (Classified) Locations” and the National Electrical Code® (ANSI/NFPA70) sections504 and 505.6) The configuration of associated Apparatus must be Factory Mutual Research Approved under EntityConcept.7) Hand Held Communicator and Associated Apparatus manufacturer’s installation drawing must befollowed when installing this equipment.8) AEx ib is suitable only for Class I, Zone 1, Hazardous (Classified) Locations and is not suitable forClass I, Zone 0, or Class I, Division 1 Hazardous (Classified) Locations.9) No revision to drawing without prior Factory Mutual Research Approval.10)Simple Apparatus is defined as a device that neither generates nor stores more than 1.2V, 0.1A 20uJ or25mW.Contents on this page are based on TC520807Figure 1. <strong>FCX</strong>-<strong>AII</strong> Series transmitter, Intrinsically Safe Installation or FM75
Fuji Electric France S.A.46, Rue Georges Besse - Z I du Brézet63 039 Clermont-Ferrand cedex 2 — FRANCEFrance : Tél. 04 73 98 26 98 - Fax 04 73 98 26 99International : Tél. (33) 4 7398 2698 - Fax. (33) 4 7398 2699E-mail : sales.dpt@fujielectric.frFuji Electric can accept no responsibility for possible errors in catalogues, brochures and other printed material. Fuji Electric reserves the right to alterits products without notice. This also applies to products already on order provided that such alterations can be made without subsequential changesbeing necessary in specifications already agreed. All trademarks in this material are property of the respective companies. All rights reseved.Printed in FRANCE : 2003


