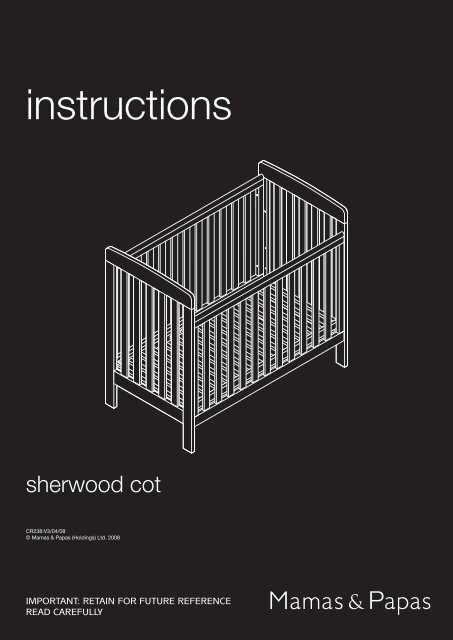
Sherwood Cot Instructions - Mamas & Papas
Sherwood Cot Instructions - Mamas & Papas
Sherwood Cot Instructions - Mamas & Papas
- No tags were found...
You also want an ePaper? Increase the reach of your titles
YUMPU automatically turns print PDFs into web optimized ePapers that Google loves.
ASTEP 1Insert four dowels (A)into the holes in the endsof the cots fixed side (1)top and bottom rails.Insert two dowels (A) intothe holes in the ends ofthe support rail (2).You may need to gentlytap the dowels intothe holes using a lighthammer.12CBSTEP 2Attach the two guides(B) to the front legs ofthe head (3) and foot (4)ends.Slot the guide screws (C)through the guides.Tighten the screws intothe ends as shown in thediagram.Important: Do not overtighten the screws. Theguides must turn freely.34--4--
I3DSTEP 3Screw the metal studs (D)into the metal inserts inthe front legs of the headend (3) and foot end (4)using the allen key (I).41STEP 4Attach the fixed side (1)to the cot ends.Screw four long bolts (E)through the side rails ofthe fixed side and into thecot ends using the allenkey (I).Important: Do not fullytighten the long bolts.EI--5--
STEP 6 STEP 5Slot the dowels into theends of the support rail(2) into the holes in thecot ends.Insert two short bolts(F) into the holes in thecot ends and screw intothe support rail using theallen key (F).With the help of anotherperson carefully turn thecot over so that the fixedsidefaces down.Ensure that the two shortbolts used to attach thesupport rail are half tight.Lower the drop side (5)into position betweenthe cot ends. Ensure thatthe plastic teething railis at the top and that thedrop side mechanism ispositioned the correctway round.2IF5Plasticteethingrail--6--
5STEP 8 STEP 7Align the guides (B) onthe cot ends with themetal runners in the dropside (5).Insert each guide into therecess below the metalrunner one side at a time.Slide the drop sidetowards the support railto ensure that the guidesare correctly engaged inthe metal runners.Align the metal studs (D)on the cot ends align withthe plastic runners in thedrop side.With the help of anotherperson carefully pull theleg of the cot end awayfrom the drop side toallow enough space toinsert the metal stud intothe plastic runner.Insert each guide into thefirst groove in the plasticrunner one side at a time.Fully tighten the twoshort bolts and four longbolts used to attach thesupport rail and the fixedsideto the cot ends.MetalrunnerPlasticrunnerBD--7--
STEP 13Raising the drop sideStand in front of the dropside and grip the top railwith both hands.Pull the drop side up untilit locks in position.Apply firm downwardpressure to the drop sideto ensure it is locked inposition.--10--
INSTRUCTIONS FOR SAFE USE & maintenance• For reasons of safety we only recommend the use of the <strong>Mamas</strong> & <strong>Papas</strong> size 300mattress for this cot.• There should be a minimum of 500mm between the top of the mattress and the upperedge of the cot side when the base is set in the lowest position.• There should be a minimum of 200mm between the top of the mattress and the upperedge of the cot side when the base is set in the highest position. This distance is indicatedby the mattress height mark engraved in the cot.• The mattress should be no more than 40mm shorter or narrower than the internal lengthor width of the cot.• If you leave the child unattended in the cot, always make sure that the drop side is in thehighest position.• Never leave anything in the cot which could provide a foothold for your child to climb outor would present a danger of suffocation or strangulation.• Ensure that there are no loose screws that could trap parts of the child’s body or clothing(e.g. ribbons, drawstrings, necklaces) or pose a risk of strangulation.• Regularly check that all fittings and components of the cot are fully tightened and inworking order. If any parts have become worn or damaged then do not use the cot. Seekadvice by calling Customer Care on: +44 (0)845 268 2000.• Do not use replacement parts that are not recommended or supplied by <strong>Mamas</strong> & <strong>Papas</strong>.• Non-approved parts may render the repair or cot unsafe.• Do not place your cot in proximity of an open fire and other sources of heat, such asradiators, electric or gas fires.• Your cot may be cleaned with a damp cloth. Never use bleach or harsh abrasives.Due to constant updating and improvements, some components may occasionally differ slightly from the diagrams shown inthese instructions. We reserve the right to change the specifications of any product without prior notice.After sales Service: If you need assistance, spare parts or you are unhappy with any aspect of the goods pleasecontact Customer Care on: +44 (0)845 268 2000, or e-mail us at: customer.care@mamasandpapas.com.Visit our website at mamasandpapas.com for the latest product information.-11-
mamasandpapas.com<strong>Mamas</strong> & <strong>Papas</strong>Colne Bridge RoadHuddersfield, HD5 0RH, UKcustomer services helpline: +44 (0)845 268 2000customer care email: customer.care@mamasandpapas.com-12-


