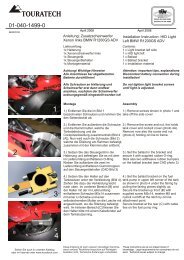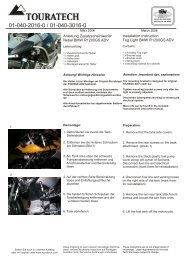
Mounting Instruction - Touratech-USA
Mounting Instruction - Touratech-USA
Mounting Instruction - Touratech-USA

You also want an ePaper? Increase the reach of your titles
YUMPU automatically turns print PDFs into web optimized ePapers that Google loves.
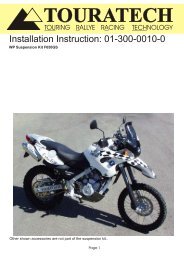
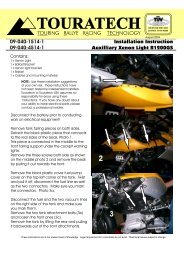
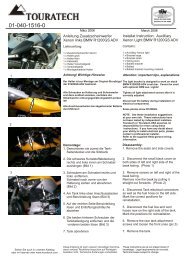
Adjustments1Compression Damping AdjusterAdjust by turning the knob on top ofthe reservoir. Turn clockwise to increasedamping, turn counter clockwise to decreaseit.1<strong>Mounting</strong> <strong>Instruction</strong>Öhlins shock absorber kit BM 543for BMW R1200 GS - Rear23Spring Preload AdjusterAdjust by turning the knob on the hydraulicadjuster. Turn clockwise to set thespring preload. Turn counter clockwiseto release it.Rebound Damping AdjusterAdjust by turning the adjuster wheel at thebottom of the piston rod. Turn clockwiseto increase damping, turn counter clockwiseto decrease it.2Kit ContentsBefore installing the shock absorber, pleasecheck the contents of the kit. If anything ismissing, please contact your Öhlins dealer.4Length AdjusterAdjust by turning the end bracket. Tightenthe lock nut to lock the position.Maximumlength whenthe groove isvisible.34DescriptionArticle no.Shock absorber 46PRCLQS BM 543 (1)Screw MC6S 6x16 01046-01 (2)Screw MC6S 8x16 01046-22 (1)Washer 00153-01 (1)Bracket 02267-05 (1)Bracket 02267-06 (1)Öhlins Sticker 00192-01 (2)Memo Notes Sticker 01180-01 (1)Öhlins Owners Manual 07241-02 (1)! WARNING!The adjustable end eye/bracket must notbe threaded out more that the the grooveis fully visible beneath the lock nut. Afteradjusting, make sure that the lock nut istightened.NOTE!When delivered the Öhlins shock absorber isdialed to recommended settings for the specificbrand and make of the motorcycle. If youhave changed the setting, reset according tothe following:The adjuster has a normal right hand thread. Turnthe damping adjuster clockwise to fully closed(pos. zero [0]). Turn counter clockwise to openand count the clicks until you reach the recommendednumber. See Set-up data above.CAUTION!Do not use force, delicate sealing surfaces canbe damaged.Set-up dataSpring pre-loadCompression dampingRebound damping17 mm12 clicks15 clicksShock absorber dataShock absorber length 403 +12 0 mmShock absorber stroke 78 mmRec. Sag and Ride HeightF1 - F2:40-50 mmF1 - F3:55-65 mmR1 - R2:5-15 mmR1 - R3:25-35 mmRead more about sag and rideheight in the Öhlins Owner’s Manual.NOTE!Read more about sag and ride height and differentsettings in your Öhlins Owner’s manual.BM 543_6, issued 20091103Before InstallingÖhlins Racing AB cannot be heldresponsible for any damage to shockabsorber or vehicle, or injury to persons, ifthe instructions for fitting and maintenanceare not followed exactly.Similarly, the warranty will become null andÖhlins products are subject to continuousimprovement and development.Consequently, although these instructionsinclude the most up-to-date informationavailable at the time of printing, theremay be minor differences between yourshock absorber and this manual. Pleaseconsult your Öhlins dealer if you have anyquestions regarding the contents of thismanual.Öhlins Racing AB, Box 722, S-194 27 Upplands Väsby, Sweden.Phone +46 8 590 025 00. Fax +46 8 590 025 80.www.ohlins.com© Öhlins Racing AB. All rights reserved. Any reprinting or unauthorized use without thewritten permission of Öhlins Racing AB is prohibited. Printed in Sweden.
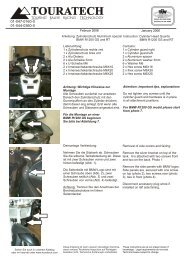
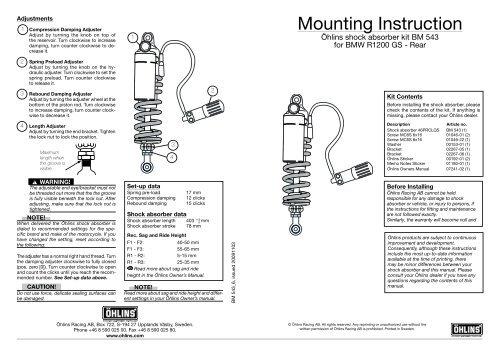
Safety SignalsImportant information concerning safety isdistinguished in this manual by the followingnotations:!The Safety alert symbol means:Attention! Your safety is involved.! WARNING!Failure to follow these warning instructionscould result in severe or fatalinjury to anyone working with, inspectingor using the shock absorber, or tobystanders.CAUTION!Caution indicates that special precautionsmust be taken to avoid damageto the shock absorber.NOTE!Indicates information that is of importanceregarding mounting procedures.<strong>Mounting</strong> <strong>Instruction</strong>s! WARNING!1. It is advisable to have an Öhlins dealer installthe shock absorber.2. Follow the instructions in the vehicle servicemanual when changing the shock absorber.3. When working on a raised vehicle, make surethat it is securely supported to prevent it fromtipping over.1Put the motorcycle on a workstand so that therear wheel is off the ground.2Remove the passenger’s and the rider’s seat.3Loosen the silencer, one bolt and a clamp, andremove it.NOTE!If the motorcycle has the ESA-shock absorbersystem: Disconnct the electrical connectorsfrom the shock absorber, Make sure that theelectrical connectors on the motorcycle aresafe from contact with water.! WARNING!1. Installing a shock absorber, that is notapproved by the vehicle manufacturer, mayaffect the stability of your vehicle. ÖhlinsRacing AB cannot be held responsible forany personal injury or damage that may occurafter installing the shock absorber.2. Please study and make certain that youfully understand all the mounting instructionsand the owner’s manual before handling thisshock absorber kit. If you have any questionsregarding proper installation procedures,contact an Öhlins dealer.3. The vehicle service manual must bereferred to when installing the Öhlins shockabsorberNOTE!During storage and transportation, especiallyat high ambient temperature, the oil andgrease used for assembling may leak insidethe packing and damage the expandedpolystyrene packing material. This is notunusual and is in no way detrimental to theshock absorber.4Remove the lower and the upper bolt of theoriginal shock absorber. Start with the lower.5Remove the original shock absorber from theleft side of the vehicle.6Install the Öhlins shock absorber. Start with theupper attachment. The reservoir should be atthe top on the left side of the vehicle.Install the hydraulic preload adjuster to theframe, on the left side of the vehicle, as indicatedin the figure.7Reinstall the silencer and the seats.NOTE!Make sure that all screws are tightened to thecorrect torque and that nothing fouls or restrictsmovement of the shock absorber whenthe suspension is being fully compressed orextended.R1Left side view5Check sag and ride height6Rear wheelF1 F2 F3R2Bike on a stand Bike on the ground Bike with rider onFront suspensionF1. Bike on a stand with thesuspension fully extended = ............F2. Bike on the ground without rider = ............F3. Bike on the ground with rider = ............Free sag F1 - F2 = ............Ride height F1 - F3 = ............Correct orientation of the ÖhlinsShock absorberWasherM6 screwsR3Rear suspensionR1. Bike on a stand with thesuspension fully extended =.............R2. Bike on the ground without rider = ............R3. Bike on the ground with rider = ............Free sag R1 - R2 = ............Ride height R1 - R3 = ............