JUNOGiWS06—Using the JUNO-Gi with a Computer - Roland UK
JUNOGiWS06—Using the JUNO-Gi with a Computer - Roland UK
JUNOGiWS06—Using the JUNO-Gi with a Computer - Roland UK
Create successful ePaper yourself
Turn your PDF publications into a flip-book with our unique Google optimized e-Paper software.
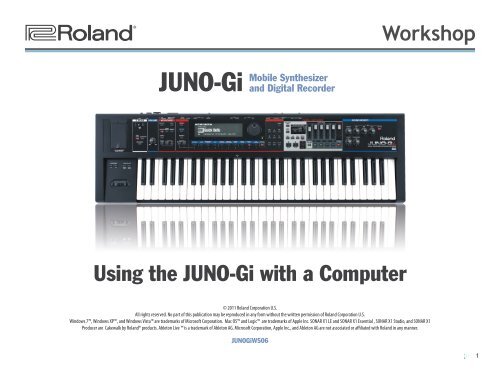
®ÂØÒňΠ®Workshop<strong>JUNO</strong>-<strong>Gi</strong>Mobile Syn<strong>the</strong>sizerand Digital RecorderUsing <strong>the</strong> <strong>JUNO</strong>-<strong>Gi</strong> <strong>with</strong> a <strong>Computer</strong>© 2011 <strong>Roland</strong> Corporation U.S.All rights reserved. No part of this publication may be reproduced in any form <strong>with</strong>out <strong>the</strong> written permission of <strong>Roland</strong> Corporation U.S.Windows 7, Windows XP, and Windows Vista are trademarks of Microsoft Corporation. Mac OS and Logic are trademarks of Apple Inc. SONAR X1 LE and SONAR X1 Essential , SONAR X1 Studio, and SONAR X1Producer are Cakewalk by <strong>Roland</strong>® products. Ableton Live is a trademark of Ableton AG. Microsoft Corporation, Apple Inc., and Ableton AG are not associated or affiliated <strong>with</strong> <strong>Roland</strong> in any manner.<strong>JUNO</strong><strong>Gi</strong>WS061
About <strong>the</strong> <strong>JUNO</strong>-<strong>Gi</strong> Workshop BookletsThe <strong>Roland</strong> <strong>JUNO</strong>-<strong>Gi</strong> Mobile Syn<strong>the</strong>sizer <strong>with</strong> Digital Recorder is anaffordable, portable, perfect instrument for performers and songwriters.It’s got a top-of-<strong>the</strong>-line sound engine and over 1300 exciting new sounds.The onboard digital recorder allows you to record and develop your songs,<strong>with</strong> dedicated faders and acclaimed BOSS GT-class effects. With USB MIDIcapabilities and its instant MIDI Controller mode, <strong>the</strong> <strong>JUNO</strong>-<strong>Gi</strong> also fits nicelyinto any computer-based recording system. Finally, <strong>the</strong> <strong>JUNO</strong>-<strong>Gi</strong> sports aversatile USB song player for playing backing tracks onstage.Each <strong>JUNO</strong>-<strong>Gi</strong> Workshop Series booklet focuses on one <strong>JUNO</strong>-<strong>Gi</strong> topic, and isintended as a companion to <strong>the</strong> <strong>JUNO</strong>-<strong>Gi</strong> Owner’s Manual.This booklet requires <strong>JUNO</strong>-<strong>Gi</strong> Operating System v1.01 or higher. You candownload <strong>the</strong> latest <strong>JUNO</strong>-<strong>Gi</strong> O.S. for free from www.<strong>Roland</strong>US.com.The PossibilitiesAfter you’ve installed <strong>the</strong> driver software that ships <strong>with</strong> <strong>the</strong> <strong>JUNO</strong>-<strong>Gi</strong>, <strong>the</strong><strong>JUNO</strong>-<strong>Gi</strong> can play three important roles in creating music on your computer:• The <strong>JUNO</strong>-<strong>Gi</strong> can act as your DAW’s audio interface• The <strong>JUNO</strong>-<strong>Gi</strong> can be your DAW’s MIDI controller• You can use <strong>the</strong> <strong>JUNO</strong>-<strong>Gi</strong>’s sounds <strong>with</strong> your DAWWe’ll assume you know how to use your computer and DAW software. Ifyou need help, please consult <strong>the</strong> software’s documentation.The <strong>JUNO</strong>-<strong>Gi</strong> as Your Audio InterfaceAbout This BookletAs a modern instrument, <strong>the</strong> <strong>JUNO</strong>-<strong>Gi</strong> is designed for use <strong>with</strong> a computerbasedrecording system’s digital audio workstation, or “DAW.” This bookletdescribes how to place <strong>the</strong> <strong>JUNO</strong>-<strong>Gi</strong> at <strong>the</strong> center of a DAW-based system.Live audio......through <strong>the</strong> <strong>JUNO</strong>-<strong>Gi</strong>.Understanding <strong>the</strong> Symbols in This BookletUSBUSB...is recorded in <strong>the</strong> DAW.Throughout this booklet, you’ll come across information that deservesspecial attention—that’s <strong>the</strong> reason it’s labeled <strong>with</strong> one of <strong>the</strong> followingsymbols.Hear <strong>the</strong> DAW’s audio output...A note is something that adds information about <strong>the</strong> topic at hand.A tip offers suggestions for using <strong>the</strong> feature being discussed.Warnings contain important information that can help you avoidpossible damage to your equipment, your data, or yourself.One of <strong>the</strong> most important pieces of equipment you need to purchase andadd to your computer when setting up a DAW system is a device to whichyou can connect your mics and instruments in order to get <strong>the</strong>ir sounds intoyour computer. Likewise, <strong>the</strong> device provides a way to properly listen to yourDAW’s audio outputs. This device is your “audio interface.”The <strong>JUNO</strong>-<strong>Gi</strong> spares you from having to purchase one since it can do <strong>the</strong> jobitself as <strong>the</strong> 44.1 kHz, 16-bit audio interface for your DAW.2
As your interface, <strong>the</strong> <strong>JUNO</strong>-<strong>Gi</strong>’s USB connection simultaneously• feeds audio digitally to your DAW, including• its own sounds—such as its live sets when you’re playing <strong>the</strong><strong>JUNO</strong>-<strong>Gi</strong>, or up to 16 tones or rhythms in MIDI Controller mode.• live audio from instruments or mics connected to its rear-paneljacks—as described in <strong>the</strong> Using <strong>the</strong> <strong>JUNO</strong>-<strong>Gi</strong>’s Live Audio Inputsand BOSS Effects Workshop booklet. You can download <strong>the</strong>booklet by clicking here.• carries <strong>the</strong> entire stereo audio output of your DAW digitally back to <strong>the</strong><strong>JUNO</strong>-<strong>Gi</strong>—so you can hear its audio tracks, soft synths, and so on, along<strong>with</strong> <strong>the</strong> <strong>JUNO</strong>-<strong>Gi</strong>’s sounds, through <strong>the</strong> <strong>JUNO</strong>-<strong>Gi</strong>’s audio outputs orheadphones plugged into <strong>the</strong> <strong>JUNO</strong>-<strong>Gi</strong>’s PHONES jack.The <strong>JUNO</strong>-<strong>Gi</strong> as Your MIDI ControllerThe <strong>JUNO</strong>-<strong>Gi</strong> as a Sound ModuleMIDI notes...USB...are captured in <strong>the</strong> DAW....where <strong>the</strong>y play notes.Notes are sent to <strong>JUNO</strong>-<strong>Gi</strong>...USBMIDI notes...In MIDI Controller mode, you can use <strong>the</strong> <strong>JUNO</strong>-<strong>Gi</strong> as a “multitimbral” soundmodule, playing up to 16 of its tones and rhythms at once via MIDI from aDAW. Since <strong>the</strong> <strong>JUNO</strong>-<strong>Gi</strong> also acts as a master MIDI controller, you can useits keyboard for sequencing <strong>the</strong> DAW MIDI tracks that play <strong>the</strong> <strong>JUNO</strong>-<strong>Gi</strong>’ssounds.USB...are captured in <strong>the</strong> DAW.You can also play General MIDI files on your computer and use <strong>the</strong> <strong>JUNO</strong>-<strong>Gi</strong>’sbuilt-in General MIDI 2 tones as its sounds.If you’d like to know more about MIDI and/or General MIDI, see ourInFocus booklet, An Introduction to MIDI, which you can downloadhere.In its easy-to-use MIDI Controller mode, <strong>the</strong> <strong>JUNO</strong>-<strong>Gi</strong> can act as <strong>the</strong> mastercontroller for your DAW system. Play <strong>the</strong> DAW’s soft synths from <strong>the</strong><strong>JUNO</strong>-<strong>Gi</strong> and shape <strong>the</strong>ir sound in realtime using <strong>the</strong> <strong>JUNO</strong>-<strong>Gi</strong>’s knobs,sliders, and buttons. The <strong>JUNO</strong>-<strong>Gi</strong> can also play sounds in any external MIDIdevice connected to your computer (including itself).We’ll discuss MIDI Controller mode in “Using <strong>the</strong> <strong>JUNO</strong>-<strong>Gi</strong> as a Master MIDIController” on page 7.Of course, you can use ano<strong>the</strong>r MIDI controller—such as a <strong>Roland</strong>OCTAPAD® SPD-30 digital percussion pad or o<strong>the</strong>r keyboard controller—if you prefer.When you use <strong>the</strong> <strong>JUNO</strong>-<strong>Gi</strong> as a sound module, you can send its output toaudio tracks in your DAW for recording via <strong>the</strong> same USB connection you usefor MIDI communication.3
Getting ReadyConnecting <strong>the</strong> <strong>JUNO</strong>-<strong>Gi</strong> Via USB to Your <strong>Computer</strong>You’ll connect <strong>the</strong> <strong>JUNO</strong>-<strong>Gi</strong> to your computer using a standard USB A/Bcable.If your computer is runningA-type plugB-type plug• Windows—you’ll be instructed to connect <strong>the</strong> <strong>JUNO</strong>-<strong>Gi</strong> to yourcomputer as part of <strong>the</strong> driver installation process. Please don’t connectit until instructed to do so.• Mac OS X—you can connect <strong>the</strong> <strong>JUNO</strong>-<strong>Gi</strong> via USB to your computerbefore or after driver installation.Here’s how to connect <strong>the</strong> <strong>JUNO</strong>-<strong>Gi</strong> to your computer:1 Connect <strong>the</strong> B end of <strong>the</strong> USB cable to <strong>the</strong> <strong>JUNO</strong>-<strong>Gi</strong>’s rear-panel USBCOMPUTER jack.Connect B plug here.Installing <strong>the</strong> <strong>JUNO</strong>-<strong>Gi</strong> Drivers on Your <strong>Computer</strong>The <strong>JUNO</strong>-<strong>Gi</strong> drivers enable <strong>the</strong> passing of sounds and MIDI messagesbetween <strong>the</strong> <strong>JUNO</strong>-<strong>Gi</strong> and your computer using a single USB cable.You can find <strong>the</strong> driver software you need for your <strong>JUNO</strong>-<strong>Gi</strong> on <strong>the</strong> <strong>JUNO</strong>-<strong>Gi</strong>DRIVER CD-ROM that shipped <strong>with</strong> your <strong>JUNO</strong>-<strong>Gi</strong>, or download <strong>the</strong> latestversion for your operating system from here.After installing <strong>the</strong> drivers, you’ll need to restart your computer.Installing <strong>the</strong> <strong>JUNO</strong>-<strong>Gi</strong> Drivers in Windows 7If you’re installing <strong>the</strong> drivers for Windows XP or Vista, please see <strong>the</strong>instructions accompanying <strong>the</strong> installer files.Throughout <strong>the</strong> installation process, Windows 7 may ask you to allow<strong>the</strong> installer to change your computer. Click Yes to continue.1 Power up your PC <strong>with</strong> all USB cables disconnected except for yourkeyboard and mouse. If any applications are running, quit <strong>the</strong>m.2 Begin by• locating <strong>the</strong> driver software on <strong>the</strong> <strong>JUNO</strong>-<strong>Gi</strong> CD-ROM—andopening <strong>the</strong> Driver folder, and <strong>the</strong>n <strong>the</strong> Windows 7 folder.• downloading <strong>the</strong> <strong>JUNO</strong>-<strong>Gi</strong> USB Drivers Windows 7 32-bit or 64-bitsoftware—from here.2 Connect <strong>the</strong> A-plug end of <strong>the</strong> cable to a USB port on your computer.When you connect <strong>the</strong> <strong>JUNO</strong>-<strong>Gi</strong> to your computer via USB, you’lltypically get <strong>the</strong> best results using USB jacks on <strong>the</strong> back of a desktopcomputer or on <strong>the</strong> side of a laptop. We recommend not using a hub.To find out if you’re running Windows 7 32-bit or 64-bit, go to <strong>the</strong> Startmenu, click Control Panel, <strong>the</strong>n System Security, and <strong>the</strong>n System. ForSystem Type, you’ll see “32-bit” or “64-bit Operating System.”When you download <strong>the</strong> installer, save it to your desktop <strong>with</strong>outopening it. Then, right-click <strong>the</strong> downloaded file and select ExtractAll..., choosing <strong>the</strong> Desktop as <strong>the</strong> extraction destination. You’ll find<strong>the</strong> installer file in <strong>the</strong> resulting folder.4
3 Double-click <strong>the</strong> <strong>JUNO</strong>-<strong>Gi</strong> USB MIDI Setup file to display <strong>the</strong> followingwindow:7 Windows 7 presents a window instructing you to• make sure <strong>the</strong> <strong>JUNO</strong>-<strong>Gi</strong> is turned off—and <strong>the</strong>n• connect <strong>the</strong> <strong>JUNO</strong>-<strong>Gi</strong> via USB to your computer—as we describedon page 4, and <strong>the</strong>n turn it on.Once you do <strong>the</strong>se things, <strong>the</strong> <strong>JUNO</strong>-<strong>Gi</strong> drivers are installed.8 Click <strong>the</strong> Close button and you’re ready to go.Installing <strong>JUNO</strong>-<strong>Gi</strong> Drivers in Mac OS XYou can use your <strong>JUNO</strong>-<strong>Gi</strong> <strong>with</strong> a computer running Mac OS X 10.6,10.5, and 10.4.4 Click Next to display <strong>the</strong> installation start window:5 Click Next—Windows 7 begin to install <strong>the</strong> driver, and asks if youwish to complete <strong>the</strong> process.6 Checkmark Always trust software from “<strong>Roland</strong> Corporation”, and<strong>the</strong>n click Install to proceed.You can install <strong>the</strong> <strong>JUNO</strong>-<strong>Gi</strong> driver software <strong>with</strong> <strong>the</strong> <strong>JUNO</strong>-<strong>Gi</strong> alreadyconnected via USB to your Mac via, or not.1 Begin by• locating <strong>the</strong> driver software on <strong>the</strong> <strong>JUNO</strong>-<strong>Gi</strong> CD-ROM—by opening<strong>the</strong> Driver folder, and <strong>the</strong>n <strong>the</strong> folder for <strong>the</strong> version of Mac OSX you’re using.• downloading <strong>the</strong> <strong>JUNO</strong>-<strong>Gi</strong> driver software—from here. If you’reusing Mac OS X 10.6 (Snow Leopard), click <strong>JUNO</strong>-<strong>Gi</strong> USB DriversMac OS 10.6. If you’re using Mac OS X 10.4 or 10.5, click <strong>JUNO</strong>-<strong>Gi</strong>USB Drivers Mac OS 10.5 and Earlier. Once you’ve downloaded<strong>the</strong> necessary file to your Download folder, double click its folderto reveal <strong>the</strong> installer file.2 Double-click <strong>the</strong> installer file to launch <strong>the</strong> driver installer. If you’reusing• Mac OS 10.6—double-click <strong>the</strong> <strong>JUNO</strong><strong>Gi</strong>_USBDriver.pkg file.• Mac OS 10.5 or 10.4—double-click <strong>the</strong> <strong>JUNO</strong><strong>Gi</strong>USBDriver.pkg file.When <strong>the</strong> installer launches, <strong>the</strong> computer may display a messageabout verifying that your computer can use <strong>the</strong> <strong>JUNO</strong>-<strong>Gi</strong> driver.3 If you see this message, click Continue to display <strong>the</strong> installer’sIntroduction screen that lets you confirm you have <strong>the</strong> correctinstaller for your version of Mac OS X.5
Sound-Selection TriggerWhen you press one of <strong>the</strong> <strong>JUNO</strong>-<strong>Gi</strong>’s 0-9 category buttons in MIDI Controllermode, <strong>the</strong> button fires off <strong>the</strong> three MIDI messages required to select soundsin an external MIDI sound module you’re controlling from <strong>the</strong> <strong>JUNO</strong>-<strong>Gi</strong>.Though we’re talking about using <strong>the</strong> <strong>JUNO</strong>-<strong>Gi</strong> <strong>with</strong> a DAW, <strong>the</strong>se messagesare still important, and are sent between MIDI devices in this order:1 a Bank Select MSB (for “Most Signficant Bit”) value2 a Bank Select LSB (for “Least Significant Bit”) value3 a Program Change ValueThe values are presentedin a different order on<strong>the</strong> <strong>JUNO</strong>-<strong>Gi</strong> display.In some MIDI devices and software, Bank MSB and LSB messages arereferred to as “CC00” and “CC32” messages, respectively. You canlearn more about MSB and LSB messages in An Introduction to MIDI.In <strong>the</strong> middle of <strong>the</strong> screen are <strong>the</strong> settings for one of <strong>the</strong> 0-9 buttons.(Button 1 is selected in <strong>the</strong> screenshot above.) To select a different 0-9button, touch <strong>the</strong> button—<strong>the</strong> screen updates to show you <strong>the</strong> button’scurrent Bank Select and Program Change buttons.You can assign different Bank Select MSB, LSB, and Program Change valuesto <strong>the</strong> currently displayed button by highlighting each setting in turn andselecting <strong>the</strong> desired value.Each of <strong>the</strong> buttons, knobs, and faders shown in blue above can transmit aMIDI Control Change value to your DAW.To program any of <strong>the</strong>m, touch or move it, and its currently assigned MIDImessage is displayed at <strong>the</strong> bottom of <strong>the</strong> screen. Highlight <strong>the</strong> control’scurrent setting, and select <strong>the</strong> MIDI message you want it to transmit.DAW-Specific InstructionsFor <strong>the</strong> rest of this booklet, we’ll walk you through <strong>the</strong> details of using <strong>the</strong><strong>JUNO</strong>-<strong>Gi</strong> <strong>with</strong> some popular DAWs. (Teaching you how to use your DAW ingeneral is beyond <strong>the</strong> scope of this booklet, of course.)We’ll be showing you how to use <strong>the</strong> <strong>JUNO</strong>-<strong>Gi</strong> <strong>with</strong>• Cakewalk by <strong>Roland</strong> SONAR X1 LE and SONAR Essential, Studio, andProducer—on page 9. (The steps for using <strong>the</strong> <strong>JUNO</strong>-<strong>Gi</strong> <strong>with</strong> SONAR 8.5LE are similar; only <strong>the</strong> menu and parameter locations have changed.)• Apple Logic Pro 9—on page 13.• Ableton Live—on page 16.You can jump to <strong>the</strong> section on your DAW by clicking its page numberabove.Realtime Controller SetupWe’re going to assume you’ve installed <strong>the</strong> <strong>JUNO</strong>-<strong>Gi</strong>’s USB driverson your computer, that you’ve got <strong>the</strong> <strong>JUNO</strong>-<strong>Gi</strong> connected to yourcomputer and powered up, and that your DAW is launched.Your DAW may allow you to use more than one audio interface, MIDIcontroller, and/or sound module—we’ll be describing how to use just<strong>the</strong> <strong>JUNO</strong>-<strong>Gi</strong> for <strong>the</strong>se purposes. If you’re an advanced DAW user, youcan build upon <strong>the</strong>se instruction if you want to use multiple devices.8
SONAR X1 LE and SONAR X1 and <strong>the</strong> <strong>JUNO</strong>-<strong>Gi</strong>Setting Up SONAR X1 LE and SONAR X1Selecting <strong>the</strong> <strong>JUNO</strong>-<strong>Gi</strong> as Your AudioInterfaceWhe<strong>the</strong>r you’re using SONAR X1 LE or a version of SONAR X1, <strong>the</strong> method forsetting up <strong>the</strong> <strong>JUNO</strong>-<strong>Gi</strong> as your audio interface is <strong>the</strong> same.1 From <strong>the</strong> Edit menu, select Preferences... .2 Click <strong>the</strong> Basic button in <strong>the</strong> lower left of <strong>the</strong> Preferences window.3 Click Devices in <strong>the</strong> Audio section at <strong>the</strong> left of <strong>the</strong> screen if it’s notalready highlighted.4 Un-check all of <strong>the</strong> available Input Driver and Output Drivercheckboxes except for IN (<strong>JUNO</strong>-<strong>Gi</strong>) and OUT (<strong>JUNO</strong>-G).7 Click Apply.8 Click Playback and Recording at <strong>the</strong> left of <strong>the</strong> window and selectASIO from <strong>the</strong> Driver Mode popup like so:If you don’t see <strong>the</strong><strong>JUNO</strong>-<strong>Gi</strong> on thisscreen, jump to Step8, and <strong>the</strong>n comeback here.9 Click Apply.At some point in <strong>the</strong> setup process, Windows may automatically check<strong>the</strong> audio interface’s specs.5 Click Apply.6 Click Driver Settings, and set Playback Timing Master to 1: <strong>JUNO</strong>-<strong>Gi</strong>OUT and Record Timing Master to 1: <strong>JUNO</strong>-<strong>Gi</strong> IN.If you didn’t see <strong>the</strong> <strong>JUNO</strong>-<strong>Gi</strong> in <strong>the</strong> Devices pane earlier, click Devicesnow, and make sure only IN (<strong>JUNO</strong>-<strong>Gi</strong>) and OUT (<strong>JUNO</strong>-<strong>Gi</strong>) are checked.10 If you want to use <strong>the</strong> <strong>JUNO</strong>-<strong>Gi</strong> as your master controller or use itstones, leave <strong>the</strong> Preferences window open for <strong>the</strong> next section of thisbooklet. If not, click Close.9
Selecting <strong>the</strong> <strong>JUNO</strong>-<strong>Gi</strong> as a MIDI ControllerHere’s how to set SONAR to exchange MIDI messages <strong>with</strong> <strong>the</strong> <strong>JUNO</strong>-<strong>Gi</strong>.1 Click Devices in <strong>the</strong> MIDI area at <strong>the</strong> left of <strong>the</strong> Preferences window.(If <strong>the</strong> Preferences window’s not yet open, select Preferences... from<strong>the</strong> Edit menu.)5 When <strong>the</strong> Define Instrument Names window opens, click Import...6 Navigate to <strong>the</strong> junogi_ins folder, and open it.2 In <strong>the</strong> Inputs and Outputs areas, make sure that <strong>the</strong> <strong>JUNO</strong>-<strong>Gi</strong>’s boxesare checkmarked.3 Click Apply.4 If you want to use <strong>JUNO</strong>-<strong>Gi</strong> tones <strong>with</strong> your DAW, leave <strong>the</strong> Preferenceswindow open for <strong>the</strong> next section. If not, click Close.Enabling Simple <strong>JUNO</strong>-<strong>Gi</strong> Tone and Rhythm Selection1 Using your browser, click this link and download <strong>the</strong> <strong>JUNO</strong>-<strong>Gi</strong>Cakewalk SONAR Instrument Definition List file to your desktop.2 Right-click <strong>the</strong> file and choose Extract All..., selecting <strong>the</strong> Desktop asyour destination. This creates <strong>the</strong> junogi_ins folder.3 Back in SONAR’s Preferences window, click Instruments in <strong>the</strong> MIDIarea at <strong>the</strong> left. (If <strong>the</strong> window’s not open, select Preferences... from<strong>the</strong> Edit menu first.)4 Click <strong>the</strong> Define... button, circled in red below.7 Select <strong>the</strong> <strong>JUNO</strong>-<strong>Gi</strong>_Tone+GM2.ins file, and click Open.8 In <strong>the</strong> Import Instrument Definitions window, make sure <strong>Roland</strong><strong>JUNO</strong>-<strong>Gi</strong>: Tone is selected, and click OK.10
9 Repeat Steps 4-8, this time selecting <strong>the</strong> <strong>JUNO</strong>-<strong>Gi</strong>_Rhythm+GM2.insfile in Step 7 and <strong>Roland</strong> <strong>JUNO</strong>-<strong>Gi</strong>: Rhythm in Step 8.10 Back in <strong>the</strong> Preferences windows’ Instruments pane, select all of <strong>the</strong><strong>JUNO</strong>-<strong>Gi</strong>’s outputs in <strong>the</strong> left-hand box.11 Control-click <strong>JUNO</strong>-<strong>Gi</strong> / 10 to de-select it.12 In <strong>the</strong> right-hand box, select <strong>Roland</strong> <strong>JUNO</strong>-<strong>Gi</strong>: Tone.Using <strong>the</strong> <strong>JUNO</strong>-<strong>Gi</strong> <strong>with</strong> SONAR X1 LE and SONAR X1The <strong>JUNO</strong>-<strong>Gi</strong> as SONAR’s Audio InterfaceListening to SONAR Through <strong>the</strong> <strong>JUNO</strong>-<strong>Gi</strong>Once you’ve got <strong>the</strong> <strong>JUNO</strong>-<strong>Gi</strong> configured as SONAR’s audio interface, youcan listen to SONAR• through your speakers—by connecting <strong>the</strong> <strong>JUNO</strong>-<strong>Gi</strong>’s L/MONO and ROUTPUT jacks to your mixer, powered speakers, or amplifier.• through headphones—by plugging your headphones into <strong>the</strong><strong>JUNO</strong>-<strong>Gi</strong>’s PHONES jack.In both cases, <strong>the</strong> <strong>JUNO</strong>-<strong>Gi</strong>’s VOLUME knob controlsyour listening level.If you can’t hear SONAR at all through <strong>the</strong> <strong>JUNO</strong>-<strong>Gi</strong>,select <strong>the</strong> SONAR Master channel strip and check tomake sure <strong>JUNO</strong>-<strong>Gi</strong> OUT is selected as its output.13 Click <strong>JUNO</strong>-<strong>Gi</strong> / 10 so it’s <strong>the</strong> only output selected.14 In <strong>the</strong> right-hand box, select <strong>Roland</strong> <strong>JUNO</strong>-<strong>Gi</strong>: Rhythm.Setting Up an Audio Track for RecordingFrom <strong>the</strong> <strong>JUNO</strong>-<strong>Gi</strong>1 In SONAR X1 LE or SONAR X1, create an audiotrack or select one that’s not in use.2 Make sure <strong>the</strong> audio track’s Input Echo buttonis turned off since you’ll be listening to your liveaudio through <strong>the</strong> <strong>JUNO</strong>-<strong>Gi</strong> to avoid a timing lag,or “latency.”3 Click <strong>the</strong> Input popup and select Stereo <strong>JUNO</strong>-<strong>Gi</strong> IN.Output popup menuInput popup menu15 Checkmark <strong>the</strong> Save Changes for Next Session box so you don’t haveto import <strong>the</strong> <strong>JUNO</strong>-<strong>Gi</strong> definitions each time you start a new project.16 Click Apply, and <strong>the</strong>n click Close.11
We’ve selected <strong>the</strong> <strong>JUNO</strong>-<strong>Gi</strong>’s stereo output, <strong>the</strong> most common thingto do. If you prefer, you can record ei<strong>the</strong>r <strong>the</strong> left or ride side of itsstereo output as a mono track instead. With two mono tones pannedleft and right <strong>with</strong>in <strong>the</strong> <strong>JUNO</strong>-<strong>Gi</strong>, this is a good way to simultaneouslyrecord <strong>the</strong>m on separate tracks. It’s also a good way to record a monotrack of live audio.4 Click <strong>the</strong> Output popup and select MASTER so <strong>the</strong> track’s outputgoes to <strong>the</strong> to SONAR’s Master outputs, or to <strong>the</strong> desired bus if you’regrouping <strong>the</strong> audio track <strong>with</strong> o<strong>the</strong>rs on a bus.Choosing <strong>the</strong> <strong>JUNO</strong>-<strong>Gi</strong> Tone or Rhythm You WantYou use three popup menus in <strong>the</strong> middle of a MIDI track’s channel strip insetting up <strong>the</strong> track prior to sequencing.Channel popupPatch popupBank popupEach of <strong>the</strong> <strong>JUNO</strong>-<strong>Gi</strong>’s 16 possible tones or rhythms is played by one of <strong>the</strong> 16available MIDI channels. If you want each MIDI track to play its own sound, ithas to be <strong>the</strong> only one using this MIDI channel.1 Click <strong>the</strong> Channel popup and select a channel for <strong>the</strong> MIDI track touse.Output popup menuThe <strong>JUNO</strong>-<strong>Gi</strong> as SONAR’s Controller and Sound ModuleIn SONAR, you use a MIDI track when you want to sequence using <strong>the</strong><strong>JUNO</strong>-<strong>Gi</strong> as your master controller, or use its tones and rhythms. Begin bycreating a new MIDI track, or selecting one that’s not already in use.Using <strong>the</strong> <strong>JUNO</strong>-<strong>Gi</strong> as Master MIDI ControllerAs you set up for sequencing a new MIDI track:1 Click <strong>the</strong> track’s Input popup menu.2 Select• MIDI Omni—to receive on anyMIDI channel <strong>the</strong> <strong>JUNO</strong>-<strong>Gi</strong> uses.• <strong>the</strong> specific MIDI channel—shownon <strong>the</strong> <strong>JUNO</strong>-<strong>Gi</strong>’s MIDI Controllermode screen, as described onpage 7.The Input popup menuAs we’ve got SONAR configured, select 10: <strong>Roland</strong> <strong>JUNO</strong>-<strong>Gi</strong>:Rhythm ifyou want to use one of <strong>the</strong> <strong>JUNO</strong>-<strong>Gi</strong>’s drum or percussion kits.If you do want multiple MIDI tracks to use <strong>the</strong> same tone or rhythm, set<strong>the</strong>m to use <strong>the</strong> same part.It can be handy to have a list of <strong>the</strong> available tones and rhythms onhand as you select your sounds. For a PDF of this list, click here anddownload <strong>the</strong> <strong>JUNO</strong>-<strong>Gi</strong> Patch/Performance List.2 Click <strong>the</strong> Bank popup and select <strong>the</strong> bank in <strong>the</strong> <strong>JUNO</strong>-<strong>Gi</strong> thatcontains <strong>the</strong> tone or rhythm you want <strong>the</strong> MIDI track to play.3 Click <strong>the</strong> Patch popup and select <strong>the</strong> desired tone or rhythm.If <strong>the</strong> <strong>JUNO</strong>-<strong>Gi</strong>’s in MIDI Controller mode, <strong>the</strong> MIDI track’s now readyto sequence using one of <strong>the</strong> <strong>JUNO</strong>-<strong>Gi</strong>’s tones or rhythms.You can create a SONAR project template <strong>with</strong> your favorite <strong>JUNO</strong>-<strong>Gi</strong>tones and rhythms to save setup time when you start a new project.12
Logic Pro and <strong>the</strong> <strong>JUNO</strong>-<strong>Gi</strong>Setting Up Logic ProSelecting <strong>the</strong> <strong>JUNO</strong>-<strong>Gi</strong> as Your Audio Interface1 After you launch Logic Pro, click and hold down <strong>the</strong> Preferencesbutton in <strong>the</strong> Arrange window tool bar, and select Audio... to open<strong>the</strong> Core Audio tab of <strong>the</strong> Preferences window. (If you prefer, you cando <strong>the</strong> same thing from <strong>the</strong> Logic Pro menu.)2 Set <strong>the</strong> Input and Output Device popup menus to <strong>JUNO</strong>-<strong>Gi</strong> 44.1kHz,and uncheck <strong>the</strong> 24-bit Recording and Software Monitoring boxes.Setting <strong>the</strong> Project’s Sample RateEach Logic Pro project you work on using <strong>the</strong> <strong>JUNO</strong>-<strong>Gi</strong> must use a 44.1 kHzsample rate. To change a project sample’s rate:1 Click and hold down <strong>the</strong> Settings button in <strong>the</strong>Arrange window tool bar, and select Audio... toopen <strong>the</strong> Project Settings window. (If you prefer,you can do <strong>the</strong> same thing from <strong>the</strong> File menu’sProject Settings sub-menu.)2 Set <strong>the</strong> Sample Rate popup menu to 44.100 kHz.Settings buttonWe’ll be listening to <strong>the</strong> <strong>JUNO</strong>-<strong>Gi</strong> and its live audio inputs through <strong>the</strong><strong>JUNO</strong>-<strong>Gi</strong>. This is <strong>the</strong> best way to avoid any listening lag, or “latency.”3 Close <strong>the</strong> Project Settings window.If <strong>the</strong> Core Audiotab—shownhere—isn’t visible,click its tab.To avoid having to set your sample rate for each new project, considersaving a 44.1 kHz <strong>JUNO</strong>-<strong>Gi</strong> template project.Enabling Simple <strong>JUNO</strong>-<strong>Gi</strong> Tone and Rhythm Selection1 Using your browser, click this link and download <strong>the</strong> <strong>JUNO</strong>-<strong>Gi</strong>Logic Pro Multi-Instrument file that contains <strong>the</strong> <strong>JUNO</strong>-<strong>Gi</strong> Tones andRhythms project.3 If you had to make any changes in Step 2 above, click Apply Changes.4 Close <strong>the</strong> Preferences window.2 In Logic Pro, create a new project, or open <strong>the</strong> one <strong>with</strong> which youwant to work.If <strong>the</strong> <strong>JUNO</strong>-<strong>Gi</strong> is your only hardware synth—or if you’re new to LogicPro—you can work directly in this project. Consider saving it as atemplate. Once you’ve loaded <strong>the</strong> project or a copy of it, jump aheadto Step 3 in “Choosing <strong>the</strong> <strong>JUNO</strong>-<strong>Gi</strong> Tone or Rhythm You Want” on page15 to learn how to choose its tones and rhythms.13
3 Once <strong>the</strong> project’s open, select Open… from <strong>the</strong> File menu.4 When Logic Pro asks you if you want to close <strong>the</strong> current project, clickDon’t Close.5 Navigate to <strong>the</strong> <strong>JUNO</strong>-<strong>Gi</strong> Tones and Rhythms project file, and <strong>the</strong>nclick Open.6 Once <strong>the</strong> <strong>JUNO</strong>-<strong>Gi</strong> Tones and Rhythms project opens, selectEnvironment from <strong>the</strong> Window menu.7 Select MIDI Instruments or MIDI Instr. from <strong>the</strong> Environment window’sLayer popup menu.8 Click on <strong>the</strong> <strong>JUNO</strong>-<strong>Gi</strong> Library multi-instrument by clicking its icon, asshown here.Using Logic Pro <strong>with</strong> <strong>the</strong> <strong>JUNO</strong>-<strong>Gi</strong>The <strong>JUNO</strong>-<strong>Gi</strong> as Logic Pro’s Audio InterfaceListening to Logic Pro Through <strong>the</strong> <strong>JUNO</strong>-<strong>Gi</strong>Once you’ve got <strong>the</strong> <strong>JUNO</strong>-<strong>Gi</strong> configured as Logic Pro’s audio interface, youcan listen to Logic Pro• through your speakers—by connecting <strong>the</strong> <strong>JUNO</strong>-<strong>Gi</strong>’s L/MONO and ROUTPUT jacks to your mixer, powered speakers, or amplifier.• through headphones—by plugging your headphones into <strong>the</strong><strong>JUNO</strong>-<strong>Gi</strong>’s PHONES jack.In both cases, <strong>the</strong> <strong>JUNO</strong>-<strong>Gi</strong>’s VOLUME knob controls your listening level.Setting Up an Audio Track for Recording From <strong>the</strong> <strong>JUNO</strong>-<strong>Gi</strong>1 In <strong>the</strong> Arrange window, click <strong>the</strong> + button above <strong>the</strong> track list tocreate a new stereo audio track in Logic Pro, selecting Input 1-2 from<strong>the</strong> Input menu, and unchecking <strong>the</strong> Input Monitoring box.9 Select Copy from <strong>the</strong> Edit menu, and close <strong>the</strong> Environment window.10 Close <strong>the</strong> <strong>JUNO</strong>-<strong>Gi</strong> Tones and Rhythms project—when Logic Pro asksyou if you want to save any changes you’ve made, click Don’t Save.This puts you back in <strong>the</strong> project you created or opened in Step 2.(Logic Pro pauses to reload any audio <strong>the</strong> project needs.)11 Select Environment from <strong>the</strong> Window menu.12 Select MIDI Instruments or MIDI Instr. from <strong>the</strong> Layer popup menu.13 Select Paste from <strong>the</strong> Edit menu to add <strong>the</strong> <strong>JUNO</strong>-<strong>Gi</strong> Library multiinstrumentto this project, and <strong>the</strong>n close <strong>the</strong> Environment window.2 Click Create to finish creating your audio track.We’ve selected <strong>the</strong> <strong>JUNO</strong>-<strong>Gi</strong>’s stereo output. If you prefer, you canrecord ei<strong>the</strong>r <strong>the</strong> left or ride side of its stereo output on a monotrack instead by selecting Input 1 or 2, respectively. With two monotones panned left and right <strong>with</strong>in <strong>the</strong> <strong>JUNO</strong>-<strong>Gi</strong>, this is a good way tosimultaneously record <strong>the</strong>m on separate tracks. It’s also a good way torecord a mono track of live audio.14
The <strong>JUNO</strong>-<strong>Gi</strong> as Logic Pro’s Controller/Sound ModuleUsing <strong>the</strong> <strong>JUNO</strong>-<strong>Gi</strong> as Master MIDI ControllerLogic Pro is set by default to listen MIDI data on anychannel so <strong>the</strong>re’s nothing to set up. You can see LogicPro “listening” to <strong>the</strong> <strong>JUNO</strong>-<strong>Gi</strong> by playing some notesand watching <strong>the</strong> activity monitor in <strong>the</strong> Logic Protransport bar.Setting Up a MIDI Track to Play a <strong>JUNO</strong>-<strong>Gi</strong> Tone or Rhythm1 In <strong>the</strong> Arrange window, click <strong>the</strong> + button above <strong>the</strong> track list tocreate a new External MIDI track.Make sure Open Libraryis checked, too.Choosing <strong>the</strong> <strong>JUNO</strong>-<strong>Gi</strong> Tone or Rhythm You WantHere’s how to get your Logic Pro track to automatically select <strong>the</strong> <strong>JUNO</strong>-<strong>Gi</strong>tone or rhythm you want each time you play your project.You may want to have a list of <strong>the</strong> available tones and rhythms onhand as you select your sounds. For a PDF of this list, click here anddownload <strong>the</strong> <strong>JUNO</strong>-<strong>Gi</strong> Patch/Performance List.1 After creating your External MIDI track in <strong>the</strong>Arrange window, make sure its MIDI parametersare visible in <strong>the</strong> Inspector by clicking <strong>the</strong>irdisclosure triangle.2 Check <strong>the</strong> Program checkbox.3 In <strong>the</strong> track’s header, double-click its icon toopen <strong>the</strong> track’s object editor.Disclosure triangleEach of <strong>the</strong> <strong>JUNO</strong>-<strong>Gi</strong>’s 16 possible tones or rhythms is played by oneof <strong>the</strong> 16 available MIDI channels. If you want each MIDI track to playits own sound, it has to be <strong>the</strong> only one using this MIDI channel.2 In <strong>the</strong> opened Library pane, select <strong>JUNO</strong>-<strong>Gi</strong> library, and <strong>the</strong>n <strong>the</strong> MIDIchannel you want <strong>the</strong> MIDI track to use.Double-click here.You’ll find <strong>the</strong> <strong>JUNO</strong>-<strong>Gi</strong>’s tones and rhythms in <strong>the</strong> object editor.Here we’ve selected<strong>the</strong> <strong>JUNO</strong>-<strong>Gi</strong>’sChannel 1.If you do want multiple MIDI tracks to use <strong>the</strong> same tone or rhythm, set<strong>the</strong>m to use <strong>the</strong> same part.In <strong>the</strong> <strong>JUNO</strong>-<strong>Gi</strong> Patch/Performance List, you can see that each toneand rhythm has an LSB value.If <strong>the</strong> <strong>JUNO</strong>-<strong>Gi</strong>’s in MIDI Controller mode, <strong>the</strong> Logic Pro track’s nowready to sequence using one of <strong>the</strong> <strong>JUNO</strong>-<strong>Gi</strong>’s tones or rhythms.15
You’ll find <strong>the</strong> tone in <strong>the</strong> Logic Pro bank that shares this number.Ableton Live and <strong>the</strong> <strong>JUNO</strong>-<strong>Gi</strong>Setting Up LiveSelecting <strong>the</strong> <strong>JUNO</strong>-<strong>Gi</strong> as Your Audio Interface1 From <strong>the</strong> Live menu, select Preferences... and click Audio along <strong>the</strong>left edge of <strong>the</strong> Preferences window to open <strong>the</strong> Audio tab.In addition, you’ll find <strong>JUNO</strong>-<strong>Gi</strong> rhythms in Bank 7.4 Select <strong>the</strong> bank you want from <strong>the</strong> Bank popup menu.5 Select <strong>the</strong> desired tone or rhythm from <strong>with</strong>in that bank by clicking itin <strong>the</strong> object editor to highlight it.6 Close <strong>the</strong> object editor window when you’re done.2 From <strong>the</strong> Audio Input Device and Output Device popup menus,select <strong>JUNO</strong>-<strong>Gi</strong> 44.1kHz (2 In 2 Out).You can also select sounds directly in <strong>the</strong> track’s Inspector pane,though it’s not as reliable a method as using <strong>the</strong> object editor.Live’s sample rate is set by <strong>the</strong> <strong>JUNO</strong>-<strong>Gi</strong>.You can create a project template <strong>with</strong> your favorite <strong>JUNO</strong>-<strong>Gi</strong> tonesand rhythms already set up to save time when you begin a new project.Live has an easy-to-use system for setting <strong>the</strong> optimal buffer size, akey element in smooth audio-recording operations. To learn about it,see “Learn how to set up your audio hardware” in <strong>the</strong> Setup section ofLive’s built-in Help pane.16
Selecting <strong>the</strong> <strong>JUNO</strong>-<strong>Gi</strong> as a MIDI Controller1 In <strong>the</strong> Preferences window, click <strong>the</strong> MIDI Sync tab.2 In <strong>the</strong> MIDI Ports area, activate• incoming MIDI—by clicking <strong>the</strong> Input: <strong>JUNO</strong>-<strong>Gi</strong> Track button soit lights and reads On.• outgoing MIDI—by clicking <strong>the</strong> Output: <strong>JUNO</strong>-<strong>Gi</strong> Track button soit lights and reads On.Setting Up an Audio Track for Recording From <strong>the</strong> <strong>JUNO</strong>-<strong>Gi</strong>1 Create a new audio track or select an unused one.By default, a new audio track is set to Ext. In and Inputs 1/2, so <strong>the</strong><strong>JUNO</strong>-<strong>Gi</strong>’s outputs are automatically routed to <strong>the</strong> track <strong>with</strong>out yourhaving to do anything.We’re using <strong>the</strong> <strong>JUNO</strong>-<strong>Gi</strong>’s stereo output here. If you prefer,you can record ei<strong>the</strong>r <strong>the</strong> left or ride side of its stereo outputas a mono track instead by selecting Input 1 or 2, respectively.With two mono tones panned left and right <strong>with</strong>in <strong>the</strong><strong>JUNO</strong>-<strong>Gi</strong>, this is a good way to simultaneously record <strong>the</strong>m on separatetracks. It’s also a good way to record a mono track of live audio.2 Set <strong>the</strong> track’s Monitor section to Off so you’re listening to <strong>the</strong> audioyou’re recording directly through <strong>the</strong> <strong>JUNO</strong>-<strong>Gi</strong> instead of via Live’soutputs. This prevents any timing lag, or “latency.”3 Close <strong>the</strong> Preferences window.Using Live <strong>with</strong> <strong>the</strong> <strong>JUNO</strong>-<strong>Gi</strong>The <strong>JUNO</strong>-<strong>Gi</strong> as Live’s Audio InterfaceListening to Live Through <strong>the</strong> <strong>JUNO</strong>-<strong>Gi</strong>Once you’ve got <strong>the</strong> <strong>JUNO</strong>-<strong>Gi</strong> configured as Live’s audio interface, you canlisten to Live• through your speakers—by connecting <strong>the</strong> <strong>JUNO</strong>-<strong>Gi</strong>’s L/MONO and ROUTPUT jacks to your mixer, powered speakers, or amplifier.• through headphones—by plugging your headphones into <strong>the</strong><strong>JUNO</strong>-<strong>Gi</strong>’s PHONES jack.In both cases, <strong>the</strong> <strong>JUNO</strong>-<strong>Gi</strong>’s VOLUME knob controls your listening level.Here’s what your audio track’scontrols should look like.The <strong>JUNO</strong>-<strong>Gi</strong> as Live’s Controller/Sound ModuleUsing <strong>the</strong> <strong>JUNO</strong>-<strong>Gi</strong> as Master MIDI ControllerSince Live, by default, “listens” to all MIDI inputs on all channels automatically,<strong>the</strong>re’s nothing you need to do—just play your <strong>JUNO</strong>-<strong>Gi</strong>, and Live’s MIDIawaretracks respond.17
Setting Up a MIDI Track to Use a <strong>JUNO</strong>-<strong>Gi</strong> Tone or Rhythm1 In <strong>the</strong> Arrangement View create a new MIDI track or select one.2 Click <strong>the</strong> MIDI To popup, and select <strong>JUNO</strong>-<strong>Gi</strong>.4 In <strong>the</strong> Notes area, you’ll find <strong>the</strong>• Bank popup menu—that sets <strong>the</strong> Bank Select MSB value to besent to <strong>the</strong> <strong>JUNO</strong>-<strong>Gi</strong>. Live uses an offset of 1 for this, so add 1 to<strong>the</strong> patch-performance list’s MSB value.3 Click <strong>the</strong> Channel popup just below “<strong>JUNO</strong>-<strong>Gi</strong>” andselect <strong>the</strong> MIDI channel you want to use for <strong>the</strong> track’s<strong>JUNO</strong>-<strong>Gi</strong> tone or rhythm.With <strong>the</strong> <strong>JUNO</strong>-G in MIDI Controller mode, you’re readyto sequence using a <strong>JUNO</strong>-<strong>Gi</strong>’s tone or rhythm.Choosing <strong>the</strong> <strong>JUNO</strong>-<strong>Gi</strong> Tone or Rhythm You WantThe Bank Select MSB for thistone is 87, so we’ve entered 88.• Sub-Bank popup menu—that sets <strong>the</strong> Bank Select LSB value. Livealso offsets <strong>the</strong> LSB, so add 1 to <strong>the</strong> listed LSB value as well.You’ll need <strong>the</strong> <strong>JUNO</strong>-<strong>Gi</strong> tone and rhythm list as you select sounds.Click here to download a PDF of <strong>the</strong> <strong>JUNO</strong>-<strong>Gi</strong> Patch/Performance List.1 Select <strong>the</strong> first measure of your MIDI track by dragging from left toright across it <strong>with</strong> your mouse in Arrangement View.The Bank Select LSB for this toneis 0, so we’ve entered 1.• Program popup menu—that sets <strong>the</strong> Program Change value tobe sent to <strong>the</strong> <strong>JUNO</strong>-<strong>Gi</strong>. (There’s no offset for this value.)2 Select Insert MIDI Clip from <strong>the</strong> Create menu.3 Double-click <strong>the</strong> clip to show its settings in <strong>the</strong>Clip View.For our example, we’ll select St. Piano 1, whichrequires• an MBS value—of 87,• an LSB value—of 0, and• a Program Change value—of 1.Double-click here.Here’s what it all looks like after weenter <strong>the</strong> Program Change value.5 Press <strong>the</strong> Play button so Live sends <strong>the</strong> MIDI messages to <strong>the</strong><strong>JUNO</strong>-<strong>Gi</strong> and selects your tone or rhythm.6 To play <strong>the</strong> <strong>JUNO</strong>-<strong>Gi</strong> sound, click <strong>the</strong> track’s Arm button so it lightsred.18
After sequencing in Arrangement View, you can chop up your sequenceinto clips for use in Session view.Why not create a live-set template <strong>with</strong> all of your favorite <strong>JUNO</strong>-<strong>Gi</strong>tones and rhythms already set up to save time when you begin a newproject?The EndWe hope you’ve found this workshop helpful. Keep an eye out foro<strong>the</strong>r <strong>JUNO</strong>-<strong>Gi</strong> Workshop booklets available for downloading atwww.<strong>Roland</strong>US.com.19


