Product Catalogue - Hot Press
Product Catalogue - Hot Press
Product Catalogue - Hot Press
- No tags were found...

Create successful ePaper yourself
Turn your PDF publications into a flip-book with our unique Google optimized e-Paper software.
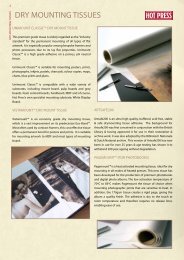
16THE CANVAS BONDING PROCESS FOR PAPER PRINTSTHE CANVAS BONDING PROCESSFOR PAPER PRINTSSTEP 1 – Set the press temperature to 90 °C. While it warms up, set the timer for 5 to 10 minutes. Make sure you use asheet of silicone release film in the base of the press and a sheet of vacufoam over the silicone release film.STEP 2 – Measure the image to be bonded and cut a piece of heatseal film that is 76mm (3”) larger than the image all theway round. For example, with a 406 x 508mm (16” x 20”) image, the film should be cut to 559 x 660mm (22” x 26”). GlossLustre, Satin Matt or Matt heatseal laminates may be used for this process.STEP 3 – Cut a piece of coated canvas to the same dimensions as the film.STEP 4 – Peel back the release liner of the film to expose about 102mm (4”) of adhesive. The film should be face downwith the adhesive face up. Line up your image so it is centred within the film (image faced down), then lightly tack down theleading edge of the image to the adhesive. Peel back more release film until the entire image is in contact with the adhesive.This should leave you with 76mm (3”) of film still attached to the release paper. Allow the free release paper to fall back andcover the back of the image and exposed edges of adhesive, smoothing as you go.STEP 5 – You now have a “heatseal envelope” with the image trapped between the film and its release liner. Place theenvelope into your press and under a sheet of vacufoam. Process it for 5 to 10 minutes at 90°C.STEP 6 – When all the air has escaped and the adhesive has activated, remove the envelope from the press; then removethe silicone release paper from the back.STEP 7 – Completely immerse the heatsealed image in a bath of room temperature water and soak it until the back of theimage turns a uniform grey. This will happen when the water has completely soaked into the image. Generally speaking,thicker prints and larger prints take longer to process. The whole procedure will require anywhere from around 3 minutes(for small thin images) up to an hour (for large thick prints that have been lightly crumpled).NOTE: Lightly crumpling the print before soaking will break the paper fibres and speed up the process, but do not overdo this.STEP 8 – While your print is soaking, prepare a work area with a smooth surface. The area should be larger than yourwhole assembly. Glass, Perspex, Melamine and Acrylic are all good working surfaces.STEP 9 – When your print is completely soaked, lay it on the smooth work area, picture face up, wet paper side down.Smooth the image onto the surface to remove any air, then lift a corner of the film. As the back-side of the wet print gripsthe smooth surface, you should find the picture is now starting to delaminate. Place your thumb on the delaminated cornerand peel the image and film back until it has completely delaminated from the paper backing.STEP 10 – Before proceeding further, allow your delaminated image to dry naturally, Do not force dry with heat. Whenthe image has dried, peel back 100mm (4”) of the release paper on your coated canvas and line up your image squarely.Remove more release paper about 50mm (2”) at a time. As you do this, smooth your image onto the exposed adhesive ofthe canvas, avoiding air bubbles and wrinkles as you go. When this process is complete, trim off 6mm (¼”) to 13mm (½”)all around the edge of the assembly and place it back in your press for 2 to 5 minutes. The assembly should be placed ontop of the foam, with the image face down and the back of the canvas facing up. This completes the process.