Product Catalogue - Hot Press
Product Catalogue - Hot Press
Product Catalogue - Hot Press
- No tags were found...

You also want an ePaper? Increase the reach of your titles
YUMPU automatically turns print PDFs into web optimized ePapers that Google loves.
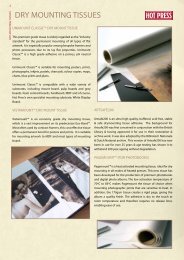
6BASIC DRY MOUNTINGPROCEDUREBASIC DRY MOUNTING PROCEDUREDry mounting is the process of bonding an image to a mountingsubstrate. The process is simple and takes only a few minutes, butthere are a number of issues to be considered. For an in-depthunderstanding of dry mounting techniques, we invite you to attendone of our free training schools.In the meantime, the important fundamentals of dry mounting aresummarised below.Firstly, consider the artwork you wish to mount. How will it react toheat? Does it require pre–drying to remove excess moisture? Doesit require pre–pressing to remove any creases? Is the artwork cleanand free from dust / dirt / stickers or tape? Is the artwork porous?Does it have an image that may shift (as in the case of pastels)? Allthese points should be considered before proceeding. With a littleexperience they will become second nature.Secondly, determine what type of substrate is compatible with yourartwork. What is the optimum thickness? Is quality or price yourprimary objective? Will the substrate need to be pre–dried? Woulda smooth substrate benefit the artwork? Does the substrate need tobe coloured or textured? Is it porous?Based on these conclusions, identify the best adhesive for thiscombination of artwork and substrate. Please consult individualproduct descriptions, recommendations and charts to arrive at thebest match - or call us for more technical help.When you have decided on an adhesive, you can begin!• Set your press for the correct temperature (usually 90 ºC)and allow it to warm up.• Once the press has warmed up, pre-press your substrateor artwork if required. This process requires placing thematerial in the press and pressing it for two or three minutes.Remember to let it cool down again after the drying processhas been completed.• Cut the adhesive to size (normally 5mm (1/4”) bigger thanthe artwork).• Cut the substrate to size (normally 25mm (1”) bigger thanthe artwork).• Make sure you have silicone release film or paper availableto cover any exposed adhesive areas.• If you are going to use the timer, now is the time to set it.Don’t set it when your project is already in the press.• Now you can assemble your project!• Remember to check the front and back of all components fordust and dirt and make sure all the components are cool.Silicone Release Film or PaperArtworkAdhesiveSubstrateThe assembly should be set up as shown here, from top to bottom.If you are working with a hard or soft bed press, or if the projectneeds to be very precisely positioned, it may be necessary to “tack”the assembly together.Tacking is used to keep the components of an assembled projecttogether and stop them from moving around in relation to each other.Tacking may be performed in a variety of ways.SPRAYS – If you must use spray adhesive for tacking, spray afine short burst onto the substrate and position the tissue on top.Remember, your objective is to position the tissue, not actually bondit, so go easy on the spray. Then spray the top of the tissue andposition the artwork.NOTE: We do not recommend spray adhesives for mounting artwork.GLUE STICKS – The same procedure may be performed with gluesticks, but remember, only use a dab!TAPE – Assuming the board is the largest component and theartwork is the smallest, you can place a piece of masking tape at theedge of the print so it also covers the tissue and board.