
Create successful ePaper yourself
Turn your PDF publications into a flip-book with our unique Google optimized e-Paper software.
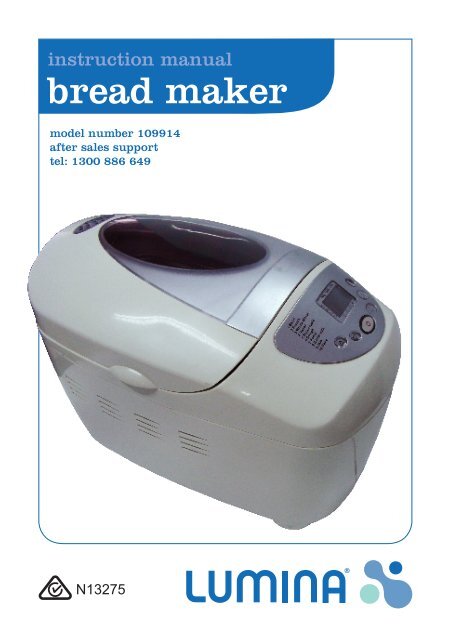
instruction manual<br />
<strong>bread</strong> <strong>maker</strong><br />
model number 109914<br />
after sales support<br />
tel: 1300 886 649<br />
N13275
ead <strong>maker</strong><br />
What your 1 year warranty means<br />
Great care has gone into the manufacture of this product and it should therefore<br />
provide you with years of good service when used properly. In the event of product<br />
failure within its intended use over the course of the first year after the date of<br />
purchase, we will remedy the problem as quickly as possible once it has been brought<br />
to our attention. In the unlikely event of such an occurrence, or if you require any<br />
information about the product please contact us via our after sales support services,<br />
details of which can be found in this manual and on the product itself.<br />
After Sales Support TEL: 1300 886 649<br />
1
Important Safety Instructions<br />
Please keep this instruction manual in a safe place, along with the warranty card,<br />
purchase receipt and carton for future reference. The safety precautions enclosed<br />
herein reduce the risk of fire, electric shock and injury when correctly adhered to.<br />
• Please read the instruction manual before using.<br />
• Do not touch the hot cooking surface after use. Please use the handle provided, when<br />
operating the appliance. Allow the appliance to cool down before cleaning.<br />
• Unplug the appliance when you stop using or cleaning. Allow the appliance to cool<br />
down compeletely before taking apart.<br />
• Do not immerse in water.<br />
• Keep children away from the appliance when using.<br />
• Do not place anything on the power cord.<br />
• Do not place the power cord close to the hot surface of the appliance. Do not cover<br />
the hot surface with any objects.<br />
• Do not touch any active components.<br />
• Do not replace the components except the spare parts provided by our company to<br />
avoid any damage or injury.<br />
• Household use only.<br />
• Do not use a power cord with damages or a malfunction. Please contact the customer<br />
service if you are uncertain.<br />
• Do not place the appliance near the fireplace or a heating source.<br />
• If the supply cord is damaged, it must be replaced or repaired by a qualified technician.<br />
After Sales Support TEL: 1300 886 649<br />
2
Overview of <strong>bread</strong> <strong>maker</strong> setting<br />
1. Display<br />
Normal Setting<br />
The LCD display will show you when the appliance is ready for use. The appliance will<br />
correspond to the normal programming. The display will show “1 3:25”. The “1” specifies<br />
which program has been selected, and the “3:25” is the length of the program. After<br />
switching the appliance on the other basic settings are “Superior Weight” and “Medium<br />
browning”<br />
During operation the course of the program can be monitored on the display. The set time<br />
will decrease progressively as the <strong>bread</strong> is being cooked. All the settings such as heating,<br />
timer, kneading, pause, rising, baking, keeping warm, and program end are all shown on<br />
the display.<br />
2. START/STOP key<br />
The “start/ Stop” key is used to start and stop the program. You can use this at any moment<br />
during the cooking process. Hold down the key until a single beep is heard. The starting<br />
position of the current program will appear on the screen.<br />
After Sales Support TEL: 1300 886 649<br />
3
3. “DELAY TIMER” keys<br />
The Time Delay key allows the user to plan and time the cooking of the <strong>bread</strong>. For example:<br />
It is 8:30 pm and the <strong>bread</strong> must be ready at 7:00am, i.e. in 10hr and 30mins. Press the<br />
time delay key until 10.30 appears .you have now program the appliance to delay the<br />
cooking process till the desired time. The maximum time delay is 14hours and 58 minutes.<br />
The following programs can be set to a time delay: Basic, French, Whole Wheat, Sweet,<br />
Super, Dough, Pasta, Butter Milk, Jam and bake. When working with the timing function<br />
never use perishable ingredients such as milk, eggs, fruit, yogurt, onions, etc.<br />
4. “COLOUR” key<br />
To select your desired browning levels use the colour key. You can select from the following<br />
LIGHT, MEDIUM, and DARK. This process is display on the LCD.<br />
5. “QUANTITY” key<br />
Every program provides the following settings:<br />
LEVEL 1 = for small <strong>bread</strong> weights up to 1.5 lb<br />
LEVEL 2 = for medium <strong>bread</strong> weights up to 2.0 lb<br />
LEVEL 3 = for large <strong>bread</strong> weights up to 2.5 lb<br />
6. “MENU” key<br />
Use the menu key to select one of the available programs. Use the following programs for<br />
the following specialties:<br />
1. BASIC For white, wheat and rye <strong>bread</strong>. This is the most used program.<br />
2. FRENCH For the preparation of French <strong>bread</strong>.<br />
3. WHOLE WHEAT For whole wheat <strong>bread</strong>s.<br />
4. SWEET For preparing fruit and sweet <strong>bread</strong>s.<br />
5. SUPER RAPID For the kneading and baking of <strong>bread</strong> loafs f up to 1250g.<br />
6. DOUGH To knead <strong>bread</strong> dough.<br />
7. PASTA For producing noodle dough.<br />
8. BUTTER MILK To make yoghurt <strong>bread</strong> weighing up to 1000g.<br />
9. JAM To cook marmalades and jams.<br />
After Sales Support TEL: 1300 886 649<br />
4
Operating Instructions<br />
How To Set The Temperature<br />
1. Making <strong>bread</strong>s to beep, and automatically:<br />
1. Make sure that the kneading blade is securely positioned on the drive shaft.<br />
2. Put the ingredients into the <strong>bread</strong> pan. Tip: add the yeast in the end, and add the yeast<br />
in the middle of other ingredients, which will benefit the performance of the yeast.<br />
3. Place the <strong>bread</strong> pan into the baking chamber securely. Then close the lid.<br />
4. Plug in the <strong>bread</strong><strong>maker</strong>. Then the display will show the default setting: “MENU 1 TIMER<br />
3:18”, then you can press the menu button to select one of the menu settings.<br />
5. Press the color button to select one of the following crust color: Light, Medium, Dark.<br />
(Your <strong>bread</strong><strong>maker</strong> will automatically produce a medium crust color unless you change<br />
it to a different setting.)<br />
6. Press the timer up or down to set the time delay.<br />
7. Press the start/stop button for 0.5s. The colon ( : ) will flash and start to work. Tips; if<br />
you want to re-adjust the settings, please press the start/stop button again to stop the<br />
<strong>bread</strong><strong>maker</strong>. If you don’t want to adjust the setting, try not to touch the control panel<br />
whilst the <strong>bread</strong><strong>maker</strong> is operating.<br />
8. During the cooking process, the display counts down by minutes until “0:00”in shown.<br />
Then the appliance will beep, and automatically entre in to the “keep Warm” mode<br />
(except on DOUGH setting) for 1 hour. After the 1 hour period the appliance will beep<br />
again, and return to the beginning status. If you do not want the appliance to enter<br />
the “keep warm” process, press the start/stop key.<br />
9. When the cooking process is complete, you can remove the <strong>bread</strong> pan from the baking<br />
chamber. Shake the <strong>bread</strong> pan to help loosen the <strong>bread</strong>. Please make sure the appliance<br />
has completed all tasks before you take the <strong>bread</strong> pan out of the appliance.<br />
10. CAUTION: The <strong>bread</strong> <strong>maker</strong> and the <strong>bread</strong> pan may be very hot, please be careful.<br />
2. Kneading dough<br />
The operating instructions for kneading dough is the same as the one for making <strong>bread</strong>.<br />
Please refer to the above operating instruction.<br />
After Sales Support TEL: 1300 886 649<br />
5
3. Baking<br />
This function can be used to bake the <strong>bread</strong>. It will last for 1 hour. Please follow the<br />
instruction below:<br />
(1) Put the <strong>bread</strong> pan into the baking chamber.<br />
(2) Put the food that you want to bake into the <strong>bread</strong> pan, then close the lid.<br />
(3) Press the menu button to select the bake setting.<br />
(4) Press the start/stop button to start baking.<br />
(5) During the operation of the <strong>bread</strong><strong>maker</strong>, the time counts down by minute in the display<br />
until “0:00” shows. It will then start to beep, and automatically keep warm (except for<br />
the dough setting) with “:” flashing for 1 hour. If you want to stop the process of keep<br />
warm, please press the start/stop button.<br />
(6) If you find the food is already cooked, you can stop baking by pressing the start/stop<br />
button even though it hasn’t reached 1 hour.<br />
NOTE: If power to the appliance is cut off during the baking process, the <strong>bread</strong> <strong>maker</strong> will<br />
hold its memory for 10 minutes. If power is re-connected within this time the appliance will<br />
automatically start where it left off.<br />
Malfunction NOTE: If “EEE” and/or “HHH” appears on the display of the appliance, contact<br />
the after sales support centre. This means the appliance has malfunctioned and needs to be<br />
sent away for servicing.<br />
4. Beep<br />
The beep function works as following:<br />
(1)<br />
(2)<br />
(3)<br />
(4)<br />
It will beep when resetting.<br />
It will beep each time START/STOP is pressed.<br />
It will beep to remind you to add the fruit/nuts in the kneading process at the fruit/nut.<br />
It will beep for 15 times continuously when the <strong>bread</strong> making process ends.<br />
After Sales Support TEL: 1300 886 649<br />
6
Cleaning and Maintenance<br />
Cleaning<br />
o<br />
Disconnect the machine from the power and let it cool down prior to cleaning.<br />
• Bread pan : Rub inside and outside with a damp cloth. Do not use any sharp or abrasive<br />
agents for the consideration of protecting the non-stick coating. The pan must be dried<br />
completely prior to installing.<br />
• Kneading blade: If the kneading bar is difficult to remove from the axle, fill the container<br />
with warm water and allow it to soak for approx.30 minutes. The kneader can then be<br />
easily removed for cleaning. Also wipe the blade carefully with a cotton damp cloth.<br />
Please note both the <strong>bread</strong> pan and kneading blade are dishwashing safe components.<br />
• Housing: Gently wipe the outer surface of housing with a wet cloth. Do not use any<br />
abrasive cleaners to clean it as this would degrade the high polish of the surface. Never<br />
immerse the housing into water for cleaning.<br />
• Before the <strong>bread</strong> <strong>maker</strong> is packed away for storage. Ensure that it has completely<br />
cooled down, is clean and dry, and the lid is closed.<br />
DISPOSAL: Do not dispose of electrical appliances as unsorted municipal<br />
waste, use separate collection facilities. Contact you local government<br />
for information regarding the collection systems available. If electrical<br />
appliances are disposed of in landfills or dumps, hazardous substances<br />
can leak into the groundwater and get into the food chain, damaging<br />
your health and well-being.<br />
After Sales Support TEL: 1300 886 649<br />
o<br />
7