Lesson documents - Career and Technical Education
Lesson documents - Career and Technical Education
Lesson documents - Career and Technical Education

Create successful ePaper yourself
Turn your PDF publications into a flip-book with our unique Google optimized e-Paper software.
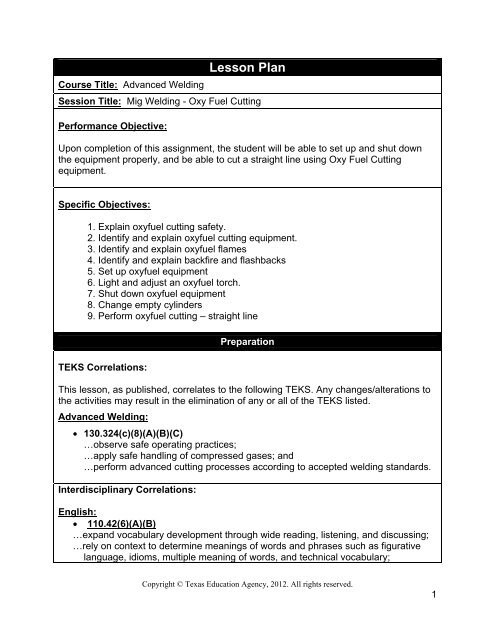
Course Title: Advanced Welding<strong>Lesson</strong> PlanSession Title: Mig Welding - Oxy Fuel CuttingPerformance Objective:Upon completion of this assignment, the student will be able to set up <strong>and</strong> shut downthe equipment properly, <strong>and</strong> be able to cut a straight line using Oxy Fuel Cuttingequipment.Specific Objectives:1. Explain oxyfuel cutting safety.2. Identify <strong>and</strong> explain oxyfuel cutting equipment.3. Identify <strong>and</strong> explain oxyfuel flames4. Identify <strong>and</strong> explain backfire <strong>and</strong> flashbacks5. Set up oxyfuel equipment6. Light <strong>and</strong> adjust an oxyfuel torch.7. Shut down oxyfuel equipment8. Change empty cylinders9. Perform oxyfuel cutting – straight lineTEKS Correlations:PreparationThis lesson, as published, correlates to the following TEKS. Any changes/alterations tothe activities may result in the elimination of any or all of the TEKS listed.Advanced Welding: 130.324(c)(8)(A)(B)(C)…observe safe operating practices;…apply safe h<strong>and</strong>ling of compressed gases; <strong>and</strong>…perform advanced cutting processes according to accepted welding st<strong>and</strong>ards.Interdisciplinary Correlations:English: 110.42(6)(A)(B)…exp<strong>and</strong> vocabulary development through wide reading, listening, <strong>and</strong> discussing;…rely on context to determine meanings of words <strong>and</strong> phrases such as figurativelanguage, idioms, multiple meaning of words, <strong>and</strong> technical vocabulary;Copyright © Texas <strong>Education</strong> Agency, 2012. All rights reserved.1
Instructor/TrainerReferences:1. Jeffus, Larry; Welding Principles <strong>and</strong> Applications Third Edition, DelmarPublishers Inc. ISBN 0-8273-5048-1; Chapter 72. Gellerman, Mike: Welding Fundamentals, Delmar Publishers Inc., ISBN 0-8273-5937-3. Unit 3Instructional Aids:• Oxy Weld PowerPoint Presentation• Oxy Weld Safety Precautions H<strong>and</strong>out• Labs 1 & 2 H<strong>and</strong>out• Terminology H<strong>and</strong>out• Oxy Weld Test• Oxy Weld Test AnswersMaterials Needed:• Steel plate• Personal safety equipmentEquipment Needed:Learner• Oxygen cylinder (with cap)• Fuel gas cylinder• Regulators – oxygen <strong>and</strong> gas• Hose set• Combination cutting torch• One-piece cutting torch• Wrenches <strong>and</strong> torch lighterDemonstrated knowledge of safety in welding.IntroductionCopyright © Texas <strong>Education</strong> Agency, 2012. All rights reserved.2
Introduction (LSI Quadrant I):SAY: Oxyfuel cutting is a process used to separate metal by heating it to akindling temperature between 1400 <strong>and</strong> 1800 degrees F, then oxidizing <strong>and</strong>blowing the metal from the cut with a stream of oxygen.SAY: At the end of the lesson you will be able to use the oxyfuel to cut a straightline in order to make coupons to prepare for welding exercise.Outline (LSI Quadrant II):StepsI. SafetyA. H<strong>and</strong>ling <strong>and</strong> using equipmentB. Personal Protective EquipmentC. VentilationD. Area SafetyII. EquipmentA. Oxygen Gas <strong>and</strong> CylindersB. Acetylene <strong>and</strong> CylindersC. RegulatorsD. HosesE. TorchesF. Cutting TipsIII. Cutting ProcedureA. Straight line cutB. Inspecting the cutI. Review Safety SheetII. Lab 1:OutlinePROCEDURE FOR TURNING OFF THE OXYFUEL RIG1. Turn off the acetylene at the torch body (the flame will go out <strong>and</strong> the oxygenwill blow out the carbon).2. Turn off the oxygen at the torch.3. Turn off the acetylene cylinder valve.Copyright © Texas <strong>Education</strong> Agency, 2012. All rights reserved.3
4. Bleed the acetylene hose <strong>and</strong> regulators, then close the torch valve (bothgauges will drop to zero).5. Screw out the acetylene regulator adjusting screw until loose.6. Turn off the oxygen cylinder valve.7. Bleed the oxygen hose <strong>and</strong> regulators <strong>and</strong> close the torch valve (both gaugeswill drop to zero).8. Screw out the oxygen regulator adjusting screw until loose.9. Recheck the valve <strong>and</strong> roll up the hose. If rig is not to be used for some time,remove the regulators <strong>and</strong> put the safety caps back on the cylinders.II. Lab 2:PROCEDURE FOR TURNING ON THE OXYFUEL RIG1. Valves on the torch body should be closed.2. The adjusting screws on the regulators must be loose.3. Turn on acetylene cylinder valve ¼ to ½ turn; if wheel type, open all the way.4. Tighten the regulator adjusting screw to the desired working pressure.5. Open the oxygen cylinder valve all the way.6. Tighten the regulator adjusting screw to the desired working pressure.7. If the cutting attachment is being used, open the torch body oxygen valve allthe way.8. Crack the acetylene valve <strong>and</strong> light. Blow the flame off the tip <strong>and</strong> slowlyadjust in back.9. Adjust to a neutral flame with the oxygen valve. The oxygen pressure can be 5to 10 times higher than the acetylene pressure when cutting. Never exceed 15pounds pressure per square inch on acetylene. When welding, the ratio ofoxygen to acetylene is approximately 1:1. Oxygen <strong>and</strong> acetylene settings willvary depending on the attachment tip <strong>and</strong> thickness of metal to cut or weld.Guided Practice (LSI Quadrant III):ApplicationCopyright © Texas <strong>Education</strong> Agency, 2012. All rights reserved.4
• The instructor will demonstrate all procedures before students attempt them.• The students will point out all safety procedures during the demonstrations toensure the proper use of equipment by the students.Independent Practice (LSI Quadrant III):Students will work in labs to complete the following:Lab 1 – Set-up Equipment <strong>and</strong> Shut downLab 2 – Cutting of SteelReview (LSI Quadrants I <strong>and</strong> IV):SummaryReview the key concepts of the lesson.Monitor the students as they are cuttingContinue to review safety rulesInformal Assessment (LSI Quadrant III):EvaluationObserve students as they set up the equipment <strong>and</strong> make their cuts.Formal Assessment (LSI Quadrant III, IV):The students will show mastery of 70% on the assessment.Extension/Enrichment (LSI Quadrant IV):Those that master the test will practice cutting to make coupons for welding as theteacher continues to work with students have difficulties with making the cuts.Copyright © Texas <strong>Education</strong> Agency, 2012. All rights reserved.5
SAFETY PRECAUTIONS FOR OXYFUEL1. Keep oil <strong>and</strong> grease away from all parts of the welding <strong>and</strong> cutting apparatus.2. Secure the cylinders in an upright position so they cannot be overturned.3. Face the regulator gauges up toward the ceiling, making it impossible to st<strong>and</strong> in frontof them.4. Store <strong>and</strong> use oxyfuel units in well-ventilated areas.5. Acetylene pressure in the lines should never exceed 15 pounds per square inch.6. Open the acetylene cylinder valve ¼ to ½ turn; if it is the wheel type, open all the way7. Use a friction spark lighter to light the torch; never use matches or cigarette lighters.8. Never use oxygen in pneumatic tools, to blow out lines, air up tires, or dust offclothing.9. Never hang clothing on cylinders, running the risk of saturating them with oxygen <strong>and</strong>acetylene.10. Do not convert an acetylene regulator to an oxygen regulator or vice versa.11. Slowly open the oxygen cylinder valve to prevent a sudden surge.12. Release or loosen the regulator adjusting screw before opening a cylinder valve.13. Do not walk with a lighted torch or lay down a lighted torch.14. Blow out hoses before attaching the torch.15. Repair hoses with proper hose splicers, not friction tape. Never use a leaky hose.16. Test for leaks with soap <strong>and</strong> water, not matches17. If valves on cylinders are faulty or too tight, notify the supplier, undue force would bedangerous.18. Keep a fire extinguisher h<strong>and</strong>y at all times.19. Dress properly <strong>and</strong> wear eye protection.20. Prevent heat <strong>and</strong> sparks from getting to cylinders <strong>and</strong> hoses.21. Do not arc on or hit a cylinder with a metal object.22. Never use a cylinder as a ground in an electrical circuit.23. Never make a guess; get the correct information from a qualified person <strong>and</strong> markor otherwise designate empty cylinders.Copyright © Texas <strong>Education</strong> Agency, 2012. All rights reserved.6
LAB 1PROCEDURE FOR TURNING OFF THE OXYFUEL RIG1. Turn off the acetylene at the torch body (the flame will go out <strong>and</strong> the oxygen willblow out the carbon).2. Turn off the oxygen at the torch.3. Turn off the acetylene cylinder valve.4. Bleed the acetylene hose <strong>and</strong> regulators, then close the torch valve (both gauges willdrop to zero).5. Screw out the acetylene regulator adjusting screw until loose.6. Turn off the oxygen cylinder valve.7. Bleed the oxygen hose <strong>and</strong> regulators <strong>and</strong> close the torch valve (both gauges willdrop to zero).8. Screw out the oxygen regulator adjusting screw until loose.9. Recheck the valve <strong>and</strong> roll up the hose. If rig is not to be used for some time, removethe regulators <strong>and</strong> put the safety caps back on the cylinders.Copyright © Texas <strong>Education</strong> Agency, 2012. All rights reserved.7
LAB 2PROCEDURE FOR TURNING ON THE OXYFUEL RIG1. Valves on the torch body should be closed.2. The adjusting screws on the regulators must be loose.3. Turn on acetylene cylinder valve ¼ to ½ turn; if wheel type, open all the way.4. Tighten the regulator adjusting screw to the desired working pressure.5. Open the oxygen cylinder valve all the way.6. Tighten the regulator adjusting screw to the desired working pressure.7. If the cutting attachment is being used, open the torch body oxygen valve all the way.8. Crack the acetylene valve <strong>and</strong> light. Blow the flame off the tip <strong>and</strong> slowly adjust inback.9. Adjust to a neutral flame with the oxygen valve. The oxygen pressure can be 5 to 10times higher than the acetylene pressure when cutting. Never exceed 15 poundspressure per square inch on acetylene. When welding, the ratio of oxygen toacetylene is approximately 1:1. Oxygen <strong>and</strong> acetylene settings will vary dependingon the attachment tip <strong>and</strong> thickness of metal to cut or weld.Copyright © Texas <strong>Education</strong> Agency, 2012. All rights reserved.8
TerminologyCopyright © Texas <strong>Education</strong> Agency, 2012. All rights reserved.9
Oxy Fuel Welding Test - BURNING TESTDIRECTIONS: Mark the T if the statement if true. Mark the F if the statement isfalse.T F 1. Oxygen is a colorless, odorless, tasteless gas, <strong>and</strong> will support combustion.T F 2. Full cylinder for oxygen is 2,400 to 3,600 psi.T F 3. Beside cutting <strong>and</strong> welding with the oxyfuel flame, it can be used for cuttingwood <strong>and</strong> cutting glass.T F 4. Check for leaks with oil or gas line after making repairs on torch hose or ifyou smell gas.T F 5. Full cylinder pressure for acetylene is approximately 250 psi.T F 6. A neutral flame has a rounded inner cone, quiet sound, <strong>and</strong> an equalmixtureof oxygen <strong>and</strong> acetylene.T F 7. While cutting <strong>and</strong> welding, the tip of the inner cone should be held 5/16 to ½inch above the metal.T F 8. Oxygen cylinders are equipped with double seated valves <strong>and</strong> should beopened all the way.T F 9. Acetylene cylinders not having the wheel type valve opener should beopened less than one turn.T F 10. Pressure in the acetylene hose line should never exceed 15 pounds psi.T F 11. Matches may be used for lighting the torch.T F 12. An oily wipe cloth should be used to clean out the oxygen cylinder fittings.T F 13. Cutting metal should be done over concrete floors.Copyright © Texas <strong>Education</strong> Agency, 2012. All rights reserved.10
Oxy Fuel Welding Test AnswersAnswer key to Burning Test1. T2. F3. F4. F5. T6. T7. F8. T9. T10. T11. F12. F13. FCopyright © Texas <strong>Education</strong> Agency, 2012. All rights reserved.11