Honeywell-Confidential - Seam-avionic
Honeywell-Confidential - Seam-avionic
Honeywell-Confidential - Seam-avionic
- No tags were found...

You also want an ePaper? Increase the reach of your titles
YUMPU automatically turns print PDFs into web optimized ePapers that Google loves.
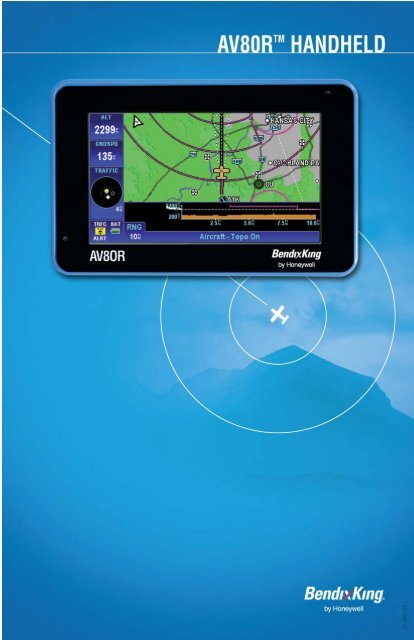
<strong>Honeywell</strong> International Inc.23500 W 105th StreetOlathe, KS 66061U.S.ACAGE: 22373Telephone: (800) 601-3099 (U.S.A./Canada)Telephone: (602) 365-3099 (International)AV8OR HandheldUser’s GuideRevised January 2011Printed in U.S.A. Pub. No. 7450-0840-01 July 2008© <strong>Honeywell</strong> International Inc. Do not copy without express permission of <strong>Honeywell</strong>T-1
<strong>Honeywell</strong> Bendix/King AV8OR User’s Guideaerospace products, <strong>Honeywell</strong> hereby grants you a limited, nonexclusivelicense to use these Materials to maintain or repair thesubject <strong>Honeywell</strong> aerospace products only at the facility to whichthese Materials have been shipped ("the Licensed Facility").Transfer of the Materials to another facility owned by you ispermitted only if the original Licensed Facility retains no copies ofthe Materials and you provide prior written notice to <strong>Honeywell</strong>.2. Rights In Materials - <strong>Honeywell</strong> retains all rights in theseMaterials and in any copies thereof that are not expressly grantedto you, including all rights in patents, copyrights, trademarks, andtrade secrets. No license to use any <strong>Honeywell</strong> trademarks orpatents is granted under this License Agreement.3. <strong>Confidential</strong>ity - You acknowledge that these Materialscontain information that is confidential and proprietary to<strong>Honeywell</strong>. You agree to take all reasonable efforts to maintainthe confidentiality of these Materials.4. Assignment And Transfer - This License Agreement may beassigned to a formally designated service designee to the extentallowed under an applicable product support agreement ortransferred to a subsequent owner or operator of an aircraftcontaining the subject <strong>Honeywell</strong> aerospace products. However,the recipient of any such assignment or transfer must assume allof your obligations under this License Agreement. No assignmentor transfer shall relieve any party of any obligation that such partythen has hereunder.5. Copies of Materials - Unless you have the express writtenpermission of <strong>Honeywell</strong>, you may not make or permit making ofcopies of the Materials. Notwithstanding the foregoing, you maymake copies of only portions of the Material for your internal use.You agree to return the Materials and any copies thereof to<strong>Honeywell</strong> upon the request of <strong>Honeywell</strong>.6. Term - This License Agreement is effective until terminated asset forth herein. This License Agreement will terminateimmediately, without notice from <strong>Honeywell</strong>, if you fail to complywith any provision of this License Agreement or will terminatesimultaneously with the termination or expiration of yourapplicable product support agreement, authorized repair facilityagreement, or your formal designation as a third party serviceprovider. Upon termination of this License Agreement, you willreturn these Materials to <strong>Honeywell</strong> without retaining any copiesand will have one of your authorized officers certify that allMaterials have been returned with no copies retained.7450-0840-01 TitleRev 4 Jan 2011© <strong>Honeywell</strong> International Inc. Do not copy without express permission of <strong>Honeywell</strong>Page T- 3
<strong>Honeywell</strong> Bendix/King AV8OR User’s Guide7. Remedies - <strong>Honeywell</strong> reserves the right to pursue allavailable remedies and damages resulting from a breach of thisLicense Agreement.8. Limitation of Liability - <strong>Honeywell</strong> does not make anyrepresentation regarding the use or sufficiency of the Materials.THERE ARE NO OTHER WARRANTIES, WHETHER WRITTENOR ORAL, EXPRESS, IMPLIED OR STATUTORY, INCLUDING,BUT NOT LIMITED TO, (i) WARRANTIES ARISING FROMCOURSE OF PERFORMANCE, DEALING, USAGE, OR TRADE,WHICH ARE HEREBY EXPRESSLY DISCLAIMED, OR (ii)WARRANTIES AGAINST INFRINGEMENT OF INTELLECTUALPROPERTY RIGHTS OF THIRD PARTIES, EVEN IFHONEYWELL HAS BEEN ADVISED OF ANY SUCHINFRINGEMENT. IN NO EVENT WILL HONEYWELL BE LIABLEFOR ANY INCIDENTAL DAMAGES, CONSEQUENTIALDAMAGES, SPECIAL DAMAGES, INDIRECT DAMAGES, LOSSOF PROFITS, LOSS OF REVENUES, OR LOSS OF USE, EVENIF INFORMED OF THE POSSIBILITY OF SUCH DAMAGES. TOTHE EXTENT PERMITTED BY APPLICABLE LAW, THESELIMITATIONS AND EXCLUSIONS WILL APPLY REGARDLESSOF WHETHER LIABILITY ARISES FROM BREACH OFCONTRACT, WARRANTY, TORT (INCLUDING BUT NOTLIMITED TO NEGLIGENCE), BY OPERATION OF LAW, OROTHERWISE.9. Controlling Law - This License shall be governed andconstrued in accordance with the laws of the State of New Yorkwithout regard to the conflicts of laws provisions thereof. Thislicense sets forth the entire agreement between you and<strong>Honeywell</strong> and may only be modified by a writing duly executedby the duly authorized representatives of the parties.Copyright - NoticeCopyright 2010, <strong>Honeywell</strong> International Inc. All rights reserved.<strong>Honeywell</strong> is a registered trademark of <strong>Honeywell</strong> International Inc.All other marks are owned by their respective companies.Title 7450-0840-01Page T- 4© <strong>Honeywell</strong> International Inc. Do not copy without express permission of <strong>Honeywell</strong>Rev 4 Jan 2011
<strong>Honeywell</strong> Bendix/King AV8OR User’s GuideHONEYWELL CUSTOMER SUPPORTFor more information, including details regarding your warranty,visit http://www.bendixking.com/av8or.For technical support of this product please contact your localBendix/King Dealer. To locate the Bendix/King Dealer nearest youvisit http://www.bendixking.com/av8or..For additional support, contact <strong>Honeywell</strong> Customer & ProductSupport: at:US & Canada: 1-877-712-2386All other countries: 1-913-712-2613Fax: 1-913-712-5697HONEYWELL AEROSPACE TECHNICALPUBLICATIONSIf you have access to the Internet, go to the <strong>Honeywell</strong> OnlineTechnical Publications Web site athttps://portal.honeywell.com/wps/portal/aero to:• Download or see publications online• Make an order for a publication• Tell <strong>Honeywell</strong> of a possible data error in a publication.• If you do not have access to the <strong>Honeywell</strong> Online TechnicalPublications web site and need technical publications information:• Send an e-mail message to the complete customer care centerat:cas-publications-distribution@honeywell.com• Send a fax or speak to a person at the Customer and ProductSupport contact numbers7450-0840-01 TitleRev 4 Jan 2011© <strong>Honeywell</strong> International Inc. Do not copy without express permission of <strong>Honeywell</strong>Page T- 5
<strong>Honeywell</strong> Bendix/King AV8OR User’s GuideThis PageIntentionally Left BlankTitle 7450-0840-01Page T- 6© <strong>Honeywell</strong> International Inc. Do not copy without express permission of <strong>Honeywell</strong>Rev 4 Jan 2011
<strong>Honeywell</strong> Bendix/King AV8OR User’s GuideRevision History and InstructionsManual:AV8OR Handheld User’s GuideRevision: 4 - Jan 2011SummaryAdded weight and balance sectionAdded FAA airport diagramsAdded “Dest WPT” and “Next WPT” data fieldsAdded XM WX graphical freezing levelsNew airplane and helicopter symbolsIncreased flight logging storage capacityAdded “Subscriptions and Updates” sectionAdded “Smart Airway Flight Planning” functionAdded XM radio tuningRevised and simplified XM WX/Radio activationsequenceBluetooth Manager function has been totally revisedWxWorx XM Weather Bluetooth setup has beenrevisedAdded Memory Map flight logRevised system setup pages7450-0840-01 Record of RevisionsRev 4 Jan 2011 Page RR- 1© <strong>Honeywell</strong> International Inc. Do not copy without express permission of <strong>Honeywell</strong>
<strong>Honeywell</strong> Bendix/King AV8OR User’s GuideTable of Contents1. GETTING STARTED .............................................................. 1-1Introduction ............................................................................. 1-1Unit Overview .......................................................................... 1-2Displays and Controls ............................................................. 1-3Supplied software and Equipment ....................................... 1-5Optional Equipment .............................................................. 1-6Charging the internal battery ................................................ 1-7Understanding Terms ........................................................... 1-8Turning AV8OR on/off .......................................................... 1-9AV8OR Sleep Mode ........................................................ 1-10Turn Sleep Mode On and Off .......................................... 1-10Main Menu .......................................................................... 1-10Getting satellite signals ...................................................... 1-11View GPS status from Settings ....................................... 1-11GPS Signal Strength ..................................................... 1-12Current Position ............................................................ 1-12GPS Data Flow ............................................................. 1-13Satellite Acquisition Reset ............................................ 1-132. AVIATION MODE OPERATION ............................................. 2-1Basic Operation....................................................................... 2-1Aviation Mode ....................................................................... 2-1Program Startup ................................................................ 2-1Demo Mode ....................................................................... 2-4Aviation Main Menu Page .................................................. 2-5VFR Moving Map Function ................................................... 2-10Main Map Display Window ................................................. 2-10Fast Access ..................................................................... 2-12Image overlays ................................................................ 2-13Map page Pointer/Non-Pointer: ....................................... 2-16Data Fields....................................................................... 2-18VFR Moving Map Operation ............................................... 2-25Map Zooming ................................................................... 2-25Map View ......................................................................... 2-26Smart Profile ................................................................. 2-26Auto Zoom .................................................................... 2-27Change View ................................................................. 2-29Airports ............................................................................ 2-31Rnwys Tab .................................................................... 2-32Comms Tab .................................................................. 2-347450-0840-01 Table of ContentsRev 4 Jan 2011© <strong>Honeywell</strong> International Inc. Do not copy without express permission of <strong>Honeywell</strong>Page TC-1
<strong>Honeywell</strong> Bendix/King AV8OR User’s GuideTable of Contents (cont)Fuel Tab ........................................................................ 2-34Svcs Tab ....................................................................... 2-36Local Tab ...................................................................... 2-36NEAREST – Select Nearest Destination ......................... 2-37Nearest Airports ............................................................ 2-39Nearest VORs ............................................................... 2-41Nearest User Wpts ........................................................ 2-41Nearest Towns and Cities ............................................. 2-42Waypoint Alert ................................................................. 2-43Turn Anticipation .............................................................. 2-44DIRECT-TO Navigation ................................................... 2-45Create a Direct-To course from the Map ...................... 2-45Create a Direct-To course from the keyboard entry(No Flight Plan) ............................................................. 2-46Re-center aircraft when Direct-To is already enabled .. 2-48Bypass a WPT with a flight plan active ......................... 2-49Enter a Direct-To WPT with a flight plan active. ........... 2-50PTR MENU ...................................................................... 2-52Create a User Waypoint ............................................... 2-52Center the Map around Pointer Position ....................... 2-54PTR MENU – DIRECT-TO Navigation ............................ 2-55To select a user defined point on the map: .................. 2-56PTR MENU – OBS Navigation ........................................ 2-56To select a NAVAID point on the map: ......................... 2-56To select a user defined point on the map: .................. 2-57Center Map ...................................................................... 2-58Center To WPT/Center Aircraft ..................................... 2-58Selectable GPS Data Source ....................................... 2-59AUTONAV ....................................................................... 2-60STOP WATCH ................................................................. 2-61Flight Plan Function .............................................................. 2-62User WPTS ........................................................................ 2-62User Waypoint Icons ....................................................... 2-64User Airport Entry ......................................................... 2-65Creating New Flight Plan using the Virtual Keyboard ........ 2-66Inserting Victor Airways into Flight Plan ............................. 2-70Smart Airways .................................................................. 2-72Creating New Flight Plan using MAP Selections ............... 2-73Stored Flight Plans Processing .......................................... 2-77EDIT FPLAN .................................................................... 2-78DATA VIEW Mode ........................................................ 2-78Table of Contents 7450-0840-01Page TC-2© <strong>Honeywell</strong> International Inc. Do not copy without express permission of <strong>Honeywell</strong>Rev 4 Jan 2011
<strong>Honeywell</strong> Bendix/King AV8OR User’s GuideTable of Contents (cont)MAP VIEW Mode .......................................................... 2-79FPLAN ADMIN ................................................................ 2-79COPY FPLAN ............................................................... 2-80NEW FPLAN ................................................................. 2-80INVERT FPLAN ............................................................ 2-80DELETE FPLAN ........................................................... 2-81FLY FPLAN...................................................................... 2-82Active Flight Plan .......................................................... 2-83Flight Logging ..................................................................... 2-84Text Format (Bendix/King) flight log ................................ 2-84Jeppesen FliteStar flight log ............................................ 2-85Google Earth flight log ..................................................... 2-85Memory Map flight log ..................................................... 2-85Weather Function .................................................................. 2-86Hardware Accessory .......................................................... 2-86Receiving Weather Data .................................................... 2-86XM Weather Information Products ..................................... 2-88NEXRAD Composite Reflectivity (USA and Canada) ..... 2-90NEXRAD Legend .......................................................... 2-90NEXRAD Map Setup .................................................... 2-91Graphical METARs (USA and Canada) .......................... 2-93Graphical PIREPs (USA only) ......................................... 2-95Graphical AIRMETs (USA only) ...................................... 2-97Graphical SIGMETs (USA only) .................................... 2-100Graphical Conv-SIGMETs (USA only) .......................... 2-102Graphical Winds Aloft (USA only) ................................. 2-104Graphical Winds Aloft Soft Keys ................................. 2-105Winds Aloft Legend ..................................................... 2-105Select Flight Level ....................................................... 2-106Graphical Freezing Level ............................................... 2-107Text METARs (USA and Canada) ................................. 2-108Text TAFs (USA and Canada)....................................... 2-109Text PIREPs (USA only) ................................................ 2-110Text AIRMETs (USA only) ............................................. 2-111Text SIGMETs (USA only) ............................................. 2-112Text Conv-SIGMETs (USA only) ................................... 2-113Legend ........................................................................... 2-114XM Overlays ..................................................................... 2-115Graphical Metar Overlay ................................................ 2-116Graphical TFR Overlay .................................................. 2-116Lightning Overlay ........................................................... 2-1187450-0840-01 Table of ContentsRev 4 Jan 2011© <strong>Honeywell</strong> International Inc. Do not copy without express permission of <strong>Honeywell</strong>Page TC-3
<strong>Honeywell</strong> Bendix/King AV8OR User’s GuideTable of Contents (cont)Cloud Top Overlay ......................................................... 2-118Storm Cell Overlay ........................................................ 2-119Traffic Function ................................................................... 2-120Hardware Accessory ........................................................ 2-120Traffic Main Page ............................................................. 2-121Fields on The Traffic Page: ........................................... 2-121Traffic Setup .................................................................. 2-122Flight Level .................................................................. 2-123Enable/Disable Pop-UP .............................................. 2-123Taxiways FUNCTION ......................................................... 2-125Chart View Page .............................................................. 2-125Charts/Procedure Page .................................................... 2-126Select Charts to View Menu .......................................... 2-127PANEL FUNCTION ............................................................. 2-128Panel Page ....................................................................... 2-128Auxiliary FUNCTION ........................................................... 2-130Messages Page ................................................................ 2-130Messages Soft Keys ...................................................... 2-132Checklist ........................................................................... 2-133Wind Vector Calculator Page ........................................... 2-135Weight and Balance Page ................................................ 2-136Data Entry - .................................................................... 2-137C.G. Graph .................................................................... 2-139Layout ............................................................................ 2-140Profile ............................................................................. 2-140Envelope ........................................................................ 2-142Creating a new Weight and Balance Section ................ 2-143System Setup Function ....................................................... 2-145System Setup Menu ......................................................... 2-145General System Setup .................................................. 2-146Map Setup ..................................................................... 2-148Navigation Setup ........................................................... 2-153Data Field Setup ............................................................ 2-156Flight Plan Data Setup ................................................... 2-158Demo Mode Setup ......................................................... 2-159Device Setup Page ........................................................ 2-161Status Page ................................................................... 2-162Refresh Mode ............................................................. 2-167NMEA Output Setup ...................................................... 2-168Transmit Default NMEA Sentences: ........................... 2-169Transmit Selected NEMA Sentences ......................... 2-169Table of Contents 7450-0840-01Page TC-4© <strong>Honeywell</strong> International Inc. Do not copy without express permission of <strong>Honeywell</strong>Rev 4 Jan 2011
<strong>Honeywell</strong> Bendix/King AV8OR User’s GuideTable of Contents (cont)Shut Down ........................................................................ 2-1713. AUTOMOTIVE MODE OPERATION ...................................... 3-1Warnings and Safety information ............................................ 3-1Map Updates ........................................................................ 3-2Glossary .................................................................................. 3-2Getting Started ........................................................................ 3-4Simple and Advanced modes .............................................. 3-6Soft Keys and Controls on the screen .................................. 3-8Using keyboards .............................................................. 3-10Additional Controls .......................................................... 3-11Using the Map ................................................................. 3-13Checking the Details of a Map Location .......................... 3-13Manipulating the Map ...................................................... 3-14Status Information and Hidden Controls on the Map ...... 3-17Using the Cursor (the selected map location) ................. 3-23Advanced Functions ........................................................... 3-24Smart Zoom ..................................................................... 3-24Position Markers .............................................................. 3-25Current GPS Position and Lock-on-Road ....................... 3-25Returning to Normal Navigation ...................................... 3-26Selected Location (Cursor).............................................. 3-26Original Position in the Cursor Menu ............................... 3-27Daytime and night color schemes ................................... 3-27Color scheme in tunnels .................................................. 3-27Route Calculation and Recalculation .............................. 3-28Itinerary ............................................................................ 3-28Track Logs ....................................................................... 3-30Route demonstration ....................................................... 3-31POI (Points of Interest) .................................................... 3-31Saving POI....................................................................... 3-32Managing POI .................................................................. 3-32Road Safety Cameras ..................................................... 3-32Saving Road Safety Cameras ......................................... 3-33Camera Warning ............................................................. 3-33Camera Types ................................................................. 3-33Camera Directions ........................................................... 3-35Speed limit warning ......................................................... 3-36Advanced Features in GoDrive Version 8.3 ......................... 3-37ROUTE Navigation ............................................................... 3-38Selecting the Destination of a Route .................................. 3-387450-0840-01 Table of ContentsRev 4 Jan 2011© <strong>Honeywell</strong> International Inc. Do not copy without express permission of <strong>Honeywell</strong>Page TC-5
<strong>Honeywell</strong> Bendix/King AV8OR User’s GuideTable of Contents (cont)Detour menu .................................................................... 3-77Cursor menu .................................................................... 3-77Position menu .................................................................. 3-80Route Information screen ................................................ 3-81Trip Information screen .................................................... 3-84Trip Computer screen ...................................................... 3-88Quick menu...................................................................... 3-89GPS data screen ............................................................. 3-91Find menu ........................................................................ 3-94Route menu ..................................................................... 3-95Manage Menu .................................................................. 3-97Manage Saved Routes ................................................. 3-97Manage History ............................................................. 3-98Manage Track Logs ...................................................... 3-98Manage Favorites .......................................................... 3-100Manage POIs .............................................................. 3-100Manage Saved Search Criteria ................................... 3-102User Data Management .............................................. 3-103Settings Menu ................................................................ 3-104Map Screen Settings .................................................. 3-106Sound Settings ............................................................ 3-107Route Planning Options .............................................. 3-108Regional Settings ........................................................ 3-111Navigation Settings ..................................................... 3-113Warning Settings ......................................................... 3-114GPS Settings .............................................................. 3-116Menu Settings ............................................................. 3-116Device Settings ........................................................... 3-117Track Log Settings ...................................................... 3-1184. MULTIMEDIA .......................................................................... 4-1Music Player ............................................................................ 4-1Photos ..................................................................................... 4-2Movie player ............................................................................ 4-3Ebook Reader ......................................................................... 4-5XM Tuner ................................................................................ 4-5XM Weather and Radio Setup ............................................. 4-6XM Radio Tuning .................................................................. 4-7Downloading Multimedia Files ................................................ 4-85. SYSTEM SETTINGS .............................................................. 5-17450-0840-01 Table of ContentsRev 4 Jan 2011© <strong>Honeywell</strong> International Inc. Do not copy without express permission of <strong>Honeywell</strong>Page TC-7
<strong>Honeywell</strong> Bendix/King AV8OR User’s GuideTable of Contents (cont)GPS Status ............................................................................. 5-1Backlight Brightness ............................................................... 5-1Backlight control bar ............................................................. 5-2Backlight shutdown setting ................................................... 5-2Volume .................................................................................... 5-2Enable/disable audio output ................................................. 5-3Volume control bar ............................................................... 5-3System Info ............................................................................. 5-3Bluetooth ................................................................................. 5-4Service Providers Page ..................................................... 5-7DUN Setup Page ............................................................... 5-8DUN Favorite Provider Selection Page ............................. 5-8Initial Setup ........................................................................... 5-96. APPENDIX .............................................................................. 6-1Acronyms and Abbreviations .................................................. 6-1Downloading/Uploading files from/To PC ............................... 6-4Connection to An External GPS Source ................................. 6-7Bendix/King KLN-94 ............................................................. 6-7Garmin© GNS 430/430W/530/530W ................................... 6-7Connection to An External Weather Source ........................... 6-9Bendix/King KDR-610 Setup ................................................ 6-9WxWorx XM Weather Receiver Serial Setup ..................... 6-11WxWorx XM Weather Receiver Bluetooth Setup ............... 6-12Connection to An External Traffic Source ............................. 6-16Zaon XRX - Serial Setup .................................................... 6-16Configuration of the Zaon XRX ........................................ 6-16Configuration of AV8OR .................................................. 6-16Zaon XRX - Bluetooth Setup .............................................. 6-17External Flight Plans ............................................................. 6-17Jeppesen FliteStar© PC Application .................................. 6-17Subscriptions and Updates ................................................... 6-20Bendix/King Subscriptions:................................................. 6-20GoFly Navigation Data Subscriptions .............................. 6-20GoFly Fuel Pricing and Airport Services ......................... 6-20Other Subscriptions: ........................................................... 6-21GoFly Airport Diagrams: .................................................. 6-21GoFly XM Weather: ......................................................... 6-21GoDrive Automotive Maps ............................................... 6-21Updates: ............................................................................. 6-21Table of Contents 7450-0840-01Page TC-8© <strong>Honeywell</strong> International Inc. Do not copy without express permission of <strong>Honeywell</strong>Rev 4 Jan 2011
<strong>Honeywell</strong> Bendix/King AV8OR User’s GuideList of IllustrationsFigure 1-2: AV8OR - Multimedia ..................................................... 1-1Figure 1-3: AV8OR Controls ........................................................... 1-2Figure 1-4: Charging with AV8OR turned off .................................. 1-7Figure 1-5: Charge is completed ..................................................... 1-8Figure 1-6: AV8OR Power Up ......................................................... 1-9Figure 1-7: AV8OR Power off ....................................................... 1-10Figure 1-8: AV8OR Sleep Mode ................................................... 1-10Figure 1-9: Main Menu .................................................................. 1-11Figure 1-10: Settings Page ........................................................... 1-11Figure 1-11: GPS Signal Strength Page – Locked and Unlocked 1-12Figure 1-12: GPS Information of Current position ........................ 1-12Figure 1-13: GPS Data flow .......................................................... 1-13Figure 1-14: GPS Reset ................................................................ 1-13Figure 2-1: Initial Title Page ............................................................ 2-1Figure 2-2: Self Test Failed ............................................................. 2-2Figure 2-3: Self Test Failed Caution ............................................... 2-2Figure 2-4: SELF TEST COMPLETED Page .................................. 2-3Figure 2-5: Final Title Page ............................................................. 2-3Figure 2-6: Demo Mode .................................................................. 2-4Figure 2-7: Map Page ..................................................................... 2-5Figure 2-8: Main Menu Page........................................................... 2-5Figure 2-9: Flight Plan – Flight Plan Index Page ............................ 2-6Figure 2-10: Panel Page ................................................................. 2-6Figure 2-11: Weather – Weather Map Page ................................... 2-7Figure 2-12: Traffic Main Page ....................................................... 2-8Figure 2-14: Messages – Messages Info Page .............................. 2-9Figure 2-15: System Setup – System Setup Menu page ................ 2-9Figure 2-16: Main Map Display Page ............................................ 2-10Figure 2-17: Map – No position data CAUTION ........................... 2-12Figure 2-18: Map – No Altitude Available CAUTION .................... 2-12Figure 2-19: Fast Access .............................................................. 2-13Figure 2-20:Topo On Map - Overlay Setup ................................... 2-15Figure 2-21: Map – Non-pointer Map mode .................................. 2-16Figure 2-22: Map – Pointer Map mode ......................................... 2-17Figure 2-23: Map – Pointer Tag Window / Title Window .............. 2-17Figure 2-24: Map – Without soft keys ........................................... 2-17Figure 2-25: Map – Map View Setup ............................................ 2-26Figure 2-26: Map – Smart Profile On ............................................ 2-27Figure 2-27: Smart Profile – Airspace Vertical Boundaries .......... 2-27Figure 2-29: Auto Zoom Suspended ............................................. 2-28Figure 2-30: Map – Topo On ......................................................... 2-297450-0840-01 Table of ContentsRev 4 Jan 2011© <strong>Honeywell</strong> International Inc. Do not copy without express permission of <strong>Honeywell</strong>Page TC-9
<strong>Honeywell</strong> Bendix/King AV8OR User’s GuideList of Illustrations (cont)Figure 2-31: Map – Relative Terrain ............................................. 2-30Figure 2-32: Map – Topo Off ......................................................... 2-31Figure 2-33: Airport – MORE INFO ............................................... 2-32Figure 2-34: Airport – Rnwys Page ............................................... 2-32Figure 2-35: Airports – Extended Centerline on Map page .......... 2-33Figure 2-36: Airports – Deselect Runway ..................................... 2-33Figure 2-37: Airport – Comms Page ............................................. 2-34Figure 2-38: Airport – Fuel Page ................................................... 2-35Figure 2-39: Nearby Fuel Price Comparison ................................ 2-35Figure 2-40: Airport – Svcs Page .................................................. 2-36Figure 2-41: Airport – Local Page ................................................. 2-37Figure 2-42: Map – Nearest Database Selection .......................... 2-38Figure 2-43: Map – Direct-To OFF ................................................ 2-39Figure 2-44: Nearest Airports ........................................................ 2-39Figure 2-45: Map – Airport Filter ................................................... 2-40Figure 2-46: Nearest VORs ........................................................... 2-41Figure 2-47: Nearest User Waypoints ........................................... 2-42Figure 2-48: Nearest Towns and Cities ........................................ 2-43Figure 2-49: Waypoint Alert .......................................................... 2-44Figure 2-50: Turn Anticipation ....................................................... 2-44Figure 2-51: Map – Select a NAVAID ........................................... 2-45Figure 2-52: Map – Direct To a NAVAID ....................................... 2-46Figure 2-53: Map – Navigate to a NAVAID point .......................... 2-46Figure 2-54: Map – Virtual Keyboard ............................................ 2-47Figure 2-55: Map – Entered Waypoint Info ................................... 2-47Figure 2-56: Re-center aircraft – Step 1 ....................................... 2-48Figure 2-57: Step 1 Bypass a WPT .............................................. 2-49Figure 2-58: Bypass a WPT – Step 2 ........................................... 2-49Figure 2-59: Bypass a WPT – Step 3 ........................................... 2-50Figure 2-60: Bypass a Waypoint Step 4 ....................................... 2-50Figure 2-61: Enter a New WPT with Flight Plan Active ................ 2-51Figure 2-62: Enter New WPT – Select KEYBD Soft key .............. 2-51Figure 2-63: Enter New WPT Ident ............................................... 2-52Figure 2-64: New Direct-To Active. ............................................... 2-52Figure 2-65: Map –PTR MENU – Save Waypoint ......................... 2-53Figure 2-66: Map – User Defined Waypoint .................................. 2-53Figure 2-67: User Waypoint – MORE INFO .................................. 2-54Figure 2-68: PTR Menu – Center to Map ...................................... 2-54Figure 2-69: Pointer Menu ............................................................ 2-55Figure 2-70: Map Centered on Pointer ......................................... 2-55Figure 2-71: Map – Navigate to a user defined WPT ................... 2-56Table of Contents 7450-0840-01Page TC-10© <strong>Honeywell</strong> International Inc. Do not copy without express permission of <strong>Honeywell</strong>Rev 4 Jan 2011
<strong>Honeywell</strong> Bendix/King AV8OR User’s GuideList of Illustrations (cont)Figure 2-72: OBS Course to NAVAID ........................................... 2-56Figure 2-73: Map –OBS Start........................................................ 2-57Figure 2-74: Map – OBS Navigation ............................................. 2-57Figure 2-75: Map – OBS Configuration ......................................... 2-58Figure 2-76: Map – Center to WPT ............................................... 2-59Figure 2-77: Map – Center Aircraft ............................................... 2-59Figure 2-78: Stop Watch Data Field .............................................. 2-61Figure 2-79: Flight Plan Index Page ............................................. 2-62Figure 2-80: Flight Plan – User Waypoint List .............................. 2-63Figure 2-81: Flight Plan – New/Edit User Waypoint ..................... 2-63Figure 2-82: Flight Plan – WPT Range and Bearing Config ......... 2-64Figure 2-83: Select User Waypoint Icon ....................................... 2-64Figure 2-84: User Airport Entry Page 1 ......................................... 2-65Figure 2-85: User Airport Entry Page 2 ......................................... 2-65Figure 2-86: Flight Plan – Index Page with no Flight Plan ............ 2-66Figure 2-87: New Flight Plan Page ............................................... 2-67Figure 2-88: Virtual Keyboard ....................................................... 2-67Figure 2-89: Enter Waypoint Identifier .......................................... 2-68Figure 2-90: Waypoint Entry Window ........................................... 2-68Figure 2-91: All WPTs Entered into Flight Plan ............................ 2-69Figure 2-92: Flight Plan Saved ..................................................... 2-69Figure 2-93: Stored Flight Plan ..................................................... 2-70Figure 2-94: Stored Plan ............................................................... 2-70Figure 2-95: Select Airway Segment ............................................ 2-71Figure 2-96: Select Entry and Exit Points ..................................... 2-71Figure 2-97: Updated Flight Plan with Victor Airway .................... 2-72Figure 2-98: Smart Airways Entry Screen ..................................... 2-72Figure 2-99: Smart Airways - Segment Details ............................. 2-73Figure 2-100: Flight Plan Index ..................................................... 2-74Figure 2-101: New Flight Plan Page ............................................. 2-74Figure 2-102: Flight Plan – Map Selection of WPTs ..................... 2-75Figure 2-103: Flight Plan – Waypoint Detail ................................. 2-75Figure 2-104: Flight Plan – Selected Waypoint Detail Information2-76Figure 2-105: Flight Plan – Stored Flight Plan with a Waypoint ... 2-76Figure 2-106: Flight Plan – Save Waypoint .................................. 2-77Figure 2-107: Flight Plan – Flight Plan Accepted ......................... 2-77Figure 2-108: Flight Plan Index Page ........................................... 2-78Figure 2-109: Flight Plan – DATA VIEW ....................................... 2-78Figure 2-110: Flight Plan Selected WPT from Map ...................... 2-79Figure 2-111: Flight Plan – FPLAN ADMIN .................................. 2-79Figure 2-112: Flight Plan – COPY FPLAN .................................... 2-807450-0840-01 Table of ContentsRev 4 Jan 2011© <strong>Honeywell</strong> International Inc. Do not copy without express permission of <strong>Honeywell</strong>Page TC-11
<strong>Honeywell</strong> Bendix/King AV8OR User’s GuideList of Illustrations (cont)Figure 2-113: Invert Flight Plan – Step 1 ...................................... 2-80Figure 2-114: Invert Flight Plan – Step 2 ...................................... 2-81Figure 2-115: Invert Flight Plan – Step 3 ...................................... 2-81Figure 2-116: Delete Flight Plan ................................................... 2-82Figure 2-117: Flight Plan – FLY FPLAN ....................................... 2-82Figure 2-118: Flight Plan – Active Flight Plan ............................... 2-83Figure 2-119: WX – No Data Received ......................................... 2-88Figure 2-120: WX – Non-pointer mode ......................................... 2-88Figure 2-121: WX – Choose Product ............................................ 2-89Figure 2-122: WX – NEXRAD with Cloud and Coverage Overlay 2-90Figure 2-123: NEXRAD Legend .................................................... 2-91Figure 2-124: WX NEXRAD Map – Overlay Setup ....................... 2-91Figure 2-125: WX – NEXRAD & Storm Cells Overlay .................. 2-92Figure 2-126: Graphical TFRs ....................................................... 2-92Figure 2-127: TFR Popup Window ............................................... 2-93Figure 2-128: TFR MORE INFO Window ..................................... 2-93Figure 2-129: WX – Graphical METARs ....................................... 2-94Figure 2-130: WX: – Graphical METARs Data Box ...................... 2-95Figure 2-131: WX: – Text METARs Page ..................................... 2-95Figure 2-132: WX – Graphical PIREPs ......................................... 2-96Figure 2-133: WX – Graphical PIREPs Popup Window ............... 2-96Figure 2-134: WX – Graphical PIREPs Legend ............................ 2-97Figure 2-135: WX – Text PIREPs ................................................. 2-97Figure 2-136: WX – AIRMETs ....................................................... 2-98Figure 2-137:WX – Graphical AIRMET Popup Window ............... 2-99Figure 2-138:WX: – Graphical AIRMET LEGEND ........................ 2-99Figure 2-139: WX – Text AIRMET Page ..................................... 2-100Figure 2-140: WX – Graphical SIGMETs .................................... 2-100Figure 2-141: WX – Graphical SIGMET Popup Window ............ 2-101Figure 2-142: WX – Graphical SIGMET Legend ......................... 2-101Figure 2-143: WX – Text SIGMETs ............................................ 2-102Figure 2-144: WX – Graphical Conv SIGMETs .......................... 2-102Figure 2-145: WX – Graphical CONV SIGMET Popup ............... 2-103Figure 2-146: WX – Graphical Conv SIGMET Legend ............... 2-103Figure 2-147: WX – Text CONV SIGMETs Page ....................... 2-104Figure 2-148: Graphical Winds Aloft ........................................... 2-104Figure 2-149: Graphical Winds Aloft – Speed and Direction ...... 2-105Figure 2-150: Winds Aloft Legend............................................... 2-106Figure 2-151: Select Flight Level ................................................ 2-106Figure 2-152: Graphical Freezing Level Page ............................ 2-107Figure 2-153: Freezing Level - Pointer Tag Window .................. 2-107Table of Contents 7450-0840-01Page TC-12© <strong>Honeywell</strong> International Inc. Do not copy without express permission of <strong>Honeywell</strong>Rev 4 Jan 2011
<strong>Honeywell</strong> Bendix/King AV8OR User’s GuideList of Illustrations (cont)Figure 2-154: Freezing Level Legend ......................................... 2-108Figure 2-155: WX – Text METARs ............................................. 2-108Figure 2-156: WX – Text TAFs ................................................... 2-109Figure 2-157: WX –Text PIREPs ................................................ 2-110Figure 2-158: Text AIRMETs ...................................................... 2-111Figure 2-159: Text SIGMETs ...................................................... 2-112Figure 2-160: Text Conv-SIGMETs ............................................ 2-113Figure 2-161: WX – Pointer mode .............................................. 2-114Figure 2-162: WX – Legend Info ................................................. 2-115Figure 2-163: Topo On Map – Overlay Setup ............................. 2-115Figure 2-164: Graphical Metar Overlay on Map Page ................ 2-116Figure 2-165: TFR Overlay ......................................................... 2-117Figure 2-166: TFR Overlay – Popup ........................................... 2-117Figure 2-167: TFR Overlay – MORE INFO ................................. 2-118Figure 2-168: Lightning Strikes on Map Page ............................. 2-118Figure 2-169: Cloud Top Overlay on Nexrad Page .................... 2-119Figure 2-170: WX –Storm Cells Overlay on Nexrad Page .......... 2-119Figure 2-171: Traffic Main Page ................................................. 2-121Figure 2-172: Traffic Page – Traffic Setup .................................. 2-122Figure 2-173: Traffic page – Enable Pop-Up .............................. 2-123Figure 2-174: Traffic page – Disable Pop-Up ............................. 2-124Figure 2-175: Chart View Page - No Airport Diagrams Loaded .. 2-125Figure 2-176: Charts/Procedure Page ........................................ 2-126Figure 2-177: Chart View Page with Airport Selected Page ....... 2-126Figure 2-178: Chart View Page with Airport Selected Page ....... 2-127Figure 2-179: Messages ............................................................. 2-128Figure 2-180: Panel Page: New Waypoint Selected ................... 2-129Figure 2-181: Messages ............................................................. 2-130Figure 2-182: Checklist Page ...................................................... 2-134Figure 2-183: Checklist Page ...................................................... 2-135Figure 2-184; Wind Vector Calculation Page .............................. 2-135Figure 2-185: Enter Magnetic Heading ....................................... 2-136Figure 2-186: Weight and Balance Page .................................... 2-137Figure 2-187: W&B Data Entry Page with Profile and Envelope TabsFilled Out ............................................................................. 2-138Figure 2-188: W&B - FILE Options Page .................................... 2-138Figure 2-189: W&B COG Graph with Profile and Envelope TabsFilled Out ............................................................................. 2-139Figure 2-190: W&B - Aircraft Loaded Beyond C.G. Limits .......... 2-140Figure 2-191: W&B Layout Page with Profile and Envelope TabsFilled Out ............................................................................. 2-1407450-0840-01 Table of ContentsRev 4 Jan 2011© <strong>Honeywell</strong> International Inc. Do not copy without express permission of <strong>Honeywell</strong>Page TC-13
<strong>Honeywell</strong> Bendix/King AV8OR User’s GuideList of Illustrations (cont)Figure 2-192: W&B Profile Page ................................................. 2-141Figure 2-193: W&B Envelope Page ............................................ 2-142Figure 2-194: System Setup – System Setup Menu Page ......... 2-145Figure 2-195: System Setup – General System Setup Options . 2-146Figure 2-196: System Setup – Setting values ............................. 2-146Figure 2-197: System Setup – Map System Setup Options ....... 2-148Figure 2-198: Map System Setup -- Select Map Layer ............... 2-150Figure 2-199: Map System Setup – Point Feature Setup ........... 2-151Figure 2-202: Map System Setup – Overlay Setup 1 ................. 2-152Figure 2-203: System Setup – Navigation Setup ........................ 2-153Figure 2-204: System Setup – Data Field Setup ........................ 2-156Figure 2-205: System Setup – Wide windows Data Field ........... 2-158Figure 2-206: System Setup – Flight Plan Data Setup ............... 2-158Figure 2-207: System Setup – Demo Mode Setup ..................... 2-159Figure 2-208: System Setup – Demo Mode Setup Ident Setting 2-160Figure 2-209: System Setup – Demo Mode Setup Ident Details 2-160Figure 2-210: System Setup – Device Setup Menu .................... 2-161Figure 2-211: System Setup – Status Page ................................ 2-162Figure 2-212: System Setup – Internal GPS Status ................... 2-163Figure 2-213: System Setup – External GPS Status .................. 2-163Figure 2-214: System Setup – Common Map Data Sources ...... 2-164Figure 2-215: System Setup – Software and Database Version 2-164Figure 2-216: System Information Page ..................................... 2-165Figure 2-217: Traffic Status Page ............................................... 2-165Figure 2-218: System Setup – Weather Status Page ................. 2-166Figure 2-219: NMEA Output Setup Page .................................... 2-168Figure 2-220: Exit Go Fly Warning Screen ................................. 2-171Figure 2-221: Go Fly exit screen ................................................. 2-171Figure 3-1: AV8OR Main Menu ....................................................... 3-4Figure 3-2: Simple Mode ................................................................. 3-5Figure 3-3: Advanced Mode ............................................................ 3-5Figure 3-4: Map Screen ................................................................ 3-13Figure 3-5: Itinerary ....................................................................... 3-29Figure 3-6: Guidance Stripes ........................................................ 3-37Figure 3-7: Highway Signposts ..................................................... 3-37Figure 3-8: Enter an Address (Europe) ......................................... 3-40Figure 3-9: Find an Address – USA .............................................. 3-42Figure 3-10: Map Screen Advanced Mode ................................... 3-65Figure 3-11: Route Information Screen ......................................... 3-81Figure 3-12: Trip Information Screen ............................................ 3-84Figure 3-13: Quick Menu ............................................................... 3-89Table of Contents 7450-0840-01Page TC-14© <strong>Honeywell</strong> International Inc. Do not copy without express permission of <strong>Honeywell</strong>Rev 4 Jan 2011
<strong>Honeywell</strong> Bendix/King AV8OR User’s GuideList of Illustrations (cont)Figure 3-14: GPS Status ............................................................... 3-92Figure 3-15 Settings Menu .......................................................... 3-104Figure 4-1: Multimedia Menu .......................................................... 4-1Figure 4-2: Music Player – Searching for a Music File ................... 4-2Figure 4-3: Music Player – Playing Music ....................................... 4-2Figure 4-4: Photo Browser – Searching for a Photo ....................... 4-3Figure 4-5: Photo Browser – Viewing a Photo ................................ 4-3Figure 4-6: Movie Player – Searching for a Movie .......................... 4-4Figure 4-7: Movie Player – Playing a Movie ................................... 4-4Figure 4-8: EBook Reader – Searching for a Book ........................ 4-5Figure 4-9: Ebook Reader ............................................................... 4-5Figure 4-10: XM Radio Page........................................................... 4-6Figure 4-12: XM Categories Page .................................................. 4-8Figure 5-1: Settings Page ............................................................... 5-1Figure 5-2: Backlight Page .............................................................. 5-2Figure 5-3: Volume Control ............................................................. 5-3Figure 5-4: System Info Screen ...................................................... 5-4Figure 5-5: Bluetooth Manager Page .............................................. 5-4Figure 5-6: Bluetooth – Add Device Page ....................................... 5-5Figure 5-7: BlueTooth – Pair Device Page ..................................... 5-6Figure 5-8: Bluetooth – Passkey Requested Page ......................... 5-7Figure 5-9: Bluetooth – Service Providers Page ............................. 5-7Figure 5-10: Bluetooth – DUN Setup Page ..................................... 5-8Figure 5-11: Bluetooth – DUN Favorite Provider Page ................... 5-9Figure 5-12: Initial Setup Menu Page ............................................. 5-9Figure 6-1: Connection to USB port. ............................................... 6-4Figure 6-2: Configure AV8OR as external drive ............................. 6-5Figure 6-3: External GPS Setup Screen ......................................... 6-8Figure 6-4: Weather Setup – KDR-610 ........................................... 6-9Figure 6-5: WxWorx XM Weather Setup ....................................... 6-11Figure 6-6: WxWorx Bluetooth Receiver Setup ............................ 6-12Figure 6-7: Bluetooth Manager Page ............................................ 6-13Figure 6-8: Add Bluetooth Device ................................................. 6-13Figure 6-9: BlueTooth – Pair Device ............................................. 6-14Figure 6-10: BlueTooth Passkey Required ................................... 6-14Figure 6-11: BlueTooth Connecting .............................................. 6-15Figure 6-12: Bluetooth WxWorx Connection Established ............. 6-15Figure 6-15: Device Setup Page – Traffic ..................................... 6-17Figure 6-16: Navigation Data Subscription Coverage .................. 6-20Figure 6-17: AV8OR Handheld Upgrade Screen .......................... 6-227450-0840-01 Table of ContentsRev 4 Jan 2011© <strong>Honeywell</strong> International Inc. Do not copy without express permission of <strong>Honeywell</strong>Page TC-15
<strong>Honeywell</strong> Bendix/King AV8OR User’s GuideList of TablesTable 1-1 Displays and Controls ..................................................... 1-3Table 1-3 Optional Equipment ........................................................ 1-6Table 1-4: Battery Charge Level ..................................................... 1-7Table 2-1: Image Overlays on Primary Maps ............................... 2-14Table 2-2 Course Deviation Limits ................................................ 2-19Table 2-3 Calculated Time En Route ............................................ 2-20Table 2-4 Time Zones ................................................................... 2-23Table 2-5 Relative Terrain ............................................................. 2-30Table 2-6 Graphical AIRMET Types ............................................. 2-98Table 2-7 Messages .................................................................... 2-130Table 3-1: Simple Mode versus Advanced Mode ........................... 3-6Table 3-2: Soft keys and controls on the screen............................. 3-8Table 3-3: Using Keyboards .......................................................... 3-10Table 3-4: Additional Controls ....................................................... 3-11Table 3-5: Controls to manipulate the Map ................................... 3-14Table 3-6: Itenerary Screen .......................................................... 3-29Table 3-7: Road Safety Cameras ................................................. 3-34Table 3-8: Navigation Menu .......................................................... 3-64Table 6-1 Directory Structure .......................................................... 6-5Table 6-2 KLN 94 Pinouts ............................................................... 6-8Table 6-3 GNS 430/430W/530/530W Pinouts ................................ 6-8Table 6-4 KDR 610 Pinouts .......................................................... 6-10Table of Contents 7450-0840-01Page TC-16© <strong>Honeywell</strong> International Inc. Do not copy without express permission of <strong>Honeywell</strong>Rev 4 Jan 2011
1. GETTING STARTEDINTRODUCTION<strong>Honeywell</strong> Bendix/King AV8OR User’s GuideThank you for choosing the <strong>Honeywell</strong> AV8OR Handheld, a Multi-Function Display (MFD) that integrates a GPS, Navigation Database,Graphical Terrain, Traffic and XM Weather/Radio into a single, easyto use, portable aviation device. In addition to the benefits foraviation use, this device also contains a complete compliment ofautomotive navigation and multi-media features for use when not inyour aircraft. To get the most out of your new navigation system,read this manual completely to learn the features for your unit.Figure 1-1: AV8OR - In the Air or On the GroundFigure 1-2: AV8OR - Multimedia7450-0840-01 Getting StartedRev 4 Jan 2011© <strong>Honeywell</strong> International Inc. Do not copy without express permission of <strong>Honeywell</strong>1-1
<strong>Honeywell</strong> Bendix/King AV8OR User’s GuideUNIT OVERVIEWFigure 1-3: AV8OR ControlsGetting Started 7450-0840-011-2© <strong>Honeywell</strong> International Inc. Do not copy without express permission of <strong>Honeywell</strong>Rev 4 Jan 2011
DISPLAYS AND CONTROLS<strong>Honeywell</strong> Bendix/King AV8OR User’s GuideThe table below describes the AV8OR displays and controls that aredisplayed in Figure 1-3:Table 1-1 Displays and ControlsFIG DISPLAY ORDESCRIPTIONNO CONTROL1 Touch screen 4.3 inch TFT touch screen.The resolution is 480 x 272pixels.2 POWER key The POWER key is used toturn the unit on and off andalso can put the unit intoSleep mode and wake the unitfrom Sleep mode.3 MENU key The MENU key returns theuser to the main menu fromany program in the unit.4 LED charging statusindicatorShows the status of thecharging system while the unitis being charged.5 SD slot and SD card The SD slot holds a SD cardwhich contains the aviationand automotive navigationsoftware.6 LOCK tab The LOCK tab disables allcontrols and stops the touchscreen from responding totaps.7 6 VDC powerconnectorThis connector lets the unitreceive power from an AC oran automotive DC.7450-0840-01 Getting StartedRev 4 Jan 2011© <strong>Honeywell</strong> International Inc. Do not copy without express permission of <strong>Honeywell</strong>1-3
<strong>Honeywell</strong> Bendix/King AV8OR User’s GuideFIG DISPLAY ORDESCRIPTIONNO CONTROL8 Microphone The microphone is used forBluetooth connections to cellphones.9 USB/Serial port This is used for a standardUSB connection to a PC todownload movies, pictures, E-books and new updates to thenavigational software. Alsoused for a RS 232 connectionto external hardware with anoptional cable.10 AV-IN port Future expansion11 Headset jack The headset jack accepts astandard headphone miniaturestereo adapter so the user canlisten to music or movies fromthe unit.12 Volume control knob The volume control controlsthe volume of the soundthrough the rear speaker orthe Headset jack if a headsetis plugged in.13 External GPS antennajackThe remote GPS antenna jackallows the user to plug in theremote GPS antenna that issupplied with the unit forbetter satellite reception.14 Stylus The stylus allows the user toprecisely tap the touch screen.Getting Started 7450-0840-011-4© <strong>Honeywell</strong> International Inc. Do not copy without express permission of <strong>Honeywell</strong>Rev 4 Jan 2011
FIG DISPLAY ORNO CONTROL15 Removable batterycover<strong>Honeywell</strong> Bendix/King AV8OR User’s GuideDESCRIPTIONA replaceable battery isincluded with the unit. Anoptional battery with a longerlife is also available. The serialnumber for the unit is locatedon the case under the battery.16 Internal speaker AV8OR has an Internalspeaker for music, movies,routing instructions.17 Reset button The reset button reboots theAV8OR unit.Supplied software and EquipmentThe SD card on the AV8OR Handheld comes preloaded with anavigation map for the GoFly program and the GoDrive program.Different maps for different regions are available. Please visitthe http://www.bendixking.com/av8or website to browse the availableregions, purchase a replacement SD card for your current region orto purchase a SD card for a different region.For Automotive map subscriptions and software updates, visitthe http://www.naviextras.com website.See the Subscriptions and Updates section on page 6-20 for moreinformation.7450-0840-01 Getting StartedRev 4 Jan 2011© <strong>Honeywell</strong> International Inc. Do not copy without express permission of <strong>Honeywell</strong>1-5
<strong>Honeywell</strong> Bendix/King AV8OR User’s GuideThe AV8OR Handheld comes with the standard equipment thatfollows:Table 1-2 Standard EquipmentITEM PART NUMBER DESCRIPTION1 066-01207-0099 GPS Base Display Unit, with 800mAh Battery and battery mountingbracket2 005-03702-0002 12-28 VDC Adaptor3 005-03702-0003 120/220 VAC Adapter (with electricalplug)4 005-03702-0004 PC/USB Cable5 005-03702-0005 Carrying Bag6 005-03702-0007 Aviation Mount7 005-03702-0009 Automotive Windshield Mount8 005-03702-0010 Earphone9 005-03702-0012 CD – User manual10 005-03702-0013 Quick Reference GuideOptional EquipmentThe following accessories are available for the AV8OR:Table 1-3 Optional EquipmentITEM PART NUMBER DESCRIPTION1 005-03702-0006 Remote GPS Antenna2 005-03702-0014 1600 mAh Battery, (with mountingbracket)3 005-03702-0008 Automotive Dashboard Mount4 005-03702-0017 RS232 CableNote: The list of optional equipment may change in the future. Forthe latest list of options or to order a part, please visitthe http://www.bendixking.com/av8or website.Getting Started 7450-0840-011-6© <strong>Honeywell</strong> International Inc. Do not copy without express permission of <strong>Honeywell</strong>Rev 4 Jan 2011
Charging the internal battery<strong>Honeywell</strong> Bendix/King AV8OR User’s GuideBefore using this unit for the first time or when replacing the internalbattery with a new battery, the internal battery in the AV8OR must becharged.Find the power connector (7) on the right side of the unit. Referto Figure 1-3.Recharge the unit by either using the DC power adapter or the120/220V AC adapter.The LED charging indicator (4) on the unit shows a yellow light whilethe unit is charging.Figure 1-4: Charging with AV8OR turned offWhen the unit is completely charged, the yellow light changes to agreen light. If the unit is turned on while charging, the charginganimation in the top right portion of the screen also displays a greenbattery with full bars.The table below shows the different charge levels.Table 1-4: Battery Charge LevelStatus Charge Number of bars on ColorLeveliconFull > 75% 5 GreenGood > 50% & 25% & < 3 Yellow7450-0840-01 Getting StartedRev 4 Jan 2011© <strong>Honeywell</strong> International Inc. Do not copy without express permission of <strong>Honeywell</strong>1-7
<strong>Honeywell</strong> Bendix/King AV8OR User’s GuideStatus Charge Number of bars on ColorLevelicon50%Low > 5% &
<strong>Honeywell</strong> Bendix/King AV8OR User’s GuidePan: Touch the screen and move your finger or stylus across thescreen while continuing to touch the screen. This allows you to scrollthe map and change settings.Highlight: Touch on the screen to select the desired individualfields. Moving the highlight to a desired location allows the user tomake a selection, begin data entry, or scroll through a list.Field: The location on a page where data or an option can beentered and shown.Scroll Bar: When viewing a list of items that is too long to show onthe screen, a scroll bar appears along the right side of the list. Toscroll through a list, hold your finger or stylus on the scroll bar andmove your finger or stylus up or down and the list of items will moveup or down too.Turning AV8OR on/offThe first time your new AV8OR is turned on, the GPS receiver mustcollect satellite data and establish its present location. Before youturn on the unit, make sure that it has a clear and unobstructed viewof the sky to receive satellite signals.1. Ensure that the “Lock” switch is unlocked.2. Hold the Power Key down until the blue screen shows.Figure 1-6: AV8OR Power Up3. To turn off the AV8OR, press and hold the Power Key untilPOWER OFF screen shows.7450-0840-01 Getting StartedRev 4 Jan 2011© <strong>Honeywell</strong> International Inc. Do not copy without express permission of <strong>Honeywell</strong>1-9
<strong>Honeywell</strong> Bendix/King AV8OR User’s GuideFigure 1-7: AV8OR Power offAV8OR SLEEP MODEAV8OR can be put into sleep mode as shown in the figure below.AV8OR, while in sleep mode, continues to run in a low power mode.Figure 1-8: AV8OR Sleep ModeTURN SLEEP MODE ON AND OFF1. To put the unit in Sleep mode, press and quickly release thePower soft Key until Sleeping shows on the screen for a moment,then the screen goes blank.2. To wake up the unit, press and quickly release the Power softKey.Main MenuAfter the logo startup page shows, the MAIN MENU is displayed.Getting Started 7450-0840-011-10© <strong>Honeywell</strong> International Inc. Do not copy without express permission of <strong>Honeywell</strong>Rev 4 Jan 2011
<strong>Honeywell</strong> Bendix/King AV8OR User’s GuideGetting satellite signalsFigure 1-9: Main MenuWhen the AV8OR is turned on, it automatically begins to search forsatellite signals. This process can take a few minutes. Be sure thedevice has a clear and unobstructed view of the sky.VIEW GPS STATUS FROM SETTINGSYou can monitor GPS status by tapping the Settings soft key on theMain Menu page (refer to Figure 1-9, and tapping on the GPSStatus soft key (refer to Figure 1-10).Figure 1-10: Settings PageThe GPS Status page provides a visual reference of satelliteacquisition, receiver status, current position and a reset mechanism.7450-0840-01 Getting StartedRev 4 Jan 2011© <strong>Honeywell</strong> International Inc. Do not copy without express permission of <strong>Honeywell</strong>1-11
<strong>Honeywell</strong> Bendix/King AV8OR User’s GuideGPS Signal StrengthThe GPS Signal Strength page is the default page for GPS Status.As the receiver locks onto satellites, a bar appears for each satellite.The bar shows the signal strength for each satellite. The barchanges color from grey to blue when the satellite is locked.Figure 1-11: GPS Signal Strength Page – Locked and UnlockedCurrent PositionTapping this soft key displays the longitude, latitude, altitude (ALT)and UTC time information for the current position when the devicehas acquired a GPS satellite lock.Figure 1-12: GPS Information of Current positionGetting Started 7450-0840-011-12© <strong>Honeywell</strong> International Inc. Do not copy without express permission of <strong>Honeywell</strong>Rev 4 Jan 2011
<strong>Honeywell</strong> Bendix/King AV8OR User’s GuideGPS Data FlowTapping this soft key shows the GPS national marine electronicsassociation (NMEA) data in real-time.Figure 1-13: GPS Data flowSatellite Acquisition ResetTapping this soft key causes the GPS engine to reset. If the unit hasdifficulty acquiring satellites, tapping the GPS reset soft key will clearthe GPS engine memory.Figure 1-14: GPS ResetTap thesoft key to return to the Settings page.7450-0840-01 Getting StartedRev 4 Jan 2011© <strong>Honeywell</strong> International Inc. Do not copy without express permission of <strong>Honeywell</strong>1-13
<strong>Honeywell</strong> Bendix/King AV8OR User’s GuideThis PageIntentionally Left BlankGetting Started 7450-0840-011-14© <strong>Honeywell</strong> International Inc. Do not copy without express permission of <strong>Honeywell</strong>Rev 4 Jan 2011
<strong>Honeywell</strong> Bendix/King AV8OR User’s Guide2. AVIATION MODE OPERATIONNote: Chapter 2 documents the 02/05 version of the Go Flyprogram. The version number is shown at the bottom left corner ofthe Initial Title Page (Figure 2-1) upon startup. If you are using anearlier version, go to http://www.bendixking.com/av8or forinstructions on how to update your AV8OR to the latest version.BASIC OPERATIONThis section introduces how to start the aviation mode navigation,and what the status of the program is during the initializationprocess.Aviation ModeOn the Main Menu page, tap theicon to start theAviation mode navigation program.PROGRAM STARTUPWhile the Aviation mode is starting, a startup title page is displayed,as shown in the figure below.Figure 2-1: Initial Title PageA self-test status window is displayed under the title box. The selftestchecks to make sure the internal navigation, cartography andterrain databases are correct. While the self-test is checking thesedatabases, the window header SELF TEST IN PROGRESS isdisplayed in yellow.7450-0840-01 Basic OperationRev 4 Jan 2011© <strong>Honeywell</strong> International Inc. Do not copy without express permission of <strong>Honeywell</strong>Page 2-1
<strong>Honeywell</strong> Bendix/King AV8OR User’s GuideA green check mark is placed to the right of each test item as it ischecked.If the initial self-test fails, the unit is unable to continue operatingsafely. A red is displayed in place of the check mark and the firstsoft key changes to HELP, as shown in the figure below.Figure 2-2: Self Test FailedWhen the HELP soft key is tapped, a caution message is displayedas shown in the figure below.Figure 2-3: Self Test Failed CautionThe unit should be turned off and then turned back on. IfAV8OR still fails the self-test, please contact customer support.If the self-test finishes successfully, the self-test window headerchanges to SELF TEST COMPLETED in green, as shown in thefigure below.Basic Operation 7450-0840-01Page 2-2© <strong>Honeywell</strong> International Inc. Do not copy without express permission of <strong>Honeywell</strong>Rev 4 Jan 2011
<strong>Honeywell</strong> Bendix/King AV8OR User’s GuideFigure 2-4: SELF TEST COMPLETED PageThe SELF TEST COMPLETED page shows for 2 seconds then thefinal title page is displayed as shown in the figure below.Figure 2-5: Final Title PageThe final title page shows the subscription expiration dates of thepresent database, installed charts and the data providers in ascrollable window (if needed). Use the AV8OR as an aid tosituational awareness only when the database is current.The software level is shown on the bottom left side of the screen(current software level is 02/05).For additional information on the present software and databaseversions, please go to the System Setup page and tap on the StatusPage soft key to bring up the System Status Menu. Highlight theSoftware and Database Versions and tap the Select soft key toshow the present software and database versions.7450-0840-01 Basic OperationRev 4 Jan 2011© <strong>Honeywell</strong> International Inc. Do not copy without express permission of <strong>Honeywell</strong>Page 2-3
<strong>Honeywell</strong> Bendix/King AV8OR User’s GuideThe user can browse the Bendix/King web pageat http://www.bendixking.com/av8or to see if a newer version of thesoftware or database is available.If the OK soft key is pushed to acknowledge the Jeppesen database,the Aviation Map page is displayed, as shown in Figure 2-7: MapPage.If the DEMO MODE soft key is tapped, then AV8OR will enter asimulation mode.DEMO MODEDemo Mode lets the user become familiar with handling the AV8ORsystem on the ground by running in a simulation mode. When theAV8OR is in Demo Mode, it performs the same as when it isreceiving valid sensor signals to use the various functions. DemoMode can only be activated on the final title page during startup, asshown in Figure 2-5. After tapping the DEMO MODE soft key, thesimulator shows a caution page which must be acknowledged beforecontinuing, as shown in the figure below.Figure 2-6: Demo ModeTap the OK soft key to acknowledge the caution and then the Mappage is displayed.Basic Operation 7450-0840-01Page 2-4© <strong>Honeywell</strong> International Inc. Do not copy without express permission of <strong>Honeywell</strong>Rev 4 Jan 2011
<strong>Honeywell</strong> Bendix/King AV8OR User’s GuideFigure 2-7: Map PageAVIATION MAIN MENU PAGETap on the MAIN MENU soft key on the Map page to display theAviation Main Menu Page.Figure 2-8: Main Menu PageAn example of each function in Aviation Mode appears below. Eachfunction has a specific use and is discussed later in this guide. Thefollowing figures are each of the function’s first pages.• Map: Tap on the soft key on the Aviation Main Menuto return to the Moving Map page. The Map mode is the primarymode of the system. Refer to the VFR MOVING MAPFUNCTION on page 2-10 for a detailed explanation of the MAPmode.7450-0840-01 Basic OperationRev 4 Jan 2011© <strong>Honeywell</strong> International Inc. Do not copy without express permission of <strong>Honeywell</strong>Page 2-5
<strong>Honeywell</strong> Bendix/King AV8OR User’s Guide• Weather: Tap on the soft key on the Aviation MainMenu to show the Weather page (if weather is enabled in DeviceSetup). The AV8OR system connects with a Bendix/King KDR-610 XM receiver or a WxWorx XM receiver through a Bluetoothor RS 232 interface to receive weather data from the XMSatellite Radio network. Refer to the WEATHER FUNCTIONsection on page 2-86 for a detailed explanation of the Weatherfunction. Refer to the Connection to An External Weather Sourcesection in the Appendix on page 6-9 for a detailed explanationon how to connect the AV8OR to an XM receiver.Figure 2-11: Weather – Weather Map Page• Traffic: Tap on the soft key on the Aviation MainMenu to show the Traffic page. The AV8OR system connectsthrough a RS-232 interface to devices such as the Zaon XRXtraffic receiver. Refer to the TRAFFIC FUNCTION section onpage 2-120 for a detailed explanation of the Traffic function.Refer to the Connection to An External Traffic Source section onpage 6-16 in the APPENDIX for a detailed explanation on how toconnect the AV8OR to a Traffic receiver.7450-0840-01 Basic OperationRev 4 Jan 2011© <strong>Honeywell</strong> International Inc. Do not copy without express permission of <strong>Honeywell</strong>Page 2-7
<strong>Honeywell</strong> Bendix/King AV8OR User’s GuideFigure 2-12: Traffic Main Page• Taxiway: Tap on the soft key on the Aviation Main Menuto show the Taxiway page. Refer to the Taxiways FUNCTIONsection on page 2-125 for a detailed explanation of the TaxiwayfunctionFigure 2-13: Taxiways – Info Page• Auxiliary: Tap on the soft key on the Aviation MainMenu to show the Messages page. Refer to the Messages Pagesection on page 2-130 for a detailed explanation of the Messagefunction.Basic Operation 7450-0840-01Page 2-8© <strong>Honeywell</strong> International Inc. Do not copy without express permission of <strong>Honeywell</strong>Rev 4 Jan 2011
<strong>Honeywell</strong> Bendix/King AV8OR User’s GuideFigure 2-14: Messages – Messages Info Page• Settings: Tap on the soft key on the Aviation MainMenu to show the Settings page. Use the System Setup Menu tosetup map, navigation, data fields, flight plan and other displaypreferences. Refer to the SYSTEM SETUP FUNCTION sectionon page 2-145 for a detailed explanation of the system setupfunction.Figure 2-15: System Setup – System Setup Menu page• Exit: Tap on the soft key on the Aviation Main Menuto exit back to the Main Menu.7450-0840-01 Basic OperationRev 4 Jan 2011© <strong>Honeywell</strong> International Inc. Do not copy without express permission of <strong>Honeywell</strong>Page 2-9
<strong>Honeywell</strong> Bendix/King AV8OR User’s GuideVFR MOVING MAP FUNCTIONThe AV8OR features a real-time moving map that can do much morethan just plot your course. The core capability of AV8OR MAP modefunction is its intuitive mapping and navigation function, which iscapable of displaying highly detailed, vectored (point and line) maps.This detailed vector data includes road over flown data, streetaddress data, airspace boundaries, airports, Navigational Aid(NAVAID)s, lakes, rivers, coastlines, cities, highways and terrainelevation data used to help situational awareness.Main Map Display WindowOn the Aviation Main Menu, tap on theMain Map page, as shown in the figure below.soft key to enter theFigure 2-16: Main Map Display PageData field information (1): The data field information is displayedalong the left side of the screen. For more information about the datafield window configuration please refer to Data Fields in the nextsection.The ZOOM IN (2) icon decreases the displayed range of themap.North Pointer (3): In the upper left corner of the Map display is aNorth pointer. The pointer has a triangle shape . The north pointeralways points north to help orient the map view. Double tapping onVFR Moving Map Function 7450-0840-01Page 2-10© <strong>Honeywell</strong> International Inc. Do not copy without express permission of <strong>Honeywell</strong>Rev 4 Jan 2011
<strong>Honeywell</strong> Bendix/King AV8OR User’s Guidethe north pointer toggles the map orientation between North Up andthe Track Up mode.Map Page (4): The map page is the main page for Go Fly aviationmode. The map page shows the aircraft position on the map.Aircraft Symbol (5): A Fixed wing or Rotary wingaircraft symbol is displayed in the center of the screen thatrepresents the actual position of the aircraft. The aircraft symbolpoints in the direction of the GPS track based on a valid GPSposition fix.• If Rotary Wing is selected as aircraft type, and AV8OR loses avalid GPS position fix, the aircraft symbol is removed from thescreen.• If Fixed Wing is selected as the aircraft type, and the aircraftstops, the aircraft symbol stays on the screen and point in thedirection of the last known GPS track. When the GPS speed isgreater than 3 kts, the aircraft symbol follows the GPS track asthe heading source. The symbol is changed in the System Setup– General System Setup page.Menu Soft keys (6): The menu soft keys are displayed on the rightside of the screen. They allow the user to navigate through the menudirectory. The soft keys are shown initially when the Map page is firstdisplayed. After a configurable period of time, the soft keys areremoved from the Map page. Tapping on the Map page causes themenu soft keys to display again. The MAIN MENU soft key returns tothe Aviation Main Menu page.Title Bar (7): The title bar shows the currently selected map viewacross the bottom of the Map page. The Title Bar area also providesfast access to primary pages. For more information on how fastaccess works, refer to the Fast Access section on page 2-12.The ZOOM OUT (8)map.icon increases the displayed range of theMap Range (9): The current range (labeled RNG ) is displayedin the range tag window in the lower left corner of the display. Therange distance unit (nautical miles, statute miles or kilometers) isconfigured in the System Setup-GENERAL SYSTEM SETUP page.Range is measured on the map as the distance from the center ofthe aircraft symbol to the outer ring around the aircraft. The inner7450-0840-01 VFR Moving Map FunctionRev 4 Jan 2011 Page 2-11© <strong>Honeywell</strong> International Inc. Do not copy without express permission of <strong>Honeywell</strong>
<strong>Honeywell</strong> Bendix/King AV8OR User’s Guidering is at one-half the displayed range value. These rings are turnedon or off in System Setup-MAP SETUP page.Status window (10): When there is a new aircraft status, a flashingicon is displayed in the status window in the left bottom of the datawindow column . The status window also shows the batterycondition and the status of the XM weather receiver (if installed) andtraffic information (if installed) . .Caution: When AV8OR has lost its GPS position fix, a blue “Noposition data” caution message is displayed across the screen andthe aircraft symbol is not displayed.Figure 2-17: Map – No position data CAUTIONIf no altitude data is available and the map display option is setto Relative Terrain Map, then a “No Altitude Available” messageis displayed.FAST ACCESSFigure 2-18: Map – No Altitude Available CAUTIONFast access lets you rapidly change between the configured primaryinformation pages (Map, Weather or Traffic) or rapidly access theMap page. There is an area within and above the Title Window thatVFR Moving Map Function 7450-0840-01Page 2-12© <strong>Honeywell</strong> International Inc. Do not copy without express permission of <strong>Honeywell</strong>Rev 4 Jan 2011
<strong>Honeywell</strong> Bendix/King AV8OR User’s Guideyou can use to change to a different page or jump back to the Mappage as shown in the figure below.Figure 2-19: Fast AccessIf the Map, Weather or Traffic page, is displayed, slide your finger orstylus left or right in the Fast Access area to cycle forwards orbackwards through the available pages.If a page other than Map, Weather or Traffic page is displayed, slideyour finger or stylus left or right in the Fast Access area to displaythe Map page.Tap within the Fast Access area to display directional windows oneach side of the Fast Access area as shown in the figure above. Thedirectional windows show which page will be displayed if you touchand slide your finger or stylus in that direction.The following pages do not have Fast Access availability.• Start Up pages• Main Menu• Exit• Any page that has an edit selection window. (This is a menu listthat is displayed when the EDIT soft key is touched or theeditable field is double touched. The user must make a selectionbefore jumping to the MAP page)IMAGE OVERLAYSImage overlays are user selectable images that can be configured todisplay on the map page and other primary maps. Each primary mapallows different overlays to be configured for it.7450-0840-01 VFR Moving Map FunctionRev 4 Jan 2011 Page 2-13© <strong>Honeywell</strong> International Inc. Do not copy without express permission of <strong>Honeywell</strong>
<strong>Honeywell</strong> Bendix/King AV8OR User’s GuideThe following table lists the image overlays that can be displayed onthe primary maps:• Flight Plan: When there is an active flight plan, the legs andturning points of the flight plan are shown (Including Direct-To).• Traffic: When a traffic device has a connection with AV8OR andhas been enabled, traffic icons are displayed on the map page, ifavailable.• Flight Log Trail: Flight log points are plotted when the flight logoverlay has been enabled for the current map scale.The following overlays require a current XM weather subscriptionand a connection to a XM weather receiver to be displayed.• Metar: If a meteorological aviation report (METAR) is available,the METAR icon shows on the map.• TFR: If a TFR is available, a yellow and black dashed TFRboundary is displayed on the page.• Lightning: If lightning strike data is available, lightning strikeicons are displayed on the page.• Precip Type: If precipitation type data is available, the preciptype icon is displayed on the page.• Nexrad Coverage: If Nexrad coverage is available, it is displayedon the page.• Cloud Top: If cloud top data is available, it is displayed on thepage.• Storm Cell: If storm cell data is available, it is displayed on thepage.The table below show which overlays are available for each primarymap: An “X” in the column indicates that the overlay is available forthe primary page at the top of the columnTable 2-1: Image Overlays on Primary MapsTopoOn MapTopoOff MapNexradMapMetar,Pirep,WindsAloftMapsFlight X X X X XAirmetSigmetMapsVFR Moving Map Function 7450-0840-01Page 2-14© <strong>Honeywell</strong> International Inc. Do not copy without express permission of <strong>Honeywell</strong>Rev 4 Jan 2011
TopoOn MapTopoOff Map<strong>Honeywell</strong> Bendix/King AV8OR User’s GuideNexradMapMetar,Pirep,WindsAloftMapsPlanTraffic X X X X XFlight X X X X XLog TrailMetar X X XTFR X X XLightning X X XPrecipTypeNexradCloudTopStormCellXXXAirmetSigmetMapsOverlays are configured in the Map Setup section. The Topo OnMap Overlay page is shown in the figure below.XFigure 2-20:Topo On Map - Overlay SetupRefer to the Map Setup section on page 2-148 for more informationon how to configure the image overlays.7450-0840-01 VFR Moving Map FunctionRev 4 Jan 2011 Page 2-15© <strong>Honeywell</strong> International Inc. Do not copy without express permission of <strong>Honeywell</strong>
<strong>Honeywell</strong> Bendix/King AV8OR User’s GuideCAUTIONThe lightning strikes and displayed weather are forinformational purposes only. Weather information from theXM receiver is not real time and the displayed weather imagesshould not be used for tactical flying.MAP PAGE POINTER/NON-POINTER:The Non-pointer MAP mode screen is displayed showing theaircraft’s current position on the map using the aircraft symbol in thecenter of the screen, if valid GPS signals are available.Figure 2-21: Map – Non-pointer Map modeIf the soft keys have been hidden, touching anywhere on the screenin the Main Map Window, will activate a black arrow pointer and theCLEAR PTR and PTR MENU soft keys will be shown. The pointerfollows the finger or stylus around the screen until the finger or stylusis lifted from the screen. The pointer can be moved in any directionto interrogate WPTs or specific map features, such as: airports,airspace, user defined WPTs and so on. While the pointer is activethe map stops moving to permit easier pointer access to objects, andthe aircraft moves over the map.VFR Moving Map Function 7450-0840-01Page 2-16© <strong>Honeywell</strong> International Inc. Do not copy without express permission of <strong>Honeywell</strong>Rev 4 Jan 2011
<strong>Honeywell</strong> Bendix/King AV8OR User’s GuideFigure 2-22: Map – Pointer Map modeIn Pointer Map mode, the pointer tag window displays the pointerposition in the currently selected coordinate system. Below thepointer tag window, the title window component displays the bearingand distance of the pointer relative to the aircraft’s position.Figure 2-23: Map – Pointer Tag Window / Title WindowThe pointer is removed from the screen after 30 seconds of nofurther input (touching and dragging of the pointer).Auto-Hide Soft keys: When the map mode is displayed withouttouching any control, the on-screen soft key labels are removed fromthe screen after a period of time that is configurable, as shownin Figure 2-24. The default time is 30 seconds.Figure 2-24: Map – Without soft keys7450-0840-01 VFR Moving Map FunctionRev 4 Jan 2011 Page 2-17© <strong>Honeywell</strong> International Inc. Do not copy without express permission of <strong>Honeywell</strong>
<strong>Honeywell</strong> Bendix/King AV8OR User’s GuideFor configuration of the Auto-Hide Soft keys, please refer tothe General System Setup section on page 2-146 in the SystemSetup section.The labels are redisplayed when the user touches the screen. Thisfeature maximizes the visible area for mapping. This feature can bedisabled by setting the Auto-Hide Keys on the Map Mode Page toOFF in the General System Setup page (Refer to the GeneralSystem Setup section on page 2-146).DATA FIELDSUp to four data windows can show at a time on the left side of themap page. Up to 9 data windows can be configured for display. Thefive data windows that do not show on the page are displayed bydragging the data windows up or down to show the data fields thatare off screen.Data fields are selected in the System Setup Menu, Refer tothe Data Field Setup section on page 2-156.The Data Fields that follow can be selected for display on the mappage.Altitude Data FieldThe Altitude data field displays the highest priorityenabled GPS altitude source.Bearing Data FieldThe Bearing data field displays the bearing of thecurrent destination WPT for the aircraft position in degrees relative tomagnetic north.Course Deviation Indicator (CDI) Data FieldThe Course Deviation Indicator data field displays theperpendicular distance from the aircraft position to the desired track.The triangle in the center displays whether the aircraft is going TO orFROM the destination WPT. If the triangle points upwards, theaircraft is going TO the destination. If the triangle points downwards,the aircraft is going FROM the destination.The table below displays the full scale limits for the CDI.VFR Moving Map Function 7450-0840-01Page 2-18© <strong>Honeywell</strong> International Inc. Do not copy without express permission of <strong>Honeywell</strong>Rev 4 Jan 2011
<strong>Honeywell</strong> Bendix/King AV8OR User’s GuideTable 2-2 Course Deviation LimitsUnitsAvailable CDI limitsNautical miles 0.3 nm, 1.0 nm and 5.0 nmStatute miles 0.4 sm, 1.0 sm and 5.0 smKilometers 0.6 km, 2.0 km and 10.0 kmDeparture Time Data FieldThe departure time data field displays the departuretime when the ground speed of the aircraft is 20 knots or higher. Thetime is displayed in HH:MM format. The time is dashed if there is nodeparture time available.Destination Waypoint Ident Data FieldThe DEST WPT data field displays the ident of the finaldestination waypoint.If the waypoint ident is unavailable then dashes are displayed.When a waypoint identifier is displayed in the data field, the waypoint identdata window is an “active” data window. Double tap” on the data window togo to the waypoint information page.The waypoint ident is truncated to fit into the size of the datawindow.Distance to Waypoint Data FieldThe distance to waypoint data field displays thedistance from the aircraft to the destination waypoint. The distance isdisplayed in the currently selected units for distance.Desired Track Data FieldThe desired track data field displays the magnetic anglefrom the start waypoint to the destination waypoint as an integervalueEn-Route Safe Altitude Data FieldThe en-route safe altitude data field displays the highest“minimum off-route altitude” along the track line between the start7450-0840-01 VFR Moving Map FunctionRev 4 Jan 2011 Page 2-19© <strong>Honeywell</strong> International Inc. Do not copy without express permission of <strong>Honeywell</strong>
<strong>Honeywell</strong> Bendix/King AV8OR User’s Guideand destination waypoints. The ESA is displayed in the currentlyselected altitude units.Estimated Time of Arrival for Next Leg Data FieldThe ETA LEG data field displays the calculated arrivaltime calculated as the distance to the next waypoint, divided by theground speed, plus the current time.Estimated Time of Arrival Data FieldThe estimated time of arrival data field displays thecalculated arrival time calculated as the distance to the destinationwaypoint, divided by the ground speed, plus the current time.Estimated Time En-Route for next Leg Data FieldThe ETE LEG data field displays the calculated time enroute as the distance to the next waypoint, divided by the groundspeed. If the ETE is greater than 10 minutes then the format isHH:MM. If HH is less than 10 then no leading zeroes are displayed.Otherwise the format is MM:SS, with leading zeroes displayed. If theETE is invalid or greater than 24 hours then “--:--“ is displayed.Estimated Time En-Route Data FieldThe estimated time en-route data field displays thecalculated time en route as the distance to the destination waypoint,divided by the ground speed. If the ETE is greater than 10 minutesthen the format is HH:MM. If HH is less than 10 then no leadingzeroes are displayed. Otherwise the format is MM:SS, with leadingzeroes displayed. If the ETE is invalid or greater than 24 hours then“--:--“ is displayed.Examples are shown in the following table:Table 2-3 Calculated Time En Route1hr 55 min 1 : 551min:55 sec 01 : 5524 min : 2435 sec 00 : 35VFR Moving Map Function 7450-0840-01Page 2-20© <strong>Honeywell</strong> International Inc. Do not copy without express permission of <strong>Honeywell</strong>Rev 4 Jan 2011
Flight Time Data Field<strong>Honeywell</strong> Bendix/King AV8OR User’s GuideThe flight time data field displays the current flightduration in HH:MM format. The flight timer displays the current timein flight or, if the flight has ended, the duration of the flight justended. The flight timer begins counting when the ground speedexceeds 20 knots. The flight timer continues until the unit shutsdown, or until the ground speed has been below 3 knots for 5minutes. If the ground speed exceeds 20 knots after the flight timehad previously stopped then the flight time continues from theprevious flight time.Groundspeed Data FieldThe ground speed data field displays the current aircraftground speed in the configured units.Minimum Safe Altitude Data FieldThe minimum safe altitude data field displays theminimum off-route altitude (from the Jeppesen MORA database.) atthe current aircraft position.The MSA value is displayed in the currently selected units foraltitude.If the position is invalid then the MSA value is displayed as dashes.Near Position Data FieldThe near position data field displays the current aircraftposition relative to a near-by database feature that is determined bythe user configuration.If the displayed distance to the nearest selected database feature isless than 0.1, in the currently selected distance units, then theposition is described as ‘AT’ the database feature.If the distance is 0.1 or more then the compass bearing from thedatabase feature is also displayed.7450-0840-01 VFR Moving Map FunctionRev 4 Jan 2011 Page 2-21© <strong>Honeywell</strong> International Inc. Do not copy without express permission of <strong>Honeywell</strong>
<strong>Honeywell</strong> Bendix/King AV8OR User’s GuideThe bearing is one of sixteen compass bearings (e.g. ENE, NE, andSSW).The icon, used to display the database item on the map, is displayedimmediately below the ident.The ident is displayed to the maximum width displayable in theselected data window size.Present Position Data FieldThe present position data field displays the coordinatesof the aircraft position in the currently selected coordinate system.If the present position is unknown then dashes are displayed.Stop Watch Data FieldThe Stop Watch data field displays the current value ofthe Stop Watch in MM:SS format.The time counts up from 00:00 when enabled (started) and the textcolor changes to yellow.The time stops counting when disabled and the text color changes towhite.The time is displayed as --:-- in white text when the window is firstdisplayed.The largest value that can show is 99:59 at which time it rolls over to00:00.Double tap on the STP WTCH data field to start, stop or clear thetimer.Time Data FieldThe time data field displays the current system time inthe selected time zone.The selected time zone abbreviation is displayed in the data windowtitle, after the word TIME.If the time is unavailable then dashes are displayed.The table below lists the time zones that are selectable:VFR Moving Map Function 7450-0840-01Page 2-22© <strong>Honeywell</strong> International Inc. Do not copy without express permission of <strong>Honeywell</strong>Rev 4 Jan 2011
<strong>Honeywell</strong> Bendix/King AV8OR User’s GuideTable 2-4 Time ZonesTime Zone DescriptionOffsetAbbreviationfrom UTCLCL Local time – user Userconfigurable offset from definedUTCUTC Universal time 0:00GST Greenland Standard Time -3:00GDTGreenland Daylight Saving -2:00TimeATS Atlantic Standard Time -4:00ATD Atlantic Daylight Saving -3:00TimeEST Eastern Standard Time -5:00EDT Eastern Daylight Saving -4:00TimeCST Central Standard Time -6:00CDT Central Daylight Saving -5:00TimeMST Mountain Standard Time -7:00MDTMountain Daylight Saving -6:00TimePST Pacific Standard Time -8:00PDT Pacific Daylight Saving -7:00TimeAKS Alaska Standard Time -9:00AKD Alaska Daylight Saving -8:00TimeHAS Hawaii Standard Time -10:00HAD Hawaii Daylight Saving -9:00TimeSST Samoa Standard Time -11:00SDT Samoa Daylight Saving -10:00Time -Track Angle Error Data FieldThe track angle error data field displays the differencebetween the desired track and the current aircraft track over groundin integer degrees. An arrow indicates the direction to steer toreduce the track angle error.7450-0840-01 VFR Moving Map FunctionRev 4 Jan 2011 Page 2-23© <strong>Honeywell</strong> International Inc. Do not copy without express permission of <strong>Honeywell</strong>
<strong>Honeywell</strong> Bendix/King AV8OR User’s GuideTrack Angle Data FieldThe track angle data field displays the track angle ofthe aircraft over the ground in integer degrees relative to magneticnorth.Mini Traffic-Targets Data WindowThe mini traffic-targets data field displays a reducedrepresentation of the main traffic display within a double height datafield. All of the traffic targets are displayed relative to the nose of theaircraft. The traffic-targets only show when the Map page is in“Track Up” mode. This prevents confusion between the main Mappage display and the mini traffic display.The mini traffic-targets data window displays targets out to 6 nm (7sm or 10 km).If the main image display is set to North-Up, the message “NOTSHOWN IN NORTH UP” is displayed within the data window.If the currently configured traffic unit has failed the message “FAIL” isdisplayed in yellow text in the center of the mini traffic-targets datawindow.If the traffic unit has been removed from the system the message“NOT INSTALLED” is displayed in white text in the center of the minitraffic-targets data window and no traffic-targets are displayed.Track To Steer Data FieldThe track to steer data field displays the calculatedoptimum track over ground angle to be flown to achieve the desiredtrack to the destination waypoint as an integer value relative tomagnetic north.Wind Vector Data FieldThe wind vector data field displays the wind speed anddirection the wind is from in the presently selected speed units.VFR Moving Map Function 7450-0840-01Page 2-24© <strong>Honeywell</strong> International Inc. Do not copy without express permission of <strong>Honeywell</strong>Rev 4 Jan 2011
<strong>Honeywell</strong> Bendix/King AV8OR User’s GuideThe arrow represents the direction of the wind relative to true north(direction the window is from. (As the aircraft direction changes, thewind direction arrow follows the direction of the aircraft)If there is a valid Track then the wind direction is be displayed asMagnetic North otherwise displayed as True North.If no valid wind vector data is available then “NOT AVAILABLE” isdisplayed in the wind vector window.Waypoint Ident Data FieldThe waypoint ident data field displays the ident of thecurrent destination waypoint.If the waypoint ident is unavailable then dashes are displayed.When a waypoint identifier is displayed in the data field, the waypointident data window is an “active” data field. Tap the waypoint identdata field twice to display the MORE INFO window for this waypoint.The waypoint ident is truncated to fit into the size of the data window.Cross Track Error Data FieldThe cross track error data field displays the magnitudeof, and direction to steer, to reduce the perpendicular distancebetween the aircraft position and the desired track. An arrow isdisplayed to the right of the cross track error value indicating thedirection to steer to reduce the cross track error.VFR Moving Map OperationMAP ZOOMINGZOOM IN or ZOOM OUT changes the current map range to the nextvalue. Holding either soft key smoothly increments or decrements(changes the range by 10 percent) through the ranges permitting theuser to stop at almost any range value desired. Pushing the oppositeZOOM soft key steps the range in the opposite direction. The maprange value will be displayed on the RNG label.The ZOOM IN and ZOOM OUT soft keys disappear when themaximum or minimum limit is reached.When the pilot operates the unit outside of the data base regioncontained on the SD card and zooms into a range that requires thehigh resolution terrain data, the pilot will see a purple backgroundscreen color and a message stating “Outside Database Region”.7450-0840-01 VFR Moving Map FunctionRev 4 Jan 2011 Page 2-25© <strong>Honeywell</strong> International Inc. Do not copy without express permission of <strong>Honeywell</strong>
<strong>Honeywell</strong> Bendix/King AV8OR User’s GuideThis warning and alert is issued at all zoom levels where the highresolution terrain data is not available.MAP VIEWThe MAP VIEW soft key allows the user to select the information tobe shown on the map. Tapping the MAP VIEW soft key on the MAINMAP DISPLAY window brings up the CHANGE VIEW soft key.Figure 2-25: Map – Map View SetupTap the SAVE & EXIT soft key to return to the Map page.Smart ProfileThe Smart Profile mode displays the vertical profile of the flight pathalong the route of flight above the title bar. A cross section of theterrain for the flight is shown on the vertical profile. A dashed line isshown to represent the altitude of the flight path.If Smart Profile is OFF, tapping the MAP VIEW soft key ,then theSMART PROFILE soft key toggles Smart Profile to ON. The mapimage shrinks 25% to show the SMART PROFILE on the bottom onthe screen.VFR Moving Map Function 7450-0840-01Page 2-26© <strong>Honeywell</strong> International Inc. Do not copy without express permission of <strong>Honeywell</strong>Rev 4 Jan 2011
<strong>Honeywell</strong> Bendix/King AV8OR User’s GuideFigure 2-26: Map – Smart Profile OnIf Smart Profile is ON tapping the SMART PROFILE soft key togglesthe Smart Profile mode to OFF.Vertical profiles of airspace vertical boundaries and man-madeobstructions are also displayed in the Smart Profile window.Figure 2-27: Smart Profile – Airspace Vertical BoundariesAuto ZoomThe Auto Zoom function automatically changes the zoom level onthe map page. The Auto Zoom function can be turned on or off orsuspended. See the Map Setup section on page 2-148 forinstructions on how to change the Auto Zoom mode.7450-0840-01 VFR Moving Map FunctionRev 4 Jan 2011 Page 2-27© <strong>Honeywell</strong> International Inc. Do not copy without express permission of <strong>Honeywell</strong>
<strong>Honeywell</strong> Bendix/King AV8OR User’s GuideFigure 2-28: Auto Zoom ModeWhen flying the last leg of a Flight Plan or when flying a Direct To,the system automatically zooms to a screen range that keeps thedestination WPT within the display area. The system continues tozoom in to the lowest zoom level.When the lowest zoom has been reached and the aircraft begins tofly away from the destination WPT, then the system zooms outautomatically to keep the WPT within the display area.When auto zoom is in operation AUTO (Automatic) is shown in theRNG (Range) display field. Pushing either the ZOOM IN or ZOOMOUT soft key suspends the Auto Zoom mode. An “Auto ZoomSuspended” message shows on the top of the MAP page for a fewseconds.To reactivate Auto Zoom mode, tap the MAP VIEW soft key todisplay the MAP VIEW menu as shown in the figure below.Figure 2-29: Auto Zoom SuspendedVFR Moving Map Function 7450-0840-01Page 2-28© <strong>Honeywell</strong> International Inc. Do not copy without express permission of <strong>Honeywell</strong>Rev 4 Jan 2011
<strong>Honeywell</strong> Bendix/King AV8OR User’s GuideAn AUTO ZOOM soft key is displayed in the menu. The AUTOZOOM soft key only shows when the Auto Zoom mode has beensuspended.Tap the AUTO ZOOM soft key to resume the Auto Zoom mode. An“Auto Zoom Active” message shows on the top of the MAP page fora few seconds.Change ViewTapping the CHANGE VIEW soft key toggles the display through thedifferent map types. The Map page defaults to Topo On.• Topo On• Relative TerrainFigure 2-30: Map – Topo OnCAUTIONNEVER USE THE TOPOGRAPHIC ELEVATIONDISPLAYED ON THIS EQUIPMENT AS YOUR SOLEREFERENCE FOR TERRAIN AVOIDANCE.7450-0840-01 VFR Moving Map FunctionRev 4 Jan 2011 Page 2-29© <strong>Honeywell</strong> International Inc. Do not copy without express permission of <strong>Honeywell</strong>
<strong>Honeywell</strong> Bendix/King AV8OR User’s GuideFigure 2-31: Map – Relative Terraino On the Relative Terrain map, the terrain is coloredaccording to its height relative to the aircraft, as shownin the following table.oA 0.5 nm radius circle around each is colored accordingto the height of the obstacle relative to the aircraft, asshown in the following table.Relative TerrainAltitude (feet)Table 2-5 Relative TerrainRelativeObstacleAltitude (feet)ColorDitherPatternPercentFilled>= +250 >= -250 Red 50%-250 to +249 -750 to –251 Yellow 50%-750 to –251 -1250 to –751 Yellow 25%-1250 to –751 -17500 to –1251 DarkGreen/DarkYellow50%-2000 to –1251 < -2000 to -1751 Dark 100%Green< -2000 < -2000 Black 100%ooAt ranges of 200 nm and less, areas not covered bythe terrain database are displayed using a 50 % reddithered pattern.The Relative Terrain Map is rotated and scaledconsistent with the current map location, orientationand range.VFR Moving Map Function 7450-0840-01Page 2-30© <strong>Honeywell</strong> International Inc. Do not copy without express permission of <strong>Honeywell</strong>Rev 4 Jan 2011
ooo<strong>Honeywell</strong> Bendix/King AV8OR User’s GuideWhen terrain data is scaled for display, the highestelevation is used for each location to determine itscolor.The 0.5 nm radius circles around obstacles aredisplayed only if their radii after scaling are largeenough to be shown.If altitude information is not available then a warningmessage is displayed on the map image with the text“No Altitude Available. Relative Terrain Not Displayed.”• Topo OffFigure 2-32: Map – Topo OffTapping the MAP SETUP soft key allows the user to configure theMap Setup options. For more detail information about Map Setup,refer to the Map Setup section on page 2-148 in the System Setupsection.AIRPORTSAirports show on the MAP page as blue or green circles with a linedrawn through them. The line indicates the direction of the primaryrunway at the airport. Blue circles represent VFR airports and greencircles represent IFR airports.Tap on an airport icon to bring up the MORE INFO soft key.7450-0840-01 VFR Moving Map FunctionRev 4 Jan 2011 Page 2-31© <strong>Honeywell</strong> International Inc. Do not copy without express permission of <strong>Honeywell</strong>
<strong>Honeywell</strong> Bendix/King AV8OR User’s GuideFigure 2-33: Airport – MORE INFORnwys TabTap on the MORE INFO soft key to display the Airport Information –Runways page as shown below.Figure 2-34: Airport – Rnwys Pageand icons allow the user to change the airport area maprange.Tap on a runway listed under the Runway Details menu to highlightthe runway. Tap on the SELECT RUNWAY soft key to causeextended centerlines to be drawn from both ends of the runway onthe MAP page.The centerlines extend to 10 nm from each side of the airport symboland show whenever the range is less than or equal to 100 nm.VFR Moving Map Function 7450-0840-01Page 2-32© <strong>Honeywell</strong> International Inc. Do not copy without express permission of <strong>Honeywell</strong>Rev 4 Jan 2011
<strong>Honeywell</strong> Bendix/King AV8OR User’s GuideThe extended runway centerlines are displayed in a light blue andwhite line as shown below.Figure 2-35: Airports – Extended Centerline on Map page.On the Airport Information – Runways page, the selected runwaybackground changes to blue with a white outline as shown below.Figure 2-36: Airports – Deselect RunwayTap on the DESELECT RUNWAY soft key to remove the extendedcenterlines from the MAP page.Note: When a new airport is selected, the extended centerlines onthe current airport are turned off.Additional pages of airport information are shown as tabs across thetop of the page.The tabs are as follows:• Rnwys – Shows Airport and Runway information.7450-0840-01 VFR Moving Map FunctionRev 4 Jan 2011 Page 2-33© <strong>Honeywell</strong> International Inc. Do not copy without express permission of <strong>Honeywell</strong>
<strong>Honeywell</strong> Bendix/King AV8OR User’s Guide• Comms – Lists the communication frequencies for the airport.• Fuel – Shows fuel availability and prices for the airport.• Svcs – Shows available services at the airport.• Local – Shows local information about the airport.Note: A subscription is required to the “Flight Guide Fuel Pricingand Airport Services” database to display Fuel Pricing data. Thesubscription is available at http://www.bendixking.com/av8or.Daily downloads are available.Comms TabTap on the Comms tab to display the Airport Information – Commspage as shown below.Figure 2-37: Airport – Comms PageThe Comms page shows the following information:• Airport Identifier• Type of Approaches available at airport• Time Zone• Fuel type available• Type of Frequency, frequency and whether it is part time or not.Tap the PREV PAGE soft key to return to the previous page or tapone of the other tabs to view the corresponding page.Fuel TabTap on the Fuel tab to display the Airport Information – Fuel Pricingpage as shown below.VFR Moving Map Function 7450-0840-01Page 2-34© <strong>Honeywell</strong> International Inc. Do not copy without express permission of <strong>Honeywell</strong>Rev 4 Jan 2011
<strong>Honeywell</strong> Bendix/King AV8OR User’s GuideFigure 2-38: Airport – Fuel PageThe Fuel Pricing page displays fuel pricing information for allfacilities at the airport that are listed in the Airport Services database.The following fuel information is displayed, if available:• Facility name• Name of the fuel supplier• The type(s) of fuel• The Self Service price• The Full Service price• The date that the data was last updatedTap the PREV PAGE soft key to return to the previous page or tapone of the other tabs to view the corresponding page.Tap the SEARCH PRICE soft key to display the Nearby Fuel PriceComparison window as shown below.Figure 2-39: Nearby Fuel Price Comparison7450-0840-01 VFR Moving Map FunctionRev 4 Jan 2011 Page 2-35© <strong>Honeywell</strong> International Inc. Do not copy without express permission of <strong>Honeywell</strong>
<strong>Honeywell</strong> Bendix/King AV8OR User’s GuideThe Nearby Fuel Price Comparison page shows a list of availablefuel types and prices at nearby airports. The list initially shows theclosest airports first. Tap on titles at the top of each column to sortthe airports by the column title.Tap on an airport identifier to highlight it and then tap the AIRPORTINFO soft key to display the airport information page for the selectedairport.Tap the PREV PAGE soft key to return to the previous page or tapone of the other tabs to view the corresponding page.Svcs TabTap on the Svcs tab to display the Airport Information – AirportServices page as shown in the figure below.Figure 2-40: Airport – Svcs PageThis page displays the services available at each provider on theairport that are listed in the Airport Services database.Tap the PREV PAGE soft key to return to the previous page or tapon of the other tabs to view the corresponding page.Local TabTap on the Local tab to display the Airport Information – LocalServices page as shown in the figure below.VFR Moving Map Function 7450-0840-01Page 2-36© <strong>Honeywell</strong> International Inc. Do not copy without express permission of <strong>Honeywell</strong>Rev 4 Jan 2011
<strong>Honeywell</strong> Bendix/King AV8OR User’s GuideFigure 2-41: Airport – Local PageThis page displays the services available near the selected airportbut not on the actual airport.The local services that display are as follows, if available:• Accommodations – Hotels/Motels• Restaurants• Taxis• Car RentalsThe distance from the airport is listed for each service.Tap the PREV PAGE soft key to return to the previous page or tapon of the other tabs to view the corresponding page.NEAREST – SELECT NEAREST DESTINATIONThe NEAREST soft key gives access to the Nearest DatabaseSelection window, as shown in the figure below. The NEAREST softkey lets the user get information about a near selection or navigateusing a soft key to any WPT within the nearest database.7450-0840-01 VFR Moving Map FunctionRev 4 Jan 2011 Page 2-37© <strong>Honeywell</strong> International Inc. Do not copy without express permission of <strong>Honeywell</strong>
<strong>Honeywell</strong> Bendix/King AV8OR User’s GuideFigure 2-42: Map – Nearest Database SelectionTapping the NEAREST soft key on the Map page shows theNearest Database Selection menu. In the menu you can select;Nearest Airports, Nearest VORs, Nearest User WPTs or NearestTowns and Cities as a destination.The 40 nearest Airports/Helipads, VORs or User Waypoints or acombination of them that are nearest to the aircraft’s current positionare accessible through the Nearest Database Selection menu.To select an item as your destination from the Nearest DatabaseSelection Menu:Tap the NEAREST soft key in MAP mode.Double tap the nearest selection or tap it once and tap the SELECTsoft key to select the nearest type. Select the nearest airport, VOR,User Wpt or Town or City from the list to highlight the selection andthen tap the soft key to set a direct to course from the aircraftspresent position to the selected destination.To cancel the active Direct-To navigation, tap the soft key, tapthe Clear soft key on the virtual keyboard and then tap the Enter softkey.VFR Moving Map Function 7450-0840-01Page 2-38© <strong>Honeywell</strong> International Inc. Do not copy without express permission of <strong>Honeywell</strong>Rev 4 Jan 2011
<strong>Honeywell</strong> Bendix/King AV8OR User’s GuideFigure 2-43: Map – Direct-To OFFNearest AirportsDouble tap on the Nearest Airports selection or tap once on theNearest Airports selection and tap the SELECT soft key to showthe Nearest Airports.Figure 2-44: Nearest AirportsNearest Airports Soft KeysTap the PREV PAGE soft key to return to the Nearest DatabaseSelection window.Tap the MORE INFO soft key to display additional information aboutthe highlighted airport from the list. Tap the soft key afterselection of an airport to set a new course from the aircraft’s present7450-0840-01 VFR Moving Map FunctionRev 4 Jan 2011 Page 2-39© <strong>Honeywell</strong> International Inc. Do not copy without express permission of <strong>Honeywell</strong>
<strong>Honeywell</strong> Bendix/King AV8OR User’s Guideposition directly to the selected airport. The new Direct-To course isdisplayed on the map.Tap the AIRPORT FILTER soft key to configure the airport filter bysetting the minimum runway length and surface requirements. Thefilter will not allow airports below the minimum requirements to bedisplayed in the list.Figure 2-45: Map – Airport FilterDouble tap on the Minimum length selection to display a numerickeypad to enter the minimum length.Theminimum runway length will be rounded to the nearest hundred feet.Double tap on the Required surface selection to select the type ofsurface for the airports you want to filter.Any or Hard Only can be selected for the required runway surface.Tap the DONE soft key to accept the changes.Only airports that match the filter conditions will now show in theNearest Airports window.VFR Moving Map Function 7450-0840-01Page 2-40© <strong>Honeywell</strong> International Inc. Do not copy without express permission of <strong>Honeywell</strong>Rev 4 Jan 2011
<strong>Honeywell</strong> Bendix/King AV8OR User’s GuideWhen the user has selected (highlighted) the nearest point in thedesired destination list, the user taps the soft key. The systemsets a new course from the aircraft’s present position directly to thedesired nearest point’s position and shows the new Direct-To courseon the map.Nearest VORsDouble tap on the Nearest VORs selection or tap once on theNearest VORs election and tap the SELECT soft key to show theNearest VORs/DMEs.Figure 2-46: Nearest VORsNearest VORs Soft KeysTap the PREV PAGE soft key to return to the Nearest DatabaseSelection window.Tap the MORE INFO soft key to display additional information aboutthe highlighted VOR/DME from the list.Tap the soft key after selection of a VOR to set a new coursefrom the aircraft’s present position directly to the selected VOR. Thenew Direct-To course is displayed on the map.Nearest User WptsDouble tap on the Nearest User Wpts selection or tap once on theNearest User Wpts selection and tap the SELECT soft key to showthe Nearest Towns and Cities.7450-0840-01 VFR Moving Map FunctionRev 4 Jan 2011 Page 2-41© <strong>Honeywell</strong> International Inc. Do not copy without express permission of <strong>Honeywell</strong>
<strong>Honeywell</strong> Bendix/King AV8OR User’s GuideFigure 2-47: Nearest User WaypointsNearest User Waypoints Soft KeysTap the PREV PAGE soft key to return to the Nearest DatabaseSelection window.Tap the MORE INFO soft key to display additional information aboutthe highlighted user waypoint from the list.Tap the soft key after selection of a user waypoint to set a newcourse from the aircraft’s present position directly to the selecteduser waypoint. The new Direct-To course is displayed on the map.Note: User waypoints that have a VFR Airport, VOR, Town or Cityicon associated with them will also show in the Nearest Airports,Nearest VOR or Nearest Towns and Cities list as well as in theNearest User Waypoints list.Nearest Towns and CitiesDouble tap on the Nearest Towns and Cities selection or tap onceon the Nearest Towns and Cities selection and tap the SELECTsoft key to show the Nearest Towns and Cities.VFR Moving Map Function 7450-0840-01Page 2-42© <strong>Honeywell</strong> International Inc. Do not copy without express permission of <strong>Honeywell</strong>Rev 4 Jan 2011
<strong>Honeywell</strong> Bendix/King AV8OR User’s GuideFigure 2-48: Nearest Towns and CitiesNearest Towns and Cities Soft KeysTap the PREV PAGE soft key to return to the Nearest DatabaseSelection window.Tap the MORE INFO soft key to display additional information aboutthe highlighted town or city from the list.Tap the soft key after selection of a user waypoint to set a newcourse from the aircraft’s present position directly to the selectedtown or city. The new Direct-To course is displayed on the map.WAYPOINT ALERTThe Waypoint Alert flashes the next desired track (NEXT DTK) whenthe estimated time to the next waypoint is about 20 seconds asshown in the figure below. Turning to establish the NEXT DTK willaid in intercepting the next leg of the flight plan.7450-0840-01 VFR Moving Map FunctionRev 4 Jan 2011 Page 2-43© <strong>Honeywell</strong> International Inc. Do not copy without express permission of <strong>Honeywell</strong>
<strong>Honeywell</strong> Bendix/King AV8OR User’s GuideTURN ANTICIPATIONFigure 2-49: Waypoint AlertWhen Turn Anticipation is enabled in Navigation Setup, itprovides turn guidance to a new course to intercept the next leg ofthe flight plan.Waypoint Alerting begins when the estimated time to the start of theturn is about 20 seconds. The Waypoint Alert is annunciated byflashing the next desired track (NEXT DTK) window as shown in thefigure above.When the computed turn point is reached TURN TO is displayed asshown in the figure below.Figure 2-50: Turn AnticipationVFR Moving Map Function 7450-0840-01Page 2-44© <strong>Honeywell</strong> International Inc. Do not copy without express permission of <strong>Honeywell</strong>Rev 4 Jan 2011
<strong>Honeywell</strong> Bendix/King AV8OR User’s GuideThe required bank angle to follow the arc will normally be between 3°and 25° depending on the aircraft speed and the amount of coursechange.DIRECT-TO NAVIGATIONDirect-To Navigation lets the user set a course line from his currentposition to any other position. Direct-To Navigation can be done withthe methods that follow:• Create a Direct-To course from the Map.• Create a Direct-To course from the keyboard entry.• Re-center the aircraft when Direct-To is already enabled• Bypass a WPT with a flight plan active• Enter a new WPT with a flight plan active.Create a Direct-To course from the MapPan and zoom in/out on the map to find the NAVAID point you wantto set a course to. Tap on the NAVAID point to show its name, moredetail information about the NAVAID point is shown by tapping theMORE INFO soft key, as shown in the figure below.Figure 2-51: Map – Select a NAVAIDTapping the PTR MENU soft key, on the right side of the screen,shows the soft key.7450-0840-01 VFR Moving Map FunctionRev 4 Jan 2011 Page 2-45© <strong>Honeywell</strong> International Inc. Do not copy without express permission of <strong>Honeywell</strong>
<strong>Honeywell</strong> Bendix/King AV8OR User’s GuideFigure 2-52: Map – Direct To a NAVAIDTapping the soft key causes the system to create a new coursefrom the aircraft’s present position directly to the selected NAVAIDpoint. The new course line is colored magenta.Figure 2-53: Map – Navigate to a NAVAID pointCreate a Direct-To course from the keyboard entry (No FlightPlan)Tap the soft key from the Map page to display the virtualkeyboard on the screen as shown in the figure below.VFR Moving Map Function 7450-0840-01Page 2-46© <strong>Honeywell</strong> International Inc. Do not copy without express permission of <strong>Honeywell</strong>Rev 4 Jan 2011
<strong>Honeywell</strong> Bendix/King AV8OR User’s GuideFigure 2-54: Map – Virtual KeyboardTap the Esc soft key to return to the Map page.Tap the Clear soft key to clear the entry you typed in.The user taps on the keyboard to enter the Ident, name or thelocation of the existing NAVAID point. The closest match to the entryshows on the page as you type in the data. If the closest match iscorrect, tap the Enter soft key to accept without having to finishtyping the complete location.After the Enter key is tapped, a Waypoint Entry screen showsdetailed information about the entered location.Figure 2-55: Map – Entered Waypoint InfoTap the CANCEL soft key to cancel the Direct-To and return to thevirtual keyboard page to enter a different location or to Esc back tothe Map page.7450-0840-01 VFR Moving Map FunctionRev 4 Jan 2011 Page 2-47© <strong>Honeywell</strong> International Inc. Do not copy without express permission of <strong>Honeywell</strong>
<strong>Honeywell</strong> Bendix/King AV8OR User’s GuideTap the MORE INFO soft key to see additional information about thelocation. If additional pages are available, the NEXT INFO soft keyshows. When finished browsing the additional data, tap the CLEARsoft key to return to the WayPoint Entry Screen.Tap the OBS soft key to start an OBS course and show themagnetic heading from your present position to the WPT.Tap the DIRECT TO soft key to accept the entered location. Thesystem sets a new course from the aircraft’s present position directlyto the entered WPT’s position and shows the new Direct-To courseon the Map.Re-center aircraft when Direct-To is already enabledWhen flying on a course using the Direct-To function, if the aircraftgets away from the course line on the map, the pilot can easilycreate a new course line to the destination from the aircraft’s presentposition by using the steps that follow:Tap the soft key from the Map page to display the virtualkeyboard. The active Direct-To destination will already be filled in onthe keyboard.Figure 2-56: Re-center aircraft – Step 1Tap the Enter soft key to use the entered WPT and re-center thecourse line from the aircraft’s present position to the destination.VFR Moving Map Function 7450-0840-01Page 2-48© <strong>Honeywell</strong> International Inc. Do not copy without express permission of <strong>Honeywell</strong>Rev 4 Jan 2011
<strong>Honeywell</strong> Bendix/King AV8OR User’s GuideBypass a WPT with a flight plan activeWhen a flight plan is active, the pilot may want to bypass one of theWPTs in the flight plan and go direct to one of the other WPTs. Usethe steps that follow to bypass a WPT.The active course shows as a magenta line on the Map.Figure 2-57: Step 1 Bypass a WPTTap on thesoft key to display the Active Flight Plan page.Figure 2-58: Bypass a WPT – Step 2Highlight the WPT in the Active Flight Plan you want to go to next.7450-0840-01 VFR Moving Map FunctionRev 4 Jan 2011 Page 2-49© <strong>Honeywell</strong> International Inc. Do not copy without express permission of <strong>Honeywell</strong>
<strong>Honeywell</strong> Bendix/King AV8OR User’s GuideFigure 2-59: Bypass a WPT – Step 3Tap on the soft key to create a new course from the aircraft’spresent position to the selected WPT.Figure 2-60: Bypass a Waypoint Step 4Enter a Direct-To WPT with a flight plan active.The active course shows as a magenta line on the Map.VFR Moving Map Function 7450-0840-01Page 2-50© <strong>Honeywell</strong> International Inc. Do not copy without express permission of <strong>Honeywell</strong>Rev 4 Jan 2011
<strong>Honeywell</strong> Bendix/King AV8OR User’s GuideFigure 2-61: Enter a New WPT with Flight Plan ActiveTap on thesoft key to display the Active Flight Plan page.Figure 2-62: Enter New WPT – Select KEYBD Soft keyTap on the KEYBD ENTRY soft key to display the virtual keyboardentry screen with the next WPT entry already entered.Enter the new WPT you want to go direct to.7450-0840-01 VFR Moving Map FunctionRev 4 Jan 2011 Page 2-51© <strong>Honeywell</strong> International Inc. Do not copy without express permission of <strong>Honeywell</strong>
<strong>Honeywell</strong> Bendix/King AV8OR User’s GuideFigure 2-63: Enter New WPT IdentTap on the Enter soft key when done and then tap on the OK softkey to activate the Direct-To WPT. This will suspend the active flightplan and create a new course from the aircraft present position to theselected location. The new course shows in a magenta color.Figure 2-64: New Direct-To Active.PTR MENUCreate a User WaypointWhen you tap a NAVAID point or any blank place on the map, thePTR MENU soft key is displayed. Tap the PTR MENU soft key toshow the pointer menu.VFR Moving Map Function 7450-0840-01Page 2-52© <strong>Honeywell</strong> International Inc. Do not copy without express permission of <strong>Honeywell</strong>Rev 4 Jan 2011
<strong>Honeywell</strong> Bendix/King AV8OR User’s GuideFigure 2-65: Map –PTR MENU – Save WaypointChoose the Save Waypoint item, and tap the SELECT soft key, auser defined WPT is created at the point position on the map withthe name USRXXX. Tap on the waypoint to show the User Waypointpopup window as shown in the figure below.Figure 2-66: Map – User Defined WaypointThe User Waypoint popup window lists the waypoint ID and the dateand time the waypoint was created.Tap on the MORE INFO soft key to display additional informationabout the waypoint.7450-0840-01 VFR Moving Map FunctionRev 4 Jan 2011 Page 2-53© <strong>Honeywell</strong> International Inc. Do not copy without express permission of <strong>Honeywell</strong>
<strong>Honeywell</strong> Bendix/King AV8OR User’s GuideFigure 2-67: User Waypoint – MORE INFOTap the DELETE WPT soft key to delete the waypoint.Tap the CLEAR soft key to return to the previous menu.Center the Map around Pointer PositionOn the Map page, tap a point on the map to display the PTR MENUsoft key.Figure 2-68: PTR Menu – Center to MapTap on the PTR MENU soft key to show the pointer menu.VFR Moving Map Function 7450-0840-01Page 2-54© <strong>Honeywell</strong> International Inc. Do not copy without express permission of <strong>Honeywell</strong>Rev 4 Jan 2011
<strong>Honeywell</strong> Bendix/King AV8OR User’s GuideFigure 2-69: Pointer MenuChoose the Center Map option and tap the SELECT soft key tocenter the position of the Map page on the pointer position.Figure 2-70: Map Centered on PointerPTR MENU – DIRECT-TO NAVIGATIONThe DIRECT TO shows the course to navigate the aircraft to thedesired WPT directly when the WPT was selected from the pointermap mode screen. When the user moves the pointer arrow to anydesired map location, the pointer’s position (PTR), bearing (PBRG)and distance (PDIS) are shown on two lines at the bottom left of thescreen7450-0840-01 VFR Moving Map FunctionRev 4 Jan 2011 Page 2-55© <strong>Honeywell</strong> International Inc. Do not copy without express permission of <strong>Honeywell</strong>
<strong>Honeywell</strong> Bendix/King AV8OR User’s GuideTo select a user defined point on the map:If the user taps on a point on the map that is not a NAVAID pointerstored in database, taps on the PTR MENU soft key and then tapsthe soft key, a temporary WPT named USRXXX is created atthe pointer position on the map and a new course from the aircraftspresent position directly to the selected NAVAID point is created.The new course line is colored magenta.Figure 2-71: Map – Navigate to a user defined WPTPTR MENU – OBS NAVIGATIONTo select a NAVAID point on the map:If the user touches a NAVAID point on the map and taps the PTRMENU soft key, the OBS soft key will be shown. After the OBS softkey is tapped, the OBS window shows the magnetic course to theNAVAID.Figure 2-72: OBS Course to NAVAIDVFR Moving Map Function 7450-0840-01Page 2-56© <strong>Honeywell</strong> International Inc. Do not copy without express permission of <strong>Honeywell</strong>Rev 4 Jan 2011
<strong>Honeywell</strong> Bendix/King AV8OR User’s GuideTo select a user defined point on the map:If the point the user touches is not a NAVAID point, then after theOBS soft key is tapped, a temporary WPT is created at that position.The OBS course ends at that user defined temporary WPT.To edit the OBS Course Angle, double tap on the OBS CourseWindow to open a key pad.After the OBS point is selected the OBS course selection window isshown and the DONE, and CANCEL OBS soft keys aredisplayed, as shown in the figure below.Figure 2-73: Map –OBS StartTap the DONE soft key and the adjusted OBS course is activatedand a course is generated to the selected point, as shown in thefigure below.Figure 2-74: Map – OBS NavigationTap the OBS ADJUST soft key to show the following window.7450-0840-01 VFR Moving Map FunctionRev 4 Jan 2011 Page 2-57© <strong>Honeywell</strong> International Inc. Do not copy without express permission of <strong>Honeywell</strong>
<strong>Honeywell</strong> Bendix/King AV8OR User’s GuideFigure 2-75: Map – OBS ConfigurationHere double tapping on the OBS Course window allows the user toadjust the OBS course.The user can fly an OBS course to any selected point even whileflying an active flight plan. This provides the ability to show anextended runway centerline for any airport or user selected point ofinterest.Cancel the OBS using the or CANCEL OBS soft keys.CENTER MAPIn pointer map mode (User taps on the map and a black pointer isshown and the PTR MENU soft key is tapped), the CENTER MAPsoft key is shown as an option on the Pointer Menu. Refer toFigure 2-69.The CENTER MAP option is tapped to center the map on the PTRposition on the map.Tap on the CLEAR PTR to return clear the PTR position and centerthe aircraft on the map. The PTR position will remain centered on theMap for a period of time and then the Map page changes to showthe aircraft position centered on the Map.Center To WPT/Center AircraftAfter any kind of navigation was activated, in Non-Pointer mode, theCENTER TO WPT soft key is shown for the user to view the WPTposition on the map.VFR Moving Map Function 7450-0840-01Page 2-58© <strong>Honeywell</strong> International Inc. Do not copy without express permission of <strong>Honeywell</strong>Rev 4 Jan 2011
<strong>Honeywell</strong> Bendix/King AV8OR User’s GuideThe CENTER TO WPT soft key changes to a CENTER AIRCRAFTsoft key after the CENTER TO WPT soft key is tapped.The CENTER AIRCRAFT soft key is shown for the user to show theaircraft’s present position on the map.Figure 2-76: Map – Center to WPTSelectable GPS Data SourceFigure 2-77: Map – Center AircraftThe AV8OR system can receive data from either the internal or anexternal GPS Source. When an external source is configured, theunit uses data from it. Switching to the internal GPS source isautomatic when data from the external source is no longer valid oravailable.7450-0840-01 VFR Moving Map FunctionRev 4 Jan 2011 Page 2-59© <strong>Honeywell</strong> International Inc. Do not copy without express permission of <strong>Honeywell</strong>
<strong>Honeywell</strong> Bendix/King AV8OR User’s GuideAUTONAVAutoNav allows the AV8OR to automatically switch between theexternal and internal GPS sources when there is more than onesource. AutoNav is enabled in the Navigation Setup Page. Seethe Navigation Setup section on page 2-153 for setup instructions.The AutoNav function is not enabled until both the internal and theexternal position source have acquired a valid satellite fix or the GoFly program has been running for 4 minutes.If the external position source is invalid for more than 5 seconds, theGo Fly program will switch to the internal GPS antenna.The following sequence of events occurs:• If the flight plan source is the external GPS, then the flight plan iscaptured and cross-referenced to the internal database.• The following warning message is displayed that requires pilotconfirmation.• “The external GPS source is no longer available. The GPSsource has been changed to the internal GPS backup. GPSlimited to VFR use only. PRESS OK TO ACKNOWLEDGE”.• Touching the OK soft key closes the message window.• If the external GPS source becomes valid again for a period ofmore than 5 seconds, the AutoNav function automaticallyswitches back to the external GPS source.• The following warning message window is displayed that requirespilot confirmation.• “The external GPS source is now available. The GPS source hasbeen changed to the external GPS source. PRESS OK TOACKNOWLEDGE”.• Tapping the OK soft key closes the message window.VFR Moving Map Function 7450-0840-01Page 2-60© <strong>Honeywell</strong> International Inc. Do not copy without express permission of <strong>Honeywell</strong>Rev 4 Jan 2011
STOP WATCH<strong>Honeywell</strong> Bendix/King AV8OR User’s GuideFigure 2-78: Stop Watch Data FieldThe stopwatch can be started or stopped only when thedata window shows on the Map screen.When the stopwatch is stopped, double tap thestart the timer.icon toWhen the stopwatch is running, double tap theicon to stopthe timer. Double tap the icon to reset it.When the stopwatch is active, it continues to count even if thestopwatch data window is not being displayed.7450-0840-01 VFR Moving Map FunctionRev 4 Jan 2011 Page 2-61© <strong>Honeywell</strong> International Inc. Do not copy without express permission of <strong>Honeywell</strong>
<strong>Honeywell</strong> Bendix/King AV8OR User’s GuideFLIGHT PLAN FUNCTIONVFR flight plans can be created in the AV8OR when configured touse the internal GPS.Flight plans can also be created on a PC with the JeppesenFliteStar© PC application. Refer to the Chapter 7 APPENDIX sectionon page 6-1, for more information on how to import a flight plan.The FLIGHT PLAN function is selected through the AviationMain Menu, as shown in Figure 2-7. Tap on theopen the Flight Plans Index page.icon toFigure 2-79: Flight Plan Index PageTwo options are available from the Initial Page, NEW FPLAN andUSER WPTS.User WPTSTapping the USER WPTS soft key shows the current User definedWPTs list. Refer to Figure 2-80.Flight Plan Function 7450-0840-01Page 2-62© <strong>Honeywell</strong> International Inc. Do not copy without express permission of <strong>Honeywell</strong>Rev 4 Jan 2011
<strong>Honeywell</strong> Bendix/King AV8OR User’s GuideFigure 2-80: Flight Plan – User Waypoint ListThe user can tap the NEW WPT soft key to define a new WPT. Amaximum of 1000 user WPTs can be created.The user can also tap the EDIT WPT soft key to edit the selectedWPT’s parameters. When the user creates a new WPT or edits anexisting WPT, the User Waypoint Edit page is displayed as shown inthe figure below.Figure 2-81: Flight Plan – New/Edit User WaypointThe AV8OR system creates a default: Ident name, Icon, Position,Comment 1 and Comment 2 parameters for the new WPT. Thedefault Ident name is in the format USRXXX and the default positionis the current aircraft’s position.In the User Waypoint Edit page the user can edit all theseparameters. Highlight the Ident item, and the CLEAR IDENT soft keybecomes available to clear the current Ident name. Highlight theComment 1 / Comment 2 items and the CLEAR TEXT soft keybecomes available to clear the comment text.7450-0840-01 Flight Plan FunctionRev 4 Jan 2011© <strong>Honeywell</strong> International Inc. Do not copy without express permission of <strong>Honeywell</strong>Page 2-63
<strong>Honeywell</strong> Bendix/King AV8OR User’s GuideTap the RNG&BRG soft key to display the range and bearingconfiguration page.Figure 2-82: Flight Plan – WPT Range and Bearing ConfigIn the Range and Bearing page the DELETE soft key allows the userto delete this WPT. The SAVE&EXIT soft key saves all WPTconfigurations and exits to the User Waypoint List page (Note: If theuser entered the User Waypoint Edit page from the VFR movingmap page, then this screen will return to the VFR moving map page.)Tap the USER WPT soft key to return to the User Waypoint Editpage.USER WAYPOINT ICONSDouble tap on the Icon to display the Select use waypoint iconpopup box.Figure 2-83: Select User Waypoint IconFlight Plan Function 7450-0840-01Page 2-64© <strong>Honeywell</strong> International Inc. Do not copy without express permission of <strong>Honeywell</strong>Rev 4 Jan 2011
<strong>Honeywell</strong> Bendix/King AV8OR User’s GuideUse the scroll box to select the icon to use. Double tap on the icon ortap on the icon and tap the SELECT soft key to use the selectedicon.Note: If a VFR Airport, VOR, City or Town icon is selected, thewaypoint will also show under the Nearest Airport, Nearest VOR, orNearest Towns and Cities selections when searching the NearestDatabase using the NEAREST soft key on the Map page.User Airport EntryIf a VFR Airport Icon is selected for the Icon field, a NEXT soft key isdisplayed on the screen as shown in the figure below.Figure 2-84: User Airport Entry Page 1Tap on the NEXT soft key to show the User Airport Edit page 2 asshown in the figure below.Figure 2-85: User Airport Entry Page 27450-0840-01 Flight Plan FunctionRev 4 Jan 2011© <strong>Honeywell</strong> International Inc. Do not copy without express permission of <strong>Honeywell</strong>Page 2-65
<strong>Honeywell</strong> Bendix/King AV8OR User’s GuideOn page 2, runway information and communication frequencies canbe set up for the airport.The Runway Information section includes data fields for the runwayalignment, length, surface and elevation. The Comm Frequenciessection includes data fields for two different frequencies andfrequency types.Tap SAVE & EXIT to return to the User Waypoints Page.Creating New Flight Plan using the Virtual KeyboardA maximum of 100 flight plans can be stored in the AV8OR. Eachflight plan can contain up to 99 WPTs. To create a new flight plan,perform the following steps.Tap the soft key on the Aviation Main Menu Page to showthe Flight Plan Index page. Initially, when no flight plans have beenstored, a blank screen is displayed, as shown in the figure below.Figure 2-86: Flight Plan – Index Page with no Flight PlanThe NEW FLIGHT PLAN line is highlighted. Tap on the NEWFPLAN soft key to show the New Flight Plan page. In this page, youcan enter a WPT using the keyboard.Flight Plan Function 7450-0840-01Page 2-66© <strong>Honeywell</strong> International Inc. Do not copy without express permission of <strong>Honeywell</strong>Rev 4 Jan 2011
<strong>Honeywell</strong> Bendix/King AV8OR User’s GuideFigure 2-87: New Flight Plan PageTap on the INSERT soft key to display the virtual keyboard to pageto enter WPTs.Figure 2-88: Virtual KeyboardEnter the Ident, name, User Waypoint or location of the first locationon the flight plan.7450-0840-01 Flight Plan FunctionRev 4 Jan 2011© <strong>Honeywell</strong> International Inc. Do not copy without express permission of <strong>Honeywell</strong>Page 2-67
<strong>Honeywell</strong> Bendix/King AV8OR User’s GuideFigure 2-89: Enter Waypoint IdentifierTap on Esc soft key to cancel the entry.Tap on the Clear soft key to clear the entry and start over.Tap the Enter soft key when complete to show the Waypoint Entrywindow.Figure 2-90: Waypoint Entry WindowFlight Plan Function 7450-0840-01Page 2-68© <strong>Honeywell</strong> International Inc. Do not copy without express permission of <strong>Honeywell</strong>Rev 4 Jan 2011
<strong>Honeywell</strong> Bendix/King AV8OR User’s GuideTap the MORE INFO soft key to view additional data about the WPT.The NEXT soft key will show if additional pages are available. Whenfinished, tap the CLEAR soft key to return to the Waypoint Entrypage.If the WPT is not correct, tap on the CANCEL soft key to return tothe virtual keyboard page.If the correct WPT is shown, tap on the OK soft key to save the firstWPT on the flight plan.Tap on the INSERT soft key to add additional WPTs to the flight planand do the same steps as shown in the figure above to accept eachWPT until all the WPTs are entered.Figure 2-91: All WPTs Entered into Flight PlanTap on the SAVE & EXIT soft key to save the flight plan. The flightplan now displays on the Flight Plan Index page.Figure 2-92: Flight Plan Saved7450-0840-01 Flight Plan FunctionRev 4 Jan 2011© <strong>Honeywell</strong> International Inc. Do not copy without express permission of <strong>Honeywell</strong>Page 2-69
<strong>Honeywell</strong> Bendix/King AV8OR User’s GuideInserting Victor Airways into Flight Plan1. Victor Airways can be inserted into any flight plan as it is createdor into a stored Flight Plan when it is edited.2. Highlight the waypoint where the Victor airway is to be insertedabove.3. Tap the Insert soft key.Figure 2-93: Stored Flight Plan4. Using the virtual keyboard enter the name of the victor airway.Figure 2-94: Stored Plan5. Highlight the segment to use and then tap Select Segment.Flight Plan Function 7450-0840-01Page 2-70© <strong>Honeywell</strong> International Inc. Do not copy without express permission of <strong>Honeywell</strong>Rev 4 Jan 2011
<strong>Honeywell</strong> Bendix/King AV8OR User’s GuideFigure 2-95: Select Airway Segment6. Using the scrolling arrows select the entry and exit points for theairway and then tap OK.Figure 2-96: Select Entry and Exit Points7. The flight plan will be modified with all of the waypoints betweenthe entry and exit points as shown in the figure below.7450-0840-01 Flight Plan FunctionRev 4 Jan 2011© <strong>Honeywell</strong> International Inc. Do not copy without express permission of <strong>Honeywell</strong>Page 2-71
<strong>Honeywell</strong> Bendix/King AV8OR User’s GuideFigure 2-97: Updated Flight Plan with Victor AirwaySMART AIRWAYSVictor Airways can also be entered into a flight plan in the same waythat clearances are requested or issued by approach control.In order to add an airway to your flight plan:Press the INSERT soft key while on the flight plan edit page.Enter the Entry Point, Airway Name and Exit Point in a single line. Inthe example below, the flight plan is from Hutchinson Kansas toTucumcari, New Mexico, U.S.A. The correct entry for this would be“ICT V12 TCC”.Figure 2-98: Smart Airways Entry ScreenAfter tapping the Enter soft key, the following screen shows:Flight Plan Function 7450-0840-01Page 2-72© <strong>Honeywell</strong> International Inc. Do not copy without express permission of <strong>Honeywell</strong>Rev 4 Jan 2011
<strong>Honeywell</strong> Bendix/King AV8OR User’s GuideFigure 2-99: Smart Airways - Segment DetailsThe screen shows the Airway selected and the entry and exit points.Tap the OK soft key to accept the routing.Tap the SELECT LIST soft key after highlightingeither the Entry or Exit data field to change to adifferent Entry or Exit point.A popup list displays the selections available forthat segment of the airway.Use the scroll bar to find the new entry or exitpoint and tap on the field to highlight it. Then tapon the SELECT soft key to accept the new Entryor Exit waypoint. Tap the CANCEL soft key tocancel selection of a new Entry or Exit data field.Tap the CANCEL soft key to cancel this airway entry.Tap the KEYBD EDIT soft key to reenter the Airway segments.Creating New Flight Plan using MAP SelectionsTap the soft key on the Aviation Main Menu Page to showthe Flight Plan Index page.7450-0840-01 Flight Plan FunctionRev 4 Jan 2011© <strong>Honeywell</strong> International Inc. Do not copy without express permission of <strong>Honeywell</strong>Page 2-73
<strong>Honeywell</strong> Bendix/King AV8OR User’s GuideFigure 2-100: Flight Plan IndexThe NEW FLIGHT PLAN line is highlighted. Tap on the NEWFPLAN soft key to show the New Flight Plan page, as shown in thefigure below.Figure 2-101: New Flight Plan PageTap on the MAP VIEW soft key to show a map to select WPTs from.In this page, you can select the waypoint on the map using thecursor. When you tap a waypoint on the map, the name of thewaypoint is shown in a pop-up window.Flight Plan Function 7450-0840-01Page 2-74© <strong>Honeywell</strong> International Inc. Do not copy without express permission of <strong>Honeywell</strong>Rev 4 Jan 2011
<strong>Honeywell</strong> Bendix/King AV8OR User’s GuideFigure 2-102: Flight Plan – Map Selection of WPTsUse your finger or stylus to pan the map to the first WPT you want toenter into the flight plan. Use the Zoom In and Zoom out icons tomake it easier to pan the screen.Tap on the WPT to show the name and identifier.Figure 2-103: Flight Plan – Waypoint DetailTo view detailed information about this point, tap the MOREINFO soft key on the right of the page. The selected WPTdetailed information is displayed, as shown in the figure below.7450-0840-01 Flight Plan FunctionRev 4 Jan 2011© <strong>Honeywell</strong> International Inc. Do not copy without express permission of <strong>Honeywell</strong>Page 2-75
<strong>Honeywell</strong> Bendix/King AV8OR User’s GuideFigure 2-104: Flight Plan – Selected Waypoint Detail InformationTap the CLEAR soft key to close the WPT detailed informationwindow.After you select a WPT, tap the INSERT WPT soft key to insert thatWPT into the new Flight Plan. The first WPT is displayed in the FlightPlan, as shown in the figure below.Figure 2-105: Flight Plan – Stored Flight Plan with a WaypointUse the INSERT WPT soft key to continue inserting WPTs until theFlight Plan is complete. Tap the CLEAR PTR soft key to show theSAVE&EXIT soft key, as shown in the figure below.Flight Plan Function 7450-0840-01Page 2-76© <strong>Honeywell</strong> International Inc. Do not copy without express permission of <strong>Honeywell</strong>Rev 4 Jan 2011
<strong>Honeywell</strong> Bendix/King AV8OR User’s GuideFigure 2-106: Flight Plan – Save WaypointTap the SAVE & EXIT soft key to save the selected WPTs, exit fromthe Stored Flight Plan page and return to the Flight Plan Index page.The name of the flight plan is displayed in the Flight Plan Indexpage, as shown in the figure below.Figure 2-107: Flight Plan – Flight Plan AcceptedIf you want to create another new Flight Plan, repeat the previoussteps.Stored Flight Plans ProcessingSelect an existing Flight Plan and EDIT FPLAN, FPLAN ADMIN,USER WPTS and FLY FPLAN soft keys are displayed on the rightside of the page.7450-0840-01 Flight Plan FunctionRev 4 Jan 2011© <strong>Honeywell</strong> International Inc. Do not copy without express permission of <strong>Honeywell</strong>Page 2-77
<strong>Honeywell</strong> Bendix/King AV8OR User’s GuideFigure 2-108: Flight Plan Index PageEDIT FPLANTap the EDIT FPLAN soft key to enter the stored flight plan page indata view mode. Here the user can edit the flight plan using mapview mode or data view mode. On the bottom right side of the pageis the MAP VIEW switch soft key.To change the title of the Flight Plan, tap on the flight plan NAMEfield. The keyboard window will open with the current namepreloaded in the name field.DATA VIEW ModeIn data view mode, the flight plan WPTs are displayed in tableformat, including each WPT’s detailed information. Highlight a WPTto delete it or to insert a new waypoint before it or highlight thedashed line to insert a new WPT at the end of the flight plan.Figure 2-109: Flight Plan – DATA VIEWTap the MAP VIEW soft key to switch to map view mode.Flight Plan Function 7450-0840-01Page 2-78© <strong>Honeywell</strong> International Inc. Do not copy without express permission of <strong>Honeywell</strong>Rev 4 Jan 2011
<strong>Honeywell</strong> Bendix/King AV8OR User’s GuideMAP VIEW ModeIn map view mode the user can select a WPT on the map, draw andmove the map, tap on the map to insert a WPT. If the tap point is acurrent WPT in the flight plan the DELETE WPT soft key is shown toallow the user to delete it from the flight plan. If the tap point is not inthe flight plan the INSERT WPT soft key is shown to allow the userto insert it into the flight plan.Figure 2-110: Flight Plan Selected WPT from MapWhen the user taps on one of the WPTs in the WPT list, the mapmoves to the selected WPT area. The user can also delete selectedWPTs here. If the user taps on the dashed line the INSERT soft keyis available to insert a WPT.FPLAN ADMINTap the FPLAN ADMIN soft key and the corresponding function softkeys on the right side of the Flight Plan Index page are shown.Figure 2-111: Flight Plan – FPLAN ADMIN7450-0840-01 Flight Plan FunctionRev 4 Jan 2011© <strong>Honeywell</strong> International Inc. Do not copy without express permission of <strong>Honeywell</strong>Page 2-79
<strong>Honeywell</strong> Bendix/King AV8OR User’s GuideCOPY FPLANHighlight the flight plan you want to copy and then tap the COPYFPLAN soft key. This function permits the selected flight plan to becopied for editing while not changing the original one.Figure 2-112: Flight Plan – COPY FPLANNEW FPLANThis function is the same as the one introduced before in theCREATING NEW FLIGHT PLAN section.INVERT FPLANThis function reverses the selected flight plan’s WPT sequence. Thislets the pilot return from a destination to the same starting pointwithout creating a new flight plan.Highlight the flight plan that you wish to invert.Figure 2-113: Invert Flight Plan – Step 1Flight Plan Function 7450-0840-01Page 2-80© <strong>Honeywell</strong> International Inc. Do not copy without express permission of <strong>Honeywell</strong>Rev 4 Jan 2011
<strong>Honeywell</strong> Bendix/King AV8OR User’s GuideTap on the INVERT FPLAN soft key to show the flight plan with theWPTs inverted from the stored flight plan.Figure 2-114: Invert Flight Plan – Step 2Tap the SAVE & EXIT soft key to invert the flight plan. The flight plannow shows on the Flight Plan Index Page with the WPTs inverted.Figure 2-115: Invert Flight Plan – Step 3DELETE FPLANThis function deletes the selected flight planHighlight the flight plan on the Flight Plan Index Page you want todelete, tap on the FPLAN ADMIN soft key and then tap on theDELETE FPLAN soft key.7450-0840-01 Flight Plan FunctionRev 4 Jan 2011© <strong>Honeywell</strong> International Inc. Do not copy without express permission of <strong>Honeywell</strong>Page 2-81
<strong>Honeywell</strong> Bendix/King AV8OR User’s GuideFigure 2-116: Delete Flight PlanTap OK to save all changes and return to the user Waypoints Page.FLY FPLANAfter creating/editing the Flight Plans you can highlight the desiredone and activate it for navigation.1. Highlight the desired Flight Plan.2. Tap the FLY FPLAN soft key to display the message shownin Figure 2-117.Figure 2-117: Flight Plan – FLY FPLAN3. Push the OK soft key to use the selected flight plan. Whendesired, the selected flight plan is navigated in reverse bytapping the INVERT FPLAN soft key.4. The Active Flight Plan page lists the current active Flight Plan’sWPTs, as shown in the figure below. The WPT in magenta withthe arrow pointing to it is the current WPT.Flight Plan Function 7450-0840-01Page 2-82© <strong>Honeywell</strong> International Inc. Do not copy without express permission of <strong>Honeywell</strong>Rev 4 Jan 2011
<strong>Honeywell</strong> Bendix/King AV8OR User’s GuideFigure 2-118: Flight Plan – Active Flight Plan5. After activating a flight plan the Map page is shown.Active Flight Plan1. Once a flight plan has been activated, tap the Flight Plans softkey from the Main Menu page and then tap the STOREDFPLANS soft key to go to the Flight Plan Index page.2. The active flight plan is shown in magenta color.3. When the active flight plan is selected, tap the FPLAN OFF softkey to deactivate the flight plan. The flight plan course isremoved from the map.7450-0840-01 Flight Plan FunctionRev 4 Jan 2011© <strong>Honeywell</strong> International Inc. Do not copy without express permission of <strong>Honeywell</strong>Page 2-83
<strong>Honeywell</strong> Bendix/King AV8OR User’s GuideFlight LoggingThe Flight Logging mode records the aircrafts position, speed,altitude and direction at a user selected rate to a file. This lets theuser play back the flight on a PC using flight planning software orGoogle Earth/Maps for evaluation of the flight.The maximum duration of the flight log is dependent upon thelogging rate. For text format and FliteStar data, a 1 second loggingrate allows 70 minutes of data, a 5 second logging rate allows 5.5hours, a 10 second logging rate allows 11 hours and a 99 secondlogging rate allows 4.5 days. The logging rate is set in the GeneralSystem options of the System Setup section.Flight logs are saved in the following format on the SD card.• Text Format (Bendix/+King).• FliteStar© Format.• Google Format.• Memory Map FormatRefer to the “Downloading/Uploading files from/To PC” section onpage 6-4 for instructions on how to upload the flight logs to your PC.The different file types are:TEXT FORMAT (BENDIX/KING) FLIGHT LOGThe flight log is stored as “Bendix King flight log.txt” and uses thefollowing data format:• Date• Time• Latitude• Longitude• Heading• Altitude• Course over Ground (COG) (Actual track)• Speed over ground (SOG) (Ground speed)• TrafficEach file is stored in the directory: \Data\User\Flight Logs\TextFormat.Flight Plan Function 7450-0840-01Page 2-84© <strong>Honeywell</strong> International Inc. Do not copy without express permission of <strong>Honeywell</strong>Rev 4 Jan 2011
<strong>Honeywell</strong> Bendix/King AV8OR User’s GuideJEPPESEN FLITESTAR FLIGHT LOGThe flight log is stored as “FliteStar flight log.txt” and uses thefollowing data format:• Date• Time• Latitude• Longitude• Heading• Ground Speed• AltitudeEach file is stored in the directory: \Data\User\Flight Logs\FliteStar.GOOGLE EARTH FLIGHT LOGThe flight log is stored as “Google Earth flight log.kml”.The kml file is a file format that can be used to display the recordedflight using Google Earth.When Google Earth is installed on your computer, launching the kmlfile will overlay your flight on Google Earth.Each file is stored in the directory: \Data\User\FlightLogs\GoogleEarth.MEMORY MAP FLIGHT LOGEach file is stored in the directory: \Data\User\Flight Logs\MemoryMap.7450-0840-01 Flight Plan FunctionRev 4 Jan 2011© <strong>Honeywell</strong> International Inc. Do not copy without express permission of <strong>Honeywell</strong>Page 2-85
<strong>Honeywell</strong> Bendix/King AV8OR User’s GuideWEATHER FUNCTIONTap the soft key on the Aviation Main Menu page to enterthe weather page.CAUTIONDatalink weather information is to be used as a strategicplanning tool for pilot decisions on avoiding inclementweather areas that are beyond visual range or where poorvisibility precludes visual acquisition of inclement weather.Datalink weather information may be used as follows:• To aid the pilot in situational awareness of hazardousmeteorological conditions.• As a cue to the pilot to communicate with the ATCcontroller or AFSS specialist to get furtherinformation about the current meteorologicalconditions. In no case should the pilot take anyevasive action based solely upon the datalinkweather display.The datalink weather information is intended for assistance instrategic flight planning purposes only and lacks sufficientresolution and updating necessary for tactical maneuvering.Hardware AccessoryThe AV8OR unit will work with either the WxWorx REWX91D XMreceiver or the certified KDR 610 XM receiver. See the Device SetupSection on page 2-161 for more information on how to configure theXM weather receiver. See the XM Tuner section on page 4-6 forinformation on how to activate the XM receiver.The XM Weather receiver is used to receive the weather informationwhich is then displayed on the screen.In order to use this feature, the user must purchase andactivate a subscription from XM Satellite Radio (XM).Receiving Weather DataThe AV8OR system connects with the WxWorx REWX91D XMreceiver through the Bluetooth interface or either of the XM receiversWeather Function 7450-0840-01Page 2-86© <strong>Honeywell</strong> International Inc. Do not copy without express permission of <strong>Honeywell</strong>Rev 4 Jan 2011
<strong>Honeywell</strong> Bendix/King AV8OR User’s Guidethrough the serial (RS 232) interface to receive weather data fromthe XM Satellite Radio network.The following XM weather products are supported by the AV8OR:• NEXRAD (Next-Generation Radar) - USA and Canada• TAFs (Terminal Area Forecast) - USA and Canada• METARs (Meteorological Aviation Report) - USA andCanada• AIRMETs (Airmen's Meteorological Information) - USA• SIGMETs (Significant Meteorological Information) - USA• Convective SIGMETs - USA• Winds Aloft – USA• Freezing Level• PIREPs (Pilot Report) – USAThe following XM weather overlays and other services are supportedby the AV8OR and are only available for the USA:• Severe Wx Storm Tracking (Storm Cells)• Lightning Overlay• TFR Overlay• Satellite Mosaic (Cloud Tops) Overlay• Precipitation Type OverlayUntil current XM data has been received from the XM receiver, acaution message will be displayed on the weather page as shown inthe figure below. Assuming good signal strength a complete set ofXM weather data will be received every 12 minutes. The initial datadisplayed is dependent upon where in that 12 minute cycle the datawas received..7450-0840-01 Weather FunctionRev 4 Jan 2011© <strong>Honeywell</strong> International Inc. Do not copy without express permission of <strong>Honeywell</strong>Page 2-87
<strong>Honeywell</strong> Bendix/King AV8OR User’s GuideFigure 2-119: WX – No Data ReceivedXM Weather Information ProductsOnce data has been received from the XM Receiver, the CHOOSEPRODUCT soft key is available to select the desired weatherinformation products.Figure 2-120: WX – Non-pointer modeTap an available product to highlight it and then tap the SELECT softkey to complete the product selection.Weather Function 7450-0840-01Page 2-88© <strong>Honeywell</strong> International Inc. Do not copy without express permission of <strong>Honeywell</strong>Rev 4 Jan 2011
<strong>Honeywell</strong> Bendix/King AV8OR User’s GuideFigure 2-121: WX – Choose ProductThe AV8OR shows the selected product on the weather page:The following selections are available from the SELECT WXPRODUCT menu:• NEXRAD Composite Reflectivity (USA and Canada)• Graphical METARs (USA and Canada)• Graphical PIREPs (USA only)• Graphical AIRMETs (USA only)• Graphical SIGMETs (USA only)• Graphical Conv-SIGMETs (USA only)• Graphical Winds Aloft (USA only)• Text METARs (USA and Canada)• Text TAFs (USA and Canada)• Text PIREPs (USA only)• Text AIRMETs (USA only)• Text SIGMETs (USA only)• Text Conv-SIGMETs (USA only)7450-0840-01 Weather FunctionRev 4 Jan 2011© <strong>Honeywell</strong> International Inc. Do not copy without express permission of <strong>Honeywell</strong>Page 2-89
<strong>Honeywell</strong> Bendix/King AV8OR User’s GuideNEXRAD COMPOSITE REFLECTIVITY (USA AND CANADA)Figure 2-122: WX – NEXRAD with Cloud and Coverage OverlayThe NEXRAD Composite Reflectivity page can show differentproducts overlaid on the map if configured. The available overlaysare: Flight Plan, Traffic, Flight Log Trail, METAR, TFR, Lightning,NEXRAD coverage, Cloud Top and Storm Cell.All of these products may not be initially available when the XMWeather receiver is first turned on. Assuming good signal strength acomplete set of XM weather data will be received every 12 minutes,therefore, the initial data displayed will be dependent upon where inthat 12 minute cycle the data was received.NEXRAD LegendTap on the Map to show the LEGEND soft key. Tap the LEGENDsoft key to show the NEXRAD Legend window on the page.Weather Function 7450-0840-01Page 2-90© <strong>Honeywell</strong> International Inc. Do not copy without express permission of <strong>Honeywell</strong>Rev 4 Jan 2011
<strong>Honeywell</strong> Bendix/King AV8OR User’s GuideFigure 2-123: NEXRAD LegendNEXRAD Map SetupThe user can select which of these overlays are displayed byconfiguring the weather overlays on the “WX NEXRAD Map –Overlay Setup” page. This can be accessed by tapping the MAPSETUP soft key and using the NEXT soft key to navigate to the WXNEXRAD Map - Overlay Setup page as shown in the figure below.Figure 2-124: WX NEXRAD Map – Overlay SetupThe following image shows storm cells, lightning, METARs andNEXRAD coverage overlaid on the map.7450-0840-01 Weather FunctionRev 4 Jan 2011© <strong>Honeywell</strong> International Inc. Do not copy without express permission of <strong>Honeywell</strong>Page 2-91
<strong>Honeywell</strong> Bendix/King AV8OR User’s GuideFigure 2-125: WX – NEXRAD & Storm Cells OverlayThe following image shows TFRs, Cloud Cover and METARSoverlaid on the map.Figure 2-126: Graphical TFRsTFR boundaries show as a yellow and black dashed line.Tap on the TFR boundary to show the TFR popup window.The TFR popup window contains the vertical height of the TFR andage as shown in the figure below.Weather Function 7450-0840-01Page 2-92© <strong>Honeywell</strong> International Inc. Do not copy without express permission of <strong>Honeywell</strong>Rev 4 Jan 2011
<strong>Honeywell</strong> Bendix/King AV8OR User’s GuideFigure 2-127: TFR Popup WindowTap on the MORE INFO soft key to show the Temporary FlightRestriction popup screen. The popup screen shows the NOTAM ID,Type, Altitude Restrictions, Date modified, Status and Expirationdate, if available.Figure 2-128: TFR MORE INFO WindowTap on the CLEAR soft key to return to the previous page.GRAPHICAL METARS (USA AND CANADA)Tap on the CHOOSE PRODUCT soft key on the Weather Main pageand select Graphical METARs from the SELECT WX PRODUCTbox.7450-0840-01 Weather FunctionRev 4 Jan 2011© <strong>Honeywell</strong> International Inc. Do not copy without express permission of <strong>Honeywell</strong>Page 2-93
<strong>Honeywell</strong> Bendix/King AV8OR User’s GuideThe graphical METAR page can also show overlays on the map ifconfigured. The available overlays are: Flight Plan, Traffic and FlightLog Trail. Refer to the Map Setup section on page 2-148 for moreinformation on how to configure the overlaysGraphical METAR icons show as a rectangular box on the map .The colors on the box indicate the type of meteorological conditionsthat currently exist at the location .The graphical METAR is derived from the most currently receivedtextual METAR or SPECI data from reporting sites. The METARSare displayed on a map background to enhance situationalawareness as shown in the figure below.Figure 2-129: WX – Graphical METARsCAUTIONGraphical METAR data must be used for strategic planningpurposes only. Due to inherent delays, areas of coverage andrelative age and availability of the data that can beexperienced, Graphical METAR data cannot be viewed as anabsolute depiction of conditions at a specific location.Tapping on a METAR icon brings up a data box that shows theairport and age of the METAR.Weather Function 7450-0840-01Page 2-94© <strong>Honeywell</strong> International Inc. Do not copy without express permission of <strong>Honeywell</strong>Rev 4 Jan 2011
<strong>Honeywell</strong> Bendix/King AV8OR User’s GuideFigure 2-130: WX: – Graphical METARs Data BoxTap on the MORE INFO soft key to display the text METARs page.The details of the METAR are translated into easy to understandtext.See the Text METARs section for more information on TextMETARS.Figure 2-131: WX: – Text METARs PageGRAPHICAL PIREPS (USA ONLY)Tap on the CHOOSE PRODUCT soft key on the Weather Main pageand select Graphical PIREPs from the SELECT WX PRODUCT box.The graphical PIREPs page can also show overlays on the map ifconfigured. The available overlays are: Flight Plan, Traffic and Flight7450-0840-01 Weather FunctionRev 4 Jan 2011© <strong>Honeywell</strong> International Inc. Do not copy without express permission of <strong>Honeywell</strong>Page 2-95
<strong>Honeywell</strong> Bendix/King AV8OR User’s GuideLog Trail. Refer to the Map Setup section on page 2-148 for moreinformation on how to configure the overlaysThe graphical PIREPs is derived from the location description in thetextual PIREPs and displayed as a blue circle with a diagonal lineintersecting the circle . The boundaries are displayed on a mapbackground to enhance situational awareness as shown in the figurebelow.Figure 2-132: WX – Graphical PIREPsTap on a graphical PIREP to show the PIREPs popup window.The PIREPs popup window contains the PIREP name, type,intensity and age as shown in the figure below.Figure 2-133: WX – Graphical PIREPs Popup WindowWeather Function 7450-0840-01Page 2-96© <strong>Honeywell</strong> International Inc. Do not copy without express permission of <strong>Honeywell</strong>Rev 4 Jan 2011
<strong>Honeywell</strong> Bendix/King AV8OR User’s GuideTap on the LEGEND soft key to display the Graphical PIREPLegend Window.Figure 2-134: WX – Graphical PIREPs LegendTap on the MORE INFO soft key to display the text PIREP page.Figure 2-135: WX – Text PIREPsGRAPHICAL AIRMETS (USA ONLY)Tap on the CHOOSE PRODUCT soft key on the Weather Main pageand select Graphical AIRMETs from the SELECT WX PRODUCTbox.The graphical AIRMET is derived from the location description (ifprovided) in the textual AIRMET and displayed as a boundary box7450-0840-01 Weather FunctionRev 4 Jan 2011© <strong>Honeywell</strong> International Inc. Do not copy without express permission of <strong>Honeywell</strong>Page 2-97
<strong>Honeywell</strong> Bendix/King AV8OR User’s Guidewith the appropriate color for the condition as shown in the legend.The boundaries are displayed on a map background to enhancesituational awareness as shown in the figure below.Figure 2-136: WX – AIRMETsThe graphical AIRMET types are shown in the following tableTable 2-6 Graphical AIRMET TypesAIRMET TYPE PRIORITY COLORIFR 1 (Highest) YellowMountain2 MagentaObscurationIcing 3 CyanTurbulence 4 GreenSurface Winds 5 (Lowest) WhiteTap on a graphical AIRMET to show the AIRMET popup window.The AIRMET popup window contains the AIRMET name, type andage as shown in the figure below.Weather Function 7450-0840-01Page 2-98© <strong>Honeywell</strong> International Inc. Do not copy without express permission of <strong>Honeywell</strong>Rev 4 Jan 2011
<strong>Honeywell</strong> Bendix/King AV8OR User’s GuideFigure 2-137:WX – Graphical AIRMET Popup WindowTap on the LEGEND soft key to display the AIRMET LegendWindow.Figure 2-138:WX: – Graphical AIRMET LEGENDTap on the MORE INFO soft key to display the text AIRMET page.7450-0840-01 Weather FunctionRev 4 Jan 2011© <strong>Honeywell</strong> International Inc. Do not copy without express permission of <strong>Honeywell</strong>Page 2-99
<strong>Honeywell</strong> Bendix/King AV8OR User’s GuideFigure 2-139: WX – Text AIRMET PageGRAPHICAL SIGMETS (USA ONLY)Tap on the CHOOSE PRODUCT soft key on the Weather Main pageand select Graphical SIGMETs from the SELECT WX PRODUCTbox.The graphical SIGMET is derived from the location description in thetextual SIGMET and displayed as a boundary box with theappropriate color for the condition as shown in the legend. Theboundaries are displayed on a map background to enhancesituational awareness as shown in the figure below.Figure 2-140: WX – Graphical SIGMETsTap on a graphical SIGMET to show the SIGMET popup window.The SIGMET popup window contains the SIGMET name, type andage as shown in the figure below.Weather Function 7450-0840-01Page 2-100© <strong>Honeywell</strong> International Inc. Do not copy without express permission of <strong>Honeywell</strong>Rev 4 Jan 2011
<strong>Honeywell</strong> Bendix/King AV8OR User’s GuideFigure 2-141: WX – Graphical SIGMET Popup WindowTap on the LEGEND soft key to display the SIGMET LegendWindow.Figure 2-142: WX – Graphical SIGMET LegendTap on the MORE INFO soft key to display the text SIGMET page.7450-0840-01 Weather FunctionRev 4 Jan 2011© <strong>Honeywell</strong> International Inc. Do not copy without express permission of <strong>Honeywell</strong>Page 2-101
<strong>Honeywell</strong> Bendix/King AV8OR User’s GuideFigure 2-143: WX – Text SIGMETsGRAPHICAL CONV-SIGMETS (USA ONLY)Tap on the CHOOSE PRODUCT soft key on the Weather Main pageand select Graphical Conv-SIGMETs from the SELECT WXPRODUCT box.The graphical Convective SIGMET is derived from the locationdescription in the textual Convective SIGMET and displayed as ayellow boundary box. The boundaries are displayed on a mapbackground to enhance situational awareness as shown in the figurebelow.Figure 2-144: WX – Graphical Conv SIGMETsTap on a graphical CONV SIGMET to show the CONV SIGMETpopup window. The CONV SIGMET popup window contains theCONV SIGMET name, type and age as shown in the figure below.Weather Function 7450-0840-01Page 2-102© <strong>Honeywell</strong> International Inc. Do not copy without express permission of <strong>Honeywell</strong>Rev 4 Jan 2011
<strong>Honeywell</strong> Bendix/King AV8OR User’s GuideFigure 2-145: WX – Graphical CONV SIGMET PopupTap on the LEGEND soft key to display the SIGMET LegendWindow.Figure 2-146: WX – Graphical Conv SIGMET LegendTap on the MORE INFO soft key to display the text SIGMET page.7450-0840-01 Weather FunctionRev 4 Jan 2011© <strong>Honeywell</strong> International Inc. Do not copy without express permission of <strong>Honeywell</strong>Page 2-103
<strong>Honeywell</strong> Bendix/King AV8OR User’s GuideFigure 2-147: WX – Text CONV SIGMETs PageGRAPHICAL WINDS ALOFT (USA ONLY)When a subscription for Graphical Winds Aloft is valid, and a WindsAloft product is available, then the Graphical Winds Aloft Page canbe selected to display.Tap on the CHOOSE PRODUCT soft key on the Weather Main pageand select Graphical Winds Aloft from the SELECT WX PRODUCTbox.The graphical Winds Aloft page can also show overlays on the mapif configured. The available overlays are: Flight Plan, Traffic andFlight Log Trail. Refer to the Map Setup section on page 2-148 formore information on how to configure the overlaysThe graphical winds aloft page is show below:Figure 2-148: Graphical Winds AloftWeather Function 7450-0840-01Page 2-104© <strong>Honeywell</strong> International Inc. Do not copy without express permission of <strong>Honeywell</strong>Rev 4 Jan 2011
<strong>Honeywell</strong> Bendix/King AV8OR User’s GuideGraphical Winds Aloft Soft KeysThe Graphical Winds Aloft page has the following soft keys:• MAIN MENU - Tap the MAIN MENU soft key to return to theMain Menu page.• FLIGHT LEVEL- Tap the FLIGHT LEVEL soft key to display theSELECT FLIGHT WINDOW popup box.• CENTER TO WPT - Tap the CENTER TO WPT soft key todisplay the map around the current destination position. This soft keyis only displayed when Direct To or OBS is active and the MAP viewis centered on the aircraft position.• CENTER TO AIRCRAFT- Tap the CENTER TO AIRCRAFT softkey to display the map around the current aircraft position. This softkey is only displayed when Direct To or OBS is active and the MAPview is centered on the destination.• CHOOSE PRODUCT- Tap the CHOOSE PRODUCT soft key todisplay the Choose Product page.• MAP SETUP - Tap the MAP SETUP soft key to display the MapSetup page.Tap on a wind vector to display a Wind Data popup box that showsthe wind speed and direction.Figure 2-149: Graphical Winds Aloft – Speed and DirectionWinds Aloft LegendTap on the Legend soft key to display the Winds Aloft Legend.7450-0840-01 Weather FunctionRev 4 Jan 2011© <strong>Honeywell</strong> International Inc. Do not copy without express permission of <strong>Honeywell</strong>Page 2-105
<strong>Honeywell</strong> Bendix/King AV8OR User’s GuideFigure 2-150: Winds Aloft LegendSelect Flight LevelTap on the FLIGHT LEVEL soft key to display the SELECT FLIGHTLEVEL popup box.Figure 2-151: Select Flight LevelTap on a level to highlight it and tap the SELECT soft key to set theselected flight level to display on the Graphical Winds Aloft page.Weather Function 7450-0840-01Page 2-106© <strong>Honeywell</strong> International Inc. Do not copy without express permission of <strong>Honeywell</strong>Rev 4 Jan 2011
GRAPHICAL FREEZING LEVEL<strong>Honeywell</strong> Bendix/King AV8OR User’s GuideTap on the CHOOSE PRODUCT soft key on the Weather Main pageand select Graphical Freezing Level from the SELECT WXPRODUCT box. The Freezing Level page is shown.Figure 2-152: Graphical Freezing Level Page• Tap on the MAIN MENU soft key to return to the Main Menu.• Tap on the CHOOSE PRODUCT soft key to show the ChooseProduct page. The Choose Product page only shows if weatherproducts other than NEXRAD are available.• Tap on the MAP SETUP soft key to show the Map Setup page.• Tap anywhere on the screen to show the pointer tag window.Figure 2-153: Freezing Level - Pointer Tag Window7450-0840-01 Weather FunctionRev 4 Jan 2011© <strong>Honeywell</strong> International Inc. Do not copy without express permission of <strong>Honeywell</strong>Page 2-107
<strong>Honeywell</strong> Bendix/King AV8OR User’s GuideTap the CLEAR PTR soft key to remove the pointer and center themap over the aircraft position.Tap the LEGEND soft key to show the “Freezing Level Legend”popup window.Figure 2-154: Freezing Level LegendTap the CLEAR soft key to hide the “Freezing Level Legend” popupwindow.TEXT METARS (USA AND CANADA)Tap on the CHOOSE PRODUCT soft key on the Weather Main pageand select Text METARs from the SELECT WX PRODUCT box.Figure 2-155: WX – Text METARsA METAR (Aviation Routine Weather Report) describes the specificweather conditions at a particular airport at a given time.A METAR contains elements in the following order:Weather Function 7450-0840-01Page 2-108© <strong>Honeywell</strong> International Inc. Do not copy without express permission of <strong>Honeywell</strong>Rev 4 Jan 2011
• Type of report• ICAO station identifier• Date and time of issue<strong>Honeywell</strong> Bendix/King AV8OR User’s Guide• Modifier (AUTO if automated report or COR if correctedobservation)• Wind• Visibility• Runway visual range (as required)• Weather phenomena• Sky condition• Temperature/dew point group• Altimeter• Remarks (as required)The METAR text has been translated into easy to understand text.TEXT TAFS (USA AND CANADA)Tap on the CHOOSE PRODUCT soft key on the Weather Main pageand select Text TAFs from the SELECT WX PRODUCT box.Figure 2-156: WX – Text TAFs7450-0840-01 Weather FunctionRev 4 Jan 2011© <strong>Honeywell</strong> International Inc. Do not copy without express permission of <strong>Honeywell</strong>Page 2-109
<strong>Honeywell</strong> Bendix/King AV8OR User’s GuideA TAF is a statement of expected meteorological conditions at anairport during a specified period of time.A TAF contains elements in the following order:• Type of report• ICAO station identifier• Date and time of issue• Date and time valid• Wind• Visibility• Weather phenomena• Sky conditions• Wind shear (as required)• Forecast weather change indicatorTEXT PIREPS (USA ONLY)Tap on the CHOOSE PRODUCT soft key on the Weather Main pageand select Text PIREPs from the SELECT WX PRODUCT box.Figure 2-157: WX –Text PIREPsA PIREP (Pilot Weather Report) is an observation of conditions at aspecific location or along a specific route. These conditions arereported by pilots when communications are established with groundfacilities such as EFAS, AFSS/FSS, ARTCC or ATC.Weather Function 7450-0840-01Page 2-110© <strong>Honeywell</strong> International Inc. Do not copy without express permission of <strong>Honeywell</strong>Rev 4 Jan 2011
A PIREP contains elements in the following order:• Type of message (urgent or routine)<strong>Honeywell</strong> Bendix/King AV8OR User’s Guide• Location in relation to an airport or VHF NAVAID• Time observed• Flight Level (may not always be present)• Type of aircraft (may not always be present)• Sky cover (may not always be present)• Weather conditions (may not always be present)• Temperature (may not always be present)• Wind direction and speed (may not always be present)• Turbulence (may not always be present)• Icing (may not always be present)• Remarks (may not always be present)TEXT AIRMETS (USA ONLY)Tap on the CHOOSE PRODUCT soft key on the Weather Main pageand select Text AIRMETs from the SELECT WX PRODUCT box.Figure 2-158: Text AIRMETsAn AIRMET is an advisory of significant weather that could behazardous to single engine, light aircraft and VFR pilots. However,parameters are such that the phenomena do not require issuance ofa SIGMET. AIRMETs address details regarding IFR, extensivemountain obscuration, turbulence, strong surface winds, icing and7450-0840-01 Weather FunctionRev 4 Jan 2011© <strong>Honeywell</strong> International Inc. Do not copy without express permission of <strong>Honeywell</strong>Page 2-111
<strong>Honeywell</strong> Bendix/King AV8OR User’s Guidefreezing levels. AIRMETs are considered widespread because theymust either be affecting or forecast to affect an area at least 3,000square miles. However, during the forecast period, the actualaffected area may be much smaller. AIRMETs are issued every sixhours and the maximum forecast period is 6 hours.An AIRMET contains elements in the following order:• Forecast Area• Report Type• Date and time issued• Report designation and reason for issuance• Validity period• Area of coverage• Weather phenomenon details.TEXT SIGMETS (USA ONLY)Tap on the CHOOSE PRODUCT soft key on the Weather Main pageand select Text SIGMETs from the SELECT WX PRODUCT box.Figure 2-159: Text SIGMETsA SIGMET) is an advisory of non-convective weather that ispotentially hazardous to all aircraft. SIGMETs address detailsregarding severe icing not associated with thunderstorms, severe orextreme turbulence not associated with thunderstorms, dust or sandstorms lowering visibility to less than 3 miles, volcanic ash. SIGMETsare considered widespread because they must either be affecting orWeather Function 7450-0840-01Page 2-112© <strong>Honeywell</strong> International Inc. Do not copy without express permission of <strong>Honeywell</strong>Rev 4 Jan 2011
<strong>Honeywell</strong> Bendix/King AV8OR User’s Guideforecast to affect an area at least 3,000 square miles. However,during the forecast period, the actual affected area may be muchsmaller. SIGMETs are issued as needed and the maximum forecastperiod is 4 hours, except for 6 hours for conditions associated withhurricanes.A SIGMET contains elements in the following order:• Forecast Area• Report Type• Date and time issued• Report designation and reason for issuance• Validity period• Area of coverage• Location of weather phenomenon• Weather phenomenon details.TEXT CONV-SIGMETS (USA ONLY)Tap on the CHOOSE PRODUCT soft key on the Weather Main pageand select Text Conv-SIGMETs from the SELECT WX PRODUCTbox.Figure 2-160: Text Conv-SIGMETsA Convective SIGMET (Convective Significant MeteorologicalInformation) is an advisory of convective weather that the forecaster7450-0840-01 Weather FunctionRev 4 Jan 2011© <strong>Honeywell</strong> International Inc. Do not copy without express permission of <strong>Honeywell</strong>Page 2-113
<strong>Honeywell</strong> Bendix/King AV8OR User’s Guidebelieves hazardous to all aircraft. Convective SIGMETs addressdetails regarding severe thunderstorms, embedded thunderstorms, aline of an area 40 percent or more of an area at least 3,000 squaremiles. Convective SIGMETs are issued hourly with a maximumforecast period of 2 hours.A Convective SIGMET contains elements in the following order:• Region Identifier and issue date and time• Report designator• Validity period• Area of coverage• Location details• Weather phenomena detailsLEGENDIn pointer mode (the user taps on the map and a black arrow pointeris shown) the LEGEND soft key is used to display the LegendWindow.Figure 2-161: WX – Pointer modeTap on the Legend soft key to show the legend for the currentWeather product displayed on the screen.Weather Function 7450-0840-01Page 2-114© <strong>Honeywell</strong> International Inc. Do not copy without express permission of <strong>Honeywell</strong>Rev 4 Jan 2011
<strong>Honeywell</strong> Bendix/King AV8OR User’s GuideXM OverlaysFigure 2-162: WX – Legend InfoThe following additional XM services can be overlaid on the primarypages:• Metar:• Graphical TFR Overlay• Lightning• Cloud TopsStorm CellsOverlays are configured in the Overlay Setup page in the Map Setupsection as shown in the figure below.Figure 2-163: Topo On Map – Overlay Setup7450-0840-01 Weather FunctionRev 4 Jan 2011© <strong>Honeywell</strong> International Inc. Do not copy without express permission of <strong>Honeywell</strong>Page 2-115
<strong>Honeywell</strong> Bendix/King AV8OR User’s GuideRefer to the Map Setup section on page 2-148 for more informationon how to configure overlays.GRAPHICAL METAR OVERLAYGraphical Metars are displayed on their own page in the weathersection with the CHOOSE PRODUCT soft key. GRAPHICAL Metarscan also be displayed on the Topo On map, Topo Off map and theNexrad Map as an overlay. The figure below shows graphical Metaroverlays on the map page.Figure 2-164: Graphical Metar Overlay on Map PageGRAPHICAL TFR OVERLAYWhen TFR has been set to display in the Overlay Setup page and avalid TEXT TFR product is available, and a subscription forGRAPHICAL TFRs is valid, then the GRAPHICAL TFRs aredisplayed on the Map page as shown in the figure below. TFRs canalso be configured to display on the Topo Off page and the Nexradpage.Weather Function 7450-0840-01Page 2-116© <strong>Honeywell</strong> International Inc. Do not copy without express permission of <strong>Honeywell</strong>Rev 4 Jan 2011
<strong>Honeywell</strong> Bendix/King AV8OR User’s GuideFigure 2-165: TFR OverlayTFRs show as a yellow/black segmented line which representsthe boundary around the TFR area.. Tap on the TFR line to showthe TFR Pop-UP window.Figure 2-166: TFR Overlay – PopupTap on the MORE INFO soft key to show the Temporary FlightRestriction window.7450-0840-01 Weather FunctionRev 4 Jan 2011© <strong>Honeywell</strong> International Inc. Do not copy without express permission of <strong>Honeywell</strong>Page 2-117
<strong>Honeywell</strong> Bendix/King AV8OR User’s GuideFigure 2-167: TFR Overlay – MORE INFOLIGHTNING OVERLAYWhen Lightning has been set to display in the Overlay Setup pageand a subscription for Lightning is valid, then lightning strikes aredisplayed on the Map page as shown belowFigure 2-168: Lightning Strikes on Map PageA Lightning strike icon may be caused by a single or multiplestrikes in the same area.Each strike is less than 7 minutes old when it is initially displayedon the Map page. Each strike is displayed for 20 minutes. Alightning strike can remain on the Map page for up to 27 minutestotal.CLOUD TOP OVERLAYCloud Tops are only displayed on the Nexrad Map as an overlay.The figure below shows cloud tops on the Nexrad Map.Weather Function 7450-0840-01Page 2-118© <strong>Honeywell</strong> International Inc. Do not copy without express permission of <strong>Honeywell</strong>Rev 4 Jan 2011
<strong>Honeywell</strong> Bendix/King AV8OR User’s GuideFigure 2-169: Cloud Top Overlay on Nexrad PageSTORM CELL OVERLAYStorm Cell can are only displayed on the Nexrad Map as an overlay.The figure below shows storm cells on the Nexrad Map.Figure 2-170: WX –Storm Cells Overlay on Nexrad Page7450-0840-01 Weather FunctionRev 4 Jan 2011© <strong>Honeywell</strong> International Inc. Do not copy without express permission of <strong>Honeywell</strong>Page 2-119
<strong>Honeywell</strong> Bendix/King AV8OR User’s GuideTRAFFIC FUNCTIONCAUTIONThe Zaon XRX and other similar traffic receivers are notrecommended as a substitute for proper traffic scanningprocedures as listed in the FAA Airman’s Information Manualand under the “See and Avoid” concept presented in FAAAC90-48C. The display of traffic targets on AV8OR from thesereceivers is intended to be used as an additional tool todetermine potential traffic threats and help the pilot to locateother aircraft while in VFR conditions.Make sure you fully understand the operations andlimitations of the Zaon XRX and other similar traffic receiversbefore you use them with the AV8OR. Abrupt changes in thecontrol of the aircraft due to a Traffic Alert should be avoidedunless positive identification with the traffic is made, or youhave been ordered to do so by the Air Traffic Controller. TheFAA, their representatives, as well as published airspaceregulations, always supersede any indication given by theZaon XRX and other similar other traffic receivers.Hardware AccessoryThe AV8OR unit interfaces to the Zaon XRX traffic receiver. Thetraffic receiver is used to receive the traffic information which is thendisplayed on the screen.See chapter 6 “Connection to An External Traffic Source” section onpage 6-16 for directions on how to connect AV8OR to a trafficreceiver.When the Zaon XRX is set up so that the detection envelope iswithin a 6 nm radius and ± 2500ft altitude of the aircraft,When the Zaon XRX is configured correctly and AV8OR is receivingtraffic information from the traffic receiver, a blue traffic icon isdisplayed on the Status window in the left bottom corner of the Mappage .Traffic Function 7450-0840-01Page 2-120© <strong>Honeywell</strong> International Inc. Do not copy without express permission of <strong>Honeywell</strong>Rev 4 Jan 2011
<strong>Honeywell</strong> Bendix/King AV8OR User’s GuideIf AV8OR is configured correctly and does not receive trafficinformation from the Zaon XRX, a caution popup window shows onthe Traffic pageTraffic Main PageTap the soft key on the Aviation Main Menu page to displaythe Traffic page as shown in the figure below.CAUTIONAV8OR displays all of the traffic targets that are received fromtraffic receivers. The Zaon XFX only displays a primary targetand two secondary targets. There may be additional traffictargets that do not show on the display.Figure 2-171: Traffic Main PageFIELDS ON THE TRAFFIC PAGE:• Traffic Alerts targets show as a solid yellow circle. Trafficalerts are used for targets within 0.7 nm range and within 700 ftof the same altitude.7450-0840-01 Traffic FunctionRev 4 Jan 2011© <strong>Honeywell</strong> International Inc. Do not copy without express permission of <strong>Honeywell</strong>Page 2-121
<strong>Honeywell</strong> Bendix/King AV8OR User’s Guide• Traffic Advisories targets show as a white diamond icon.Traffic advisories are used for targets outside the Traffic Alertszone and within 2.0 nm and 1000 ft altitude.• Other targets show as a black diamond with a whiteborder. The black diamond icon is used for targets that areoutside the Traffic Alerts zone and the Traffic Advisories zone.• The altitude of traffic target is shown above the targetsymbol if the aircraft is above own aircraft altitude.• Altitude of traffic target is shown below the target symbol if theaircraft is above own aircraft altitude.• A vertical trend is shown with a down arrow to the right ofthe target symbol if altitude trend down is 500 ft/min or greater.The Altitude trend is shown with an up arrow to the right of thetarget symbol if altitude trend up is 500 ft/min or greater.TRAFFIC SETUPTap the TRAFFIC SETUP soft key on the Traffic page to change thesetup settings as shown in the figure below.Figure 2-172: Traffic Page – Traffic SetupTraffic Function 7450-0840-01Page 2-122© <strong>Honeywell</strong> International Inc. Do not copy without express permission of <strong>Honeywell</strong>Rev 4 Jan 2011
<strong>Honeywell</strong> Bendix/King AV8OR User’s GuideFlight LevelTap the FLIGHT LEVEL soft key to change the altitude labels abovethe targets from altitude above or below the target (100 ftincrements) to the altitude of target above sea level (100 ftincrements)Enable/Disable Pop-UPTo enable traffic alerts pop-ups, tap the ENABLE POP_UP soft keyto display the following pop up window, as shown in the figure below.Figure 2-173: Traffic page – Enable Pop-UpTap the OK soft key to accept the change and return to the Trafficpage.Tap the CANCEL soft key to cancel the change and return to theTraffic page.When the Traffic Alerts Pop-up is enabled, AV8OR displays theTraffic Page whenever an alert is given.A traffic alert symbol is also displayed in the Status window.“ALRT” flashes on and off to draw attention to the Traffic Alert.7450-0840-01 Traffic FunctionRev 4 Jan 2011© <strong>Honeywell</strong> International Inc. Do not copy without express permission of <strong>Honeywell</strong>Page 2-123
<strong>Honeywell</strong> Bendix/King AV8OR User’s GuideTo disable pop-up traffic, do the following steps:Tap the DISABLE POP_UP soft key to display the following pop upwindow, as shown in the following figure.Figure 2-174: Traffic page – Disable Pop-UpTap the OK soft key to accept the change and return to the Trafficpage.Tap the CANCEL soft key to cancel the change and return to theTraffic page.Traffic Function 7450-0840-01Page 2-124© <strong>Honeywell</strong> International Inc. Do not copy without express permission of <strong>Honeywell</strong>Rev 4 Jan 2011
TAXIWAYS FUNCTION<strong>Honeywell</strong> Bendix/King AV8OR User’s GuideAirport Diagrams that the FAA has published for the U.S.A. areavailable for the AV8OR handheld (charts subscription required).A charts subscription for the Airport Diagrams is available fromSeattle Avionics at the following URL:(http://www.seattle<strong>avionic</strong>s.com/av8or).As part of the subscription process, an automatic charts downloadutility called the “Data Manager” can be installed on your homecomputer. The data manager runs in the background and downloadsnew data each month as the data becomes available. The datamanager will automatically download Airport Diagrams (if not alreadydownloaded) and update your AV8OR any time that it is plugged intoyour PC via the USB cable.Chart View PageTap the soft key from the Main Menu page to enter theChart View Page.Figure 2-175: Chart View Page - No Airport Diagrams Loaded• Tap the MAIN MENU soft key to return to the Main Menu page.• Tap the LOAD CHARTS soft key to go to the Charts/ProcedurePage to load an airport diagram for display.7450-0840-01 Taxiways FunctionRev 4 Jan 2011© <strong>Honeywell</strong> International Inc. Do not copy without express permission of <strong>Honeywell</strong>2-125
<strong>Honeywell</strong> Bendix/King AV8OR User’s GuideCharts/Procedure PageIf a destination airport is currently selected or a flight plan is active, apreview of the airport diagram is generated on the page and theairport identifier shows after the “Airport:” label.Figure 2-176: Charts/Procedure Page• Tap the CHANGE AIRPORT soft key to display a virtualkeyboard. Type in the Airport Identifier and tap the Enter key. Ifthe airport does not have a published FAA airport diagram, theairport diagram preview will not show. Tap the OK soft key toconfirm the correct airport selection.• Tap the SELECT soft key to view the selected airport diagram.Figure 2-177: Chart View Page with Airport Selected Page• Tap the TOP LEFT soft key to zoom in and show only thetop left portion of the airport diagram. Each time that the softTaxiways Function 7450-0840-012-126© <strong>Honeywell</strong> International Inc. Do not copy without express permission of <strong>Honeywell</strong>Rev Jan 2011
<strong>Honeywell</strong> Bendix/King AV8OR User’s Guidekey is tapped, a different section of the airport diagram isdisplayed. The display changes from the top left to the topright to the bottom left and then to the bottom right.• Tap the FULL SCREEN soft key to show the completeairport diagram on the page.• Tap the ROTATE soft key to rotate the airport diagram 90degrees.• Tap the zoom in “+” or zoom out “-“ soft keys on the left sideof the page to zoom in or out of the airport diagram.• Tap the MAIN MENU soft key to return to the Main Menupage.• If the MORE CHARTS soft key shows, tap it to select adifferent chart.• If the CHARTS soft key shows, tap it to show the “SelectCharts to View” menu.SELECT CHARTS TO VIEW MENUFigure 2-178: Chart View Page with Airport Selected Page• Tap on an airport identifier from the list to highlight it Forexample, the KOFF airport identifier is highlighted in the abovefigure.• Tap on the SELECT soft key to select the highlighted airportidentifier.• Tap on the UNLOAD CHART soft key to remove the highlightedairport identifier form the list of loaded charts.• Tap on the CANCEL soft key to cancel the selection of adifferent airport diagram.• Tap on the MORE CHARTS soft key to add another airportdiagram to the list of loaded charts.7450-0840-01 Taxiways FunctionRev 4 Jan 2011© <strong>Honeywell</strong> International Inc. Do not copy without express permission of <strong>Honeywell</strong>2-127
<strong>Honeywell</strong> Bendix/King AV8OR User’s GuidePANEL FUNCTIONPanel PageTap thePanel page.soft key from the Main Menu page to enter theFigure 2-179: MessagesThis page simulates a modern, glass panel PFD. The instrumentsare based on GPS input ONLY. Therefore, the AV8OR PortableGlass Panel displays Rate of Turn, Ground Speed, GPS Altitude,Vertical Speed and a Compass Rose integrated with the aircraftflight plan display.• Tap the MAIN MENU soft key to return to the Main Menu page.• Tap the NEAREST soft key to display a popup Nearest DatabaseSelection menu. Use the Nearest Database Selection menu toselect a Direct To waypoint. Once selected and the Direct To softkey is tapped, a magenta line shows on the Compass Rose thatis aligned with the direct to course to the selected waypoint asshown in the figure below. Waypoints will also show on thescreen if they are within the set range (RNG).• Tap the Direct To soft key to display the virtual keyboard toselect a new waypoint. When the OK button is pressed, amagenta line shows on the Compass Rose that is aligns with thedirect to course to the selected waypoint as shown in the figurebelow.Panel Function 7450-0840-012-128© <strong>Honeywell</strong> International Inc. Do not copy without express permission of <strong>Honeywell</strong>Rev 4 Jan 2011
<strong>Honeywell</strong> Bendix/King AV8OR User’s Guide• Tap the Zoom in “+” or the Zoom out “-“ Icons to decrease orincrease the range (RNG) value.Figure 2-180: Panel Page: New Waypoint Selected7450-0840-01 Panel FunctionRev 4 Jan 2011© <strong>Honeywell</strong> International Inc. Do not copy without express permission of <strong>Honeywell</strong>2-129
<strong>Honeywell</strong> Bendix/King AV8OR User’s GuideAUXILIARY FUNCTIONMessages PageTap theMessages page.soft key from the Main Menu page to enter theFigure 2-181: MessagesThe User can also access the Messages page when a new messageis indicated in the Status Window. Tap the flashing new messageStatus Window in any other function page and the Messages page isshown.The Message soft key stays active until the message has beenviewed or the message has been removed from the queue.If the number of system messages exceeds the area on the display,a scroll bar is displayed to let the user to scroll through all of themessages.The table that follows lists the different messages that can bedisplayed.Table 2-7 MessagesMessage TextAirspace Alert[followed by name,type and limits ofairspace]Inside SUA [followedby name, type andlimits of airspace]CauseWhen airspace alerting has beenenabled and the aircraft is within thealerting zoneWhen airspace alerting has beenenabled and the aircraft is inside theairspaceAuxiliary Function 7450-0840-012-130© <strong>Honeywell</strong> International Inc. Do not copy without express permission of <strong>Honeywell</strong>Rev 4 Jan 2011
Message TextInternal GPS failureNav data Referencedto True NorthNav data Referencedto User-Defined MagVarUnit Configurationvalidation errorsfound, values set todefault.User settingvalidation errorsfound, values set todefault.Unit Configurationcleared to DefaultsAll User Settingscleared to DefaultsFailed to save usersettingsUnit History Datacleared to DefaultsDetailed terraindatabase is invalidFailed to read FPLfileThe FPL file hadformatting errorsFailed to read userWPT from fileFailed to read flightplan from fileFailed to read FPLWPT from file<strong>Honeywell</strong> Bendix/King AV8OR User’s GuideCauseWhen the internal GPS is configuredbut no data is being received from itWhen the operator has elected to use amanually input magnetic variation offsetof ZEROWhen the operator has elected to use amanually input magnetic variation ratherthan AUTOSome System setting were out of rangeand were set to defaultsSome User settings were out of rangeand were set to defaultsThe System settings NVM could not beused so default settings were usedinsteadThe User settings NVM could not beused so default settings were usedinsteadAll attempts to save & back upUser/System/Volatile data failed.The Volatile settings NVM could not beused so default settings were usedinsteadThe fine terrain database could not beloaded from the card or its checksumwas found to be invalid.A flight plan file could not be read.The format of a flight plan file wasincorrect.User WPTs could not be read from aflight plan file.A flight plan could not be read from aflight plan file.A flight plan WPT could not be readfrom a flight plan file.7450-0840-01 Auxiliary FunctionRev 4 Jan 2011© <strong>Honeywell</strong> International Inc. Do not copy without express permission of <strong>Honeywell</strong>Page 2-131
<strong>Honeywell</strong> Bendix/King AV8OR User’s GuideMessage TextFailed to merge userWPT from fileNot enough availablespace to merge userWPTsFailed to merge FPLWPTNot enough space tomerge flight plansDuplicate user WPTin flight plan fileUser Waypointmemory fullFlight plan WPT(s)not found indatabase have beendeletedError writing flightplan data to datacardUnable to save aflight plan backupUnable to convertflight plan data afterDB update, all userflight plans deletedBattery LowCauseWhile merging WPTs from a flight planfile, a WPT was found with an identmatching an existing WPT, but at adifferent location.There is not enough memory to mergein WPTs from a flight plan file.A user WPT in a merged flight plan wasnot found in the user WPTs data.There is not enough memory to mergein flight plans from a flight plan file.While loading user WPTs from a flightplan file, a WPT was found with an identmatching an existing user WPT.A WPT loaded from a flight plan filecould not be stored because user WPTmemory was already full.When one or more of the WPTreferences in a flight plan file do notexist in the databaseWhen the software encounters an errorwhile trying to write a flight plan file.All attempts to back up the flight plandata failed.When the system detects a changeddatabase but cannot find a currentbackup of the flight plan resulting in alluser flight plans to be deletedGenerated when the battery levelremaining drops below 5% of full chargeMESSAGES SOFT KEYSMAIN MENU – Tap on the MAIN MENU soft key to return to theMain Menu page.PREV PAGE – The PREV PAGE soft key only shows if this pagewas entered by tapping on the MSG icon in the Status Window.This soft key returns to the previous page.Auxiliary Function 7450-0840-012-132© <strong>Honeywell</strong> International Inc. Do not copy without express permission of <strong>Honeywell</strong>Rev 4 Jan 2011
<strong>Honeywell</strong> Bendix/King AV8OR User’s GuideCHECKLIST – Tap the CHECKLIST soft key to display theChecklist page.WIND CALC - Tap the WIND CALC soft key to display the WindCalc page.WEIGHT BALANCE - Tap the WEIGHT BALANCE soft key todisplay the Weight and Balance page.ChecklistTap on the CHECKLIST soft key to display customized checklists.The checklists can only be created, edited and deleted on a PC andthen transferred to the SD card. In order to create a valid checklistand allow the software to find the checklists the following rules mustbe followed:• The Checklists must be stored in the \GoFly\data\user\Notepadsdirectory on the SD card.• Checklists must be text files.• The filename must have the .txt extension. (Example is“emergency.txt”)• The file size must be less than 16,384 bytes.• A text file with the name “route.txt” is an invalid checklist filenameand is not recognized. The filename “route.txt” is used to loadflight plan and WPT data.• The name assigned to the file will be the name displayed on thechecklist page. Therefore, the name should be representative ofthe function the checklist is performing. An example is “EngineStart”.• Checklists must be created using the following rules:• Each checklist item should start with [] square brackets to createan easy to read checklist.• The [] brackets are interpreted as a check box indication and canappear anywhere.• Each checklist item must end with a carriage return.7450-0840-01 Auxiliary FunctionRev 4 Jan 2011© <strong>Honeywell</strong> International Inc. Do not copy without express permission of <strong>Honeywell</strong>Page 2-133
<strong>Honeywell</strong> Bendix/King AV8OR User’s Guide• The number of characters on each line should be limited to 50 orfewer characters. If more than 50 characters are on a line, thenthe text will wrap to the next line.• Everything is displayed as typed.An example checklist is shown below:[] Entry 1[] Entry 2[] Entry 3[] Entry 4[] Entry 5[] Entry 6When checklists are available; tap on the CHECK LIST soft keyto show a menu of the available checklists.Figure 2-182: Checklist PageHighlight a checklist and tap the SELECT soft key to display thechecklist.Auxiliary Function 7450-0840-012-134© <strong>Honeywell</strong> International Inc. Do not copy without express permission of <strong>Honeywell</strong>Rev 4 Jan 2011
<strong>Honeywell</strong> Bendix/King AV8OR User’s GuideFigure 2-183: Checklist PageTap the PREV PAGE soft key to return to the Checklist Page.Tap the CHECK BOX soft key to put a check mark in the firstcheckbox.Tap the SKIP CHECK soft key to skip to the next check box.Tap the CHANGE NOTEPAD soft key to change to a differentchecklist.Wind Vector Calculator PageTap on the WIND CALC soft key on the Message page to displaythe Wind Vector Calculation Page. as shown in the figure below.Figure 2-184; Wind Vector Calculation PageThis page allows the user to enter the following parameters: GroundSpeed, Magnetic Heading, Desired Track (DTK), Calibrated AirSpeed (CAS), Outside Air Temperature (OAT) and Indicated7450-0840-01 Auxiliary FunctionRev 4 Jan 2011© <strong>Honeywell</strong> International Inc. Do not copy without express permission of <strong>Honeywell</strong>Page 2-135
<strong>Honeywell</strong> Bendix/King AV8OR User’s GuideAltitude.. After these parameters are entered, the unit calculatesWind Speed / Angle and True Air Speed (TAS). If the Wind datawindow is selected, the Wind Speed and Direction are displayed inthe window.The Ground Speed, Track and Indicated Altitude parameters areautomatically entered by the program.Enter the Magnetic Heading, Calibrated Air Speed and Outside AirTemperature to enable the Wind calculation function to calculate thewinds speed/angle and True Air Speed. Double tap on each field ortap on each field to highlight it and tap the EDIT soft key to display anumeric entry keypad as shown in the figure below.Figure 2-185: Enter Magnetic HeadingEnter the correct value and tap the Enter button to accept thevalue.Weight and Balance PageUsing aircraft-specific data, the Weight and Balance page lets thepilot quickly calculate both take-off and zero-fuel moments. The pilotcan see the data in table format, a Center of Gravity (C.G.) EnvelopeGraph and an aircraft layout page. The Layout page is the openingpage as shown in the figure below.Auxiliary Function 7450-0840-012-136© <strong>Honeywell</strong> International Inc. Do not copy without express permission of <strong>Honeywell</strong>Rev 4 Jan 2011
<strong>Honeywell</strong> Bendix/King AV8OR User’s GuideFigure 2-186: Weight and Balance PageTap the PREV PAGE soft key to return to the Messages Page.The five tabs that follow show across the top of the top of the page:• Data Entry• C.G. Graph• Layout• Profile• EnvelopeDATA ENTRY - The Data Entry page is used to enter the aircraft’sloading for the flight. The weight of passengers in each row,baggage and amount of fuel in gallons is entered on this page. TheArm locations for each line item can be entered once and are storedalong with the rest of the aircraft profile.7450-0840-01 Auxiliary FunctionRev 4 Jan 2011© <strong>Honeywell</strong> International Inc. Do not copy without express permission of <strong>Honeywell</strong>Page 2-137
<strong>Honeywell</strong> Bendix/King AV8OR User’s GuideFigure 2-187: W&B Data Entry Page with Profile and Envelope TabsFilled OutTap the PREV PAGE soft key to return to the Messages Page.Tap the EDIT soft key to edit data on a highlighted cell. The leftrows that show depend on the data setup in the aircraft Profiletab.Tap the RESET soft key to reset the data on the displayed tabback to the default settings.Tap the FILE soft key to save the displayed Weight and Balancedata to a file as shown below.NOTE:The FILE soft key can be accessed from the “Data Entry”,“Profile” and the “Envelope” tab on the Weight and Balancescreen.Figure 2-188: W&B - FILE Options PageAuxiliary Function 7450-0840-012-138© <strong>Honeywell</strong> International Inc. Do not copy without express permission of <strong>Honeywell</strong>Rev 4 Jan 2011
<strong>Honeywell</strong> Bendix/King AV8OR User’s GuideThe FILE page soft key functions are shown below.Tap on the CLOSE soft key to close the FILE page.Tap on the NEW FILE soft key to create a new weight andbalance file. The virtual keyboard shows to enter a new filename.Tap on the SAVE soft key to save the highlighted file. Anyprevious settings will be overwriting by the current settings.Tap on the LOAD soft key to load a weight and balance file.Tap on the DELETE soft key to delete the current weightand balance file.C.G. GRAPH - The C.G. Graph displays both the Ramp (take-off)weight/CG and the Zero-Fuel weight/CG.Figure 2-189: W&B COG Graph with Profile and Envelope TabsFilled OutIf the aircraft is loaded beyond the limits entered, the point and graphlines change to a RED color, and a red “EXCEED” warning appearson the graph as shown in the figure below.7450-0840-01 Auxiliary FunctionRev 4 Jan 2011© <strong>Honeywell</strong> International Inc. Do not copy without express permission of <strong>Honeywell</strong>Page 2-139
<strong>Honeywell</strong> Bendix/King AV8OR User’s GuideFigure 2-190: W&B - Aircraft Loaded Beyond C.G. LimitsLAYOUT - The Layout page displays the loading of the aircraftgraphically. This view makes it easy to identify ways to shift loadingto adjust the C.G. to a desired point.Tap on each station to display a numeric keypad. Enter the correctamount and tap on the “Enter” key to insert the amount into theselected station. As weight is added to each station, it shows in thecorrect position on the aircraft graph.Figure 2-191: W&B Layout Page with Profile and Envelope TabsFilled OutPROFILE – Use the Profile page to enter information about theaircraft, including its seating and baggage configuration, type of fuel,empty weight/arm and the number of C.G. Envelope points. Forexample, if the allowable C.G. envelope for a particular aircraft is arectangle, you would enter “4” as the number of envelope points.Auxiliary Function 7450-0840-012-140© <strong>Honeywell</strong> International Inc. Do not copy without express permission of <strong>Honeywell</strong>Rev 4 Jan 2011
<strong>Honeywell</strong> Bendix/King AV8OR User’s GuideThis data is entered once for each aircraft profile that you would liketo save in the AV8OR.Figure 2-192: W&B Profile PageTap the PREV PAGE soft key to return to the Messages Page.Tap the EDIT soft key to edit data on the highlighted cell. Use thescroll bar to view any fields that are not visible on the screen.The following data entry fields are available:oAircraft Registration – Enter the registration numberfor the aircraft.o Units – Select the units you want to use for theaircraft.ooooooAvailable selections are;English – in/lb/galEnglish – ft/lb/galMetric – cm/kg/lMetric – m/lg/lPlane Type– Select Single or Twin.o # Rows of seats – Enter the number of rows ofseats.o # Baggage Areas – Enter the number of baggageareas.o# Fuel Tanks – Enter the number of fuel tanks.7450-0840-01 Auxiliary FunctionRev 4 Jan 2011© <strong>Honeywell</strong> International Inc. Do not copy without express permission of <strong>Honeywell</strong>Page 2-141
<strong>Honeywell</strong> Bendix/King AV8OR User’s Guideo Empty aircraft weight – Enter the aircraft emptyweight.ooEmpty aircraft arm – Enter the empty aircraft arm.Fuel density – Enter how much the fuel weights foreach selected unit. For example, enter “6.00” for thefuel weight of 100 No Lead Aviation fuel with lbs/galselected for the Units field.o Number of envelope points – Enter the number ofenvelope points that the COG graph has.Tap the FILE soft key to save the displayed Weight and Balancedata to a file.ENVELOPE – Use the Envelope page to enter information about theallowable C.G. envelope for the aircraft. Once the number ofenvelope points has been added on the aircraft profile page, thelocation of each point on the graph is defined here. The data pointsthat define the allowable C.G. envelope for a particular aircraft cantypically be found in either the aircraft flight manual or in the aircraft’sType Certificate. This data is entered once for each aircraft profilethat you would like to save in the AV8OR.Figure 2-193: W&B Envelope PageThe Envelope tab contains data entry field for the number ofenvelope points that was defined in the Profile tabTap the PREV PAGE soft key to return to the Messages Page.Auxiliary Function 7450-0840-012-142© <strong>Honeywell</strong> International Inc. Do not copy without express permission of <strong>Honeywell</strong>Rev 4 Jan 2011
<strong>Honeywell</strong> Bendix/King AV8OR User’s GuideTap the EDIT soft key to edit data on a highlighted cell. Enter theweight and the arm in each field of the Envelope page. Use the scrollbar to view any fields that are not visible on the screen.Tap the FILE soft key to save the displayed Weight and Balancedata to a file.CREATING A NEW WEIGHT AND BALANCE SECTIONUse the following order of entry to create a new Weight and Balancesection for an aircraft.1. Select the Profile tab and enter data for all of the fields.2. Select the Envelope tab and enter the weight and the arm forthe number of envelope points that was entered in the Profiletab.3. View the C.G. Graph page and the Layout page and make surethat they match your aircraft flight manual Type Certificate.4. Select the Data Entry Tab and enter the Arm for each row thatshows. (Rows were defined in the Profile page)5. Tap on the FILE soft key to save or create a new weight andbalance file. An Aircraft Profile pop up button shows. If noWeight and Balance file has been created yet, only the CLOSEand the NEW FILE soft keys show. If a file has already beencreated, SAVE, LOAD and DELETE soft keys also show.6. Tap on the NEW FILE soft key and enter the name of the newaircraft profile into the data entry screen. Tap on the “Enter” keyto accept the aircraft profile name.7. Tap on the SAVE soft key and the OK soft key to save the newaircraft profile.Multiple Weight and Balance aircraft profiles can be created fordifferent aircraft. After the aircraft profiles are created, use the FILEsoft key that shows on the “Data Entry”, “Profile” or “Envelope” tabson the Weight and Balance screen to display the “Aircraft Profile”window. Select and highlight the aircraft profile you want to use andtap on the LOAD soft key to load that profile into the current settings.7450-0840-01 Auxiliary FunctionRev 4 Jan 2011© <strong>Honeywell</strong> International Inc. Do not copy without express permission of <strong>Honeywell</strong>Page 2-143
<strong>Honeywell</strong> Bendix/King AV8OR User’s GuideThe latest A/C settings are automatically saved and retained througha power cycle and used as default when GoFly is restarted asfollows:1. Preserves last opened aircraft profile for next use (aircraft name,W&B envelope, etc.). This includes all information from theProfile and Envelope pages.2. The weight for the 1st row of seats (pilot) is retained from lastuse (ex: 180lbs)3. All station arms entered on the Data Entry page are preserved.4. All other station weights and fuel volumes are zeroed (fuel,baggage, other rows, etc.)Auxiliary Function 7450-0840-012-144© <strong>Honeywell</strong> International Inc. Do not copy without express permission of <strong>Honeywell</strong>Rev 4 Jan 2011
SYSTEM SETUP FUNCTION<strong>Honeywell</strong> Bendix/King AV8OR User’s GuideTap the System Setup soft key on the Aviation Main Menupage to enter the System Setup Menu page, as shown in the figurebelow.Figure 2-194: System Setup – System Setup Menu PageThe System Setup Menu allows the user to set parameters for itemsthat show in the menu. Tap and highlight an item in the menu list andtap the SELECT soft key to enter the corresponding item’s setuppage.System Setup MenuThe System Setup Menu has the following setup categories:• General System Setup• Map Setup• Navigation Setup• Data Field Setup• Flight Plan Data Setup• Device Setup• NMEA Output Setup• Demo Mode Setup (If Demo mode is enabled)7450-0840-01 System Setup FunctionRev 4 Jan 2011 Page 2-145© <strong>Honeywell</strong> International Inc. Do not copy without express permission of <strong>Honeywell</strong>
<strong>Honeywell</strong> Bendix/King AV8OR User’s GuideGENERAL SYSTEM SETUPThe General System Setup page is shown in Figure 2-195. Tap thedesired item in the left list column and the associated value field ishighlighted in the right column.Figure 2-195: System Setup – General System Setup OptionsDouble tap the highlighted value item or tap on the EDIT soft key todisplay a pop up window to show the possible values that can be set.Double tap on a value to select it or tap once on a value to highlightit and then tap the SELECT soft key to select the item. Tap theCANCEL soft key to cancel the selection.Figure 2-196: System Setup – Setting valuesTap the SAVE & EXIT soft key to save any changes. Tap theRESET VALUES soft key to restore most of the values in theGeneral System Setup Options tables to their factory initial settings.The values that not reset are: Aircraft Type and Min Runway length.System Setup Function 7450-0840-01Page 2-146© <strong>Honeywell</strong> International Inc. Do not copy without express permission of <strong>Honeywell</strong>Rev 4 Jan 2011
<strong>Honeywell</strong> Bendix/King AV8OR User’s GuideThe following are the general system setup options and theirpossible values.• Aircraft Type: Select the appropriate host aircraft type: FixedWing or Rotary Wing. This determines the aircraft symbolthat is used in VFR Moving Map mode.• Auto-Hide Keys on Map Page: When this option is turnedON and a value in seconds is set, all the soft keys on the VFRMoving Map page are automatically removed after the settime delay. Touching on the screen makes the soft keysvisible again. If the option is set to OFF the soft keys arealways visible.• Flight Logging Rate: Sets the interval in seconds that thesystem logs position data and loads it into a 2000-point cyclicmemory. The interval can be set between 1 and 99 seconds.• Position Coordinate System: Sets the coordinate system tobe used for the display and entry of position information. Theavailable options are:o Lat/Long: (Latitude and longitude)o OS (GB): Ordnance Survey Great Britaino OS (Ireland): Ordnance Survey Irelando UTM: Universal Transverse Mercatoro MGRS: Military Grid Reference System.• Ellipsoid: Sets the datum to be used for the display and entryof position information. The available options are:o WGS84: the WGS84 datumo OS (GB): Ordnance Survey Great Britaino OS (Ireland): Ordnance Survey Irelando ED50 (Euro Mean): the ED50 datumo NAD27 (CONUS): the NAD27 (CONUS) datum• Speed Units: Sets speed units to Knots (nautical miles perhour), mph (statute miles per hour) or kph (kilometers perhour).• Distance Units: Sets distance units to Nautical Miles,Statute Miles or Kilometers.• Altitude Units: Sets altitude units to Feet or Meters. Whenfeet are selected, all altitudes are reported in feet. Whenmeters are selected, all altitudes are reported in meters.• Runway Length Units: Sets runway length units to Feet orMeters. When feet are selected, runway lengths are reportedin feet. When meters are selected, runway lengths arereported in meters.7450-0840-01 System Setup FunctionRev 4 Jan 2011 Page 2-147© <strong>Honeywell</strong> International Inc. Do not copy without express permission of <strong>Honeywell</strong>
<strong>Honeywell</strong> Bendix/King AV8OR User’s Guide• Req Runway Surface: The options are Any and Hard Only.The Required Runway Surface type is also used when usingthe DIRECT TO soft key to search for the nearest airports inVFR Moving Map mode. When runway surface is set to ANY,airports with either hard or soft runways are displayed. Whensurface is set to HARD ONLY, only airports with hard surfacerunways are displayed and soft-runway airports are ignored.• MIN R/W LENGTH: This field contains the minimum length ofthe main runway at those airports that are included when theten nearest airports are shown. Select the length field and useset the minimum length value. The available values arespecified in steps of 100 feet from 0 to 16,000 feet or in stepsof 50 meters from 0 to 4900 meters when the runway lengthunits are set to meters. By setting a minimum length, airportswith shorter runway lengths are not included in the search forthe closest airport. To disable this filter set the minimumrunway length to 00000 feet.MAP SETUPThe initial Map Systems Setup Options page allows differentmapping options to be configured. Refer to Figure 2-197.Figure 2-197: System Setup – Map System Setup OptionsThere are five groups of features for each of the map layers. Theyare: Common Features, Point Features, Line Features, Airspace andOverlay. Each shows in a tab across the top.Tap the SAVE & EXIT soft key to save any changes and go back tothe previous menu.Tap the EDIT soft key to edit the data for the tabbed screen on top.System Setup Function 7450-0840-01Page 2-148© <strong>Honeywell</strong> International Inc. Do not copy without express permission of <strong>Honeywell</strong>Rev 4 Jan 2011
<strong>Honeywell</strong> Bendix/King AV8OR User’s GuideTap the RESET VALUES soft key to set all options to their factoryinitial settings except Minimum Elevation when it is currently set to avalid value.Tap on the Common tab to select the Common features that showbelow:• Orientation: Sets the Map Mode presentation to either a TRACKUP or NORTH UP orientation.• Extended Track Line: Turns the extended track line ON or OFF.The extended track line is drawn ahead of the aircrafts presentposition in the direction of the present track.• Range Rings On Map: Controls the display of the range ringsshown around the aircraft. OFF removes the rings. OUTER RINGshows only the outer ring. OUTER AND INNER RING shows bothrings.• Airport Label Format: Labels airports in Map Mode either withtheir ICAO CODE, their FULL NAME (given airport name) orCITY NAME (local city name).• Auto Zoom: Turns the auto zoom function ON or OFF. Whenflying the last leg of a Flight Plan or when flying a Direct To, thesystem automatically zooms to a screen range that keeps thedestination WPT within the display area. The system continues tozoom in to the lowest zoom level. When the lowest zoom hasbeen reached and the aircraft begins to fly away from thedestination WPT, then the system zooms out automatically tokeep the WPT within the display area. When auto zoom is inoperation AUTO (Automatic) is shown in the RNG (Range)display field. Pushing either the ZOOM IN or ZOOM OUT soft keycancels the auto zoom capability. Auto zoom is re-activated inthis menu.• Minimum Elevation: Controls the high definition terrain contoursminimum level elevation. When altitude units are set to metersthe options are: SEA LEVEL, 300M, 500M, 900M and 1200M.When altitude units are set to feet, the options are: 1000ft, 2000ft,3000ft and 4000ft.• Maximum Elevation: Controls the high definition terrain contoursmaximum level elevation. The options are: 500M, 750M, 1000M,1250M, 1500M, 1750M, 2000M, 2250M, 2500M, 3000M andMAXIMUM. When altitude units is set to feet, the options are:7450-0840-01 System Setup FunctionRev 4 Jan 2011 Page 2-149© <strong>Honeywell</strong> International Inc. Do not copy without express permission of <strong>Honeywell</strong>
<strong>Honeywell</strong> Bendix/King AV8OR User’s Guide1500ft, 2000ft, 2500ft, 3000ft, 4000ft, 5000ft, 6000ft, 7000ft,8000ft, 9000ft and Maximum.The Point, Line, Airspace and Overlay pages have the followingfour columns:• Feature – Feature Description• Icon/Style – A graphical representation of the Feature• Max – The maximum range that the feature will show on themap. If the range on the selected map page is set higherthan the Max setting, the feature does not show on the mappage.• Label - The maximum range that the label for the feature willshow on the map. If the range on the selected map page isset higher than the Label setting, the label does not show onthe map page.The ALL MAPS soft key copies the settings of the features onthe current tab to all available maps.The RESET VALUES soft key resets the options on the page tothe default value for each feature.The CHANGE MAP soft key displays the list of map layers asshown in the figure below. Select the desired map or chart andthen tap the SELECT soft key to select that layer and return tothe Map Features page.Figure 2-198: Map System Setup -- Select Map LayerTapping the Point tab displays the Point Feature Setup screen,as shown in the figure below.System Setup Function 7450-0840-01Page 2-150© <strong>Honeywell</strong> International Inc. Do not copy without express permission of <strong>Honeywell</strong>Rev 4 Jan 2011
<strong>Honeywell</strong> Bendix/King AV8OR User’s GuideFigure 2-199: Map System Setup – Point Feature SetupTapping the Line tab displays the Line Feature Setup screen, asshown in the figure below.Figure 2-200: Map System Setup – Line Feature SetupTapping the Airspace tab displays the Airspace Setup screen, asshown in the figure below.7450-0840-01 System Setup FunctionRev 4 Jan 2011 Page 2-151© <strong>Honeywell</strong> International Inc. Do not copy without express permission of <strong>Honeywell</strong>
<strong>Honeywell</strong> Bendix/King AV8OR User’s GuideFigure 2-201: Map System Setup – Airspace SetupTapping the Overlay tab displays the Overlay Setup screen, asshown in the figure below.Figure 2-202: Map System Setup – Overlay Setup 1To change values, double tap the highlighted value item or tap onceon the item to highlight it and then tap on the Edit soft key and a popup window shows the possible values that can be set. Highlight thedesired value and double tap it or tap the Select soft key to finish thechange. Tap the SAVE & EXIT soft key to return to the previousmenu.System Setup Function 7450-0840-01Page 2-152© <strong>Honeywell</strong> International Inc. Do not copy without express permission of <strong>Honeywell</strong>Rev 4 Jan 2011
<strong>Honeywell</strong> Bendix/King AV8OR User’s GuideNAVIGATION SETUPThe Navigation Setup page permits the navigation setup options tobe configured, as shown in the figure below..Figure 2-203: System Setup – Navigation SetupTap the SAVE & EXIT soft key to save any changes. Tap theRESET VALUES soft key to restore most of the values to theirfactory initial settings.Double tap on an option or tap once on an option to highlight it andthen tap on the EDIT soft key to display a pop up window to showthe possible values that can be set. Double tap the highlighted valueor highlight the value and tap on the SELECT soft key to change theitem’s values.• AutoNav: Enable the AutoNav function to allow AV8OR toautomatically switch between the external and internal GPSsources when there is more than one source. The AutoNavoption only shows on the Navigation Setup Page when both theNavigation Source and Position in the Device Setup Page areset to External.• CDI Scale: Sets the full scale deflection of any displayed CourseDeviation Indicator (CDI) to: 0.6, 2 or 10 kilometers, 0.3, 1, or 5nautical miles or 0.4, 1 or 5 statute miles. Values are based onthe distance units that are configured in the General SystemSetup Options table distance units field. The CDI is configured onthe Data Field Setup Page in System Setup.7450-0840-01 System Setup FunctionRev 4 Jan 2011 Page 2-153© <strong>Honeywell</strong> International Inc. Do not copy without express permission of <strong>Honeywell</strong>
<strong>Honeywell</strong> Bendix/King AV8OR User’s Guide• Time Zone: The AV8OR has an on board clock that ensures theEstimated Time of Arrival (ETA) information presented isaccurate. The time is stored in two summed parts as UTC(Universal Coordinated Time or Greenwich Mean Time) and as aLocal Offset. The system Global Positioning System (GPS)acquires the correct UTC time at Power-up and maintains itaccurately. The following Time Zone value can be set:o LCL (Local Time) Offset from UTC – userconfigurable offset from UTC User definedo UTC (Universal Time) Offset from UTC 0:00o GST (Greenland Standard Time) Offset from UTC -3:00o GDT (Greenland Daylight Saving Time) Offset fromUTC -2:00o ATS (Atlantic Standard Time) Offset from UTC -4:00o ATD (Atlantic Daylight Saving Time) Offset fromUTC -3:00o EST (Eastern Standard Time) Offset from UTC -5:00o EDT (Eastern Daylight Saving Time) Offset fromUTC -4:00o CST (Central Standard Time) Offset from UTC -6:00o CDT (Central Daylight Saving Time) Offset fromUTC -5:00o MST (Mountain Standard Time) Offset from UTC -7:00o MDT (Mountain Daylight Saving Time) Offset fromUTC -6:00o PST (Pacific Standard Time) Offset from UTC -8:00o PDT (Pacific Daylight Saving Time) Offset from UTC-7:00o AKS (Alaska Standard Time) Offset from UTC -9:00o AKD (Alaska Daylight Saving Time) Offset from UTC-8:00o HAS (Hawaii Standard Time) Offset from UTC -10:00o HAD (Hawaii Daylight Saving Time) Offset fromUTC -9:00o SST (Samoa Standard Time) Offset from UTC -11:00o SDT (Samoa Daylight Saving Time) Offset fromUTC -10:00System Setup Function 7450-0840-01Page 2-154© <strong>Honeywell</strong> International Inc. Do not copy without express permission of <strong>Honeywell</strong>Rev 4 Jan 2011
<strong>Honeywell</strong> Bendix/King AV8OR User’s Guide• Offset from UTC: If the user sets Time Zone as Local, the Offsetfrom UTC column can be configure. This method permits offsetsof hours and 30-minute increments.• Magnetic Variation: Settings are Auto or Manual. When set toauto the magnetic variation is derived from the GPS location.When set to manual the variation angle is entered in the linebelow by moving the cursor to the left, then down and then to theright to highlight the angle value field. The angle range is from 0to 180 degrees.• Near Position Format: All Data, Airports / (Very high frequencyOmni-directional Radio range (VOR)s, or VORs Only.• Turn Anticipation: ON or OFF. Turn Anticipation assistsnavigation for a fixed wing aircraft along a curved path segmentto ensure a smooth transition between two adjacent legs in theflight plan using a standard rate turn.• SUA Buffer: The SUA altitude buffer is set from 500 to 16000feet in 100-foot increments.• SUA Alerting: Special Use Airspace (SUA) Alerting is turned ONor OFF. When SUA Alerting is turned on, a SUA alertingmessage shows when the aircraft is within the SUA alert zone.• SUA Display Filtering: Special Use Airspace (SUA) DisplayFiltering is turned ON or OFF.• VSD (Smart Profile) Swath Distance:oooFor Nm: 0.1 to 1.0 nm adjustable in 0.1 nmincrements, using the numeric keyboard (default =0.5 nm)For sm: 0.1 to 1.0 sm adjustable in 0.1 smincrements, using the numeric keyboard (default =0.6 sm)For km: 0.2 to 2.0 km adjustable in 0.2 kmincrements, using the numeric keyboard (default =1.0 km)• VSD (Smart Profile) Above Aircraft:o For Feet: 0500 to 2000 ft adjustable in 100 ftincrements using the numeric keyboard (default =1000 ft)o For Meters: 150 to 600 .m adjustable in 50 m7450-0840-01 System Setup FunctionRev 4 Jan 2011 Page 2-155© <strong>Honeywell</strong> International Inc. Do not copy without express permission of <strong>Honeywell</strong>
<strong>Honeywell</strong> Bendix/King AV8OR User’s Guideincrements using the numeric keyboard (default =300 m)• VSD (Smart Profile) Below Aircraft:ooFor Feet: 500 to 10000 ft adjustable in 100 ftincrements using the numeric keyboard (default =2000 ft)For Meters: 150 to 3000 m adjustable in 50 mincrements using the numeric keyboard (default =600 m)• Direct-To-Mode: Leg (default) and Target.• Default Fuel Flow: 0.1 to 999.9 /hr, adjustable by 0.1 (8.0default).• Default Ground Speed: 0 to 999 kts, adjustable by 1 (135 ktsdefault).DATA FIELD SETUPThis setup permits the user to arrange data windows along the leftedge of the display in any order as shown in the figure below. Theleft edge allows 4 visible data windows. 5 more data windows maybe shown by panning the data windows up or down.Figure 2-204: System Setup – Data Field SetupHow to configure the Data Field windows:1. Tap and highlight the desired left data window to modify the datafield type. Note that the corresponding window in the SelectData Field Type table is also identified. The title of the selectedactive data window is highlighted in white with black lettering,and the data window is highlighted in shades of grey.System Setup Function 7450-0840-01Page 2-156© <strong>Honeywell</strong> International Inc. Do not copy without express permission of <strong>Honeywell</strong>Rev 4 Jan 2011
<strong>Honeywell</strong> Bendix/King AV8OR User’s Guide2. Drag the scroll bar to up and down to select the desired newdata field type. The abbreviation of the selected data type will bedisplayed in the highlighted left data field window along with itspresent value.3. Tap and highlight the left data window, the new data windowconfiguration is completed.4. Repeat 1 through 3 for each data field window to be changed.5. Totally 21 data field types can be selected, they are:• BRG: Bearing to WPT• CDI: Deviation Indicator• DIS: Distance to WPT• DEP TIME: Departure Time• DTK: Desired Track• ESA: En Route Safe Altitude• ETA WPT: Est. Time Of Arrival• ETE WPT: Est Time En Route• FLT TIME: Flight Time• GNDSPD: Ground Speed• GPS ALT: GPS Altitude• MSA: Minimum Safe Altitude• NEAR POS: Near Position Display• PPOS: Present Position• STP WTCH: Stop Watch• TIME: Time• TKE: Track Angle Error• TRACK: Actual Track• TRAFFIC: Traffic Mini-Targets• TTS: Track to Steer• WPT: Active WPT• XTK: Cross Track ErrorWIDE WINDOWS soft key controls the width of the data windows.Tap the WIDE WINDOWS soft key to expand the width of the datafield windows to make long labels in the windows more readable.The WIDE WINDOWS soft key changes to NARROW WINDOWSwhen the windows are set to WIDE WINDOWS as shown in thefigure below.7450-0840-01 System Setup FunctionRev 4 Jan 2011 Page 2-157© <strong>Honeywell</strong> International Inc. Do not copy without express permission of <strong>Honeywell</strong>
<strong>Honeywell</strong> Bendix/King AV8OR User’s GuideFigure 2-205: System Setup – Wide windows Data FieldTap the RESET VALUES soft key to set all option to their factorydefaults.FLIGHT PLAN DATA SETUPFlight Plan Data Setup page allows the user to set up the headersfor the flight plan in the flight planning section.Figure 2-206: System Setup – Flight Plan Data SetupThe ‘Flight Plan Data Column Setup’ table displays the currentcolumn headings for the flight plan data display. The ‘Select DataColumn Type’ table defines the column headings that are available.Tap on the ‘Flight Plan Data Column Setup’ table to highlight thedesired configurable column, the corresponding column type isdisplayed with a white border box in the ‘Select Data Column Type’table. Move the highlighted box to the desired new column headingthe heading in the above table changes as the lower table highlightis moved.System Setup Function 7450-0840-01Page 2-158© <strong>Honeywell</strong> International Inc. Do not copy without express permission of <strong>Honeywell</strong>Rev 4 Jan 2011
<strong>Honeywell</strong> Bendix/King AV8OR User’s GuideTap the RESET COLUMNS soft key to set the column heading totheir factory defaults.DEMO MODE SETUPThe data in the Demo Mode Setup window Figure 3-207 is used tocontrol the starting position, altitude, speed and initial track of thesimulator. You must select DEMO MODE on initial turn on to showthis menu selection See the Demo Mode section on page 2-4 forinstructions on how to enable Demo Mode.Figure 2-207: System Setup – Demo Mode SetupScroll up and down between the options, and set the values.• Ident: Use the Ident field to assign a name to the Initial Position(manual entry). Highlight the Ident and enter the Ident inputentry, the virtual keyboard is displayed. Input the Ident namecharacters. The system will search for similar Ident names in thedatabase based on the character being input, as shown in thefigure below. As an example when the user inputs LOS ANG,the system will display similar Ident names such as LOSANGELES/VAN NUYS. This function is convenient for the userby finishing the input of the full Ident name. The user can alsodefine a new name for the Ident.7450-0840-01 System Setup FunctionRev 4 Jan 2011 Page 2-159© <strong>Honeywell</strong> International Inc. Do not copy without express permission of <strong>Honeywell</strong>
<strong>Honeywell</strong> Bendix/King AV8OR User’s GuideFigure 2-208: System Setup – Demo Mode Setup Ident SettingsFigure 2-209: System Setup – Demo Mode Setup Ident Details• Initial Position: Determines the latitude and longitude of wherethe simulator flight starts. The user can input the latitude andlongitude.• Altitude: The simulators altitude can be set to any altitudebetween 0 and 99900 feet in 100-foot increments or between 0and 30500 meters in 100-meter increments.• Groundspeed: The simulators speed can be set to any valuebetween 0 and 999 in any of the selected speed units.• Track: Set the initial track from the initial WPT. Track can be setto any value between 0 and 359 degrees.When all the parameters have been entered tap the RESTARTDEMO soft key to restart the simulator and return to the SystemSetup Menu.System Setup Function 7450-0840-01Page 2-160© <strong>Honeywell</strong> International Inc. Do not copy without express permission of <strong>Honeywell</strong>Rev 4 Jan 2011
<strong>Honeywell</strong> Bendix/King AV8OR User’s GuideDEVICE SETUP PAGEThis page lets the user to configure the external interfaces (GPSReceiver, Flight Plan Device, and WX Receiver) to the unit.Figure 2-210: System Setup – Device Setup MenuThe Position Device port has the following Port options:• Internal (Default value)• Serial• BluetoothThe Position Device can be configured as either NMEA (defaultvalue) or AR-NAV.The Flight Plan Device has the following Port options:• Internal (Default value)• ExternalThe Flight Plan Device receives data in the following Type formats:• N/A (Default value)• NMEA• AR-NAV• ENH AR-NAV (Enhanced) allows arcs to be drawn in flight plan1.The Weather Device has the following Port options:• None• Serial (Default value)• Bluetooth1.The Weather Device receives data in the following Type formats:• N/A• WxWorx (Default value)7450-0840-01 System Setup FunctionRev 4 Jan 2011 Page 2-161© <strong>Honeywell</strong> International Inc. Do not copy without express permission of <strong>Honeywell</strong>
<strong>Honeywell</strong> Bendix/King AV8OR User’s Guide• KDR-610The Traffic Device has the following Port options:• None (Default value)• Serial• BluetoothThe Traffic Device receives data in the following Type formats:• N/A• ZAON Traffic1.The NMEA Device has the following Port options:• None (Default value)• Serial2.The NMEA Device receives data in the following Type format:• NMEA (Default value)STATUS PAGEFrom the System Setup Menu, tap the STATUS PAGE soft keyto access the System Status Menu page, as shown in the figurebelow.Figure 2-211: System Setup – Status PageThe System Status Menu page gives information about:• Internal GPS Status• External Position Source Status• Map Information• Software and Database Versions• System InformationSystem Setup Function 7450-0840-01Page 2-162© <strong>Honeywell</strong> International Inc. Do not copy without express permission of <strong>Honeywell</strong>Rev 4 Jan 2011
• Traffic Status• XM Weather Status<strong>Honeywell</strong> Bendix/King AV8OR User’s GuideInternal GPS Status: The Internal GPS Status Page shows theGPS status in two tables, as shown in the figure below. The firsttable shows the GPS receiver status. The second table shows theGPS satellite status for those that should be in view.Figure 2-212: System Setup – Internal GPS StatusExternal Position Source Status: The External Position SourceStatus page displays the reported status of the external GPSreceiver. (Only available if an external position source is configured)The Communication Status window is updated regularly.Figure 2-213: System Setup – External GPS StatusMap Information: The Common Map Data Sources Page shows thesources of the map data for the cartography, terrain and aeronauticaldata bases as shown in the figure below.7450-0840-01 System Setup FunctionRev 4 Jan 2011 Page 2-163© <strong>Honeywell</strong> International Inc. Do not copy without express permission of <strong>Honeywell</strong>
<strong>Honeywell</strong> Bendix/King AV8OR User’s GuideFigure 2-214: System Setup – Common Map Data SourcesSoftware and Database Versions: The Software and DatabaseVersions Page shows the software status in tables, as shownin Figure 2-215. The software table shows the application name,build status and operating system number. Databases table showsthe Region, the Aeronautical part number, the Expiration date, theCartography number and the Topography number.Figure 2-215: System Setup – Software and Database VersionSystem Information: This page shows the system status and eventcodes as follows:• Flight Log Start Time: The UTC time at the beginning of theflight.• Flight Log End Time: The UTC time at the end of the flight.• Run Time: The total time of the flight.• Cycles: The number of power cycles.System Setup Function 7450-0840-01Page 2-164© <strong>Honeywell</strong> International Inc. Do not copy without express permission of <strong>Honeywell</strong>Rev 4 Jan 2011
• Event Codes: A list of Events.<strong>Honeywell</strong> Bendix/King AV8OR User’s GuideFigure 2-216: System Information PageTraffic Status: The Traffic Status Page shows the status of theexternal traffic receiver, as shown in the figure below.Figure 2-217: Traffic Status PageThe Id and the communication status of the traffic device areshown.Weather Status: The Weather Status Page shows status of theexternal weather receiver, as shown in the figure below.7450-0840-01 System Setup FunctionRev 4 Jan 2011 Page 2-165© <strong>Honeywell</strong> International Inc. Do not copy without express permission of <strong>Honeywell</strong>
<strong>Honeywell</strong> Bendix/King AV8OR User’s GuideFigure 2-218: System Setup – Weather Status PageThe Weather Status column has the following fields:• Radio Serial Number – The ID of the XM receiver• Bit Error Rate – The rate of errors being received. The biterror rate for at least the ground station of one of thesatellites needs to be below 60 to get a good signal.• Service Level – The subscription level of service that thecustomer has purchased.The Communication Status column has the following fields:NOTE:• Receiving Data – A check mark indicates that data(communication) is being received from the XM receiver. Ared “X” indicates that data is not being received.• Receiving Valid Data - A check mark indicates that validdata (processed and useable weather data) is beingreceived from the XM receiver. A red “X” indicates thatreceived data is not valid.If a green check mark is displayed under “Receiving Data”and a Radio Serial number is displayed, then there is validcommunication between AV8OR and the weather receiver.A red X under “Receiving Valid Data” indicates a criticalproblem. It could mean a subscription problem (try theRefresh Mode update procedure listed below) or a weatherreceiver failure.When the XM receiver is first powered up, it may take 15 secondsor longer to see the following indications:System Setup Function 7450-0840-01Page 2-166© <strong>Honeywell</strong> International Inc. Do not copy without express permission of <strong>Honeywell</strong>Rev 4 Jan 2011
<strong>Honeywell</strong> Bendix/King AV8OR User’s Guide• The bit error rates drop down (the lower the better)• The service level displays on the page• The “Receiving Valid Data” goes green• The WX icon in the lower left hand status window displays thesignal strength.The bars on the WX icon in the status windowstrength of the incoming weather satellite signal.show the• Three bars indicates the strongest signal. All available WXproducts will be received for the subscription level that has beenpurchased.• Two bars indicates marginal reception. The NEXRAD weatherproduct may not be displayed.• One or no bars indicates that signal strength is too low to receiveweather product data.Refresh ModeNOTE: The REFRESH MODE soft key is only available when“WxWorx” is set as the Weather Type on the Device SetupPage.The REFRESH MODE soft key provides the user with an easymethod to activate the WxWorx receiver.Activation should only be necessary when the user is attempting touse the receiver for the first time, the user has changed subscriptionlevels or the WxWorx receiver has become deactivated for anyreason.To begin the activation process, the user either contacts WxWorxtechnical support or uses their website. After all of the appropriatedata has been submitted or entered, the XM system will transmit anactivation message within the next 3 hours.Tapping the REFRESH MODE soft key causes the AV8OR to sendcommands to the WxWorx receiver that forces it into the activationmode as long as the user remains on this page or taps the NORMALMODE soft key. When a Service Level is displayed, the activationhas been successfully completed.7450-0840-01 System Setup FunctionRev 4 Jan 2011 Page 2-167© <strong>Honeywell</strong> International Inc. Do not copy without express permission of <strong>Honeywell</strong>
<strong>Honeywell</strong> Bendix/King AV8OR User’s GuideTap the PREV PAGE soft key to return to the System Status Menu.NMEA OUTPUT SETUPThe NMEA interface is a standard that was developed to allow datacommunication between electronic instruments, navigationequipment and communications equipment.The NMEA standard uses a simple ASCII, serial communicationsprotocol that defines how data is transmitted in a "sentence" fromone "talker" to one "listener" at a time.AV8OR outputs a user selectable subset of the most commonnavigation NMEA sentences through the RS-232 port on the mini-USB port when configured properly.CAUTIONThe NMEA sentences supplied by AV8OR may not be thecorrect sentences for the all equipment that can receiveNMEA sentences.Even though NMEA outputs are intended for use withexperimental aircraft only, Bendix King is not responsible forthe correct operation of equipment that receives the NMEAoutput from AV8OR.The NMEA Output Setup page permits the NMEA setup options tobe configured, as shown in the figure below.Figure 2-219: NMEA Output Setup PageWhen using the NMEA output to talk to another device, refer to theuser guide for the device for the correct NMEA setup.System Setup Function 7450-0840-01Page 2-168© <strong>Honeywell</strong> International Inc. Do not copy without express permission of <strong>Honeywell</strong>Rev 4 Jan 2011
<strong>Honeywell</strong> Bendix/King AV8OR User’s GuideTap the SAVE & EXIT soft key to save any changes.Tap the RESET VALUES soft key to restore the values to theirfactory initial settings.Double tap on an option or tap once on an option to highlight it andthen tap on the EDIT soft key to display a pop up window to showthe possible values that can be set. Double tap the highlighted valueor highlight the value and tap on the SELECT soft key to change theitem’s values.NMEA Output Setup Options:Output Rate: The Output Rate sets the frequency that AV8ORsends a NMEA sentence per second. The Output Rate has thefollowing options:• 0.5 HZ (Default value)• 1 HZBaud Rate: The Baud Rate has the following options:• 4800 (Default value)• 9600Lat/Lon Minutes Precision: The Lat/Lon Minutes Precision hasthe following options:• XX.XX (Default value)• XX.XXX• XX.XXXXTransmit Default NMEA Sentences:The following sentences are always available for transmission whenNMEA output is selected in the Device Setup page:• GPGGA:: Global Positioning System Fix Data• GPRMB:: Recommended Minimum Navigation Data• GPRMC:: Recommended Minimum Specific GNSS DataTransmit Selected NEMA Sentences7450-0840-01 System Setup FunctionRev 4 Jan 2011 Page 2-169© <strong>Honeywell</strong> International Inc. Do not copy without express permission of <strong>Honeywell</strong>
<strong>Honeywell</strong> Bendix/King AV8OR User’s GuideThe following sentences can be selected to be included fortransmission when NMEA output is selected in the Device Setuppage:Transmit GPBWC: Bearing and Distance to WaypointThe sentence has the following options:• OFF (Default value)• ONTransmit GPGLL: Geographic Position – Latitude/LongitudeThe sentence has the following options:• OFF (Default value)• ONTransmit GPVTG: Course over Ground and Ground SpeedThe sentence has the following options:• OFF (Default value)• ONTransmit GPXTE: Measured Cross-Track ErrorThe sentence has the following options:• OFF (Default value)• ONTransmit GPGSA & GPGSV: GNSS DOP and Active Satellites,GNSS Satellites in ViewThe sentence has the following options:• OFF (Default value)• ONTransmit GPWPL & GPRTE: Waypoint Location, RoutesThe sentence has the following options:• OFF (Default value)• ONTransmit GPBOD: Bearing and Origin to DestinationThe sentence has the following options:• OFF (Default value)• ONSystem Setup Function 7450-0840-01Page 2-170© <strong>Honeywell</strong> International Inc. Do not copy without express permission of <strong>Honeywell</strong>Rev 4 Jan 2011
Shut Down<strong>Honeywell</strong> Bendix/King AV8OR User’s GuideTap the soft key on the Aviation Main Menu page to goto the Program Close page as shown in the figure below.Figure 2-220: Exit Go Fly Warning ScreenTap on the YES soft key to exit from the program or tap the NO softkey to stay in the programIf you tap the YES soft key, the Go Fly program is halted and a “GoFly is exiting” message is displayed as shown in the figure below.Figure 2-221: Go Fly exit screen7450-0840-01 System Setup FunctionRev 4 Jan 2011 Page 2-171© <strong>Honeywell</strong> International Inc. Do not copy without express permission of <strong>Honeywell</strong>
3. AUTOMOTIVE MODEOPERATION<strong>Honeywell</strong> Bendix/King AV8OR User’s GuideWARNINGS AND SAFETY INFORMATIONGoDrive is a navigation system that helps you find your way to yourdestination with a connected GPS receiver. GoDrive does nottransmit your GPS position; others cannot track you.It is important that you look at the display only when it is safe to doso. If you are the driver of the vehicle, we recommend that youoperate GoDrive before you start your journey. Plan the route beforeyour departure and stop if you need to change something in theroute.GoDrive has a Safety Mode: if you turn on Safety Mode, you cannotchange anything in GoDrive while the vehicle is moving at a speedof 6 mph (10 km/h) or higher. Unless only passengers operateGoDrive, we strongly encourage you to turn on Safety Mode.You must obey the traffic signs and follow the road geometry. If youdeviate from the route that GoDrive recommended, GoDrivechanges the instructions accordingly.Never place mobile devices where it obstructs the driver's view,where it is in the deployment zone of an airbag or where it mightcause injuries in an accident.CAUTIONLeaving the unit and / or mounting bracket on thedashboard or attached to the windshield of a car with thewindows closed on a hot day can cause damage to theunit and / or mounting bracket. The temperature in aclosed car can exceed 70 deg C (158 deg F).7450-0840-01 Automotive Mode OperationRev 4 Jan 2011 Page 3-1© <strong>Honeywell</strong> International Inc. Do not copy without express permission of <strong>Honeywell</strong>
<strong>Honeywell</strong> Bendix/King AV8OR User’s GuideMap UpdatesOver time, roads and features change. To keep the GoDrive Mapdatabase up to date, map subscriptions are available from Nav-n-Goat http://www.naviextrras.com. See the Subscriptions and Updatessection on page 6-20 for more information.GLOSSARY2D/3D GPS receptionThe GPS receiver uses satellite signals to calculate its (your)position and need at least four signals to give a three-dimensionalposition, including elevation. Because the satellites are moving andbecause objects can block the signals, your GPS device might notreceive four signals. If three satellites are available, the receiver cancalculate the horizontal GPS position but the accuracy is lower andthe GPS device does not give you elevation data: only 2D receptionis possible.Active routeThe Active route is the currently navigated route. You can save andload routes in GoDrive, but only one route can be active at anygiven time. It is always active until you delete it, reach yourdestination or you quit GoDrive. See also: Route.City CenterThe City Center is not the geometric center of the settlement but anarbitrary point the map creators have chosen. In towns and villages,it is usually the most important intersection; in larger cities, it is animportant intersection.GPS accuracySeveral factors have impact on the deviation between your realposition and the one given by the GPS device. For example, signaldelay in the ionosphere or reflecting objects near the GPS devicehave a different and varying impact on how accurately the GPSdevice can calculate your position.MapGoDrive works with digital maps which are not simply thecomputerized versions of traditional paper maps. Similarly to thepaper road maps, the 2D mode of digital maps show you streets,roads, and elevation is also shown by colors.You can use digital maps interactively: you can zoom in and out(increase or decrease the scale), you can tilt them up and down, andAutomotive Mode Operation 7450-0840-01Page 3-2© <strong>Honeywell</strong> International Inc. Do not copy without express permission of <strong>Honeywell</strong>Rev 4 Jan 2011
<strong>Honeywell</strong> Bendix/King AV8OR User’s Guideturn them left and right. In GPS-supported navigation, digital mapsfacilitate route planning.North-up map orientationIn North-up mode the map is rotated so its top always faces North.This is the orientation in 2D map view mode and in Overview mode.See also: Track-up map orientation.Overview modeYou can instruct GoDrive to automatically switch to Overview modeif the next route event is in a distance. In Overview mode the map isshown in 2D but scaled down to a predefined zoom level. When youapproach the next route event, the previous 2D or 3D map viewreturns automatically.RouteA route is a series of destinations to be reached one after the other.A simple route contains one start point and only one destination.Multi-point routes contain one or more via points (intermediatedestinations). The last route point is the final destination and theroute is cut into different legs (from one destination to the next).SchemeGoDrive comes with different color schemes for the map for daytimeor night use. Schemes are custom graphic settings for the map andthey can have different colors for streets, blocks or surface waters in2D and 3D modes, and they display shades or shadows in differentways in 3D mode.One daytime scheme and one night scheme is always selected.GoDrive uses them when it switches from day to night and back.Track-up map orientationIn Track-up mode the map is rotated so its top always points in thecurrent driving direction. This is the default orientation in 3D mapview mode. See also: North-up map orientation.Road Safety CameraA special POI type exists for speed cameras and red light cameras.Different data sources are available, and you can also mark theposition of a Road Safety Camera on the map.You can configure GoDrive to warn you when you approach one ofthese cameras.7450-0840-01 Automotive Mode OperationRev 4 Jan 2011 Page 3-3© <strong>Honeywell</strong> International Inc. Do not copy without express permission of <strong>Honeywell</strong>
<strong>Honeywell</strong> Bendix/King AV8OR User’s GuideGETTING STARTEDFrom the Main Menu (refer to Figure 3-1), tap thekey to start the GoDrive Automotive Navigation program.softFigure 3-1: AV8OR Main MenuWhen GoDrive is started the first time, you need to do the following:• Select the written language of the application. Later you canchange it in the Settings Menu section.• Select the language and speaker used for voice guidancemessages. Later you can change it in Settings Menusection.• Select whether to start the program in “Simple” mode or in“Advanced” mode. Later you can switch between the twooperating modes in Settings Menu section.After this, the Navigation menu appears and you can start usingGoDrive. Figure 4-2 displays the Navigation menu in Simple mode.Automotive Mode Operation 7450-0840-01Page 3-4© <strong>Honeywell</strong> International Inc. Do not copy without express permission of <strong>Honeywell</strong>Rev 4 Jan 2011
<strong>Honeywell</strong> Bendix/King AV8OR User’s GuideFigure 3-2: Simple ModeFigure 4-3 displays the Navigation menu in Advanced mode:Figure 3-3: Advanced ModeThe typical way of using GoDrive is to select a destination, and startnavigating. You can select your destination in the following ways (notall of them are available in Simple mode):• Use the selected location on the map.• Enter a full address or a part of an address, for example a streetname without a house number or the names of two intersectingstreets.• Enter an address with postal code. This way you do not need toselect the name of the settlement and the search for streetnames might be faster as well.• Use a coordinate.7450-0840-01 Automotive Mode OperationRev 4 Jan 2011 Page 3-5© <strong>Honeywell</strong> International Inc. Do not copy without express permission of <strong>Honeywell</strong>
<strong>Honeywell</strong> Bendix/King AV8OR User’s Guide• Use a saved location:o A Favoriteo A POIo The History of previously set destinations and waypoints.Simple and Advanced modesThe two operating modes of GoDrive mainly differ in the menustructure and the number of available features. The controls andscreen layouts are the same.• Simple mode: you have easy access to the most importantnavigation functions and the basic settings only. The rest ofthe settings are set to values that are optimal for typical use.• Advanced mode: you have access to the full functionality ofGoDrive.To switch from Simple mode to Advance mode: on the startupscreen (Navigation Menu), tap ,.To switch from Advanced mode Simple mode on the startup screen(Navigation Menu), tap , .The features and settings available in each mode are as follows:Table 3-1: Simple Mode versus Advanced ModeType of actionNavigating to a selectedmap pointNavigating to a streetaddressAvailablein SimplemodeYesYesAvailableinAdvancedmodeYesYesNavigating to an Yes YesAutomotive Mode Operation 7450-0840-01Page 3-6© <strong>Honeywell</strong> International Inc. Do not copy without express permission of <strong>Honeywell</strong>Rev 4 Jan 2011
<strong>Honeywell</strong> Bendix/King AV8OR User’s GuideType of actionincomplete addressAvailablein SimplemodeAvailableinAdvancedmodeNavigating to anintersectionNavigating to recentdestinations (History)YesYesYesYesNavigating to Favorites Yes YesNavigating to a POI Yes YesNavigating to coordinates No YesCreating a multi-pointrouteSaving a map point as aFavorite destinationSaving a map point as aPOISaving a map point as alocation of a Road SafetyCameraMark a map point with aPinNoYesNoNoNoYesYesYesYesYesSaving the active route No YesSaving Track Logs No YesMap Screen settings No YesMenu settingsOnlybackgroundYes7450-0840-01 Automotive Mode OperationRev 4 Jan 2011 Page 3-7© <strong>Honeywell</strong> International Inc. Do not copy without express permission of <strong>Honeywell</strong>
<strong>Honeywell</strong> Bendix/King AV8OR User’s GuideType of actionAvailablein SimplemodepictureAvailableinAdvancedmodeSound settingsOnlyMastervolumeYesRoute Planning options Yes YesRegional settingsOnlylanguageselectionYesWarnings No YesSoft Keys and Controls on the screenYou only need to confirm selections or changes in GoDrive if theapplication needs to restart, it needs to perform a majorreconfiguration, or you are about to lose some of your data orsettings. Otherwise,immediately.saves and applies the new settingsTable 3-2: Soft keys and controls on the screenType Example Description How to useitSoft KeyTap it to initiatea function, toopen a newscreen, or to seta parameter.Tap it once.Automotive Mode Operation 7450-0840-01Page 3-8© <strong>Honeywell</strong> International Inc. Do not copy without express permission of <strong>Honeywell</strong>Rev 4 Jan 2011
<strong>Honeywell</strong> Bendix/King AV8OR User’s GuideType Example Description How to useitIcon Shows statusinformation.Some iconsalso functionas a softKey. Tapthem once.ListWhen you needto select fromseveral options,they appear in alist.Turnpagethethewithandsoft Keysand tap thevalue thatyou want.SliderWhen a featurehas severaldifferentunnamedvalues, GoDriveshows anindicator on agauge thatdisplays andsets a valuefrom a range.• Drag thehandle tomove theslider to itsnewposition.• Tap thesliderwhere youwant thehandle toappear; thethumbjumpsthere.7450-0840-01 Automotive Mode OperationRev 4 Jan 2011 Page 3-9© <strong>Honeywell</strong> International Inc. Do not copy without express permission of <strong>Honeywell</strong>
<strong>Honeywell</strong> Bendix/King AV8OR User’s GuideType Example Description How to useitSwitchVirtualkeyboardWhen there areonly twochoices, acheckmarkshows whetherthe feature isenabled.Alphabetic andalphanumerickeyboards toenter text andnumbers.Tap it to turnthe switchon or off.Each key isa touchscreen softKey.USING KEYBOARDSYou only need to enter letters or numbers in GoDrive when youcannot avoid it. You can type with your fingertips on the full-screenkeyboards and you can switch between various keyboard layouts, forexample ABC, QWERTY, or numerical.Table 3-3: Using KeyboardsTaskSwitching to anotherkeyboard layout, forexample from a LatinQWERTY keyboard toa Greek keyboardDetailsTapand select from thelist of available keyboard types.Correcting your entryon the keyboardRemove the unneeded character(s): tap.Tapand hold the soft Keyto delete the entire input string.Automotive Mode Operation 7450-0840-01Page 3-10© <strong>Honeywell</strong> International Inc. Do not copy without express permission of <strong>Honeywell</strong>Rev 4 Jan 2011
<strong>Honeywell</strong> Bendix/King AV8OR User’s GuideEntering a space, forexample between a firstname and a familyname or in multi-wordstreet namesEntering small or capitallettersEntering symbolsFinalizing the keyboardentryTap .Tap to cycle through entering lowercase letters, capital initials or all capitals.Tap to switch to a keyboard ofsymbol characters.Tap .ADDITIONAL CONTROLSTable 3-4: Additional ControlsTasksTappingholdingscreenandtheInstructionsYou do not need this to access the basicnavigation functions. Tap and keep pressing thefollowing soft Keys to reach extra functions:• Tap and hold on the Map screen: you canset the minimum and maximum zoom level ofSmart Zoom.• Tap and hold any of thesoft Keys on the Mapscreen: you can set or reset the zoom value of thesoft Key (2D map).• Tap and hold any of thesoft Keys on the Mapscreen: you can set or reset the tilt and zoom7450-0840-01 Automotive Mode OperationRev 4 Jan 2011 Page 3-11© <strong>Honeywell</strong> International Inc. Do not copy without express permission of <strong>Honeywell</strong>
<strong>Honeywell</strong> Bendix/King AV8OR User’s GuideTasksInstructionsvalues of the soft Key (3D map).• Tap and holdon list and menuscreens: the Navigation menu appears.AdditionalTappingholdingscreenfunctionsandtheTap and hold any of thesoft Keys on the Map screen: youcan rotate, tilt or scale the map continuously.• Tap and hold on keyboardscreens: you can delete several charactersquickly.• Tap and hold or in long lists: youcan turn the page continuously.• Tap and hold the soft Keys in the Quick menuto open screens from the Manage menu orthe Settings menu related with the function ofthe soft Key.• • In portrait screen orientation there aresymbols (instead of labels) on the soft Keys atthe bottom of the screen. Tap and hold any ofthese soft Keys, and its name pops up at thecenter of the screen.Gestures (drag& drop)You do not need gestures to access the basicnavigation features. You need to drag and dropthe screen only in cases like:• Moving the handle on a slider.• Moving the map: grab the map, and move it inthe desired direction.• Shortcut to open the Map screen: slide yourfinger from the bottom right corner to theAutomotive Mode Operation 7450-0840-01Page 3-12© <strong>Honeywell</strong> International Inc. Do not copy without express permission of <strong>Honeywell</strong>Rev 4 Jan 2011
<strong>Honeywell</strong> Bendix/King AV8OR User’s GuideTasksInstructionsbottom left corner on any screen.Shortcut to open the Navigation menu: slide yourfinger from the top left corner to the bottom leftcorner on any screen.USING THE MAPThe map screen is the most frequently used screen of GoDrive. Itcan be accessed from the Navigation menu by tappingFigure 3-4: Map ScreenFor further information about the map screen, refer to the MapScreen section.CHECKING THE DETAILS OF A MAP LOCATION• If you are interested in the details of your current position duringnavigation:1. Check the bottom line of the map. It shows the current streetand house number information.2. For further details, tap to open the Position menu.7450-0840-01 Automotive Mode OperationRev 4 Jan 2011 Page 3-13© <strong>Honeywell</strong> International Inc. Do not copy without express permission of <strong>Honeywell</strong>
<strong>Honeywell</strong> Bendix/King AV8OR User’s Guide3. Tap The address, the coordinate and the listof nearby POIs will be displayed.• You can check the details of any other location by selecting it onthe map:1. Tap the map anywhere to open the map control soft Keys.2. Tap the desired location on the map. The Cursor ( )3. For Further details, tap to open the Cursor menu.4. Tap The address, the coordinate and the listof nearby POIs will be displayed.• It is even easier if you select the desired point in the Find menu.Then the Cursor menu opens automatically. You only need to tap thesoft Key.MANIPULATING THE MAPPosition markers on the map:Current GPS position:Selected location (Cursor):The following controls help you modify the map view to best suit youractual needs. Most of these controls appear only if you tap the maponce, and disappear after a few seconds of inactivity.Table 3-5: Controls to manipulate the MapAction Soft Key(s) DescriptionAutomotive Mode Operation 7450-0840-01Page 3-14© <strong>Honeywell</strong> International Inc. Do not copy without express permission of <strong>Honeywell</strong>Rev 4 Jan 2011
Action Soft Key(s) Description<strong>Honeywell</strong> Bendix/King AV8OR User’s GuideMoving the mapwith drag &dropNo soft KeysYou can move the map intoany direction: tap and hold themap, and move your finger tothe direction in which you wantto move the map.If GPS position is availableand you have moved the map,Opening/closingmap control softKeysZooming in andoutthe soft Key appears.Tap this soft Key to return tothe GPS position.Tap this soft Key to show orhide the following map controlsoft Keys:• Zoom in/out• Rotate left/right (3D maponly)• Tilt up/down (3D map only)• Zoom preset soft Keys (2Dmap only)• Tilt and zoom preset softKeys (3D map only)• Return to GPS position softKey Smart Zoom soft KeyChanges how much of themap is displayed on thescreen. GoDrive uses highqualityvector maps that let yousee the map at various zoomlevels, always with optimizedcontent. It always displaysstreet names and other textwith the same font size, neverupside-down, and you only seethe streets and objects thatyou need. Map scaling hasdifferent limits in 2D and in 3D7450-0840-01 Automotive Mode OperationRev 4 Jan 2011 Page 3-15© <strong>Honeywell</strong> International Inc. Do not copy without express permission of <strong>Honeywell</strong>
<strong>Honeywell</strong> Bendix/King AV8OR User’s GuideAction Soft Key(s) Descriptionmap view modes.Tilting up anddownChanges the vertical viewangle of the map in 3D mode.Rotatingand rightleftChanges the horizontal viewangle of the map in 3D mode.When GPS position isavailable, GoDrive alwaysrotates the map so its topfaces your direction of travel(Track-Up orientation). Youcan turn away from Track-Upwith these soft Keys. If GPSposition is available and youhave rotated the map, thesoft Key appears. Tapthis soft Key to re-enable theautomatic map rotation.Viewing modesGives you the following mapperspectives in GoDrive:• classic top-down view (2D)• • perspective view (3D) Thevalue always shows themode the soft Key switchesto: If you are in 2D mode,you can seethe softAutomotive Mode Operation 7450-0840-01Page 3-16© <strong>Honeywell</strong> International Inc. Do not copy without express permission of <strong>Honeywell</strong>Rev 4 Jan 2011
Action Soft Key(s) Description<strong>Honeywell</strong> Bendix/King AV8OR User’s GuideKey and you need to tap it toswitch to 3D mode.STATUS INFORMATION AND HIDDEN CONTROLS ON THE MAPThe following information appears in the rounded field in the top leftcorner, the Turn Preview field. When tapping this area, the resultdepends on the information currently shown.Icon Information Details ActionThere is noactive routein SimplemodeIf there is no route tobe navigated inSimple mode, thisicon appears in theTurn Preview field.Tap this area toopen FindAddress.There is noactive routein AdvancedmodeIf there is no route tobe navigated inAdvanced mode, thisicon appears in theTurn Preview fieldTap this area toopen Find.,There is novalid GPSposition.If an active routeexists, and there is novalid GPS position,the view of the skyabove you is shownwith colored dots foreach satellite. Somedots need to turngreen to be able tonavigate.Tap this area toopen the RouteInformationscreen.7450-0840-01 Automotive Mode OperationRev 4 Jan 2011 Page 3-17© <strong>Honeywell</strong> International Inc. Do not copy without express permission of <strong>Honeywell</strong>
<strong>Honeywell</strong> Bendix/King AV8OR User’s GuideIcon Information Details ActionIf the icon is GPS position and an Tap this area toaactive route are make GoDrivestatic picture, available, but recalculate theroute automatic off-route recommendedcalculation is recalculation is route.needed switched off, and youdeviated from theroute.If the icon is GoDriveis Nothinganimated, calculating or happens if youroute,calculation isin progressrecalculating the route tap this area ofthe screen,,Next routeevent (nextmaneuver)GPS position and anactive route areavailable, and younavigate therecommended route.This area gives youinformation about thetype and distance ofthe next route event.Tap this area toopen the RouteInformationscreen.The following area appears next to the above described roundedarea. When tapping this area, the result depends on the informationcurrently shown.Icon Information Details ActionThere is novalid GPSpositionIf there is novalid GPSposition, thissymbolappears here.Tap this areato open theGPS Datascreen tocheck thesignal status orAutomotive Mode Operation 7450-0840-01Page 3-18© <strong>Honeywell</strong> International Inc. Do not copy without express permission of <strong>Honeywell</strong>Rev 4 Jan 2011
<strong>Honeywell</strong> Bendix/King AV8OR User’s GuideIcon Information Details Actionthe connectionsettings.TrafficrestrictionWhen GPSposition isavailable, butthere is noroute to benavigated, thetrafficrestriction ofthe upcomingintersection isshown here ifthere is anyNothinghappens if youtap this area ofthe screen.,Second routeevent(maneuverafter the nextmaneuver)When GPSposition and anactive route areboth available,this field showsthe route eventthat follows thenext routeevent shown inthe abovedescribed area.Tap this areato open theItineraryscreen with theturn by turnguidanceinstructions.Approachinga RoadSafetyCameraThis iconappears whenyou areapproaching aRoad SafetyCamera, andthe warning forcameras isenabled inSettings.Tap this areato suppressthe audiblecamerawarning.7450-0840-01 Automotive Mode OperationRev 4 Jan 2011 Page 3-19© <strong>Honeywell</strong> International Inc. Do not copy without express permission of <strong>Honeywell</strong>
<strong>Honeywell</strong> Bendix/King AV8OR User’s GuideIcon Information Details ActionStops therunningsimulationRouterecalculationprogressThis iconappears duringRoute Fly Over,RouteSimulation, andTrack Logplayback.During routerecalculation,this field showstherecalculationprogressbetween 0%and 100%.Tap this areato stop thesimulation.Nothinghappens if youtap this area ofthe screen.The following symbols appear in the Indicator strip:IconDescriptionThe sound output of GoDrive is muted.The sound output of GoDrive is enabled.GoDrive records a Track log when GPS position isavailable.Track log recording is disabled.No TMC receiver is connected or TMC is turnedoff.TMC receiver is connected and a radio station withTMC broadcast is received.Automotive Mode Operation 7450-0840-01Page 3-20© <strong>Honeywell</strong> International Inc. Do not copy without express permission of <strong>Honeywell</strong>Rev 4 Jan 2011
<strong>Honeywell</strong> Bendix/King AV8OR User’s GuideIconDescriptionThere are new, unread TMC events.IconDescriptionA part of the route is bypassed based on TMCevents.A part of the route is mentioned in TMC events butcould not be bypassed (for example, thedestination is on a congested street).The Bluetooth radio is switched off.The Bluetooth radio is turned on, but no telephoneis connected.There is an error in the Bluetooth connection.GoDrive is connected to a telephone as a handsfree set via Bluetooth.A phone call is in progress over the Bluetoothconnection.The following information can be seen in the three data fields shownon the map screen. Tap this area to open the Trip Information screenwhere you can select which values to be shown in these three fields.When there is no active route, these fields show the followinginformation: current speed, compass and the current time of day.Icon Type More information7450-0840-01 Automotive Mode OperationRev 4 Jan 2011 Page 3-21© <strong>Honeywell</strong> International Inc. Do not copy without express permission of <strong>Honeywell</strong>
<strong>Honeywell</strong> Bendix/King AV8OR User’s GuideIcon Type More informationCompassSpeedinformationShows the direction of your headingboth when the map is automaticallyrotated (3D) and when the map isalways facing North (2D).There are speed values that can beshown: • Current speed • Speedlimit on the current roadTimeinformationDistanceinformationThere are time values that can beshown: • Current GPS time• Time remaining to reach thedestination • Time remaining toreach the next via point• Estimated arrival time at thedestination• Estimated arrival time at the nextvia pointThere are distance type values thatcan be shown:• Distance remaining to reach thedestination• Distance remaining to reach thenext via point • Current altitudeThe next area is a combined status field. Tap this area to open theQuick menu (Refer to Figure 3-13: Quick Menu)..IconStatusforGPSpositionqualityMore informationThe more lit bars, the better is the GPSposition.Automotive Mode Operation 7450-0840-01Page 3-22© <strong>Honeywell</strong> International Inc. Do not copy without express permission of <strong>Honeywell</strong>Rev 4 Jan 2011
IconStatusforBatterystatus<strong>Honeywell</strong> Bendix/King AV8OR User’s GuideMore informationThe device is running on battery power.The number of lit bars represent theremaining capacity.Thebatteryis beingchargedThe device is running on external power.The battery is being charged.VehicletypeThe symbol displays the vehicle type usedfor route calculation.USING THE CURSOR (THE SELECTED MAP LOCATION)First, place the Cursor at the desired map location with one of thefollowing options:• Use the Find menu to select a location. The map returns with theselected point (the Cursor) in the middle, and the Cursor menuappears with the available options.• Tap the screen and tap again to place the Cursor at the desiredlocation. Now tapto open the Cursor menu.You can perform the following actions:Soft KeyActionIn the active route, uses the Cursor as thestart point by replacing the current GPSposition (available in Advanced modeonly)In the active route, uses the Cursor as thedestination by replacing the previousdestination7450-0840-01 Automotive Mode OperationRev 4 Jan 2011 Page 3-23© <strong>Honeywell</strong> International Inc. Do not copy without express permission of <strong>Honeywell</strong>
<strong>Honeywell</strong> Bendix/King AV8OR User’s GuideSoft KeyActionIn the active route, uses the Cursor as avia point (an intermediate destination)preceding the destination (available inAdvanced mode only)In the active route, uses the Cursor as thedestination while keeping the previousdestination as a via point (available inAdvanced mode only)Shows the different routes calculated bythe available routing methods. Choosethe one that suits your needs thebest.(available in Advanced mode only)Saves the Cursor as a POI(available inAdvanced mode only)Saves the Cursor as a Favorite locationSaves the Cursor as a Road SafetyCamera location (available in Advancedmode only)Marks the map with a Pin at the Cursor(available in Advanced mode only)Opens a screen with the name, addressand coordinate information of the Cursor,and the list of POIs near itAdvanced FunctionsSMART ZOOMSmart Zoom is a lot more than just a usual automatic zoom:While following a route calculated by GoDrive:When approaching a turn, it will zoom in and raise the view angle tolet you easily recognize your maneuver at the next junction. If thenext turn is at a distance, it will zoom out and lower the view angle toAutomotive Mode Operation 7450-0840-01Page 3-24© <strong>Honeywell</strong> International Inc. Do not copy without express permission of <strong>Honeywell</strong>Rev 4 Jan 2011
<strong>Honeywell</strong> Bendix/King AV8OR User’s Guidebe flat so you can see the road in front of you.While driving without an active route in GoDrive:Smart Zoom will zoom in if you drive slowly and zoom out to the limitset here when you drive at high speed.Enabling Smart ZoomTap the map to let the map control soft Keys appear, and then tapto enable Smart Zoom.Fine-tuning Smart ZoomTap the map to let the map control soft Keys appear, and then tapand hold to open the Smart Zoom Settings window. Modifythe zoom limits of Smart Zoom if necessary.POSITION MARKERSCURRENT GPS POSITION AND LOCK-ON-ROADWhen your GPS position is available, GoDrive marks your currentposition with the icon on the map. The exact location of theposition marker depends on the vehicle type used for routecalculation.The vehicle type can be selected in Route settings or in the QuickMenu.• If you choose pedestrian: The icon is at your exact GPSposition. The direction of the icon shows your actual heading.• If you choose any of the vehicles: The icon is aligned tothe nearest road to suppress GPS position errors. The directionof the icon is one of the directions of the route.To use the current GPS position, tap. The Position menu7450-0840-01 Automotive Mode OperationRev 4 Jan 2011 Page 3-25© <strong>Honeywell</strong> International Inc. Do not copy without express permission of <strong>Honeywell</strong>
<strong>Honeywell</strong> Bendix/King AV8OR User’s Guideappears and you can save the GPS position as one of the following:• A Favorite• A Road Safety Camera• A POI• A map marker PinRETURNING TO NORMAL NAVIGATIONWhen GPS position is available, and you have moved the map (theicon is moving or is not even visible), or you have rotated themap in 3D mode, the soft Key appears. Tap it to move themap back to the GPS position and re-enable Track-up maporientation (automatic map rotation).Note!Even if you move the map while you are driving, GoDrivecontinues navigating if there is an active route: it plays thevoice instructions and displays the turn preview iconsaccording to your current GPS position.SELECTED LOCATION (CURSOR)If you select a location in the Find menu, or you tap the map whenthe map control soft Keys are visible, the Cursor appears at theselected point on the map. GoDrive displays the Cursor with aradiating red dot ( ) to make it visible at all zoom levels, evenwhen it is in the background of a 3D map view.When the Cursor is set, tap . The Cursor menu appears andyou can use the Cursor as one of the following:• The start point of a route• A via point in a route• The destination of a routeYou can also search for POIs around the Cursor. Or you can savethe location of the Cursor as:Automotive Mode Operation 7450-0840-01Page 3-26© <strong>Honeywell</strong> International Inc. Do not copy without express permission of <strong>Honeywell</strong>Rev 4 Jan 2011
• A Favorite• A Road Safety Camera• A POI• A map marker PinORIGINAL POSITION IN THE CURSOR MENU<strong>Honeywell</strong> Bendix/King AV8OR User’s GuideWhen the Cursor menu is open, a special icon ( ) shows theCursor position the menu was opened with.You can move and zoom the map, and you can set the Cursor to adifferent place. The usual cursor ( ) appears, and the soft Keysof the Cursor menu initiate actions for this new location.To return to the original Cursor position, tap . The map jumpsback to the position with which the Cursor menu was opened, andthe icon appears again.DAYTIME AND NIGHT COLOR SCHEMESGoDrive uses different color schemes during the day and during thenight.Daytime colors are similar to paper road maps.The night color schemes use dark colors for large objects to keepthe average brightness of the screen low.GoDrive offers different daytime and night color schemes. It canalso switch automatically between the daytime and the night schemebased on the current time and GPS position a few minutes beforesunrise, when the sky has already turned bright, and a few minutesafter sunset, before it becomes dark.COLOR SCHEME IN TUNNELSWhen entering a tunnel, the colors of the map change. All buildingsdisappear, the large objects (such as surface waters or forests) andthe empty areas between roads become black.However, roads and streets keep their original colors from thedaytime or night color scheme currently used.7450-0840-01 Automotive Mode OperationRev 4 Jan 2011 Page 3-27© <strong>Honeywell</strong> International Inc. Do not copy without express permission of <strong>Honeywell</strong>
<strong>Honeywell</strong> Bendix/King AV8OR User’s GuideAfter leaving the tunnel, the original colors return.ROUTE CALCULATION AND RECALCULATIONGoDrive calculates the route based on your preferences:Route calculation method:• Fast• Short• Economical• EasyVehicle types:• Car• Taxi• Bus• Emergency vehicles• Bicycle• PedestrianRoad types• Unpaved Roads• Permit Needed• Motorways• Toll Roads• Charge Roads• Ferries• Cross-border Planning• Carpool Lanes (appears only when used in the USA)GoDrive automatically recalculates the route if you deviate from theproposed itinerary. For further information about Route Planningoptions, refer to the Settings Menu section.ITINERARYThe Itinerary is the list of the route events, that is, the drivingAutomotive Mode Operation 7450-0840-01Page 3-28© <strong>Honeywell</strong> International Inc. Do not copy without express permission of <strong>Honeywell</strong>Rev 4 Jan 2011
instructions.<strong>Honeywell</strong> Bendix/King AV8OR User’s GuideFigure 3-5: ItineraryWhen you are on the Map screen, you can display the Itinerary inone of the following ways:- Tap the area between the Turn preview and the Travel data fieldswhere the symbol of the second next maneuver is displayed (forexample: ).- In Advanced mode, tap the following soft Keys: , ,You have the following options on the Itinerary screen:Table 3-6: Itenerary ScreenSoft KeyDescriptionAny of the list items Opens the map with the selectedmaneuver in the middle.7450-0840-01 Automotive Mode OperationRev 4 Jan 2011 Page 3-29© <strong>Honeywell</strong> International Inc. Do not copy without express permission of <strong>Honeywell</strong>
<strong>Honeywell</strong> Bendix/King AV8OR User’s GuideSoft KeyDescriptionChanges the detail level of the Itinerary.The levels are as follows:• Detailed Instructions: all intersectionsare listed• Itinerary: only significant intersections(the ones announced in voice guidance)are listed• Road list: the list of the roads used whilenavigating the routeTurns the page for additional list items.,When the map is open with a maneuver in the middle:Soft KeyDescriptionZooms in the map.Zooms out the map.,Moves the map to show the previous or nextmaneuver.Soft KeyDescriptionOpens a screen where you can avoid a partof the route starting from the selectedmaneuver.TRACK LOGSGoDrive can log the track that you drive.A Track Log is a recording of how your GPS position changed and itis independent of the route that GoDrive calculated.Automotive Mode Operation 7450-0840-01Page 3-30© <strong>Honeywell</strong> International Inc. Do not copy without express permission of <strong>Honeywell</strong>Rev 4 Jan 2011
<strong>Honeywell</strong> Bendix/King AV8OR User’s GuideTrack Logs can be recorded, renamed, replayed, shown on the map,exported to a memory card in GPX format, and deleted. See page69.Independently of the normal track log, you can instruct GoDrive torecord the native GPS data received from the GPS device. Theselogs are saved as separate text files on the memory card, and theycannot be shown or replayed in GoDrive.To turn on NMEA/SIRF log saving, tap the following soft Keys:, , , .ROUTE DEMONSTRATIONA simulation drives you through the route, following the drivinginstructions. You can choose from a simulation at high speed or atnormal driving speed.You can use it, for example, to see which bridge GoDrive plannedfor the route; if you do not want to take that bridge, you can avoid it.Route demonstrations can be started from the Route menu bytapping the(high speed simulation) or the(normal speed simulation) soft Key.POI (POINTS OF INTEREST)A point of interest (POI) is a location that someone might find usefulor interesting. GoDrive is delivered with thousands of POIs and youcan also create your own POIs in the application.POI locations are marked on the map with special icons. POI iconsare quite large so you can easily recognize the symbol. The iconsare also semi-transparent: they do not cover the streets andintersections behind them.POIs are grouped into several levels of categories andsubcategories. The icon of a POI that comes with the map shows thesymbol of the POI category. If you save your own POI, you canselect an icon for it independently of the POI category you have put itin.7450-0840-01 Automotive Mode OperationRev 4 Jan 2011 Page 3-31© <strong>Honeywell</strong> International Inc. Do not copy without express permission of <strong>Honeywell</strong>
<strong>Honeywell</strong> Bendix/King AV8OR User’s GuideSAVING POITo save a POI, place the Cursor () at the desired location,then tap the following soft Keys: , ,.MANAGING POIYou can select which POI groups to show and which ones to hide onthe map, and from which zoom levels POI icons are visible. At thesame place you can manage the saved POIs. A saved POI can berenamed, moved to a different POI group, its icon can be changed,or a phone number and additional information can be added to it.Tap the following soft Keys: , ,ROAD SAFETY CAMERASThe location of a Road Safety Camera is a special POI. They cannotbe searched like other POIs, and there is a special proximity warningonly for cameras.QUESTIONCan Road Safety Camera locations be uploaded in atext file?Can you save the Cursor as the location of a RoadSafety Camera?ANSWERYesYesAutomotive Mode Operation 7450-0840-01Page 3-32© <strong>Honeywell</strong> International Inc. Do not copy without express permission of <strong>Honeywell</strong>Rev 4 Jan 2011
<strong>Honeywell</strong> Bendix/King AV8OR User’s GuideSAVING ROAD SAFETY CAMERASTo save the location of a Road Safety Camera, place the Cursor () at the desired location, then tap the following soft Keys:, , .CAMERA WARNINGWhen you approach a Road Safety Camera with the warningenabled, the following happens:• Visible Warning: The type of the camera is displayed in thesecondary Turn Preview field (for example).• Audible Warning: If there is no speed limit given for the camera,or your speed is under the given speed limit, single beeps warnyou about the camera.• If you exceed the speed limit of the camera, the following alsohappens:o Visible Warning: A symbol with the speed limit appears inothe corner of the map (for example: ),Audible Warning: A special alert sound is played.CAMERA TYPESThe warning for Road Safety Cameras can be turned on in WarningSettings. Tap the following soft keys , , ,.When you approach a Road Safety Camera with the warningenabled, the following happens:7450-0840-01 Automotive Mode OperationRev 4 Jan 2011 Page 3-33© <strong>Honeywell</strong> International Inc. Do not copy without express permission of <strong>Honeywell</strong>
<strong>Honeywell</strong> Bendix/King AV8OR User’s GuideVisible Warning: The type of the camera is displayed in thesecondary Turn Preview field (for example ).• Audible Warning: If there is no speed limit given for the camera,or your speed is under the given speed limit, single beeps warnyou about the camera.• If you exceed the speed limit of the camera, the following alsohappens:o Visible Warning: A symbol with the speed limit appears inothe corner of the map (for example: ).Audible Warning: A special alert sound is played.There are different types of Road Safety Cameras.Table 3-7: Road Safety CamerasSymbol Type DescriptionFixed Some speed cameras stand by theroadside, looking in one direction,measuring one or both directions of thetraffic. They measure your current speed.For these speed cameras you can specifythe controlled traffic direction and the speedlimit. GoDrive warns you when youapproach these speed cameras in themeasured direction. If your speed exceedsthe speed limit near the speed camera,GoDrive plays a special warning sound.MobileBuilt-inSome speed cameras are operated fromvehicles. They do not always work and theyare not set to check a preset speed limit.The warning is similar to fixed speedcameras, but as there is no speed limitgiven, only the proximity is announced.Some speed cameras are built into trafficlights. They work like fixed speed cameras,but they are difficult to spot. The warning forproximity and speeding is the same as forAutomotive Mode Operation 7450-0840-01Page 3-34© <strong>Honeywell</strong> International Inc. Do not copy without express permission of <strong>Honeywell</strong>Rev 4 Jan 2011
Symbol Type Description<strong>Honeywell</strong> Bendix/King AV8OR User’s Guidethe fixed speed cameras.SectioncontrolRed lightThese speed cameras work in pairs, and donot measure your current speed but youraverage speed between the two speedcameras. Both identify your car and recordthe exact time you pass them. They use thedifference between the two points in time tocalculate your average speed. GoDrivewarns you when you approach one of thesespeed cameras, but as you pass by, thewarning stays on, and your average speedis measured until you reach another speedcamera of this type. If your average speedexceeds the speed limit between the twospeed cameras, you receive the samespecial warning sound as with the otherspeed camera types. In the rare caseGoDrive cannot register the moment youpass the second speed camera (forexample, it is placed at the exit of a tunnelwhere GPS position is not yet available) thewarning continues. Just tap the speedcamera symbol displayed on the screen tostop the warning.These cameras check if you obey trafficlights. The warning is similar to mobilespeed cameras: as there is no speed limitgiven, only the proximity is announced.CAMERA DIRECTIONSA speed camera can measure the speed of one direction of thetraffic, both directions, or even several directions in an intersection,when they are mounted on a rotating base. The same directionsapply to red light cameras. GoDrive warns you only if you drive in ameasured or possibly measured direction. The measured direction of7450-0840-01 Automotive Mode OperationRev 4 Jan 2011 Page 3-35© <strong>Honeywell</strong> International Inc. Do not copy without express permission of <strong>Honeywell</strong>
<strong>Honeywell</strong> Bendix/King AV8OR User’s Guidethe camera appears with the following symbols:SymbolDescriptionThe camera checks the speed of the direction into whichyou are driving.The camera checks the speed of the opposite drivingdirection.The camera checks the speed in both directions on theroad.The camera can check the speed in any direction.SPEED LIMIT WARNINGMaps sometimes contain information about the speed limits of theroad segments. This information may not be available for your region(ask your local dealer) or may not be fully correct for all roads on themap.You can configure GoDrive to warn you if you exceed the currentlimit. Tap the following soft Keys: , , ,.When you exceed the speed limit, the following happens:• Visible Warning: A symbol with the speed limit appears inthe corner of the map (for example: ).• Audible Warning: A voice message is played using theselected voice guidance profile.Automotive Mode Operation 7450-0840-01Page 3-36© <strong>Honeywell</strong> International Inc. Do not copy without express permission of <strong>Honeywell</strong>Rev 4 Jan 2011
<strong>Honeywell</strong> Bendix/King AV8OR User’s GuideADVANCED FEATURES IN GODRIVE VERSION 8.3Note: The following features are only available in Version 8.3 ofGoDrive. To identify if you have version 8.3, tap , ,, to view the About page.Guidance Stripes: Guidance stripes show the direction to follow incase of a maneuver.Figure 3-6: Guidance StripesSignposts: When driving on a highway, signposts are displayed.Figure 3-7: Highway Signposts7450-0840-01 Automotive Mode OperationRev 4 Jan 2011 Page 3-37© <strong>Honeywell</strong> International Inc. Do not copy without express permission of <strong>Honeywell</strong>
<strong>Honeywell</strong> Bendix/King AV8OR User’s GuideShutdown: If AV8OR is disconnected from an external powersource, AV8OR will automatically shut down after a set number ofseconds unless you tap the Cancel soft key.ROUTE NAVIGATIONYou can set up your route in GoDrive in several ways:if you need a simple route (a route with only one destination, withoutany intermediate via points), you can select the destination and startnavigating to it right awayyou can plan a multi-point route (available in Advanced mode only)you can also plan a route independently of your current GPS positionor even without GPS reception (available in Advanced mode only)Selecting the Destination of a RouteGoDrive offers you several ways of choosing your destination andvia points (intermediate destinations):• Use the selected location on the map.• Enter a full address or a part of an address, for example a streetname without a house number or the names of two intersectingstreets.• Enter an address with postal code. This way you do not need toselect the name of the settlement and the search for streetnames might be faster as well.• Use a coordinate.• Use a saved location:o A Favoriteo A POIo The History of previously set destinations and waypoints.Tip!If you are going to use a route later, save it before you startnavigating. Tap the following soft Keys: , ,Automotive Mode Operation 7450-0840-01Page 3-38© <strong>Honeywell</strong> International Inc. Do not copy without express permission of <strong>Honeywell</strong>Rev 4 Jan 2011
<strong>Honeywell</strong> Bendix/King AV8OR User’s Guide.SELECTING THE CURSOR AS THE DESTINATION1. Locate your destination on the map: move and scale the map asneeded.2. Tap the location that you want to select as your destination. TheCursor () appears.3. Tap to open the Cursor menu.4. The map appears with the selected point in the middle. Tap(Simple mode) or(Advanced mode) from the Cursor menu. The route is thenautomatically calculated, and you can start navigating.Tip!If you know that you will use a destination later, when the Cursormenu appears, save it as a POI, or put it on the list of yourFavorites first. The Cursor menu returns automatically with thesame point. Now you can use it as a route point.ENTERING AN ADDRESS OR PART OF AN ADDRESSIf you know at least a part of the address, it is the quickest way toselect the destination of the route.• Using the same screen, you can find an address by entering:• The exact address, including house number• The center of a settlement• An intersection• The midpoint of a street• Any of the above, starting the search with the postal code.7450-0840-01 Automotive Mode OperationRev 4 Jan 2011 Page 3-39© <strong>Honeywell</strong> International Inc. Do not copy without express permission of <strong>Honeywell</strong>
<strong>Honeywell</strong> Bendix/King AV8OR User’s GuideENTERING AN ADDRESS (EUROPE)In some countries, states are not used in addressing. After selectingthe country, the next step is to define the settlement. There are fourlines on the screen:Figure 3-8: Enter an Address (Europe)The procedure is explained starting from the Navigation menu.1. Tap the following soft Keys: (Simple mode), or, (Advanced mode).2. By default, GoDrive proposes the country and settlement whereyou are. If needed, tap the soft Key with the name of the country,and select a different one from the list.• If needed, change the settlement:• To select the settlement from the list of recently used ones,tap the soft Key.• To enter a new settlement:1. Tap the soft Key with the name of the settlement, or ifAutomotive Mode Operation 7450-0840-01Page 3-40© <strong>Honeywell</strong> International Inc. Do not copy without express permission of <strong>Honeywell</strong>Rev 4 Jan 2011
<strong>Honeywell</strong> Bendix/King AV8OR User’s Guideyou have changed the country/state, tap.2. Start entering the settlement name on the keyboard.3. Get to the list of search results:• After entering a couple of characters, the names thatmatch the string appear in a list.• Tap to open the list of results beforeit appears automatically.• Pick the settlement from the list.4. Enter the street name:1. Tap .2. Start entering the street name on the keyboard.3. Get to the list of results:o After entering a couple of characters, the names thatmatch the string appear in a list.o Tap to open the list of results beforeit appears automatically.4. Pick the street from the list.5. Enter the house number:1. Tap .2. Enter the house number on the keyboard.3. Tap to finish entering the address.6. The map appears with the selected point in the middle. Tap7450-0840-01 Automotive Mode OperationRev 4 Jan 2011 Page 3-41© <strong>Honeywell</strong> International Inc. Do not copy without express permission of <strong>Honeywell</strong>
<strong>Honeywell</strong> Bendix/King AV8OR User’s GuideSimple mode) or(Advanced mode) from the Cursor menu. The route is thenautomatically calculated, and you can start navigating.ENTERING AN ADDRESS (NORTH AMERICA, AUSTRALIA)In some countries, the state is also used in addresses. If you are inone of these countries, or choose any of them from the list ofcountries, five lines appear on the screen:Figure 3-9: Find an Address – USAThe procedure is explained starting from the Navigation menu.1. Tap the following soft Keys: (Simple mode), or, (Advanced mode).2. By default, GoDrive proposes the country, state and settlementwhere you are. If needed, tap the soft Key with the name of thecountry, and select a different one from new country, you alsoneed to select the state, or tapto search for asettlement regardless of the state it is in.3. If you have not changed the country, you still have the possibilityto change the state. Tap the soft Key with the name of the state,and select from the list.4. If needed, change the settlement:• To select the settlement from the list of recently used ones,Automotive Mode Operation 7450-0840-01Page 3-42© <strong>Honeywell</strong> International Inc. Do not copy without express permission of <strong>Honeywell</strong>Rev 4 Jan 2011
<strong>Honeywell</strong> Bendix/King AV8OR User’s Guidetap thesoft Key.• To enter a new settlement:1. Tap the soft Key with the name of the settlement, or ifyou have changed the country/state, tap.2. Start entering the settlement name on the keyboard.3. Get to the list of search results:o After entering a couple of characters, the names thatmatch the string appear in a list.o Tap to open the list of results beforeit appears automatically.4. Pick the settlement from the list5. Enter the street name:a. Tap .b. Start entering the street name on the keyboard.c. Get to the list of results:o After entering a couple of characters, the names thatmatch the string appear in a list.o Tap to open the list of results beforeit appears automatically.4. Pick the street from the list.6. Enter the house number:1. Tap .2. Enter the house number on the keyboard.3. Tap to finish entering the address.7450-0840-01 Automotive Mode OperationRev 4 Jan 2011 Page 3-43© <strong>Honeywell</strong> International Inc. Do not copy without express permission of <strong>Honeywell</strong>
<strong>Honeywell</strong> Bendix/King AV8OR User’s Guide7. The map appears with the selected point in the middle. Tap(Simple mode) or(Advanced mode) from the Cursor menu. The route is thenautomatically calculated, and you can start navigating.ENTERING AN ADDRESS IF HOUSE NUMBERING ISRESTARTEDThere are long roads where the house numbering is restarted atsome point. This way the same house number can appear twice oreven more times on the same road. If this is the case, after givingthe house number, you need to select the appropriate address bythe district/suburb information.The procedure is explained starting from the Navigation menu.1. Tap the following soft Keys: (Simple mode), or, , (Advanced mode).2. By default, GoDrive proposes the country/state and settlementwhere you are. If needed, tap the soft Key with the name of thecountry/state, and select a different one from the list.3. If needed, change the settlement:• To select the settlement from the list of recently used ones,tap the soft Key.• To enter a new settlement:1. Tap the soft Key with the name of the settlement, or ifyou have changed the country/state, tap.2. Start entering the settlement name on the keyboard.3. Get to the list of search results:o After entering a couple of characters, the names thatmatch the string appear in a list.Automotive Mode Operation 7450-0840-01Page 3-44© <strong>Honeywell</strong> International Inc. Do not copy without express permission of <strong>Honeywell</strong>Rev 4 Jan 2011
<strong>Honeywell</strong> Bendix/King AV8OR User’s Guideo Tap to open the list of results beforeit appears automatically.4. Pick the settlement from the list.4. Enter the street name:1. Tap .2. Start entering the street name on the keyboard.3. Get to the list of results:o After entering a couple of characters, the names thatmatch the string appear in a list.o Tapo to open the list of results before it appearsautomatically.4. Pick the street from the list.5. Enter the house number:1. Tap .2. Enter the house number on the keyboard.3. Tap to finish entering the address.6. A list appears with the matching addresses. Tap the desired one.7. The map appears with the selected point in the middle. Tap(Simple mode) or(Advanced mode) from the Cursor menu. The route is thenautomatically calculated, and you can start navigating.ENTER AN ADDRESS WITHOUT KNOWING THEDISTRICT/SUBURBLong roads can run across several districts or suburbs. You may notknow if a particular house number is in which of them. In this case,follow the instructions below:The procedure is explained starting from the Navigation menu.7450-0840-01 Automotive Mode OperationRev 4 Jan 2011 Page 3-45© <strong>Honeywell</strong> International Inc. Do not copy without express permission of <strong>Honeywell</strong>
<strong>Honeywell</strong> Bendix/King AV8OR User’s Guide1. Tap the following soft Keys: (Simple mode), or, (Advanced mode).2. By default, GoDrive proposes the country/state and settlementwhere you are. If needed, tap the soft Key with the name of thecountry/state, and select a different one from the list.3. If needed, change the settlement:• To select the settlement from the list of recently used ones,tap the soft Key.• To enter a new settlement:1. Tap the soft Key with the name of the settlement, or ifyou have changed the country/state, tap.2. Start entering the settlement name on the keyboard.3. Get to the list of search results:o After entering a couple of characters, the names thatmatch the string appear in a list.o Tap to open the list of results beforeit appears automatically.4. Pick the settlement from the list.4. Enter the street name:1. Tap .2. Start entering the street name on the keyboard.3. Get to the list of results:o After entering a couple of characters, the names thatmatch the string appear in a list.o Tap to open the list of results beforeAutomotive Mode Operation 7450-0840-01Page 3-46© <strong>Honeywell</strong> International Inc. Do not copy without express permission of <strong>Honeywell</strong>Rev 4 Jan 2011
it appears automatically.<strong>Honeywell</strong> Bendix/King AV8OR User’s Guide4. Instead of picking one of the streets, tap5. Enter the house number:1. Tap .2. Enter the house number on the keyboard.3. Tap to finish entering the address.6. A list appears with the matching addresses. Tap the desired one.7. The map appears with the selected point in the middle. Tap(Simple mode) or(Advanced mode) from the Cursor menu. The route is thenautomatically calculated, and you can start navigating.SELECTING AN INTERSECTION AS THE DESTINATIONThe procedure is explained starting from the Navigation menu.1. Tap the following soft Keys: (Simple mode), or, (Advanced mode).2. By default, GoDrive proposes the country/state and settlementwhere you are. If needed, tap the soft Key with the name of thecountry/state, and select a different one from the list.3. If needed, change the settlement:• To select the settlement from the list of recently used ones,tap the soft Key.• To enter a new settlement:1. Tap the soft Key with the name of the settlement, or if7450-0840-01 Automotive Mode OperationRev 4 Jan 2011 Page 3-47© <strong>Honeywell</strong> International Inc. Do not copy without express permission of <strong>Honeywell</strong>
<strong>Honeywell</strong> Bendix/King AV8OR User’s Guideyou have changed the country/state, tap.2. Start entering the settlement name on the keyboard.3. Get to the list of search results:o After entering a couple of characters, the names thatmatch the string appear in a list.o Tap to open the list of results beforeit appears automatically.4. Pick the settlement from the list.4. Enter the street name:1. Tap .2. Start entering the street name on the keyboard.3. Get to the list of results:o After entering a couple of characters, the namesthat match the string appear in a list.o Tap to open the list of resultsbefore it appears automatically.4. Pick the street from the list.5. Tap the• If only a few intersecting streets exist, their list appearsimmediately.• In case of a longer street, a keyboard screen appears. Startentering the name of the intersecting street on the keyboard.As you type, if the matching streets can be shown on onescreen, their list appears automatically.6. Tap the desired intersecting street in the list.7. The map appears with the selected point in the middle. Tap(Simple mode) or(Advanced mode) from the Cursor menu. The route is thenautomatically calculated, and you can start navigating.Automotive Mode Operation 7450-0840-01Page 3-48© <strong>Honeywell</strong> International Inc. Do not copy without express permission of <strong>Honeywell</strong>Rev 4 Jan 2011
<strong>Honeywell</strong> Bendix/King AV8OR User’s GuideSELECTING A CITY CENTER AS THE DESTINATIONThe City Center is not the geometric center of the settlement but anarbitrary point the map creators have chosen. In towns and villages,it is usually the most important intersection; in larger cities, it is animportant intersection.The procedure is explained starting from the Navigation menu.1. Tap the following soft Keys: (Simple mode), or, (Advanced mode).2. By default, GoDrive proposes the country/state and settlementwhere you are. If needed, tap the soft Key with the name of thecountry/state, and select a different one from the list.3. If needed, change the settlement:• To select the settlement from the list of recently used ones,tap the soft Key.• To enter a new settlement:1. Tap the soft Key with the name of the settlement, or ifyou have changed the country/state, tap.2. Start entering the settlement name on the keyboard.3. Get to the list of search results:o After entering a couple of characters, the names thatmatch the string appear in a list.o Tap to open the list of results beforeit appears automatically.4. Pick the settlement from the list.4. Tap the soft Key.5. The map appears with the selected point in the middle. Tap7450-0840-01 Automotive Mode OperationRev 4 Jan 2011 Page 3-49© <strong>Honeywell</strong> International Inc. Do not copy without express permission of <strong>Honeywell</strong>
<strong>Honeywell</strong> Bendix/King AV8OR User’s Guide(Simple mode) or(Advanced mode) from the Cursor menu. The route is thenautomatically calculated, and you can start navigating.ENTERING AN ADDRESS WITH A POSTAL CODEAll of the above address searching possibilities can be performedwith entering the postal code instead of the settlement name. Findbelow an example with a full address:The procedure is explained starting from the Navigation menu.1. Tap the following soft Keys: (Simple mode), or, (Advanced mode).2. By default, GoDrive proposes the country/state and settlementwhere you are. If needed, tap the soft Key with the name of thecountry/state, and select a different one from the list.3. Tap the soft Key with the name of the settlement, and enter thepostal code:1. Start entering the postal code on the keyboard.2. Get to the list of results:o After entering a couple of numbers, the ones thatare a match appear in a list.o Tap to open the list of results beforeit appears automatically.3. Pick the settlement from the list.4. Enter the street name:1. Tap .2. Start entering the street name on the keyboard.3. Get to the list of results:o After entering a couple of characters, the names thatmatch the string appear in a list.Automotive Mode Operation 7450-0840-01Page 3-50© <strong>Honeywell</strong> International Inc. Do not copy without express permission of <strong>Honeywell</strong>Rev 4 Jan 2011
<strong>Honeywell</strong> Bendix/King AV8OR User’s Guideo Tap to open the list of results beforeit appears automatically.4. Pick the street from the list.5. Enter the house number:1. Tap .2. Enter the house number on the keyboard.3. Tap to finish entering the address.6. The map appears with the selected point in the middle. Tap(Simple mode) or(Advanced mode) from the Cursor menu. The route is thenautomatically calculated, and you can start navigating.TIPS ON ENTERING ADDRESSES QUICKLYWhen you are entering the name of a settlement or a street,GoDrive only displays those characters that appear in possiblesearch results. The other characters are grayed out.• When entering the settlement name or the street name, tap thesoft Key after a couple of letters; GoDrive liststhe items that contain the character set.• You can speed up finding an intersection:o Search first for the street with a less common or less usualname; fewer letters are enough to find it.o If one of the streets is shorter, search for that one first. Youcan then find the second one faster.• You can search for both the type and the name of a road. If thesame word appears in several names, for example in the nameof streets, roads and avenues, you can obtain the result faster ifyou enter the first letter of the street type: For example, enter PiA to obtain Pine Avenue and skip all Pine Streets andPickwick Roads.7450-0840-01 Automotive Mode OperationRev 4 Jan 2011 Page 3-51© <strong>Honeywell</strong> International Inc. Do not copy without express permission of <strong>Honeywell</strong>
<strong>Honeywell</strong> Bendix/King AV8OR User’s Guide• You can also search in postal codes. This is useful when a streetname is common and it is used in several districts of a city.SELECTING THE DESTINATION FROM YOUR FAVORITESYou can select a location that you have already saved as a Favoriteto be your destination. The procedure is explained starting from theNavigation menu.1. Tap the following soft Keys: (Simple mode) or, (Advanced mode).2. Tap the Favorite that you want to set as your destination.3. The map appears with the selected point in the middle. Tap(Simple mode) or(Advanced mode) from the Cursor menu. The route is thenautomatically calculated, and you can start navigating.SELECTING THE DESTINATION FROM THE POISYou can select your destination from the POIs included withGoDrive or from the ones you have previously created.The procedure is explained starting from the Navigation menu.1. Tap the following soft Keys: (Simple mode), or, (Advanced mode).2. Select the area around which the POI should be searched:• : The POI will be searched around a given address.• : The map appears with the Cursor in the middle.Modify the location of the Cursor if necessary, then tapAutomotive Mode Operation 7450-0840-01Page 3-52© <strong>Honeywell</strong> International Inc. Do not copy without express permission of <strong>Honeywell</strong>Rev 4 Jan 2011
<strong>Honeywell</strong> Bendix/King AV8OR User’s Guidelocation.. The POI will be searched around the given• : The POI will be searched around thecurrent GPS position.• : The POI will be searched around thedestination of the active route.• : The POI will be searched not around agiven point but by the size of the detour it means from theactive route. This can be useful if you search for a laterstopover that causes only a minimal detour. For exampleupcoming petrol stations or restaurants.3. You can narrow the search with the following: Select the POIgroup (e.g. Accommodation), and after that, if needed, select thePOI subgroup (e.g. Hotel or Motel).• To find the POI by its name, tap , and use thekeyboard to enter a part of the name.• To list all POIs in a given POI group, tap4. [optional] When finally the list of results appear, you can sort thelist:• : sort the list alphabetically (available whenyou search around a single location)• : sort the list by the distance from yourcurrent position in a straight line (available when you searcharound a single location)7450-0840-01 Automotive Mode OperationRev 4 Jan 2011 Page 3-53© <strong>Honeywell</strong> International Inc. Do not copy without express permission of <strong>Honeywell</strong>
<strong>Honeywell</strong> Bendix/King AV8OR User’s Guide• : sort the list by the distance to drive on route fromyour current position (available when you search along theactive route)• : sort the list by the size of the needed detour(available when5. Tap the desired POI in the list.6. The map appears with the selected point in the middle. Tap(Simple mode) or(Advanced mode) from the Cursor menu. The route is thenautomatically calculated, and you can start navigating.SELECTING THE DESTINATION WITH SAVED POI SEARCHCRITERIAPOI search criteria can be saved in the POI section of the Managemenu, but GoDrive is already shipped with some saved criteria youcan use instantly when searching for a POI.The procedure is explained starting from the Navigation menu.1. Tap the following soft Keys: (Simplemode), or , (Advanced mode).2. Tap3. Select one of the saved criteria and the list of matchingPOIs appear.4. Tap the desired POI in the list.5. The map appears with the selected point in the middle.Tap6. (Simple mode) orAutomotive Mode Operation 7450-0840-01Page 3-54© <strong>Honeywell</strong> International Inc. Do not copy without express permission of <strong>Honeywell</strong>Rev 4 Jan 2011
<strong>Honeywell</strong> Bendix/King AV8OR User’s Guide(Advanced mode) from the Cursormenu. The route is then automatically calculated, andyou can start navigating.SELECTING THE DESTINATION FROM THE HISTORYThe destinations that you have set earlier appear in the History. Theprocedure is explained starting from the Navigation menu.1. Tap the following soft Keys: (Simple mode), or, (Advanced mode).2. If necessary, turn the page with to see earlierdestinations.3. Tap the desired item.4. The map appears with the selected point in the middle. Tap(Simple mode) or(Advanced mode) from the Cursor menu. The route is thenautomatically calculated, and you can start navigating.SELECTING THE DESTINATION BY ENTERING ITSCOORDINATEThis feature is available in Advanced mode only. The procedure isexplained starting from the Navigation menu.1. Tap the following soft Keys:2. [optional] Tap to change the format ofthe displayed coordinates.3. Tap the latitude or longitude value to change the coordinate.7450-0840-01 Automotive Mode OperationRev 4 Jan 2011 Page 3-55© <strong>Honeywell</strong> International Inc. Do not copy without express permission of <strong>Honeywell</strong>
<strong>Honeywell</strong> Bendix/King AV8OR User’s Guide4. Enter the coordinate values in WGS84 format on the keyboard:the latitude (N or S) and the longitude (E or W).5. Tap6. The map appears with the selected point in the middle. Tap(Simple mode) or(Advanced mode) from the Cursor menu. The route is thenautomatically calculated, and you can start navigating.Creating a Multi-point Route (Inserting a Via Point)Multi-point routes are created from simple routes, so a route must beactive first. One of the ways of expanding the route is to keep thedestination, and to add via points (intermediate destinations).This feature is available in Advanced mode only.1. Select a new location as you did in the previous sections. Thiswill be the additional destination in the route.2. The map appears with the selected point in the middle, and theCursor menu opens automatically.3. Tap to add the point as anintermediate destination preceding the final destination of theroute.4. [optional] To add more points to the route, repeat the abovesteps as many times as you like.If you insert a via point in a route that is already a multi-point route,you will automatically be taken to the Edit Route screen where youcan determine the position of the intermediate route point. When youenter the screen, the new via point is placed as the last via pointbefore the final destination. The new point is the selected point in thelist.You have the following options:Soft KeyActionThe selected point moves up in the list (becomes avia point to be reached earlier). Tap this soft Keyrepeatedly, and the point becomes the start point ofAutomotive Mode Operation 7450-0840-01Page 3-56© <strong>Honeywell</strong> International Inc. Do not copy without express permission of <strong>Honeywell</strong>Rev 4 Jan 2011
<strong>Honeywell</strong> Bendix/King AV8OR User’s GuideSoft KeyActionthe route.The selected point moves down in the list(becomes a via point to be reached later). Tap thissoft Key repeatedly, and the point becomes thefinal destination of the route.The route is reversed. The start point becomes thedestination, the destination becomes the start point,and all via points are to be reached in the oppositeorder than before.The route is optimized. The start point and thedestination remain at their position, but the viapoints are reordered to make the shortest possibleroute.The selected point is removed from the route. Theroute remains as it was before adding the newpoint.Every time a new point is added, the route is recalculatedautomatically, and you can start navigating right away.Creating a Multi-point Route (Append a NewDestination)Multi-point routes are created from simple routes, so a route must beactive first. One of the ways of expanding the route is to add a newdestination. The previous destination becomes the last via point ofthe route.This feature is available in Advanced mode only.1. Select a new location as you did in the previous sections. Thiswill be the additional destination in the route.2. The map appears with the selected point in the middle, and theCursor menu opens automatically.3. Tap to open the full Cursor menu withthe additional functions.7450-0840-01 Automotive Mode OperationRev 4 Jan 2011 Page 3-57© <strong>Honeywell</strong> International Inc. Do not copy without express permission of <strong>Honeywell</strong>
<strong>Honeywell</strong> Bendix/King AV8OR User’s Guide4. Tap to add the point as a new finaldestination demoting the previous one to the last intermediatedestination.5. [optional] To add more points to the route, repeat the abovesteps as many times as you like.Every time a new point is added, the route is recalculatedautomatically, and you can start navigating right away.Editing the RouteThis feature is available in Advanced mode only.Tap the following soft Keys: , ,The list of route points appear with the start point at the top of the listand the final destination at the bottom. If several via points exist, youmight need to turn the page.Tap one of the route points in the list. You have the followingoptions:Soft KeyActionThe selected point moves up in the list (becomes avia point to be reached earlier). Tap this soft Keyrepeatedly, and the point becomes the start point ofthe route.The selected point moves down in the list(becomes a via point to be reached later). Tap thissoft Key repeatedly, and the point becomes thefinal destination of the route.The route is reversed. The start point becomes thedestination, the destination becomes the start point,and all via points are to be reached in the oppositeorder than before.The route is optimized. The start point and thedestination remain at their position, but the viapoints are reordered to make the shortest possibleroute.Automotive Mode Operation 7450-0840-01Page 3-58© <strong>Honeywell</strong> International Inc. Do not copy without express permission of <strong>Honeywell</strong>Rev 4 Jan 2011
<strong>Honeywell</strong> Bendix/King AV8OR User’s GuideThe selected point is removed from the route.As soon as you leave this screen, the route is recalculatedautomatically, and you can start navigating right away.Viewing Whole route on the Map (Fit to Screen)The map can be moved and scaled to show the whole line of theroute. You do not need to manipulate the map manually. The Planon Map feature does it for you.In Advanced mode you have the following options to enter Plan onMap:• Via the Find menu: tap , , .• Via the Route Information screen: tap , ,, ,• Via the Route Information screen using a shortcut: tap ,In Simple mode the last option is available only.Watching the Simulation of the RouteThis feature is available in Advanced mode only. The procedure isexplained starting from the Map screen.1. Tap the following soft Keys:2. The Route menu appears. There are two ways of running theroute simulation:• Tap to run the simulation at high speed togive you a quick overview of the route.7450-0840-01 Automotive Mode OperationRev 4 Jan 2011 Page 3-59© <strong>Honeywell</strong> International Inc. Do not copy without express permission of <strong>Honeywell</strong>
<strong>Honeywell</strong> Bendix/King AV8OR User’s Guide• Tap• to run the simulation at normal speed and with voiceguidance instructions announced. This option is fordemonstration purposes, or for checking difficult parts of theroute in advance.3. The simulation can be aborted any time by tapping .Enabling Safety ModeThis feature is available in Advanced mode only.Safety Mode disables the touch screen above 10 km/h (6 mph) tokeep your attention on the road. While driving, you will not be able toset a new destination or to change settings. The only screen controlthat remains enabled is the gesture that puts you back on the Mapscreen.The procedure is explained starting from the Map screen.Tap the following soft Keys: , , ,Pausing the Active Route.You do not need to pause the active route: when you start drivingagain, GoDrive restarts the voice instructions from your position.Deleting the Next Via Point from the RouteThe easiest way to delete the upcoming route point (the next viapoint) in both Simple mode and Advanced mode is to open theRoute Information screen by tapping the Turn Preview field ( )on the Map screen, and then tappingIn Advanced mode, you have another option. Tap the following softAutomotive Mode Operation 7450-0840-01Page 3-60© <strong>Honeywell</strong> International Inc. Do not copy without express permission of <strong>Honeywell</strong>Rev 4 Jan 2011
<strong>Honeywell</strong> Bendix/King AV8OR User’s GuideKeys: , ,Deleting the Active RouteThe easiest way to delete the active route in both Simple mode andAdvanced mode is to open the Route Information screen by tappingthe Turn Preview field ()on the Map screen, and then tapping.In Advanced mode, you have another option. Tap the following softKeys: , , ,If via points exist in the active route, you cannot delete the routeimmediately on the Route Information screen. Taprepeatedly until all via points disappear and theKey appears. Tap it to cancel the whole route.Using Track LogssoftGoDrive can record the track (how your GPS position changed) thatyou drive.Tip!You do not need to select a destination and create a route for this;you can also record your driving path while cruising.This feature is available in Advanced mode only. The procedure isexplained starting from the Map screen.RECORDING THE TRAVELLED PATH (CREATING A TRACKLOG)1. Start driving.2. Tap the following soft Keys , ,7450-0840-01 Automotive Mode OperationRev 4 Jan 2011 Page 3-61© <strong>Honeywell</strong> International Inc. Do not copy without express permission of <strong>Honeywell</strong>
<strong>Honeywell</strong> Bendix/King AV8OR User’s Guide3. Start the recording: tap the soft Key. You returnto the map and you can continue driving.4. Repeat the above steps, then tap later to stopthe recording. GoDrive labels the Track Log with a time stamp.(As an alternative, you can tap the soft Key in the Quickmenu to start, and later to stop the Track Log recording.)SIMULATING A TRACK LOG ON THE MAP1. Tap the following soft Keys: , ,2. Locate the desired Track Log, and then tap the soft Keynext to it.3. The map returns, and the Track Log simulation (a life-like replay)begins.4. You can stop the replay any time by tapping the soft Key.CHANGING THE COLOR OF A TRACK LOG1. Tap the following soft Keys:2. Tap the desired Track Log and then tap one of the color softKeys.SAVING A ROUTEThis feature is available in Advanced mode only.The procedure is explained starting from the Map screen.Tap the following soft Keys: , ,Automotive Mode Operation 7450-0840-01Page 3-62© <strong>Honeywell</strong> International Inc. Do not copy without express permission of <strong>Honeywell</strong>Rev 4 Jan 2011
<strong>Honeywell</strong> Bendix/King AV8OR User’s GuideEnter a name for the saved route, and then tapWhen you save a route, GoDrive not only saves the route points butthe whole itinerary:• The saved route might have been influenced by TMCinformation. When you later use the route, it appears as it wassaved, but if it needs to be recalculated, the current TMCinformation will be used in the new route.• If you updated your map since you first saved the route,GoDrive recognizes the change, and recalculates the drivinginstructions according to the latest available map information.• GoDrive deletes from the route the via points that you alreadyleft behind during navigation together with the road segmentsused to reach it. To avoid this, if you want to save the route, youneed to save it before you start navigating.LOADING A SAVED ROUTEThis feature is available in Advanced mode only.The procedure is explained starting from the Map screen.1. Tap the following soft Keys:2. Tap the route you wish to navigate.3. In the very likely case when the start position of the saved routeis different from the current GPS position, you need to confirmwhether you want to stop navigating from the current GPS position touse the start point of the loaded route.• If you choose this option, the automatic off-routerecalculation will be disabled.• If you choose to keep the current GPS position as the startpoint, the route will be recalculated starting from your currentposition.4. The map appears, and you can start navigating.7450-0840-01 Automotive Mode OperationRev 4 Jan 2011 Page 3-63© <strong>Honeywell</strong> International Inc. Do not copy without express permission of <strong>Honeywell</strong>
<strong>Honeywell</strong> Bendix/King AV8OR User’s GuideREFERENCE BOOK (ADVANCED MODE)On the following pages you will find the description of the differentmenu screens of GoDrive in Advanced mode. In Simple mode,these functions work the same way, but only a few of them areavailable.The Navigation menu:GoDrive starts with the Navigation menu. From there you canaccess the following screens:Table 3-8: Navigation MenuScreen Soft Key DescriptionMapThe Map screen.FindSelecting the destination (forexample an address or a POI)or using the search engine ofGoDrive for any other reason(for example to look for thephone number of a POI).Route Managing the active route(obtaining information about it,changing or deleting it or partsof it) or planning a routewithout GPS reception.ManageManaging user data, such assaved locations (POIs,Favorites, Pins, and Historyitems), Saved Routes, andTrack Logs.Settings Managing the behavior ofGoDrive, for example the maplayout during navigation, theused languages or thewarnings.Automotive Mode Operation 7450-0840-01Page 3-64© <strong>Honeywell</strong> International Inc. Do not copy without express permission of <strong>Honeywell</strong>Rev 4 Jan 2011
Map Screen<strong>Honeywell</strong> Bendix/King AV8OR User’s GuideThe most important and most often used screen of GoDrive is theMap screen.Figure 3-10: Map Screen Advanced ModeDuring navigation, the screen shows route information and trip data(left screenshot), but when you tap the map, additional soft Keys andcontrols appear for a few seconds (right screenshot). Most parts ofthe screen behave as soft Keys.Symbol Name ActionTurn Preview, thatis, the next routeeventSecond upcomingroute eventOpens the RouteInformation screenOpens the ItineraryTrip data Opens the TripInformation screenBattery status Opens the Quickmenu7450-0840-01 Automotive Mode OperationRev 4 Jan 2011 Page 3-65© <strong>Honeywell</strong> International Inc. Do not copy without express permission of <strong>Honeywell</strong>
<strong>Honeywell</strong> Bendix/King AV8OR User’s GuideSymbol Name ActionGPS position quality Opens the QuickmenuVehicle used inroute calculationOpens the QuickmenuTop row Next street n/aBottom rowCurrent street andhouse numbers onleft and rightn/aMap view modes Switches between2D and 3D mapmodes,Menu Opens theNavigation menuDetourPosition menu(appears whennavigating a route)Opens the Detourscreen, two ways ofmodifying the route:• the list of SavedSearch Criteria • asoft Key to avoidparts of the routeOpens the PositionmenuAutomotive Mode Operation 7450-0840-01Page 3-66© <strong>Honeywell</strong> International Inc. Do not copy without express permission of <strong>Honeywell</strong>Rev 4 Jan 2011
<strong>Honeywell</strong> Bendix/King AV8OR User’s GuideSymbol Name ActionCursor menu(appears when thereis no GPS positionor the Cursor is notat the current GPSposition)Open/Close Mapcontrol soft KeysOpens the CursormenuTap this soft Key toshow or hide thefollowing mapcontrol soft Keys: •Zoom in/out •Rotate left/right (3Dmap only) • Tiltup/down (3D maponly) • Zoom presetsoft Keys (2D maponly) • Tilt and zoompreset soft Keys (3Dmap only) • Returnto GPS position softKey • Smart Zoomsoft Key,,,Rotate left, rotaterightTilt up, tilt downZoom in, zoom outReturn to GPSposition (appearswhen GPS positionis available and youhave moved theRotates the 3D mapleft or rightTilts the 3D mapScales the mapTap this soft Key tomove the map backto the current GPSposition. If the maphas been rotated in7450-0840-01 Automotive Mode OperationRev 4 Jan 2011 Page 3-67© <strong>Honeywell</strong> International Inc. Do not copy without express permission of <strong>Honeywell</strong>
<strong>Honeywell</strong> Bendix/King AV8OR User’s GuideSymbol Name Actionmap)3D mode, automaticmap rotation is alsore-enabled.Enable Smart Zoom(replaces theprevious soft Key ifthere is no GPSposition or the maphas not beenmoved)Zoom preset softKeys (available inAdvanced modeonly)Zoom preset softKeys (available inAdvanced modeonly)Tap this soft Keyonce to enableSmart Zoom. Tap &hold the soft Key toset the zoom limitsof Smart Zoom.Tap one of thepreset soft Keys toset the zoom levelto a fix,Tap one of thepreset soft Keys toset the zoom levelto a fix, predefinedvalue. Smart Zoomis disabled. Thesesoft Keys areavailable in 2Dmode Tap & holdany of the soft Keysto set its value tothe current zoomlevel or to reset it toits original value.,Automotive Mode Operation 7450-0840-01Page 3-68© <strong>Honeywell</strong> International Inc. Do not copy without express permission of <strong>Honeywell</strong>Rev 4 Jan 2011
<strong>Honeywell</strong> Bendix/King AV8OR User’s GuideSymbol Name ActionTilt preset soft Keys(available inAdvanced modeonly)Current GPSposition (on nearestroad)Cursor (selectedmap location)Tap one of thepreset soft Keys toset the tilt and zoomlevels to fix,predefined values.Smart Zoom isdisabled. These softKeys are availablein 3D mode. Tap &hold any of the softKeys to set its valueto the current tiltand zoom levels, orto reset it to itsoriginal value.n/an/aLane informationn/aOrange line Active route n/aMap scale (2D maponly)n/aICONS ON THE MAPThere are several status icons on the map. Most of them alsofunction as a soft Key. The information they provide is as follows:• GPS position quality7450-0840-01 Automotive Mode OperationRev 4 Jan 2011 Page 3-69© <strong>Honeywell</strong> International Inc. Do not copy without express permission of <strong>Honeywell</strong>
<strong>Honeywell</strong> Bendix/King AV8OR User’s Guide• Battery status• Vehicle type used for route calculation• Sound status (muted or enabled)• Track log recording status• TMC reception and processing status• Bluetooth connection and communication statusBATTERY, GPS POSITION QUALITY, VEHICLE TYPEINDICATORThis is a complex indicator, and a soft Key that opens the Quickmenu. The battery part shows information about the rechargeablebattery of the device.IconDescriptionThe battery is charging. The device runs onexternal power.The battery is not charging but it is full.The battery is not full but it still has enoughcapacity.You need to recharge the battery.The GPS reception quality shows the current accuracy of theposition information.IconDescriptionThere is no connection to the GPS receiver: GPSnavigation is not possible. Devices with a built-inGPS receiver are permanently connected. Onsuch devices, the icon does not appear in normalcircumstances.Automotive Mode Operation 7450-0840-01Page 3-70© <strong>Honeywell</strong> International Inc. Do not copy without express permission of <strong>Honeywell</strong>Rev 4 Jan 2011
<strong>Honeywell</strong> Bendix/King AV8OR User’s GuideIconDescriptionGoDrive is connected to the GPS receiver, butthe signal is too weak and the receiver cannotdetermine the GPS position. GPS navigation isnot possible.Only a few satellites are received. Positioninformation is available, but elevation (altitude)cannot be calculated. GPS navigation is possible,but the position error may be significant.Altitude information is available, the position is a3D position. GPS navigation is possible.The remaining part of the field shows the vehicle type used for routecalculation.IconVehicle typeCarTaxiBusEmergency vehiclesBicycle7450-0840-01 Automotive Mode OperationRev 4 Jan 2011 Page 3-71© <strong>Honeywell</strong> International Inc. Do not copy without express permission of <strong>Honeywell</strong>
<strong>Honeywell</strong> Bendix/King AV8OR User’s GuidePedestrianSTATUS INDICATOR STRIPThis is a complex indicator. In one strip it indicates the followingstatus information:IconDescriptionThe sound output of GoDrive is muted.IconDescriptionThe sound output of GoDrive is enabled.GoDrive records a Track log when GPS position isavailable.Track log recording is disabled.No TMC receiver is connected or TMC is turned off.TMC receiver is connected and a radio station with TMCbroadcast is received.There are new, unread TMC events.A part of the route is bypassed based on TMC events.A part of the route is mentioned in TMC events but couldnot be bypassed (for example, the destination is on acongested street).Automotive Mode Operation 7450-0840-01Page 3-72© <strong>Honeywell</strong> International Inc. Do not copy without express permission of <strong>Honeywell</strong>Rev 4 Jan 2011
The Bluetooth radio is switched off.<strong>Honeywell</strong> Bendix/King AV8OR User’s GuideThe Bluetooth radio is turned on, but no telephone isconnected.There is an error in the Bluetooth connection.GoDrive is connected to a telephone as a hands free setvia Bluetooth.A phone call is in progress over the Bluetooth connection.NEXT TWO ROUTE EVENTS (TURN PREVIEW FIELDS)There are two fields reserved on the Map screen to display the nexttwo maneuvers (route events that are listed in the Itinerary). Both thetype of the event (turn, roundabout, exiting motorway, etc.) and itsdistance from the current GPS position is displayed.Most of these icons are very intuitive and you also know them asroad signs. The following table lists some of the frequently shownroute events. The same symbols are used in both fields:IconDescriptionTurn left.,Turn right.,Turn back.,Bear right.,7450-0840-01 Automotive Mode OperationRev 4 Jan 2011 Page 3-73© <strong>Honeywell</strong> International Inc. Do not copy without express permission of <strong>Honeywell</strong>
IconDescription<strong>Honeywell</strong> Bendix/King AV8OR User’s GuideKeep left.,,Continue straight in the intersection.,,,,,,,,Enter roundabout. The number of the exit isshown in the circle, but only for the next turn.Enter motorway.Exit motorway.Board ferry.Leave ferry.Approaching the next via point.Approaching the destination.Turn sharp left.In certain situations when route events are not important, these fieldsshow other useful pieces of information.Objects on the mapSTREETS AND ROADSGoDrive shows the streets in a way that is similar to how the paperroad maps show them. Their width and colors correspond to theirimportance: you can easily tell a motorway from a small street.Automotive Mode Operation 7450-0840-01Page 3-74© <strong>Honeywell</strong> International Inc. Do not copy without express permission of <strong>Honeywell</strong>Rev 4 Jan 2011
<strong>Honeywell</strong> Bendix/King AV8OR User’s GuideTip!If you prefer not to see street names during navigation, turn themoff.ELEMENTS OF THE ACTIVE ROUTEGoDrive shows the route in the following way:Symbol Name DescriptionCurrentGPSpositionCursor(selectedlocation)mapYour current position displayed onthe map.• In pedestrian mode it is the exactGPS position.• If a vehicle is selected for routecalculation, the arrow is put on thenearest road.The location selected in the Findmenu, or a map point selected bytapping the map.Start point The first point of the route.Normally, if GPS position isavailable, it is the start point of theroute.If there is no valid GPS position,GoDrive uses the last known GPSposition as the start point.When you are using a saved route,GoDrive asks you if you want touse your GPS position or the firstpoint in the saved route as the startpoint.You can also modify the start pointin the Cursor menu. If you do so,the automatic off-route recalculationneeds to be turned off to keep theselected point as the start point.If the automatic off-routerecalculation is disabled for any of7450-0840-01 Automotive Mode OperationRev 4 Jan 2011 Page 3-75© <strong>Honeywell</strong> International Inc. Do not copy without express permission of <strong>Honeywell</strong>
<strong>Honeywell</strong> Bendix/King AV8OR User’s GuideSymbol Name Descriptionthe above, tapping theicon in the Turn Preview field notonly initiates a route recalculationfrom the current GPS position, but itwill re-enable the automatic offrouterecalculation as well.Via pointDestination(end point)A via point is an intermediatedestination. You can place as manyvia points as you want.The last point of the route, the finaldestination.Symbol Name DescriptionRoute colorActive leg ofthe routeInactive legsof the routeThe route always stands out with its coloron the map, both in daytime and in nightcolor mode. The active leg of the route isalways displayed in a brighter shade thanthe inactive (upcoming) legs.The section of the route on which you aredriving. If you have not added any viapoints (only a destination), the entireroute is the active leg. If you have addedvia points, the active leg is the part of theroute from your current location to thenext route point (the next via point, or thedestination if there are no more via pointsto reach).The future sections of the route; each ofthem becomes active when you reachthe via point at its beginning.Automotive Mode Operation 7450-0840-01Page 3-76© <strong>Honeywell</strong> International Inc. Do not copy without express permission of <strong>Honeywell</strong>Rev 4 Jan 2011
<strong>Honeywell</strong> Bendix/King AV8OR User’s GuideStreets androads that areexcluded fromthe navigationYou can choose whether you want to useor avoid certain road types. However,when GoDrive cannot avoid such roads,the route will include them and it willshow them in a color that is different fromthe route color.DETOUR MENUThis screen contains quick detour possibilities during navigation. Itcan be opened directly from the Map screen by tapping .You have the following options:• On the main part of the screen you can see the first page ofSaved Search Criteria. Select any of the criteria to quicklyreceive the list of nearest matching POIs, and instantly plan anew route to the desired one, or insert it as a via point in youractive route.• In Advanced mode more soft Keys appear at the bottom:o: If you want to bypass a part of the routestarting from the next intersection, tap this soft Key, andselect a distance to bypass.o: If you have used the above functionbefore, tap this soft Key to clear the restrictions from themap.CURSOR MENUAs soon as you select one point in the Find menu, the map appearswith the Cursor menu, a menu with possible actions for the selectedpoint.Alternatively, when you tap the map, control soft Keys appear. Tapagain to place the Cursor, a radiating red dot. Now tap andthe Cursor menu opens with a list of options. In order to show a partof the map with the Cursor menu, it contains only a few soft Keysfirst.7450-0840-01 Automotive Mode OperationRev 4 Jan 2011 Page 3-77© <strong>Honeywell</strong> International Inc. Do not copy without express permission of <strong>Honeywell</strong>
<strong>Honeywell</strong> Bendix/King AV8OR User’s GuideTapto get all the options.Soft KeyDescriptionCloses the Cursor menu, and returns to theprevious screen.Zooms out the map.Zooms in the map.With the Cursor menu open, you can stillmove or scale the map, and tap the mapanywhere to place the Cursor to a newlocation, but when you use this soft Key, theCursor jumps back to the place where it wasat the time when you opened the Cursormenu.Displayed at the Cursor if it is at the samelocation with which the Cursor menu wasopened.Displayed at the Cursor if it has beenrelocated since the Cursor menu wasopened.Opens a new screen with the address andcoordinate of the Cursor, and the list ofnearby POIs.Opens the full-screen Cursor menu with allthe possible options.A new route is calculated with the Cursor asthe destination. The previous route isdeleted.Automotive Mode Operation 7450-0840-01Page 3-78© <strong>Honeywell</strong> International Inc. Do not copy without express permission of <strong>Honeywell</strong>Rev 4 Jan 2011
<strong>Honeywell</strong> Bendix/King AV8OR User’s GuideSoft KeyDescriptionIf the Cursor is at or near the destination, thissoft Key replaces the previous one, anddeletes the current destination from theroute. The last via point is promoted asdestination, or if there are no via points, theroute is deleted.The Cursor is added to the active route as anintermediate route point, a point to bereached before the destination. If there isalready a via point in the route, the EditRoute screen opens to let you decide wherethe new via point is to appear in the route.If the Cursor is at or near one of the viapoints, this soft Key replaces the previousone, and deletes the selected via point fromthe route. The route is recalculated withoutthe deleted point.The Cursor is appended at the end of theroute as the new destination. The previousdestination is demoted, and becomes the lastvia point.This soft Key is similar to the soft Key, but anew screen opens, and the route iscalculated with all the possible routecalculation methods (Fast, Short, Economicaland Easy). Observe the results, and chooseone of the routes to navigate.The Cursor becomes the start point of theroute. This means that the route will not bestarted from the current GPS position, andAutomatic Off-route Recalculation needs tobe turned off to keep the start point theselected one.Soft KeyDescription7450-0840-01 Automotive Mode OperationRev 4 Jan 2011 Page 3-79© <strong>Honeywell</strong> International Inc. Do not copy without express permission of <strong>Honeywell</strong>
<strong>Honeywell</strong> Bendix/King AV8OR User’s GuideSoft KeyDescriptionIf the Cursor is at or near the selected startpoint, this soft Key replaces the previousone, and deletes the start point from theroute. The current GPS position is usedagain as the start point, and Automatic OffrouteRecalculation is re-enabled.The Cursor is saved as a user POI. Selectthe POI group and give a name for the POI,then select a suitable icon, enter a phonenumber, and additional information if you like.Map locations can be marked with Pins.Unlike POIs, a Pin has no name and otherdetails, only a color to let you tell one fromanother on the map.If the Cursor is at or near a Pin, this soft Keyreplaces the previous one, and deletes thePin the Cursor is near to.The Cursor is saved as the location of aRoad Safety Camera (speed camera or redlight camera). A new screen appears whereyou can set the type of the camera, thedirection of the measured traffic, and thespeed limit checked (if applicable).If the Cursor is at or near a Road SafetyCamera, this soft Key replaces the previousone, and opens a new screen where you canedit the details of the camera.The location of the Cursor is added to the listof frequently visited destinations, the socalled Favorites. You can give a name for theFavorite.POSITION MENUAutomotive Mode Operation 7450-0840-01Page 3-80© <strong>Honeywell</strong> International Inc. Do not copy without express permission of <strong>Honeywell</strong>Rev 4 Jan 2011
<strong>Honeywell</strong> Bendix/King AV8OR User’s GuideWhen you follow the recommended route on the map (the Cursor isthe current GPS position), the Position menu replaces the Cursormenu. It does not contain soft Keys that modify the current route, asthe GPS position is not useful as a route point.To open the Position menu, tapROUTE INFORMATION SCREENThe Route Information screen has all the data and some of thefunctions you need while you navigate. There are two ways to openthis screen:• It can be opened directly from the Map screen by tapping theTurn Preview field ( ).• In Advanced mode, from the Navigation menu tap the followingsoft Keys: , .Figure 3-11: Route Information ScreenIn the top section of the screen you see information about the currentroute. The fields on this screen are continuously updated while youkeep the screen open.When you open the screen, all fields contain information aboutreaching your final destination. Tap any of the fields to see data onthe via points starting from the first one through the final destinationagain.7450-0840-01 Automotive Mode OperationRev 4 Jan 2011 Page 3-81© <strong>Honeywell</strong> International Inc. Do not copy without express permission of <strong>Honeywell</strong>
<strong>Honeywell</strong> Bendix/King AV8OR User’s GuideYou have the following data and functions on this screen:Name Description FunctionRoute lineEstimatedArrivalDistance LeftTime LeftThe upper part of this screenshows your planned route as ahorizontal line. Its leftmost pointis the start of the route, therightmost one is the finaldestination, and you can seeyour via point flags along theline, spaced in proportion totheir distance.Shows the estimated arrivaltime at the final destination ofthe route based on informationavailable for the remainingsegments of the route. Thecalculation cannot take intoaccount traffic jams and otherpossible delays.Shows the distance you need totravel on the route beforereaching your final destination.Shows the time needed toreach the final destination of theroute based on informationavailable for the remainingsegments of the route. Thecalculation cannot take intoaccount traffic jams and otherpossible delays.Tap this field tochange thecontent of alldata fields tovia pointinformation.Tap this field tochange thecontent of alldata fields tovia pointinformation.Tap this field tochange thecontent of alldata fields tovia pointinformation.Tap this field tochange thecontent of alldata fields tovia pointinformation.Automotive Mode Operation 7450-0840-01Page 3-82© <strong>Honeywell</strong> International Inc. Do not copy without express permission of <strong>Honeywell</strong>Rev 4 Jan 2011
<strong>Honeywell</strong> Bendix/King AV8OR User’s GuideName Description FunctionMethodWarning iconsThis field shows how the routewas calculated. It eitherdisplays the Route CalculationMethod or the Vehicle field fromthe Route Planning options. Ifyou have chosen Car, Taxi orBus, the type of the route (Fast,Short, Easy or Economical) willbe displayed here; if you haveselected Emergency, Bicycle orPedestrian, this information willbe displayed here.In these square fields graphicalsymbol are displayed in casewarnings are attached to theplannedTap this field tochange thecontent of alldata fields tovia pointinformation.Tap any of theicons for anexplanation.Name Description Functionroute. These are warnings, soicons always show informationfor the whole route, even if thedata fields display values fromyour current position to a viapoint only.Opens theRoute Planningoptions screenfrom theSettings menu.Opens the mapscreendesigned forroute planning.Appears only if at least one viapoint exists.Deletes thenext via pointfrom the route.7450-0840-01 Automotive Mode OperationRev 4 Jan 2011 Page 3-83© <strong>Honeywell</strong> International Inc. Do not copy without express permission of <strong>Honeywell</strong>
<strong>Honeywell</strong> Bendix/King AV8OR User’s GuideName Description FunctionAppears only if there are no viapoints in the route.Deletes theactive route.TRIP INFORMATION SCREENThe Trip Information screen has both route and travel data you mightneed during your journey. It can be opened directly from the Mapscreen by tapping the Trip Data field ( ).Figure 3-12: Trip Information ScreenThe fields on this screen are continuously updated while you keepthe screen open. When you open the screen, all route data fieldscontain information about reaching your final destination. Tapand the fields concerning your route displaydata for the next via point. Tap the soft Key repeatedly to togglebetween the two possibilities.You have the following data and functions on this screen:Name Description FunctionAutomotive Mode Operation 7450-0840-01Page 3-84© <strong>Honeywell</strong> International Inc. Do not copy without express permission of <strong>Honeywell</strong>Rev 4 Jan 2011
<strong>Honeywell</strong> Bendix/King AV8OR User’s GuideName Description FunctionorField next to the flagShows whetherthe route datafields showinformation aboutthefinaldestination(checkered flag) orabout the next viapoint (yellow flag).Shows the nameor number of thecurrent street orroad.Turn Preview Shows the typeand distance ofthe next routeevent.CompassShows the currentheading.Tap this field toshow it on the mapscreen in one of theTrip Data fields.SpeedometerShows the currentspeed bothgraphically and asa number.Tap this field toshow it on the mapscreen in one of theTrip Data fields.Distance Remaining Shows thedistance you needto travel on theroute beforereaching your finaldestination.Tap this field toshow it on the mapscreen in one of theTrip Data fields.7450-0840-01 Automotive Mode OperationRev 4 Jan 2011 Page 3-85© <strong>Honeywell</strong> International Inc. Do not copy without express permission of <strong>Honeywell</strong>
<strong>Honeywell</strong> Bendix/King AV8OR User’s GuideName Description FunctionTime RemainingShows the timeneeded to reachthefinaldestination of theroute based oninformationavailable for theremainingsegments of theroute. Thecalculation cannottake into accounttraffic jams andother possibledelays.Tap this field toshow it on the mapscreen in one of theTrip Data fields.Arrival Time Shows theestimated arrivaltime at the finaldestination of theroute based oninformationavailable for theremainingsegments of theroute. Thecalculation cannottake into accounttraffic jams andother possibledelays.GPS TimeShows the currenttime correctedwith time zoneoffset. Theaccurate timecomes from theGPS satellites,and the time zoneinformation comesTap this field toshow it on the mapscreen in one of theTrip Data fields.Tap this field toshow it on the mapscreen in one of theTrip Data fields.Automotive Mode Operation 7450-0840-01Page 3-86© <strong>Honeywell</strong> International Inc. Do not copy without express permission of <strong>Honeywell</strong>Rev 4 Jan 2011
<strong>Honeywell</strong> Bendix/King AV8OR User’s GuideName Description Functionfrom the map or itcan be setmanually inRegional settings.Altitude Shows theelevation if it isprovided by theGPS receiver.Tap this field toshow it on the mapscreen in one of theTrip Data fields.Speed LimitShows the speedlimit of the currentstreet if the mapcontains it.If you tap theprevious soft Key,this one replacesit.Tap this field toshow it on the mapscreen in one of theTrip Data fields.Opens a newscreen with threeresettable TripComputers.Tap this soft Key tochange the contentof the Route Datafields to showinformation aboutthe next via point.Tap this soft Keyand the Route Datafields showinformation aboutthe final destinationagain.Most of the fields on this screen have asymbol next to them.7450-0840-01 Automotive Mode OperationRev 4 Jan 2011 Page 3-87© <strong>Honeywell</strong> International Inc. Do not copy without express permission of <strong>Honeywell</strong>
<strong>Honeywell</strong> Bendix/King AV8OR User’s GuideThis symbol shows whether the field it is attached to is shown on themap as a Trip Data. It also shows the position of the data as follows:SymbolDescriptionThis value is not shown on the map screen.This value appears on the map screen in the TripData area. This is the value at the top.This value appears on the map screen in the TripData area. This is the value in the middle.This value appears on the map screen in the TripData area. This is the value at the bottom.TRIP COMPUTER SCREENThe Trip Computer screen provides collected trip data. It can beopened from the Trip Information screen by tapping.The fields on this screen are continuously updated while you keepthe screen open. You can switch between the trips, pause thenresume them, or reset their data. You have the following functions onthis screen:NameDescriptionPauses the trip currently shown on the screen.Values on the screen stop changing.This soft Key replaces the previous one if it hasbeen activated. Tap it to resume collecting tripdata.Automotive Mode Operation 7450-0840-01Page 3-88© <strong>Honeywell</strong> International Inc. Do not copy without express permission of <strong>Honeywell</strong>Rev 4 Jan 2011
<strong>Honeywell</strong> Bendix/King AV8OR User’s GuideResets all counters of the currently shown trip.Collecting trip data is restarted only whenGoDrive receives a position from the GPS.,Cycles through all trips.QUICK MENUThe Quick menu is a selection of controls that are frequently neededduring navigation. It can be opened directly from the Map screen bytapping .Figure 3-13: Quick MenuIf you tap any of the switches in the Quick menu except for theVehicle type, the Map screen immediately returns. A switch is on ifits lamp is lit. The Vehicle type soft Key is different. It is a multi-valuesoft Key. It opens a list of available choices, and the symbol of theselected vehicle is shown on the soft Key.NameMain function (singletap)Functionand hold)(tapMastersliderVolumeAdjusts the soundvolume of the device. Allsounds of theNo action.7450-0840-01 Automotive Mode OperationRev 4 Jan 2011 Page 3-89© <strong>Honeywell</strong> International Inc. Do not copy without express permission of <strong>Honeywell</strong>
<strong>Honeywell</strong> Bendix/King AV8OR User’s GuideNameMain function (singletap)Functionand hold)(tapapplication are involved.If you only adjust thevolume, you need to usethis soft Key to return tothe Map screen.Opens theNavigation menu.Mutes all sounds ofGoDrive.Openssettings.SoundSwitches between thedaytime and night colorschemes manually. Thiswill not disable theautomatic switchingbetween the twoschemes: the othercolor scheme returns atthe next scheduled time.3D buildings can bedisplayed on the map.Use this switch tosuppress themtemporarily.Tap this soft Key andselect the Vehicle typeto be used for routecalculation. Otherwise itis selected in RoutePlanning options inSettings. Changing theVehicle type triggers anautomatic routerecalculation.Turns track logrecording on or offotherwise controlled onOpens ColorProfiles settings.Opens 3DSettings.Opens RoutePlanning options.Opens ManageTrack Logs.Automotive Mode Operation 7450-0840-01Page 3-90© <strong>Honeywell</strong> International Inc. Do not copy without express permission of <strong>Honeywell</strong>Rev 4 Jan 2011
<strong>Honeywell</strong> Bendix/King AV8OR User’s GuideNameMain function (singletap)Functionand hold)(tapthe Manage Track Logsscreen.Opens the GPS Datascreen with satelliteinformation, datacoming from the GPSreceiver, and a shortcutto the GPS Settingsscreen if needed (GPSreceiver detection isautomatic).No action.When a TMC receiver isconnected to GoDrive,this soft Key opens thelist of TMC messages,and provides access tothe TMC Settings andthe radio station settingsscreens.No action.Opens the Bluetoothsettings screen.No action.GPS DATA SCREENTap the following soft Keys: ,to open the GPS Data screen and to see the status of the GPSreception.7450-0840-01 Automotive Mode OperationRev 4 Jan 2011 Page 3-91© <strong>Honeywell</strong> International Inc. Do not copy without express permission of <strong>Honeywell</strong>
<strong>Honeywell</strong> Bendix/King AV8OR User’s GuideFigure 3-14: GPS StatusIcon Color Name DescriptionGreenGPSpositionqualityindicatorGoDrive has aconnection to theGPS receiver andGPS positioninformation isavailable in 3D:GoDrive cancalculate both yourhorizontal andvertical GPSposition.Yellow GoDrive has aconnection to theGPS receiver andGPS positioninformation isavailable in 2D:only the horizontalposition iscalculated,GoDrive cannotcalculate yourvertical GPSposition.Automotive Mode Operation 7450-0840-01Page 3-92© <strong>Honeywell</strong> International Inc. Do not copy without express permission of <strong>Honeywell</strong>Rev 4 Jan 2011
<strong>Honeywell</strong> Bendix/King AV8OR User’s GuideIcon Color Name DescriptionGrey GoDrive has aconnection to theGPS receiver butGPS positioninformation is notavailable.Red GoDrive has noconnection to theGPS receiver.Green, blinkingGPSconnectionqualityGoDrive isconnected to theGPS receiver.SkycircleviewYellow, blinking indicator GoDrive has noconnection to theGPS receiver but itis still trying toestablish aconnection.Red, blinking GoDrive has noconnection to theGPS receiver anddoes not try toestablish aconnection.The virtual skyshows the visiblepart of the skyabove you, withyour position as thecenter. Thesatellites areshown at theircurrent positions.The GPS receivesdata from both thegreen and yellow7450-0840-01 Automotive Mode OperationRev 4 Jan 2011 Page 3-93© <strong>Honeywell</strong> International Inc. Do not copy without express permission of <strong>Honeywell</strong>
<strong>Honeywell</strong> Bendix/King AV8OR User’s GuideIcon Color Name Descriptionsatellites. Signalsfrom the yellowsatellites are onlyreceived, whilegreen ones areused by the GPS tocalculate yourcurrent location.n/aCoordinates Your current GPSposition in WGS84format.n/aStatus bar for thesatellitesDark bars are for theyellow and lit barsare for the greensatellites. The moresatellites your GPStracks (the greenones), the better isyour calculatedposition.FIND MENUSelect the destination of your route. Tap the following soft Keys:Soft KeyDescriptionIf you know at least a partof the address, this is thequickest way to find thelocation.Automotive Mode Operation 7450-0840-01Page 3-94© <strong>Honeywell</strong> International Inc. Do not copy without express permission of <strong>Honeywell</strong>Rev 4 Jan 2011
<strong>Honeywell</strong> Bendix/King AV8OR User’s GuideYou can select yourdestination from thethousands of POIs includedwith GoDrive or from theones you have previouslycreated.The destinations that youhave already entered inGoDrive are available inthe History list.You can select yourdestination by entering itscoordinates.You can select as yourdestination a location thatyou have already saved asa Favorite.Opens a special 2D mapscreen optimized for routeplanning. Only the Zoom inand Zoom out soft Keysand the route modificationsoft Keys of the Cursormenu appear.ROUTE MENUSave, load and edit your routes. Tap the following soft Keys:Soft KeyDescriptionOpens a screen with usefulroute data.7450-0840-01 Automotive Mode OperationRev 4 Jan 2011 Page 3-95© <strong>Honeywell</strong> International Inc. Do not copy without express permission of <strong>Honeywell</strong>
<strong>Honeywell</strong> Bendix/King AV8OR User’s GuideSoft KeyDescriptionYou can browse the drivinginstructions that GoDrivefollows during navigation. Youcan exclude maneuvers orstreets to adjust the route toyour preferences.You can modify the route:remove route points orchange their order.Erase the active route withall its route points (startpoint, via points anddestination). If you laterdecide that you need thesame route, you will haveto rebuild it from scratch.You can save the activeroute for later use.You can load a previouslysaved route for navigation.Opens the Route settingsscreen with controls tomodify the vehicle, the roadtypes used for routecalculation, or the routecalculation method.You can run ademonstration of the routeat high speed.You can run ademonstration of the routeat normal speed.Automotive Mode Operation 7450-0840-01Page 3-96© <strong>Honeywell</strong> International Inc. Do not copy without express permission of <strong>Honeywell</strong>Rev 4 Jan 2011
<strong>Honeywell</strong> Bendix/King AV8OR User’s GuideMANAGE MENUYou can manage the content that GoDrive stores. Tap the followingsoft Keys: , .Soft KeyDescriptionRenaming or deleting saved routesDeleting History itemsRecording, simulating, renaming ordeleting track logs, assigning colorto them to be shown on the mapRenaming or deleting FavoritesCreating, updating or deleting POIsCreating, updating or deleting POIgroups Modifying POI visibilitysettingsCreating, renaming or deletingSaved Search CriteriaManage Saved RoutesYou can manage the previously saved routes. Tap the following softKeys: , , .Soft KeySoft Key with the name of thesaved routeDescriptionOpens the selected route forediting.7450-0840-01 Automotive Mode OperationRev 4 Jan 2011 Page 3-97© <strong>Honeywell</strong> International Inc. Do not copy without express permission of <strong>Honeywell</strong>
<strong>Honeywell</strong> Bendix/King AV8OR User’s GuideDeletes the selected route.Clears the list of saved routes.,Turns the page for additional listitems.Manage HistoryYou can manage the list of locations you used lately. Tap thefollowing soft Keys: , , .Soft KeyDescriptionDeletes the selected item in the History.Deletes the entire History.,Turns the page for additional list items.Manage Track LogsYou can record Track Logs, then play them back, display them onthe map, and see their details. Tap the following soft Keys: ,, .Automotive Mode Operation 7450-0840-01Page 3-98© <strong>Honeywell</strong> International Inc. Do not copy without express permission of <strong>Honeywell</strong>Rev 4 Jan 2011
<strong>Honeywell</strong> Bendix/King AV8OR User’s GuideSoft KeyDescriptionStarts recording the track that you drive.(You can also start recording a track login the Quick menu.)Stops the ongoing Track Log recording.(You can also stop the track logrecording in the Quick menu.)Soft Key with the nameof the track logShows the details of the selected TrackLog.Starts a simulated playback of theselected Track Log on the map.Turns the page for additional list items.,When track log details are shown:Soft KeySoft Key with thename of the TrackLogDescriptionOpens a keyboard screen to let you renamethe Track Log.Tap this soft Key to hide the Track Log onthe map. No color will be assigned to theTrack Log.Tap one of the colored soft Keys to assigna color to the Track Log. The Track Log willbe shown on the map with this color.The map returns with the Track Log. Themap is scaled to show the whole Track Log.Deletes the selected Track Log.7450-0840-01 Automotive Mode OperationRev 4 Jan 2011 Page 3-99© <strong>Honeywell</strong> International Inc. Do not copy without express permission of <strong>Honeywell</strong>
<strong>Honeywell</strong> Bendix/King AV8OR User’s GuideSaves the Track Log on the insertedmemory card in GPX format.MANAGE FAVORITESYou can manage the list of your Favorites. Tap the following softKeys:, , .Soft KeySoft Key with thename of the favoriteDescriptionOpens the selected Favorite for editing.Deletes the selected item in the list ofFavorites’.Clears the list of Favorites'.,Turns the page for additional list items.Manage POIsYou can manage your POIs, and set the POI visibility for both yourPOIs and the ones that came with the product. Tap the following softKeys: , , .Soft Key / IconSoft Key with thename of the POIgroupSoft Key with thename and address ofDescriptionOpens the list of the subgroups of this POIgroup. The new list behaves the same asthis one.Opens the selected POI for editing. Only theAutomotive Mode Operation 7450-0840-01Page 3-100© <strong>Honeywell</strong> International Inc. Do not copy without express permission of <strong>Honeywell</strong>Rev 4 Jan 2011
<strong>Honeywell</strong> Bendix/King AV8OR User’s GuideSoft Key / Icona POI itemDescriptionPOIs you have created appear in this list.Opens the selected POI group for editing.Tap to filter the list to contain only the POIsthat you saved.Tap to see all POIs in the list.Creates a new POI group at the givengroup level.,Turns the page for additional list items.This POI group is not shown on the map.This POI group and all its subgroups areshown on the map.This POI group and some of its subgroupsare shown on the map.This POI group contains POIs that yousaved.When a POI group is open for editing:Soft KeyDescriptionItems in the POI group will not beshown on the map.7450-0840-01 Automotive Mode OperationRev 4 Jan 2011 Page 3-101© <strong>Honeywell</strong> International Inc. Do not copy without express permission of <strong>Honeywell</strong>
<strong>Honeywell</strong> Bendix/King AV8OR User’s Guide,The distance soft Keys set the zoomlevel from which the items in the POIgroup will be shown on the map.Subgroups under the edited POIgroup will inherit its visibility settings.Soft Key with the icon ofthe POI groupTap this soft Key to select a new iconfor the POI group.Deletes the edited POI group. You areonly allowed to remove POI groupsthat you have created.When a POI item is open for editing:Soft KeySoft Key with the nameof the POISoft Key with the iconof the POIDescriptionTap this soft Key to rename the POI.Tap this soft Key to select a new icon forthe POI.Tap this soft Key to enter a telephonenumber for the POI.Tap this soft Key to enter additionalinformation for the POI.Tap this soft Key to delete the selectedPOI.Tap this soft Key to move the POI toanother POI group or subgroup.Manage Saved Search CriteriaAutomotive Mode Operation 7450-0840-01Page 3-102© <strong>Honeywell</strong> International Inc. Do not copy without express permission of <strong>Honeywell</strong>Rev 4 Jan 2011
<strong>Honeywell</strong> Bendix/King AV8OR User’s GuideYou can manage the list of search criteria previously saved to easilyfind frequently searched POI types. Tap the following soft Keys:, , .Soft KeySoft Key with the name of theSaved Search CriteriaDescriptionTap to rename the saved query.Deletes the selected item in thelist.Deletes the entire list.,Turns the page for additional listitems.Tap to save a new search criteria.Similar to how you search for aPOI, select the search referencefirst, then select the POI group orsubgroup to search in.User Data ManagementYou can manage the data you have saved (Pins, POIs, Favorites’,History, and Track logs) , and the settings you have made in theprogram. Tap the following soft Keys: , , .Soft KeyRemove PinsDescriptionMap locations can be marked with Pins usingthesoft Key in theCursor menu. Tap this soft Key to remove allyour Pins from the map.7450-0840-01 Automotive Mode OperationRev 4 Jan 2011 Page 3-103© <strong>Honeywell</strong> International Inc. Do not copy without express permission of <strong>Honeywell</strong>
<strong>Honeywell</strong> Bendix/King AV8OR User’s GuideBackup User DataRestore User DataDelete User DataAll user data and the current settings will besaved on the inserted memory card. There isalways one backup file. If you perform abackup later, the previous backup will beoverwritten with the new information.All user data and settings will be overwrittenwith the information stored in the backup file.Data and settings created after the latestbackup will be lost.All user data will be deleted, and settings willreturn to their factory defaults.ResetSettingsFactoryAll settings will return to their factory defaults,but no user data will be deleted.SETTINGS MENUYou can configure the program settings, and modify the behavior ofGoDrive. Tap the following soft Keys: , .The Settings menu has two pages of submenus. Tapaccess the other options.toFigure 3-15 Settings MenuSoft KeyDescriptionYou can fine-tune theappearance and content ofthe Map screen.Automotive Mode Operation 7450-0840-01Page 3-104© <strong>Honeywell</strong> International Inc. Do not copy without express permission of <strong>Honeywell</strong>Rev 4 Jan 2011
<strong>Honeywell</strong> Bendix/King AV8OR User’s GuideSoft KeyDescriptionYou can adjust the sounds ofGoDrive.These settings determinehow routes will be calculated.These settings allow you toadjust the application to yourlocal language, measurementunits, time and date and theirformats, as well as choosethe voice guidance profile youprefer.You can control how GoDrivebehaves during navigation.You can enable some handywarnings, and disable thetouch screen in a movingvehicle with Safety Mode.You can set up theconnection to the GPSreceiver.You can set up theconnection to the TMCreceiver. If the TMC receiveris working, you can select theradio station to be received.You can modify the look andbehavior of the Menuscreens.Soft KeyDescription7450-0840-01 Automotive Mode OperationRev 4 Jan 2011 Page 3-105© <strong>Honeywell</strong> International Inc. Do not copy without express permission of <strong>Honeywell</strong>
<strong>Honeywell</strong> Bendix/King AV8OR User’s GuideSoft KeyDescriptionYou can change somedevice settings to controlthe screen backlightwhen GoDrive is running.You can set up anautomatic Track Logsaving, and fine-tune itssettings.This screen has nonavigation feature. Itmerely providesinformation about themaps and licensesincluded with yournavigation system.You can switch to Simplemode. In Simple modeonly a few of the abovesettings are available.The rest of the settingsare set to values that areoptimal for typical use.Map Screen SettingsYou can fine-tune the appearance and content of the Map screen.Tap the following soft Keys: , , .Soft KeyDescriptionAutomotive Mode Operation 7450-0840-01Page 3-106© <strong>Honeywell</strong> International Inc. Do not copy without express permission of <strong>Honeywell</strong>Rev 4 Jan 2011
<strong>Honeywell</strong> Bendix/King AV8OR User’s GuideSoft KeyColor ProfilesDescriptionGoDrive is able to show the map and the menusin different colors during the day and during thenight. Select the color profiles to be used in eachmode, and select the automatic or manualswitching between the daytime and night colorprofiles.Elevation on 2DMapShow Street Names2D maps can also display 3D information. Thesetop-down maps can display elevation by colorsand shading.Street names and POI icons can bedisturbing on the map during navigation.With this switch you can suppress these mapelements when GoDrive is following yourposition on the map. If you move the map,both the street names and POI iconsreappear immediately.Lane InformationSome maps contain lane information to helpyou position your car in the upcomingintersection. This setting tells GoDrivewhether to display this information at the topor at the bottom of the map.Sound SettingsYou can adjust the sounds of GoDrive. Tap the following soft Keys:, .Soft KeyMaster VolumeDescriptionUse the switch to mute all sounds of thedevice and then to re-enable them again. Theposition of the fader determines the volumelevel. The loudness of GoDrive isindependent of your device settings. Whenyou exit the program, the device defaultsettings return.7450-0840-01 Automotive Mode OperationRev 4 Jan 2011 Page 3-107© <strong>Honeywell</strong> International Inc. Do not copy without express permission of <strong>Honeywell</strong>
<strong>Honeywell</strong> Bendix/King AV8OR User’s GuideSoft KeyVoiceVolumeGuidanceDescriptionThe slider adjusts the loudness of voiceprompts. In its leftmost position, the voiceguidance is suppressed; in its rightmostposition, the master volume applies.Key SoundsDynamic VolumeKey sounds are audible confirmation of eitherpressing hardware soft Keys or tapping thetouch screen. The switch turns the keysounds on or off. Key sounds are played atthe master volume level.When driving at high speed, the noise in thecar may be too loud to clearly hear the voiceguidance and other sounds. Using DynamicVolume you can instruct GoDrive to increasethe volume when your speed exceeds acertain minimum, and reach its highestvolume at the given maximum speed.Route Planning OptionsThese settings determine how routes will be calculated. Tap thefollowing soft Keys: , , .Soft KeyVehicleDescriptionYou can set the type of vehicle you will use tonavigate the route. Based upon this setting,some of the road types will be excluded fromthe route (e.g. motorways for pedestrians), orsome of the restrictions may not be taken intoaccount (e.g. emergency vehicles have only afew restrictions).Automotive Mode Operation 7450-0840-01Page 3-108© <strong>Honeywell</strong> International Inc. Do not copy without express permission of <strong>Honeywell</strong>Rev 4 Jan 2011
<strong>Honeywell</strong> Bendix/King AV8OR User’s GuideSoft KeyRoad Types Usedfor Route PlanningRoute CalculationMethodDescriptionTo let the route fit your needs, you can alsoset which road types are to be considered foror to be excluded from the route, if possible.Excluding a route is a preference. It does notnecessarily mean total prohibition. If yourdestination can only be accessed using someof the excluded road types, they will be used,but only as much as necessary. In this case awarning icon will be shown on the RouteInformation screen, and the part of the routenot matching your preference will bedisplayed in a different color on the map.You can choose from different route types.The routing method can also be chosen whilecreating the route: when the destination isselected, tapCursor menu.in theUseInformationRecalculateAvoid TrafficTraffictoWhen TMC messages are received, thissetting tells GoDrive whether to use thatinformation in route planning.This setting determines how GoDrive usesthe received TMC information in routerecalculation: • Automatic: When routerecalculation becomes necessary based onthe received TMC events, GoDriverecalculates the route automatically. • Manual:When route recalculation becomes necessarybased on the received TMC events, GoDrivenotifies you, but you can decide whether torecalculate the route or not. • Disabled: TMCevents are only taken account when the routeis recalculated in an off-route situation.Vehicle Types:• Car7450-0840-01 Automotive Mode OperationRev 4 Jan 2011 Page 3-109© <strong>Honeywell</strong> International Inc. Do not copy without express permission of <strong>Honeywell</strong>
<strong>Honeywell</strong> Bendix/King AV8OR User’s Guide• Taxi• Bus• Emergency vehicles• Bicycle• PedestrianRoad Types Used for Route Planning:TypeMotorwaysUnpavedroadsToll roadsChargeroadsPermitneededFerriesCrossborderplanningCarpoollanesDescriptionYou might need to avoid motorways when you aredriving a slow car or you are towing another vehicle.GoDrive excludes unpaved roads by default: unpavedroads can be in a bad condition and usually youcannot reach the speed limit on them.By default GoDrive includes toll roads (pay roadswhere there is a peruse charge) in the routes. If youdisable toll roads, GoDrive plans the best toll-freeroute.Charge roads are pay roads where you can purchasea pass or vignette to use the road for a longer periodof time. They can be enabled or disabled separatelyfrom toll roads.You might need a permit or permission from theowners to use certain roads or to enter certain areas.GoDrive excludes these roads from the routecalculation by default.GoDrive includes ferries in a planned route by default.However, a map does not necessarily containinformation about the accessibility of temporaryferries. You might also need to pay a fare on ferries.In some cases the route calculated according to yourother navigation and route preferences would leadthrough another country. If you wish to always staywithin the same country, turn this option off.This control appears only when navigating in the USA.You should check whether you are allowed to useAutomotive Mode Operation 7450-0840-01Page 3-110© <strong>Honeywell</strong> International Inc. Do not copy without express permission of <strong>Honeywell</strong>Rev 4 Jan 2011
<strong>Honeywell</strong> Bendix/King AV8OR User’s GuideTypeDescriptioncarpool lanes before enabling this road type.Route Calculation Method types:OptionFastShortEconomicalEasyDescriptionGives the quickest possible route if you cantravel at or near the speed limit on all roads.Usually the best selection for fast and normalcars.Gives a route that has the smallest total distanceof all possible routes between the route points.Usually practical for pedestrians, cyclists or slowvehicles.Combines the benefits of Fast and Short:GoDrive calculates as if it were calculating theFast route, but it takes other roads to savepetrol.Results in a route with fewer turns. With thisoption, you can make GoDrive to take, forexample, the motorway instead of series ofsmaller roads or streets.Regional SettingsThese settings allow you to adjust the application for your locallanguage, measurement units, time and date and their formats, aswell as choose the voice guidance profile you prefer. Tap thefollowing soft Keys: , , .Soft KeyProgram LanguageDescriptionThis soft Key displays the current writtenlanguage of GoDrive. By tapping the softKey, you can select a new one from the list of7450-0840-01 Automotive Mode OperationRev 4 Jan 2011 Page 3-111© <strong>Honeywell</strong> International Inc. Do not copy without express permission of <strong>Honeywell</strong>
<strong>Honeywell</strong> Bendix/King AV8OR User’s GuideSoft KeyVoice ProfileUnitsSet Date & TimeFormatTime and TimeZone SettingsDescriptionavailable languages. The application willrestart if you change this setting; you areasked to confirm this.This soft Key shows the current language ofthe voice guidance. By tapping the soft Key,you can select a new one from the list ofavailable languages and speakers. Tap anyof these to hear a sample voice prompt. Justtap OK when you have selected the newspoken language.You can set the distance units to be used bythe program. GoDrive may not support allthe listed units in some voice guidancelanguages. If you select a measurement unitnot supported by the chosen voice guidancelanguage, a warning message will appear.You can set the date and time format.Various international formats are available.You can access time and time zone settings.GoDrive helps you with correcting the devicetime to the ever accurate GPS time. GoDrivecan also help you set the time zone based onyour current GPS position.Time and Time Zone Settings:Soft KeyAuto TimeCorrection to GPSUse Auto Time ZoneDescriptionUse this feature to synchronize the clock ofyour device to the very accurate timeprovided by the GPS receiver.Use this feature to synchronize the time zoneof the clock of your device to the time zonebased on your current GPS position. This isuseful if you travel abroad.Automotive Mode Operation 7450-0840-01Page 3-112© <strong>Honeywell</strong> International Inc. Do not copy without express permission of <strong>Honeywell</strong>Rev 4 Jan 2011
<strong>Honeywell</strong> Bendix/King AV8OR User’s GuideSoft KeySet Time ZoneCompare GPS anddevice timesDescriptionSet time zone manually if you do not want tosynchronize the time zone automatically.This allows you to use Auto Time Correctionand apply a time zone offset to obtain thedesired time.The current time of the GPS receiver and thedevice clock are displayed. Please note thatthe GPS clock is only available with GPSreception. This allows you to check whetherany correction is needed.Navigation SettingsYou can control how GoDrive behaves during navigation. Tap thefollowing soft Keys: , , .Soft KeyKeep Position onRoadOff-routeRecalculationDescriptionThis feature allows car drivers to alwayscorrect GPS position errors by matching thevehicle position to the road network. Forpedestrian navigation, this feature isautomatically disabled to let the softwareshow your exact position. By turning off thisfeature you also turn off the GPS positionerror filtering. The position shown on themap will be subject to all position errors andposition fluctuations.This switch tells GoDrive whether toautomatically recalculate the route when youdeviate from it. If this feature is turned off,you need to initiate route recalculationmanually otherwise navigation will bestopped until you return to the originallyrecommended route. Setting another pointthan the current GPS position as the startpoint of the active route will automaticallydisable this feature.7450-0840-01 Automotive Mode OperationRev 4 Jan 2011 Page 3-113© <strong>Honeywell</strong> International Inc. Do not copy without express permission of <strong>Honeywell</strong>
<strong>Honeywell</strong> Bendix/King AV8OR User’s GuideSoft KeyRestorePositionLock-to-DescriptionIf you have moved or rotated the map duringnavigation, this feature moves the map backto your current GPS position and re-enablesautomatic map rotation after the givenperiod of inactivity.Automatic OverviewThis feature switches the map view toOverview mode when the next route event isat a distance. Overview is a zoomed out 2Dview to let you see the surrounding area.You have the following controls forAutomatic Overview:• Turn Distance for Overview: The map viewwill be switched to Overview mode if thenext route even is at least as far as thisvalue.• Default Zoom Level: Overview mode willappear with this zoom level. You can scalethe map in Overview mode but next timeOverview appears again, this zoom level willbe applied.Warning SettingsYou can enable some handy warnings, and disable the touch screenin a moving vehicle with Safety Mode. Tap the following soft Keys:, , .Soft Key DescriptionWarnSpeedingWhenMaps may contain information about the speedlimits of the road segments. GoDrive is able towarn you if you exceed the current limit. Thisinformation may not be available for your region(ask your local dealer), or may not be fullycorrect for all roads in the map. This setting letsyou decide whether you wish to receive thewarnings. You can set the relative speeding atwhich the applicationAutomotive Mode Operation 7450-0840-01Page 3-114© <strong>Honeywell</strong> International Inc. Do not copy without express permission of <strong>Honeywell</strong>Rev 4 Jan 2011
<strong>Honeywell</strong> Bendix/King AV8OR User’s GuideSoft KeyDescriptionwarns you (100% is the current speed limit): • InBuilt-up Areas: in cities and towns • Elsewhere:at all other locations There are two types ofwarnings. You can turn them on or offindependently:• Audible Warning: A voice message is playedusing the selected voice guidance profile.• Visible Warning: A symbol with the speed limitappears in the corner of the map (for example:).SpeedWarningCameraThis feature allows you to receive a warningwhen approaching a Road Safety Camera. Youmust ensure on your own liability that using thisfeature is legal in the country where you intendto use it. You have the following options:• Audible Warning: beeps can be played whileyou are approaching the camera, or just alertsounds if you exceed the speed limit whileapproaching one of these cameras.• Visible Warning: the type of the camera andthe controlled speed limit appears on the Mapscreen while you are approaching one of thesecameras.Warn if Too Fastfor a PedestrianSafety ModeEnable this warning to be alert if pedestrianmode is activated and you drive fast. You areasked if you want to change to car navigationmode. This way you can be sure you will not berouted via one-way roads in the wrong directionas a pedestrian could, for example.Safety Mode disables the touch screen above10 km/h (6 mph) to keep your attention on theroad. While driving, you will not be able to set anew destination or to change settings. The onlyscreen control that remains enabled is thegesture that puts you back on the Map screen.7450-0840-01 Automotive Mode OperationRev 4 Jan 2011 Page 3-115© <strong>Honeywell</strong> International Inc. Do not copy without express permission of <strong>Honeywell</strong>
<strong>Honeywell</strong> Bendix/King AV8OR User’s GuideGPS SettingsYou can set up the connection to the GPS receiver. Tap thefollowing soft Keys: , , .Soft KeyGPS receiverGPS EnabledPortBaud RateAutodetectDescriptionThe first line of the screen informs you aboutthe connection status of the GPS receiver.Connecting the GPS receiver is automatic, sonormally you will not need this screen ofsettings at all.Turn the connection to the GPS receiver on oroff. Turning off the GPS receiver can beuseful for indoors use or demonstrationpurposes.The communication port used between theGPS receiver and the application.The communication speed used between theGPS receiver and the application.Tap this soft Key to find and connect theGPS receiver.Menu SettingsYou can modify the look and behavior of the Menu screens. Tap thefollowing soft Keys: , , .Soft KeyDescriptionAnimationBackgroundYou can activate and deactivate the Menuanimations. When animation is turned on, softKeys on Menu and keyboard screens appear inan animated way.You can choose the image to be used as themenu background image.Automotive Mode Operation 7450-0840-01Page 3-116© <strong>Honeywell</strong> International Inc. Do not copy without express permission of <strong>Honeywell</strong>Rev 4 Jan 2011
<strong>Honeywell</strong> Bendix/King AV8OR User’s GuideSoft KeySkinDescriptionYou can choose from a list of available skins tochange the look of GoDrive.Device SettingsYou can change some device settings to control the screen backlightwhen GoDrive is running. Tap the following soft Keys: , ,.Soft KeyPower ManagementBacklight Intensity atDaytimeBacklight Intensity atNightAutorun EnabledDescriptionYou can set how the backlight will behavewhen the screen has not been touched for awhile. You have the following options: •Backlight Always On: The screen iscontinuously lit. • Use Device Settings: Thebacklight settings of the device will beapplied in GoDrive. • Smart: When runningon battery, Smart Powersave will light up thescreen only when you press a soft Key, tapthe screen, or if there is something to showyou. After a few seconds the light leveldecreases, and after another few secondsthe backlight turns off. This helps achieve alonger battery life.You can set the backlight level for daytimeuse.You can set the backlight level for night use.You can instruct the PDA to automaticallyrun GoDrive when the memory card isinserted.SetOrientationScreenYou can change the orientation of thescreen when running. The screenorientation can follow the current orientationof the PDA, or you can set a fixed7450-0840-01 Automotive Mode OperationRev 4 Jan 2011 Page 3-117© <strong>Honeywell</strong> International Inc. Do not copy without express permission of <strong>Honeywell</strong>
<strong>Honeywell</strong> Bendix/King AV8OR User’s GuideSoft KeyDescriptionorientation that is independent of the PDAsettings.Track Log SettingsYou can set up an automatic Track Log saving, and fine-tune itssettings. Tap the following soft Keys: , , .Soft KeyDescriptionUpdate IntervalEnable Auto-savingTrack Log DatabaseSizeTrack Logs Max.SizeCreate NMEA/SIRFLogThis is how often track points will be saved.Position information is normally receivedonce a second from the GPS. If you do notneed such a detailed log, you can increasethis number to save track log space.When auto-saving is enabled, you do notneed to turn track log saving on and offmanually. GoDrive will automatically startrecording the track log as soon as GPSposition is available.This figure shows how much memory isused by the automatically saved track logs.You can set the maximum database size forthe automatically saved track logs. When thelimit is reached, the oldest automaticallysaved track logs will be deleted.Independently of the normal track log, youcan record the native GPS data receivedfrom the GPS device. These logs are savedas separate text files on the memory card,and they cannot be shown or replayed inGoDrive.Automotive Mode Operation 7450-0840-01Page 3-118© <strong>Honeywell</strong> International Inc. Do not copy without express permission of <strong>Honeywell</strong>Rev 4 Jan 2011
4. MULTIMEDIA<strong>Honeywell</strong> Bendix/King AV8OR User’s GuideThe all-in-one versatile AV8OR provides several multimediaprograms, such as listening to music, viewing photos, watching amovie, reading an Ebook or listening to XM Radio. Tap theicon on the Main Menu (Refer to Figure 1-9) to go to theMultimedia menu page.MUSIC PLAYERFigure 4-1: Multimedia MenuTo enter the music player service, tap the icon on theMultimedia menu.The Music program opens to the default Multimedia/music folder onthe SD card as shown in the figure below.The music player supports the following audio formats:• MP3• WMA.7450-0840-01 MultimediaRev 4 Jan 2011© <strong>Honeywell</strong> International Inc. Do not copy without express permission of <strong>Honeywell</strong>Page 4-1
<strong>Honeywell</strong> Bendix/King AV8OR User’s GuideFigure 4-2: Music Player – Searching for a Music FileDouble tap on a music file to select and play it.Figure 4-3: Music Player – Playing MusicTap thePHOTOSicon to return to the Multimedia menu page.To enter the photo browser service, tap the icon on theMultimedia menu.The Photo program opens to the default Multimedia/photo folder onthe SD card as shown in the figure below.The photo browser supports the following image formats:• BMP7Multimedia 7450-0840-01Page 4-2© <strong>Honeywell</strong> International Inc. Do not copy without express permission of <strong>Honeywell</strong>Rev 4 Jan 2011
• JPG• GIF• PNG<strong>Honeywell</strong> Bendix/King AV8OR User’s GuideFigure 4-4: Photo Browser – Searching for a PhotoDouble tap on a picture to display it.Figure 4-5: Photo Browser – Viewing a PhotoTap theicon to return to the Multimedia menu page.MOVIE PLAYERTo select a movie to view, tap themenu page.icon on the Multimedia7450-0840-01 MultimediaRev 4 Jan 2011© <strong>Honeywell</strong> International Inc. Do not copy without express permission of <strong>Honeywell</strong>Page 4-3
<strong>Honeywell</strong> Bendix/King AV8OR User’s GuideThe Movie program opens to the default Multimedia/movies folder onthe SD card as shown in the figure below.The movie player supports the following video formats:• AVI• WMV• MPG• ASFFigure 4-6: Movie Player – Searching for a MovieDouble tap on a movie file to play the movie.Figure 4-7: Movie Player – Playing a MovieTap theicon to return to the Multimedia menu page.7Multimedia 7450-0840-01Page 4-4© <strong>Honeywell</strong> International Inc. Do not copy without express permission of <strong>Honeywell</strong>Rev 4 Jan 2011
EBOOK READER<strong>Honeywell</strong> Bendix/King AV8OR User’s GuideTo read an Ebook, tap the icon on the Multimedia menu.The Ebook program opens to the default Multimedia/ebooks folderon the SD card. The Ebook program can only read text files.Figure 4-8: EBook Reader – Searching for a BookDouble tap on one of the Ebook files to open in the Ebook reader.Figure 4-9: Ebook ReaderTap theicon to return to the Multimedia menu page.XM TUNERTap the XM TUNER icon on the Multimedia menu to show the XMRadio page. From the XM Radio page, you can scroll through the list7450-0840-01 MultimediaRev 4 Jan 2011© <strong>Honeywell</strong> International Inc. Do not copy without express permission of <strong>Honeywell</strong>Page 4-5
<strong>Honeywell</strong> Bendix/King AV8OR User’s Guideof available channels, select a channel to listen to, select a channelcategory, add a channel to your “Favorites” category or activate yourXM subscription.Figure 4-10: XM Radio PageXM Weather and Radio Setup1. Tap on the Radio Status soft key to activate either XM weatheror XM radio or both. The XM Status page is displayed. TheRadio ID for the XM receiver shows to the right of the SerialNumber label as shown below??. The Radio ID is also on thebottom on the WxWorx XM receiver.Figure 4-11: XM Status Page7Multimedia 7450-0840-01Page 4-6© <strong>Honeywell</strong> International Inc. Do not copy without express permission of <strong>Honeywell</strong>Rev 4 Jan 2011
<strong>Honeywell</strong> Bendix/King AV8OR User’s Guide2. With your Radio ID number ready, call XM’s Listener Care at800-985-9200 to subscribe to the XM WX and/or XM Radioservices. For prompt service, be sure to also have your datapackage choice and payment option ready when you call.3. After you have subscribed to the XM WX and/or XM Radioservices, tap on the Activation Mode soft key.4. It may take up to an hour to begin receiving XM data. Make surethat the GPS is in an area where good satellite reception isavailable. Make sure the AV8OR unit is fully charged or isoperating off of AC/DC power instead of the internal battery soenough power is available to finish the activation sequence.5. Once XM data is received, the Service Level field will show. Thisindicates that the XM receiver has been activated and XMservices are available for use. Tap the Normal Mode soft key toexit the Activation Mode.To return to the XM Radio page, tap on the OK soft key.XM Radio TuningThe main XM Radio page shows a scrollable list of the XM radiochannels that are available and soft keys on the bottom of the page.NOTE: Due to limitations with the WxWorx XM receiver, only the firsteight characters of the Artist and Song Title are available to bedisplayed. Therefore, you may find that some artists and song titlesare truncated in the display at the top of the XM Radio page.To select a channel, use the scroll bar on the right to scroll to thechannel you want to listen to and tap on the channel to highlight it.Tap on the Select Channel soft key to select it.To select a category, tap on the soft key on the upper right sideof the screen to show the XM Categories page as shown below.7450-0840-01 MultimediaRev 4 Jan 2011© <strong>Honeywell</strong> International Inc. Do not copy without express permission of <strong>Honeywell</strong>Page 4-7
<strong>Honeywell</strong> Bendix/King AV8OR User’s GuideFigure 4-12: XM Categories PageUse the scroll bar on the right to scroll to the category you want tolisten to and tap on the category to highlight it. Tap on the Selectsoft key to select the category or tap on the Cancel soft key tocancel selection. Once the category is selected, highlight thechannel you want to listen to from the filtered list and tap the SelectChannel soft key to start reception of the channel.To add a channel to a list of favorites, highlight the channel and tapthe Add to Favorites soft key.Tap the Favorites soft key to select a channel from a list of favorites.The Favorites soft key does not show until at least one favorite hasbeen added to it.Tap theicon to return to the Multimedia menu page.DOWNLOADING MULTIMEDIA FILESRefer to the Downloading/Uploading files from/To PC section onpage 6-4 in chapter 6 - Appendix for instructions on how to downloadmultimedia files to the AV8OR.7Multimedia 7450-0840-01Page 4-8© <strong>Honeywell</strong> International Inc. Do not copy without express permission of <strong>Honeywell</strong>Rev 4 Jan 2011
5. SYSTEM SETTINGS<strong>Honeywell</strong> Bendix/King AV8OR User’s GuideThe user can customize how the AV8OR operates and adjustsystem settings in the Settings page. Tap thethe Main Menu page to enter the Settings page.soft key onFigure 5-1: Settings PageTap theGPS STATUSsoft key to return to the Main Menu.To enter the GPS status page, tap the “GPS Status” soft key on theSettings page. This option should only be used if the Go Fly orGoDrive Navigation Applications are not running. Ensure NavigationApplications are exited prior to trying to access this GPS StatusPage. More information on the GPS Status page is located onthe Getting satellite signals section on page 1-11.BACKLIGHT BRIGHTNESSTo enter the Backlight page, tap the “Backlight” soft key on theSettings page.7450-0840-01 System SettingsRev 4 Jan 2011© <strong>Honeywell</strong> International Inc. Do not copy without express permission of <strong>Honeywell</strong>Page 5-1
<strong>Honeywell</strong> Bendix/King AV8OR User’s GuideBacklight control barFigure 5-2: Backlight PageTo increase the brightness, tap theicon. To decrease thebrightness, tap the icon. You can also drag the soft keyleft or right or tap either side of thebar.Backlight shutdown settingSelect the wait time to turn off the backlight from the “Shut down thebacklight” list.Tap theicon to return to the Settings page.VOLUMETap the “Volume” soft key on the Settings page to enter the Volumepage.The settings on the Volume page control the volume of the touchscreenoperation and the Menu soft key tappingThis page allows the user to set the maximum volume for the unit.The volume control knob on the left side of the unit can adjust thevolume from Zero up to the level set on the volume page. To set theSystem Settings 7450-0840-01Page 5-2© <strong>Honeywell</strong> International Inc. Do not copy without express permission of <strong>Honeywell</strong>Rev 4 Jan 2011
<strong>Honeywell</strong> Bendix/King AV8OR User’s Guidevolume on the volume page, first set the volume control to maximum(up). Refer to Figure 5-3.Figure 5-3: Volume ControlEnable/disable audio outputTap theVolume control baricon to enable or disable the audio output.To increase volume, tap theicon. To decrease volume, tapthe icon. You can also drag the soft key left or right ortap either side of thebar.Tap theSYSTEM INFOicon to return to the Settings page.To enter the System Info page, tap the “System Info” soft key onthe Settings page.7450-0840-01 System SettingsRev 4 Jan 2011© <strong>Honeywell</strong> International Inc. Do not copy without express permission of <strong>Honeywell</strong>Page 5-3
<strong>Honeywell</strong> Bendix/King AV8OR User’s GuideBLUETOOTHFigure 5-4: System Info ScreenTo enter the Bluetooth page, tap the “Bluetooth” soft key on theSettings page to display the Bluetooth Manager page.Figure 5-5: Bluetooth Manager PageThe Bluetooth Manager page has the following functions:• Back: Returns to the previous page.• Up and Down Arrows: Scrolls the list up and down.• Add Device: Goes to the Add Device page for the deviceselected.• Delete Device: Goes to the Delete Device page for thedevice selectedSystem Settings 7450-0840-01Page 5-4© <strong>Honeywell</strong> International Inc. Do not copy without express permission of <strong>Honeywell</strong>Rev 4 Jan 2011
<strong>Honeywell</strong> Bendix/King AV8OR User’s Guide• Connect/Disconnect: If the selected device is not connected,this soft key is be labeled “Connect”. When AV8OR attemptsto make a connection to the selected device. If the selecteddevice is connected this soft key is labeled “Disconn”. Whentouched the device is disconnected from AV8OR.• Phone: Goes to the Phone page.• About: Goes to the About page.To pair to a device with Bluetooth, do the following steps:• Prepare your Bluetooth device to be discovered.• Tap on the Add Device page to open the Add Device Page.Figure 5-6: Bluetooth – Add Device PageA search is performed for all available Bluetooth devices. When thesearch is completed, all devices that have at least one feature thathas not been previously paired to AV8OR are displayed.Tap the Search Again soft key to do the search over.Highlight the device you wish to pair and tap the Pair Device softkey to display the Pair Device page as shown below.7450-0840-01 System SettingsRev 4 Jan 2011© <strong>Honeywell</strong> International Inc. Do not copy without express permission of <strong>Honeywell</strong>Page 5-5
<strong>Honeywell</strong> Bendix/King AV8OR User’s GuideFigure 5-7: BlueTooth – Pair Device PageThe selected device is listed on the first line.The services provided by the selected device are indented and listedon the following lines. When the user touches the desired service,that line is highlighted.Double tap on the desired service to start the pairing process or taponce on the desired service and tap on the Connect Service softkey.If Dial up networking is selected, the Service Providers page isdisplayed.Tap the Search Again soft key to do the search over.Tap on the Bluetooth Manager soft key to return to the BluetoothManager Page.If a passkey Entry is required during the connection, the PasskeyEntry Page will display as shown below.System Settings 7450-0840-01Page 5-6© <strong>Honeywell</strong> International Inc. Do not copy without express permission of <strong>Honeywell</strong>Rev 4 Jan 2011
<strong>Honeywell</strong> Bendix/King AV8OR User’s GuideFigure 5-8: Bluetooth – Passkey Requested PageEnter the passkey for the device you are connecting and tap on theOK soft key to return to the previous menu.Service Providers PageFigure 5-9: Bluetooth – Service Providers PageThis page allows the user to set up the Dial-Up Network (DUN).The page displays all of the available service providers.Tap on the Add soft key to set up a new provider.Tap on the Favorite soft key to select from previously connectedservice providers.7450-0840-01 System SettingsRev 4 Jan 2011© <strong>Honeywell</strong> International Inc. Do not copy without express permission of <strong>Honeywell</strong>Page 5-7
<strong>Honeywell</strong> Bendix/King AV8OR User’s GuideTap on the OK soft key to approve the network selection. Ifnecessary, the DUN Setup Page will show. After the networkselection is approved, the Pair Device Page displays again.DUN Setup PageFigure 5-10: Bluetooth – DUN Setup PageThis page lets the user to enter the following data:• Connection Name• Phone Number• User Name• Password• DomainAfter entering the above data, tap on the OK soft key to accept thedata and initiate the DUN connection.DUN Favorite Provider Selection PageThe Favorite Service Providers page is entered when the Favoritesoft key is tapped on the Service Providers Page as shown below.System Settings 7450-0840-01Page 5-8© <strong>Honeywell</strong> International Inc. Do not copy without express permission of <strong>Honeywell</strong>Rev 4 Jan 2011
<strong>Honeywell</strong> Bendix/King AV8OR User’s GuideFigure 5-11: Bluetooth – DUN Favorite Provider PageThis page lets the user to enter the following data:• Connection Name• Phone Number• User Name• Password• DomainAfter entering the above data, tap on the OK soft key to accept thedata and initiate the DUN connection.INITIAL SETUPTo enter the Initial Setup page, tap the “Initial Setup” soft key onthe Settings page. The Initial Setup Menu page is displayed asshown below.Figure 5-12: Initial Setup Menu Page7450-0840-01 System SettingsRev 4 Jan 2011© <strong>Honeywell</strong> International Inc. Do not copy without express permission of <strong>Honeywell</strong>Page 5-9
<strong>Honeywell</strong> Bendix/King AV8OR User’s GuideTap on the Language soft key to select the language from theavailable language list. Tap the Back button to return to the InitialSetup Menu page when done.Tap on the Calibrate Screen soft key to display a blank screen withcrosshairs shown in the middle of the screen. Tap on the exactcenter of the crosshairs. The crosshairs will move to a new location.Continue tapping on the exact center of the crosshairs until thecalibration is complete and the screen returns to the Initial SetupMenu page.Tap on the System Standby soft key to put the system into Standbymode.Tap on the Color Theme soft key to select the color scheme fromthe list of available colors. Tap on the Back soft key to return to theInitial Setup Menu page.When finished, tap on the Back soft key to return to the main menu.System Settings 7450-0840-01Page 5-10© <strong>Honeywell</strong> International Inc. Do not copy without express permission of <strong>Honeywell</strong>Rev 4 Jan 2011
<strong>Honeywell</strong> Bendix/King AV8OR User’s GuideThis PageIntentionally Left Blank7450-0840-01 System SettingsRev 4 Jan 2011© <strong>Honeywell</strong> International Inc. Do not copy without express permission of <strong>Honeywell</strong>Page 5-11
<strong>Honeywell</strong> Bendix/King AV8OR User’s Guide6. APPENDIXACRONYMS AND ABBREVIATIONSAcronyms and abbreviations used in this guide are defined asfollows:TERMS DEFINITIONAALT altitudeATC air traffic controlAUTO automaticBBRG bearingCCDI course deviation indicatorCOG center of gravityCOM communicationDDIS distanceDTK desired trackEELEV elevationESA en route safe altitudeETA estimated time of arrivalETE estimated time en routeETT-WPT estimated time to WPTEXT externalFFPLAN flight planft feetGGND groundGNDSPD groundspeedGPS global positioning systemGPS-ALT GPS determined altitudeGS ground speedHHSI Horizontal situation indicatorIICAO International Civil Aviation Organization7450-0840-01 AppendixRev 4 Jan 2011© <strong>Honeywell</strong> International Inc. Do not copy without express permission of <strong>Honeywell</strong>Page 6-1
<strong>Honeywell</strong> Bendix/King AV8OR User’s GuideID identificationIFR instrument flight rulesINT internalKkm kilometerskts nautical miles per hourLLAT latitudeLCD liquid crystal displayLON longitudeLONG longitudeLTNG lightningMM metersMETAR meteorological aviation reportMFD multifunction displayMGRS military grid reference systemMOD modificationMPH statute miles per hourMSA minimum safe altitudeMSL Mean sea levelNNAV navigationNAVAID Navigation/al AidNCD non-computed dataNDB non-directional beaconnm nautical milesNMEA national marine electronics associationNVM non-volatile memoryOOBS omni-directional bearing selectorPPBRG pointer bearingPC personal computerPDIS pointer distancePIN personal identification numberPOS positionPTR pointerRRMA return material authorizationRNG rangeSSBY standbyAppendix 7450-0840-01Page 6-2© <strong>Honeywell</strong> International Inc. Do not copy without express permission of <strong>Honeywell</strong>Rev 4 Jan 2011
<strong>Honeywell</strong> Bendix/King AV8OR User’s Guidesm statute milesSPD speedSTBY standbySTRK strikeSUA special use airspaceTTA traffic alertTAU protective area around aircraftTCAS Traffic alert and collision avoidance systemTIS traffic information serviceTOPO topographical data (i.e. coastlines, terrain, rivers, lakes andso on)TRFC trafficTRK actual trackTST testTTS track to steerUUSB universal serial busUTC universal coordinated time (same as Greenwich MeanTime)UTM universal transverse MercatorVVFR visual flight rulesVOR very high frequency omni-directional radio rangeVRP visual reference pointVSD vertical situation display (Smart Profile)WWPT WaypointXXTK cross track error7450-0840-01 AppendixRev 4 Jan 2011© <strong>Honeywell</strong> International Inc. Do not copy without express permission of <strong>Honeywell</strong>Page 6-3
<strong>Honeywell</strong> Bendix/King AV8OR User’s GuideDOWNLOADING/UPLOADING FILES FROM/TO PC• Turn on the power to the AV8OR and let AV8OR boot up to themain menu.• Use the included PC/USB cable (part number 005-03702-0004)to attach from the AV8OR to a USB port on a P/C.• A connection symbol shows on screen. The AV8OR modescannot be used while AV8OR is connected to the PC..Figure 6-1: Connection to USB port.• Configure the PC to connect the AV8OR as an external drive toview files as shown in the figure below.Appendix 7450-0840-01Page 6-4© <strong>Honeywell</strong> International Inc. Do not copy without express permission of <strong>Honeywell</strong>Rev 4 Jan 2011
<strong>Honeywell</strong> Bendix/King AV8OR User’s GuideFigure 6-2: Configure AV8OR as external driveNote: The SD card can also be removed from the AV8OR andplugged into a compatible SD card slot on a PC to transfer files.Refer to the http://www.bendixking.com/av8or website forinstructions on how to download software and database file updatesfrom the PC to the SD card in the AV8OR.Use the directory structure in the table below to download/uploadfiles to the SD card:Table 6-1 Directory StructureDirectoryDescription\GoDriveRoot level for Car NavigationSoftware\GoFly Root level for AviationSoftware\GoFly\dataStorage location for Aviationdata\GoFly\data\Vector Storage location for all7450-0840-01 AppendixRev 4 Jan 2011© <strong>Honeywell</strong> International Inc. Do not copy without express permission of <strong>Honeywell</strong>Page 6-5
<strong>Honeywell</strong> Bendix/King AV8OR User’s GuideDirectoryDescriptiondatabases\GoFly\data\System Storage location for NVM data\GoFly\data\userStorage location for user data\GoFly\data\user\Notepads Storage location for userchecklists\GoFly\data\user\FlightLogsStorage location for user flightlogs\MultimediaRoot level for all Multimedia\Multimedia\ebooks Storage location for E-books\Multimedia\movies Storage location for movies\Multimedia\musicStorage location for music\Multimedia\photos Storage location for photosCAUTIONMake sure that any multimedia files that are downloaded onlygo into the correct multimedia subdirectory.CAUTIONDeleting or changing files in the GoDrive or GoFly directorieson the SD card may make the aviation or automotivenavigation programs unusable.Appendix 7450-0840-01Page 6-6© <strong>Honeywell</strong> International Inc. Do not copy without express permission of <strong>Honeywell</strong>Rev 4 Jan 2011
<strong>Honeywell</strong> Bendix/King AV8OR User’s GuideCONNECTION TO AN EXTERNAL GPS SOURCEThe AV8OR will accept external GPS source data via the RS 232interface and can be used as a non-certified display of GPS data.Below is a list of a few RS 232 GPS units that have been evaluatedReminder: The AV8OR only provides for one RS 232 interface.Bendix/King KLN-94Garmin© GNS 430/430W/530/530WTo configure the AV8OR to receive external position and flight plandata, perform the following steps:From the Aviation Main Menu, tap the soft key to open theSystem Setup Menu.Highlight the Device Setup option and tap the SELECT soft key toshow the Device and Port Setup page.The AV8OR must be set up so that the Position Port is configured as“Serial” and the Flight Plan Port is configured as “External”. The typemust be set as AR-NAV.On the Device and Port Setup page, the configuration steps are:• If the Weather Source is set to Serial, it must be changed toeither BlueTooth or None.• Set the Position Port to “Serial”.• Set the Flight Plan Port to “External”.• Set the Position Type to “AR-NAV”. This will change the FlightPlan Type to “ENH AR-NAV”.When finished the Device and Port Setup page should looklike Figure 7-3.7450-0840-01 AppendixRev 4 Jan 2011© <strong>Honeywell</strong> International Inc. Do not copy without express permission of <strong>Honeywell</strong>Page 6-7
<strong>Honeywell</strong> Bendix/King AV8OR User’s GuideFigure 6-3: External GPS Setup ScreenThe interconnect between the Bendix/King KLN 94 and theAV8OR is as follows:Table 6-2 KLN 94 PinoutsKLN 94 Signal Name KLN 94 AV8OR AV8OR PinPin Out Signal Name OutGENERAL RS-232 OUT P941-2 RS 232 RX DB9-2GENERAL RS-232 IN P941-1 RS 232 TX DB9-3AIRCRAFT GROUND P941-14 GROUND DB9-5The wiring interconnect between the GNS 430/430W/530/530W andthe AV8OR is as follows:GNS430/530NameTable 6-3 GNS 430/430W/530/530W PinoutsSignalGNS430/530Pin OutAV8ORSignalNameAV8OR PinOutGPS RS-232 OUT 1 P5001-56 RS 232 RX DB9-2GPS RS-232 IN 1 P5001-57 RS 232 TX DB9-3-AIRCRAFT GROUND P5001-77,78 GROUND DB9-5Appendix 7450-0840-01Page 6-8© <strong>Honeywell</strong> International Inc. Do not copy without express permission of <strong>Honeywell</strong>Rev 4 Jan 2011
<strong>Honeywell</strong> Bendix/King AV8OR User’s GuideCONNECTION TO AN EXTERNAL WEATHERSOURCEBendix/King KDR-610 SetupTo configure the AV8OR to receive weather data from the KDR-610,perform the following steps:From the Aviation Main Menu, tap the soft key to open theSystem Setup Menu.Highlight the Device Setup option and tap the SELECT soft key toshow the Device and Port Setup page.On the Device and Port Setup page, the configuration steps are:• If the Position Source is set to Serial, it must be changed toInternal or Bluetooth since there is only one RS232 portavailable.• Set the Weather Port to Serial.• Set the Weather Type to “KDR-610”. When finished the Deviceand Port Setup page should look like Figure 7-4.Figure 6-4: Weather Setup – KDR-610The output of the KDR 610 is RS 422. You must use an RS 422 toRS 232 converter to change the KDR 610 differential outputs to thesingle ended levels that the AV8OR requires. This converter isinstalled between the KDR 610 and the AV8OR.7450-0840-01 AppendixRev 4 Jan 2011© <strong>Honeywell</strong> International Inc. Do not copy without express permission of <strong>Honeywell</strong>Page 6-9
<strong>Honeywell</strong> Bendix/King AV8OR User’s GuideAn RS 232 to RS 422 Converter can be purchased from Telebyte,Model 253 (www.telebyteusa.com).The pinouts for the Bendix/King KDR 610 and the AV8OR are asfollows:Table 6-4 KDR 610 PinoutsKDR 610 SignalNameKDR 610 PinOutAV8ORSignal NameAV8OR PinOut422TXH P6101-15 RS 232 RX DB9-2422TXL P6101-33GROUND P6101-37 GROUND DB9-5Appendix 7450-0840-01Page 6-10© <strong>Honeywell</strong> International Inc. Do not copy without express permission of <strong>Honeywell</strong>Rev 4 Jan 2011
<strong>Honeywell</strong> Bendix/King AV8OR User’s GuideWxWorx XM Weather Receiver Serial SetupTo configure the AV8OR to receive weather data from the WxWorxXM Weather Receiver, perform the following steps:Attach the cable from the WxWorx XM Weather Receiver (suppliedwith the WX XM Weather Receiver) to the USB port on the AV8OR.From the Aviation Main Menu, tap the soft key to open theSystem Setup Menu.Highlight the Device Setup option and tap the SELECT soft key toshow the Device and Port Setup page.On the Device and Port Setup page, the configuration steps are:• If the Position Source is set to Serial, it must be changed toInternal or Bluetooth since there is only one RS232 portavailable.• Set the Weather Port to Serial.• Set the Weather Type to “WxWorx”. When finished the Deviceand Port Setup page should look like Figure 7-5.Figure 6-5: WxWorx XM Weather SetupRefer to the section on page 4-6 for how to activate yoursubscription to XM weather.7450-0840-01 AppendixRev 4 Jan 2011© <strong>Honeywell</strong> International Inc. Do not copy without express permission of <strong>Honeywell</strong>Page 6-11
<strong>Honeywell</strong> Bendix/King AV8OR User’s GuideWxWorx XM Weather Receiver Bluetooth SetupTo configure the AV8OR to receive weather data from the Bluetoothversion of the WxWorx XM Weather Receiver, perform the followingsteps:Setup the WxWorx receiver in the Device and Port Setup page asfollows:1. On the Main Menu page, tap the soft key to start theAviation mode navigation program.2. From the Map page, tap on the MAIN MENU soft key to go tothe Aviation Main Menu.3. Tap the soft key to open the System Setup Menu.4. Highlight the Device Setup option and tap the SELECT soft keyto show the Device and Port Setup page.5. Set the Weather Port to BlueTooth.6. Set the Weather Type to “WxWorx”. When finished the Deviceand Port Setup page should look like in Figure 6-6.Figure 6-6: WxWorx Bluetooth Receiver SetupEstablish a paired connection between the WxWorx XM receiver andthe AV8OR.as follows:Appendix 7450-0840-01Page 6-12© <strong>Honeywell</strong> International Inc. Do not copy without express permission of <strong>Honeywell</strong>Rev 4 Jan 2011
<strong>Honeywell</strong> Bendix/King AV8OR User’s Guide1. From the MAIN MENU, touch the SETTINGS soft key, and thentouch the Bluetooth soft key to display the Bluetooth ManagerPage.Figure 6-7: Bluetooth Manager Page2. This page shows the devices that have been previously pairedwith AV8OR. If the WxWorx Receiver has not previous beenpaired with AV8OR, tap on the Add Device soft key to start theconnection process. The Bluetooth manager searches for allavailable Bluetooth devices that have not been previously pairedwith the unit and displays them on the screen as shown below.Figure 6-8: Add Bluetooth Device3. Highlight the WxWorx Receiver option and tap on the “PairDevice” soft key. The Pair Device is page is displayed.7450-0840-01 AppendixRev 4 Jan 2011© <strong>Honeywell</strong> International Inc. Do not copy without express permission of <strong>Honeywell</strong>Page 6-13
<strong>Honeywell</strong> Bendix/King AV8OR User’s GuideFigure 6-9: BlueTooth – Pair Device4. Highlight the “Bluetooth Serial Port” option and then tap on theConnect Service soft key to start the connection process anddisplay the Passkey Entry Page.Figure 6-10: BlueTooth Passkey Required5. Enter the Passkey supplied with your WxWorx receiver “9679”and then touch the “OK” soft key to continue connection to thedevice. A “Connecting” message is displayed.Appendix 7450-0840-01Page 6-14© <strong>Honeywell</strong> International Inc. Do not copy without express permission of <strong>Honeywell</strong>Rev 4 Jan 2011
<strong>Honeywell</strong> Bendix/King AV8OR User’s GuideFigure 6-11: BlueTooth Connecting6. After the WxWorx Receiver is paired, it is displayed in theBluetooth Manager page as shown below.Figure 6-12: Bluetooth WxWorx Connection Established7450-0840-01 AppendixRev 4 Jan 2011© <strong>Honeywell</strong> International Inc. Do not copy without express permission of <strong>Honeywell</strong>Page 6-15
<strong>Honeywell</strong> Bendix/King AV8OR User’s GuideCONNECTION TO AN EXTERNAL TRAFFIC SOURCEZaon XRX - Serial SetupCONFIGURATION OF THE ZAON XRXTo configure the Zaon XRX, perform the following steps:• Using the XRX AIRCRAFT menu, set the aircraft type asappropriate for your aircraft as described in the ZAON usersManual.• Using the XRX RANGE menu, set the horizontal detection rangeto 6 nm radius.• Using the XRX ALTITUDE menu, set the altitude limitation to2500 ft.• Using the XRX COM menu, set the third party communicationsto PROFILE 1.o Verify the XRX configuration switches are set asdescribed in the XRX Users Guide for third-party output.• Press Mute to return to the traffic screen. This screen will show“PROFILE 1”.• Set the configuration switches on the Zaon XRX to the correctconfiguration to use the RS-232 output.CONFIGURATION OF AV8ORTo configure the AV8OR to receive external traffic data, perform thefollowing steps:• If the Weather Source is set to Serial, it must be changed toBluetooth or None.• From the Aviation Main Menu, tap the soft key to openthe System Setup Menu.• Highlight the Device Setup option and tap the SELECT soft keyto show the Device Setup page.• The AV8OR must be set up so that the Traffic Port is configuredas “Serial”. The Type must be set as “ZAON Traffic”.oooOn the Device Setup page, the configuration steps are:Change any port that is set to “Serial” to either“BlueTooth” or “None” as only one serial port isavailable.On the Traffic row, set Port to “Serial”.Appendix 7450-0840-01Page 6-16© <strong>Honeywell</strong> International Inc. Do not copy without express permission of <strong>Honeywell</strong>Rev 4 Jan 2011
o<strong>Honeywell</strong> Bendix/King AV8OR User’s GuideOn the Traffic row, set Type to “ZAON Traffic”.When finished the Device Setup page should look like the figurebelow.Figure 6-13: Device Setup Page – Traffic• Tap on the SAVE & EXIT soft key to save changes.Use the <strong>Honeywell</strong> RS-232 connector (PN 005-037-02-0017available at http://www.bendixking.com/av8or) to connect the ZaonXRX to the mini USB port on the AV8OR.Zaon XRX - Bluetooth SetupThe Zaon XRX requires an optional Bluetooth module to synchronizewith other Bluetooth devices. The AV8OR supports a Bluetoothconnection to the Zaon XRX after the optional module has beeninstalled on the Zaon XRX. Refer to the User’s manual for the ZaonXRX Bluetooth module for details on how to connect to the ZaonXRX.EXTERNAL FLIGHT PLANSJeppesen FliteStar© PC ApplicationThe AV8OR can use flight plans created by the Jeppesen FliteStar©PC application. Flight plans can be created and modified using theJeppesen tool. The flight plans need to be saved using the “Exportas Text” option, with the filename “Route.txt”. This file must then be7450-0840-01 AppendixRev 4 Jan 2011© <strong>Honeywell</strong> International Inc. Do not copy without express permission of <strong>Honeywell</strong>Page 6-17
<strong>Honeywell</strong> Bendix/King AV8OR User’s Guidetransferred to the SD card and stored in the GoFly\data\userdirectory.When creating routes using the Jeppesen FliteStar© tool, only theWPTs under the “route” directory should be exported. If there areidentifiers, airports, WPTs, etc in the “Other Charts” directory theywill be appended to the end of the flight plan when it is exported.When this flight plan is imported into AV8OR, the extra items will betreated as extra WPTs resulting in a flight plan different than the onecreated using FliteStar©.Appendix 7450-0840-01Page 6-18© <strong>Honeywell</strong> International Inc. Do not copy without express permission of <strong>Honeywell</strong>Rev 4 Jan 2011
<strong>Honeywell</strong> Bendix/King AV8OR User’s GuideSUBSCRIPTIONS AND UPDATESThe latest available subscriptions for the GoFly program areat http://www.bendixking.com/av8or after login:Bendix/King Subscriptions:GOFLY NAVIGATION DATA SUBSCRIPTIONS– Subscriptions are available for the three following areas:• Americas• Atlantic• PacificRefer to the chart below for the coverage available for each area.Figure 6-14: Navigation Data Subscription CoverageGOFLY FUEL PRICING AND AIRPORT SERVICES• All US onlyAppendix 7450-0840-01Page 6-20© <strong>Honeywell</strong> International Inc. Do not copy without express permission of <strong>Honeywell</strong>Rev 4 Jan 2011
Other Subscriptions:GOFLY AIRPORT DIAGRAMS:<strong>Honeywell</strong> Bendix/King AV8OR User’s GuideAn Airport Diagrams subscription for the GoFly program isavailable from Seattle Avionics (www.seattle<strong>avionic</strong>s.com/av8or).Once subscribed, an automatic charts download utility called the“Data Manager” will need to be installed on your home computer.The data manager automatically downloads Airport Diagrams andupdate your AV8OR any time that it is plugged into your PC via theUSB cable. Refer to the Seattle Avionics website for moreinformation about the Airport Diagrams subscription and the DataManager software.GOFLY XM WEATHER:Call WxWorx at 1-800-985-9200 to purchase an XM Weathersubscription. The XM weather subscription options are available onthe WxWorx website at http://www.wxworx.com.GODRIVE AUTOMOTIVE MAPSAutomotive maps are provided by Nav-n-Go. Map andsoftware updates are available at www.naviextras.com. Onefree automotive database update is available upon purchaseof an AV8OR system or SD card which includes automotivemapping after 1/1/10. For any GoDrive and automotivemapping support issues, visit Nav-n-Goat www.naviextras.com.Updates:The following subscriptions for the AV8OR Handheld are availableat http://www.bendixking.com/av8or after login:• GoFly Software Updates• AV8OR Firmware Updates7450-0840-01 AppendixRev 4 Jan 2011© <strong>Honeywell</strong> International Inc. Do not copy without express permission of <strong>Honeywell</strong>Page 6-21
<strong>Honeywell</strong> Bendix/King AV8OR User’s GuideThe AV8OR Handheld must be connected to the PC with theincluded USB connector. The PC will automatically detectthe AV8OR handheld and display the available updates asshown in the figure below.Figure 6-15: AV8OR Handheld Upgrade ScreenFollow the instructions on the PC screen to upgrade the GoFlysoftware or AV8OR firmware.Appendix 7450-0840-01Page 6-22© <strong>Honeywell</strong> International Inc. Do not copy without express permission of <strong>Honeywell</strong>Rev 4 Jan 2011