
Create successful ePaper yourself
Turn your PDF publications into a flip-book with our unique Google optimized e-Paper software.
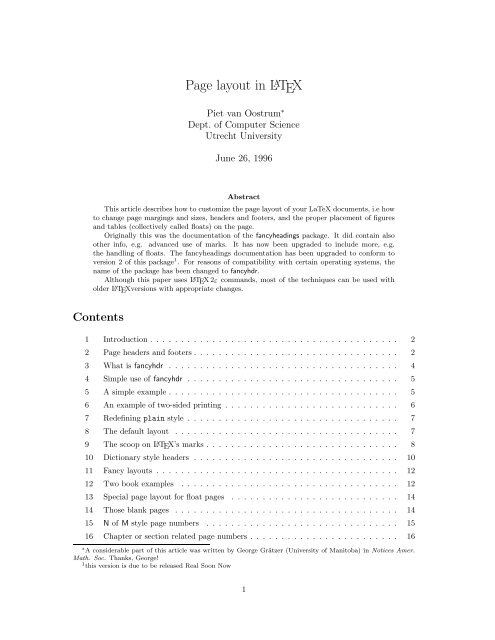
<strong>Page</strong> <strong>layout</strong> <strong>in</strong> L A TEXPiet van Oostrum ∗Dept. of Computer ScienceUtrecht UniversityJune 26, 1996AbstractThis article describes how to customize the page <strong>layout</strong> of your LaTeX documents, i.e howto change page marg<strong>in</strong>gs and sizes, headers and footers, and the proper placement of figuresand tables (collectively called floats) on the page.Orig<strong>in</strong>ally this was the documentation of the fancyhead<strong>in</strong>gs package. It did conta<strong>in</strong> alsoother <strong>in</strong>fo, e.g. advanced use of marks. It has now been upgraded to <strong>in</strong>clude more, e.g.the handl<strong>in</strong>g of floats. The fancyhead<strong>in</strong>gs documentation has been upgraded to conform toversion 2 of this package 1 . For reasons of compatibility with certa<strong>in</strong> operat<strong>in</strong>g systems, thename of the package has been changed to fancyhdr.Although this paper uses L A TEX2ε commands, most of the techniques can be used witholder L A TEXversions with appropriate changes.Contents1 Introduction . . . . . . . . . . . . . . . . . . . . . . . . . . . . . . . . . . . . . . . . 22 <strong>Page</strong> headers and footers . . . . . . . . . . . . . . . . . . . . . . . . . . . . . . . . . 23 What is fancyhdr . . . . . . . . . . . . . . . . . . . . . . . . . . . . . . . . . . . . . 44 Simple use of fancyhdr . . . . . . . . . . . . . . . . . . . . . . . . . . . . . . . . . . 55 A simple example . . . . . . . . . . . . . . . . . . . . . . . . . . . . . . . . . . . . . 56 An example of two-sided pr<strong>in</strong>t<strong>in</strong>g . . . . . . . . . . . . . . . . . . . . . . . . . . . . 67 Redef<strong>in</strong><strong>in</strong>g pla<strong>in</strong> style . . . . . . . . . . . . . . . . . . . . . . . . . . . . . . . . . . 78 The default <strong>layout</strong> . . . . . . . . . . . . . . . . . . . . . . . . . . . . . . . . . . . . 79 ThescooponL A TEX’s marks . . . . . . . . . . . . . . . . . . . . . . . . . . . . . . . 810 Dictionary style headers . . . . . . . . . . . . . . . . . . . . . . . . . . . . . . . . . 1011 Fancy <strong>layout</strong>s . . . . . . . . . . . . . . . . . . . . . . . . . . . . . . . . . . . . . . . 1212 Two book examples . . . . . . . . . . . . . . . . . . . . . . . . . . . . . . . . . . . 1213 Special page <strong>layout</strong> for float pages . . . . . . . . . . . . . . . . . . . . . . . . . . . 1414 Those blank pages . . . . . . . . . . . . . . . . . . . . . . . . . . . . . . . . . . . . 1415 N of M style page numbers . . . . . . . . . . . . . . . . . . . . . . . . . . . . . . . 1516 Chapter or section related page numbers . . . . . . . . . . . . . . . . . . . . . . . . 16∗ A considerable part of this article was written by George Grätzer (University of Manitoba) <strong>in</strong> Notices Amer.Math. Soc. Thanks, George!1 this version is due to be released Real Soon Now1
17 When to change the headers and footers? . . . . . . . . . . . . . . . . . . . . . . . 1618 Headers and footers <strong>in</strong>duced by the text . . . . . . . . . . . . . . . . . . . . . . . . 1719 A movie . . . . . . . . . . . . . . . . . . . . . . . . . . . . . . . . . . . . . . . . . . 1920 Thumb-<strong>in</strong>dexes . . . . . . . . . . . . . . . . . . . . . . . . . . . . . . . . . . . . . . 1921 Float placement . . . . . . . . . . . . . . . . . . . . . . . . . . . . . . . . . . . . . . 2022 Multipage Floats . . . . . . . . . . . . . . . . . . . . . . . . . . . . . . . . . . . . . 2322.1 Tables . . . . . . . . . . . . . . . . . . . . . . . . . . . . . . . . . . . . . . . . . . . 2322.2 Figures . . . . . . . . . . . . . . . . . . . . . . . . . . . . . . . . . . . . . . . . . . 2423 Contact <strong>in</strong>formation . . . . . . . . . . . . . . . . . . . . . . . . . . . . . . . . . . . 251 IntroductionA page <strong>in</strong> a L A TEX document is built from various elements as shown <strong>in</strong> figure 1. The bodyconta<strong>in</strong>s the ma<strong>in</strong> text of the document together with the so called floats (tables and figures).The pages are constructed by L A TEX’s output rout<strong>in</strong>e, which is quite complicated and should thereforenot be modified. Some of the packages described <strong>in</strong> this paper conta<strong>in</strong>s small modificationsto the output rout<strong>in</strong>e to accomplish th<strong>in</strong>gs that cannot be done <strong>in</strong> another way. You should usethese packages to get the desired result rather than fiddl<strong>in</strong>g with the output rout<strong>in</strong>e yourself.There a a number of th<strong>in</strong>gs that you must be aware of:1. The marg<strong>in</strong>s on the left are not called \leftmarg<strong>in</strong>, but \evensidemarg<strong>in</strong> (on evennumberedpages) and \oddsidemarg<strong>in</strong> (on odd-numbered pages). In one-sided documents\oddsidemarg<strong>in</strong> is used for either. \leftmarg<strong>in</strong> is also a valid L A TEX parameter but it hasa different use (namely the <strong>in</strong>dentation of lists).2. Most of the parameters should not be changed <strong>in</strong> the middle of a document. Some changesmight work at a pagebreak. If you want to change the height of a s<strong>in</strong>gle page, you can usethe \enlargethispage command.The marg<strong>in</strong> notes area conta<strong>in</strong>s small pieces of <strong>in</strong>formation created by the \marg<strong>in</strong>par command.On twosided documents the marg<strong>in</strong> notes appear on the left and right alternatively. The marg<strong>in</strong>notes are not on fixed places with respect to the paper but at approximately the same height asthe paragraph <strong>in</strong> which they appear. Due to the algorithm used to decide the placement of marg<strong>in</strong>notes, <strong>in</strong> a twosided document unfortunately they may appear on the wrong side if they are closeto a page break. If you want to put <strong>in</strong>formation on fixed places <strong>in</strong> the marg<strong>in</strong>s you may use thetechnique described <strong>in</strong> sections 19 and 20.The first part of this paper describes how to change the header and footer areas. The last partdescribes how to get your floats at the desired place.2 <strong>Page</strong> headers and footersThe page headers and footers <strong>in</strong> L A TEX are def<strong>in</strong>ed by the \pagestyle and \pagenumber<strong>in</strong>gcommands. \pagestyle def<strong>in</strong>es the general contents of the headers and footers (e.g. where thepage number will be pr<strong>in</strong>ted), while \pagenumber<strong>in</strong>g def<strong>in</strong>es the format of the page number.L A TEX has four standard pagestyles:2
4i5i6i✻2i❄✻❄✻❄ Header✻✻❄Bodyi7Marg<strong>in</strong>Notesi3✲✛✲ ✛ 9 i✛10i✲✛8i✲✛i1✲❄✻i11Footer❄1 one <strong>in</strong>ch + \hoffset 2 one <strong>in</strong>ch + \voffset3 \oddsidemarg<strong>in</strong> = 18pt 4 \topmarg<strong>in</strong> = 0pt5 \headheight = 12pt 6 \headsep = 25pt7 \textheight = 646pt 8 \textwidth = 424pt9 \marg<strong>in</strong>parsep = 11pt 10 \marg<strong>in</strong>parwidth = 54pt11 \footskip = 30pt \marg<strong>in</strong>parpush = 5pt (not shown)\hoffset = 0pt\voffset = 0pt\paperwidth = 597pt\paperheight = 845ptFigure 1: <strong>Page</strong> elements. The values shown are those <strong>in</strong> effect <strong>in</strong> the current document, not thedefaults.3
emptypla<strong>in</strong>head<strong>in</strong>gsmyhead<strong>in</strong>gsno headers or footersno header, footer conta<strong>in</strong>s page number centeredno footer, header conta<strong>in</strong>s name of chapter/section and/or subsectionand page numberno footer, header conta<strong>in</strong>s page number and user supplied <strong>in</strong>formationAlthough these are useful styles, they are quite limited. Additional page styles can be def<strong>in</strong>ed bydef<strong>in</strong><strong>in</strong>g commands of the form \ps@xxx. This command is executed when a \pagestyle{xxx}is given <strong>in</strong> the document. The \ps@xxx command should def<strong>in</strong>e the follow<strong>in</strong>g commands for thecontents of the headers and footers:\@oddhead header on odd numbered pages <strong>in</strong> two-sided documents (on allpages <strong>in</strong> one-sided)\@evenhead header on even numbered pages <strong>in</strong> two-sided documents\@oddfoot footer on odd numbered pages <strong>in</strong> two-sided documents (on allpages <strong>in</strong> one-sided)\@evenfoot footer on even numbered pages <strong>in</strong> two-sided documentsThese are not user commands, but rather “variables” that are used by L A TEX’s output rout<strong>in</strong>e.As the command names conta<strong>in</strong> the character ’@’, they should be def<strong>in</strong>ed <strong>in</strong> a package file, orotherwise be sandwiched between the commands \makeatletter and \makeatother.The \pagenumber<strong>in</strong>g command def<strong>in</strong>es the <strong>layout</strong> of the page number. It has a parameter fromthe follow<strong>in</strong>g list:arabic arabic numeralsroman lower case roman numeralsRoman upper case roman numeralsalph lower case letterAlph upper case letterThe \pagenumber<strong>in</strong>g{xxx} def<strong>in</strong>es the command \thepage to be the expansion of the page number<strong>in</strong> the given notation xxx. The pagestyle command then would <strong>in</strong>clude \thepage <strong>in</strong> theappropriate place. Additionally the \pagenumber<strong>in</strong>g command resets the page number to 1. The\pagestyle and \pagenumber<strong>in</strong>g apply to the page that is be<strong>in</strong>g constructed, so they should beused at a location where it is clear to what page they apply (see section 17).3 What is fancyhdrThe fancyhdr macro package allows you to customize <strong>in</strong> L A TEX your page headers and footers <strong>in</strong>an easy way. You can def<strong>in</strong>e:• three-part headers and footers• decorative l<strong>in</strong>es <strong>in</strong> headers and footers• headers and footers wider than the width of the text• multi-l<strong>in</strong>e headers and footers• separate headers and footers for even and odd pages• different headers and footers for chapter pages• different headers and footer on pages with floatsOf course, you also have complete control over fonts, uppercase and lowercase displays, etc.4
4 Simple use of fancyhdrTo use this package <strong>in</strong> a L A TEX2ε document, place the file fancyhdr.sty <strong>in</strong> a directory/folderwhere TEX can f<strong>in</strong>d it (normally <strong>in</strong> the <strong>in</strong>put directory/folder), and <strong>in</strong>clude <strong>in</strong> the preamble ofyour document after\documentclass{...}the commands 2 :\usepackage{fancyhdr}\pagestyle{fancy}We can visualize the page <strong>layout</strong> we can create with fancyhdr as follows:LeftHeader CenteredHeader RightHeaderpage bodyLeftFooter CenteredFooter RightFooterThe LeftHeader and LeftFooter are left justified; the CenteredHeader and CenteredFooter arecentered; the RightHeader and RightFooter are right justified.We def<strong>in</strong>e each of the six “fields” and the two decorative l<strong>in</strong>es separately.5 A simple exampleK. Grant is writ<strong>in</strong>g a report to Dean A. Smith, on “The performance of new graduates” with thefollow<strong>in</strong>g page <strong>layout</strong>:The performance of new graduatespage bodyFrom: K. Grant To: Dean A. Smith 3where “3” is the page number. The title: “The performance of new graduates” is bold.This is accomplished by these commands follow<strong>in</strong>g \pagestyle{fancy} 3 :\lhead{}\chead{}\rhead{\bfseries The performance of new graduates}\lfoot{From: K. Grant}\cfoot{To: Dean A. Smith}2 For LaTeX2.09 you should specify [fancyhdr] <strong>in</strong> the \documentstyle <strong>in</strong>stead of the \usepackage command.3 Note that version 1 of fancyhead<strong>in</strong>gs used the \setlength command to change the \...rulewidth parameters.5
On an even page, we get the <strong>layout</strong>:1.2 EVALUATION CHAPTER 1. INTRODUCTIONpage bodyOn an odd page, we get the <strong>layout</strong>:4CHAPTER 1. INTRODUCTION1.2 EVALUATIONpage bodywhere the header text is slanted uppercase.This default <strong>layout</strong> is produced by the follow<strong>in</strong>g commands:\fancyhead[LE,RO]{\slshape \rightmark}\fancyhead[LO,RE]{\slshape \leftmark}\fancyfoot[C]{\thepage}The follow<strong>in</strong>g sett<strong>in</strong>gs are used for the decorative l<strong>in</strong>es:\headrulewidth0.4pt\footrulewidth 0 ptThe header text is turned <strong>in</strong>to all uppercase <strong>in</strong> book.cls.39 ThescooponL A TEX’s marksUsually, for documents of class book and report, you may want to use chapter and section<strong>in</strong>formation <strong>in</strong> the head<strong>in</strong>gs (chapter only for one-sided pr<strong>in</strong>t<strong>in</strong>g), and for documents of classarticle, section and subsection <strong>in</strong>formation (section only for one-sided pr<strong>in</strong>t<strong>in</strong>g). L A TEX usesamarker mechanism to remember the chapter and section (section and subsection) <strong>in</strong>formation fora page; this is discussed <strong>in</strong> detail <strong>in</strong> the L A TEX Companion, Section 4.3.1.There are two ways you can use and change the higher- and lower-level section<strong>in</strong>g <strong>in</strong>formationavailable to you. The macros: \leftmark (higher-level) and \rightmark (lower-level) conta<strong>in</strong>the <strong>in</strong>formation processed by L A TEX, and you can use them directly as shown <strong>in</strong> Section 8.The \leftmark conta<strong>in</strong>s the Left argument of the Last \markboth on the page, the \rightmarkconta<strong>in</strong>s the Right argument of the fiRst \markboth or the only argument of the fiRst \markrighton the page. If no marks are present on a page they are “<strong>in</strong>herited” from the previous page.You can <strong>in</strong>fluence how chapter, section, and subsection <strong>in</strong>formation (only two of them!) is displayedby redef<strong>in</strong><strong>in</strong>g the \chaptermark, \sectionmark, and\subsectionmark commands 4 . You mustput the redef<strong>in</strong>ition after the first call of \pagestyle{fancy} as this sets up the defaults.4 There are similar commands for paragraph and subparagraph but they are seldom used.8
Code:\renewcommand{\chaptermark}[1]{%\markboth{\chaptername\ \thechapter.\ #1}{}}\renewcommand{\chaptermark}[1]{%\markboth{\MakeUppercase{%\chaptername}\ \thechapter.%\ #1}{}}\renewcommand{\chaptermark}[1]{%\markboth{\MakeUppercase{%\chaptername\ \thechapter.%\ #1}}{}}\renewcommand{\chaptermark}[1]{%\markboth{#1}{}}\renewcommand{\chaptermark}[1]{%\markboth{\thechapter.\ #1}{}}\renewcommand{\chaptermark}[1]{%\markboth{\thechapter.%\ \chaptername.\ #1}{}}Pr<strong>in</strong>ts:Chapter 2. Do it nowCHAPTER 2. Do it nowCHAPTER 2. DO IT NOWDo it now2. Do it now2. Chapter. Do it nowFigure 3: Marker variantsLet us illustrate this with chapter <strong>in</strong>fo. It is made up of three parts:• the number (say, 2), displayed by the macro \thechapter• the name (<strong>in</strong> English, Chapter), displayed by the macro \chaptername• the title, conta<strong>in</strong>ed <strong>in</strong> the argument of \chaptermark.Figure 3 shows some variants for “Chapter 2. Do it now” (the last example is appropriate <strong>in</strong>some non-English languages). The % signs at the end of the l<strong>in</strong>es are to prevent unwanted space.Normally you would cont<strong>in</strong>ue the l<strong>in</strong>es and remove these % signs 5 .For the lower-level section<strong>in</strong>g <strong>in</strong>formation, do the same with \markright.So if “Section 2.2. First steps” is the current section, then\renewcommand{\sectionmark}[1]{\markright{\thesection.\ #1}}will give “2.2. First steps”Redef<strong>in</strong><strong>in</strong>g the \chaptermark and \sectionmark commands may not elim<strong>in</strong>ate all uppercaseness.E.g. the bibliography will have a title of bibliography <strong>in</strong> the header, as the \MakeUppercase isexplicitly given <strong>in</strong> the def<strong>in</strong>ition of \thebibliography. Similar for <strong>in</strong>dex etc. If you don’t want toredef<strong>in</strong>e these commands, you can use the \nouppercase command that fancyhdr makes available<strong>in</strong> the header and footer fields. Note that this may screw other th<strong>in</strong>gs, like uppercase romannumerals <strong>in</strong> your headers, so it should be used with care. Essentially this command typesets its5 the \MakeUppercase command is used <strong>in</strong> <strong>LATEX</strong>2ε to generate uppercase text, while <strong>in</strong> <strong>LATEX</strong> 2.09\uppercaseis used. The difference is that \MakeUppercase also deals with non-ASCII letters. Fancyhdr def<strong>in</strong>es \MakeUppercaseto be an alias for \uppercase if it isn’t def<strong>in</strong>ed.9
argument <strong>in</strong> an environment where \MakeUppercase and \uppercase are changed <strong>in</strong>to do-noth<strong>in</strong>goperations.\lhead{\nouppercase{\rightmark}}\rhead{\nouppercase{\leftmark}}It should be noted that the L A TEX mark<strong>in</strong>g mechanism works f<strong>in</strong>e with chapters (which alwaysstart on a new page) and sections (which are reasonably long). It does not work quite as well withshort sections and subsections. This is a problem with L A TEX, not with fancyhdr.As an example let’s take a page <strong>layout</strong> where the leftmarks are generated by the sections and therightmarks by the subsections (as is default <strong>in</strong> the article class). Take a page with some shortsections, e.g.Section 1.subsection 1.1subsection 1.2Section 2.As the leftmark conta<strong>in</strong>s the last mark of the page it will be “Section 2.”, and the rightmark willbe “subsection 1.1” as it will be the first mark of the page. So the page header <strong>in</strong>fo will comb<strong>in</strong>esection 2 with subsection 1.1 which isn’t very nice. The best you can do <strong>in</strong> these cases is use onlythe \rightmarks and redef<strong>in</strong>e \sectionmark accord<strong>in</strong>gly. A L A TEX command \firstleftmarkwould also be a nice addition (see the extramarks package <strong>in</strong> section 18).Another problem with the marks <strong>in</strong> the standard L A TEX classes is that the higher level section<strong>in</strong>gcommands (e.g. \chapter) call\markboth with an empty right argument. This means that onthe first page of a chapter (or a section <strong>in</strong> article style) the \rightmark will be empty. If this isa problem you must manually <strong>in</strong>sert extra \markright commands or redef<strong>in</strong>e the \chaptermark(\sectionmark) commands to issue a \markboth command with two decent parameters.As a f<strong>in</strong>al remark you should also note that the * forms of the \chapter etc. commands do notcall the mark commands. So if you want your preface to set the header <strong>in</strong>fo but not be numberednor be put <strong>in</strong> the table of contents, you must issue the \markboth command yourself, e.g.\chapter*{Preface\markboth{Preface}{}}Enter<strong>in</strong>g the \markboth command <strong>in</strong>side the \chapter* <strong>in</strong>sures that the mark will not be separatedfrom the title by a page break. Of course with \chapter* this wouldn’t be a problem if youput the mark command after the chapter title, as the \chapter* command starts at a new page.However with a \section* it could be dangerous to say:\section*{Preface}\markboth{Preface}{}as a page break may occur between the two commands.10 Dictionary style headersDictionaries and concordances usually have a header conta<strong>in</strong><strong>in</strong>g the first word def<strong>in</strong>ed on the pageor both the first and the last words. This can easily be accomplished with fancyhdr and L A TEX’smark mechanism. Of course if you use the marks for dictionary style headers, you cannot use themfor chapter and section <strong>in</strong>formation, so if there are also chapters and sections present, you mustredef<strong>in</strong>e the \chaptermark and \sectionmark to make them harmless:10
% fixmarks.sty:% Patch LaTeX’s output rout<strong>in</strong>e to handle marks correctly with two columns.% Joe Pallas % Corrected by Piet van Oostrum on Feb 5, 1993, Oct 5, 1994\def\@outputdblcol{\if@firstcolumn \global\@firstcolumnfalse% Remember the marks from the first column\global\setbox\@leftcolumn\copy\@outputbox\splitmaxdepth=\maxdimen \cbaddness=10000\setbox\@outputbox\vsplit\@outputbox to\maxdimen\xdef\@firstcoltopmark{\topmark}%\xdef\@firstcolfirstmark{\splitfirstmark}%\ifx\@firstcolfirstmark\empty\global\let\@setmarks\relax\else\gdef\@setmarks{\let\firstmark\@firstcolfirstmark\let\topmark\@firstcoltopmark}%\fi% End of change\else \global\@firstcolumntrue\setbox\@outputbox\vbox{\hbox to\textwidth{\hbox to\columnwidth{\box\@leftcolumn \hss}\hfil \vrule width\columnseprule\hfil\hbox to\columnwidth{\box\@outputbox \hss}}}\@comb<strong>in</strong>edblfloats% Override current first and top with those of first column if necessary\@setmarks% End of change\@outputpage \beg<strong>in</strong>group \@dblfloatplacement \@startdblcolumn\@whilesw\if@fcolmade \fi{\@outputpage\@startdblcolumn}\endgroup\fi}Figure 4: Fix marks <strong>in</strong> twocolumn style\renewcommand{\chaptermark}[1]{}\renewcommand{\sectionmark}[1]{}Now you do a \markboth{#1}{#1} for each dictionary or concordance entry #1 and use \rightmarkfor the first entry def<strong>in</strong>ed on the page and \leftmark for the last one.If you want to use a header entry of the form firstword–lastword it would be nice if this would bereduced to just the form firstword if both are the same. This could happen if there is just oneentry on the page. In this case a test must be made to check if the marks are the same. However,TEX’s marks are strange beasts, which cannot be compared out of the box with the pla<strong>in</strong> TEX \ifcommands. Fortunately the ifthen package works well:\newcommand{\mymarks}{\ifthenelse{\equal{\leftmark}{\rightmark}}{\rightmark} % if equal{\rightmark--\leftmark}} % if not equal\fancyhead[LE,RO]{\mymarks}\fancyhead[LO,RE]{\thepage}Dictionaries are often done with two columns. Unfortunately there is a bug <strong>in</strong> L A TEX’s twocolumnoption which causes some marks to be lost. If you use the package <strong>in</strong> figure 4, this will be solved 67 .6 This is a simplification of the actual code. Get the real package from the CTAN sites.7 The multicol package uses a similar technique.11
11 Fancy <strong>layout</strong>sYoucanmakeamulti-l<strong>in</strong>efieldwiththe\\ command. It is also possible to put extra space <strong>in</strong> afield with the \vspace command. Note that if you do this you will probably have to <strong>in</strong>crease theheight of the header (\headheight) and/or of the footer (\footskip), otherwise you may geterror messages “Overfull \vbox ...has occurred while \output is active” 8 . See Section 4.1 of theL A TEX Companion for detail.For <strong>in</strong>stance, the follow<strong>in</strong>g code will place the section title and the subsection title of an article <strong>in</strong>two l<strong>in</strong>es <strong>in</strong> the upper right hand corner:\documentclass{article}\usepackage{fancyhdr}\pagestyle{fancy}\addtolength{\headheight}{\basel<strong>in</strong>eskip}\renewcommand{\sectionmark}[1]{\markboth{#1}{}}\renewcommand{\subsectionmark}[1]{\markright{#1}}\rhead{\leftmark\\\rightmark}You can also customize the decorative l<strong>in</strong>es. You can make the decorative l<strong>in</strong>e <strong>in</strong> the header quitethick with\renewcommand{\headrulewidth}{0.6pt}or you can make the decorative l<strong>in</strong>e <strong>in</strong> the footer disappear with\renewcommand{\footrulewidth}{0pt}The decorative l<strong>in</strong>es, themselves, are def<strong>in</strong>ed <strong>in</strong> the two macros \headrule and \footrule. For<strong>in</strong>stance, if you want a dotted l<strong>in</strong>e rather than a solid l<strong>in</strong>e <strong>in</strong> the header, redef<strong>in</strong>e the command\headrule:\renewcommand{\headrule}{\vbox to 0pt{\hboxto\headwidth{\dotfill}\vss}}There is one additional parameter that you can set: \footruleskip. It def<strong>in</strong>es the distancebetween the decorative l<strong>in</strong>e <strong>in</strong> the footer and the top of the footer text l<strong>in</strong>e. By default it is setto 30% of the normal l<strong>in</strong>e distance. You may want to adjust it if you use unusally large or smallfonts <strong>in</strong> the footer. Change it with \renewcommand.12 Two book examplesThe follow<strong>in</strong>g def<strong>in</strong>itions give an approximation of the style used <strong>in</strong> L. Lamport’s L A TEX book.Lamport’s header overhangs the outside marg<strong>in</strong>. This is done as follows.The width of headers and footers is \headwidth, which by default equals the width of the text:\textwidth. You can make the width wider (or narrower) by redef<strong>in</strong><strong>in</strong>g \headwidth with the\setlength and \addtolength commands. To overhang the outside marg<strong>in</strong> where the marg<strong>in</strong>alnotes are pr<strong>in</strong>ted, add both \marg<strong>in</strong>parsep and \marg<strong>in</strong>parwidth to \headwidth with thecommands:8 If you use 11pt or 12pt you will probably also have to do this, because <strong>LATEX</strong>’s defaults are quite small12
\addtolength{\headwidth}{\marg<strong>in</strong>parsep}\addtolength{\headwidth}{\marg<strong>in</strong>parwidth}You must issue these commands after the first \pagestyle{fancy} command as this willestablish the default for \headwidth 9 .And now a complete def<strong>in</strong>ition of Lamport’s book style:\documentclass{book}\usepackage{fancyhdr}\pagestyle{fancy}\addtolength{\headwidth}{\marg<strong>in</strong>parsep}\addtolength{\headwidth}{\marg<strong>in</strong>parwidth}\renewcommand{\chaptermark}[1]{\markboth{#1}{}}\renewcommand{\sectionmark}[1]{\markright{\thesection\ #1}}\fancyhf{}\fancyhead[LE,RO]{\bfseries\thepage}\fancyhead[LO]{\bfseries\rightmark}\fancyhead[RE]{\bfseries\leftmark}\fancypagestyle{pla<strong>in</strong>}{%\fancyhead{} % get rid of headers\renewcommand{\headrulewidth}{0pt} % and the l<strong>in</strong>e}Notice that the \chaptermark and \sectionmark commands have been redef<strong>in</strong>ed to elim<strong>in</strong>ate thechapter numbers and the uppercaseness.For the second example, we take the AMS-L A TEX book.Chapter pages have no headers or footers. So we declare\thispagestyle{empty}for every chapter page, and we do not need to redef<strong>in</strong>e pla<strong>in</strong>.Chapter and section titles appear <strong>in</strong> the form: 2. DO IT NOW, so we have to redef<strong>in</strong>e\chaptermark and \sectionmark as follows (see Section 9):\renewcommand{\chaptermark}[1]%{\markboth{\MakeUppercase{\thechapter.\ #1}}{}}\renewcommand{\sectionmark}[1]%{\markright{\MakeUppercase{\thesection.\ #1}}}In an even-header, the page number is pr<strong>in</strong>ted as the LeftHeader and the chapter <strong>in</strong>fo as theRightHeader; <strong>in</strong> an odd-header, the section <strong>in</strong>fo is pr<strong>in</strong>ted as the LeftHeader and the page numberas the RightHeader. The CenteredHeaders are empty. There are no footers.There is a decorative l<strong>in</strong>e <strong>in</strong> the header. It is 0.5pt wide, so we need the commands:\renewcommand{\headrulewidth}{0.5pt}\renewcommand{\footrulewidth}{0pt}The font used <strong>in</strong> the headers is 9 pt bold Helvetica. The PSNFSS system by Sebastian Rahtz usesthe short (Karl Berry) name phv for Helvetica, so this font is selected with the commands:9 In version 2 of fancyhdr it is usually safe to do it before, but it is still advised to do after.13
\fontfamily{phv}\fontseries{b}\fontsize{9}{11}\selectfont(See Sections 7.6.1 and 11.9.1 of the L A TEX Companion.) Let us def<strong>in</strong>e a shorthand for this:\newcommand{\helv}{%\fontfamily{phv}\fontseries{b}\fontsize{9}{11}\selectfont}Now we are ready for the page <strong>layout</strong>:\documentclass{book}\usepackage{fancyhdr}\pagestyle{fancy}\renewcommand{\chaptermark}[1]%{\markboth{\MakeUppercase{\thechapter.\ #1}}{}}\renewcommand{\sectionmark}[1]%{\markright{\MakeUppercase{\thesection.\ #1}}}\renewcommand{\headrulewidth}{0.5pt}\renewcommand{\footrulewidth}{0pt}\newcommand{\helv}{%\fontfamily{phv}\fontseries{b}\fontsize{9}{11}\selectfont}\fancyhf{}\fancyhead[LE,RO]{\helv \thepage}\fancyhead[LO]{\helv \rightmark}\fancyhead[RE]{\helv \leftmark}13 Special page <strong>layout</strong> for float pagesSome people want to have a special <strong>layout</strong> for float pages (pages only conta<strong>in</strong><strong>in</strong>g floats). As thesepages are generated autonomically by L A TEX, the user doesn’t have any control over them. Thereis no \thispagestyle for float pages and any change of the page style will at least also affectthe page before the float page. With fancyhdr, however, you can specify <strong>in</strong> each of the header- orfooter fields\iffloatpage{value for float page}{value for other pages}You can even use this to get rid of the decorative l<strong>in</strong>e on float pages only by def<strong>in</strong><strong>in</strong>g:\renewcommand{\headrulewidth}{\iffloatpage{0pt}{0.4pt}}Sometimes you may want to change the <strong>layout</strong> also for pages that conta<strong>in</strong> a float on the top ofthe page or a float on the bottom of the page.fancyhdr gives you the commands \iftopfloat and \ifbotfloat similar to \iffloatpage.Note: Marks <strong>in</strong> floats will not be visible <strong>in</strong> L A TEX’s output rout<strong>in</strong>e, so it is not useful to put marks<strong>in</strong> floats. So there is currently no way to let a float (e.g. a figure caption) <strong>in</strong>fluence the page headeror footer.14 Those blank pagesIn the book class when the openany option is not given or <strong>in</strong> the report class when the openrightoption is given, chapters start at odd-numbered pages, half of the time caus<strong>in</strong>g a blank page to be<strong>in</strong>serted. Some people prefer this page to be completely empty, i.e. without headers and footers.Thiscannotbedonewith\thispagestyle as this command would have to be issued on theprevious page. There is, however, no magic necessary to get this done:14
\clearpage{\pagestyle{empty}\cleardoublepage}As the \pagestyle{empty} is enclosed <strong>in</strong> a group it only affects the page that may be generatedby the \cleardoublepage. You can of course put the above <strong>in</strong> a private command. If you wantto have this done automatically at each chapter start or when you want some other text on thepage then you must redef<strong>in</strong>e the \cleardoublepage command.\makeatletter\def\cleardoublepage{\clearpage\if@twoside \ifodd\c@page\else\hbox{}\vspace*{\fill}\beg<strong>in</strong>{center}This page <strong>in</strong>tentionally conta<strong>in</strong>s only this sentence.\end{center}\vspace{\fill}\thispagestyle{empty}\newpage\if@twocolumn\hbox{}\newpage\fi\fi\fi}\makeatother15 N of M style page numbersSome document writers prefer the pages to be numbered as n of m where m is the number of pages<strong>in</strong> the document. There is a package nofm.sty available, but some versions of it are defective, andmost don’t work with fancyhdr because they take over the complete page <strong>layout</strong>. For L A TEX2εthere is a package lastpage available which you can use with fancyhdr as follows:\usepackage{lastpage}...\cfoot{\thepage\ of \pageref{Last<strong>Page</strong>}}If you are still us<strong>in</strong>g L A TEX2.09 and you are not able to switch to L A TEX2ε you can use the L A TEX2.09compatible lastpage209.sty. which is def<strong>in</strong>ed as follows:\let\origenddocument=\enddocument\def\enddocument{\clearpage\if@filesw{\addtocounter{page}{-1} \immediate\write\@ma<strong>in</strong>aux{\str<strong>in</strong>g\newlabel{Last<strong>Page</strong>}{{}{\thepage}}}}\origenddocument}The value of the Last<strong>Page</strong> label can be used to make different headers or footers on the last pageof a document. E.g. if you want the footer of every odd page, except if it is the last one, to conta<strong>in</strong>the text “please turn over”, this can be done as follows 10 :\usepackage{lastpage}\usepackage{ifthen}...\rfoot{\ifthenelse{\isodd{\value{page}} \and \not\value{page}=\pageref{Last<strong>Page</strong>}{please turn over}{}}10 This requires a reasonably recent version of the ifthen package.15
16 Chapter or section related page numbersIn technical documentation very often page numbers are used of the form 2-10 where the firstnumber is the chapter number and the second is the pagenumber relative to the chapter. Sometimessection is used rather than chapter. The package chappg canbeusedtogetthisformat. Ifyouwant to change the <strong>layout</strong> e.g. use a dot rather than a dash, or a section rather than a chapter,you should make a private copy and edit it.This package redef<strong>in</strong>es \thepage as \arabic{chapter}-\arabic{page}. Unfortunatelythis gives numbers rather than letters for appendices. A better def<strong>in</strong>ition wouldbe \thechapter-\arabic{page} but you can give this def<strong>in</strong>ition yourself after the\usepackage{chappg} command. What the package also does is reset the page numberto 1 at the beg<strong>in</strong>n<strong>in</strong>g of each chapter.There is a fundamental difference between the page number<strong>in</strong>g of the style “m of n” as described<strong>in</strong> the previous section and the current one. The m of n style is only used <strong>in</strong> the page header orfooter, but not <strong>in</strong> the table of contents, <strong>in</strong>dex, or references like “See page xx”. Therefore it doesnot change the command \thepage. The page number<strong>in</strong>g style “2-10”, however should be used<strong>in</strong> all references to the page number, therefore it must be done by redef<strong>in</strong><strong>in</strong>g \thepage.17 When to change the headers and footers?Sometimes you want to change the header or footer <strong>layout</strong> <strong>in</strong> the course of a document. Someof these changes can be accomplished by us<strong>in</strong>g the mark mechanism as may be seen <strong>in</strong> section 9and 18. However, sometimes we want a more drastic change, e.g to change the page number<strong>in</strong>gfrom roman to arabic (with \pagenumber<strong>in</strong>g), to change one of the fancyhdr fields or to changeto another page style. Sometimes you may be surprised to f<strong>in</strong>d the change to occur too early. Ingeneral the above mentioned changes take effect immediately, i.e. on the page that is currentlybe<strong>in</strong>g built. If you want the change to take effect at the next page you must make sure that thecurrent page is f<strong>in</strong>ished. In most cases this can be done by issu<strong>in</strong>g a \clearpage command beforeany of the above mentioned changes. If this is not possible you can use the afterpage packagewith:\afterpage{\lhead{new value}} or \afterpage{\pagenumber<strong>in</strong>g{roman}. You cannot use\afterpage to change the \pagestyle as the commands issued by \afterpage are local <strong>in</strong> agroup, and the \pagestyle command makes only local changes. The \pagenumber<strong>in</strong>g and thefancyhdr commands make global changes so they will work, as will the \thispagestyle command.It should be noted that although the fancyhdr commands like \fancyhead take effect immediately,this does not mean that any “variables” used <strong>in</strong> these commands get the value they have atthe place where these commands are given. E.g. if \fancyfoot[C]{\thepage} is given the pagenumber that will be <strong>in</strong>serted <strong>in</strong> the footer is not the page number of the page where this commandis given, but rather the page number of the actual page where the footer is constructed. Of coursefor the page number this is what you expect, but it is also true for other commands.So if you have a book where each chapter is written by a different author and you want the nameof the author <strong>in</strong> the lower left-hand corner you can use the follow<strong>in</strong>g commands:\newcommand{\TheAuthor}{}\newcommand{\Author}[1]{\renewcommand{\TheAuthor}{#1}}\lfoot{\TheAuthor}and start each chapter with the command \Author{Real Name}. If however, the author namewould be changed before a page is completed the wrong author could come <strong>in</strong> the footer. Thiswould be the case if you gave the above command before the \chapter command rather than afterit. Another source of problems is the fact that TEX’s output rout<strong>in</strong>e processes commands ahead,16
so it may already have processed some commands that produce text that will appear on the nextpage. See the next section for an example.18 Headers and footers <strong>in</strong>duced by the textWe have seen how we can use L A TEX’s marks to get <strong>in</strong>formation from the document contents tothe headers and footers. The marks mechanism is the only reliable mechanism that you can useto get chang<strong>in</strong>g <strong>in</strong>formation to the headers or footers. This is because L A TEX may be process<strong>in</strong>gyour document ahead before decid<strong>in</strong>g to break the page.Sometimes the two marks that L A TEX offers are not enough. An example is the follow<strong>in</strong>g:If a solution to an exercise goes across a page break, then I would like to have “(Cont<strong>in</strong>uedon next page. . . )” at the bottom of the first page and “(Cont<strong>in</strong>ued. . . )” at thetop <strong>in</strong> the marg<strong>in</strong> of the next page.You cannot use L A TEX’s mark mechanisms for this if you also want to use chapter and section<strong>in</strong>formation.The code from figure 5 constitutes a package that gives you two extra marks that can be used <strong>in</strong>this situation 11 . Here is a way to use this package:\usepackage{extramarks}...\pagestyle{fancy}\lhead{\firstxmark}\rfoot{\lastxmark}...\extramarks{}{Cont<strong>in</strong>ued on next page\ldots}Some text that may or may not cross a page boundary...\extramarks{Cont<strong>in</strong>ued\ldots}{}Note that the \extramarks command must be close to the text, i.e no empty l<strong>in</strong>es (paragraphboundaries) should <strong>in</strong>tervene. Otherwise the page may be broken at that boundary and theextramarks would come on the wrong page.There are two new marks that can be used <strong>in</strong> the page <strong>layout</strong> with this package: If commandsof the form \extramarks{m 1 }{m 2 } are given \firstxmark gives you the first m 1 value and\lastxmark gives you the last m 2 value of the current page. It also gives you the \firstleftmarkand \lastrightmark commands that complement the standard L A TEX marks.To stress the po<strong>in</strong>t that marks are the correct way to do this, let me give you a “solution” thatwill not work 12 :\lhead{Cont<strong>in</strong>ued}\rfoot{Cont<strong>in</strong>ued on next page\ldots}Some text that may or may not cross a page boundary...\lhead{}\rfoot{}You may be tempted to th<strong>in</strong>k that the first \lhead and \rfoot will be <strong>in</strong> effect when TEX breaksthe page <strong>in</strong> the middle of the text, and the last ones when the page breaks after the text. This11 After I made this package I discovered a package secret.sty that does a similar th<strong>in</strong>g to mark confidentialparagraphs if they cross a page boundary. It does it, however, by chang<strong>in</strong>g the output rout<strong>in</strong>e.12 Actually there is another way but it requires two <strong>LATEX</strong> passes: you can put \label commands before and afterthe text and compare the \pagerefs.17
% extramarks.sty\def\@leftmark#1#2#3#4{#1}\def\@rightmark#1#2#3#4{#2}\def\markboth#1#2{{\def\protect{\noexpand\protect\noexpand}\let\label\relax \let\<strong>in</strong>dex\relax \let\glossary\relax\expandafter\@markboth\@themark{#1}{#2}\mark{\@themark}}\if@nobreak\ifvmode\nobreak\fi\fi}\def\markright#1{{\def\protect{\noexpand\protect\noexpand}\let\label\relax \let\<strong>in</strong>dex\relax \let\glossary\relax\expandafter\@markright\@themark{#1}\mark{\@themark}}\if@nobreak\ifvmode\nobreak\fi\fi}\def\@markright#1#2#3#4#5{\gdef\@themark{{#1}{#5}{#3}{#4}}}\def\@markboth#1#2#3#4#5#6{\gdef\@themark{{#5}{#6}{#3}{#4}}}\def\leftmark{\expandafter\@leftmark\botmark{}{}{}{}}\def\rightmark{\expandafter\@rightmark\firstmark{}{}{}{}}\def\firstleftmark{\expandafter\@leftmark\firstmark{}{}{}{}}\def\lastrightmark{\expandafter\@rightmark\botmark{}{}{}{}}\def\@themark{{}{}{}{}}\def\extramarks#1#2{{\def\protect{\noexpand\protect\noexpand}\let\label\relax \let\<strong>in</strong>dex\relax \let\glossary\relax\expandafter\@markextra\@themark{#1}{#2}\mark{\@themark}}\if@nobreak\ifvmode\nobreak\fi\fi}\def\@markextra#1#2#3#4#5#6{\gdef\@themark{{#1}{#2}{#5}{#6}}}\def\firstxmark{\expandafter\@firstxmark\firstmark{}{}{}{}}\def\topxmark{\expandafter\@firstxmark\topmark{}{}{}{}}\def\lastxmark{\expandafter\@lastxmark\botmark{}{}{}{}}\def\@firstxmark#1#2#3#4{#3}\def\@lastxmark#1#2#3#4{#4}Figure 5: Package for extra marks <strong>in</strong> L A TEXis not true as the whole paragraph (<strong>in</strong>clud<strong>in</strong>g the last def<strong>in</strong>itions) will be processed before TEXconsiders the page break, so at the time of the page break the last def<strong>in</strong>itions are effective, whetherthe page break occurs <strong>in</strong>side the text or outside of it. Putt<strong>in</strong>g a paragraph boundary between thetext and the last def<strong>in</strong>itions will not work either, because you don’t want the first def<strong>in</strong>itions tobe <strong>in</strong> effect when TEX decides to break the page exactly at this boundary. Actually the marksmechanism was <strong>in</strong>vented to get rid of these k<strong>in</strong>ds of problems.In the above example the text “Cont<strong>in</strong>ued” appears <strong>in</strong> the page header. It may be nicer toput it <strong>in</strong> the marg<strong>in</strong>. This can be easily accomplished by position<strong>in</strong>g it at a fixed place relativeto the page header. In pla<strong>in</strong> TEX you would use a concoction of \hbox to 0pt, \vbox to 0pt,\hskip,\vskip, \hss and \vss but fortunately L A TEX’s picture environment gives a much cleanerway to do this. In order not to disturb the normal header <strong>layout</strong> we put the text <strong>in</strong> a zero-sizedpicture. Generally this is the best way to position th<strong>in</strong>gs on fixed places on the page. You canthen also use the normal head<strong>in</strong>gs. See also section 20 for another example of this technique.\lhead{\setlength{\unitlength}{\basel<strong>in</strong>eskip}%\beg<strong>in</strong>{picture}(0,0)\put(-2,-3){\makebox(0,0)[r]{\firstxmark}}\end{picture}\leftmark}This solution can of course also be used for the footer. Make sure you put the picture as the firstth<strong>in</strong>g <strong>in</strong> left-handside entries and last <strong>in</strong> right-handside ones.18
F<strong>in</strong>ally you may want to put “(Cont<strong>in</strong>ued. . . )” <strong>in</strong> the text rather than <strong>in</strong> the header or the marg<strong>in</strong>.Then you have to use the afterpage package. We also decide to make a separate environment forit.\newenvironment{cont<strong>in</strong>ued}{\par\extramarks{}{Cont<strong>in</strong>ued on next page\ldots}\afterpage{\no<strong>in</strong>dent\firstxmark\vspace{1ex}}}{\extramarks{(Cont<strong>in</strong>ued\ldots)}{}\par}It is a bit dangerous to use \firstxmark outside the page <strong>layout</strong> rout<strong>in</strong>e, but apparently with\afterpage this works. If you would need the <strong>in</strong>formation further on <strong>in</strong> the page you mustremember the state of the marks <strong>in</strong> your own variable. You can set this <strong>in</strong> one of the fancyhdrfields. For example if you want to add someth<strong>in</strong>g after the broken piece of text you can use thefollow<strong>in</strong>g:\newcommand{\mysaved}{}\newenvironment{cont<strong>in</strong>ued}{\par\extramarks{}{Cont<strong>in</strong>ued on next page\ldots}}{\extramarks{(Cont<strong>in</strong>ued\ldots)}{}\par\vspace{1ex}\mysaved}\lhead{\leftmark}\chead{\ifthenelse{\equal{\lastxmark}{}}{\gdef\mysaved{}}{\gdef\mysaved{\no<strong>in</strong>dent[Cont<strong>in</strong>ued from previous page]}}}If you want to <strong>in</strong>clude one of the marks or other vary<strong>in</strong>g <strong>in</strong>formation <strong>in</strong> the saved text, you mustuse \xdef rather than \gdef.19 A movieIf you put at each page on the same place a picture that slightly changes from page to page youcan get a movie-like effect by flipp<strong>in</strong>g through the pages. You can create such a movie easily withfancyhdr. For simplicity we assume that each picture is <strong>in</strong> a postscript (EPS) file called pic〈n〉.pswhere 〈n〉 is the page number and that we use the graphics or graphicx package 13 . To putthe movie <strong>in</strong> the righthandside bottom corner the follow<strong>in</strong>g will work:\rfoot{\setlength{\unitlength}{1mm}\beg<strong>in</strong>{picture}(0,0)\put(5,0){\<strong>in</strong>cludegraphics{pic\thepage.ps}}\end{picture}}Notice that the \unitlength parameter should be set locally <strong>in</strong> the fancyhdr field <strong>in</strong> order toavoid unwanted <strong>in</strong>terference with its value <strong>in</strong> the text.20 Thumb-<strong>in</strong>dexesSome railroad guides and expensive bibles have so called thumb-<strong>in</strong>dexes, i.e. there are marks onthe sides of the pages that <strong>in</strong>dicate where the chapters are. You can create these by pr<strong>in</strong>t<strong>in</strong>gblack blobs <strong>in</strong> the marg<strong>in</strong> of the pages. The vertical position should be determ<strong>in</strong>ed by the chapter13 If you use an older version of <strong>LATEX</strong> youcouldusetheepsf or epsfig package.19
\setlength{\unitlength}{18mm}\newcommand{\blob}{\rule[-.2\unitlength]{2\unitlength}{.5\unitlength}}\newcommand\rblob{\thepage\beg<strong>in</strong>{picture}(0,0)\put(1,-\value{section}){\blob}\end{picture}}\newcommand\lblob{%\beg<strong>in</strong>{picture}(0,0)\put(-3,-\value{section}){\blob}\end{picture}%\thepage}\pagestyle{fancy}\cfoot{}\newcounter{l<strong>in</strong>e}\newcommand{\secname}[1]{\addtocounter{l<strong>in</strong>e}{1}%\put(1,-\value{l<strong>in</strong>e}){\blob}\put(-7.5,-\value{l<strong>in</strong>e}){\Large \arabic{l<strong>in</strong>e}}\put(-7,-\value{l<strong>in</strong>e}){\Large #1}}\newcommand{\overview}{\thepage\beg<strong>in</strong>{picture}(0,0)\secname{Introduction}\secname{The first year}\secname{Specialisation}...etc...\end{picture}}\beg<strong>in</strong>{document}\fancyhead[R]{\overview}\mbox{}\newpage % This produces the overview page\fancyhead[R]{} % Front matter may follow here\clearpage\fancyhead[RE]{\rightmark}\fancyhead[RO]{\rblob}\fancyhead[LE]{\lblob}\fancyhead[LO]{{\leftmark}...Figure 7: Thumb-<strong>in</strong>dex code21
If <strong>in</strong> spite of all your attempts L A TEX still moves your floats to the end of the document or theend of a chapter, you can <strong>in</strong>sert a \clearpage command. This will start a new page and <strong>in</strong>sertall pend<strong>in</strong>g floats before cont<strong>in</strong>ue<strong>in</strong>g. If it is undesirable to have a pagebreak you can use theafterpage package and the follow<strong>in</strong>g command:\afterpage{clearpage}This will wait until the current page is f<strong>in</strong>ished and then flush all outstand<strong>in</strong>g floats. In somepathological circumstances afterpage may give strange results, however.F<strong>in</strong>ally, if you want a float only at the place where you def<strong>in</strong>e it, without L A TEX mov<strong>in</strong>gitwhatsoever,you can use the float package and give the command:\restylefloat{figure}<strong>in</strong> the preamble. Now you will be able to specify [H] as the position parameter, which will mean“HERE and only HERE”. This may cause an unwanted page break however 15 . If you want toavoid the unwanted pagebreak, i.e. let L A TEX move the float only if it doesn’t fit on the page, theuse the afterpage package with:\afterpage{\clearpage \beg<strong>in</strong>{figure}[H] ... \end{figure}}Compla<strong>in</strong>ts from L A TEX about “Too many floats” are usually caused by one of the above problems:floats not be<strong>in</strong>g able to be placed and L A TEX collect<strong>in</strong>g too many of them. The solutions givenabove, especially those with \clearpage <strong>in</strong> them will usually help. In some cases there reallyare too many floats, as L A TEX has a limited number of “boxes” to store the floats. The packagemorefloats can be used to <strong>in</strong>crease this number. If you need still more then you must edit a privatecopy of this file, but even then there will be some limit that you cannot pass. Then your onlyresort will be to change your document.22 Multipage FloatsL A TEX’s floats cannot be split across pages. Sometimes, however, you want to have a table orfigure that doesn’t fit on one page. The easiest way is to split these <strong>in</strong>to multiple table or figureenvironments, but this has a number of undesirable effects:• Where do you split it? This is <strong>in</strong> general more difficult for tables than for figures.• How do you keep them together?• You don’t want more than one entry <strong>in</strong> the list of figures/tables.Although these problems are not fully solvable <strong>in</strong> all cases, here are a couple of suggestions:22.1 TablesFor tables longer than a page you can use the longtable package. This package def<strong>in</strong>es alongtable environment that is a k<strong>in</strong>d of amalgamation of table and tabular. It has approximatelythe same syntax as the tabular environment, but it adds some features of table, likecaptions. Longtables will be automatically split when they don’t fit on the page. And they willbe entered <strong>in</strong> the list of tables when a caption is given. They will not float, however, and cannotbe used <strong>in</strong>side a float environment. This could mean that another table environment, which was15 Thereusedtobeahere.sty with the same effect, but this is <strong>in</strong>compatible with <strong>LATEX</strong>2ε23
def<strong>in</strong>ed before the longtable, will float past it, and therefore the numbers may get out of order.Another problem could be that the longtable starts rather far down the page, which isn’t apleasant sight. If you want the longtable to start at the top of the page, the best th<strong>in</strong>g to do isto <strong>in</strong>clude it <strong>in</strong> an \afterpage command (us<strong>in</strong>g the afterpage package). As a longtable is bydef<strong>in</strong>ition large, it is best to put it <strong>in</strong> a separate file, and \<strong>in</strong>put it <strong>in</strong> the \afterpage command:\afterpage{\<strong>in</strong>put{mytable}}\afterpage{\clearpage\<strong>in</strong>put{mytable}}The last form has the additional advantage that most of the outstand<strong>in</strong>g floats will be pr<strong>in</strong>tedfirst.22.2 FiguresThere isn’t an equivalent longfigure solution, so for figures you will usually have to split ityourself. In general this is less of a problem. However, the problem you get now is how to keepthem together, i.e. how to get the parts on subsequent pages, and how to get a s<strong>in</strong>gle entry <strong>in</strong> thelist of figures.You will have to split the figure <strong>in</strong>to pieces and put each part <strong>in</strong> a separate figure environment. Tokeep them together it is best to use only the [p] placement, so that they will be put on floatpages.As they are bigger than a page this is appropriate. The first part would then get a \caption,the subsequent parts would be used without a caption. If you want to add a caption-like text,enter it as normal text rather than a \caption, so that it will not be entered <strong>in</strong> the list of figures.It may also be desirable to issue a \clearpage first, just like we did for the longtable, andtoencapsulate this <strong>in</strong> the \afterpage command. E.g.\afterpage{\clearpage\<strong>in</strong>put{myfigure}}where myfigure.tex conta<strong>in</strong>s:\beg<strong>in</strong>{figure}[p]\<strong>in</strong>cludegraphics{myfig1.eps}\caption{This is a multipage figure}\label{fig:xxx}\end{figure}\beg<strong>in</strong>{figure}[p]\<strong>in</strong>cludegraphics{myfig2.eps}\beg<strong>in</strong>{center}Figure~\ref{fig:xxx} (cont<strong>in</strong>ued)\end{center}\end{figure}You have to make sure that the last part is big enough, otherwise L A TEX could decide to postponeit until it has collected some more floats. This can be done either by mak<strong>in</strong>g the figure big enough(e.g. by add<strong>in</strong>g some \vspace), or by tweak<strong>in</strong>g the \floatpagefraction parameter.If you want your multipage figure to start at a lefthand-side (even-numbered) page you can use atest <strong>in</strong> the \afterpage command (us<strong>in</strong>g the ifthen package):\afterpage{\clearpage\ifthenelse{\isodd{\value{page}}{\afterpage{\<strong>in</strong>put{myfigure}}} % odd page{\<strong>in</strong>put{myfigure}}}} % even pageIf there are too many floats on the skipped page, this may still fail to start your multipage figureon an even page, however.24
23 Contact <strong>in</strong>formationPiet van OostrumDept. of Computer ScienceUtrecht UniversityP.O. Box 80.0893508 TB Utrecht, The NetherlandsTelephone: +31 30 2531806 Telefax: +31 30 2513791E-mail: piet@cs.ruu.nlWWW: http://www.cs.ruu.nl/people/piet25