Smartsteer - New Holland PLM Portal
Smartsteer - New Holland PLM Portal
Smartsteer - New Holland PLM Portal
- No tags were found...

You also want an ePaper? Increase the reach of your titles
YUMPU automatically turns print PDFs into web optimized ePapers that Google loves.
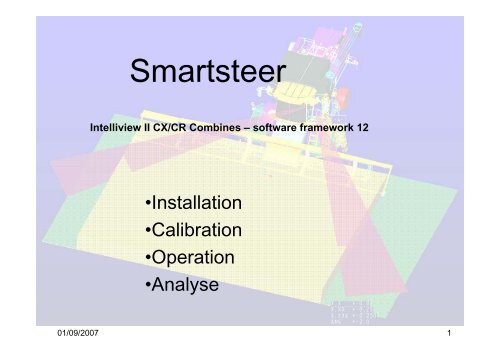
<strong>Smartsteer</strong>Intelliview II CX/CR Combines – software framework 12•Installation•Calibration•Operation•Analyse01/09/2007 1
<strong>Smartsteer</strong>Driveline setup screenSelect toolbox from the main screenGo to the “drive” screen and enter the “auto guidance Type” selection box. A pop up screen will appearwith 4 possible choices. It is important to choose the correct type in accordance with the system installedon the combine:• “Not installed” is the default selection.• “Edge” is used for <strong>Smartsteer</strong> laser based edge guidance.• “Row” is used for corn header row guidance.• “DGPS” is used for Intellisteer (DGPS based auto guidance)By setting up the Auto Guidance Type, the CCM3 module knows what guidance hardware to use. It willenable certain calibration features for the appropriate system.01/09/2007 2
<strong>Smartsteer</strong>Driveline setup screenRemark: there is a possibility of changing the maximum steering angledefault of 32° (higher than that is not possible). This should normally notbe touched. It is there to decrease the header swing out when theautomatic auto guidance system is engaged. This could become handywhen using large attachments.01/09/2007 3
<strong>Smartsteer</strong>Calibration screenWhen “edge” has been chosen in the driveline Setup screen, three lines willbe added to the Calibrations screen “HGS Turnable Actuator”, “HGS LaserSensor” and “Rear Wheel Position”.01/09/2007 4
<strong>Smartsteer</strong>Calibration screen: step 1: Rear wheel PositionFirst method : using menuCalibrating the rear wheel position willenable the system to know the 0 angleposition of the steering cylinder sensor.Follow up the pop up instructions on thescreen.Second method : using AG buttonYou can also calibrate the straight steer function by pushing and holding the AG button for atleast 8 seconds, until you hear a beep which confirms the calibration has been performed.Of course you need to make sure your rear wheels are pointing straight forward before startingcalibration.01/09/2007 5
<strong>Smartsteer</strong>Calibration screen: step 2: HGS Turntable ActuatorIn the calibration page, go to “HGS turntable actuator” and enter. There isan explaining text. The laser eye will first go fully to the right, then fully tothe left and will stop in the middle. Where it stopped in the middle, itcalibrates its centre point. Follow up the pop up instructions on the screen.01/09/2007 6
<strong>Smartsteer</strong>Possible abort codes during HGS turnable actuator calibration:01/09/2007 7
<strong>Smartsteer</strong>Calibration screen: step 3: HGS Laser SensorCondition: to perform this calibration, you need to be in AG ready mode (move steering wheel whilepushing AG button until you see the greyed out AG symbol in the status frame)Important: before calibrating, harvest about 30 m crop in a straight line, drive backwards outside thecrop. Park the combine left from the harvested crop to perform a RHS calibration, park the combineright from the harvested crop to perform a LHS calibration.Remark: Abort code 4 means the calibration needs to be redone because the laser eye could not finda straight enough edge. Try it again after repositioning the combine.01/09/2007 8
<strong>Smartsteer</strong>Possible abort codes during HGS laser sensor calibration:01/09/2007 9
<strong>Smartsteer</strong>Enabling modeThe SmartSteer system is switched on to its enabled (standby) mode by turning slightly the steering wheel, so the sensoris recognised and pressing the SmartSteer rocker switch (6) forat least two seconds.A signal will sound and a greyed SmartSteer icon will show inthe status area on the IntelliView II monitor.Pushing the rocker switch again will get you out of enablemode and the smartsteer symbol will disappear.01/09/2007 10
<strong>Smartsteer</strong>Operating modeConditions:* AG mode needs to be enabled* HGS sensor needs to find a quality edge* Threshing/feeder engaged* Automatic header height activated (HHC mode)* Driving more than 0.5 km/h* do not turn Steering wheel for more than 2 seconds.When all these conditions are fulfilled, the combine will switch over to HGS operating mode.You will see the AG status icon changing from grey to outlined red.When one of these conditions is violated, the status icon will jump back to grey with a pop upmessage accordingly and smartsteer will be back in enable mode.01/09/2007 11
<strong>Smartsteer</strong>Manipulations during operation* Switching crop Edges:During operation the laser eye cannot switch over automatically from left crop edge to rightcrop edge and vice versa. The operator needs to do that himself. This can only be done inAG enable mode.1. To switch, press and hold the neutral unlockswitch (1) and at the same time press and holdthe header lateral float rocker switch (3)forminimum two seconds.Left for left-hand side crop edge and right forright-hand side crop edge.2. A sound signal indicates that the switching hasbeen done.3. The HGS sensor turns now to the left-hand or theright-hand side to focus on the selected cropedge.IMPORTANT: The left and right-hand side needs tobe correctly calibrated before.01/09/2007 12
<strong>Smartsteer</strong>Manipulations during operation* Offset adjustment:It is also possible to fine-tune the distance betweenthe crop edge and the header side. The adjustmentcan only be done when the SmartSteer system isin its operating mode.1. To switch, press and hold the neutral unlockswitch (1) and at the same time pressthe headerlateral flotation rocker switch (3) shortly. Left forleft-hand side fine adjustment and right forright-hand side fine adjustment.2. Each pulse will adjust the offset with 10 cm (4”) tothe left or to the right and the newly selected offsetwill be saved automatically.NOTE: The offsets are reset automatically each timethe crop edge calibration is done.01/09/2007 13
<strong>Smartsteer</strong>HGS info for diagnostics on Run 6 when using default layout:‘HGS Edge status’ indicates at what side ofthe combine the laser eye is scanning.Indicates the difference in height betweencut/uncut crop in percentage. (ex. 50%=+/-20 cm) Minimum 30% needed.HGS edge scan indicates how well the HGSturntable is horizontally adjusted to the crop edge.Scale is in percentage, 50% is ideal, between 40 to60 % is acceptable. Below 50% is scanning at theleft of the scanning area. Above 50% is scanning tothe right of the scanning area.Changing the HGS offset influences this value.Indicates the steering wheel angle position. Whencalibrated correctly, 0° indicates the wheels are straight inline with the combine. Turning steering wheel CCW willshow a negative value, turning steering wheel CW showsa positive value.Indicates the angle position of the laser eye where edgeis found. – is left, + is right.Indicates the distance in mm between the centre of thecombine and the crop edge. ( - = left, + = right).HGS edge scan indicates how well the HGSturntable is vertically adjusted to the crop edge.Scale is in percentage, 50% is ideal, between 40 to60 % is acceptable. Below 50% is scanning at thelower half of the scanning area. Lower the HGSvertically to obtain 50%. Above 50% means theedge is found in the upper half of the scanningarea. Adjust the HGS upward to obtain 50%.Indicates the distance in mm between the laser eye andcrop edge scanning area.This icon is the same as the ‘HGS Scan height’ icon andwill disappear in future software releases01/09/2007 14