1 - The Dixons Stores Group Image Server
1 - The Dixons Stores Group Image Server
1 - The Dixons Stores Group Image Server

You also want an ePaper? Increase the reach of your titles
YUMPU automatically turns print PDFs into web optimized ePapers that Google loves.
VP9408.qxd 14/04/00 14:56 Page 1
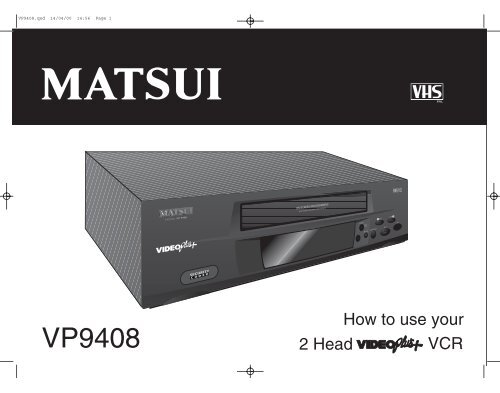
VP9408.qxd 14/04/00 14:56 Page 2Introduction &ContentsSafety WarningsInstalling yourVCRPlease read before installationIf this VCR has been moved from a cold place to a warm place, DO NOT plug it in for 2-3 hours(e.g. from a cold car boot to a warm room).<strong>The</strong>re is a possibility that moisture may have condensed on the head drum of this VCR, this can cause damage to your VCR orany tapes played on it. To avoid damage please unpack your VCR and allow it to stand at room temperature for 2-3 hoursbefore use. This will help any moisture evaporate and prevent unnecessary damage to your VCR.Setting up yourVCRPlaying aVideo TapeRecordingProgrammesAdvancedFeaturesHelp andSpecification2Interference – Do not place your VCR nearappliances which may cause electromagneticinterference (i.e. TV, HI-FI speakers). If you do, it mayadversely affect the working of the unit, causing thepicture or sound to distort.Covers – Do not remove any fixed covers as this mayexpose dangerous voltages.Weather – It is advisable to unplug the aerial during athunderstorm.Ventilation – <strong>The</strong> ventilation holes on the casing ofyour VCR prevent it from over heating. Do not block orcover these holes - especially with cloth or paper. It isrecommended you leave a 10cm gap all around yourVCR.Damage – Never use your VCR if it is damaged in anyway. Always place your VCR on a flat level surfaceavoiding anywhere which may be subject to strongvibration.Batteries – Batteries are easily swallowed by youngchildren. Do not allow young children to play with theremote control unit.Temperature – Avoid extremes of temperature, eitherhot or cold, place your VCR well away from heatsources such as radiators or gas/electric fires.Moisture – Do not allow your VCR to be exposed torain, moisture, dust. If any liquid is spilt into yourtelevision it can cause serious damage. If you spill anyliquid into your VCR switch it off at the mainsimmediately. Contact your store immediately.Your VCR is supplied with an approved13AMP fused mains plug. Whenreplacing the fuse always use a 3AMP(BS 1362) approved type.To obtain a replacement fuse contactyour store.If the mains sockets in your home differor are not suitable for the type of plugsupplied, then the plug should be cutfrom the mains lead and a suitabletype fitted. You must use a 13 AMPplug (BS 1363) and fit a 3 AMP fuse(BS 1362).If any other type of plug is used a 3AMP fuse must be fitted, either in theplug, adaptor or at the distributionboard.Please refer to the wiring instructions onpage 45 of this book.
VP9408.qxd 14/04/00 14:56 Page 3ContentsIntroduction &ContentsIntroduction & ContentsSafety Warnings. . . . . . . . . . . . . . . . . . . . . . . . . . . . . . . . . . . . . . . . . . 2Contents . . . . . . . . . . . . . . . . . . . . . . . . . . . . . . . . . . . . . . . . . . . . . . . 3VCR Features . . . . . . . . . . . . . . . . . . . . . . . . . . . . . . . . . . . . . . . . . . . . 4How to use this Instruction Book . . . . . . . . . . . . . . . . . . . . . . . . . . . . . . . 5Installing your VCRPutting batteries into your Remote Control . . . . . . . . . . . . . . . . . . . . . . . . 6Connecting your VCR to a TV. . . . . . . . . . . . . . . . . . . . . . . . . . . . . . . . . 7Basic VCR Installation . . . . . . . . . . . . . . . . . . . . . . . . . . . . . . . . . . . . . . 8Connecting your VCR to a TV and Decoder . . . . . . . . . . . . . . . . . . . . . . . 9Setting up your VCRAutomatic SET-UP . . . . . . . . . . . . . . . . . . . . . . . . . . . . . . . . . . . . . 10-11Removing Interference. . . . . . . . . . . . . . . . . . . . . . . . . . . . . . . . . . . . . 12Selecting a Language . . . . . . . . . . . . . . . . . . . . . . . . . . . . . . . . . . . . . 13Get to know your VCR . . . . . . . . . . . . . . . . . . . . . . . . . . . . . . . . . . . . 14Selecting and Skipping TV Stations. . . . . . . . . . . . . . . . . . . . . . . . . . . . 15Playing a Video TapePlaying a Video (VCR) tape . . . . . . . . . . . . . . . . . . . . . . . . . . . . . 16 -17Rewind (REW) and Fast Forward (F.FWD) . . . . . . . . . . . . . . . . . . . . . . . 18Video Index Search System . . . . . . . . . . . . . . . . . . . . . . . . . . . . . . . . . 19Clock/Counter Display and Zero Return . . . . . . . . . . . . . . . . . . . . . . . . 20Recording ProgrammesWhat are VIDEO Plus+ and PDC . . . . . . . . . . . . . . . . . . . . . . . . . . . . . 21One Touch Recording (OTR). . . . . . . . . . . . . . . . . . . . . . . . . . . . . . 22-23Recording using VIDEO Plus+ . . . . . . . . . . . . . . . . . . . . . . . . . . . . 24-25Timer Recordings . . . . . . . . . . . . . . . . . . . . . . . . . . . . . . . . . . . . . 26-27Checking VIDEO Plus+ or Timer Recordings. . . . . . . . . . . . . . . . . . . . . . 28Cancelling VIDEO Plus+ or Timer Recordings. . . . . . . . . . . . . . . . . . . . . 29Advanced FeaturesUsing the Playback Sharpness feature. . . . . . . . . . . . . . . . . . . . . . . . . . 30Auto Repeat Play . . . . . . . . . . . . . . . . . . . . . . . . . . . . . . . . . . . . . . . . 31Manually setting the correct Time and Date . . . . . . . . . . . . . . . . . . . 32-33Manual Tuning . . . . . . . . . . . . . . . . . . . . . . . . . . . . . . . . . . . . . . . 34-35Checking VIDEO Plus+ Set-up . . . . . . . . . . . . . . . . . . . . . . . . . . . . 36-37Setting the Security Protection. . . . . . . . . . . . . . . . . . . . . . . . . . . . . 38-39Automatic Tracking and Call . . . . . . . . . . . . . . . . . . . . . . . . . . . . . . . . 40Help and SpecificationHelp and Troubleshooting . . . . . . . . . . . . . . . . . . . . . . . . . . . . . . . 41-42Connecting your VCR to another VCR or a Camcorder . . . . . . . . . . . . . . 43Connecting to a Hi-Fi and SCART Socket Information . . . . . . . . . . . . . . . 44Wiring Instructions and Record Protection Tab . . . . . . . . . . . . . . . . . . . . 45Specification . . . . . . . . . . . . . . . . . . . . . . . . . . . . . . . . . . . . . . . . . . . 46Installing yourVCRSetting up yourVCRPlaying aVideo TapeRecordingProgrammesAdvancedFeatures3Help andSpecification
VP9408.qxd 14/04/00 14:56 Page 4Introduction &ContentsVCR FeaturesYour Matsui VP9408 VCR has all the following features:Installing yourVCRSetting up yourVCRPlaying aVideo TapeRecordingProgrammesAdvancedFeaturesAutomatic Set-up (AUTO SET-UP)• Your VCR will automatically tune in all available channels and set the correct time and date.VIDEO Plus+ and PDC (Program delivery control system)• Your VCR features VIDEO Plus+, with VIDEO Plus+ you simply enter the PlusCode from your TV listings for the program you want to record and all the details areset automatically. Your VCR also features PDC which lets your VCR know when programs are running early or late.On Screen Programming• On screen programming allows easy use of the functions you are likely to use during everyday playback and recording.Timer Recordings• <strong>The</strong> built in timer allows automatic unattended recording of up to 8 programmes within a 1 month period.Standard (SP) and Long Play (LP)• Your VCR is pre-set to standard play but you may extend the recording time of your video tapes by using the long play feature.NTSC Playback• Your VCR is designed to playback NTSC colour tape to a standard TV (PAL system). This means you can playback VCR tapes from USA or Japan (see page 17).Video Index Search System• Video index search system automatically records marks on the tape whenever you start a recording. <strong>The</strong>se marks are easily located so that you can go straight toyour desired recording without having to keep stopping and viewing your tape.Security Protection• Your VCR includes a security PIN feature that protects your VCR from unauthorised use after being disconnected from the mains supply.Automatic Tracking• Your VCR automatically adjusts itself to give the best possible picture during playback.Help andSpecification4
VP9408.qxd 14/04/00 14:56 Page 6Introduction &ContentsPutting Batteries into your Remote ControlInstalling yourVCRRemove battery1 coverInsert batteries23Replace batterycoverSetting up yourVCRPlaying aVideo TapeRecordingProgrammesCarefully slide back and remove theBATTERY COVER from the back ofyour remote control.Insert two AAA / R03 / UM-4 sizebatteries into the batterycompartment. Make sure they areinserted the correct way round.Slide the BATTERY COVER back intoplace.AdvancedFeatures• Remote control operation may become erratic if direct sunlight, fluorescent lamp,standard household lamp (incandescent) or any other strong light source shines onthe remote sensor on your VCR.• Make sure there are no obstacles between your VCR and the remote control.• Use two AAA/R03/UM-4 size batteries for the remote control.• <strong>The</strong> batteries may last approximately one year depending on how much theremote control is used. For best performance it is recommended batteries arereplaced every year, or when remote control operation becomes erratic.• Do not operate your VCR from a distance greater than 5 meters.• Do not mix old and new batteries or different types.Help andSpecification6• Do not operate your VCR away from the normal viewing angle; over 30 o eitherside of the remote sensor on your VCR.• Weak batteries can leak and severely damage your remote control. Alwaysremove batteries when they become weak, or if your VCR is not to be used for along time.
VP9408.qxd 14/04/00 14:56 Page 7DO NOT PLUGYOUR VCR INTOTHE MAINSSUPPLY YET.NOTE: If your TV hasmore than oneSCART socket pleaserefer to your TV’sInstruction Book forinformation aboutwhich SCART socketto use.Back view of VCR.Connecting your VCR to a TVWe recommend connecting your VCR to your TV using a SCART lead AND a normal aerial lead.If you connect using a SCART lead you will find it easier to set-up your VCR,you will also benefit from improved picture quality playback from your VCR.Back view of TV(not supplied).SCART lead(not supplied).Aerial lead(not supplied).Advice• We recommend all connectionsare made with both your VCR andTV unplugged from the mainssupply.• If you use a cable service thenconnect the aerial lead to yourcable decoder box instead of yourmain aerial wall socket.(Consult your cable decoder boxinstructions for more details)• <strong>The</strong> type of household aerialrequired depends on the positionof your home, it’s distance from thetransmitter and local interference. Ifyou do not have a householdaerial and you are uncertain ofwhat to buy, you should seek theadvice of a local aerial contractor.Introduction &ContentsInstalling yourVCRSetting up yourVCRPlaying aVideo TapeRecordingProgrammes8AdvancedFeaturesAerial lead (supplied).7Help andSpecification
VP9408.qxd 14/04/00 14:56 Page 8Introduction &ContentsInstalling yourVCRSetting up yourVCRPlaying aVideo TapeRecordingProgrammesBasic VCR InstallationThis page shows the most basic way to connect your VCR to your TV if you do not have a SCART lead or SCART socket on your TV.We recommend you connect your VCR to your TV using a SCART lead (see the previous page).We recommend all connections must be made with both your VCR and TV unplugged from the mains supply.Extra Advice• Before you can use your VCR, itmust be connected to your TVusing an aerial lead. You must alsoconnect your VCR to yourhousehold aerial.• <strong>The</strong> type of household aerialrequired depends on the positionof your home, it’s distance from thetransmitter and local interference. Ifyou do not have a householdaerial and you are uncertain ofwhat to buy, you should seek theadvice of a local aerial contractor.• If you use a cable service thenconnect the aerial lead to yourcable decoder box instead of yourmain aerial wall socket.(Consult your cable decoder boxinstructions for more details)DO NOT PLUGYOUR VCR INTOTHE MAINSSUPPLY YET.Back view of VCR.Back view of TV(not supplied).Aerial lead(not supplied).AdvancedFeatures8Help andSpecification8Aerial lead (supplied).
VP9408.qxd 14/04/00 14:56 Page 9Connecting your VCR to a TV and DecoderIf you are connecting your VCR to a TV and a digital or satellite decoder and you only have a single scart socket on your TV anddecoder we recommend you connect your equipment as shown below.Please consult your satellite decoder instruction book for more connection options.We recommend all connections are made with both your VCR, TV and decoder unplugged from the mains supply.Connect this lead to yoursatellite dish or socket.Back view of a Decoder (not supplied).NOTE: If your TV has more than oneSCART socket please refer to your TV’sInstruction Book for information aboutwhich SCART socket to use.Aerial lead(not supplied).Back view of TV(not supplied).Aerial lead(supplied).Extra Advice• Before you can use your VCR, itmust be connected to your TVusing an aerial lead. You must alsoconnect your VCR to yourhousehold aerial.• You can connect your VCR to aTV and a Satellite decoder using a2-way SCART lead. Call PartmasterDirect on 0870 9090444 and askfor part number SAT2.• If you use a cable service thenconnect the aerial lead to yourcable decoder box instead of yourmain aerial wall socket.(Consult your cable decoder boxinstructions for more details)Introduction &ContentsInstalling yourVCRSetting up yourVCRPlaying aVideo TapeRecordingProgrammesDO NOT PLUGYOUR VCR INTOTHE MAINSSUPPLY YET.Back view of VCR.2 way SCART lead (not supplied).9AdvancedFeaturesHelp andSpecification
VP9408.qxd 14/04/00 14:56 Page 10Introduction &ContentsInstalling yourVCRSetting up yourVCRPlaying aVideo TapeRecordingProgrammesAdvancedFeaturesHelp andSpecification10Automatic SET-UPMAKE SURE YOUR VCR IS FULLY INSTALLED (pages 7-9)YOU MUST FOLLOW THE INSTRUCTIONS ON THESE PAGES CAREFULLY TO MAKE SURE YOUR VCR IS INSTALLED CORRECTLY.YOUR VCR WILL NOT FUNCTION PROPERLY UNTIL AUTO SET-UP HAS BEEN COMPLETED.What isAuto SET-UP• <strong>The</strong> AUTO SET-UP feature makesinstalling your VCR easy. Itautomatically searches and tunesall available TV Stations and storesthem in the correct order in yourVCR, it then sets the correct timeand date.• You should not adjust the time ordate after AUTO SET-UP has setthem unless they have been setincorrectly. If you do adjust themthe VIDEO Plus+ feature and timerrecordings might not workcorrectly.• To restart the AUTO SET-UPfeature at a later date, press andhold the PROGRAMME UP andDOWN buttons together until theword ‘AUTO ‘ flashes in theVCR’s display.1Plug your VCR intoa mains socketMake sure you have fully installedyour VCR (pages 7-9) and that anaerial lead is connected from yourhousehold aerial or cable decoder(if you subscribe to a cable service)If a satellite decoder is connected,make sure it is switched on andSKY One is selected.Plug your VCR into a mains socket.<strong>The</strong> AUTO SET-UP process willstart.2AUTO SET-UP willstart 3<strong>The</strong> word ‘AUTO’ will flash in theVCR’s display.Your VCR is now automaticallytuning in all available TV stationsand setting the correct time anddate.This will take approximately 4minutes. Do NOT touch anycontrols while ‘AUTO’ is flashing inthe display.When AUTO SET-UP is complete,the current time will be displayedin the VCR’s display window.ELAUTOTUNEREC/OTRPress and HOLD theON buttonSTOP/EJECTREWPLAYF.FWDPRESS and HOLD the ON buttonon the front of your VCR until ‘CH1’ then ‘OUT 36’ appears in theVCR’s display.If ‘CH 1’ stays in the display, press theON button once, then press and holdthe ON button until ‘OUT 36’ appears.If the time still shows in the display,then press and hold the ON buttonuntil ‘OUT 36’ appears.ON
VP9408.qxd 14/04/00 14:56 Page 11Installing yourVCRPlaying aVideo TapeIntroduction &Contents4aIf you connected your VCR to yourTV with a SCART and aerial lead...ON SCREEN PROGRAMMINGAUTO TUNE & SORT SYSTEM = NTSC PLAYBACKCHANNELAUTOTUNEREC/OTRSTOP/EJECTREW4bIf youconnected yourVCR to your TV usingjust an aerial lead...5AUTO SET-UP iscompleteYour VCR is now fully installed andready for use.Now turn to page 13 to setthe language.Setting up yourVCRCHANNELAUTOTUNEREC/OTRSTOP/EJECTRepeatedly press the CHANNEL DOWN button on the front of yourVCR until the word ‘OFF’ appears in the VCR’s display.<strong>The</strong> TV picture might change while you are pressing the programme downbutton - ignore this for now.Press the ON button on the front of your VCR. <strong>The</strong> current time willappear again in the VCR’s display.Your VCR is now fully installed and ready for use.Turn on your TV and select an unusedchannel on your TV to use as yourVCR channel (for watching yourVCR).Tune in the channel you have selectedon your TV until the test pattern(shown here) appears clearly on yourTV screen.Consult your TV’s Instruction Book fordetails about tuning your TV.When you have tuned in your TV,press the ON button on the front ofyour VCR. <strong>The</strong> current time willappear again in the VCR display.Your VCR is now fully installed andready for use.If you connected your VCR to yourTV with a SCART and aerial lead,select the AV (or EXT) channel onyour TV when you want to viewyour VCR. Some TVs willautomatically switch to displayyour VCR when you play a tape orpress the CALL or MENU button.If you connected your VCR to yourTV using just an aerial, select thechannel you chose as your VCRchannel on your TV when you wantto view your VCR.Select this TV channel every timeyou wish to use your VCR.RecordingProgrammesAdvancedFeaturesHelp andSpecification11
VP9408.qxd 14/04/00 14:57 Page 12Introduction &ContentsRemoving InterferenceOnly follow the instructions on this page if you notice interference on your TV screen when watching TV Stations on your VCR.If you have connected your VCR to your TV using a SCART lead you can ignore this page.Installing yourVCRSetting up yourVCRPlaying aVideo TapeInterference• In certain areas of the countryyou may experience interferenceon your TV screen when you arewatching TV Stations on your VCR.This interference can be due toanother TV Station (will appear asa shaky picture or as lines acrossthe screen) or a digital signal (willappear as speckles on thescreen).1Select the VCR’s TestPattern2Try changing theoutput number 3Remove the VCR’sTest PatternRecordingProgrammesCHANNELAUTOTUNEREC/OTRSTOP/EJECTREWPLAYF.FWDONCHANNELAUTOTUNEREC/OTRSTOP/EJECTREWPLAYF.FWDONCHANNELAUTOTUNEREC/OTRSTOP/EJECTREWPLAYF.FWDONAdvancedFeaturesHelp andSpecification12Both types of interference are easyto remove if you follow the adviceon this page.Make sure your VCR is in standby.Press and HOLD the ON button onthe front of your VCR until ‘OUT36’ appears in the VCR’s display.If ‘CH 1’ stays in the display, press theON button once, then press and holdthe ON button until ‘OUT 36’ appears.If the time still shows in the display,then press and hold the ON buttonuntil ‘OUT 36’ appears.Press the CHANNEL UP orDOWN buttons on the front ofyour VCR to change the number(try changing it to 37).Now tune your VCR channel onyour TV again until the black andwhite test pattern appears.If the pattern is now clear, press theON button to remove the blackand white test pattern.If the pattern is still not clear, trychanging the number again (seestage 2) and re-tune your TV untilthe pattern is clear.
VP9408.qxd 14/04/00 14:57 Page 13Selecting a LanguageYour VCR will default to English Language but you can choose to display the on screen displays in English, German or French.<strong>The</strong> first time you press the MENU button your VCR will go straight to the LANGUAGE menu.Introduction &Contents1Select your VCRchannel2Select the SYSTEMSETUP menuSelect a Language3 4Store your selectionInstalling yourVCRTIMER REC SETAUTO REPEATOFFPLAYBACK SHARPNESSCHANNEL SETUPPIN CODE REGISTRATIONSYSTEM SETUPSELECT :ENTER : ENTEREXIT : MENUSYSTEM SETUPCLOCK SETLANGUAGE / SPRACHE / LANGUESELECT :ENTER : ENTEREXIT : MENULANGUAGE / SPRACHE / LANGUEENGLISHDEUTSCHFRANCAISSELECT : OK : ENTERSetting up yourVCRRecordingProgrammesPlaying aVideo TapeIf your VCR is in standby, press theVCR ON button on your remotecontrol to switch it on. Select theVCR channel on your TV (e.g. AVor channel 0).Press the MENU button on theremote control.<strong>The</strong> MAIN menu appears.Press the PLAY or STOP buttons tohighlight SYSTEM SETUP, then pressENTER.Press the PLAY or STOP buttons tohighlight LANGUAGE.Press the ENTER button on theremote control.Press the PLAY or STOP buttons toselect the language you require.Press ENTER to store your setting.AdvancedFeaturesHelp andSpecificationPress the MENU button twice toremove the on screen display.13
VP9408.qxd 14/04/00 14:57 Page 14Introduction &ContentsGet to know your VCRThis page will give you an overview of what the buttons on the front of your VCR do.Installing yourVCRSetting up yourVCRCassette tape doorRewind buttonFast ForwardbuttonPlaying aVideo TapeON SCREEN PROGRAMMINGAUTO TUNE & SORT SYSTEM = NTSC PLAYBACKRecordingProgrammesCHANNELAUTOTUNEREC/OTRSTOP/EJECTREWPLAYF.FWDONVCR ON/StandbybuttonAdvancedFeaturesRemote control sensorVCR display windowChannel UP and DOWN/AUTO SET-UP buttonsPlay buttonStop/Eject buttonHelp andSpecification14Record/One TouchRecord (OTR) button
VP9408.qxd 14/04/00 14:57 Page 151Selecting and Skipping TV StationsSometimes during AUTO SET-UP your VCR will store more than one copy of the same channel or leave achannel empty or with a poor picture. Using the SKIP feature you can disable these unwanted channels.e.g. You skip channel 6, now when you press the CHANNEL UP button the channel will change from channel 5 to 7.Selecting channels on your VCR1Skipping unwanted channels on your VCRIntroduction &ContentsInstalling yourVCRPDC CH 4CH 29PDC CH 5Playing aVideo TapeSetting up yourVCRCHANNELAUTOTUNEREC/OTRSTOP/EJECTRecordingProgrammesIf your VCR is in standby, press the VCR ON button on your remote controlto switch it on. Select the VCR channel on your TV (e.g. AV or channel 0).Press the CHANNEL UP or DOWN button on the remote control or front ofyour VCR to change the channels.You can also select channels directly by pressing the NUMBERED buttons onthe remote control. e.g. press button 4 to select channel 4.To select channels 10-80, press the -/- - button then the 2 NUMBERED buttons, e.g.press -/- - then 2 then 9 for channel 29.To skip unwanted channels, select the channel you wish to skip and thenpress the CANCEL button.<strong>The</strong> Channel number will flash in the VCR’s display to show this channel hasbeen skipped. When a channel is skipped you will not be able to select itwith the CHANNEL UP or DOWN buttons.To unskip a channel, select it with the NUMBERED buttons then pressCANCEL again. You will now be able to select the channel with theCHANNEL UP or DOWN buttons.AdvancedFeaturesHelp andSpecification15
VP9408.qxd 14/04/00 14:57 Page 16Introduction &ContentsInstalling yourVCRPlaying a Video (VCR) TapeYour VCR is marked with ‘HQ’ which means it incorporates VHS High Quality technology. A built in detail enhancer is used to boost therecorded signal and provide maximum picture quality.Only use VHS video cassette tapes (or NTSC for playback only).1Switch your VCRand TV onAutomatic play from Start playing a tape2 pre-recorded tapes 3 4Stop playing a tapeSetting up yourVCRPlaying aVideo TapeRecordingProgrammesAdvancedFeaturesHelp andSpecification16If your VCR is in standby, press theVCR ON button on your remotecontrol to switch it on. Select theVCR channel on your TV (e.g. AVor channel 0).Insert a video tape.If you insert a pre-recorded videotape with the record protection tabremoved (for example a rented orbought film) your VCR will start toplay automatically.If playback does not startautomatically, press the PLAYbutton.<strong>The</strong> word ‘PLAY’ will appear in theVCR’s display followed by the VCRcounter.Press STOP to stop playing avideo tape, ‘STOP’ will appear inthe VCR display and the TV Stationcurrently selected on your VCR willbe displayed on your TV.Press PLAY again to resumeplayback.
VP9408.qxd 14/04/00 14:57 Page 17If you do not press the STOP button, the tape will continue until it reaches the end. <strong>The</strong> auto rewind facility will automatically rewindthe tape to the beginning, your VCR will then automatically eject the tape and turn off into standby.Introduction &Contents5Pausing playbackPress PAUSE while a tape isplaying to view a still picture.<strong>The</strong> pause feature will automaticallychange to play after 5 minutes to avoidstretching your tape.Press PLAY to resume playback.6Ejecting the tapePress STOP to stop playback.Press EJECT and the tape will ejectfrom the VCR.<strong>The</strong> TV Station currently selected onyour VCR will be displayed on your TV.Playing NTSCtapes on yourVCR• Your VCR can playback videotapes recorded using the NTSCcolour system (TV system usuallyused in USA and JAPAN) on aPAL I TV (TV system used in theUK).Play an NTSC tape as you would anormal VHS tape.Your VCR will playback NTSCtapes recorded using Standardplay (SP), Long play (LP) andExtended play (EP). However, therewill be a deterioration in soundquality in the LP and EP modes.• If your TV supports the NTSCsystem, the picture from your VCRwill fill the whole screen, if not, thepicture will have a black band atthe top and bottom of the screen.• Please note that there will be nosound during any PAUSE mode.17Installing yourVCRSetting up yourVCRPlaying aVideo TapeRecordingProgrammesAdvancedFeaturesHelp andSpecification
VP9408.qxd 14/04/00 14:57 Page 18Introduction &ContentsInstalling yourVCRRewind (REW) and Fast Forward (F.FWD)You can wind forwards or backwards through a cassette tape. With the picture search feature you can also wind forwards orbackwards with the picture on the screen at the same time.During picture search the sound will be muted and white lines will appear across the screen.1Rewind (REW) and Fast Forward (F.FWD)2Picture searchSetting up yourVCRPlaying aVideo TapeRecordingProgrammes<strong>The</strong> speed of the search timedepends on the speed used duringrecording, either standard play(SP) or long play (LP).AdvancedFeaturesHelp andSpecification18To rapidly wind the tape backwards or forwards, press the REW or F.FWDbuttons when a tape is NOT playing.‘REW’ or ‘FF’ will appear in the display.To rewind or fast forward the tapewith the tape’s picture on your TVscreen (picture search) press PLAYthen either REW or F.FWD.Review ‘REVEW’ or ‘CUE’ willappear in the VCR’s display.Standard Play (SP)1st press 5 times normal speed2nd press 7 times normal speed(NTSC times are slower)Long Play (LP)1st press 7 times normal speed2nd press 13 times normal speedPress PLAY to return to normalplayback.
VP9408.qxd 14/04/00 14:58 Page 19Video Index Search System<strong>The</strong> Video Index search system allows you to easily locate the beginning of any recording made on your VCR.Your VCR automatically records index marks on the tape whenever a recording is started.Introduction &Contents1Select the Indexfeature2Select an Indexposition3Search for the IndexpositionVideo IndexingInstalling yourVCR• <strong>The</strong> Video Index search systemwill only work once severalrecordings have been made on aVCR tape.Setting up yourVCR• Occasionally, when recordingstarts at the very beginning of aVCR tape the index mark may bemissed.• When your VCR is searching foran index mark, it will not wind asquickly as normal because it issearching for the index marks.Playing aVideo Tape• A maximum of 9 index markscan be searched on a single VCRtape.RecordingProgrammesPress the INDEX button on yourremote control during playback orwhile the video is stopped.<strong>The</strong> word ‘INDEX’ will appear onyour TV screen.Press the NUMBERED buttons onthe remote control to select thenumber of index positions to skip.e.g. your VCR tape is at the beginningand you want to watch the thirdrecording on the tape, press thenumber 3 on the remote control.Press the F.FWD button to searchthe selected number of indexpositions forward through the tapeor REW to search backwards.Playback will start automaticallywhen the index position is found.19AdvancedFeaturesHelp andSpecification
VP9408.qxd 14/04/00 14:58 Page 20Introduction &ContentsInstalling yourVCRClock/Counter Display and Zero ReturnYour VCR has a counter which can display the actual amount of time (in seconds) that a VCR tape has been playing. <strong>The</strong> Zero returnfeature allows you to set the counter to 0:00:00 at any point in the tape and then rewind and start playing from that point when youpress the ZERO RETURN button.1Selecting the counterReset the counterZero return2 3 4Counter pauseSetting up yourVCRPlaying aVideo TapeRecordingProgrammesAdvancedFeaturesHelp andSpecification20<strong>The</strong> clock displays the current time inthe VCR display. <strong>The</strong> counter displayshow much time (in seconds) haselapsed since the point at which youstarted playing a tape.To switch between the two pressthe CLOCK/COUNTER button.Select the counter and then pressCOUNTER RESET to reset thecounter to 0:00:00.When you load a tape the counterwill reset.If you rewind a tape from 0:00:00, aminus sign (-) will appear in front of thecounter.When the VCR is not playing pressthe ZERO RETURN button, thetape will rewind or fast forwarduntil the counter reaches 0:00:00automatically.This feature is useful for returning to apoint in a tape you wish to view again.When you rewind or fast forwardthrough blank sections of the tape,the counter will stop counting.
VP9408.qxd 14/04/00 14:58 Page 21What are VIDEO Plus+ and PDC?Please read this guidance if VIDEO Plus+ or PDC are new to you before making a VIDEO Plus+ or Timer recording.Introduction &ContentsWhat is VIDEO Plus+ ?What is PDC ?Installing yourVCR• Your VCR is equipped withVIDEO Plus+. This recordingsystem makes programming atimer recording much easier.Simply enter the VIDEO Plus+PlusCode (the long number aftereach programme in your TVlistings) and the correct start time,end time, channel and date foryour recording will be setautomatically. For full details ofmaking a VIDEO Plus+ recording, turn to pages 24-25.• PDC stands for ProgramDelivery Control system. APDC signal is broadcast atthe beginning and end ofmost TV programmes. Thislets your VCR know if a TVprogramme is running earlyor late.8.20pm 8.30pm 8.40pm 8.50pm 9.00pm 9.10pmPROGRAMME 1 PROGRAMME 2A VIDEO Plus+ recording with PDCA VIDEO Plus+ recording without PDCRecording misses the last10 minutes of the programme• If you switch PDC on then a recording will not start until your VCR receives the PDCsignal, for example, you have set a VIDEO Plus+ recording to start at 8.30pm until 9.00pmon BBC2. <strong>The</strong> programme before overruns and does not finish until 8.40pm. Without PDCyour recording would have started at 8.30pm as programmed and ended at 9.00pm, youwould have missed the last 10 minutes of your programme.Setting up yourVCRPlaying aVideo Tape• In order for VIDEO Plus+ to work correctly the channels inyour VCR must be stored in the following order. <strong>The</strong> AutoSET-UP process will store your channels in this order in mostcases and you should not need to change them manually.See page 36 to change channel order.VCR Channel Station1 BBC12 BBC23 ITV4 Channel 45 Channel 56 Decoder (if fitted)With PDC on your VCR will wait until the PDC signal is received and then start recording,therefore your recording starts at 8.40pm and ends at 9.10pm - you don't miss anything!• Not all TV Stations transmit PDC signal all of the time,PDC CH 3 however your VCR will automatically detect if a channelis broadcasting a PDC signal every time you changechannel or when you program a recording. If PDC isbeing broadcast on the channel you wish to record fromthen PDC will automatically be set to ON when you gointo the recording menus. If your VCR has automaticallyset PDC to OFF this will be because there is currently noPDC signal being transmitted and we recommend you leave PDC OFF.• For more information on making a PDC recording please turn to pages 24-27. Whenprogramming a Timer Recording you must set the start and end times exactly as they areshown in your TV listings if PDC is set to ON.21RecordingProgrammesAdvancedFeaturesHelp andSpecification
VP9408.qxd 14/04/00 14:58 Page 22Introduction &ContentsOne Touch Recording (OTR)With the one touch recording feature you can make recordings quickly and easily.Make sure your VCR is properly installed and all the channels are tuned in the correct order (see pages 10-11).Installing yourVCROTR information1Switch your VCRON 2Insert a blank tape3Select a Station torecord fromSetting up yourVCRPlaying aVideo Tape• Your VCR can record inStandard play (SP) or Long play(LP). When you record in SP a 3hour tape will be able to record 3hours of programmes. When yourecord in LP a 3 hour tape will beable to record 6 hours ofprogrammes.You may notice a slightly lower qualityof recording in LP mode, especiallywhen using the PAUSE or PICTURESEARCH features.RecordingProgrammes• If the record protection tab hasbeen removed from a tape or youtry to record onto a bought orrented tape, the tape will ejectwhen you press the REC/OTRbutton.AdvancedFeaturesIf your VCR is in Standby, press theVCR ON button on the remotecontrol to switch it on. Select theVCR channel on your TV.Insert a blank tape into your VCR.0:00:00 will appear in the VCRdisplay.Press the NUMBERED buttons orthe CHANNEL UP or DOWNbuttons on the remote control toselect the TV Station you wish torecord.Help andSpecification22
VP9408.qxd 14/04/00 14:58 Page 23Introduction &Contents4Select the taperecord speed5Start recording6Stop recordingOTR record timeInstalling yourVCR00 : 00 : 01 SPINDEXCH1• If you wish to record for a setlength of time (e.g. 1 hour) you canset an OTR recording to stop aftera set length of time.• Each time you press theREC/OTR button the record timeis increased by 30 minutes (or 1hour after 5 presses), e.g;1st press2nd press3rd press4th press5th press6th press7th press8th presscontinuous recording30 minutes1 hour1 hour 30 minutes2 hours3 hours4 hours5 hourse.g. four presses will start recordingimmediately but stop after 1 and a halfhours.Setting up yourVCRPlaying aVideo TapeRecordingProgrammesPress the SPEED button to selectthe recording speed, standard play(SP) or long play (LP).Press the REC/OTR button to startrecording. <strong>The</strong> VCR will startrecording.Recording will end when either:• <strong>The</strong> STOP button is pressed.• <strong>The</strong> tape runs out.• <strong>The</strong> VCR has finished recordingfor the programmed OTR time.• You can add to the OTRrecording time at any point bypressing the REC/OTR buttonagain.When the tape speed LP isselected, the recording time can beset up to 10 hours.AdvancedFeaturesHelp andSpecification23
VP9408.qxd 14/04/00 14:59 Page 24Introduction &ContentsInstalling yourVCRRecording using VIDEO Plus+Make sure your VCR has been properly installed (pages 10-11)Your VCR is equipped with VIDEO Plus+. This recording system makes programming a recording much easier. By entering the VIDEOPlus+ PlusCode (the long number after each programme in your TV listings) the correct start time, end time, channel and date are set foryou automatically. <strong>The</strong> VCR's timer allows up to 8 programmings to be set within a 1 month period.1Switch your VCRON2Enter a VIDEO Plus+ PlusCode3Select how often torecordSetting up yourVCRPLUSCODE NO. _ _ _ _ _ _ _ _ _ONCEDAILYWEEKLYPLUSCODE NO. 0-9SELECTCLEARCANCELOKENTEREXITVIDEO PLUS+PLUSCODE NO. 3 4 6 8 4 2 7ONCEDAILYWEEKLYPLUSCODE NO. 0-9SELECTCLEARCANCELOKENTEREXITVIDEO PLUS+PLUSCODE NO. 3 4 6 8 4 2 7ONCEDAILYWEEKLYPLUSCODE NO. 0-9SELECTCLEARCANCELOKENTEREXITVIDEO PLUS+Playing aVideo TapeVIDEO Plus+ PlusCodes can befound printed after eachprogramme in most TV guides.RecordingProgrammesAdvancedFeaturesHelp andSpecification24Switch on your TV and select AV oryour VCR channel.If your VCR is in-standby, switch iton by pressing the VCR ONbutton.Insert a blank tape. <strong>The</strong> clock willchange to a counter in the VCRdisplay.Press the VIDEO Plus+ TIMER REC button on the video remote control. <strong>The</strong>VIDEO Plus+ screen will appear.Enter the PlusCode number for the programme you wish to record using theNUMBERED buttons on the remote control.If an incorrect PlusCode is entered, the word ‘ERROR’ will be displayed and you willhave to re-enter the correct number.Repeatedly press PLAY or STOPon the video remote control toselect once, daily or weekly.Select once for a single recording,daily to record at the same time eachday and weekly to record at the sametime weekly.Press ENTER.
AUTO TUNE & SORT SYSTEM = NTSC PLAYBACKCHANNELREC/OTRVP9408.qxd 14/04/00 14:59 Page 254Set the tape recording speedand select PDC on or offVIDEO Plus+ and PlusCode are registered trademarks of Gemstar Development Corporation.<strong>The</strong> VIDEO Plus+ system is manufactured under license from Gemstar Development Corporation.5Set your VCR into Timer Record ModeIntroduction &ContentsInstalling yourVCRPLUSCODE NO.DATESTARTENDCHSPEEDPDCSELECTSETEXIT MENU3 4 6 8 4 2 78 MON7:158:153SPONOKENTERPLUSCODE NO.DATESTARTENDCHSPEEDPDCSELECTSETEXIT MENU3 4 6 8 4 2 78 MON7:158:153SPONOKENTERON SCREEN PROGRAMMINGAUTOTUNESTOP/EJECTREWPLAYF.FWDONSetting up yourVCR<strong>The</strong> VIDEO Plus+ display will show the date,start time, end time and TV Station for theprogramme you wish to record.Press PLAY or STOP to select SPEED (seepage 22 for more details).Press REW or F.FWD to select the taperecording speed (SP or LP).Press PLAY or STOP to select PDC. (seepage 21 for more details).Press REW or F.FWD to select PDC on oroff. PDC will automatically be set to ON if PDCis being broadcast on the channel you haveselected (see page 21 for more details).Press ENTER to confirm your recording. <strong>The</strong> timer recording screen will showthe details of all the recordings you have programmed.To edit a recording, press PLAY or STOP to highlight the recording and thenpress ENTER.Do NOT change any time or date settings if PDC is set to ON - Thismight stop your recording from taking place.Press the MENU button twice to removethe timer recording screen.To programme further recordings repeatstages 2 to 4.Now press the TIMER SET button toset your timer recording.(If the record protection tab has been removedfrom your tape it will be ejected.)Your VCR will go into timer record mode(this looks like standby, but the timer setsymbol will appear in the VCR display).If you do not put your VCR into timer record mode yourrecording will not take place.Your TIMER RECORDING is now set.At the set time your VCR will switch on and record your programme then goback into timer record mode.When your VCR has recorded all your programmes, it will remain in standbymode.25Playing aVideo TapeRecordingProgrammesAdvancedFeaturesHelp andSpecification
VP9408.qxd 14/04/00 14:59 Page 26Introduction &ContentsTimer RecordingsTimer recordings allow you to program your VCR to switch on and record a programme at a preset time.Make sure your VCR is properly installed before making a timer recording (see pages 10-11).Installing yourVCR1Insert a tape2Select a free timerrecord position3Set the date, start time and end time.Setting up yourVCRTIMER REC SETDATE 8 MONSTART 7:15END --:--CH 3SPEED SPPDC ONSELECTSETEXIT MENUTIMER REC SETDATE 8 MONSTART 7:15END 8:15CH 3SPEED SPPDC ONSELECTSETEXIT MENUPlaying aVideo Tape<strong>The</strong> timer record screen will appear.Press the REW or F.FWD buttons to setthe date of the programme you wish torecord.Press STOP to confirm the date.RecordingProgrammesYour timer allows up to 8 recordings to be setwithin 1 month of the current date.Press REW or F.FWD to set the hour theprogramme starts.Press STOP to confirm the hour.AdvancedFeaturesHelp andSpecification26If your VCR is in standby, press theVCR ON button on the remotecontrol to switch it on. Select theVCR channel on your TV.Insert a blank tape into your VCR.Press the MENU button on theremote control. <strong>The</strong> main menu willappear.Press PLAY or STOP to highlightTIMER REC SET. Press ENTER.Press the PLAY or STOP buttons toselect a free timer position (blankdotted line), then press ENTER.Press REW or F.FWD to set the minutethe programme starts.Press STOP to confirm the minutes.Press REW or F.FWD to set the hour the programme ends.Press STOP to confirm the hour.Press REW or F.FWD to set the minute the programme ends.Press STOP to confirm the minutes.
VP9408.qxd 14/04/00 14:59 Page 29Cancelling VIDEO Plus+ or Timer RecordingsIntroduction &Contents1Cancel timer recordmode2Select a recording tocancelDelete the recording3 4Reset timer recordmodeInstalling yourVCR8 MON 11 : 46 11 : 58 3 SP_ _ _ _ _ _ _ _ : _ _ _ _ : _ _ _ _ __ _ _ _ _ _ _ _ : _ _ _ _ : _ _ _ _ __ _ _ _ _ _ _ _ : _ _ _ _ : _ _ _ _ __ _ _ _ _ _ _ _ : _ _ _ _ : _ _ _ _ __ _ _ _ _ _ _ _ : _ _ _ _ : _ _ _ _ __ _ _ _ _ _ _ _ : _ _ _ _ : _ _ _ _ __ _ _ _ _ _ _ _ : _ _ _ _ : _ _ _ _ _SELECT : / ENTERCLEAR : CANCELEXIT : MENUSetting up yourVCRRecordingProgrammesPlaying aVideo TapeIf your VCR is in timer record modepress the TIMER SET button toswitch on your VCR.<strong>The</strong> timer set symbol will go out.Press MENU.Press the PLAY or STOP buttons tohighlight TIMER REC SET.Press the ENTER button.<strong>The</strong> timer event menu will appear.If you wish to cancel a timerrecording, press PLAY or STOP tohighlight the recording.Press CANCEL; the timer recordingdetails will be deleted.After checking the details,repeatedly press the MENU buttonto clear the screen.Press TIMER SET to put your VCRback into timer record mode ifthere are any more recording to bemade. If you do not, the recordingswill not take place.AdvancedFeaturesHelp andSpecification29
VP9408.qxd 14/04/00 15:00 Page 30Introduction &ContentsUsing the Playback Sharpness featureYour VCR has a Playback Sharpness feature which can be used to improve the picture quality from a VCR during playback.You will only be able to select the playback sharpness feature when a VCR tape is playing.Installing yourVCR1Start playing a VCRtape<strong>The</strong> playback sharpness Adjust the playback2 screen will appear 3 sharpness 4Exit the menuSetting up yourVCRTIMER REC SETAUTO REPEATOFFPLAYBACK SHARPNESSCHANNEL SETUPPIN CODE REGISTRATIONSYSTEM SETUPSELECT : /ENTER : ENTEREXIT : MENUPLAYBACK SHARPNESSPLAYBACK SHARPNESSPlaying aVideo TapeRecordingProgrammesAdvancedFeaturesHelp andSpecification30Start playing a VCR tape.Press MENU, the main menu willappear. Press PLAY or STOP tohighlight PLAYBACK SHARPNESS.Press ENTER, the playbacksharpness screen will appear.You will not be able to select theplayback sharpness feature unless aVCR tape is playing.Press REW or F.FWD to adjust theplayback sharpness to the level yourequire.Moving the bar to the left makesthe picture appear softer. Movingthe bar to the right increases thedefinition on the picture.Press the MENU button repeatedlyto remove the playback sharpnessscreen.<strong>The</strong> playback sharpness screendisappears automatically after 60seconds if no buttons are pressed.
VP9408.qxd 14/04/00 15:00 Page 31Auto Repeat PlayWhen the Auto Repeat feature is switched on your VCR tape will play continuously.Introduction &Contents1Insert a VCR tape2Select Auto RepeatSelect on or off3 4Start playing yourVCR tapeInstalling yourVCRTIMER REC SETAUTO REPEATOFFPLAYBACK SHARPNESSCHANNEL SETUPPIN CODE REGISTRATIONSYSTEM SETUPSELECT : /ENTER : ENTEREXIT : MENUTIMER REC SETAUTO REPEATONPLAYBACK SHARPNESSCHANNEL SETUPPIN CODE REGISTRATIONSYSTEM SETUPSELECT : /ENTER : ENTEREXIT : MENURecordingProgrammesPlaying aVideo TapeSetting up yourVCRIf your VCR is in standby, press theVCR ON button on the remotecontrol to switch it on. Select theVCR channel on your TV.Insert the VCR tape you wish toplay continuously.Press MENU; the main menu willappear.Press PLAY or STOP to highlightAUTO REPEAT.Press REW to select ON or OFF.Press MENU to clear the screen.Press PLAY to start playing yourtape.When the end of the tape isreached, it will rewind to thebeginning and start to play again.Help andSpecification31AdvancedFeatures
VP9408.qxd 14/04/00 15:00 Page 32Introduction &ContentsInstalling yourVCRSetting up yourVCRPlaying aVideo TapeManually setting the correct Time and DateYou must set the correct time and date on your VCR before you make any VIDEO Plus+ or timed recordings.You should only need to set the time manually if it was not set during AUTO SET-UP (pages 10-11).If your VCR is in standby, press the VCR ON button on the remote control to switch it on. Select the VCR channel on your TV.Manual SETUP• Your VCR is fitted with a 24hrclock and a year 2000 compliantcalender.• Before you can make anyrecording you must set the correcttime and date.• Your VIDEO Plus+ or timerrecordings might miss thebeginning or end of programmes ifthe time or date are not setcorrectly.1Select SYSTEMSETUP 2TIMER REC SETAUTO REPEATOFFPLAYBACK SHARPNESSCHANNEL SETUPPIN CODE REGISTRATIONSYSTEM SETUPSELECT :ENTER : ENTEREXIT : MENUSELECT CLOCK SETSYSTEM SETUPCLOCK SETLANGUAGE / SPRACHE / LANGUESELECT :ENTER : ENTEREXIT : MENU3Set the DAYCLOCK SETDAY 8 SATMONTH 1YEAR 2000TIME 0 : 00AUTO TIME ONSELECT :SET :OK : ENTER EXIT : MENURecordingProgrammesAdvancedFeaturesHelp andSpecification32• Once set, the time will show inthe VCR’s display when the VCR isin stand-by.• If your VCR is unplugged fromthe mains or you have a power cut,your VCR will keep the correct timeand date in its memory forapproximately 30 minutes. If thereis no power for longer than this,you must set the correct time anddate again.Press the MENU button on theremote control, the MAIN menuwill appear.Press PLAY or STOP to highlightSYSTEM SETUP.Press ENTER.Press PLAY or STOP to selectCLOCK SET.Press ENTER, the CLOCK SETscreen will appear.<strong>The</strong> DATE digit will be flashing.Press REW or F.FWD to set thecorrect date.<strong>The</strong> three letters after the date show theDAY of the week (MON=Monday). <strong>The</strong>DAY will NOT be correct until themonth and year have been set.Press STOP to store the date.
VP9408.qxd 14/04/00 15:00 Page 334Set the MONTHAUTO TIME - Your VCR has an AUTO TIME feature, when this feature is ON your VCR will update the clock every hourautomatically. We recommend you leave this feature ON to ensure your recordings take place at the correct time. To switchthe feature OFF, select the AUTO TIME line and press REW or F.FWD to select ON or OFF. Press ENTER to store your settingand MENU twice to clear the screen.5Set the YEAR6Set the HOUR7Set the MINUTEIntroduction &ContentsInstalling yourVCRCLOCK SETDAY 23 MONMONTH 10YEAR 2000TIME 0 : 00AUTO TIME ONSELECT :SET :OK : ENTER EXIT : MENUCLOCK SETDAY 23 MONMONTH 10YEAR 2000TIME 0 : 00AUTO TIME ONSELECT :SET :OK : ENTER EXIT : MENUCLOCK SETDAY23 MONMONTH 10YEAR 2000TIME 11: 00AUTO TIME ONSELECT :SET :OK : ENTER EXIT : MENUCLOCK SETDAY 23 MONMONTH 10YEAR 2000TIME 11: 00AUTO TIME ONSELECT :SET :OK : ENTER EXIT : MENURecordingProgrammesPlaying aVideo TapeSetting up yourVCR<strong>The</strong> MONTH digit will be flashing.Press REW or F.FWD to set thecorrect month (1-12).e.g. enter 3 if the month is Marchor 8 if the month is August.Press STOP to store the month.<strong>The</strong> YEAR digit will be flashing.Press REW or F.FWD to select thecorrect year.Once the YEAR is set correctly theDAY of the week near the top ofthe screen should be correct.Press STOP to store the year.<strong>The</strong> HOUR digit will be flashing.Press REW or F.FWD to select thecorrect hour.Please note that your VCR clockuses the 24 hour format.Press STOP to store the hour.<strong>The</strong> MINUTE digit will be flashing.Press REW or F.FWD to select thecorrect minute.Press STOP to store the minute.Press the MENU button 3 times toremove the menu.Help andSpecification33AdvancedFeatures
VP9408.qxd 14/04/00 15:00 Page 34Introduction &ContentsManual TuningYou should only need to manually tune channels on your VCR if the Auto SET-UP missed one or you wish to tune in re-tune a duplicatechannel, e.g. you may have two ITV’s - Anglia and Carlton and may wish to tune Carlton into channel 3 instead of Anglia.Installing yourVCRManual Tuning1Switch your VCRON 2Select the mainMENU 3Select CH TUNINGSetting up yourVCRPlaying aVideo Tape• Your VCR is fitted with a tunerthat can store up to 80 differentstations (if available).• Before you can view a channelon your VCR or make a recordingyou must tune all available stationsinto your VCR.• Switch on any externalequipment connected to your VCR(e.g. a satellite decoder) beforeyou start tuning.PLAYBACK SHARPNESSCHANNEL SETUPCH TUNNINGGUIDE CH SETSELECT :ENTER : ENTEREXIT : MENURecordingProgrammes• It is highly recommended thatyou store the stations you tune inthe order shown in the table below.VCR ChannelStation1 BBC1AdvancedFeaturesHelp andSpecification342 BBC23 ITV4 Channel 45 Channel 56 Decoder (if fitted)If your VCR is in standby, press theVCR ON button on the remotecontrol to switch it on. Select theVCR channel on your TV.Press the MENU button on theremote control, the MAIN menuwill appear.Press PLAY or STOP to highlightCHANNEL SETUP.Press ENTER.Press PLAY or STOP to highlightCH. TUNING.Press ENTER.
VP9408.qxd 14/04/00 15:01 Page 35RecordingProgrammesPlaying aVideo TapeIntroduction &Contents4Automatically searchfor a Station5Select the foundStation 6Store in the correctchannel number 7Remove the menusInstalling yourVCRSEARCH :EXIT : MENUCH 1SEARCH :OK : ENTERCH 1EXIT : MENUCH : / 0–9OK : ENTERCH 3EXIT : MENUSetting up yourVCRPress the REW or F.FWD buttonson the remote control, the smallarrow will move on the tuning barand your VCR will automaticallysearch for a station.This may take a few seconds.When the arrow stops, a stationhas been found.If a station appears that you do notwant, repeat stage 4.Press ENTER to select this station.You must now store the station youhave found in the correct channelon your VCR. Press PLAY or STOPto select the correct channelnumber.<strong>The</strong> table on page 36 shows thecorrect channel numbers for stations tobe stored in.Press ENTER to store the station.Repeat stages 4-7 if you wish totune in further channels.When you have finished, press theMENU button 3 times to clear thescreen.35AdvancedFeaturesHelp andSpecification
VP9408.qxd 14/04/00 15:01 Page 36Introduction &ContentsInstalling yourVCRSetting up yourVCRChecking VIDEO Plus+ Set-upIn certain areas of the country the AUTO SETUP feature may not tune all the stations in the correct order. Before VIDEO Plus+ recordingswill work properly BBC1 must be stored in channel 1, BBC2 in channel 2, ITV in channel 3 etc. If your order is different or you arehaving problems with VIDEO Plus+ recordings, Follow the instructions below.VIDEO Plus+• In order for VIDEO Plus+ towork correctly your TV Station mustbe in the positions in the tablebelow. Only follow the guidanceon these pages if the order isdifferent.1Select the MAINmenu 2TIMER REC SETAUTO REPEATOFFPLAYBACK SHARPNESSCHANNEL SETUPPIN CODE REGISTRATIONSYSTEM SETUPSELECT :ENTER : ENTEREXIT : MENUSelect CHANNELSETUP 3TIMER REC SETAUTO REPEATOFFPLAYBACK SHARPNESSCHANNEL SETUPPIN CODE REGISTRATIONSYSTEM SETUPSELECT :ENTER : ENTEREXIT : MENUSelect GUIDE CHSETCHANNEL SETUPCH TUNNINGGUIDE CH SETSELECT :ENTER : ENTEREXIT : MENUPlaying aVideo TapeRecordingProgrammesVCR Channel Station1 BBC12 BBC23 ITV4 Channel 45 Channel 56 Decoder (if fitted)• See page 21 for more detailson VIDEO Plus+AdvancedFeaturesHelp andSpecification36In the following example theSatellite channel has beenincorrectly stored in channel 8 inyour VCR.Press MENU; the main menu willappear.Press PLAY or STOP to selectCHANNEL SETUP.Press ENTER.Press PLAY or STOP to selectGUIDE CH SET.Press ENTER.
VP9408.qxd 14/04/00 15:01 Page 37Installing yourVCRRecordingProgrammesPlaying aVideo TapeIntroduction &Contents4Select the GUIDE CH5Select the VCR CH6Store your settings7Remove the menusGUIDE CH SETGUIDECHSATSET : /0-9OK : ENTEREXIT : MENU_VCRCH6GUIDE CH SETGUIDECHSAT_SET : /0-9OK : ENTERCLEAR : CANCELEXIT : MENUVCRCH8GUIDE CH SETGUIDECHSATSetting up yourVCRSET : /0-9OK : ENTEREXIT : MENU_VCRCH8Press PLAY or STOP until 'SAT'flashes under 'GUIDE CH'.This indicates the Satellite.Press ENTER.Press NUMBERED buttons (0 and8) to enter a number 8 underneath'VCR CH'.This tells your VCR that the Satellite hasbeen stored in channel 8.Press ENTER to store the newsetting.If you have connected your satelliteusing the SCART socket you must selectAV underneath 'VCR CH'.Repeat stages 4-6 to adjust anyother channels.Help andSpecificationPress MENU three times to removethe menu.37AdvancedFeatures
VP9408.qxd 14/04/00 15:01 Page 38Introduction &ContentsInstalling yourVCRSetting the Security ProtectionIn an effort to fight crime, we have equipped your VCR with security protection. When switched ON you have to enter a PIN code afteryour VCR has been unplugged from the mains for approximately half an hour or longer.You MUST write down your PIN code and keep it in a safe place.IMPORTANT1Select PIN CODEREGISTRATION 2Enter owners nameSetting up yourVCR• <strong>The</strong> PIN code protection willonly work if your VCR is unpluggedfrom the mains supply forapproximately half an hour orlonger.TIMER REC SETAUTO REPEATOFFPLAYBACK SHARPNESSCHANNEL SETUPPIN CODE REGISTRATIONSYSTEM SETUPSELECT :ENTER : ENTEREXIT : MENUPlaying aVideo Tape• If your VCR needs to beserviced, make sure that thesecurity protection is set to OFF,otherwise you will be charged forre-setting the feature.RecordingProgrammesAdvancedFeatures• If you have already set thesecurity protection your VCR willask you to enter your PIN codebefore entering the SecurityProtection menu.• PLEASE NOTE:In the event of losing yourPIN code you will becharged by Mastercare toreset your VCR.Press MENU; the main menu willappear.Press ENTER to set the owners name. Press PLAY or STOP until the desiredletter is displayed.Help andSpecification38Press PLAY or STOP to highlightPIN CODE REGISTRATION.Press ENTER; the pin coderegistration screen will appear.Store the letter by pressing F.FWD. You can enter up to 20 letters.Each press of PLAY or STOP changes the letter as follows;Press ENTER to store your OWNER’S NAME.
VP9408.qxd 14/04/00 15:01 Page 39PLEASE NOTE: You MUST write down your PIN code and keep it in a safe place.In the event of losing your PIN code you will be charged by Mastercare to reset your VCR.Introduction &Contents3Enter a PIN code4Set the Protection toON 5Entering your PIN codeSetting up yourVCRInstalling yourVCRAfter a power failure or after the VCRhas been unplugged from the mains forlonger than 30 minutes, the PIN codescreen will appear the next time youswitch your VCR on.Playing aVideo TapeEnter your PIN code using theNUMBERED BUTTONS on the remotecontrol, then press ENTER.If you enter the correct PIN code, "PINCODE OK" will appear and you cannow use your VCR as normal.RecordingProgrammesPress PLAY or STOP to select PINCODE, then press ENTER.Press the NUMBERED buttons onthe remote control to enter a PINcode. Your PIN code can be acombination of any 4 digits.Press ENTER to store your PINcode.Press PLAY or STOP to selectPROTECT. Press ENTER to selectON.Press MENU twice to exit themenu, the security protection isnow on.To switch protection off select OFF fromthe Pin Code Registration menu.If you entered an incorrect PIN code,"PIN CODE ERROR" will appear andyou can try to enter the correct code again.If you entered an incorrect PIN code more than 3 times your VCR will lockitself and you will not be able to use it. To unlock the VCR you must unplugthe VCR from the mains supply for a further 30 minutes, then plug the VCRback in and enter the correct PIN code.If you forget or loose your PIN code call Mastercare on 08709004088. A charge will be made for resetting your VCR.39Help andSpecificationAdvancedFeatures
VP9408.qxd 14/04/00 15:01 Page 40Introduction &ContentsAutomatic Tracking and CallAutomatic tracking adjusts the picture to make sure you see the best possible picture.Installing yourVCRAutomatictracking1Manual and Automatic Tracking1Call FeatureSetting up yourVCR• When a VCR tape is played, thedigital auto\ tracking systemautomatically adjusts the trackingof the VCR to obtain the bestpicture from the VCR tape.16:14 TUE PDC CH 400:00:25 LPPlaying aVideo TapeRecordingProgrammes• <strong>The</strong> Auto Tracking Indicator(ATR) flashes in the VCR displaywhile your VCR searches foroptimum tracking (usually the firstfew seconds of playing a tape).<strong>The</strong> ATR will remain lit as long asautomatic tracking continues.AdvancedFeaturesIf white lines appear during playback or the picture starts to shake you cantry to adjust the tracking manually.Press the TRACKING + or - buttons to obtain the best picture.To resume automatic tracking, press the ATR button.When you press the CALL button,the current time, channel and anyother relevant information (e.g.tape counter, record sign) willappear on the screen.Help andSpecification40Press CALL again to remove theinformation.
VP9408.qxd 14/04/00 15:02 Page 41Help and TroubleshootingPlease check the following points before contacting the Mastercare Service Helpline.41Help andSpecificationAdvancedFeaturesRecordingProgrammesPlaying aVideo TapeSetting up yourVCRInstalling yourVCRIntroduction &Contents
VP9408.qxd 14/04/00 15:02 Page 42Introduction &ContentsHelp and TroubleshootingPlease check the following points before contacting the Mastercare Service Helpline.Installing yourVCRSetting up yourVCRPlaying aVideo TapeRecordingProgrammesAdvancedFeaturesHelp andSpecification42If the problem still exists after checking the above points, please call the Mastercare Service Helpline on 08709 004088.Please note: If you call a Mastercare engineer out to your home and the product is found not to be faulty, or the instruction book hasnot been followed, our product guarantee is not applicable and a call out fee will be charged.
VP9408.qxd 14/04/00 15:02 Page 43Connecting your VCR to another VCR or a CamcorderIf you connect your VCR to another VCR or Video camera it is possible to duplicate a pre-recorded tape. Please note that the picturequality will not be as good as that on the original tape. Make sure all appliances are unplugged from the mains supply and switchedoff before you attempt to connect the relevant connection lead.Introduction &ContentsSetting up yourVCRInstalling yourVCR88Playing aVideo TapeHow to connect your VCR to a video camera1 If you connect your camcorder, you can duplicate a previouslyrecorded tape.2 Make sure all connections are made before turning the power on.Insert the tape you wish to record ON into your VCR.3 Press the AV button to select the AV channel.4 Insert the tape you wish to record FROM into the video camera.5 Press the REC/OTR button on your VCR.6 Press the play button, on the video camera; playback and recordingwill start.How to connect your VCR to another VCR1 Link the two VCR's with a SCART lead. (not supplied)2 Insert the tape you wish to record ON into your VCR.3 Insert the tape you wish to record FROM into the second VCR.Press the play button on the second VCR.4 Press the REC/OTR button on your VCR.5 Recording will start.RecordingProgrammesAdvancedFeaturesHelp andSpecification43
VP9408.qxd 14/04/00 15:02 Page 44Introduction &ContentsConnecting to a Hi-Fi and SCART Socket InformationInstalling yourVCRSetting up yourVCR• If your VCR is connected to a TV using a SCART lead, a video playedwill automatically be displayed on the TV irrespective of the channelyou are watching (unlike "normal" RF aerial connection where youmust use a nominated channel).• <strong>The</strong> AV button your VCR provides a convenient method of switchingbetween an appliance connected to the SCART socket (e.g. a SatelliteReceiver) or TV stations received by your 'normal' aerial connected tothe AERIAL SOCKET of your VCR.Playing aVideo TapeRecordingProgrammesHow to connect your VCR to a Hi-Fi8You can connect your VCR directly to your Hi-Fi with an audio (phono) lead.1 All connections must be made with both your VCR and Hi-Fi unpluggedfrom the mains supply.• If you do not have anything plugged into the SCART SOCKET of yourVCR and you press AV the screen will go blank. Press AV again andyour TV will display the last station viewed on your VCR.• It is an infringement of the Copyright, Designs and Patents Act 1956,1988 chapter 48 and the Performers Protection Act 1958-72 to copyRecords, Pre-recorded cassettes, Pre-recorded video tapes andcompact discs or to re-record them in any form without permission ofthe Copyright owners.AdvancedFeaturesHelp andSpecification442 Connect one end to the SCART socket on the back of your VCR.3 Connect the other end to the AUDIO IN sockets on the back of your Hi-Fi.4 Press the PLAY button on your VCR to play the video sound trackthrough the speakers of a Hi-Fi system. <strong>The</strong> sound from your VCRthrough your Hi-Fi will be mono not stereo.5 Due to the wide variety of Hi-Fi equipment, the information on thispage should be used only as guidance. Refer to your Hi-Fi'sInstruction Book for more details.21 Pin SCART socket1. Audio output (right)2. Audio input (right)3. Audio output (left)4. Audio earth5. Blue earth6. Audio input (left)7. Blue In8. Switching voltage (put)9. Green earth10. Date line 211. Green In12. Date Line 113. Red earth14. Reserved15. Red In16. Blanking signal17. Video earth18. Blanking signal earth19. Video output20. Video input21. Shield/earth
VP9408.qxd 14/04/00 15:02 Page 45Wiring Instructions and Record Protection TabIntroduction &ContentsWarning: If the mains plug is cut from the mains lead of this appliancethe plug must be destroyed. A mains plug with bared wires is hazardousif engaged in a mains output socket.Neutral (N)Mains lead3 AMPLive (L)Fuse (3 AMP)Wire clampTo preventaccidentalerasure of arecording, break off therecord protection tabwith a screwdriver.Record Protection TabIf you need to record onto atape that he tab has beenremoved from, cover thehole with a small piece ofadhesive tape.Installing yourVCRSetting up yourVCRPlaying aVideo Tape<strong>The</strong> wires in your VCR mains lead are coloured in accordance with thefollowing:-<strong>The</strong> wire which is coloured Blue must be connected to the terminal in theplug which is marked with the letter N or coloured Black.<strong>The</strong> wire which is coloured Brown must be connected to the terminal inthe plug which is marked with the letter L or coloured Red.No connection must be made to the earth terminal of the plug.You must use a 13 amp plug (BS 1363), and fit a 3 amp fuse (BS 1362).If any other type of plug is used a 3 amp fuse must be fitted, either in theplug, adaptor or at the distribution board.When you insert a video cassette with the record protection tab removed(for example a pre-recorded tape from a video hire shop) playback willstart straight away.Automatic video head cleaning<strong>The</strong> video heads are the means by which the VCR reads pictures from thetape during playback. In the unlikely event that they become dirty enoughto be clogged, no picture will be played back. This can easily bedetermined if during playback of a known good tape, there is good soundbut no picture (picture is extremely snowy). <strong>The</strong> auto head cleaning systemcleans the video heads automatically when a video is inserted andejected, this will prevent dirt from accumulating on the heads. Manualcleaning may still be necessary in some cases, if this is the case, have theVCR checked and cleaned by qualified Mastercare personnel. Headcleaning cartridges are not recommended because they can be abrasiveto your video heads. To help prevent video head clogging, use only goodquality VHS tapes. Discard worn out tapes.45RecordingProgrammesAdvancedFeaturesHelp andSpecification
VP9408.qxd 14/04/00 15:02 Page 46Introduction &ContentsSpecificationBecause we continually strive to improve our products we may change specifications and designs without prior notice.Weight and Dimensions are approximate.Installing yourVCRSetting up yourVCRPlaying aVideo TapeRecordingProgrammesOperating Temperature: . . . . . . . . .5 o C to 40 o CHeads: . . . . . . . . . . . . . . . . . . . . . . .Video: 2 Rotary Heads. . . . . . . . . . . . . . . . . . . . . . . . . . . . .Audio/Control: 1 Stationary Head. . . . . . . . . . . . . . . . . . . . . . . . . . . . .Erase: 1 Full Track EraseVideo recording system: . . . . . . . . .VHS, 2 Rotary Heads Helical Scanning SystemLuminance Signal: . . . . . . . . . . . . .FM azimuth recordingColour signal: . . . . . . . . . . . . . . . . . .Low frequency converted direct recordingTelevision System: . . . . . . . . . . . . . .CCIR: 625 lines 50 fields PAL IAudio Track: . . . . . . . . . . . . . . . . . . .1 trackHi-Fi audio signal:Output level line: . . . . . . . . . . . . . .-3.8dB 1K ohmS/N Ratio: . . . . . . . . . . . . . . . . . . . .More than 35dBFrequency Response: . . . . . . . . . . . .50Hz ~ 7.5kHzTape format: . . . . . . . . . . . . . . . . . . .12.65mm high density tapeTape speed: . . . . . . . . . . . . . . . . . . .PAL SP: 23.39 mm/s LP: 11.69mm/s. . . . . . . . . . . . . . . . . . . . . . . . . . . . .NTSC SP:33.35 mm/sRewind/Fast Forward time: . . . . . .F.FWD : 1’48” (with E-180 cassette). . . . . . . . . . . . . . . . . . . . . . . . . . . . .REW : 1’48” (with E-180 cassette)Input level: . . . . . . . . . . . . . . . . . . . .Video: 1.0Vp-p, 75 ohm unbalanced. . . . . . . . . . . . . . . . . . . . . . . . . . . . .Audio: 500mV, 50k ohm unbalancedOutput level: . . . . . . . . . . . . . . . . . .Video: 1.0Vp-p, 75 ohm unbalanced. . . . . . . . . . . . . . . . . . . . . . . . . . . . .Audio: 500mV, 1k ohm unbalancedRF output channel: . . . . . . . . . . . . . .Channel 36 (23~69, Adjustable)Power supply: . . . . . . . . . . . . . . . . .AC 230V–240V ~ 50HzPower consumption: . . . . . . . . . . . .12WDimensions: . . . . . . . . . . . . . . . . . . .380mm (W) x 272mm (D). . . . . . . . . . . . . . . . . . . . . . . . . . . . .x 95mm (H)Weight: . . . . . . . . . . . . . . . . . . . . . . .3.5kgAdvancedFeaturesHelp andSpecification46No part of this publication may be reproduced, stored in a retrieval system or transmitted in any form or by any means, without the prior permission in writing of <strong>Dixons</strong> <strong>Stores</strong><strong>Group</strong>, nor be otherwise circulated in any form of binding or cover other than that in which is published and without a similar condition including this condition being imposed onthe subsequent purchaser.