ServInt Corporation Credit Card Authorization Form - AccessGard
ServInt Corporation Credit Card Authorization Form - AccessGard
ServInt Corporation Credit Card Authorization Form - AccessGard
- No tags were found...

You also want an ePaper? Increase the reach of your titles
YUMPU automatically turns print PDFs into web optimized ePapers that Google loves.
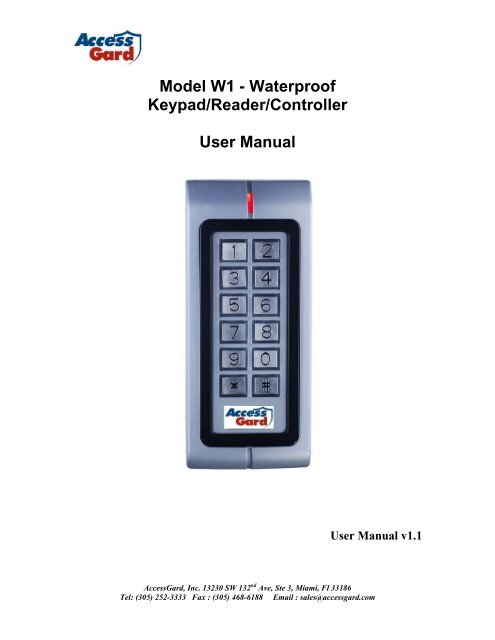
Model W1 - WaterproofKeypad/Reader/ControllerUser ManualUser Manual v1.1<strong>AccessGard</strong>, Inc. 13230 SW 132 nd Ave, Ste 3, Miami, Fl 33186Tel: (305) 252-3333 Fax : (305) 468-6188 Email : sales@accessgard.com
1, Description.W1 is standalone access controller for single door.It is in metal shell, which can be available in two kinds: silver light, matt.W1 is 2000 users’ capacity, supports <strong>Card</strong>, Code, <strong>Card</strong> + Code. <strong>Card</strong> type-125KHZEM card, 4 digits passwords code.W1 is a high-standard waterproof device. It is suitable to be installed outdoor, andworks well even in the water long time under pressure, confirms to IP68.Besides, it is anti-magnetic, lock output current short protection, Wiegand interface,and keypad backlight, so many good functions make W1 an ideal choice for dooraccess.Installation: suitable for not only small shops, household, warehouse, labs but also forbanks, companies, prisons, factories…..etc.2, Feature and SpecificationMain Feature;• Waterproof. Works well even put in water.• Metal shell, anti-vandal• Full programming from the keypad• 2000 uses, supports card, Code, <strong>Card</strong> +code• Can be used as only keypad;• Backlight keys• Wiegand 26 input, wiegand 26 output.• Besides working standalone, it can be connected to other controller as slave reader• 2 pcs W1 can interconnect; 2 pcs W1 can be interlocked• Can be connected many kinds of card readers, such as HID, Mifare and so on;• One programming MOS output• Adjustable Door relay time, Alarm time, Door Open Detection.• Very low power consumption(20Ma)• Full of 2000 users, recognizing speed
Specification:Operating Voltage12V DCUser capacity 2000Keypad12 keys, 2*6 digits<strong>Card</strong> type125KHZ EM card<strong>Card</strong> reading distance3-6 CMActive Current
3.2 Wire connectionWire Connector function1 D0 Yellow Wiegand output, input signal wire D02 D1 Blue Wiegand output, input signal wire D13 ALARM Brown onnecting to the negative pole of the alarm equipment4 OPEN Purple To connect to one part of Exit Button5 D_IN Grey Door Contact input,6 12V Red (+) 12Vdc Positive Regulated Power Input7 GND Black (-) Negative Regulated Power Input8 VSS White the negative pole of the controller, connect to the other part of Exit button anddoor contact9 L- Green Connect to the negative pole of the Lock10 L+/Alarm+ Orange Connect to the positive pole of the lock and alarm equipmentConnection diagramRemark:W1 can connect both types of locks directly, no matter it’s Fail Secure (unlock whenpower on) or Fair Safe (unlock when power off). Please check Manager Operation Item4.5 for lock setting.3.3 Intramural interface circuit<strong>AccessGard</strong>, Inc. 13230 SW 132 nd Ave, Ste 3, Miami, Fl 33186Tel: (305) 252-3333 Fax : (305) 468-6188 Email : sales@accessgard.com
3.4 Method of Reset to Factory default settingTo reset to factory default setting, power off, open the back cover, take off thewaterproof adhesive tape on the top right, you will see a 2P plug base. Then put theContact Pin into it, power on, you will hear three beeps, it means reset to factorydefault setting successfully.Power off, take out the Contact Pin, and stick the waterproof adhesive tape well.3.5 About Anti-demolition AlarmW1 uses LDR (light dependent resistor). If the device is open, the LDR contacts with the externallight, it will alarm.4, Manager OperationEnter into programming mode:* Manager Password # . Default Manager Password: 888888Change Manager Password:0 New Password # Repeat New Password #The manager password must be 6~8 digit number.Remarks: All steps below must be done after entering into programming mode.Setting working mode:3 0 # Valid card users only3 1 # Valid card and password users3 2 # Valid card or password users (factory default setting)4.1 Valid card or password users (factory default setting) - 3 2 #Remarks: in this mode, the user is valid either by card or password.The device can be used as only keypad.4.1.1 Add Password users1 ID number # Password #Remarks: ID number is any digit between 1-2000.Password is any fourdigits between 0000-9999.To add password user continuously1 ID number 1- # - Password 1- # ID number 2- # - Password 2- #… #<strong>AccessGard</strong>, Inc. 13230 SW 132 nd Ave, Ste 3, Miami, Fl 33186Tel: (305) 252-3333 Fax : (305) 468-6188 Email : sales@accessgard.com
4.1.2 Add card usersTwo ways to add card users,No. 1-the fast way (ID number auto generation)1 <strong>Card</strong> # Or1 the <strong>Card</strong> Number (8 digit) #Remark:To add more than one card, just input cards or <strong>Card</strong> number continuouslyNote: when add card users, it can just enroll the card number and don’t have to enrollthe card itself. The card number is the 8 digit printing on the card.In the same way, when delete card users, it can just enroll the card number to deleteit and don’t have to get the card if it is lost.No.2-By user ID one by one (ID number Appointment)1 ID number # <strong>Card</strong> # Or1 ID number # the <strong>Card</strong> Number (8 digit) #Remark:ID number can be any digit between 1-2000, but one ID toone card.Press # means confirm,Press the last # means finish the step,Press * to exit from the step.4.1.3 User operationIn this mode, the user can enter either by card or by password.For card user, read card to enter in.For Password user, press Password # to enter in.Remarks: the Password user can change his password himself* ID number - # Password # New Password # Repeat Password#4.2 Valid <strong>Card</strong> users only. (3 0 # )To add card users, it is the same like 4.1.2In this mode, the user can only enter in by card.4.3 Valid <strong>Card</strong> and Password users only. (3 1 # )Firstly, like 4.1.2, add cards, press * to exit from the programming mode.Then by card to set the password,* Read card 1234 # New Password # Repeat Password #(Password is any four digit between 0000-9999)Now the card and password have been programmed successfully.In this mode, the user can only enter in by <strong>Card</strong> and password.To enter in: Read card Password #<strong>AccessGard</strong>, Inc. 13230 SW 132 nd Ave, Ste 3, Miami, Fl 33186Tel: (305) 252-3333 Fax : (305) 468-6188 Email : sales@accessgard.com
If the user wants to change the password, he can make it himself* Read card Password # New Password # Repeat Password #4.4 Delete Users:4.4.1 Delete <strong>Card</strong> users2 Read <strong>Card</strong> # OR 2 <strong>Card</strong> number #To delete card user continuously, just input card or card number continuously.If delete card user by ID2 User ID #Remarks: When delete card users, the Master can just delete its ID number anddon’t have to read card. It is good option if the user was left or card lost.4.4.2 Delete Password users2 User ID #4.4.3 Delete card+ password usersTo delete card and password users, just deleting the card is OK.To delete the card, please follow 4.4.1.4.4.4 Delete all the users2 0000 #Note: this will delete all users enrolled. Before this operation, it is suggested tomake sure the data is un-useful.4.5 Lock style setting and door relay time settingFail secure (unlock when power on) : * manager password # 4 0~10 # *Fail safe (unlock when power off): * manager password # 5 1~10 # *Remarks: In programming mode, press 4 is to choose Fail secure lock, 0-10 is to setdoor relay time 0-10 seconds; press 5 is to choose Fail safe lock, 1-10 is to set door relaytime 1- 10 seconds. (Factory default setting is Fail safe lock, relay time 5 seconds.)4.6 Setting Door open dection6 0 # to disable this function (factory default setting)6 1 # to enable this functionWhen enable this function:a) If open the door normally, but not closed after 1 minute, the inside Siren willalarm automatically, the alarm will be off itself after 1 minuteb) If the door is opened force, or the door is opened after 20 seconds of lockreleased, the inside Buzzer and outside Siren will both alarm.<strong>AccessGard</strong>, Inc. 13230 SW 132 nd Ave, Ste 3, Miami, Fl 33186Tel: (305) 252-3333 Fax : (305) 468-6188 Email : sales@accessgard.com
4.7 Setting Security StatusNormal status: 7 0 # (Factory default setting)Lock on status: 7 1 # In 10 minutes, if there’s 10 times invalid card or wrongPassword, the device will lock on for 10 minutes.Alarm status: 7 2 # In 10 minutes, if there’s 10 times invalid card or wrongPassword, the device will alarm.4.8 Two devices interlock setting8 0 # to disable this function (factory default setting)8 1 # to enable this function4.9 Setting Alarm signal output time9 0~3 #Alarm time is 0-3 minutes, factory default setting 1 minute.4.10 Save and Exit from the programming mode.When finished the setting, press * at last to save and exit from the programmingmode.5. Remove Alarm5.1 Alarm from the Alarm equipment and Buzzer built-inTo remove it: Read valid card OR Manager Password - #3.2 Alarm to close the doorTo remove it: Close the door OR Read valid card OR Manager Password - #6, Sound and Light indicationOperation Status Red Light Green Yellow Light BuzzerLightPower on - Bright - Short RingStand by Bright - - -Press keypad - - - Short RingOperation succeed - Bright - Short RingOperation fail - - - Three shortringEnter into programming Bright - - Short RingmodeIn the programming mode - - Bright -Exit from the Bright - - Short Ringprogramming modeOpen the door - Bright - Short RingAlarm Bright - - Alarm<strong>AccessGard</strong>, Inc. 13230 SW 132 nd Ave, Ste 3, Miami, Fl 33186Tel: (305) 252-3333 Fax : (305) 468-6188 Email : sales@accessgard.com
7, Packing ListName Quantity RemarksDigital Keypad-W1 1User manual 1Screw Driver 1Pastern Stopper 4 6*27mm, used for fixingSelf Tapping Screws 4 3.5*27mm, used for fixingContact Pin 1 Used for factory default settingTwo devices interconnected Function1, W1 Works as slave reader, connecting to Controller – Finger 1W1 supports wiegand output, it can be connected to any controller which supportswiegand 26 input as its slave reader, the connection diagram is as figure 1Finger 1<strong>AccessGard</strong>, Inc. 13230 SW 132 nd Ave, Ste 3, Miami, Fl 33186Tel: (305) 252-3333 Fax : (305) 468-6188 Email : sales@accessgard.com
2, W1 works as Controller, connecting slave reader – Finger 2W1 supports wiegand input, any card reader which supports wiegand 26 output canconnect to it as its slave reader, no matter it is ID card or IC card. The connection isshowed as Finger 2. when add cards, it is required to do it at the slave reader, but notcontroller( except EM card reader, which can be added on either reader or controller)<strong>AccessGard</strong>, Inc. 13230 SW 132 nd Ave, Ste 3, Miami, Fl 33186Tel: (305) 252-3333 Fax : (305) 468-6188 Email : sales@accessgard.com
3. Two W1 interconnected - single door Finger 3Wiegand output, Wiegand input: The connection is showed as Figure 3. One W1installed inside the door, the other outside the door, two devices interconnect. Eitherdevice acts as the controller and reader at the same time. It has below feature:3.1 Users can be enrolled on either of the device. The information of the twodevices can be communicated. In this situation the user capacity for one doorcan be up to 4000. Each user can use fingerprint or password for access.3.2 The setting of the two W1 must be the same. If the master password was setdifferent, the user enrolled in the outdoor unit can’t access from outside.<strong>AccessGard</strong>, Inc. 13230 SW 132 nd Ave, Ste 3, Miami, Fl 33186Tel: (305) 252-3333 Fax : (305) 468-6188 Email : sales@accessgard.com
4. Two W1 interconnected & interlocked – two doors Finger 4The connection is showed as Figure 4, for the two doors, each door install onecontroller-W1 and one lock related. The interlocked function will go when eitherdoor is opened, the other door is locked forced, only close this door, the other doorcan be opened.The interlocked function is mainly using in bank, prison, and other places whererequire higher security. Two doors are installed for one access.The user enters Password or card on controller 1, the door 1 will open, the userenters, and close door 1, only after that, the user can open the second door byentering Password or card on second controller.<strong>AccessGard</strong>, Inc. 13230 SW 132 nd Ave, Ste 3, Miami, Fl 33186Tel: (305) 252-3333 Fax : (305) 468-6188 Email : sales@accessgard.com