ncr/doc/RealPOS/Other/595x_Dynakey/Technical_M... - Alsys Data
ncr/doc/RealPOS/Other/595x_Dynakey/Technical_M... - Alsys Data
ncr/doc/RealPOS/Other/595x_Dynakey/Technical_M... - Alsys Data

You also want an ePaper? Increase the reach of your titles
YUMPU automatically turns print PDFs into web optimized ePapers that Google loves.
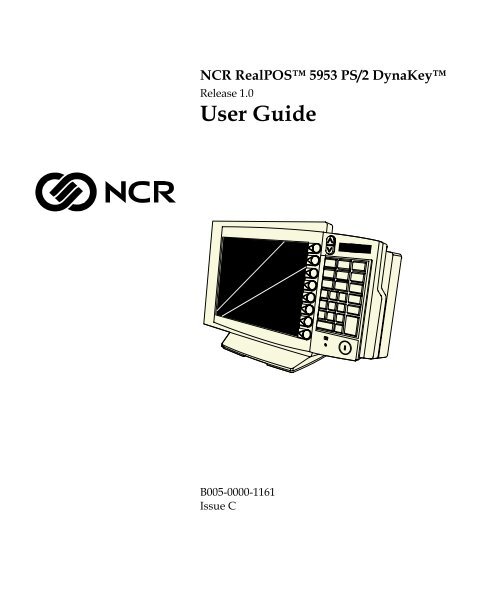
NCR <strong>RealPOS</strong> 5953 PS/2 DynaKeyRelease 1.0User GuideB005-0000-1161Issue C
The product described in this book is a licensed product of NCR Corporation.NCR is a registered trademark of NCR Corporation.It is the policy of NCR Corporation (NCR) to improve products as new technology, components, software, andfirmware become available. NCR, therefore, reserves the right to change specifications without prior notice.All features, functions, and operations described herein may not be marketed by NCR in all parts of the world.In some instances, photographs are of equipment prototypes. Therefore, before using this <strong>doc</strong>ument, consultwith your NCR representative or NCR office for information that is applicable and current.To maintain the quality of our publications, we need your comments on the accuracy, clarity, organization, andvalue of this book.Address correspondence to:Manager, Information ProductsNCR Corporation2651 Satellite Blvd.Duluth, GA 30096Copyright © 2000By NCR CorporationDayton, Ohio U.S.A.All Rights Reserved
iPrefaceSafety RequirementsCaution: This device should only be powered by a power sourcewhich meets Safety Extra Low Voltage (SELV) and LPS (Limited PowerSource) requirements per UL1950, IEC 950, and EN 60 950. The powersource must be certified by the appropriate safety agency for thecountry of installation.Caution: For continued protection against risk of fire, replace onlywith the same type and ratings of fuse.Attention: Pour prévenir et vous protéger contre un risque de feu,remplacer la fusible avec une autre fusible de même type, seulement.
iiiTable of ContentsChapter 1: OverviewCompatibility.........................................................................................1-1Features ..................................................................................................1-2Wedge Controller..................................................................................1-3Decoded Scanner...................................................................................1-4Multi-Color Power LED.......................................................................1-4LCD Contrast Control ..........................................................................1-5Keylock Positions..................................................................................1-5External Standard PC Keyboard Connector...............................1-6Special “PC Setup” Keypad Layout.............................................1-6Three-Track MSR or Two-Track JIS MSR ..........................................1-6Speaker ...................................................................................................1-6Integrated 2 x 20 Customer Display...................................................1-7Chapter 2: Site PreparationPhysical Environment ..........................................................................2-1Operating Range.............................................................................2-1Storage Range .................................................................................2-1Transit Range ..................................................................................2-1Electrical Environment ..................................................................2-2Power Consumption ......................................................................2-2Cable Length Limitations ..............................................................2-2Dimensions ............................................................................................2-3Chapter 3: InstallationIntroduction ...........................................................................................3-1Serial Number Location.................................................................3-2
ivConnector Panel Access.................................................................3-2Mounting Options..........................................................................3-2Installing the 5953 .................................................................................3-4Installing a Remote Table Top Mounted 5953 DynaKey(5953-F022).......................................................................................3-4Installing an Integrated Customer Display (5972-F039).......3-5Installing a Wall Mounted 5953 DynaKey (7401-K533) ..........3-10Installing a Checkstand-Mounted 5953 DynaKey ...................3-11Installing a 5953-K023 Checkstand Mount...........................3-12Installing a 5953-K023 Checkstand Mount...........................3-16Installing the Integrated Customer Display (7454-K451) ..............3-17Connecting the 5953 DynaKey to the Host...............................3-19Installing the PCI LCD Card (5953-K152).............................3-19Powering Up .................................................................................3-22Special Keypad Mode..............................................................3-22Normal Operating Mode ........................................................3-25Screen Saving Feature..................................................................3-26Chapter 4: ProgrammingSoftware Drivers and Utilities.............................................................4-1MicroTouch Touch Screen Drivers and Utilities........................4-112.1-Inch DynaKey Video Drivers ...............................................4-2Device Interfaces ...................................................................................4-3Wedge Controller Interface...........................................................4-3Touch Screen Interface ..............................................................4-4Analog MSR Interface................................................................4-4RS-232 Interface..........................................................................4-5PS/2 Keyboard Interface...........................................................4-5Keyboard Firmware .......................................................................4-5Command Set..................................................................................4-6Commands from the Host Workstation to the DynaKey .........4-7
vPOS Defaults ...................................................................................4-9Special POS Capabilities..............................................................4-10Num Lock Operation ...................................................................4-10NUM LOCK “OFF” .................................................................4-11NUM LOCK “ON”...................................................................4-11Cursor Control at the DynaKey..................................................4-12Alt-Control-Delete Protection.....................................................4-12Alt-Control-Delete Disabled .......................................................4-12Alt-Control-Delete Enabled ........................................................4-13Calculator or Telephone Numeric Pad Layout ........................4-14Detection of Double High/Wide Keys......................................4-15Auto Detection of Double High/Wide Key Mode (default) ..4-15Blocking Key Locations ...............................................................4-16NCR POS-Compatible Double High/Wide KeyConfiguration Mode.....................................................................4-17Keyboard Options Command EA..........................................4-17Double High/Wide Keys........................................................4-18Double Key Error Detection........................................................4-19First Byte = Command Byte (EA Hex) ..................................4-19Second Byte = Parameter Byte 1 (Blocking Keys,Keypad, Double Key Error Detection) ..................................4-19Third Byte = Parameter Byte 2 (Blocking Keys) ..................4-20Fourth Byte = Parameter Byte 3 = (Blocking Key Pairs).....4-21Fifth Byte = Parameter Byte 4 (Blocking Key Pairs)............4-21Keyboard Part Number/Type Command (EC Hex)...............4-22Key Position Diagram..................................................................4-23Panel OFF/ON Sequence...................................................................4-25PCI LCD Board (69000 Chips)................................................4-25Chapter 5: Service and RepairSafety Requirements.............................................................................5-1
viProblem Isolation Procedures.......................................................5-2Troubleshooting Table...................................................................5-2Servicing the DynaKey Module..........................................................5-8Touch Screen Cleaning Procedures .............................................5-8Service Procedures................................................................................5-9Servicing the DynaKey ..................................................................5-9Internal Components ...................................................................5-12Replacing the MSR...................................................................5-12MSR Cleaning Cards................................................................5-13Replacing the DynaKey Controller Board............................5-14Replacing the Inverter Board..................................................5-16Replacing the Speaker Assembly...........................................5-17Replacing the LCD Bracket Assembly ..................................5-18Replacing the Keypad..............................................................5-18Replacing the Touch Screen....................................................5-19Replacing the Keylock Adaptor Assembly...........................5-20Re-Assembling the DynaKey .................................................5-20Connector Pin-Out Information .................................................5-21External Keyboard Connector................................................5-21External RS-232 Scanner Connector ......................................5-21Spare Parts List....................................................................................5-22DynaKey Cleaning Procedures ..................................................5-25Cleaning the Glass ...................................................................5-25
viiRevision RecordIssue Date RemarksA Aug 1999 First issueB July 2000 Added connectivity information for Release 3MotherboardsC June 2002 Updated Customer Display Installation section
ixDeclaration of ConformityManufacturer’s NameNCR CorporationManufacturer’s AddressType of EquipmentModel Number Class 5953Electrical Ratings (Input)NCR CorporationRetail Systems Group – Atlanta2651 Satellite BoulevardDuluth, GA 30096-5810Information Technology Equipment12 V dc, 2.0 ANCR Corporation, 1700 South Patterson Boulevard, Dayton, OH 45459,USA, declares that the equipment specified above conforms to thereferenced EU Directives and Harmonized Standards.EU DirectiveHarmonized Standard(s)89/336/EEC (EMC) EN 55022EN 5502473/23/EEC (Low Voltage) EN 60 950: A1 + A2 + A3 + A4 + AllDirector of Quality AssuranceNCR CorporationRetail Products & Systems — Atlanta2651 Satellite BoulevardDuluth, GA 30096-5810European Contact:International IP Counsel206 Marylebone RoadLondon, NW1 6LY, England
Chapter 1: OverviewCompatibilityThe NCR <strong>RealPOS</strong> 5953 PS/2 DynaKey is a Point-of-Sale (POS)keyboard with a built-in 12.1-inch SVGA flat panel Liquid CrystalDisplay (LCD). The 5953 comes with a passive matrix (DSTN) colorLCD or an active matrix (TFT) color LCD. Touch Screen is alsoavailable as an option. Unique to the DynaKey is a set of “DynaKeys”located beside the LCD. These keys change function depending on thesoftware application appearing on the LCD. Also unique are twoup/down scroll keys.The keypad module contains configurable key matrix, DynaKeys, andscroll keys.The NCR 5953 DynaKey is designed as an optional Input/Output(I/O) device for the following workstations:• NCR 7452 retail workstation (non-586 motherboard)• NCR 7453 retail workstation (non-586 motherboard)• An Intel-based PC with an available standard PCI slot (the LCDboard has been tested and found to be compatible with a widevariety of standard PCs)17089
1-2 Chapter 1: OverviewFeaturesThe NCR 5953 DynaKey contains either a 12.1-inch passive-matrix(DSTN) or a 12.1-inch active-matrix (TFT) color LCD. In addition to theLCD and the keypad, the unit includes the following features:• Resistive touch screen (option)• External decoded RS-232 scanner connector• Multi-color power status LED• LCD contrast control (not on active matrix TFT units)• Keylock• Three-track ISO Magnetic Stripe Reader (MSR) (option)• Speaker (separate from the PC speaker)• External standard PC keyboard connector• Special “PC Setup” keypad layout• Integrated 2 x 20 Customer Display (option)• Integrated keypad
Chapter 1: Overview 1-3Wedge ControllerThe Wedge consists of a microcontroller and associated circuitry thatsupports (via a PC standard keyboard interface) the followingperipheral devices:• A Magnetic Stripe Reader (MSR)• Decoded RS-232 Scanner• Keylock• SpeakerThe controller logically connects these devices with a standard PCkeyboard. The retail workstation or PC interprets the data flow askeyboard input.An application can use special start and end sentinel characters todetermine that the information actually came from the Wedge deviceinstead of the keypad or external keyboard.On a retail terminal or PC workstation, the Wedge also controls theoperation of the built-in speaker (not the PC speaker).For more information on the Wedge, refer to the NCR Wedge SoftwareUser’s Guide, BD20-1368-B.
1-4 Chapter 1: OverviewDecoded ScannerMulti-Color Power LEDThe DynaKey permits a standard decoded RS-232 bar code scanner toinput data via the keyboard data stream. The scanner port alsoprovides +5V power to permit easy scanner connection.Note: Scanners connected to the Wedge RS-232 Scanner Port shouldbe configured to operate at 1200 bps if there is any possibility ofscanning activity simultaneous with keyboard or mouse input. Athigher baud rates, scanner data may be lost if the wedge controller isbusy processing input from the keyboard (including DynaKeys) ormouse.On the face of the DynaKey is a multi-color power LED. The status andcondition indicated by the LED are shown as follows.StatusGreenRedOrange*Flashing red/greenOffConditionDynaKey power onWedge controller reporting an error conditionLCD in standby mode (or see note below)DynaKey keypad in “PC Setup” mode(See Special Keypad mode in Installation)DynaKey power offNote: The LED may also be orange for a few seconds on power-upbefore display is active.
Chapter 1: Overview 1-5LCD Contrast ControlThe passive DynaKey has a manual contrast control knob to adjust theLCD Contrast for temperature changes and different viewing angles.Warmer temperatures cause the LCD to lighten. The LCD darkenswhen colder.Note: The contrast control knob is located on the access cover.Keylock PositionsThe DynaKey includes a standard NCR Keylock, accessible through theWedge controller.There are four positions: Exception, Locked, Retail, and Supervisor.They are explained in the following table.Abbreviation Position DescriptionEx Exception Used by the customer or service representativeto perform low level programming such asworkstation diagnostics, configuring theworkstation, or loading the workstation.L Locked Used to lock keyboard input to prohibit use ofnormal functions.R Retail Used when performing normal retail modefunctions.SSupervisor Used by the supervisor to provide highest levelof workstation control in cases such as refundsand running totals.
1-6 Chapter 1: OverviewExternal Standard PC Keyboard ConnectorBecause the DynaKey does not have alphanumeric keys, a standard PCkeyboard can be connected externally to the DynaKey whenever PCinput is required. The PC perceives only one keyboard input, but theDynaKey passes commands from the external keyboard to the hostworkstation.Special “PC Setup” Keypad LayoutOn power-up, the operator can switch the DynaKey into an alternatekeypad layout that can be used with many PC BIOS setup andconfiguration routines. The alternate layout contains keys such as ESC,TAB, END, “+”, “-” and arrow keys which are not available in thenormal keypad layout. The alternate layout allows the operator toconfigure a PC without an external alphanumeric keyboard. (See theInstallation chapter.)Three-Track MSR or Two-Track JIS MSRThe 5953 includes an optional integrated International Organization forStandardization (ISO) three-track analog MSR head or a two-track JISMSR head.SpeakerThe 5953 includes a built-in speaker. By default, it sounds key clicks,but it can be programmed through the Wedge to sound tones undercontrol of the application program. The speaker is tied to the speakercontrol of the 7452/7453 Workstation so that whenever the 7452/7453speaker sounds, so does the 5953 speaker.
Chapter 1: Overview 1-7Integrated 2 x 20 Customer DisplayThe Model 5953 supports an optional integrated 2x20 VFD customerdisplay. The 5972-F039 Integrated Post Mount includes a special rearcover for the 12.1-Inch DynaKey table top mount that allowsattachment of the 5972-1000 2x20 Customer Display Post Mount. Thisspecial rear cover is used with the 5953-F023 table top mount forcustomer display (which does not include a rear cover), or replaces thestandard rear cover that is shipped with the 5953-F022 and 7452/7453-F451 12.1-Inch DynaKey Table Top Mount.
1-8 Chapter 1: Overview
Chapter 2: Site PreparationPhysical EnvironmentOperating RangeThe physical environments required for the 5953 module and the PCILCD board are listed in this section.ConditionRangeTemperature 5° to 45°CRelative HumidityAtmospheric Pressure10% to 90% (Non-condensing)3000 meters (max.)Storage RangeConditionRangeTemperature -10° to 50°CRelative Humidity 10% to 90%Transit RangeConditionRangeTemperature-40° to 60°C (One week max.)Relative Humidity 5% to 95%
2-2 Chapter 2: Site PreparationElectrical EnvironmentVoltage Tolerance Current (Typical) Current (Max)5953 Module +12 V SupplyVoltage±10% 1700 mA 2008 mA+5V ExternalKeyboard Voltage±5% N/A 250 mALCD PCI Card +5V SupplyVoltage (PCI Bus)±5% 1275 mA 1500 mAPower Consumption - Touch Head24.1W (Max)Power ConsumptionTypical Maximum5953 Module 20 W 24.1 WLCD PCI Card 6.4 7.5 WCable Length LimitationsConfigurationConnected to an LCD BoardLength4 m (13 ft)
Chapter 2: Site Preparation 2-3Dimensions470 mm(18.5 in.)300 mm(11.7 in.)255 mm(10.0 in.)20051470 mm(18.5 in.)263 mm(10.3 in.)420 mm(16.5 in.)255 mm(10.0 in.)366 mm(14.5 in.)20052
2-4 Chapter 2: Site Preparation5953-K023 Table-Top MountThe Table-Top Mount is fully adjustable between the minimum andmaximum dimensions that are illustrated below. The DynaKey canalso be rotated right and left of center (shown) by approximately 90degrees, as well as tilted from a vertical position to approximately 45degrees (shown).370 mm(14.5 in.)38 mm1.5 in.114 mm4.25 in.89 mm3.5 in.70 mm2.75 in.330 mm(13.0 in.)7.6.mm0.30 in.480 mm(19.0 in.)216 mm(8.5 in.)213 mm(8.4 in.)400 mm(15.75 in.)19909
Chapter 2: Site Preparation 2-5There are two positions to install the post to the back of the DynaKey.270 mm(10.75 in.)140 mm5.5 in.105 mm4.13 in.200 mm(8.0 in.)19908
2-6 Chapter 2: Site Preparation
Chapter 3: InstallationIntroductionCaution: This device should only be powered by a power supplysource which meets Safety Extra Low Voltage (SELV) and LPS (LimitedPower Source) requirements per UL1950, IEC 950, and EN 60 950. Thepower source must be certified by the appropriate safety agency for thecountry of installation.Caution: Use a grounding strap when installing this feature.The DynaKey is fully assembled at the factory. This section describes:• Serial number locations• Connector Access• Connector Location• Cable Routing• Mounting options• Connection of unit to terminal• Connection of keyboard to unit• PCI LCD Board Installation• Powering Up• Screen Saving FeaturesRemove the DynaKey unit from the shipping package and verify thecorrect components are present before beginning installation.
3-2 Chapter 3: InstallationSerial Number LocationThe 5953 serial number is located on the bottom of the unit. The labelcan be seen by tilting the display.Serial Number Label19844Connector Panel AccessThe cable connectors are located on the bottom of the 5953 assembly.All cables can be routed through the base mount as illustrated below.The illustrations below are shown for reference only.Mounting Options• Tilt display to access the cable connectors.• Check the right side knob to lock or unlock the tilt action.The 5953 DynaKey can be installed various configurations:• 5953-F022 Remote Table-top Mount• 7401-K533 Wall Mount• 5952-K024 Checkstand Mount w/Base• 5953-K023 Checkstand Mount
Chapter 3: Installation 3-3The sections that follow describe these installations. The section thatfollows those sections, Connecting the 5953 DynaKey to the Terminal,describes the cable connections.
3-4 Chapter 3: InstallationInstalling the 5953Installing a Remote Table Top Mounted 5953 DynaKey(5953-F022)1. Connect the cable(s). To access the cable connectors, tilt the display.LCD Connector KeyboardScanner Connector169762. Route the cables down through the base.17163
Chapter 3: Installation 3-5Installing an Integrated Customer Display(5972-F039)The standard Poser Supply Cover on the 5953-F022 Remote Table TopMount does not support attachment of an integrated NCR 5972 2 x 20Customer Display. In order to mount an integrated 5972 display youneed to install 5972-039, which includes:1. Power Supply Cover2. 12-inch Integrated Display Post3. Top Bracket.4. Nylon Hole Plug123419726
3-6 Chapter 3: InstallationInstallation Procedure1. Route the cable (display connector end) up through the PowerSupply Cover, Display Post, and Top Bracket. This is a tight fit andthe connector has to be angled in order to make it though theopenings. Use care to not damage the wires.Top BracketDisplay PostPower Supply Cover2 x 20 IntegratedHigh-Post Cable199492. Insert the post into the hole on the top of the Power Supply Cover.Note the orientation above. The slot on the bottom end of the postshould face the inside of the cover.3. Install the Top Bracket onto the post.
Chapter 3: Installation 3-74. Connect the cable to thea) Remove the Integrated Display Bracket (2 screws).b) Connect the cable to the 2 x 20 VFD Assembly.c) Replace the Integrated Display Bracket.2 x 20 VFD Assembly Integrated Display Bracket Phillips PH Screw(4-24 x 0.625)5. Install the Display Assembly onto the Top Bracket.19948
3-8 Chapter 3: Installation6. Install the Nylon Hold Plug in the Power Supply Cover, locking thepost in place. The slot permits the display to be rotated to personalpreference.Nylon Hole PlugPowered RS-232on Host Terminal16714b
Chapter 3: Installation 3-97. Remove the Power Supply Cover from the 5953 unit.a) Remove the screws (2) that secure the cover.b) Press in on both sides of the cover and lift it up in the back toremove it.Press in on Both SidesScrews (2)200488. Install the Customer Display and Cover assembly onto the 5953(2 screws).16970
3-10 Chapter 3: Installation9. Connect the Customer Display Cable to the host terminal. Forspecific information see the terminal’s Hardware User Guide.Installing a Wall Mounted 5953 DynaKey(7401-K533)1. Install the Universal Mount Bracket to the wall (4 lag screws orhardware with similar strength).Note: The screen's recommended viewing height is 1.2 m (48 in.)from the floor.Pivoting Wall MountRelease Lever2. Install the Pivoting Wall Mount to the base (4 screws).Universal Mount Braket171643. Install the DynaKey by inserting the Wall Mount Adapter Plate'slocking tabs into the slots on the Wall Plate. The Release Leverlocks the DynaKey onto the Wall Plate.
Chapter 3: Installation 3-11Installing a Checkstand-Mounted 5953 DynaKeyTwo Checkstand Mounts are available for the 5953 DynaKey:• 5953-K023 Checkstand Mount• 5952-K024 Checkstand Mount w/Base5953-K023 Checkstand Base5952-K024 Checkstand Base17225
3-12 Chapter 3: InstallationInstalling a 5953-K023 Checkstand MountNote: The cable(s) for the DynaKey can be routed through theCheckstand Base1. Loosen the Thumbscrew on the side of the Checkstand Base andthen slide the upper half of the Checkstand Base out of the lowerhalf of the Checkstand Base.Checkstand Base(Upper Half)ThumbscrewSide CoverMounting PlateCheckstand Base(Lower Half)2. Slide the Side Cover off the lower half of the Checkstand Base.173213. In the desired location on the countertop drill four 6 mm (0.25 in.)holes for the mounting bolts and one 38 mm (1.5 in.) hole for theDynaKey cable(s). Use the Checkstand Base as a template forlocating the holes.4. Bolt the Checkstand Base (Lower Half) to the countertop.
Chapter 3: Installation 3-135. Remove the Thumbscrew and the Front Cover from theCheckstand Base (Upper Half).Checkstand Base(Upper Half)Front CoverThumbscrew17322
3-14 Chapter 3: Installation6. Screw the Checkstand Base onto the back of the DynaKey (4screws).17323
Chapter 3: Installation 3-157. Route the cable(s) through the upper half of the Checkstand Base.Install the Thumbscrew and the Front Cover. Be sure to leaveenough slack in the cable(s) to permit easy tilting of theDynaKey.8. Plug the LCD cable into the DynaKey.• Optional - Plug a scanner cable into the DynaKey.• Optional - Plug a PC-compatible keyboard cable to theDynaKey.17449
3-16 Chapter 3: Installation9. Route the cable(s) through the upper half of the Checkstand Baseand install the Thumbscrew and the Front Cover. Be sure to leaveenough slack in the cable(s) to permit easy tilting of the5953 DynaKey.10. Route the cable(s) into the lower half of the Checkstand Base andthrough the countertop.11. Slide the Side Cover onto the lower half of the Checkstand Base.12. Slide the upper half of the Checkstand Base into the lower half ofthe Checkstand Base and tighten the Thumbscrew.Installing a 5953-K023 Checkstand MountThe cable(s) for a 5953 DynaKey cannot be routed through theWeighted Base Checkstand. They must be routed outside the Post.1. Screw the Checkstand Base onto the back of the DynaKey (4screws)2. Plug the LCD cable into the DynaKey.• Optional - Plug a scanner cable into the DynaKey.• Optional - Plug a PC-compatible keyboard cable to theDynaKey.3. Route the cable(s) as desired to the terminal.
Chapter 3: Installation 3-17Installing the Integrated Customer Display(7454-K451)1. Assemble the Customer Display components. Note the plastic pinthat locks the post in place. The post is inserted into the base andthe pin is installed when the slot in the post aligns with the hole inthe base. The slot permits the display to be rotated to personalpreference.Power SupplyHost Terminal16714a
3-18 Chapter 3: Installation1. Install the Customer Display assembly to the 5953.2. Tighten the two thumbscrews.169703. Connect the Customer Display Cable to an RS-232 connector on thehost terminal.4. Connect the power cable pigtail to an external power supply.
Chapter 3: Installation 3-19Connecting the 5953 DynaKey to the HostInstalling the PCI LCD Card(5953-K152)Before the 5953 DynaKey can be connected to the host, a PCI LCDboard must be installed in the terminal. The PCI LCD Board provides aPCI bus interface for the 5953 LCD Display Product. It is designed toplug into a 32-bit 5V slot in a standard PCI-equipped PC. This boarddoes not contain a 16550 UART and associated support logic. TheSVGA BIOS on this board occupies memory locations C0000-CAFFF.The PCI LCD Board Kit (5953-K152) consists of the following.Qty. Item Part Number1 SVGA+PCI LCD Board 497-04135091 Y Cable Wedge Keyboard Adapter (7453) 497-04074901 Wedge Keyboard Adapter cable 497-04068681 Dual Speaker Harness (7452) 497-04152341 Dual Speaker Harness (7453) 497-04112671 PCI LCD Y Power Harness (7453/7452) 497-0407803
3-20 Chapter 3: Installation1. Power the system OFF.2. Verify that the W1 jumper is set to position 2-3 or no shuntinstalled.VGA BIOSKeyboard Header Connector(for optional internal harness)System SpeakerConnectionPower Harness ConnectorW1 Jumper Switchand ShuntLCD ConnectorPS/2 Keyboard Connector(Keyboard Adapter Cable)167733. Install the PCI LCD Board into one of the PCI slots.Caution: Use care to not damage the Speaker or Keyboard Headerconnectors on the Motherboard during card installation.
Chapter 3: Installation 3-214. Connect the cables as shown below. The scanner and PS/2Keyboard are optional items.Note: The cabling for the presentation scanners varies, dependingon which type you have. Some connect directly to the DynaKeyWedge connector as shown below and some require an externalpower supply. See your Scanner User Guide for cable information.5953 DynaKeyPS/2 Kybd7892 ScannerPCI LCDBoardTo TerminalPower SupplyTo TerminalPS/2 ConnectorTo TerminalRS-232 PortLCD CableDynaKey Adapter Cable(Use without Touch Screen)Y-Cable(Use withTouch Screen)To TerminalPS/2 Connector19804
3-22 Chapter 3: InstallationPowering UpThis section describes how to power up the system and the initialcheckout procedures after all hardware has been installed.Note: No unit setup is required at installation unless the configurationmust be changed from factory defaults. The Wedge Support Disk(G370-0701-0000) permits configuration of the operational parametersin the Wedge.1. Plug the terminal AC Power Cord into an AC power source.2. Turn the Keylock on the DynaKey to the Ex position.3. Power on the system.Special Keypad ModeThe BIOS setup routine requires keys that are not present in the regularDynaKey keypad layout (such as the ESC and End keys). Although theDynaKey has a PC keyboard port, a PC keyboard may not be readilyavailable to the operator. To use the DynaKey to run setup routines,you can place the DynaKey into a special alternate layout mode thatreplaces the normal layout of the keypad and function keys. To enterthe special Setup Keypad Mode, proceed as follows:
Chapter 3: Installation 3-231. Power up the system.2. After the memory test completes, hold down key number 10 andkey number 12 simultaneously. Make sure both keys are held downtogether. The 10 and 12 keys must be the first two keys pressedafter a power on. If any other keys are pressed first, pressing the 10and 12 keys simultaneously will not put the DynaKey into theSetup Keypad Mode. The status LED flashes red/green to indicatethat the keypad entered the Setup Keypad Mode.3526F1342728293031F21 2 34 5 67 8 9Tab End10 11 12 1378914 15 16 174 5 618 19 20 211 2 3F1F2ESC3222 23 * 24 250 Del . CR3317195aNote: Numeric keypad is shown in calculator layout.
3-24 Chapter 3: InstallationAll unlabeled keys are non-functional in Setup Keypad Mode. Ignoreany stuck key error messages displayed as a result of the keys beingheld down.3. Press the [F2] key to put it into the BIOS configuration routine.4. Use the special keypad layout to run the system’s BIOSConfiguration routine.Note: The DynaKey Setup Keypad Mode is provided simply as aconvenience feature. If you prefer not to use this mode, simply connectan external keyboard to the DynaKey keyboard port to use for systemconfiguration.
Chapter 3: Installation 3-25Normal Operating ModeAfter setup and configuration, the keyboard can be reset to exit thespecial keypad mode. This is done by power cycling the DynaKey, orpressing the 10 and 12 keys simultaneously. This puts the keyboardback into its normal operating mode as shown. Usually keys 22 - 23and 21 - 25 are capped together by default.3526272829F1F2F3F4341 2 3Shift-F1 Shift-F2 Shift-F34 5 6Shift-F4 Shift-F5 Shift-F67 8 9Shift-F7 Shift-F8 Shift-F1010 11 12 137 8 9 Cntl-F130F514 15 16 174 5 6Cntl-F23132F6F718 19 20 211 2 322 23 24 25Cntl-F30 Shift-F9 .CR33F817195bNote: Numeric keypad is shown in calculator layout.
3-26 Chapter 3: InstallationScreen Saving FeatureThe display has a time-out function that causes the display to go blankafter several minutes of inactivity. The screen saving feature iscontrolled by NCR platform software integrated into the 5953 drivers.Note: If your screen saver is active and the Keylock is in the Lposition, you may need to put the Keylock into another position toun-blank the LCD.When a key is pressed to return the display from screen saver mode,the resulting keystroke is passed to the application by default. See theProgramming chapter for information on how to program the controllerfor proper panel OFF/ON sequencing.
Chapter 4: ProgrammingSoftware Drivers and UtilitiesMicroTouch Touch Screen Drivers and UtilitiesA DynaKey with Touch Screen option requires the MicroTouch TouchScreen Drivers and Utilities. The software CD includes Touch ScreenDrivers, Utilities and Manuals.The NCR 74xx Base System and Client 3 rd Party Drivers (D370-1111-0100)includes the software from G370-0525-0000, G370-1289-0000, andG370-0835-0000. This SOFTWARE CD includes configuration andcalibration utilities for the MicroTouch touch screen for DOS, Win 3.11,Win 95, Win 98, and Win NT.The Microcal utility does not support calibration for 800 x 600 (SVGA)resolution under DOS or Windows 3.x environments. The GetSet3utility is required to calibrate the 12.1” Touch Screen with 800 x 600resolution under DOS and Windows 3.x environments.While the GetSet3 Utility provides other functions, only the calibrationfunctionality should be used. Please refer to the Restrictions Fileincluded with the GetSet3 utility.• For Windows 95 and NT environments use the Windows StartMenu at: START/PROGRAMS/MICROTOUCH/TOUCHWARE CONTROLPANEL• For more information on the Touch Screen controller and firmwarecommands, contact3M Touch Systems3M Optical Systems Divisions501 Griffin Brook Park DriveMethuen, MA 01844(978) 659-9000.
4-2 Chapter 4: ProgrammingNote: Whenever an application or driver turns the backlight off or on,it should also reset the Touch Controller (send a RESET command).This ensures that the noise generated by the sidelight is nulled anddoesn’t affect touch accuracy.12.1-Inch DynaKey Video DriversWhen using 12.1 displays the required video drivers depends on whichclass-model of the terminal that it is configured with or if the display isbeing used with the C&T 69000 LCD SVGA Video Adapter card. Thedrivers are available on NCR software CD; NCR 74xx-Base and SystemClient 3rd Party Drivers, D370-1111-0100 (previously, G370-0830-0000).Drivers and installation instructions are available on this software CDfor Win. 3.1, Windows 95, Windows NT 4.0 and Windows 2000.Drivers are not needed for DOS.If the display is being used in a Dual Display configuration, refer to theCID User's Guide (BD20-1331-B) for specific OS, driver, and installationinformation.
Chapter 4: Programming 4-3Device InterfacesThis chapter provides information on the device interfaces, including:• Wedge Controller• Touch Screen• Analog MSR• RS-232• PS/2 KeyboardWedge Controller Interface• Keyboard FirmwareCaution: When performing touch screen calibration on the 5953DynaKey under Windows 95, note that if the terminal is shut downimproperly the calibration may be lost. To avoid this situation, verifythe terminal is properly shut down after calibrating the touch screen.To shut down correctly, select the START button in the lower leftcorner of the screen, and then select SHUTDOWN. When the terminalis powered up, the recent settings will be retained.This procedure is especially important during initial calibration of thedisplay in order to ensure that at least a base set of reasonablecalibration parameters are preserved in the Windows 95 Registry.The Wedge consists of the following.• Microcontroller and its associated circuitry that supports athree-track ISO or a two-track JIS Magnetic Stripe Reader (MSR)• Keylock.The Wedge merges the data into the keyboard data stream.
4-4 Chapter 4: ProgrammingThe data arrives at the retail workstation or PC as if someone hadentered it directly through a keyboard. An application can use specialstart and end control characters to determine that the informationactually came from the Wedge instead of the keypad or externalkeyboard.The Wedge also controls the operation of the built-in speaker (not thePC speaker) and the status LEDs.For more information on the Wedge, refer to the NCR Wedge SoftwareUser’s Guide, BD20-1368-B. Contact your NCR sales representative toorder this book.Touch Screen InterfaceThe Touch Screen module connects to the 7452 or 7453 retailworkstation or a PC through the external connector on the PCI LCDboard.The Touch Screen firmware defaults to the following communicationsparameters:• 9600 baud• No parity• 7 data bits• 2 stop bit• Auto baud disabledThese parameters may be changed by the MicroTouch drivers. To setthem, use the MicroTouch MicroCal program.Please refer to the MicroTouch Drivers and Utilities section for asoftware explanation.Analog MSR InterfaceThe analog MSR interface sends data to the workstation or PC throughthe Wedge controller. The data is amplified and then formatted by thewedge.
Chapter 4: Programming 4-5RS-232 InterfaceThe RS-232 interface allows connection of RS-232 devices such as adecoded laser scanner. The connector provides the RS-232communications lines and +5V and GROUND. Most scanners do notrequire an external power supply. The DynaKey reads the scanner dataand places it in the keyboard data stream. Only scanners certified byNCR should be connected to this interface.PS/2 Keyboard InterfaceA PS/2-style keyboard connector permits alphanumeric entry and nontouchapplications to be used through a standard PC keyboard. Youcannot connect and use a Wedge Keyboard in this port.Note: The keylock is not available as a pass-through interface. Youcan only access it through the Wedge controller.Keyboard FirmwareThe DynaKey firmware consists of standard IBM PS/2-compatiblekeyboard firmware with added extensions for POS-specific functions.The DynaKey supports the following minimum standard PC keyboardcapabilities:• Multi-key rollover (3-key minimum)• Optional system reset (Alt-Control-Delete) at the externalkeyboard (default=enabled)• Keyboard buffering (32 bytes)Additionally, the DynaKey has capabilities unique to the POSenvironment. The DynaKey keyboard contains extensions for thefollowing added POS-specific functions:• Keyboard auto-repeat for numeric and cursor control keys only (forexample, no auto-repeat for function keys and DynaKeys).• Automatic detection of double high/wide keys (default = enabled).
4-6 Chapter 4: Programming• Firmware command for user configuration of the numeric keypadfor either “calculator” or “telephone” arrangement.• Firmware command for user configuration of double high/widekeys (and keypad layout for backward compatibility). Takesfirmware out of “double high/wide auto detection” mode.• Firmware command for the controller to return its NCR partnumber.• Firmware command for enabling and disabling the system reset(Alt-Control-Delete) sent by the external keyboard. The defaultsetting is determined by the state of an external I/O pin on thekeyboard microcontroller (default=enabled).• Special “PC Setup” alternate keypad layout so the DynaKey can beused to run PC BIOS configuration routines.Command SetThe host workstation does not recognize two keyboards. However, anexternal keyboard can be connected to the DynaKey, and the DynaKeypasses the commands to the host workstation.Note: The connection of an external keyboard to the DynaKey isoptional.You can use the POS commands only for communication between theDynaKey and the host system. The POS commands are not passedthrough to an external keyboard.
Chapter 4: Programming 4-7Commands from the Host Workstation to the DynaKeyUnique POS CommandsAlt-Control-Del/Keypad LayoutKeyboard OptionsReservedKeyboard Part Number/TypeHexE9EAEBECPC Standard CommandsSet/Reset Mode IndicatorsEcho(Not Supported)Read IdSet Typematic Rate/DelayEnableDefault DisableSet Default(Not Supported)ResendResetHexEDEEEF-F1F2F3F4F5F6F7-FDFEFFNote: The DynaKey keyboard firmware does not support commandsEF-F1 and F7-FD. The firmware responds with a RESEND uponreceiving any of these commands and does NOT pass these commandsthrough to an external keyboard.For detailed information on the PC standard commands, please refer toIBM PS/2 Hardware Interface <strong>Technical</strong> Reference - Common Interfaces,Keyboards (101- and 102-key) section, IBM <strong>doc</strong>ument number 84F9735.
4-8 Chapter 4: ProgrammingCommands to the Host Workstation from the DynaKeyThe following are commands to the host workstation from theDynaKey.CommandHexError/Overrun 00Keyboard IDBAT CompletionBAT FailureEchoACKResend83ABAAFCEEFAFEFor detailed information on these commands, please refer to IBM PS/2Hardware Interface <strong>Technical</strong> Reference - Common Interfaces, Keyboards(101- and 102-key) section, IBM <strong>doc</strong>ument number 84F9735.
Chapter 4: Programming 4-9POS DefaultsDuring power up, the host workstation initializes the keyboardfirmware by generating a keyboard reset. While this reset is active orthe keyboard power is rising, the keyboard will be locked andprohibited from execution by the keyboard hardware.Upon powering up or receiving a reset, the keyboard initializes byclearing RAM, clearing internal indicators, resetting the indicator lights(if any), and performing keyboard diagnostic tests. Additionally, thekeyboard performs initialization diagnostic tests to ensure validoperation of the keyboard.These diagnostic tests check the keyboard ROM and RAM, and theydetect stuck keys on the keyboard. If the ROM or RAM tests fail, thekeyboard attempts to return an error status. If a stuck key condition isdetected, the make key code of the stuck key is returned following thesuccessful status (AA Hex).Following is a list of Power Up and Reset POS default conditions:• Calculator numeric keypad configurationAuto detection of double high/wide keys enabled.• Alt-Control-Delete protection default at power-up is determinedby examining I/O pin P2.7 on the keyboard microcontroller. (Referto table in the Alt-Control-Delete section.) Alt-Control-Delete isdefault enabled.
Chapter 4: Programming 4-11When the operator presses a key on the DynaKey that requires theNum Lock to be “on” (i.e., the numeric keys and the “.” key), thefirmware examines the current state of its Num Lock Flag and does oneof two things:NUM LOCK “OFF”Send NUM LOCK key codes, then keypad key codes.The DynaKey sends make-and-break codes for the Num Lock key (toturn Num Lock “ON”) and then the keypad key codes. (Note that theDynaKey firmware keeps track of the Num Lock state with an internalNum Lock Flag that is set according to the host Set/Reset ModeIndicators command. Note also that the Set/Reset Mode Indicatorcommand is passed-through to the external keyboard, if attached.)After sending the Num Lock and keypad codes, in the event that theDynaKey does not receive a Set/Reset Mode Indicators response fromthe host before another keypad key is pressed, the DynaKey simplysends another Num Lock code sequence followed by the keypad keycodes.NUM LOCK “ON”Do not send NUM LOCK codes, simply send key codes. The DynaKeysimply sends the correct scan code for the key that was pressed. Thisscenario does not change if no external keyboard is attached.Many keys on the DynaKey do not change state with the Num Lockmode. Obviously, for those keys, there is no need to check the NumLock Flag first before sending their key codes.The host terminal should not be able to tell that two keyboards existwhen an external keyboard is plugged into the DynaKey. TheDynaKey appears to the host system as one keyboard whether or notan external keyboard is attached.
4-12 Chapter 4: ProgrammingCursor Control at the DynaKeyAlt-Control-Delete ProtectionThe up arrow and down arrow keys are patterned after the cursor keyson an IBM PS/2 101 keyboard.The simultaneous depression of the Alt, Control, and Delete keys onthe external keyboard results in a PC system reset or reboot. Topreserve security in a POS environment, it may be necessary to restrictthe system-reset function to avoid an unnecessary reboot of the system.The default state of the Alt-Control-Delete disable function after akeyboard reset is determined by examining the state of the 2.7 I/O pinon the keyboard microcontroller.Pin State Alt-Control-DeleteP2.7 High (1) Enabled (default)P2.7 Low (0) DisabledAlt-Control-Delete DisabledThe host can disable the Alt-Control-Delete with the followingcommand:Command ParameterE9 00After a reset, the DynaKey keeps track of the state of the Alt, Control,and Delete keys (whether they are pressed down or not) with threebits in its on-board RAM.After the host issues the Alt-Control-Delete disable command, if anytwo of the three keys are down, the DynaKey does not pass-throughthe make code for the third key from the external keyboard.
Chapter 4: Programming 4-13Alt-Control-Delete EnabledFor example, if the DynaKey sees the make code for the Delete key, itchecks its on-board RAM to determine the state of the Alt and Controlkeys. If it determines that the Alt and Control keys are also down, thenthe DynaKey does not pass through the make code for the Delete keyon to the host system. It discards the Delete make code.The codes for the Alt-Control-Delete key sequence need not arrive atthe DynaKey in sequence. <strong>Other</strong> key make-or-break codes could arrivebetween the make codes for the sequence. Note that any combinationof Alt-Control-Delete causes a system reboot.The firmware is capable of insuring that the operator is not able toreboot the system by holding down the Alt, Control, and Delete keyson the external keyboard at any time, in any sequence, and incombination with any other keys.The Alt-Control-Delete feature is enabled when the host issues thefollowing command:Command ParameterE9 01Upon receiving this command, the DynaKey firmware allows the Alt-Control-Delete scan codes to be passed through from an externalkeyboard to the host system.
4-14 Chapter 4: ProgrammingCalculator or Telephone Numeric Pad LayoutEither of two commands (EA or E9) can be used to switch the layout ofthe numeric keypad on the DynaKey from the traditional calculatorstylelayout to a telephone-style layout.The EA command takes the DynaKey out of Autodetect DoubleHigh/Wide Keys mode. EA requires that the host system sendblocking key information to the DynaKey along with the numerickeypad layout information. The EA command is primarily used forbackward compatibility of the DynaKey with previous NCR retailworkstations.The E9 command only changes the numeric keypad layout. It does notaffect automatic double high/wide key detection.Command ParameterE9 02 (Telephone)E903 (Calculator, Default)Upon receiving the E9 command and 02 parameter combination, theDynaKey switches from the default calculator numeric keypad layoutto the telephone numeric keypad layout. If the host needs to restore thedefault calculator layout, it sends the E9 command and 03 parameter.Note: Changing the numeric keypad layout also requires physicallyremoving and swapping the key caps on the first and third rows of thekeypad. The key codes for the DynaKey’s numeric keypad are the sameas the numeric keypad on an IBM PS/2 101-key keyboard.After each reset, the host workstation can issue either the E9-02command or the EA Keyboard Options command to specify thetelephone numeric keypad configuration.
Chapter 4: Programming 4-15Detection of Double High/Wide KeysSeveral keys on the DynaKey keypad can accept optional key tips thatcover two keys to produce double high or wide keys.When you press a double high/wide key tip, the DynaKey firmwaresends only one of the two keys’ scan codes to the host system.The DynaKey supports two methods of double high/wide keyoperation:• Auto-detection of double high/wide key mode (default)• NCR POS-compatible double high/wide key configuration modeAuto Detection of Double High/Wide Key Mode (default)In this mode of operation, if you press a valid double high/wide keycombination simultaneously (for example, one key is pressed within 18ms of the other), the firmware sends only one scan code to the system.The scan code sent is the code for the key that is not the blocking key inthe double high/wide pair.For example, if a double high Enter key tip is placed over keys 21 and25, and you press the double high key tip, then the firmware sees thatboth keys 21 and 25 are being pressed within 18 ms of each other. Thefirmware knows that the key 21 and 25 combination is a valid doublehigh key pair and that key 21 is a blocking key. Therefore, the firmwaresends the make code for only key 25.If you press two or more keys simultaneously (within the 18 mswindow), and the key combination is not a valid double high/widepair, then the firmware does not send the make codes for either key.Instead the firmware sends the 00 (overflow) code -- which causes thehost PC to beep. This is known as double key error detection.
Chapter 4: Programming 4-17NCR POS-Compatible Double High/Wide Key ConfigurationModeThe DynaKey enters this mode after receiving the Keyboard Optionscommand (EA Hex) and remains in this mode until a reset. Asexplained below, this command directly configures the doublehigh/wide key combinations, thus negating the need for the firmwareto auto detect a double high/wide pair. This mode is used primarily tomaintain DynaKey compatibility with previous NCR POSworkstations.Keyboard Options Command EAThe DynaKey firmware supports command-selectable keyboardoptions under user control:• Calculator or telephone arrangement of numeric pad• Activation/deactivation of Blocking Keys• Activation/deactivation of double key error detectionCommandEAParameterByte #1 - Blocking Keys, Telephone/Calculator Keypad,Double Key Error DetectionByte #2 - Blocking KeysByte #3 - Blocking Key PairsByte #4 - Blocking Key PairsNote: Issuing the Keyboard Option command for any reason takes theDynaKey out of Autodetect Double High/Wide Key mode.
4-18 Chapter 4: ProgrammingDouble High/Wide KeysThe keyboard firmware for the DynaKey supports host workstationconfiguration of double size keys and the arrangement of the numerickeypad. The host workstation can also specify deactivation of doublekey error detection. If you want to change any of these options fromtheir default state, the host workstation must issue the KeyboardOptions command to the keyboard following each power up or reset.The Keyboard Options command consists of five bytes. Upon receivingthe command, the DynaKey switches to NCR POS-compatible doublehigh/wide key configuration mode (auto-detection of doublehigh/wide keys is disabled). In typical PC environments, the POSKeyboard Options command is not activated by PC software.However, this capability is in the keyboard firmware for possible PCuse.The first byte is the command byte (EA Hex) which indicates the actionbeing requested from the keyboard.The second and third bytes are parameter bytes that define thearrangement of the numeric keypad; control the double key errordetection; and specify the active blocking keys.The fourth and fifth bytes are parameter bytes that define the keyspaired with the blocking keys to form double-size keys.Note: Adding or changing a single double-size key requires theactivation of the blocking key plus the selection of the second key inthe pair forming the double-size key.For double-size keys, the DynaKey firmware sends only the one activekey scan code to the workstation. The blocking key scan code is notsent.Additionally, if the keyboard firmware detects only the blocking key, itsends only the key code for the specified active key to the hostworkstation. The keyboard firmware ensures that the active and theblocking keys do not both send a key code for one double-size keydepression.
Chapter 4: Programming 4-19Double Key Error DetectionWhen double key error detection is enabled and two or more keys aredetected within an 18 ms period, the keyboard firmware indicates anerror condition in the same manner as a Buffer Overflow (00 Hex).The multiple keys detected within the 18 ms period are ignored by thekeyboard and not sent to the host workstation. Only the bufferoverflow indication is sent to the workstation.When double key error detection is disabled, the keyboard firmwaredoes not perform double key error detection and transmits all keyentries. This permits the workstation diagnostic and configurationsoftware to receive two key codes for double-size keys for initializationof the keyboard. Once the double-size keys are defined, theworkstation configuration software then activates the double key errordetection feature while programming the keyboard for blocking keys.First Byte = Command Byte (EA Hex)Second Byte = Parameter Byte 1 (Blocking Keys, Keypad,Double Key Error Detection)Bit 0 - 0 = Calculator Numeric Pad Arrangement (Default).Bit 0 - 1 = Telephone Numeric Pad ArrangementTo complete the change to Telephone Numeric Pad, Key tips 1, 2,and 3 must be interchanged with Key tips 7, 8, and 9.Bit 1 - 0 = Blocking Key 23 offBit 1 - 1 = Blocking Key 23 activated (Default Double Wide Zero - 0)To complete the change from a double-wide key to two single widekeys, replace the double wide key tip with two single wide keytips.Bit 2 - 0 = Blocking Key 21 offBit 2 - 1 = Blocking Key 21 activated (Default Double High Enter)
4-20 Chapter 4: ProgrammingTo complete the change from a double high key to two keys, the1/2 x 2 high key tip must be replaced by two individual key tips1/2 x 1 high.To complete the change from two keys to a double high key, two1/2 x 1 key tips must be replaced by a double high key tip with aleveling device.Bit 3 - 0 = Double Key Error Detection activated (Default)Bit 3 - 1 = Double Key Error Detection offBit 4 - 0 = Blocking Key 4 off (Default)Bit 4 - 1 = Blocking Key 4 activatedBit 5 - 0 = Blocking Key 5 off (Default)Bit 5 - 1 = Blocking Key 5 activatedBit 6 - 0 = Not usedBit 7 - 0 = ReservedThird Byte = Parameter Byte 2 (Blocking Keys)Bit 0 - 0 = Blocking Key 6 off (Default)Bit 0 - 1 = Blocking Key 6 activatedBit 1 - 0 = Blocking Key 13 off (Default)Bit 1 - 1 = Blocking Key 13 activatedBit 2 - 0 = Not usedBit 3 - 0 = Not usedBit 4 - 0 = Not usedBit 5 - 0 = Not usedBit 6 - 0 = Not usedBit 7 - 0 = Reserved
Chapter 4: Programming 4-21Fourth Byte = Parameter Byte 3 = (Blocking Key Pairs)Bit 0 - 0 = Not usedBit 1 = Not usedBit 2 = Not usedBit 3 - 0 = Not usedBit 4 - 0 = Blocking Key 4 + Key 1 (Default)Bit 4 - 1 = Blocking Key 4 + Key 7Bit 5 - 0 = Blocking Key 5 + Key 2 (Default)Bit 5 - 1 = Blocking Key 5 + Key 8Bit 6 - 0 = Not usedBit 7 - 0 = ReservedFifth Byte = Parameter Byte 4 (Blocking Key Pairs)Bit 0 - 0 = Blocking Key 6 + Key 3 (Default)Bit 0 - 1 = Blocking Key 6 + Key 9Bit 1 = Not usedBit 2 - Not usedBit 3 - Not usedBit 4 - Not usedBit 5 - Not usedBit 6 - Not usedBit 7 - Not used
4-22 Chapter 4: ProgrammingKeyboard Part Number/Type Command (EC Hex)The DynaKey contains keyboard part number and type values in thekeyboard ROM. The DynaKey sends these values to the workstationwhen requested by the Keyboard Part Number/Type command (ECHex). Upon receiving this command, the keyboard firmware performsthe following:• Send ACK to Workstation• Clear Keyboard Buffer• Read Keyboard Part Number and Type from ROM• Send to WorkstationThe Keyboard Part Number/Type format is shown below:Keyboard Part NumberKeyboard TypeThe keyboard part number is a five-character binary coded decimal(BCD) value indicating the NCR part number (10 digits) of thekeyboard ROM chip. This value is within the keyboard ROM.The keyboard part number for the DynaKey ROM is (BCD):49 70 40 65 05 = 497-0406505Note: This part number changes with subsequent noninterchangeablereleases of the DynaKey keypad firmware or majorchanges in the DynaKey unit.The DynaKey sends the most significant two digits to the host as aBCD byte first. The next two digits are sent second. This ordercontinues for the next 3 bytes.For the DynaKey, the keyboard type field is a one-byte field indicatingthe type of keyboard as shown below:Type Keyboard02 Hex DynaKey
Chapter 4: Programming 4-23Key Position DiagramThe DynaKey sends the Keyboard Type byte to the workstationimmediately following the last byte of the keyboard part number.The following diagram shows the DynaKey key positions. The keypadis shown in “calculator” layout.Key Position Key Scan Code ASCII1 (Shift-F1) 542 (Shift-F2) 553 (Shift-F3) 564 (Shift-F4) 575 (Shift-F5) 586 (Shift-F6) 597 (Shift-F7) 5A8 (Shift-F8) 5B9 (Shift-F10) 5D10 7 47 3711 8 48 3812 9 49 3913 (Cntl-F1) 5E14 4 4B 3415 5 4C 3516 6 4D 3617 (Cntl-F2) 5F18 1 4F 3119 2 50 3220 3 51 3321 (Cntl-F3) 6022 0 52 30
4-24 Chapter 4: ProgrammingKey Position Key Scan Code ASCII23 (Shift-F9) 5C24 . 53 2E25 (CR) 1C 0D26 DynaKey-F1 3B27 DynaKey-F2 3C28 DynaKey-F3 3D29 DynaKey-F4 3E30 DynaKey-F5 3F31 DynaKey-F6 4032 DynaKey-F7 4133 DynaKey-F8 4234 down cursor 5035 up cursor 48
Chapter 4: Programming 4-25Panel OFF/ON SequenceBefore turning the Panel Off, turn off the video using SequencerRegister 1 bit 5 (SR01[S]) in the same manner as IBM recommends forthe standard VGA. To make Video Off more effective, some additionaldelay should be included before Panel Off.By turning the Video Off via SR01[5], the Sequencer is no longerrefreshing the screen. This gives the Sequencer enough bandwidth towork with the Panel Off logic to do an orderly shutdown of the videooutput.PCI LCD Board (69000 Chips)Panel Off Sequence:Save Sequencer Register IndexTurn Video Off (SR01[5]=1)Restore SR IndexDelay 15mSTurn Panel Off (FR05[3]=1)Panel On Sequence:Turn Panel On (FR05[3]=0)Save SR IndexTurn Video On (SR01[5]=0Restore SR IndexThese are brief sequence examples. Implementation is up to the user. Ifthere are any questions regarding these sequences, please contact:NCR <strong>Technical</strong> Support, or Chips and Technologies, Inc.2950 Zanker RoadSan Jose, CA 95134(408) 434-0600.Whenever an application or driver turns the backlight off or on, itshould also reset the Touch Controller (send a RESET command). Thisensures that the noise generated by the sidelight is nulled and doesn’taffect touch accuracy
Chapter 5: Service and RepairSafety RequirementsCarefully follow these safety requirements before servicing theDynaKey.Warning: The DynaKey LCD contains hazardous voltages andshould only be serviced by qualified service personnel.Warning: Before servicing the equipment plug your safety strapinto a proper grounding outlet. Failure to do so could damage theequipment.Caution: Before servicing the DynaKey, power down the terminal orPC and disconnect the terminal AC power cord. Disconnect the cablesfrom the PC or workstation to the Touch Screen.Caution: To protect the internal circuitry from damage, unplug theAC power cord and then momentarily press the power switch ON todrain the power supply capacitance.Caution: The power supply cord is used as the main disconnectdevice. Ensure that the socket outlet is located/installed near theequipment and is easily accessible.Attention: Le cordon d’alimentation est utilisé comme interrupteurgénéral. La prise de courant doit être située ou installée a proximite dumatériel et être facile d’accés.
5-2 Chapter 5: Service and RepairProblem Isolation ProceduresTroubleshooting TableNCR offers both on-site and mail-in service for the NCR 5953 WedgeDynaKey. Before calling for service or mailing in your unit for repair,step through the problem isolation procedures below to make sure theDynaKey module is in need of repair. Also, your answers to thesequestions may speed the servicing of your DynaKey.The following table provides general troubleshooting tips for theDynaKey. If you experience a problem with your DynaKey, pleaseexplore the possible solution options in this table before replacing anycomponent in the system.Symptom Probable Cause SolutionDynaKey keypad notworkingSome keys on theDynaKey keypad notworkingExternal Keyboard notworkingKeylock in “L” positionKeyboard not powered7452/7453/PC: Keyboardadapter cable not connectedDynaKey is in “PC Setup” mode(LED is flashing red/green)DynaKey “hot plugged” intoterminal with terminal poweredon.Keylock in “L” positionKeyboard plugged into PC orworkstationKeyboard not poweredTurn Keylock to anotherpositionCheck fuse in DynaKeyController BoardConnect keyboard adaptercable between PCI-LCD Cardand PC keyboard portPower cycle the system.Re-boot the systemTurn Keylock to anotherpositionPlug keyboard into DynaKeyController BoardCheck fuse in DynaKeyController Board
Chapter 5: Service and Repair 5-3Symptom Probable Cause SolutionMSR, Keylock, Scanner,and External Keyboardnot working7452/7453/PC: Keyboardadapter cable not connectedWedge Controller configuredincorrectlyConnect keyboard adaptercable between PCI-LCD Cardand PC keyboard portConfigure Wedge Controllerusing Wedge Utility (See NCRWedge Software User’s Guide,BD20-1368-B)Speaker not working Speaker harness not connected Connect speaker harness toDynaKey Controller Board.PC speaker harness notconnected to PCI-LCD board in7452/74537452/7453/PC: WedgeController not configuredcorrectlyConnect harness to PCI-LCDboard in 7452/7453Configure speaker operationusing Wedge Utility (See NCRWedge Software User’s Guide,BD20-1368-B)MSR not working MSR card not oriented properly Ensure that magnetic stripe oncard is “up” when swiped.Scanner not workingMSR harness loose or brokenWedge Controller configuredincorrectlyScanner not poweredUnsupported scanner connectedto unitEnsure that the MSR harnessis securely fastened to theDynaKey Controller Board,and that none of the wireshave pulled loose from theconnector.Configure MSR operationusing Wedge Utility (See NCRWedge Software User’s Guide,BD20-1368-B)Check fuse in DynaKeyController BoardEnsure that the scanner is adecoded RS-232 model
5-4 Chapter 5: Service and RepairSymptom Probable Cause SolutionLCD Dim/Contrast tooLight or DarkWedge Controller configuredincorrectlyUnit is “cold”Contrast set incorrectlyUnit is in direct sunlightConfigure Scanner operationusing Wedge Utility (See NCRWedge Software User’s Guide,BD20-1368-B)Wait 15 minutes for unit toreach operating temperaturebefore measuring brightnessor contrast. Do not expose theunit to operating temperaturesbelow 5 degrees C.Turn contrast control knob toadjust contrast. Usually asetting near the middleprovides the best display.(passive unit only)For best display quality, keepthe unit out of direct sunlightor other bright light sources.Lines in LCD Display Internal LCD harness loose Re-seat the LCD harness at theDynaKey Controller Boardand LCD ends.No display (GreenLED)External LCD cable looseBent pin in external LCD cableContrast control set incorrectlyInternal LCD cable looseEnsure that the LCD cable issecurely fastened to the PCI-LCD-card and 5953.Check both ends of the LCDcable for bent pins. Fix orreplace cable.Turn contrast control knob toadjust contrast. Usually, asetting near the middleprovides the best display.Re-seat the LCD harness at theDynaKey Controller Boardand LCD ends.
Chapter 5: Service and Repair 5-5Symptom Probable Cause SolutionNo display (orangeLED)Touch Screen notworkingInternal backlight harness loose7452/7453/PC: Unit in“standby” mode (screen blank)Ensure that the backlightharness is securely fastened tothe inverter board and theinverter harness is connectedto the DynaKey ControllerBoardReturn unit from standby asrequired by application.Ensured Keylock not in “L”position.PC or workstation not turned on. Turn PC or workstation ONCables loose7452/7453/PC: Blown fuse onPCI-LCD cardTouch Screen sensor harnesslooseEnsure all cables are securelyfastenedCheck +12V fuse on PCI-LCDcardEnsure that the Touch Screensensor harness is securelyfastened to the 5953 controlboard.
5-6 Chapter 5: Service and RepairSymptom Probable Cause SolutionIncorrect RS-232 settings in theTouch Screen Controller orapplicationExternal harness loose or notconnected.Bent pin in external Y cableThe default setting for theTouch Screen is 9600 N 7 2.Ensure that the applicationand Touch Screen settingsmatch.Note: Do not use MicroCal tocalibrate the 5953. For DOSenvironments, use theGETSET program. ForWindows 95 and WindowsNT environments, use theTouch Ware utility that isfound in the Windows StartMenu at:START/PROGRAMS/MICROTOUCH/TOUCHWARE CONTROLPANELMake sure that the Y-cable isproperly connected.Check both ends of the Y cablefor bent pins. Fix or replacecable.
Chapter 5: Service and Repair 5-7Symptom Probable Cause SolutionTouch Screen notaccurateMultiple overlappingimages with verticallinesTouch Screen not calibratedproperlyThis version of DynaKeyshould only be connected to aPCI LCD card, and not to aSeries 4000 motherboard.This version of DynaKeyshould only be connected to aSeries 4000 motherboard, andnot to a PCI LCD card.Note: For DOSenvironments, load theGETSET.EXE PROGRAMAND SET THE VIDEO MODETO 800X600. Test thecalibration using the drawutility. If calibration is incorrect, recalibrate using the 2point calibration option inGETSET.EXE. ForWindows 95 and NT usethe Touch Ware ControlPanel program in Menuat:Windows Start Menu.START/PROGRAMS/MICROTOUCH/TOUCHWARECONTROL PANELConnect the touch screen to aPCI LCD card, see the“Installation” chapter.Connect the touch screen to aSeries 4000 motherboard, seethe “NCR 7453 WorkstationMotherboard Upgrade KitInstallation Guide, B005-0000-1208”.
5-8 Chapter 5: Service and RepairServicing the DynaKey ModuleThis section provides detailed instructions on how to completelydisassemble the NCR 5953 DynaKey LCD.Touch Screen Cleaning Procedures1. Spray an ammonia-based glass cleaner on a soft cloth and gentlywipe the touch screen clean.Warning: Do not use any other types of cleaners such as vinegar,solvents, or degreasers. These can damage the screen.2. Wipe the screen and edges dry.3. Allow the glass and screen edges to completely dry before usingthe unit.
Chapter 5: Service and Repair 5-9Service ProceduresServicing the DynaKeyThis section provides detailed instructions on to how to disassemblethe DynaKey.Warning: Only properly trained personnel using proper groundingprocedures should service the DynaKey. Personal injury could occur,or the DynaKey may be damaged.1.Disconnect the cable(s).LCD Connector KeyboardScanner Connector16976
5-10 Chapter 5: Service and Repair1. Remove the Base Mount (6 screws).6 Screws16977
Chapter 5: Service and Repair 5-113. Remove the access cover by applying pressure on the release tabsand lifting up.Release Tabs16978a2. Remove the (6) screws from the back of the cabinet and remove theback.6 Screws16981
5-12 Chapter 5: Service and Repair3. Open the DynaKey cabinet.17176Internal ComponentsCaution: For continued protection against risk of fire, replace onlywith the same type and ratings of fuse.Attention: Pour prévenir et vous protéger contre un risque de feu,remplacer la fusible avec une autre fusible de même type, seulement.Replacing the MSR1. Carefully disconnect the MSR Harness from the DynaKeyController Board.Caution: Do not pull on the wires because they may pull out of theconnector terminals.
Chapter 5: Service and Repair 5-132. Remove the (2) screws holding the MSR into place.2 Screws169832. Push the tab down as shown above and pull MSR unit down andaway.3. Remove the (2) screws holding the MSR module in place.Screws171934. Replace the MSR.MSR Cleaning CardsPartPart NumberMSR Cleaning Card, Dry 998-0052929MSR Cleaning Card, Wet 603-9004998
5-14 Chapter 5: Service and RepairReplacing the DynaKey Controller Board1. DynaKey offers two controller boards. Disconnect the appropriatecables plugged into the controller board to remove the board.Touch Screen ControllerF2,5 A, 125V LCDPower (3.3-5V)Inverter Power ConnectorKey Lock ConnectorLCDRibbonConnectorMSR ConnectorTouch Screen ConnectorKey Pad ConnectorSpeakerLED Board ConnectorPassive Contrast Control ConnectorScanner PortLCD ConnectorPS/2 KeyboardConnectorF1, 1A, 125V Keyboard PS/2 (5V)Non -Touch Screen ControllerF2,5 A, 125V LCDPower (3.3-5V)Inverter Power ConnectorKey Lock ConnectorLCDRibbonConnectorMSR ConnectorKey Pad ConnectorSpeakerLED Board ConnectorPassive Contrast Control ConnectorScanner PortLCD ConnectorPS/2 KeyboardConnectorF1, 1A, 125V Keyboard PS/2 (5V)17191
Chapter 5: Service and Repair 5-15• Inverter Power Connector• Touch Screen Connector• Passive Contrast Control Connector (used on passive LCD only)• Keylock Connector• LCD Ribbon Connector• LCD Connector• Speaker Connector• LED Board Connector• Key Pad Connector• Scanner Port Connector• MSR Connector2. Remove (4) screws shown below and lift board off mountingbrackets.Note: Verify all cables free and out of the way prior to removal.4 Screws169823. Replace the Controller Board and connect cables.
5-16 Chapter 5: Service and RepairReplacing the Inverter Board1. Remove the (2) screws attaching the inverter shield to the LCDbracket as shown below:2. Remove the inverter shield carefully to expose the inverter board.Inverter Shield2 SCREWS171723. Remove the (2) LCD Backlight connectors from the inverter board.Remove the (3) screws attaching the inverter board to the LCD bracketand remove3 ScrewsLCD Connectors16986
Chapter 5: Service and Repair 5-17Replacing the Speaker Assembly1. Verify speaker is unplugged from control board.2. Using a small screwdriver, pry out plastic tab as shown below andslide speaker out.SpeakerPull Tab Up171693. Replace speaker and re-install plastic tab.
5-18 Chapter 5: Service and RepairReplacing the LCD Bracket Assembly1. Remove the (4) screws attaching the LCD bracket to the bezel.4 Screws16984Note: The LCD bracket assembly includes the LCD and the mountingbracket. Verify that all cables are free before removing LCD bracket.2. Remove the LCD bracket assembly.3. Replace LCD bracket assembly.Replacing the Keypad1. Remove (3) screws attaching keypad to the bezel.Screws169872. Remove and replace the keypad.
Chapter 5: Service and Repair 5-19Replacing the Touch Screen1. Remove the touch screen by lifting the touch screen out of the bezelas illustrated below:Touch ScreenGasket16989Note: The gasket should be replaced if damaged. Verify theadhesive backing is removed prior to installation2. Replace the touch screen and gasket.
5-20 Chapter 5: Service and RepairReplacing the Keylock Adaptor Assembly1. To Remove Keylock assembly, squeeze the plastic retainers andpush the Keylock assembly out the front of the unit as shownbelow:PlasticRetainers169902. Replacing the Keylock assembly. Align the tabs and snap intoplace.3. Carefully route the wires through the bezel.Re-Assembling the DynaKeyTo re-assemble the DynaKey module, use the reverse order of theprevious procedures. In addition, check the following:1. Before closing the cabinet, check the LCD and Touch Screen tomake sure there are no fingerprints or lint particles.2. Make sure the cables are routed properly before closing the cabinet.
Chapter 5: Service and Repair 5-21Connector Pin-Out InformationExternal Keyboard ConnectorThe external keyboard connector is a PS/2-style, 6-pin, mini-DINconnector. The table below lists the function of each pin.Pin Symbol Description1 DATA Keyboard <strong>Data</strong>2 N/C Unused3 GROUND Ground4 +5V 5V Power5 CLOCK Keyboard Clock6 N/C UnusedExternal RS-232 Scanner ConnectorThe external RS-232 scanner connector is an 8-pin modular connector.The table below lists the function of each pin.Pin Symbol Description1 N/C Unused2 N/C Unused3 GROUND Ground4 TXD <strong>Data</strong> to Scanner5 RXD <strong>Data</strong> from Scanner6 +5V 5V Power7 CTS Clear To Send (from Scanner)8 RTS Request to Send (to Scanner)
5-22 Chapter 5: Service and RepairSpare Parts List121361091151617210
Chapter 5: Service and Repair 5-23Number Part Description Part Number Class/Model used with1 Front Bezel 497-0413214 5953-2xxx/3xxx, 7452/53-F415/F416/F417/F4182 Gasket (Touch) 497-0412730 5953-F061, 7452/53-F416/F4182 Gasket (Non-touch) 497-0412624 5953-F060, 7452/53-F415/F4173 Touchscreen 006-8602210 5953-F061, 7452/53-F416/F4184 LCD Assy-Active 497-0414744 5953-3xxx, 7452/53-F417/F4184 LCD Assy-Passive 497-0414743 5953-2xxx, 7452/53-F415/F4165 PCB-TouchController5 PCB-Non TouchCont6 PCB-Adapter(passive)6 PCB-Adapter(active)497-0413223 5953-F061, 7452/53-F416/F418497-0413222 5953-F060, 7452/53-F415/F417497-0412726 5953-2xxx, 7452/53-F415/F416497-0412729 5953-3xxx, 7452/53-F417/F4187 LCD Ribbon Cable 497-0411110 5953-2xxx/3xxx, 7452/53-F415/F416/F417/F4188 PCB-Inverter 006-8800373 5953-2xxx/3xxx, 7452/53-F415/F416/F417/F4189 Contrast ControlAssy497-0413468 5953-2xxx, 7452-53-F415/F41610 Speaker 497-0410906 5953-2xxx/3xxx, 7452/53-F415/F416/F417/F41811 Cabinet-No MSR 497-0412635 5953-F010, 7452/53-F21911 Cabinet-MSR 497-0412637 5953-F011/F012, 7452/-F217/F218,7453-F21711 MSR-3track (ISO) 497-0405705 5953-F011, 7452/53-F21711 MSR-2track (JIS) 497-0411069 5953-F012, 7452-F218
5-24 Chapter 5: Service and RepairNumber Part Description Part Number Class/Model used with12 Back cover 497-0412622 5953-2xxx/3xxx, 7452/53-F415/F416/F417/F41813 Inverter Shield 497-0412628 5953-2xxx/3xxx, 7452/53-F415/F416/F417/F41814 Access Cover 497-0414521 5953-2xxx/3xxx, 7452/53-F415/F416/F417/F41815 Keypad Assy 497-0413216 5953-2xxx/3xxx, 7452/53-F415/F416/F417/F41816 Keylock Assy 497-0412717 5953-2xxx/3xxx, 7452/53-F415/F416/F417/F418Part Description Part number Class/Model used withPCB-SVGA PCI 497-0413509 5953-F152, 7452/53-F149/F155Harness-7453 Dual Speaker 497-0411267 5953-F152, 7453-F149/F155Harness-7452 Dual Speaker 497-0411048 5953-F152, 7452-F149/F155Harness-Inverter (passive) 497-0413264 5953-2xxx, 7452/53-F415/F416Harness-Inverter (active) 497-0413354 5953-3xxx, 7452/53-F417/F418Cable-12.1” Touch 1 Meter 497-0410939 5953-F040Cable-12.1” Touch 4 Meter 497-0410940 5953-F041Cable-Wedge Touch 497-0407490 5953-F061, 7452/53-F149Cable-Wedge Non Touch 497-0406868 5953-F060, 7452/53-F155
Chapter 5: Service and Repair 5-25DynaKey Cleaning ProceduresNCR keyboards are designed for general retail applications. Theseproducts, are resistant to spills and dust, However, these products arenot spill proof or dust proof.To maintain proper keyboard operation, users should prevent water,beverages, or cleaning agents from being introduced into the keyboardduring storage, operation, or cleaning.To clean your keyboard, use the following procedures:1. Turn off power to your PC or workstation.2. Unplug keyboard cable from your PC/workstation.3. Spray liquid cleaner (such as window cleaner spray or a productdesigned for cleaning office computer equipment) onto a soft clothto wipe the keys and housing clean. (Do not spray liquid cleanersdirectly onto the keyboard.) Let the keyboard dry completelybefore reusing.4. Use either a “canned air” type office supply product or a smallvacuum to remove dust or foreign objects from between the keys.Cleaning the Glass4. Spray an ammonia-based glass cleaner on a soft cloth and gentlywipe the glass screen clean.Warning: Do not use any other types of cleaners such as vinegar,solvents, or degreasers. These can damage the screen.5. Wipe the screen and edges dry.6. Allow the glass and screen edges to completely dry before usingthe unit.5. When cleaning has been completed, plug in the keyboard cable andpower on the PC/workstation.
5-26 Chapter 5: Service and Repair
Index—5—5953 DynaKeyCheckstand mounts, 3-10connecting to the terminal, 3-17Table-top mount, 3-3Wall mounted, 3-95953 DynaKey Installation, 3-2—C—Cable Length Limitations, 2-2Compatibility, 1-1Connecting to the Host, 3-3Connector Panel Access, 3-2Connector Pin-Out Information, 5-21ConnectorsRS-232, 4-5—D—DynaKey Moduleservicing, 5-8—E—Electrical Environment, 2-2External Keyboard Connector, 5-21External RS-232 Scanner Connector, 5-21—I—Installation5953 DynaKey, 3-2InstallingWall mounted 5953 DynaKey, 3-9Installing the Integrated CustomerDisplay, 3-4, 3-15—K—Keylockpositions, 1-5—L—LCD PCI boardoperating ran ge, 2-1operating range, 2-1storage range, 2-1transit range, 2-1—M—Magnetic Stripe Reader (MSR)analog interface, 4-4MSR Cleaning Cards, 5-13—P—Panel OFF/ON Sequence, 4-25
Index-2Physical Environment, 2-1Problem Isolation Procedures, 5-2Programming, 4-1—R—Re-Assembling the DynaKey, 5-20Replacing the DynaKey Processor Board,5-14Replacing the Inverter Board, 5-16Replacing the Keypad, 5-18Replacing the LCD Assembly Bracket, 5-18Replacing the MSR, 5-12Replacing the Speaker Assembly, 5-17Replacing the Touch Screen, 5-19—S—Screen Savingunblanking the LCD, 3-23Screen Saving Feature, 3-23Serial Number Location, 3-2Service and Repair, 5-1Service Procedures, 5-9Servicing the DynaKey, 5-9Servicing the Touch Screen Module, 5-8Spare Parts List, 5-22Speaker, 1-6—T—Touch Screen Cleaning Procedures, 5-8Touch Screen Interface, 4-4Troubleshooting Table, 5-2