Thermo Scientific Orion AQUAfast AQ4500 Turbidimeter - RS Hydro
Thermo Scientific Orion AQUAfast AQ4500 Turbidimeter - RS Hydro
Thermo Scientific Orion AQUAfast AQ4500 Turbidimeter - RS Hydro

Create successful ePaper yourself
Turn your PDF publications into a flip-book with our unique Google optimized e-Paper software.
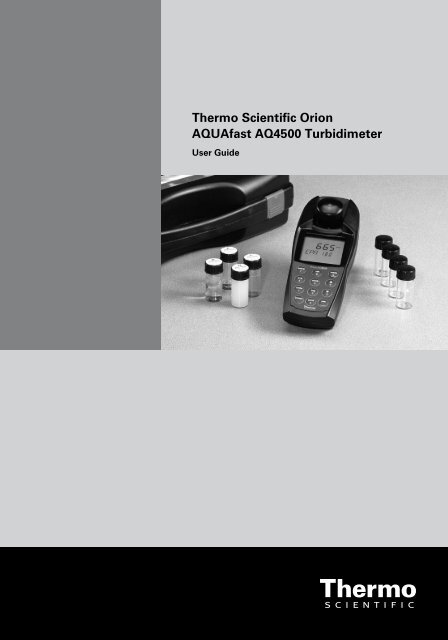
<strong>Thermo</strong> <strong>Scientific</strong> <strong>Orion</strong><br />
<strong>AQUAfast</strong> <strong>AQ4500</strong> <strong>Turbidimeter</strong><br />
User Guide
ROSS and the COIL trade dress are trademarks of <strong>Thermo</strong> Fisher <strong>Scientific</strong> Inc. U.S. patent 6,793,787.<br />
<strong>AQUAfast</strong>, Cahn, ionplus, KNIpHE, No Cal, ORION, perpHect, PerpHecT, PerpHecTion, pHISA, pHuture, Pure Water, Sage, Sensing the Future, SensorLink,<br />
ROSS, ROSS Ultra, Sure-Flow, Titrator PLUS and TURBO2 are registered trademarks of <strong>Thermo</strong> Fisher.<br />
1-888-pHAX-ION, A+, All in One, Aplus, AQUAsnap, AssuredAccuracy, AUTO-BAR, AUTO-CAL, AUTO DISPENSER, Auto-ID, AUTO-LOG, AUTO-READ,<br />
AUTO-STIR, Auto-Test, BOD AutoEZ, Cable-Free, CERTI-CAL, CISA, DataCOLLECT, DataPLUS, digital LogR, DirectCal, DuraProbe, Environmental Product<br />
Authority, Extra Easy/Extra Value, FAST QC, GAP, GLPcal, GLPcheck, GLPdoc, ISEasy, KAP, LabConnect, LogR, Low Maintenance Triode, Minimum Stir<br />
Requirement, MSR, NISS, One-Touch, One-Touch Calibration, One-Touch Measurement, Optimum Results, <strong>Orion</strong> Star, Pentrode, pHuture MMS, pHuture<br />
Pentrode, pHuture Quatrode, pHuture Triode, Quatrode, QuiKcheK, rf link, ROSS Resolution, SAOB, SMART AVERAGING, Smart CheK, SMART STABILITY,<br />
Stacked, Star Navigator 21, Stat Face, The Enhanced Lab, ThermaSense, Triode, TRIUMpH, Unbreakable pH, Universal Access are trademarks of<br />
<strong>Thermo</strong> Fisher.<br />
Guaranteed Success and The Technical Edge are service marks of <strong>Thermo</strong> Fisher.<br />
PerpHecT meters are protected by U.S. patent 6,168,707.<br />
PerpHecT ROSS electrodes are protected by U.S. patent 6,168,707.<br />
ORION Series A meters and 900A printer are protected by U.S. patents 5,198,093, D334,208 and D346,753.<br />
ionplus electrodes and Optimum Results solutions are protected by U.S. patent 5,830,338.<br />
ROSS Ultra electrodes are protected by U.S. patent 6,793,787.<br />
ORP standard is protected by U.S. patent 6,350,367.<br />
No Cal electrodes are protected by U.S. patent 7,276,142.<br />
© 2009 <strong>Thermo</strong> Fisher <strong>Scientific</strong> Inc. All rights reserved. All trademarks are the property of <strong>Thermo</strong> Fisher <strong>Scientific</strong> Inc. and its subsidiaries.<br />
The specifications, descriptions, drawings, ordering information and part numbers within this document are subject to change without notice.<br />
This publication supersedes all previous publications on this subject.
Chapter 1<br />
Chapter 2<br />
Chapter 3<br />
Chapter 4<br />
Table of Contents<br />
ntroduction . . . . . . . . . . . . . . . . . . . . . . . . . . . . . . . . . . . . . . . . . . . . . . . . . . . 1<br />
Principle of Operation . . . . . . . . . . . . . . . . . . . . . . . . . . . . . . . . . . . . . . 2<br />
Display . . . . . . . . . . . . . . . . . . . . . . . . . . . . . . . . . . . . . . . . . . . . . . . . . 3<br />
Keypad . . . . . . . . . . . . . . . . . . . . . . . . . . . . . . . . . . . . . . . . . . . . . . . . . 4<br />
Meter Setup . . . . . . . . . . . . . . . . . . . . . . . . . . . . . . . . . . . . . . . . . . . . . . . . . . . 5<br />
Battery Installation . . . . . . . . . . . . . . . . . . . . . . . . . . . . . . . . . . . . . . . . 5<br />
Vial Cover . . . . . . . . . . . . . . . . . . . . . . . . . . . . . . . . . . . . . . . . . . . . . . 6<br />
<strong>RS</strong>232 Connection . . . . . . . . . . . . . . . . . . . . . . . . . . . . . . . . . . . . . . . . 8<br />
Setup Menu . . . . . . . . . . . . . . . . . . . . . . . . . . . . . . . . . . . . . . . . . . . . . . . . . . . 9<br />
Setup Functions . . . . . . . . . . . . . . . . . . . . . . . . . . . . . . . . . . . . . . . . . . 9<br />
Cal Chek . . . . . . . . . . . . . . . . . . . . . . . . . . . . . . . . . . . . . . . . . . . . . . 9<br />
Clock . . . . . . . . . . . . . . . . . . . . . . . . . . . . . . . . . . . . . . . . . . . . . . . . 10<br />
Set Baud . . . . . . . . . . . . . . . . . . . . . . . . . . . . . . . . . . . . . . . . . . . . . 10<br />
Print . . . . . . . . . . . . . . . . . . . . . . . . . . . . . . . . . . . . . . . . . . . . . . . . . 11<br />
Auto Print . . . . . . . . . . . . . . . . . . . . . . . . . . . . . . . . . . . . . . . . . . . . 11<br />
Digits . . . . . . . . . . . . . . . . . . . . . . . . . . . . . . . . . . . . . . . . . . . . . . . . 11<br />
Battery . . . . . . . . . . . . . . . . . . . . . . . . . . . . . . . . . . . . . . . . . . . . . . . 12<br />
Self Test . . . . . . . . . . . . . . . . . . . . . . . . . . . . . . . . . . . . . . . . . . . . . . 12<br />
Calibration . . . . . . . . . . . . . . . . . . . . . . . . . . . . . . . . . . . . . . . . . . . . . . . . . . . 13<br />
Preparing and Filling the Calibration Standard Vials . . . . . . . . . . . . . . 14<br />
Calibration Check . . . . . . . . . . . . . . . . . . . . . . . . . . . . . . . . . . . . . . . . 15<br />
Preparation of Low Turbidity Water . . . . . . . . . . . . . . . . . . . . . . . . . . 16<br />
Initial Calibration for EPA 180 .1, ISO-NEPH or IR Ratio Modes . . . 17<br />
Daily Calibration Check for EPA 180 .1, ISO-NEPH<br />
and IR Ratio Modes . . . . . . . . . . . . . . . . . . . . . . . . . . . . . . . . . . . . . . 18<br />
Calibration of ISO-ABSB Mode . . . . . . . . . . . . . . . . . . . . . . . . . . . . . 18<br />
Calibration of White %T Mode . . . . . . . . . . . . . . . . . . . . . . . . . . . . . 18<br />
Calibration of IR %T Mode . . . . . . . . . . . . . . . . . . . . . . . . . . . . . . . . 19<br />
Refilling the Calibration Standard Vials with Fresh Standard . . . . . . . . 19<br />
Preparation of Primary Calibration Standards . . . . . . . . . . . . . . . . . . . 20<br />
<strong>Thermo</strong> <strong>Scientific</strong> <strong>Orion</strong> <strong>AQUAfast</strong> <strong>AQ4500</strong> <strong>Turbidimeter</strong> User Guide
Chapter 5<br />
Chapter 6<br />
Chapter 7<br />
Chapter 8<br />
Appendix A<br />
Measurement . . . . . . . . . . . . . . . . . . . . . . . . . . . . . . . . . . . . . . . . . . . . . . . . 21<br />
Turbidity Sample Measurement . . . . . . . . . . . . . . . . . . . . . . . . . . . . . . 21<br />
Measurement of Low Level Turbidity Samples (< 1 NTU) . . . . . . . . 22<br />
Measurement Tips . . . . . . . . . . . . . . . . . . . . . . . . . . . . . . . . . . . . . . 23<br />
EPA Interim Approval Letter . . . . . . . . . . . . . . . . . . . . . . . . . . . . . . . . 24<br />
Functions . . . . . . . . . . . . . . . . . . . . . . . . . . . . . . . . . . . . . . . . . . . . . . . . . . . . 25<br />
Log Functions . . . . . . . . . . . . . . . . . . . . . . . . . . . . . . . . . . . . . . . . . . . 25<br />
Average Functions . . . . . . . . . . . . . . . . . . . . . . . . . . . . . . . . . . . . . . . . 26<br />
Use with Printers and Computers . . . . . . . . . . . . . . . . . . . . . . . . . . . . . . . 27<br />
Data Transmission Settings . . . . . . . . . . . . . . . . . . . . . . . . . . . . . . . . . 27<br />
Customer Services . . . . . . . . . . . . . . . . . . . . . . . . . . . . . . . . . . . . . . . . . . . . 29<br />
<strong>Turbidimeter</strong> Self Test . . . . . . . . . . . . . . . . . . . . . . . . . . . . . . . . . . . . . 29<br />
<strong>Turbidimeter</strong> Maintenance . . . . . . . . . . . . . . . . . . . . . . . . . . . . . . . . . 29<br />
Vial Maintenance . . . . . . . . . . . . . . . . . . . . . . . . . . . . . . . . . . . . . . . . 29<br />
Operator Assistance Codes . . . . . . . . . . . . . . . . . . . . . . . . . . . . . . . . . 30<br />
Assistance . . . . . . . . . . . . . . . . . . . . . . . . . . . . . . . . . . . . . . . . . . . . . . 30<br />
Warranty . . . . . . . . . . . . . . . . . . . . . . . . . . . . . . . . . . . . . . . . . . . . . . . 30<br />
Declaration of Conformity . . . . . . . . . . . . . . . . . . . . . . . . . . . . . . . . . 31<br />
Ordering Information . . . . . . . . . . . . . . . . . . . . . . . . . . . . . . . . . . . . . 32<br />
Specifications . . . . . . . . . . . . . . . . . . . . . . . . . . . . . . . . . . . . . . . . . . . . 33<br />
Tungsten vs . LED Discussion . . . . . . . . . . . . . . . . . . . . . . . . . . . . . . . . . . . 35<br />
<strong>Thermo</strong> <strong>Scientific</strong> <strong>Orion</strong> <strong>AQUAfast</strong> <strong>AQ4500</strong> <strong>Turbidimeter</strong> User Guide
Chapter 1 ntroduction<br />
The <strong>AQUAfast</strong> <strong>AQ4500</strong> turbidimeter is the most advanced portable<br />
microprocessor based LED turbidimeter on the market today . The<br />
<strong>AQ4500</strong> turbidimeter operates on the nephelometric and ratiometric<br />
principles of turbidity measurement . The <strong>AQ4500</strong> turbidimeter allows<br />
turbidity measurement based on EPA 180 .1 and ISO 7027 as well as an<br />
infrared ratio (IR ratio) mode that gives results in accordance with EPA<br />
GLI method 2 . The <strong>AQ4500</strong> also allows the user to make measurements<br />
based on percent transmittance (%T), American Society of Brewing<br />
Chemists (ASBC) units or European Brewing Chemists (EBC) units .<br />
The <strong>AQUAfast</strong> <strong>AQ4500</strong> turbidimeter is the only advanced completely<br />
waterproof turbidimeter with a rating of IP67 . The <strong>AQ4500</strong> can log 100<br />
data points that can later be downloaded to a printer or computer .<br />
The <strong>AQUAfast</strong> <strong>AQ4500</strong> turbidimeter has received interim approval<br />
from the EPA for wastewater turbidity reporting when in the EPA180 .1<br />
mode and following <strong>Thermo</strong> <strong>Orion</strong> Method AQ 4500, Revision 5 . See<br />
the EPA Interim Approval Letter section of this user guide and visit<br />
www .thermo .com/waterapps for updated information on EPA approval .<br />
Until final approval from the EPA for turbidity reporting, please contact<br />
your state or local regulatory agency for their requirements for interim<br />
approval methods . Refer to Appendix A for information on the benefits<br />
of a white LED light source for turbidity measurements .<br />
<strong>Thermo</strong> <strong>Scientific</strong> <strong>Orion</strong> <strong>AQUAfast</strong> <strong>AQ4500</strong> <strong>Turbidimeter</strong> User Guide<br />
1
Principle of<br />
Operation<br />
Figure 1<br />
Pure Nephelometric<br />
Turbidity<br />
Measurement<br />
without Color<br />
Compensation<br />
Figure 2<br />
Color Compensation<br />
in the Dual-beam<br />
System with Two<br />
Photo Detectors<br />
Nephelometric turbidity is measured by determining the sidewardscattered<br />
light intensity . A light beam is passed through the flow cell and<br />
the scattered light produced by the solid particles (turbidity) is detected<br />
at a specific angle . This measurement method ignores the light that passes<br />
straight through the cell .<br />
IR LED<br />
Emitted Light<br />
Light<br />
Detector<br />
90˚ Scattered<br />
Light<br />
If the medium contains absorbent substances (such as colored<br />
constituents), these can easily attenuate the light beam by factors ranging<br />
from 2 to 10 and thus falsify the results . So it is absolutely necessary to<br />
eliminate the effect of the medium’s absorption in such cases . This is<br />
achieved by using two light beams: a measurement beam and a reference<br />
beam . The turbidity is thus determined from their ratio .<br />
2 <strong>Thermo</strong> <strong>Scientific</strong> <strong>Orion</strong> <strong>AQUAfast</strong> <strong>AQ4500</strong> <strong>Turbidimeter</strong> User Guide
Display<br />
Figure 3<br />
<strong>AQ4500</strong> Display<br />
tem Number Description<br />
1 Calibrate Icon lit while <strong>AQ4500</strong> is in calibration mode<br />
2 Setup Icon lit while <strong>AQ4500</strong> is in setup mode<br />
3 Measure Icon lit during measurement<br />
4 Avg Icon lit while <strong>AQ4500</strong> performs zero<br />
5 Units Icons for units of measurement<br />
6 ? Icon lit when <strong>AQ4500</strong> prompts a question<br />
7 Time Icon lit while timer is active<br />
8 Log Icon lit if data is in <strong>AQ4500</strong> log<br />
9 Battery Icon lit when battery in <strong>AQ4500</strong> is low<br />
10 Print Icon lit during print function<br />
11 188 Not used<br />
12 Alphanumeric display<br />
13 Numeric display<br />
<strong>Thermo</strong> <strong>Scientific</strong> <strong>Orion</strong> <strong>AQUAfast</strong> <strong>AQ4500</strong> <strong>Turbidimeter</strong> User Guide<br />
3
Keypad<br />
Figure 4<br />
<strong>AQ4500</strong> Keypad<br />
Key Description<br />
Turns the <strong>AQ4500</strong> on or off<br />
Initiates print mode or inputs number 0<br />
Confirms an answer or inputs a decimal point<br />
Allows selection of measurement units or inputs number 1<br />
Initiates log mode or inputs number 2<br />
Scrolls down, answers “NO” or inputs number 3<br />
Initiates Average mode or inputs number 4<br />
Displays Time/Date and Stopwatch or inputs number 5<br />
Scroll ups, answers “NO” or inputs number 6<br />
Initiates Setup function or inputs number 7<br />
Initiates a calibration or inputs number 8<br />
Initiates a measurement or inputs number 9<br />
<strong>Orion</strong> <strong>AQ4500</strong><br />
4 <strong>Thermo</strong> <strong>Scientific</strong> <strong>Orion</strong> <strong>AQUAfast</strong> <strong>AQ4500</strong> <strong>Turbidimeter</strong> User Guide
Battery<br />
nstallation<br />
Figure 5<br />
Battery Installation<br />
Chapter 2 Meter Setup<br />
The <strong>AQ4500</strong> turbidimeter requires 4 AA alkaline or lithium batteries .<br />
With 4 alkaline batteries, the expected life is 2,500 hours . With lithium<br />
batteries the expected life is 10,000 hours .<br />
To install batteries, carefully loosen the two captive screws on the bottom<br />
of the battery cover . Remove the cover and insert batteries as shown in<br />
Figure 5 .<br />
Replace battery cover and tighten captive screws .<br />
The <strong>AQ4500</strong> has an auto-shutoff feature to conserve battery life . The<br />
auto-shutoff will turn the turbidimeter off if no keys have been pressed<br />
for approximately 20 minutes .<br />
When the battery gets low “battery” will be displayed . Also at power-up<br />
an indication of battery life will be displayed .<br />
<strong>Thermo</strong> <strong>Scientific</strong> <strong>Orion</strong> <strong>AQUAfast</strong> <strong>AQ4500</strong> <strong>Turbidimeter</strong> User Guide<br />
5
Vial Cover<br />
Figure 6<br />
Figure 7<br />
The vial cover serves two functions; first, it keeps the optical well<br />
covered so water, dirt and dust do not enter the well . Second, it covers<br />
the vial during measurement to prevent stray light from affecting the<br />
measurement . When the vial cover is installed and screwed down the<br />
<strong>AQ4500</strong> is waterproof to IP67 standards .<br />
The vial cover can be used in two ways . First for measurement when the<br />
waterproof integrity of the meter is important, place the vial cover over<br />
the vial and screw down as shown in Figure 6. To remove, unscrew and<br />
lift up .<br />
If using turbidimeter in a lab where waterproof integrity is not a factor,<br />
the cover can just be placed down over the vial . To remove vial cover, lift<br />
cover straight up as shown in Figure 7 .<br />
6 <strong>Thermo</strong> <strong>Scientific</strong> <strong>Orion</strong> <strong>AQUAfast</strong> <strong>AQ4500</strong> <strong>Turbidimeter</strong> User Guide
Figure 8<br />
During measurement it is important to place the vial into the <strong>AQ4500</strong><br />
aligning the white triangle (s) on the vial with the tab on the<br />
turbidimeter . See Figure 8 aligning vial with tab on turbidimeter .<br />
<strong>Thermo</strong> <strong>Scientific</strong> <strong>Orion</strong> <strong>AQUAfast</strong> <strong>AQ4500</strong> <strong>Turbidimeter</strong> User Guide<br />
7
<strong>RS</strong>232<br />
Connection<br />
Figure 9<br />
<strong>AQ4500</strong> <strong>RS</strong>232<br />
Cable Connection<br />
The <strong>AQ4500</strong> has a bidirectional <strong>RS</strong>232 port located on the underside of<br />
the turbidimeter . See Figure 9 . To connect the <strong>AQ4500</strong> to a printer or<br />
computer, use the optional <strong>RS</strong>232 cable, Cat . No . AQ4CBL . See the Use<br />
With Printers and Computers section .<br />
8 <strong>Thermo</strong> <strong>Scientific</strong> <strong>Orion</strong> <strong>AQUAfast</strong> <strong>AQ4500</strong> <strong>Turbidimeter</strong> User Guide
Setup<br />
Functions<br />
Cal Chek<br />
setup<br />
Chapter 3 Setup Menu<br />
The setup key allows the user to access all the user selectable functions in<br />
the <strong>AQ4500</strong> turbidimeter .<br />
Cal Chek Allows the user to confirm the time and date of the last<br />
calibration for the measurement mode selected.<br />
Clock Allows the user to set the date and time.<br />
Set Baud Allows the user to set the baud rate for the meter when using<br />
it with a printer or computer.<br />
Print Allows the user to set the print out format.<br />
Auto Print Allows the user to set the turbidimeter to automatically print<br />
each measurement.<br />
Digits Allows the user to select the number of significant digits to be<br />
displayed.<br />
Battery Allows the user to view remaining battery life.<br />
Self test Allows the user to initiate a self test to verify meter operation.<br />
Allows the user to confirm the last calibration for the selected<br />
measurement mode .<br />
1 . Press the key .<br />
2 . Press the or key until “CAL CHEK” is displayed .<br />
3 . Press the key to accept .<br />
4 . The last calibration date and time will be displayed .<br />
5 . Press the or key to return to the setup mode or press the<br />
key to return to measurement mode .<br />
<strong>Thermo</strong> <strong>Scientific</strong> <strong>Orion</strong> <strong>AQUAfast</strong> <strong>AQ4500</strong> <strong>Turbidimeter</strong> User Guide<br />
9
setup<br />
setup<br />
Clock<br />
Set Baud<br />
Allows the user to set the time and date .<br />
1 . Press the key .<br />
2 . Press the or key until “CLOCK” is displayed .<br />
3 . Press the key to accept .<br />
4 . “20_ _” will be displayed . Enter the year .<br />
5 . “_ _ MONTH” will be displayed . Enter the month .<br />
6 . “_ _ DAY” will be displayed . Enter the day .<br />
7 . “_ _:_ _ (24) HOUR” will be displayed . Enter the time .<br />
8 . The <strong>AQ4500</strong> will proceed to next setup mode .<br />
The default baud rate is 1200 . The user may select a baud rate of 1200,<br />
2400, 4800 or 9600 .<br />
1 . Press the key .<br />
2 . Press the or key until “SET BAUD” is displayed .<br />
3 . Press the key to accept . 1200 or last baud rate selected will be<br />
displayed .<br />
4 . Press the or key until the desired baud rate is selected .<br />
5 . Press the key to accept .<br />
10 <strong>Thermo</strong> <strong>Scientific</strong> <strong>Orion</strong> <strong>AQUAfast</strong> <strong>AQ4500</strong> <strong>Turbidimeter</strong> User Guide
setup<br />
Print<br />
Auto Print<br />
setup<br />
setup<br />
Digits<br />
Allows the user to select the printout format . The user can select between<br />
a standard printout or a comma delimited format for importing data into<br />
a spreadsheet .<br />
1 . Press the key .<br />
2 . Press the or key until “PRINT” is displayed .<br />
3 . Press the key to accept . “STND PRN?” will be displayed .<br />
4 . Press the or key to toggle between “STND PRN?” and<br />
“CMA DELM?” .<br />
5 . Press the key to accept .<br />
Auto print “ON” will automatically send readings to the printer .<br />
1 . Press the key .<br />
2 . Press the or key until “AUTO PRT” is displayed .<br />
3 . Press the key to accept . “AUTO OFF?” or “AUTO ON?” will be<br />
displayed .<br />
4 . Press the or key to toggle between “AUTO OFF?” and<br />
“AUTO ON?” .<br />
5 . Press the key to accept .<br />
The digit selection allows the user to select the resolution of the<br />
reading, from 0 .000, 0 .00, 0 .0 and 0 or auto resolution . Default is auto<br />
resolution .<br />
1 . Press the key .<br />
2 . Press the or key until “DIGITS”<br />
is displayed .<br />
3 . Press the key to accept .<br />
4 . Press the or key until the desired resolution is selected .<br />
5 . Press the key to accept .<br />
<strong>Thermo</strong> <strong>Scientific</strong> <strong>Orion</strong> <strong>AQUAfast</strong> <strong>AQ4500</strong> <strong>Turbidimeter</strong> User Guide<br />
11
Battery<br />
setup<br />
Self Test<br />
setup<br />
1 . Press the key .<br />
2 . Press the or key until “BATTERY” is displayed .<br />
3 . Press the key to see remaining battery life .<br />
Puts the turbidimeter into a self-diagnostic mode . See the <strong>Turbidimeter</strong><br />
Self Test section .<br />
12 <strong>Thermo</strong> <strong>Scientific</strong> <strong>Orion</strong> <strong>AQUAfast</strong> <strong>AQ4500</strong> <strong>Turbidimeter</strong> User Guide
Chapter 4 Calibration<br />
Warning: Never pour liquid directly into the sample chamber<br />
of the <strong>AQ4500</strong> turbidimeter . Only use 24 mm diameter vials,<br />
Cat . No . AC2T24 .<br />
Note: Always use clean dry vials for calibration and measurement . See<br />
the Measurement Tips section .<br />
The EPA approved SDVB primary standards in the meter kit are in<br />
plastic bottles for improved precision and shelf life . Five vials are included<br />
and labeled for each standard level .<br />
The <strong>AQ4500</strong> turbidimeter has been factory calibrated . Measure the<br />
provided SDVB primary turbidity standards, as if they are samples, before<br />
using the turbidimeter for the first time to verify the standards using the<br />
meter factory calibration . The standards should read within the accuracy<br />
specification for the standard, according to the certificate of analysis for<br />
that standard .<br />
For best accuracy and regulatory compliance, perform an initial<br />
calibration with the SDVB turbidity standards after measuring them as<br />
samples and whenever a calibration check standard exceeds ± 10% of<br />
the expected value . The EPA 180 .1, ISO-NEPH, and IR Ratio modes<br />
may be calibrated in this manner . The EBC mode is automatically<br />
calibrated when the ISO-NEPH mode is calibrated . The ASBC mode<br />
is automatically calibrated when the EPA 180 .1 mode is calibrated . The<br />
ISO-ABSB, White %T, and the IR %T modes require calibration with<br />
low-turbidity water only .<br />
For EPA 180, ISO-NEPH, and IR Ratio modes, meter performance<br />
checks should be performed on a daily basis using the primary standards<br />
in the turbidity calibration kit, Cat . No . AC45ST, and low-turbidity<br />
water .<br />
For ISO-ABSB, White %T, and the IR %T modes, the meter should be<br />
calibrated daily using low-turbidity water .<br />
<strong>Thermo</strong> <strong>Scientific</strong> <strong>Orion</strong> <strong>AQUAfast</strong> <strong>AQ4500</strong> <strong>Turbidimeter</strong> User Guide<br />
13
Preparing and<br />
Filling the<br />
Calibration<br />
Standard Vials<br />
The five bottles of calibration standards supplied with your meter are<br />
more stable than Formazin, do not need to be shaken and have a shelf life<br />
of 12 months . If you use the supplied calibration standards to calibrate<br />
the instrument, review the expiration date (indicated on the bottle label)<br />
to ensure that the standards have not expired .<br />
Note: It is important that the calibration standards are not violently<br />
shaken or agitated because air entrapment in the fluid introduces an error<br />
factor during calibration which subsequently will lead to an inaccurate<br />
measurement . Also, do not store in freezing temperatures which causes<br />
irreversible shrinkage of the standards’ particles thus resulting to<br />
inaccurate calibration and measurement .<br />
Before using the meter for the first time, rinse the inside of the vial with a<br />
small amount of the same NTU standard that will be used to fill that vial .<br />
1 . Gently pour about 5 mL of the standard into the vial .<br />
2 . Cap and swirl the vial so the inside of the vial is fully rinsed with<br />
the standard .<br />
3 . Pour the standard out of the vial .<br />
4 . Repeat steps 1 through 3 .<br />
5 . Gently pour the standard into the vial up to the mark on the vial and<br />
cap the vial .<br />
6 . Repeat this rinse and filling procedure for the other three vials .<br />
Note: The vial rinsing is most critical for precision with the lower<br />
NTU standards .<br />
It is recommended to use the prepared calibration standard vials daily as<br />
check standards prior to the measurement of samples .<br />
14 <strong>Thermo</strong> <strong>Scientific</strong> <strong>Orion</strong> <strong>AQUAfast</strong> <strong>AQ4500</strong> <strong>Turbidimeter</strong> User Guide
Calibration<br />
Check<br />
1 . Place the <strong>AQ4500</strong> turbidity meter on a flat and level surface .<br />
2 . Insert the CAL 1 standard (0 NTU) into the sample chamber .<br />
3 . Press down the vial until it slides fully into the instrument . Cover the<br />
vial using the vial cover .<br />
4 . Select the measurement mode .<br />
5 . Press the key .<br />
6 . The meter will display the results . Record the reading .<br />
7 . Repeat the calibration check for CAL 2, CAL 3, CAL 4 and CAL 5<br />
calibration standards .<br />
8 . If the displayed results are within 10% of the nominal NTU<br />
value of the standard or the precision criteria required by your<br />
method, the calibration check passed and the meter is now ready<br />
for measurement .<br />
Note: If a standard no longer reads within 10% of the nominal NTU<br />
value for the standard, the standard has most likely degraded . The lower<br />
level NTU standards will be less stable when stored in glass than the<br />
higher NTU standards . The lower level standards may need to be replaced<br />
periodically, especially if the value falls outside of the tolerance range .<br />
See the Refilling the Calibration Standard Vials with Fresh Standard<br />
section .<br />
<strong>Thermo</strong> <strong>Scientific</strong> <strong>Orion</strong> <strong>AQUAfast</strong> <strong>AQ4500</strong> <strong>Turbidimeter</strong> User Guide<br />
15
Table 1<br />
Primary Calibration<br />
Standards<br />
Table 2<br />
Calibration Ranges<br />
Preparation of<br />
Low Turbidity<br />
Water<br />
EPA 180 .1 SO-NEPH R Ratio<br />
1000 NTU 100 NTU 1000 NTU<br />
100 NTU 10 NTU 100 NTU<br />
10 NTU 1 NTU 10 NTU<br />
1 NTU Low-turbidity water 1 NTU<br />
Low-turbidity water Low-turbidity water<br />
If desired, the meter may be calibrated at concentrations other than those<br />
listed in Table 1 .<br />
Note: Preparing standards and calibrating at these concentrations may<br />
yield reduced accuracy .<br />
Cal EPA 180 .1 SO-NEPH R Radio<br />
Standard Level<br />
1 0.90 to 1.1 NTU 0.86 to 1.1 FNU 0.86 to 1.1 NTU<br />
10 9.0 to 11 NTU 9.0 to 11.6 FNU 9.0 to 11.3 NTU<br />
100 90 to 110 NTU 90 to 157 FNU 90 to 119 NTU<br />
1000 900 to 1100 NTU N/A 654 to 1100 NTU<br />
To obtain low-turbidity water for dilutions, nominal value 0 .02 NTU,<br />
pass laboratory reagent-grade water through a 0 .1 micron (mm) filter .<br />
Rinse the collecting flask at least twice with filtered water and discard<br />
the next 200 mL . Alternately, use laboratory reagent-grade water without<br />
filtering, if turbidity values are similar to or lower than filtered water . Use<br />
caution to avoid the introduction of dust and particulates .<br />
16 <strong>Thermo</strong> <strong>Scientific</strong> <strong>Orion</strong> <strong>AQUAfast</strong> <strong>AQ4500</strong> <strong>Turbidimeter</strong> User Guide
nitial<br />
Calibration<br />
for EPA 180 .1,<br />
SO-NEPH or R<br />
Ratio Modes<br />
Notes for Handling<br />
Cat . No . AC45ST Kit<br />
Standards<br />
1 . Select the measurement mode, EPA 180, ISO-NEPH or IR Ratio by<br />
scrolling up or down until the desired mode is displayed .<br />
2 . Press the key . “H2O INSERT” will be displayed .<br />
3 . Insert vial containing pure water and press the key .<br />
4 . “H2O WAIT” will be displayed and then “1 .00 YES?” .<br />
5 . If the standard is 1 .00, insert standard vial and press the key . If<br />
standard is another value, press the or key, “CHANGE?”<br />
will be displayed . Press the key . “STD VAL?” will be displayed .<br />
Enter value of standard using numeric keypad . Press the key to<br />
accept .<br />
6 . Repeat step 5 for each standard .<br />
7 . When the calibration is complete the <strong>AQ4500</strong> will proceed to the<br />
measure mode .<br />
After performing the initial calibration with the primary calibration<br />
standards, perform a meter performance check by measuring the<br />
standards and a blank (turbidity-free water) . The performance is good<br />
when the blank reads less than 0 .1 NTU and the standards read within ±<br />
10 % of the expected values . If results are not within limits, reanalyze the<br />
standards and blank . If the confirms that calibration is outside of limits,<br />
discontinue analysis and determine the cause of error .<br />
• Do not freeze kits<br />
• Do not shake or agitate the sample<br />
• Remove fingerprints and smudges with a soft wiper cloth<br />
<strong>Thermo</strong> <strong>Scientific</strong> <strong>Orion</strong> <strong>AQUAfast</strong> <strong>AQ4500</strong> <strong>Turbidimeter</strong> User Guide<br />
17
Daily<br />
Calibration<br />
Check for EPA<br />
180 .1, SO-<br />
NEPH and R<br />
Ratio Modes<br />
Calibration<br />
of SO-ABSB<br />
Mode<br />
Calibration<br />
of White %T<br />
Mode<br />
Check meter performance daily by analyzing the SDVB primary<br />
standards and a blank before and after sample measurements . The<br />
performance is good when the blank reads less than 0 .1 NTU and the<br />
standards read within ± 10% of the expected values . If results are not<br />
within limits, pour fresh standards into the vials and reanalyze with the<br />
fresh SDVB primary standards and blank . If the reanalysis confirms that<br />
calibration is outside of limits, stop analysis and determine the cause of<br />
error before proceeding . A new initial calibration may be required .<br />
1 . Select the measurement mode ISO-ABSB using the or key .<br />
2 . Press the key . “H2O INSERT” will be displayed .<br />
3 . Insert vial containing turbidity-free water and press the key .<br />
“H2O WAIT” will be displayed .<br />
4 . When the calibration is complete the <strong>AQ4500</strong> will proceed to the<br />
measure mode .<br />
After successful calibration, the low-turbidity water should read “0” FAU .<br />
1 . Select the measurement mode White %T using the or key .<br />
2 . Press the key . “W➞100?” will be displayed .<br />
3 . Insert vial containing low-turbidity water and press the key .<br />
4 . “WAIT” will be displayed .<br />
5 . When the calibration is complete the <strong>AQ4500</strong> will proceed to the<br />
measure mode .<br />
After successful calibration, the low-turbidity water should read<br />
“CAL DONE” .<br />
18 <strong>Thermo</strong> <strong>Scientific</strong> <strong>Orion</strong> <strong>AQUAfast</strong> <strong>AQ4500</strong> <strong>Turbidimeter</strong> User Guide
Calibration of<br />
R %T Mode<br />
Refilling the<br />
Calibration<br />
Standard Vials<br />
with Fresh<br />
Standard<br />
1 . Select the measurement mode IR %T using the or key .<br />
2 . Press the key . “IR➞100?” will be displayed .<br />
3 . Insert vial containing turbidity-free water and press the key .<br />
4 . “WAIT” will be displayed .<br />
5 . When the calibration is complete the <strong>AQ4500</strong> will proceed to the<br />
measure mode .<br />
After successful calibration, the low-turbidity water should read<br />
“CAL DONE” .<br />
1 . Pour the old standard out of the vial .<br />
2 . Wash the vial with laboratory glassware detergent and water . Rinse<br />
the vial with turbidity-free water to remove all laboratory detergent<br />
from the vial .<br />
3 . Rinse the vial with about 5 mL of the standard from the plastic bottle<br />
with the matching NTU value .<br />
4 . Cap and swirl the vial so the inside of the vial is fully rinsed with the<br />
fresh standard .<br />
5 . Pour the standard out of the vial .<br />
6 . Pour the fresh standard into the vial up to the mark on the vial and<br />
cap the vial .<br />
7 . Perform the procedure in the Calibration Check section with the vial<br />
containing the fresh standard .<br />
If the fresh standard does not read with the 10% range of the nominal<br />
value, or to the tolerance of your method, follow the steps in one of the<br />
Calibration Mode sections .<br />
<strong>Thermo</strong> <strong>Scientific</strong> <strong>Orion</strong> <strong>AQUAfast</strong> <strong>AQ4500</strong> <strong>Turbidimeter</strong> User Guide<br />
19
Preparation<br />
of Formazin<br />
Calibration<br />
Standards<br />
Use the following procedure for EPA 180 .1, ISO-NEPH, and IR Ratio<br />
modes . A primary formazin stock standard at 4000 NTU is available as<br />
Cat . No . AC45FZ . This formazin stock standard can be used to prepare<br />
primary calibration standards for the EPA 180 .1, ISO-NEPH, and IR<br />
Ratio modes, as noted in Table 1 .<br />
For initial calibration, prepare the following primary calibration standards<br />
by dilution of the 4000 NTU formazin stock standard with low-turbidity<br />
water . Preparing standards at these concentrations yields the best accuracy .<br />
Note: When using the 4000 NTU formazin stock and preparing primary<br />
calibration standards, it is important to keep the solutions well mixed<br />
when handling .<br />
Note: It is well known that diluted Formazin is unstable . If you choose<br />
to use Formazin to calibrate the instrument, ensure that you are using a<br />
fresh stock suspension of Formazin to achieve the precision quoted for the<br />
instrument . It is very difficult to accurately pipet Formazin for low level<br />
NTU standards, due to the non-homogeneous nature of Formazin and<br />
because these standards have very limited stability at low levels . Be sure<br />
to use good laboratory technique and accurate Class A pipets and refer<br />
to ASTM Method 6855-03 for low level standard vial preparation when<br />
using Formazin .<br />
20 <strong>Thermo</strong> <strong>Scientific</strong> <strong>Orion</strong> <strong>AQUAfast</strong> <strong>AQ4500</strong> <strong>Turbidimeter</strong> User Guide
Turbidity<br />
Sample<br />
Measurement<br />
Chapter 5 Measurement<br />
Warning: Never pour liquid directly into the sample chamber of the<br />
<strong>AQ4500</strong> . Only use 24 mm diameter vials, Cat . No . AC2T24 .<br />
Below are general instructions for performing turbidity measurements .<br />
For best results, always cover vial with vial cover whenever measuring<br />
a sample .<br />
1 . Allow the sample to come to room temperature .<br />
2 . Mix the sample thoroughly to disperse the solids .<br />
3 . Wait until all visible air bubbles disappear (a few minutes at most) .<br />
4 . Select the measurement mode .<br />
5 . Pour the sample into a clean, dry turbidity vial . If the sample has<br />
settled, mix it gently to resuspend the solids before pouring it into<br />
the sample vial .<br />
6 . Cap the vial securely .<br />
7 . Wipe the vial free of liquid and fingerprints with a soft lint-free wipe<br />
or cloth .<br />
8 . Place the vial into the <strong>AQ4500</strong> sample chamber and cover it with the<br />
vial cover .<br />
9 . Press the key .<br />
10 . The <strong>AQ4500</strong> will display the result . Record the value or log the data .<br />
Proceed with the next sample .<br />
<strong>Thermo</strong> <strong>Scientific</strong> <strong>Orion</strong> <strong>AQUAfast</strong> <strong>AQ4500</strong> <strong>Turbidimeter</strong> User Guide<br />
21
Measurement<br />
of Low Level<br />
Turbidity Samples<br />
(< 1 NTU)<br />
Observe the following precautions to improve accuracy of low-level<br />
turbidity sample measurements:<br />
1 . Prepare the calibration samples with low-turbidity water that<br />
has been filtered through a 0 .1 mm membrane filter or water<br />
that has been demonstrated to be equivalent . Use care to avoid<br />
introduction of dust and particulates into the water, calibration<br />
standards and samples .<br />
2 . Use very clean vials that are free from scratches and imperfections .<br />
3 . Index the vials with the low-turbidity water to find the orientation<br />
that produces the lowest background blank value . Mark the<br />
orientation on the vials, above the marked line (so the orientation<br />
mark does not interfere with the meter light path) .<br />
4 . Apply a light coating of silicon oil to mask minor imperfections in<br />
the glass vials . Spread the oil uniformly and remove excess oil by<br />
polishing with a soft, lint-free cloth . (Silicone oil and cloth kit, Cat .<br />
No . AC45SI)<br />
5 . Do not handle vials where the light path of the meter strikes them .<br />
Hold vials above the marked line or by the cap, once the cap is on<br />
the vial .<br />
6 . Use the same indexed vial for the 1 NTU calibration point and for<br />
measurement of the low-level turbidity sample or samples . Clean<br />
the vial carefully between the calibration and the sample<br />
measurement . Fill with low-turbidity water and obtain a blank<br />
reading to ascertain that there has been no significant carryover,<br />
before using for sample measurements .<br />
7 . Rinse the vial a few times with the sample before filling .<br />
8 . Degas the sample before measurement, even if no bubbles are visible .<br />
Degas by immersing the sample cell in an ultrasonic bath for 1 to 2<br />
seconds only or applying a partial vacuum .<br />
Proceed with measurement steps .<br />
22 <strong>Thermo</strong> <strong>Scientific</strong> <strong>Orion</strong> <strong>AQUAfast</strong> <strong>AQ4500</strong> <strong>Turbidimeter</strong> User Guide
Measurement<br />
Tips<br />
• Keep turbidity vials scrupulously clean both inside and out .<br />
• Discard vials if they become scratched or etched and silicone oil does<br />
not improve their performance .<br />
• Do not handle vials in the light path area .<br />
• Wash vials well with laboratory detergent, rinse repeatedly with<br />
deionized water and allow to air dry .<br />
• If condensation forms on the outside of the vial, warm sample to<br />
room temperature, wipe off excess moisture and remix sample before<br />
analysis .<br />
<strong>Thermo</strong> <strong>Scientific</strong> <strong>Orion</strong> <strong>AQUAfast</strong> <strong>AQ4500</strong> <strong>Turbidimeter</strong> User Guide<br />
23
EPA nterim<br />
Approval Letter<br />
24 <strong>Thermo</strong> <strong>Scientific</strong> <strong>Orion</strong> <strong>AQUAfast</strong> <strong>AQ4500</strong> <strong>Turbidimeter</strong> User Guide
Log Functions<br />
setup<br />
setup<br />
Chapter 6 Functions<br />
The <strong>AQ4500</strong> turbidimeter allows the user to store up to 100 points in<br />
the log .<br />
To Log Data<br />
Once measurement is complete, press the key to log point prior to<br />
next measurement .<br />
To Display Log<br />
1 . Press and hold the key for approximately 3 seconds .<br />
2 . “DISPLAY” will be displayed and last point in log will be displayed .<br />
3 . Use the or key to scroll through log points .<br />
4 . Press the key to escape log display mode .<br />
To Clear Log<br />
1 . Go into setup mode by pressing the key .<br />
2 . Press the or key; “DEL LOG” will be displayed .<br />
3 . Press the key; “CLR LOG?” will be displayed .<br />
4 . Press the key to abort log clear .<br />
5 . Press the key to clear log . “DELETED” will be displayed and<br />
meter will return to measure mode .<br />
Note: It is recommended to print or download log prior to clearing .<br />
<strong>Thermo</strong> <strong>Scientific</strong> <strong>Orion</strong> <strong>AQUAfast</strong> <strong>AQ4500</strong> <strong>Turbidimeter</strong> User Guide<br />
25
Average<br />
Functions<br />
To Activate<br />
the Average<br />
Function<br />
To Deactivate<br />
the Average<br />
Function<br />
To Print or Download Log<br />
1 . Plug serial cable, Cat . No . AQ4CBL, into <strong>AQ4500</strong> .<br />
2 . Connect AQ4CBL cable to printer or computer . See the Setup<br />
Menu section .<br />
3 . Go to log display mode and press the key .<br />
The average “AVG” function enables the meter to take into account<br />
larger particles that may be floating through the sample during analysis .<br />
This situation is often encountered while testing environmental waters<br />
from rivers and lakes . As these particles may not always be present in the<br />
measuring path, observing the sample for a longer period of time may<br />
yield more accurate and reproducible readings . When AVG is turned<br />
on the meter takes a large number of consecutive readings, and then<br />
displays the averaged result . The measurement will take slightly longer<br />
(approximately 15 seconds) . The result is a better or truer reading of the<br />
turbidity .<br />
It is important to note that even if the AVG function is off, the meter<br />
will perform a certain amount of signal averaging . This smart averaging<br />
is most prominent when measuring samples of very low turbidity (
Data<br />
Transmission<br />
Settings<br />
Chapter 7 Use with Printers and<br />
Computers<br />
The <strong>AQ4500</strong> allows communication to a printer or communication with<br />
a computer . When connecting to a printer or a computer, use Cat . No .<br />
AQ4CBL . This cable has a special 3 pin connector on one end for the<br />
<strong>AQ4500</strong> . When used to connect to a computer, a serial adapter may be<br />
required (a 25 pin to 9 pin adapter is included with Cat . No . AQ4CBL) .<br />
Baud Rate (Selectable) 1200 (default), 2400, 4800, 9600<br />
Parity None<br />
Data Bits 8<br />
Start Bit 1<br />
Stop Bit 1<br />
<strong>Thermo</strong> <strong>Scientific</strong> <strong>Orion</strong> <strong>AQUAfast</strong> <strong>AQ4500</strong> <strong>Turbidimeter</strong> User Guide<br />
27
28 <strong>Thermo</strong> <strong>Scientific</strong> <strong>Orion</strong> <strong>AQUAfast</strong> <strong>AQ4500</strong> <strong>Turbidimeter</strong> User Guide
<strong>Turbidimeter</strong><br />
Self Test<br />
<strong>Turbidimeter</strong><br />
Maintenance<br />
Vial<br />
Maintenance<br />
Chapter 8 Customer Services<br />
1 . To initiate self test, press the key .<br />
2 . Press the or key until display reads “SELFTEST” .<br />
3 . Press the key to initiate self test .<br />
4 . When “PRESS 7” is displayed, press the key and follow the<br />
directions through the test .<br />
5 . When complete, unit should display “UNIT OK” .<br />
6 . Press any key to confirm display operation .<br />
7 . Press any key to exit the self test .<br />
8 . Press the key to return to measurement mode or press the<br />
or key to proceed through setup menu .<br />
• Wipe the outside of the turbidimeter with a damp cloth .<br />
• Use a lens tissue, a soft cloth, or clean compressed air can to remove<br />
dust and dirt from the sample compartment .<br />
• Always wipe moisture off any vial before inserting into the <strong>AQ4500</strong> .<br />
• Always wipe fingerprints off any vial before inserting into the<br />
<strong>AQ4500</strong> .<br />
• To clean vials, wash vials well with laboratory detergent, rinse<br />
repeatedly with deionized water and allow to air dry .<br />
• Use a light coating of silicone oil (Cat . No . AC45SI) and lint-free<br />
cloth to fill in tiny scratches and optimize the vial surface .<br />
• Discard vials if they become scratched or etched and silicone oil does<br />
not improve their performance .<br />
<strong>Thermo</strong> <strong>Scientific</strong> <strong>Orion</strong> <strong>AQUAfast</strong> <strong>AQ4500</strong> <strong>Turbidimeter</strong> User Guide<br />
29
Operator<br />
Assistance<br />
Codes<br />
Table 3<br />
Error Codes<br />
Assistance<br />
Warranty<br />
Operator assistance codes are used to inform a user of a problem during<br />
operation . See Table 3 for these codes . Contact the Technical Support<br />
department for assistance .<br />
Warning: Opening the meter enclosure (excluding the battery<br />
compartment) will void the warranty .<br />
Error Code Error Code Type<br />
E1 Keyboard error<br />
E2 Bad EPROM error<br />
E4 RTC not detected<br />
E8 RTC not running<br />
E16 RTC not generating interrupts<br />
E32 RTC interrupt pulse out of specification or missing<br />
E64 Bad ADC or battery reading out of specification<br />
E128 White LED, transmission detector or monitor failure<br />
E256 IR LED, transmission detector or monitor failure<br />
E512 Scatter detector reading out of specification<br />
E1024 No signal scatter or transmission readings out of specification<br />
E2048 No signal monitor readings out of specification<br />
E4096 White ZDI scatter too high<br />
E8192 IR DI scatter too high<br />
OVERRNGE Measurement exceeded operation range<br />
After troubleshooting all components of your measurement system,<br />
contact Technical Support . Within the United States call 1 .800 .225 .1480<br />
and outside the United States call 978 .232 .6000 or fax 978 .232 .6031 .<br />
In Europe, the Middle East and Africa, contact your local authorized<br />
dealer . For the most current contact information, visit<br />
www .thermo .com/contactwater .<br />
For the most current warranty information, visit www .thermo .com/water .<br />
30 <strong>Thermo</strong> <strong>Scientific</strong> <strong>Orion</strong> <strong>AQUAfast</strong> <strong>AQ4500</strong> <strong>Turbidimeter</strong> User Guide
Declaration of<br />
Conformity<br />
Manufacturer: <strong>Thermo</strong> Fisher <strong>Scientific</strong><br />
166 Cummings Center<br />
Beverly, MA 01915 U .S .A .<br />
Hereby declares that the <strong>AQ4500</strong> turbidity meter conforms with the<br />
following standards and documents:<br />
<strong>Thermo</strong> <strong>Scientific</strong> <strong>Orion</strong> <strong>AQUAfast</strong> <strong>AQ4500</strong> <strong>Turbidimeter</strong> User Guide<br />
Safety EC Directive 72/23/EEC Low Voltage Directive<br />
EMC EC 89/336/EEC Electromagnetic Compatibility<br />
EN/IEC 61326:1997 + A1: 1998, Annex C<br />
Emissions EN 55011 (Class A) Emissions<br />
FCC Part 15 Class A<br />
Canadian Emissions (EMCAB-3 ISSUE 2)<br />
Immunity DIN EN 50082-1 1994 Generic Immunity<br />
IEC 61000-4-2 1999 ESD Susceptibility<br />
IEC 61000-4-3 1998 Radiated Immunity<br />
This <strong>Thermo</strong> <strong>Scientific</strong> <strong>Orion</strong> product has been manufactured in<br />
compliance with the provisions of the relevant manufacturing and test<br />
documents and processes . These documents and processes are recognized<br />
as complying with ISO 9001:2008 by QMI, listed as File # 001911 .<br />
Patrick Chiu Place and Date of Issue:<br />
Senior Quality Engineer, Beverly, MA<br />
Regulatory Compliance April 16, 2009<br />
31
Ordering<br />
nformation<br />
Cat. No. Description<br />
<strong>AQ4500</strong> <strong>AQUAfast</strong> IV advanced turbidimeter, with field kit,<br />
primary standards, silicone oil cloth, standard vials,<br />
sample vials and user guide<br />
AC2T24 Turbidity measurement replacement vials, pack of 12<br />
AQ4CBL <strong>AQUAfast</strong> IV <strong>RS</strong>232 cable<br />
AC45ST <strong>AQ4500</strong> calibration kit of primary standards<br />
AC45FZ 4000 NTU formazin standard stock solution, 475 mL<br />
AC45SI Silicone oil (15 mL) and cloth kit<br />
32 <strong>Thermo</strong> <strong>Scientific</strong> <strong>Orion</strong> <strong>AQUAfast</strong> <strong>AQ4500</strong> <strong>Turbidimeter</strong> User Guide
Specifications<br />
Measurement Method Range<br />
EPA 180 .1 0 to 2000 NTU<br />
EPA GLI Method 2 0 to 40 NTU<br />
ISO-NEPH (7027) 0 to 150 FNU<br />
ISO-ABSB 40 to 4000 FAU<br />
IR-RATIO 0 to 4000 NTU<br />
EBC 0 to 24 .5 EBC<br />
ASBC 0 to 236 ASBC<br />
WHITE %T 0 to 100 %T<br />
IR %T 0 to 100 %T<br />
<strong>AQ4500</strong> <strong>Turbidimeter</strong><br />
Resolution 0 .01 NTU (0 to 9 .99)<br />
0 .1 NTU (10 to 99 .9)<br />
1 NTU (100 to 1000)<br />
Wavelength Selection Automatic<br />
Repeatability ± 1% of reading or 0 .01 NTU<br />
Accuracy ± 2% of reading plus 0 .01 NTU<br />
(0 to 500 NTU)<br />
± 3% of reading (500 to 1000 NTU)<br />
± 5% of reading (1000 to 2000 NTU)<br />
Source Lamp Light emitting diode (LED)<br />
Detector Silicon Photodiode<br />
Sample Size Approximately 12 mL<br />
Environmental Conditions<br />
Operating Temperature - 40 .0 to 60 .0 °C<br />
Humidity 90% relative humidity at 30 .0 °C max<br />
Waterproof IP67<br />
Inputs<br />
Keypad 12 dual function keys with tactile<br />
feedback<br />
<strong>RS</strong>232 Yes<br />
Sample Chamber 24 mm<br />
Display Custom LCD<br />
Units FNU, NTU, FAU, ASBC, EBC<br />
Low Battery Indicator Yes<br />
<strong>Thermo</strong> <strong>Scientific</strong> <strong>Orion</strong> <strong>AQUAfast</strong> <strong>AQ4500</strong> <strong>Turbidimeter</strong> User Guide<br />
33
Software Features<br />
Datalogging 100 points<br />
Built-in Clock with Time<br />
and Date Display<br />
34 <strong>Thermo</strong> <strong>Scientific</strong> <strong>Orion</strong> <strong>AQUAfast</strong> <strong>AQ4500</strong> <strong>Turbidimeter</strong> User Guide<br />
Yes<br />
Auto Shut-off Yes<br />
Electrical Features<br />
Power 4 AA batteries<br />
Battery Life 2,500 hours (alkaline) 10,000 hours<br />
(lithium)<br />
Non-volatile Memory Yes
Appendix A Tungsten vs . LED Discussion<br />
Traditionally, tungsten lamps have been used as light sources in turbidity<br />
measuring instrumentation . As such, they have been accepted by US EPA,<br />
and widely used in all white light turbidity measuring instrumentation .<br />
The primary characteristic, which made their use necessary, is the required<br />
broadband spectral distribution . Tungsten bulbs have a measurable output<br />
ranging from blue light all the way into infrared wavelengths .<br />
At the time there had been no suitable alternatives to consider, so<br />
tungsten bulbs were accepted despite the operating problems they<br />
presented . Although LEDs were widely available for a very long time, they<br />
were characterized by a relatively narrow spectral emission, unsuitable for<br />
US EPA 180 .1 method .<br />
Recently, high-powered white LEDs have become available . In essence,<br />
these are blue (450 nm) LEDs with a phosphorus coating on the die . This<br />
construction gives off a broadband light from deep blue into deep red<br />
wavelengths and uses minimal power to accomplish this .<br />
<strong>Thermo</strong> <strong>Scientific</strong> <strong>Orion</strong> products include a meter that uses this new<br />
solid-state light source . The <strong>Thermo</strong> <strong>Orion</strong> AQ 4500 Method, Revision<br />
5 has been given interim EPA approval for wastewater reporting . The<br />
EPA approval was through the ATP (Alternative Test Procedure) program<br />
to allow new technologies to be accepted for use where applicable<br />
methodologies meet or exceed the original technology . Visit<br />
www .thermo .com/waterapps for details . The following are some<br />
important considerations which characterize and compare this approach<br />
to that of a traditional tungsten light source .<br />
<strong>Thermo</strong> <strong>Scientific</strong> <strong>Orion</strong> <strong>AQUAfast</strong> <strong>AQ4500</strong> <strong>Turbidimeter</strong> User Guide<br />
35
Spectral<br />
Distribution<br />
Detector-LED<br />
Combined<br />
Responsivity<br />
EPA 180 .1 method describes a polychromatic measurement system . It<br />
is based on a tungsten light source and a detector system with spectral<br />
characteristics between 400 and 600 nm .<br />
In order to substitute a white LED light source, it is important to<br />
consider the spectral emission and transmission characteristics of the<br />
combined electro-optical system .<br />
As can be seen from the graph, the white LED – Si photo detector system<br />
described here is quite broadband . Its appearance is very similar to that<br />
of a tungsten bulb and a cadmium sulfide photo detector combination .<br />
It also contains a narrow secondary peak at 460 nm . As the blue output<br />
is very limited in tungsten bulbs, this peak can aid in better detection of<br />
very small particles . However, as the peak area is very small compared to<br />
that of a main body, this enhancement is not very pronounced .<br />
36 <strong>Thermo</strong> <strong>Scientific</strong> <strong>Orion</strong> <strong>AQUAfast</strong> <strong>AQ4500</strong> <strong>Turbidimeter</strong> User Guide
Stability<br />
Ambient Light<br />
and Electronic<br />
Bias Rejection<br />
Longevity<br />
Voltage and<br />
Temperature<br />
Dependency<br />
As follows from the theory of operation, and has been observed in<br />
practice, white LED meters exhibit high level of stability over a wide<br />
range of operating conditions . The meters have been observed to hold<br />
calibration over a period of weeks of intensive use . In contrast, tungsten<br />
bulb based instrumentation requires relatively frequent calibrations .<br />
Unlike tungsten bulbs, LED light sources readily lend themselves to<br />
rapidly pulsed operation . This enables the use of synchronous detection,<br />
a technique by which the ambient light as well as other electronic<br />
induced errors are effectively cancelled out . In doing so it is possible to<br />
reduce the ambient light leakage errors when making very low turbidity<br />
measurements .<br />
LEDs have a very long operating life: typically 100,000 hours or more .<br />
Thus, it is not necessary to include provisions for their replacement .<br />
It is well known that the spectral output (color temperature) of tungsten<br />
bulbs is very dependent on the operating voltage . Although, this voltage<br />
can be easily regulated, the meter-to-meter reproducibility for certain<br />
samples can vary, as the typical voltage accuracy is on the order of 1% .<br />
This has a very significant effect on the color temperature, particularly in<br />
view of the fact that the bulbs themselves are not as reproducible as the<br />
LED sources .<br />
The operating voltage and ambient temperature have a very minimal<br />
effect on LEDs, and are most pronounced on the intensity, not the<br />
spectral output . As any minor intensity variations are easily corrected<br />
by the meter electronics, for all practical purposes, these errors are nonexistent<br />
.<br />
<strong>Thermo</strong> <strong>Scientific</strong> <strong>Orion</strong> <strong>AQUAfast</strong> <strong>AQ4500</strong> <strong>Turbidimeter</strong> User Guide<br />
37
Warm-up<br />
Aging<br />
Shock<br />
Resistance<br />
Bulb<br />
Replacement<br />
As the light sources are powered up, they all experience intensity and<br />
spectral characteristic shifts until the operating equilibrium is reached .<br />
This is commonly referred as the warm-up time . This parameter is a very<br />
important consideration when measuring the turbidity . It is important to<br />
have a spectrally and intensity stable light source . Although it is possible<br />
to correct for intensity variations, it is not possible to do so for color<br />
temperature effects .<br />
Tungsten bulbs suffer from pronounced warm-up problems: both in<br />
intensity and color temperature . White LEDs also do have a warm-up<br />
period . However, this is much shorter (1 second or so), and the only<br />
parameter that significantly varies is the LED intensity .<br />
Another well-known fact about the tungsten bulbs is that they change<br />
their properties through their life (aging) . There are number of<br />
mechanisms which contribute to this, and presently it is not possible to<br />
eliminate these effects . This has number of consequences on the turbidity<br />
measurements, the most significant being the need for very frequent<br />
calibrations . In contrast, white LEDs do not exhibit any significant aging<br />
signs .<br />
Unlike tungsten bulbs, all LEDs have very high shock resistance . This is<br />
particularly important for field instrumentation .<br />
As mentioned earlier, the LED based instrumentation does not need<br />
any provisions for bulb replacement . This not only results in cheaper<br />
instrumentation, but since the light source focusing and positioning has<br />
been pre-adjusted at the factory, it will be correct for the entire meter<br />
operating life .<br />
38 <strong>Thermo</strong> <strong>Scientific</strong> <strong>Orion</strong> <strong>AQUAfast</strong> <strong>AQ4500</strong> <strong>Turbidimeter</strong> User Guide
Water Analysis Instruments<br />
North America<br />
166 Cummings Center<br />
Beverly, MA 01915 USA<br />
Toll Free: 1-800-225-1480<br />
Tel: 1-978-232-6000<br />
Dom. Fax: 1-978-232-6015<br />
Int’l Fax: 978-232-6031<br />
Europe<br />
P.O. Box 254, 3860 AG Nijkerk<br />
Wallerstraat 125K, 3862 CN Nijkerk,<br />
Netherlands<br />
Tel: (31) 033-2463887<br />
Fax: (31) 033-2460832<br />
Asia Pacific<br />
Blk 55, Ayer Rajah Crescent<br />
#04-16/24, Singapore 139949<br />
Tel: 65-6778-6876<br />
Fax: 65-6773-0836<br />
www.thermo.com/water<br />
© 2009 <strong>Thermo</strong> Fisher <strong>Scientific</strong> Inc. All rights reserved.<br />
256473-001 Rev. A 06-09<br />
9 0 0 1 : 2 0 0 8