

PDF Manual - GME
PDF Manual - GME
PDF Manual - GME

Create successful ePaper yourself
Turn your PDF publications into a flip-book with our unique Google optimized e-Paper software.
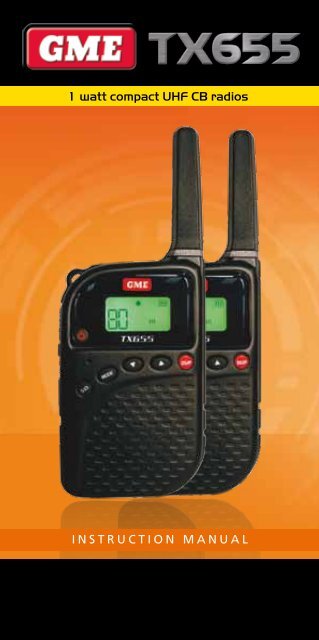
1 watt compact UHF CB radiosI N S T R U C T I O N M A N U A L
expanded to 80 channels thereby doubling the channel capacityand relieving congestion in the UHF CB/PRS band.Original 40 channel wideband radios will continue to operate on theoriginal 40 channels, however they will not be able to converse on thenewer channels 41 – 80. The newer narrowband radios will be ableto converse with all older 40 channel wideband radios on all channels1 to 40 as well as the newer channels allocated from 41 to 80.The mixing of narrowband and wideband radios in the samespectrum can cause some possible operating issues of interferenceand varying levels of received volume.Possible issuesWhen a new narrowband radio receives a transmission from an olderwideband radio the speech may sound loud and distorted – simplyadjust your radio volume for best performance.When an older wideband radio receives a signal from a newnarrowband radio, the speech may sound quiet - simply adjust yourradio volume for best performance.Depending on how close your receiving radio is to anothertransmitting radio, there can be interference from the transmittingradio if it is using a channel adjacent to the channel you are listeningto. Simply try going up or down a few channels from the currentlyselected channel.The above situations are not a fault of the radio but a symptom ofoperating wideband and narrowband radios in the same bandwidth.This possible interference will decrease over time as the population ofwideband radios ages and decreases.Further information and updates are available from theAustralian Communications and Media Authority (ACMA) atwww.acma.gov.au and the Ministry of Economic Development(MED), Radio Spectrum Management at: www.rsm.govt.nzThe ACMA has allocated channels 5/35 for emergency use only.Channel 5 is the primary Simplex Emergency Channel. Where aChannel 5 repeater is available, you should select Duplex on CH 5.Note: Channel 35 is the input channel for the Channel 5 repeatertherefore Channel 35 should also not be used for anything other thanemergency transmissions.PA G E 4 i n s t r u c t i o n m a n ua l T X 6 5 5
Telemetry ChannelsACMA regulations have allocated channels 22 and 23 for telemetryonly applications and have prohibited the transmission of speechon these channels. Consequently the TX655 has a transmit-inhibitapplied to channels 22 and 23.In the event that additional telemetry/telecommand channels areapproved by the ACMA, these channels shall be added to thosecurrently listed where voice transmission is inhibited. Currentlytransmissions on channels 61, 62 and 63 are also inhibited and thesechannels are reserved for future allocation.features• Microprocessor Controlled Frequency Synthesiser: Allowsuser programmable control of scanning, channel memories andselected feature options.• Programmable Scan Function: Scans up to 80 UHF CB channels.• In-built CTCSS: User selectable Continuous Tone Coded Squelchsystem for quiet channel operation.• 1 watt/0.5 watt RF Power: When transmitting in close rangeyou can conserve battery power by using the Low Power setting.• Individually Programmable Duplex Function: User selectablefor those individual repeater channels in your area.• Power-Save Feature: Sleeps during periods of inactivity.• In-built Li-Ion Rechargeable Battery: Average 10 hoursworking time.• Keypad Lock: Prevents accidental button presses.• Backlit LCD: For night viewing.• Calling Tone/Roger Beep: Alerts you to incoming calls.• Dual Watch: Monitors two channels simultaneously.• VOX: Voice activated transmit for hands free operation.• In-Built LED Torch• Room Monitor Function• Intercom Function: For use with optional intercom connector.• Voice Scrambler: Makes your voice unintelligible to others notusing the same scrambler technology.T X 6 5 5 i n s t r u c t i o n m a n ua l PA G E 5
ChannelSelected* Emergency channel onlyReceiveChannelTransmitChannel1 1 312 2 323 3 334 4 345* 5* 35*6 6 367 7 378 8 3841 41 7142 42 7243 43 7344 44 7445 45 7546 46 7647 47 7748 48 78To Activate the Duplex ModeSelect a duplex channel (1 – 8 or 41 – 48). Briefly press the DUPbutton to toggle duplex on or off on that channel. When Duplexmode is enabled on the selected channel, ‘DUP’ appears on thedisplay.Scan/Lock ButtonPress this button briefly to activate or deactivate scanning whereappropriate. Press and hold this button for 2 seconds to activateor deactivate the keypad lock. The keypad lock will prevent somebuttons from being pressed accidentally.PA G E 1 0 i n s t r u c t i o n m a n ua l T X 6 5 5
BASIC RADIO OPERATIONThe Citizens Band Radio Service operates on a shared channel basis.This means that other users and groups may be using any of the 80available channels. If the Channel you have selected is already in useplease make an alternative selection.To use your radio1. Switch the TX655 on by pressing the POWER button for 2seconds.2. Adjust the volume by pressing the or buttons.3. Select the required channel by pressing the Mode button thenpressing the or buttons.4. Listen first to ensure the channel is clear before transmitting.5. To speak, hold the radio upright, about 10 cm from your mouthand press the PTT. Speak slowly and clearly towards the radio.There is no need to shout as the microphone is quite sensitive.Release the PTT when you have finished speaking.ADJUSTING THE VOLUMEThere are 7 volume levels to suit your personal preference. To adjustthe volume level, press the or button. ‘UL’ is displayed alongwith a volume level setting between 1 and 7. A beep tone will alsoindicate an increase or decrease in volume.Note: The volume level cannot be adjusted when Scan or DualWatch modes are selected.MENU MODEThe Menu mode allows you to select user preferences, activatefeatures and use advanced functions.To Access the Menu ModePress the MODE button briefly to access the Menu options. Continueto press the Mode button briefly to step sequentially through theavailable Menu options. An icon associated with the selected optionwill flash on the display. To adjust the selected option, press theor buttons.To store your settings, press the PTT or wait for 5 seconds and yourradio will exit the menu and automatically return to stand-by mode.T X 6 5 5 i n s t r u c t i o n m a n ua l PA G E 1 1
MENU OPTIONSDisplay Functions Settings‘Flashing’ Change Channel 01 – 40CTC Change CTCSS Code 01 – 38, oFPo Set TX Power Lo / HIdh Select Dual Watch Mode 01 – 40, oFUo Select Hands Free (VOX) Lo / HI / oFrb Activate Roger Beep on / oFbP Activate Key Beep on / oFbb Activate Room Monitor on / oFit Intercom on / oFSr Scrambler on / oFC Change Call Tone 01 – 03SELECTING CHANNELSPress the MODE button. The channel number will flash. Press theor buttons to select the desired channel. Press the PTT or wait for5 seconds to store your choice.CTCSS CODESCTCSS (Continuous Tone Coded Squelch System) is a Squelchquieting system that allows several groups of users to share thesame channel without disturbing each other. The system applies acontinuous low-level tone to your transmission and uses a matchingtone decoder in your receiver to control its Squelch. With CTCSSenabled, the channel remains quiet to all incoming signals unlessthey carry the correct tone. When a transmission with the correcttone is received, the Squelch opens and remains open for as longas the signal is present. When the transmission ends, the channelbecomes quiet again. Transmissions that do not use the correct tonewill not be heard.The TX655 is fitted with 38 different CTCSS codes (see code chart).You can select or change the current CTCSS code via the MODEMenu. If the other radios you are communicating with are not usingCTCSS, set your CTCSS code to ‘oF’. The TX655 allows CTCSS to beenabled or disabled on individual channels.PA G E 1 2 i n s t r u c t i o n m a n ua l T X 6 5 5
Note: CTCSS codes do not prevent other radio users from hearingyour conversation. They simply allow you to ignore messages fromradios that are not using the same code to you.To Change the CTCSS Code on the Selected ChannelPress the MODE button repeatedly until ‘CTC’ flashes. Press the orbuttons to select the desired code or select ‘oF’ to turn CTCSS off.Press the PTT or wait for 5 seconds to store your choice. The CTCSSicon will appear whenever a CTCSS code is enabled on theselected channel.TX POWER SETTINGThe TX655 has two transmitter power settings - High and Low. Whenyou are transmitting in close range to other radios you can conservebattery power by using the Low power setting. Select the High powersetting only when you need increased range.To Change the Power SettingPress the MODE button repeatedly until ‘Po’ is displayed. Pressthe or buttons to select the desired power setting. Select ‘HI’for high power or ‘Lo’ for Low power. Press the PTT or wait for 5seconds to store your choice. A ‘HI’ or ‘Lo’ icon will be displayed toindicate the selected power setting.DUAL WATCHDual Watch mode allows you to monitor two channels at the sametime a primary channel and Dual Watch channel. When a signal isreceived on either channel the unit will pause on that channel for 5seconds before resuming the Dual Watch.To Activate the Dual Watch Mode1. Press the MODE button once so the channel display flashes thenselect your primary channel using the or buttons.2. Press the MODE button repeatedly until ‘dh’ appears.3. Press the or buttons to select the desired Dual Watch channel.4. Press the PTT or wait for 5 seconds to store your choice. This willactivate the Dual Watch mode.While Dual Watch is active, the display will alternate between theprimary and Dual Watch channels and ‘DW’ will be displayed.To Deactivate Dual Watch ModePress the button. ‘DW’ will disappear from the display.T X 6 5 5 i n s t r u c t i o n m a n ua l PA G E 1 3
Transmitting While in Dual Watch ModeIf the PTT is pressed while the radio is receiving a signal in DualWatch mode, the radio will transmit on the currently displayed channel.If the PTT is pressed while no signal is present, the radio will transmiton the primary channel.Note: The MODE button does not function while the Dual Watchmode is active.HANDS FREE (VOX) MODEWhen Hands Free (VOX) mode is selected the radio will automaticallytransmit whenever the Microphone detects your voice (or othernearby noise). It can be used with the internal microphone or with anappropriate audio accessory.To avoid accidental operation and to reduce the chance of beingtriggered by background noise there are two microphone sensitivitysettings – High and Low.To activate the Hands Free (VOX) mode, press the MODE buttonrepeatedly until ‘Uo’ is displayed. Press the or buttons to selectthe sensitivity level (HI or Lo) . Press the PTT or wait for 5 seconds tostore your choice. This will activate the VOX mode. The icon willbe displayed when VOX mode is active.To deactivate the Hands Free (VOX) mode, repeat the process aboveand set the sensitivity setting to ‘oF’.ROGER BEEPThe Roger Beep is a short tone that is automatically added to the end ofyour transmissions to tell other users that you have finished speaking.To Activate or Deactivate the Roger BeepPress the MODE button repeatedly until ‘rb’ appears. Press the orbuttons to change the setting to ‘on’ or ‘oF’. Press the PTT or waitfor 5 seconds to store your selection. The icon will be displayedwhenever Roger Beep is active.KEY BEEPWhen the Key Beep is activated, your radio will emit a confirmationbeep with each key press (excluding the PTT).To activate or deactivate the Key BeepPress the MODE button repeatedly until ‘bP’ appears. Use the orbuttons to change the setting to ‘on’ or ‘oF’. Press the PTT or waitPA G E 1 4 i n s t r u c t i o n m a n ua l T X 6 5 5
for 5 seconds to store your choice. The icon will be displayedwhenever Key Beep is active.Room MonitorThe Room Monitor works in a similar way to the Hands Free (VOX)mode but uses only the highest microphone sensitivity setting. Whenactivated, the Room Monitor listens for sounds in the room. Any short,brief sounds are ignored but a continuous sound lasting 5 secondsor more will cause the radio to transmit for 15 seconds. If the soundpersists, the radio will continue to transmit for a further 15 seconds.To Activate the Room Monitor ModePress the MODE button repeatedly until ‘bb’ is displayed. Use theor buttons to change the setting to ‘on’ or ‘oF’. Press thePTT or wait for 5 seconds to store your choice. The icon will bedisplayed whenever the Room Monitor is active.Note: The Squelch must be closed for the room monitor tooperate correctly.IMPORTANT: The Room Monitor function is not a replacement forregularly checking the safety and security of children. If you move outof communication range you will not hear transmissions.INTERCOMThe intercom function allows you to communicate with anotherTX655 radio using an optional intercom connector(available separately).To Activate the Intercom ModePress the MODE button repeatedly until ‘it’ appears. Press theor buttons to change the setting to ‘on’ or ‘oF’. Press the PTT orwait 5 seconds to store your choice. The ‘INT’ icon will be displayedwhen the intercom function is active.SCRAMBLERYour radio incorporates a simple voice scrambler using bandinversion. The scrambler is compatible with the majority of scramblersused by other manufacturers, allowing you to enjoy scrambledcommunications with both <strong>GME</strong> or non-<strong>GME</strong> radios. Once thescrambler has been activated your transmission and reception willonly be intelligible to others using the same scrambler technology.To Activate the ScramblerPress the MODE button repeatedly until ‘Sr’ appears. Press theor buttons to change the setting to ‘on’ or ‘oF’. Press the PTT orT X 6 5 5 i n s t r u c t i o n m a n ua l PA G E 1 5
wait 5 seconds to store your choice. The ‘SCR’ icon will be displayedwhen the scrambler is switched on.CALL ALERTTo alert others to your call you can send a Call Alert Melody. Thereare five different Call Alert Melodies available.To change the MelodyPress the MODE button repeatedly until ‘C’ appears. The presentlyselected Call Melody will be heard. Use the or buttons tochange the melody. The new melody will be heard. Press the PTT orwait 5 seconds to store your choice.To Send the Call AlertDouble press the PTT. The Call Melody will be transmitted on theselected channel and will also be heard in your radio’s speaker.MONITORThe Monitor function is used to temporarily open the Squelch tocheck for activity on the current channel regardless of CTCSS codesettings. It also sets the squelch to minimum which will allow weakersignals to be heard.To Activate or Deactivate the MonitorPress and hold the MONITOR/LAMP button (below the PTT) forabout 2 seconds. The icon will appear when the Monitor isactive. When Monitor is activated and there are no signals present, abackground hiss will be heard. This is normal.LED FLASHLIGHTThe TX655 is fitted with a high intensity LED flashlight. To switch theflashlight LED on or off, briefly press the MONITOR/LAMP button.The flashlight LED will operate only while the radio is switched on.KEY LOCKThe Key Lock function is designed to avoid accidentally changing thechannel or function settings.To Activate or Deactivate the Key LockPress and hold the button for about 2 seconds. The iconwill appear when the Key Lock is active. During this time the Scan,Mode and Duplex buttons are disabled however the Power, PTT,Monitor and Volume or buttons are still active.PA G E 1 6 i n s t r u c t i o n m a n ua l T X 6 5 5
CHANNEL SCANThe Channel Scan can be used to find users on other channels.To Activate or Deactivate the Channel ScanPress the button briefly. The icon will appear when theChannel Scan is active. The radio will scan through all 80 channelssearching for signals. If your radio detects a valid signal the scan willpause for 5 seconds to allow you to listen to that channel.If you press the PTT when the scan is paused, the radio will transmiton the paused channel. Scanning will automatically resume afterapproximately 15 seconds. Press the or buttons to resumescanning immediately.If you press the PTT while the radio is scanning, the radio will returnto your original channel. Scanning will resume approximately 15seconds after the channel becomes inactive.Press the button again to deactivate the Scan function.The icon will disappear.Note: The MODE Menu and Volume adjustments are disabled whilstscanning, however, pressing the or buttons will select the directionof the scan. To increase battery life, use the Scan Mode sparingly.CTCSS CODE SCANThe TX655 has a CTCSS code scan function which can be used todetermine the CTCSS code currently being used by signals on theselected channel.To Use the CTCSS Code ScanPress the MODE button repeatedly until the CTCSS code numberflashes, then briefly press the button. The icon will appear.The radio will scan through all 38 CTCSS codes comparing themto the signal being received on the selected channel. If your radiomatches a CTCSS code with one on the incoming signal, the CTCSSscan will pause for 5 seconds. If you now press the PTT, your radiowill transmit using the same CTCSS code as the signal that wasdetected during the Scan.CTCSS scanning will resume after approximately 15 seconds. Toresume scanning immediately, press the or buttons. If you pressthe PTT while scanning, the radio will return to your original CTCSScode. The ‘MODE’ Menu and Volume are disabled whilst scanning.To increase battery life, use the Scan Mode sparingly.T X 6 5 5 i n s t r u c t i o n m a n ua l PA G E 1 7
BATTERY WARNING INDICATORThe Battery Warning icon indicates when the battery levelis low and the battery needs recharging. If necessary, refer to theinstructions to recharge the battery. Operating the radio with a lowbattery will reduce performance.POWER SAVETo conserve battery power the radio will automatically enter a PowerSave mode after a short period of inactivity.UHF CB OPERATING FREQUENCIESChannel Frequency (MHz) Channel Frequency (MHz)1 476.425~ 21 476.9252 476.450~ 22# 476.9503 476.475~ 23# 476.9754 476.500~ 24 477.0005* 476.525~ 25 477.0256 476.550~ 26 477.0507 476.575~ 27 477.0758 476.600~ 28 477.1009 476.625 29 477.12510 476.650 30 477.15011+ 476.675 31 477.175~12 476.700 32 477.200~13 476.725 33 477.225~14 476.750 34 477.250~15 476.775 35* 477.275~16 476.800 36 477.300~17 476.825 37 477.325~18 476.850 38 477.350~19 476.875 39 477.37520 476.900 40^ 477.400* Emergency use only + Officially designated call channel# Telecommand/Selcall use only. Voice transmission is inhibited asrequired by AS/NZS 4365:2011.PA G E 1 8 i n s t r u c t i o n m a n ua l T X 6 5 5
There are no user settings for the Power Save mode.TROUBLE SHOOTINGIf you experience problems with your TX655 first check the BatteryWarning icon as low batteries can cause problems such as notransmission, weak reception and poor sound quality.Check the manual and radio display to ensure that functions (suchas VOX, Scan or DW) have not been activated by accident. In case offurther difficulty please consult your Dealer.Channel Frequency (MHz) Channel Frequency (MHz)41 476.4375~ 61• 476.937542 476.4625~ 62• 476.962543 476.4875~ 63• 476.987544 476.5125~ 64 477.012545 476.5375~ 65 477.037546 476.5625~ 66 477.062547 476.5875~ 67 477.087548 476.6125~ 68 477.112549 476.6375 69 477.137550 476.6625 70 477.162551 476.6875 71 477.1875~52 476.7125 72 477.2125~53 476.7375 73 477.2375~54 476.7625 74 477.2625~55 476.7875 75 477.2875~56 476.8125 76 477.3125~57 476.8375 77 477.3375~58 476.8625 78 477.3625~59 476.8875 79 477.387560 476.9125 80 477.4125^ Road channel ~ Repeater channels• Guard band channels. Voice transmission is inhibited as requiredby AS/NZS 4365:2011.T X 6 5 5 i n s t r u c t i o n m a n ua l PA G E 1 9
CTCSS TONE FREQUENCIESNo. Frequency No. Frequency No. Frequency1 67.0 14 107.2 27 167.92 71.9 15 110.9 28 173.83 71.9 16 114.8 29 179.94 77.0 17 118.8 30 186.25 79.7 18 123.0 31 192.86 82.5 19 127.3 32 203.57 85.4 20 131.8 33 210.78 88.5 21 136.5 34 218.19 91.5 22 141.3 35 225.710 94.8 23 146.2 36 233.611 97.4 24 151.4 37 241.812 100.0 25 156.7 38 250.313 103.5 26 162.2 oF 0(CTCSS frequency shown in Hz)PA G E 2 0 i n s t r u c t i o n m a n ua l T X 6 5 5
SPECIFICATIONGeneralComplies with: AS/NZS 4365:2011 for radiocommunications equipment in theUHF CB and personal radio service.Frequency Range: 476.425 – 477.4125 MHzNumber of Channels: 80(75 Voice, 2 Telemetry-RX only,3 Guard-RX only)Channel Spacing: 12.5 kHzOperating Mode: Simplex or half duplexPrivacy Codes: 38Operating Temperature: -10˚C to + 60˚CBattery Source: Li-Ion 3.7 V DC 720 mAhrechargeable battery packOperating Time: 10 Hrs(Transmit 5%, Receive 5%,Standby 90%)TransmitterRF Output: Hi – 1 watt, Low – 0.5 wattsModulation: FMMax. Deviation: ± 2.5 kHzModulation Distortion: < 5% (1 kHz 70%)ReceiverUsable Sensitivity: > – 118 dBmMaximum Audio Output: > 0.3 watts maximum (8 Ohms)Modulation Distortion: < 5% (1 kHz 70%)Specifications are typical unless otherwise indicated and may be subject tochange without notice or obligation.T X 6 5 5 i n s t r u c t i o n m a n ua l PA G E 2 1
<strong>GME</strong> contract warranty against defectsThis warranty against defects is given by Standard Communications Pty LtdACN 000 346 814 (We, us, our or <strong>GME</strong>). Our contact details are set out inclause 2.7.1. Consumer guarantees1.1 Our goods come with guarantees that cannot be excluded under theAustralian Consumer Law. You are entitled to a replacement or refundfor a major failure and for compensation for any other reasonablyforeseeable loss or damage. You are also entitled to have the goodsrepaired or replaced if the goods fail to be of acceptable quality andthe failure does not amount to a major failure.1.2 To the extent we are able, we exclude all other conditions, warrantiesand obligations which would otherwise be implied.2. Warranty against defects2.1 This Warranty is in addition to and does not limit, exclude or restrictyour rights under the Competition and Consumer Act 2010 (Australia)or any other mandatory protection laws that may apply.2.2 We warrant our goods to be free from defects in materials andworkmanship for the warranty period (see warranty table) fromthe date of original sale (or another period we agree to in writing).Subject to our obligations under clause 1.2, we will at our option,either repair or replace goods which we are satisfied are defective.We warrant any replacement parts for the remainder of the period ofwarranty for the goods into which they are incorporated.2.3 To the extent permitted by law, our sole liability for breach of acondition, warranty or other obligation implied by law is limited(a) in the case of goods we supply, to any one of the following aswe decide -(i) the replacement of the goods or the supply of equivalentgoods;(ii) the repair of the goods;(iii) the cost of repairing the goods or of acquiring equivalentgoods;(b) in the case of services we supply, to any one of the following aswe decide –(i) the supplying of the services again;(ii) the cost of having the services supplied again.2.4 For repairs outside the warranty period, we warrant our repairs tobe free from defects in materials and workmanship for three monthsfrom the date of the original repair. We agree to re-repair or replace(at our option) any materials or workmanship which we are satisfiedare defective.PA G E 2 2 i n s t r u c t i o n m a n ua l T X 6 5 5
2.5 We warrant that we will perform services with reasonable care andskill and agree to investigate any complaint regarding our servicesmade in good faith. If we are satisfied that the complaint is justified,and as our sole liability to you under this warranty (to the extentpermitted at law), we agree to supply those services again at no extracharge to you.2.6 To make a warranty claim you must before the end of the applicablewarranty period (see warranty table), at your own cost, return thegoods you allege are defective, provide written details of the defect,and give us an original or copy of the sales invoice or some otherevidence showing details of the transaction.2.7 Send your claim to:Standard Communications Pty Ltd. Unit B, 22-24 College Street,Gladesville, NSW 2111, Australia.Telephone: (02) 9879 8888 Fax: (02) 9816 4722.Email: servadmin@gme.net.au2.8 If we determine that your goods are defective, we will pay for the costof returning the repaired or replaced goods to you, and reimburse youfor your reasonable expenses of sending your warranty claim to us.3. What this warranty does not cover3.1 This warranty will not apply in relation to:(a) goods modified or altered in any way;(b) defects and damage caused by use with non StandardCommunications products;(c) repairs performed other than by our authorised representative;(d) defects or damage resulting from misuse, accident, impactor neglect;(e) goods improperly installed or used in a manner contrary to therelevant instruction manual; or(f) goods where the serial number has been removed ormade illegal.4. Warranty period4.1 We provide the following warranty on <strong>GME</strong> and Kingray products. Norepair or replacement during the warranty period will renew or extendthe warranty period past the period from original date of purchase.Product typewarranty period477 MHz UHF CB portable transceivers 1 yearT X 6 5 5 i n s t r u c t i o n m a n ua l PA G E 2 3
A division of:Standard Communications Pty. Ltd.Head Office: SYDNEY- Locked Bag 2086, North Ryde NSW 1670,Australia. Tel: (02) 9844 6666, Fax: (02) 9844 6600.Brisbane Sydney AucklandUnit 1 Unit B 2/24 Bishop Dunn Place89-101 Factory Rd. 22-24 College St. East TamakiOxley Gladesville Manukau 2013QLD 4075 NSW 2111 NZT: (07) 3278 6444 T: (02) 9879 8888 T: (09) 274 0955F: (07) 3278 6555 F: (02) 9816 4722 F: (09) 274 0959Melbourne Adelaide Perth7 Micro Circuit 14 Phillips St. Unit 1Dandenong South Thebarton 10-12 Harvard WayVIC 3165 SA 5031 Canning ValeT: (03) 9798 0988 T: (08) 8234 2633 WA 6155F: (03) 9798 0177 F: (08) 8234 5138 T: (08) 9455 5744F: (08) 9455 3110For customers outside Australia and New Zealand, please contact your local<strong>GME</strong> retailer or email to: export@gme.net.auwww.gme.net.auPart Number: 310538 Drawing Number: 45711-4


