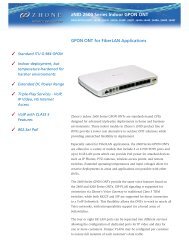
6218-A1 Wireless Router User's Guide - Zhone Technologies
6218-A1 Wireless Router User's Guide - Zhone Technologies
6218-A1 Wireless Router User's Guide - Zhone Technologies

You also want an ePaper? Increase the reach of your titles
YUMPU automatically turns print PDFs into web optimized ePapers that Google loves.
2. Hardware Installation and PC Setup10. In the TCP/IP Properties dialog box, click on the IP Address tab.11. Click in the radio button labeled “Use the following IP address” and type192.168.1.x (where x is any number between 2 and 254) in the IP Addressfield. Type 255.255.255.0 in the Subnet Mask field.12. Click on OK twice to confirm and save your changes. You will be prompted torestart Windows. Click on Yes and restart your PC again.Windows NT 4.0To configure the IP address under Windows NT 4.0:Procedure1. In the Windows NT task bar, click on the Start button, point to Settings, andthen click on Control Panel.2. In the Control Panel window, double click on the Network icon.3. In the Network dialog box, click on the Protocols tab.The Protocols tab displays a list of currently installed network protocols. If thelist includes TCP/IP, the protocol has already been enabled, in which case youcan skip to Step 9.4. If TCP/IP does not appear as an installed component, click on Add.5. In the Select Network Protocol dialog box, select TCP/IP, and then click onOK.You may be prompted to install files from your Windows NT installation CD orother media. Follow the instructions to install the files.After all files are installed, a window displays to inform you that a TCP/IPservice called DHCP can be set up to dynamically assign IP information.6. Click on Yes to continue, and then click on OK if prompted to restart yourcomputer.7. After restarting your PC, open the Control Panel window, and then double-clickon the Network icon.8. In the Network dialog box, click on the Protocols tab.9. In the Protocols tab, select TCP/IP, and then click on Properties.10. In the Microsoft TCP/IP Properties dialog box, click in the radio button labeledUse the following IP address and type 192.168.1.x (where x is any numberbetween 2 and 254) in the IP Address field. Type 255.255.255.0 in the SubnetMask field.11. Click on OK twice to confirm and save your changes, and then close theControl Panel.2-8 July 2005 <strong>6218</strong>-A2-GB20-10