
You also want an ePaper? Increase the reach of your titles
YUMPU automatically turns print PDFs into web optimized ePapers that Google loves.
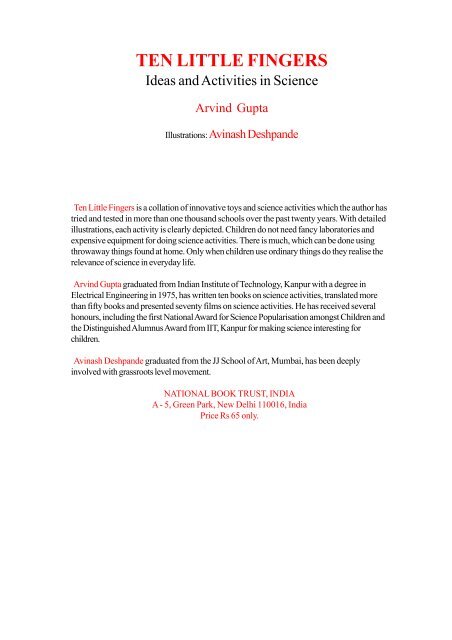
BIRDS OF PEACEIllustration: Suddhasattwa BasuWhen America dropped the atom bomb on Hiroshima during the Second World War, Sadakowas only two years old and too young to remember the bomb. She lived a mile away fromHiroshima, so nothing much happened to her, although more than two hundred thou- sand peopledied in the holocaust. After the reconstruction of Hiroshima, Sadako began to attend school.Sadako was now eleven years old.One day while she was practicing for the relay race she fell down unconscious. She wasimmediately rushed to the hospital. The doctors found out that she had leukaemia - a sort of bloodcancer. Lots of people had earlier died of this disease by radiation.Sadako was admitted to the hospital. She felt afraid because she knew that everyone who had gotthis disease had died. Sadako wanted to live. She did not want to die.One day her best friend Chizuko came to see her. She had brought with her some squares ofwhite paper. Chizuko took a paper square and folded it into a bird - a beautiful crane. She toldSadako that the crane was sacred to the Japanese and that it lived for over a thousand years. Shetold her that if a sick person folded a thousand cranes she would surely get well. Every day Sadakotried to fold the cranes. But the disease left her very weak. On some days she would fold twentycranes while on some other days she could fold only three. Sadako knew that she would notbecome all right but still she was determined to fold the cranes.On one particular day she could manage only one. But she kept on making cranes until she couldnot make them anymore. She folded 644 cranes. Sadako Sasaki died on October 25,1955. Herfriends folded the remaining 356 cranes. Her friends admired her brave and hopeful spirit. Sadako’sdeath made them feel very sad. Her friends collected money to build a monument of PEACE ANDLOVE in the memory of Sadako. This monument is called the Children’s Peace Monument, and isin the Peace Park, right in the middle of Hiroshima, where the bomb was dropped. The statuedepicts Sadako standing on the Mountain of Paradise, holding a golden crane in her outstretchedhands. Every year, on Peace Day, children hang garlands of paper cranes under the statue. Theirwish is engraved at its base.THIS IS OUR CRYTHIS IS OUR PRAYERPEACE IN THE WORLD
JUMPING FROGThis is an amazing paper toy. It needs a special size of rectangular paper where the length is doublethe width. The frog has a special spring folded from the paper itself. When you press the spring itmakes the frog leap and jump.1. Take a 10 cm x 20 cmrectangular sheet of paper.Fold two squares in it2. Fold criss-cross diagonals inboth the squares. All the fourcreases should be in the samedirection.3. Reverse the paper. It willlook like two hillocks. Foldthe edges of the hills to themidline.4. Reverse the paper. Tap thecentres of both squares to gettwo cups. Push to make atriangle.5. Repeat the same for theright side.6. Bring all the four standingtriangular ears to the left andright hand side corners andcrease.7. Bisect theinternal angles tomake the legs jut out.8. The model whenreversed looks like atortoise. Crease itsbackbone.9. Crease the leftand right hand edgesof the diamond shapeto the backbone.10. Fold the basetriangle upwards, andinsert the left flap in thepocket of the triangle tomake a lock.11. Similarly, lockthe right flap.12. Make a Zshaped spring byfirst folding the frogbackwards and thenforwards.13. Press the spring to makethe frog jump and leap.
ROLLING TOYYou will thoroughly enjoy making this two minute tumbling toy.1. Take a slightly stiff squarepaper with an edge length of10 cm. Fold its two adjacentcorners to the centre.2. Fold the top point tobring it down slightlybelow the centre line.3. Crease the foldedpart along its centre line.4. First fold the sides tothe vertical middle line -unfold, and then fold thecorners to the crease.5. Leave the toy straight with the ramp end down and see ittumble. Why does it roll over ? The 8 layers of paper on thetop make it heavy. So, when it falls there is enough momentumto roll over onceRABBIT1. Fold a 10 cm edgelength square along thediagonal to make atriangle.2. Fold this big triangleinto half to make asmall triangle.3. This smalltriangle will havea ‘V shape. Drawthe ears of therabbit with acurved dotted line.4. Cut only along the dottedcurved line to make the ears ofthe rabbit.5. Fold along the straight dottedline to make the front legs of therabbit. Hold the rabbit with theleft hand as shown and move thetail back and forth with the righthand. The rabbit will flap its ears.
PAPER PUPPETSMost children make the Tippy - Tippy - Tappy (also called the salt and pepperbox or DIN- RAAT).With a few more folds they can make two delightful paper puppets.1. Fold the diagonalsof a 20 cm squarepiece of paper tolocate its centre.2. Fold all thefour corners tomeet at the centre.3. It willlook like anenvelope.4.Turn over theenvelope and foldthe 4 corners onceagain to the centreto make a smallerenvelope.5. Turnover thesmallenvelope.Cat-Chat1. Bring the top edge tomeet the bottom edge.Crease sharply and open.Now, fold the right edgeto meet the left edge.This time do not open.Chatterbox2. You will findfour flaps alongthe right edgeDraw the eyesof the cat.3. Slip your right index andmiddle fingers into the twoupper pockets. Grasp the lowerright hand corner between yourright thumb and ring finger.4. By raisingand loweringyour right handfingers you canmake the catchat.1. Take the double envelope base and fold itstwo opposite flaps in the middle. These twotriangles will make the upper and lower halvesof the chatterbox’s face.3. Slip your thumbunder the upper halfof the face andpinch the centrecrease, so that thenose stands out.Pinch the bottomcentre crease too.2. Crease along the middle line and draw theface.4. Hold the side corners with the thumband index fingers of both your hands sothat the two halves of the face are broughttogether. By moving your hands you willbe able to make the chatterbox chatter.
PAPER HOUSE1. Take a stiff square paperwith an edge length of about20 cm. Fold 16 smallsquares in it.2. Cut along six quarter linesas shown.3. Put one middle square exactlyon top of the other and stick themwith glue. They will make thetriangular roof of the house.4. Stick the two end squares to makethe side wall of the house. Do the sameon the other side to complete the house.5. Using different sizes of squares you can make houses ofdifferent sizes. You can cut doors and windows in them.The outline of the house can be drawn on a big cardboard.Children can make the rooms, furniture, kitchen etc on thecardboard and then cover it with the paper house.SPINNER1-cm4-cm1. Cut a 2 cm long piece from an oldball-pen refill and make a hole in itscentre with a divider point.2. Take a 9 cm longthin wire and bend it intoa ‘U’ shape.3. Weave the refillspinner in the ‘U’ shapedwire.4. Wrap the two ends of the wireon the plastic refill, leaving enoughclearance for the spinner to rotate.5. On blowing through the refill the spinner willrotate. For obtaining the maximum speed adjust thewires so that the air is directed towards the end ofthe spinners.
FUN WITH PAPERCircular SpringTake a circle of any sizeand cut it round andround into a spiral. Hangthe centre by a paper clipto make a helical spring.Self-standing shelfFold a rectangular sheet ofpaper in half. Make cuts in themargin and fold the cut stripsback to make a pretty pattern.You can make this shelf stand.Square HangerTake a square paper of any size andcut a square spiral in it. Hang thissquare spiral and enjoy it swaying inthe breeze.Lace HangerMAKING THINGSby Ann SayreWiseman1. Fold a crisscrossin a papersquare.2. With open endsdown, draw a halfcentimetre marginand cutting lines.3. Cut from the leftside to the margin onthe right. Then cut fromright side to margin onthe left.4. Open folds carefullyto get a beautifulpaper lace hanger.
PAPER PATTERNSTo make these cut-out repeat patterns all you will need are some paper squares(newspapers will do) and a pair of scissors. First fold the square of paper in half.1. Fold the top layer of the bottomedge up to tfie folded edge. Turnover and do the same behind.2. Fold the right edge to the left edge.3. Fold the top layer of the left edge to thefolded edge. Turn over and do the samebehind. This gives you a little square ofpaper sixteen layers. By cutting into thisshape and unfolding, you can discover manyinteresting patterns.4. Simply cutting away each corner of thelittle square, for example will create a grill(jaali) like pattern.5. By cutting these two curves youwill achieve a more complex pattern.6. Experiment in this way and when you find a pattern which you like make several similar ones.You can stick these together to decorate the cover of a book or perhaps to decorate a wall. Youcan make lovely greeting cards by sticking the cut-out of one colour on a background card sheet ofa different colour.
EVERYTHING HAS A HISTORYScience is also the history of science. Every generation adds its own quanta of knowledge. Weknow so much because we stand on the towering shoulders of so many past generations. A HighSchool student of today, knows more maths than Newton did, four hundred years ago.S. E. Stokes was an American who came to India in 1910. He pioneered the plantation andpropagation of apples in Himachal Pradesh. Being a philanthropist, he also set up a school inKotgarh for the local children. In 1920, the American economist Richard Greggs—deeplyinspired by Gandhiji came to work in India. For two years, Greggs taught activity based scienceto children in Stoke’s school at Kotgarh. Based on his real life experiences with Indian children hewrote a book titled Preparation for Science in 1928. This book was first printed by NavjivanPrakashan from Ahmedabad. This remains the most pioneering treatise on how science shouldbe taught to children in Indian schools. Greggs wrote:“The apparatus required is exceedingly simple and inexpensive, and almost all of it is familiar tovillage children. Most of it can be made by village carpenters, potters or blacksmiths. The childrenmust not get an idea that science is machinery or strange technology. The great pioneers ofscience did their work with very simple apparatus. It is possible, therefore, to follow theirfootsteps and learn to do scientific thinking without much expensive or elaborate apparatus. Afterall, the student’s mind is the most expensive piece of apparatus involved.”Greggs further commented, “I do not want Indian children in villages to get the idea that scienceis only a school affair or only relates to shiny brass and glass devices and paraphernalia. I believethey can learn to think more clearly and to acquire a scientific attitude without all the expensiveand complicated apparatus used in western laboratories, or at least with extremely little of it.”As has often happened in the history of science, the prophetic book remained buried until KeithWarren - a UNICEF consultant rediscovered it in 1975, illustrated parts of it, and brought it outas Preparation for Understanding.The activities in the next few pages have been collated from the above books. Young childrenlearn best from simple things. And naturally it is most helpful for them to understand first thosethings that are around them in their daily lives.It is best for two or three children to work together at these activities so that they can sharematerials and help each other. Thus they begin to learn cooperation.Science is built from curiosity, experience, analysis, and finally the expression of discovery. Themain part of this process is arranging objects, activities and ideas so as to create a new order orpattern. Science is the discovery of new patterns. These exercises will help children discover thepatterns and arrangements of the world around them by using their hands, senses and minds.Understanding is the discovery of order.
SHAPETake a plate full of stones and separatethem into different kinds of shapes - roundones, flat ones, sharp - cornered ones. Ofcourse, you cannot do it perfectly, but dothe best you can.Take a lot of leaves. Separate them intoSeparate these twigs intobroad, thick ones..... and thin, pointed ones .straight twigs.... curved twigs.... and twigs thathave sharp bends..Do the same with these pieces ofwire. They are all mixed up and youhave to separate them into straightwires, curved wires and wires whichhave sharp bends.Tie a pencil to a piece of string andtie the other end loosely to a stick.Draw circles on paper or on the groundwith your pencil, string and stick. Makepatterns with circlesMake traditional Rangoli patterns on theground and observe the symmetry in them.
SHAPECut a lot of small and big geometrical shapes outof cardboard or newspaper and then separatethem into triangles, squares, circles and hexagons.Draw three or four very simple shapes. Thenmake a pattern by repeating the drawings ofthe shapes many times.Cut leaves into triangles,squares, circles and othershapes. Arrange them on thefloor in different patterns.Take any picture and stick it onan old postcard to make it stiff.Cut the picture into many partsto make a jig-saw puzzle.Take a broken clay pot and try toput all the broken pieces together tomake the pot again.Take a coconut. Break its hard shell into pieceswithout cutting into its soft flesh. Collect all the hardpieces of the coconut shell. Put them together tomake the whole coconut. This will make a three -dimensional jig - saw puzzle.
SIZEBreak some broomsticks into different lengths.Then arrange them in order from the smallestto the biggestSome of you can bring your sets of stickstogether to make a sort of pattern on the floor.At the end, all of you can mix all your sticks together and then make a big arrangement of allthe sticks from the biggest to the smallest.Draw some lines on the ground that grow longer as you go from right to left.Then draw some lines that gradually get shorter as you go from right to left.Get some nuts, seeds and leaves so that youhave four types of things of different sizes.Get about six of each type, such as 6 smallseeds, 6 large seeds, 6 nuts still bigger in sizeand 6 large leaves.Arrange them in a pattern so that itlooks attractive.Any design which is repeated again and againsoon becomes a pattern.Take plenty of time and make as many patternsas you can think of.
SIZING UPTake a handful of small stones. Divide theminto three groups and put each group intoorder according to size.Then mix them together and divide theminto two groups and put these in order.Then mix them all together and put the whole lot in order.Get a small plant with all its leaves on.Remove all the leaves and arrange them intosmall leavesmiddle - sized leavesbig leavesDiscuss the insects that you know. Tell theirnames in the order of their sizes, starting withthe smallest.Repeat their names again, but start with thebiggest insect this timeLater on, write down some of the names inyour copy.Do the same things with the birds that youknow. And then with animals. Draw someof them. It does not matter if you cannotdraw them well at first. Try your best.Write down some of their names.This activity would need a lot of children - infact, the whole class. Line up along the side ofa room, with the smallest of you in the frontand the tallest of you at the back.Then mix yourself again. Then arrangeyourself again. This time arrange yourselfin the opposite order, with the tallest inthe front and the smallest at the back.Try to do this all by yourself without the help ofan adult. This makes it difficult. Try to find yourright place without arguing.
Picture BingoDraw about 20 pictures like this on the board. Talk about the pictures as you draw them.1 Tell the children to choose any six of the pictures they like and copy them on a paper.2. Give each child six seeds .3. Tell them to cover a picture if you call its name. For example if you call out ‘ snake’ then thechild who has drawn a snake should cover it with a seed. Keep a record of the words you havecalled.4. The first child to cover all six pictures should shout ‘ Bingo !’5 Check out if you have called all the six. If the child has covered a picture you have not called,that child is out. If you have called all six pictures, that child has won.Measuring growthPlant a seed in some dampearth in a transparent glassso that you can see it grow.Each day, measure howmuch the root and shoot havegrown and break a thin stickto the same length. Then fixthe stick upright with a bit ofclay on the ground beside theglass.Next day do thesame thing, puttinganother stick besidethe first. After aweek or two, thelength of your stickswill show you a setof measurements ofhow the plant isgrowing.Measuring rainBlock and TackleIn the rainy season, put a deep container outsideto hold the rain. Bring the container inside everyday,stand it on a level surface and measure howdeep is the water in it.Do this by putting a thin stick in, down to thebottom. Then take it out to see what length of thestick is wet. Break the wet part of the stick andstand it upright on the ground with a bit of clay.Do this everyday so that the length of the sticksgive you an idea of the rainfall each day for aweek or more.Let two strong adults hold two bamboo sticks. Then tiea rope and weave it around the sticks as shown. Youpull on the free end of the rope. You will be able to pullthe two sticks together even though they are kept apart.You have formed a combination of pulleys. In thisexperiment, you increase your force each time you wraparound the broomstick. A small force moving a longdistance results in a greater force moving a shorterdistance.
SPINNING DICEIf you find that you cannot play your favourite board game like Ludo, Snakes and Laddersetc. because you have lost your dice, then try making a substitute dice in the following way:1. You will require a thick card sheet, a matchstick, a pencil and some glue.2. Make a six sided regular hexagon about 8 cms across. Divide the surface into six equaltriangles by drawing lines across from corner to comer. Write numbers from 1 to 6, one in eachtriangle.3. Push the matchstick halfway through the centre point and apply a bit of glue to secure itfirmly in place. Once the glue dries the dice is completed. Spin it on a flat surface.4. When the dice stops spinning one of its edges end up lying on the surface. This indicates theface number, or the number of moves you can make.DOMINOESDominoes are made from2 x 1 rectangles of card, withdifferent coloured shapes gluedto each end. You will require28 pieces to make a set,decorated with combinationsof six different shapes, plus theblanks.Here are some traditionaldominoes in which pieces aremarked with a number of spotsat either end. Some ends areleft blank.
PATTERNS WITH COINSAsk the children to collect different coins. Children can keep these coins on a paper anddraw their outlines with a pencil. Using a combination of coins of different shapes and sizeschildren can make different patterns. Children can later colour or shade these patterns.MATCH THE PICTURESDraw two sets of pictures.Children have to join the matching pictures of the two sets by a line.
ZERO-COST INSET PUZZLESOld rubber slippers are great for makingMontessori Inset Puzzles. Take an old rubber“Hawai slipper and scrub it clean with soap.Mark out some geometric shapes on theslipper with a pen. Keep the slipper on awooden board and cut the shapes using a shoemaker’s knife (rampi). Round circles are bestcut by hammering a sharpened pipe on therubber.Rubber slippers have no sharp points so theycannot hurt children and are safe. The rubberblocks fit snugly into their slots. The insetblocks are white above and blue below. If youupturn them then the blue block stand outclearly on the white background. So, there isno need to paint them.MOTHER MOTHER TRUCKRUCK1 Take a 20 cm x 30 cm pieceof shoe sole rubber (about 8mm thick). Mark out differentvehicles - engine, car, jeep andvan on it.2. Cut these shapes with asharp knife3. Using a shoe maker’spunch make two holes of8 mm diameter near thebase of each vehicle.4. The finished rubber carswill look like this.5. Make several buttonwheel pairs. Use 1.5 cmlong pieces of a ball-penbody as bearings.6. These pieces will snapinto the holes of therubber vehicles. You canfix or remove the wheelsat will.7. You can also fix wheels on theMother Truck.8. Fix the wheels on the vehicles to make them run.Join all the vehicles into a train.
A THORNY ISSUEThis happened in the early years of the Hoshangabad Science Teaching Programme (HSTP).This programme emphasized on activity based science learning. It was thought that the best wayto learn science was by doing scientific experiments. There was a lot of emphasis on learning fromthe environment.It was thought that the best way to learn about various types of plant roots was not by drawingpictures of taproots and fibrous- roots on the blackboard but by actually stepping out of theclassroom and studying these real plants in the field. For botanical observations the children wereprovided with hand lenses and dissecting needles.One day the children went on a field trip. They were to collect different wild flowers and dissectthem. Soon the children were cutting the flowers and examining the stamens, pistils and ovaries.They were all using their dissecting needles to pry open the flower parts.But, for one girl. She had forgotten to bring her dissecting needle. What could she do? She wassearching for something pointed and sharp to open up the flowers. And soon she found a lot ofBabool (Acacia arabica) thorns. These thorns were strewn all around and worked as beautifuldissecting needles.This little girl had taught the Science Programme a great lesson. Why use the standard dissectingneedle - a long steel needle embedded in a plastic handle, when you can use a thorn for the job.The needle had to be bought from the nearby town, as it was not available in the village. The thornon the other hand was free. Millions of those thorns were crying to be picked up right there in thevillage.This was a great lesson learnt. It was easy to make the thorn walk on two legs. The result was asimple, no-cost divider, made out of thorns. The humble Babool thorn had become an importanttool for scientific inquiry!
LENGTHIf you know the lengths of some common things around you, then you can use them for estimatingthe length of other objects. Things like matchboxes, postcards, coins - which are mass producedconform to certain standard dimensions. The lengths of these and many more objects can be usedfor estimation of length. You must verify the lengths of these objects by actually measuring them witha scale. Later on, even if you do not have a scale at hand, you can always use these objects tomake a good estimate of length.2mm.1. The length of the common matchbox is a goodestimate of 2 inches or 5 centimetres It can beused for estimating length. Half the matchboxwould measure 1 inch, or 2.5 centimetres.2. Every matchstick has a squarecross-section. Each side of thesquare measures 2 mm.3. The length of six matchboxes kept end-to-end would almost be 1 foot, or 30 centimetres.4. The postcard is always 14 cm longand 9 cm broad.5. Bricks are normally 9 inches long,4.5 inches wide and 3 inches thick.6. The length of a normalbicycle spoke isapproximately 1 footor 30 centimetres.7. Coins have standarddimensions. They can be usedas pretty good estimates formeasurement of length. Stack20 similar coins one on top ofthe other and measure theirheight. Divide it by 20 to get thethickness of one coin.8. Measure the length ofyour hand span andremember it. This is oneruler which you will alwaysbe carrying around. Alsomeasure the distancebetween two steps as youwalk. This will be a goodestimate to measure longdistance.
AREAThe matchbox has three distinct surfaces: The labelled surface (1);the strike surface (2); and the drawer surface (3).Which surface is bigger, the labelled or the strike surface (1 or 2)?Why is (1) bigger than (2) when both of them share a common length ?Which is bigger the strike surface or the drawer surface (2 or 3) ?Why is (2) bigger than (3) when both share a common breadth ?How to find the area of the outer shell of a matchbox ?One way, of course, is to measure the length and the breadth andmultiply it. There is however, another interesting way of finding outthe area. Matchsticks have a square cross-section measuring2 mm x 2 mm. So, burnt matchsticks can be used as standardbricks for measurement of area. Pack burnt matchstick “bricks’ inthe outer shell of a matchbox to construct a wall. The area of eachstandard ‘brick’ is already known.By counting the total number of matchstick ‘bricks’ used, you canestimate the area of the matchbox shell.POST CARD 14-cm x 9-cmCut a postcard - 14-cm x 9-cm into one centimetre squares. Use these squares to estimate thearea of various shapes.Knock three short sticks into the ground andstretch a string around them to make a triangle.Now you are going to find out how big the triangleis.Arrange the post card unit squares in the triangleand count how many you need to fit in.Make other shapes with the sticks andstring to find out how many squarecentimetres you need to fill them.With nails or sticks and strings, mark out arectangle on the wall of your room or a walloutside. Count how many bricks are there in therectangle.
VOLUME20ml.1. Dip a little cotton ball in oil and rub it on anordinary matchbox drawer. Soon the wood /card of the matchbox will absorb the oil. Oilingmakes the drawer water proof.3. Stick a strip ofwhite paper alongthe length of a bottle.Now, fill the matchboxdrawer withwater and pour it inthe bottle. Mark aline on the stripindicating 20 ml.2. This drawer when filled with waterholds approximately 20 ml of water.The drawer can be used as a roughstandard for measurement of volume.4. Add moredrawers full ofwater and similarlymark thelevels of 40 ml,60 ml, 80 ml and100 ml. You candraw a linemidway between40 and 60 toindicate 50-ml.5. This bottle now becomes a graduatedcylinder for measurement of volume. Fill thebottle upto the 100 ml mark and then pour itout in a big pan. Repeat this ten times. Nowthe water in the bucket will be 1,000 millilitresor 1 litre. You can also use old mineral waterplastic bottles for measurement of volume.Conservation of Volume6. Put an exact cupful of water into each of thevarious pots, jugs, jars, bottles and other utensils.Now it will be difficult to tell that there is the sameamount of water in each because the sizes and shapesof the vessels are so different.Ask your friend to tell you the ways in which thevessels with water are alike. This time there areseveral ways in which they are similar:1. They are all containers.2. They all contain water.3. They are all waterproof.4. They all contain the same amount of water.
FROOTI FACTSThe Frooti carton is called a tetrapack. Tetrapacks are made by fusing together layers ofdifferent materials like plastic, aluminium, paper etc. into a single composite sheet. This wonderpackaging material apart from being very expensive is also very energy-intensive. Being nonbiodegradable,tetrapacks are very difficult to recycle. Nothing illustrates it better than the Frootipacket. The Frooti packet costs Rs. 8.00. The empty Frooti carton itself costs Rs. 1.50 -perhaps more than the drink itself!1. The dimensions of aFrooti packet are length6.2 cm, breadth 4.0cm, and height 8.0 cm.The area of crosssectionof a Frootipacket is 6.2 cm x 4.0cm., which approximatesto 25 sq, cm. Itsheight is 8 cms.2. Flatten out the Frooti pack and cut off itstop lid. Reshape it again into a container.3. The container with aheight of 8 cm will havea 200 ml. capacity.4. The containerwith a height of 6cm will have a 150ml. capacity.5. The containerwith a height of 4cm will have a100 ml. capacity.6. The containerwith a height of 2cm will have a 50ml. capacity.7. As Frooti packets are water proof, unbreakable and collapsible they are idealcontainers for measuring volume, lliey can be used to approximate volumes of200-ml, 150-ml, 100-ml and 50-ml. Dhara packets can be used to measure1000 ml or 1 litre. The Frooti container can also be used as a collapsible tumblerfor drinking water during a journey. Afterwards you can flatten and tuck away thetumbler in your pocket.Frooti Funnel8. A useful funnel can be instantly made outof a Frooti packet. Flatten a Frooti packetand cut it along the diagonal and also makea small cut at the bottom right hand corner.9. The Frooti funnelis very handy forpouring out oil,kerosene and otherliquids. It can alsobe flattened andstored away easily.
WEIGHT1. Make a weighing balance using two tin lids for the pans. Ensure thatthe balance point is equidistant from the two pans. Only then will thebalance weigh truly. Now keep one oiled matchbox drawer on each ofthe pans. As the drawers have the same weight the beam will remainhorizontal. Fill the left hand drawer completely with water. The drawerwill hold 20 ml of water which will weigh 20 gms (density of water 1-gm/ml). It will amount to putting a 20 gm weight in the left pan. Put some junkwire on the right pan so as to balance the beam. The wire shall now weigh20 gms.10 gms. 5 gms. 5 gms.2. Straighten out the wire and cut it outinto half and quarter lengths to make 10gms and 5 gms weights. You can similarlymake 50 gms and other weights.2.0 gms. 2.5 gms. 5.0 gms. 6.0 gms.3. Coins are made in a mint and have standard weights.The new circular 10 paise coin is exactly 2 gms. The old 25paise coin is 2.5 gms. The old 50 paise coin is 5.0 gms. Theold one rupee coin is 6.0 gms. These coins are still incirculation and can be used for measurement of weight.The weights of new coins are in odd fractions and are noteasy to remember.10 gms.4 An ordinary brand new sealed matchboxis a good estimate for 10 gms. Thenew matchbox has approximately 50matchsticks which weigh about 5.0 gms1.0 gms5.Ten unburnt matchsticksapproximately weigh 1.0 gm.0.1 gms6. One unburntmatchstick is avery good estimatefor 0.1 gms.7. A single, double spread sheetof ordinary newspaper, weighsapproximately 25 gms. Four suchdouble spread sheets will weighclose to 100 gms.2.5 gms0.1 gms20 Milligram8. The weight of an ordinary postcard is around 2.5 gms. Its area is 9 x 14 = 126 cm sq.Five, 1 cm squares of the postcard will weigh 0.1 gm and a lone 1 cm sq will weigh 20milligrams. So you can easily make fractional weights too.
TIN CLOCKToday Montessori teaching aids have become so expensive that even the very rich schools cannotafford them. The Montessori Clock for teaching how to read time costs over Rs.200. Apart from itsexpense it also occupies a lot of space. You could build your own tin clock for less than One Rupee!But then you will have to collect a lot of throw away junk.1. You will need a circular lid of an old tinbox, an old ball pen plastic refill, a 1 cm.diameter press-button, some aluminiumfoil, a pin, a matchstick and someordinary hand tools. You will need asmall tube of Araldite to stick thebutton to the lid.2. Make a hole in the centreof the lid with a nail.3. Stick one half of a big press-button in thishole using a drop of Araldite.Keep the assembly to dry overnight.4. Cut an 8 mm. diameter circle out of analuminium foil. Punch a hole in its centre, andcut a little tongue in its rim. Insert a smallplastic refill in this tongue. This becomes thehour hand of the clock5. Bend the head of a paper pin at right angles.Insert this head into the depression in the otherhalf of the press-button and apply a drop ofAraldite. Leave it overnight to dry. Now the pinwill become attached to the press-button. Insertthe pin point in a refill using a piece of matchstickas the wedge. This becomes the minuteshand of the clock.6. Cut numbers from 1 to 12 from an oldcalendar and stick them on the face of the tinlid to make the dial of the clock. Assemble theneedles to complete the clock.7. Instead of the tin lid you can also use acircular cardboard for the dial. In this caseyou can sew one half of the press buttonin the centre of the cardboard.
SAND HOUR GLASS1. You will need two cleaninjection bottles, an old refill,thorn or divider, sand, blade andsome rubber adhesive.2. Apply cycle puncturesolution on the flat sides of thetwo rubber caps and stickthem back to back.3. Make a see throughhole (2mm) through thecentre of the caps byrepeatedly poking themwith a thorn or a divider.4 You should be able tosee a clear hole in the caps5. Cut a 5 mm long piecefrom an old plastic ball penrefill.6. Insert this refill piecein the hole between thetwo rubber caps.7. The ball pen refill boreprovides a smooth and uniformorifice for the flow of sand.Pulse BeatWith a bit of soft clay orplasticine, fix amatchstick on the pulseof your wrist so that youcan see the end of thematch move slightly eachtime your heart pumpsblood.Does your pulse moveevery second, or fasteror slower? How manytimes do you breathe inone minute?How many steps do youwalk in one minute?8. Fill fine and dry sand in oneof the injection bottles.Assemble the two rubber capsand the other empty bottle ontop of it.Simple Pendulum9. On inverting, sandfrom the top bottle willtrickle down into thelower bottle. By fillingin the right quantity ofsand and calibrating itagainst a standardwatch you can make aone minute sand hourglass.Hold a string with a stone tied to the endso that it can swing without touchinganything. Give it a slight push so that itswings gently. Make the string longer andshorter and notice whether the stoneswings quickly or slowly.Take a 1 metre long string and hang it bya nail so that it swings freely. Give it alight push so that it starts swinging gently.You will find that die time the stone takesto go from one side to the other is onesecond when the string is one metreCount sixty swings to understand howlong one minute is.Practice counting swings with your eyesshut while your friend watches theswinging stone. In this way you can learnto count seconds even without a swingingstone.
NUMBER PATTERNSIt is sad to see children learn tables by rote. It would have been so much better if childrenlooked at number patterns instead. Most children grow up to hate mathematics. This is becauseof the horrendous way that maths is taught in schools. If there was less emphasis on rote learningand more in discovering the hidden number patterns, then maths would be such great fun.This happened a long time ago - some two hundred years ago. Fredrick Gauss - the famousmathematician was then studying in class three. One day, his teacher wanted to take a smallsnooze in the class. So he asked all the children to take out their slates and write numbers from 1to 100. This was not too much of a challenge for class three kids. As an after thought, the teacherasked them not only to write numbers from 1 to 100 but also to add them up. This, the teacherthought, will enable him to have a longer sleep.The children quickly wrote down the numbers and then started to add them up. It was easy toadd the first few numbers, as they were small. But as they went to two digits and higher numbersthe going became slow. All the while, that the other children were frantically adding up, Fredricklooked intently at the numbers. As he peered at the numbers with rapt attention he discovered anamazing pattern. In a flash, he wrote 5050 as the answer on his slate.The teacher looked at him in utter disbelief. On being asked how he found the answer, Gaussexplained:1 + 2 + 3 + 4 +..............................................97 + 98 + 99 + 100“I looked at the first and the last number. Their sum was 1 + 100 = 101. Then I looked at thesecond and the second last number. Their sum was also 101 (2 + 99 = 101). The sum of the thirdand the third last number was also 101. This pattern extended to the whole series. I reckonedthat as there were only hundred numbers, there would be 50 such pairs - each adding to 101. SoI simply multiplied 101 by 50 and got 5050.”
1. These matchstick models usematchsticks as the basic structuralmembers and cycle valve tubes asthe basic joints. Cycle valve tube ischeap. A packet of 100 gms. costsRs.15/- and contains 12 metres (50feet) of valve tube.MATCHSTICK MODELScycle valve tube2. Cut 1.5 cms.long pieces of thevalve tube.Scrape thesulphur from thematchstick headswith a blade.3. Push two matchsticks through the two endsof the valve tube. This is a joint -of - two.4. This flexible joint can be usedfor depicting angles - acute,right, obtuse angles etc.5. Three match- sticks and three valvetubes can be looped to make an equilateraltriangle.6. Other shapes like squares, rectangles, pentagons, hexagons canbe made by joining more matchsticks and valve tube pieces.7. If you press thepentagon it changesshape and becomesboat shaped.8. The square whenpressed becomes arhombus.9. But no matter howhard you press, atriangle remains atriangle. The triangle isthe only rigid polygon.That is why rooftrusses, bridges,electricity towers aremade of triangles. Thetriangles make themrigid and strong.
THREE DIMENSIONAL MODELS1. Pierce a hole in the valve tubejoint-of- two, by poking it atright angles either with a longneedle or else a thorn.2. Insert a third matchstick(slightly sharpenedat the end) in this hole.This is a joint- of - three,or simply a T-joint.TETRAHEDRON3. Take the equilateral triangleand poke holes in its valvetube joints with a thorn.Now insert the three matchstickends of the T-joint in theholes of the triangle.4. This structure is calleda TETRAHEDRON.It has 4 corners, 6edges and 4 distinctsurfaces.5. All its surfaces are equilateraltriangles. Triangles are rigid.So this triangular house is verystrong.6. PENTAGONAL BOX7. In a similar manner two separatetriangles can be joined together usingthree matchsticks to make a PRISM.8. Two separate squares can be joinedwith four matchsticks to make a CUBE.9. Several of these three-dimensionalstructures can be put together to makedifferent kinds of houses and otherconfigurations. You can play with this simplemeccano to create your own models.
JOINTS OF FOUR, FIVE AND SIX1. Take two pieces of valvetube about 2 cms. long.Weave a thorn through thehole of one. Then pierce thethorn through the centre ofthe other valve tube.2. Pull both the ends of thesecond valve tube and slide itover the first one. Gentlyremove the cross, joint- offourfrom the thorn.3. Use these joints tomake a PYRAMID4 Make a joint-of-four butdo not remove it from thethorn. Just like the second,insert a third valve tube.5. The second and the thirdtubes are at right angles to thefirst tube. Insert a small pieceof a matchstick in any of thefour free legs of the ‘H’.6. Weave this matchstickneedle through the centre ofthe other leg of the ‘H’.7. Now remove thethorn and phase outthe six valve tube legsto form a star.8. This is a joint-of -six.For a joint-of- five, simply cutone of the legs of the ‘H’.9. You can attach sixmatchsticks to the star joint.10. Assemble twelve joints-of- five and thirty matchsticks to make an ICOSAHEDRON.One pentagonal face of the icosahedrons can be flexed in to make an IGLOO.With joints of 2, 3, 4, 5 and 6, and matchsticks as members there are many different kinds ofmodels and structures which you can make. This is a very interesting way to learn solidgeometry.
GEOMETRY BY PAPER FOLDINGMost of these Geometric Exercises in Paper Folding have been inspired by abook of the same name, written by an Indian mathematician in 1893.His name was T. Sundara Row (anglicised from Rao).Ninety Degree angleForty Five Degree angle1. We will start with simple angles. A straight edgeis 180 degrees. If we double a straight edge uponitself we get two ninety degree angles.2. A forty five degree angle is got byfolding any right angle corner into half.Sixty Degree angle3. How to fold 60 degrees ? Divide a straight edge (180 degrees) into three equal angles. Take apoint mid-way on the straight edge of paper lift both edges of the paper from this point and foldthem to approximately 60 degrees. Before creasing ensure that the edges are flush with the folds tobe creased.Thirty Degree angleFifteen Degree angle4. Fold the 60 degree angle such that its oneedge doubles on the other. 60 will be dividedinto two 30 degree angles.5. A fifteen degree angle can be got byhalving the 30 degree angle. This can bedone by doubling its one edge on the other.PAPER DIAMONDS1. First fold asheet ofrectangularpaper into half.2. and theninto quarter.3. Fold a triangleat the left-bottom,four fold comer(the centre of thepaper).4. On openingone layer youwill see half ofthe diamond.5. Open fully to see anelegant rhombus in themiddle of the paper.6. If you make several parallelcreases at the four fold cornerthen ...7. On opening you will see a diamond in a diamond in adiamond - a series of nesting diamonds or rhombuses.
Knotty Pentagon1. Take a long rectangular strip ofpaper and tie the two loose ends intoan ordinary knot.2. Gently pull theends to tighten theknot.Regular Hexagon3. Tighten the knotand crease well andyou will be surprisedto see...4. a regularPENTAGON.1. Fold a rectangularsheet of paper intohalf.2. Fold the doubled upstraight edge into threeequal parts of 60 degreeseach. Crease wellHexagonal Cobweb3. There will be 6layers of paper onthe top corner. Foldit into a triangle4.On opening youwill see a regularHEXAGON in themiddle.5. If you make several parallelcreases at the top corner then....Octagon6. On opening you will see a set ofnesting hexagons resembling a cobweb.1. Fold a sheetof paper into halfand then...2. into aquarter.3. Crease the 4fold corner againinto a triangle tomake 8 folds.4. Crease the8 fold cornersharply.5. On opening youwill find a regularOCTAGON in thecentre.Sum of the angles of a triangle equal two right angles.1. Cut a triangle from apieceof paper. Fold the top tomeet at the base as shown.2. Fold the left andright angles too.3. The three angles of the triangle canbe folded to form a 180 degreeangle. The three angles when placedlike this make a straight line.
PAPER CUBEUsing six similar squares of paper you can fold a very regular cube. You need no glue. Once youmake the cube you can make various kinds of dices and a whole world of games based on the cube.1. Take a 10 cms.square. Fold itsmiddle line andopen again.2. Fold the leftand right edgesto meet thismiddle line.3. Fold the topright anglecomer into half.4. Crease andopen up. Youwill find a smalltriangular flap.5. Fold itinwards.6. Now insert theright hand corner inbetween the folds ofthe left verticalrectangle.7. Repeat thesame process forthe lower leftcorner of therectangle. Firstfold it into half.8.Then openthe crease.9. And foldthe triangularflap inwards.10. Insert thelower left cornerbetween the foldsof the rightvertical rectangle.This is a selflockedparallelogram.11. One surface of this parallelogram is plainand smooth while the other surface has got fourpockets. Fold the triangular flaps of all the sixparallelograms towards the plain side. Now thepocket face will become an exact square.12. Start with two parallelograms.Insert the flap of the first into thepocket of the second.13. Take the third parallelogramand insert both its flaps - one ineach of the previous parallelogrampockets. Thus one cornerof the cube will be made.14. Continue assembling,taking care that all the flaps willcome over the square facetsand get inserted in the pockets.No flap will be inside the cube.15. Finally you will get aregular CUBE, withoutusing any glue. Small andstiff cubes make beautifuldices.
Make a paper cube or dice. Mark sixdifferent shapes on it instead of numbers.Cut ten numbers of each of those shapeswith cardboard and put them in a bag. Rollthe dice. Feel in the bag for the shape thatappears on the top face of the dice. If youpull out the right shape, then you keep it.Take turns. The first person to collect 5shapes is the winner.For this game you will need a few counters and adice. Each person draws 4 boxes like this :FUN WITH DICESRoll the dice.Write the number shown on the dice in one of the boxes. When you have put the number in the boxit cannot be changed. Keep rolling the dice until all the boxes are full. Is the left hand numbergreater than the right hand number ? If it is then you collect a counter. The first person to collect 5counters is the winner.Addition GameFor this game you require three dicesand a paper and pencil to record yourscore.Throw all three dices together. Add thedots on the top surfaces of all the 3dices. The winner is the player to score agrand total of 100.Multiplication GameFor this game you will require two dices and a paper and pencil to record your score. Both thedices are tossed by the player twice. The total number obtained by counting the dots on the topsurface of each dice on every throw become the factors for multiplying and the player must give thefinal answer correctly.6 x 9 = 54After each round, the player with the highest score gets 1 point. The winner is the player whoscores 10 points first.VariationsChildren can change the rules and make various games using three dices. They can throw all threedices together. Then add the two dices with the highest numbers and from this sum subtract thenumber on the third dice. This would be their score. They take turns and the player who scores 100first is the winner. Alternately, they throw all three dices together. Multiply the two lowest numbersand add to it the third number. This becomes their score. The one who scores 200 first is declared thewinner. The paper cube described on the previous page makes a very accurate dice. All that is requiredto make such a dice is six equal squares of paper. There is no gluing or pasting required. Having madea paper cube children could either make dots on them to make a number dice, or draw different shapes,or else make a dice with different colours on all its six facets. When children play with two or threedices they automatically learn to add, subtract and multiply in a very playful way. This kind of mentalmaths would stand them in good stead later on.
Slipper AbacusPLACE VALUE / DECIMAL POINT1. Take an old rubber slipper.Make three 7-8 mm diameterholes on its midline using ashoemaker’s punch.Rubber Abacus2. Insert / press fit a pencil/ reed in these holes. Theheight of the pencil shouldbe only 9 beads high.3. This simple abacus can be usedto show place value. The number293 is denoted on it.1. Cut a 5 cm x 10 cm piecefrom an old hawai chappal.2. Mark out 3 columns and9 rows of dots on it. Punchholes on the dots using a2mm shoemaker’s punch.3. Using matchsticks youcan depict any score from0 to 999 on this counter.The score right now is 159.Place Value Snake This splendid teaching aid is made from a strip of paper. Whenyou open up the snake then you see the actual place values of allthe numerals.DECIMAL ABACUS1. Cut a 6 cm x 3cm piecefrom an old rubber slipper.2. Stick 4 needles in therubber so that they are 4.5cm above.3. Cut a 6 cm x 6 cm piece ofold postcard Make 3 holes and2 slits on it. Mark a black spoton another postcard strip.4. Attach the postcard pieceto the rubber with pins.Weave the strip through theslits.5. Cut 5 mm long beads froman old refill.6. The abacus indicates520.9. It has got a slidingdecimal point
BROOMSTICK TABLESThis article is inspired by the work of Sri P.K.Srinivasan of Chennai. Tables are often learnt byrote. This repetitious drill might help quick recall but it kills the whole joy of learning. With only 18broomsticks children could discover the whole world of tables.1. Lay one broomstick and place one across it. At howmany points do they meet ? Obviously one. So, 1 x 1 = 1.If two vertical broomsticks are placed criss-cross overthree horizontal broomsticks then they have six junctions.A criss-cross of 4 and 3 sticks will have 12 junctions.So, 4 x 3 - 12. Six vertical sticks over five horizontal stickswill have 30 intersections.2 x 3 = 6.4 x 3 = 12.6 x 5 = 30.2. Children can make a 0 to 9 matrix on a squareruled copy and make their own table sheet byplacing broom- sticks criss-cross and countingthe number of junctions Children who know howto count should be encouraged to make their ownmultiplication table chart.12 x 13 = 156Multiplication of two-digit numbersMultiplication of two-digit numbers would meancounting too many junctions. So, ten broomstickscan be represented by one card strip.Criss-cross of two strips will be 10 x 10 = 100,while that of a strip and a broomstick will be10x1=10. Add up the sums of all the junctions to getthe multiplication value. For instance, 12 x 13 = 156.Multiplication by ZeroThe abstract concept of multiplication by a zero can be concretised by the use of broomsticks.2 x 1 = 2.1. 2 x 1= 2. Nowremove thevertical stick.2 x 0 = 02. As there are no junctionsnow so 2 x 0 = 0.Now remove one horizontalstick.1 x 0 = 0.3. What remainsis 1 x 0 = 0. Nowremove the lasthorizontal stick.0 x 0 = 0.4. Now thereare no junctions,so 0 x 0 = 0.Finger MultiplicationThis is a simple way to multiply numbers from 6 to 10.This method was used in some parts of Russia beforethe Revolution because at that time poor people andtheir children could not go to school. For this methodyou must do the following:1. You give numbers to your fingers from 6 to 10.2. If you want to multiply 7 by 8, finger number 7 ofone hand must touch finger number 8 on the otherhand. Then the two fingers together with all thefingers under them are tens. You have five tens, that is50.Then you multiply the number of the other fingers onthe left hand by the number of other fingers on theright hand. This gives you 3 x 2 = 6. So, 50 + 6 = 56.This method always gives the right answer.5 x 10 = 50.3 x 2 = 6.
ROULETTEEmpty ball pen refills are not for throwing for they make beautiful bearings. For this you needcheap refills which still cost 75 paise each and have a thin brass tip. The plastic end of these refillscan easily slide into the brass tip (Reynold and Sharp refills will not be appropriate).1. You will need an old refill (thin tip), an oldrubber slipper, cardboard, a small 2 mm shoemaker’s punch or a poker, Fevibond and scissors.2. Cut a used refill about1 cm from the top.3. Insert the plasticrefill in its brass tip.4. The refill goes in verysmoothly. The refill on itsown brass tip makes a veryefficient bearing.5. Punch a 2 mm hole in a1 cm diameter rubber disccut from an old slipper.6. Stick this disc at the centreof a 15 cm diametercardboard. Insert the 1 cmrefill with the tip in this hole.8. Place the refill in the pointer on the brass tip, in themiddle of the cardboard disc. Try twirling the pointer. Thepointer will rotate very smoothly. Place a circular carddisc divided into 8 equal sectors on the cardboard disc.The roulette has now become an 8 digit dice. By dividingthe card disc into different number of segments you canmake a dice of any number. Children spin the pointer andlater put seeds corresponding to the number indicated bythe pointer.Instead of numbers you can have shapes, colours,alphabets, different leaves on separate card sheets. Youcan make a number of very interesting matching gamesusing this simple roulette.Stretchable StomachThis toy is a source of endless amusement for little children.Paste a white paper on the outer case of a cardboardmatchbox and also on its drawer. Draw a cat as shown.When the drawer is slid inside, the cat appears in its normalsize. On pulling the drawer out, it appears as if the cat has astretchable stomach.7. Cut a 15 cm long and 1 cmwide pointer out ofcardboard. Stick anotherrubber disc at its centre Insertan 8 cm long refill in this disc.In another variation of this toy,the neck of a giraffe can bestretched, much to theamusement of children!
THE SOMA CUBE1. Take 27 wooden or plastic cubes and stickthem into seven shapes as shown. You canalso make use of the paper cubes shown onthe previous page. These are the seven piecesof the Soma Cube.2. Assemble all these sevenpieces to make a 3 x 3 x 3 solidcube. There are over 230 waysof making this cube. How manyways can you find?3. The number of pleasing structures which can be made with the sevenpieces of the Soma Cube seem to be unlimited. You can make all thesethree - dimensional figures using all the seven pieces in each case.
PAPER PROTRACTOR1. Take a 10cm x 10cmpiece of square paper(ABCD).2. Fold along itsmiddle line EF.3. Fold corner B and move it upand down on mid-line EF untilline BA passes through the lefthandcorner A. Crease AG.CD90 04. By doing this angle AGB will become 60 degrees.In triangle ABG, angle A is a corner of a square (90degrees), angle AGB is 60 so the remaining angleBAG will be 30 degrees. Now fold the lower trianglealong line BG and tuck it below triangle ABG.PBAP15 0AD75 0 90 060 0D B30 090 0600GB6. As angle ABP is aright angle being acorner of a square sothe remaining angleAPB will be 75degrees.Which Holds More?G15 030 090 075 0 60 0A300 30 0150 060 05. Bring edges AD and AB together soas to bisect angle DAP (30 degrees)into half. Now angle PAB will be 15degrees.7. Now we have a beautifulpaper protractor with angles of15,30,45,60,75 and 90 degreesmarked on it. Corners P (75degrees) and G (60 degrees) canalways be opened and doubledto make angles of 150 and 120degrees. So, next time if youforget your geometry box, thereisn’t much to worry about. Justfold a paper protractor.G1. Take two postcardsand roll each one of theminto a tube. One the longway and the other theshort way. Do not overlapthe ends. Tape the ends.2. One cylinder willbe tall and thin. Theother will be fat andshort Both will havethe same surfacearea.3. Will each cylinder hold the sameamount? What do you think is theanswer? The short and fat cylinderholds much more sand. Why?
THE MOEBIUS TWISTThe Moebius strip is a geometric curiosity. An ordinary square piece of paper has four edgesand two surfaces - the top and the bottom. But the Moebius strip has only one edge and onesurface. It was discovered by a German mathematician and astronomer Augustus Moebius,during the last century.1. Take a full sheet ofnewspaper and cutthree strips 5 cm. wideand about 80 cm. long.2 Label the strips a, b, and c.3. lake strip a and glue theends together, so as tomake a circular loop.4. Give strip b half a turn (180degree) before gluing the endstogether to make a loop.5. Give the last strip c afull turn (360 degrees)before gluing the endstogether to make a loop.6. Now, give the threeloops to three differentfriends. The loops lookalmost the same. Butwhen your friends..7. cut them along themiddle line of eachloop they will be in fora great surprise.8. The first loop Awill get divided intotwo separate loopsof paper.9. Loop B willbecome a singleloop whose lengthwill be double thatof the original loop.10. However, it is the thirdloop C which will surpriseyou the most. It willbecome two loops whichare linked together.
TANGRAMTangram is a thousand year old Chinese puzzle. In this a square is cut into seven pieces.Then all the seven pieces are joined together to create different patterns - geometricdesigns, humans, birds, animals. All the seven pieces have to be used for each design.There are thousands of different designs to make.1. Mark 16 smallsquares in a cardboardsquare of edge 10cm.2. Draw the lines as shown.3. Cut along the lines andyou have the seven piecesof the tangram.
Make all these humans, birds, animals using all the seven pieces of the Tangram in each case.
BEST PESTLessons are mugged up for passing exams. Definitions and formulae are learnt by heart to scorehigh marks in the tests. Often the lessons have nothing to do with real life. There is often no linkbetween what is taught in science and the needs of the community. But this need not always be so.An enlightened village science teacher in Andhra Pradesh got hold of an old mosquito net. Withwire hoops and pieces of net he made a butterfly net for every child. Each child was allocated aparticular small patch of the village paddy field. While coming to school the children had to oncescoop the butterfly net through the paddy field. They had to bring their booty of insect pests to theschool.In the school the children separated and sorted out the various insects. They counted the insectsand tried to know their names. They plotted a daily chart giving the number of insects foundeveryday. This simple bar diagram, would tell them about the increase or decrease in the insectpopulation. It was like a frequency count. It would give them some inkling of the pest menace.When is the pest population at the maximum? What would be the best time to spray the fields withpesticide?Children learnt a lot about insect pests and their plant hosts. Which insects attacked the paddyfields? Which insects attacked the black gram and ragi fields? Which was the best way to managethe pests? Would a solution made of crushed tobacco leaves, or of neem leaves work on aparticular pest?A conscious teacher was able to inspire the students to learn science from real life. The childrenwere learning relevant science in a very interesting way. Not only were they doing great science butthey were also helping the community in combating the pests for a sustainable livelihood.
AIRThese simple experiments are fun to do. In each of these experiments whenever you blowair, its high speed creates a low-pressure zone, which makes things either come close orrise up in the air.Take a strip of card 50-cm long and 5 cmwide. Cut a window in its middle and bendits two legs to make it stand like a table.On blowing through the window both thelegs of the paper table come close together.Can you remove a table - tennis ball from a glasswithout physically touching it ?Yes you can. Blow hard towards one wall of theglass and the ball will be ejected out of the glass.Take a thin strip of paper and hold it inthe gap between the thumb and theindex finger. Then bring the thumb closeto your mouth and blow horizontally.The strip will rise and float in the air.You can also tape the paper strip to theend of a plastic straw and blow through it.The strip will rise up and float horizontally.25-cm10-cm5-cm10-cmTape two light plastic balls to the ends of a 25-cm long thread. Tape a 5-cm longpaper strip in the middle to keep die balls apart. Hang the balls and use a plasticstraw to blow air between them. The balls will come close and strike each other.
FLYING FISH1. To make it all you need is a strip of oldnewspaper. The strip should be 2-cm wideand about 12-cm. long. Place the strip in ahorizontal position. On the lower right- handside, about 1.5-cm. from the end, cut a slithalf-way across the strip.2. Make a similarcut on the upperleft- hand side.3. Slip both the slitsinto each other sothat they interlocktogether.4. The fish is now complete.HELICOPTER5. Throw it high in theair and it will twist andturn around on its wayto the ground. Trymaking Flying Fishes ofvarious sizes andcolours. This is thesimplest and the mostamazing flying objectthat you can make. Thefish will twist and turnround and round as itcomes to the ground.1. Cut a long strip of paper12-cm. long and 3-cm.wide. Cut two-thirds of thelength along the dotted lines.4. Fasten the two ends witha paper clip, and that thehelicopter will stay verticalwhile flying.2. Hold the upper right-handand the lower left-hand andbring them together.3. To form a ‘V’ shape.5. Now drop the helicopterfrom a height andwatch it whirl round andround. Make a loopwith the thumb and firstfinger of your right hand.Try and catch thevertical tail of the fallinghelicopter in this loop.
THREE BLADE FANThis is a two minute toy. It is a very simple toy to make and it is great run to play with.1. Cut three long strips from an oldpostcard each about 1.5 cm wide.Fold each strip A, B, C in half fromthe right to the left.2. Take strips A and B andput A inside B like this.3. Weave stripC into place.4. Pull the strips in thedirection as shown ...5. to make a tight paperknot. The interlocking ofthe three strips makes abowl like form.6. Put this fan on a. blunt pointof a pencil and run with it.The fan will rotate.LEAPING FROG1. Take an oldcigarette packetand...2. remove its insidedrawer made of thincard sheet.3. Fold the twocorners on the top tothe middle to make atriangular head.4. Fold the tipof the triangularhead inwards.5. The folds on the leftside of the drawer act as avery fine spring. Turn thefrog upside down andpress the spring with yourindex finger to make itleap. Paint the frog greenand stick two eyes tomake it look like a realfrog.
DANCING DOLLYou will need one sheet of paper, pencil, ruler, scissors and craft knife, glue, compass and protractor.1. To make the skirtdraw two concentriccircles of 2.5 and 7.5cm radius. Draw ahorizontal line throughthe centre of the circles.2. Draw 60 degreeangles above andbelow the line fromthe centre The circlewill be now dividedinto six segments.3. Mark thecircumference of theouter circle at pointshalf-way betweeneach radial line.4. From these midpointsdraw six slantlines as shown.5. Cut alongfive of theselines. Makefurther cuts asshown anddiscard theshaded area.6. Form a coneby bringing pointsX and Y together.Glue them tocomplete theskirt.7. To make thedoll: cut a 7.5 cmsquare of paperand fold it in half.Draw half the dollas shown.8. Cut throughboth the layersof the paper inone go. Discardthe shaded area.Cut along the slitlines.9. Unfold and shapethe lower part.Overlap the twoends and glue themtogether.10. Raise the little tabsand glue them on theunderside. Then fix theupper body to the skirt.Rearrange the arms.11. Balance the doll on a tip of apencil. Blow on the skirt and thedoll will spin round and round.
FAN TAILED BIRD1. Take a 7.5-cm x 3.0-cm strip ofbond paper. Fold its length into threeequal parts. Leaving one third of thewidth cut two sectors along thelength Repeat the same at the othershort edge.2. Fold one third ofthe end strips inwardsand glue them.3. Cut a one centimetrelong piece from an oldball pen plastic refilland flatten one of itsends by pressing itbetween your teeth.4. Put a pin throughthis end. The oval refillend prevents the pinfrom going through.5. Apply glue (Fevibond /Vamicol is best) on the doubledup ends. Stick the end of the pinas shown in the picture.6. Now turn the strip and stickthe two glued portions together.Glue7. If you now hold the refill andblow through the wide side ofthis Y shaped propeller then itwill rotate very fast.8. Fold a FLAPPINGBIRD using a 10-cmsquare of thick paper. Cutthe bird’s tail as shown bythe dotted lines.9. Apply glue on both the innerportions of the tail and stick theplastic refill of the fan. Take careso that the glue does not touchthe head of the pin.10. Tie a thread to thebird and then rotate it.11. The tail fan will rotate giving afeel of the bird in flight.
LOOP GLIDER1. Cut two strips of paper,one measuring2-cm. x 16-cm. and theother 2-cm. x 10-cm.2. Cut a stiff drinkingstraw or a light reed of15-cm. long.3. Bend the small strip into aloop so that its ends overlapa bit. Tape the overlappingends together. Do the samewith the large strip.4. With a piece ofsticky tape attachthe small loop toone end of thestraw.5. Attach thelarge loop to theother end.CLOTHES CLIP PCLOTHES CLIP PISTOL6. To fly the glider, hold it high with the smallloop in the front and throw gently. The loopglider will glide through the air. If the gliderwobbles, adjust the position of the loops.1. To make this ingenious pistol you willrequire a wooden or a plastic clothes clip,a rubber band and a matchstick.2. Place the matchstick and therubber band as shown in the picture.3. The rubber band will be in tension.If you press the clip in this positionthen...4. The matchstick will shootforward. A wooden clothes clipand a thicker stick works better.
AIR TOP1. Take a thick card disc 7-cmin diameter. Mark out the linesas shown.2. Cut along the three sides ofthe flaps with a sharp blade.3. Bend theflaps upwardsas shown.Funny Money4. Stick a pin or athin nail through thecentre of the disc,leaving about 1 cmprojecting below.This will be thepivot point of thetop.6. Now hold thedisc lightly againstone end of anempty thread spoolwith your finger,letting the long endof the pin stick upthrough the hole inthe spool. Blowthrough the otherend of the spool.5. Applyglue, orFevicolaround thepin to holdit in place.7. The stream of air youblow strikes the vanesradially and makes themspin. The stream of airalso creates a lowpressurezone, that holdsthe disc against thespool, Once you stopblowing, the top willdrop from the spool andcontinue to spin on thetable.1. Pull an aluminiumhanger into adiamond shape.2. Make a hole inan injection bottlecap and insert it inthe hook.3. Place a coin onthe rubber cap.Swing the hanger ina full circle. Continuespinning fast. Thecoin will not fall.4. When you stop the coin willstill be perched on the cap.This is a very dramatic way todemonstrate centripetal force.
Aeroplane Wing1. Cut a piece of paper 20-cm. longand 10-cm. wide. Bend it in half andstick the edges together. Run a foldalong the edge with your fingernails sothat it bends, curved at the top andalmost flat underneath. The flat end ofthe wing is the leading edge, and thethin edge is the trailing edge.20-cm.10-cm2. Make a straight hole through both theparts of the wing about 3-cm. from theleading edge. Pass a piece of empty straw orball pen refills through it and fix it with a dabof glue. Stick a piece of paper on the centreline of the trailing edge. This fin will standvertically and help in stabilising the wing.3. Pass a thin thread through therefill and tie the two ends of thethread to two sticks. Now hold thesticks in your two hands and pullthem so that the thread is in tension.As you swing the sticks through theair the wing will rise on the thread.4. How does an aircraft fly? How does the aircraft’s wingproduce lift? How does the heavy aircraft with such a load ofpassengers and cargo fly in the air? This simple paper modelof the aeroplane’s wing will help you understand the principleof flight.As you pull the thread and run with both the sticks the paperwing lifts up on the thread. There is a hump on the top portionof the wing. The top portion of the wing is longer than thebottom portion, which is almost flat. As the wing moves in theair, its leading edge divides the air stream into two parts. Oneair stream goes over the top and the other goes along thebottom of the wing. Both the air streams meet after the sametime at the trailing edge. The upper air stream has to go overa hump and hence has to travel a much larger distance ascompared to the lower stream. Since both air stream meet atthe trailing edge at the same time the upper stream has tomove faster. This higher speed of airflow on the top of thewing produces a low-pressure on the top of the wing, thusproducing lift from below. This is how a wing helps anaeroplane to rise in the air.
Abraham Lincoln wrote this letter to his son’steacher. This letter is a timeless classic.TEACH MY SONAbraham Lincoln... He will have to learn, I know, that men arenot just, all men are not true. But teach him alsothat for every scoundrel there is a hero; that forevery selfish politician, there is a dedicatedleader. Teach him that for every enemy there isa friend. It will take time, I know, but teach himif you can, that a dollar earned is of far morevalue than five found.Teach him to learn to lose and also to enjoywinning. Steer him away from envy, if you can,teach him the secret of quiet laughter. Let himlearn early that bullies are the easiest to lick.Teach him, if you can, the wonder of books,but also give him quite some time to ponder theeternal mystery of birds in the sky, bees in thesun, and flowers on a green hillside.In school teach him that it is far more honourableto fail than to cheat. Teach him to havefaith in his own ideas, even if everyone tells himthey are wrong. Teach him to be gentle withgentle people, and tough with the tough.Try to give my son the strength not to follow the crowd when everyone is getting on the bandwagon.Teach him to listen to all men but teach him also to filter all he hears on a screen of truth andtake only the good that comes through.Teach him if you can, how to laugh when he is sad.Teach him that there is no shame in tears. Teach him to scoff at cynics and beware of too muchsweetness.. Teach him to sell his brawn and brain to the highest bidders, but never to put a pricetag on his heart and soul. Teach him to close his ears to the howling mob and to stand up andfight if he thinks he is right.Teach him gently, but do not coddle fine steel. Let him have the courage to be impatient, lethim have the patience to be brave. Teach him always to have sublime faith in mankind.This is a big order, but see what you can do. He is such a fine fellow, my son.
Can you fill the empty bottle?Place a funnel in the neck ofan empty soda bottle. Packclay around the neck of thebottle so that there is nospace between the bottleand the funnel. Pour waterinto the funnel Notice whathappens. Then take the clayoff the bottle and funnel.The clay seals the neck ofthe bottle outside of thefunnel. When water flowsinto the funnel, the aircannot escape, except bygoing through the watervery slowly. The air in thebottle takes space andprevents the water fromcoming in. When the clay isremoved the air can escape,and water flows in easily.FUN WITH WATERThe SiphonPlace a tall jar full of water on ahigh table and an empty jar ona lower chair. Fill a tube withwater and hold the water in bypinching both ends of the tubeor with a clothespin. Place oneend of the tube in the top andthe other end in the lower jar.Open the two ends. The waterwill flow as long as the level ofwater in one jar is lower thanthe level of water in the otherjar. The pull of gravity causeswater to flow from the tube andreduces the pressure within it(at B). The air pressure isgreater at A and water is forcedinto the tube.Try to use the siphon withoutfilling the tube. Does it work?How does a straw work?Mix a few drops of ink in half aglass of water. Place atransparent straw in the glasswith coloured water. Suck up alittle of the water into thestraw. Then hold your fingeracross the top of the strawand pull the straw out of theliquid. What happens? Thenremove your finger from thestraw. While your fingercovers the top of the straw,the liquid remains in the straw.When you remove the finger,the water flows out. Whenyou cover the straw with yourfinger you are lessening thepressure of air over the straw.The greater pressure of airunder the straw can hold theliquid inside the straw.Make an atomiserHow many coins will it hold?How to compress airPlace a jar or a glass in abasin. Fill the jar to thebrim with water. Drop in25 paise coins or paperpins, holding them fromtheir edges. You will seethat you can drop in asurprising number ofcoins into the jar beforethe water flows over.The explanation for thisis that there is almost anelastic rubber likemembrane on top of thewater surface. Thissurface tension permitsyou to heap the waterquite high before itbreaks and the waterruns over.Make a slit in a plastic straw about one-third from oneend. Bend the straw at the slit and place the shortsection in a glass of water. Make sure the slit is nomore than 0.5 cm above the surface of the water. Blowhard through the straw. You will see that water entersthe straw from the glass and comes out through the slitlike a spray.Hold a glass with its mouth down and push itinto a deep bowl or bucket of water. You will seethat the water enters the glass a little way. Nobubbles of air escape. The water forces the airinto a smaller space. The molecules of air areforced closer together.
BELLOWS PUMPWith this very efficient pump you can inflate a balloon with air or fill it with water. This pump will alsomake a great Pichkari for Holi, for with every down stroke 40-ml of water comes gushing out.1. For making the pump you will need twofilm-reel bottles, 15-cm of old cycle tube, anold refill or a Frooti straw, and some rubberbased adhesive like Fevibond or Vamicol2 Make a hole in thebase of film-reel bottleA by using a dividerpoint. Widen this holeby gently rotating thepointed end of ascissors The holeshould be about 1-cmin diameter and shouldnot have any burrs.3. Make asimilar holein cap B.4. Cut two circular washersabout 1.5-cm in diameterfrom a cycle rubber-tube.Apply Fevibond on half ofthe area of the two washers.5. ApplyFevibond to thecap and pasteone washer.6. The washerwhich is stuck onone side only willact like a hinge. Itcan open and closelike a valve.This is theDELIVERYVALVE.7. Paste the othervalve on the base ofthe film-reel bottle.This is theSUCTION VALVE.8. Take anotherfilm- reel bottle Band make a smallhole on its cylindricalsurface.9. Press fit a short thick Frootistraw or a ball-pen refill in itfor the delivery pipe. Fix thecap with the delivery valve(Fig 6) to bottle B.DeliveryValveSuctionValve10. Cut a 15-cm long piecefrom an old bicycle tube.Stretch and slide the tubeover both the bottles asshown. The bottles will beseparated by 7-8 cm ofcycle tube. This rubbertube acts like a pair ofbellows.11. Now hold the lower bottle in water andpress the top bottle B downwards. After afew initial strokes water will start gushingout of the delivery tube.
SPRINKLER1. Tie a metre long string to the topof a carrot. Slip the free end of thestring through an empty ball penbody. Then tie it to a small potato.2. Hold the pen body inyour hand and beginmaking circular motions- the potato must swingin a circle. As youincrease the speed ofrotation the carrot willrise There is a forceassociated with therotation of the potato.This force pulls away thecentre of the circle and iscalled Centrifugal force.3. This simplesprinkler works onthe same principleTake a one meterlong flexible plastictube - the one usedas a petrol pipe oras a mason’s leveltube. Keep oneend of the tubeimmersed in waterand suck from theother end.4. When waterstarts coming fromthe other end youstart rotating it andslowly raise it.Inertia PumpThis simple pump was designed by SureshVaidyarajan. Any hollow tube - PVC, metalor even a 30 cm long Papaya stem can bemade to pump up waterHold the tube with your left hand and moveit up and down into a bucket of water.Keep the palm of your right hand on thetop of the tube and open and close it witheach up and down reciprocation. Soonwater will start squirting out. Here theup - down motion of the left hand does thepumping while the right palm acts like avalve.5. Water will keep sprinkling out as longas you continue spinning the tube Thisway you can dram out the whole bottle.The Centrifugal force of rotation isenough to suck and lift water from aheight of almost half a metre. You canmake a simple foot valve using a cyclesteel ball and a pen body as a seat.
HANDPUMP1. For making this pump you willrequire a black film-reel bottle,one more cap, a cycle spoke,old cycle tube, an old refill,simple hand tools and Fevibond- a rubber adhesive.2. With a sharp scissors cut andremove the outer circle of thecap. The inner circle will make asuperb piston. Rub it a little onsandpaper so that it is free insidethe bottle - the cylinder.3. Make a 2-mm hole inthe centre and a 6-mm holefor the delivery valve port.Apply Fevibond to a 2-cmx 1-cm piece of bicyclerubber tube and stick it tocover the hole. This rubberwill act like a hinge andopen and close like a valve.4. Cut a 12-cm long piecefrom a bicycle spoke Fix thepiston on the spoke threadswith two nipple nuts.5. This is the piston, delivery valveand connecting rod assembly.6. Take another film-reelbottle cap and make a 6-mmhole in it. Apply Fevibond toa 2-cm x 1-cm piece of tuberubber and stick it on oneside to cover the hole. This isthe suction valve.7. Make a 3-mm hole inthe centre of the bottlebase so that the cyclespoke can move freelyin it. Make another holeon the curved surfacenear the base and fix anold refill or Frooti strawin it. This is the deliverypipe.8. Insert the spoke throughthe bottle base and snap thesuction valve lid to completethe hand pump assembly.Keep the pump in a bowl ofwater and move the spoke upand down. After a fewpriming strokes large quantaof water will gush out of thedelivery pipe with everyupward stroke of the spoke.Both the rubber washers -stuck only on one side ashinges, act as very efficientvalves. This is a superb modelto understand the working ofa real hand pump.
BAREFOOT PATHOLOGISTSOften the school science curriculum is cut-and-dry and divorced from real life. It is no wonder thatsuch lessons are unable to sustain interest and capture the imagination of the children. A number ofexperiments have proven that when science curriculum’s are designed with the community’s needs inmind, then they spark a great deal of interest and are able to galvanise the community into action.Vigyan Ashram an NGO near Pune, devised a unique curriculum for ninth class girls. The girlswere trained to conduct blood, urine and stool tests by professional pathologists. They were alsotaught a course on food, nutrition, health and hygiene.These girls were then asked to visit all the village homes and examine the health of the children.They had to make a note of the number of children in every house. Also the age, sex, height andweight of the children. These girls also took blood samples of pregnant mothers and children.Whenever the haemoglobin count was found low, the patients were advised to eat green leafyvegetables and other iron rich foods. These girls gave the families simple tips on cleaning thewater. The girls periodically visited the homes and monitored the progress of their patients.The village families were very happy by the help rendered by these girls. Slowly these girlsbecame so skilled that soon they were doing simple pathological tests for the local doctors for afee!One day these girls will many and have their own families. They will be very conscious mothersand will pay a lot of attention to the health of their family.At present these girls are offering a great service to their community and at the same timelearning the rudiments of science in a very creative way.
SightOUR SENSES1. Look at a distant object. Then hold up your fingerat arm’s length With one eye closed look at the scenejust over the top of your finger. Note the object thatyou see. Without changing the position look at thescene with the other eye The background shifts. Yousee a different object beyond your finger. This showsthat a different image is observed in each eye.2. Try to bring the wide end of a pencildown to touch another wide end of a pencilheld in front of you. First try it with one eyeclosed. You miss quite easily. But with twoeyes you can do it all the time. Both eyesare needed to sense the distance of anobject.Touch1. Touch different point of a tooth - pick or thin nailto different spots on the back of your middle finger.You will feel the pressure of the nail pointswherever you touch it to the skin. But at somepoints you feel the point more sharply than theothers. These are the spots that feel pain.2. Place the points of two pencils heldclosely together against the back of ablindfolded person’s neck. He feelsthem as one point. But when touchedto his finger he feels two. The sense oftouch is much more sensitive in thefingers than on the back of the neck.3. Touch a pencil to thecrossed fingers of ablindfolded person. Hethinks there are twopencils because he feelsthem on opposite sides ofthe fingers that arenormally in a differentposition.4. Paste two thin sheets of papertogether. Cut out a square of thispaper and another of a singlethickness. Ask a person to tell ifthey are the same or of differentthickness. Most people can tell byfeeling them, which is thicker. Thisexperiment shows how sensitiveour sense of touch is.5. Feel a metal surface anda wooden one. The metalfeels colder because itconducts heat away fromyour body faster. It isactually at the sametemperature as the wood.

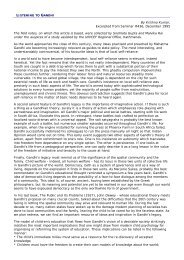
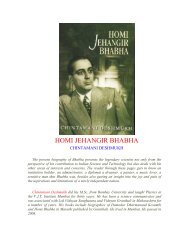
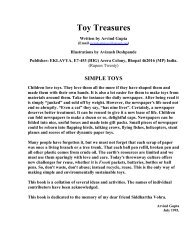
![tq,a] diM+s vkSj vk/qfud ekuo - Vidya Online](https://img.yumpu.com/31264147/1/190x245/tqa-dim-s-vksj-vk-qfud-ekuo-vidya-online.jpg?quality=85)