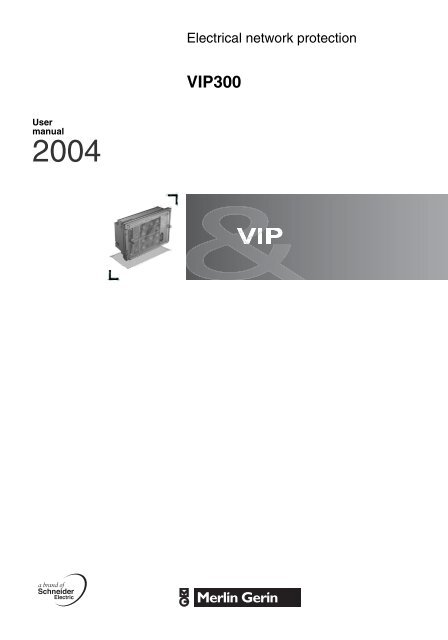
vip300 user manual - Schneider Electric
vip300 user manual - Schneider Electric
vip300 user manual - Schneider Electric

You also want an ePaper? Increase the reach of your titles
YUMPU automatically turns print PDFs into web optimized ePapers that Google loves.
ContentsFunctions and characteristicsPresentation of the VIP300 relay 2Presentation of sensors 3Description of VIP300 relays 4Presentation of the VAP6 test unit 8Using the VAP6 test unit 9Technical characteristics 10Installation and connectionMounting 14Connection 161
Functions andcharacteristicsPresentation of the VIP300 relayDE50967DE10332Simplified wiring diagram.Self-powered protection relayThe VIP300 relay is designed for use in power distribution systems. It may be usedto protect MV/LV transformers, incoming points of industrial installations or branchfeeders.The VIP300 provides protection against phase-to-phase faults and earth faults. Thechoice of tripping curves and multiple settings make is suitable for use in a widevariety of discrimination schemes.The VIP300 is a self-powered relay (supplied by current sensors) requiring noauxiliary power supply.It actuates a Mitop release.The VIP300 is available in three models:b VIP300LL and VIP300P, designed for use with RM6, SFset and Evolis 24 kVcircuit breakersv VIP300LL: phase and earth protectionv VIP300P: phase protection onlyb VIP300LH, designed for use with Ringmastercircuit breakers: phase and earthprotection with an equivalent time multiplier table on the front to convert settings.Phase protectionThe phase protection has two separately adjustable thresholds:b the low threshold may of the definite time or IDMT typeb the high threshold is of the definite time type.The IDMT curves comply with standard IEC 60255-3. They are of the standardinverse, very inverse and extremely inverse types.The low threshold may also be used with the RI curve.Earth protectionEarth fault protection is based on residual current measurements using the sum ofthe sensor secondary currents.Like phase protection, earth protection has two separately adjustable thresholds.Phase and earth fault curves.Equipment descriptionThe VIP300 relay is mounted in an injected polycarbonate casing that protects themagainst dripping water and dusty environments.The front is protected by a transparent cover fitted with a sealing gasket. The covermay be lead-sealed to protect access to the settings.Rotary selector switches are used for setting. The phase and earth fault currentsettings are set in amperes. This means that the graduations on the front must beadapted to suit the sensor range used. This is done by fitting the appropriate settinglabel when mounting the relay.The connection is made on the back of the relay using fast-on type connectors.IndicationTwo indicators show the cause of tripping (phase or earth fault). The indication ismaintained even if relay power is cut.Two LEDs (phase and earth) indicate that the low threshold has been overrun andthat the time delay is running.2
Functions andcharacteristicsPresentation of sensorsSensors for VIP300To obtain the indicated performance characteristics, VIP300 relays must be usedwith the specified sensors. The relay/sensor assembly is defined to respect thetechnical characteristics indicated, in particular:b operation over the enitre rangeb response timeb accuracyb short-circuit thermal withstand.The three sensors must be of the same type.Sensors for VIP300LL and VIP300Pb CRa 200/1 and CRb 1250/1 sensors are used on RM6 units (models since 1998).b CSa 200/1 and CSb 1250/1 sensors are used on SFset circuit breakers.CSa and CSb sensors have the same number of secondary turns as the CRa et CRbsensors respectively.b CEa 200/1 and CEb 1250/1 sensors are used on 24 kV Evolis integrated circuitbreakers (lateral versions).Sensors for VIP300LHb 200/1 and 800/1 are used on Ringmaster circuit breakers.VIP300 sensor input ratingsEach VIP 300 has two input ratings corresponding to two different operating ranges.For this reason, the input transformers have an intermediate tapping point on theirprimary winding. Each tapping point corresponds to a rating with a different operatingrange.Choosing the right sensorChoose the sensor to be used and the VIP300 connection range in accordance withthe desired current setting range.VIP300LL / VIP300P sensors Rating Current setting rangeCRa, CSa, CEa 200/1 x 1 10 A - 50 Ax 440 A - 200 ACRb, CSb, CEb, 1250/1 x 1 63 A - 312 Ax 4250 A - 1250 AVIP300LH sensors Rating Current setting rangeRingmaster 200/1 x 2 20 A - 100 Ax 440 A - 200 ARingmaster 800/1 x 2 80 A - 400 Ax 4160 A - 800 AFor a given operating range, the bottom of the current setting range represents theminimum operating current of the relay.3
Functions andcharacteristicsDescription of VIP300 relaysPhase protection1. phase overcurrent protection zone2. threshold overrun indicator3. phase trip indicator4. phase current setting Is5. choice of low threshold curve type6. low threshold I>7. low threshold time delay t>8. multiplying factor (low threshold)9. high threshold I>>10. high threshold time delay t>>DE50969Earth protection11. earth fault protection zone12. threshold overrun indicator13. earth trip indicator14. earth current setting Ios15. low threshold time delay to>16. low threshold Io>17. choice of low threshold curve type18. multiplying factor (low threshold)19. high threshold Io>>20. high threshold time delay to>>Other functionsa. setting labelb. sensor and range informationc. indicator resetd. minimum operating currente. VAP6 test plugf. VIP300LL: tripping curvesVIP300LH: equivalent time multiplier table for conversions.VIP300LL/VIP300LH front panel.DE50970VIP300P front panel.4
Functions andcharacteristicsDescription of VIP300 relaysDE10324DE10325See also c: indicator reset button.Curve 1: phase setting V IDMT low thresholdVIP300LL, VIP300LH and VIP300P phaseprotectionb 1: phase protection setting zoneThe phase protection settings are located in the top half of the front panel.b 2: threshold overrun indicatorWhen the red indicator blinks, the phase protection low threshold time delay isrunning. When this is the case, if the current does not decrease, the relay will trip.For IDMT curves (SI, VI, EI), the LED lights up when the current is greater than 1.2times the current setting Is.For the IDMT curve (RI), it lights up when the current is greater than the Is setting.For the definite time curve DT, it lights up when the low threshold is overrun.b 3: trip indicatorIt is normally black and turns yellow to indicate that the phase protection has given atripping order. It stays in the same status, even when the relay is no longer energized.b 4: choice of current setting IsThe current setting range depends on the sensor and range used: the selector switchgraduations should be adapted to suit the sensor and range using the setting label.b 5: choice of type of low threshold curvev DT: definite timev SI: inverse timev VI: very inverse timev EI: extremely inverse timev RI: specific curvev off: low threshold disabled.b 6: choice of low threshold I>The threshold is a multiple of the current setting. It is only active for definite timethresholds (selector switch 5 set to DT).If the tripping curve is selected with IDMT (selector switch 5 set to RI, SI, VI, EI), theselector switch has no effect.b 7: setting of low threshold time delay t>If the tripping curve is of the definite time (DT) type, the selector switch sets the lowthreshold time delay.If the curve is of the IDMT type (RI, SI, VI, EI), the value displayed is the tripping timefor a phase current equal to 10 times the current setting.b 8: low threshold time delay multiplying factorIn the x10 position, the time delay displayed on selector switch 7 is multiplied by 10.b 9: setting of high threshold I>>The high threshold is chosen as a multiple of the current setting.In "off" position, the high threshold is disabled.b 10: setting of high threshold time delay t>>The time delay is set directly in seconds.Phase protection settingThe numbers indicated on the curves opposite are those of the phase protectionsetting switches (refer to the diagram of the front view).Curve 2: phase setting V definite time low thresholdSet:b current setting Is (4)b type of low threshold I> curve (5)v IDMT: RI, SI, VI, EIv definite time: DTb low threshold I> (6). This setting is only active if the low threshold curve chosen isof the definite time DT type (curve 2). For the other choices, SI, VI, EI, RI (fig 1), theselector switch is disabled.b low threshold time delay t> (7) and (8)b high threshold I>> (9)b high threshold time delay t>> (10).5
Functions andcharacteristicsDescription of VIP300 relaysVIP300LL and VIP300LH earth protectionThe principle is the same as for phase protection.The earth fault threshold overrun indicator only lights up if thephase current is greater than the minimum operating current.See also c: indicator reset button.b 11: earth protection setting zoneThe earth protection settings are located in the bottom half of the front panel.b 12: threshold overrun indicatorWhen this indicator blinks, the earth protection low threshold time delay is running.When this is the case, if the current does not decrease, the relay will trip.for IDMT curves (SI, VI, EI), the LED lights up when the current is greater than 1.2times the current setting Ios.For the IDMT curve (RI), it lights up when the current is greater than the Ios setting.For the definite time curve DT, it lights up when the low threshold is overrun.b 13: trip indicatorIt is normally black and turns yellow to indicate that the earth protection has given atripping order. It stays in the same status, even when the relay is no longer energized.b 14: choice of current setting IosThis is the maximum residual current that can flow in the system without theprotection being tripped.The Ios current setting range depends on the sensor and range used: the selectorswitch graduations should be adapted to suit the sensor and range using the settinglabel.b 15: setting of low threshold time delay to>If the tripping curve is of the definite time (DT) type, the selector switch sets the lowthreshold time delayIf the curve is of the IDMT type (RI, SI, VI, EI), the value displayed is the tripping timefor an earth current equal to 10 times the current setting.b 16: choice of low threshold Io>The threshold is a multiple of the current setting. It is only active for definite timethresholds (selector switch 17 set to DT).If the tripping curve is selected with IDMT (selector switch 17 set to RI, SI, VI, EI), theselector switch has no effect.b 17: choice of type of low threshold curvev DT: definite timev SI: inverse timev VI: very inverse timev EI: extremely inverse timev RI: specific curvev off: low threshold disabled.b 18: low threshold time delay multiplying factorIn the x10 position, the time delay displayed on selector switch 15 is multiplied by 10.b 19: setting of high threshold Io>>The high threshold is chosen as a multiple of the current setting Ios.In "off" position, the high threshold is disabled.b 20: setting of high threshold time delay t>>The time delay is set directly in seconds.Earth protection settingThe principle is the same as for phase protection.Set:b current setting Ios (14)b type of low threshold Io> (17)v IDMT: RI, SI, VI, EIv definite time: DTb low threshold Io> (16). This threshold is only active if the low threshold curvechosen is of the definite time DT type. For the other choices, SI, VI, EI, RI, theselector switch is disabled.b low threshold time delay to> (15) et (18)b high threshold Io>> (19)b high threshold time delay to>> (20)OperationThe high and low thresholds operate separately.The tripping order results from a "logical OR" between the two thresholds.6
Functions andcharacteristicsDescription of VIP300 relaysDE50982MOther VIP300LL, VIP300LH and VIP300P functionsb a: setting labelThe setting label should be fitted on the VIP300 when it is mounted on the circuitbreaker.The label indicates the graduations of the phase current and earth protection settingselector switches. It is inserted from the top, behind the transparent part of the frontpanel.Each VIP300 comes with a set of labels. Install the label that matches:b the type of sensor usedb the VIP300 modelb the range used.Each setting label matches a sensor and is printed on both sides for each of the tworanges. The label may therefore be turned around if the VIP300 range is changedduring the service life of the installation.b b: sensor and range indicationThe text is printed on the setting label.When the label is in position in the slot, the text is hidden by a non-transparent zone.It is not visible to the <strong>user</strong>.How to fit the setting labelb c: indicator reset buttonThe button is accessible when the transparent cover is closed. Pressing the buttonhas two results:v it resets (black position) the two phase and earth trip indicators (when the relay isno longer energized, it is still possible to reset the indicators for about 48 hours; afterthat time, they may be reset after the VAP6 is plugged in)v it lights up the two red LEDs (about 3 s). This indicates that:- the relay is energized (the indicator lights up when the current is greater than theminimum operating current)- relay self-testing results are OK.If one of the two conditions is not met, the indicators do not light up.This function may be used to carry out a basic relay operation test.DE50975Minimum operating current: the VIP300 does not operate belowthe minimum operating current level. As a result, if the earthprotections are set below the minimum operating current, theywill only take effect when there is phase current greater than orequal to the minimum operating current.b d: minimum operating currentThe minimum operating current is the phase current required for the relay to beenergized and operational. It is printed on each setting label.The value given on the setting label is the three-phase rms minimum operatingcurrent. The minimum operating current always corresponds to the the lowest valueof the current setting range.b e: VAP6 test plugThe test plug is exclusively designed for connection of the VAP6, used for fast andeasy relay testing.The test may be carried out during normal operation of the installation since theVAP6 and VIP300 provide the possibility of testing without circuit breaker tripping.b f: tripping curvesv VIP300LL/VIP300Pv VIP300LH: equivalent time multiplier table for conversions.Testing the VIP300 with the VAP67
Functions andcharacteristicsUsing the VAP6 test unitDE50992VAP6 test sequenceThe test may be carried out with or without current in the sensors. During the testoperations, all the VIP300 settings are effective; the relay should perform inaccordance with the settings. During the test, the relay remains operational and willgive a tripping order in the event of a fault, unless the "trip inhibition" button ispressed.b Connect the VAP6 to the "VAP6 test plug". The VAP6 batteries automatically go onand the "on" indicator lights up.b Press the VIP300 "reset" button:v if the two "trip" indicators were yellow, they go blackv the two red I> and Io> indicators of the VIP300 light up for about 3s to indicate thatthe central processing unit has correctly performed self-testing.b Press the "trip inhibition" button if the test should be carried out without tripping ofthe circuit breaker.Be sure to keep the "trip inhibition" button pressed throughout the time ittakes to send the stimulus.If the "phase overcurrent" button is held down after tripping, theVIP300 starts the time delay/tripping cycle again; this is normal.In that case:b the VAP6 red "trip" indicator lights up for a short time aftereach tripb depending on the time delay setting, the VIP300 red "I>"indicator may be off or blink rapidly in an irregular manner.b Press the "phase overcurrent" button to send the phase protection test stimulus:v continue pressing the button throughout the duration of the stimulus (the stimulusrepresents about 20 times the current setting Is)v the VAP6 "test in progress" indicator lights up to confirm the sending of thestimulus to the VIP300 relayv the red "I>" indicator of the VIP300 blinks during the time delay periodv then the VIP300 phase "trip" indicator turns yellowv the circuit breaker trips if it is not inhibited.b Press "earth fault" to test operation of the earth protection. The stimulus injectedis equal to 20 times the current setting Ios. Use the same procedure as for the phaseprotection test.b Disconnect the VAP6.In order to save battery power, do not leave the VAP6 connected to the relayunnecessarily.9
Functions andcharacteristicsTechnical characteristicsPhase protectionAccuracyLow threshold I> ±5 % or 0/+2 A(1)Low threshold time delay t>definite time ±2 % or ±20 ms(2) (8)IDMT class 5, IEC 60255-3 or 0/+20 ms(2) (8)High threshold I>> ±5 %High threshold time delay t>> ±2 % or ±20 ms(2)Drop-out/pick-up % 95 %Storage time20 msEarth protectionLow threshold Io> ±5 % or 0/+2 A(3) (4) (5)Low threshold time delay to>definite time±2 % or ±20 msIDMT classe 5, IEC 60255-3 ou 0/+ 25 ms(2) (5) (8)High threshold Io>> ±5 %High threshold time delay to>> ±2 % or ±20 ms(2) (8)Drop-out/pick-up % 95 %Storage time20 msGeneral characteristicsValueContinuous thermal withstand 240 A with CRa, CSa or CEa sensor1500 A with CRb, CSb or CEb sensor240 A with RMR 200/1 sensor960 A with RMR 800/1 sensorShort-time thermal withstand 25 kA / 1 s with CRa, CRb, RMR 800/1,CSa, CEa, CSb or CEb sensor25 kA / 1 s with RMR 200/1 sensor on range x220 kA / 1 s with RMR 200/1 sensor on range x4Operating frequency 50 Hz ±10 %, 60 Hz ±10 %Operating temperature –25 °C to +70 °CStorage temperature –40 °C to +85 °CWeight1.7 kgMinimum operating current Range ValueVIP300LL/VIP300P + CRa, CSa or CEa sensor x1 10 A(7)x440 AVIP300LL/VIP300P + CRb, CSb or CEb sensor x1 63 Ax4250 AVIP300LH + RMR 200/1 sensor x1 20 Ax240 AVIP300LH + RMR 800/1 sensor x1 80 Ax2160 AClimatic withstand Standard SeverityLow temperature operation IEC 60068-2-1 –25 °C, 16 hLow temperature storage IEC 60068-2-1 –40 °C, 96 hHigh temperature operation IEC 60068-2-2 +70 °C, 16 hHigh temperature storage IEC 60068-2-2 +85 °C, 96 hFast changes in temperature IEC 60068-2-14 –25 °C à +70 °C, 5 cyclesOperation in damp heat IEC 60068-2-3 56 days, 93 % HRSalt spray IEC 60068-2-52 severity 110
Functions andcharacteristicsTechnical characteristicsMecanical withstand Standard SeverityVibrations IEC 60255-21-1 class 2Shocks and bumps IEC 60255-21-2 class 2Earthquakes IEC 60255-21-3 class 2Enclosure degree of protection EN 60529 IP54 (cover closed)Fire resistance IEC 60695-2-1 650 °C<strong>Electric</strong>al withstand Standard SeveritySensor input isolation IEC 60255-5 2 kV rms, 50 Hz, 1 mn1.2/50 µs impulse voltage IEC 60255-5 5 kV (6)Oscillatory waves - 1 MHz burst IEC 60255-22-1 2.5 kV cm (6)1 kV dmFast transient bursts IEC 60255-22-4 4 kV common and diff. modes, 5 kHz burst (6)1.2/50(8-20 µs) hybrid wave IEC 61000-4-5 2 kV, 42 Ω (6)Electrostatic discharge IEC 60255-22-2 8 kV in air, 6 kV on contactHF electromagnetic field IEC 60255-22-3 30 V/m not modulated, 27 to 1000 MHzEN 50082-210 V/m modulated, ampl., 80 to 1000 MHzEN 50082-210 V/m modulated, impuls., 900 MHz(1) Value given for three-phase VIP300 power supply. For single-phase operation, the accuracy range is ±10% or 0/+5A.For the low threshold, this does not generally represent a real operating situation. However, it may occur during injection testing carried out with a single-phasesupply.The error is mainly due to the non-linearity of the sensors and VIP300 input transformers for low currents; the inaccuracy is accentuated when the relay is onlysupplied by one phase.(2) The accuracy is indicated for a fault (sinusoidal current) that occurs when the VIP300 is already supplied by the current flowing through the circuit breaker. Inthe event of closing on a fault, the tripping time may be increased by:b +30 ms at 1.5 Isb +20 ms from 2 Is to 10 Isb +10 ms above 10 Is.(3) Generally speaking, the accuracy ranges of earth protection times and thresholds are indicated for a VIP300 supplied by a current that is greater than or equalto the minimum operating current. The measurement of a threshold for earth protection with a single-phase supply is therefore not significant if the threshold is lowerthan the minimum operating current.(4) Value given for three-phase VIP300 supply. For single-phase testing, the accuracy is ±10% or 0/+5A.For the low threshold, this may occur when the earth protection is tested with a single-phase supply and no supply by the other phases.(5) Under the following specific conditions:b VIP300LLb with CRa sensorb wired to x1 rangeb if Ios < 8 Ab if three-phase current < 20 Athe threshold and time delay characteristics are:b low threshold: ±10 % or 0/+4 Ab class not specified.(6) Not applicable to test plug.(7) Accuracy ±10 % or ±1.5 A.The value indicates the guaranteed minimum operating current for three-phase operation.(8) The tripping times indicated do not include the mitop response time that depends on the mechanical load (for no load, its tripping time is less than 5 ms).11
Functions andcharacteristicsTechnical characteristicsIDMT tripping curvesThe curves in this chapter indicate the IDMT low threshold tripping times for the 16t> (or to>) time delay settings.The phase protection and earth protection curves are the same.The numbers indicated to the right of the curves represent the settings on the t> (orto>) time delay selector switch.SI curveDE51247-SIVI curveDE51248-VI12
Functions andcharacteristicsTechnical characteristicsIDMT tripping curvesEI curveDE51249-EIRI curveT(s)DE51250-RI1010,10,011 10 100I/Is13
Installation and connectionMountingDimensionsThe VIP300 is designed for flush-mounting in rectangular cut-outs in sheet-metalpanels with a maximum thickness of 3 mm.DE103280.3VIP300 mounting dimensions.(*) The 4 holes are required only whenmounting the VIP on SFset or Evolis24 kV circuit breakers.DE10337Mounting the VIP300DE50981The latch may be put into the vertical position by looseningeach of the screws (V) before tightening them.b Insert the VIP300 in the cut-out and correctly position the two bottom pins (E) ofthe casing on the edge of the panel cut-out.b Tighten the screws (V) on the two mounting lugs accessible via the front afteropening the transparent cover.b After tightening, make sure that the latch (N) of each lock (visible on the rear face)is in the vertical position, pressing against the panel.b The hole (P) may be used to lead-seal the relay after the setting label has beenfitted and the settings made14
Installation and connectionMountingDE50982MFitting the setting labelb Slide the setting label into position behind the transparent part of the front face.b Make sure that the indications at the top of the label (M) match:v the sensor used (sensor)v the VIP300 modelv the range used (range).This information is hidden when the label is in position.b Make sure that it is pushed right to the bottom of the slot.b To remove the label, use the hole in the top, if necessary with the help of the tip ofa pencil or a screwdriver.Choosing the right setting labelSetting label for VIP300LL and VIP300Pwith CRa, CSa or CEa sensorsSetting label for VIP300LL and VIP300Pwith CRb, CSb or CEb sensorsrecto verso recto versoDE50983DE50984x1 range x4 range x1 range x4 rangeSetting label for VIP300LH withRingmaster 200/1 sensorsSetting label for VIP300LH withRingmaster 800/1 sensorsrecto verso recto versoDE50985DE50986x2 range x4 range x2 range x4 range15
Installation and connectionConnectionVIP300LL and VIP300LH modelsConnections are made to the back of the VIP300 via 6.35 mm fast-on connectors.Wiring to x1 (or x2) rangeDE50976Wiring to x4 rangeDE5097716
Installation and connectionConnectionVIP300P modelConnections are made to the back of the VIP300 via 6.35 mm fast-on connectors.Wiring to x1 (or x2) rangeDE50978Wiring to x4 rangeDE5097917
18Notes
Notes19
20Notes
<strong>Schneider</strong> <strong>Electric</strong> Industries SASPostal address:Communication Distribution Electrique38050 Grenoble cedex 9 - FranceTel : +33 (0)4 76 57 60 60http://www.schneider-electric.comART.20499As standards, specifications and designs change from time to time, please ask for confirmationof the information given in this publication.This document has been printedon ecological paper.Design: AmegPublication: <strong>Schneider</strong> <strong>Electric</strong>Printed:PCRED399008EN - 51311871EN/A0 - © 2004 - <strong>Schneider</strong> <strong>Electric</strong> - All right11-2004