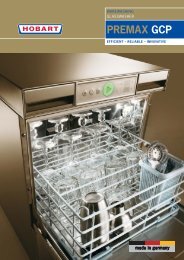
PREMAX AUP Install & Operations Manual.pdf - Hobart Food ...
PREMAX AUP Install & Operations Manual.pdf - Hobart Food ...
PREMAX AUP Install & Operations Manual.pdf - Hobart Food ...

You also want an ePaper? Increase the reach of your titles
YUMPU automatically turns print PDFs into web optimized ePapers that Google loves.
2 <strong>Install</strong>ation2.1 Location–Rear wall clearance not required.For corner installation lateral clearance of 107 mm is required.For free-standing installation the optional rear panel hasto be installed.DEGBFNL––Level machine by turning the feet.Distribute machine weight equally onto all feet.2.2 Converting to corner operationDepending on direction of operation, the guide rails may need to beadjusted to suit the direction of operation (see arrows).–Unscrew the guide rail in front.–Refit guide rail at right angle according to the direction of operation.AG-21567-B-08-08 5
<strong>Install</strong>ationA2.6 Adjustment of shut-off valve with flowreducer for steam supply––––The built-in shut-off valve is equipped with an adjustment device (A) tolimit the heating supply medium.A special tool is necessary for adjusting the valve-seat.The correct adjustment is very important particulary for higher pressure,and therefore must be done by a HOBART trained service manat first installation or after any changes are done at the customer site.The adjustment is correct if the heating-up time of the boiler is as longas the shortest wash cycle, while the valve is opened to maximum.If adjusted too far open pressure shocks may occur when thesolenoid valve closes. This could cause damage at the installation.If adjusted too far close the required heating-power cannot beachieved.DEGBFNL2.7 Drain connectionmax. 750 mm–––Connection between machine and site drain must not exceed max.height of 0.75 m.Do not place the drain hose loosely on the floor (the hose could berubbed through). Fix it at site!Do not kink the drain hose.AG-21567-B-08-08 7
DEGBFNL3 Connecting a powder or solid detergent dispenser–––Must be carried out by an authorized technician accordingto the local and national codes.Tank must be drained.Switch off main switch or unplug.Remove front panel and the left hand or right hand side panel(according to requirement on site).–Lift up control box and turn it to front.–Break out perforated disk at the tank panel (either at the right or leftside).–Drill a hole through the inner tank wall appropriate to the requiredconnection diameter.–Screw up tightly the dosing connection with tank wall.A––Connect the plug (A) of the wire harness with the dosage pump(max. 100 VA).Note: The chemicals deficiency sensor must be deactivated(see chapter 11.9).–Close control box and put panels back into place.Switch on main switch at site or put the plug in.–Dispenser adjustment see chapter 11.1.Conductivity probe:ca.120mmca.120mm––Conductivity probe should be installed at the flat part of tank bottom(see fig.).The hole size should be appropriate to the conductivity probe.AG-21567-B-08-08
4 ControlsDE42 31986GBFNL1075➀ Machine ON / OFFPushing this button switches the machine on.By pushing and holding (3 seconds) this button, the drain and selfcleaning cycle starts. At the end of the cycle, the machine switches offautomatically.After switch off, the machine is not voltage free!Furthermore the button illuminates to indicate the mode of the machine:GREENBLUEREDGREEN/REDBLUE/RED(alternate flashing)(alternate flashing)= Machine is ready for operation= Wash cycle is running= Failure indication (see chapter 10)= Failure indication (see chapter 10)= Failure indication (see chapter 10)The status of the program is indicated by the color change of the fourbutton segments:FillingDrainingWashingincreasingly GREENdecreasingly GREENfrom BLUE back to GREEN➁ Program buttonBy pushing this button, it is possible to select between different presetprograms, according to the model and equipment.The program no. (e.g. P02) will be shown in the Display ➅.➂ High pressure button Activation of high pressure cleaning (see page 13).Never use for cleaning glasses and light dishes (breakage) !➃ Stop buttonIn case of operating error or faults, it is possible to switch-off themachine immediately without the drain cycle, by pushing this button.After switch off, the machine is not voltage free!➄ Display e.g. temperature indication Wash (°C) (see chapter 8).➅ Display e.g. temperature indication Rinse (°C) (see chapter 8).➆ Salt requiredIndicating the need for regeneration salt to be added.(Only with built-in softener.)➇ Detergent-/rinse aid indicator Indicates detergent or rinse aid deficiency.➈ Hygiene indicatorIndicates that a hygiene cleaning should be carried out(see chapter 7.4).➉ Service indicator Indicating, that the machine has a fault (see chapter 10).AG-21567-B-08-08 9
DEGBFNL5 Start-up5.1 Detergent / rinse aidUse only commercial detergent and rinse aid. Please pay attention tothe manufacturers safety instructions.The dosing pumps can operate to a maximum head heightof 1.5 m. Do not confuse the containers !5.1.1 DetergentDo not use any acidic detergent products with the built-in detergentpump! (The ph-value has to be higher than 7.)–Place the suction hose into the external detergent container.Fill the suction hose according to chapter 5.2.5.1.2 Rinse aid–Place the suction hose (blue marking) into the external rinse aidcontainer. Fill the suction hose according to chapter 5.2.5.1.3 Changing the type of detergent / rinse aid–––Before changing to a different product type (even from the samesupplier), the suction hoses must be rinsed thoroughly with freshwater (procedure as described under 5.2).Otherwise, the mixing of different types of chemicals will causecrystallisation, which may result in a malfunction of the dosing pump.If a new type of detergent / rinse aid is attached, maybe the deficiencysensor has to be readjusted.Contact the after sales service if necessary.5.2 Priming the suction hoses–Is carried out automatically but will take several wash cycles.Therefore we recommend the manual hose priming as follows.––ATTENTION:The machine has to be switched off.Open the hood.Push Stop button ➃ and Program button ➁ simultaneously until theupper Display ➅ shows "CH1".–Push Program button repeatedly, until "d" is displayed.–Close the hood.In the upper Display appears "SF1", in the lower one "0".10 AG-21567-B-08-08
Start-up5.2.1 Detergent suction hose–Pushing the ON/OFF button ➀ activates the hose priming for60 seconds.Each cycle can be interrupted by pushing the ON/OFF button again.DEGBFNL5.2.2 Rinse aid suction hose–Push the Program button ➁.In the upper Display ➅ appears "SF2", in the lower one ➄ "0".–Pushing the ON/OFF button ➀ activates the hose priming for130 seconds.Each cycle can be interrupted by pushing the ON/OFF button again.5.2.3 Termination of hose priming–Open hood and close it again or do not press any button for10 seconds.5.3 Softener (only on option)For the first run, the softener has to be filled with regeneration saltand potable water.Filling the salt reservoir with cleaning agent will damagethe water softener.––––––Open the hood.Unscrew the softener lid and fill the softener with 2 kg of "Granularregeneration salt" (do not use salt tablets).Fill up the softener with potable water (only at the first run).Clean seal and rim of softener lid carefully, before closingthe lid.Close lid and tighten.Adjust the water hardness according to chapter 11.4 !When the Salt indicator ➆ illuminates during operation, the softenerhas to be refilled with regeneration salt.There will be a slight delay before salt light goes out after refill.AG-21567-B-08-08 11
Operation–To avoid heat loss, lower hood to "Stand By" position betweenwash cycles.DEGBFNL6.3 Program selectionThe machine is operating automatically with standard cycle time.If needed, it is possible to select a shorter or longer program.To show the present program, push the Program button ➁ beforestarting the wash cycle.To change the program, push the Program button again.P01 = Short cycleP02 = Standard cycleP03 = Long cycle(for light / medium soiled dishes andglassware)(for medium / heavy soiled dishes)(for dried on soiling and containers)P04 = Endless cycleAn endless cycle will be indicated by moving light points in thedisplays.To stop the wash cycle, push ON/OFF button ➀.(After 20 minutes the machine will stop automatically.)After a short break, rinse starts automatically.H = See chapter 7.4bc = Stripping cycle (intensive basic cleaning, see chap. 9)The machine continues with the chosen cycle time until it is switchedoff or another program is chosen.High pressure cleaningNever use for cleaning glasses and light dishes (breakage) !––To activate high pressure mode for the next or for a running cycle:Push High pressure button ➂ shortly.During Stand-by = "HP" flashesDuring wash cycle = "HP" illuminates permanentlyTo activate high pressure mode permanently for the present program:Push High pressure button for approx. 3 seconds.In the lower Display illuminates "HP".As soon as another program is selected, if the machine is switched offor by pushing the high pressure button again, high pressure cleaningwill be deactivated.AG-21567-B-08-08 13
DEGBFNL10 Faults–According to the fault, an error code will be shown in the upperdisplay ➅ (see table below).Please report the error code to the service technician.If the ON/OFF button ➀ is flashing GREEN/RED alternately – restricted operation may be possible:CODE POSSIBLE CAUSE MEASURESAL Drain hose blocked. Restart drain cycle. Clean drain hose if necessary.HEI Rinse booster heating defective. Call the after sales service.d 0CH1CH2SALCLOSEHoodDOSOPTIONExternal demineralisation cartridge depleted.Detergent deficiency.Rinse aid deficiency.Salt deficiency(only with built-in softener).Filling interrupted because hood is open.Replace cartridge.Replace container. After replacement it can take severalwash cycles until the indication goes out. If required, hosepriming should be carried out according to chapter 5.2.Refill the softener with granular regeneration salt.Close hood, filling will continue.The ON/OFF button ➀ illuminates RED and the Service indicator ➈ is illuminated:CODE POSSIBLE CAUSE MEASURESFIL Shut-off valve is closed. Open shut-off valve at site and switch on machine again.Fill valve or fill system defective.Call the after sales service.SIE Tank strainer not correctly positioned. Put strainer correctly in place.UL Drain hose blocked. Clean drain hose and restart drain cycle.Fill system or drain system defective.Call the after sales service.F01 Temperature probe "rinse booster" defective. Call the after sales service.F02 Temperature probe "tank" defective. Call the after sales service.F03 Pressure transmitter "rinse booster" defective. Call the after sales service.F04 Pressure transmitter "tank" defective. Call the after sales service.Other indicationsMoving light point in the upper display:CODE CAUSE MEASURES. . . Softener regeneration active (only with built-insoftener).None.The ON/OFF button ➀ is flashing BLUE/RED alternately:CODE CAUSE MEASURESWash tank filters blocked.Remove and flush strainers.Replace in machine, lower hood to recommence wash cycle.16 AG-21567-B-08-08
11 Settings and Counter values–ATTENTION:The machine has to be switched off.Open the hood.If the hood will be closed or if no button is pressed for 10 seconds,the indicator automatically switches off and the new settings willbe saved.Therefore the setting procedure can be interrupted at any time.DEGBFNL11.1 Adjustment of detergent dosage quantity–––Push Stop button ➃ und Program button ➁ simultaneously until inthe upper Display ➅ "CH1" appears.In the lower Display ➄ appears e.g.:"8" = pre-adjusted value of the detergent dosage time =8 s ≈ 2 g/l.To adjust the detergent dosage time, push ON/OFF button ➀repeatedly, until the desired value (0-50 s ≈ 0-15.4 g/l) appears.Adjustment should be done in accordance with chemical suppliersrecommendations.11.2 Adjustment of rinse aid dosage quantityprogram P01 to P04–Push Program button ➁ again.In the upper Display ➅ appears "CH2".In the lower Display ➄ appears e.g.:"2.5" = pre-adjusted value of the rinse aid dosage time =2.5 s ≈ 0,33 g/l.–To adjust the rinse aid dosage time, push ON/OFF button ➀repeatedly, until the desired value (0-50 s ≈ 0-6.6 g/l) appears.Adjustment should be done in accordance with chemical suppliersrecommendations.11.3 Adjustment of rinse aid dosage quantityprogram bc–Push Program button ➁ repeatedly until the upper Display ➅shows "CH4".In the lower Display ➄ appears e.g.:"3.5" = pre-adjusted value of the rinse aid dosage time =3.5 s ≈ 0,31 g/l.–To adjust the rinse aid dosage time, push ON/OFF button ➀repeatedly, until the desired value (0-50 s ≈ 0-4.4 g/l) appears.Adjustment should be done in accordance with chemical suppliersrecommendations.AG-21567-B-08-08 17
DEGBFNLSettings and Counter values11.4 Adjustment of water hardness–With optional softener only.To adjust the softener to the local water hardness (obtain details fromlocal water authority:Push Program button ➁ repeatedly until in the upper Display ➅"H02" appears.–Push ON/OFF button ➀ repeatedly, until the required value(H01-H04) will be displayed.H01 = up to 9 °eh / H02 = 10 to 18 °eh / H03 = 19 to 26 °eh /H04 = 27 to 38 °eh water hardness (°eh = Clark).11.5 Cycle counter–Push Program button ➁ again.The display will show alternately "P" or the number of wash cycles.–In the lower Display ➄ appears the value up to 999.Thousands will be shown in the upper Display ➅.Example: 1023 wash cyclesMax. indication: 999 99911.6 Water consumption counter–Push Program button ➁ again.The display will show alternately "E" or the water consumption (liter).In the lower Display ➄ appears the value up to 999 liter.Thousands will be shown in the upper Display ➅.Example: 10217 literMax. indication: 999 99918 AG-21567-B-08-08
Settings and Counter values11.7 Remaining water quantity counterfor external water treatment(Only available if activated in service mode (S18). The capacity(liter) of the water treatment has to be stored via C79/80.)DEGBFNL–Push Program button ➁ again.The display will show alternately "d" and/or the remaining waterquantity (liter).In the lower Display ➄ appears the value up to 999 liter.Thousands will be shown in the upper Display ➅.Example: 1586 literMax. indication: 999 999To reset the counter to pre-set value, push and hold (3 seconds) theON/OFF button ➀.11.8 Activation / deactivation Acoustic Signals––Close the hood.In the upper Display ➅ appears "SF1".––Push Program button ➁ repeatedly, until "S" is displayed.By pushing the ON/OFF button ➀ acoustic signals can beactivated / deactivated.The lower Display ➄ shows "I" (activated) or "0" (deactivated).11.9 Activation / deactivation ofchemicals deficiency sensors––Push Program button ➁ repeatedly, until "CH" is displayed.The lower Display ➄ shows "I" (activated) or "0" (deactivated).By pushing the ON/OFF button ➀ sensors can be activated /deactivated.11.10 Termination of setting mode /counter display–Open the hood and close it again or do not press any button for10 seconds.AG-21567-B-08-08 19
DE12 Frost preventionGBFNLIn case of frost or longer operation pauses (e.g. for seasonal operations)the machine must be completely drained.This should be carried out by after sales service.Reset for operation according to chapter 5.13 MaintenanceFor trouble free operation we recommend you enter into a servicecontract with your local Service Office.14 Troubleshooting guideTYPE OF FAILURE POSSIBLE CAUSE REMEDYPoor wash resultDishes are not clean.Dishes or glasses do not dryproperly.Wash arms stiff (you should be able toturn them easily by hand).Wash arm nozzles are clogged(visual check).Rinse arm nozzles are clogged(possibly by lime deposit)Detergent concentration is too low or toohigh.Coarse strainer soiled.Fine strainer soiled or obstructed bylime.Wrong program selected for heavilysoiled dishes.Rinse aid concentration too low.Dishes still greasy.Rack is not suitable for type of dishes(sloping).Dishes stay too long in the machine atthe end of program.Take out wash arms and clean them thoroughly.Check water outlet from machine to wash arms isclear.Take out wash arm, remove cleaning cap and rinsewash arm thoroughly until soil is removed.Replace correctly.Remove rinse arms and decalcify them in separatecontainer.Check setting of detergent concentration.See also operating instructions point 11.1.Take out strainer, empty and clean it.Take out fine strainer. If heavily soiled soak in avinegar solution. Then clean it thoroughly until thepores are free.Cleaning is to be done daily (see operatinginstructions).Select program with longer wash cycle.Increase concentration.See also operating instructions point 11.2.1...Detergent concentration too low: increase(see instructions).Check if detergent is appropriate. If not choosea stronger one.Drain soiled water and refill machine.Check pre-scrapping procedure.Use appropriate racks to create a sloping positionwhich allows water to drain away from cavities.Take out dishes as soon as cycle is completed toenable them to dry.20 AG-21567-B-08-08
Troubleshooting guideTYPE OF FAILURE POSSIBLE CAUSE REMEDYPoor wash resultStripes and staines ondishes or glasses.Rinse aid concentration too high.Hard water or high mineral content.Rack is not suitable for type of dishes(sloping).Insufficient rinse aid concentrationcauses stainesMachine with softener:Wrong type of salt used.Reduce quantity (see instructions).Check water quality.Obtain details from local water authority.Recommended values:Ideal degree of hardness is 4° Clark.Ideal conductivity value for glasses ismax. 150 µS/cm and for dishes max. 400 µS/cm.Use appropriate racks to create a sloping positionwhich allows water to drain away from cavities.Increase quantity (see instructions)Use only granular regeneration salt.DEGBFNLOther malfunctionsGlasses are totally orpartially cloudySurface of glasses is rough andporous, this is called glass corrosionThis is not caused by a malfunction on themachine. Replace with new glasses.Glass breakages. Use of inappropriate dish or glass racks. Use appropriate racks.Machine suddenly stopsduring wash program.High pressure cleaning had beenactivated.Machine is connected to a "maximumpower supply unit" which cuts out theenergy consumer at a given point, or machineis interlocked with another energyconsumer unit.Blown site fuse.Never use high pressure cleaning for glasses andlight dishes.Connect machine separately (call electrician).Check site fuses.If no button will be pressed during 6 hours, the machine switches off automatically without draining.AG-21567-B-08-081
As continued product improvement is a policy of HOBART, specifications are subject to change without notice.Printed in GermanyAG-21567-B-08-08-PC