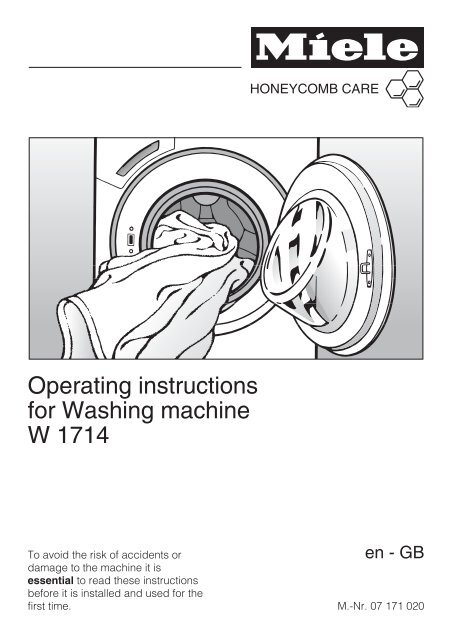
Operating instructions for Washing machine W 1714
Operating instructions for Washing machine W 1714
Operating instructions for Washing machine W 1714
- No tags were found...

Create successful ePaper yourself
Turn your PDF publications into a flip-book with our unique Google optimized e-Paper software.
<strong>Operating</strong> <strong>instructions</strong><strong>for</strong> <strong>Washing</strong> <strong>machine</strong>W <strong>1714</strong>To avoid the risk of accidents oren-GBdamage to the <strong>machine</strong> it isessential to read these <strong>instructions</strong>be<strong>for</strong>e it is installed and used <strong>for</strong> thefirst time. M.-Nr. 07 171 020
Caring <strong>for</strong> our environmentDisposal of the packingmaterialThe transport and protective packinghas been selected from materials whichare environmentally friendly <strong>for</strong> disposaland can normally be recycled.Ensure that any plastic wrappings,bags etc. are disposed of safely andkept out of the reach of babies andyoung children. Danger of suffocation!Rather than just throwing thesematerials away, please ensure they areoffered <strong>for</strong> recycling.Disposal of your old <strong>machine</strong>Electrical and electronic <strong>machine</strong>soften contain materials which, ifhandled or disposed of incorrectly,could be potentially hazardous tohuman health and to the environment.They are, however, essential <strong>for</strong> thecorrect functioning of your <strong>machine</strong>.Please do not there<strong>for</strong>e dispose of itwith your household waste.Please dispose of it at your localcommunity waste collection / recyclingcentre or contact your Dealer <strong>for</strong>advice. Ensure that it presents nodanger to children while being stored<strong>for</strong> disposal.It should be unplugged or disconnectedfrom the mains electricity supply by acompetent person.2
ContentsCaring <strong>for</strong> our environment . . . . . . . . . . . . . . . . . . . . . . . . . . . . . . . . . . . . . . . . . 2Warning and Safety <strong>instructions</strong> . . . . . . . . . . . . . . . . . . . . . . . . . . . . . . . . . . . . . 6<strong>Operating</strong> the washing <strong>machine</strong>. . . . . . . . . . . . . . . . . . . . . . . . . . . . . . . . . . . . . 10Control panel .....................................................10Be<strong>for</strong>e using <strong>for</strong> the first time. . . . . . . . . . . . . . . . . . . . . . . . . . . . . . . . . . . . . . . 12<strong>Washing</strong> environmentally and economically . . . . . . . . . . . . . . . . . . . . . . . . . . 13Energy and water consumption ....................................13Detergent .....................................................13How to wash correctly. . . . . . . . . . . . . . . . . . . . . . . . . . . . . . . . . . . . . . . . . . . . . 14Spinning . . . . . . . . . . . . . . . . . . . . . . . . . . . . . . . . . . . . . . . . . . . . . . . . . . . . . . . . 19Final spin speed ..................................................19Rinse and interim spin ...........................................19To omit the final spin (Rinse hold) ..................................19To omit rinse and interim spin and the final spin (No ) .................19Programme chart . . . . . . . . . . . . . . . . . . . . . . . . . . . . . . . . . . . . . . . . . . . . . . . . . 20Programme sequence . . . . . . . . . . . . . . . . . . . . . . . . . . . . . . . . . . . . . . . . . . . . . 22Garment care label symbols . . . . . . . . . . . . . . . . . . . . . . . . . . . . . . . . . . . . . . . . 24Changing the programme sequence . . . . . . . . . . . . . . . . . . . . . . . . . . . . . . . . . 25Cancelling a programme ............................................25Interrupting a programme ...........................................25Changing a programme ............................................25Adding or removing laundry after a programme has started ................26Safety lock .......................................................263
ContentsDetergent . . . . . . . . . . . . . . . . . . . . . . . . . . . . . . . . . . . . . . . . . . . . . . . . . . . . . . . 27The correct detergent ..............................................27Water softener ....................................................28<strong>Washing</strong> with several components ....................................28Fabric conditioners and liquid starch ..................................29Automatic dispensing of fabric conditioner or liquid starch to laundryat the end of a programme ........................................29Colour run and dye removers / dyes ...................................29Cleaning and care . . . . . . . . . . . . . . . . . . . . . . . . . . . . . . . . . . . . . . . . . . . . . . . . 30External casing and fascia panel .....................................30Extra cleaning ..................................................30Cleaning the detergent dispenser drawer. ..............................30Cleaning the water inlet filters ........................................32Problem solving guide . . . . . . . . . . . . . . . . . . . . . . . . . . . . . . . . . . . . . . . . . . . . 33The programme does not start .......................................33Fault messages in the display ........................................34General problems .................................................35An unsatisfactory wash result ........................................36The drum door does not open when you press the Door button. .............37Opening the drum door in the event of a blocked drain outletand/or power failure. ...............................................38Blocked drain outlet .............................................38After sales service . . . . . . . . . . . . . . . . . . . . . . . . . . . . . . . . . . . . . . . . . . . . . . . . 40Future updates (PC) .............................................40Appliance guarantee ............................................40Optional spare parts and accessories ...............................40Installation and connection . . . . . . . . . . . . . . . . . . . . . . . . . . . . . . . . . . . . . . . . 41Front view. .......................................................41Rear view ........................................................42Installation surface. ................................................43Transporting the <strong>machine</strong> to its installation site ........................43Removing the transit bars ...........................................43Re-fitting the transit bars ............................................454
ContentsLevelling the <strong>machine</strong> ..............................................46Screwing out and adjusting the feet .................................46Building under a worktop .........................................47Washer-dryer stack. .............................................47The Miele water protection system ....................................48Connection to the water supply .......................................49Connection to the drainage system. ...................................50Electrical connection U.K. ...........................................51Consumption data . . . . . . . . . . . . . . . . . . . . . . . . . . . . . . . . . . . . . . . . . . . . . . . . 52Note <strong>for</strong> test institutes: ...........................................52Technical data . . . . . . . . . . . . . . . . . . . . . . . . . . . . . . . . . . . . . . . . . . . . . . . . . . . 53Programmable functions. . . . . . . . . . . . . . . . . . . . . . . . . . . . . . . . . . . . . . . . . . . 55To access programmable functions .................................55To select a programmable function .................................55To alter a programmable function ..................................55To come out of programmable functions .............................55Language ......................................................55Water plus .......................................................56Gentle action .....................................................56Suds cooling .....................................................56Code ...........................................................57Temperature unit ..................................................58Buzzer ..........................................................58Keypad tone .....................................................58Brightness .......................................................58Contrast .........................................................58Standby display ...................................................59Memory .........................................................59Anti-crease. ......................................................59Optional accessories. . . . . . . . . . . . . . . . . . . . . . . . . . . . . . . . . . . . . . . . . . . . . . 60CareCollection ....................................................605
Warning and Safety <strong>instructions</strong>This washing <strong>machine</strong> con<strong>for</strong>ms tocurrent safety requirements.Inappropriate use can, however,lead to personal injury and damageto property.To avoid the risk of accidents anddamage to the washing <strong>machine</strong>,please read these <strong>instructions</strong>carefully be<strong>for</strong>e using it <strong>for</strong> the firsttime. They contain importantin<strong>for</strong>mation on its installation, safety,use and maintenance.Keep these <strong>instructions</strong> in a safeplace and ensure that new users arefamiliar with the content. Pass themon to any future owner.Correct application This washing <strong>machine</strong> is <strong>for</strong>domestic use only and can only beused to wash items which are specifiedby the manufacturer to be<strong>machine</strong>-washable on the wash carelabel, and textiles composed ofhand-washable wool or wool blendfabrics as well as satin, lace, silk andother hand-washable garments.Any other applications may bedangerous. Miele cannot be held liable<strong>for</strong> damage resulting from incorrect orimproper use or operation. This washing <strong>machine</strong> is notintended <strong>for</strong> use by persons (includingchildren) with reduced physical,sensory or mental capabilities, or lackof experience and knowledge, unlessthey are supervised whilst using it orhave been shown how to use it by aperson responsible <strong>for</strong> their safety.Safety with children Keep children away from thewashing <strong>machine</strong> at all times. It is not atoy! To avoid the risk of injury do notallow children to play on or near it or toplay with its controls. Supervisechildren whilst you are using it. Older children may only use thewashing <strong>machine</strong> if its operation hasbeen clearly explained to them andthey are able to use it safely,recognising the dangers of misuse. For <strong>machine</strong>s with a 'porthole' door,remember that the porthole glass willbe hot when washing at very hightemperatures.Do not let children touch it.6
Warning and Safety <strong>instructions</strong>Technical safety Be<strong>for</strong>e setting up the washing<strong>machine</strong>, check it <strong>for</strong> any externallyvisible damage.Do not install or use a damagedwashing <strong>machine</strong>. Be<strong>for</strong>e connecting the washing<strong>machine</strong>, ensure that the connectiondata on the data plate (voltage andconnected load) match the mainselectricity supply. If in any doubt,consult a qualified electrician. The electrical safety of this washing<strong>machine</strong> can only be guaranteed whencontinuity is complete between it andan effective earthing system whichcomplies with current local and nationalsafety regulations. It is most importantthat this basic safety requirement ispresent and regularly tested, andwhere there is any doubt the householdwiring system should be inspected by aqualified electrician. The manufacturercannot be held liable <strong>for</strong> theconsequences of an inadequateearthing system (e.g. electric shock). Do not connect the washing<strong>machine</strong> to the mains electricity supplyby an extension lead. Extension leadsdo not guarantee the required safety ofthe appliance (e.g. danger ofoverheating). Faulty components must only bereplaced by genuine Miele originalspare parts. Only when these parts arefitted can the safety standards of the<strong>machine</strong> be guaranteed. Unauthorised repairs could result inun<strong>for</strong>eseen dangers <strong>for</strong> the user, <strong>for</strong>which Miele cannot accept liability.Repairs should only be undertaken by aMiele approved service technician.Ensure current is not supplied to the<strong>machine</strong> until after maintenance orrepair work has been carried out. If the connection cable is faulty itmust only be replaced by a Mieleapproved service technician to protectthe user from danger. In the event of a fault or <strong>for</strong> cleaningpurposes, the washing <strong>machine</strong> is onlycompletely isolated from the electricitysupply when:– it is switched off at the wall socketand the plug is withdrawn, or– it is switched off at the mains, or– the mains fuse is withdrawn, or thescrew-out fuse is removed (incountries where this is applicable). This washing <strong>machine</strong> must only beconnected to the on-site water supplyusing a new hose kit. Old hoses mustnot be re-used. In countries where there are areaswhich may be subject to infestation bycockroaches or other vermin, payparticular attention to keeping the<strong>machine</strong> and its surroundings in aclean condition at all times. Anydamage which may be caused bycockroaches or other vermin will not becovered by the guarantee.7
Warning and Safety <strong>instructions</strong> This washing <strong>machine</strong> may only beused in mobile installations such asships if a risk assessment of theinstallation has been carried out by asuitably qualified engineer. Do not make any alterations to thewashing <strong>machine</strong>, unless authorised todo so by Miele.Correct use Do not install your washing <strong>machine</strong>in rooms where temperatures belowfreezing may occur. Frozen hoses mayburst or split. The reliability of theelectronic control unit may be impairedat temperatures below freezing point. Be<strong>for</strong>e using the washing <strong>machine</strong><strong>for</strong> the first time, check that the transitbars at the rear of the <strong>machine</strong> havebeen removed (see section on"Installation and connection"). Duringspinning, a transit bar which is still inplace may result in damage to both the<strong>machine</strong> and adjacent furniture orappliances. Turn off the stopcock if the <strong>machine</strong>is to be left <strong>for</strong> any length of time (e.g.holiday), especially if there is no floordrain (gully) in the immediate vicinity. Flooding danger.If hooking the drain hose into a washbasin, check that the water can drainoff quickly enough to prevent the sinkfrom overflowing. Make sure the drainhose is secure, so that the <strong>for</strong>ce of thewater flowing out of the hose does notdislodge it. Take care to ensure that <strong>for</strong>eignobjects (e.g. nails, pins, coins, paperclips) do not find their way into the<strong>machine</strong> with the laundry. These maydamage components of the <strong>machine</strong>(e.g. suds container, drum), which inturn can result in damage to thelaundry. If the correct amount of detergent isdispensed, the <strong>machine</strong> should notneed to be descaled. If, however, youdo wish to descale the <strong>machine</strong> onlyuse proprietary non-corrosive descalingagents and strictly observe the<strong>instructions</strong> on the packaging. Aspecial descaling agent is available toorder from the Miele Spare PartsDepartment or via the internet onwww.miele-shop.com.8
Warning and Safety <strong>instructions</strong> Textiles which have beenpre-treated in solvent based cleaningagents must be thoroughly rinsed inclean water be<strong>for</strong>e being washed in the<strong>machine</strong>. Never use solvent based cleaningagents, e.g. those containing benzene,in this <strong>machine</strong>, as this may result indamage to component parts and createtoxic fumes. Such agents also pose afire and explosion hazard. Never use solvent based cleaningagents, e.g. those containing benzene,to clean the outside surfaces of this<strong>machine</strong>. They can cause damage toplastic surfaces. Only use dyes specified by themanufacturer as being suitable <strong>for</strong> usein a domestic washing <strong>machine</strong>. Alwaysobserve the manufacturer's <strong>instructions</strong>carefully. Only remove laundry from thewashing <strong>machine</strong> once the drum hasstopped turning. Reaching into amoving drum is extremely dangerousand could result in injury.Accessories Accessory parts may only be fittedwhen expressly approved by Miele. Ifother parts are used, guarantee,per<strong>for</strong>mance and product liabilityclaims will be invalidated.Miele cannot be held liable <strong>for</strong>damage caused by non-compliancewith these Warning and Safety<strong>instructions</strong>. Colour run and dye removerscontain sulphur compounds which cancause damage such as corrosion. Donot use these products in this <strong>machine</strong>. If liquid detergent comes intocontact with the eyes, rinse themthoroughly with lukewarm water immediately.If swallowed, seek medicalassistance immediately and retain thepackaging or label <strong>for</strong> reference. Thosewith skin problems or sensitive skinshould avoid their skin coming intocontact with liquid detergent.9
<strong>Operating</strong> the washing <strong>machine</strong>Control panel DisplaySee the following page <strong>for</strong> morein<strong>for</strong>mation. Temperature buttonFor selecting a temperature. Spin speed buttonFor selecting the final spin speed or (Rinse hold) or deselecting thespin No . PC / Optical interfaceThis is used by service techniciansto run diagnostic checks on your<strong>machine</strong> and can also be used toupdate programming data in thefuture. Start/Stop buttonFor starting the programme selectedand cancelling a programme once ithas started. Extra option buttonsVarious Extra options can be addedto the washing programmes. Programme selectorFor selecting a programme. Theindicator light next to the selectedprogramme will come on. Theprogramme selector can be turnedclockwise or anti-clockwise. Door buttonOpens the <strong>machine</strong> door. I-On/0-Off buttonFor switching the <strong>machine</strong> on or off.10
<strong>Operating</strong> the washing <strong>machine</strong>The following are selected via thedisplay:– wash temperature– spin speed– programmable functions– cancellation of a programme– safety lockThe display also shows:– the programme duration– the programme sequenceProgramme durationAfter the start of a programme, theestimated programme duration willappear in the display in hours andminutes.During the first 8 minutes the washing<strong>machine</strong> measures how much water isbeing absorbed by the laundry anduses this to calculate the load. Theprogramme duration may be longer orshorter depending on this absorbencyrate.Programmable functionsThe programmable functions can beused to tailor washing programmes tosuit your individual requirements. Inprogramming mode, the display willshow the function selected.11
Be<strong>for</strong>e using <strong>for</strong> the first timeBe<strong>for</strong>e using the <strong>machine</strong> <strong>for</strong> the firsttime ensure that it is correctlyinstalled and connected. See"Installation and connection". Alsocheck that the drain filter is securelytightened to prevent the risk of waterleaks during use.This washing <strong>machine</strong> hasundergone a thorough functional testin the factory and there will be someresidual water in the drum from thisprocess.For safety reasons, spinning is notpossible until the <strong>machine</strong> has beenprepared <strong>for</strong> using <strong>for</strong> the first time. Toactivate the spinning function you mustrun a wash programme without laundryand without detergent.Using detergent could result in anexcessive build-up of foam.This also activates the ball valve. Theball valve prevents detergent escapingfrom the suds container into the sumpduring a wash programme, thus makingmaximum use of the detergent. Press the I-On/0-Off button in.If the washing <strong>machine</strong> is beingswitched on <strong>for</strong> the first time, thewelcome screen will appear.The welcome screen will appear inthe display every time the <strong>machine</strong> isswitched on until a programmelasting longer than 1 hour has beencompleted.Setting the languageYou will be asked to select thelanguage you require <strong>for</strong> the display. Itis possible to change the language atany time via the programmablefunctions.deutsch If the language shown is not the oneyou want, select the language you dowant by turning the programmeselector. Confirm your selection bypressing the Start/Stop button.Reminder to remove transit barsTo avoid the risk of damage, thetransit bars must be removed be<strong>for</strong>ethe <strong>machine</strong> is used <strong>for</strong> the first time.See "Installation and connection" <strong>for</strong><strong>instructions</strong> on how to do this. After removing the transit bars (if thishas not already been done by yourfitter), press the Start/Stop button.Running your first programmeRun a Cottons 60°C programme withoutany laundry and without detergent. Open the stopcock. Press the Start/Stop button. At the end of the programme switchthe <strong>machine</strong> off.The <strong>machine</strong> is now ready <strong>for</strong> use.12
<strong>Washing</strong> environmentally and economicallyEnergy and water consumption– Water consumption and energyusage are determined by the size ofthe load.To make the most out of your<strong>machine</strong>, load the maximum dry load<strong>for</strong> the programme you are using.– Use the Automatic and Expressprogrammes <strong>for</strong> small loads.– When smaller amounts of laundry arewashed using the Cottonsprogramme, the automatic loadrecognition system will reduce theamount of water, time and energyused. This may mean that the timeleft shown in the display is adjustedduring the course of the washprogramme.– Using the Cottons 60°C programme,instead of the Cottons 95°Cprogramme will give energy savingsof between 35% and 45%. This issufficient <strong>for</strong> most levels of soiling.Detergent– Do not exceed the amounts ofdetergent recommended by themanufacturer on the packaging.– Adjust the dosage to the degree ofsoiling of the laundry.– Reduce the amount of detergent withsmaller loads (approx. 1 / 3 less thanthe amount recommended can beused when washing a half load).Choosing the correct extra option(Short and Pre-wash)Select:– A wash programme together with theShort extra option <strong>for</strong> light to normalsoiling where there are no obviousmarks.– A wash programme without any extraoptions <strong>for</strong> normal to heavy soilingwith visible staining.– The Pre-wash extra option <strong>for</strong> laundrywith large amounts of dirt (e.g. dust,sand).When drying with a tumble dryerSelecting the highest possible spinspeed <strong>for</strong> the wash programme willsave energy when drying in a tumbledryer afterwards.13
How to wash correctlyBrief <strong>instructions</strong>The headings numbered , , , ...show the operating sequence and canbe used as brief <strong>instructions</strong>. Sort the laundryIf you use a solvent-based cleaningagent (e.g. one containing benzene)to pre-treat a stain, make surethat any plastic parts (e.g. buttons)are protected, and that the cleaningagent is rinsed off be<strong>for</strong>e washing thegarment in the <strong>machine</strong>.Do not use solvent-basedcleaning agents in this <strong>machine</strong>. Sort the laundry by colour and bycare label. Most garments have atextile care label in the collar or sideseam. Empty all pockets.Foreign objects (e.g. nails,coins, paper clips, etc.) can causedamage to garments andcomponents in the <strong>machine</strong>. Badly soiled areas, stains etc. shouldbe cleaned as soon as possible,preferably whilst still fresh. Spillagesshould be carefully dabbed off usinga soft colourfast cloth. Do not rub!Badly soiled areas can be pre-treatedwith liquid detergent, stain removersetc. first, following the manufacturer's<strong>instructions</strong>. With particularly stubbornstains ask your dry cleaner <strong>for</strong> advice.Dark textiles often contain excess dyeand should be washed separatelyseveral times be<strong>for</strong>e being included ina mixed load. Always wash whites andcoloureds separately.– Curtains: Remove lead weights firstor place in a laundry bag.– Underwiring and collar stiffeners:Any loose wiring in bras, shirt collarstiffeners, etc. should be removed orsewn in.– Knitted garments, trousers andjeans, T-shirts and sweat shirts: Turninside out, if recommended by themanufacturer.– Close any zips, fasten hooks andeyes etc be<strong>for</strong>e washing.– Fasten duvet covers etc. to preventsmall items from being rolled upinside them.Do not wash any items in this <strong>machine</strong>which are specified by themanufacturer as not washable on thecare label. ( symbol)14
How to wash correctly Switch on the washing <strong>machine</strong> Load the drum Press the Door button to open thedrum door. Unfold the laundry and load looselyin the drum. Mixing both large andsmall items gives better wash resultsand also helps distribute the loadevenly during spinning.The most efficient use of energy andwater is achieved when a full load iswashed. However, do not overload asthis causes creases and reducescleaning efficiency.Make sure that no garments arecaught between the drum door andseal. Select a programme Turn the programme selectorclockwise or anti-clockwise to therequired programme. Theprogramme indicator light <strong>for</strong> theprogramme selected will come on. Select a temperature / spin speedThe suggested temperature and/or spinspeed can be changed.1:49 60° 1400 Press the Temperature button to alterthe temperature and press the Spinspeed button to alter the spin speed. Shut the door with a gentle swing.15
How to wash correctly Select an extra option(s)Water plusThe water level in the main wash andthe rinses will be increased if the Waterplus option is selected.However, you can select other settings<strong>for</strong> Water plus. These are described in"Programmable functions".Pre-washFor laundry with large amounts of dirte.g. dust, sand. Select any extra options by pressingthe appropriate button. The relevantindicator light will come on to showwhich extra option has beenselected.Not all the extra options are suitable <strong>for</strong>use with every programme.You can only select extra options whichare compatible with the programmebeing used.BuzzerAn audible tone sounds repeatedly atthe end of a programme and whenRinse hold is reached. The buzzer willsound repeatedly until the <strong>machine</strong> isswitched off. The volume of the buzzercan be changed, see "Programmablefunctions".ShortFor light to normal soiling with no visiblestaining.The duration of the main wash isreduced.16
How to wash correctly Add detergentIt is important to dispense the correctamount, because .... . . too little detergent results in:– Laundry not getting properly cleanand with time it may become greyand hard to the touch.– Greasy particles clinging to thelaundry.– Limescale deposits on the heaterelements.. . . too much detergent results in:– Excessive foam which causes a lowlevel of agitation and poor wash,rinse and spin results.– Higher water consumption (anadditional rinse cycle willautomatically switch in).– A burden to the environment. Pull out the detergent drawer andplace detergent in the compartmentsas follows:Detergent <strong>for</strong> the pre-wash (dividethe total recommended amount asfollows: add 1 / 3 to compartment and 2 / 3 to compartment )Detergent <strong>for</strong> the main washFabric conditioner or liquid starch Close the detergent drawer.See "Detergent" <strong>for</strong> further in<strong>for</strong>mation.17
How to wash correctly Start the programme Press the flashing Start/Stop button.The estimated programme duration willappear in the display once theprogramme has started. During the first8 minutes the <strong>machine</strong> measures howmuch water is being absorbed by thelaundry. The programme duration maybe longer or shorter depending on thisabsorbency rate.The programme sequence is alsoshown in the display. The washing<strong>machine</strong> shows you when each sectionof the programme is reached. Remove the laundry when theprogramme has finishedIn the anti-crease phase after theprogramme has finished, the followingwill appear alternately in the display:0:00 Anti-creaseand0:00 Finish Press the Door button to open thedrum door. Remove the laundry.Check that all items have beenremoved from the drum. Items left inthe drum could discolour other itemsin the next wash or becomediscoloured themselves. Check the folds in the door seal <strong>for</strong>any small articles, e.g. buttons whichmight be lodged there. Switch the <strong>machine</strong> off with the I-On/0-Off button. Close the drum door. Otherwise thereis the danger of objects being placedinadvertently in the drum. If theseremained unnoticed and werewashed in the next load, they coulddamage the laundry.18
SpinningFinal spin speedProgrammerpmCottons 1400Minimum iron 1200Delicates 600Woollens 1200Express 1400Automatic 1200Shirts 600Denim 900Dark garments 1200Spin 1400You can reduce the final spin speed.However, you cannot select a final spinspeed higher than that shown in thechart above.Rinse and interim spinThere is a spin after the main wash andbetween the rinses. A reduction in thefinal spin speed will also reduce theinterim spin speed. If a spin speed ofless than 700 rpm is selected <strong>for</strong> aCottons programme, an additional rinseis introduced.To omit the final spin (Rinse hold) Select the Rinse hold () settingusing the Spin speed button. Thelaundry will not be spun and willremain suspended in the final rinsewater. This reduces creasing if thelaundry is not going to be removedfrom the drum immediately after theend of the programme.– To start the final spin:The washing <strong>machine</strong> will display themaximum spin speed possible. Youcan select a spin speed lower thanthis. Start the final spin by pressingthe Start/Stop button.– To end the programme:Press the Door button. The water willdrain away. Press the Door buttonagain to open the door.To omit rinse and interim spin andthe final spin (No ) Select the No setting using theSpin speed button. The laundry is notspun after the final rinse. The waterwill drain away and the <strong>machine</strong> willgo straight into the anti-crease stage.An additional rinse is introduced ifthis setting is selected with theCottons, Minimum iron, Express andAutomatic programmes.19
Programme chartCottons * 30°C to 95°C Max. load 6.0 kgFabric Cottons, linens or cotton mix fabrics, e.g. table linen, towelling,underwear, T-shirts etc.Extra options Short, Water plus, Pre-washNote <strong>for</strong> test institutes:Short programme: 3.0 kg load and Short extra optionMinimum iron30°C to 60°C Max. load 3.0 kg*Fabric Synthetics, mixed fibres and easy care cottons. If fabrics have ahigh proportion of man-made fibres, it is advisable to programmethe <strong>machine</strong> <strong>for</strong> "Gentle action". See "Programmable functions".Note Reduce the spin speed <strong>for</strong> fabrics which crease easily.Extra options Short, Water plus, Pre-washDelicates * cold to 60°C Max. load 2.0 kgFabric For delicate garments made of synthetic fibres, mixed fibres, rayonand easy care cottons. Also suitable <strong>for</strong> <strong>machine</strong>-washable silks.Curtains, including net curtains, specified as <strong>machine</strong>-washableby the manufacturer.Notes – Dust in curtains usually makes using a programme with aPre-wash advisable.– For curtains which crease easily, reduce the spin speed ordeselect the spin.Extra options Short, Pre-washWoollens * cold to 40°C Max. load 2.0 kgFabric Machine-washable or hand-washable wool or wool blend fabrics.If the care label does not specify a temperature, wash using thecold setting.Also suitable <strong>for</strong> hand-washable silks. Reduce the spin speed.Express * cold to 40°C Max. load 3.0 kgFabric Small loads of items which require freshening up and which canbe washed in a Cottons programme.Note This programme can be used <strong>for</strong> rinsing individual items. Selectthe cold setting, and do not add any detergent.Extra option Water plus20
Programme chartAutomatic * cold to 40°C Max. load 3.5 kgFabric Mixed loads of garments suitable <strong>for</strong> the Cottons and Minimumiron programmes. Sort according to colour.Note The wash parameters (e.g. water level, wash rhythm and spinspeed) are adjusted automatically in this programme to ensurethe best possible care and wash result <strong>for</strong> each item.Shirts cold to 60°C Max. load 2.0 kgNotes – Pre-treat collars and cuffs if necessary.– Use the Delicates programme <strong>for</strong> <strong>machine</strong>-washable silkgarments and the Woollens programme <strong>for</strong> hand-washable silkgarments.Extra options Short, Water plusDenim cold to 60°C Max. load 3.0 kgNotes – Wash denim inside out.– Denim often contains excess dye and will run during the firstfew washes. Wash light and dark coloured items separately.Extra options Short, Pre-washDark garments cold to 40°C Max. load 3.0 kgFabric Dark garments made from cotton or mixed fibres.Note Wash inside out.Extra option ShortSpinNotes – Make sure you select the appropriate spin speed.– Drain only: Select No .* Please note that the "buckets" represent garment care label symbols. See"Garment care label symbols".21
Programme sequenceMain wash Rinses SpinningWaterlevelWashrhythmWaterlevelRinsesInterimspinFinal spinCottons 2-4 1) Minimum iron 2-3 2) Delicates 3 – Woollens 2 Express 2-3 2) Automatic 2-3 2) Shirts 2 – Denim 3 – Dark garments 3 Spin – – – – – = Low water level = Medium water level = High water level= Intensive rhythm= Normal rhythm= Gentle rhythm= Sensitive rhythm= Handwash rhythmSee the following pages <strong>for</strong> more in<strong>for</strong>mation about the programme sequences.22
Programme sequenceThis <strong>machine</strong> has fully electroniccontrols with automatic loadrecognition. It takes in the right amountof water required <strong>for</strong> the programmedepending on the amount of laundryand its absorbency rate. This meansthat programme cycles and durationscan vary.The programme sequences outlined inthe chart are based on the basicprogramme with a full load. Extraoptions which can be selected have notbeen taken into account.The display shows the stage theprogramme has reached.Special features in the programmesequences:Anti-crease:At the end of every programme, withthe exception of the Woollensprogramme, the drum continues to turnat intervals <strong>for</strong> up to 30 minutes to helpprevent creasing. The door can beopened and laundry removed at anytime during the anti-crease phase.1)A second rinse is carried out when atemperature of 60°C to 95°C hasbeen selected. A third rinse iscarried out when a temperaturebelow 60°C is selected.A third/fourth rinse is carried out if:– there is too much foam in the drum– a spin speed lower than 700 rpm hasbeen selected– No has been selected2)A third rinse is carried out if:No has been selected23
Garment care label symbols<strong>Washing</strong>The figure quoted in the bucket is themaximum temperature the garmentcan be washed at. The number ofbars under the symbol indicates thelevel of agitation permitted. No bar under the symbol: =normal agitation One bar under the symbol: =reduced agitation Two bars under the symbol: =much reduced agitation Hand wash (if no temperatureis specified use the lowesttemperature or cold) Do not washDryingThe number of dots indicates thedrying temperature Normal temperature Low temperature Do not tumble dryIroningThe number of dots indicates theironing temperature Hot iron (max sole plate temp.approx. 200°C) Medium hot iron (max soleplate temp. approx. 150°C) Cool iron (max sole platetemp. approx. 110°C). Do notsteam iron garments carryingthis symbol. Do not ironProfessional cleaningDry clean only. The lettersindicate the type of cleaningagent required.Professional Wet Clean onlyDo not dry cleanBleachingAny oxidising bleachingagent can be usedOnly use an oxygen basedbleach or a non-chlorinebleachDo not bleach24
Changing the programme sequenceCancelling a programmeYou can cancel a programme at anytime after it has started. Press the Start/Stop button.Cancel programme Press the flashing Start/Stop buttonagain.The suds will be pumped away.If you want to remove the laundry: Press the Door button.If you want to select a differentprogramme: Switch the <strong>machine</strong> off with the I-On/0-Off button. Switch the washing <strong>machine</strong> back onagain. Check that there is still detergent inthe detergent drawer. Add detergent,if necessary. Select and start a new programme.Interrupting a programme Switch the <strong>machine</strong> off with the I-On/0-Off button.To continue with the same programme: Switch the <strong>machine</strong> back on with theI-On/0-Off button.Changing a programmeAfter the start of a programme it is nolonger possible to select a differentprogramme.TemperatureIt is possible to select a differenttemperature up to 5 minutes after theprogramme has started. Press the Temperature button.Spin speedIt is possible to change the spin speedup until the final spin begins. Press the Spin speed button.Extra optionsIt is possible to select or deselect theShort and Water plus extra options upto five minutes after the programme hasstarted.A programme cannot be cancelledor changed if the safety lock hasbeen activated.25
Changing the programme sequenceAdding or removing laundryafter a programme has started Press the Door button to open thedrum door. Add or remove items. Close the drum door.The programme will continueautomatically.Please note:Once a programme has started the<strong>machine</strong> cannot recognise anyadjustment to the load.For this reason, if laundry is added orremoved after the start of a programme,the <strong>machine</strong> will always complete theprogramme cycle assuming a full loadwhich can lead to an increase in theprogramme duration shown in thedisplay.The door cannot be opened, if:– the suds temperature is above 55°C.– the water is above a certain level.– the programme has reached theFinal spin stage.If you press the Door button when theabove conditions are present, thefollowing will appear in the display:Door lockedSafety lockThe safety lock prevents the <strong>machine</strong>from being opened and programmesfrom being cancelled during a washprogramme.To activate the safety lock Press and hold in the Start/Stopbutton after the programme hasstarted.Stop or in 3 secs Keep the Start/Stop button pressed inuntil the time has elapsed and thefollowing appears in the display:Locked The safety lock is now activated. It isdeactivated automatically at the end ofthe programme.To deactivate the safety lock Press and hold in the Start/Stopbutton after the programme hasstarted.Unlock in 3 secs Keep the Start/Stop button pressed inuntil the time has elapsed and thefollowing appears in the display:Unlocked 26
The correct detergentAll modern detergents produced <strong>for</strong> automatic washing <strong>machine</strong>s are suitable.Use dispensing aids, e.g. balls, if these are supplied with the detergent. Tabletsare suitable <strong>for</strong> full loads, but note that it may be impractical to reduce tablets <strong>for</strong>smaller loads. Some tablets do not dissolve as rapidly as others, and may not besuitable <strong>for</strong> programmes with short durations.Do not use biological detergents on silk as the enzymes may damage the silk!Instructions <strong>for</strong> use and recommended dosage amounts are given on thedetergent packaging.Liquid detergent should be dispensed using a ball provided by the manufacturer<strong>for</strong> programmes without a pre-wash.For programmes with a pre-wash you will need to purchase a special containerfrom the Miele Spare Parts department which sits in the main wash compartment of the detergent dispenser drawer . Add liquid detergent to this container <strong>for</strong>the main wash and to compartment <strong>for</strong> the pre-wash.See "Optional accessories" at the end of this booklet <strong>for</strong> details of Miele brandedcare products including detergent and fabric conditioner.Universaldetergent*Detergent <strong>for</strong>coloureds*DetergentDetergent <strong>for</strong>delicatesCottons X XMinimum iron X XDelicatesXWoollensLiquid detergent <strong>for</strong> <strong>machine</strong>-washable woollensExpress X XAutomatic X XShirts X XDenim X 1)Dark garments X 1)1) Only use liquid detergent* Powder detergent, tablet detergent, liquid detergent and liquid tab detergent.27
DetergentThe right amount to dispense willdepend on the following:– The quantity of laundry– The soiling level of the laundryLightly soiledNo visible dirt or stains. Possiblyslight body odour.Normally soiledVisibly dirty and/or just a few slightstains.Heavily soiledVisible dirt and stains and/or dried onsoiling.– The water hardness level.Check with your local water supplierif you do not know the hardness levelin your area.Water softenerA water softener can be used to cutdown on the use of detergents in hardwater areas. Dispense according to theamount specified on the packaging.First add detergent and then the watersoftener.Miele branded water softening tabletsare available from the Miele Spare PartsDepartment or via the internet onwww.miele-shop.com.Use a quantity of detergent as <strong>for</strong> softwater.Miele do not recommend connectingthe <strong>machine</strong> to a household watersoftener.<strong>Washing</strong> with severalcomponentsIf you wash using several components(e.g. special application detergents),we recommend always dispensing theagents into compartment in thefollowing order:1. Detergent2. Water softeners3. Stain removerThis way the agents are distributedmore evenly.28
DetergentFabric conditioners and liquidstarchFabric conditionersmake garments soft to handle and helpprevent static cling when tumbledrying.Starchstiffens and gives body to items oflaundry, e.g. shirts, tablecloths and bedlinen.Automatic dispensing of fabricconditioner or liquid starch tolaundry at the end of a programmeIf starching frequently, thoroughlyclean the dispenser compartment,especially the siphon tube and thefabric conditioner channel, regularly.See "Cleaning the detergentdispenser drawer". Do not usepowder starch <strong>for</strong>mulations orviscous liquid starch in the compartment as it will clog up.Colour run and dye removers /dyes Do not use colour run or dyeremovers in this <strong>machine</strong>. Dyes suitable <strong>for</strong> use in domesticwashing <strong>machine</strong>s can be used.However, please note that the saltused in the dyeing process cancause corrosion to stainless steelcomponents in the <strong>machine</strong> if youdye frequently. Always observe themanufacturer's <strong>instructions</strong> carefully. Add the fabric conditioner or liquidstarch to compartment . Do notexceed the maximum level mark.It will be automatically dispensed in thelast rinse. At the end of the programmea small amount of water remains in thefabric conditioner compartment .29
Cleaning and careDisconnect the <strong>machine</strong> from themains electricity supply andwithdraw the plug from the socketbe<strong>for</strong>e cleaning the <strong>machine</strong>.The washing <strong>machine</strong> must notbe hosed down.A range of Miele branded cleaning andconditioning products is available toorder from the Miele Spare PartsDepartment or via the internet onwww.miele-shop.com.External casing and fasciapanel Clean the casing using a MieleE-Cloth or with a mild non-abrasivecleaning agent or soap and waterusing a well wrung-out cloth. Wipedry with a soft cloth. The drum can be cleaned using asuitable stainless-steel cleaningagent following the <strong>instructions</strong> onthe packaging.Do not use solvents, abrasivecleaners, glass cleaners orall-purpose cleaning agents.These might damage plasticsurfaces and other componentsbecause of the chemicals theycontain.Extra cleaningCarry out a hot wash (70°C or above)with powder detergent approx. every 6weeks to help prevent deposits buildingup in the <strong>machine</strong>. These can occurwhen washing is mainly done at lowtemperatures, and can lead tounpleasant smells. If you have noreason to wash occasionally at this hightemperature, then run a Cottons 95°Cprogramme with detergent but nolaundry at regular intervals.Cleaning the detergentdispenser drawerFor hygienic reasons, clean the entiredrawer at regular intervals. Pull out the detergent dispenserdrawer until a resistance is felt. Pressdown the release catch and at thesame time pull the drawer right out ofthe <strong>machine</strong>. Clean the detergent drawer withwarm water.30
Cleaning and careCleaning the siphon and conditionerchannelCleaning the detergent dispenserdrawer housing1. Remove the siphon fromcompartment and rinse underwarm running water. Clean thesiphon tube in the same way.2. Replace the siphon. Use a bottle brush to removedetergent residues and limescalefrom the jets inside the detergentdispenser drawer housing. Clean the fabric conditioner channelusing a brush and warm water.If starching frequently, thoroughlyclean the siphon, the siphon tubeand the fabric conditioner channelregularly. A build-up of starch willcause them to get clogged.31
Cleaning and careCleaning the water inlet filtersThe washing <strong>machine</strong> has two filters toprotect the inlet valves.These filters should be checked everysix months or so, or more often if thereare frequent interruptions to the watersupply.To clean the filter in the water inletvalve: Using pliers, carefully loosen theribbed plastic nut on the inlet valveand unscrew.To clean the filter in the union in theopen end of the inlet hose: First turn off the stopcock. Unscrew the threaded unionconnecting the free end of the inlethose to the stopcock. Use pointed nose pliers to withdrawthe plastic filter by the bar (seeillustration). Clean, put back andsecure.The two filters must be put back inplace after cleaning. Remove rubber seal 1 from therecess. Using pointed pliers, take hold ofplastic filter bar 2, remove the filterand clean it. Put the filter and seal back in thereverse order and reconnect thehose. Turn on the stopcock and check theconnection is watertight. If it leaks,tighten the connection.32
Problem solving guideWith the help of the following notes, minor faults in the per<strong>for</strong>mance of the<strong>machine</strong>, some of which may result from incorrect operation, can be put rightwithout contacting the Service Department.Repair work to electrical appliances should only be carried out by asuitably qualified person in strict accordance with current local and nationalsafety regulations. Repairs and other work by unqualified persons could bedangerous. The manufacturer cannot be held liable <strong>for</strong> unauthorised work.The programme does not startProblem Possible cause RemedyThe display remainsdark, and the Start/Stop button indicatorlight does not comeon.You are asked to entera code.The display is dark.There is no power tothe <strong>machine</strong>.Access via a code hasbeen activated.The display hasswitched offautomatically to saveenergy (Standbymode).Check whether– the mains plug is pluggedin and switched on.– the fuse or circuit breakerhas tripped.Enter the code and confirmthe entry. Deactivate the codeif you do not wish thismessage to appear in thedisplay the next time the<strong>machine</strong> is switched on.Press a button. Standbycomes to an end.33
Problem solving guideFault messages in the displayProblem Possible cause Remedy lights up in thedisplay andDrain faultflashes.– The water outlet isblocked orrestricted.– The drain hose hasbeen fixed too high.– Clean the drain filter andthe drain pump.– The maximum deliveryhead is 1 m. lights up in thedisplay andWater inletfaultflashes. lights up in thedisplay andWaterprooffaultflashes. lights up in thedisplay andTechnicalfaultflashes.Anti-creaseChk detergentflashes in the display.– The water inlet isblocked orrestricted.The water protectionsystem has reacted.There is a fault.Excessive foam hasbuilt up duringwashing.Check whether– the stopcock is openedproperly.– the inlet hose is kinked.– the water pressure is toolow.Call the Service Department.Start the programme again.If the fault message appearsagain, contact the ServiceDepartment.Use less detergent next timeand follow the manufacturer's<strong>instructions</strong> on dosage givenon the packaging. To switch off the fault message: Switch the <strong>machine</strong> off with I-On/0-Off button.34
Problem solving guideGeneral problemsProblem Possible cause RemedyThe <strong>machine</strong> shakesduring the spin cycle.The laundry has not beenspun properly and is stillwet.The laundry has not spunsatisfactorily.The pump makes strangenoises.There is a lot ofdetergent residue in thedetergent drawer.Fabric conditioner is notcompletely dispensed ortoo much water remainsin the compartment.The display is in adifferent language.When laundry is dry, itfeels hard to the touch.The <strong>machine</strong> feet are notlevel.The <strong>machine</strong> detected animbalance during the finalspin and reduced thespin speed automatically.The spin speed selectedwas too low.Level the <strong>machine</strong> (see"Installation andconnection").Include both large andsmall items in the load asthis will give betterdistribution.Select a higher spinspeed next time.This is not a fault! These noises occur at the end of apump sequence as a normal part of the operation.The water pressure is toolow.Powder detergent usedwith water softeners canbe sticky.The siphon tube is notcorrectly positioned or isclogged up.A different language hasbeen selected in theProgrammable functions- Language .– Clean the water inletfilter.– Select Water plus.Add washing powderand then add the watersoftener.Clean the siphon, (see"Cleaning and care -Cleaning the detergentdispenser drawer").Set the language youwant. The flag symbolwill guide you.Too vigorous wash action. Programme in gentleaction and more water.Not enough detergentused.No fabric conditionerusedIncrease detergent doseto prevent limescalebuild-up in laundry.Use fabric conditioner inlast rinse.35
Problem solving guideAn unsatisfactory wash resultProblem Possible cause RemedyLiquid detergentdoes not give therequired result.Grey, greasyparticles cling towashed laundry.A stale smell is inthe drum and onlaundry.White residueswhich look likepowder detergentare seen on darktextiles afterwashing.Clothes are comingout creased.Liquid detergentsusually contain nobleaching agents.They do not removefruit, coffee and teastains.Insufficient amounts ofdetergent were usedto break down theparticles of grease inheavily soiled laundry.Low temperaturewashing.The detergentcontained compounds(zeolites) to aid watersoftening which arenot soluble in water.They have ended upon the laundry.The <strong>machine</strong> wasoverloaded.The wrongprogramme was used.– Use a general purposedetergent containing ableaching agent.– Pour stain removers intocompartment of thedispenser drawer and liquiddetergent into a dispenser ball.– Never put stain removers andliquid detergent together in thedispenser drawer.– Use more detergent.– Be<strong>for</strong>e washing the next loadrun a Cottons 95°C programmewith powder detergent butwithout a load.– Be<strong>for</strong>e washing the next loadrun a Cottons 95°C programmewith powder detergent butwithout a load.– Try and brush off the residueswith a soft brush once thelaundry is dry.– Wash dark textiles using adetergent which contains nozeolites. Liquid detergentsusually contain no zeolites.– Use the Dark garmentsprogramme.– Reduce quantity of clothes indrum.– Check care labels and theprogramme chart.– Use easy iron conditioners.36
Problem solving guideThe drum door does not open when you press the Door buttonPossible causeThe <strong>machine</strong> is notconnected to theelectricity supply and/or isnot switched on.The safety lock has beenactivated.Access via a code hasbeen activated.Power cut.The door was not correctlyengaged.There is still water in thedrum and the <strong>machine</strong> isunable to drain.RemedyInsert the plug in the socket and switch on and/orswitch the <strong>machine</strong> on with the I-On/0-Off button.Deactivate the safety lock as described in"Changing the programme sequence - Safetylock".Deactivate the code as described in"Programmable functions - Code".Open the drum door as described in the nextsection.Press hard against the lock side of the drum doorand then press the Door button.Clean the drain filter and drain pump as describedin the next section.For safety reasons the drum door cannot be opened if the suds temperature ishigher than 55°C.37
Problem solving guideOpening the drum door in theevent of a blocked drain outletand/or power failure Switch the washing <strong>machine</strong> off.There is a lever behind the detergentdrawer fascia panel.Blocked drain outletIf the drain outlet is blocked, up to25 litres of water will be retained in the<strong>machine</strong>.Caution: if laundry has beenwashed at a high temperature, waterdraining out of the <strong>machine</strong> will stillbe hot. Danger of scalding!Procedure <strong>for</strong> draining the <strong>machine</strong> Place a suitable container under theaccess flap.When draining water from the<strong>machine</strong>, do not unscrew the drainfilter completely or take it right out. Remove the lever. Use it to open the access flap. Unscrew the drain filter lid until waterruns out.To interrupt the flow of water: Tighten the drain filter back up again.38
Problem solving guideOnce the flow of water ceases:Make sure the drain filter issecurely tightened. Otherwise thereis a risk of water leakage during use.Opening the drum doorAlways make sure that the drumis stationary be<strong>for</strong>e reaching into the<strong>machine</strong> to remove laundry.Reaching into a moving drum isextremely dangerous. Remove the drain filter completely. Clean it thoroughly. Pull the emergency releasedownwards (see illustration). Thedrum door will open. Remove any <strong>for</strong>eign objects (e.g.buttons, coins, etc.) and fluff from thefilter housing. Turn the impeller byhand to check that it rotates freely.Any <strong>for</strong>eign object causing anobstruction should be removed. Put the drain filter back in place andsecure.39
After sales serviceIn the event of any faults which youcannot remedy yourself, pleasecontact:– your Miele Dealer or– Miele (see back cover <strong>for</strong> contactdetails).When contacting your Dealer or Miele,please quote the model and serialnumber of your <strong>machine</strong>, both of whichare shown on the data plate visibleabove the porthole glass when the dooris open.Future updates (PC)The indicator light marked PC is theinterface used by Miele servicetechnicians during servicing work <strong>for</strong>testing purposes and <strong>for</strong> updating the<strong>machine</strong>'s programme data.Appliance guaranteePlease see the guarantee cardsupplied with your <strong>machine</strong>.Optional spare parts and accessoriesOptional spare parts and accessories<strong>for</strong> this washing <strong>machine</strong> are availablefrom your Miele Dealer, the Miele SpareParts Department or via the internet atwww.miele-shop.com.Please note that telephone calls maybe monitored and recorded <strong>for</strong>training purposes.N.B. A call-out charge will be applied<strong>for</strong> service visits where the problemcould have been resolved asdescribed in these <strong>instructions</strong>.40
Installation and connectionFront view Inlet hose (tested to withstandpressure of at least 7,000 kPa) Electricity supply cable - Flexible drain hose (withdetachable swivel elbow) Detergent dispenser drawer Control panel Drum door Access to drain filter, drain pumpand emergency release Four height adjustable feet41
Installation and connectionRear view Protruding lid <strong>for</strong> holding whenmoving the <strong>machine</strong> Electricity supply cable Inlet hose (tested to withstandpressure of at least 7,000 kPa) Drain hose Transit bar covers Restraining clip <strong>for</strong> inlet hose anddrain hose Restraining clips <strong>for</strong> transit barswhen removed42
Installation and connectionInstallation surfaceA concrete floor is the most suitableinstallation surface <strong>for</strong> a washing<strong>machine</strong>, being far less prone tovibration during the spin cycle thanwooden floorboards or a carpetedsurface.Please note the following points: The <strong>machine</strong> must be level andsecurely positioned. To avoid vibrations during spinning,the <strong>machine</strong> should not be installedon soft floor coverings.If installing on a wooden joist floor: We recommend a plywood base (atleast 59x52x3 cm). The base shouldspan several joists and be bolted tothe joists and not only to thefloorboards. Check <strong>for</strong> the presenceof pipes and cables first.If possible, install the <strong>machine</strong> in acorner, as this is usually the most stablepart of the floor.If the <strong>machine</strong> is installed on araised plinth, it has to be securedagainst slippage during spinningusing retaining clips (available fromthe Miele Spare Parts Dept).Transporting the <strong>machine</strong> to itsinstallation siteTo manoeuvre the <strong>machine</strong> out of itspacking case to its installation site, holdit by the front feet as well as by theedge of the lid where it protrudes to therear of the washing <strong>machine</strong>.Ensure that the <strong>machine</strong> feet andthe floor are dry to prevent the<strong>machine</strong> from slipping during thespin cycle.Removing the transit bars To remove the left and right covers1. Use a screwdriver to prise out thecover as illustrated.2. Pull the cover <strong>for</strong>wards to remove.43
Installation and connection Using the spanner supplied, turn theleft-hand transit bar 90°, then Turn the right-hand transit bar 90°,then withdraw the transit bar. withdraw the transit bar.44
Installation and connectionTo avoid the risk of injury theholes <strong>for</strong> the transit bars must becovered after the transit bars havebeen removed. Secure the transit bars to the back ofthe washing <strong>machine</strong>. Make sure thatholes are fitted over retainers . Fit the covers onto the two holes.Then plug the holes as shown withthe caps.The <strong>machine</strong> must not be movedwithout the transit bars in place.Store them as shown or keep themin a safe place <strong>for</strong> future use. Theymust be re-fitted if the <strong>machine</strong> is tobe moved again (e.g. when movinghouse).Re-fitting the transit barsRe-fitting is carried out by reversing theprocedure.45
Installation and connectionLevelling the <strong>machine</strong>The <strong>machine</strong> must stand perfectly levelon all four feet to ensure safe andproper operation.Incorrect installation may increaseelectricity and water consumption andmay cause the <strong>machine</strong> to move about.Screwing out and adjusting the feetThe four adjustable screw feet are usedto level the <strong>machine</strong>. All four feet arescrewed in when the <strong>machine</strong> isdelivered. Use a spirit level to check the<strong>machine</strong> is standing level. Hold foot 1 securely with a pipewrench. Turn counternut 2 againusing the spanner supplied until itsits firmly up against the housing.All four counternuts must befirmly up against the housing. Pleasealso check this <strong>for</strong> the feet which didnot need adjustment. Otherwisethere is the danger of the <strong>machine</strong>moving about. Using the spanner supplied turncounternut 2 in a clockwise direction.Then turn counternut 2 together withfoot 1 to unscrew.46
Installation and connectionBuilding under a worktopThe <strong>machine</strong> lid must not beremoved.This washing <strong>machine</strong> can be pushedunder a worktop with its lid in place,providing the worktop is high enough.Washer-dryer stackA Miele tumble dryer can be stackedwith the washing <strong>machine</strong>. A WTVstacking kit is necessary which can bepurchased from your Dealer, the MieleSpare Parts Department or via theinternet on www.miele-shop.com.Please note:a Safety distance to wall:at least 2 cmb Height:Stacking kit with pull-out shelf:approx. 172 cmStacking kit without pull-out shelf:approx. 170 cmc Depth of the washer-dryer stack:approx. 65 cm47
Installation and connectionThe Miele water protectionsystemThe Miele water protection systemprotects the washing <strong>machine</strong> fromwater damage.The system consists of three maincomponents:1) the inlet hose2) the electronic unit and the washing<strong>machine</strong> housing3) the drain hose– Overflow protectionThis prevents the washing <strong>machine</strong>taking in too much water. If the waterlevel exceeds a certain level, thedrain pump switches in and pumpsthe excess water away.3) Drain hoseThe drain hose is protected by aventilation system which prevents thewashing <strong>machine</strong> from beingemptied completely.1) Inlet hoseThe inlet hose can withstandpressure of more than 7,000 kPa.2) Electronic unit and washing<strong>machine</strong> housing– SumpAny leaking water is collected in asump in the base of the <strong>machine</strong>. Afloat switches off the safety valves,preventing any more water flowinginto the <strong>machine</strong> and water in thesuds container is pumped away.48
Installation and connectionConnection to the watersupplyThe <strong>machine</strong> should be connected to amains water supply in accordance withlocal and national safety regulations.The German authorities do not require itto have a non-return valve as thewashing <strong>machine</strong> has been designedto comply with DIN regulations.The <strong>machine</strong> is designed to operatewith a flow pressure of between100 kPa and 1,000 kPa. If it is higherthan 1,000 kPa it is essential to fit apressure reducing valve.Connection to the mains water supplyshould incorporate a mains stopcockwith 3 / 4 " thread. The stopcock shouldbe fitted by a qualified plumber.In order to protect the water inletvalve, the two dirt filters - one in theopen end of the inlet hose, one atthe inlet point in the <strong>machine</strong> - mustnot be removed.Extension hose– Longer hoses 2.5 or 4.0 m in lengthare available from your Miele dealeror the Miele Spare Parts Departmentas optional extras.The connection point is subjectto mains water pressure. Turn on thestopcock slowly and check <strong>for</strong> leaks.Correct the position of the washerand union if appropriate.The washing <strong>machine</strong> is not suitable<strong>for</strong> connection to a hot water supplyand connection to a householdwater softener is not recommended.Maintenance and careOnly use a genuine Miele hose shouldyou ever need a replacement orextension. These are tested towithstand pressure of at least7,000 kPa.49
Installation and connectionConnection to the drainagesystemThe <strong>machine</strong> drains via a drain pumpwith a delivery head of 1 metre*. Thedrain hose must not be kinked as thisrestricts drainage. The swivel elbow atthe end of the hose can be turned ineither direction, or can be detached ifrequired, with a sharp twist and pull.If required, the drain hose can beextended to a length of 5 m. Thenecessary parts can purchased fromthe Miele Spare Parts Department oryour Miele dealer.* For a delivery head of more than 1 m(up to a max. of 1.8 m) a replacementdrain pump will need to be fitted.Please contact the Miele Spare PartsDepartment or your Miele Dealer.Drain hose connection:1. Direct into a sink or basin:Please note the following:– Hook the hose over the edge andsecure.– Make sure that the water can drainaway freely without hindrance.Otherwise there is a risk of wateroverflowing or of some of the drainedwater being sucked back into the<strong>machine</strong>.2. Connected securely to a plasticdrain pipe with a rubber nipple.There is no need to use a non-returnvalve.3. Connected securely to a standpipe.4. Connected securely to a floor gully.Please note: Adapter Nut Hose clip End of the hose Fit adapter to the sink drain outletusing nut . Attach the end of the hose toadapter . Use a screwdriver to tighten hoseclip up close to the nut.50
Installation and connectionElectrical connection U.K.All electrical work should be carried outby a suitably qualified and competentperson, in strict accordance withcurrent national and local safetyregulations (BS 7671 in the UK).Ensure power is not supplied to theappliance until after installation workhas been carried out.The appliance is supplied with a mainscable with moulded plug ready <strong>for</strong>connection to a 230-240V mainssupply.Please ensure the connection dataquoted on the data plate match thehousehold mains supply.Connection should be made via asuitable switched socket which is easilyaccessible after installation.For extra safety it is advisable to protectthe <strong>machine</strong> with a suitable residualcurrent device (RCD). Contact aqualified electrician <strong>for</strong> advice.Do not connect via an extension lead.Extension leads do not guarantee therequired safety of the appliance (e.g.danger of overheating).Non-rewireable plugs BS 1363The fuse cover must be refitted whenchanging the fuse, and if the fuse coveris lost, the plug must not be used until asuitable replacement is obtained. Thecolour of the correct replacement coveris that of the coloured insert in the baseof the plug, or the colour that isembossed in words on the base of theplug (as applicable to the design ofplug fitted).Replacement fuses should be ASTAapproved to BS 1362 and have thecorrect rating. Replacement fuses andfuse covers may be purchased fromyour local electrical supplier.WARNING: THIS APPLIANCEMUST BE EARTHED51
Consumption dataLoadConsumption dataEnergy Water Durationin kWh in litres Short NormalCottons 95°C 6.0 kg 1.99 47 2 h 09 min60°C 1) 6.0 kg 1.02 47 1 h 49 min60°C 3.0 kg 0.73 39 1 h 03 min40°C 1) 6.0 kg 0.65 59 2 h 04 min40°C 2) 3.0 kg 0.36 39 59 minMinimum iron 40°C 1) 3.0 kg 0.50 55 59 min 1 h 19 minDelicates 30°C 2.0 kg 0.35 69 49 min 59 minWoollens 30°C 2.0 kg 0.23 39 – 39 minExpress 40°C 3.0 kg 0.30 34 – 30 minAutomatic 40°C 3.5 kg 0.35 - 0.50 40 - 55 – 1 h 18 minShirts 60°C 2.0 kg 1.00 59 1 h 02 min 1 h 12 minDenim 40°C 3.0 kg 0.50 52 50 min 1 h 00 minDark garments 40°C 3.0 kg 0.60 60 1 h 00 min 1 h 10 minNote <strong>for</strong> test institutes:1)EN 60456 test programme2)Short programme <strong>for</strong> test institutes; the Short extra option must be selected.Consumption data can vary from the nominal values given depending on waterpressure, water hardness, water inlet temperature, room temperature, type andvolume of load, fluctuations in the electricity supply and any extra optionsselected.52
Height850 mmWidth595 mmDepth634 mmDepth with door open1074 mmWeight99 kgCapacity6 kg dry laundryVoltagesee data plateConnected loadsee data plateFuse ratingsee data plate / plugConsumption datasee "Consumption data"Water flow pressure minimum100 kPa (1 bar)Water flow pressure maximum 1,000 kPa (10 bar)Inlet hose length1.60 mDrain hose length1.50 mMains connection cable length 1.60 mDelivery head max.1.00 mMaximum drainage length5.00 mLEDs Class 1Test certificates awardedsee data plateTechnical data53
Programmable functions<strong>for</strong> changing default settingsThe programmable functions are used to alter the <strong>machine</strong>'s electronics to suitchanging requirements.Programmable functions can be altered at any time.
Programmable functionsTo access programmable functionsThe programmable functions areaccessed via the Start/Stop buttonand the programme selector.Be<strong>for</strong>e you begin, first ensure that:– The washing <strong>machine</strong> is switched off.– The <strong>machine</strong> is properly closed. Press the Start/Stop button and keepit pressed in whilst carrying out steps-. Press the I-On/0-Off button in. As soon as ...Language .... . . appears in the display, releasethe Start/Stop button.To select a programmable function Turn the programme selector untilthe programmable function yourequire appears in the display. Press the Start/Stop button to confirmyour selection.To alter a programmable functionYou can see the different optionsavailable <strong>for</strong> a programmable functionby turning the programme selector.The option which is currently set willhave a tick beside it. Turn the programme selector untilthe option you want appears in thedisplay. Press the Start/Stop button toactivate this option.To come out of programmablefunctions Turn the programme selector untilBack appears in the display. Press the Start/Stop button.Language The display can be set to appear inone of several different languages.The flag after the word Languageacts as a guide to prevent a languagewhich will not be understood frombeing set.The language selected is saved tomemory.55
Programmable functionsWater plusThis programmable function is usedto select the water intake setting <strong>for</strong>the Water plus extra option.There are three different options:Water +(the <strong>machine</strong> is delivered with thisoption selected)The water level is increased in the washand rinse stages.Extra rinseAn extra rinse is introduced.Water+ & Extra rinseThe water intake is increased in thewash and rinse stages and anadditional rinse is also introduced.Gentle actionActivating gentle action reduces thedrum action and is suitable <strong>for</strong>washing slightly soiled items moregently. It should be activated <strong>for</strong>garments with a single bar under thecare label and <strong>for</strong> articles which feeltoo hard after they have been dried.Gentle action can be activated <strong>for</strong> theCottons and the Minimum ironprogrammes.The washing <strong>machine</strong> is delivered withthe Gentle action setting deactivated.Suds coolingWhen this is activated, additionalwater flows into the drum at the endof the main wash to cool the sudsdown. Hot suds can damage plasticdrainage pipes.Suds cooling takes place whentemperatures of 95°C and 75°C areselected.Suds cooling should be activated:– to prevent the danger of scalding ifthe drain hose is hooked over theedge of a sink or basin.– where the drainage pipes do notcomply with DIN 1986.The <strong>machine</strong> is delivered with Sudscooling deactivated.56
Programmable functionsCodeA code can be used to lock theelectronics on the washing <strong>machine</strong>to prevent it being used without yourknowledge.When the code has been activated, youhave to enter a code after switching thewashing <strong>machine</strong> on. Otherwise thewashing <strong>machine</strong> cannot be operated.Code ... Press the Start/Stop button.To activate the codeActivate Press the Start/Stop button.The display will now request that acode is entered.To enter the codeThe code is 125 and cannot be altered.O __ __ Turn the programme selector until thefirst number appears in the display. Confirm your selection of the numberby pressing the Start/Stop button. Repeat the process until all threenumbers have been entered.1 2 5 Press the Start/Stop button.The following will appear in the display:Code activatedOnce the <strong>machine</strong> is switched off, itcan only be used again if the code isentered.To use the washing <strong>machine</strong> whenthe code is activatedWhen the <strong>machine</strong> is switched onagain, the display will request the code. Enter code 125 as described aboveand confirm the entry.The washing <strong>machine</strong> is now unlockedand ready <strong>for</strong> use.To deactivate the codeMake sure the washing <strong>machine</strong> isswitched off and the door is properlyclosed. Press the Start/Stop button andkeep it pressed in whilst you press thel-On/0-Off button in.As soon as ...O __ __. . . appears in the display, releasethe Start/Stop button. Now enter the code and press theStart/Stop button. Select Code and confirm Deactivate.57
Programmable functionsTemperature unitYou can chose <strong>for</strong> the temperature tobe displayed as °C/Celsius or°F/Fahrenheit.The <strong>machine</strong> is delivered with°C/Celsius as the default setting.BuzzerWhen the buzzer function has beenactivated, an audible tone sounds atthe end of a programme or whenRinse hold is reached.There are two volumes:Normal(the <strong>machine</strong> is delivered with thisoption as the default setting.)The buzzer sounds at the end of aprogramme or when Rinse hold isreached.LoudThe buzzer sounds at maximum volumeLoud at the end of a programme orwhen Rinse hold is reached.Keypad toneAn audible tone sounds each time abutton is pressed.The <strong>machine</strong> is delivered with thekeypad tone deactivated.BrightnessThere are ten different displaybrightness settings.The bar chart shows you the setting.The <strong>machine</strong> is delivered with thedisplay brightness on setting 5.This will change as soon as a differentsetting is chosen.ContrastThere are ten different displaycontrast settings.The bar chart shows you the setting.The <strong>machine</strong> is delivered with thedisplay contrast on setting 5.This will change as soon as a differentsetting is chosen.58
Programmable functionsStandby displayTo save energy, the display goes outand the indicator light <strong>for</strong> the Start/Stop button will start flashing slowly.The display will always go out,– if a programme is not selected within10 minutes of the <strong>machine</strong> beingswitched on.– 10 minutes after the end of aprogramme.Pressing one of the buttons switchesthe display back on again.You can also choose whether you wantthe display to go out 10 minutes after aprogramme has started or to remainvisible throughout the programme.OnThe standby function is switched on.When this option is selected, thedisplay will go out 10 minutes after aprogramme has started.Not in current prog.(the <strong>machine</strong> is delivered with thisoption selected)The standby function is switched off.The display will remain visible during aprogramme.MemoryThe washing <strong>machine</strong> will store themost recently selected settings(programme, temperature, spinspeed and any extra options) inmemory once the programme hasstarted.These settings will appear in thedisplay the next time the <strong>machine</strong> isswitched on.The <strong>machine</strong> is delivered with thememory function deactivated.Anti-creaseAnti-crease helps prevent creasing iflaundry is not normally removedimmediately after the end of aprogramme.The drum will turn at intervals <strong>for</strong> up to30 minutes after the programme hasfinished.The door can be opened and laundryremoved at any time during theanti-crease phase.On(the <strong>machine</strong> is delivered with thisoption selected)Anti-crease is activated.OffAnti-crease is deactivated.59
Optional accessoriesMiele washing <strong>machine</strong>s offer perfectcare <strong>for</strong> your laundry and feature awide range of special programmesdesigned to suit the fabric beingwashed. Miele have also developed arange of specialist CareCollectiondetergents and conditioning productsto offer you a complete package <strong>for</strong>cleaning and caring <strong>for</strong> your laundry.The Miele CareCollection detergentsand conditioning products are listedbelow. You can order these and manyother useful products via the internet at:All the products can also be orderedvia the Miele Customer Contact Centre(see back cover <strong>for</strong> contact details).CareCollectionMiele specialist detergents"Outdoor wear"This specialist detergent will clean yourwater-repellent outerwear with care."Sportswear"The Miele Sportswear detergent isdesigned to clean sportswear whilsttaking care of the special microfibresused in these garments. It will help toneutralise and remove odours whilstprotecting the colour of the fabric andpreventing static build-up."Down Items"This special-purpose detergentcontains a mild tenside and has beenspecially <strong>for</strong>mulated to keep down-filleditems supple and to give them bounce.Miele proofing agentThis special finishing agent reproofsgarments against wind and water andprovides a dirt-repellent finish whilstretaining elasticity and breathability.60
Optional accessories"UltraWhite" detergentThis multi-purpose powder detergenthas excellent stain removal propertiesand is suitable <strong>for</strong> white and lightcoloured laundry as well as heavilysoiled coloured items."UltraColor" detergent <strong>for</strong> colouredgarmentsThis liquid detergent is particularlysuitable <strong>for</strong> cleaning coloured and darkgarments. The special <strong>for</strong>mulationoffers effective stain removal, even atlow temperatures, while helping toprevent colours fading.Liquid detergent "For Delicates"This liquid detergent is ideal <strong>for</strong> thegentle treatment of delicate fabrics,such as wool and silk. Its special<strong>for</strong>mulation cleans effectively attemperatures as low as 20°C, whileprotecting the colour of your delicategarments.Fabric conditionerThe Miele fabric conditioner will giveyour laundry a fresh, natural fragrance.It makes garments soft to handle andprevents static build-up during tumbledrying.61
Alteration rights reserved/3309/W <strong>1714</strong> M.-Nr. 07 171 020 / 03