User manual - TV STAR
User manual - TV STAR
User manual - TV STAR
- No tags were found...

Create successful ePaper yourself
Turn your PDF publications into a flip-book with our unique Google optimized e-Paper software.
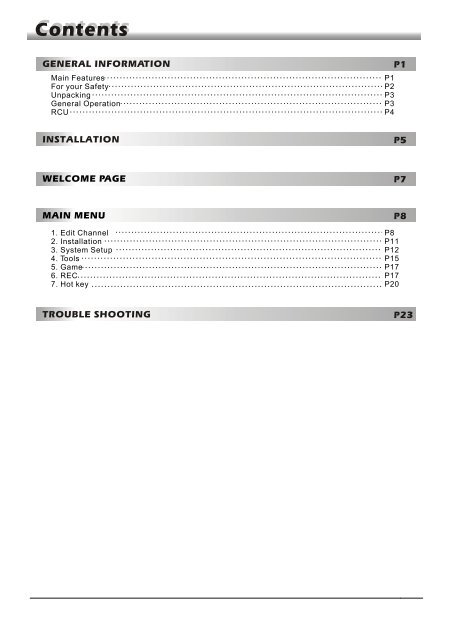
ContentsGENERAL INFORMATIONMain FeaturesFor your SafetyUnpackingGeneral OperationRCUP1P2P3P3P4P1INSTALLATIONP5WELCOME PAGEP7MAIN MENU1. Edit Channel2. Installation3. System Setup4. Tools5. Game6. REC7. Hot keyP8P8P11P12P15P17P17P20TROUBLE SHOOTINGP23
GENERAL INFORMATIONGENERAL INFORMATIONThis Digital Terrestrial Receiver (DTR) will take you to the new and exciting world of DigitalTelevision. A world of crystal clear widescreen pictures, digital sound, more information andnew services. All this and more on "Free to Air" Digital Television.To make full use of your new DTR please take the time to familiarize yourself with theextensive features of the unit detailed in this <strong>User</strong>'s Guide.If you need help in setting up please call your dealer or a customer service adviser.Main FeaturesSD MPEG-2/SD MPEG4 & HD H.264 & fully DVB-T compliantAutomatic PAL/NTSC conversion1000 channels <strong>TV</strong> and Radio programmable8 different favorite groups selectionOn Screen Display with multi-languageFully support to 7 days Electronic Program Guide(EPG)Picture in Graphics(PIG) support256 colors On Screen DisplayChannel search in automatic, <strong>manual</strong> searchVarious channel editing functions(favorite, move, lock, rename and sort)Parental control for channelsEase to use Menu SystemSoftware upgrades through USB portTime set by GMT offset automatic and <strong>manual</strong>,Summer Time supportAutomatic turn on/off by Timer setting(multiple options)Subtitle support DVB EN300743 and EBUTeletext support DVB ETS300472 by VBI and OSDAutomatic save for last channelSupport Logic Channel Number(LCN)3 GamesSupport FAT16/FAT32/FAT12,NTFS(Option)MP3/ JPEG/ BMP/ OGG filesDefault 2 hours, user can setting the end timeLock/Delete/Rename,Preview playback,Browse record files informationPlay/Pause/Stop/Step1
GENERAL INFORMATIONGENERAL INFORMATIONFor Your SafetyTo avoid electric-shock hazards, do notopen the cabinet, refer servicing to qualifiedpersonnel only.Keep the receiver away from flower vases,tubs, sinks, etc., in order to avoid damagingthe equipment.Do not expose the receiver un-der thesunlight. And keep it away from the heatsource.Do not block ventilation holes of theReceiver so that air can circulate freely.When the abnormal phenomenon occur,you should cut off the power immediately.Do not touch the receiver during thunder,since that might create electric-shockhazards.Switch the receiver off whenever it remainsout of service for an extended period.Be sure to turn the Receiver off anddisconnect the AC power cord beforecleaning the Receiver surface. If thesurface is dirty, wipe clean with a clothwhich has been dipped in a weak soap-andwatersolution and wrung out thoroughly,and then wipe again with a dry cloth.2
GENERAL INFORMATIONGENERAL INFORMATIONUnpacking(optional)Remote Control Batteries <strong>User</strong>’s <strong>manual</strong>General OperationThroughout this <strong>manual</strong> you will notice that the everyday operation of the receiver isbased on a series of user friendly on screen display and menus. These menus willhelp you get the most from your receiver, guiding you through installation, channelorganizing, viewing and many other functions.All functions can be carried out using the buttons on the RCU, and some of thefunctions can also be carried out using the buttons on the front panel.The receiver is easy to use, always at your command and adaptable for futureadvances.Please be aware that new software may change the functionality of the receiver.Should you experience any difficulties with the operation of your receiver, pleaseconsult the relevant section of this <strong>manual</strong>, including the Problem Shooting, oralternatively call your dealer or a customer service adviser.3
GENERAL INFORMATIONGENERAL INFORMATIONRCUKeyFunctionTurns power ON/OFFWhen watching a channel, mute the sound0~9<strong>TV</strong>/RADIOPRFAVSHIFTFINDINFOMENUPR+, PR-PAGE+,PAGE-OK, LISTEXITEPGLR<strong>TV</strong>/AVTXTSLEEPPAUSERECORDV-FORMATEnter number of the required menu item orselect a channel number to watchSwitches between <strong>TV</strong> and Radio modeSwitches back to previous channelDisplays the favorite group listTimeshift function keyDisplay the Find windowShow information of the current channelPress this key one time to run menu onscreenMoves up / down a page in the listExecutes the selected item in the menu screenor enters the desired value in any input modeWhen watching a channel, change channels ormove to the next higher or lower item in the menuWhen watching a channel, adjust the volume ormove to the left or right item in the menuReturn to the previous menu on the menuscreen or escape from the menuCall up the EPG (Electronic Program Guide)Display the Audio window.Switch between <strong>TV</strong> and AV modesSwitch to teletext modeEnter into the sleep in modePress once to pause the screen picture, pressonce again to go to the normal modeRecord the programChanges the HD-FormatSwitch to subtitle mode,Play and stop the programPress to fast forward or fast backwardPress to slow forward or slow backward4The picture is only for reference, please make the object as the standard.
INSTALLATIONRear PanelCONNECT TO DIGITAL AMPLIFIERPOWER CABLECONNECT TO <strong>TV</strong>USING A SCART CABLEPOWER ON/OFFCONNECT TO USB DEVICECONNECT TO <strong>TV</strong> SET HDMI-OUT INPUTANT IN: CONNECT TO ANTENNAConnecting to <strong>TV</strong> using SCART supportAntennaDTRINSCART<strong>TV</strong>5The picture is only for reference, please make the object as the standard.
INSTALLATIONConnecting to Digital AmplifierAntennaDTRDIGITAL AUDIOCONVERTOR ORAMPLIFIERRLSPDIFSPEAKERThe picture is only for reference, please make the object as the standard.6
WELCOME PAGEWELCOME PAGEWhen power on first time, it will show welcome page like below.Press PR+,PR- keys to move highlight to selectRegion, Display Mode, Aspect Mode andLanguage.Pressyour choice.keys to move the cursor to chooseMove highlight to [OK] option and press OK keyto enter “ Auto Scan” menu .Press [EXIT] key to exit this menu.7
MAIN MENUMAIN MENUWhen you press [MENU] key, you can enter Main Menu.This menu consists of 6 major sub-menus asbelow.- Edit Channel- Installation- System Setup- Tools- Game- REC1. Edit ChannelMove highlight on Edit Channel item and press [OK]key to enter Edit Channel menu as besides.This menu has 3 sub-menus such as: <strong>TV</strong> Channel list,Radio Channel List and Delete All .1.1 <strong>TV</strong> Channel List1. Press PR+, PR- keys to select the program that youwant to play, and then press OK key to view it in thesmall window. If move the yellow cursor to select up ordown, you will see a gray line which indicates theplaying program in the small window.2. Press FAV key to move the FAV button upward.Select the program and press OK key to pop up thefavourite group list. In the list, select the group that youwant to add into and press OK key, and then you willfind the favourite mark is displayed at the right side ofthe selected program.Press FAV key again to exit from the fav mode, and youwill find the FAV button return to the origin position.3. Press red colour key to move the Lock buttonupward. Select the program and press OK key to markthis program with the Lock mark. You can cancel thismark by pressing OK key once more.Press red colour key again to exit from the lock mode,and you will find the Lock button return to the originposition.8
MAIN MENUMAIN MENU4. Press green colour key to move the Skip buttonupward. Select the program and press OK key to markthis program with the skip mark. You can cancel thismark by pressing OK key once more.Press green colour key again to exit from the skipmode, and you will find the Skip button return to theorigin position.5. Press yellow colour key to move the Move buttonupward. Select the program and press OK key to markthis program with the move mark. Press PR+, PR- keysto move the cursor to the position where you want tolocate and press OK key to confirm.Press yellow colour key again to exit from the yellowmode, and you will find the yellow button return to theorigin position.6. Press blue colour key to enter into the Editchannel window.i . Sort (red colour key)Press red colour key to pop up the Sort drop-down list.Name(A-Z): The ascending order, omitting the $character, the number is ahead, then the capital letter,at last the lowercase.Name (Z-A): The opposite order of the above Name (A-Z).Free/Scrabmle:: All FTA programs are listed ahead,while all scrambled programs are listed last.Lock: all locked programs are listed at the bottom.9ii. Edit (green colour key)Press green colour key to move the Edit button upward.Select the program and press OK key to pop up theRename window.In Rename window, press yellow colour key to switchbetween capital letter and lower-case letter; press redcolour key to delete the character on the cursor; presskeys to move the cursor left or right; pressnumeric keys (0-9) to input the character, please referto the down table. Press blue colour key to save andexit.
MAIN MENUMAIN MENUNumeric keys1234567890Press numeric key repeatedly, display in circle.,*?!@1ABC2DEF3GHI4JKL5MNO6PQRS7TUV8WXYZ9[space]_-0If the name is empty, system will pop up a dialogue informing "Name" once yellowcolour key is pressed. Press OK key to close this dialogue.iii. Delete (blue colour key)In Delete window, press blue colour key to move theDelete button upward. Select the program and press OKkey to mark this program with the deletion mark. You cancancel this mark by pressing OK key again.Press EXIT key to pop up the dialogue "Are you sure tosave?". Select Yes button and press OK key to save, orselect NO button and press OK key to exit without saving.1.2 Radio Channel ListThe same operation as 1.1 <strong>TV</strong> Channel List, here we don't explain any more.1.3 Delete AllMove cursor to the Delete All item, and press OK Key topop up the dialogue "Warning! Do you really want todelete all channel?".Press EXIT key to pop up the dialogue "Are you sure tosave?". Select Yes button and press OK key to save, orselect NO button and press OK key to exit without saving.10
MAIN MENUMAIN MENU2. Installation1. Press PR+, PR- keys to move the cursor up or down.2. Press EXIT key or key to move the focus to theleft menu.2.1 Auto ScanWhen you enter Auto Scan menu, the screen will display as below.In FTA Only, press [Left/Right] key to choose Yes orNo.Move the highlight on the search option, and press[OK] key to start scanning.Press [EXIT] key to exit this menu.2.2 Channel Scan11When you enter Channel Scan, the screen willdisplay as beside.There are two scan modes for you. You can choose toscan by channel or by frequency.When scan band is UHF and region is “China”, therange of Ch Number is from 13 to 61. When scanband is VHF and region is “China”, the range of ChNumber is from 1 to 12. (It’s according to region.)When you complete your configuration, move highlight to search option, and press[OK] key to start scanning.Press [EXIT] key to exit the scanning and save the current parameters.2.3 Aerial AdjustmentWhen you enter Antenna feeding, the screen willdisplay as beside.In CH No. submenu, press [Left/Right] key to choosethe channel.In Tuner Power submenu, press [Left/Right] key tochoose Off and On.2.4 LCNPress [Left/Right] key to choose On and Off.
MAIN MENUMAIN MENU3. System SetupWhen you enter the System Setup menu, you will see thescreen like besides.It contains 10 sub-menus such as: Language, <strong>TV</strong> System,Display Setting, Local Timer Setting, Timer Setting,Conax Conditonal Access, Parental Lock, OSD Setting,Favorite and Auto Standby .Press [Up/Down] key to select menu among all the items.Press [OK] key to enter the selected item.3.1 Language1. Press OK key to enter into the Language window.Press keys to select the language in circle, whilepress PR+, PR- keys to move the cursor up or down incircle.2. Press MENU key or EXIT key to save and exit.3. The types of the language, pleaser refer to theconfiguration of the customer.3.2 <strong>TV</strong> SystemPress PR+, PR- key to move the cursor up or down, whilepress keys to change the setting and the settingwill take effect immediately.1. Video Resolution: Select between 480i/480p/576i/576P/720P/1080i/1080p..2. Aspect Mode: Select among 4:3LB, 4:3PS, 16:9PS,16:9LB and Auto.3 Video Output: Select between YUV and RGB.4. Digital Audio Output: Select between LPCM Out and BS Out.3.3 Display Setting1. Brightness: Press key to select from 0-100.2. Contrast: Press key to select from 0-100.3. Saturation: Press key to select from 0-100.4. Hue: Press key to select from 0-100.5. Sharpness: Press key to select from 0-10.12
MAIN MENUMAIN MENU3.4 Local Time Setting1. Region: Select the region.2. GMT Usage: Select between On and Off. If select "Off",the GMT Offset and Summer Time item will turned gray.3. GMT Offset: When select "ON" in GMT Usage item,system will get the date and time information from thescreen automatically. Date and Time two items will turngrey. Select the proper option in the GMT Offset item.The default setting is GMT ON.4. Summer Time: Select between ON and OFF. "OFF" delegates the normal time. If selectON, time will add one hour.5.Date, Time: When select "OFF" in GMT Usage, Date and Time two items take effect,while GMT Usage turns grey. Use numeric keys to input the desired value.5. After setting,press MENU key or EXIT key to exit and save. If the value is invalid, system will inform"Invalid input! Continue to edit?". Press OK key at the Yes button to continue themodification, or press OK key at the No button to exit without saving.3.5 Timer SettingIf there is no program, you can not enter into this window.There are 8 timers that can be set. Select Timer up ordown, and press OK key to enter into the setting window.1. Timer mode: The default mode is off. You can set thetimer once, daily and Off.2. Wakeup Channel: Select the channel.3. Wakeup Date, Time: Use numeric keys to input thevalid date.Duration: Set the gap time. After waking up, system willpower off automatically after the duration time.Press MENU or EXIT key to save and exit.133.6 Conax Conditional AccessSelect Conax Conditional Access item and pressOK key, then you will enter into its sub-menu whichconsists four items of Subscription Status, EvenStatus, Token Status, Change CA PIN, MaturityRating and About Conax CA.3.6.1 Subscription StatusKnow the detail information of Subscription Status.3.6.2 Event StatusKnow the detail information of Event Status.
MAIN MENUMAIN MENU3.6.3 Tokens StatusKnow the detail information of Tokens Status.3.6.4 Change CA PINChanges CA PIN window is designed for changing thesmart card's PIN, which is required if you want changethe maturity level settings.In order to change the PIN, you must know the current PIN also called the old PIN. Input thenew PIN and twice the PIN (New PIN and Confirm PIN must be the same) your want to set.Move cursor to OK button and press OK key, and then system will pop up a dialogueinforming you the changing result.3.6.5 Maturity RatingInput the PIN then Move cursor to Select Maturity Rating,you can select A-Over18,X-Erotic,G-General audience,PG-Parental Guidance,move cursor toChange Maturity level button and press OK key,and then system will pop up adialogue informing you the changing result.3.6.6 About Conax CAIn About Coanx CA sub-menu, you can know thebasic information about this conditional accesssuch as Card Status, CAS System ID, InterfaceVersion, Card Number, Number of sessions,Language and so on.3.7 Parental LockBefore entering into the Parental Lock window, youneed input the correct password. The defaultpassword is 0000.1. Menu Lock: Press keys to select betweenOff and On. If select "On" , you can not enter intothe most sub-menu before entering the password.2. Channel Lock: Press keys to selectbetween Off and On. The default value is Off.If select "On", you can not view the locked channel set in Chanel List Edit windowuntil you input the correct password.3. New Password: <strong>User</strong> numeric key (0-9) to input the new password.4. Confirm Password: Input the new password once again. Confirm passwordmust be the same as the New password. System will inform you "Change passwordsuccessfully!" while they are the same, or inform you to input the password ofConfirm password once again when they are not the same.14
MAIN MENUMAIN MENU3.8 OSD Setting1. OSD Timeout: Press keys toselect from 1to 10 by step1. The default values Is 5.2. OSD Transparency: Press keys to selectamong Off, 10%, 20%, 30%, 40%. The defaultoption is Off.Press MENU or EXIT key to save and exit.3.9 FavoriteThere are 8 favorites group listed in this window. PressPR+, PR- keys to select one and press OK key to theRename window, here we don't explain any more.3.10 Auto Standby1. Auto Standby: Select between On and Off.2. Standby Mode: Select between Low Power and Fake.4. Tools1. Press PR+, PR- keys to move the cursor up ordown.2. Press EXIT key or key to move the focus tothe left menu.154.1 InformationWhen you enter Information menu, you should seethe screen like it displays on the right.This screen displays receiver information.You should press [EXIT] key to cancel this menu.4.2 Load Factory SettingWhen you choose the option of Load Factory Settingand press [OK] key, there will be a dialogue for you toinput the password. The default password is 0000. If youinput the correct password, you will see a screen likebeside.If you choose Yes, all the parameters of this receiver willreset to the default value.Note: Please use this function carefully.
MAIN MENUMAIN MENU4.3 Upgrade By RS-2321. Press keys to select among allcode,maincode,card,Radioback,keydate defaultdb,userdb. The default option is allcode.2. Press OK key at the Start button to start checkingserial port.4.4 S/W Upgrade by OTA1. Frequency: Use numeric keys to input the propervalue.2. Bandwidth: Select among 6, 7, 8MHz.3. Down load PID: Use numeric keys to input the propervalue.3. Start: Press OK key to start upgrading.If no correct searching information, system will inform"Collecting information". You can press Exit button toreturn to the previous window.System will start upgrading after collecting informationsuccessfully. Press OK key at the Download button andpress OK key at the Burnflash button to start burning.After booting, press OK key at the Reboot button toreboot.4.5 Upgrade by USB1.Upgrade File: Show the Upgrade File.2.Upgrade Mode: Select among AllCode, maincode, conaxca and radioback. Whenusers switch the upgrade mode, Upgrade File will show the corresponding fileaccording to the table below:Upgrade ModeAll code :File featureFile named as "*.abs"Main Code: File named as *.absRadio back:Default db:File named as "*.abs", the picturewill be used as both radio back andmenu backFile named as "*.abs"Select the upgrade mode and upgrade file, then you can start upgrade by USB.3.Press OK key on start button to start receiving the data from USB device.When the USB device is not connected, this item is grey, you can not edit it now.16
MAIN MENUMAIN MENU4.6 Mail boxIn CA info menu, move cursor to mailbox item andpress OK key to enter into mail list window.All E-mails from the operator are listed in this window.Press PR+,PR- keys or keys to look up the E-mails. Once OK key is pressed at the selected E-mail,system will pop up a window where you can know it indetail.5. Game1. Press OK key or key to enter into the game.2. Press PR+, PR- keys to move the cursor up ordown.3. Press EXIT key or key to move the focusto the left menu.4. Select the game that you want to play and pressOK key to enter into the window.6. REC6.1 Media PlayerMedia Player menu will be automatically shown wheninsert U disk to USB port except auto scan, multi picture,upgrade. Or open USB menu according to Menu -> REC-> Media Player. Press OK to enter into this window.USB Device menu will be disabled when no USB deviceis plugged. Media Play List will not be saved when USBplug out or standby or power off.Move scroll bar when press up/down key, page up or down by page key. Go intosub-directory when press ok key in the file directory , play the selected file whenscroll bar is on the file, automatic return USB menu after play is over.Function KeyYellow key: Press to show the Play List17add all music to the Play List2.Press number key 1 to add all images to the Play List.3.Press INFO key to display the Setup window.4.Press FIND key to display the Sort window.FAV:Press FAV key add .
MAIN MENUMAIN MENUPlay ListPress FAV key to add the image or music to Play List .Press [OK] on Play List button you can see the image ormusic you selected and in this list you can play anddelete them.Red key: Playing the image in full screen.Yellow key: Delete the image you selected.Blue key: Delete all the image in the list.Music ListPress PR+,PR- key to select the music you want, andpress FAV key to added it to the music list, or you canpress number key 0 to add all the music to music list.Press yellow key and select the music button in thewindow, you can see the music you selected and in thislist you can play and delete the music.Red key: Playing the music.Yellow key: Delete the music you selected.Blue key: Delete all the music in the list.Image ListPress PR+,PR- key to select the iamge you want, and press FAV key to added it to theimage list, or you can press number key 1 to add all the images to image list.Press yellow key and select the image button in the window, you can see the iamge youselected and in this list you can play and delete them.Red key: Playing the picture.Yellow key: Delete the picture you selected.Blue key: Delete all the picture in the list.SetupShow Image Size: Select between full and real.Slide Show Time: Select among 1-10sec.Slide Show Repeat: Select between on and off.SortPressing FIND key, it will pop up the Sort drop-down list.6.2 Remove USB Device safely1. Press OK key on Remove USB device safely it will pop up a dialog:"You can safelyremove USB device now!". Press OK on Yes button to remove the USB device.18
MAIN MENUMAIN MENU6.3 DVR HDD InformationShow you the removable device information inwindows as besides.Press yellow key to format, and press blue key toenter DVR Set window.6.4 PVR Setting1.Timeshif: Select between on and off.2. Jump: Select among 30sec,1min,5min, 10min and30min.3. Timeshift to record: Select between on and off.4. Standby after record: Select between on and off.6.5 USB Speed TestShow you the USB speed.19
MAIN MENUMAIN MENU7. Hot Key7.1 NumberUse the numeric keys (0-9) to input the number of the desired channel. If theinputted number is beyond the valid channel number, system will "Invalid number”and press OK key to close this message.7.2 <strong>TV</strong>/RADIOIn normal mode, press <strong>TV</strong>/RADIO key to switch between <strong>TV</strong> mode and Radio mode.7.3 Up/Down (Channel Change)Press PR+, PR- keys to change the channel up or down.7.4 Left/Right (Volume+/-)Press keys to change the volume. Press keys to decrease the volume bystep 1, while press keys to add the volume by step1.7.5 MutePress key to close the volume. You can press key once again to restore thevolume, or press keys to open the volume.7.6 PauseDuring the viewing, you can press PAUSE key to stop the picture while the volumecontinues. You can play the picture by pressing PAUSE key once again.7.7 TeletextPress TXT keys to open the teletext on the screen. If there is no teletext, system willinform "No Data!". Press EXIT key to exit.7.8OK1. During the viewing or listening, press OK key topop up the <strong>TV</strong> program list or the Radio program list.2. Press PR+, PR- keys to select the channel up ordown, and then press OK key to play this channel infull-screen.3. Press MENU or EXIT key to close this window.20
MAIN MENUMAIN MENU7.9 Audio1. Press key to enter into the Audio window.2. Press keys to select between Left, Right,Mono and Stereo.3. Changing the audio mode is only connected withthe current channel, not all the channels.4. Press MENU or EXIT key to close this window.7.10 RecallPresskey to switch the current channel to the previous channel.7.11 InfoPress INFO key to enter into the information window.7.12 FAV1. Press FAV key to pop up the favourite groupwindow.2. Press keys to select the favorite group.Press PR+, PR- keys to select the channel up ordown. Press OK key at the selected channel to viewit in full-screen. Press MENU or EXIT key to exit.3. If there is no favorite channel, system will inform "No FAV Channel!" when you press FAV key.7.13 EPGPress EPG key to enter into the EPG window.1. Press PR+, PR-, keys to select up or down,left or right.2. Press red colour key to pop up the Time Bar window.Press PR+, PR- keys to select up or down, while presskeys to select left or right in the time bar.: Press OK key at this button to return to the EPGwindow.21
MAIN MENUMAIN MENU: Press OK key at this button to move thecursor to the current time line.: Press OK key to push the time forward orbackward by half an hour.: Press OK key to push the time forward orbackward by 2 hours.: Press OK key to push the time forward orbackward by a day. From the current day, you canswitch among the future 7 days in circle.3. Detail Information: In the EPG window, press PR+, PR- keys to selectthe channel and program, and press OK key to know the detail information of thecurrent program.4. Press green colour key to enter into the Timer window. You can add the currentprogram to the Timer. If 8 timers is already, system will inform "Timer is full!'.7.14 SubtitlePresskey to open the subtitle window on the screen.22
TROUBLE SHOOTINGTROUBLE SHOOTINGProblem Possible causes What to doThe display on the frontpanel does not light up.Main cable is not connected.Check that the main cable is plugged intothe power socket.No sound or picture, but thefront panel shows red light.The receiver is in standby mode.Press the standby button.No sound or picture.No signal or weak signal.Check the cable connections, antennaand other equipment connected betweenthe antenna and the receiver.Bad picture / blockingerror.Signal is too strong.Antenna noise factor too high.Connect a signal attenuator to theantenna input.Change to an antenna with lower noisefactor.The antenna is faulty.Change the antenna.The picture is notdisplayed on the screen,when switching on.The system is connected by RFleads.Check the UHF channel fixed in yoursystem and tune the UHF channelproperly.There is interference onyour terrestrial programor video signal.The system is connected by RFleads and the output program of thereceiver interferes with an existingterrestrial programs or Video signal.Change the receiver output program toa more suitable program, or connect thesystem by SCART leads.The RCU is not working.Battery exhausted.RCU is incorrectly aimed.Change the batteries.Aim RCU at the receiver, or check thatnothing blocks the front panel.Note : If you have tried all of the actions suggested above, without solving theproblem, please contact your dealer or a customer service adviser.23