Monitor / Touchscreen Removal and Installation - Megatouch
Monitor / Touchscreen Removal and Installation - Megatouch
Monitor / Touchscreen Removal and Installation - Megatouch

You also want an ePaper? Increase the reach of your titles
YUMPU automatically turns print PDFs into web optimized ePapers that Google loves.
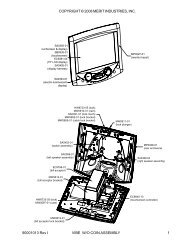
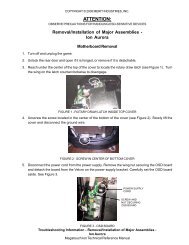
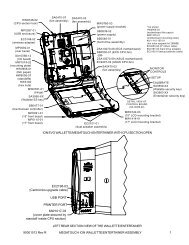
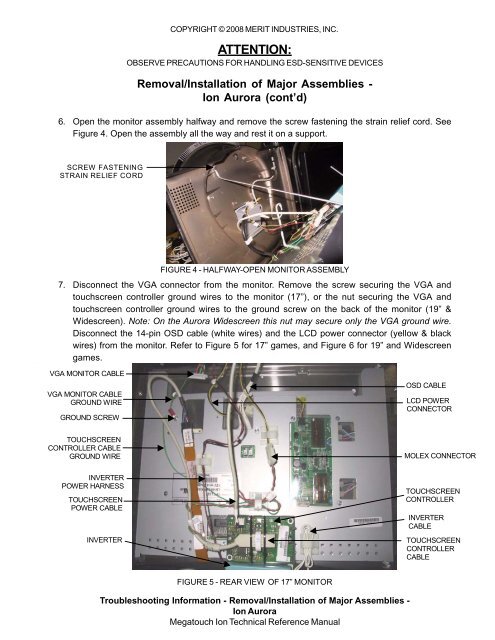
COPYRIGHT © 2008 MERIT INDUSTRIES, INC.ATTENTION:OBSERVE PRECAUTIONS FOR HANDLING ESD-SENSITIVE DEVICES<strong>Removal</strong>/<strong>Installation</strong> of Major Assemblies -Ion Aurora (cont’d)6. Open the monitor assembly halfway <strong>and</strong> remove the screw fastening the strain relief cord. SeeFigure 4. Open the assembly all the way <strong>and</strong> rest it on a support.SCREW FASTENINGSTRAIN RELIEF CORDFIGURE 4 - HALFWAY-OPEN MONITOR ASSEMBLY7. Disconnect the VGA connector from the monitor. Remove the screw securing the VGA <strong>and</strong>touchscreen controller ground wires to the monitor (17”), or the nut securing the VGA <strong>and</strong>touchscreen controller ground wires to the ground screw on the back of the monitor (19” &Widescreen). Note: On the Aurora Widescreen this nut may secure only the VGA ground wire.Disconnect the 14-pin OSD cable (white wires) <strong>and</strong> the LCD power connector (yellow & blackwires) from the monitor. Refer to Figure 5 for 17” games, <strong>and</strong> Figure 6 for 19” <strong>and</strong> Widescreengames.VGA MONITOR CABLEVGA MONITOR CABLEGROUND WIREGROUND SCREWOSD CABLELCD POWERCONNECTORTOUCHSCREENCONTROLLER CABLEGROUND WIREMOLEX CONNECTORINVERTERPOWER HARNESSTOUCHSCREENPOWER CABLEINVERTERTOUCHSCREENCONTROLLERINVERTERCABLETOUCHSCREENCONTROLLERCABLEFIGURE 5 - REAR VIEW OF 17” MONITORTroubleshooting Information - <strong>Removal</strong>/<strong>Installation</strong> of Major Assemblies -Ion Aurora<strong>Megatouch</strong> Ion Technical Reference Manual