TH-D72A/E - N3UJJ
TH-D72A/E - N3UJJ
TH-D72A/E - N3UJJ

You also want an ePaper? Increase the reach of your titles
YUMPU automatically turns print PDFs into web optimized ePapers that Google loves.
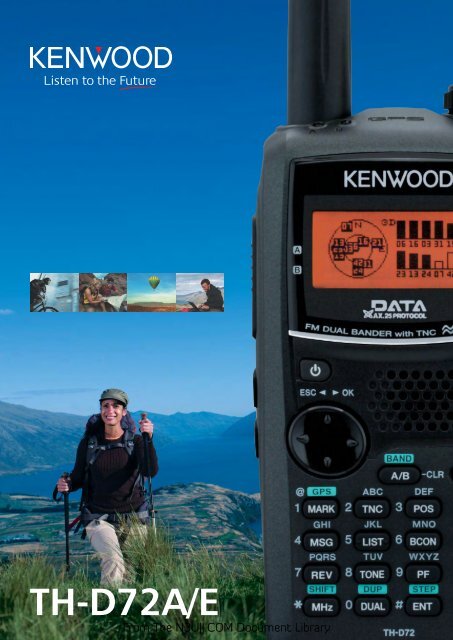
<strong>TH</strong>-<strong>D72A</strong>/EFrom The <strong>N3UJJ</strong>.COM Document Library
About CopyrightCopyright of this Manual and SoftwareAll copyrights and other intellectual property rights for this in-depth manual and relevant technicaldocuments as well as the software described in this in-depth manual and relevant technical documents,and help texts and manuals attached to the software are owned by Kenwood Corporation.A right to use the software described in this in-depth manual and relevant technical documents, andhelp texts and manuals attached to the software is granted to a licensee by Kenwood Corporation;however, the title to and ownership for the software shall be owned by Kenwood Corporation. Refer tothis in-depth manual and relevant technical documents, and help texts and manuals attached to thesoftware for details.Kenwood Corporation does not warrant that quality and performance of the software described in thisin-depth manual and relevant technical documents, and help texts and manuals attached to thesoftware conform to the applicability of any use, and Kenwood Corporation shall be free from liability forany defects, damage or loss, or from any warranty for anything other than what is expressly describedin this in-depth manual and relevant technical documents, and help texts and manuals attached to thesoftware.Any distribution, resale, lease, waiver, assignment or disclosure on a website of all in-depth manual andrelevant technical documents, and help texts and manuals attached to the software written and madeby Kenwood Corporation.About this ManualThis document was created for the product using the following design specifications.• <strong>TH</strong>-<strong>D72A</strong>/E, an external GPS unit and Weather Station available marketplaces.• <strong>TH</strong>-<strong>D72A</strong>/E with firmware version 1.02 or later.Cover 2<strong>TH</strong>-<strong>D72A</strong>/EFrom The <strong>N3UJJ</strong>.COM Document Library
About Registered Trademark• Windows ® and Windows logo are registered trademarks of Microsoft Corporation in the UnitedStates and other countries.• Windows Vista ® and .NET Framework are trademarks or registered trademarks of MicrosoftCorporation in the United States and other countries.• Kenwood Corporation is a licensee of and entitled to use the APRS trademark and protocols fromAPRS Engineering, LLC.• APRS ® (Automatic Packet Reporting System) is a registered trademark of WB4APR (BobBruninga).• TravelPlus for Repeaters is a registered trademark of American Radio Relay League, Inc.• SmartBeaconing is a trademark of HamHUD Nichetronix, LLC.• EchoLink ® is a registered trademark of Synergenics, LLC.• Dayton Hamvention ® is a registered trademark of DARA Incorporation.• All other product names referenced herein are trademarks or registered trademarks of theirrespective manufacturers. and ® are omitted in this manual.<strong>TH</strong>-<strong>D72A</strong>/E Cover 3From The <strong>N3UJJ</strong>.COM Document Library
From The <strong>N3UJJ</strong>.COM Document Library
CONTENTS1 DEVELOPMENT CONCEPT ............ 11.1 GPS Unit ............................................11.2 Evolving Development........................21.3 Other New Functions..........................32 HOW YOU ENJOY APRS WI<strong>TH</strong><strong>TH</strong>-<strong>D72A</strong>/E (WRITTEN BY BOBBRUNINGA, WB4APR).................... 43 PREPARATIONS FOR OPERATINGAPRS .............................................. 153.1 What Do I Need to Configure? .........153.2 Configuration....................................173.2.1 Built-in Clock.....................................173.2.1.1 Activating Your Mobile GPS Position..... 173.2.1.2 Setting Manually in the Menu................. 173.2.2 My Callsign .......................................183.2.3 Beacon Type ....................................183.2.4 Data Band.........................................193.2.5 Packet Speed ...................................193.2.6 Position.............................................193.2.6.1 Using Internal GPS ................................ 193.2.6.2 Using GPS Receivers ............................ 193.2.6.3 Manually Entering Your Position............ 203.2.7 Position Comment ............................203.2.8 Status Text .......................................213.2.9 APRS Icon ........................................213.2.10 Method of Beacon Transmission ......213.2.11 Packet Path ......................................223.2.12 Sound ...............................................223.2.13 Battery Saver....................................223.2.14 APRS Operating Frequency .............233.2.15 Placing a Transceiver in APRSmode.................................................233.2.16 Transmitting a Beacon......................234 GPS ................................................ 244.1 What is GPS?...................................244.1.1 Position Determination Principle.......244.1.2 Datum (Geodetic Survey System)..... 254.1.2.1 GPS and APRS Position Format............ 254.2 GPS Receivers.................................264.2.1 Garmin GPS18xPC ..........................264.2.2 AvMap G5.........................................264.2.3 Other GPS Receivers .......................264.2.4 Settings for Geodetic SurveySystem..............................................274.3 Internal GPS .................................... 274.3.1 GPS Satellite Information Display.....274.3.2 Automatic Adjustment of theBuilt-in Clock.....................................284.3.3 North Up and Heading Up ................284.3.4 NMEA Sentence Output ...................304.3.5 Internal GPS Unit Save.....................314.3.6 Battery Operating Time during theConcurrent Use of the Internal GPSUnit ...................................................314.3.7 GPS Only Mode................................324.3.8 Log Function.....................................324.3.9 Mark Waypoint..................................354.3.10 Target Point ......................................354.3.11 SBAS ................................................365 APRS SOFTWARE FOR YOURPC ...................................................375.1 UI-View32 ........................................ 375.1.1 Introduction of UI-View .....................375.1.2 Connecting a PC...............................385.1.3 How to Configure UI-View32 ............385.2 Available Software associated withAPRS ............................................... 406 OPERATIONAL EXAMPLES OFAPRS ..............................................416.1 Let’s Go Mobile ................................ 416.1.1 Overview...........................................416.1.1.1 Automatic Reply Function ...................... 416.1.1.2 Entering Characters ............................... 426.1.2 Decay Algorithm Function.................426.1.3 Proportional Pathing Function ..........426.1.4 Simultaneously using DecayAlgorithm and Proportional Pathing.... 436.1.5 SmartBeaconing(Written by Steve Bragg,KA9MVA)..........................................436.1.5.1 Variable Rate Beaconing(Transmission Interval Changes withSpeed).................................................... 436.1.5.2 Corner Pegging(Transmission after HeadingChange) ................................................. 446.1.5.3 Operation Example ................................ 466.1.6 QSY Function ...................................476.1.6.1 Transmitting QSY Information................ 476.1.6.2 Receiving QSY Information.................... 496.1.6.3 QSY Functions and EchoLink ................ 496.1.7 Message Function ............................496.1.7.1 Automatic Reply Function ...................... 496.1.7.2 TX Beep (Beacon).................................. 50<strong>TH</strong>-<strong>D72A</strong>/EIFrom The <strong>N3UJJ</strong>.COM Document Library
CONTENTS6.1.8 APRS Lock ...................................... 506.2 Base Station (Weather Station)........516.2.1 Using Meteorological Equipment ..... 516.2.1.1 Davis Instruments Corp. Inc. ..................516.2.1.2 Peet Bros. Company...............................527 APRS NETWORKS ........................537.1 APRS Servers ..................................537.2 IGate.................................................537.3 Let’s Send Email ..............................557.3.1 Sending Email with <strong>TH</strong>-<strong>D72A</strong>/E....... 557.4 Digipeaters (Digital Repeaters) ........577.4.1 UIDIGI.............................................. 577.4.2 UIFLOOD......................................... 587.4.3 UITRACE ......................................... 587.4.4 Configuration Examples (USA)........ 597.4.5 Proper Configuration(written by Bob Bruninga,WB4APR) ........................................ 607.5 Packet Path ......................................627.5.1 New-N Paradigm ............................. 627.5.2 RELAY Paradigm............................. 627.5.3 STATE/ SECTION/ REGION ........... 638.5.3 Changing the Font Sizes ................. 748.5.4 Setting your Callsign........................ 748.5.5 Exporting .hmk Files ........................ 748.5.6 Configuring RSS .............................. 748.5.7 Changing the Power-on BitmapImage............................................... 758.5.8 Configuring the Character String forthe Power-on Password................... 759 HOW TO UPDATE FIRMWARE ...... 769.1 Firmware .......................................... 769.2 Verifying Necessary Equipment....... 769.3 How to Verify Firmware Version....... 779.3.1 Checking with the Transceiver......... 779.3.2 Checking with MCP-4A.................... 779.4 How to Get LatestFirmware/Software........................... 789.5 How to Update ................................. 7810 MISCELLANEOUS TOPICS .......... 7910.1 AvMap (Don Arnold, W6GPS).......... 798 MCP-4A MEMORY CONTROLPROGRAM (FOR USE WI<strong>TH</strong><strong>TH</strong>-<strong>D72A</strong>/E).....................................6411 APPENDIX ..................................... 818.1 Downloading and InstallingMCP-4A............................................658.2 Main Functions of MCP-4A ..............688.2.1 Useful Functions of MCP-4A ........... 688.2.2 Functions Only Configurable byMCP-4A ........................................... 688.3 Reading a File ..................................698.3.1 Reading a File Created withMCP-4A ........................................... 698.3.2 Importing Other MCP Files intoMCP-4A ........................................... 698.4 Reading GPS Log Data....................708.4.1 Reading GPS Log Data from<strong>TH</strong>-<strong>D72A</strong>/E ...................................... 708.4.2 Managing the Read GPS LogData ................................................. 718.4.3 Converting to KML or GPX FileFormat ............................................. 728.5 Introduction to Main Functions .........738.5.1 Simple Operation ............................. 738.5.2 Graphical Display ofSmartBeaconing .............................. 73II<strong>TH</strong>-<strong>D72A</strong>/EFrom The <strong>N3UJJ</strong>.COM Document Library
PROLOGUEAmateurs Building the New Global Communications NetworkHams have enjoyed using FM transceivers for years for SSTV, ATV, packet, satellite, EME, GPS andother communications modes. A fundamental reason for this has been that FM transceivers are easyto use. Recently, personal computers and the Internet have combined to offer globalcommunications opportunities. Yet, with their long history of communicating using various methods,nobody is better prepared than hams to embrace and take advantage of these new communicationstechniques to create an even more interesting new global network.No longer are users of FM transceivers bound by line-of-sight distances and local same-citycoverage. The Internet now shrinks the vast distances to other operators who were once out ofreach by using only an FM transceiver. Every ham now meets, experiments and interacts worldwidevia voice and data communications using low-power FM transceivers.These networks built by individual hams connecting through gateways into the Internet are allowingothers to share the experience that this infrastructure offers. Furthermore, the networks are growingin size day-by-day. Hams are using basic FM transceivers to communicate on a direct one-on-onebasis with operators across the globe. Besides hobby applications, such a communications networkalso has tremendous capability to deliver a powerful tool to serve the general public in times ofemergencies.Kenwood’s Approaches for development of APRSThe <strong>TH</strong>-<strong>D72A</strong>/E, the successor of <strong>TH</strong>-D7A/E, incorporates APRS (Automatic Packet ReportingSystem) functions. Kenwood has a long history in developing APRS: we have combined radio andGPS technology and developed APRS products over the years.At our first meeting with the father of APRS, Mr. Bob Bruninga, 15 years ago, our history of APRSdevelopment products began. In 1996, the TM-V7A/E became popular for use with APRS becausethe transceiver has been capable of the data communications using a separate band which is apartfrom voice communications. But the Internet, personal computers, GPS and electronic mappingtechnologies were all in their infancies compared to now and along with the change of theenvironment over the years, our transceivers have always been on the way to be evolved.<strong>TH</strong>-D7A/E and TM-D700A/E, marketed as APRS transceivers, had a great deal to do with APRS’sexpansion all over the world. In addition to APRS, with TM-D710A/E launched in 2007, it is possibleto use EchoLink over VoIP and this means you can plot stations from the other side of the planet on amap while sending mail and communicating with them by voice.Kenwood continues to be committed to exploring the possibilities of APRS to add more usefulfeatures.<strong>TH</strong>-<strong>D72A</strong>/E CONTENTS IFrom The <strong>N3UJJ</strong>.COM Document Library
New Technology Expands Amateur Radio VersatilityUse of HF transceiver to call CQ and contact to hams around the world via ionosphere will never loseits appeal. But there is elegance in being able to communicate with only an FM transceiver and byadopting the latest technology.The global network consisting of thousands or even millions of stations will only get more interestingas it evolves with new ideas as a result of those like you becoming involved. Isn’t it exciting just tothink about? Everywhere even in such other country, there are hams all over waiting to be contacted!Once you begin sending a radio signal, you can communicate with a myriad of other radio amateursvia the network.Besides, this global network evolves further as each of us adds our ideas.In APRS, information on local events and weather conditions are distributed and even amateursatellites orbiting around the earth also transmit positional data. Also, in APRS, not only can youknow where your acquaintance is currently located on the earth, but you can even send them anAPRS message from your radio or PC. You can send email directly to them or take advantage ofEchoLink node numbers to make direct voice contact.Combining the different technologies adds to and enhances your communications versatility andmakes you a part of the communicating world.Kenwood <strong>TH</strong>-<strong>D72A</strong>/E Transceivers Development TeamII CONTENTS <strong>TH</strong>-<strong>D72A</strong>/EFrom The <strong>N3UJJ</strong>.COM Document Library
1 DEVELOPMENT CONCEPTFollowing is the designing and development concept for <strong>TH</strong>-<strong>D72A</strong>/E.• A genuine tool for communications via voice and data that is based on the <strong>TH</strong>-D7A/E.• An out-of-the-box transceiver with an internal GPS unit (turn-key solution)• Equipped with a USB interface• Emphasis on ease of operation (with multifunction keys; keys may not be minimized.)• Full-size dot matrix LCD display that enhances visibility for the user• User-updateable firmware• Large-capacity lithium ion battery• Compatibility with APRS inherited from the TM-D710A/EIn order to understand customer requirements, we did surveys at various ham shows, such as theDayton Hamvention, ARRL and TAPR Digital Communications Conference (DCC), JARL Ham Fair(Japan), Ham Radio in Friedrichshafen (Germany), etc.The many ideas gathered coalesced into the above development concept as the Product Planningstaff and Development staff virtually merged during the conception phase to come up with thepresent development program.1.1 GPS UnitWhen we developed <strong>TH</strong>-D7A/E series in 1997, it was difficult to incorporate an internal GPS unit in ahandheld transceiver. This was because, at that time, the GPS antenna and receive module weretoo large. The advancement of technology has enabled the miniaturization of these components andtoday they are mounted in a wide array of a mobile device such as a cellular phone, a GPS loggerand a digital camera, and is almost taken for granted.If an external GPS unit was required for a successor to <strong>TH</strong>-D7A/E, i.e. a handheld transceiver, itwould have been very cumbersome for a user to carry around more than one device as well asmultiple batteries and cables connecting them. Therefore, we started the development of the<strong>TH</strong>-<strong>D72A</strong>/E with the concept of an out-of-the-box product that delivers higher user convenience andwith the basic premise of incorporating an internal GPS unit.The internal GPS unit consists of a GPS receive module and a GPS antenna. After repeateddiscussions, to ensure enough GPS receive sensitivity and reliability, we have finally adopted a GPSunit that integrates a receive module using a SiRFstar III chipset, which is highly accepted in themarket, and a microstrip patch antenna. Also, we have separated the transceiver circuit and the GPSunit with an aluminum die cast frame to prevent mutual interference.During the development, we have conducted endless sessions of testing and experiment to comparethe performance of the product in actual operational applications such as ease of transportation andof mobile operation with competing products or GPS receivers on the market. Consequently, the newtransceiver ensures good positioning performance and satisfactory operation.Although <strong>TH</strong>-<strong>D72A</strong>/E comes with an internal GPS unit, your GPS receiver can be connected asbefore.<strong>TH</strong>-<strong>D72A</strong>/E CONTENTS 1From The <strong>N3UJJ</strong>.COM Document Library
1 DEVELOPMENT CONCEPT1.2 Evolving DevelopmentNext, we turned our sights to applied functions of GPS.Incorporating an internal GPS unit to support the collected positional information in APRSapplications is our minimum standard, and it is also very important to provide customers with appliedfunctions to enhance the convenience of the product.Following are some examples of applied functions available with the internal GPS unit.• GPS Logger Function:It features the GPS logger function to log the tracking data. The maximum of 5,000 points seemrather modest compared with a full-fledged GPS logger, but the GPS logger function on the<strong>TH</strong>-<strong>D72A</strong>/E allows setting of the interval of records in the log according to the usage environmentand therefore is very useful. A user can choose from (1) the programmed interval duration, (2) theprogrammed travel distance and (3) the timing of transmitting an APRS beacon.The recorded movement trajectory data (log) can be exported to a PC with the MCP-4A,dedicated memory control program for <strong>TH</strong>-<strong>D72A</strong>/E, installed and be saved in several file formatsincluding KML that is compatible with Google Earth.• GPS Only mode:A new mode is now added that disables all the features of the transceiver and allows only the GPSlogger to function. If you intend to only record the movement trajectory, using the mode results ina substantial reduction in battery power consumption.• Mark Waypoint and Target Point functions:While you are on a trip, a maximum of 100 points that you want to store can be stored. Therecorded points can be used as a destination (a Target Point) for navigating while verifying thedistance and azimuth until the destination.• Time adjustment function:The current time data received from a GPS satellite can be used to manually or automatically setthe clock built in the transceiver.• Display of GPS satellite information:This is a familiar function of a typical GPS receiver. The location and signal strength of eachsatellite can be viewed on the LCD screen.2 CONTENTS <strong>TH</strong>-<strong>D72A</strong>/EFrom The <strong>N3UJJ</strong>.COM Document Library
1 DEVELOPMENT CONCEPT1.3 Other New FunctionsIn addition to the functions related to the internal GPS unit, the transceiver has more new features.Following are some major functions worth to be presented.• USB interface:RS-232C has been the most common interface to connect a transceiver and a PC; however, inrecent years only few PCs are equipped with an RS-232C connector. <strong>TH</strong>-<strong>D72A</strong>/E is equipped witha Mini-B USB connector. The USB connector allows you to directly connect to a computer byusing the supplied USB cable.• Connecting weather stations:The weather stations from Peet Bros. Company, Incorporated and Davis Instruments Corporationcan be connected. The acquired weather information can be displayed on the screen ortransmitted in APRS format.• Digipeaters (Digital Repeaters):Packet signals can be relayed. The transceiver can serve as a temporary relay station when youare on a trip or on other occasions. <strong>TH</strong>-D72 is the first handheld transceiver that has this function.• APRS LOCK:This is a function to lock the settings of the data band during the operation of APRS to prevent thetransceiver configuration from being changed accidentally. For example, locking the frequency ofthe data band, locking the [PTT] switch, and locking the TNC so that it could not be disabledwithout realizing it, are all possible as a user prefers.• Cross tone:Any combination with Tone, CTCSS or DCS can be used. For example, you can use DCS fortransmission and CTCSS for reception.• Automatic cursor advancement:While entering characters of a menu name or an APRS message with the numerical keypad, uponelapse of a specified period of time after one character is entered, the cursor automatically movesto the next digit. For example, assume you need to enter “AB” (both “A” and “B” must be enteredwith the same [2] key). Upon lapse of a programmed duration of time (e.g. 1 second) after youenter “A”, the cursor moves to the next digit automatically, and you don’t have to advance itmanually so as to simplify and enhance the key operation.• Adjusting wait times:Lengths of wait times that were fixed on the previous models now can be adjusted by a user. Forexample, you can set the illumination timer, the delay time until resuming Time-Operated Scan orCarrier-Operated Scan after a pause and the duration of an interrupted display upon receipt ofAPRS data.• Weather channel scan (USA/Canada only)A total of 10 weather channels can be scanned. It is possible to search for adjacent weatherchannels with the strongest signal. Also, the scan can automatically be done with a programmedinterval and it is most effective during the operation by a mobile or portable station.In addition to the above, the <strong>TH</strong>-<strong>D72A</strong>/E has more applied functions, and we hope your actual use ofthe transceiver presents excellence!<strong>TH</strong>-<strong>D72A</strong>/E CONTENTS 3From The <strong>N3UJJ</strong>.COM Document Library
2 HOW YOU ENJOY APRS WI<strong>TH</strong> <strong>TH</strong>-<strong>D72A</strong>/E(WRITTEN BY BOB BRUNINGA, WB4APR)APRS OverviewThe <strong>TH</strong>-<strong>D72A</strong>/E APRS Handy Transceiver brings so many new capabilities and enhancements to theportable and mobile operator, that it is hard to fully grasp the power that this brings to APRS. Besidesthe built-in GPS, and significant enhancement of the capabilities and depth and breadth of APRS, thenew radio continues the evolution of the fundamental principles of APRS as a common informationresource channel for facilitating human-to-human communication on Amateur Radio. To see howthis fits in, it is first necessary to understand the history of APRS and packet radio.Packet Radio HistoryThe roots of the Automatic Packet Reporting System (APRS) go back to the late 1970s as theAMRAD (Amateur Radio Research and Development) Group was excitedly beginning to experimentwith AX.25 packet radio. This was before the Internet and as we spent our free time in our shacks,we were in fact all socially networked by the AMRAD voice repeater. All evening and weekends,someone was working on something or developing something new and sharing the excitement withthe others. We hung onto our handy transceivers everywhere we went like kids these days hangonto their iPads and smartphones to keep up with the excitement.Figure 2-1 The History of APRS from VIC-20 to <strong>TH</strong>-<strong>D72A</strong>/ESince only RTTY was legal in the USA, we developed a RTTY chat channel to augment our repeatercommunications. We wanted a digital channel that worked just like a voice repeater. That is, anyonewho had info transmitted it, and everyone monitoring captured it. Advancing from RTTY, AMRADdeveloped the AX.25 spec and as soon as it was legal, we were on the air as a chat group using realtimeUnconnected (UI) packet messaging. For this technical group, the only AMRAD operational eventwas communications support for the annual Old Dominion 100 mile endurance run. In the mid 1980s,the first vestige of APRS used Vic-20s and packet radio to share information on the hundreds ofrunners and horses across the hundreds or so square miles over the 24-hour event. There was nosuch thing as GPS. The system consisted of simply a packet channel where each checkpointbeaconed information and objects about arrivals and then transferred object responsibility as it wastaken over by the next checkpoint. At any instant, everyone could see on their screens, a list of theobjects reported at each station and their status. New information was beaconed at a high rate forimmediate delivery but decayed rapidly to reduce channel loading so that fresh information had prioritywith minimum collisions.4 CONTENTS <strong>TH</strong>-<strong>D72A</strong>/EFrom The <strong>N3UJJ</strong>.COM Document Library
2 HOW YOU ENJOY APRS WI<strong>TH</strong> <strong>TH</strong>-<strong>D72A</strong>/E (WRITTEN BY BOB BRUNINGA, WB4APR)Packet Network GrowthBeginning in 1983, we added VHF, HF and a phone line to the Vic-20 as well as a BBS messagestore and forward capability and began expanding to the Commodore 64. It was linked with othersystems on 145.01 and had the first dual-port HF link onto the 10.149 MHz HF packet frequency westill use today for APRS. It was an exciting time, but packet radio was being used more and more forconnected point-to-point traffic and then to BBS systems and the real-time connectivity betweenoperators was being lost. By that time, live beacons to announce real-time activity and to conductgroup chats by UI messaging was not only disappearing but were actually being outlawed on theshared BBS channels. Even UI digipeating was being disabled in all packet nodes to make sure thatno one beaconed or chatted on the BBS network and dozens of restricted/exclusive use packetfrequencies.But we still wanted that live operator-to-operator UI packet chat capability and we still needed atactical real-time local communications and information distribution channel for rapidly exchangingdigital data of immediate value to local operators and operations. In 1992, we abandoned theCommodore 64 and switched to the new IBM AT personal computer running at 4 MHz and changedthe name from the Connectionless Emergency Traffic System (CETS) to Automatic Packet ReportingSystem (APRS) since it matched my call so nicely.APRS in 1990sI formally presented APRS at the TAPR/ARRL Digital Conference in 1992. APRS really took off asthe cost of GPS got below $500 each and I manually digitized the entire U.S.A. and some othercountries using coordinates measured from paper maps. It was during these times that the “P” wastemporarily called “Position” to highlight this new capability. Unfortunately, this was a mistake. Overthe next decade as GPS became readily available, too many hams only saw the position maps ofAPRS and not the broad communication applications for human-to-human tactical ham radioinformation exchange in real time. Too many operators bought transmit-only GPS trackers andfurther ignored the real-time human communications element. Many follow-on software clientsfocused on maps with little attention to the underlying network protocol and human-to-humanconnectivity.<strong>TH</strong>-<strong>D72A</strong>/E CONTENTS 5From The <strong>N3UJJ</strong>.COM Document Library
2 HOW YOU ENJOY APRS WI<strong>TH</strong> <strong>TH</strong>-<strong>D72A</strong>/E (WRITTEN BY BOB BRUNINGA, WB4APR)APRS-ISIn 1997, K4HG and the Mac/WinAPRS Sproul brothers tied APRS to the Internet and the APRS-ISsystem as shown above was born. While this was a huge success that enabled instantaneous globalAPRS texting connectivity beyond our wildest dreams, it also further enhanced the map viewexperience of casual APRS viewers. Looking at an APRS map was colorful but it did not obviouslyconvey the human contact and connectivity inherent in the system. Also, it was impossible tocommunicate with all of the one-way trackers equipment and the value of two-way amateur radiocommunications was further being lost in favor of simple two-dimensional icons on maps. Furtherthese simple icons omitted the other 8 dimensions of color attributes that gave additional at-a-glancereal time information to viewers.See http://aprs.org/symbols.htmlAPRS Handheld and Mobile RadiosTo counteract this trend, we stopped using “Position” and went back to the original “Packet”nomenclature for APRS. Then in 1998, Kenwood gave a landmark boost to APRS in the field and tothis digital communications capability by introducing the fully integrated <strong>TH</strong>-D7A/E. Thus <strong>TH</strong>-D7A/Eput APRS in the palm of the hand of ham radio operators worldwide. Not only did it take GPS inputs,but it fully implemented the APRS messaging, bulletins and texting capabilities. Over the next 11years, this predecessor to the <strong>TH</strong>-<strong>D72A</strong>/E was the most popular Kenwood HT ever as APRS broughtnew life to packet radio. In parallel, Kenwood also introduced the fully integrated TM-D700A/Emobile APRS radio in 2000. These APRS front-panel-display radios now brought the full APRS localsituational awareness to the mobile operator as shown below. With these displays, the APRSinformation content delivery system was in place without any need for mobile PC’s or laptops.Further, the attached GPS provided the map display and the radio display provided all the otherinformation content.6 CONTENTS <strong>TH</strong>-<strong>D72A</strong>/EFrom The <strong>N3UJJ</strong>.COM Document Library
2 HOW YOU ENJOY APRS WI<strong>TH</strong> <strong>TH</strong>-<strong>D72A</strong>/E (WRITTEN BY BOB BRUNINGA, WB4APR)TextingBut still most non APRS ham radio operators just did not find any advantages beyond the maps. Myfrustration with the growing lack of live human content in APRS continued to fester to the breakingpoint at a 2006 ARRL Special Meeting at Dayton on the lack of youth in ham radio. The gatheredfathers of ARRL lamented: “Ham radio was missing the youth. They were “too busy texting on theircell phones” and ham radio had nothing similar to offer”. I was incensed. Ham radio had hadwireless hand-held texting and email for nearly a decade in the form of the handheld Kenwood APRS<strong>TH</strong>-D7A/E and yet even the amateur radio leadership was not aware and had never tried it. This wasfrustrating. The reason was because while the hams were shunning real-time APRS digital textcommunications, the kids of the world were just getting going with texting and then Twitter on everyconceivable handheld device. Yet the entrenched amateur radio old timers could not see any valueto APRS texting and emailing on a keypad.As mentioned in the above illustration, there are more than 26 different text systems available.I counted over 26 different texting systems in ham radio as suggested in the image above.Fortunately, today just about every smartphone and handheld has an application for APRS messagecompatibility. Our goal in APRS is to seamlessly integrate these disjointed systems so that amessage-to-callsign from any device gets delivered to the callsign owner on any device that iscurrently turned on. Many of these systems are already connected by APRS and the APRS-Internetsystem (APRS-IS).Refer to: http://aprs.org/aprs-messaging.html<strong>TH</strong>-<strong>D72A</strong>/E CONTENTS 7From The <strong>N3UJJ</strong>.COM Document Library
2 HOW YOU ENJOY APRS WI<strong>TH</strong> <strong>TH</strong>-<strong>D72A</strong>/E (WRITTEN BY BOB BRUNINGA, WB4APR)Facebook on APRSPurely as an aside, you can think back to the Kenwood VC-H1 handheld SSTVdevice as an attempt (before its time) to add the visual aspect of socialnetworking to ham radio and APRS. This was a fantastic idea. And it was fullyintegrated into all Kenwood APRS radios at the time, adding real-time video toAPRS digital and texting connectivity. You could think of the combination asreal-time “Facebook” on APRS. Unfortunately it was ahead of its time and theVC-H1 handheld is no longer in production, but thousands of hams have themand still use them. These SSTV handhelds along with readily available freeSSTV software make a great visual adjunct to APRS. This was in the early2000 time frame before anyone had camera phones. Think of the potential.Snap an image, and send it into APRS where it was picked up by a web sitethat cataloged it by position, originator and a text description for viewing byanyone. This can be a tremendous asset for ham radio public service. Thereare a few such active links from APRS and SSTV to the web called theAutomatic Picture Relay Network, or APRN.Refer to: http://aprs.org/aprn.htmlAPRS Voice AlertThree things dramatically brought back human connectivity to APRS. The first factor was Voice Alert.The second was the addition of a Frequency field in all APRS position packets. And the third was theemergence of VOIP Internet/ham radio linked voice. Voice alert is like a 3 rd simultaneous radiochannel on the Kenwood APRS transceivers. It acts like an intercom channel for all APRS operatorsto be able to quickly raise another nearby APRS voice alert station by a simple direct voice call. Itrequired no new hardware or software. It simply consists of setting CTCSS 100 Hz on the APRSdata channel and keeping the speaker volume up. This way, all packet noise was completely muted,but the operator could still be called at any time with a CTCSS 100 Hz voice call. A secondarybenefit to this technique was a free proximity detector. If any other Voice Alert station got withinsimplex range (maybe 5 miles or less) his periodic packets would give an audible alert. These newfeatures of APRS Voice Alert as indicated in the APRS Mobile Information Exchange drawing abovefinally made it easy to keep the eyes on the road, but never miss the opportunity for human contactwith a fellow APRS operator on the open road. Voice Alert is now on the Function Menu in the<strong>TH</strong>-<strong>D72A</strong>/E.Frequency Data FieldAt the nearly same time (2004), the Frequency field was added to the position packet specification.This standardized the inclusion of a voice operating frequency in the APRS system. APRS wasnever intended as an end-in-itself, but as a tool to be applied to all aspects of ham radio and humancontact. Knowing other station’s voice contact frequency in many cases is even more important forestablishing communications than knowing position. Now every ham could announce his monitoringfrequency in his APRS packet and could call others on their indicated frequency. Kenwood was thefirst to leverage the value of this capability by releasing the TM-D710A/E in 2007. This radio (as wellas the new <strong>TH</strong>-<strong>D72A</strong>/E) not only automatically includes your voice band frequency in every positionpacket but can also then tune to someone else’s frequency by simply selecting “Tune” as shownbelow.8 CONTENTS <strong>TH</strong>-<strong>D72A</strong>/EFrom The <strong>N3UJJ</strong>.COM Document Library
2 HOW YOU ENJOY APRS WI<strong>TH</strong> <strong>TH</strong>-<strong>D72A</strong>/E (WRITTEN BY BOB BRUNINGA, WB4APR)These views show the screens for a station with frequency included in his position packet. This is the11th station in the list and it is beaconing its operating frequency as well as a short note tellingeveryone he is also listening on Voice Alert in simplex range. The “MENU” button on this display willbring up a number of additional actions. One is the TUNE function shown in the middle displayabove. When TUNE is selected, then the radio automatically tunes to the second band frequency asshown in the 3 rd display.Voice Repeaters and Club InfoBesides alerting others to the voice monitoring frequency of other APRS operators, the addition ofthe Frequency field to APRS opened up a whole new application of local information for the mobileoperator. Now everywhere the APRS operator travels, he can be alerted to the recommendedtravelers voice repeater in any area he was passing through. This is accomplished by not onlyhaving every digipeater beacon its position and availability, but also by beaconing this local frequencyobject. These frequency objects show up in the station list of all mobile operators in range as shownbelow in the TM-D710A/E and <strong>TH</strong>-<strong>D72A</strong>/E front panels:On the TM-D710A/E station list as above, not only are the two stations of AB9FX nearby, but also hiscurrent VOICE operating frequency is visible. Also, we can see that this radio is in OPERATINGrange of three voice repeaters that are also identifying themselves as objects on APRS as the locallyrecommended voice operating channels. The <strong>TH</strong>-<strong>D72A</strong>/E on the right has two ham calls, two tacticalcalls and one repeater object. It is easy to find these nearby frequencies in the huge station list byfirst doing a SORT. This brings all the numeric objects (in this case, frequencies) to the top of the list.But there is more!The standard for these frequency objects also includes Tone, Shift, and bandwidth for instant tuning.In addition, they include the weekly on-air voice net times as well as the monthly club meeting datesas shown below:<strong>TH</strong>-<strong>D72A</strong>/E CONTENTS 9From The <strong>N3UJJ</strong>.COM Document Library
2 HOW YOU ENJOY APRS WI<strong>TH</strong> <strong>TH</strong>-<strong>D72A</strong>/E (WRITTEN BY BOB BRUNINGA, WB4APR)Although the information appears a bit cryptic, the fact that all voice repeater objects use this samestandard format makes it easy for the operator to understand the meaning. In this case, the localrecommended voice repeater in this area is the 147.105 (Maryland) repeater with a Tone of 107.2 Hz.The range is 25 miles and the weekly net time is Tuesday evenings at 8 p.m. The final 8 characters(for backwards compatibility to TM-D700A/E) announce that the club meetings are on the 3 rdThursday of every month. Again, a press of the “MENU” button and then selecting TUNE willinstantly take the radio to this channel. For full details on this function, refer to the following website:http://aprs.org/localinfo.html10 CONTENTS <strong>TH</strong>-<strong>D72A</strong>/EFrom The <strong>N3UJJ</strong>.COM Document Library
2 HOW YOU ENJOY APRS WI<strong>TH</strong> <strong>TH</strong>-<strong>D72A</strong>/E (WRITTEN BY BOB BRUNINGA, WB4APR)HamfestsAnother very typical object that everyone loves to see is the HAMFEST object. This bright red APRSsymbol stands out smartly on any APRS display including the AvMap GPS display as shown above.At first glance, this object tells you the most important information: Where it is, and when. TheHFEST-DDn standardized object name includes the DATE in the DD digits. Only the day is shown(here it is on the 26th), but this allows for 2 weeks notice to everyone in the area and anyone drivingthrough. The final character “n” is chosen to make the symbol unique in the global APRS system.This makes for easy sorting of these objects. Simply go to http://aprs.fi/hfest* and see a list of allactive hamfests the world over!. The talk-in frequency is also listed for instant QSY with the<strong>TH</strong>-<strong>D72A</strong>/E TUNE function. I was on a cross-country trip one day on a weekend and just happenedto see one of these objects and was able to detour and spend an hour or two at this favorite hamradio pastime.To see how to beacon your local hamfest, refer to the following website: http://aprs.org/hamfest.htmlVoice over Internet Protocol (VoIP)Recognizing the huge potential for linking local ham radio over Internet, an added goal of APRSsince 2001 has been to facilitate the use of IRLP, EchoLink, and other VoIP systems. Just like theFrequency Objects, all ham radio VoIP systems are encouraged to announce their presence onAPRS. Within 10 minutes the node number, frequency, tone and other info are available to all APRSoperators on their radios as shown above. Again, a simple press of the TUNE function will QSY theradio for instant operation. The long-term goal of this VoIP and Frequency capability has been toenable APRS to be used for setting up end-to-end global voice contacts. Simply entering a callsignin a contact-request message will cause the APRS Internet system to handshake with the VoIPsystems to set up the call and send the necessary QSY messages and frequency information for theradio to instantly tune and complete the call. Think of it as a cellular system for ham radio where youdial by callsign instead of phone number. Both TM-D710A/E and <strong>TH</strong>-<strong>D72A</strong>/E were designed to beevolved with this capability!<strong>TH</strong>-<strong>D72A</strong>/E CONTENTS 11From The <strong>N3UJJ</strong>.COM Document Library
2 HOW YOU ENJOY APRS WI<strong>TH</strong> <strong>TH</strong>-<strong>D72A</strong>/E (WRITTEN BY BOB BRUNINGA, WB4APR)Digipeater Path InformationAnother new information feature of <strong>TH</strong>-<strong>D72A</strong>/E isthe digipeater path display shown here. This displayshows the First and Last digipeaters used. MostAPRS areas encourage the use of only 2 hops orless. This means, in most cases, the full path isvisible. In this image the WB3V-6 packet was Firstheard by the N3KTX-1 digipeater and then it wasdelivered to my radio by the Last hop on the KV3B-2digipeater. This path knowledge is very valuable tothe operator in understanding his local areanetwork. This display is just one of the 9 pages ofadditional information available on each stationheard by <strong>TH</strong>-<strong>D72A</strong>/E and captured in the station list.APRS Radio Map CapabilitiesAll of the Kenwood APRS radios can display all stations in the Station list on any attached GPS mapdisplay if the GPS supports standard NMEA waypoints. These stations are shown with the GPS'snative generic waypoint symbol except for those that are compatible with the special Kenwoodinterface such as the AvMap G5/G6 which has the full APRS symbol set (shown below) and theGarmin nuvi 350 which requires the corresponding conversion cable supplied by Argent Data Systemand has about 50 different symbols. The nuvi 350 needs a GTRANS Kenwood to Garmin translatorcable available from http://argentdata.com. The AvMap is designed for 100% compatibility with thenearly 200 APRS symbols. The data cable manufactured by Argent translates the special Kenwooddata format into the 50 or so Garmin symbol set where possible.(Image of AvMap by Don Arnold, W6GPS and nuvi 350 by Mike Wren, N2QDK)Other APRS Information ResourcesThe information available to the mobile operator is unlimited. APRS is not an end in itself, but theinformation is not available if no one is transmitting it. The potential is still wide open for additionalcontent. This is not spam, but real immediate information of value to the mobile or traveler. Thereare many examples of data sources that have been implemented in some local areas.Traffic speeds at select choke points: refer to: http://aprs.org/traffic.htmlMF Mobile Satellites in view: refer to: http://aprs.org/satinfo.htmlUI-InfoKiosk local info database: refer to http://www.apritch.myby.co.uk/infokiosk.htm.12 CONTENTS <strong>TH</strong>-<strong>D72A</strong>/EFrom The <strong>N3UJJ</strong>.COM Document Library
2 HOW YOU ENJOY APRS WI<strong>TH</strong> <strong>TH</strong>-<strong>D72A</strong>/E (WRITTEN BY BOB BRUNINGA, WB4APR)Contribution by Kenwood to APRSKenwood has developed its series of radios, <strong>TH</strong>-D7A/E, TM-D700A/E, TM-D710A/E, and now thenew <strong>TH</strong>-<strong>D72A</strong>/E to best support the original objectives of APRS. The display of APRS information onthe front panel of these radios gives the mobile operator instantaneous access to all local informationbeing provided on the APRS channel about all surrounding ham radio activities.There are many APRS clients and programs that have been written that sometimes haveconcentrated too much on the display of maps and vehicle positions while leaving out much of theoriginal fundamentals of APRS and the efficiency of the APRS network The Kenwood radios avoidsuch an over-simplistic approach to APRS by implementing a rich and diverse function set. Thefunction set includes almost all of the original functions of APRS that are meant to reinforce theconcept of distributing local information. The Kenwood radios are not just Vehicle Tracking Systems,but are designed to be real-time information distribution systems for mobile operators with thesefeatures:• Position Entry<strong>TH</strong>-<strong>D72A</strong>/E with its built in GPS solves the hassle of external connections and setup and alwaysaccurately knows your position. For times indoors the radio has 5 position memories for prestoredfrequently-used positions.• Map Displays on attached GPSAlthough the radio has a built-in GPS, it still has the special waypoint output for putting all otherAPRS positions info on an attached external GPS. When connected to the AvMap G5 series andlater, these position objects will show as any of the nearly 200 special APRS symbols.• APRS Network FundamentalsKenwood fully implemented the more subtle aspects of the APRS fundamentals that assureoptimum network efficiency and channel sharing among all users. New <strong>TH</strong>-<strong>D72A</strong>/E supports thedecay algorithm, proportional pathing and SmartBeaconing. These techniques provide goodrefresh rates for new and local information while minimizing the network impact of old and distantdata.• ObjectsThe Kenwood transceivers fully appreciate the value of APRS objects and display themprominently. The object location is shown just like other stations either on the attached mapdisplay or on the front panel with distance and range. <strong>TH</strong>-<strong>D72A</strong>/E also includes filters for easysorting of these objects in the list. These objects are what give APRS the local information valueto local users.• Two-Way MessagingUnlike passive one-way tracking devices, the Kenwood radios provide the mobile user with fulltwo-way messaging and display. This real-time human-to-human communications is what makesAPRS so valuable in support of special events and emergencies.<strong>TH</strong>-<strong>D72A</strong>/E CONTENTS 13From The <strong>N3UJJ</strong>.COM Document Library
2 HOW YOU ENJOY APRS WI<strong>TH</strong> <strong>TH</strong>-<strong>D72A</strong>/E (WRITTEN BY BOB BRUNINGA, WB4APR)• Field Data EntryIn addition to making excellent field data display devices, the <strong>TH</strong>-<strong>D72A</strong>/E menus have also beendesigned for easy data, position and message entry. Often overlooked is the ability to use<strong>TH</strong>-D7A/E, TM-D700A/E, and TM-D710A/E as excellent field data entry and clipboard entrydevices at many field events.Refer to: http://aprs.org/aprsevent.html• Individual Information AccessThe Kenwood individual radio displays enhance the distribution of ham radio information to a largenumber of users by giving them individual front panel and keypad access to all of the online APRSdata. A common mistake of fixed operations with computers is the use of large display screens forlarge groups to see but which fails to recognize the individual needs of a given viewer. Theindividuality of APRS radios with individual displays spreads this data access throughout the usersin the field.• Overlay Characters on all SymbolsThe Kenwood <strong>TH</strong>-<strong>D72A</strong>/E has been expanded to show the overlay character of all symbols, notjust the original subset of special symbols. This provides hundreds of new symbol combinationsfor better APRS application to new uses.• DigipeatingNew <strong>TH</strong>-<strong>D72A</strong>/E is the first APRS HT to have a digipeater function. Each radio now has frontpanel access control to the digipeater function so that it can be turned on and off as needed tomatch the local situation. In addition, each <strong>TH</strong>-<strong>D72A</strong>/E can be used as a TEMPn-N digipeater insupport of emergency operations when a user is having difficulty accessing the existing WIDEn-Nnetwork. Refer to: http://aprs.org/TEMPn-N.html• Voice Operating FrequenciesThe most important new feature of the new <strong>TH</strong>-<strong>D72A</strong>/E is the recognition of the value of the voiceoperator frequency as a fundamental communications parameter. Not only does the radioautomatically include its own voice band frequency in every position packet, it also has specialdisplays and features that make this information readily available. For example, the station list canbe sorted to bring Frequency Objects to the top of the list in frequency order. Further, the radiocan tune to these frequencies for quick QSO with a single press of the TUNE menu.• EchoLink, IRLP or Winlink FrequenciesNew <strong>TH</strong>-<strong>D72A</strong>/E frequency TUNE function not only makes rapid QSY to another station operatoreasy, it also facilitates quick tuning to nearby EchoLink, IRLP or Winlink frequencies with the pushof a single button. Future use of this capability is anticipated to automatically and seamlesslyintegrate callsign to callsign calling from RF via local, national and global ham radio VoIP systems.Note: If all you think of when you hear the word APRS is maps and stagnant icons, then you are not using the full potential ofAPRS. If all of the local information that can be of immediate value to the APRS HT or mobile operator is not showing upin your local area, then get active and get involved in supplying this content. APRS is a communication tool, not just anautomated map. Use it. But in most cases, that means entering data, not just watching it. Kenwood has provided theAPRS handheld and mobile information display capability, it is up to us to provide content!14 CONTENTS <strong>TH</strong>-<strong>D72A</strong>/EFrom The <strong>N3UJJ</strong>.COM Document Library
3 PREPARATIONS FOR OPERATING APRS3.1 What Do I Need to Configure?Following need to be configured before start operating <strong>TH</strong>-<strong>D72A</strong>/E with APRS.Step 1:APRS data will be stamped with date and time. Therefore, the built-in clock must be set.Since the time acquired via the GPS receiver is UTC, Time Zone must be configured.Step 2:The station configured for My Callsign will be used as the originating station when APRS data is sent.You cannot send any APRS data from your station with the default value of NOCALL unchanged.Step 3:Select APRS (default) for data format for sending.Step 4:Set either of the bands on which the internal TNC handles APRS or data communications.Step 5:Adjust the packet speed to suit the APRS network.Step 6:Your station’s position is added to APRS data; therefore, you must configure your latitude andlongitude. You can get your own position also from GPS.Step 7:Built-in ClockSelect the template message (Position Comment) that is to be included in the position packet todescribe the current situation of your station.Step 8:My CallsignBeacon TypeYou can store up to five comments containing any desired text using a maximum of 42 alphanumericcharacters.Step 9:Data BandPacket SpeedConfigure your station icon.Step 10:PositionPosition CommentSelect a method to transmit the beacon.Step 11:Status TextAPRS IconSelect the packet path type.Step 12:Method of Beacon TransmissionPacket PathSoundSet to enable or disable the beep sound to be emitted when an APRS packet is received ortransmitted.<strong>TH</strong>-<strong>D72A</strong>/E CONTENTS 15From The <strong>N3UJJ</strong>.COM Document Library
3 PREPARATIONS FOR OPERATING APRSStep 13:Set the receiver shut-off period for the battery saver.Step 14:The operating frequency will depend on what region of the world you are operating. You can beginoperation using the frequency configured for the data band as follows:• North America: 144.390 MHz• Europe: 144.800 MHz• Australia: 145.175 MHz• New Zealand: 144.575 MHz• Argentina: 144.930 MHz• Brazil: 145.570 MHz• Japan: 144.640 MHz (9600 bps), 144.660 MHz (1200 bps)Step 15:Battery SaverPress the [TNC] key to place the transceiver in APRS mode so as to operate APRS.Step 16:FrequencySetting to APRS modeTransmitting beaconsSelect the [BCON] key to transmit the beacon using the method selected in the above-mentionedStep 10.16 CONTENTS <strong>TH</strong>-<strong>D72A</strong>/EFrom The <strong>N3UJJ</strong>.COM Document Library
3 PREPARATIONS FOR OPERATING APRS3.2 ConfigurationFollow the explanations below to configure each item listed in the previous section.3.2.1 Built-in Clock3.2.1.1 Activating Your Mobile GPS PositionTo enter the time in your local zone, select Menu 196 (Auxiliary-Time Zone).Example: Set to -05:00 for Atlanta.Figure 3-1 Menu 196 (Auxiliary – Time Zone)Press the [F] + [MARK] keys to enable the internal GPS unit.Once the internal GPS unit starts positioning (iGPS pictogram blinks), the built-in clock isautomatically configured with the time data from the internal GPS unit.Figure 3-2 Display of Time and Date3.2.1.2 Setting Manually in the MenuTo enter the value for the data, select Menu 194 (Auxiliary – Date).• K-type (USA and Canada): Set month, date, year in this order.• E-type (Europe): Set date, month, year in this order.Example:To configure the date to be May 20, 2011 (K-type), refer to Figure 3-3.Figure 3-3 Menu 194 (Auxiliary – Date)<strong>TH</strong>-<strong>D72A</strong>/E CONTENTS 17From The <strong>N3UJJ</strong>.COM Document Library
3 PREPARATIONS FOR OPERATING APRSSelect Menu 195 (Auxiliary-Time) and enter the value for the time.Example:To configure the time to be12:00, refer to Figure 3-4.Figure 3-4 Menu 195 (Auxiliary – Time)3.2.2 My CallsignTo enter your own callsign, select Menu 300 (APRS – Basic Set – My Callsign).Example:Enter a callsign such as W6DJY-7 to be registered. Refer to Figure 3-5.Figure 3-5 Menu 300 (Basic Set – My Callsign)3.2.3 Beacon TypeTo determine a beacon type, select Menu 301 (APRS - Basic Set - Beacon Type).Generally, beacons are transmitted in APRS format, so selecting APRS enables a transceiver totransmit beacons in APRS format.Figure 3-6 Menu 301 (Basic Set – Beacon Type)18 CONTENTS <strong>TH</strong>-<strong>D72A</strong>/EFrom The <strong>N3UJJ</strong>.COM Document Library
3 PREPARATIONS FOR OPERATING APRS3.2.4 Data BandTo configure the data band, select Menu 310 (APRS-Int.TNC-Data Band).Figure 3-7 Menu 310 (Int.TNC – Data Band)3.2.5 Packet SpeedTo configure the data speed, select Menu 311 (APRS-Int. TNC-Data Speed).Figure 3-8 Menu 311 (Int.TNC – Data Speed)3.2.6 Position3.2.6.1 Using Internal GPSPress the [F] + [MARK] keys to enable the internal GPS unit.Once the internal GPS unit starts positioning (iGPS pictogram blinks), the position data from the unitbecome available.Figure 3-9 APRS Operating Frequency3.2.6.2 Using GPS ReceiversTo use with an external GPS receiver, disable the internal GPS unit.To configure for a GPS terminal, select Menu 331 (APRS - COM Port).• Baud Rate: 4800 bps (select the same baud rate as that is configured for a GPS receiver.)• Input: GPS (enable the GPS receiver)• Output: OFF (if no WAYPOINT, DGPS are used.)<strong>TH</strong>-<strong>D72A</strong>/E CONTENTS 19From The <strong>N3UJJ</strong>.COM Document Library
3 PREPARATIONS FOR OPERATING APRSFigure 3-10 Menu 311 (COM Port – Input)3.2.6.3 Manually Entering Your PositionTo use the position configured in the menu, disable the internal GPS unit.To configure for a GPS terminal, select Menu 331 (APRS - COM Port).• Input: OffFigure 3-11 Menu 311 (COM Port – Input)To configure the position of your own station, select Menu 360 (APRS – My Position).• Name: any name (Enter a name familiar with you. For instance, Home name, etc.)• Latitude: Enter a latitude value.• Longitude: Enter a longitude value.Example:Configure a latitude of 39° 49.31' N and a longitude of 84° 15.39' W. Refer to Figure 3-12.Figure 3-12 Menu 360 (My Position)3.2.7 Position CommentTo enter a position comment, select Menu 380 (APRS - Comment - Position Comment).Figure 3-13 Menu 380 (Comment – Position Comment)20 CONTENTS <strong>TH</strong>-<strong>D72A</strong>/EFrom The <strong>N3UJJ</strong>.COM Document Library
3 PREPARATIONS FOR OPERATING APRS3.2.8 Status TextTo enter a position comment, select Menu 390 (APRS - StatusText).Select the text number. Pressing the [MHz] key displays [ ] as a mark representing the status text isin use.Figure 3-14 Menu 390 (StatusText – Number)Configure the frequency how frequently the status text is sent for transmitting the position packets.Configure the status text.Figure 3-15 Menu 390 (StatusText – TX Rate)Figure 3-16 Menu 390 (StatusText – Text)3.2.9 APRS IconTo determine an icon for your own station, select Menu 3C0 (APRS - Icon).Figure 3-17 Menu 3C0 (Icon)3.2.10 Method of Beacon TransmissionSelect Menu 3D0 (TX Beacon – Method) to configure the method to transmit the beacon. Manual is thedefault value. To transmit beacons automatically, set to “Auto” or “SmartBeaconing” in the menu.Figure 3-18 TX Beacon Method Menu<strong>TH</strong>-<strong>D72A</strong>/E CONTENTS 21From The <strong>N3UJJ</strong>.COM Document Library
3 PREPARATIONS FOR OPERATING APRS3.2.11 Packet PathTo configure the packetpath, select Menu 3H0 (APRS - PacketPath).Configure the packet path type.Set WIDE1-1.Figure 3-19 Menu 3H0 (PacketPath – Type)Figure 3-20 Menu 3H1 (PacketPath – WIDE1-1)Set the number of packet hops.Figure 3-21 Menu 3H2 (PacketPath – Total)3.2.12 SoundTo configure the sound level, select Menu 3T0 (APRS – Sound).Figure 3-22 Menu 3T0 (Sound – RX Beep)3.2.13 Battery SaverTo enable or disable the battery saver, select Menu 110 (Radio - Battery - Batt.Saver).Figure 3-23 Menu 110 (Battery – Batt.Saver)22 CONTENTS <strong>TH</strong>-<strong>D72A</strong>/EFrom The <strong>N3UJJ</strong>.COM Document Library
3 PREPARATIONS FOR OPERATING APRS3.2.14 APRS Operating FrequencyExample:144.390 MHz, the APRS operation frequency is configured for operation frequency for the data band.Figure 3-24 Frequency3.2.15 Placing a Transceiver in APRS modePress the [TNC] key to place a transceiver in APRS mode.After the message “Opening TNC” appears for three seconds, “APRS” appears and the APRS datacommunication capability becomes active. (Data communications take place on the data band.)3.2.16 Transmitting a BeaconPress the [BCON] key to transmit a beacon.The beacon is transmitted according to the method selected in Menu 3D0 (TX Beacon – Method).<strong>TH</strong>-<strong>D72A</strong>/E CONTENTS 23From The <strong>N3UJJ</strong>.COM Document Library
4 GPS4.1 What is GPS?GPS, standing for Global Positioning System, is becoming common nowadays and following is a briefintroduction.The American Defense Department developed GPS originally for military operations. The system isavailable for use by the general public. For example, anybody can use GPS in association withmodern vehicle navigation systems. Position precision for public use is 15 m or 50 feet. Moreover,precision can be improved when used for vehicle navigation and aboard ships through use of mapmatching technology and differential GPS techniques.A total of 24 or more GPS satellites are at a high-level altitude of approximately 20,000 km or 12,500miles on six circular tracks with orbital radii of approximately 26,000 km or 16,200 miles. Therefore,there are four or more satellites located in each orbital track. GPS typically operates at the frequencyof 1575.42 MHz with the bandwidth of 2.046 MHz. Because multiple GPS satellites transmit signalsat the same frequency, spread-spectrum (SS) modulation is used. Due care must be taken wheninstalling amateur radio equipment and antennas for use on the 430 MHz or 1200 MHz bands toprevent from interfering with GPS signals.Figure 4-1 GPS IIR Satellite in Orbit4.1.1 Position Determination PrincipleThe GPS receiver receives the radio signals transmitted from the GPS satellites and measures thetime duration between when the signal leaves the satellite and when the signal arrives at the GPSreceiver. The receiver measures the time duration between when the signal leaves the satellite andwhen the signal arrives at the GPS receiver. Knowing this time allows calculation of the distance thatthe signal traveled from that particular satellite. By receiving multiple signals from different satellitesand doing this distance calculation multiple times, the intersection of the spherical surfaces thatrepresent the respective radius distances to the various satellites will determine a single point. Theprecision of the determination of the intersecting point relies on the satellites and the data collected.24 CONTENTS <strong>TH</strong>-<strong>D72A</strong>/EFrom The <strong>N3UJJ</strong>.COM Document Library
4 GPS4.1.2 Datum (Geodetic Survey System)The latitude and longitude information required by the GPS receiver does not allow for accuraterepresentation of the unevenness of the Earth’s surface. For use with GPS, the current standard thatdefines the precise shape of the Earth is called WGS-84. By using this standard in conjunction withmapping standards for each country, accurate position plotting on a map can be done.4.1.2.1 GPS and APRS Position FormatAlthough position can be described in many different formats, such as degrees, degrees andminutes, and degrees, minutes and seconds, the GPS system and APRS have standardized on thedegrees and decimal minutes format. Just like it is important to use proper international phoneticswhen spelling on the air, it is important in APRS as in any communications system to have a defaultstandard for position. All operators should be trained to use the DDD MM.mm format by default invoice communications just like in the data formats. Using these standards on the air will preventcommunications errors, confusion, repeats, and conversions.APRS Standard:GeographicCoordinatesLatitudeLongitudeFormatDD MM.mm(degrees and minutes)DDD MM.mm(degrees and minutes)39 49.31N+39 49.31Example84 15.39W-84 15.39<strong>TH</strong>-<strong>D72A</strong>/E CONTENTS 25From The <strong>N3UJJ</strong>.COM Document Library
4 GPS4.2 GPS ReceiversWeather StationExternal GPS receiverCOM terminalLine filterFigure 4-2 Connection Example of GPS Receiver4.2.1 Garmin GPS18xPCThe GPS18xPC is a GPS module receiver. And it interfaces via a 9-pin D-Sub RS-232C serial port.Refer to the wiring example using commonly-available DB-9 connector (male), and a cable with3-conductor plug (Kenwood service part: E30-3400-15). Power is sourced from the 12VDC suppliedfrom a vehicle cigarette lighter socket. Because there is no screen, you cannot use the Waypointfunction.RXDTXDGND5 3 2White(to DATA IN onGPS/ WS)Red(to DATA OUT onGPS/ WS)Shield(to GND onGPS/ WS)(solder side)DB-9 connector (Male)Attach the line filter to the cable.(Kenwood service part: L79-1417-05)Figure 4-3 Cable Connection Example (Garmin GPS18xPC)4.2.2 AvMap G5The AvMap G5 comes with a Kenwood-ready cable and exclusive APRS interface built right into thepanel. You can watch APRS activity on the AvMap G5 screen without having a PC. It also can beconfigured to navigate to your favorite APRS station.4.2.3 Other GPS ReceiversThe GPS receiver used must be based on NMEA 0183 format (http://www.nmea.org).The following RS-232C signal levels are allowed for using the <strong>TH</strong>-<strong>D72A</strong>/E:• Low level: - 15 V to 0.5 V• High level: +3.0 V to +15 VYou cannot use a GPS receiver with a USB connector.26 CONTENTS <strong>TH</strong>-<strong>D72A</strong>/EFrom The <strong>N3UJJ</strong>.COM Document Library
4 GPS4.2.4 Settings for Geodetic Survey SystemFor APRS, always configure the WGS-84 Geodetic Survey System for your GPS receiver.4.3 Internal GPSThe GPS unit is mounted on the upper surface of the body. The GPS unit incorporates SiRFstar IIIchipset that is highly accepted in the market.Figure 4-4 Internal GPS Unit4.3.1 GPS Satellite Information DisplayDuring the GPS positioning, you can check the current status on the GPS satellite informationdisplay.The GPS satellite information display provides real-time data of the sky view, satellites’ signalstrength and status of the positioning. The display also helps you to get better reception by changingthe direction of the GPS antenna or making any other adjustments.1 Sky ViewThe positions of the satellites indicated by the satellite numbers are plotted on the satellite locationchart. The satellite location chart shows the azimuth and elevation of the satellites. The outercircle expresses the 360° of the azimuth. The sign of “N” at the top indicates North, the rightcorresponds to East, the bottom to South and the left to West accordingly. The elevation isrepresented by the proximity to the center; the outer circle shows 0° (horizontal position) and thecenter indicates 90° (zenith). Observing the satellites’ positions, you can see they move little bylittle over time.2 Signal strength of the satelliteThe signal strength is indicated by the bars appearing on the top of each satellite number. The baris based on a 15-point scale. The solid bar indicates the satellite is used for GPS positioning andonly the frame of the bar means the signal of the satellite is received but not used for positioning.3 Status of positioning• “2D” indicates the unit receives signals from three GPS satellites to perform two-dimensionalpositioning with latitude and longitude.• “3D” means the unit receives signals from more than four GPS satellites to perform threedimensionalpositioning with latitude, longitude and altitude.<strong>TH</strong>-<strong>D72A</strong>/E CONTENTS 27From The <strong>N3UJJ</strong>.COM Document Library
4 GPSFigure 4-5 GPS Satellite Information DisplayTo display the position information display, $GPGSV or $GPGSA should be selected in Menu 211(GPS – Setup – Sentence).4.3.2 Automatic Adjustment of the Built-in ClockWhile the internal GPS unit is active, the transceiver’s built-in clock is automatically configured withthe time and date from the internal GPS unit.While the internal GPS unit is inactive, set the clock manually.Timing of automatic adjustments:• First positioning after the power is turned ON• Once in 24 hoursThe moment the built-in clock reads 00:00, if the internal GPS unit is positioning, the time data fromthe GPS unit is set to the radio’s built-in clock.Figure 4-6 Time and Date Display4.3.3 North Up and Heading UpNorth Up keeps North at the top of the display. This is convenient when checking your destination orthe location (direction) of another station on a printed map. In contrast, Heading Up keeps yourtraveling direction at the top. So, when traveling to a destination or another station by car or anyother mode of traveling, the display conveniently allows one to definitely know which way to go at acrossing in real-time. (Thus it can be used as a portable navigation device.)Pressing the [F] key in the “Time, Altitude, Travel direction, speed” display, “Target point distance,Travel direction” display, or “Station List menu” display switches between North Up and Heading Up.28 CONTENTS <strong>TH</strong>-<strong>D72A</strong>/EFrom The <strong>N3UJJ</strong>.COM Document Library
“Time, Altitude, Travel direction, speed” display4 GPSFigure 4-7 North Up“Target point distance, Travel direction” displayFigure 4-8 Heading UpFigure 4-9 North Up“Station List menu (4 th page)”Figure 4-10 Heading UpFigure 4-11 North UpFigure 4-12 Heading Up<strong>TH</strong>-<strong>D72A</strong>/E CONTENTS 29From The <strong>N3UJJ</strong>.COM Document Library
4 GPS4.3.4 NMEA Sentence OutputThis function enables exporting the NMEA 0183 raw data from the internal GPS unit via the PC(USB) connector.Searching the web reveals many applications that utilize the raw data. Some convert the raw datainto Google Earth format and others display the satellite information or save the trajectory.Or, you can view the raw data using HyperTerminal or some other terminal software.Figure 4-13 Displaying the Raw Data<strong>TH</strong>-<strong>D72A</strong>/E can generate the following seven types of NMEA data.• $GPGGA, $GPGLL, $GPGSA, $GPGSV, $GPRMC, $GPVTG, $GPZDAUse Menu 211(GPS - Setup - Sentence) to select the type of NMEA sentence that is output from theinternal GPS unit to a PC.Figure 4-14 Menu 211 (Sentence)Press the [MHz] key to toggle between adding and deleting the sentence. The “ ” mark appears tothe left of the added sentence. “$GPGGA” and “$GPRMC” cannot be deleted, as they are necessaryfor BEACON transmission and satellite information displays.To display the position information display, $GPGSV or $GPGSA should be selected.30 CONTENTS <strong>TH</strong>-<strong>D72A</strong>/EFrom The <strong>N3UJJ</strong>.COM Document Library
4 GPS4.3.5 Internal GPS Unit SaveIf the reception is inferior (such as while you are in a building), the GPS unit continues searching for asatellite resulting the battery longevity. To prevent unnecessary battery consumption, this functionwill turn the GPS power source Off for the programmed duration of time if position data is notdetermined during the maximum capture time (5 minutes).Set the timer through Menu 201.Possible choices are “Off”, “1 min”, “2 min”, “4 min”, “8 min” and “Auto”.MaximumCatching TimeGPS ON(Catching + Tracking)GPSOFFMaximumCatching TimeGPS ON(Catching + Tracking)GPSOFFMaximumCatching TimeGPS ON(Catching + Tracking)GPSOFFMaximumCatching TimeGPS ON(Catching + Tracking)approx. 5 min. approx. 1 min. approx. 5 min. approx. 1 min. approx. 5 min. approx. 1 min. approx. 5 min.Figure 4-15 GPS Unit Behavior if 1 min is SelectedGPSOFFMaximumCatching TimeGPS ON(Catching + Tracking)GPSOFFMaximumCatching TimeGPS ON(Catching + Tracking)GPSOFFMaximumCatching TimeGPS ON(Catching + Tracking)GPSOFFMaximumCatching TimeGPS ON(Catching + Tracking)GPSOFFFigure 4-16 GPS Unit Behavior if Auto is SelectedMaximumCatching TimeGPS ON(Catching + Tracking)approx. 5 min. approx. 1 min. approx. 5 min. approx. 2 min. approx. 5 min. approx. 4 min. approx. 5 min. approx. 8 min.approx. 5 min.4.3.6 Battery Operating Time during the Concurrent Use of theInternal GPS UnitAssumed uses of the <strong>TH</strong>-<strong>D72A</strong>/E include transmitting beacons on band A in APRS mode andtransmitting voice on band B in dual band mode with the internal GPS unit on.Following is the table that provides the estimated battery operating time. (Transmission 6 seconds/reception 6 seconds/ standby 48 seconds)Table 4-1 Battery Operating TimeBattery TypeOperating TimeNormal Mode (Output Power: High)GPS Only ModeInternal GPS: Inactive Internal GPS: Active Internal GPS: ActivePB-45L lithium ion battery Approximately 6 hours Approximately 5 hours Approximately 35 hours<strong>TH</strong>-<strong>D72A</strong>/E CONTENTS 31From The <strong>N3UJJ</strong>.COM Document Library
4 GPS4.3.7 GPS Only ModeThe GPS unit has two operation modes: Normal and GPS Only modes. In the Normal mode, you canuse the functions of the transceiver and of the internal GPS unit at the same time. In the GPS Onlymode, you cannot use it as a normal transceiver.Operating in the GPS Only mode will enable a longer battery working time. If you wish to use the<strong>TH</strong>-<strong>D72A</strong>/E as a GPS logger, we recommend setting to the GPS Only mode.Battery TypeTable 4-2 Battery LifeOperating TimeNormal Mode (Output Power: High)GPS Only ModeInternal GPS: Inactive Internal GPS: Active Internal GPS: ActivePB-45L lithium ion battery Approximately 6 hours Approximately 5 hours Approximately 35 hoursYou can use Menu 200 (GPS – Int. GPS – Operating Mode) to set to the GPS Only mode. When theoperating mode is set, the transceiver restarts in the set mode.In the GPS Only mode, the internal GPS unit is always ON. Also, following is a display that appearsinstead of the frequency display.Figure 4-17 GPS Only Display4.3.8 Log FunctionThe internal GPS unit on the <strong>TH</strong>-<strong>D72A</strong>/E can retain up to 5,000 points of log data. Saved informationincludes latitude, longitude, altitude, traveling direction, speed, time and date. The GPS loggerfunction of the <strong>TH</strong>-<strong>D72A</strong>/E helps a lot on travel, cycling, mountain climbing or other outdoor activities.To start the log, press the [TNC] key in the function mode or select function menu number “F-2”.While the log function is active in Normal mode, “Log Start” appears for 5 seconds, followed by theilluminated iLOG pictogram. (iLOG pictogram blinks during the GPS positioning.) If the log is activewhile the internal GPS unit is inactive, the GPS unit also becomes active automatically.Figure 4-18 Log Start DisplayFigure 4-19 While the log is active32 CONTENTS <strong>TH</strong>-<strong>D72A</strong>/EFrom The <strong>N3UJJ</strong>.COM Document Library
4 GPSPressing the [TNC] key again in the function mode or selecting the function menu number “F-2” stopslogging. While the log function is inactive, “Log Stop” appears for 5 seconds. Even if the log isinactive, the internal GPS unit continues to be active.In GPS Only mode, while the log is active, “ ” appears as the Track Log icon, and while the log isinactive, “ ” appears as the Track Log icon.Figure 4-20 GPS Only ModeThe available log record methods are “Time”, “Distance”, and “Beacon”. Select the record methodthat suits the means of traveling you choose, the traveling distance and the environment of thelocation. For example, if there are many turns, a correct logging may not be possible with “Distance”and you should set to “Time” instead. Conversely, when you are forced to stay at the same place fora long time because of a traffic jam or for some other reason, “Distance” will be more efficient.Use Menu 230 (GPS - Log Setup - Record Method) to set the log record method.“Time” records the log with the time spacing specified in “Interval”. The possible value of Interval isbetween 2 and 1800 seconds.Figure 4-21 If 10 seconds are configured for Interval“Distance” records the log entry after a transceiver leaves exceeding the preconfigured distance fromthe point where the log was recorded last. The value of Distance can be configured in the range from0.01 to 9.99. The unit of Distance can be selected from km, mile and nm in Units 1 (Menu No. 3V0)in the APRS menu.Figure 4-22 If 0.01 miles are configured for DistanceConfiguring Beacon enables recording the log immediately after a beacon is transmitted each time.Using SmartBeaconing in conjunction enables more efficient logging at a turn in the road.Figure 4-23 Normal Logging Method<strong>TH</strong>-<strong>D72A</strong>/E CONTENTS 33From The <strong>N3UJJ</strong>.COM Document Library
4 GPSFigure 4-24 During the Use combined with SmartBeaconingTo delete the log data, select Menu 220 (GPS - Track Log - Clear All Data). Select “Yes” to delete thelog data.Figure 4-25 Log Data Deletion ScreenMemory usage for logging can be viewed in the Log Memory screen. The Log Memory screen is the4 th page from the Latitude Longitude screen to be accessed by repeatedly pressing the [OK] key.Figure 4-26 Log Memory ScreenYou can set whether or not the log is overwritten when the log memory becomes full. Selecting ON inMenu 221 (GPS – Track Log – Wrap When Full) will allow old data to be overwritten with new data.Selecting OFF will display “Log Full!!” when the memory becomes full and new data will no longer bestored.Figure 4-27 Wrap Setting Screen"Wrap When Full"is turned on"Wrap When Full"is turned off"Log Full!!" Screen34 CONTENTS <strong>TH</strong>-<strong>D72A</strong>/EFrom The <strong>N3UJJ</strong>.COM Document Library
4 GPS4.3.9 Mark WaypointYou can register the current location as a Mark Waypoint on the <strong>TH</strong>-<strong>D72A</strong>/E. A Mark Waypointincludes data of latitude, longitude, altitude, time, name and icon, and up to 100 points can beregistered.To register a Mark Waypoint, press and hold the [MARK] key. If there is no GPS data positioned byGPS, you cannot register a Mark Waypoint. After the registration of a Mark Waypoint, the registrationscreen appears for approximately 10 seconds. Press the [OK] key in the registration screen to editthe name and icon data. You can also edit name and icon information afterward.Figure 4-28 Registration ScreenThe registered Mark Waypoint can be viewed in the Mark Waypoint list. Press the [MARK] key todisplay the Mark Waypoint list.[OK][OK][OK][ESC][ESC][ESC]Press the [CLR (A/B)] key to delete the Mark Waypoint in the Mark Waypoint list.Pressing the [MENU] key opens the Mark Waypoint menu screen where you can edit the name andicon, and copy the displayed Mark Waypoint to the Target Point.4.3.10 Target PointRegistering a Target Point allows you to know the distance and direction from your current location tothe Target Point. The direction display can be switched between North Up and Heading Up. Up to 5Target Points can be registered. The registration of a Target Point can be made in two ways: enteringlatitude and longitude manually in the menu and copying an existing Mark Waypoint.To make a registration in a menu, select Menu 240 (GPS - Target Pt.). Selecting the Target Pointnumber and pressing the [MHz] key displays “ ” mark next to the number. Then, enter a Target Pointname, latitude and longitude.Figure 4-29 Target Point MenuThe information with a Mark Waypoint can be registered as a Target Point. For example, registeringa rest area on the highway as a Mark Waypoint will be useful to know, on the return trip, within howmuch time or distance you can reach the rest area. To copy a Mark Waypoint to a Target Point, go tothe menu in the Mark Waypoint list.<strong>TH</strong>-<strong>D72A</strong>/E CONTENTS 35From The <strong>N3UJJ</strong>.COM Document Library
4 GPSThe distance from the current location to the Target Point can be confirmed in the Target Pointscreen. Target Point display is the third page from the Latitude Longitude display reached byrepeatedly pressing the [OK] key. However, if no GPS data is positioned by GPS, “Finding GPSsatellites…” screen appears, and, therefore, you cannot switch to the Target Point screen. Pressingthe [F] key in the Target Point screen toggles between North Up and Heading Up.[F]North Up ScreenHeading Up Screen4.3.11 SBASSBAS (Satellite-Based Augmentation System) is a collective term given to the technologies to correctGPS errors using geostationary satellites.SBAS is referred to as WAAS (Wide Area Augmentation System) for the USA, as EGNOS (EuropeanGeostationary Navigation Overlay Service) for Europe and as MSAS (MTSAT Satellite-basedAugmentation System) for Japan.To configure SBAS, go to Menu 212 (GPS - Setup - SBAS). Note, however, that you cannotconfigure the SBAS function to be enabled if anything other than OFF is configured for Battery Savein Menu 201 (GPS - Int. GPS - Batt.Saver).Figure 4-30 SBAS MenuNote: While SBAS is active, ensure that the sky is not obstructed in the direction of the SBAS satellite during the positioning. Upon receipt of a signal from WAAS, the satellite number “35”, “47”, “48”, “51”, or “34” appears in the GPS satellite informationscreen. Upon receipt of a signal from EGNOS, the satellite number “33”, “37”, “44”, or “39” appears in the GPS satellite informationscreen. Upon receipt of a signal from MTSAT, the satellite number “42” or “50” appears in the GPS satellite information screen. The signal from satellites that are located in a geostationary orbit is weaker and more difficult to capture than the signals ofother GPS satellites, and therefore, positioning takes longer length of time. Information regarding whether or not the data received from an SBAS satellite is used for computation in the GPS unit is notdisplayed. Turning on the SBAS function does not guarantee that the margin of positioning error becomes smaller.36 CONTENTS <strong>TH</strong>-<strong>D72A</strong>/EFrom The <strong>N3UJJ</strong>.COM Document Library
5 APRS SOFTWARE FOR YOUR PC5.1 UI-View325.1.1 Introduction of UI-ViewUI-View32 is APRS client software designed to allow a PC to display APRS stations on a map and touse various APRS functions such as Internet gateway access. It allows you to display on a map onyour PC the APRS stations received by a <strong>TH</strong>-<strong>D72A</strong>/E and, in addition, connect to an Internetgateway. In doing so, APRS allows access to a much larger set of stations.To start, you will require a UI-View32 registration number (Registration No.) and a certificationnumber for the APRS server (Validation No.). Refer to the following link to download the latestversion of UI-View32 software, to register and to obtain detailed setting and usage information.http://www.ui-view.org/Note: The above URL link is subject to change. If the link is broken, search for “UI-View32” using any Internet search engine toquickly locate the appropriate home page.Figure 5-1 APRS Stations Display<strong>TH</strong>-<strong>D72A</strong>/E CONTENTS 37From The <strong>N3UJJ</strong>.COM Document Library
5 APRS SOFTWARE FOR YOUR PC5.1.2 Connecting a PCUse the USB cable that comes with the <strong>TH</strong>-<strong>D72A</strong>/E to connect the PC (USB) connector on the rear ofthe <strong>TH</strong>-<strong>D72A</strong>/E operation panel to the USB connector on your personal computer.Figure 5-25.1.3 How to Configure UI-View32For use of UI-View32 with the <strong>TH</strong>-<strong>D72A</strong>/E for APRS communications, the <strong>TH</strong>-<strong>D72A</strong>/E needs to beplaced in KISS mode.KISS (Keep It Simple, Stupid) mode is a special mode to allow a PC to control the TNC protocols.1. Press the [TNC] key to place the <strong>TH</strong>-<strong>D72A</strong>/E in packet mode.Ensure that “PACKET12” appears and the transceiver is placed in packet mode.2. Open the Comms Setup window from the Setup pulldown menu in the UI-View32.3. In the Comms Setup window, configure for UI-View32 the communication conditions of the PCterminals in the <strong>TH</strong>-<strong>D72A</strong>/E as follows:Baud Rate: 9600, Data Bits: 8, Stop Bits: 1, Parity: NoneCom port: the same port number of a PC as that is assigned to the virtual COM port of the<strong>TH</strong>-<strong>D72A</strong>/EFigure 5-3 Comms Setup Window4. From the Host mode dropdown list, select “KISS” and click the “Setup” button next to it.5. The KISS Setup window opens. Selecting “TNC2” in Easy Setup and then clicking the “OK”button closes the KISS Setup window.38 CONTENTS <strong>TH</strong>-<strong>D72A</strong>/EFrom The <strong>N3UJJ</strong>.COM Document Library
5 APRS SOFTWARE FOR YOUR PCFigure 5-4 KISS Setup Window6. Click the “OK” button in the Comms Setup window to close the Comms Setup window.UI-View32 sends a command to <strong>TH</strong>-<strong>D72A</strong>/E’s built-in TNC that is changed to the KISS mode.During the process, “STA” and “CON” on the <strong>TH</strong>-<strong>D72A</strong>/E’s display blink simultaneously 6 times.Starting from this point, APRS communications starts followed by the configuration for UI-View32.The configurations associated with APRS for <strong>TH</strong>-<strong>D72A</strong>/E (in Menu 300 to 3Y0) has no influenceto this operation.For details of other configurations for UI-Vew32, refer to the descriptions in the help file and otherreference materials.Note: Even if you select “<strong>TH</strong>-D7” or “TM-D700” for TNC type in the Comms Setup window of UI-Vew32, you cannot expect properoperation due to incompatibility of PC commands. Ensure that the transceiver is placed in KISS mode as described above. The built-in TNC has 2 kB memory to store data for KISS mode for TX and RX. We do not recommend you select “D700” for Easy Setup in the KISS Setup window of UI-View23 due to the incompatibility ofPC commands. As explained above, select “TNC2” for <strong>TH</strong>-<strong>D72A</strong>/E. When changing the PACKET transfer rate of the built-in TNC from 1200 bps (default) to 9600 bps, modify the Into KISSsection of Comms Setup window as follows: (Add the “HB9600” command.)1: ^M2: HB 96003: KISS ON4: RESTART<strong>TH</strong>-<strong>D72A</strong>/E CONTENTS 39From The <strong>N3UJJ</strong>.COM Document Library
5 APRS SOFTWARE FOR YOUR PC5.2 Available Software associated with APRSThe APRS program currently runs on a number of platforms. These programs are constantly beingupdated and can be downloaded from the Internet. Most programs are shareware and the latestversions are available at the TAPR (Tucson Amateur Packet Radio) FTP site: ftp://ftp.tapr.org/aprssig.Written by Bob Bruninga, WB4APR, the Father of APRS.Runs on MS-DOS.MacAPRS (ftp://ftp.tapr.org/aprssig/macstuff/MacAPRS)Written by Mark Sproul, KB2ICI and Keith Sproul, WU2Z.APRSdos (ftp://ftp.tapr.org/aprssig/dosstuff/APRSdos)Runs on Macintosh computers using Operating System 7 or higher.WinAPRS (ftp://ftp.tapr.org/aprssig/winstuff/WinAPRS)Written by Mark Sproul, KB2ICI and Keith Sproul, WU2Z.Runs on Windows 95 or higher, or on Windows 3.1 + Win32s.javAPRS (ftp://ftp.tapr.org/aprssig/javastuff)Written by Steve Dimse, K4HGRuns on JAVA.APRSplus (ftp://ftp.tapr.org/aprssig/winstuff/APRSPLUS)Written by Brent Hildebrand, KH2ZRuns on Windows 95 or higher, or on Windows 3.1 + Win32s.UI-View (ftp://ftp.tapr.org/aprssig/winstuff/UI-View)Written by Roger Barker, G4IDE SKAGWTracker (http://www.agwtracker.com)Written by George Rossopulos, SV2AGWNote: The above URL links are available as on the date written at the end and subject to change.40 CONTENTS <strong>TH</strong>-<strong>D72A</strong>/EFrom The <strong>N3UJJ</strong>.COM Document Library
6 OPERATIONAL EXAMPLES OF APRSWhile monitoring APRS stations from around the world that may appear on your map, you can easilysend messages to them. An interest is now growing in APRS QSOs where one station may call CQlooking for responses in the conventional style of a ham contact. Due to the number of charactersbeing restricted, it can be customary to send short sentences using abbreviated words similar tooperating CW.Searching for weather information can reveal that even adjacent nearby areas can have dramaticallydiffering weather patterns. Or, operating outdoors and timing transmissions to coincide withoverhead satellite passes can result in successful satellite communications using only a handheldtransceiver. The opportunities for many activities exist even without installing a fixed station at home.Below are two APRS operational examples. In USA and Canada, the national APRS frequency is144.390 MHz.6.1 Let’s Go Mobile6.1.1 OverviewIncorporating an internal GPS unit, <strong>TH</strong>-<strong>D72A</strong>/E permits APRS operations on its own. Needless tosay, it is also suitable for outdoor mobile operations. When traveling outdoors with the handheldtransceiver in hand, you can search for nearby stations with position beacons to exchange textmessages and establish voice contact.To enjoy APRS operation in unfavorable locations, such as in a building or restaurant, some peopleset up the mobile station as a digipeater.Furthermore, APRS beacons that include latitude, longitude, speed, direction and altitude informationare most suitable for hot-air balloon rides and hang gliding, while the support team usually tracks thewhereabouts of the balloon or glider from the ground.In these cases, since it is necessary to transmit beacons with shorter intervals than usual, operationis on a different frequency from normal APRS operations. Some applications such as Google MapAPRS (http://aprs.fi/) have a function to store the movement trajectory of specified stations and canbe utilized to review the flight of the day or to analyze the trajectory in conjunction with themeteorological data provided by the nearby weather station.Also, the following are some other features that increase convenience of text messaging whilemoving.6.1.1.1 Automatic Reply FunctionThis is a function to return a predefined message such as “Pse QRX. Will return later at 12:35”automatically when an APRS message is received.Auto Reply is only for passing along special information to anticipated message senders when theoperator may temporarily not be able to respond. It should not be left on for routine operation in mostcases because it adds unnecessary network load. The sending station will always get an ACK (anacknowledgment message), and this is sufficient to know that the message was delivered in mostcases.<strong>TH</strong>-<strong>D72A</strong>/E CONTENTS 41From The <strong>N3UJJ</strong>.COM Document Library
6 OPERATIONAL EXAMPLES OF APRS6.1.1.2 Entering CharactersCharacters can be entered using the encoder or 10-key numeric keypad as you would when textingfrom a cell phone.Further details of important functions follow.6.1.2 Decay Algorithm FunctionIf the position beacon for a mobile station is configured to be transmitted at a fixed time interval, itwould be inefficient use of air-time to continue transmitting at this fixed interval when traffic is slowmoving.The beacon transmission interval gradually increases by using a decay algorithm, thuscleverly reducing air-time used by the station.Traffic Jam!Transmits theposition beaconInitial interval: 1 minute2 minutes 4 minutes 8 minutes 16 minutes 32 minutes 32 minutesFigure 6-1 Decay AlgorithmDecay Algorithm steps the transmission interval of the beacon down from 1 (if the automatictransmission interval is set to 1 minute) to 2 to 4 to 8 to 16 to 32 minutes when the mobile station is notmoving. On the <strong>TH</strong>-<strong>D72A</strong>/E, when the interval for automatic transmission is greater than that of DecayAlgorithm, the automatic transmission interval is used. The speed at which Decay Algorithm decidesthat the car is parked can be set using the “Stopped” dropdown list in the Basic tab of the APRSwindow of the MCP-4A programming software. If the mobile station’s speed is less than this setting,then Decay Algorithm will start. The speed setting can be changed only in the MCP-4A program.6.1.3 Proportional Pathing FunctionThis function automatically changes the transmit packet path (relay route) as the automatictransmission interval elapses while traveling. The function substantially reduces load on the entirenetwork by maintaining the packet update frequency at the automatic transmission interval for nearbystations that do not require relaying, while thinning the number of relay hops for distant stations thatdo not require frequent updates.Transmitsevery 1 minuteTransmitsevery 1 minuteTransmitsevery 1 minuteTransmitsevery 1 minuteTransmitsevery 1 minuteTransmitsevery 1 minuteTransmitsevery 1 minuteDIRECT(No hop)WIDE1-1(1 hop)DIRECT(No hop)WIDE1-1,WIDE2-1(2 hops)DIRECT(No hop)WIDE1-1(1 hop)DIRECT(No hop)WIDE1-1,WIDE2-2(3 hops)Figure 6-2 Example of path switchover operation of Proportional Pathing(when the packet path is set to WIDE1-1, WIDE2-2)The speed at which Proportional Pathing decides that the car is moving can be set using the Movingdropdown list in the Basic tab of the APRS window of the MCP-4A programming software. If themobile station’s speed exceeds this setting, then Proportional Pathing will start. The speed settingcan be changed only in the MCP-4A program.42 CONTENTS <strong>TH</strong>-<strong>D72A</strong>/EFrom The <strong>N3UJJ</strong>.COM Document Library
6 OPERATIONAL EXAMPLES OF APRS6.1.4 Simultaneously using Decay Algorithm and ProportionalPathingRefer to the diagram below to understand what occurs when both Decay Algorithm and ProportionalPathing are used at the same time.Velocity (Knots)Status0 23 35321Decay Decay Proportional Proportional Proportional Proportional DecayNowProportionalPathingReturnsto DecayAlgorithmFigure 6-3 Switching between Decay Algorithm and Proportional Pathing(when Stopped = 1 (knot); Moving = 3 (knots))As the example above shows, when the mobile’s speed exceeds 3 knots, Decay Algorithm stops andProportional Pathing begins. Similarly, when the mobile’s speed drops below 1 knot, thenProportional Pathing stops and Decay Algorithm begins.Note: The Stopped value cannot be configured higher than the Moving value. Also, the Moving value cannot be configuredlower than the Stopped value.6.1.5 SmartBeaconing (Written by Steve Bragg, KA9MVA)SmartBeaconing was developed by Mr. Steve Bragg, KA9MVA, and Mr. Tony Arnerich, KD7TA, in1998. SmartBeaconing uses the speed information that is received from the GPS receiver andtraveling direction to efficiently transmit the beacon. There are two factors that come into play whendetermining how SmartBeaconing functions: distance traveled since last beacon transmission,addressed by using Variable Rate Beaconing to change the transmission interval with speed, andheading change since last beacon transmission, referred to as Corner Pegging.6.1.5.1 Variable Rate Beaconing (Transmission Interval Changes with Speed)When your mobile station is moving at a speed less than LOW SPEED as set in the menu, theposition beacon repeatedly transmits at the interval of SLOW RATE as set in the menu. When yourmobile station is moving faster than HIGH SPEED as set in the menu, the position beacon repeatedlytransmits at the interval of FAST RATE as set in the menu. And if your mobile is traveling at anyspeed between LOW SPEED and FAST SPEED, then the beacon transmits at an interval that varieslinearly according to the speed traveled. The transmission interval extends longer as the speedbecomes slower, and the interval becomes shorter as the speed gets faster.Table 6-1 Relationship between Speed and Beacon Transmission IntervalOver HIGH SPEEDSpeedFAST RATETransmission IntervalUnder HIGH SPEED(Only when HIGH SPEED ≥ LOW SPEED)Over LOW SPEEDFAST RATE x HIGH SPEED / current speed = transmission interval time(Only when HIGH SPEED ≥ LOW SPEED)Under LOW SPEEDSLOW RATE<strong>TH</strong>-<strong>D72A</strong>/E CONTENTS 43From The <strong>N3UJJ</strong>.COM Document Library
6 OPERATIONAL EXAMPLES OF APRSMenu ItemTable 6-2 Configuration ExampleConfigured ValueLOW SPEED 5HIGH SPEED 70SLOW RATEFAST RATE30 minutes120 secondsTable 6-3 Variable Rate Beaconing Example:(with LOW SPEED = 5, HIGH SPEED = 70, SLOW RATE = 30 min, FAST RATE = 120 sec)SpeedTX interval Time (FAST RATE = HIGH SPEED ÷ Speed)80 120 seconds (2 minutes)70 120 seconds (2 minutes)60 140 seconds (2 minutes and 20 seconds)50 168 seconds (2 minutes and 48 seconds)40 210 seconds (3 minutes and 30 seconds)30 280 seconds (4 minutes and 40 seconds)20 420 seconds (7 minutes)10 840 seconds (14 minutes)5 1680 seconds (28 minutes)0 1800 seconds (30 minutes)(min.)35Speed vs TX Interval Time30TX Interval Time2520151050 10 20 30 40 50 60 70 80SpeedFigure 6-4 Speed vs TX Interval TimeNote: The unit of Speed can be configured by using Menu 3V0.6.1.5.2 Corner Pegging (Transmission after Heading Change)When the mobile station’s speed is above LOW SPEED, Corner Pegging begins operating. A CornerPegging position beacon will be transmitted when the heading difference (the compass heading of thepresent direction of travel subtracted from the compass heading transmitted in the previous positionbeacon) exceeds the threshold value. The heading difference is the compass heading of the presentdirection of travel (in degrees) subtracted from the compass heading transmitted in the previousposition beacon. (Technical note: only the absolute value of the heading difference, normalized to thefirst and second quadrants, is used.) The threshold value called TURN <strong>TH</strong>RESHOLD combines a fixedangle threshold, called TURN ANGLE, with a constant called TURN SLOPE, times ten, divided by thepresent speed. You can use the formula below to calculate TURN <strong>TH</strong>RESHOLD.44 CONTENTS <strong>TH</strong>-<strong>D72A</strong>/EFrom The <strong>N3UJJ</strong>.COM Document Library
6 OPERATIONAL EXAMPLES OF APRSBy changing the value of TURN SLOPE, you can adjust how Corner Pegging responds as the mobilestation executes curves. When the value of TURN SLOPE is increased, a large heading angle changeis necessary to cause a position beacon transmission, especially at low speeds. When the value ofTURN SLOPE is reduced, the effect of speed on Corner Pegging is reduced, as the constant TURNANGLE becomes the controlling term in the equation. A value for TURN SLOPE of 110 (in units of 10degrees per mph) has been experimentally determined to be a good value for vehicles on typical roads.Corner Pegging Formula:TURN <strong>TH</strong>RESHOLD = TURN ANGLE + 10 x TURN SLOPE / SPEEDThe above formula is based on the reality of how a mobile station executes turns: when traveling atslow speed, it can turn acute angles, but when traveling at high speeds, it turns only shallow angles.In other words, TURN <strong>TH</strong>RESHOLD varies inversely with speed: at a low speed, the thresholdbecomes large, while at a high speed the threshold becomes small.To prevent the Corner Pegging beacon from transmitting too often and causing QRM, there is a timervalue called TURN TIME. The Corner Pegging position beacon is not transmitted until TURN TIMEseconds have elapsed since the previous beacon transmission, regardless of which method (CornerPegging or Variable Rate Beaconing) caused the previous beacon.Table 6-4 Conditions for Corner Pegging OperationOver HIGH SPEEDSpeedUnder HIGH SPEEDOver LOW SPEED(Only when HIGH SPEED ≥ LOW SPEED)Under LOW SPEEDCorner PeggingYesYesNoSpeedMenu ItemTable 6-5 Configuration ExampleTable 6-6 Corner Pegging Operation Example: (with TURN ANGLE = 28, TURN SLOPE = 26)TURN SLOPENote: When TURN <strong>TH</strong>RESHOLD exceeds 120°, the value will be corrected to 120°.Configured ValueLOW SPEED 5TURN ANGLE 28°TURN SLOPETURN TIMETURN SLOPE/ Speed(Cut off after the decimal point) (1)26 (x10°/speed)30 secondsTURN ANGLE (2)TURN <strong>TH</strong>RESHOLD (3)= (1) + (2)80 26 (x10) 3° 28° 31°70 26 (x10) 3° 28° 31°60 26 (x10) 4° 28° 32°50 26 (x10) 5° 28° 33°40 26 (x10) 6° 28° 34°30 26 (x10) 8° 28° 36°20 26 (x10) 13° 28° 41°10 26 (x10) 26° 28° 54°5 26 (x10) 52° 28° 80°2 26 (x10) 130° 28° 158° 120°<strong>TH</strong>-<strong>D72A</strong>/E CONTENTS 45From The <strong>N3UJJ</strong>.COM Document Library
6 OPERATIONAL EXAMPLES OF APRS(degrees)140Speed vs Turn ThresholdTurn Threshold120100806040200 10 20 30 40 50 60 70 80SpeedFigure 6-5 Speed vs Turn Threshold6.1.5.3 Operation ExampleHere are the <strong>TH</strong>-<strong>D72A</strong>/E default configurations for position beacon transmissions using theSmartBeaconing configuration as shown below.Table 6-7 SmartBeaconing Configuration ValuesMenu ItemConfigured ValueLOW SPEED 5HIGH SPEED 70SLOW RATEFAST RATE30 minutes120 secondsTURN ANGLE 28°TURN SLOPETURN TIME26 (x10°/speed)30 secondsNote: If SmartBeaconing does not result in appropriate beacon transmissions, then you must re-configure individual parametersso as to more closely match driving conditions.46 CONTENTS <strong>TH</strong>-<strong>D72A</strong>/EFrom The <strong>N3UJJ</strong>.COM Document Library
6 OPERATIONAL EXAMPLES OF APRS6.1.6 QSY FunctionThe QSY function uses AFRS (Automatic Frequency Reporting System) to report a frequency onwhich voice communications can be established. A station using the QSY function embeds thefrequency information of your voice band in a position beacon transmission. A receiving station ofthe information can easily tune to the frequency.In addition to contacts between <strong>TH</strong>-<strong>D72A</strong>/Es, when transmitting object information of a repeater or anEchoLink node station using an APRS software program, if embedding QSY information in the statustext, the receiving station can conveniently set <strong>TH</strong>-<strong>D72A</strong>/E or TM-D710A/E to be ready for accessingthe repeater or the node station with a single action.6.1.6.1 Transmitting QSY InformationA properly configured functioning <strong>TH</strong>-<strong>D72A</strong>/E QSY station can automatically embed the voicefrequency as well as Tone, Narrow/Wide, Shift (+/-), Offset frequency from the non-data band to thebeginning of status text.To embed the voice frequency, configure QSY in Status to ON in Menu 3A0 and the frequency will beautomatically added to the beginning of status text and then sent. The format of the transmittedfrequency is FFF.FFF MHz. So, for example, if at the time of a beacon transmission, the non-databand has a frequency of 446.100 MHz selected, then the frequency of “446.100 MHz” getsembedded to the beginning of the status text.Then, to embed Tone and Narrow/Wide information, configure Tone/Narrow to ON in Menu 3A1, andWide/Narrow, Tone/CTCSS/SCS and the code of Tone/CTCSS/DCS will be added after thefrequency information in the status text with a single blank space used as a delimiter.Furthermore, to embed the Shift (+/-) and Offset frequency, configure the Shift/Offset to ON in Menu3A2, and the Shift (+/-) and Offset frequency will be added after the Tone and Wide/Narrowinformation in the status text with a single blank space used as a delimiter.QSY Information Format:(Insert one space after the frequency before entering Wide/Narrow, Tone/CTCSS/DCS and Shift/Offset.)• “T079”: Upper case “T” indicates Wide. Tone frequency of 79.7 Hz (Encoding)• “t079”: Lower case “t” indicates Narrow. Tone frequency of 79.7 Hz (Encoding)• “tOFF”: Lower case “t” indicates Narrow. Tone = OFF (Without any tone encoding or decoding.)• “C079”: Upper case “C” indicates Wide. CTCSS frequency of 79.7 Hz (Encoding/ Decoding)• “c079”: Lower case “c” indicates Narrow. CTCSS frequency of 79.7 Hz (Encoding/ Decoding)• “D023”: Upper case “D” indicates Wide. DCS code of 023. (Encoding/ Decoding)• “d023”: Lower case “d” indicates Narrow. DCS code of 023. (Encoding/ Decoding)• “+”: Plus Shift (A default offset frequency is applied.)• “-” : Minus Shift (A default offset frequency is applied.)• “+500” : Plus Shift, 5 MHz Offset• “-060”: Minus Shift, 600 kHz Offset. The value of the Offset shall be a 3-digit number. (x 10 kHz/50 kHz step)Note: For detailed information on the QSY Function format, refer to the following link: (http://aprs.org/info/freqspec.txt). The<strong>TH</strong>-<strong>D72A</strong>/E transceiver complies with the standard which was proposed by Bob Bruninga, WB4APR.<strong>TH</strong>-<strong>D72A</strong>/E CONTENTS 47From The <strong>N3UJJ</strong>.COM Document Library
6 OPERATIONAL EXAMPLES OF APRSConfiguration Example(Insert one space after the frequency before entering Wide/ Narrow, Tone/CTCSS/ DCS and Shift/Offset.)• “446.100 MHz”: Voice frequency configured for 446.100 MHz, Wide-band FM, Tone frequency =None, Simplex• “446.100 MHz T071”: Voice frequency configured for 446.100 MHz, Wide-band FM, Tonefrequency of 71.9 Hz, Simplex• “446.100 MHz 0071”: Voice frequency configured for 446.100 MHz, Narrow-band FM, Tonefrequency of 71.9 Hz, Simplex• “446.100 MHz C100”: Voice frequency configured for 446.100 MHz, Wide-band FM, CTCSSfrequency of 100 Hz, Simplex• “446.100 MHz c100”: Voice frequency configured for 446.100 MHz, Narrow-band FM, CTCSSfrequency of 100 Hz, Simplex• “446.100 MHz D023”: Voice frequency configured for 446.100 MHz, Wide-band FM, DCS code of023, Simplex• “446.100 MHz d023”: Voice frequency configured for 446.100 MHz, Narrow-band FM, DCS codeof 023, Simplex• “446.100 MHz tOFF”: Voice frequency configured for 446.100 MHz, Narrow-band FM, Tonefrequency = None, Simplex• “146.850 MHz”: Voice frequency configured for 146.850 MHz, Wide, Tone frequency = None,Minus Shift, 600 kHz Offset (<strong>TH</strong>-<strong>D72A</strong>’s Auto Repeater Offset may work)• “444.750 MHz Toff +”: Voice frequency configured for 444.750 MHz, Wide, Tone frequency =None, Plus Shift, Offset = default on UHF band (5 MHz)• “146.850 MHz T131 -060”: Voice frequency configured for 146.850 MHz, Wide-band FM, Tonefrequency of 131.8 Hz, Minus Shift, 600 kHz offset• “444.7625 MHz tOFF +”: Voice frequency configured for 444.7625 MHz, Narrow-band FM, Tonefrequency = None, Plus Shift, Offset = default on UHF band (5 MHz)• “444.7625 MHz t131 +4 MHz”: Voice frequency configured for 444.7625 MHz, Narrow, Tone =131.8 Hz, +Shift, Offset = 5 MHz (Default offset on UHF band), “4 MHz” is not allowed and itresults in a syntax error for TM-D710A so that the default offset 5 MHz (K-type) is applied instead.Figure 6-6 QSY Information Transmission Configuration Menu48 CONTENTS <strong>TH</strong>-<strong>D72A</strong>/EFrom The <strong>N3UJJ</strong>.COM Document Library
6 OPERATIONAL EXAMPLES OF APRS6.1.6.2 Receiving QSY InformationThe <strong>TH</strong>-<strong>D72A</strong>/E receives QSY information not only from another <strong>TH</strong>-<strong>D72A</strong>/E, but also locationinformation from other software as well as QSY information and repeater frequency object informationembedded in status text. You can confirm the QSY information that is received as embedded data bychecking the voice frequency at the beginning of the status text on the Station List screen.Press the [OK] key to display the List Detail screen, press the [MENU] key, then select “Tune”, andthe transceiver will change quickly to the non-data band frequency. Also, on the Station List screen,“F” will appear on the right side of the screen if QSY information is embedded. This enablesconfirmation of the QSY information also on the Station List, and just pressing the [MENU] key andthen selecting “Tune” easily changes the frequency to the non-data band.Also, if, in addition to voice frequency, Wide/ Narrow, Tone/ CTCSS/ DCS, Shit (+/-), Offset frequencyare also set in the status text, selecting will not only change to the voice frequency, but switchbetween Wide/ Narrow and set Tone/ CTCSS/ DCS.Figure 6-7 QSY Station List Screen6.1.6.3 QSY Functions and EchoLinkEchoLink system operators can configure their nodes to generate APRS objects that contain theirQSY Frequency information. These beacons can either be transmitted locally on the APRS channel,or generated directly to the APRS-IS for dissemination back to RF via the local IGate station. It isimportant for nearby traveling mobiles to see these QSY Frequency objects on their maps and thefront panel of their <strong>TH</strong>-<strong>D72A</strong>/E or TM-D710A/E while traveling in new areas.6.1.7 Message FunctionThe Message function closely resembles other amateur radio modes since it consists of exchangingmessages with hams. You can send a message by entering a callsign of the message recipient.You’ll receive an acknowledgment (ACK) message back when the targeted station receives themessage. You can also enjoy group messaging by using a group name instead of a callsign. Agroup name can be configured via Menu 3S0. In addition, there is a bulletin function. Usingbulletins, you can report on upcoming events or other information to a large collection of users over abroad region.6.1.7.1 Automatic Reply FunctionThe Automatic Reply Message function replies to messages that you receive while you are drivingand you can pre-configure a message response such as “Pse QRX. Will return at 12:35”.When using <strong>TH</strong>-D7A/E or TM-D700A/E, a response message was returned to all message senders.But, beginning with <strong>TH</strong>-<strong>D72A</strong>/E or TM-D710A/E, an individual can be selected to receive a reply.<strong>TH</strong>-<strong>D72A</strong>/E CONTENTS 49From The <strong>N3UJJ</strong>.COM Document Library
6 OPERATIONAL EXAMPLES OF APRSYou can configure callsigns to which you want to reply. When the “ ” wildcard is used, thetransceiver will respond to all message senders. But if you set “W6DJY”, the transceiver will replyonly to W6DJY. Configuring “W6*” will trigger a reply only to senders with W6 as their callsign prefix.Figure 6-8 Automatic Reply Message Configuration Screen6.1.7.2 TX Beep (Beacon)Select Menu 3T1 (Sound - TX Beep (Beacon)) and select “ON” to sound a beep every time the<strong>TH</strong>-<strong>D72A</strong>/E transmits a beacon. We recommend enabling this function to monitor the status ofbeacon transmissions when SmartBeaconing is used. If “OFF” is selected, the transceiver does notbeep even if a beacon is transmitted.6.1.8 APRS LockThis function prevents accidentally changing the data band frequency or accidentally transmitting onthe data band by pressing the [PTT] switch in APRS communication.Select type of APRS Lock in Menu 302 (APRS-Basic Set-APRS Lock).• OffIt changes the data band frequency so that you can transmit on the data band by pressing the[PTT] switch.• OnThe frequency of the data band cannot be changed. You also cannot use Scan with [VFO], [MR],[ENT], [MHz] and [ENC].• On & PTTYou cannot change the frequency of the data band nor transmit on the data band by pressing the[PTT] switch.• On & TNCYou cannot change the frequency of the data band and, while in APRS mode, pressing the [TNC]key will not exit APRS mode.• On & PTT & TNCYou cannot change the frequency of the data band nor transmit on the data band by pressing the[PTT] switch. While in APRS mode, pressing the [TNC] key will not exit APRS mode.Figure 6-9 Menu 302 (Basic Set – APRS Lock)50 CONTENTS <strong>TH</strong>-<strong>D72A</strong>/EFrom The <strong>N3UJJ</strong>.COM Document Library
6.2 Base Station (Weather Station)6 OPERATIONAL EXAMPLES OF APRSWeather observation equipment intended for use at home is becoming more common in the UnitedStates. Using this equipment, you can observe and measure wind direction, wind velocity, airtemperature, humidity, rainfall, atmospheric pressure, etc. This information can be useful to otherswhen the data is gathered and transmitted in real time via APRS beacon transmissions.These kinds of weather stations are installed in many parts of the world. Some stations transmitNWS (National Weather Service) information. The weather information from NWS is dispatched andconverted for beacon use. Local important information, such as locations of nearby tornadoes asthey are forming which have not been registered with central weather bureaus, can be transmitted byAPRS beacon.The weather stations from Peet Bros. Company and Davis Instruments Corp. Inc. can be connectedin place of a GPS receiver via the GPS connector. The weather observation equipment transfers themeteorological information with serial data and this data is transmitted via beacon transmissionsusing the APRS weather format. Or you can monitor the meteorological data locally on the screen ofthe <strong>TH</strong>-<strong>D72A</strong>/E. The information on rainfall, air temperature, wind direction, wind velocity,atmospheric pressure and humidity can be displayed.6.2.1 Using Meteorological EquipmentSelect Menu 331 (APRS – COM Port) and configure the GPS terminal settings.• Baud Rate: 9600 bps (same as weather equipment being used)• Input: Weather (Davis) or Weather (Peet Bros.)• Output: OFFFigure 6-10 Menu 602 (GPS)Equipment that has been verified with our transceiver includes the following models.6.2.1.1 Davis Instruments Corp. Inc.The weather station, Vantage Pro2 (http://www.davisnet.com/weather/products/vantage-proprofessional-weather-stations.asp)can be used with <strong>TH</strong>-<strong>D72A</strong>/E.”WeatherLink for Vantage Pro2, Windows, Serial Port” (Davis Part #.06510SER) or “WeatherLink forAPRS with Streaming Data Logger” (Davis Part #.06540) is required for <strong>TH</strong>-<strong>D72A</strong>/E. Install theadapter that comes with the above accessories to work with <strong>TH</strong>-<strong>D72A</strong>/E.To communicate with Vantage Pro2, configure the communication baud rate of Vantage Pro2 for9600 bps using the panel keys and then configure the <strong>TH</strong>-<strong>D72A</strong>/E communication baud rate (Menu330) to 9600 bps as well.Note: 4800 bps (06540/ 06510SER) or 2400 bps (06510SER) may work with <strong>TH</strong>-<strong>D72A</strong>/E but we recommend using 9600 bps forstable operation.<strong>TH</strong>-<strong>D72A</strong>/E CONTENTS 51From The <strong>N3UJJ</strong>.COM Document Library
6 OPERATIONAL EXAMPLES OF APRS6.2.1.2 Peet Bros. CompanyThe weather station, ULTIMETER 2100 (http://www.peetbros.com/shop/item.aspx?itemid=2) canalso be used with <strong>TH</strong>-<strong>D72A</strong>/E.To communicate with Vantage Pro2, configure the <strong>TH</strong>-<strong>D72A</strong>/E communication baud rate (Menu 330)to 2400 bps as well.Note: Because the GPS receiver and the weather observation equipment use the same connector, combined use is not possible. You will begin to acquire meteorological data from the weather observation equipment 5 to 10 minutes after powering up thetransceiver.Meteorological data that is received from other stations is displayed in the Station List details on thefifth page. As shown below, the information is easy to understand.5 th page 6 th pageFigure 6-11 Display of Meteorological Data52 CONTENTS <strong>TH</strong>-<strong>D72A</strong>/EFrom The <strong>N3UJJ</strong>.COM Document Library
7 APRS NETWORKS7.1 APRS ServersIn the beginning, APRS networks consisted only of general packet transmissions through digitalrepeaters. To expand network coverage much further, HF gateway stations that were interfaced withthe VHF stations were added. This arrangement evolved still further when it became common forpersonal computers to be connected with the Internet. Internet gateways provided another way toexpand APRS coverage. APRServe, developed by Mr. Steve Dimse, K4HG, allows information thatis gathered from the Internet to be transferred to client computers. The worldwide APRS networkwas completed. The service is called APRS-IS (APRS-Internet Service).At present, there are several basic servers that are called Core servers, under which a number oflocal servers, called Tier 2 servers, work and are located worldwide in each participating country.Later, Pete Loveall, AE5PL developed javAPRSSrvr to establish a Tier-2 distribution system to betterhandle regional APRS-IS feeds. The Internet part of the APRS system is called APRS-IS (APRS-Internet Service).7.2 IGateThere are basically two ways to use APRS-IS effectively when operating APRS: a client personalcomputer connected directly to Core/ Tier 2 servers, and using amateur radio with IGate (Internetgateway).For client use, a callsign is required, but amateur radio equipment is not necessary. You simplyinstall APRS software such as UI-View32 and AGWTracker on a personal computer, configure thenecessary station information and connect to an APRS server via the Internet. With thisarrangement, you can enjoy the basic features of APRS such as transmitting your own stationposition, exchanging messages and dispatch or receipt of weather information.Using <strong>TH</strong>-<strong>D72A</strong>/E, you can transmit your own packet signals via amateur radio and use APRS-IS toaccess IGate. IGate acts as a two-way interface between the Internet and amateur radio packetsignals. The IGate function is obtained through various releases of APRS software and IGate iscommonly available as a result of many volunteer amateur radio operators.IGate connects directly to Core servers and Tier 2 servers and information received by amateur radiopacket transmissions is transferred to the servers, and server information can be passed via packetradio transmissions back to amateur radio operators.Setting up an additional IGate station in an area that already has an existing IGate station will resultin providing the same information to the server and put an excessive load on the Internet, andtherefore is undesirable. Traffic from IGate to amateur radio stations increases air traffic; therefore,you must be familiar with operational configurations.Various filtering functions exist so you should be knowledgeable about your local existing IGatestation. In the case of packet messaging, bidirectional data transfers are used.While operating <strong>TH</strong>-<strong>D72A</strong>/E from a fixed station, specifying a particular digipeater and the callsign asthe packet path to a nearby IGate station will guarantee packets will always be relayed by the samepath and can avoid unnecessary relays and therefore raise efficiency. In the case of a mobile station,since the packet path changes from time to time, use the default packet path or follow local rules ofeach area where you may operate.<strong>TH</strong>-<strong>D72A</strong>/E CONTENTS 53From The <strong>N3UJJ</strong>.COM Document Library
7 APRS NETWORKSTier 2ServerTier 2ServerI-GateClientTier 2ServerCore ServerI-GateCore ServerCore ServerI-GateClientTier 2ServerClientTier 2ServerClientI-GateI-GateClientClientClientFigure 7-1 APRS Network Conceptual Drawing54 CONTENTS <strong>TH</strong>-<strong>D72A</strong>/EFrom The <strong>N3UJJ</strong>.COM Document Library
7 APRS NETWORKS7.3 Let’s Send EmailWith <strong>TH</strong>-<strong>D72A</strong>/E it is possible to transmit email by using the Message function.7.3.1 Sending Email with <strong>TH</strong>-<strong>D72A</strong>/EFirst, press the [MSG] key to show the Message List on the screen.Next, press [MENU] to show the Message List Menu on the screen.And press “NEW” to create a message on the screen.Enter “EMAIL” in the “TO:” field using [ENC] on the panel or the 10-key numeric keypad.Figure 7-2 EMAIL Entry ScreenNext, enter the email address to which you wish to send email. Leave one space blank after theaddress and begin entering the message text. Refer to an example below.Figure 7-3 Entering Email MessageEnter the Email text using the encoder, cross key or the 16-key numeric keypad on the panel. Whenthe message is completely entered, it will be transmitted in an APRS message and an E-mail istransmitted via the IGate and the APRS server connected to the Internet.<strong>TH</strong>-<strong>D72A</strong>/E CONTENTS 55From The <strong>N3UJJ</strong>.COM Document Library
7 APRS NETWORKSAPRS softwareTM-D710A/EInternetFrom IGate to ServerEmail has been received!DigipeaterEmail softwareEmail transmissionServer to InternetAPRS ServerFigure 7-4 Transmission Flow for EmailNote: You cannot send email from a personal computer to a mobile station. Just like other APRS packets, the content of the email you sent can be monitored by other stations 2-byte codes cannot be sent. In case the Email Server is down, Email is not delivered.56 CONTENTS <strong>TH</strong>-<strong>D72A</strong>/EFrom The <strong>N3UJJ</strong>.COM Document Library
7 APRS NETWORKS7.4 Digipeaters (Digital Repeaters)The greatest feature of APRS is the network that is spreading around the world. The heart of thenetwork is made up of many digital repeaters commonly referred to as digipeaters. Of course,digipeaters are well-known among those who have used packet radio for years. Digipeaters receivedata over-the-air via radio signal and repeat or relay it onward. For a voice repeater, two differentfrequencies are used simultaneously to accomplish this repeater function. However, a digipeater firstreceives and stores data, and then transmits when the channel clears.In the earlier times of packet radio and digipeaters, it was required to specify the callsign of eachdigipeater station. But it was difficult to know which digipeater station to use. If moving in a vehicle,you had to constantly consider changing digipeaters. Now, APRS uses a common generic callsignfor all digipeaters referred to as WIDEn-N, where N is the number of hops desired through thenetwork (typically 2 or less). The WIDE terminology lets you know the digipeater is in a good locationfor repeating signals. A mobile station anywhere only has to specify WIDE1-1 without needing toknow a specific callsign of a digipeater in order to digipeat their beacon transmission.APRS evolved over many years beginning in 1992, and there were many inefficient older networkconcepts that were still being used in some areas. You still may see references to these obsoletetechniques (RELAY, WIDE, TRACE, and TRACEn-N). By 2004, it was decided it was time toabandon those many older inefficient paths and concentrate on only the fully traceable WIDEn-Nalgorithm. The APRS network was universally upgraded to just the one simple and traceableWIDEn-N concept. This operating standard was called the New-N Paradigm. Since its adoption,most areas have seen many improvements in local area APRS reliability. In most areas, the numberof hops should be no more than 2 hops. This was because additional hops just add too muchnetwork load and too much interference from stations far away.The following sections explain configuration of the <strong>TH</strong>-<strong>D72A</strong>/E for use with digipeaters.7.4.1 UIDIGIWith UIDIGI activated (On), when a digipeater receives a UI frame with a character string for alias(such as RELAY, WIDE1-1, etc.) that matches the alias character string in the digipeater, thedigipeater repeats the packet substituting the callsign from the digipeater’s My Callsign configurationand adding a completed flag ( ).UIDIGI should normally be off. It is not good for mobiles to be digipeating all packets on the channelbecause it causes much interference. But sometimes, in special cases, when a mobile is being usedon top of a hill or in a special weak area to provide temporary emergency digipeating, then UIDIGIcan be enabled with the WIDE1-1 alias so that this mobile can serve as the first hop out of an area.In this case, the mobile station operates as the first hop of the first relay station for this area. WIDE1-1 digipeating only operates on the first hop, so there is not much damage to the network or to othertraffic.WB4APR-7 > APK103,WIDE1-1, WIDE2-1: TestWB4APR-7 > APK103,W6DJY-1*, WIDE2-1: TestMy callsign: W6DJY-1UIdigi: ONAliases: WIDE1-1Figure 7-5 Using UIDIGI<strong>TH</strong>-<strong>D72A</strong>/E CONTENTS 57From The <strong>N3UJJ</strong>.COM Document Library
7 APRS NETWORKS7.4.2 UIFLOODWith UIFLOOD activated (On), when a digipeater receives a UI frame with a character string for aliasin the form XXXXn-N where XXXX matches the alias character string in the digipeater, the digipeatersubtracts 1 from N and processes the packet reporting only the revised character string so as not tomake the frame length too long. The UIFLOOD technique does not provide traceable paths, so itsuse is not recommended generally. UIFLOOD is used for supporting the SSn-N or SSSn-N state orregional paths. Also the example should be changed to start with SS3-3 instead of WIDE3-3.UIFLOOD should very rarely be used by mobiles.WB4APR-7 > APK103,MD3-3: TestWB4APR-7 > APK103,W4DJY-1*, MD3-2: TestWB4APR-7 > APK103,W5DJY-1*, MD3-1: TestMy Callsign: W4DJY-1UIflood: OnAlias: MDSubstitution: IDMy Callsign: W5DJY-1UIflood: OnAlias: MDSubstitution: IDFigure 7-6 Using UIFLOODThe UIFLOOD method of digipeating is only a function of a full sized properly configured permanentdigipeater. If a normal mobile station is activated with UIFLOOD, it can cause much unnecessaryinterference to the network. The only time to ever activate a mobile station with UIFLOOD is in veryspecial cases, when a mobile station is being used on top of a hill to provide temporary emergencydigipeating to replace a broken or missing wide area digipeater.7.4.3 UITRACEUITRACE functions similar to UIFLOOD with the difference that UITRACE reports the full relay pathof digipeaters that were used to relay the message. UITRACE is the most powerful and traceabledigipeating function in APRS. It is the basis of the New-N paradigm discussed in 7.4 Digipeaters.Therefore, with UITRACE activated (On), upon receipt of a UI frame by a digipeater with a characterstring for alias in the form XXXXn-N where XXXX matches the alias character string in the digipeater,the digipeater subtracts 1 from N and processes the packet reporting each of the previousdigipeaters. This causes the digipeater itself to produce a frame length that becomes longer as themessage is relayed. Using UITRACE allows you to confirm the exact routing of any message.Like UIDIGI and UIFLOOD, UITRACE should normally never be enabled by a mobile except in veryunusual circumstances.WB4APR-7 > APK103,WIDE2-2: TestWB4APR-7 > APK103,W4DJY-1*, WIDE2-1: TestWB4APR-7 > APK103,W4DJY-1, W5DJY-1,WIDE2*: TestMy Callsign: W4DJY-1UItrace: OnAlias: WIDEFigure 7-7 Using UITRACEMy Callsign: W5DJY-1UItrace: OnAlias: WIDE58 CONTENTS <strong>TH</strong>-<strong>D72A</strong>/EFrom The <strong>N3UJJ</strong>.COM Document Library
7 APRS NETWORKSAlthough UITRACE using the normal APRS network path of WIDEn-N can be a problem if mobilesactivate their digipeater at the wrong time, it is also so powerful, that it is a shame not to be able touse it easily if required. For this reason, all APRS mobiles are encouraged to activate the UITRACEpermanently, BUT using the alias of TEMP instead of WIDE. This always makes possible use of themobile as a TEMPn-N digipeater while avoiding the problem of adding interference to the normal useof WIDEn-NNotworkingWB4APR-9 > APK102,TEMP1*, WIDE2-2: TestW4DJY-1WB4APR-7 > APK103,TEMP1, W4DJY-1*,WIDE2-1: TestW5DJY-1WB4APR-7 > APK103,TEMP1, W4DJY-1, W5DJY-1,WIDE2*: TestWB4APR-7 > APK103,TEMP1-1, WIDE2-2: TestAll mobiles can act asTEMPn-N digis all the timeif needed for emergencyFigure 7-8 Using UITRACE 27.4.4 Configuration Examples (USA)Following are two configuration examples of a fill-in digipeater (fill-in type digipeater) and a WIDEdigipeater (Wide-type digipeater).Example 1:This example shows configuration for a typical <strong>TH</strong>-<strong>D72A</strong>/E fill-in type digipeater for general use inroutine operation.• DigipeatDigipeat(MyCall): On• UIdigipeatUIdigi: OnAliases: WIDE1-1• UIfloodUIflood: OnAlias: SS or SSS(where SS or SSS is the abbreviation of state or ARRL section)Substitution: ID• UItraceUItrace: OffAlias:TEMP<strong>TH</strong>-<strong>D72A</strong>/E CONTENTS 59From The <strong>N3UJJ</strong>.COM Document Library
7 APRS NETWORKSExample 2:This is a general recommendation for permanent digipeaters installed at a high location.• DigipeatDigipeat(MyCall): On• UIdigipeatUIdigi: OnAliases: SAR(other local paths can be defined here)Note: SAR stands for “Search and Rescue”.• UIfloodUIflood: OnAlias: SS or SSSSubstitution: ID• UItraceUItrace: OnAlias: WIDE7.4.5 Proper Configuration (written by Bob Bruninga, WB4APR)New-N ParadigmIn 2004, the recommendations for APRS path configuration were drastically simplified. And this wascalled the New-N Paradigm. This plan eliminated all use of the simple paths of RELAY, WIDE andTRACE. We recommend you to avoid any references to these paths and ignore them. Instead, theNew-N Paradigm introduced three major routing paths, WIDEn-N, SSn-N and TEMPn-N. There n-Nis set to the number of hops (usually 2-2 or less).WIDEn-N National Standard:The WIDEn-N path was designated the National Standard so that it would work everywhere andshould be used for routine operations. Limiting the hops to 2 hops or less assures that the packetscover the local area and region (and will get to an IGate somewhere). And at the same time thepackets do not go any farther or add unwanted interference in other areas. This drastically improvedthe efficiency and reliability of the APRS national network. The only disadvantage of the WIDEn-Nstandard was that digipeaters could only be built with specialized modern APRS TNC hardware andcould not take advantage of thousands of old TNC for small local networks. To solve this problem,the WIDE1-1 “first-hop” concept was developed.WIDE1-1 Fill-in Digipeaters:Old TNC hardware of WIDE1-1 fill-in digipeaters only allowed a single digipeater ALIAS. In the earlydays of APRS we used the generic alias of “RELAY” so that any TNC or home station could be usedas a local digipeater. But this produced too many dupes and was abandoned in 2004. In its place,we substituted the path of “WIDE1-1”. The beauty of this ALIAS Is that it can act both as a simplegeneric ALIAS but at the same time, be recognized by all of the modern WIDEn-N digipeaters aswell. These modern TNCs with the WIDEn-N mechanism all avoid making any duplicates. Thisallows local areas to put up small area, local coverage WIDE1-1 digipeaters using any old TNC as afirst hop for mobiles driving nearby. The mobile can hit these fill-in digis in weak signal areas but at60 CONTENTS <strong>TH</strong>-<strong>D72A</strong>/EFrom The <strong>N3UJJ</strong>.COM Document Library
7 APRS NETWORKSthe same time also hit the WIDEn-N network when they are in good coverage areas. For this reason,the usual 2 hop recommendation for mobiles is not WIDE2-2. This is because those packets wouldnot be recognized by these fill-in digis. Instead, we encourage all mobiles to use the 2-hop path ofWIDE1-1, WIDE2-1.WIDE1-1, WIDE2-1 Mobile Path:WIDE1-1, WIDE2-1 Mobile Path: To assure that mobiles can get 2 hops no matter where they are andno matter what digi hears them first, we recommend the WIDE1-1, WIDE2-1 path. Notice how thesecond entry is already decremented to 2-1 so that the result of this combination is still the national 2hop recommendation. The reason we do not suggest a 2 hop pair of WIDE1-1,WIDE1-1 is because itcauses unnecessary dupes in those fill-in areas which are incapable of recognizing dupes. Also, westrongly discourage any fixed station from using WIDE1-1 as the first hop. Because it is not necessaryand causes the same problems with multiple dupes.The SSn-N path:The SSn-N path (which can also be SSSn-N or SSSSn-N) is a special path for a givencommunications geographical area. Typically SS is the standard abbreviation for States in the USA,but many large states are divided into two or more ARRL communication sections. So, a 3 or 4 letterSSSn-N designation is also appropriate. These paths are used by these special communicationsorganizations for state or section-wide nets or for drills or for emergencies. Depending on N, thesepackets can hit every digipeater in the state or section, but will not go into other areas no matter howbig N is. A typical value is SS3-3 or more.For example, using WIDE3-3 from the middle of Maryland would not only hit all digipeaters inMaryland but also dozens of digipeaters in the 5 surrounding states. This would be very badpractice. But using MD3-3 would hit every digi in Maryland and nowhere else. In fact, MD5-5 wouldbe no worse than MD3-3. In either case, all digis in the state would be hit and any left over hops willnot go anywhere. This is because no digi will repeat the same packet twice.TEMPn-N Backup/Emergency Path:We also needed a special come-as-you-are emergency backup path system for when there is noexisting infrastructure and when we needed to implement a system in a hurry in the field.The two standardized paths, WIDEn-N and SSn-N provide good APRS operation everywhere formost applications. Except, if the power to the digipeaters is lost, and then there is no backup system.To meet this need, we defined the special path of TEMPn-N to be used when either WIDEn-N or SSn-N does not work.To implement this ubiquitous backup system, we took advantage of the fact that every existingKenwood Mobile APRS radio can be a digipeater. But it would be a huge problem if all these mobilesdrove around routinely with their digipeaters enabled as WIDEn-N or SSn-N. Human fallibilitysuggests that once turned on (by the hundreds), many would forget to turn them back off, and wewould destroy the national channel with unwanted interference. We solved that problem by definingthis special TEMPn-N path. This path can be enabled in ALL mobiles ALL the time, because no oneuses it for routine operations. Thus, it is available to everyone at any time if there is a mobileKenwood nearby and there is no danger of any QRM to existing operations.Unfortunately, the original TM-D700A/E did not come factory set to enable automatic TEMPn-Noperation. As a result, not many TM-D700A/E operators have remembered to do this themselves.But in the TM-D710A/E, Kenwood has enabled TEMPn-N digipeating from the factory, thus assuringthat this backup system is readily available everywhere there is a TM-D700A/E. The new <strong>TH</strong>-<strong>D72A</strong>/Ealso comes pre-loaded to support TEMPn-N digipeating but it defaults to OFF so that thesehandhelds do not automatically start digipeating when someone uses the TEMPn-N system. But theycan be enabled at any time with a simple menu item so that a <strong>TH</strong>-<strong>D72A</strong>/E handheld in a high locationcan act as a digipeater by anyone that needs it.<strong>TH</strong>-<strong>D72A</strong>/E CONTENTS 61From The <strong>N3UJJ</strong>.COM Document Library
7 APRS NETWORKSSince all of these transceivers can be used as backup emergency digipeaters anytime, anywhere,someone that is unable to hit any digipeaters from their current location with either WIDEn-N or SSn-N can always try TEMP1-1,WIDE2-2 to get out. Or, if all the digipeaters in an area are off-the-air, hecan actually try TEMP2-2 to get two mobile hops (or more) to a temporary destination. To furtherbenefit this alternate backup digipeating technique, some special battery-powered backupdigipeaters at high locations can also support this path in addition to WIDEn-N and SSn-N paths as afull time backup to the existing system.7.5 Packet PathIt is necessary to confront the issue of frequency congestion due to the spread of APRS systems inorder to efficiently transfer packet data (paradigm). <strong>TH</strong>-<strong>D72A</strong>/E supports the configurations of New-NParadigm, RELAY Paradigm and STATE/SECTION/REGION. Overall, this provides an efficientmechanism for transferring packets.7.5.1 New-N ParadigmAppropriate configuration is required in order to digipeat a packet path (relay route). New-NParadigm using WIDEn-N assigns an alias and a relay stage number for digipeaters. This system isspreading worldwide.For example, when you desire two hops, then you can configure “TOTAL HOPS: 2” and onceconfigured, you can verify that the packet path is configured to WIDE2-2. In the past years, when aregional digipeater was wanted, RELAY was used but this is replaced by WIDE1-1. You can useWIDE-1-1 simply by configuring On via menu selection Again, you can verify on the configurationscreen that “WIDE1-1 or WIDE2-1” was used for the relay route.7.5.2 RELAY ParadigmThis is one of the digipeat types used in Europe. The old backwards compatible RELAY techniquewas included for some areas that have still not updated to the universal New-N Paradigm usingtraceable WIDEn-N. It allows the first hop to be via the RELAY path and then uses TRACEn-N forsubsequent hops. The USA is using the New-N Paradigm. But, Europe has not yet fully coalescedinto RELAY PARADIGM as of this writing.62 CONTENTS <strong>TH</strong>-<strong>D72A</strong>/EFrom The <strong>N3UJJ</strong>.COM Document Library
7 APRS NETWORKS7.5.3 STATE/ SECTION/ REGIONIn contrast to WIDEn-N which generates packets equally in all directions, you can use STATE/SECTION/REGION to restrict packets to only be relayed within the specified boundary.Abbreviations, such as two letter “AZ” for Arizona or three or four letter abbreviations such as “NCA”for Northern California, are used to specify the boundary.Using these limited regions, it is possible for stations to set up special nets under specialcircumstances to communicate over large distances without adding interference to other areas notinvolved. For example, using WIDE5-5 from the middle of Maryland would generate hundreds ofpackets of interference in 13 surrounding states! This is why nothing larger than WIDE2-2 (two hops)is recommended. However, using MD5-5 from anywhere within the state of Maryland will get fromany corner to every other corner of Maryland. (13 digipeaters total and with no duplications)Thus a special Maryland APRS net in support of disaster training can be held without botheringsurrounding states.<strong>TH</strong>-<strong>D72A</strong>/E CONTENTS 63From The <strong>N3UJJ</strong>.COM Document Library
8 MCP-4A MEMORY CONTROL PROGRAM (FOR USE WI<strong>TH</strong> <strong>TH</strong>-<strong>D72A</strong>/E)MCP-4A is a software designed for use with your personal computer to edit and manage memorychannel and menu data for <strong>TH</strong>-<strong>D72A</strong>/E.For convenience of users, Kenwood distributes the software via our corporate web site as a freeservice for users.In addition to the conventional functions, the new version has a new function to manage GPS logdata. The read GPS log data can be converted into versatile KML or GPX format. The GPS log datarecorded on the <strong>TH</strong>-<strong>D72A</strong>/E can be read to a PC and displayed on map software.Create, manage and edit memory channel, menu data and GPS log data for <strong>TH</strong>-<strong>D72A</strong>/E in theenhanced MCP-4A program to maximize your enjoyment of these transceivers.Figure 8-1 MCP-4A Memory Channel Window64 CONTENTS <strong>TH</strong>-<strong>D72A</strong>/EFrom The <strong>N3UJJ</strong>.COM Document Library
8 MCP-4A MEMORY CONTROL PROGRAM (FOR USE WI<strong>TH</strong> <strong>TH</strong>-<strong>D72A</strong>/E)8.1 Downloading and Installing MCP-4A1. Check that the specifications for your computer meet the following that are necessary to useMCP-4A.Table 8-1 MCP-4A Computer Specifications TableComputerRequired SpecificationWindows XP (Service Pack 3 or later) (32-bit))Operating System Windows Vista (Service Pack 1 or later) (32-bit/ 64-bit)Windows 7 (32-bit/ 64-bit)Run-timeEnvironmentMicrosoft .NET Framework 2.0 (Service Pack 1 or later) must be installed.CPUCPU clock frequency recommended by OS or fasterMemory More than OS recommended capacityHard Disk 30 MB or more free space.Display XGA resolution or higher (1024 x 768)CommunicationPortUSB 1.0/2.0 port.Note: If using Windows XP, it is necessary to install the “Microsoft .NET Framework 2.0 (Service Pack 1 or later)” on the PC.Windows Vista and Windows 7 do not require NET Framework since this newer version of Windows already contains thenecessary environment software. To determine if “Microsoft .NET Framework 2.0 (Service Pack 1 or later)” is installed on your computer with Windows XP,click “Control Panel” > “Add or Remove Programs” and check in the list of installed software. If the list includes “.NETFramework 2.0 (Service Pack 1 or later)”, another installation is not necessary. .NET Framework Run-time can be downloaded from the Microsoft web site. A virtual COM port driver needs to be installed onto the PC to use the MCP-4A with a USB cable. Do not connect the transceiver to a PC using a USB cable before installing the virtual COM port driver. Virtual COM Port Driver: http://www.kenwood.com/i/products/info/amateur/vcp_e.html2. Download the newest version of MCP-4A from the Kenwood web site URL shown below:MCP-4A download location: http://www.kenwood.com/i/products/info/amateur/mcp4a_e.html(URL is subject to change).3. Extract the downloaded file into a designated folder.In the designated folder, a folder will be created.Execute the “setup.exe” in the folder, and follow the instructions that appear on the display toinstall MCP-4A.Note: Windows Vista and Windows 7 require that you click the “Allow (A)” button when the User Account Control windowdisplays a message asking permission to install the software. Installing MCP-4A alone without first installing “Microsoft .NET Framework 2.0 (Service Pack 1 or later)” will result inMCP-4A not being able to start. “Microsoft .NET Framework 2.0 (Service Pack 1 or later)” must be installed first.Windows Vista and Windows 7 do not require “Microsoft .NET Framework 2.0 (Service Pack 1 or later)” since this newerversion of Windows already contains the necessary environment software.<strong>TH</strong>-<strong>D72A</strong>/E CONTENTS 65From The <strong>N3UJJ</strong>.COM Document Library
8 MCP-4A MEMORY CONTROL PROGRAM (FOR USE WI<strong>TH</strong> <strong>TH</strong>-<strong>D72A</strong>/E)4. Click “Start” > “Program” > “KENWOOD” > “MCP-4A” to start MCP-4A.Figure 8-2 MCP-4A Splash Window5. Select the communication port.Specify in the COM Port frame the communication port (COM Port) that will be used tocommunicate via your computer with the target station. You cannot select grayed out ports. If allports are grayed out, this indicates your computer has no COM ports installed and you will not beable to use the MCP-4A software even if you click the “OK” button.Figure 8-3 MCP-4A COM Port Setting Window6. Read the information of <strong>TH</strong>-<strong>D72A</strong>/E.Read the desired information of <strong>TH</strong>-<strong>D72A</strong>/E that you wish to edit.Click the “OK” button. Next, select “Read Data from the Transceiver” from the Program pulldownmenu and read the information from the target transceiver.Note: The basic method of using MCP-4A is to read the existing transceiver data into MCP-4A, edit the configuration, andthen write the new configuration back to the transceiver.66 CONTENTS <strong>TH</strong>-<strong>D72A</strong>/EFrom The <strong>N3UJJ</strong>.COM Document Library
8 MCP-4A MEMORY CONTROL PROGRAM (FOR USE WI<strong>TH</strong> <strong>TH</strong>-<strong>D72A</strong>/E)Figure 8-4 MCP-4A Read Transceiver Advisory MessageFigure 8-5 MCP-4A Program Menu: Read Data from the Transceiver<strong>TH</strong>-<strong>D72A</strong>/E CONTENTS 67From The <strong>N3UJJ</strong>.COM Document Library
8 MCP-4A MEMORY CONTROL PROGRAM (FOR USE WI<strong>TH</strong> <strong>TH</strong>-<strong>D72A</strong>/E)8.2 Main Functions of MCP-4AMCP-4A has many functions. This section lists the useful functions of MCP-4A including addedfunctions.8.2.1 Useful Functions of MCP-4A• Simple operation.• Graphical display of SmartBeaconing.• Importing other MCP files.• Setting the font sizes.• Exporting .html Files.• Configuring RSS.• Reading GPS log data.8.2.2 Functions Only Configurable by MCP-4A• Changing the power-on bitmap image• Configuring the character string for the power-on password.• Changing the speed at which the switchover is made between Decay Algorithm and ProportionalPathing.(For details, refer to sections of Decay Algorithm and of Proportional Pathing in the chapter of“APRS IN ACTION”.)68 CONTENTS <strong>TH</strong>-<strong>D72A</strong>/EFrom The <strong>N3UJJ</strong>.COM Document Library
8.3 Reading a FileThis section describes how to read a file.8 MCP-4A MEMORY CONTROL PROGRAM (FOR USE WI<strong>TH</strong> <strong>TH</strong>-<strong>D72A</strong>/E)8.3.1 Reading a File Created with MCP-4ATo read a file, select “Open” from the File pulldown menu, select “<strong>TH</strong>-D72 MCP-4A File (*.mc4)” inthe “Files of type” dropdown list, and open the desired file created in <strong>TH</strong>-<strong>D72A</strong>/E.8.3.2 Importing Other MCP Files into MCP-4AWith MCP-4A, it is possible to read a file that was created using other MCP series software.To read a file created by other MCP software, select “Open” from the File pulldown menu, select thecorrect file type in the “Files of type” dropdown list, and open the desired file.In the Open window, select the correct file type in the Files of type dropdown list, and open thedesired file.The files in the table below can be imported into MCP-4A. The referenced software can bedownloaded from the following web site:http://www.kenwood.com/i/products/info/amateur/software_download.htmlTable 8-2 MCP-4A Importable File Formats TableSoftware Name andExtensionMCP-2AMCP-2000 (*.2k0)MCP-D7G (*.d7g)MCP-1A (*.mcp)MCP-F6/F7 (*.fx)MCP-D700 (*.700)MCP-D7 (*.d7)Transceiver ModelTM-V71A/ TM-V71E/TM-D710A/ TM-D710E/RC-D710A/ RC-D710ETS-2000/ TS-2000X/TS-B2000<strong>TH</strong>-D7A (G)/ <strong>TH</strong>-D7A(G2.0)/ <strong>TH</strong>-D7E (G2.0)<strong>TH</strong>-K2AT/ <strong>TH</strong>-K2E/<strong>TH</strong>-K2ET/ <strong>TH</strong>-K4AT/<strong>TH</strong>-K4E/ TM-271A/TM-271E<strong>TH</strong>-F6A/ <strong>TH</strong>-F7A/ <strong>TH</strong>-F7ETM-D700A/ TM-D700E<strong>TH</strong>-D7A/ <strong>TH</strong>-D7ERemarks<strong>TH</strong>-<strong>D72A</strong>/E CONTENTS 69From The <strong>N3UJJ</strong>.COM Document Library
8 MCP-4A MEMORY CONTROL PROGRAM (FOR USE WI<strong>TH</strong> <strong>TH</strong>-<strong>D72A</strong>/E)Only files created for K-type models (USA and Canada) can be imported into MCP-4A. Thereferenced software can be downloaded from the following Kenwood U.S.A. Corporation web site:http://www.kenwoodusa.com/Support/Amateur_Radio/Table 8-3 MCP-4A Importable File Formats Table (K-type only)Software Name andExtensionMCP-G707 (*.707)MCP-V7 (*.v7)MCP-G71 (*.71)TransceiverModelTM-G707ATM-V7A<strong>TH</strong>-G71ARemarksDedicated only for USA and Canada. Unable to use other than K-type(USA and Canada) of TM-G707 due to command specificationdifferences. DTSS is ignored.Dedicated only for USA and Canada. Unable to use other than K-type(USA and Canada) of TM-V7 due to command specificationdifferences. DTSS is ignored.Dedicated only for USA and Canada. Unable to use other than K-type(USA and Canada) of <strong>TH</strong>-G71 due to command specificationdifferences.Note: Memory channels that are outside of the receive frequency range of <strong>TH</strong>-<strong>D72A</strong>/E cannot be read. With MCP-4A, it is not possible to exchange data between above-mentioned transceivers except <strong>TH</strong>-<strong>D72A</strong>/E. MCP-4A cannot read DTMF memory and other menu settings, Although you may be able to import an MCP file type that is not included in the above tables, some data in the file may not beread into the MCP-4A program.8.4 Reading GPS Log DataMCP-4A can read GPS log data recorded on the <strong>TH</strong>-<strong>D72A</strong>/E. The read GPS log data can be viewedwith a map software program.This section describes how to read GPS log data.8.4.1 Reading GPS Log Data from <strong>TH</strong>-<strong>D72A</strong>/ESelect “Read GPS Logger Data from the Transceiver” from the Program pulldown menu. Data froma GPS Logger and Waypoints can be read. Select the checkbox of the desired data. Pressing the“Read” button will start reading the data. The data is saved as a NMEA file.When the reading is complete, a screen appears to prompt you to select whether or not you want theGPS log data in the transceiver to be deleted. The read data cannot be written onto the transceiveragain.70 CONTENTS <strong>TH</strong>-<strong>D72A</strong>/EFrom The <strong>N3UJJ</strong>.COM Document Library
8 MCP-4A MEMORY CONTROL PROGRAM (FOR USE WI<strong>TH</strong> <strong>TH</strong>-<strong>D72A</strong>/E)Figure 8-6 GPS Data Reading Screen8.4.2 Managing the Read GPS Log DataWhen the reading is complete, the PGS log data is saved in NMEA file format in the MCP-4A folder.The GPS Logger window shows the saved NMEA files. The file name is the time and date when thedata is read.Two types of NMEA file are created: a file that contains all the log data read from the transceiver anda file that is divided into blocks. Stop the log to divide the data into blocks, while recording the log onthe transceiver. For example, if you wish to divide the log data into data for outward and return trips,stopping the logging once will divide the data into two blocks.The GPS Logger window allows conversion of NMEA files to KML or GPX files, or deletion of thedata.The GPS Logger window can be opened also from “GPS Logger” in the Tools pulldown menu.Figure 8-7 GPS Logger Window<strong>TH</strong>-<strong>D72A</strong>/E CONTENTS 71From The <strong>N3UJJ</strong>.COM Document Library
8 MCP-4A MEMORY CONTROL PROGRAM (FOR USE WI<strong>TH</strong> <strong>TH</strong>-<strong>D72A</strong>/E)8.4.3 Converting to KML or GPX File FormatTo display the read GPS log data in a map program, convert the date to KML or GPX file format.In the GPS Logger window, select the desired log data and press the “Save” button. “Track” and“Rate of Preservation” appear. Changing the value of Rate of Preservation allows a user to thin theGPS log data. If track points are too closely spaced on the map, thinning the GPS log data canreduce the complexity. Press the “OK” button in the Save Track dialog box and the Save screen willappear. In the file type selection, select “Keyhole Markup Language File (*.kml)” or “GPS ExchangeFormat File (*.gpx)” to save the data in KML or GPX format. KML and GPX format data can beviewed in map programs that are compatible with these file types.Figure 8-8 Save Track Dialog BoxFigure 8-9 Save Screen of GPS data72 CONTENTS <strong>TH</strong>-<strong>D72A</strong>/EFrom The <strong>N3UJJ</strong>.COM Document Library
8 MCP-4A MEMORY CONTROL PROGRAM (FOR USE WI<strong>TH</strong> <strong>TH</strong>-<strong>D72A</strong>/E)8.5 Introduction to Main FunctionsThe following sections provide detailed descriptions of the features referred to in “8.2 Main Functionsof MCP-4A”.8.5.1 Simple OperationThe configuration screens and writing and reading screens of the configuration data for MCP-4A canbe displayed easily in the Simple Operation window.The Simple Operation window appears when MCP-4A starts or alternatively can be displayed byselecting “Simple Operation” in the View pulldown menu.Figure 8-10 Simple Operation Window8.5.2 Graphical Display of SmartBeaconingThe parameters set for SmartBeaconing can be viewed in the Rate Curve and the Turn Angle vsSpeed graphs. Changing the parameter values reflects the values in the Rate Curve and the TurnAngle vs Speed graphs. The graphs provide visual representations of the SmartBeaconing operationto help a user easily configure SmartBeaconing.Figure 8-11 Graphs of SmartBeaconing<strong>TH</strong>-<strong>D72A</strong>/E CONTENTS 73From The <strong>N3UJJ</strong>.COM Document Library
8 MCP-4A MEMORY CONTROL PROGRAM (FOR USE WI<strong>TH</strong> <strong>TH</strong>-<strong>D72A</strong>/E)8.5.3 Changing the Font SizesThe font sizes used in the various windows can be selected from three choices. In the “Font” of theView pulldown menu, the font size can be selected from “Normal”, “Large” or “Extra Large”.Note: Use an Operating System function to change the size of characters on the Menu bar. If you select a font other than Normal, some of the displayed items may not fit within a window.8.5.4 Setting your CallsignYour callsign can be set to be displayed on the MCP-4AConfigure your callsign in the Callsign Setting window in the Setup pulldown menu.The character string is shown in the Splash window when the software starts, in the About MCP-4Adialog box and in the Title bar.In addition, when the Callsign is configured, the character string configured will be played back usingMorse code when the software starts.Note: Depending on your particular computer used, it may not be possible to play back Morse code.8.5.5 Exporting .hmk FilesAlmost all the configuration data of memory channels and menus created on MCP-4A can beexported in HTML format (that can be viewed in a typical Internet browser).Select “Export” from the File pulldown menu and enter a file name to save in the Save window.8.5.6 Configuring RSSIn MCP-4A, RSS update information can be displayed on the tool bar. RSS is a file format designedto provide update information of news sites or blogs. Configuring RSS enables receipt of updateinformation automatically.To configure an RSS, select “MCP Setting” from the Setup pulldown menu to display the RSS tab.Click the “Add” button and enter the target URL and Name. Click the “OK” button to newly add theRSS to the RSS list. Selecting the checkbox enables the setting and the update information of theregistered RSS is received and displayed on the tool bar.The time interval to obtain the update information from the registered RSS’s web site and the time todisplay the updated information on the RSS bar can be configured.Figure 8-12 RSS Tool Bar74 CONTENTS <strong>TH</strong>-<strong>D72A</strong>/EFrom The <strong>N3UJJ</strong>.COM Document Library
8 MCP-4A MEMORY CONTROL PROGRAM (FOR USE WI<strong>TH</strong> <strong>TH</strong>-<strong>D72A</strong>/E)8.5.7 Changing the Power-on Bitmap ImageMCP-4A allows selection of a bitmap image which appears on the transceiver display when thetransceiver’s power is turned on. Different images can be configured for GPS Only mode and forNormal mode.From the Edit pulldown menu select “Menu” > “Radio”. Click on the “Custom Start-up Screen“checkbox in “Power-on” or “GPS Logger”. Clicking the “Bitmap File” button activates a dialog box toopen a file. Select a bitmap file to be used.Writing the configuration data to the transceiver will change the power on bitmap image.The image used for the power-on bitmap must be a monochrome bitmap file with 120 pixels widthand 48 pixels height.8.5.8 Configuring the Character String for the Power-on PasswordDo the following procedure to enter the password for the Power-on Password function.From the Edit pulldown menu select “Menu” > “Radio”. In the Radio window, enter in the Passwordedit box a string of up to 6 characters consisting of alphanumerics 0 to 9 and A to D.Note: When the entry of the password is complete, click on the Power-on Password checkbox in this window to enable thePower-on Password function.<strong>TH</strong>-<strong>D72A</strong>/E CONTENTS 75From The <strong>N3UJJ</strong>.COM Document Library
9 HOW TO UPDATE FIRMWARE9.1 FirmwareThis section describes how to update the firmware of the <strong>TH</strong>-<strong>D72A</strong>/E transceiver itself and of theTNC.9.2 Verifying Necessary EquipmentIn order to update the equipment, each of the following is required:• Equipment to be updated (<strong>TH</strong>-<strong>D72A</strong>/E)• Computer• Communication cable (USB Cable that comes with <strong>TH</strong>-<strong>D72A</strong>/E)• Firmware update programKenwood provides the firmware update program for use on Windows operating systems. Thespecifications for your computer in order to use this software are as shown in Table 9-1.Table 9-1 Firmware Update Computer Specifications TableComputerOperating SystemCPUMemoryHard DiskCommunication PortRequired SpecificationWindows XP (Service Pack 3 or later), Windows Vista (Service Pack 1 or later) (32-bit/64-bit), or Windows 7 (32-bit/ 64-bit)CPU or compatible CPU that is equivalent or superior to the CPU recommended for theOperating SystemMore than OS recommended capacity30 MB or more free spaceUSB 2.0 interfaceNote: Upon connecting the transceiver to a PC using a USB cable, ensure that the connection has securely been in place. Thefirmware updating program may not behave properly if connecting through a USB hub. Download and install the virtual COM port driver to make a USB connection possible for command communications via a USBconnector.Virtual COM Port Driver: http://www.kenwood.com/i/products/info/amateur/vcp_e.html This firmware updating program cannot read and write user data such as menu items and memory channel frequencies. Ifyou do not wish to lose user data, save the data using the MCP-4A Memory Control Program prior to updating the firmwareand writing the data back after updating the firmware.76 CONTENTS <strong>TH</strong>-<strong>D72A</strong>/EFrom The <strong>N3UJJ</strong>.COM Document Library
9 HOW TO UPDATE FIRMWARE9.3 How to Verify Firmware VersionYou can view the firmware version by the procedure below. Use one of the following two ways ofverifying.9.3.1 Checking with the Transceiver1. Press 2 [TNC] on <strong>TH</strong>-<strong>D72A</strong>/E to display “APRSxx”.2. Turn the power OFF.3. Hold #[ENT] down and turn the power ON.4. Verify the following is displayed.• Number on the first row of the display: Indicates the firmware version of the transceiver.• Number on the second row of the display: Indicates the firmware version of the Built-in TNC.Figure 9-1 Verifying Firmware Versions9.3.2 Checking with MCP-4A1. Press 2 [TNC] on <strong>TH</strong>-<strong>D72A</strong>/E to display “APRSxx”.2. Turn the power OFF. Connect the communication cable to the transceiver itself.3. Turn the power of the transceiver ON.4. Start MCP-4A and select “Transceiver Information” from the Model pulldown menu.Figure 9-2 Verifying Firmware Versions<strong>TH</strong>-<strong>D72A</strong>/E CONTENTS 77From The <strong>N3UJJ</strong>.COM Document Library
9 HOW TO UPDATE FIRMWARE9.4 How to Get Latest Firmware/SoftwareDownload the latest version of update software from the Kenwood web site URL shown below:(URL is subject to change.)http://www.kenwood.com/i/products/info/amateur/software_download.html9.5 How to UpdateCarefully read the update instructions provided when you download the software. Begin theprocedure only after you understand the provided instructions.Table 9-2 Firmware Update Summary TableItem to Update Downloads Bundle filesTransceiver<strong>TH</strong>-D72_Main_VxxxE.zip<strong>TH</strong>-D72_Main_Vxxx_e.exe<strong>TH</strong>-D72_Main_e.chmTNC<strong>TH</strong>-D72_TNC_VxxxE.zip<strong>TH</strong>-D72_Tnc_Vxxx_e.exe<strong>TH</strong>-D72_Tnc_e.chmNote: “XXX” is a 3-digit numeric version number. During the routine update, there are automatic resets executed several times. Therefore, ensure you back up all configurationdata and channel data prior to beginning the firmware update To restore the backup data, ensure using MCP-4A prior to writing data back to the transceiver all data is correct. The software update for TNC is not available on the web site: The current firmware version of TNC is 1.00 as of May 15 th ,and has not been upgraded from the original firmware version.78 CONTENTS <strong>TH</strong>-<strong>D72A</strong>/EFrom The <strong>N3UJJ</strong>.COM Document Library
10 MISCELLANEOUS TOPICS10.1 AvMap (Don Arnold, W6GPS)I find that using the Kenwood <strong>TH</strong>-<strong>D72A</strong>/E with built-in GPS is very convenient for travel And alsoAPRS operations are simple without the use of an external GPS device. But at times it is importantfor me to have a visual display of APRS activity around me without the use of a computer.<strong>TH</strong>-<strong>D72A</strong>/E uses the NMEA 0183 standard at 4800 and 9600 baud rates to communicate with theGPS unit. The transceiver has three formats for interfacing to GPS units: NMEA, Magellan and theKenwood format. A GPS system with a serial interface will connect to the <strong>TH</strong>-<strong>D72A</strong>/E but if yourGPS supports bi-directional communication, it is possible to have APRS callsigns and icons appearon the GPS screen. Of all the name brand GPS units, the AvMap G6 smoothly interfaces with theKenwood <strong>TH</strong>-<strong>D72A</strong>/E TNC better than any other with less adaptation and more features specific toAPRS and the <strong>TH</strong>-<strong>D72A</strong>/E. The AvMap G6 takes advantage of the Kenwood APRS sentence andprovides a Kenwood interface cable for truly Plug and Play operations.Note: The baud rates refer to serial communication between transceiver and GPS and not to the AX.25 Packet communicationbetween transceivers.AvMap G6 has many of the normal Personal Navigator data fields that you would find in most worldbrand GPS units, but AvMap developers have integrated the Kenwood sentence format to provideyou a Tactical Mode. No other standalone GPS system has this exclusive Kenwood/AvMap feature.If you are involved in a search and rescue scenario, you can assign one of your APRS assets(callsigns) the target designation for Tactical Mode. This designated callsign on each position reportis processed by AvMap for easy viewing and tracking.If you are using the <strong>TH</strong>-<strong>D72A</strong>/E with the AvMap, in Tactical mode, you will get an additional five datafields that can be displayed on your AvMap:• Target ID - Callsign• Target Lat Long• Target SOG - Speed over Ground• Target COG - Course over Ground• Target Altitude – Mean -sea-levelYou can choose three of these five data fields to display on the AvMap screen. So, when your targetcallsign is moving, you can get real time information and a visual display on the AvMap G6. TheAvMap operating system now uses full APRS icon representation. The decoded APRS packet fromthe Kenwood TM-D710A/E (in Kenwood WAYPOINT format) is processed by the AvMap G6operating system. When a mark is made on the screen, it now can be one of over 200 standardizedAPRS icons along with the callsign. Setup of the Kenwood transceiver with AvMap is very simple.Using the defaults of the Kenwood transceiver, only a few menu configurations are needed to set upthe <strong>TH</strong>-<strong>D72A</strong>/E.<strong>TH</strong>-<strong>D72A</strong>/E CONTENTS 79From The <strong>N3UJJ</strong>.COM Document Library
10 MISCELLANEOUS TOPICSBasic Setup Instructions for Kenwood <strong>TH</strong>-<strong>D72A</strong>/ERadio has been fully reset.Menu110 Battery Saver OFF111 APO OFF194 Date set195 Time set196 UTC offset201 Battery Saver GPS OFF300 Enter Call sign Push A/B Band KeySet A Band to 144.390F-1 Internal GPS off330 COM port speed 9600331 Input GPS332 Output Waypoint340 Format Kenwood341 Length 9-CharConnect 3-pole connection to COM Port <strong>TH</strong>-<strong>D72A</strong>/E. Connect 4-pole connection to AvMap TNCport. Verify that the AvMap is in 9600 on the Interface page.Figure 10-1 AvMap G6 and <strong>TH</strong>-<strong>D72A</strong>/E80 CONTENTS <strong>TH</strong>-<strong>D72A</strong>/EFrom The <strong>N3UJJ</strong>.COM Document Library
11 APPENDIXRevision HistoryRevision DateMay 15, 2011Release of the first edition.Summary of Changes<strong>TH</strong>-<strong>D72A</strong>/E CONTENTS 81-From The <strong>N3UJJ</strong>.COM Document Library
From The <strong>N3UJJ</strong>.COM Document Library
We would like to extend our sincere thanks to the following hams who have helped to compile this booklet:Mr. Bob Bruninga, WB4APR,Mr. Jonathan Taylor, K1RFD,Mr. Steve Bragg, KA9MVA, and Mr. Don Arnold, W6GPS.Also, we would like to thank all hams who support and maintain the APRS and EchoLink network in the world.From The <strong>N3UJJ</strong>.COM Document Library
KENWOODRevision 1.01 May 15, 2011From The <strong>N3UJJ</strong>.COM Document Library