
You also want an ePaper? Increase the reach of your titles
YUMPU automatically turns print PDFs into web optimized ePapers that Google loves.
IMPORTANT SAFETY INSTRUCTIONSFor Household Use OnlyWHEN USING YOUR SHARK ®STEAM MOP, BASIC SAFETYPRECAUTIONS SHOULD ALWAYSBE FOLLOWED, INCLUDING THEFOLLOWING:READ ALL INSTRUCTIONS BEFOREUSING YOUR SHARK ® STEAM MOP.DANGER OF SCALDING.Please use caution when using the steam mop.The steam emitted from the steam mop is veryhot.POLARIZED PLUG:This appliance has a polarized plug (one bladeis wider than the other). As a safety feature,this plug will fit into a polarized outlet onlyone way. If the plug does not fit fully into theoutlet, reverse the plug. If it still does notfit, contact a qualified electrician. Do notattempt to defeat this safety feature.WARNING:TO REDUCE THE RISK OF FIRE, ELECTRICSHOCK OR INJURY:1. Use the system only for its intended use.2. DO NOT use outdoors.3. DO NOT leave the appliance unattended whenplugged in. Always unplug the power cord fromthe electrical outlet when not in use and beforeservicing.4. DO NOT allow the appliance to be used bychildren. Close attention is necessary when usedby or near children, pets or plants.5. Use only as described in this manual.6. Use only manufacturer’s recommendedaccessories.7. DO NOT use with damaged cord or plug. Ifappliance is not working as it should, has beendropped, damaged, left outdoors, or droppedinto water. Return the appliance to EURO-PROOperating LLC for examination and repair.Incorrect re-assembly or repair can cause a riskof electrical shock or injury to persons when theappliance is used.8. To protect against a risk of electric shock, DONOT immerse the steam mop into water or anyother liquids.9. DO NOT handle plug or steam mop with wethands or operate appliance without shoes.10. DO NOT pull or carry by cord, use cord as ahandle, close a door on cord, or pull cord aroundsharp edges or corners. Do not run applianceover cord. Keep cord away from heated surfaces.11. DO NOT unplug by pulling on power cord.To unplug, grasp the plug not the power cord.Do not use extension cords or outlets withinadequate current carrying capacity.TOLL FREE: 1-800-798-7398<strong>S3901</strong>_N_11_IB_E_120410_6.indd 212-04-10 11:33 AM
12. DO NOT put any objects into openings. Do notuse with any opening that is blocked.13. DO NOT put hands or feet under the steammop. Unit gets very hot.14. In mop mode use ONLY on flat, horizontalsurfaces. Do not use on walls, counters orwindows.15. DO NOT use on leather, wax polished furnitureor floors, synthetic fabrics, velvet or otherdelicate, steam sensitive materials.16. DO NOT add cleaning solutions, scentedperfumes, oils or any other chemicals to thewater used in this appliance as this may damagethe unit or make it unsafe for use. If you live in ahard water area, we recommend using distilledwater in your steam mop.17. When in use, NEVER turn the appliance overor on its side. NEVER DIRECT STEAMTOWARDS PEOPLE, ANIMALS ORPLANTS.18. NEVER LEAVE THE STEAM MOP INONE SPOT ON ANY SURFACE FOR ANYPERIOD OF TIME WHEN THE CLEANINGPAD IS ATTACHED AS THIS WILLDAMAGE YOUR FLOORS.19. Carefully remove the cleaning pad immediatelyafter you have unplugged and allowed the steammop to cool.20. When cleaning the steam mop, unplug thepower cord from the electrical outlet and cleanwith a dry or damp cloth. Do not pour wateror use alcohol, benzene or paint thinner on theunit.21. Extreme caution should be exercised whenusing this appliance to clean stairs.22. Never use steam mop without the cleaningpad attached.23. Keep your work area well lit.24. Store steam mop indoors in a cool, dryplace.25. To avoid circuit overload, do not operateanother appliance on the same socket(circuit) as the steam cleaner.26. If an extension cord is absolutely necessary,an extension cord rated a minimumof 15 ampere, 14 gage cord should beused. Cords rated for less amperage mayoverheat. Care should be taken to arrangecord so that it cannot be pulled or trippedover.27 Always unplug and allow the steam mopto cool before removing or changing mopheads.WARNING: Your steam mop isdesigned to clean hard floor surfaces thatwill withstand high heat. Do not use onunsealed wood or unglazed ceramic floors.On surfaces that have been treated withwax or some no wax floors, the sheenmay be removed by the heat and steamaction. It is always recommended to test anisolated area of the surface to be cleanedbefore proceeding. We also recommendthat you check the use and care instructionsfrom the floor manufacturer.SAVE THESE INSTRUCTIONSwww.sharkclean.com<strong>S3901</strong>_N_11_IB_E_120410_6.indd 312-04-10 11:33 AM
This manual covers model number: <strong>S3901</strong> N 11TECHNICAL SPECIFICATIONSVoltage: 120V., 60Hz.Power: 1550 WattsWater Capacity: 300ml (10.14 oz.)TOLL FREE: 1-800-798-7398<strong>S3901</strong>_N_11_IB_E_120410_6.indd 412-04-10 11:33 AM
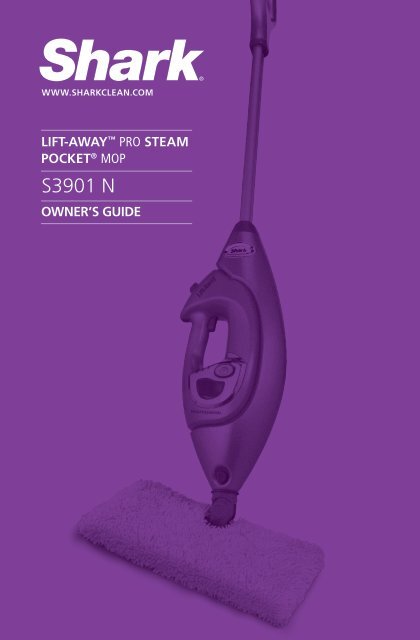
ContentsThank you forpurchasingthe Shark ®Lift-Away ProSteam Pocket ®Mop.Getting Started.................................................................................................... 2Getting Started With Your Steam Mop................................................................. 4Using Your Steam Mop......................................................................................... 6Using Your Carpet Glider...................................................................................... 9Getting Started With Your Removable Handheld Steamer.................................... 10Using Your Removable Handheld Steamer with Direct Steam Nozzle.................. 11Using Your Removable Handheld Steamer with Garment Steamer...................... 12Using Your Removable Handheld Steamer with Accessory Hose.......................... 13Using Your Removable Handheld Steamer with Flat Scrubber.............................. 14Care and Maintenance......................................................................................... 15Troubleshooting Guide......................................................................................... 17Warranty.............................................................................................................. 19www.sharkclean.com1<strong>S3901</strong>_N_11_IB_E_120410_6.indd 112-04-10 11:33 AM
Getting StartedWhen assembling your steam mop there may be a little water in or around the water tank. This is because wetest all our steam mops 100% before you buy them, so you get a quality Shark ® Lift-Away Pro SteamPocket ® Mop.ahijkbcdl m nopea Mop Handleb Steam TriggercRemovable Handheld Steamerd Handheld Steamer Housinge All-Purpose Mop HeadffgAssorted Two-Sided Cleaning Pads for theAll-Purpose Mop Headg Carpet Gliderh Accessory HoseijDirect Steam NozzleFlat Scrubber Toolk All-Purpose Scrubber Pad for FlatScrubber ToollGarment Steamer and Bristle Framem Garment Steamer Bonnetn Upholstery Bonneto Filling Flaskp (1) 6mm x 48mm Large Screw**Phillips or flat head screwdriver can be used. Screwdrivernot included.2 TOLL FREE: 1-800-798-7398<strong>S3901</strong>_N_11_IB_E_120410_6.indd 212-04-10 11:33 AM
Fig. 1Fig. 4Fig. 2Fig. 5Fig. 3Fig. 6ACCESSORIES:DIRECT STEAM NOZZLELoosen and dislodge compact dirt found in cornersor tight places. (Fig. 1)GARMENT STEAMER & BRISTLE FRAMEThis is ideal for removing wrinkles from clothing andfreshening and grooming upholstery. (Fig. 2)FLAT SCRUBBER TOOL with ACCESSORY HOSEUse with the accessory hose to clean a variety ofsurfaces such as counter tops, walls, mirrors,andwindows. (Fig. 3)CONTROLS:STEAM TRIGGERWhen using the Handheld Steamer, press and holdthe steam trigger to start steaming. (Fig. 4)STEAM SETTINGSThe Lift-Away Pro Steam Pocket ® Mophas three unique settings that can be used whenmopping your floors or with the handheld unit.(Fig. 5)ON/STEAM SETTINGPress the ON/STEAM SETTING button toselect the type of cleaning that you want. (Fig. 6)www.sharkclean.com3<strong>S3901</strong>_N_11_IB_E_120410_6.indd 312-04-10 11:33 AM
Getting Started with Your Steam Mopfig. 1 fig. 2IMPORTANT: Always make sure the mop isUNPLUGGED from the wall when not in use.Never fill the mop, attach the mop head, changeor remove the cleaning pad when the mop isplugged into the wall. To prolong the life of yourShark ® Lift-Away Pro Steam Pocket ®Mop we recommend using distilled water. Makesure you only add water to the tank. Chemicalsor cleaning solution may damage the applianceand could be unsafe for you and your family.STEAM MOP ASSEMBLY1 Insert the Mop Handle end labeled “Front” intothe Steam Mop Housing. Make sure it is insertedpast the line printed on the pole. Secure theassembled handle and pole by using the largescrew and a Phillips or a flat head screw driver(screwdriver not included). (fig. 1)2 Insert the Handheld Steamer into the Steam MopHousing. (fig. 2)4 TOLL FREE: 1-800-798-7398<strong>S3901</strong>_N_11_IB_E_120410_6.indd 412-04-10 11:33 AM
fig. 3fig. 5fig. 4fig. 63 Use the lavender loop on the side of the cleaningpad to slide the mop head into the pad pocket.Then secure the quick fasteners on the top of thepocket to lock in place. (fig. 3)4 Snap the mop head into the mop body by liningup the groove on the back of the mop body withthe groove on the back of the mop head. Pushuntil you hear it latch into place. (fig. 4)5 Turn the water tank cap counter clockwise andremove from the tank. (fig. 5)Use the filling flask and pour water into the tank.Do not overfill. Replace the cap on the watertank. (fig. 6)IMPORTANT: Do not use on unsealed woodor unglazed ceramic floors. On surfaces thathave been treated with wax or some no waxfloors, the sheen may be removed by the heatand steam action. It is always recommended totest an isolated area of the surface to be cleanedbefore proceeding. We recommend that youcheck the use and care instructions from thefloor manufacturer.NOTE: To prolong the life of your Steam Mop, werecommend using distilled water.www.sharkclean.com5<strong>S3901</strong>_N_11_IB_E_120410_6.indd 512-04-10 11:33 AM
Using Your Steam MopIMPORTANT: Make sure you do not use themop without attaching a cleaning pad andadding water to the tank first. When you areusing the mop for the first time, it might takelonger than the normal 30 seconds to startsteaming.fig. 8fig. 7NOTE: Sweep or vacuum your floors prior tocleaning with your Steam Mop.Visit www.NavigatorClean.com for other greatquick cleaning products to complement yourSteam Mop, such as the Shark ® NavigatorLift Away ® vacuums.1 Pull and twist the quick release cord holder tounwrap the power cord completely. Plug into a120-volt electrical outlet. (fig. 7)2 The ON/STEAM SETTING button will be blue.If the light does not turn on, reference thetroubleshooting section on page 17. (fig. 8)6 TOLL FREE: 1-800-798-7398<strong>S3901</strong>_N_11_IB_E_120410_6.indd 612-04-10 11:33 AM
fig. 10fig. 9 fig. 113 Press the ON/STEAM SETTING button once forDUST setting (DUST lighted setting indicator willflash and turn solid blue when it is ready to use).DUST setting is a light steam for a quick dustingand best dry time. (fig. 9)Press the ON/STEAM SETTING button twice forMOP. MOP setting is for normal, everyday steamcleaning. (fig. 10)Press the ON/STEAM SETTING button threetimes for SCRUB. SCRUB setting is for heavycleaning and will leave floors damp.After you have selected your desired steamsetting, the setting indicator light will flash andturn solid blue when it is ready to use.To better understand which steam setting to usefor your cleaning task, see page 8.4 Clean your floors with a forward and backwardmotion. (fig. 11)When you are done, press the ON/STEAMSETTING button until the light blinks blue as instandby mode.NOTE: When using your Shark ® Lift-Away Pro Steam Pocket ® Mop in MOP mode becareful not to press the steam trigger on theHandheld Steamer, as it will activate STEAMSETTING mode. If this happens, press the ON/STEAM SETTING button one time to reactivateyour steam selection.www.sharkclean.com7<strong>S3901</strong>_N_11_IB_E_120410_6.indd 712-04-10 11:33 AM
Using Your Steam Mop - cont’dThe Shark ® Lift-Away Pro Steam Pocket ® Mop has three unique steam settings soyou can use the perfect amount of steam for the cleaning task at hand. See below for tips onwhen to use each setting.Setting Ideal for These Surfaces Recommended UsageDUSTLaminateBambooHardwoodMarbleLight cleaning and dustingLoosen and lift light dirtSanitize floorsMOPHardwoodMarbleTileStoneBasic, everyday cleaningRemove spots and smaller messesClean moderate and heavily-trafficked areasSanitize floorsSCRUBTileStoneLinoleumCarpet(with Carpet Glider)Tough cleaning and removal of stuck-onmesses and stainsDeep clean heavily-trafficked areasCut through heavy dirt and grimeSanitize floorsFreshen area rugs and carpets8 TOLL FREE: 1-800-798-7398<strong>S3901</strong>_N_11_IB_E_120410_6.indd 812-04-10 11:33 AM
fig. 125 When one side of the cleaning pad gets dirty,just flip the mop and you can quickly start usingthe other side. (fig. 12)6 When the water tank is empty, the SteamMop will stop producing steam. You can refillthe water tank at any time as long as themop is unplugged from the outlet. Followthe instructions from page 5. This applies toswitching the mop heads or the cleaning pad aswell.NOTE: Please wait 2-3 minutes for the SteamMop to cool off before switching the mop heador the cleaning pad. Never leave the Steam Mopwith a damp/wet cleaning pad on any floor.Using Your Carpet GliderThe Steam Mop will not clean your carpeting orarea rugs. However, it is great for grooming andfreshening.fig. 13 fig. 14THE CARPET GLIDER1 The Carpet Glider can be used with the All-Purpose Head to lightly steam your carpetand area rugs. Just place the mop head withthe cleaning pad attached into the glider. Therecommended steam setting is SCRUB whenusing the Carpet Glider. (fig. 13)2 Move the Steam Mop back and forth across asection of the carpet. (fig. 14)www.sharkclean.com9<strong>S3901</strong>_N_11_IB_E_120410_6.indd 912-04-10 11:33 AM
Getting Started With YourRemovable Handheld SteamerYour Shark ® Lift-Away Pro Steam Pocket ®Mop is designed to clean surfaces thatwill withstand high heat and moisture.Do not use on unsealed wood surfaces(especially wooden antique furniture),unglazed ceramic tile, painted surfacesor surfaces that have been treated withwax, oils, varnishes, or shellac. The sheenmay be removed by the heat, steam, andfriction of the cleaning tools. Lacquer andpolyurethane coatings provide a harddurable protective finish that withstandsmoisture, but it is always recommended totest an isolated area of the surface to becleaned before proceeding.fig. 15We also recommend you check the useand care instructions from the surfacemanufacturer.When cleaning finished wood surfaces,use broad, continuous cleaning strokes. Toprevent surface damage, avoid focusingsteam or allowing the cleaning tools to sitin one spot for any amount of time.1 To remove the Handheld Steamer, press andhold down the Handheld Release Buttons whilepulling out the Handheld Steamer. (fig. 15)10 TOLL FREE: 1-800-798-7398<strong>S3901</strong>_N_11_IB_E_120410_6.indd 1012-04-10 11:33 AM
Using Your Removable Handheld Steamerwith Direct Steam NozzleCleaning Tip: The Direct Steam Nozzle creates direct steam spray to clean and sanitizehard to reach nooks & crannies and other places where germs may build up. Use theDirect Steam Nozzle to loosen and dislodge compact dirt often found in corner andtight places where traditional methods and cleaning tools tend to push dirt into,making it tough to reach and clean. Spray direct steam and wipe clean with a wet clothor paper towel.fig. 17fig. 16FOR SPOT CLEANING AND STEAMING2 First attach the Direct Steam Nozzle by pressingthe nozzle onto the Handheld Steamer until itclicks into place. (fig. 16)3 The Handheld Steamer is automatically set toSCRUB mode. Squeeze the steam trigger toactivate steam. To change modes press the ON/STEAM SETTING button to select either DUST,MOP or SCRUB mode. You can change the steammode while the Handheld Steamer is in standbyor in use. Once the selected setting indicatorlight has turned blue, hold down the steamtrigger to start steaming. (fig. 17)For effective cleaning, hold the steam outputnozzle 1-2 inches away from the surface you’recleaning.CAUTION: Do not press the steam trigger untilthe Direct Steam Nozzle is snapped into the mainnozzle of your Handheld Steamer.4 To remove the Direct Steam Nozzle, press andhold down the Handheld Release Buttons. Thenslide out the Direct Steam Nozzle using the grip.CAUTION: Do not press the steam triggerwhile removing the Direct Steam Nozzle. Avoidtouching the tip of the Direct Steam Nozzle, asthis will be very hot after steaming.NOTE: The Handheld Steamer may continue toemit steam for a few seconds after the trigger isreleased. This is normal, and the steaming willeventually come to a stop.www.sharkclean.com11<strong>S3901</strong>_N_11_IB_E_120410_6.indd 1112-04-10 11:33 AM
Using Your Removable Handheld Steamerwith Garment SteamerCleaning Tip: The Garment Steamer is ideal for removing wrinkles from clothing andfreshening and grooming upholstery. A terry bonnet and frame with bristles providescontrolled steaming for most types of clothing. A specialized bonnet is ideal forfreshening couches and other upholstery, where odors may accumulate.fig. 18fig. 19fig. 20CAUTION: Always determine color fastnessof any fabric, especially with reds or blues. Takea clean, moist, warm towel and gently rub asmall area on the fabric that is as out of sightand out of the way as possible. If color bleedsonto the towel, you may need to have the pieceprofessionally cleaned.1 Select either the garment steamer bonnet (terrycloth material) to steam your garments, or theupholstery bonnet (shaggy material) to freshenupholstery.2 Use the lavender loop on the side of the bonnetto slide over the nozzle opening of the GarmentSteamer. The elastic around the bonnet shouldhold it firmly in place around the GarmentSteamer opening.3 Snap the bristle frame over the Garment Steamerattachment. For ease of use, we recommend thatthe bristles be placed at the top of the GarmentSteamer bonnet. (fig. 18)4 Attach the assembled Garment Steamer to theHandheld Steamer by snapping it into the mainnozzle. (fig. 19)5 Select the steam setting and wait until theselected setting indicator light turns solid blue.Press and hold the steam trigger button, andmove slowly up and down over your garments orupholstery. (fig. 20)CAUTION: Do not press the steam triggerwhile attaching or removing the GarmentSteamer.6 To remove the Garment Steamer attachment,press and hold down the Handheld ReleaseButtons. Then slide out the Garment Steamerattachment using the grip on top of theHandheld Steamer.12 TOLL FREE: 1-800-798-7398<strong>S3901</strong>_N_11_IB_E_120410_6.indd 1212-04-10 11:33 AM
Using Your Removable Handheld Steamerwith Accessory Hosefig. 21fig. 221 To use the Accessory Hose, first attach theAccessory Hose to the Handheld Steamer bysnapping the Accessory Hose into the mainnozzle. (fig. 21)2 Select the desired cleaning tool for use. Followthe cleaning tool sub-assembly instructions forthe selected tool.3 To remove the Accessory Hose, press and holddown the Handheld Release Buttons. Then slideout the Accessory Hose using the grip. (fig. 22)CAUTION: Do not press the steam triggerwhile attaching or removing the Accessory Hose.CAUTION: Do not use the Accessory Hosewithout cleaning tools attached.NOTE: Additional attachments are available.Please visit www.sharkclean.comfor more information.www.sharkclean.com13<strong>S3901</strong>_N_11_IB_E_120410_6.indd 1312-04-10 11:33 AM
Using Your Removable Handheld Steamerwith Flat ScrubberCleaning Tip: The Flat Scrubber is designed for cleaning a variety of surfaces and isexceptional on those that are large and flat including counter tops, table tops, wallsmirrors, windows, stairs, shelves and other similar surfaces. Super absorbent bonnetloosens, lifts, and locks in dirt and grime while sanitizing at the same time.fig. 25fig. 23fig. 241 To attach the All-Purpose Scrubber Pad, placethe pad exterior side down on a flat surface(lavender tab indicates the bottom of the pad)and insert the top of the Flat Scrubber Tool intothe top portion of the pad and then pull the padover each side of the back edge.2 Press the Flat Scrubber Tool onto the AccessoryHose until it clicks into place. (fig. 23)3 Select either DUST, MOP or SCRUB mode bypressing the ON/STEAM SETTING button andwait until the selected setting indicator lightturns solid blue. Hold down the steam trigger tostart steaming. (fig. 24)4 To remove the Flat Scrubber Tool, press and holddown the Accessory Hose release button. Thenslide out the Flat Scrubber Tool. (fig. 25)CAUTION: Do not press the steam triggerwhile attaching or removing the Flat ScrubberTool.CAUTION: Do not use the Flat Scrubber Toolwithout the All-Purpose Scrubber Pad attached.14 TOLL FREE: 1-800-798-7398<strong>S3901</strong>_N_11_IB_E_120410_6.indd 1412-04-10 11:33 AM
Care and Maintenancefig. 27fig. 26fig. 28fig. 29AFTER USE AND STORAGE1 When you have finished using the HandheldSteamer, reattach it to the mop by first placingthe bottom of the Handheld Steamer into thecradle of the mop housing. (fig. 26)2 Then slide the top end of the Handheld Steamerinto the mop housing and snap into place.NOTE: Make sure all attachments are removedbefore reuniting the Handheld Steamer with theSteam Mop.3 If you have finished mopping, press the ON/STEAM SETTING button until the LED light blinksblue. This stops the unit from steaming. Unplugthe cord from the outlet and place the mop intothe upright position. Let the unit cool for 2-3minutes.Remove the cleaning pad by releasing the quickfasteners and using the lavender loop on theside of the pocket, avoiding contact with the hotpad or dirt. (fig. 27)4 Empty the water tank before storage. Remove thewater tank cap and empty the tank over a sink.Replace the water cap. (fig. 28)5 To store the Shark ® Lift-Away Pro SteamPocket ® Mop hanging up, first remove thehead (after it has cooled and the steam has beenreleased) then hang on a large hook. (fig. 29)www.sharkclean.com15<strong>S3901</strong>_N_11_IB_E_120410_6.indd 1512-04-10 11:33 AM
Care and Maintenance - cont.Cleaning Tip: To prevent clogging, it isrecommended that you periodically clean theDirect Steam Nozzle and the extension hosestem with the cleaning tool provided or apaper clip.fig. 30fig. 31fig. 32CARE OF YOUR CLEANING PAD ANDBONNETS1 We recommend washing your cleaning pad andbonnets separately from other fabrics to avoidpicking up lint. Only use liquid detergent (nopowder detergent). Do not use any fabricsofteners or bleach. Line dry or dry on a lowdryer setting. (fig. 30)2 If there are loose threads on the cleaning padcarefully cut the thread with scissors. Do not pullon them or cut at the base. (fig. 31)IMPORTANT: The cleaning pad and bonnetsmay be very hot from the steam. Use cautionwhen removing. Let the unit cool for 2-3minutes.CLEANING THE NOZZLE1 Your Handheld Steamer should not normallyrequire cleaning, however, should you noticea decrease in the steam output, it may benecessary to remove mineral deposits built uparound the nozzles.2 Unplug the cleaner from the electrical outlet.3 Use the provided nozzle cleaning tool or a smalldiameter stiff metal wire, such as a straightenedmetal paperclip, and carefully insert the end ofthe wire into the nozzle orifice. See illustrationabove. (fig. 32)4 Move the wire back and forth several times toremove any deposits.5 Plug in the appliance to the power outlet andtest steam output.16 TOLL FREE: 1-800-798-7398<strong>S3901</strong>_N_11_IB_E_120410_6.indd 1612-04-10 11:33 AM
Troubleshooting GuidePROBLEMPOSSIBLE REASONS & SOLUTIONSThe Shark ® Lift-Away Pro Steam Pocket ® Mopwill not turn-on.Your steam mop should be securely plugged into a 120V AC electrical outlet only.Check your fuse or breaker.If your unit still does not work, call Customer Care at 1-800-798-7398.The unit will notmake steam.The Shark ® Lift-Away Pro Steam Pocket ® Mopleaves water on the floor.Is there water in the water tank? If not, add water to your steam mop followinginstructions on page 5.If the unit still does not make steam, follow the instructions on page 16 to clean thenozzle.Check to see if your cleaning pad is too wet. We recommend you unplug the steam mopand change the cleaning pad.Make sure the cleaning pad is attached correctly.Cannot activate steam /flashing blue light remainson.If you have already plugged in your unit, unplug and try a different outlet. This may resetthe standby mode.Add water to the tank and select steam setting by pressing the ON/STEAM SETTINGbutton.If your unit still does not work, call Customer Care at 1-800-798-7398.The Shark ® Lift-Away Pro Steam Pocket ® Mopleft a white spot on the floor.Do not leave your steam mop on the floor with a damp or wet cleaning pad.If you’re using tap water, we recommend switching to distilled water.Make sure the cap is securely on the water tank.The cleaning pad might be dirty. Flip or change the cleaning pad.If you washed the cleaning pad with powder detergent, then your pad could be damagedand require replacement. Replacement pads are available at www.sharkclean.com.Floors are cloudy, streakyor spotty after steaming.This could also be an indication of prior soap or grease residue that has accumulatedon the floor. As our steam mops use only a small amount of water, it may not be wetenough to rinse off the accumulation that the steam is bringing to the surface. Wesuggest rinsing the floor with nothing but water, letting it dry, and then steam moppingagain with a clean pad. One or more rinses generally removes the residue.A more stubborn case may require you to rinse the floor with a mix of one part vinegarand two parts water.The Shark ® Lift-Away Pro Steam Pocket ® Mopis hard to push.Make sure the cleaning pad is attached correctly.Check to see if the cleaning pad is excessively dirty. If so, replace the cleaning pad.The nozzle leaves waterdrops on the garment orupholstery.The garment steam bonnet or the upholstery bonnet must be in place at all times duringusage. The steamer bonnet prevents water drops from being left on the garment or theupholstery and removes impurities from your water.If the steamer bonnet is too wet or the frame has condensation, let the unit cool for 30minutes, remove the steamer bonnet and let it dry out before using again, or replacewith a new steamer bonnet.www.sharkclean.com17<strong>S3901</strong>_N_11_IB_E_120410_6.indd 1712-04-10 11:33 AM
Notes18 TOLL FREE: 1-800-798-7398<strong>S3901</strong>_N_11_IB_E_120410_6.indd 1812-04-10 11:33 AM
EURO-PRO Operating LLCU.S.: Newton, MA 02459Canada: Ville St. Laurent, Québec H4S 1A71-800-798-7398www.sharkclean.comCOPYRIGHT © 2012 EURO-PRO OPERATING LLCPRINTED IN CHINA<strong>S3901</strong>_N.E.120410.6Illustrations may differ from actual product.<strong>S3901</strong>_N_11_IB_E_120410_6.indd 2012-04-10 11:33 AM