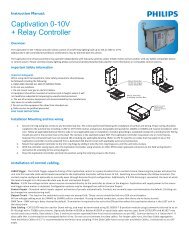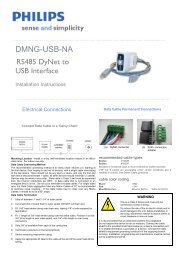
LRS2215 Instructions EN.pdf - Philips Lighting Controls
LRS2215 Instructions EN.pdf - Philips Lighting Controls
LRS2215 Instructions EN.pdf - Philips Lighting Controls

You also want an ePaper? Increase the reach of your titles
YUMPU automatically turns print PDFs into web optimized ePapers that Google loves.
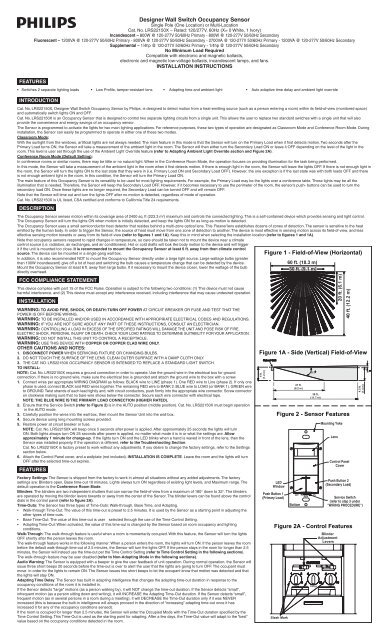
If the Sensor detects motion immediately after the audio warning beep, it will determine that the existing Time-Out value is too short. The Sensor will thus increase the Time-Out value by 1.5 times the existingvalue. If the Sensor detects motion within 45 seconds after the lights turn OFF, it will turn the lights ON and increase the Time-Out value by 1.5 times the existing value.The adapted Time-out may be reset to the base value by rotating the Time Control to a new time selection value (refer figure 2A).Time Control Setting: The base Time-Out value is selected by rotating the Time Control dial. There are four (4) values from which to choose. Each mark around the dial corresponds to a different value asindicated below (refer to figure 2A). The Sensor will beep once to indicate that a new time value has been selected.NOTE: All time durations is approximate within ±10 seconds.Adapting Ambient Light Override: The Ambient Light Override is used to keep the lights OFF if there is already enough natural light in the room. For proper operation, the Ambient Light Override adjustmentmust be performed when there is enough natural light (refer to the Settings section). If the adjustment is made when there is less natural light, the lights may not turn ON even though they are needed. This willrequire manual activation of the push-buttons to turn the lights ON.If the Ambient Light Override Adjustment is not performed properly, the Adapting feature will adjust this setting. The Sensor will use the light level prior to turning the lights ON as the new Ambient Light value andincrease it slightly so that next time the same conditions are present, it will turn the lights ON. This adapting feature may take a few cycles prior to adjusting to the proper light level.If the Ambient Light Override is not performed, the adapting feature will not be utilized (refer to Ambient Light Dial in the following section).NOTE: The ambient light level in the center of a room will be different then the level at the wall where the switch is located.NOTE: The adapting light level only affects the Secondary Load when in the Classroom Mode and affects both loads in the Conference Room Mode.Ambient Light Dial: The ambient light setting is adjusted with the Ambient Light dial (refer to figure 2A). Turning the Light Dial fully counter-clockwise (CCW), sets the Sensor to manual ON mode (lights alwaysturn ON) (see following section). All other settings will cause the lights to turn ON only when the light level is less than the setting.To prevent false low light levels from the user standing in front of the device during adjustment, the Sensor remembers the Ambient Light level from 1 minute ago.There are two ways the Adapted Ambient Light level can be reset to the level set by the dial: (1) By rotating the Light Dial, the adapted value will be replaced by the new value corresponding to the new position ofthe dial. (2) By pressing and holding either button for 3 seconds; the Sensor will beep once and reset the Adapted Light Level value to the dial setting.NOTE: When the setting is at the minimum CCW level, the lights will stay OFF when the room is dim. When the setting is at the maximum level clockwise (CW), the lights will turn ON when the room is bright.Manual ON Mode: When the light control is in the fully CCW position the lights will never automatically turn ON. In this mode the lights need to be manually turned ON by the push-button, and will turn OFF withthe absence of motion. If the light control is in the fully CW position, the lights will turn ON whenever motion is detected, even in full daylight. Intermediate settings will cause the lights to turn ON only when theambient light is below the level selected by the light control.NOTE: The ambient light in a room will change with the time of day and the season of the year.NOTE: In Classroom Mode, the Primary Load always turns ON.RANGE: To decrease detection range and sensitivity, rotate the knob CCW (refer to figure 2A). The detection range can be adjusted from 100% down to 36%.SETTINGSNOTE: To avoid PERMAN<strong>EN</strong>T DAMAGE to the unit, be careful NOT TO OVERTURN or use excessive force when setting control knobs or levers of Cat No. <strong>LRS2215</strong>0X. Use a small straight blade screwdriver toadjust knobs and your finger to adjust the blinder levers.1. Remove the control panel cover.2. Remove the warning label that covers the adjustment dials.3. Set the Mode of Operation - Rotate the Time Dial to the slash mark [full counter-clockwise (CCW)]. Press and hold both push-buttons down for 5 seconds. Once the buttons are pressed, the lights will turnON. After 5 seconds of holding the buttons, the device will issue either one beep to indicate classroom mode, or two beeps to indicate conference room mode. Release the buttons after hearing the beep(s).4. Rotate the Time dial to select the desired base time-out value.5. If the Sensor is installed within 6 feet of an air duct, rotate the Range Control 1/4 turn CCW, otherwise, leave it at maximum.6. Set the Ambient Light Level - The Ambient Light adjustment must be performed at the time of day when the light coming from the windows plus the light from the Primary Load is enough to comfortablyilluminate the room. If the room becomes occupied other than this time, the Sensor turns the Primary Load ON, and then after taking the ambient light measurement, turns the Secondary Load ON (energysaver feature). Repeating this step toggles between modes.A. Turn OFF the lights with the push-buttons.B. SLOWLY rotate the Light dial CCW until the Cat. No. <strong>LRS2215</strong>0X beeps. This is the ambient light level in the room.C. Turn the desired lights on by pressing the push-buttons.7. Non-Adapting Mode (Fixed Time-Out) -A. Rotate the Light dial full CCW.B. Adjust the Time dial. The Sensor will beep twice each time the Time dial is pointed at a new time-out value (for adapting mode, it beeps once). The time-out values for non-adapting mode are:Face MarkingValue of Time(/) Slash Mark 30 second test mode, NO walk-through1 5 minutes base time-out2 10 minutes base time-out3 20 minutes base time-outC. Return the Light dial to its previous setting.NOTE: To return to adapting mode, rotate the Time dial into a new setting while the Light dial is anywhere but in the full CCW position. Be sure the Time dial is rotated until a beep is issued to be sure a new timevalue was selected. Then return the Time dial to the desired time-out setting.8. If desired, adjust the blinders to block any unwanted motion.9. Replace the label and Control Panel Cover.OPERATIONPUSH-BUTTON: Cat. No. <strong>LRS2215</strong>0X has a push-button switch that will toggle the lights (refer to figure 2). If the lights are OFF, the lights will turn ON when the button is pressed, and remain ON in thepresence of motion. In the absence of motion, the Sensor Unit will time-out and turn the lights OFF.If the lights are ON, the lights will turn OFF when the button is pressed. The lights will stay OFF regardless of motion detected, until the time-out expires. After the time-out expires, the lights will turn ON with thenext detected motion. This is useful for slide or film presentations.Service Switch: The slide switch located at bottom of Sensor has three positions: OFF, AUTO, and ON (refer to Figure 2). Note when in the OFF or ON position, the lights will not react to the push-buttons.Switch Position FunctionOFF Left The lights are forced OFF, regardless of occupancy state. Use for changing lamps.AUTO Middle Normal occupancy sensor operation.ON Right The lights are forced ON, regardless of occupancy state.NOTES:• The Motion Indicator LED will blink every 2 seconds while motion is detected.• In Manual-On mode, the button must be pressed to turn the lights ON. In the absence of motion, the unit will time-out and turn the lights OFF.• If Manual-On mode is desired, keep the Light knob in the fully counter-clockwise (CCW) position.TROUBLESHOOTINGNOTE: When troubleshooting, remind yourself of which mode (Conference or Classroom) the Sensor is in. You can start by performing Step 3 in the SETTINGS section to verify.1. If there is no response from the unit (the light never turns ON and the LED never blinks) 1 1/2 minutes after power is applied, then uninstall device and verify there is a ground connection at the wall box. Ifthere is a ground connection, verify wiring.2. If the lights never automatically turn ON, but they do turn ON from the push-buttons:A. Check that the Service Switch is in the AUTO (middle) position.B. Check if the Ambient Light Control Knob is pointed fully counter-clockwise (CCW). Rotate it clockwise (CW) until the lights turn ON.3. If the lights constantly stay ON, even when the room is unoccupied:A. Check the Time setting. See how this time compares to how long the lights stay ON.B. Try lowering the Range Control. Rotate the knob CCW about 30˚.C. If the problem persists, try reducing again. NOTE: Do Not reduce so much that Cat. No. <strong>LRS2215</strong>0X cannot see normal occupancy.D. Be sure to use the Blinders to block any unwanted hallway traffic.E. Check for reflected heat/motion as Sensor Unit may be seeing motion through a window.F. Check for adjacent HVAC and/or heater ducts.4. For additional information call 1-800-372-3331.Wiring Diagram 1 - Single Control ApplicationSensorWiring Diagram 2 - Two Location Control ApplicationSensorSensorHot (Black)Phase 1Line120-277VAC50/60HzRedBlackGreenGroundRedBluePrimaryLoadSecondaryLoadHot (Black)Phase 1Line120-277VAC50/60HzRedBlackGreenGroundRedBlueRedBlackRedBlueGreenGroundPrimaryLoadSecondaryLoadNeutral (White)Neutral (White)Hot (Black)Phase 1Line120-277VAC50/60HzRed (To Phase 2)BlackGreenGroundSensorRedBluePrimaryLoadSecondaryLoadTo Phase 2Hot (Black)Phase 1Line120-277VAC50/60HzRedBlackGreenGroundSensorRedBlueRedBlackRedBlueGreenGroundSensorPrimaryLoadSecondaryLoadNeutral (White)Neutral (White)PRODUCT WARRANTYNOTE: Either Sensor can turn the lights ON. Either Sensor must time-out to OFF,or both manual buttons must be pressed for the lights to turn OFF.<strong>Philips</strong> <strong>Lighting</strong> Standard two (2) year warrantyContact Information: <strong>Philips</strong> <strong>Lighting</strong>, 10275 Higgins Road, Rosemont, IL 60018 USACustomer Care/Technical Service: 1 800-372-3331 E-Mail: tech.service.rosemont@philips.com Website: www.usa.lighting.philips.com